An Impressive CGI Capuchin by VFX Artist Valmont Cotonnec
Valmont Cotonnec shares the creation process for a lifelike CGI creature. Get inspired for your next project or Rookie Awards entry with his insights!
Valmont Cotonnec shares the creation process for a lifelike CGI creature. Get inspired for your next project or Rookie Awards entry with his insights!
We love this project by VFX-Workshop recent graduate, Valmont Cotonnec, and invited him to share his process for creating a lifelike CGI creature. If you are looking to add to your Rookies portfolio or enter the Rookie Awards 2024, this may be the inspiration you need for your next project!
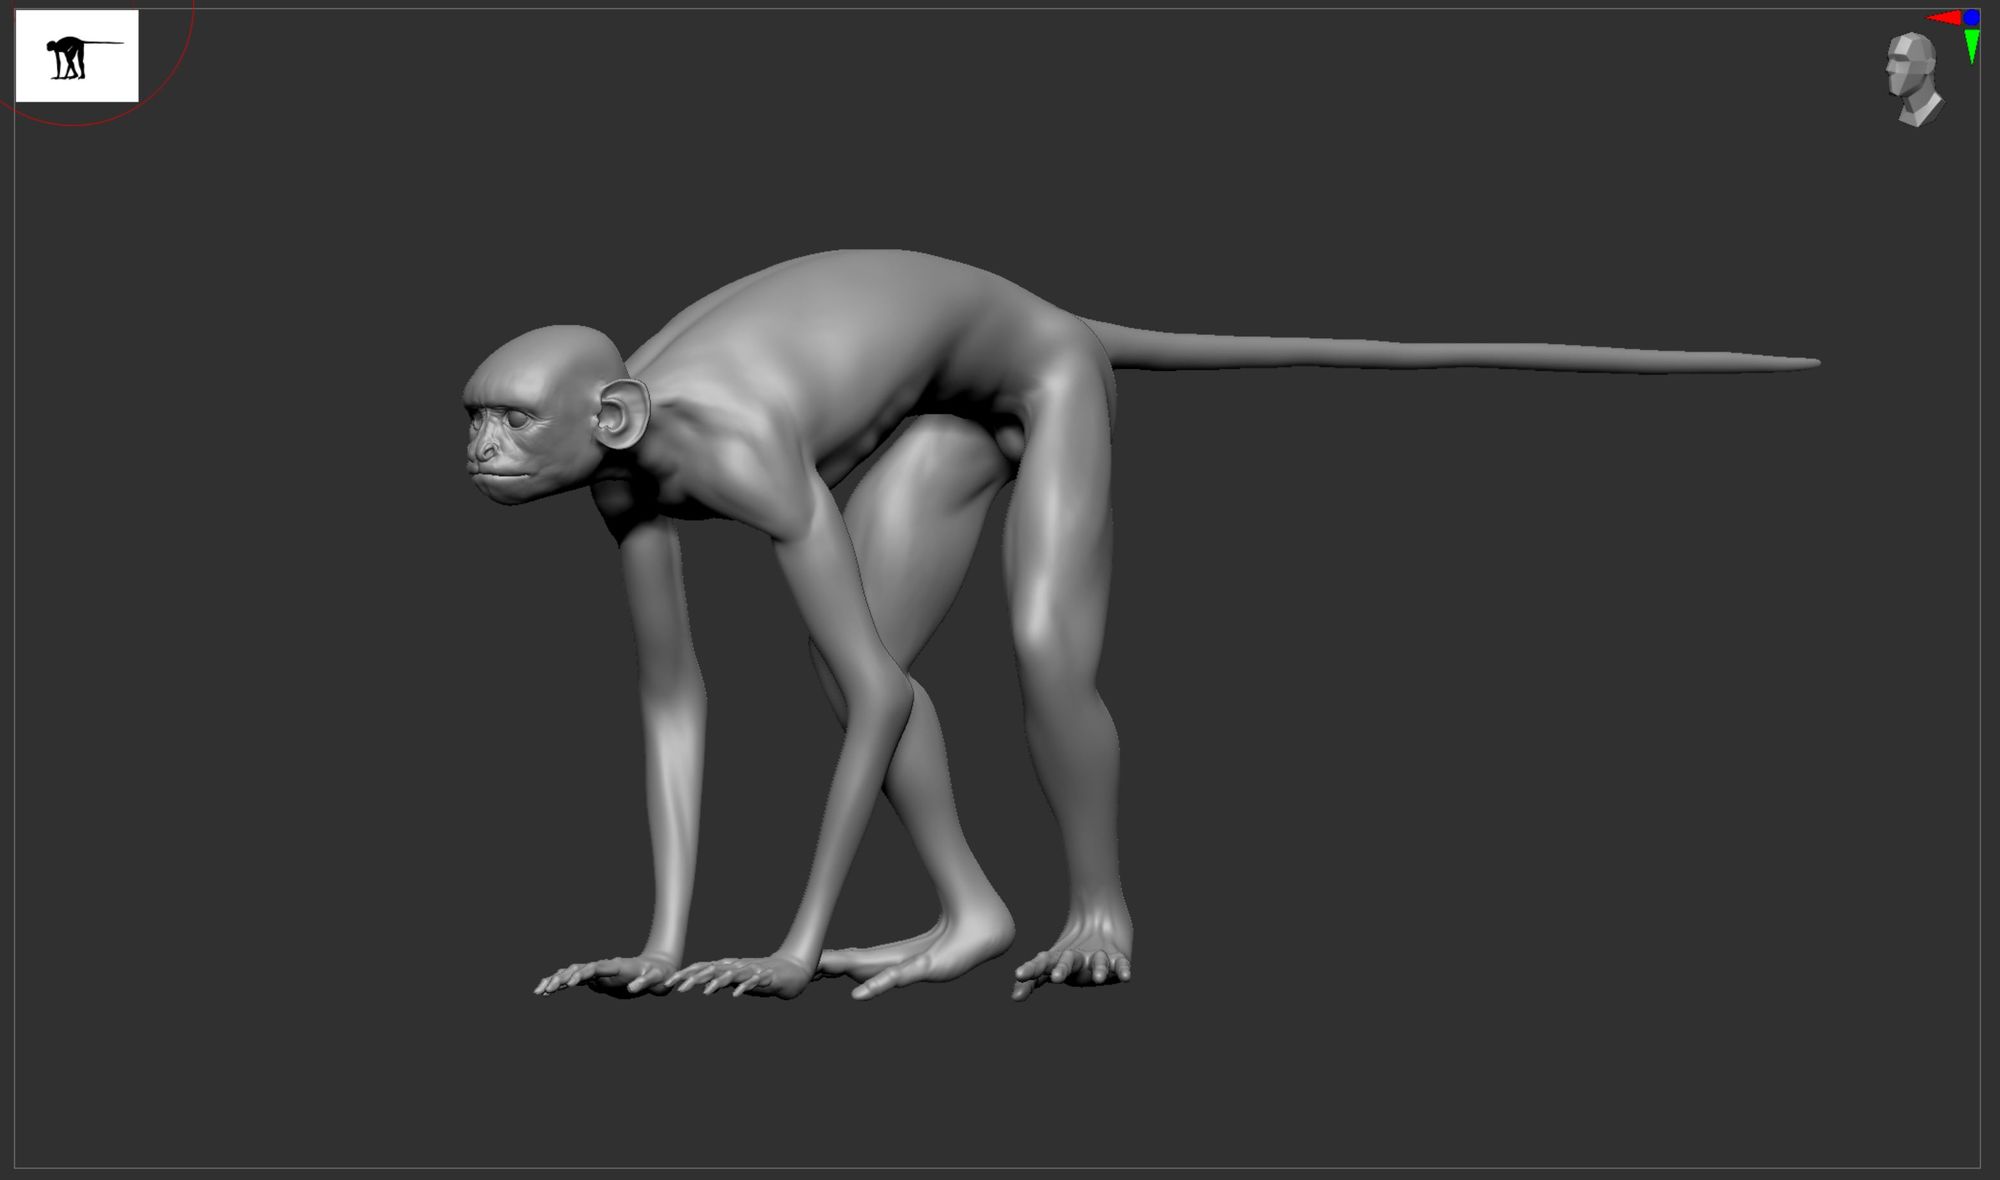
Hello everyone, today I want to introduce you to the journey of creating a CG animal through my project: Jack The Capuchin. I will talk to you about every step I followed to create this character, how I did it, and what I learned from it. It is part of a bigger project I did for the end of my scholarship which you can find via my Rookies profile here.
The first step in any project involves pre-production, which can range from detailed planning with software programs, diagrams, and mindmaps, to simply asking the right questions before diving in. This process hones a crucial skill in 3D and VFX: anticipation, ensuring efficient and flexible workflows. For this project, I opted for ZBrush, Mari, Maya, Xgen, Arnold, Marvelous Designer, Houdini (for clothing only), and Nuke, leveraging my familiarity with these tools for optimal efficiency. Each software was chosen to streamline the workflow. The major milestones included gathering references, sculpting, topology, UVs, look development, grooming, clothing, rigging, animation, posing, lighting, and compositing.
We're well-versed in our software, but now it's time to focus on the project itself. Who is Jack the capuchin? What's his attire? What type of capuchin is he, and how does he move? How will he appear in the final image? Should I prioritise body textures if they'll be covered by fur and clothing? How can I effectively integrate fur and clothing?
These questions, among others, drive the project forward. My questions included:
You cannot effectively address a problem until you are able to describe it accurately! As long as you cannot accurately describe a problem, what you believe to be a solution will actually be random. - Anonymous
With these questions to answer, I moved on to how I would solve them and build the character with a solution in mind.
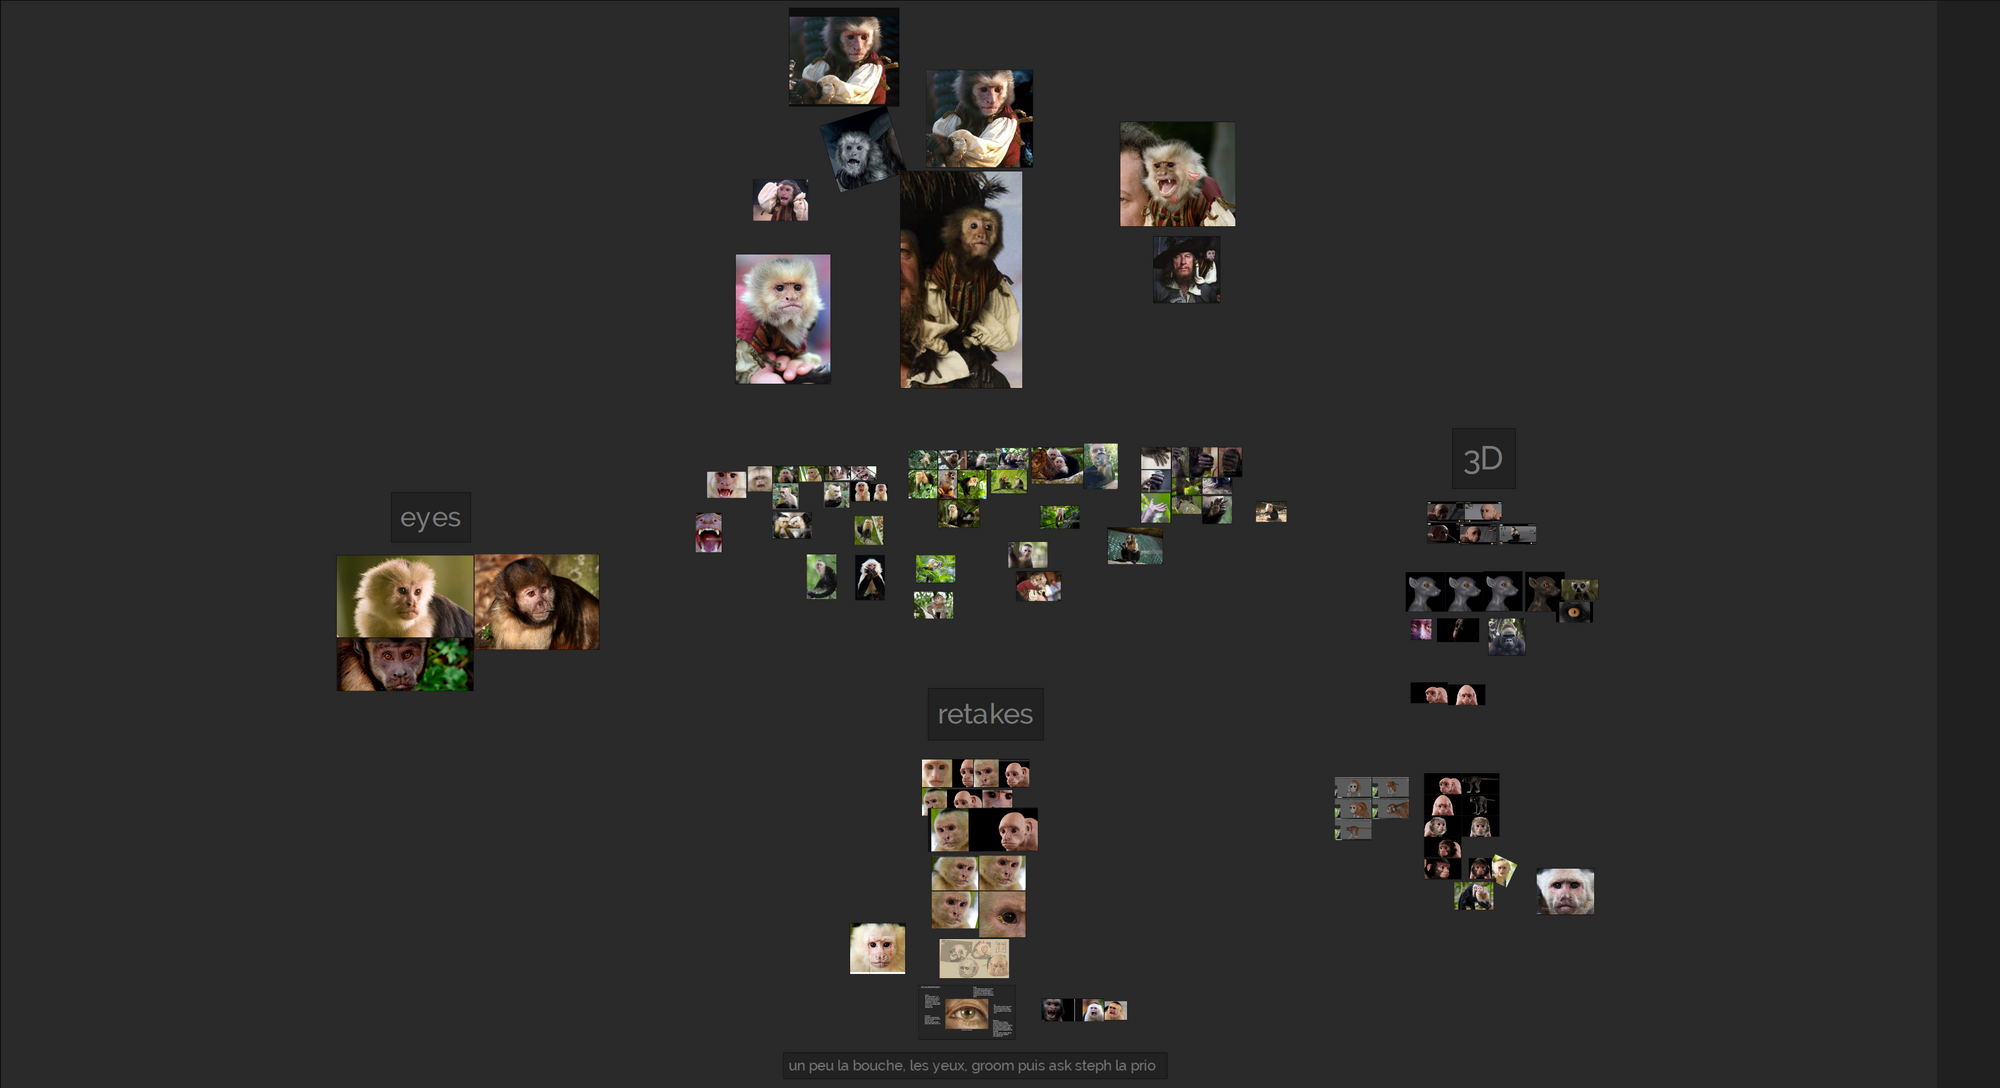
A primordial thing we need as artists and creators, are references. They allow us to compare our creations with the real world and other artwork, aiding in style development and understanding techniques. Go gather pictures, a lot! Using tools like PureRef, gather a lot of images, then organise them by sections, body parts, and details. To ensure high-quality images, explore stock photo websites, where even small banners won't impact your work.
Additionally, keep artistic rules in mind; framing, lighting, colours, and scale are key elements that distinguish good from 'great' imagery and renders.
The last thing I will say is that in 3D, our goal is often to recreate reality. While shortcuts can make our work more efficient, it's important to stay grounded in real-world principles. Even when referencing illustrations or concepts, remember that physics govern our world, and disregarding them affects the final render. This is why we rely on Physical Based Rendering (PBR) to simulate light and materials realistically. Though our computer simulations may not be perfect, striving for realism enhances our results. Even during post-rendering in compositing, always consider real-life dynamics and refer to references for accuracy.
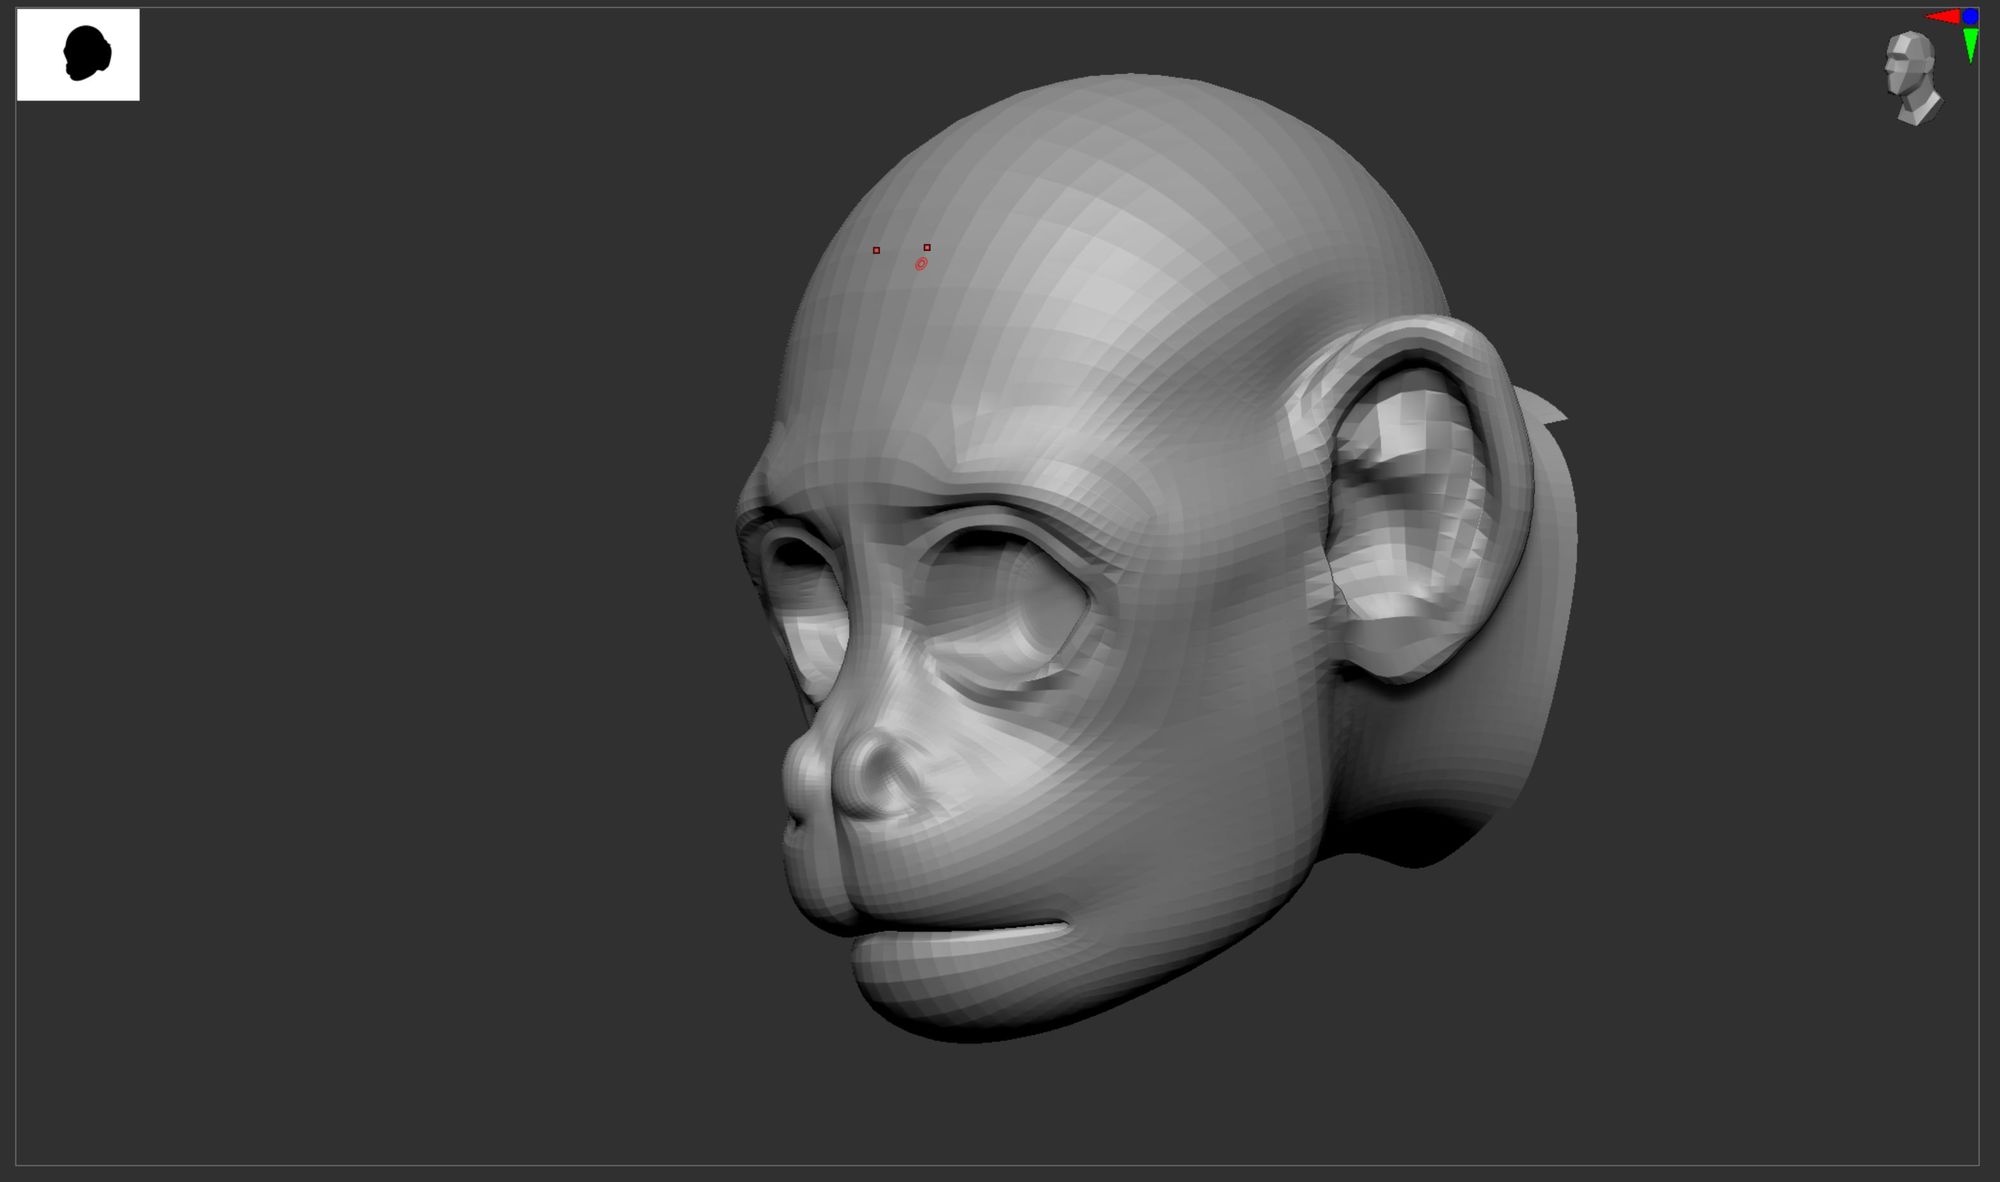
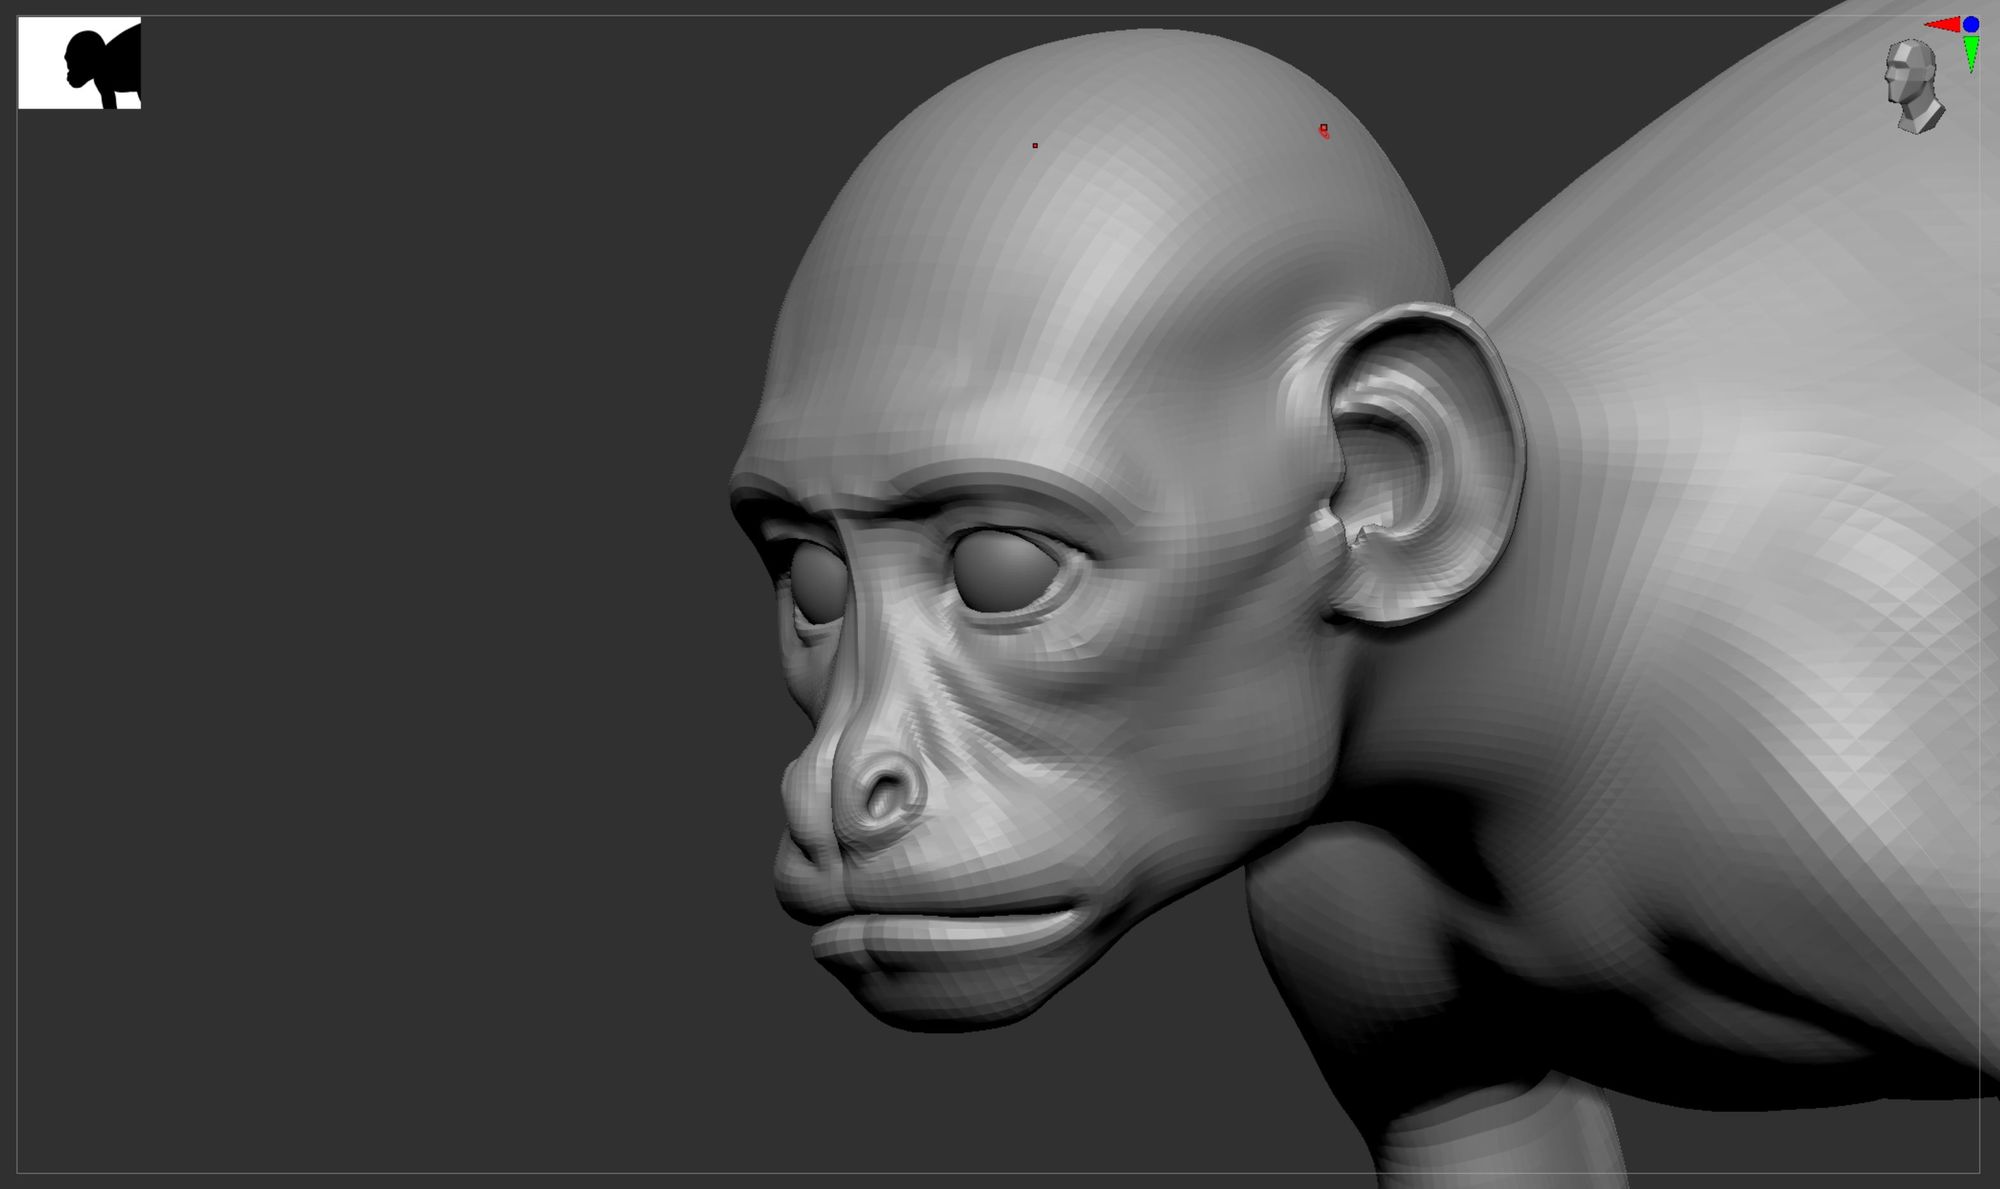
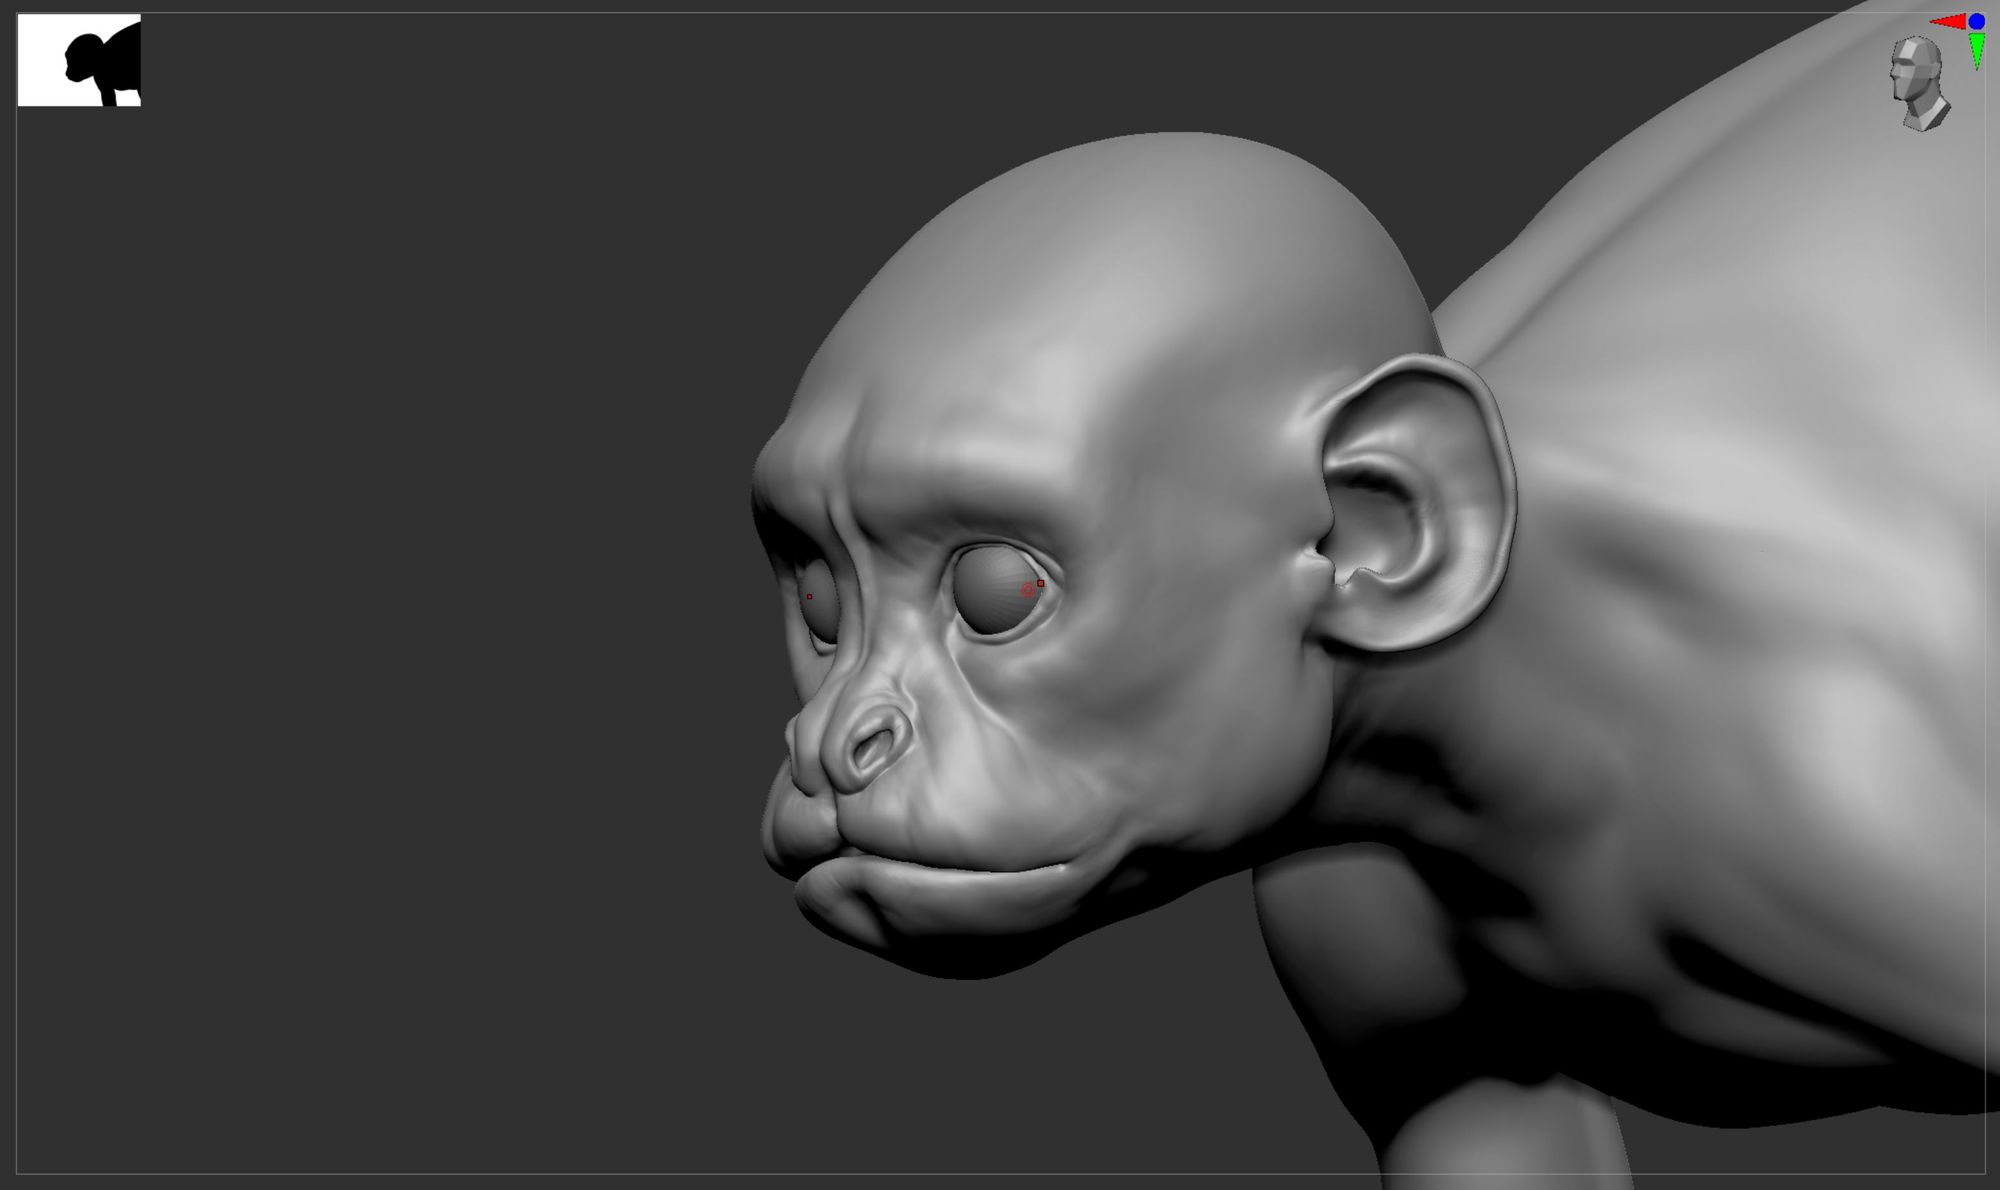
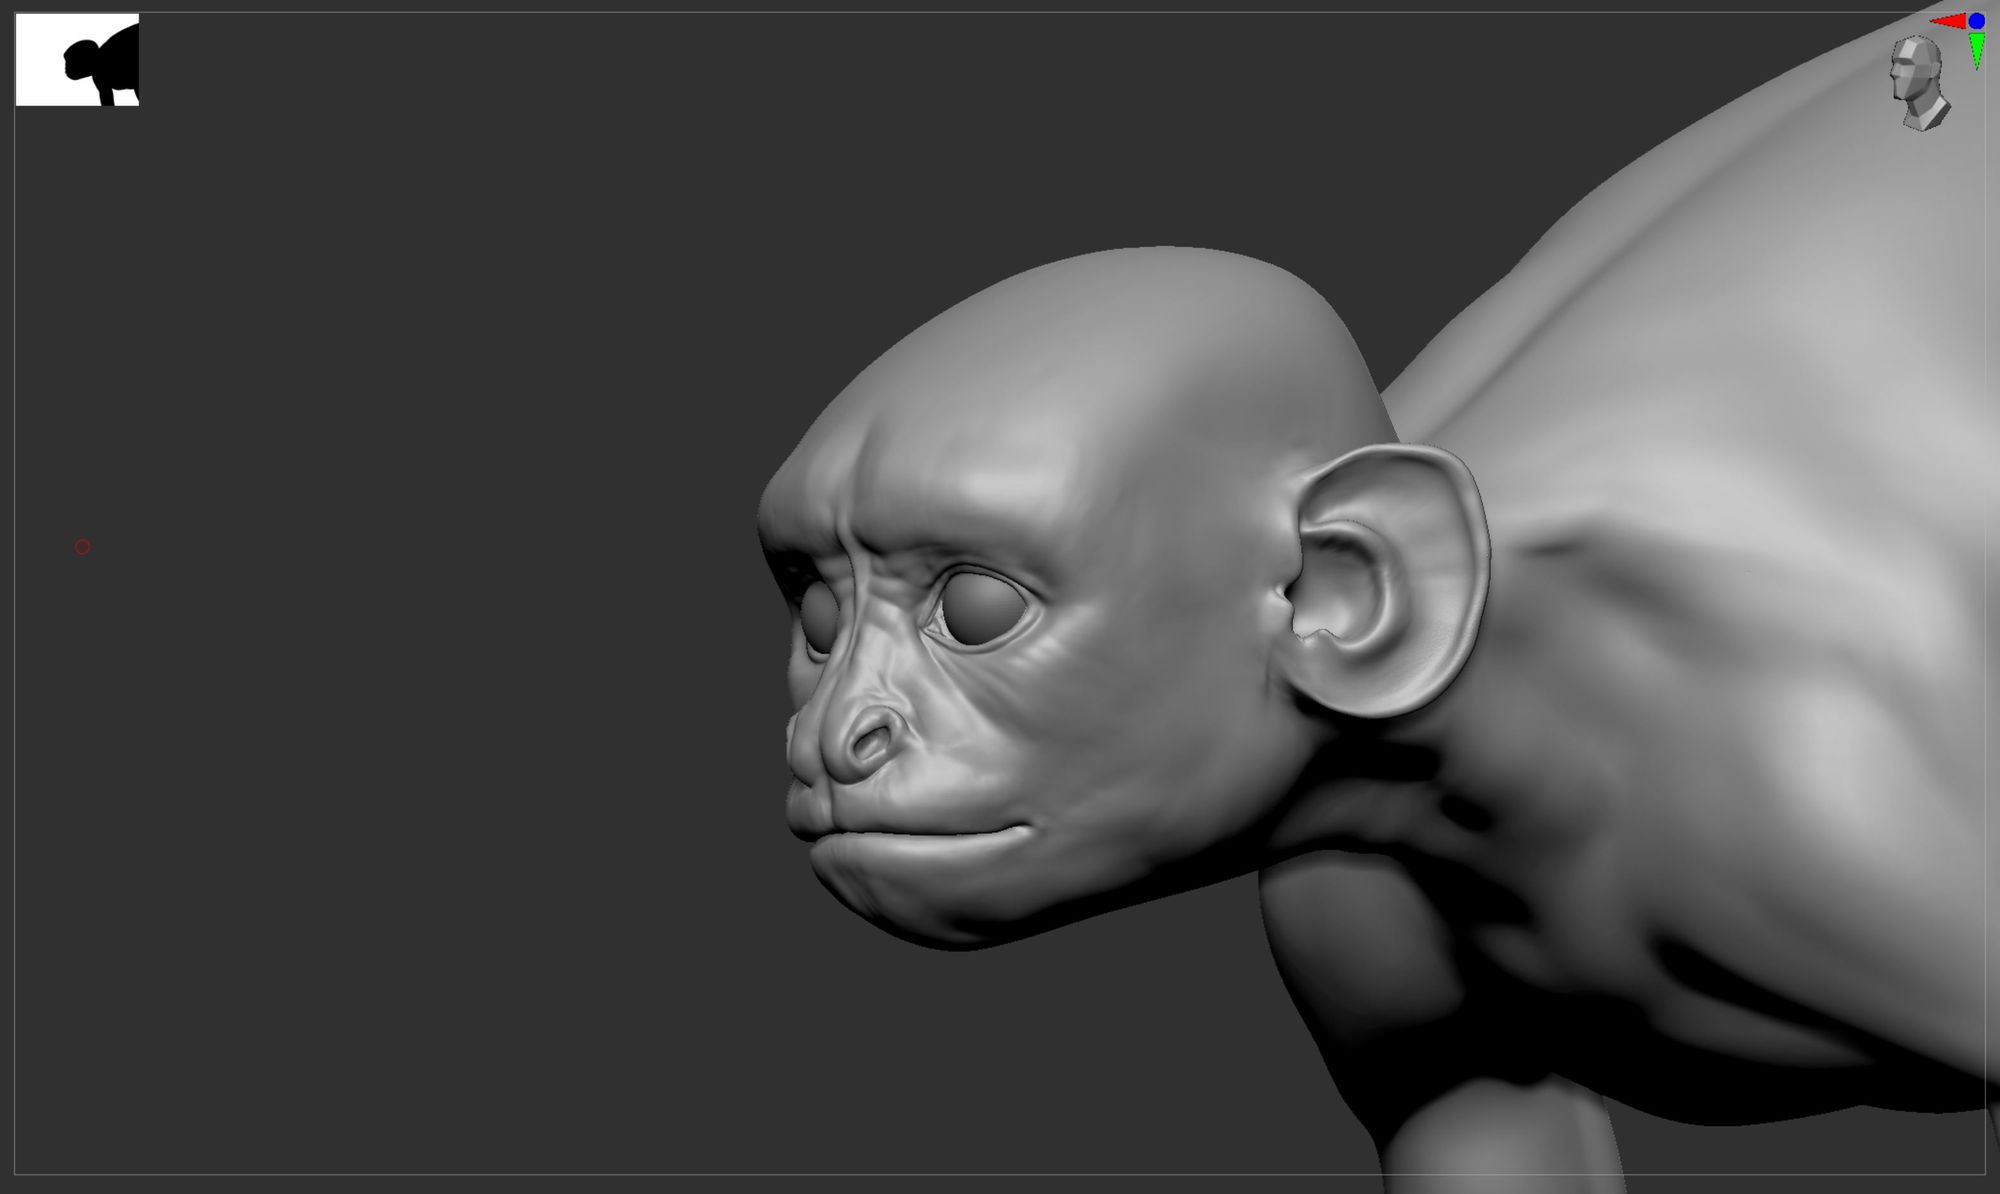
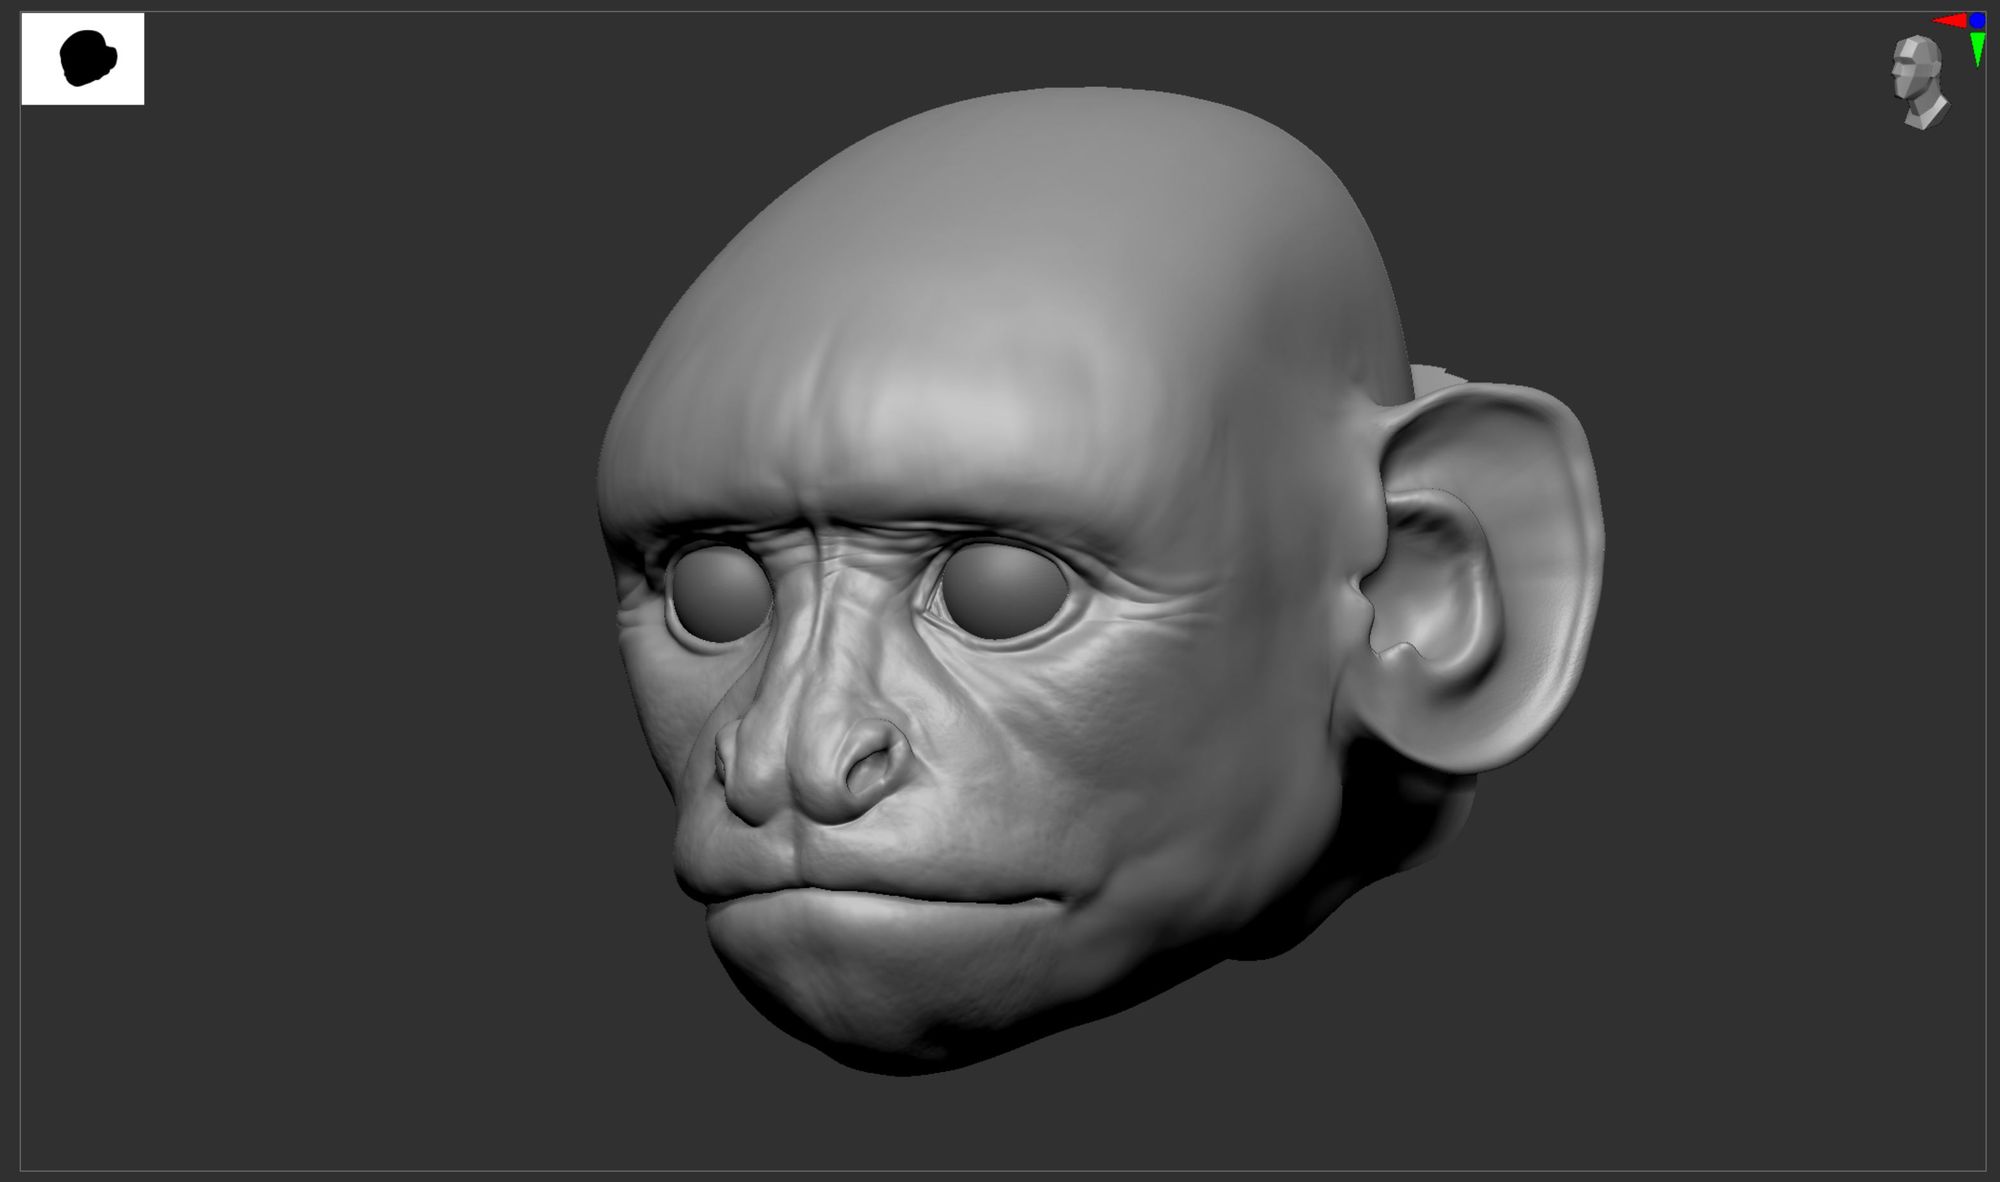
We can begin sculpting by focusing on proportions and anatomy. While I didn't have anatomy references in this PureRef doc, I relied on anatomy and comparative anatomy books to guide me when uncertain. Another team member provided a base mesh, and I received feedback from my morphology/anatomy teacher, helping me through the sculpting process from rough to refined stages. The key factor is the importance of anatomy, as it ensures coherence and credibility, even for invented creatures. While I may not be an expert sculptor, I hope to share my technique and insights to help others on a similar journey.
First, I’m not a real big fan of sculptris and sculpting on dynamesh, they are great tools and are necessary for certain steps but I prefer to Zremesh my sculpt as soon as I can, when the basic shapes are baked in, to be able to go down in mesh density and manipulate a lower resolution mesh not distracted by details or inaccurate smaller shapes.
After that, I’ll subdivide my mesh and work with the subdivision workflow, always focusing on the anatomy and primary shapes first. As the sculpt goes on, I’ll go up in subdivision, and work on smaller parts of the body and shapes. Always relying on the anatomy to stay realistic and coherent.
When I feel the model is ready, I’ll go to Maya and import quite high poly versions of the mesh to start the retopology.
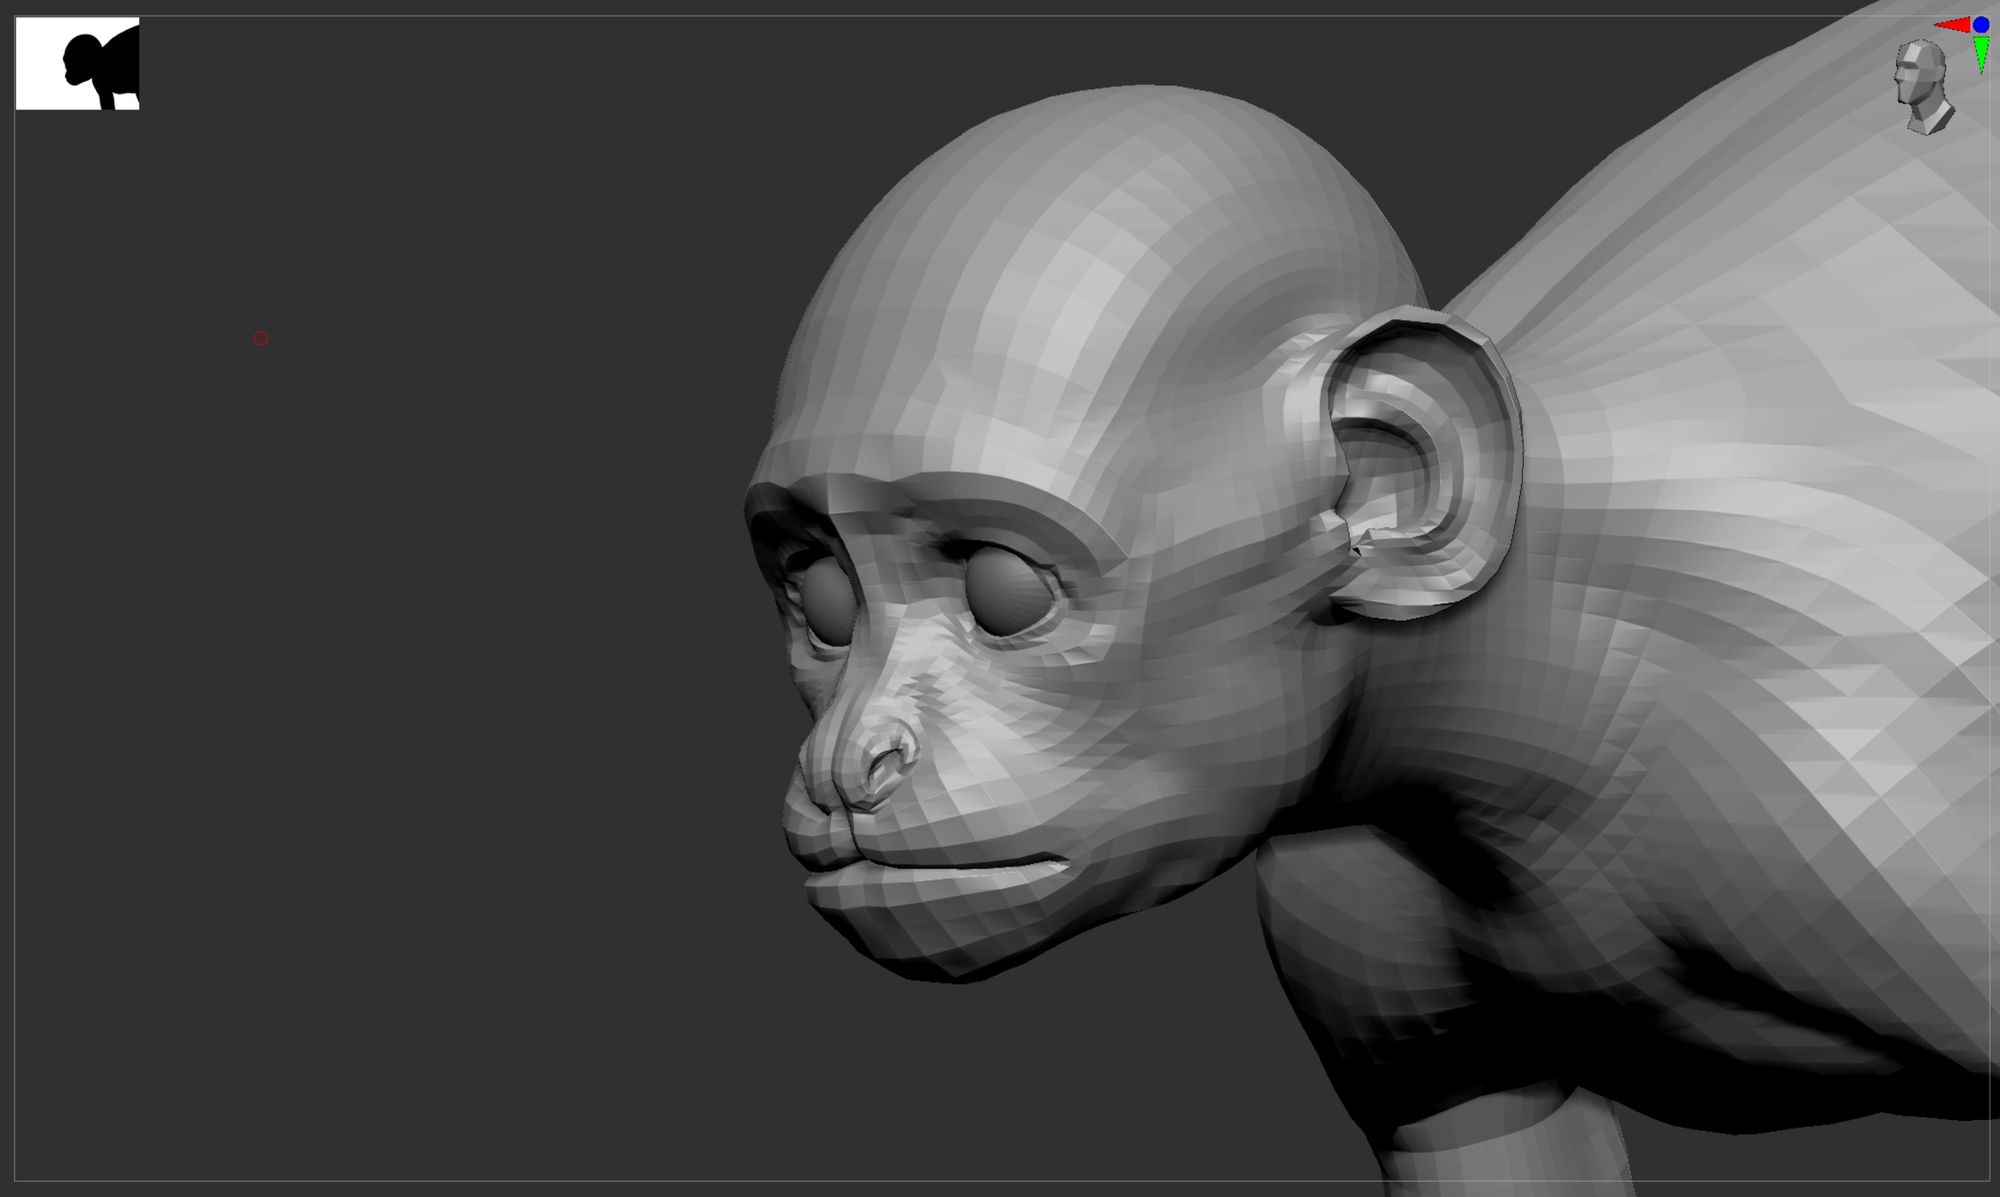
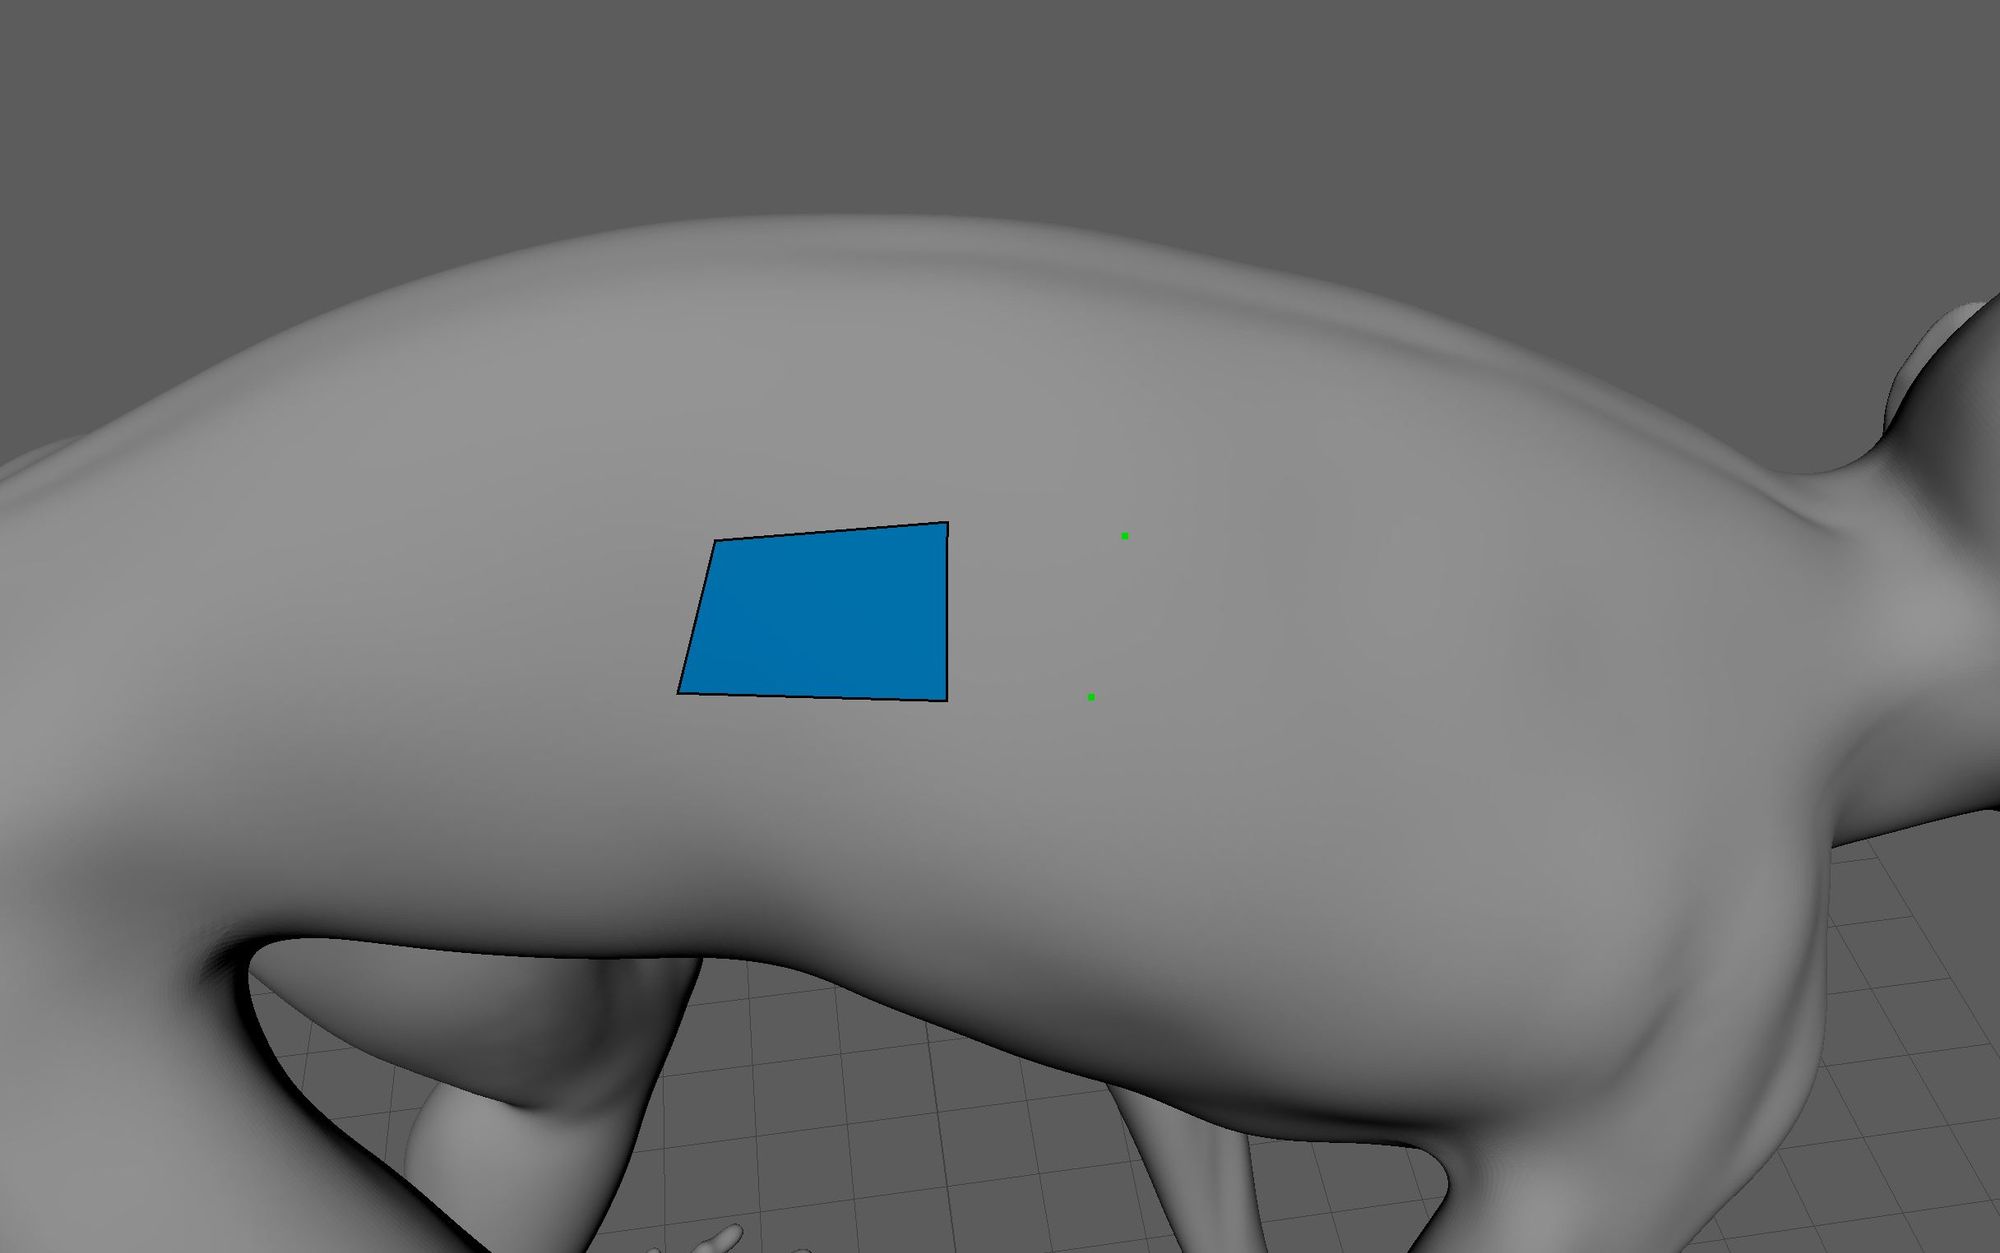
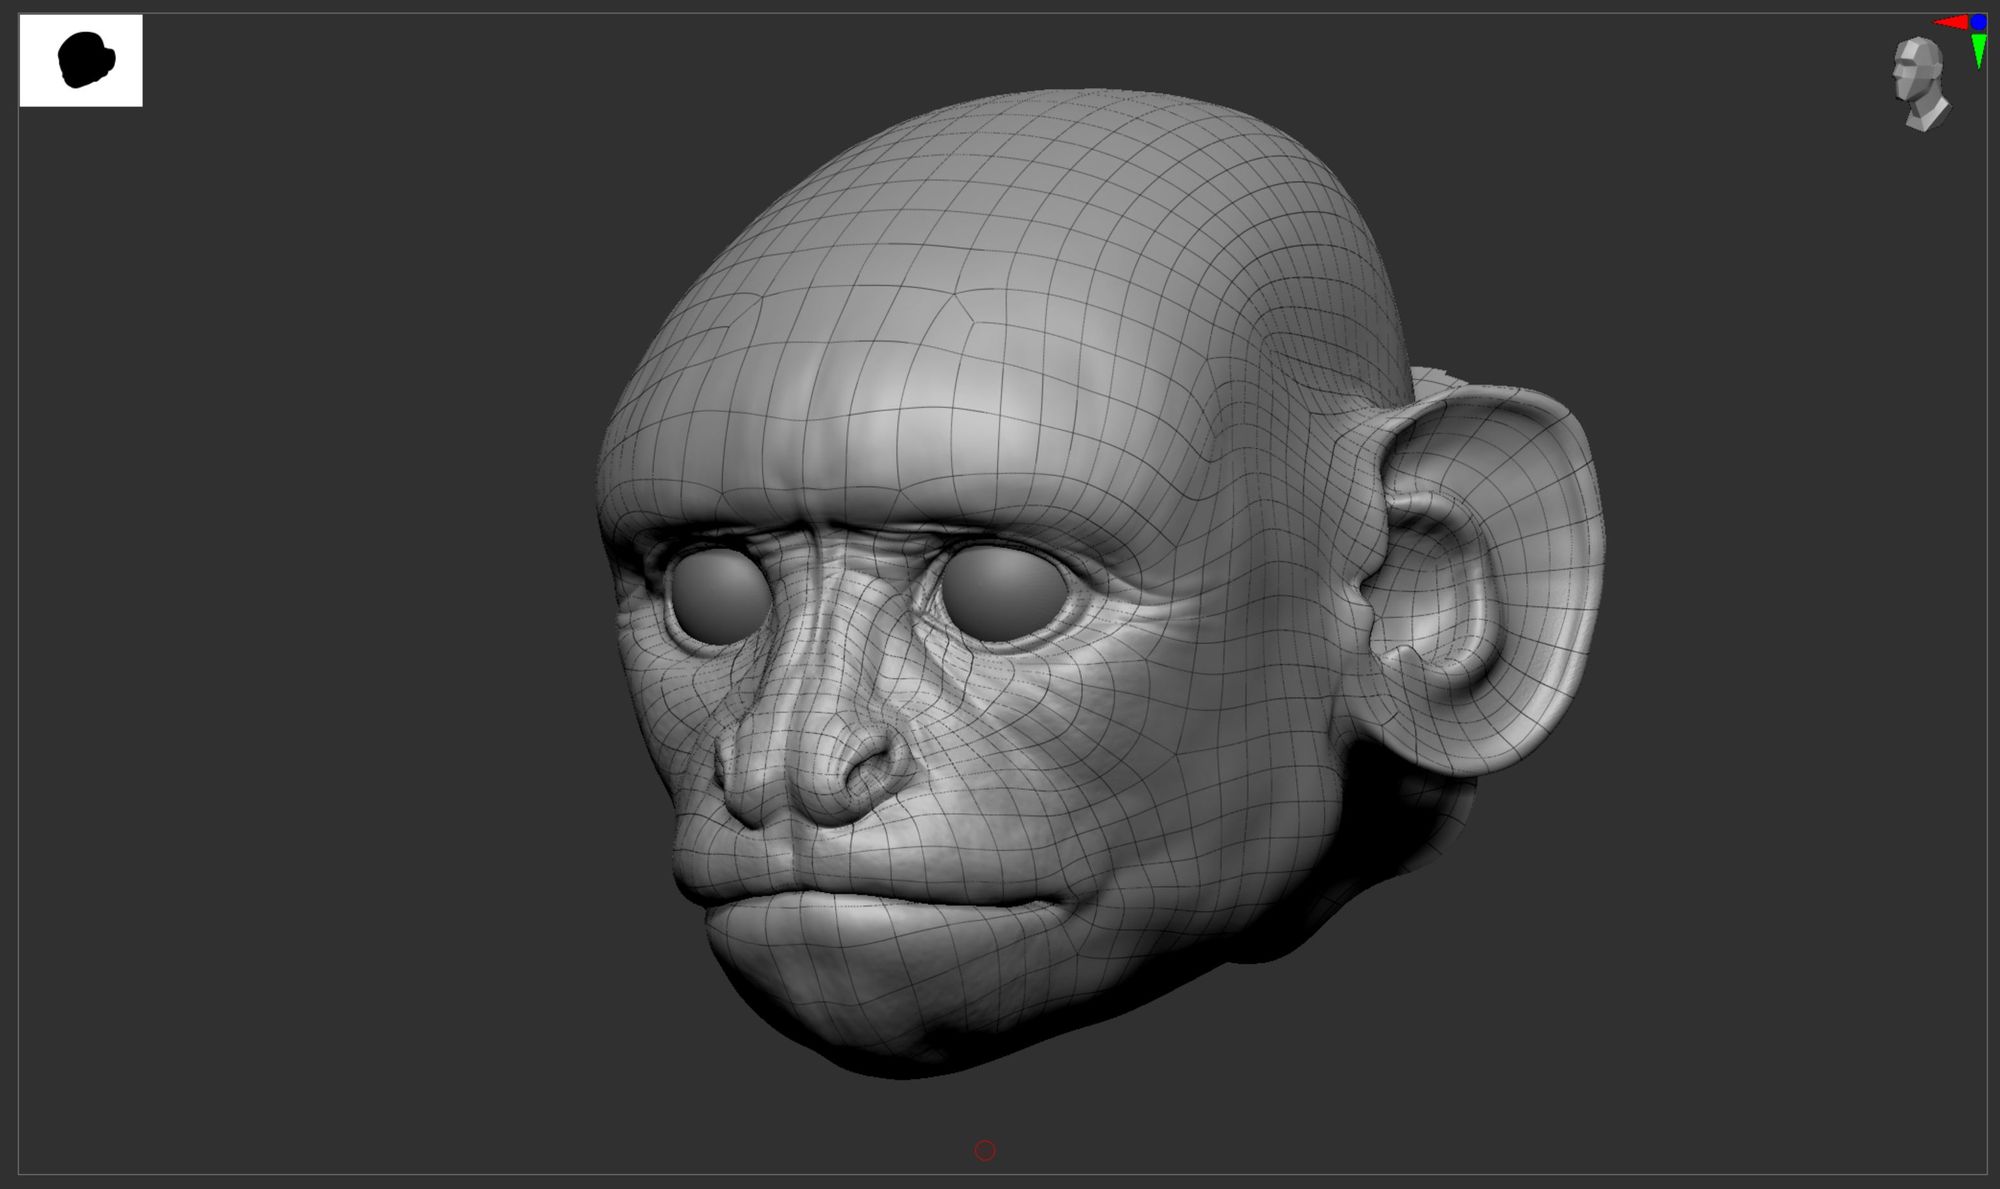
First, let’s talk about topology in general. In 3D, your models are made of vertices that are connected by edges and filled by faces. Now, you can place vertices however you want to make your shape, sure, but in order to produce nice models, we try to keep these faces 4 sided, quadrilaterals; the famous quads. It’s necessary to control the direction or the flow of your edges and faces. It helps to hold the shape of the model, and quads are the shapes to do that. I’ll Show you an example.
Good topology isn't only crucial for modeling; it impacts every stage thereafter. It streamlines UV mapping, making texturing more efficient, and makes subdivision smoother for rendering, preventing irregularities. It is also essential for rigging and animation,to allow for proper deformation and movement, presenting a significant challenge in creating characters.
To achieve this, I used a tool called Quad Draw in Maya. Starting with a relatively high-poly version of my sculpt, I outline major blocks like limbs and torso, then trace facial features, assembling the pieces like a puzzle. Topology is like a complex puzzle or brain teaser, similar to building with Lego bricks. Over time, you develop an appreciation for creating efficient and aesthetically pleasing topology, being strategic about placing patterns for optimal deformation, particularly around critical articulation points. The level of detail depends on the intended movement of the model; since mine was relatively stationary, I kept it simple.
Another thing you can correct here is the scale of your model, units can change between softwares (meters, centimeters etc...) but you need your model to be the right size for it to render correctly, have the good amount of sss, reflections and be credible, even for simulations after, good scale are necessary. As we emulate real life, being aware and vigilant about that is important.
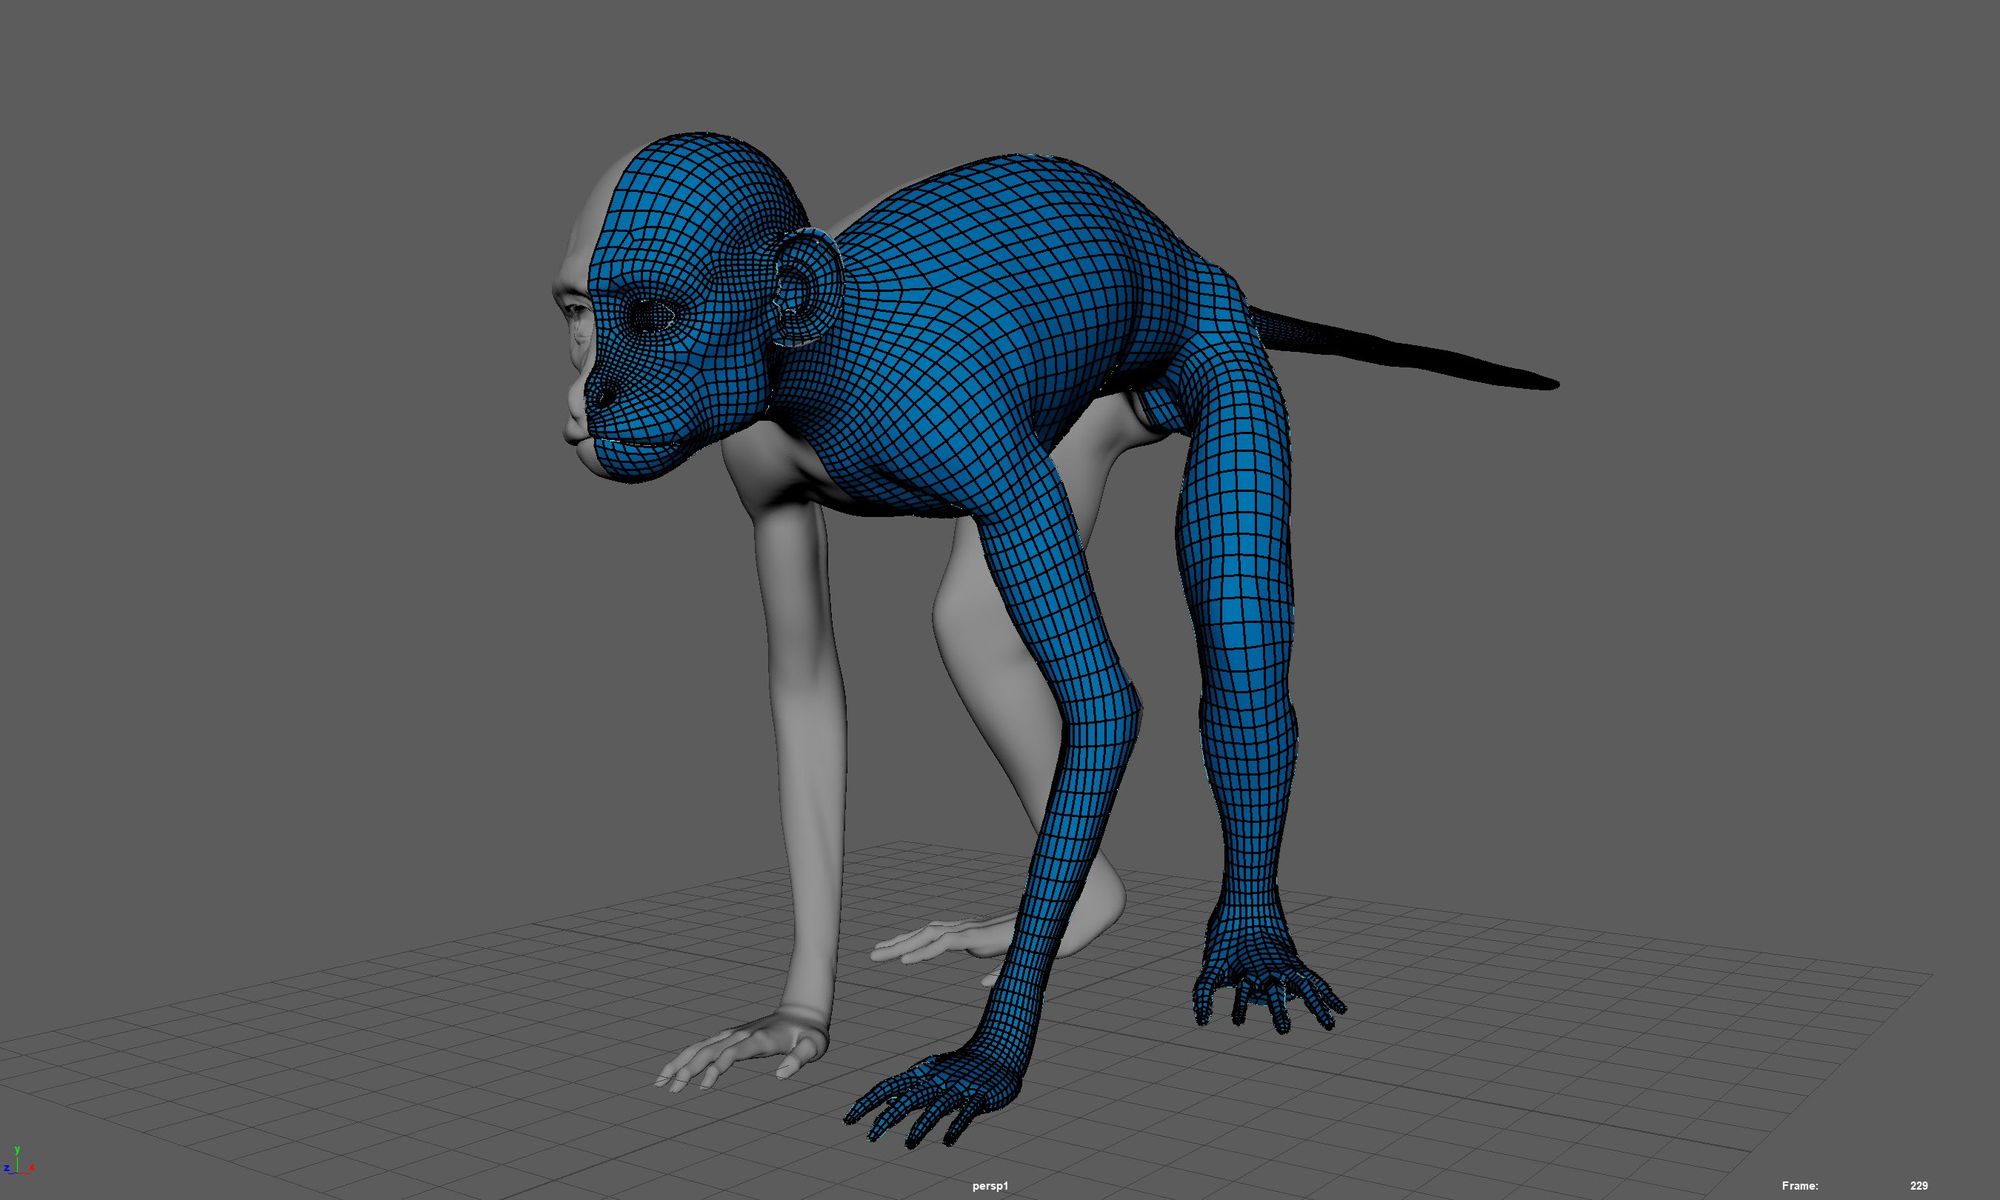
Looking back, I should have made my topology more advanced for better deformation. Even if my character doesn’t move a lot, he is still an animated model and a monkey, so it needed a lot of amplitude and liberty of movement that he ultimately will not have because of the topology I gave him. I also started the topology too early in the sculpting process; my capuchin's proportions were too far off and some of the important topology features were not in the right place as for example, the stars on his brows.
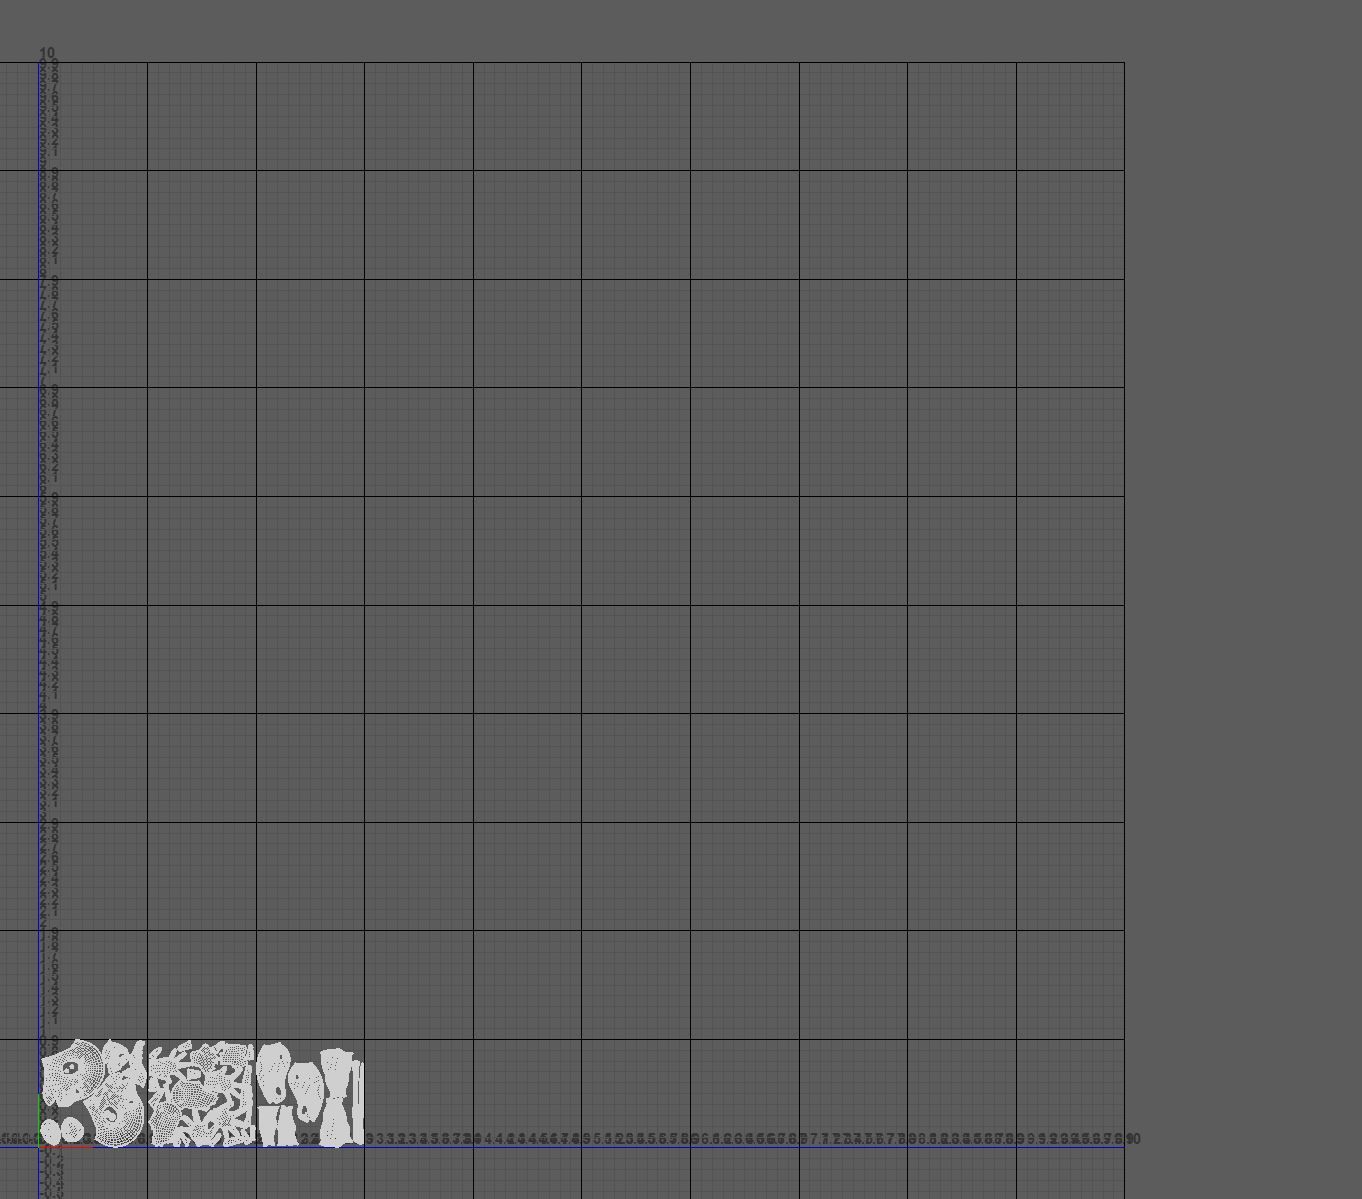
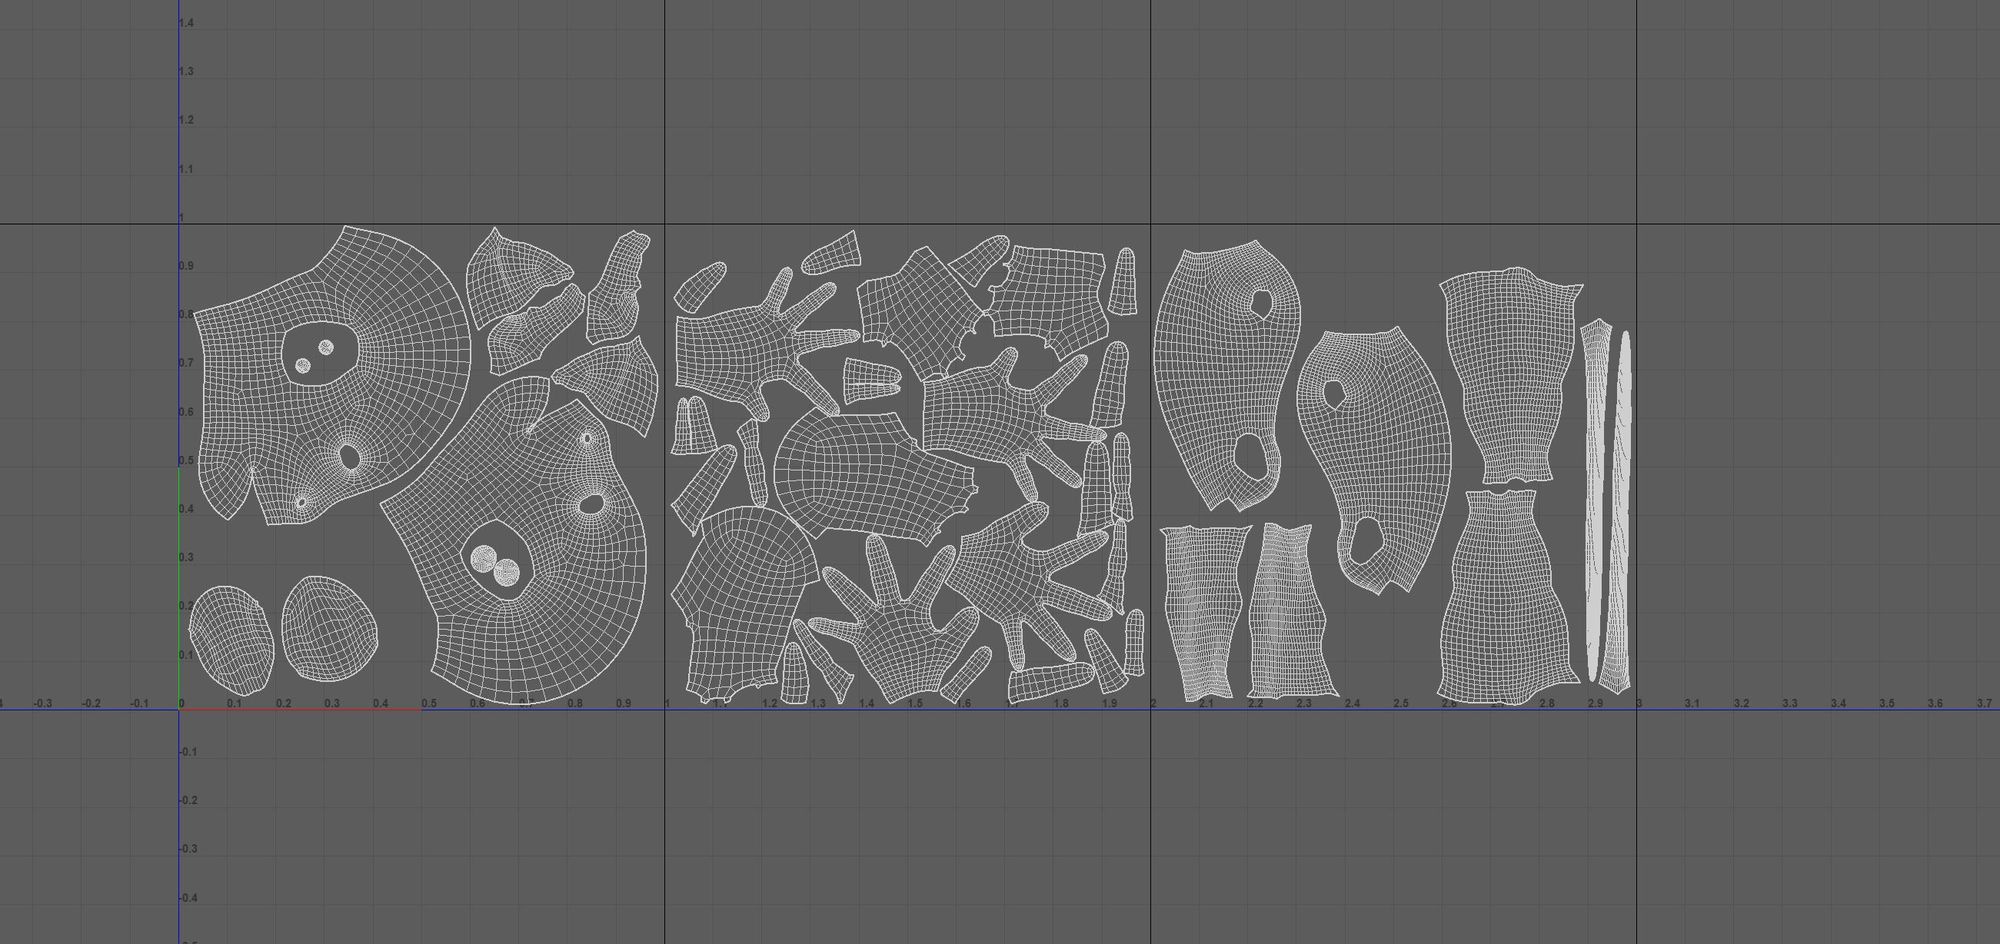
Retopology done, let’s lay out some UVs. Uvs are the flat representation of your model, unwrapped like the patterns of cubes or clothes for sewing. We can put pictures on that 2D version and thanks to the correspondence between the 2D and 3D models, the textures wrap themselves onto the model. UV space is generally described with UDIMs, they are the modern way 3D softwares arrange texture maps, UDIMs follow a grid of squares starting at 1001 extending to theoretically the infinity. I allows artists to use multiple texture maps for one 3D model and have consistent coordinates for the UVs of the model along a naming system that allows the softwares to know where each texture map goes.
The problem is that you cannot represent curved 3D shapes on 2D planes without some sort of deformation. It’s a mathematical impossibility. It is why we have different types of world maps, with different types of deformations. For example, the most known map projection is the mercator projection. The shapes and angles are conserved (great for navigation), but the scale is completely wrong. Check this out here.
So that means we have the same problem in 3D! We need to avoid stretching and compression to ease our work in texturing. To reduce deformations we have tools like heat maps that turn red or blue on stretched regions.
To create UVs, we designate edges on our model as cuts, turning them into seams that separate pieces in the 2D space. I prefer multiple smaller pieces for better control. Using UV unwrapping tools, we flatten these shapes like peeling skin, ensuring even topology aids in the process. As we unwrap, we consider the texturing technique—projection, painting, or procedural—tailoring the UV unwrapping accordingly.
Once all pieces are unwrapped, we organise them with attention to scale, ensuring consistent pixel density. This prevents disparity in texture quality, such as a highly detailed finger contrasting with a pixelated torso due to uneven UV sizing.
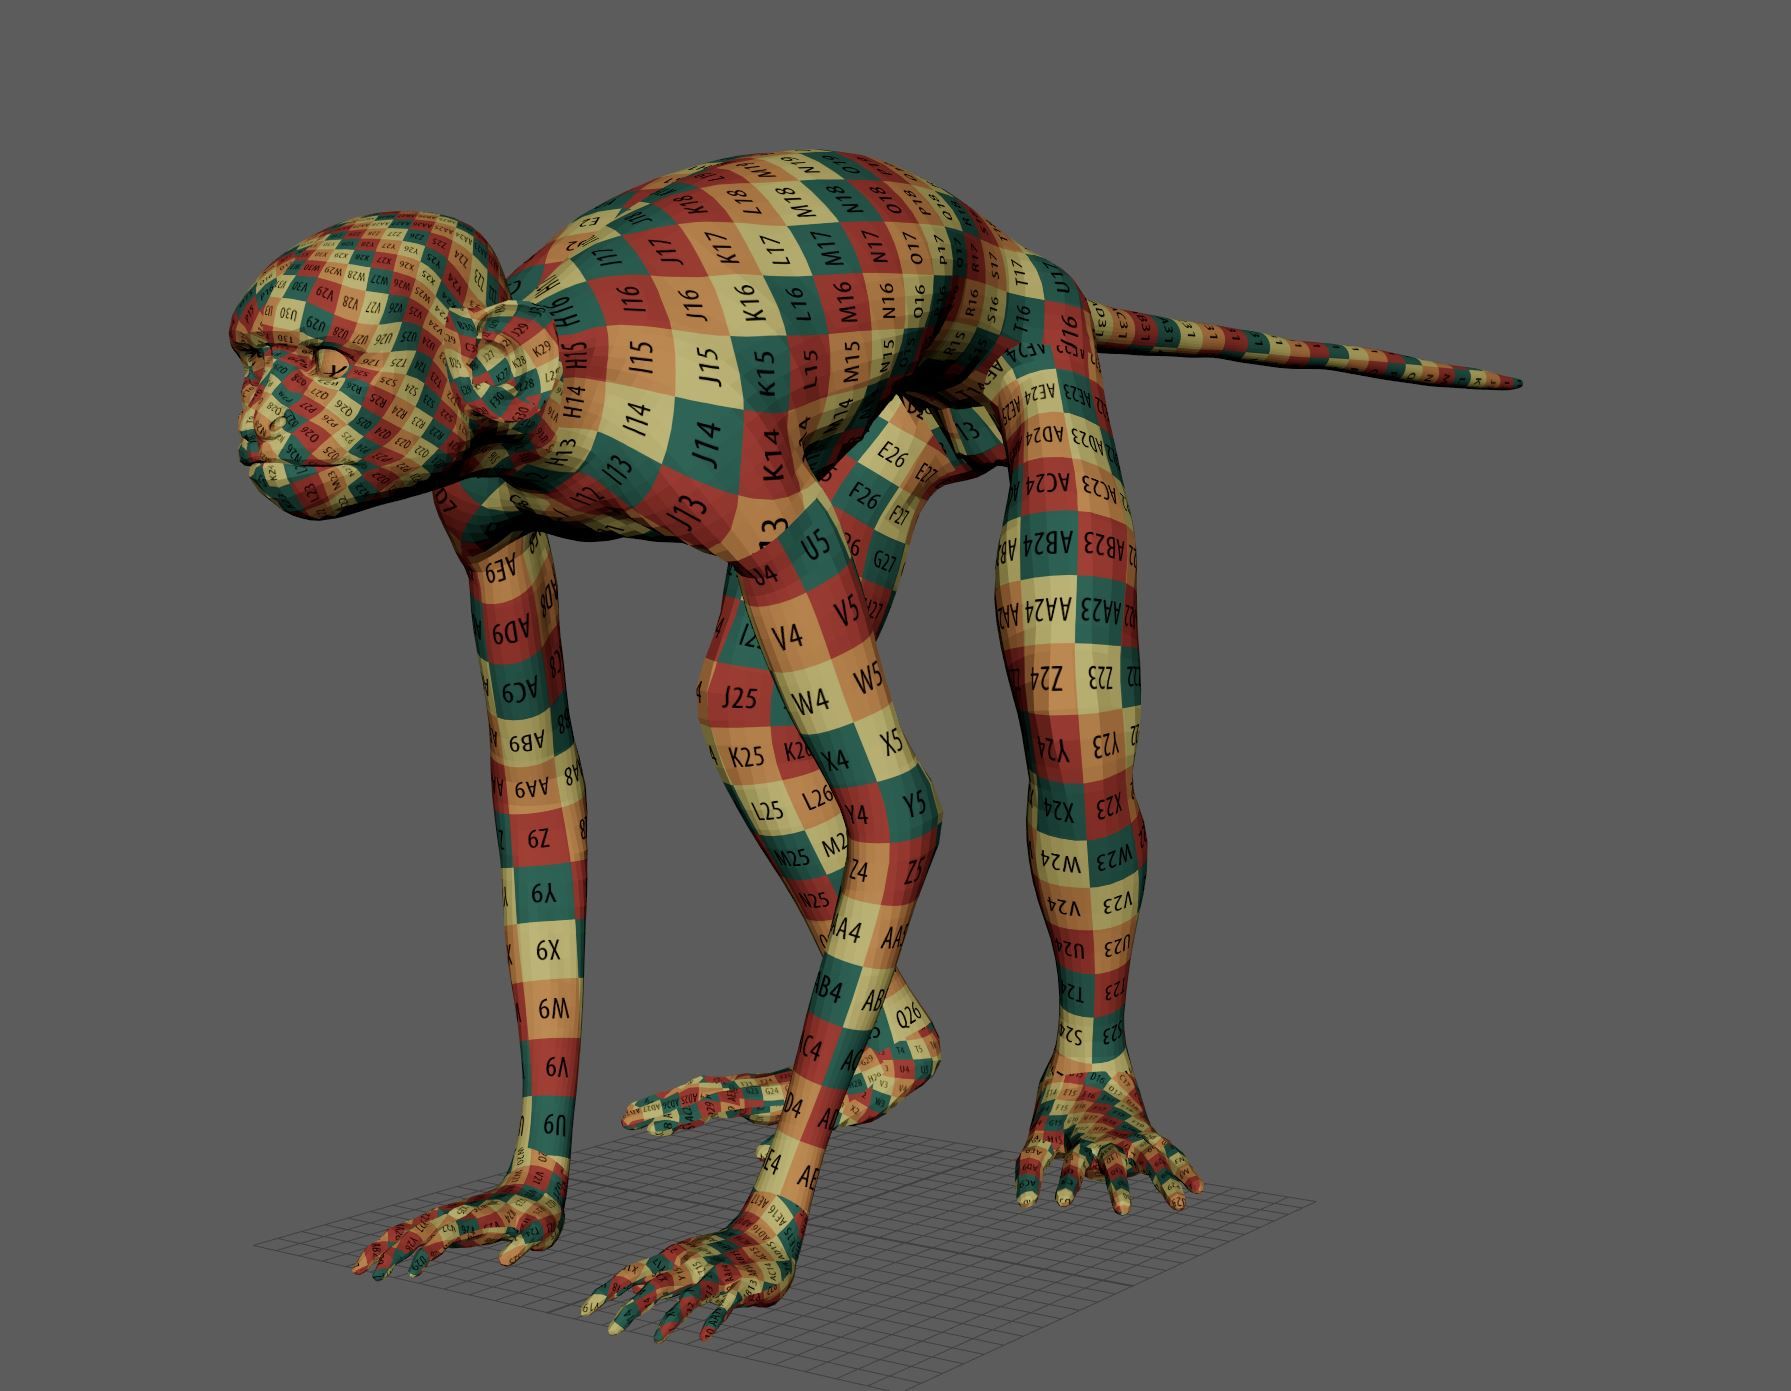
To maintain consistent texture quality, measuring tools help monitor pixel density across the model. While exceptions may occur for unseen areas like the torso, maintaining uniformity in visible parts such as the face and ears is crucial. Once parts are scaled appropriately, arranging them on the UDIM grid begins, with each square representing a texture map. Efficiency is key, but maintaining coherence between parts—like teeth, spikes, or tongues—facilitates gradients and procedural texturing.
We can admire some nice UVs and move on to Lookdev!
In the texturing and shading phase, I transition between Mari and Arnold in Maya, ensuring consistency between texture creation and rendering. Employing the same HDRI in both platforms maintains viewport consistency. Technical maps convey shader-applicable values, distinct from colour maps due to differences in colour space.
Referencing real-life details, I sculpt initial intricacies in ZBrush before projecting skin textures in Mari. This projection method resembles a cinema projector, selectively applying images to the model's UVs. For instance, RGB face displacement maps project varying skin detail levels onto the capuchin's head. Multiple tiled skin textures and pores are distributed across the body's UVs, layered on top of each other minimizing repetition. Displacement maps, bump maps, and normal maps are utilized to reproduce details, with roughness maps dictating surface disorder and color maps defining skin tones and melanin distribution. In shading, these maps are sequentially integrated, with color input into the SubSurface Scattering (SSS) section to simulate light interaction within translucent materials like skin.
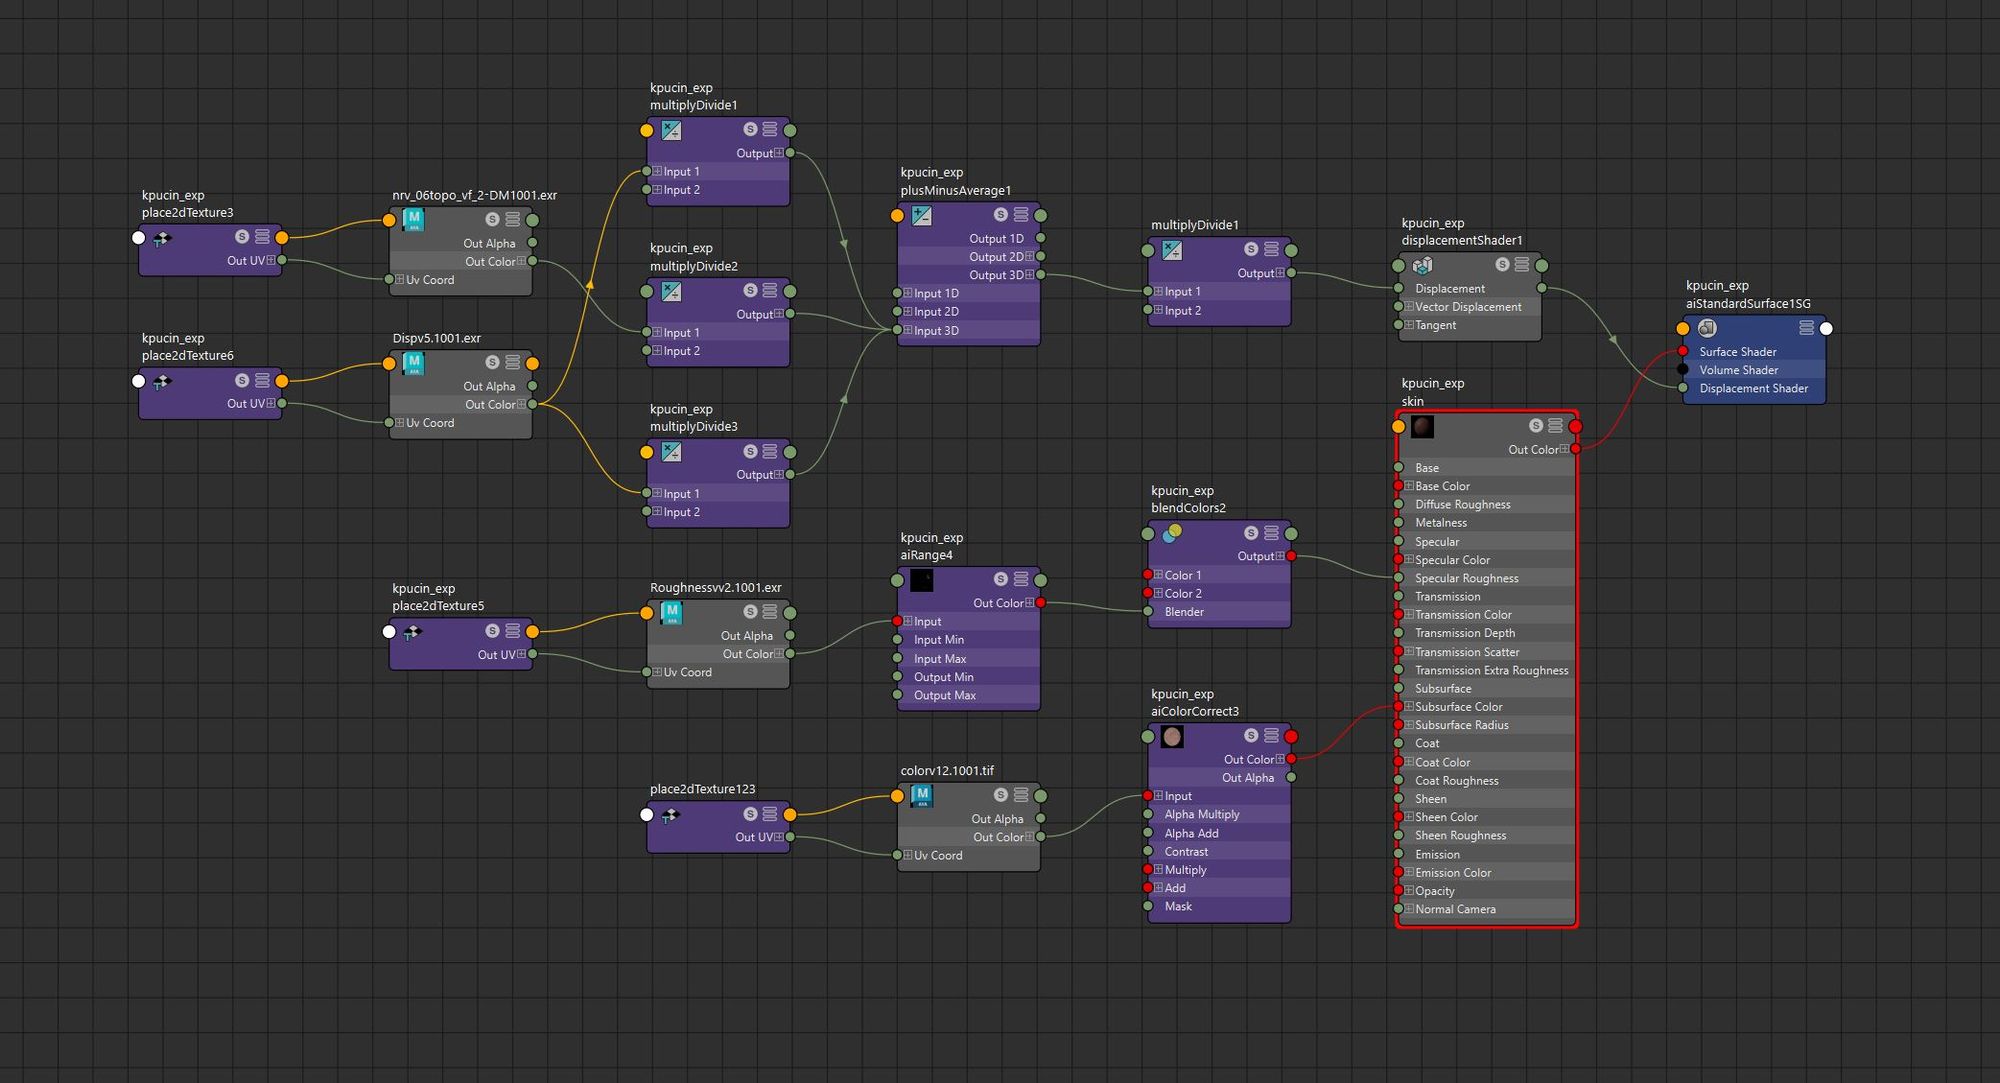
At times, I create and adjust maps iteratively, fine-tuning them within the shader by multiplying or adding layers to achieve desired render aesthetics. This perpetual cycle of tweaking and enhancing textures is a pursuit of perfection that I relish. Reflecting on this project, I realise the importance of dedicating more time to sculpting intricate skin details and incorporating additional texture variations just above the skin pores to enrich the overall skin quality. See images showcasing various sections of the node graph: Colour construction slider, displacement projection, and roughness.
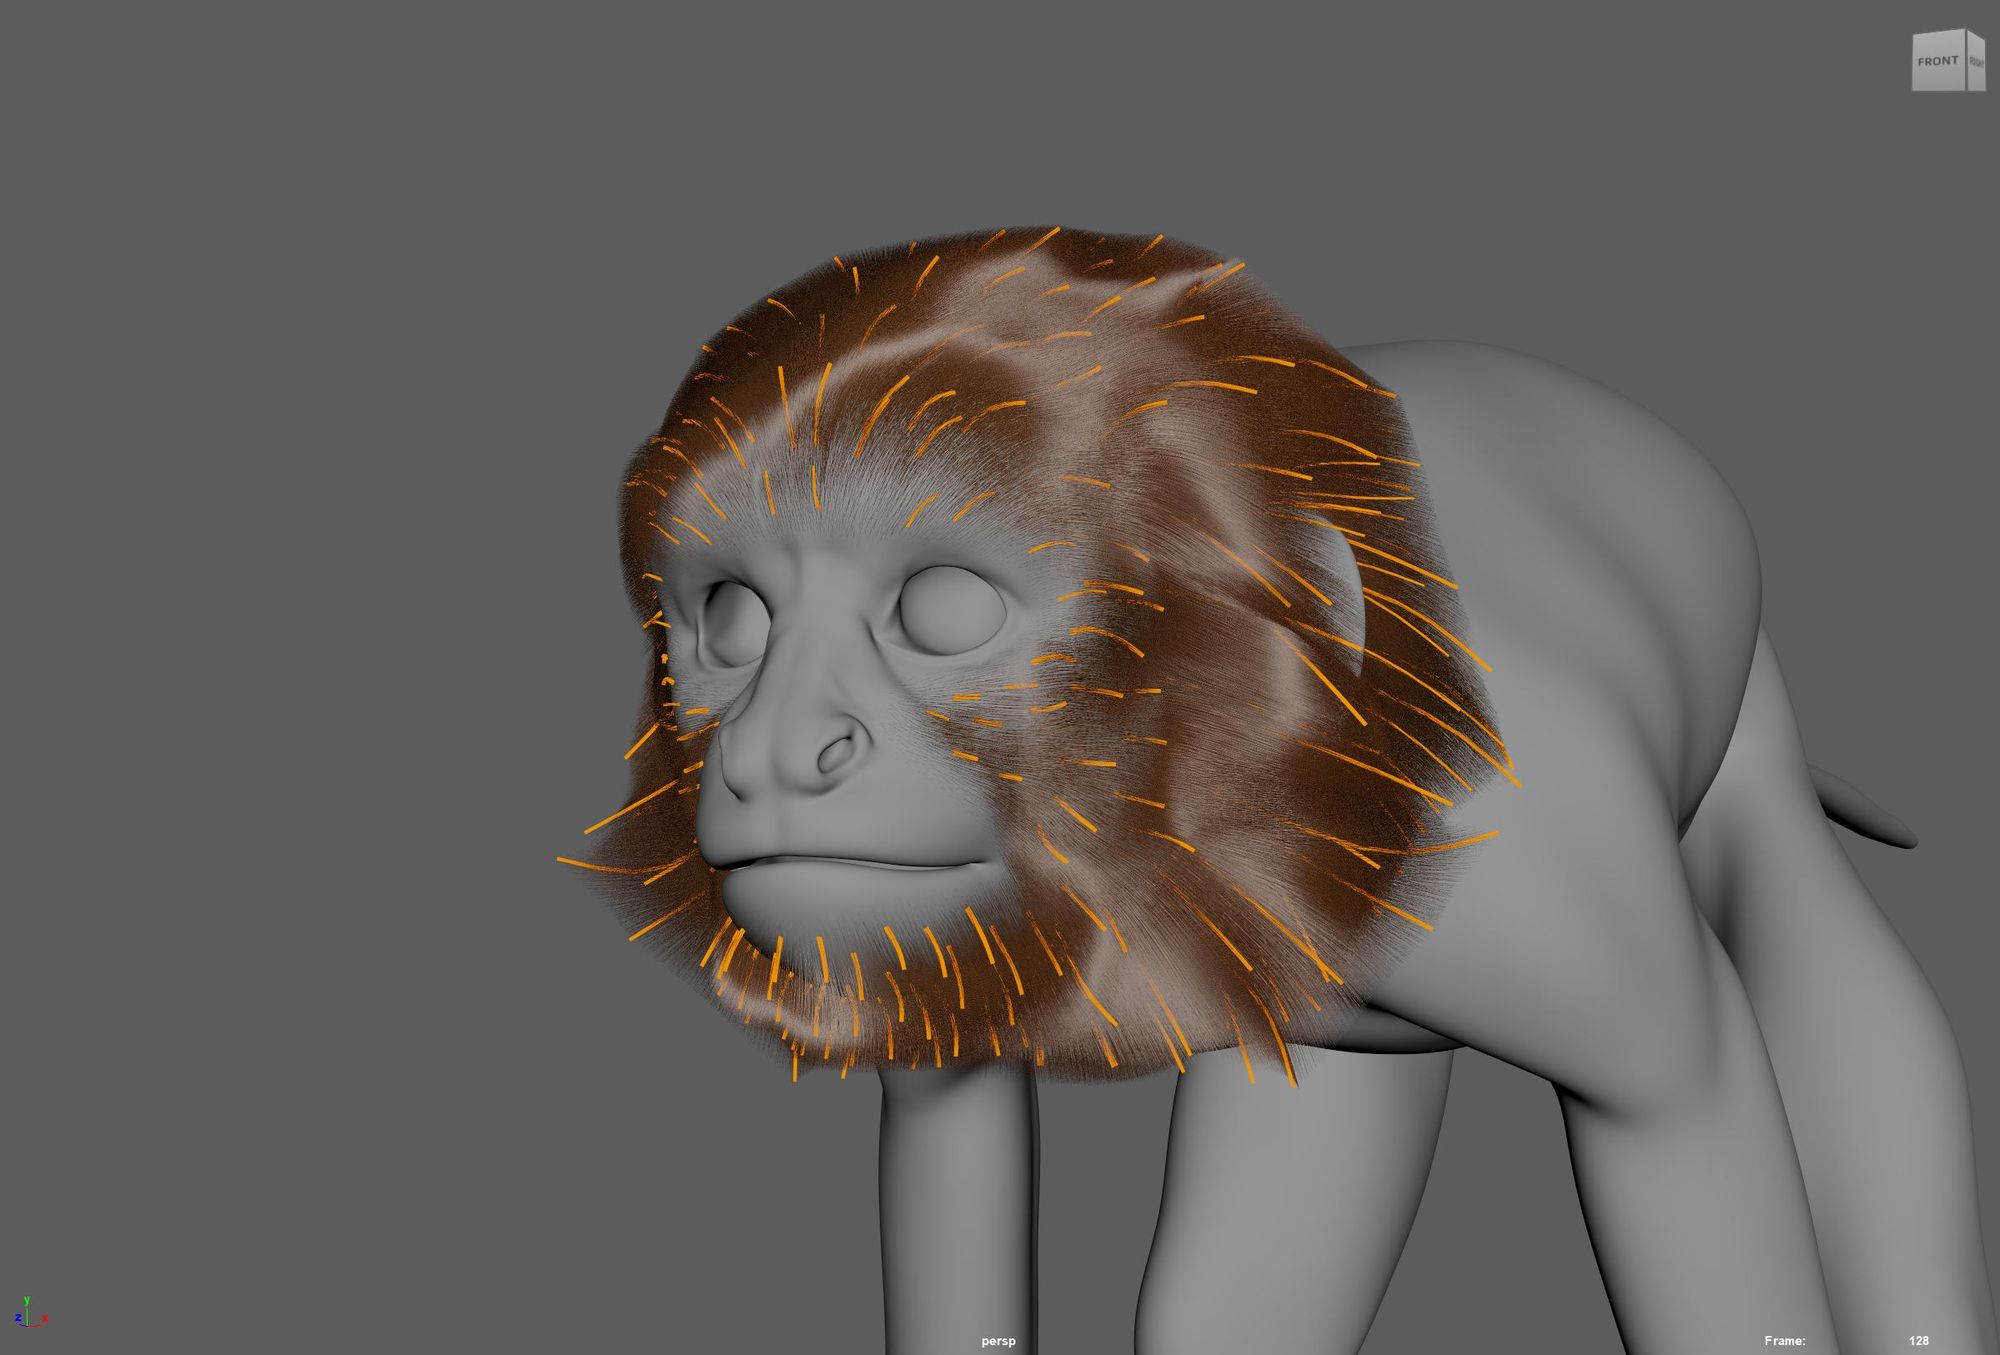
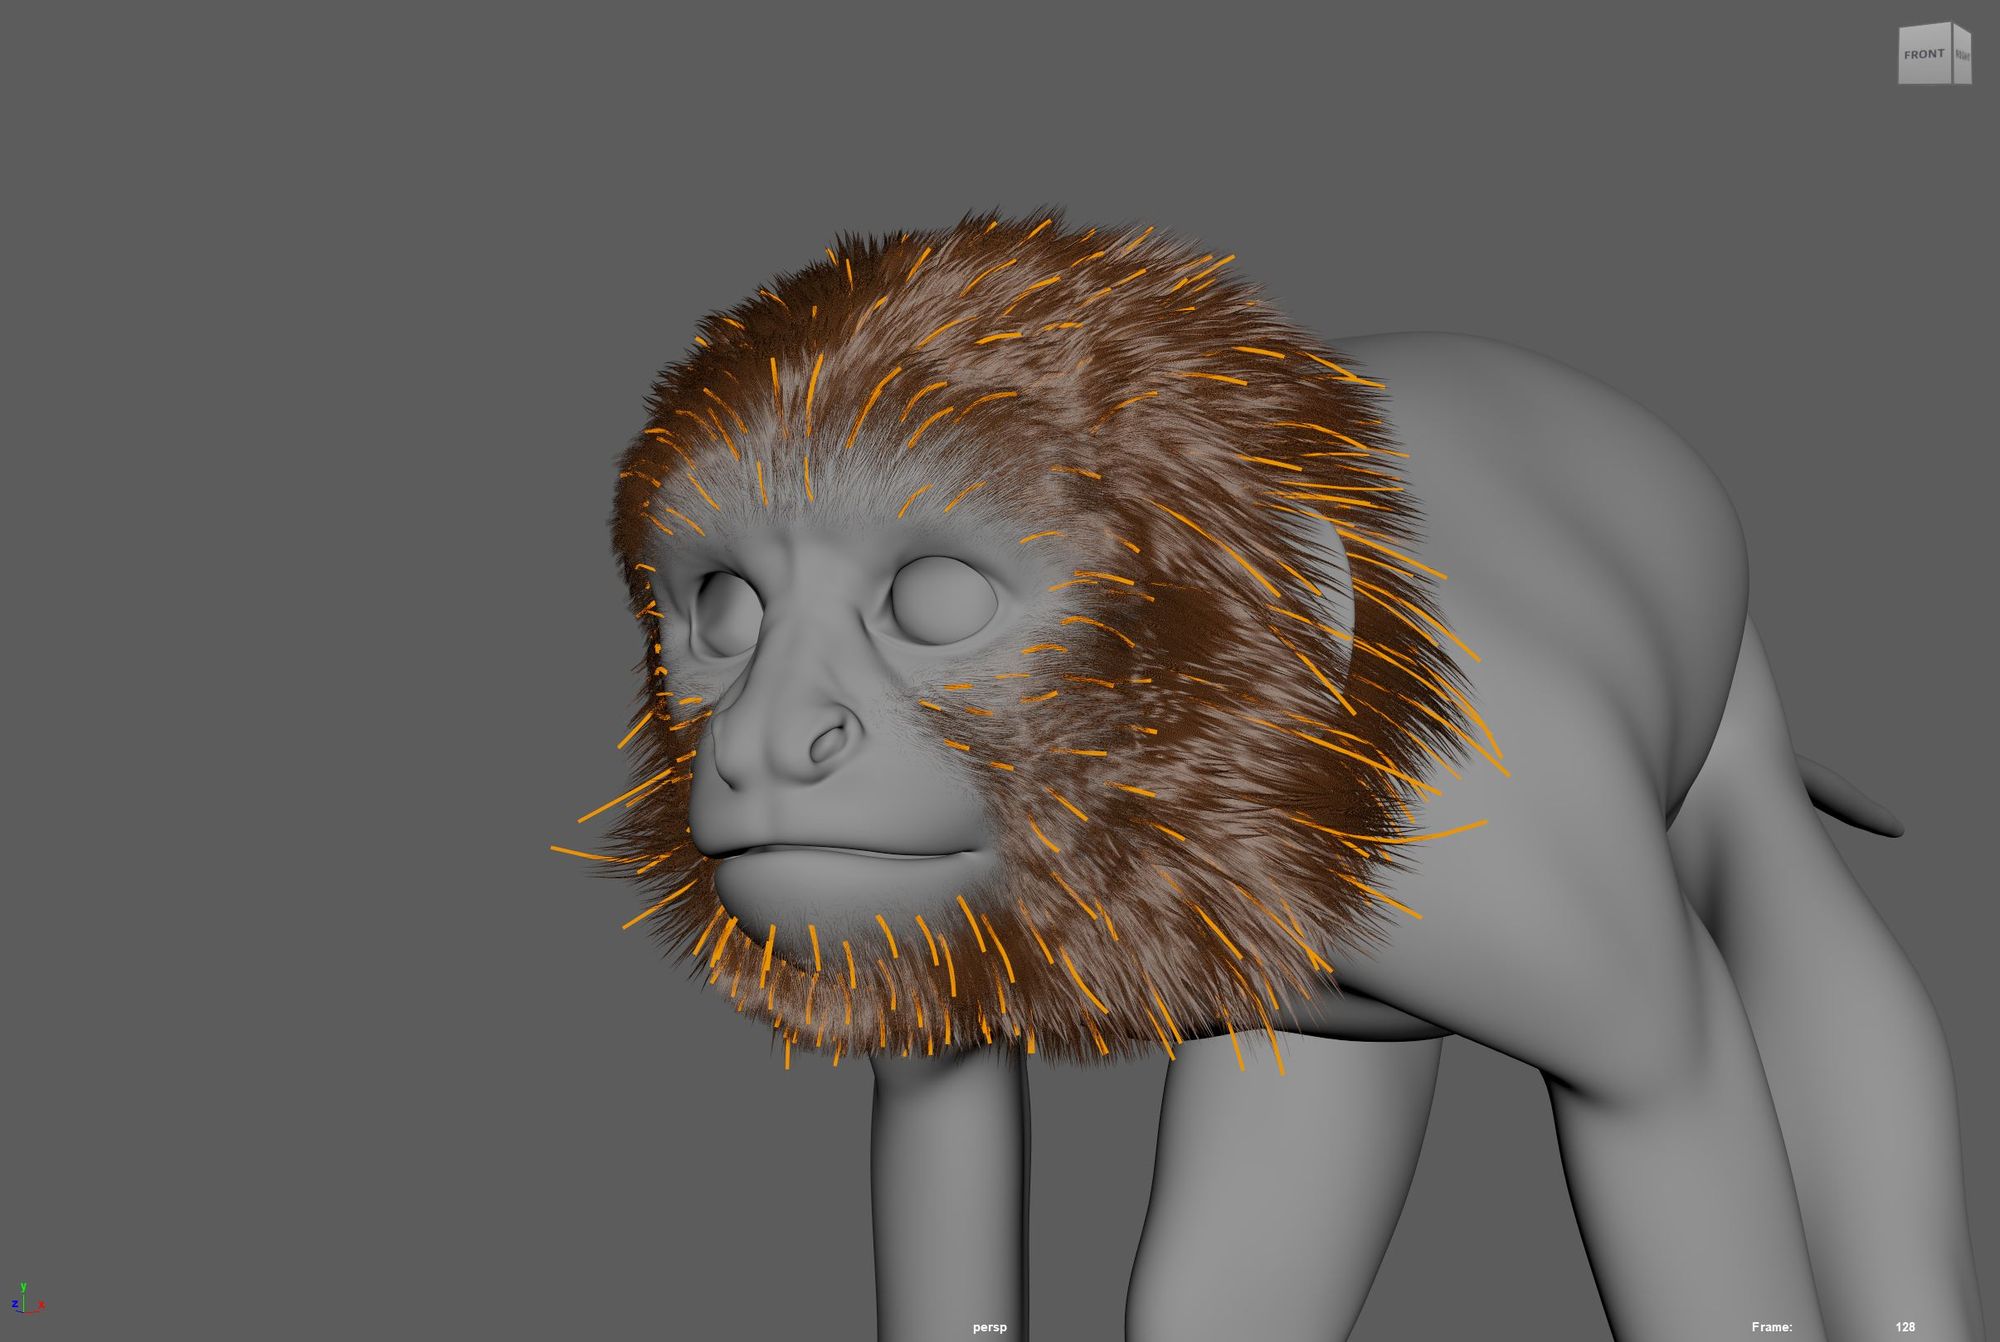
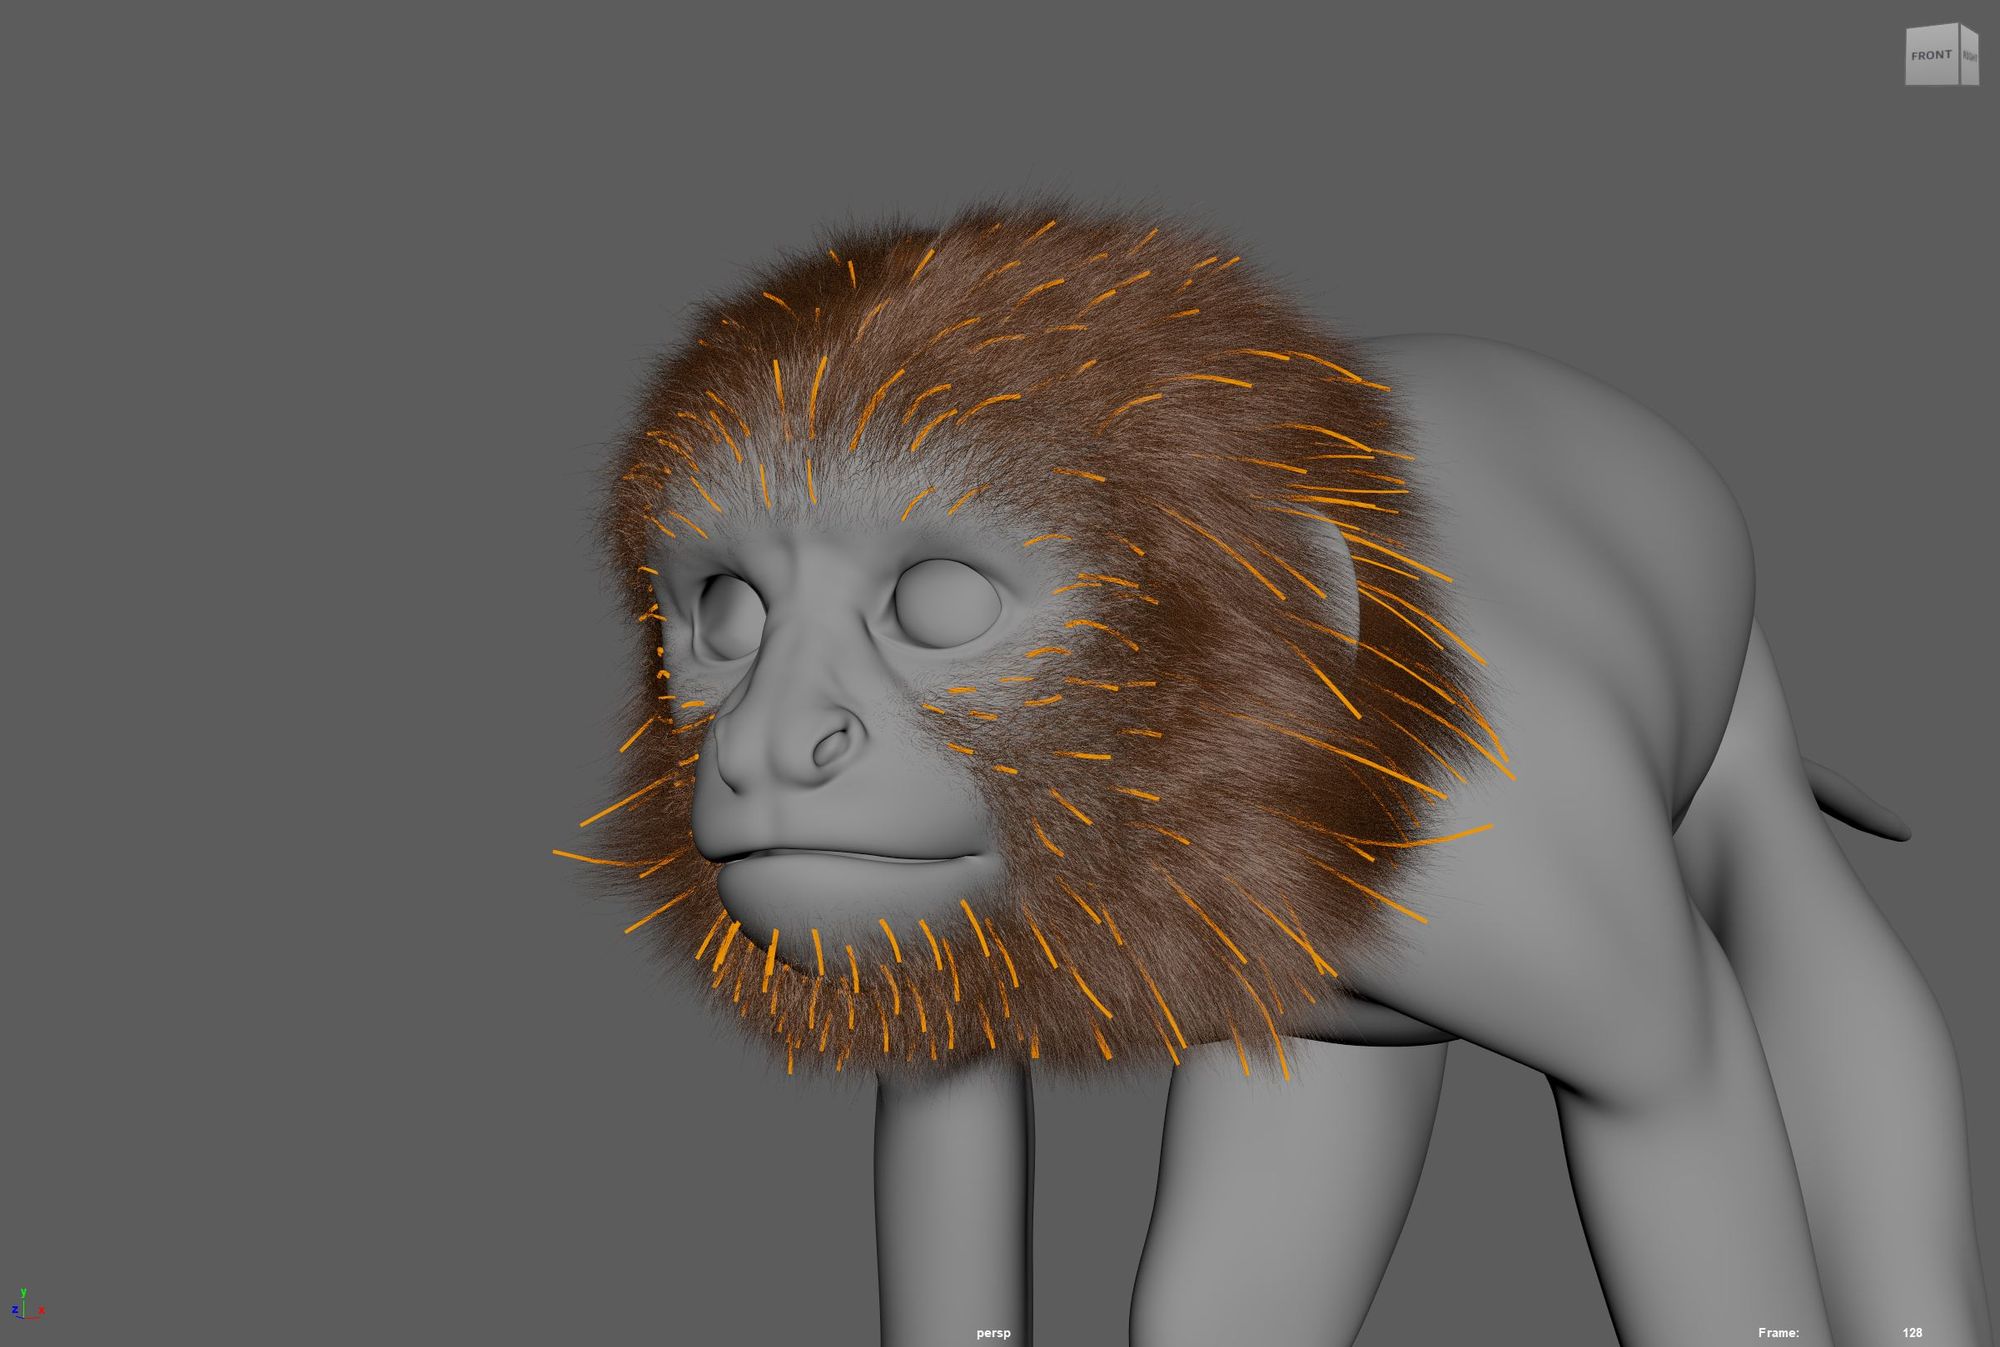
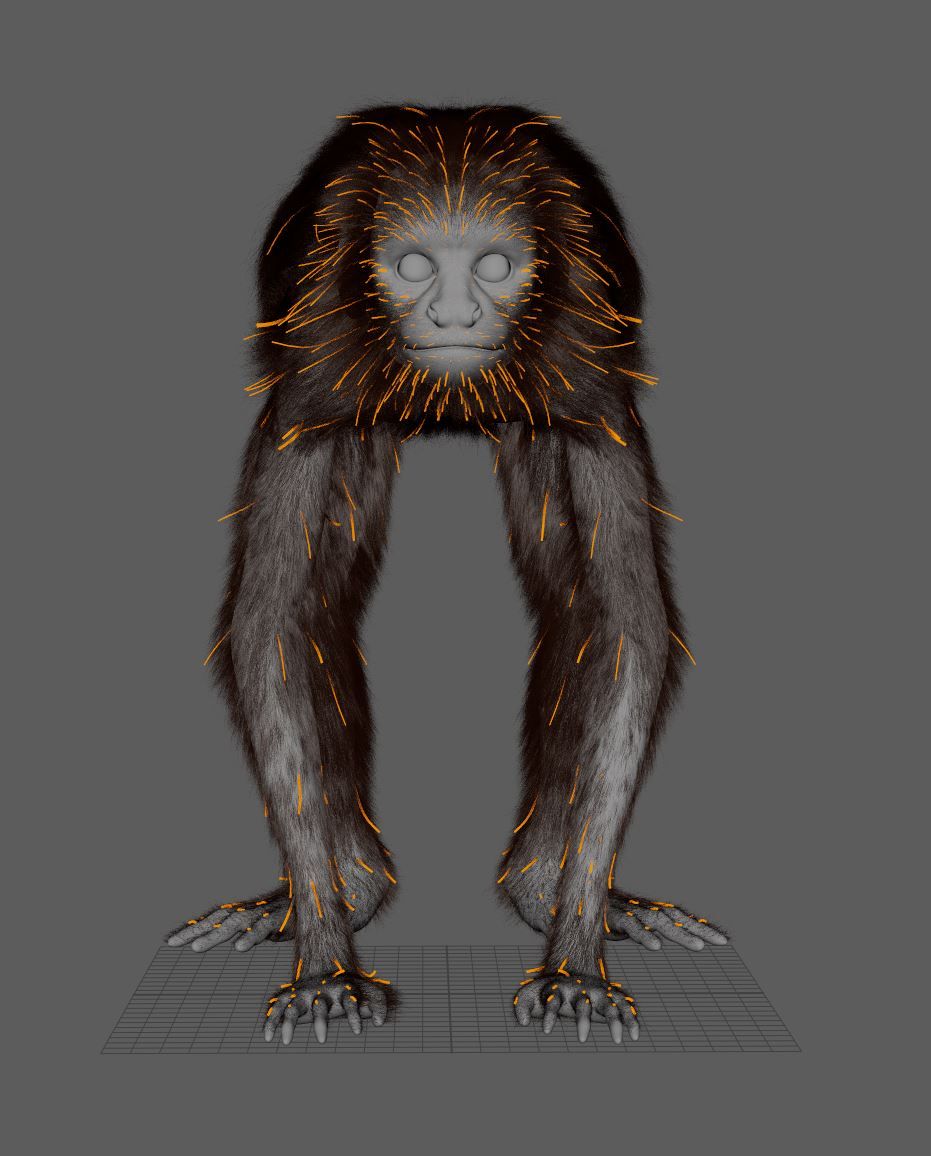
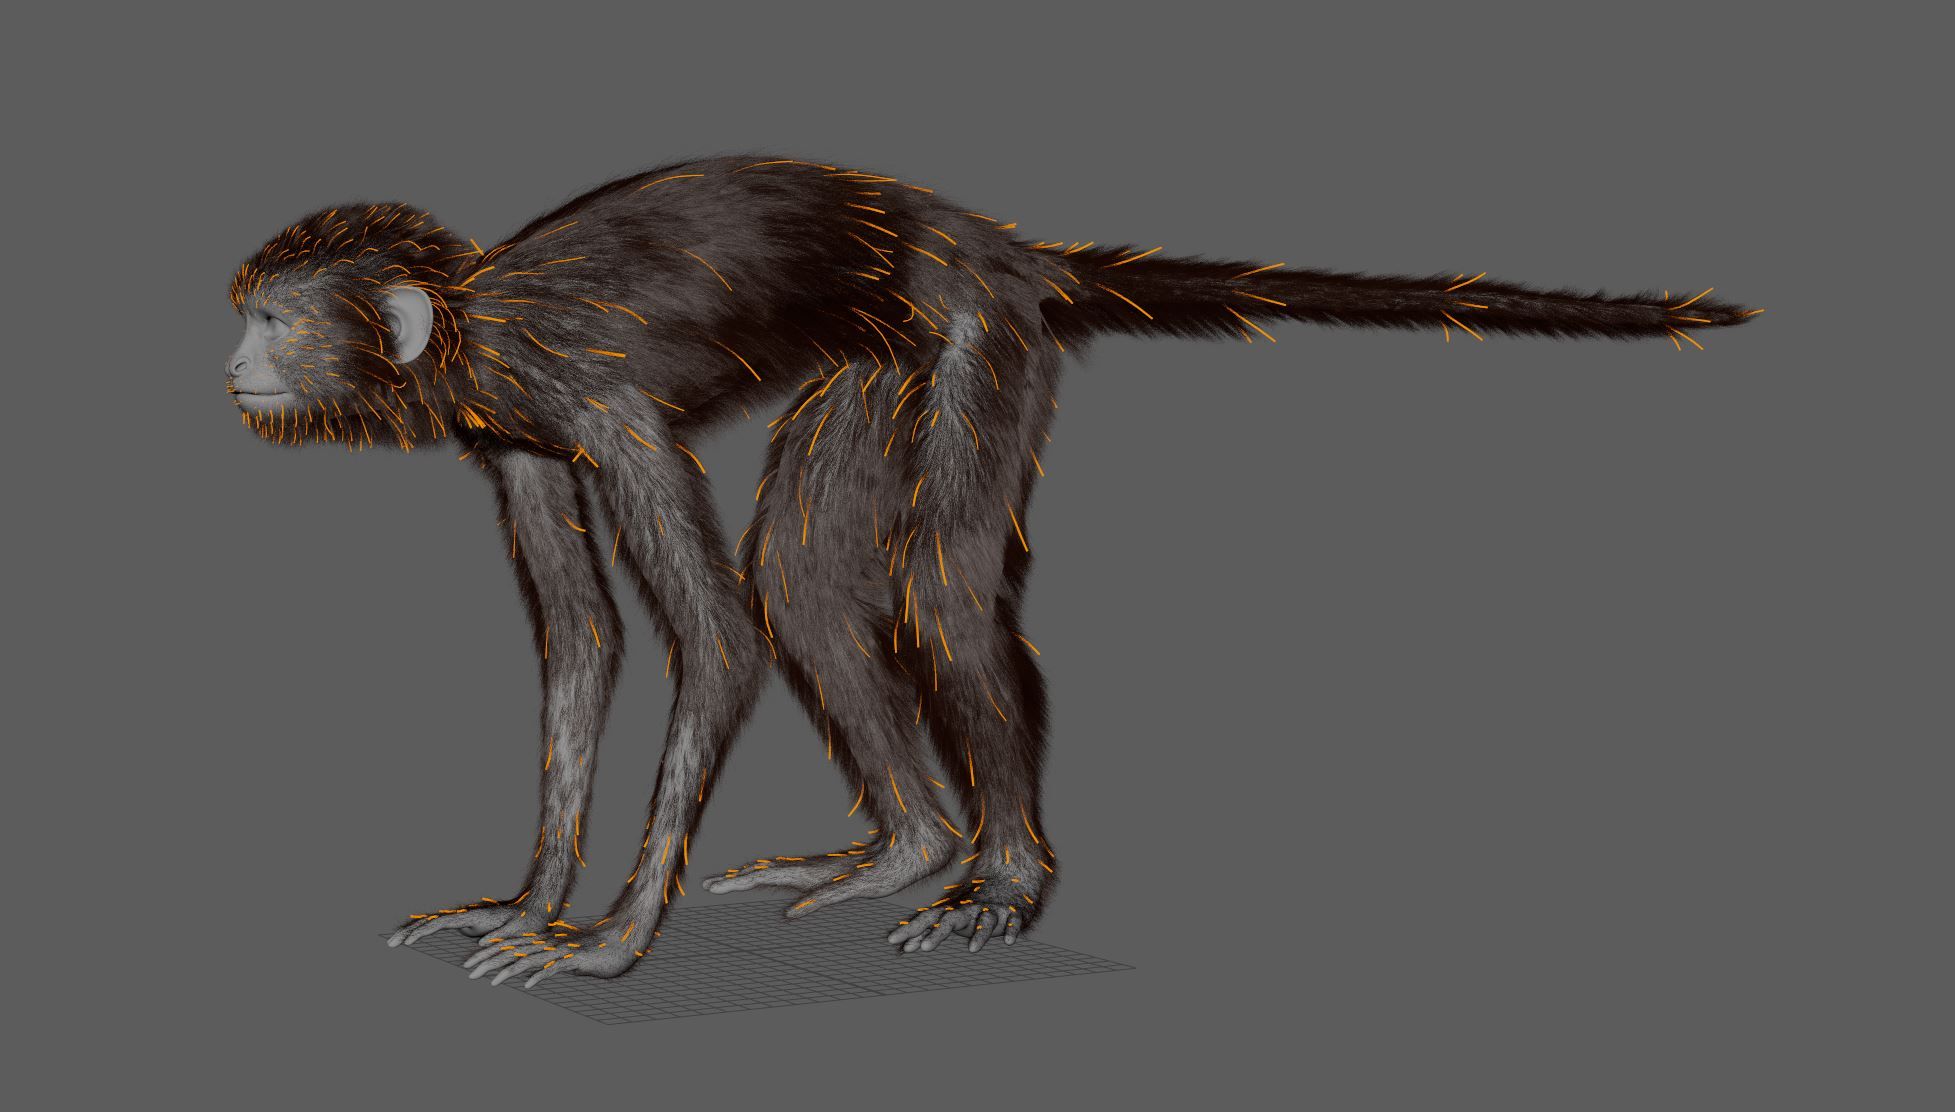
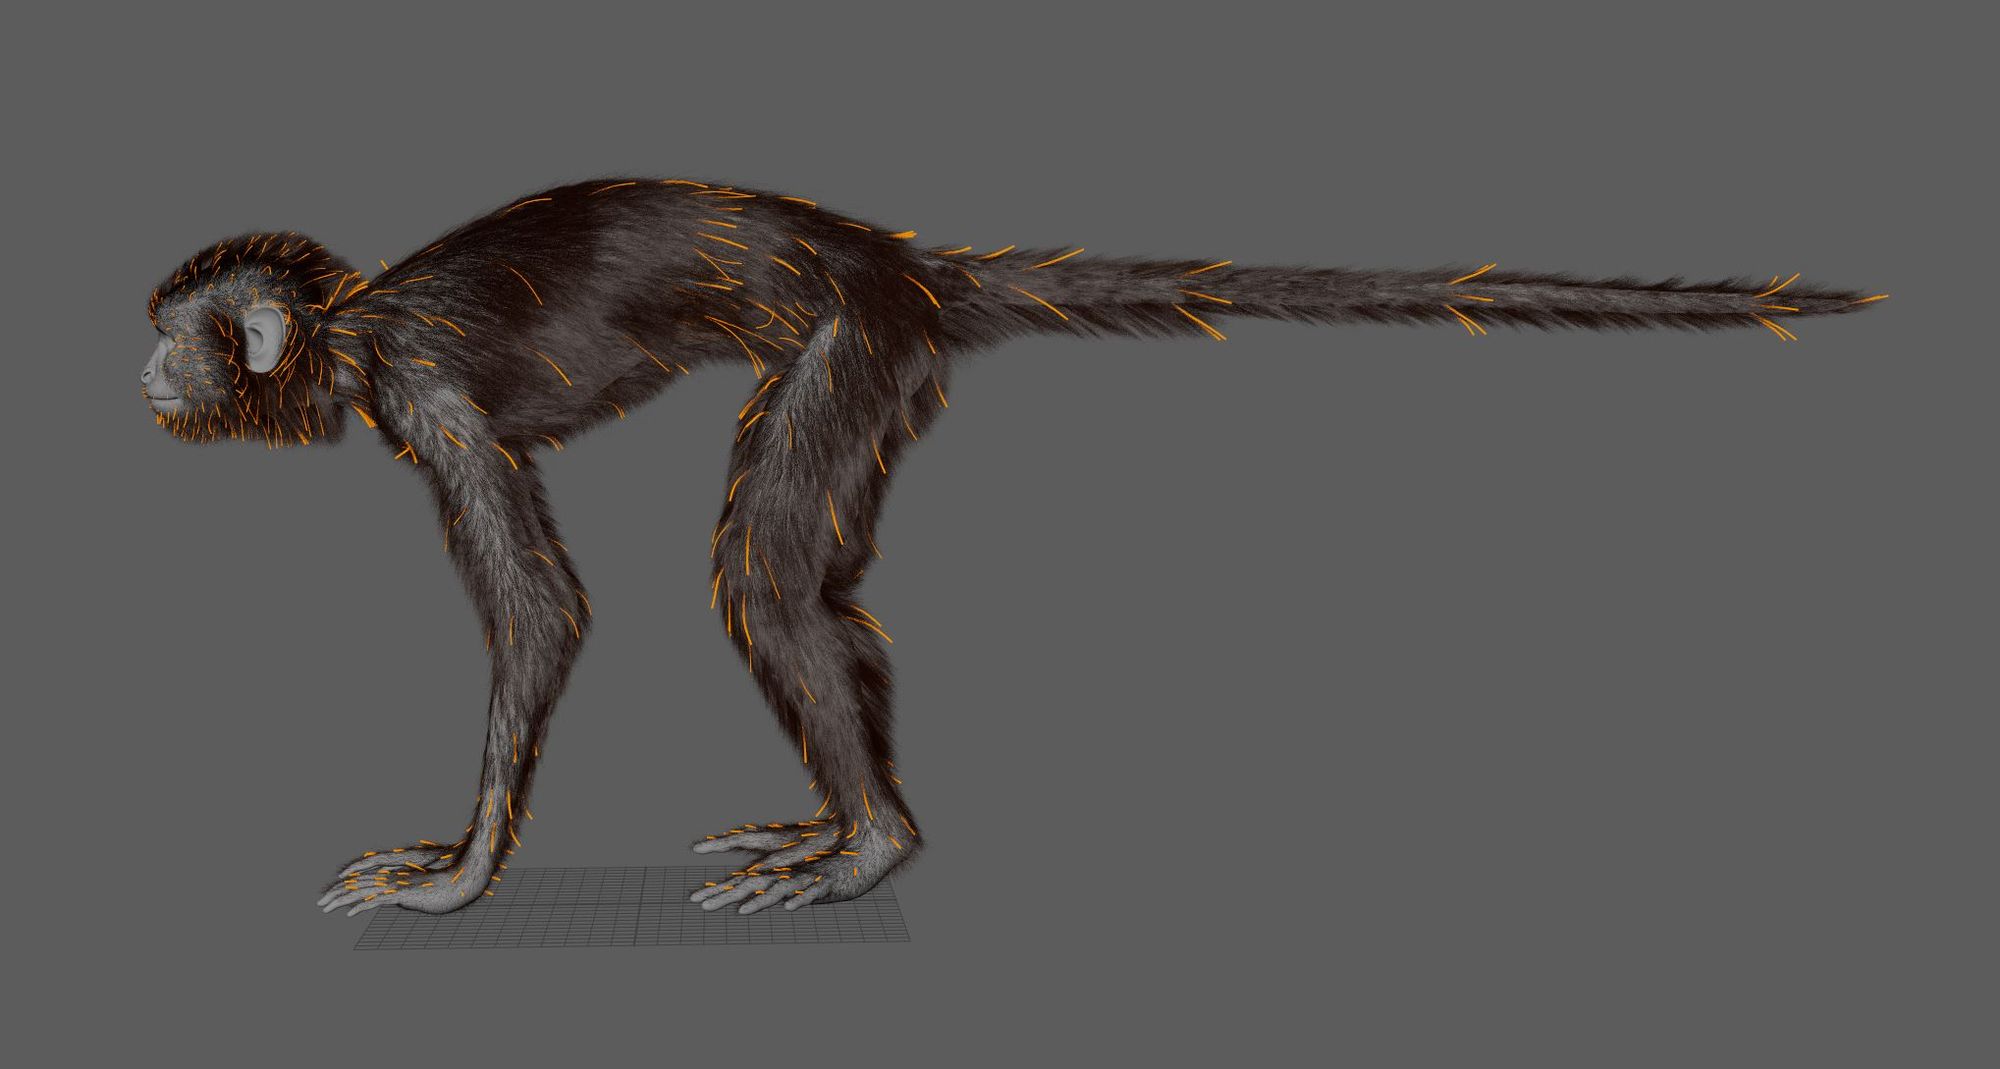
In 3D, grooming refers to the process of creating fur, hair, or feathers in the pipeline. While traditional methods involve scattering textured cards on models, grooming software like Xgen, Yeti, Ornatrix, or Houdini offers higher fidelity. These tools generate curves on the model, guided by curves that dictate flow and direction, akin to grooming a pet. Effects like noises, curls, and clumps are added for realism. Grooming involves referencing, placing guides, and creating maps for control and precision. Once groomed, a shader is assigned, rendering the curves as hair or fur. Using Xgen as an example, ensuring stability and flexibility while grooming directly on the whole mesh and using masks for splitting zones is recommended. Starting with basic guides, adjustments are made to density and effects applied to achieve the desired look.
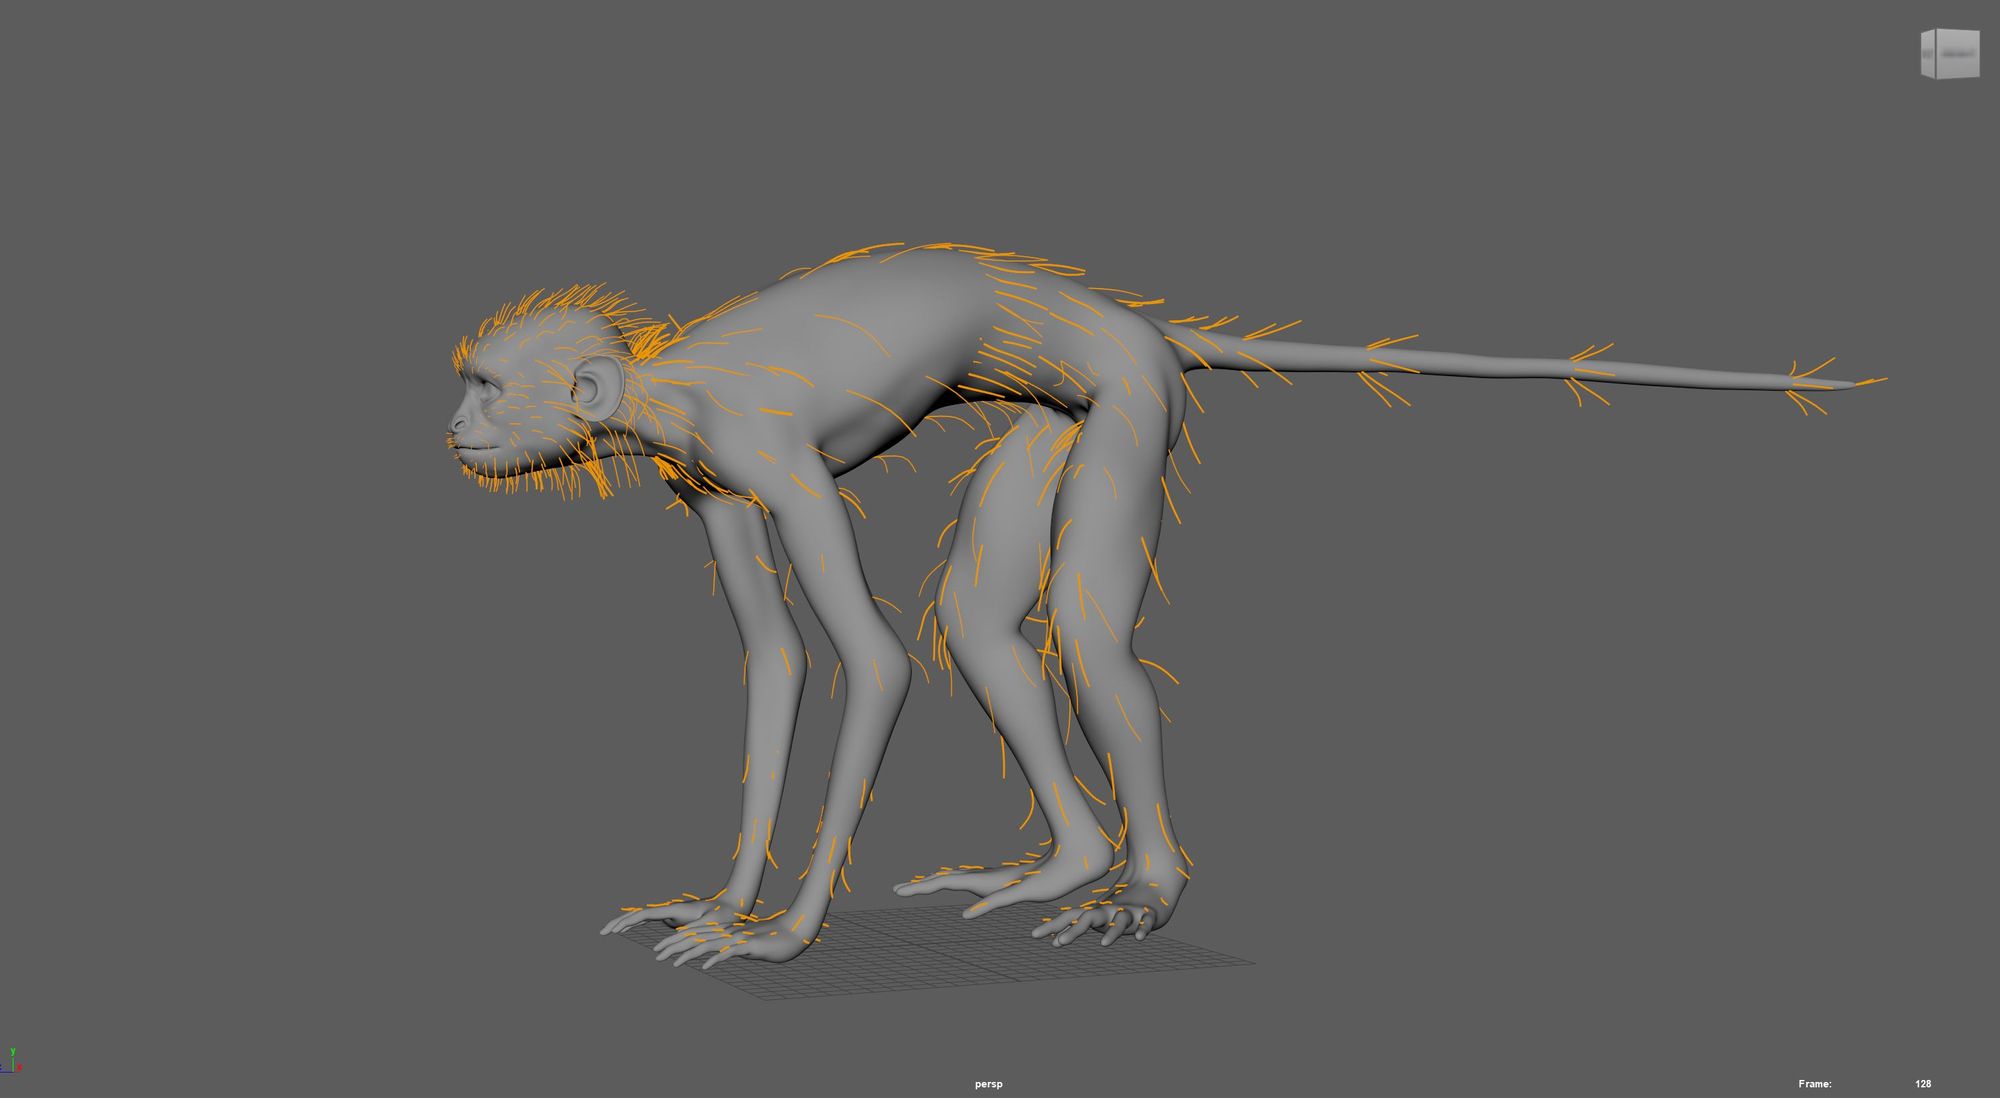
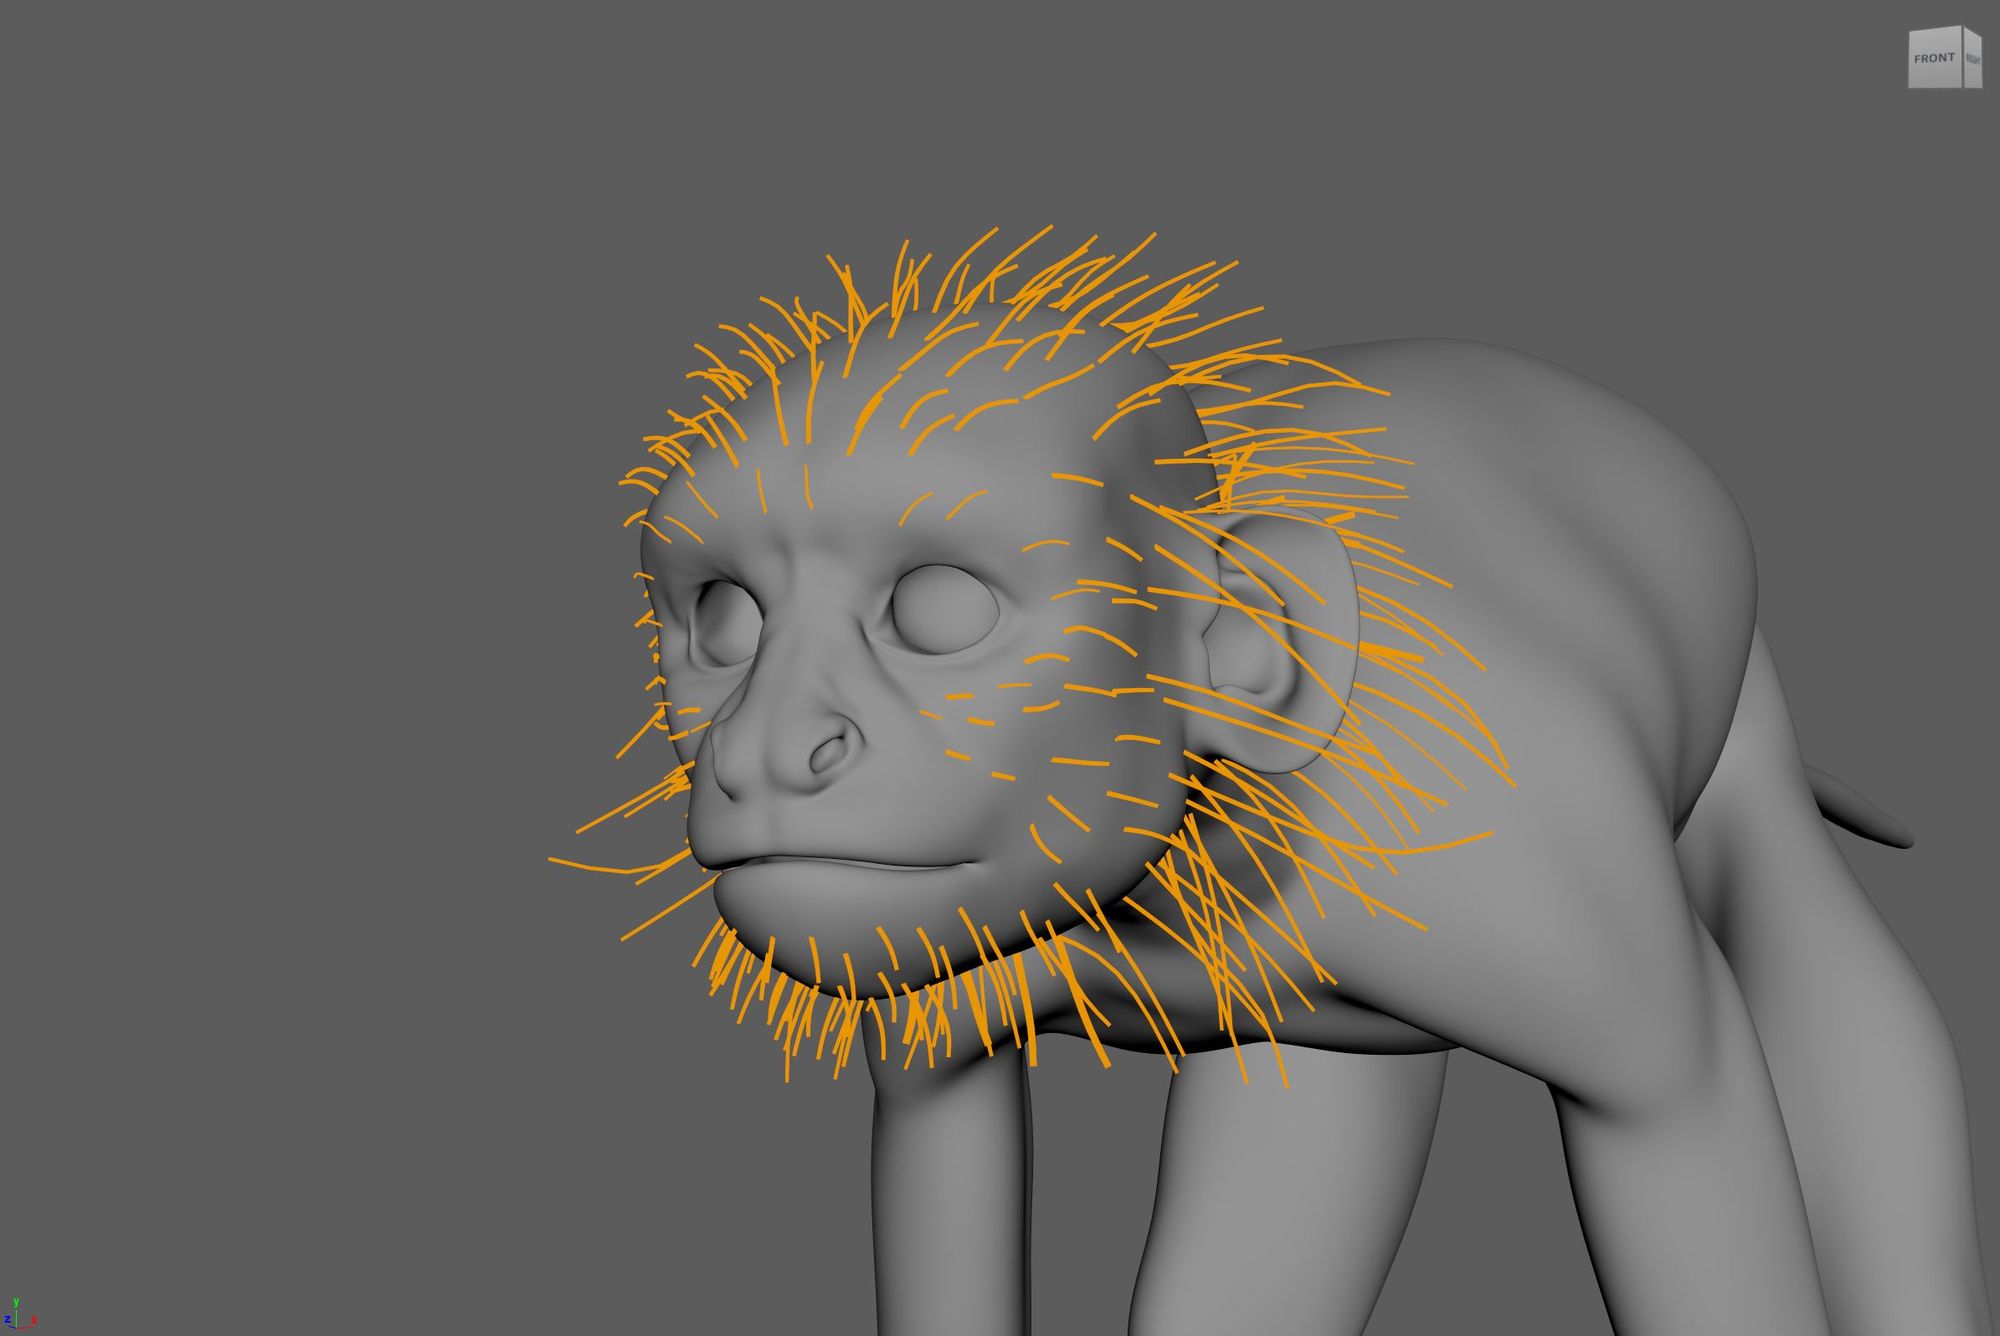
I’ll repeat this on all the different sections: limbs, tail, torso, trying to blend them seamlessly.
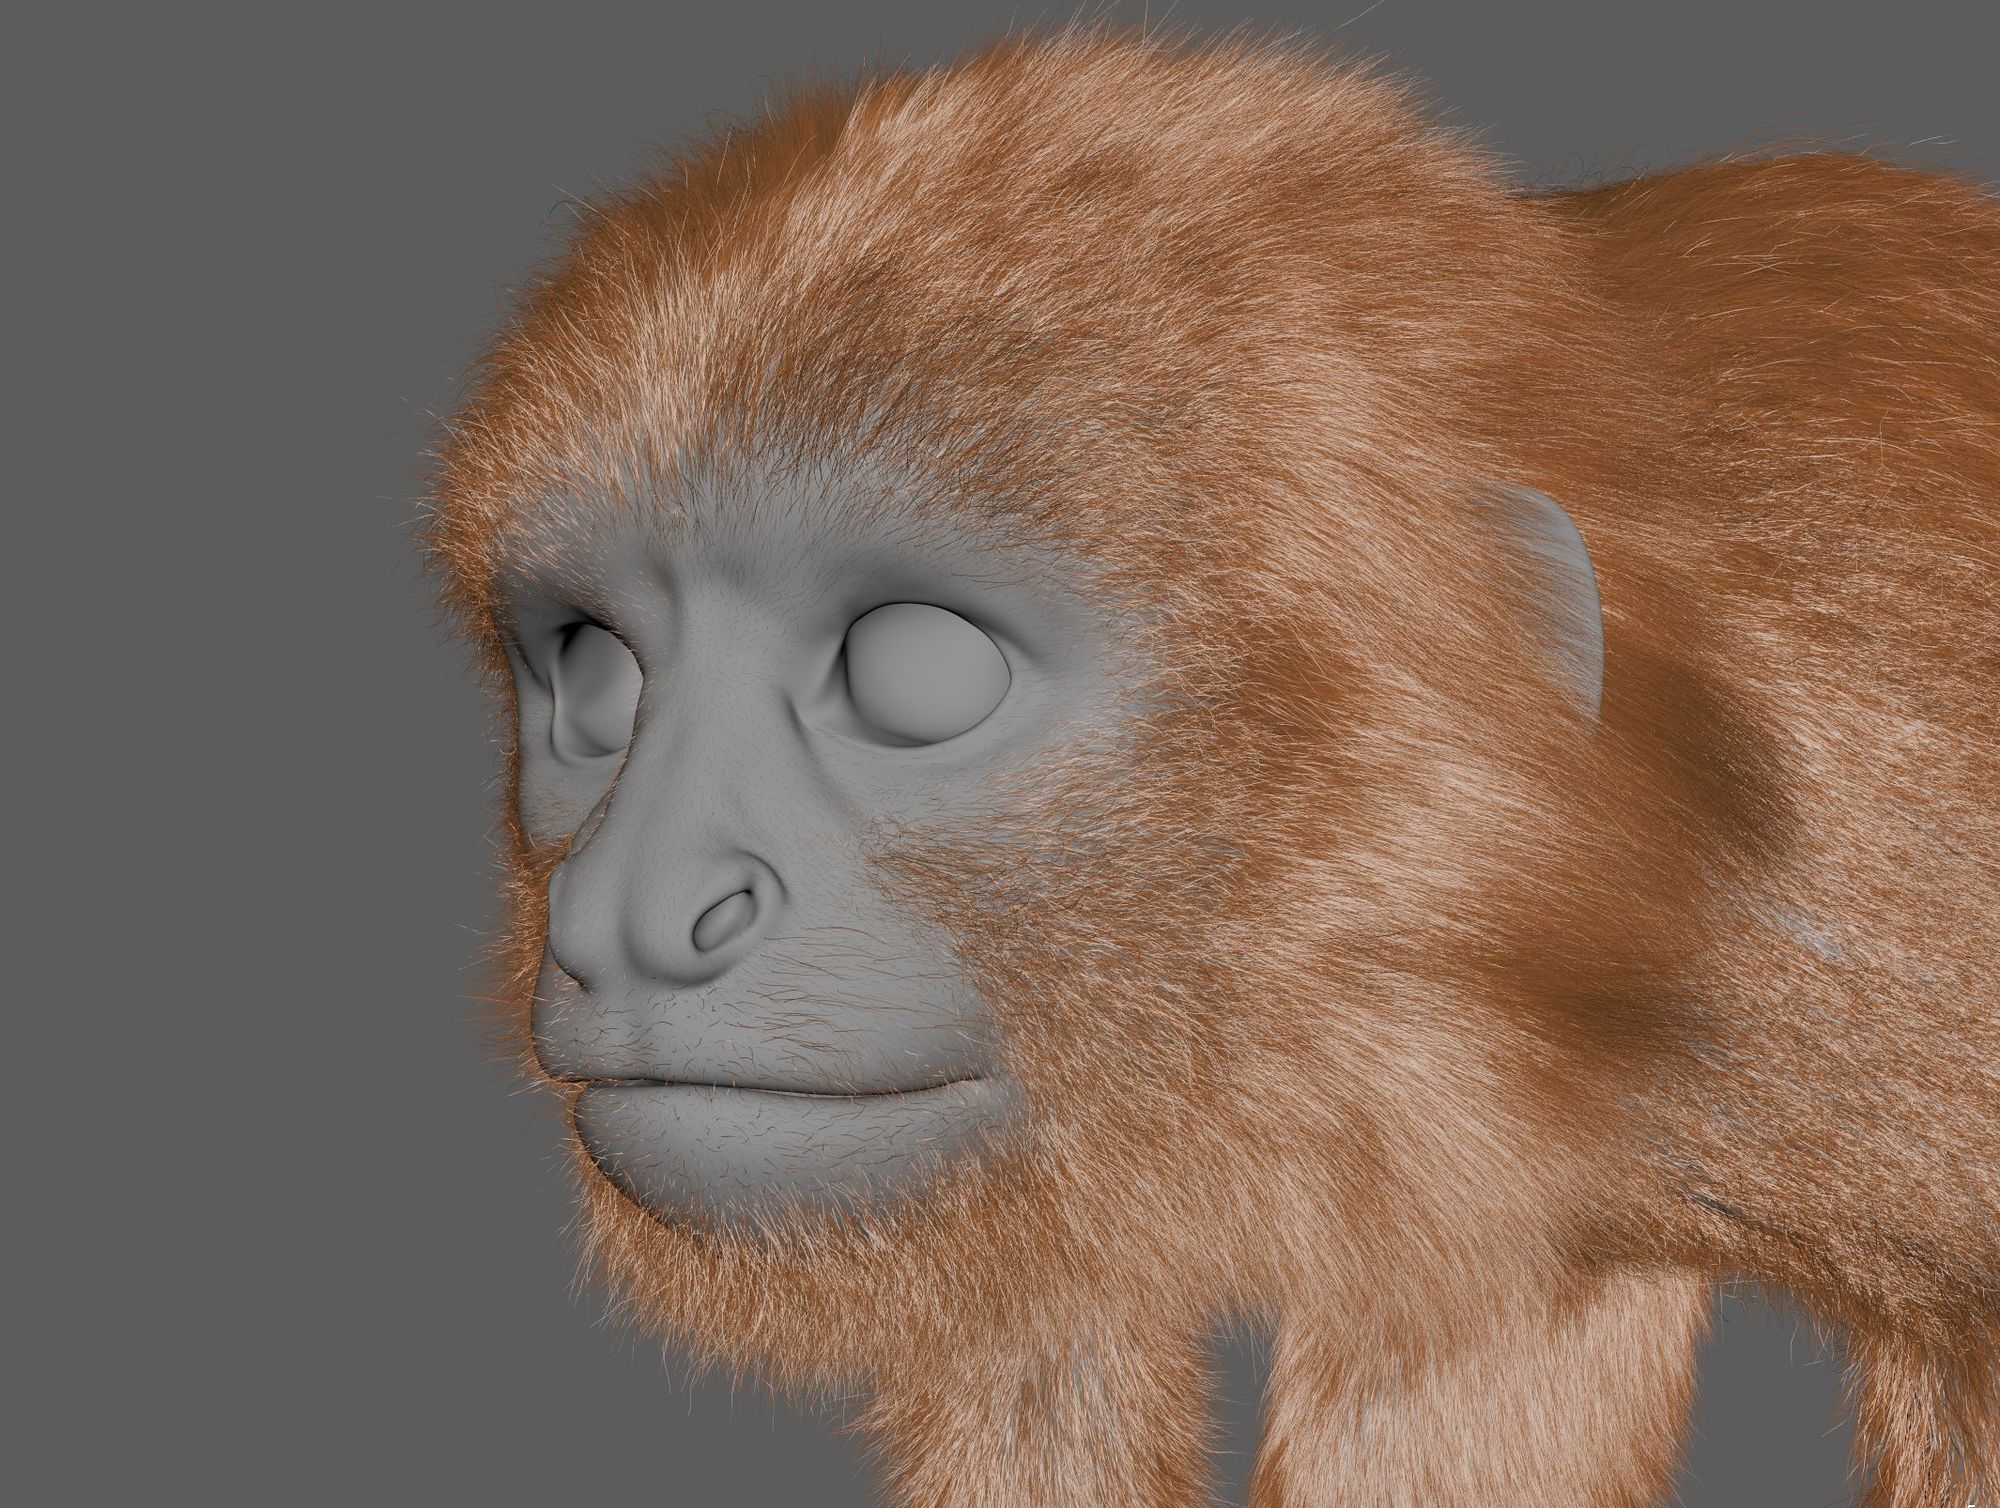
When the grooming is complete, you have a beautiful T-pose, A-pose, or base pose. However, creating animations or different poses can be challenging. With Xgen, simulation wasn't feasible due to performance issues. Fortunately, the stiff fur of the capuchin allowed for the use of a blendshape, which I'll discuss later.
So now I have fur that can follow my skin thanks to blendshapes!
Rigging involves adding a skeleton and controls to our model, allowing us to manipulate it like a puppet. This phase typically follows retopology and is crucial for animation. Essentially, we insert internal bones connected by joints, resembling a real skeleton. Once placed within the mesh, we skin the model by assigning each bone its area of influence, represented by grayscale maps. Achieving smooth deformations, especially around joints, requires precise weight distribution—a challenging aspect known as skinning.
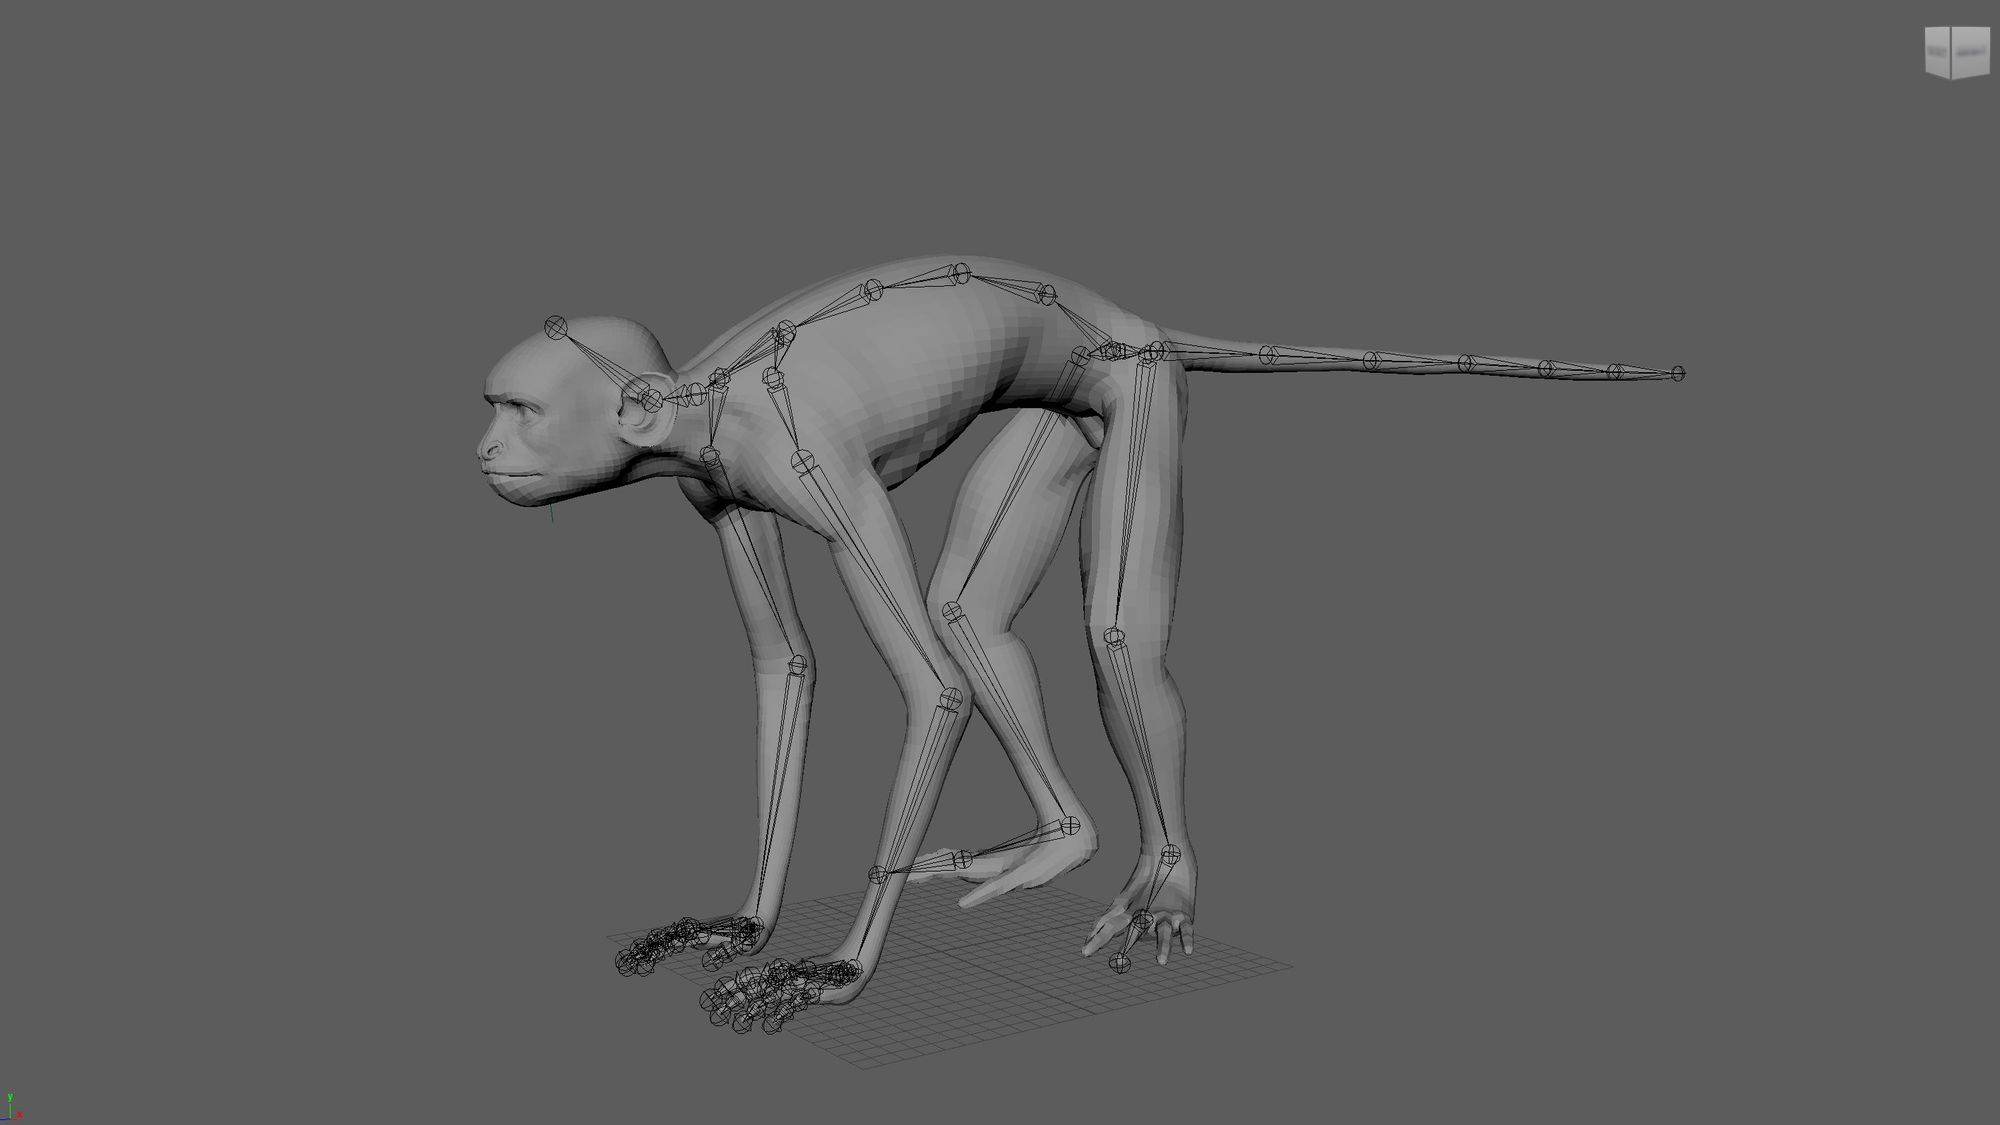
Now that each bone has weights, the challenge lies in controlling them effectively. While time keys on bones can be used, they lack the precision and ease needed for animation. Controllers, typically NURBS shapes placed on joints, act as handles and serve as the user interface for the rig. They allow for easy manipulation without affecting the bone's world position, enabling quick adjustments and returning to default poses like A or T poses.
To streamline this process, I utilized a plugin called Advanced Skeleton, which automates rig creation. With presets for various features like tails or wings, it simplifies the rigging process by generating bones, handles, basic skin weights, and even IK handles.
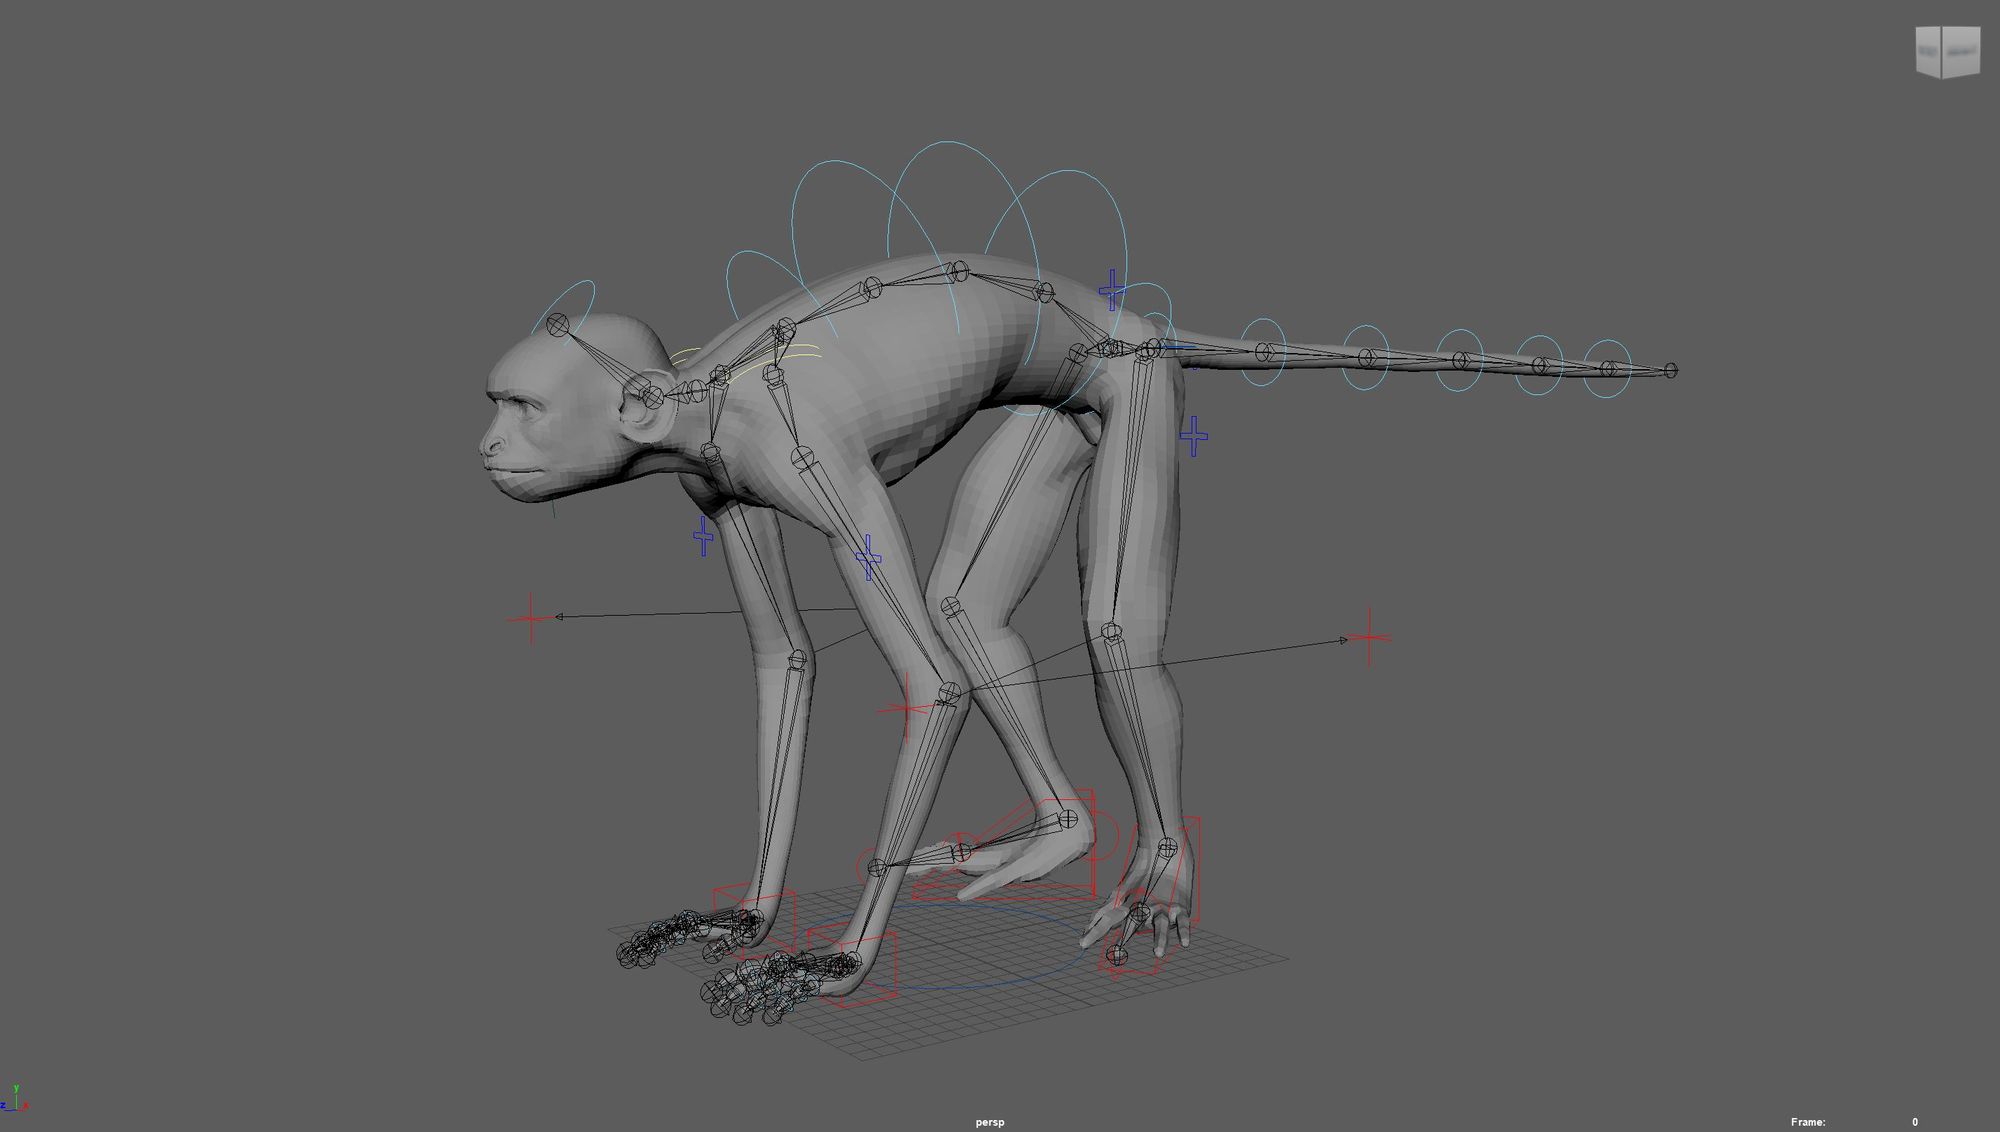
Speaking of IK (Inverse Kinematic), it offers a different approach to movement compared to FK (Forward Kinematic). While FK moves joints sequentially like a traditional puppet, IK calculates joint positions based on the movement of end-effectors, such as hands or feet. This method provides more natural movement, particularly for limbs like arms and legs.
Finally, for added refinement, I incorporated the Delta Mush deformer. This tool smooths out skinning transitions and allows for realistic stretch effects, enhancing the overall quality of the rig.
Animation isn't my strongest skill, but fortunately, for this project, I only needed to create two poses: one before a jump and the other mid-jump, with a smooth transition between them. I focused on emphasizing the compression before the jump and the stretch during it.
Blendshapes play a crucial role in achieving these transitions. They are deformers that use two different poses of the same mesh, allowing for seamless movement between them. Maintaining consistent vertex order is vital to ensure smooth blending between poses.
I utilized blendshapes extensively for facial expressions, transitioning from a neutral expression to an angry one using a slider. Blendshapes offer versatility, allowing for corrections in facial rigs or creative effects like realistic skin stretch or gill movement for fishes. They are powerful tools that enhance animation quality and flexibility.

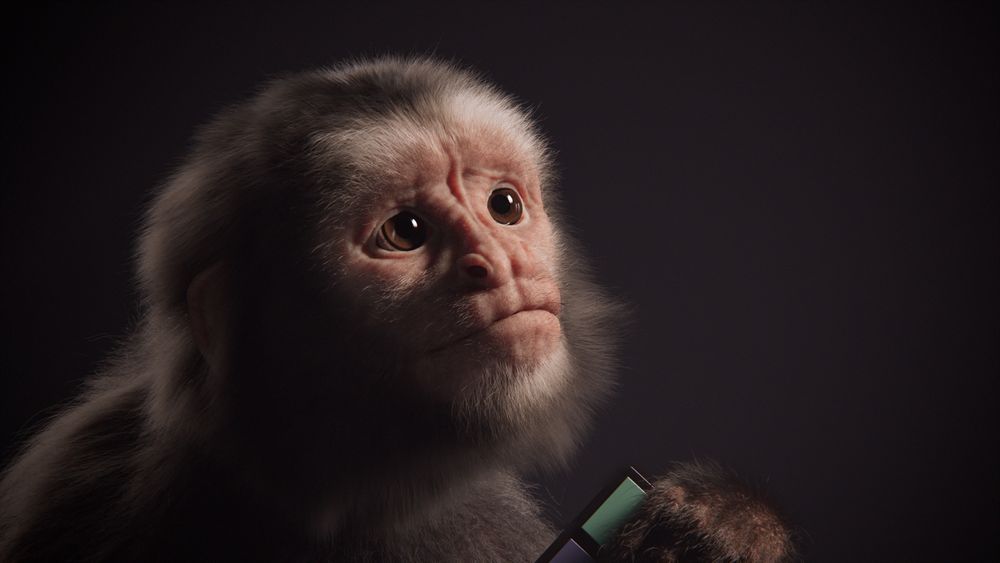
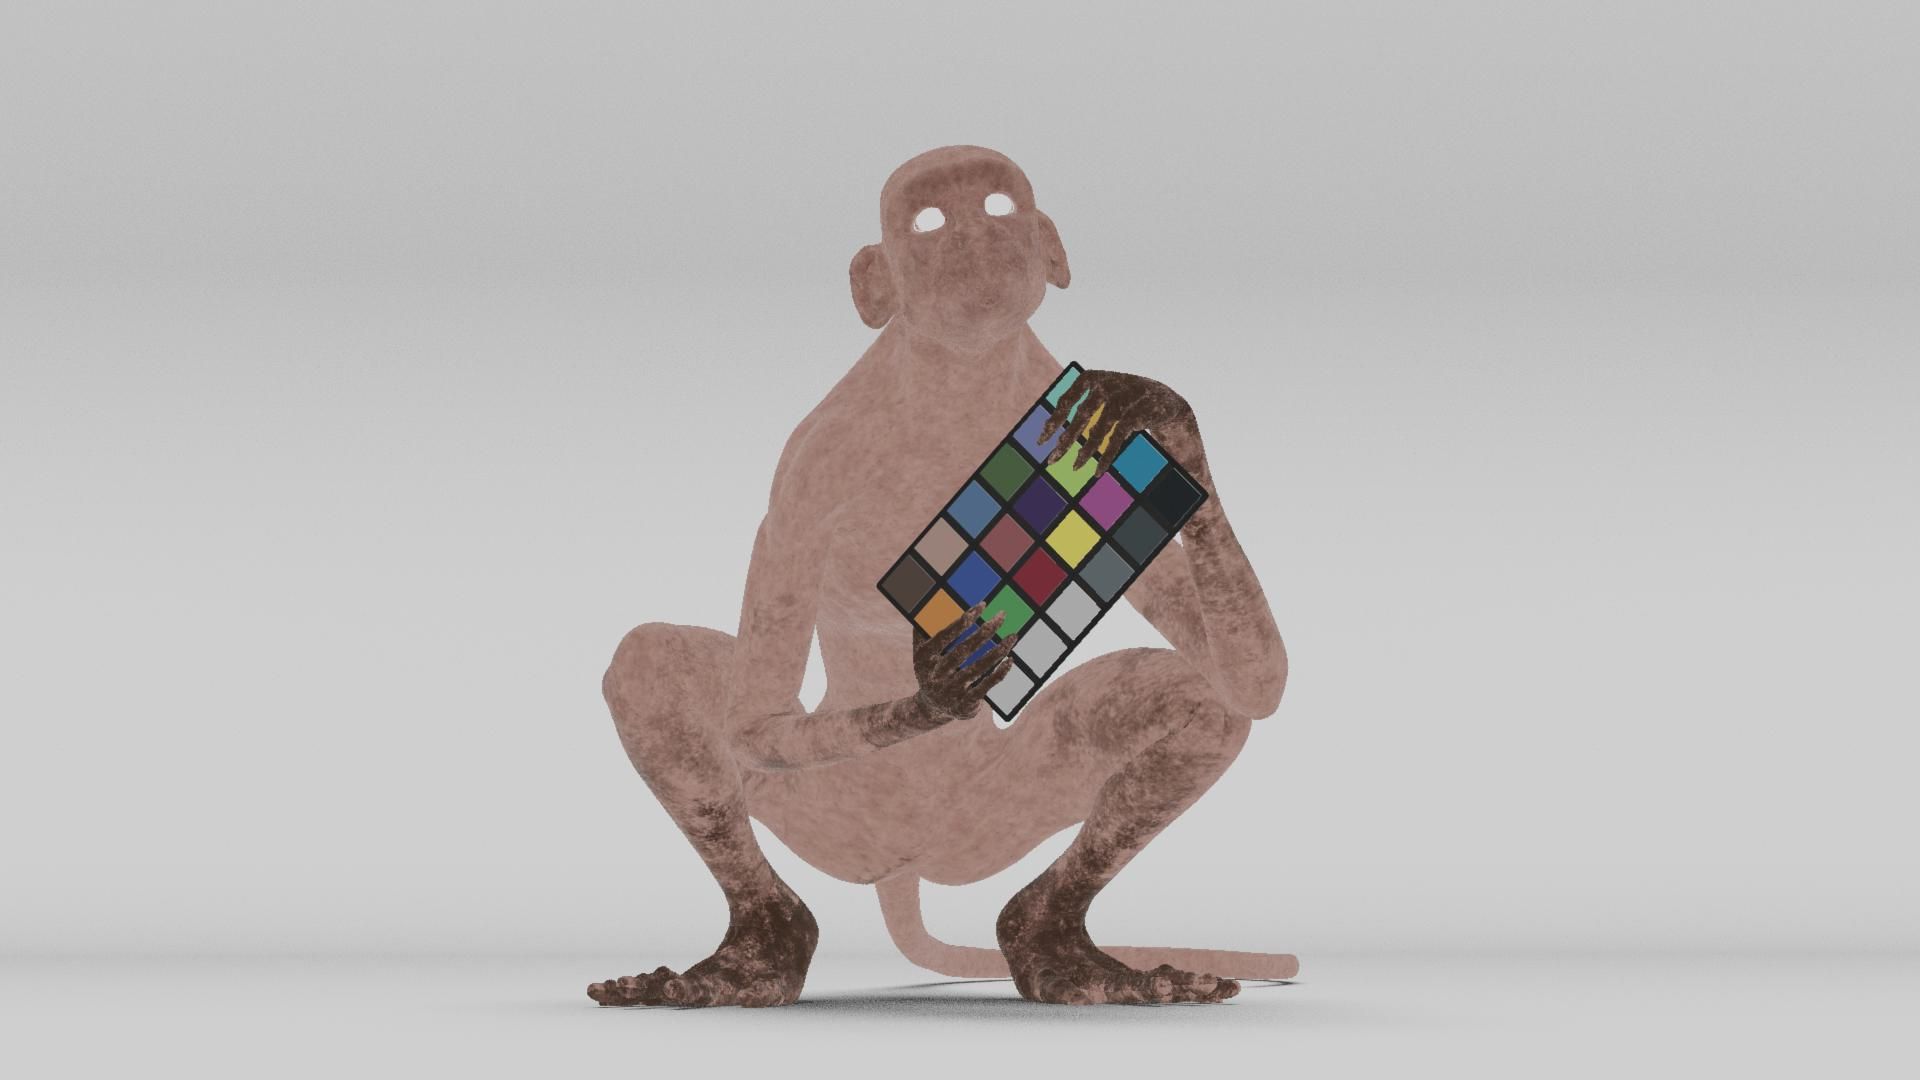
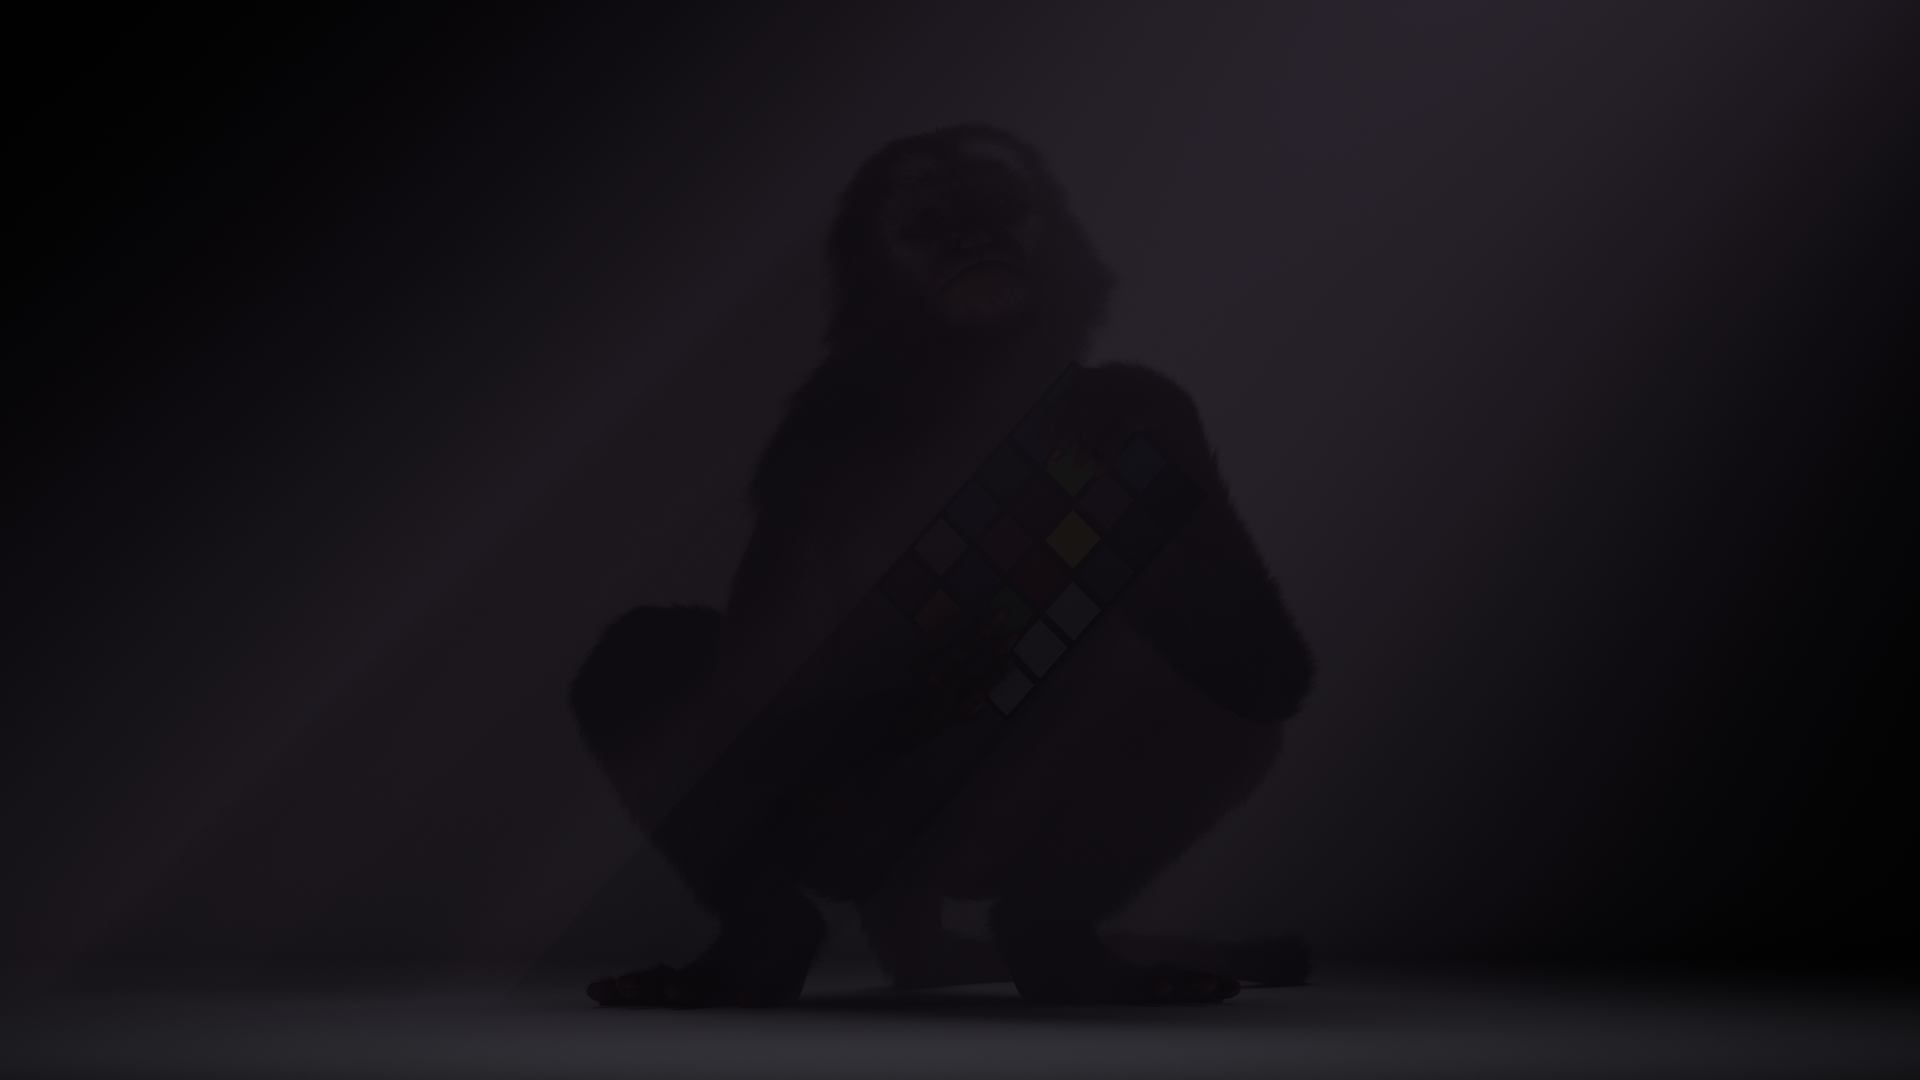
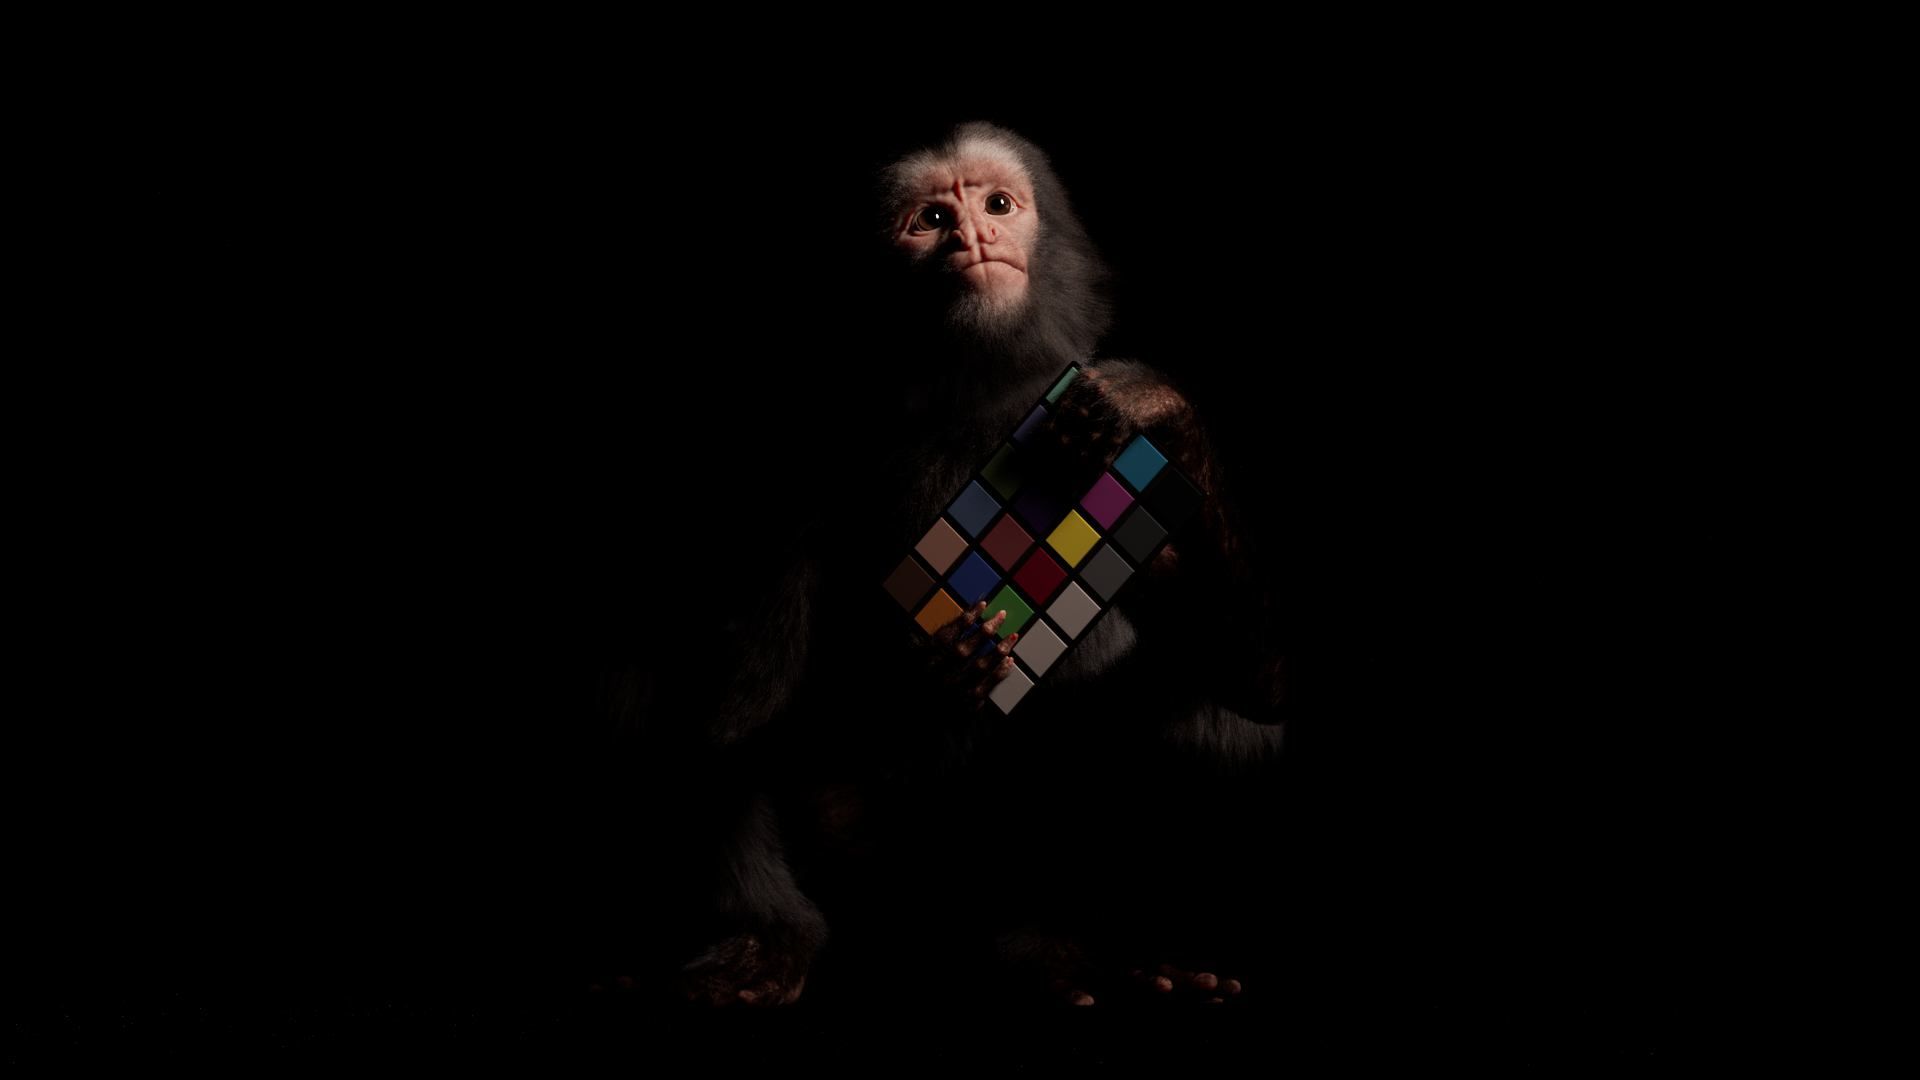
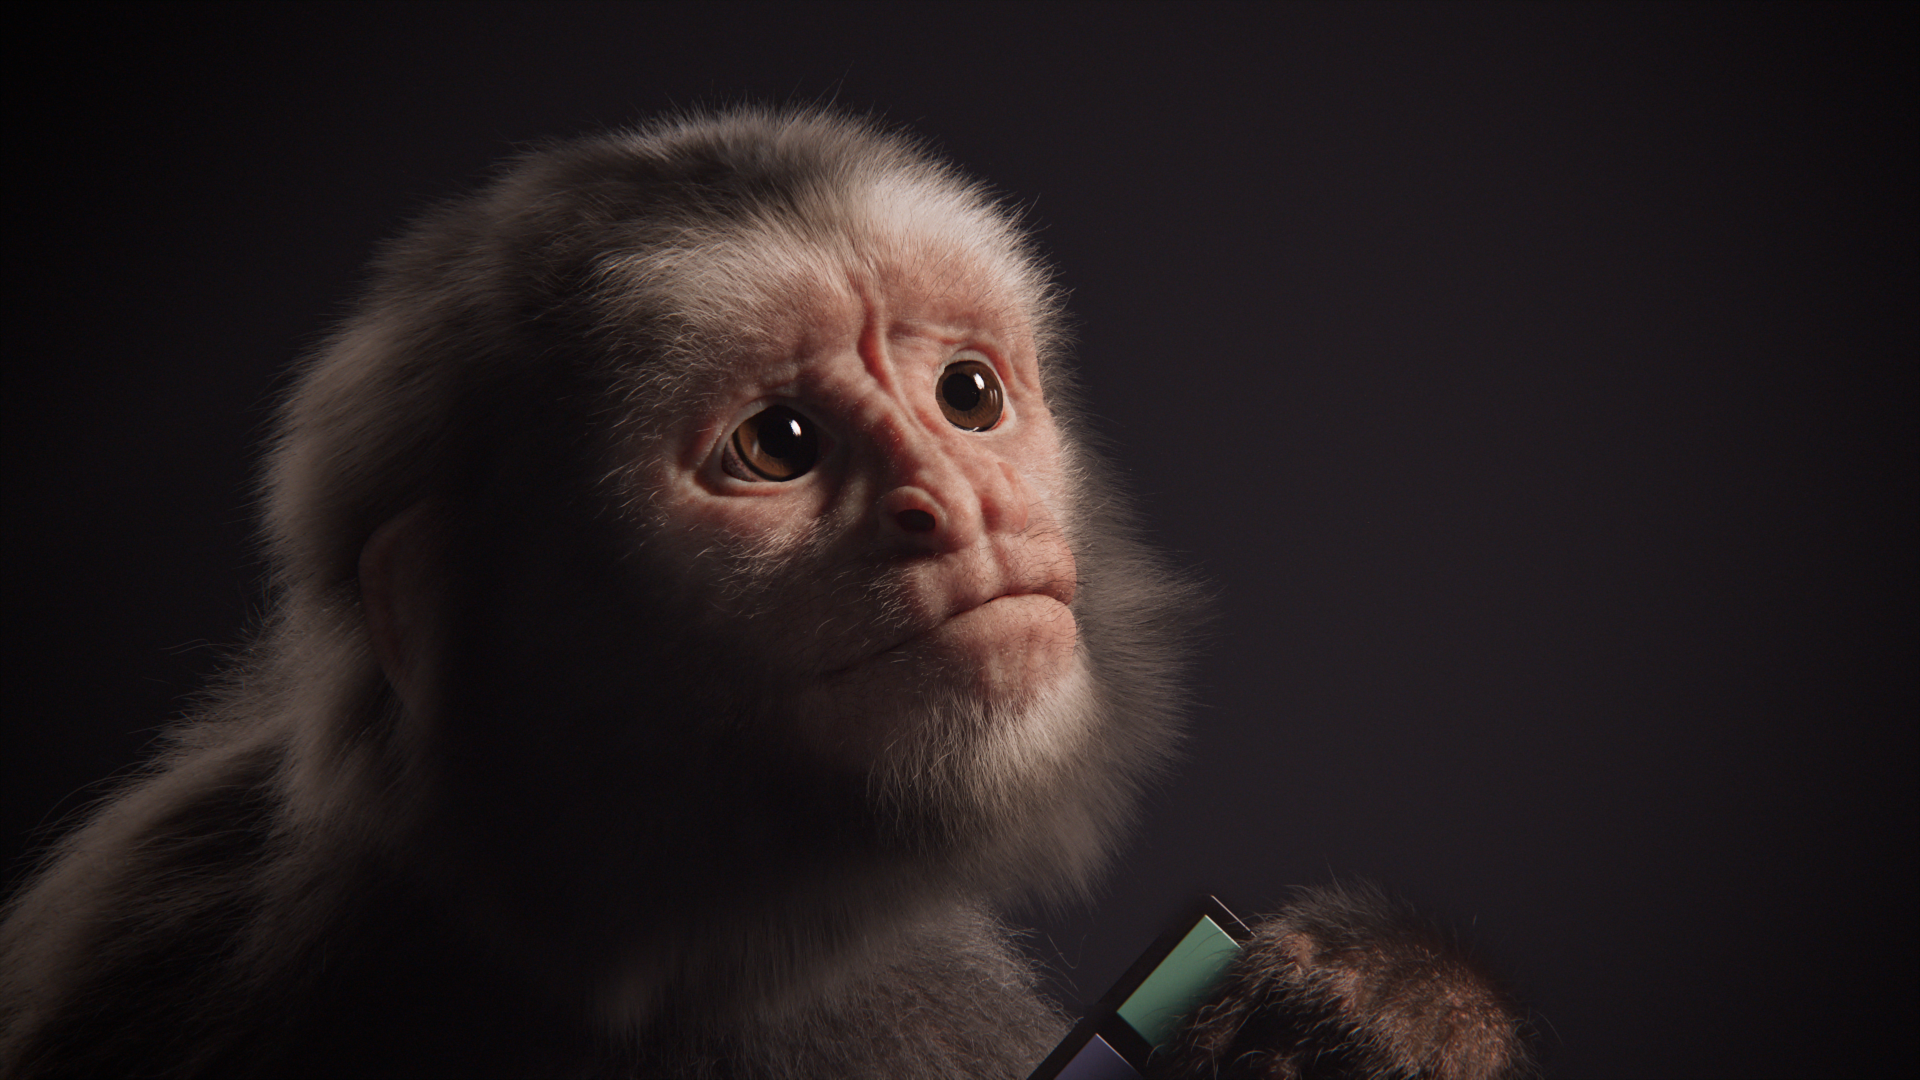
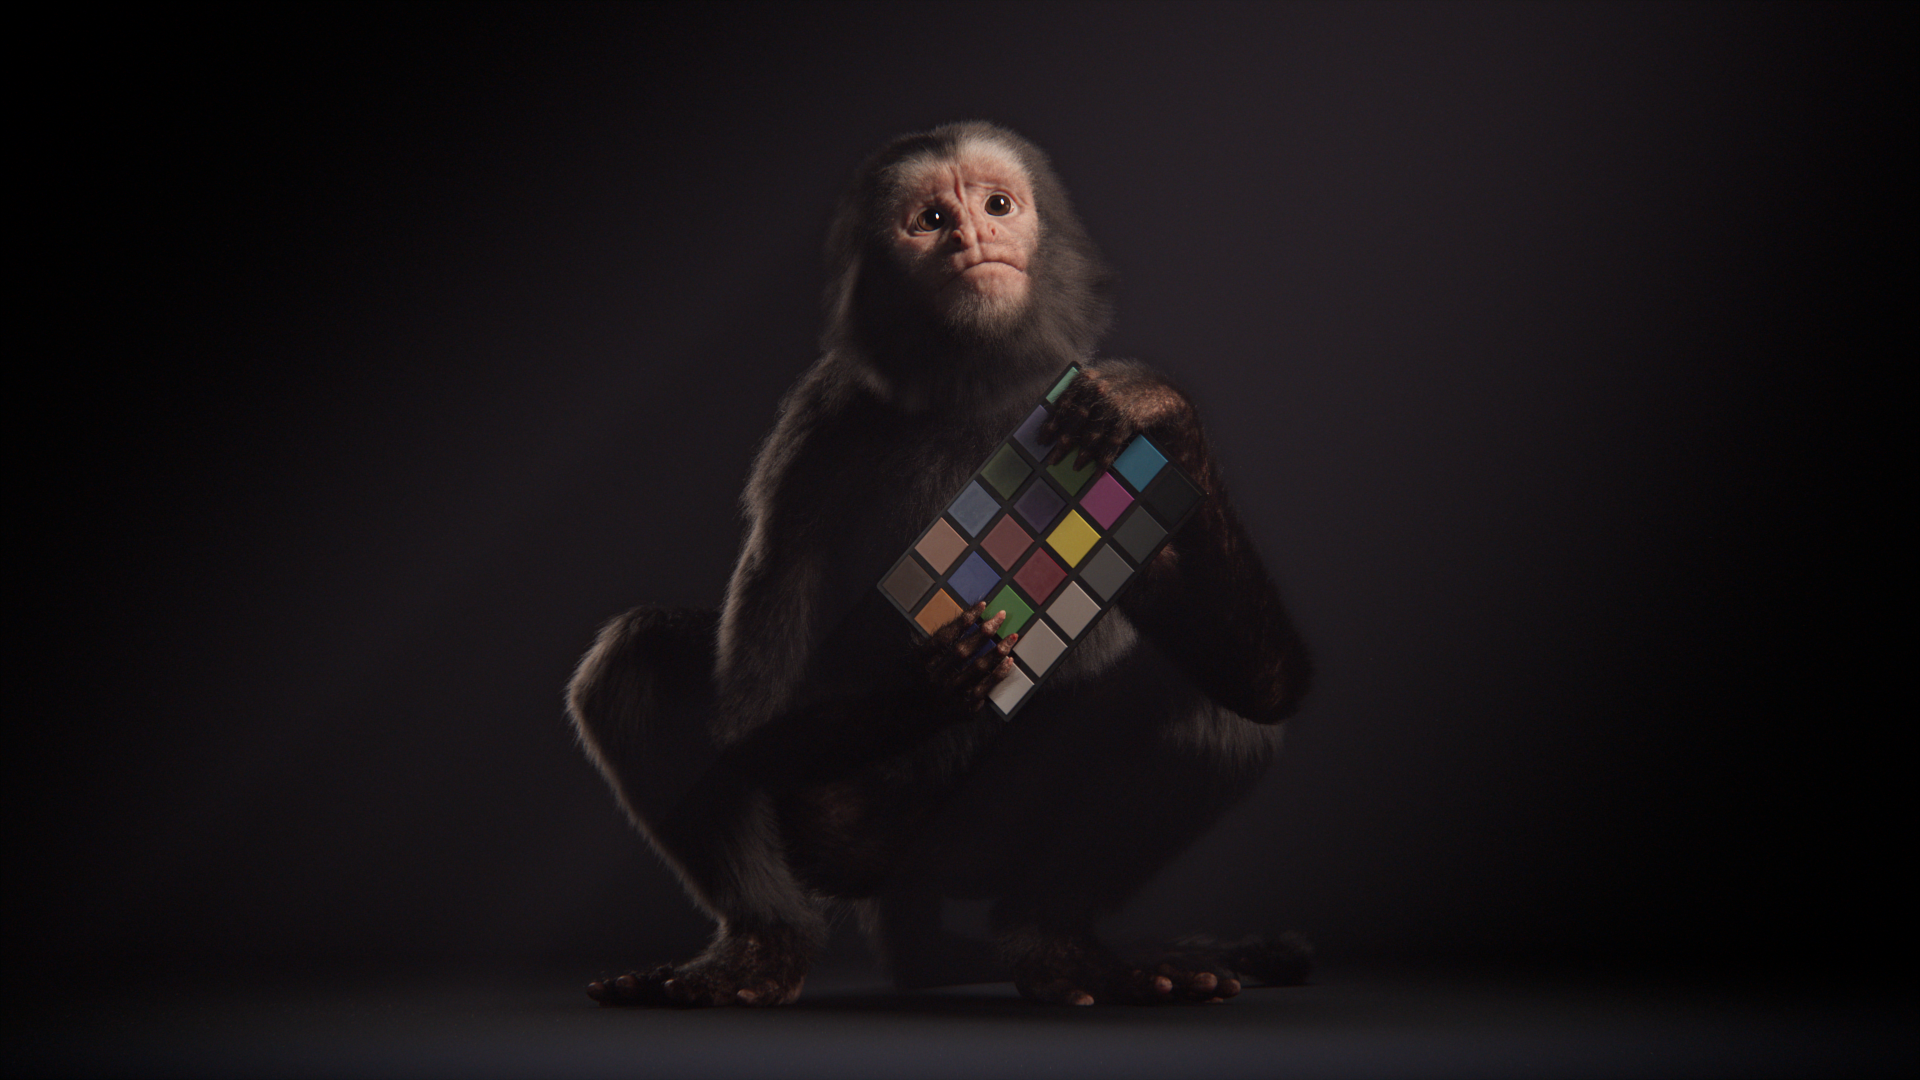
The final step was to create a pose for the key shots, aiming for a cute and endearing appearance. Leveraging his large eyes and small size, I positioned him in a childlike posture, looking upward to evoke a sense of innocence or mischief. As a playful nod to visual effects, I had him hold a Macbeth chart—an Easter egg commonly used in VFX for color calibration between live-action and 3D scenes, adding a subtle touch of authenticity to the composition.
I used Marvelous Designer, which facilitates the creation of patterns directly within the viewport. I drafted patterns, sewed them together, and positioned them accurately.
Looking at my references, I created the garments—a vest with thick chest pieces and slim sleeves—proved relatively straightforward. I traced oversized patterns, leveraging a technique to induce folds by incorporating excess fabric, allowing the simulation to naturally form creases as seams converge.
Upon obtaining the clothing, albeit composed of triangles necessitating refined topology, my colleagues and I devised a method to achieve this within Maya. Utilizing the clothes' UV coordinates from the patterns, I transferred positional attributes to a model with optimized topology. After exporting and retopologizing the flattened versions in Maya, I synchronised the UVs and positional data, then welded seam vertices for completion.
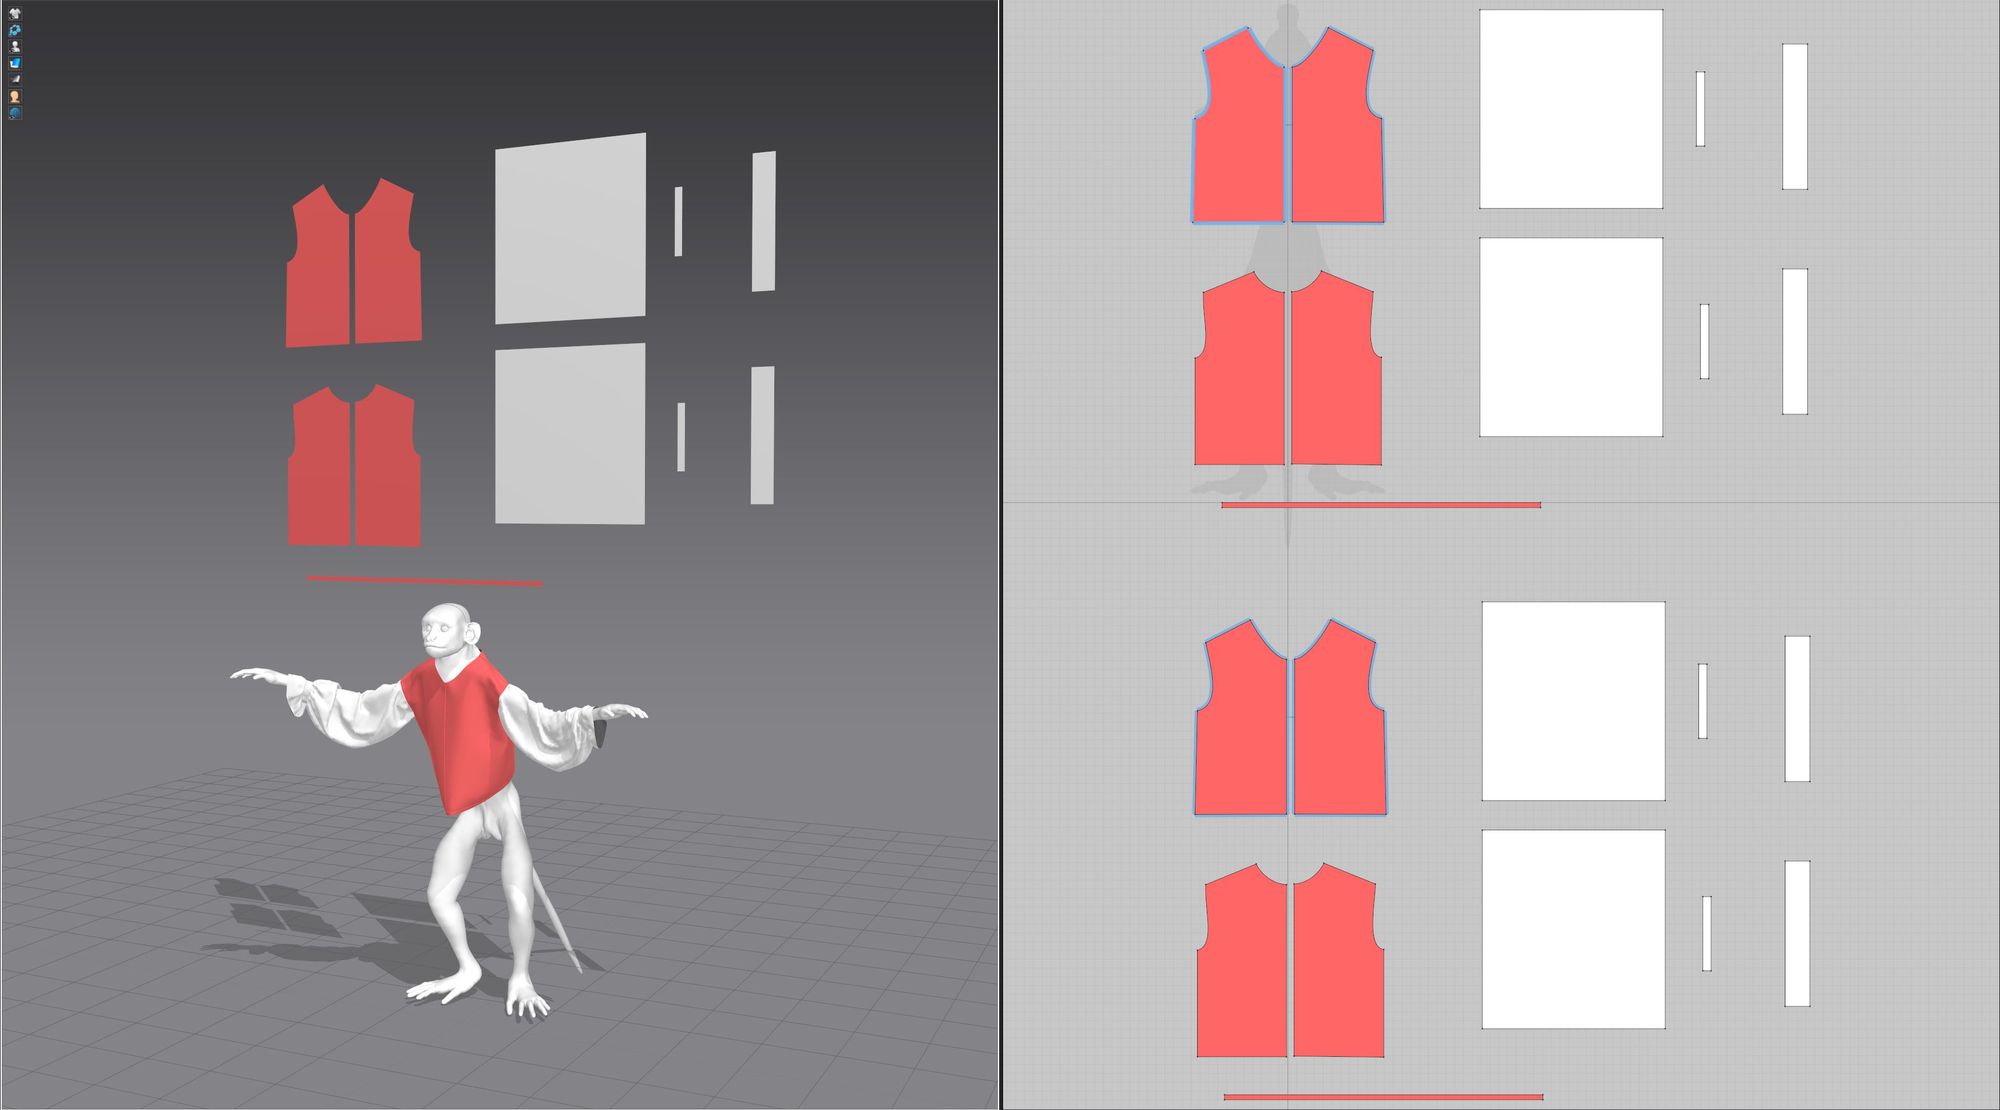

In Maya, I added additional details like shoulder protrusions and buttons before proceeding to Substance 3D Painter for texture creation and look development.
Addressing the need for dynamic clothing movement in our project, particularly alongside fur, I turned to Houdini. After importing the animation and considering the importance of triangles for optimal deformation, I remeshed the garments, configured vellum constraints and solvers, and introduced the animation as a collider, adjusting collision padding to accommodate the fur. Following simulation, I employed the point deform node to impart the triangle model's deformation onto the refined topology, resulting in simulated clothing exported as an alembic file for integration into Maya.
Light serves as the fundamental element. Without it, darkness would prevail, rendering the canvas devoid of visual essence. The etymology of "photograph" underscores this significance, with "photo" originating from light and "graph" from writing in ancient Greek, essentially connoting "writing with light." In 3D, akin to photography, light assumes the role of a pen wielded by artists such as Baudelaire or Shakespeare, shaping the narrative and essence of the scene. Mastery in this domain necessitates practice, research, and a deep understanding of lighting principles, framing, colours, optics, and beyond. Ultimately, our creations, though often confined to viewports, represent our artistic vision, with lighting serving as the conduit to manifest our intentions—albeit occasionally obscured by vibrant HDRI and turntables.
With this ethos in mind and Baudelaire's legacy on my shoulders, I embarked on illuminating this diminutive simian. Conceptually, I envisioned a portrayal of charm juxtaposed against a studio aesthetic reminiscent of a magazine photoshoot. Elevating the key light to a lofty position accentuated the monkey's gaze, imbuing a sense of innocence and diminutiveness. Complementing this, a rim light was strategically placed to delineate the subject from the background, leveraging the inherent allure of rim lighting. Opting for a dark yet subtly luminous purple backdrop provided a striking contrast to the warm, golden hues accentuating the subject's skin and surroundings. These warmer tones evoked a sense of intimacy and warmth, fostering a connection with the viewer.
Subsequently, the addition of atmospheric fog not only enhanced depth but also added a touch of ambiance and intrigue—a stylistic flourish that appealed to the eye. Collaborating with a skilled lighting expert further elevated the rendering process, enriching the visual narrative with nuanced nuances and depth. This collaborative endeavor underscored the invaluable nature of external feedback, serving as a catalyst for growth and refinement.
Thus, I advocate for the pursuit of constructive criticism, whether from peers, mentors, or industry professionals, as a vital component of artistic evolution. Embracing feedback fosters a culture of continuous improvement, wherein each critique serves as a stepping stone toward artistic mastery.
This is the journey of creating a character in 3D, along with the reflections that come with it and the challenges of production. This project was a real step in my learning process, I was able to put everything I learned during my scholarship together. It was a project inside a bigger one: West Sea World, our graduation project that took us 9 months and was an epic adventure. It was so interesting to run into the obstacles of creating and incorporating a fully digital animal on a production.
I’ll give special thanks to Maelan Rihet, Morgan Rihet, Stéphane Ma, Tai Wedekind , Maxime Titov and Nicolas Brice.
Reach out to Valmont via his Rookies profile here.