Translating 2D Art into Realistic 3D Models
Daniel Chen, a fourth-year student at L'idem Barcelona, shares his latest project, "The Dragon Herder," aimed to showcase his expertise in translating 2D art into immersive 3D models for video games.
Daniel Chen, a fourth-year student at L'idem Barcelona, shares his latest project, "The Dragon Herder," aimed to showcase his expertise in translating 2D art into immersive 3D models for video games.
Daniel Chen is a a fourth year student at L'idem Barcelona, focusing on 3D modeling with a specialisation in character art. Creating characters has long been Daniel's passion, and among various artistic fields, he has discovered 3D art as a fascinating way to express his ideas.
The objective of his latest project: The Dragon Herder, was to demonstrate his skills as a Character Artist in the field of video games, showcasing his ability to translate 2D art into realistic 3D models. In this article, he explains his steps from blocking to texturing, to final render.
Over the past three years, I immersed myself in learning the essential techniques of modeling, texturing, and rendering. While honing my skills, I also dedicated time to practicing sculpting in ZBrush, often creating weapons or armour pieces for my characters. However, I hesitated to take on a complete human characters due to my lack of experience, fearing it might result in wasted effort.
In my fourth year of study, for my final personal project, I decided to challenge myself and embark on my first gaming character project: The Dragon Herder. Throughout the project, I used various programs and plugins, including ZBrush, Maya, GSCurvetool, XGEN, XYZ, Substance 3D Painter, Marvelous Designer, and Marmoset Toolbag.
For the concept, I chose a character designed by the talented G · Z. This character has a very intricate and complex costume structure, which adds to the challenge for me. Despite my tutor’s advice to start with simpler projects, I've always been eager to showcase my artistic energy and dive into more ambitious endeavours.
The character was originally a young dragon herder, but I made the decision to age the character to adulthood. This alteration allowed me to incorporate more intricate details into the anatomy. For references, I envisioned the character as a 25-year-old Asian man, possessing an athletic physique and wearing armour reminiscent of the style found in the Monster Hunter series.
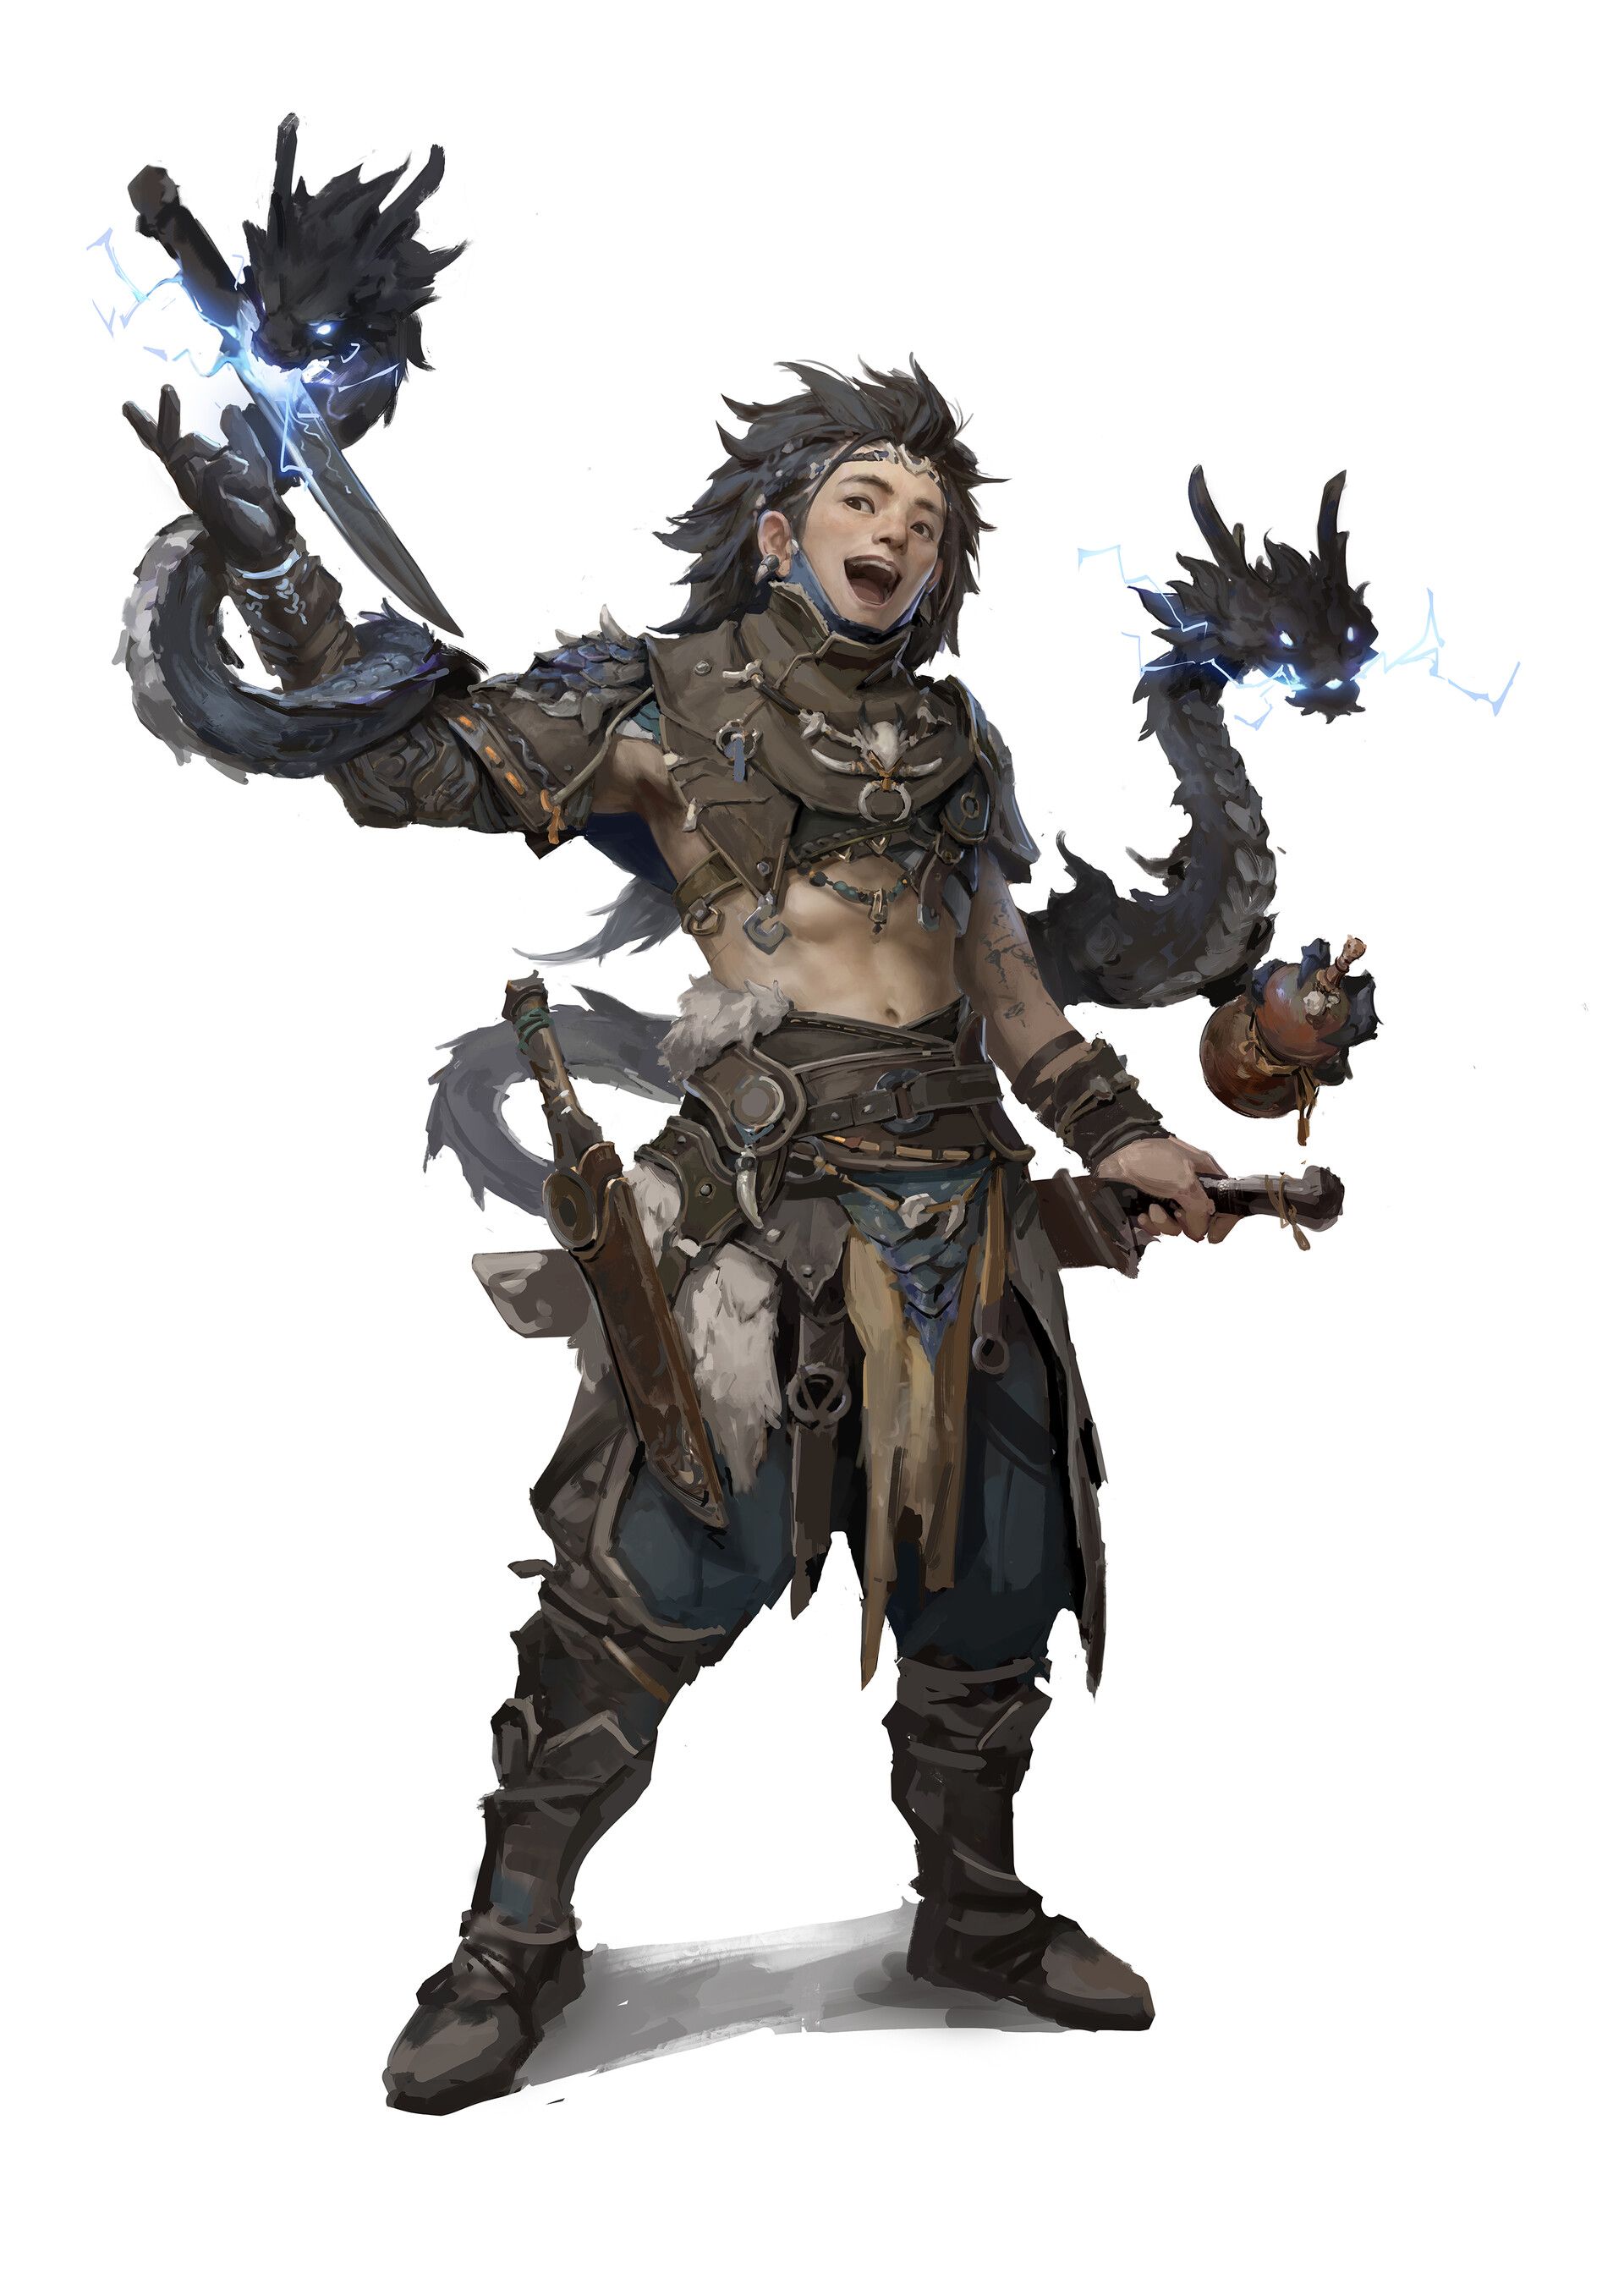

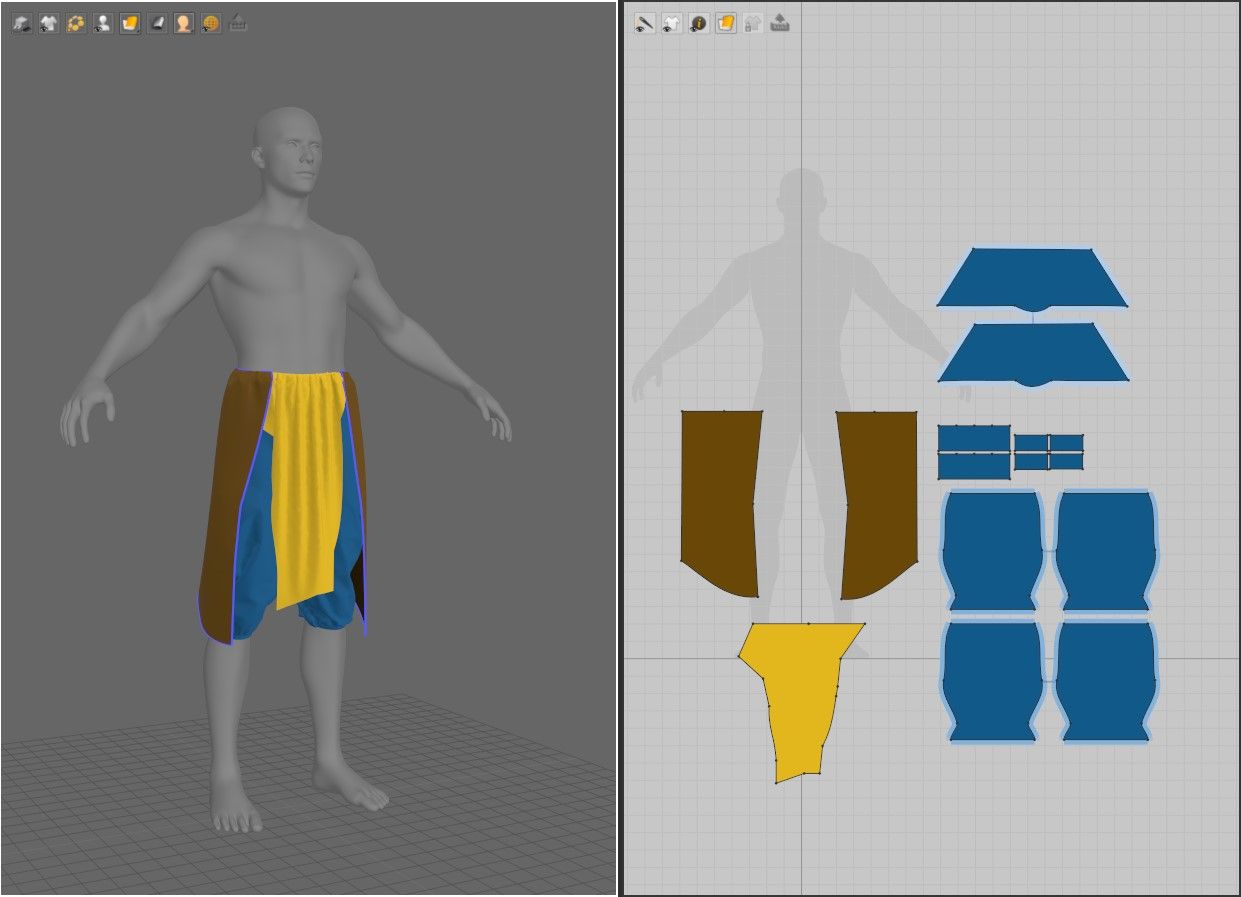
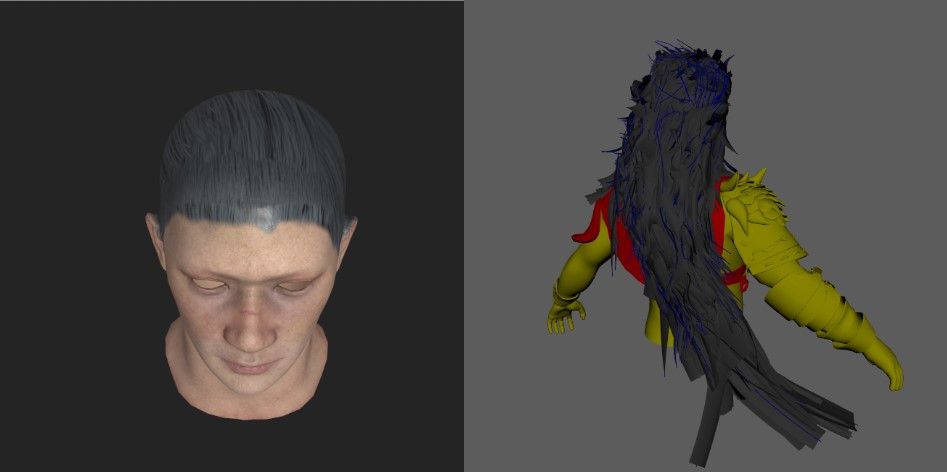
As mentioned earlier, the costume structure posed a significant challenge in this project, requiring me to fully understand it before beginning the sculpting process. To achieve this, I found that separating each part with different colours greatly aided in providing me with a clearer vision of the overall structure.
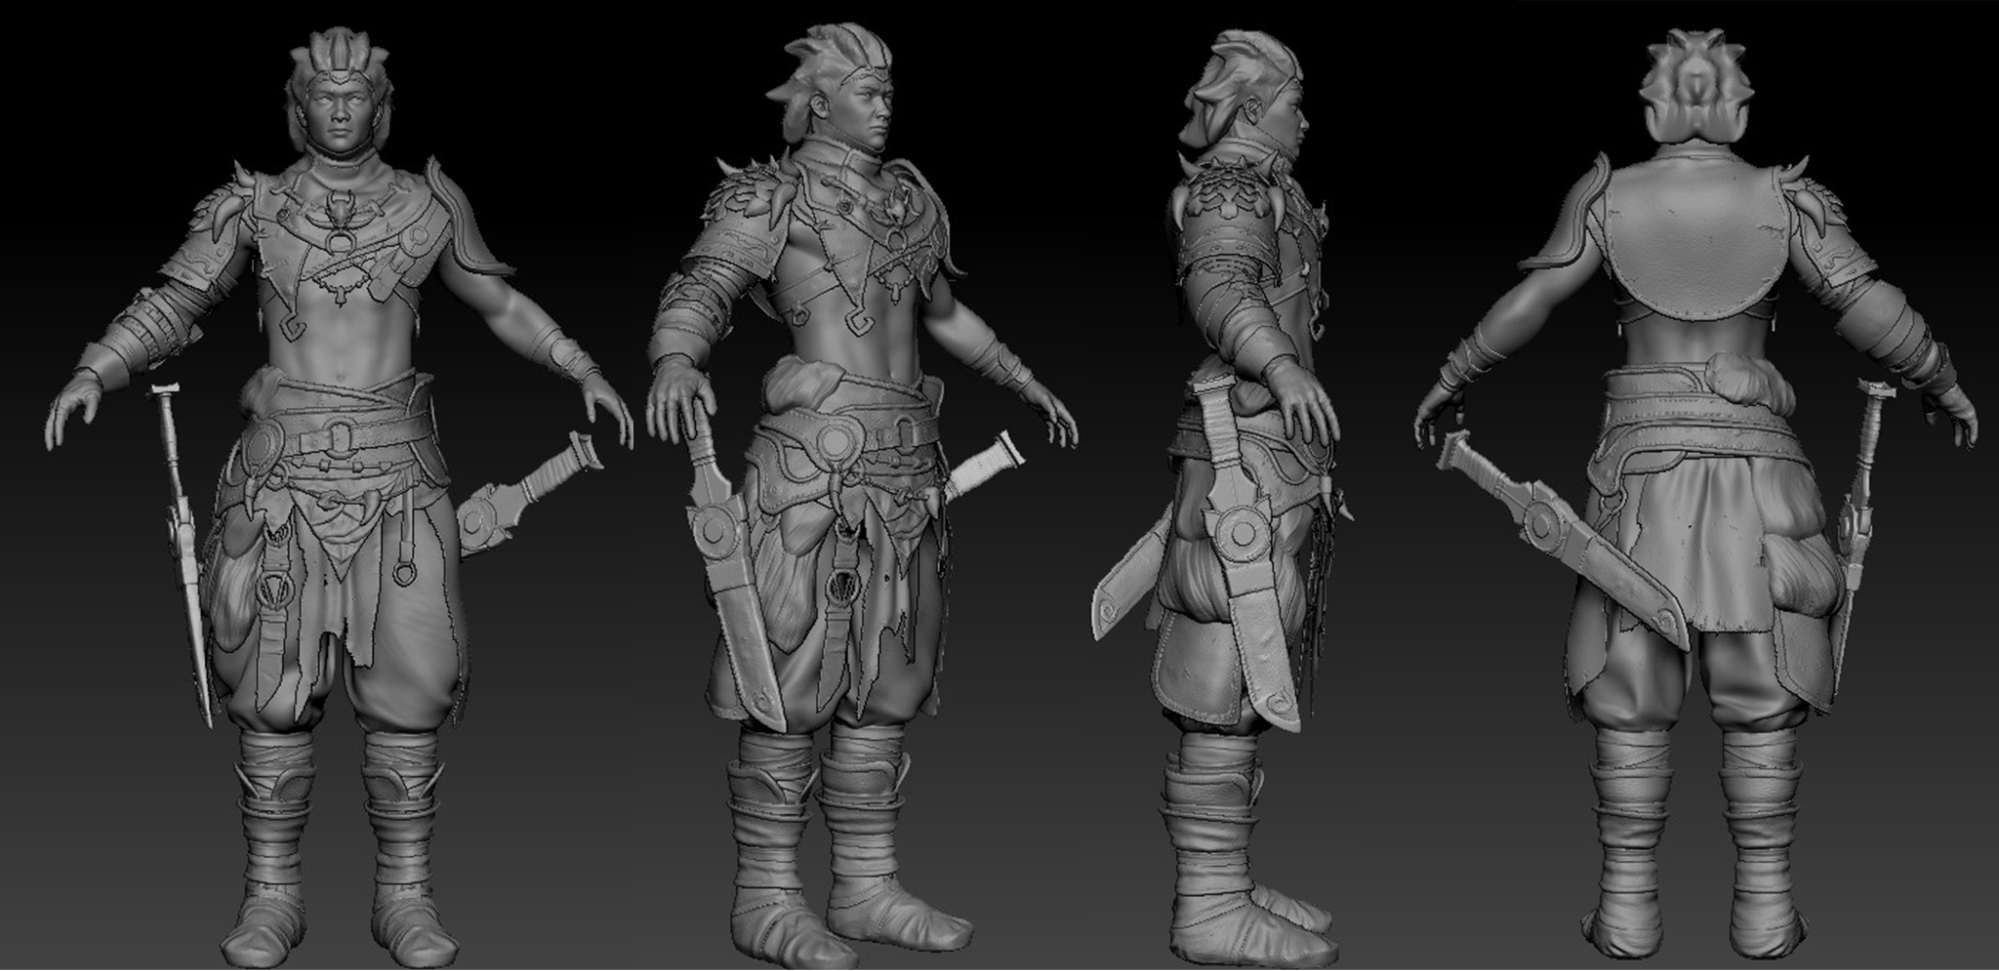
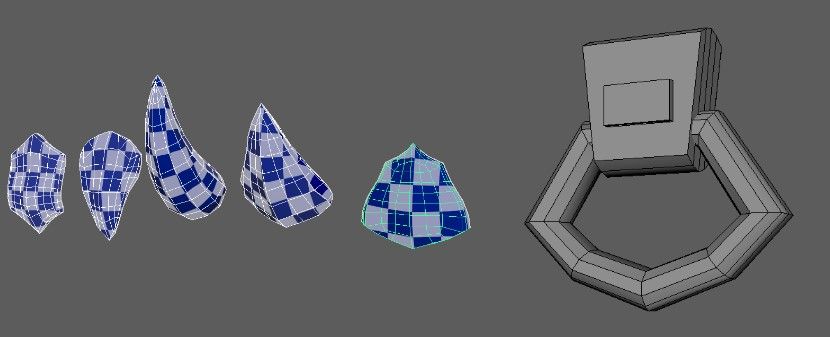
After the analysis, I created all the components in ZBrush, resulting in a draft version of the character in 3D. This would give me the general silhouette of the character. A well done blocking will only give me advantages and less room for mistakes.
After that, it’s a matter of sculpting each component individually with a lot of passion and patience!

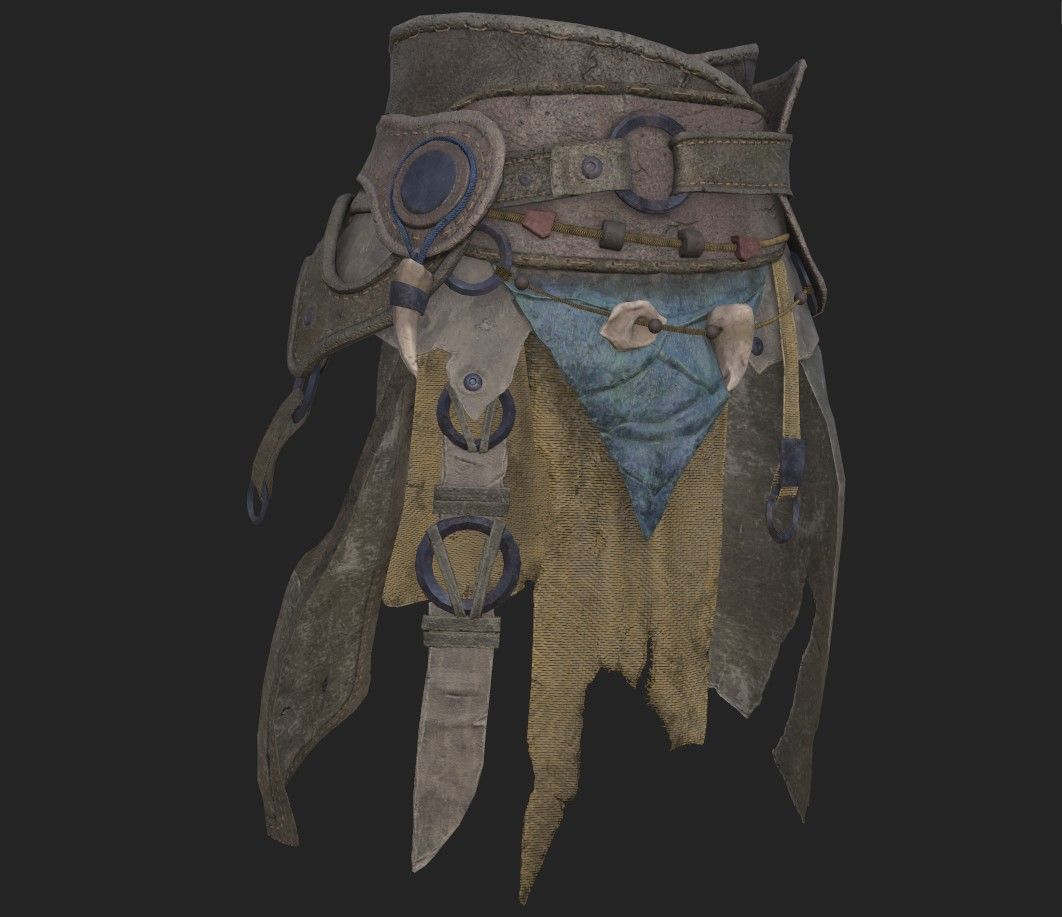
I divided the character's costume into three parts:
One characteristic of the costume is its lack of symmetry. This allows me to present more visual interest in my artwork, but also requires more time in production as I can not work in symmetry.
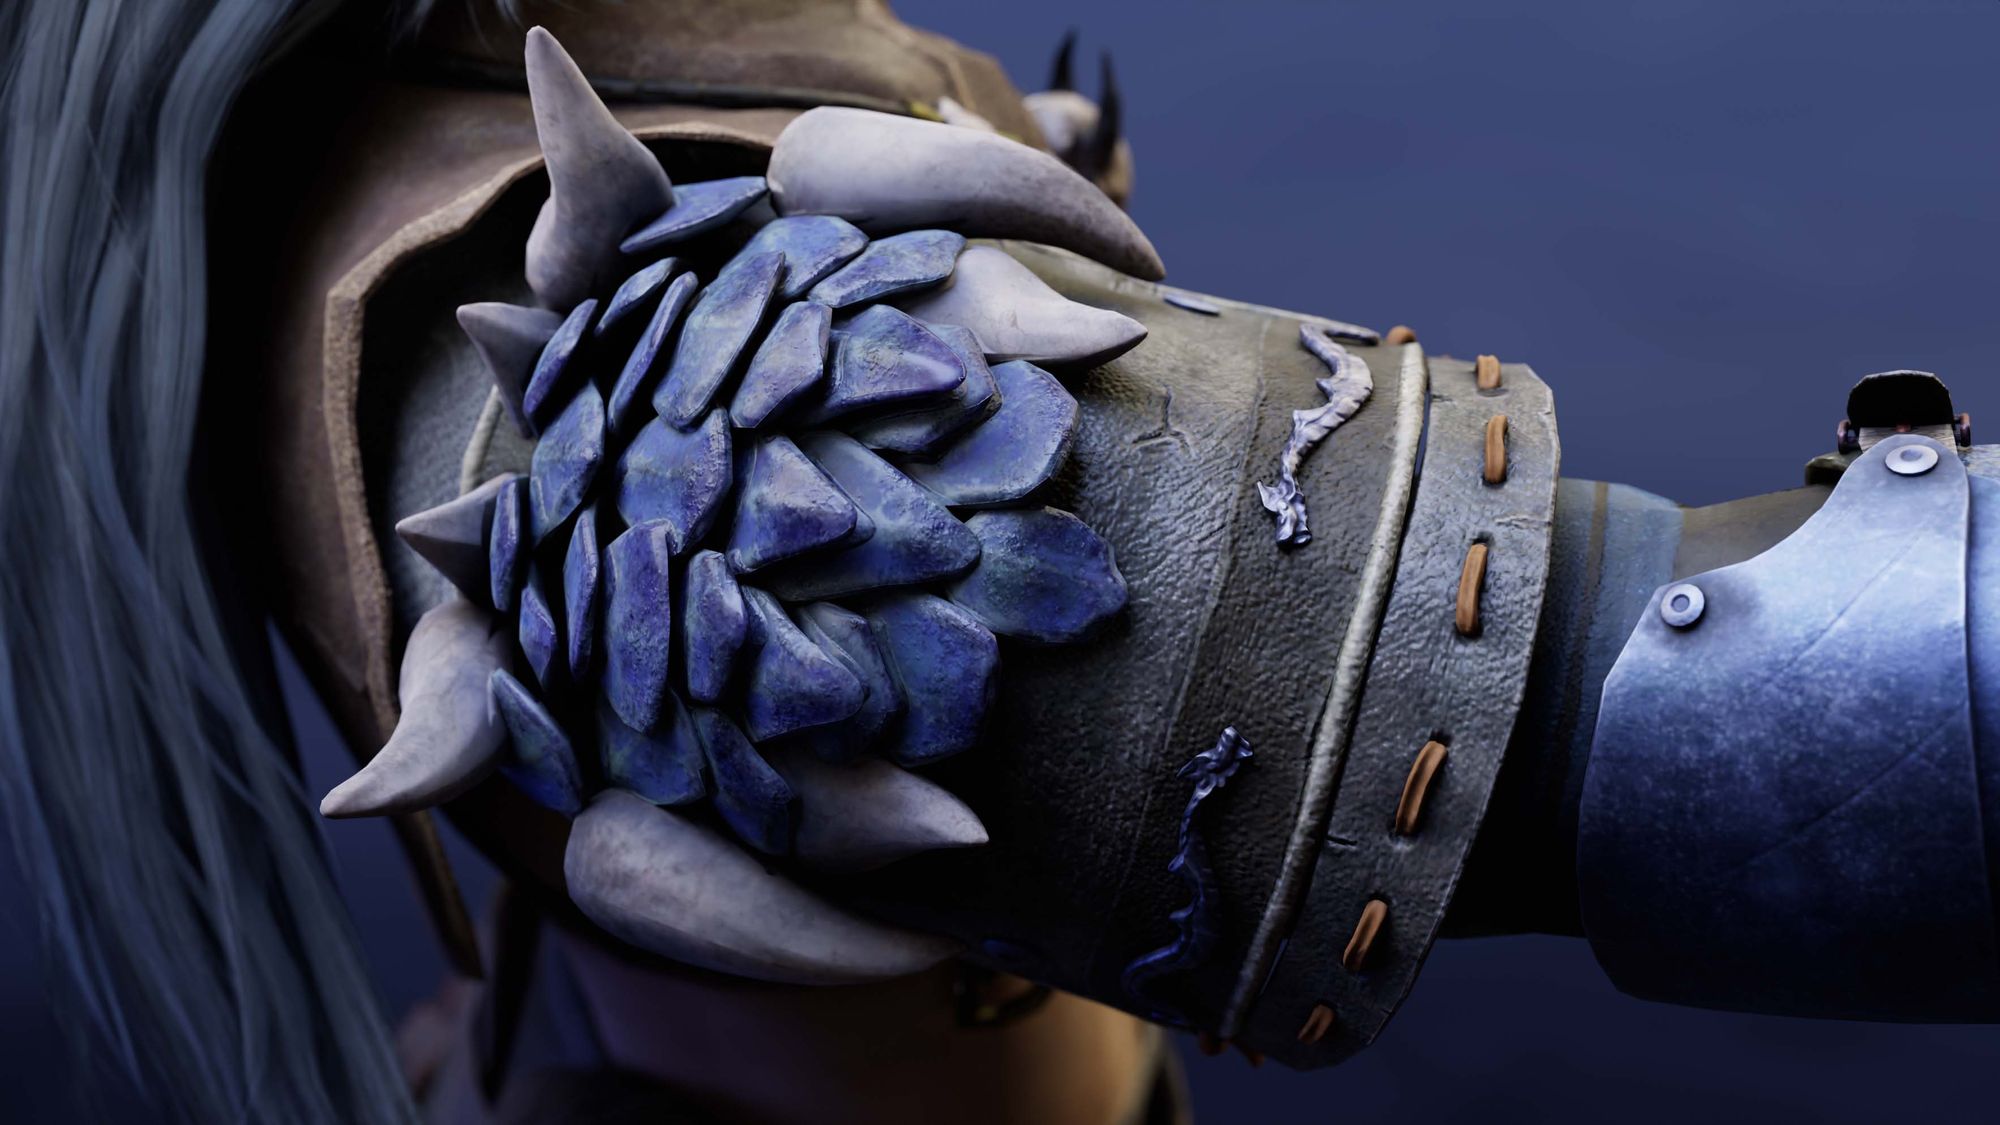
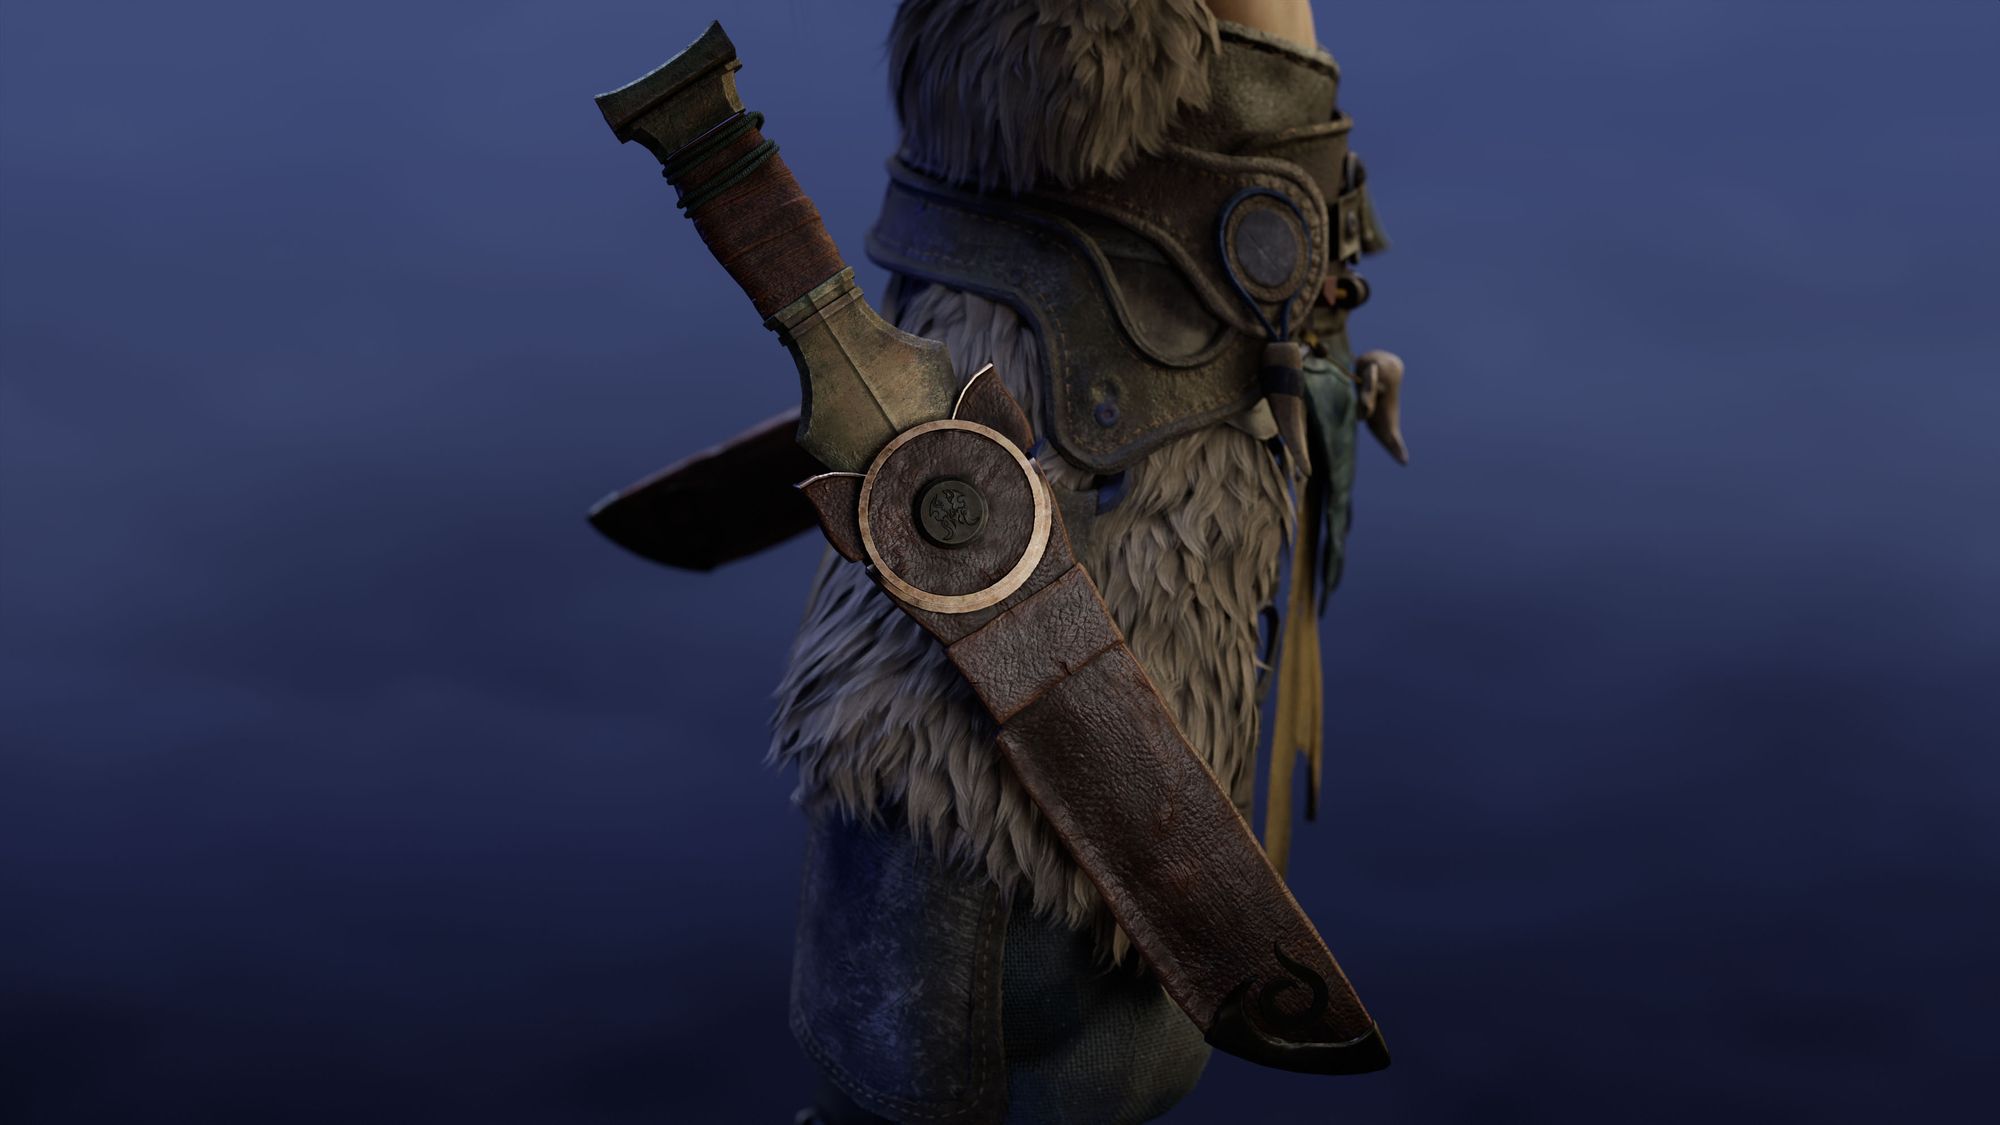
The sculpting process was mainly done in ZBrush. This character contained materials such as Dragon Skin, Bones, textile and metal, but its primary material was leather, and I used brushes like Slash or Damstantard to obtain the broken leather texture. I was aware of details like the sewing of the leather, or damaged parts. Sculpting imperfect objects would always give me more space to present my skills.
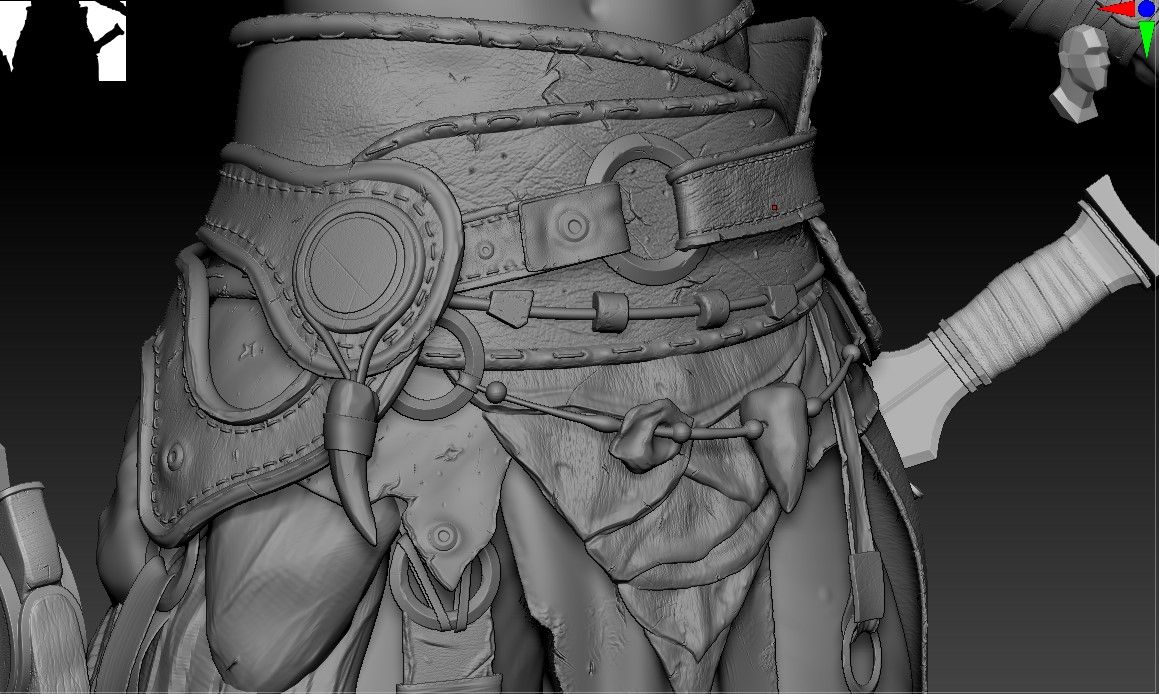

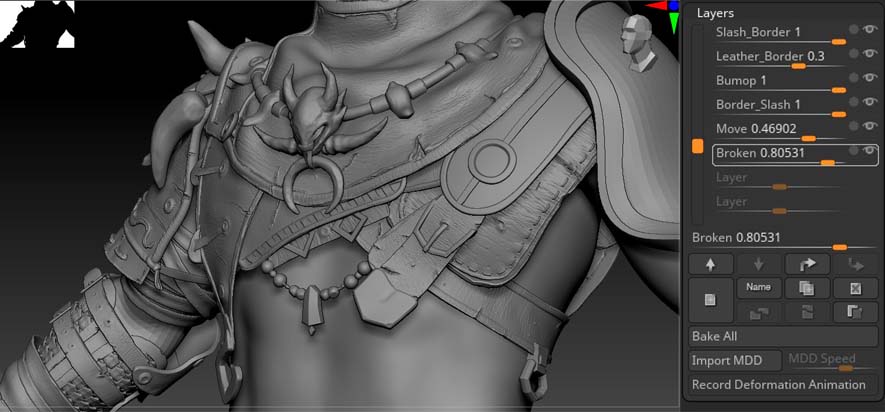
Each detail was done in ZBrush’s layer mode, this gives me more control to adjust the detailing with lesser chance for mistakes.
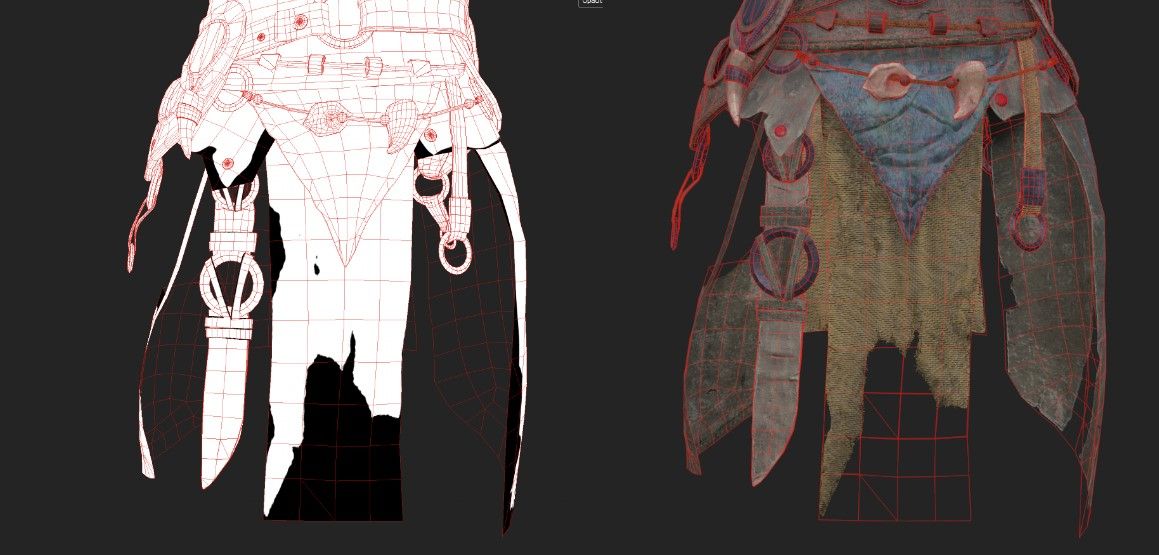
For the textile and skirt armour, I used Marvelous Designer to achieve a more realistic shape through simulations. After achieving the realistic shape, I began sculpting over it to transform it into the desired texture.
For the fabric, I aimed for a shabby appearance, reflecting the character's role as a herder whose movements would damage its clothes. I later utilised opacity in Substance 3D Painter to achieve this effect. I created a high-poly version for the broken fabric and a low-poly version for the intact fabric to facilitate baking.
Regarding the accessories and repetitive details in the costume, it's essential to perform retopology and UV mapping in advance to streamline the retopology phase and save time.
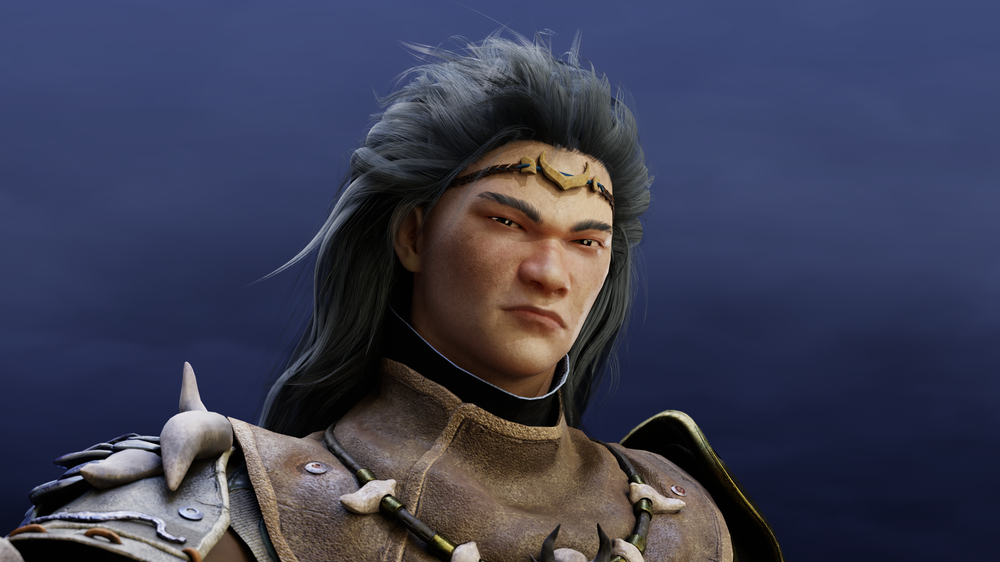
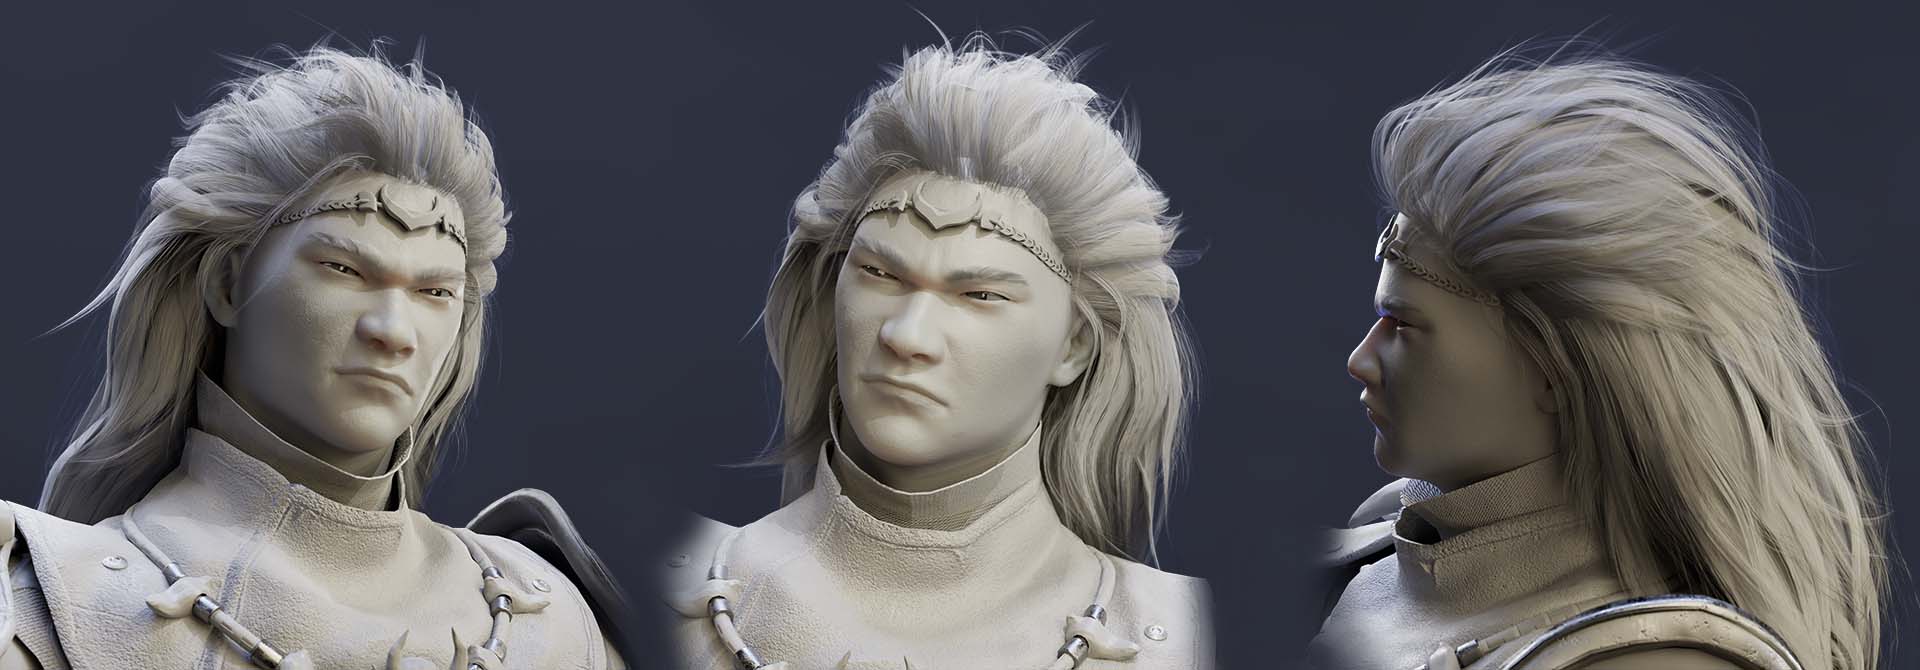
The face, being one of the most important and challenging aspects of the character, required relatively more time and attention than other components. The face is the most familiar part of the body, visible daily. Any anatomical error could lead to a strange impression, so the quality had to be impeccable.
I considered specific Asian facial features such as eye width, less pronounced facial bones and low nasal bridge.
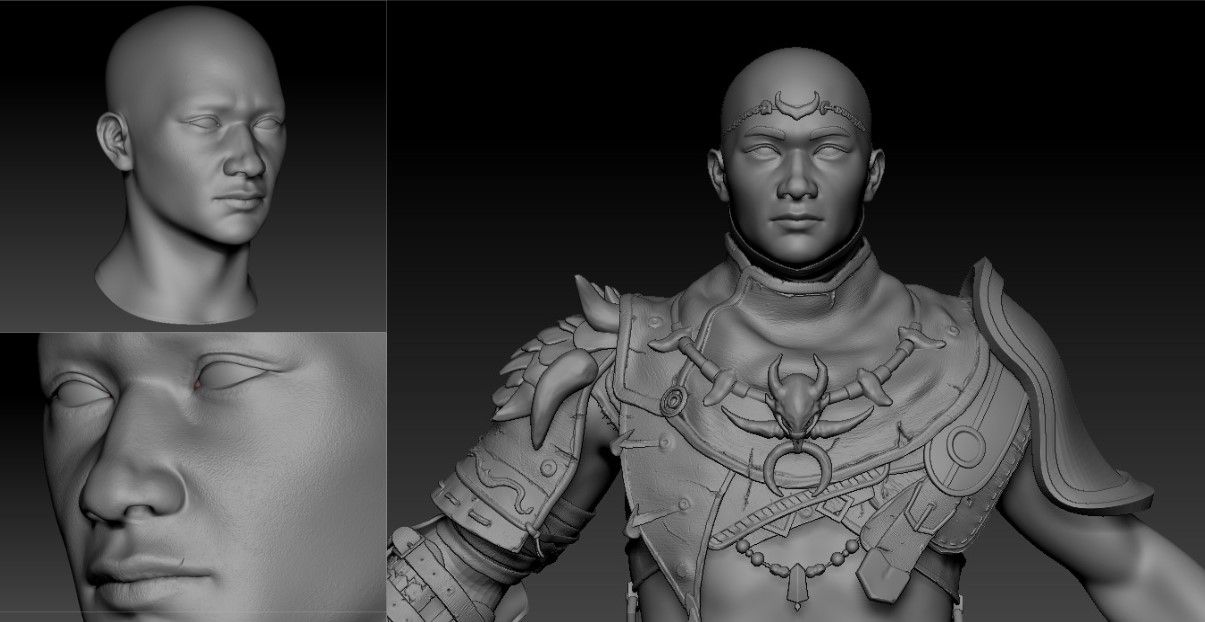

For more detailed texture, I used XYZ to bake the details into my character’s facial part, and added noises in the Surface option to have a little bit of variety.
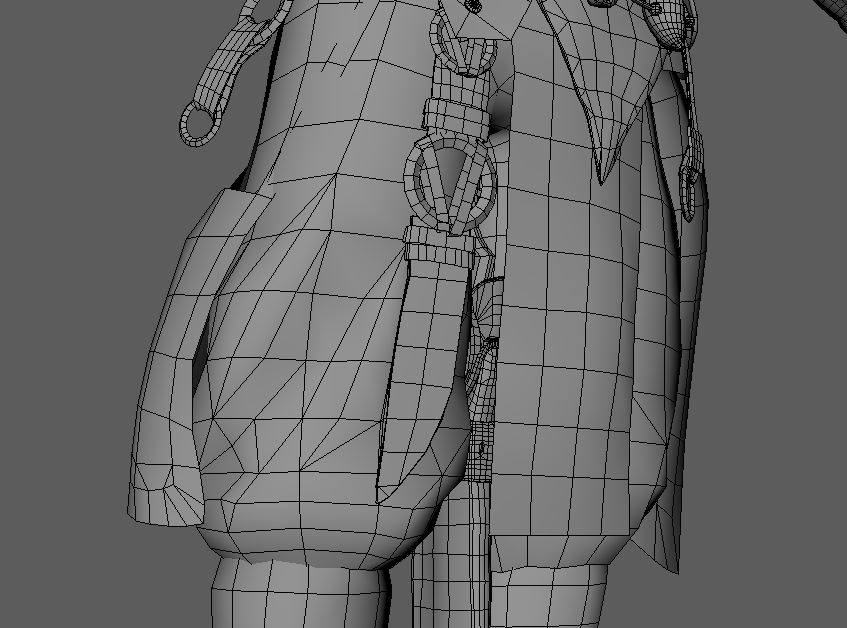
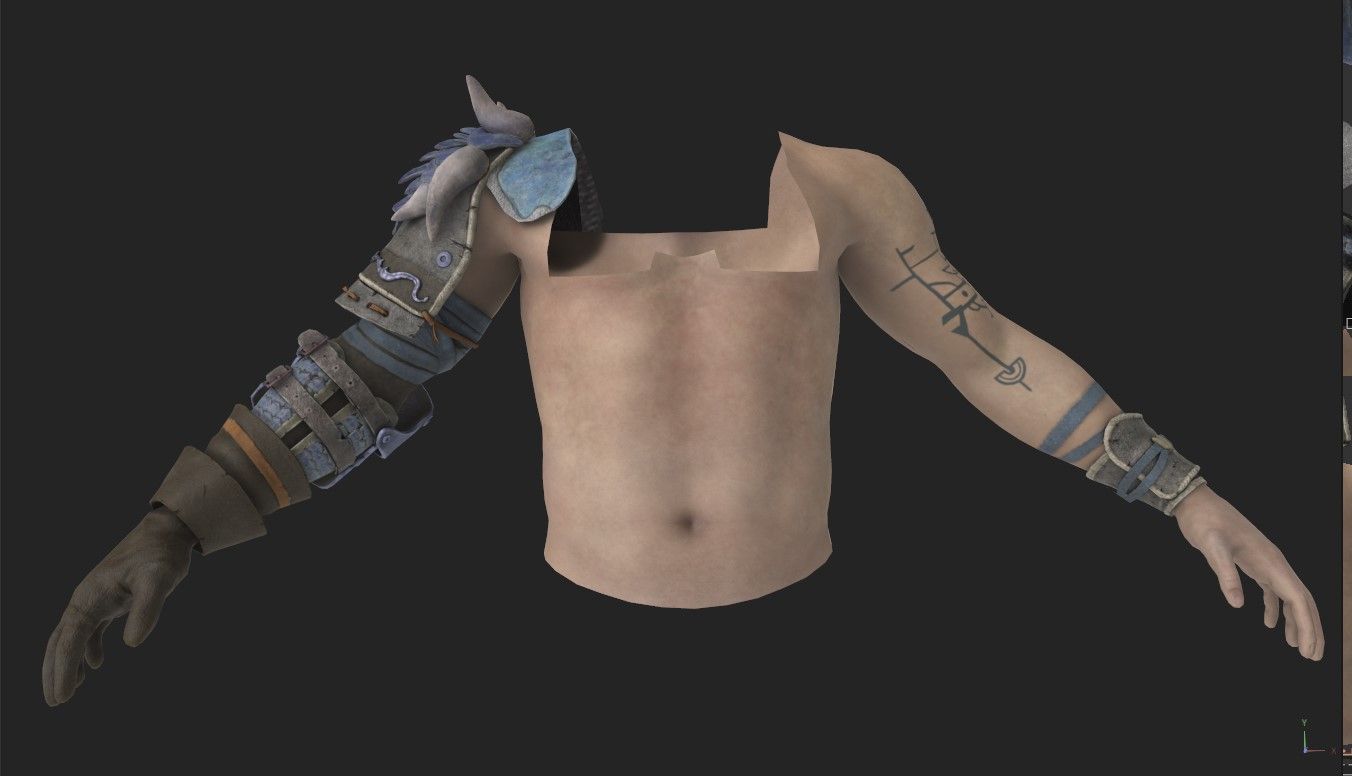
Since only the abdomen and arms were exposed, I deleted hidden body parts to save time and reduce file size. It will also be useful in the retopology phase to reduce tris.

The topology should be optimised for AAA video games, allowing triangles, and so it is necessary to control the number of tris. I have used a total of 238,658 tris, 108230 for the entire character and 130594 for the haircards.
It is also mandatory to create topology in a linear and uniform way to enable correct rigging.
I used Maya for the whole retopology progress.

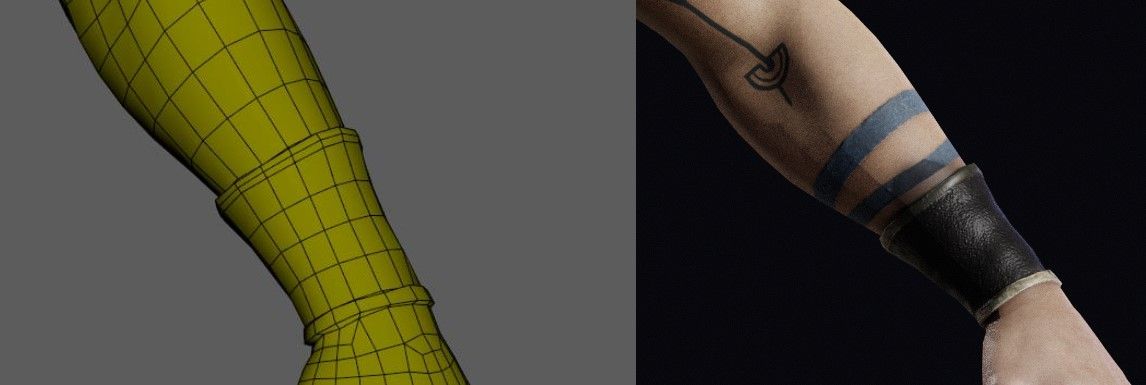
There are tightly fitting bandages on the body. Regarding retopology, I can merge them with the main body to save tris.
The planes such as the fabrics didn’t need to have thickness, the double sided texture could be activated in shading. This would save us some tris and more space for Uvs in the UDIMs.
I planned to create 8 TextureSets for this character: one for each part I divided earlier, and another for the HairCards. It's possible to overlay UVs for the small fragments that don't stand out visually.
The face required a high resolution as it's the most crucial part, so it had to occupy an entire UDIM tile and utilise it to its maximum extent.
I used Maya for the UVs.

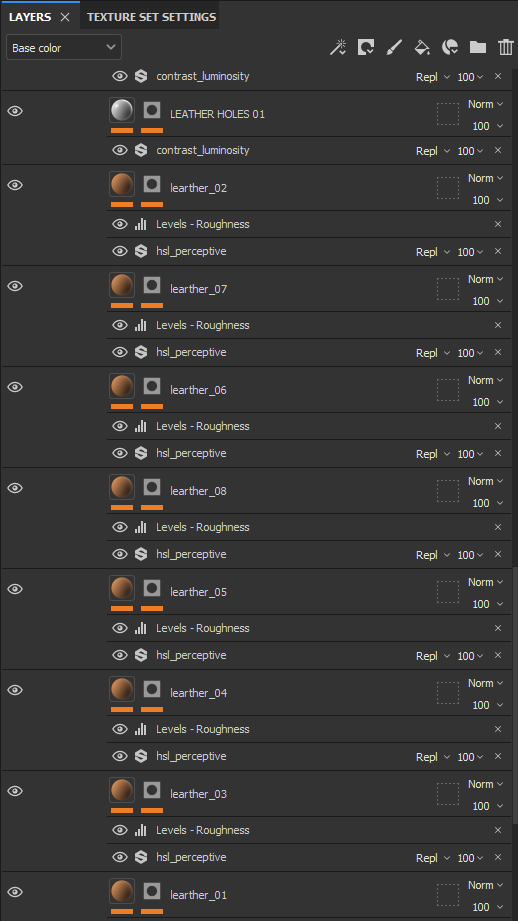
I categorised the objects by materials and created textures accordingly. In the artwork, leather played a dominant role in the textures, with different types of leather identified to achieve greater visual variety. Other materials, such as metal, bone, dragon scales, and fabric, occupied smaller parts. A significant amount of time was spent just on baking.
For texturing, Substance 3D Painter was used. The typical workflow involved starting with colours, adding base, light, and deep tones, then incorporating different tones for borders, imperfections, or wrinkles. Finally, roughness and normal maps were applied.


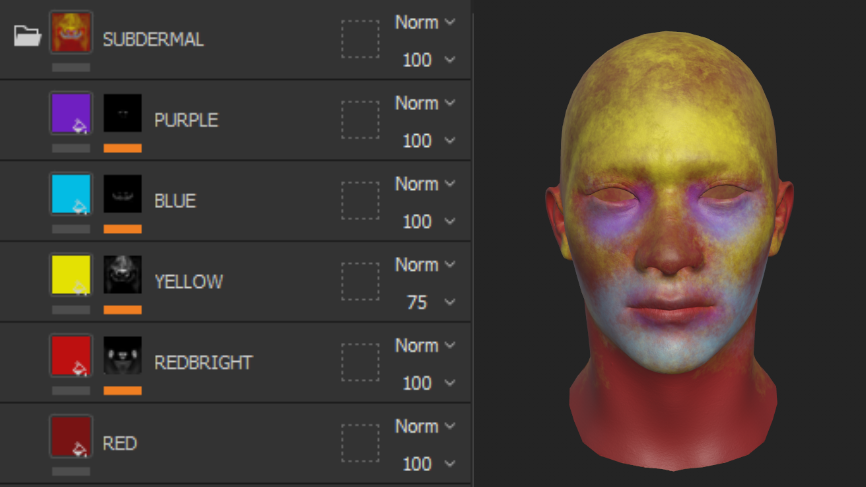
For the face, using XYZ assisted me in achieving realistic texture bakes. To represent the depth of the face, it was essential to divide it into three layers: subdermal, epidermal, and details.
In the Subdermal layer, I filled the face with base colours to separate different facial parts. This layer served as a foundation, providing guidance for any colour overlays applied to it. Front head, Nose, Lips, Ears, Neck, Jaw, Cheek, Periorbital dark circles, they all had different tones of colors and could be separated with colors Yellow, Purple, Red, and Blue.
The Epidermal Layer is where I added the skin colour. You can start from a skin base, and overlay with different layers of colours to achieve a lively skin tone.
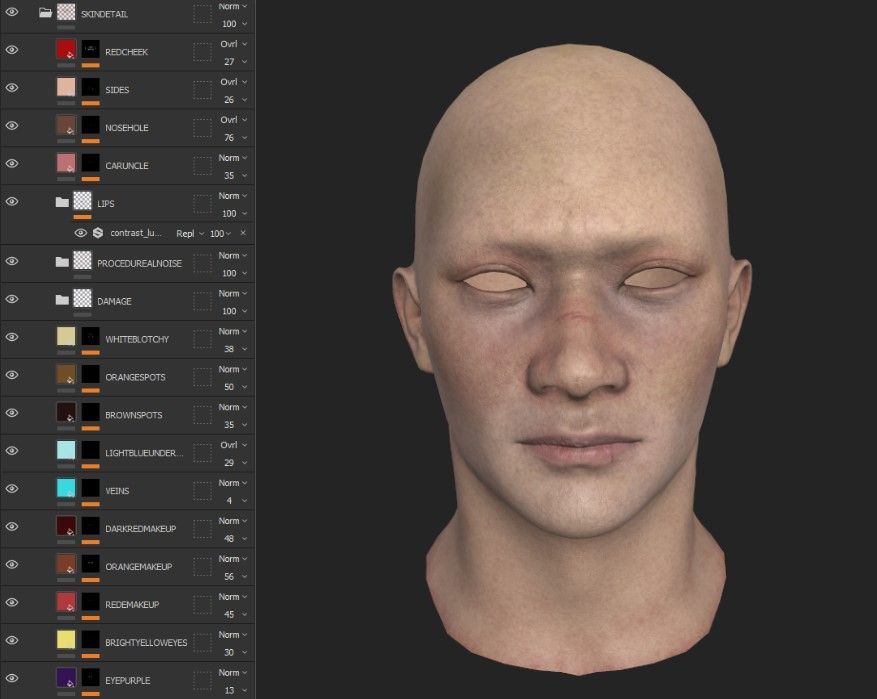
As for the Detailing layer, I added spots, veins, blushes, lips, makeup, and scars to make it realistic. I also added Ambient Occlusion (AO), Baked Normal Maps, and Subsurface Scattering (SSS) as the final touch for the face.
As mentioned before, using opacity allowed me to create the broken effect without adding too much geometry. This was achieved by creating a broken version in high and a complete version in low to facilitate the baking process.


For the hairstyle and fur, I used Hair Cards because the character needed to be playable in the game. I created the haircards texture in Xgen. Once the textures were prepared, I placed the planes using GSCurveTools, which required a lot of patience.
For the hair, I first created a base with large planes to fill in the background. It was important that the top of the head could not be visible. To achieve this, I also added a layer of hair texture on the head. Then, I added hair on top gradually until I achieved the desired shape.
Lastly, I began adding "fly aways" and thin strands as noise to break the uniformity. Regarding the fur, it was essential to consider the combinations of each tuft. They should have been short but thick, grouping them together until their edges were hidden.


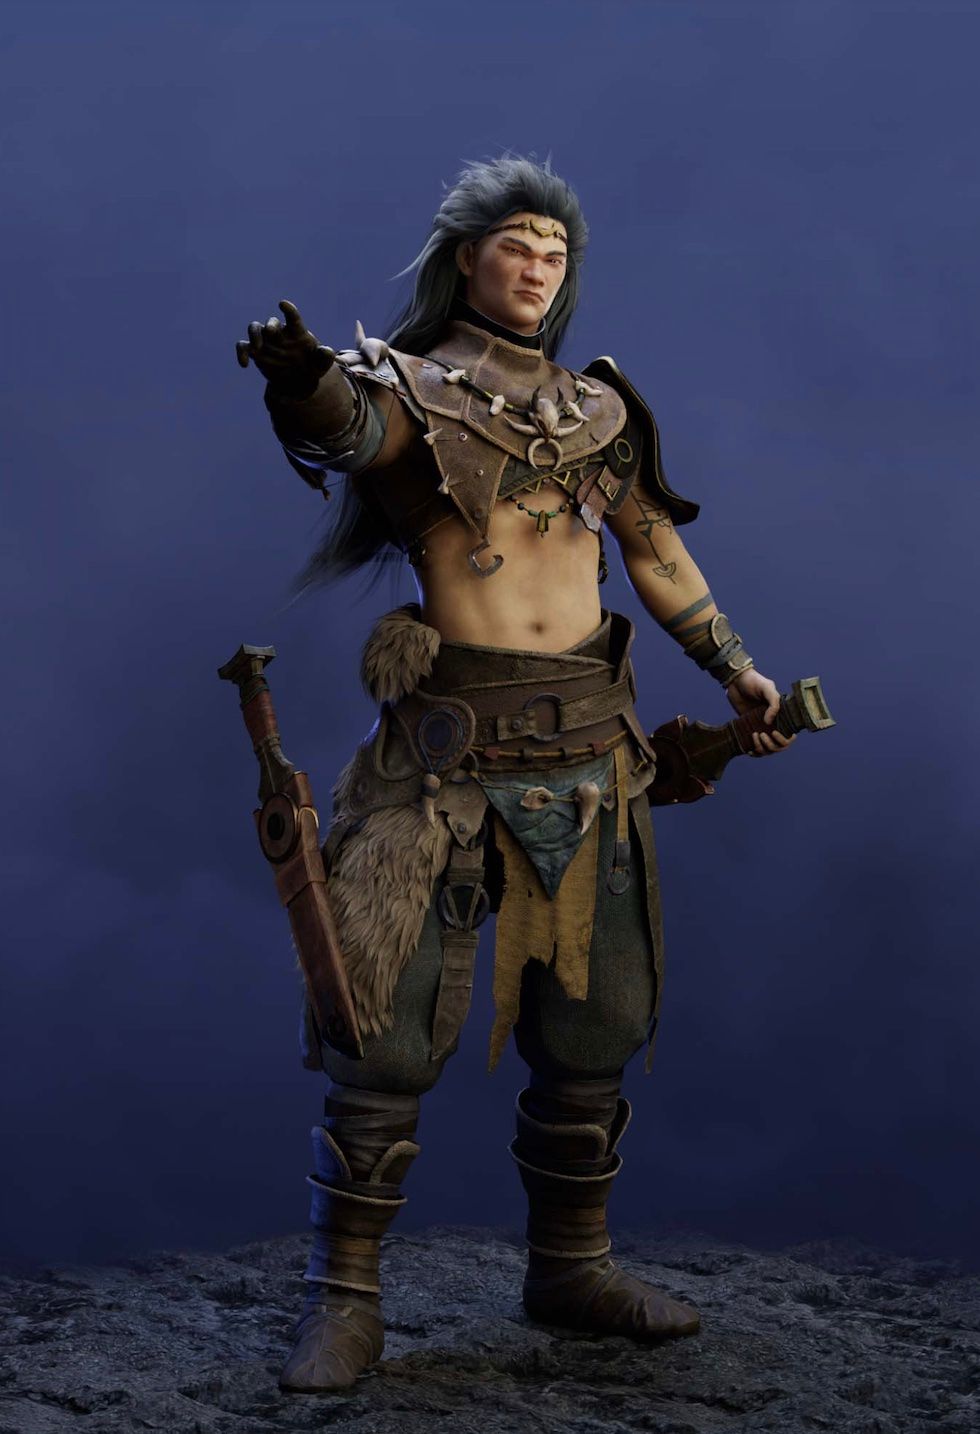
The pose in the artwork offered many advantages in presenting the character's personality and silhouette, and the goal was to replicate it as closely as possible. However, due to the absence of the dragon, the silhouette didn't fully convince me, so I chose another pose that was appropriate to the character's personality. I imagined the character as a brave young herder. I wanted to give them a powerful pose, so I posed them in ZBrush using Transpose Master.

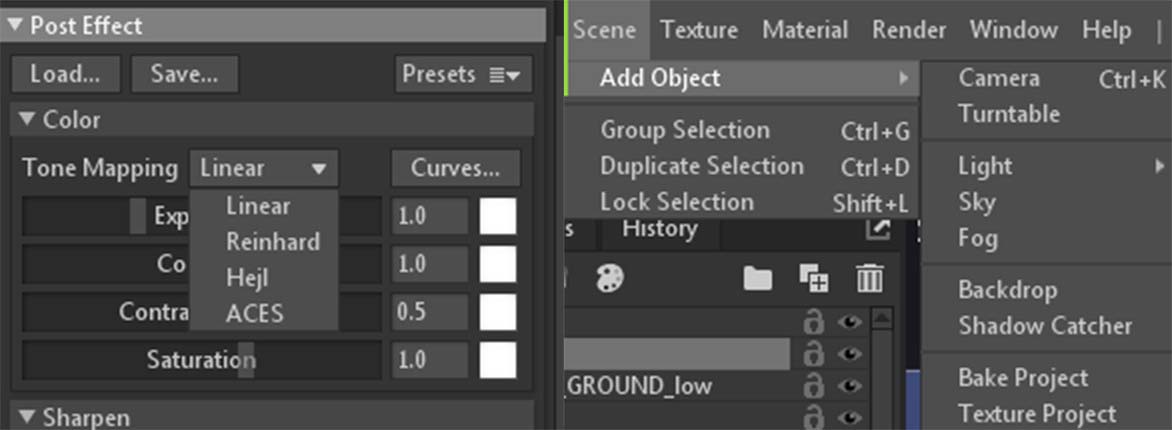
For rendering, I used Marmoset. I experimented with different lighting setups. The orange light was a strong backlight aimed directly at the back of the head. Yellow and red lights were used to generally illuminate the body, with the yellow general light serving as fill light.
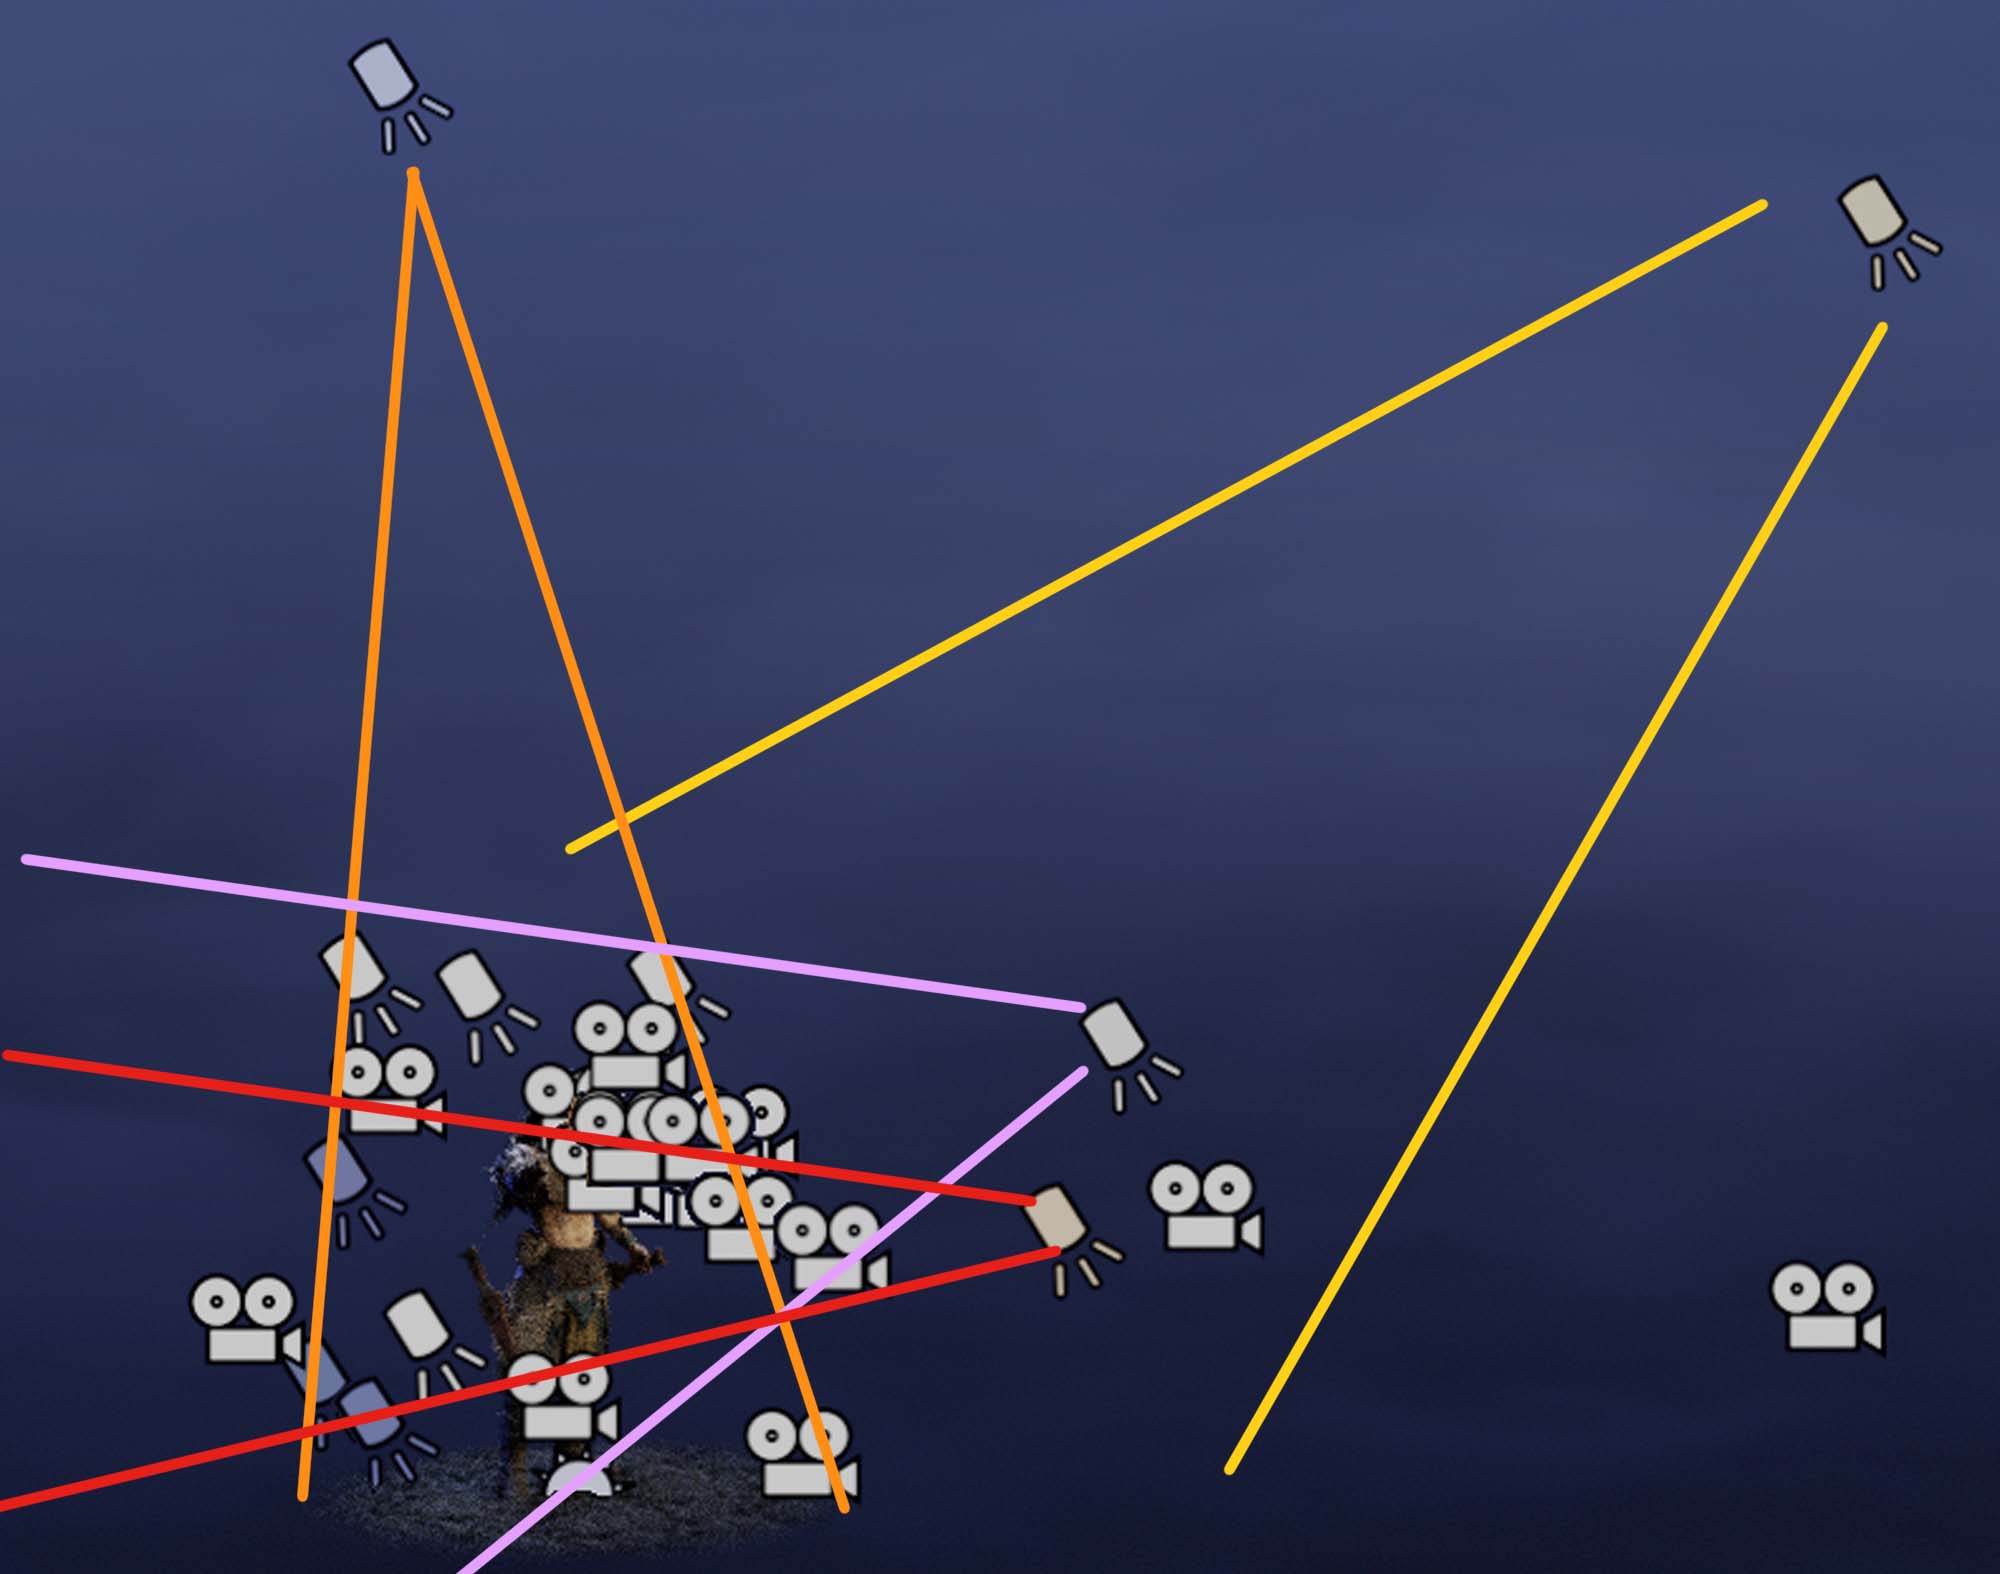
I activated the ACE mode in the Post Effect section to achieve a more intense and contrasted tone.
Finally, I added a backdrop and a plane beneath the character to enhance the presentation.


The decision to create this character for my first project was undoubtedly a significant challenge. Throughout the process, I encountered numerous difficulties I hadn't anticipated, and being outside of my comfort zone wasn't always the most comfortable experience.
However, this was exactly what I desired. My passion pushed me for improvement, and despite the challenges, my efforts eventually paid off. I'm grateful for the support and guidance I received from my teachers, classmates, friends, and family, which provided me with the motivation to complete this work, of which I am truly proud.
This initial project has ignited a greater ambition within me and my imagination. There is still much room for improvement, and as long as this ideology persists, my artistic curiosity will always be greater than ever!
Check out my Rookies portfolio for more of my work and reach out with any questions!
Special Thanks to all the supports from my Family, Esteve Garriga, Álvaro García, Miquel Aloy, The Rock Artist, my Friends and Classmates <3