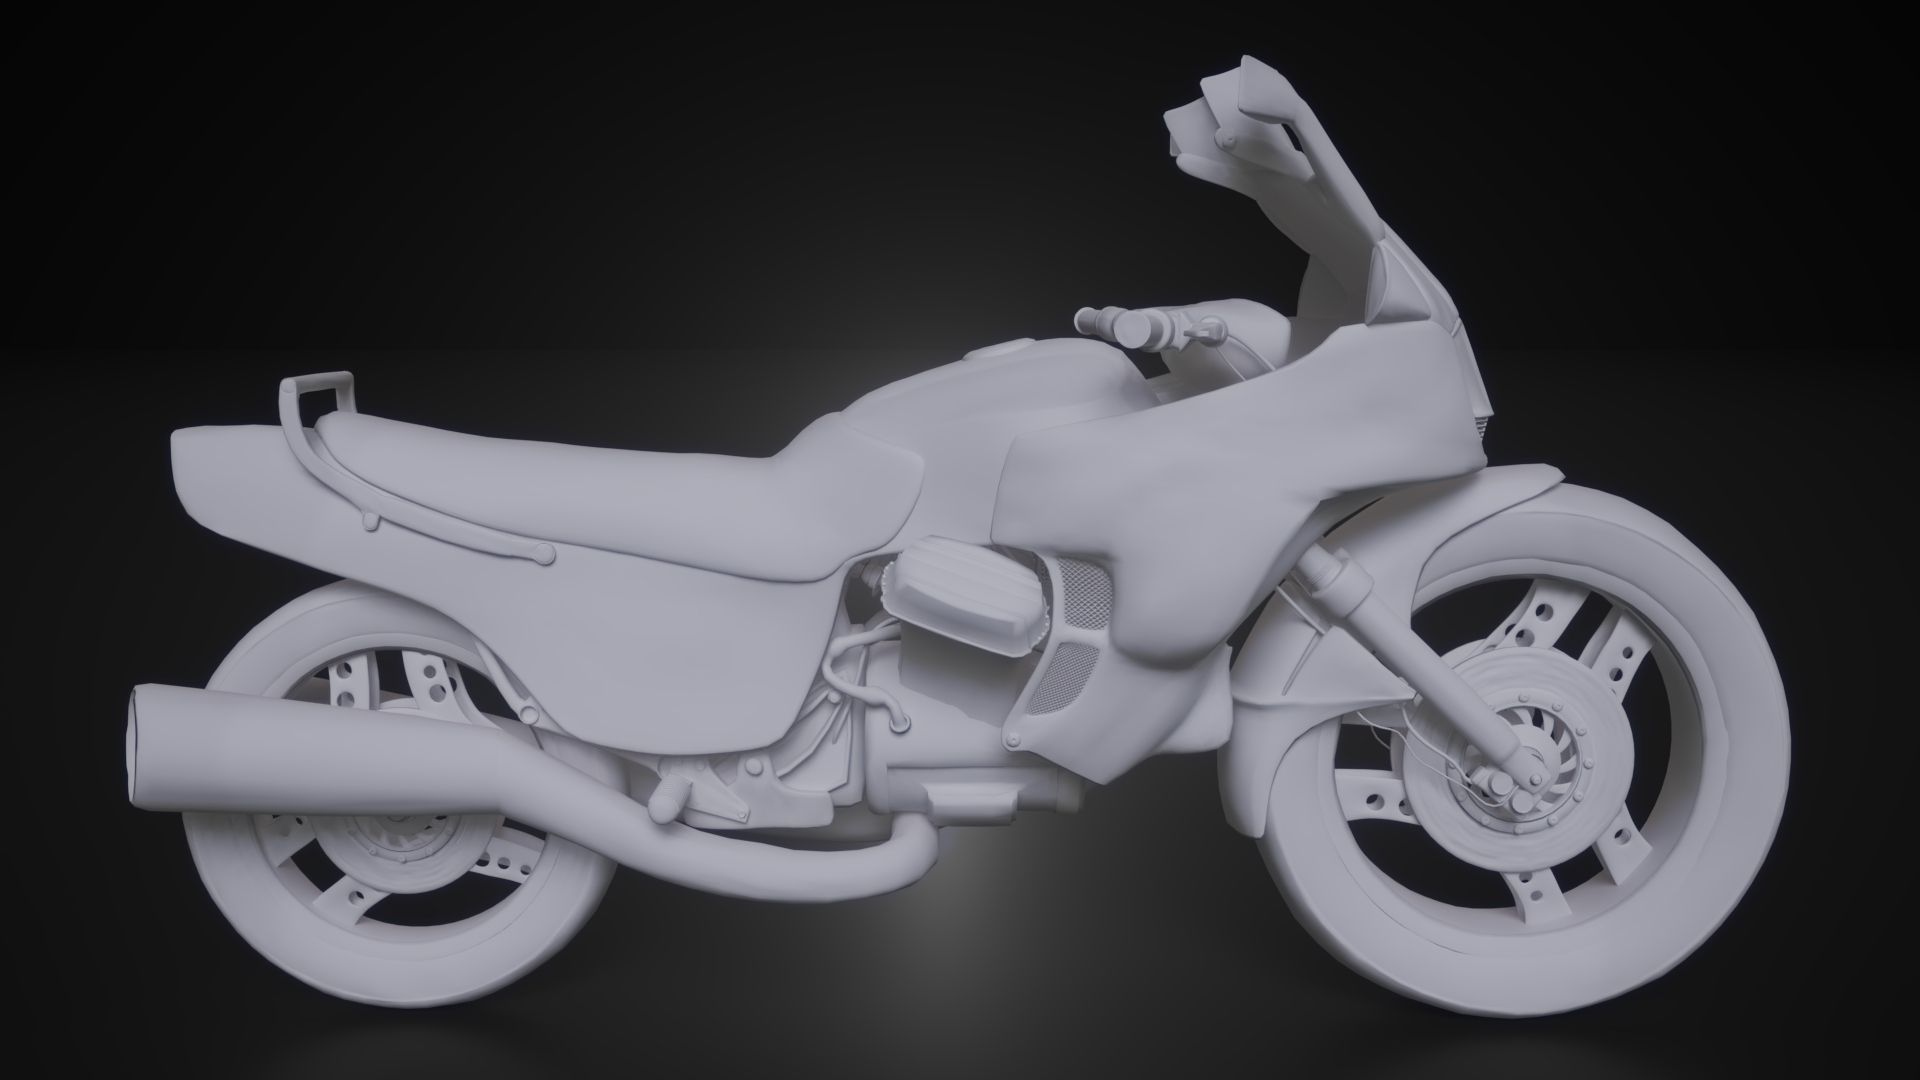
The Honda Cx650: Stylisation of a Realistic Model
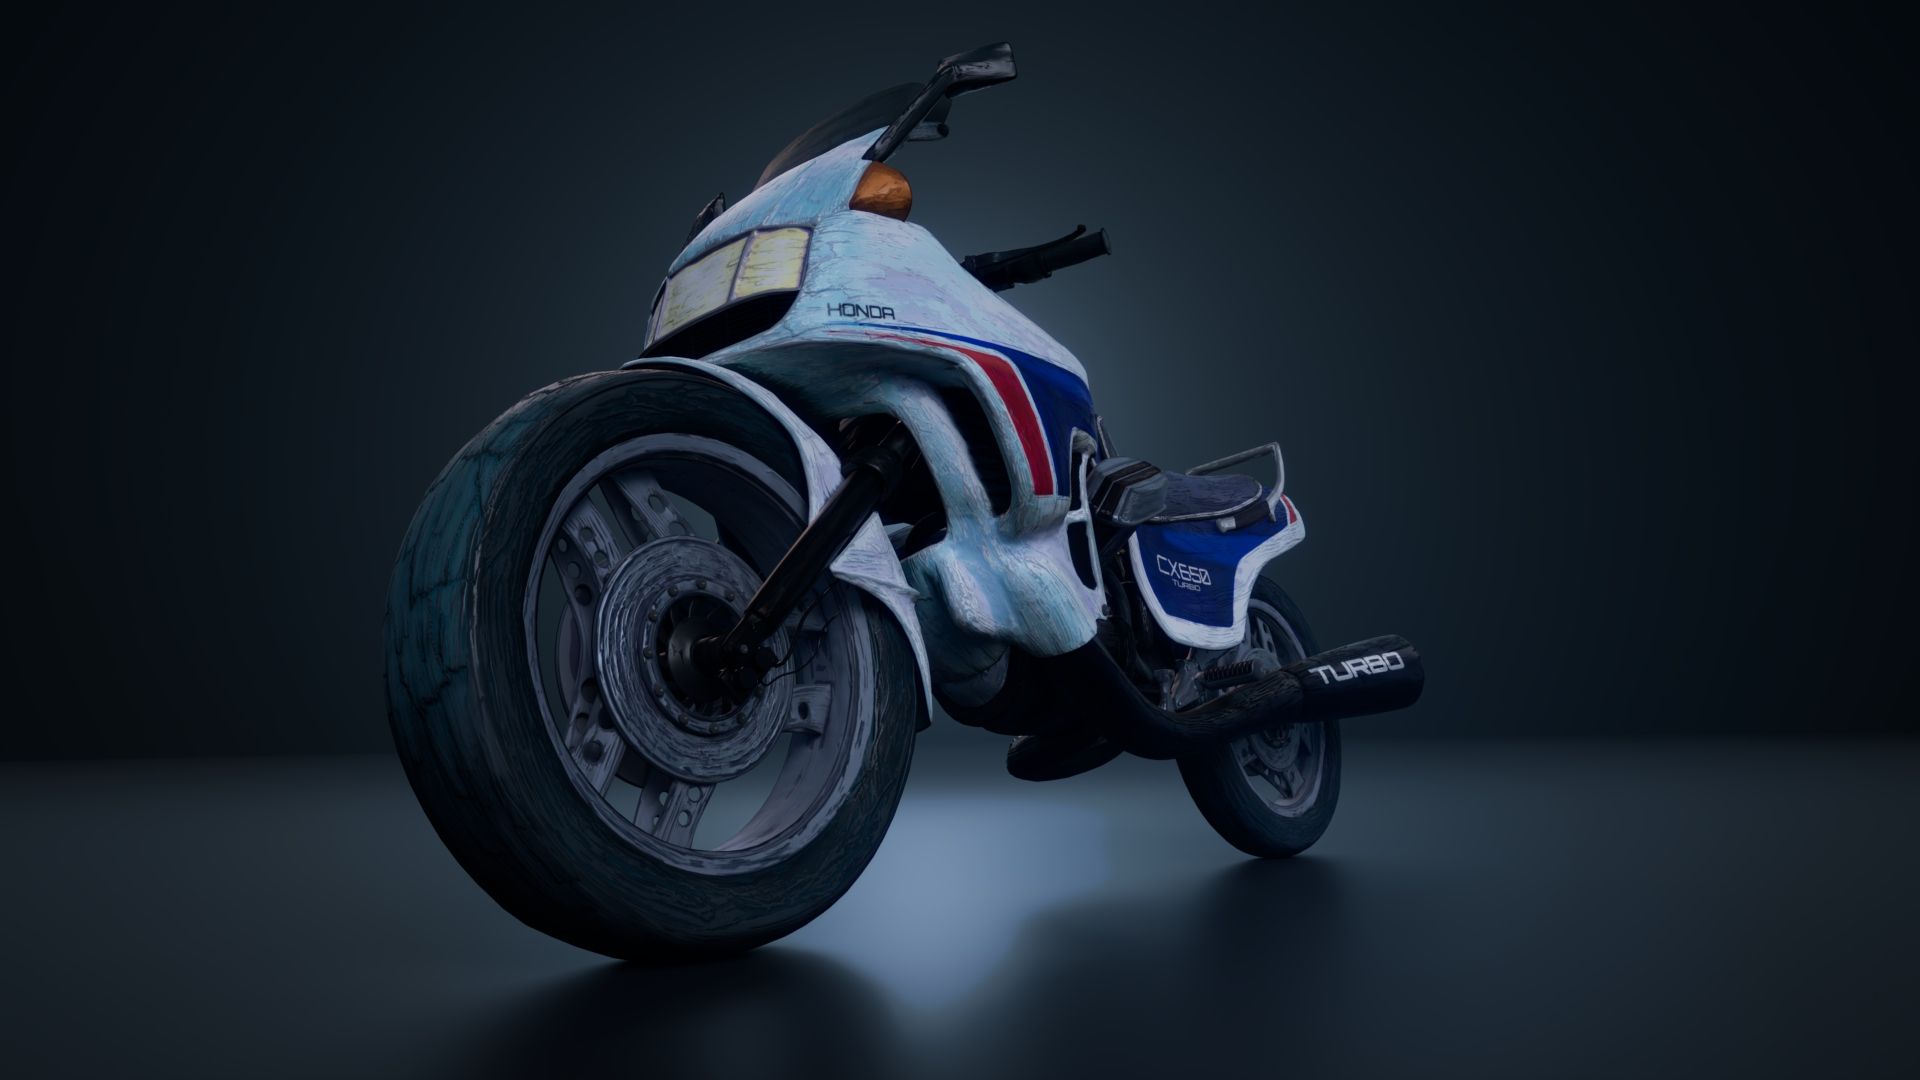
Joaquin Laca, a skilled BFA student at SCAD, shares his latest project: a stylised rendition of the legendary Honda Cx650.
Joaquin Laca, a skilled BFA student at SCAD, shares his latest project: a stylised rendition of the legendary Honda Cx650.

Step into the world of Joaquin Laca, a talented BFA student at Savannah College of Art and Design (SCAD) with a passion for 3D Art. Hailing from the vibrant city of Cordoba, Argentina, Joaquin invites you to explore his latest creation: a stylised model of the iconic Honda Cx650. Have a read through the creative process behind this piece and appreciate the many details of this project.
My main goal for this project was to create a portfolio piece during my summer break: portraying a stylised look on a more realistic base mesh. Practicing my modeling skills and further perfecting my pipeline for any 3d assets I would create moving on. Using Maya, ZBrush, and Substance 3D Painter, I wanted to go in-depth, using each software and developing a consistent workflow, and learning how to transition from one to another in an effective manner.
I needed to start by setting up deadlines for the upcoming weeks, which I would have to work towards and aim to meet. My main rule was to work on the project every day, even if only for a small amount of time.
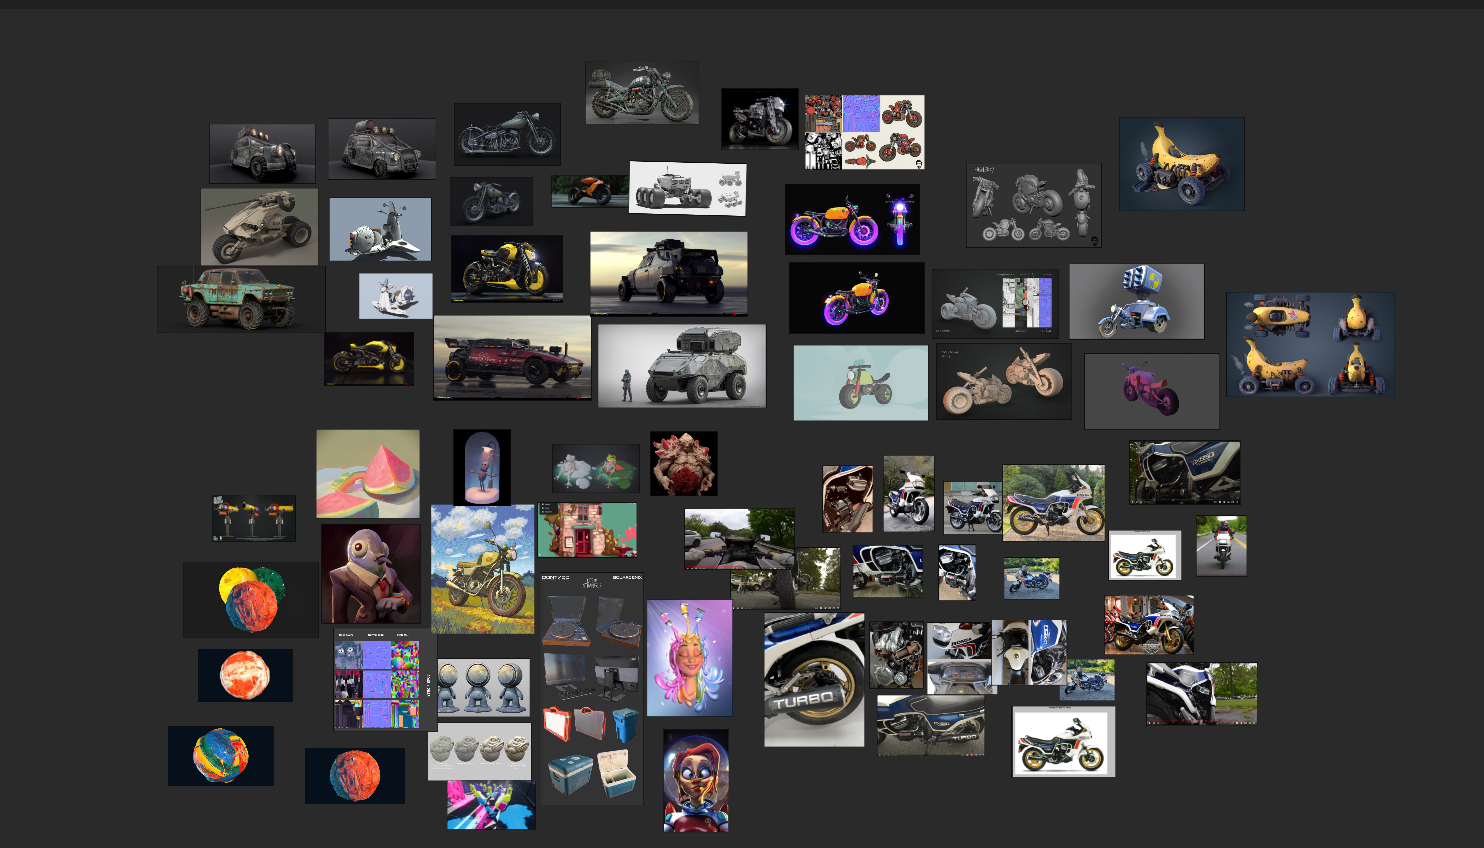
Finding references is always a step in the pipeline that I tend to be pretty loose on. Using PureRef, I kept in mind four different categories for all the concepts that I found in ArtStation:
The realistic model I work from. Establishes each different part of the motorcycle with every important landmark and silhouette. I looked up different angles and videos of the Honda Cx650 motorcycle that would help me in the hard surface modeling step.
I like putting together all the different images of bikes that are a successfully rendered piece. These could range from a monster bike to even a sci-fi one. What I require from them is to be an intricate model of a motorcycle that showcases a complex artistry. Without having to match my artistic aim for the project. I always find different small things to take inspiration from and adapt them to my work.
For the style references, I am looking for different models that have matching tertiary details on them. What I am looking at is mainly sculpted details and textures. So, the pieces themselves don’t have to be motorcycles, just any kind of model that has an art style I aspire to.
I needed to find out what was the most appropriate render setup for a vehicle asset. I looked over different types of vehicles, without caring for their art style, but rather their presentation. A road, dirt garage, or any scene similar to that, were ones I avoided. To keep the focus on the bike, as the hero asset, and not go into environment modeling.
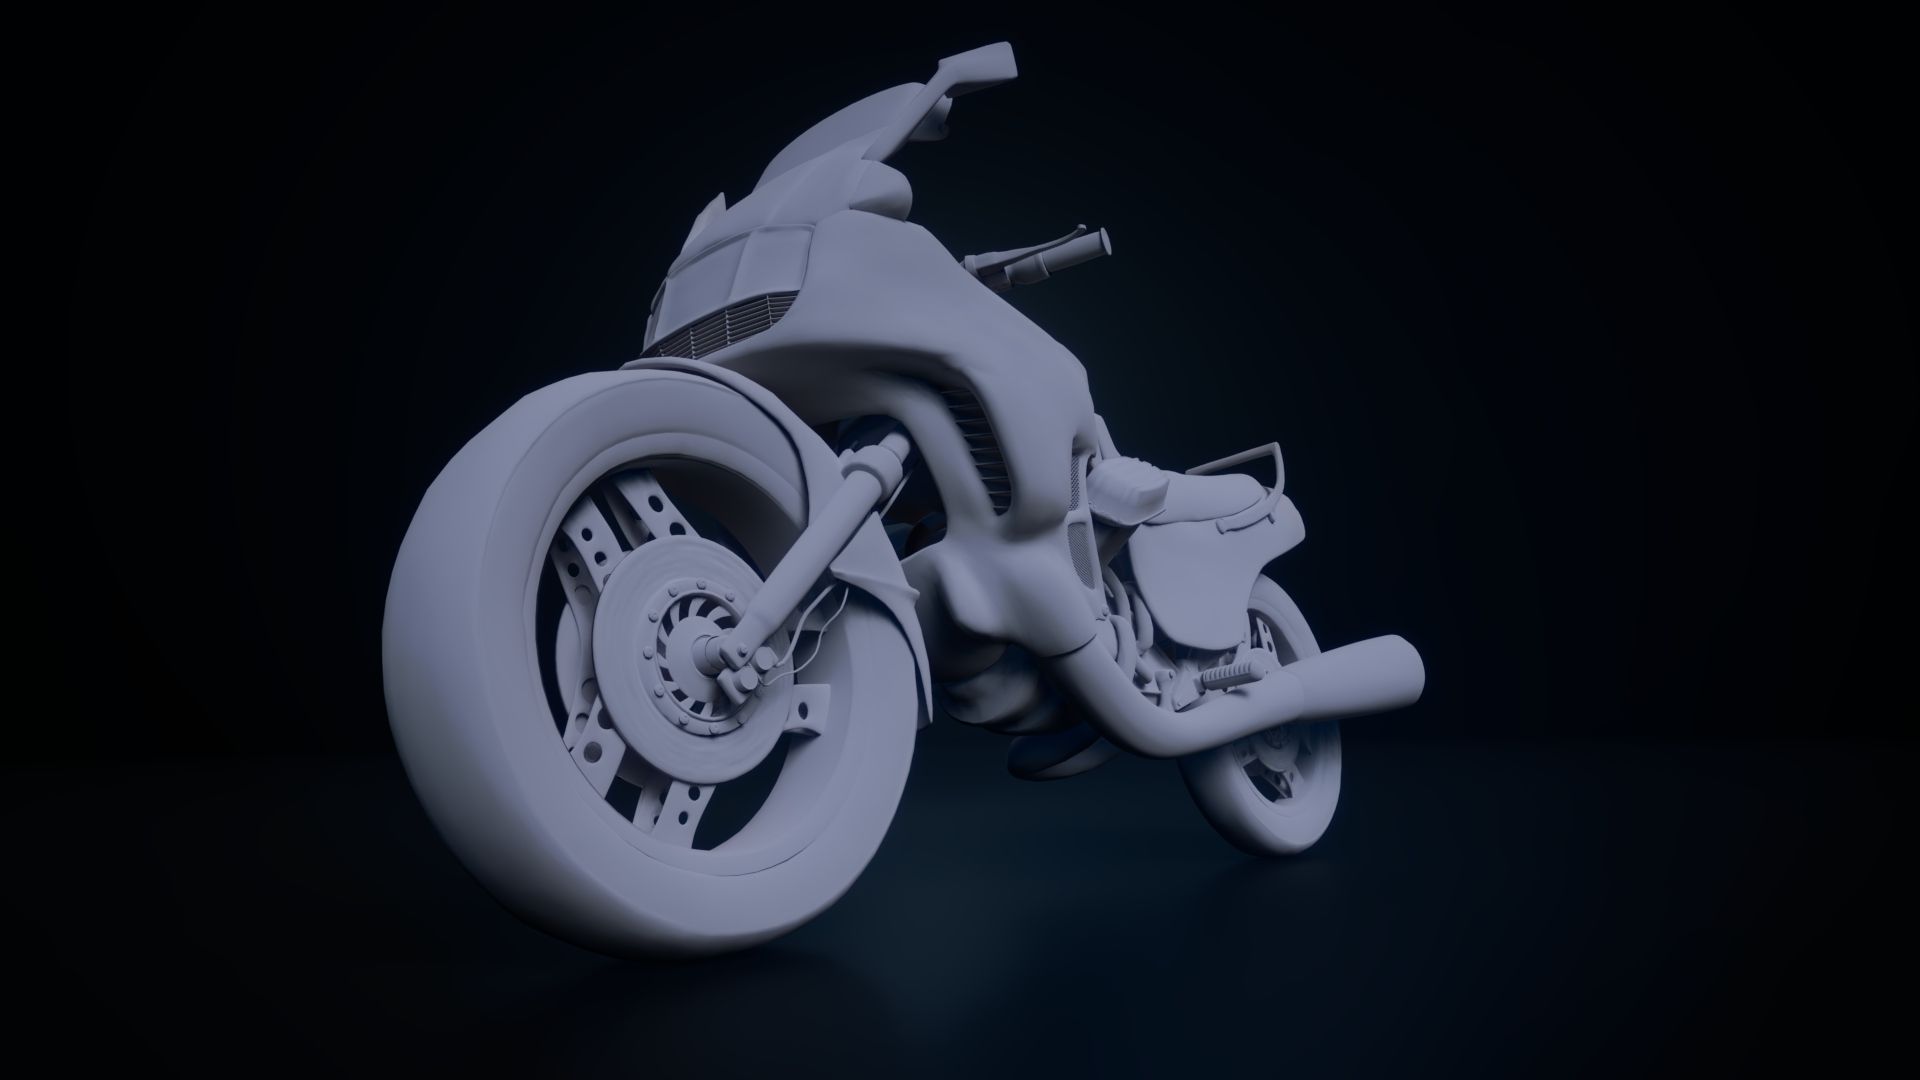
Starting with identifying and differencing different parts of the model, I used Maya as my main software.
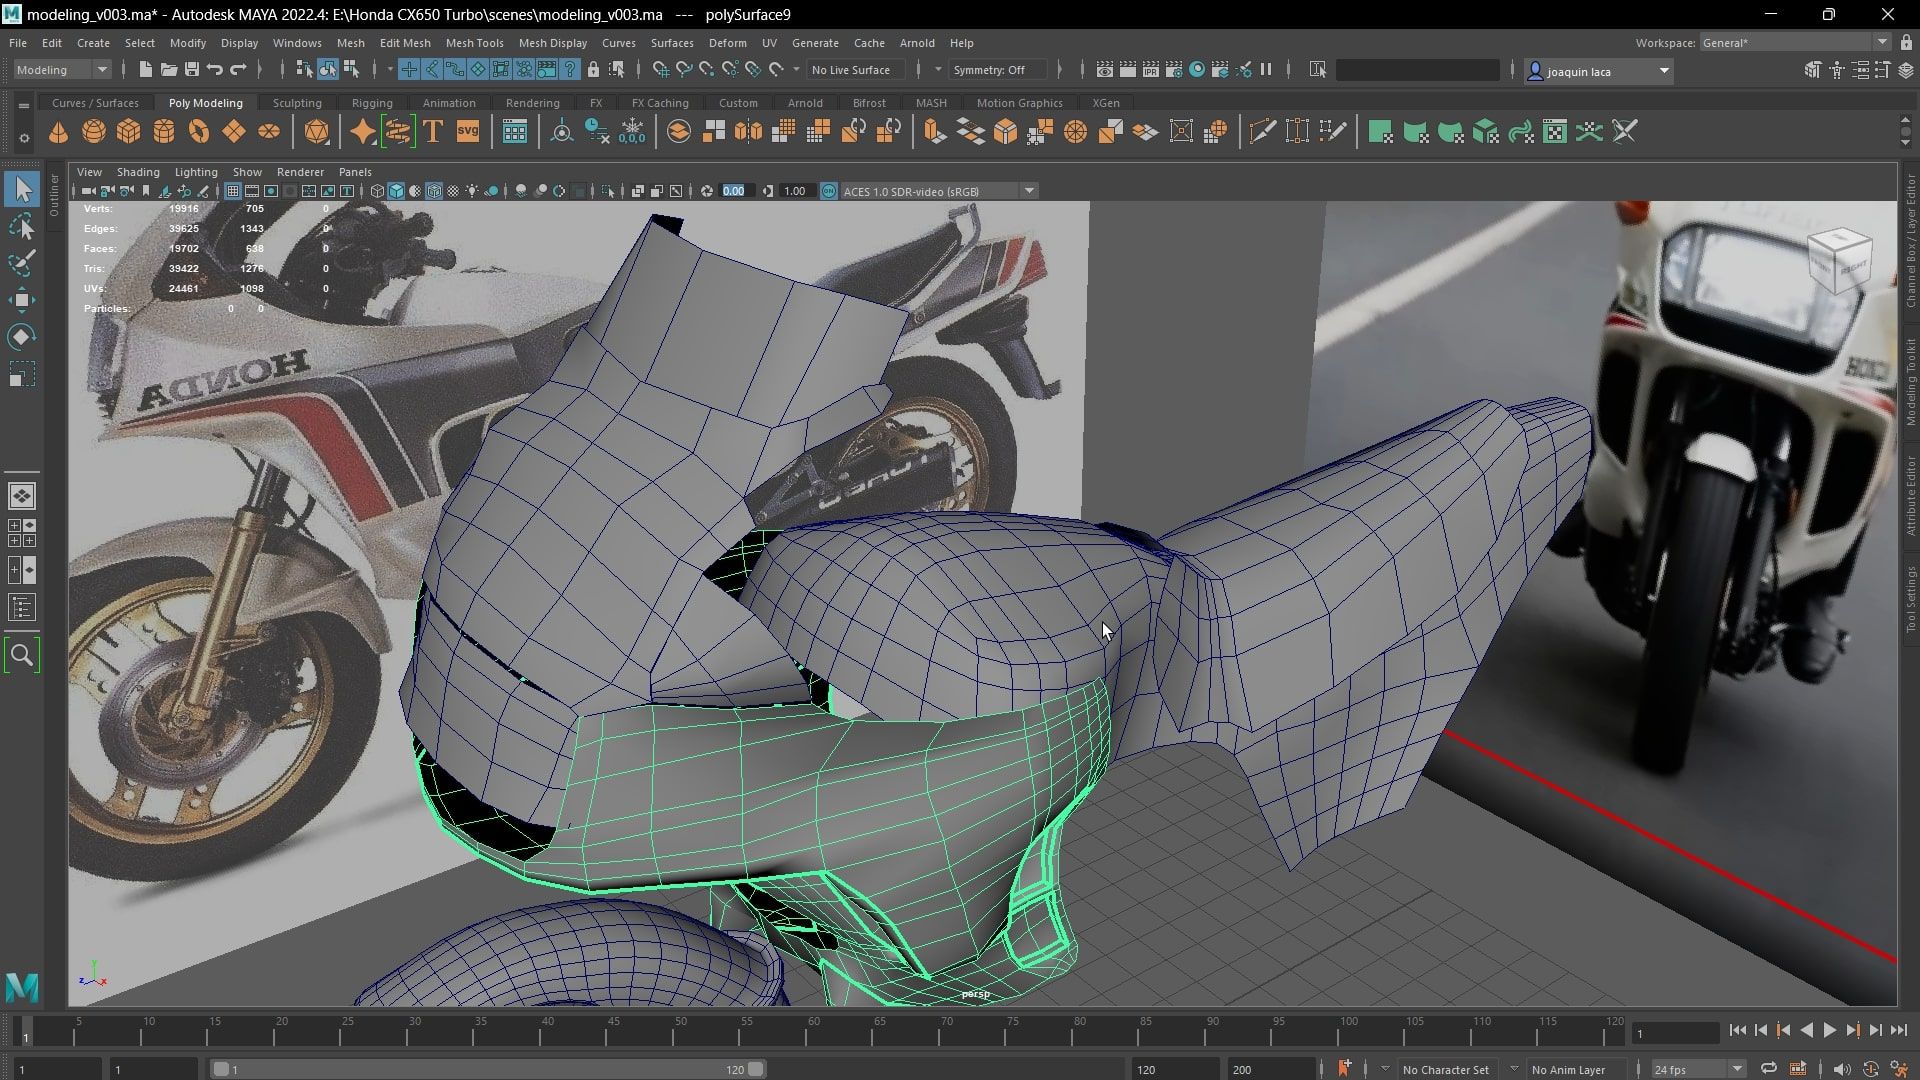
I placed simple cubes simulating the whole area of the motorcycle, using that model with X-ray turned on as my block out.
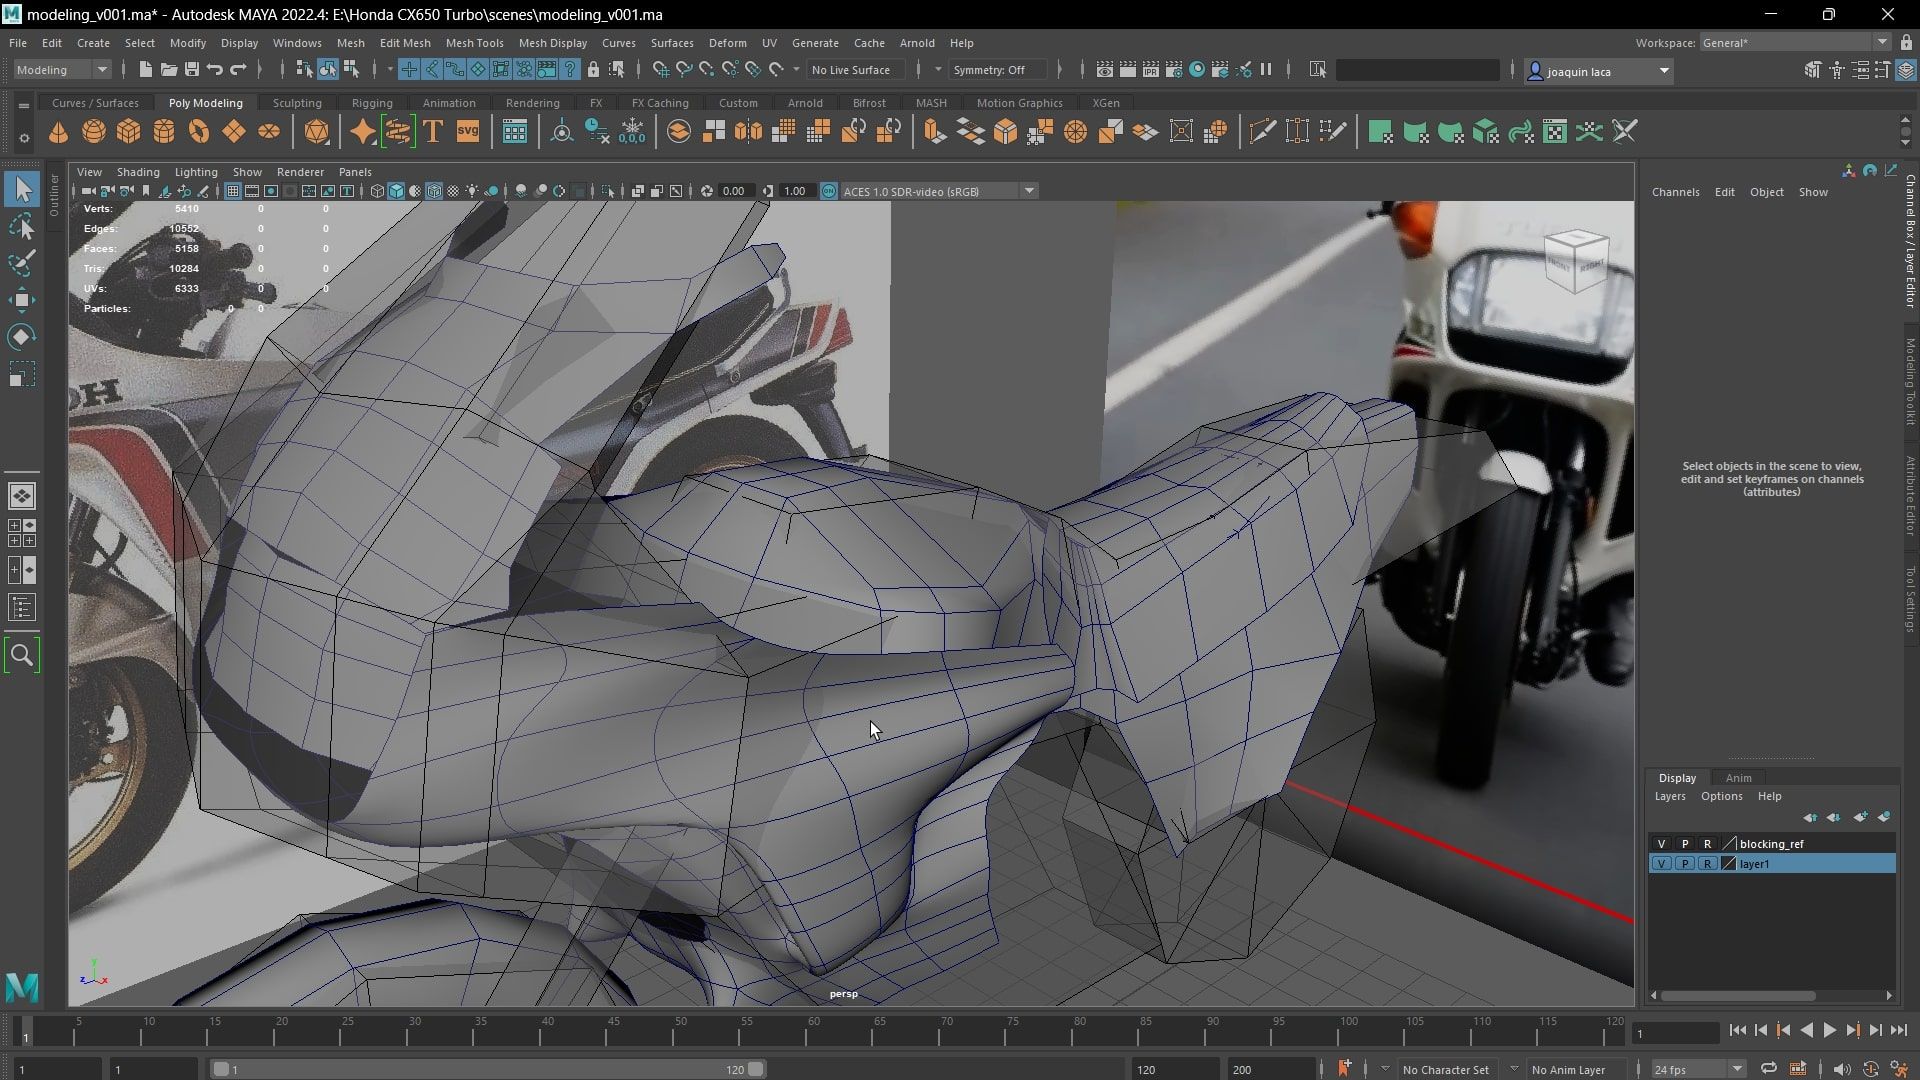
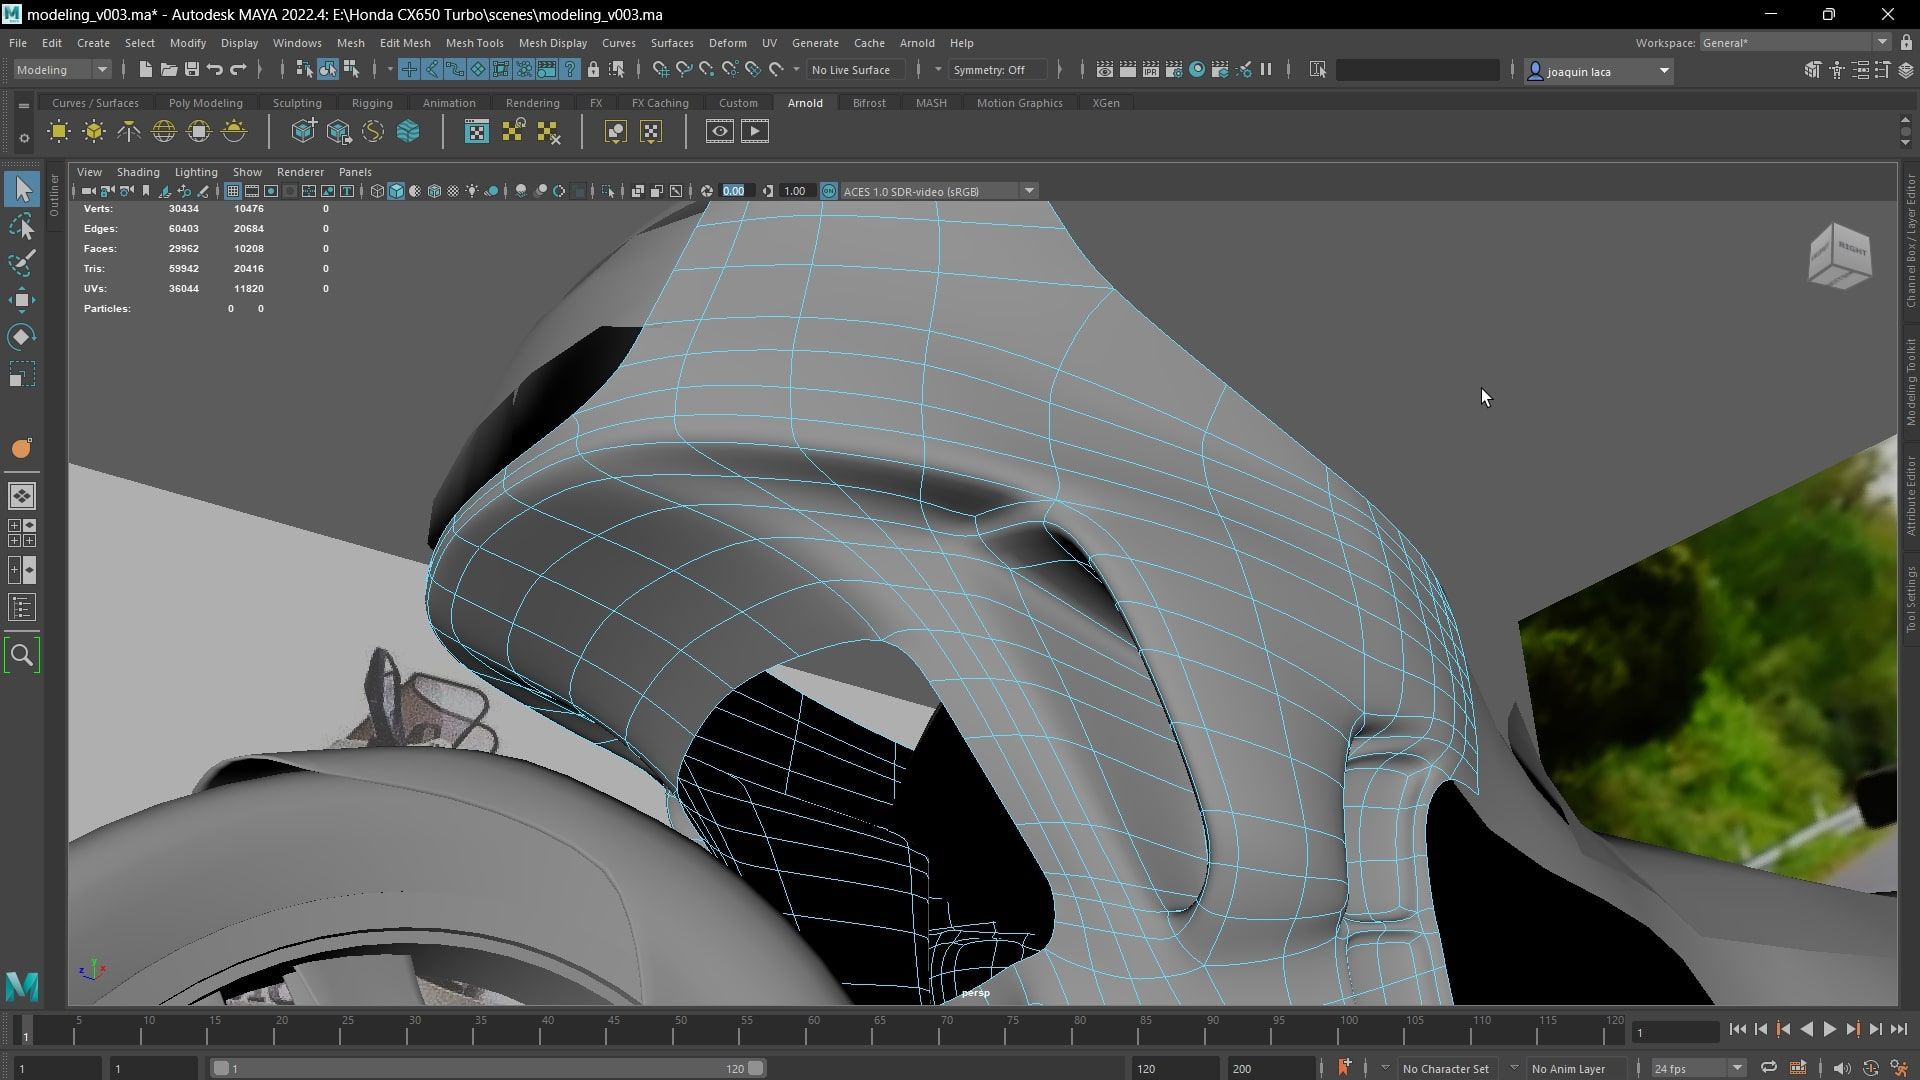
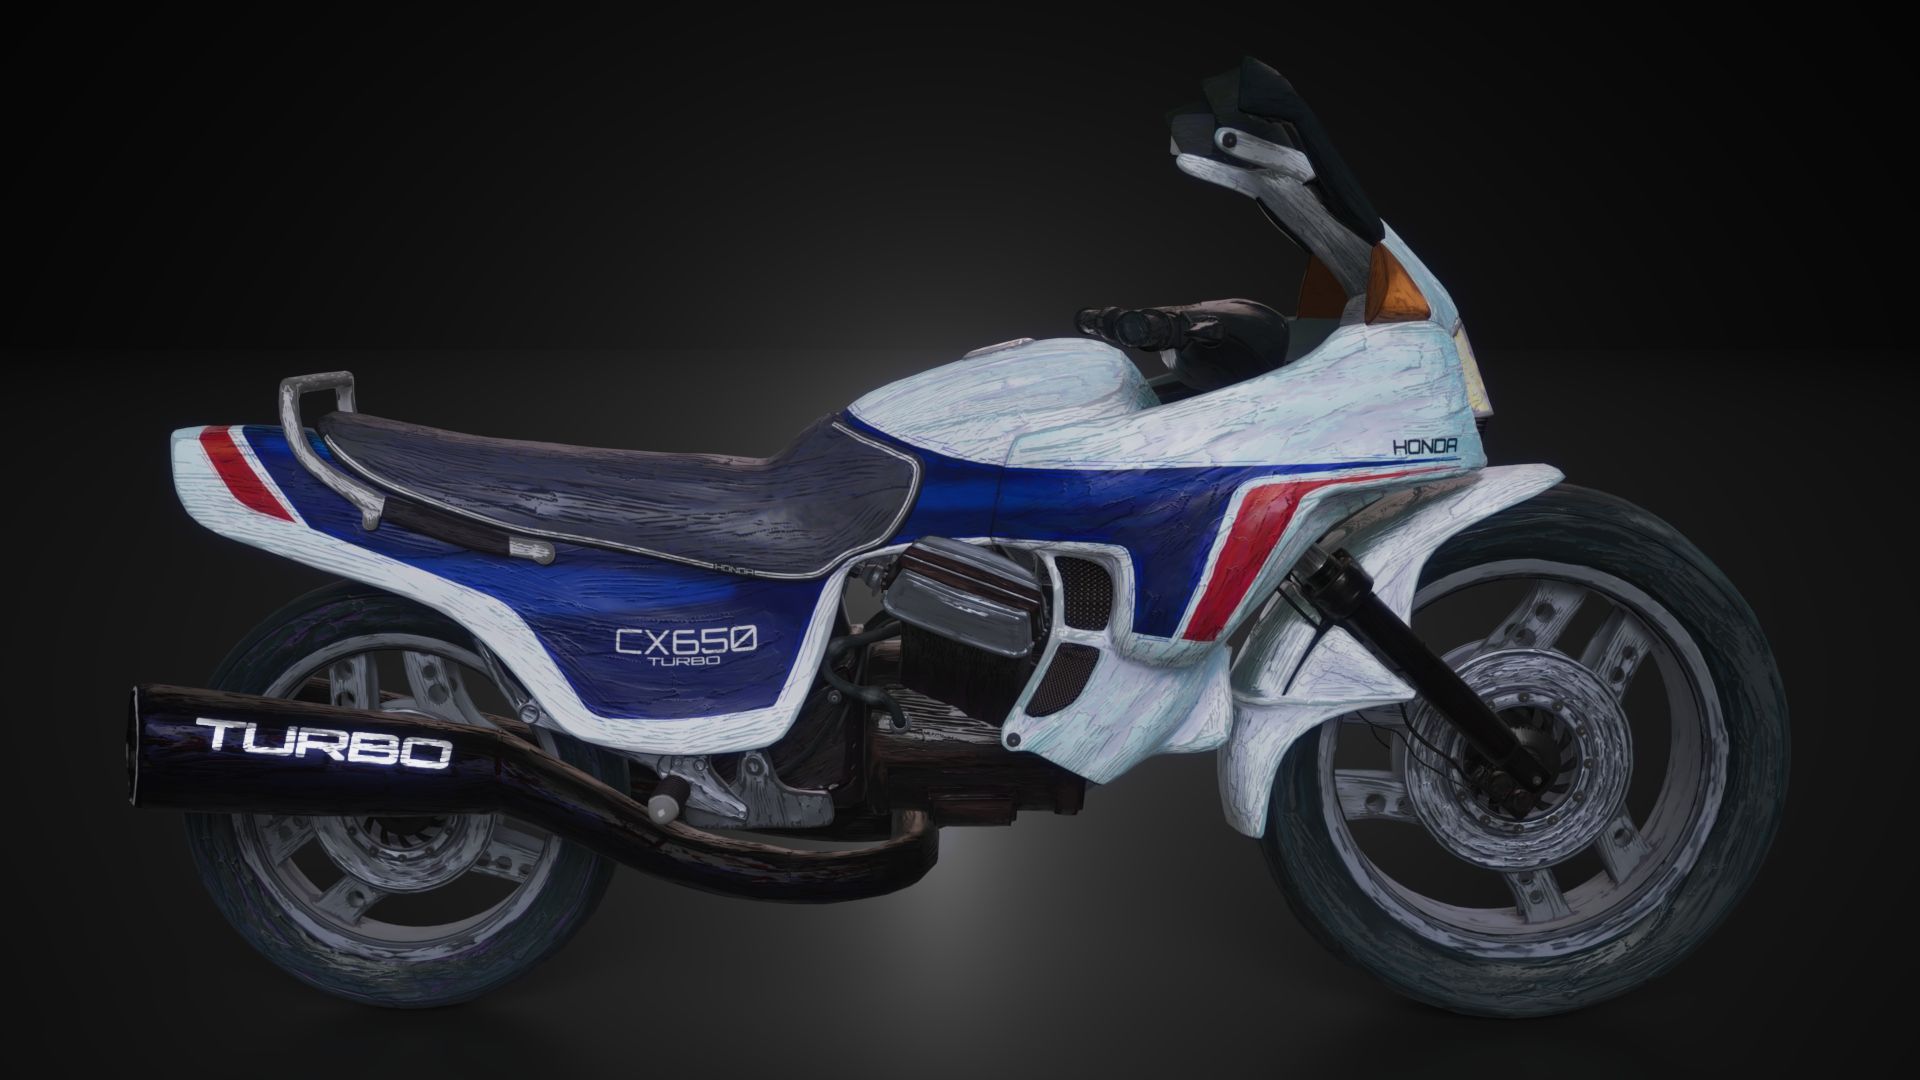
I then deformed and positioned a series of planes to match the outer form of the bike, refining them around the block out with soft selection and Maya’s sculpting brushes to emulate a retopology process. After arranging them precisely, I extruded them inwards to add thickness. This approach to hard surface modeling provided valuable insights into achieving the right flow and granted me more flexibility in shaping each component, treating the planes akin to an organic model. Particularly for areas with varying curves or apertures, I focused on establishing an effective edge flow. One notable instance was the front section of the bike, which presented numerous curves and apertures while remaining a single unit. Balancing between hard creased edges and smoother transitions posed a significant challenge, all while maintaining an optimal face count.
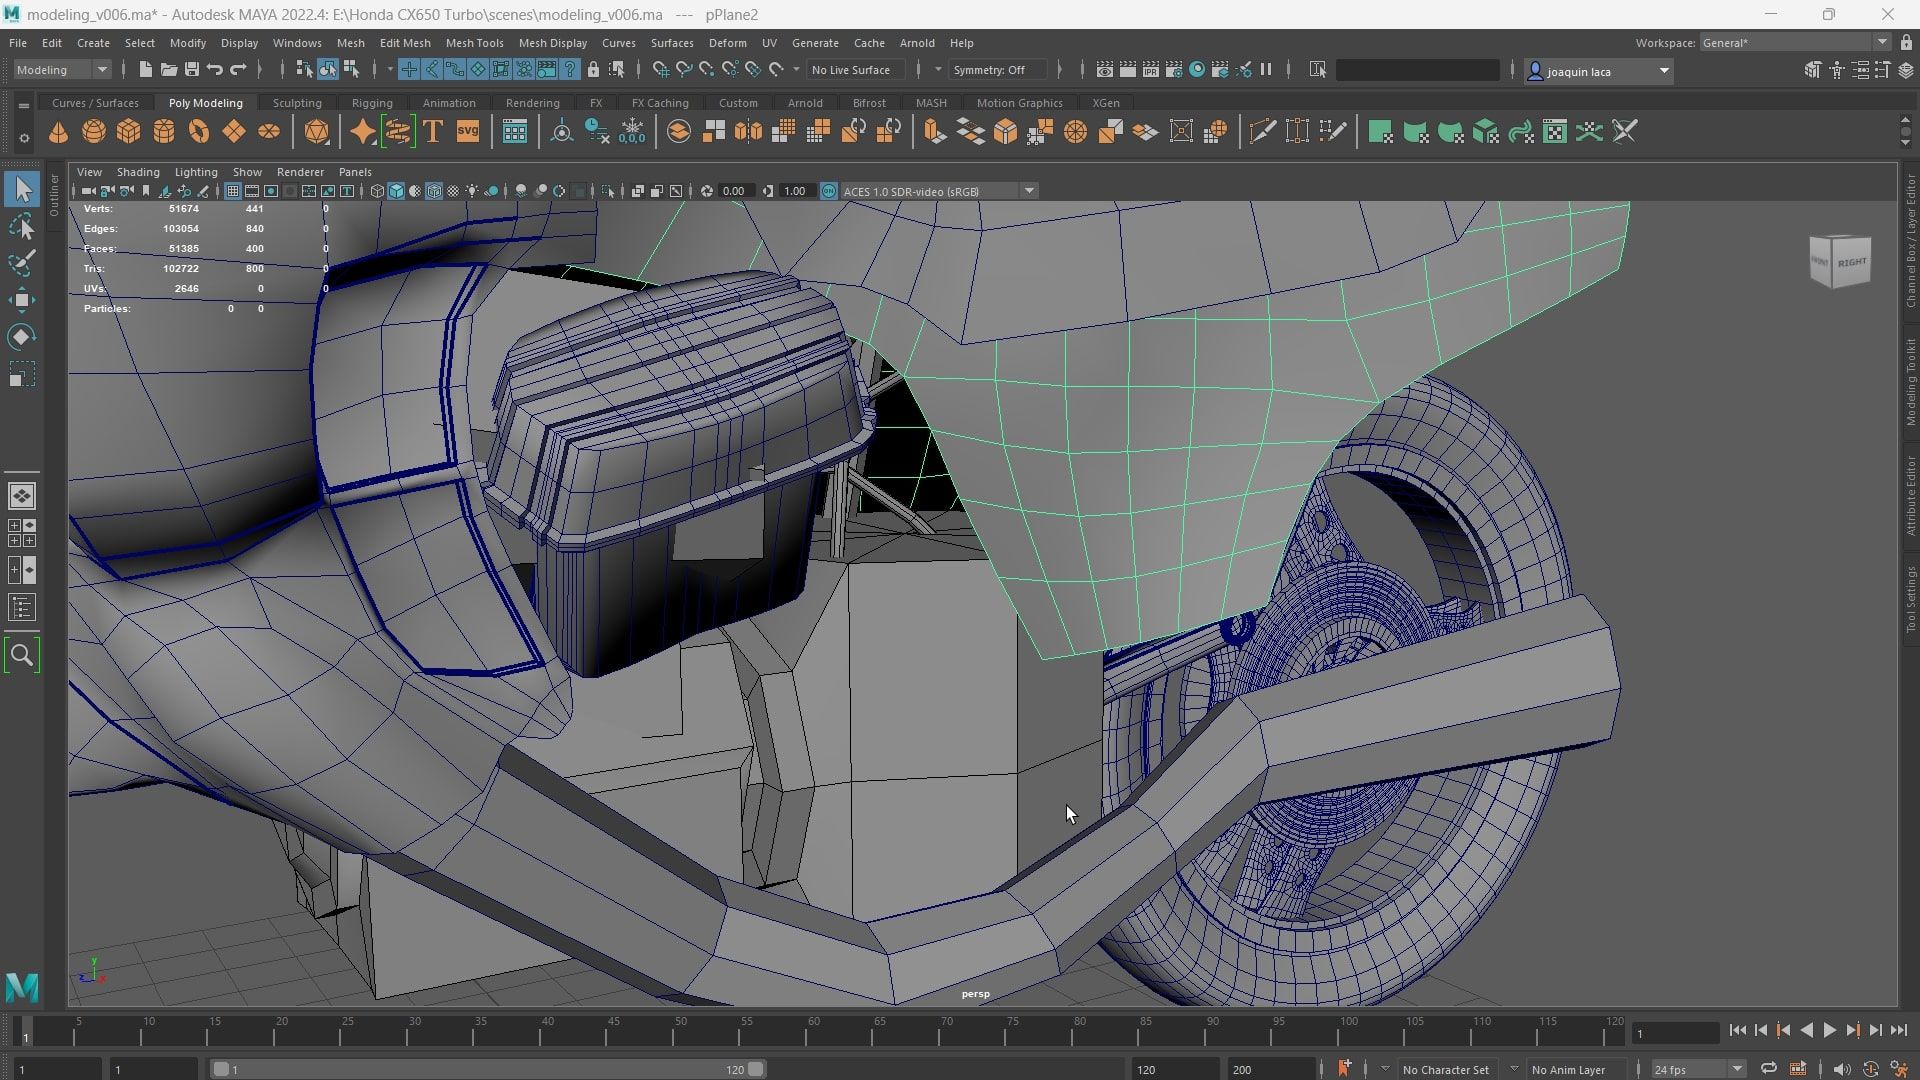
Moving on, I utilised various primitives to construct the secondary and tertiary sections of the bike, particularly focusing on the engine area. As it wasn’t the central focus of the piece, I opted for a simpler appearance without striving for realism, shaping them into their idealised form. Additionally, the engine comprised a significant number of tubes, for which the 'Sweep Mesh' tool proved invaluable in swiftly creating them. I adjusted parameters such as taper and then individually refined each tube for further customization.
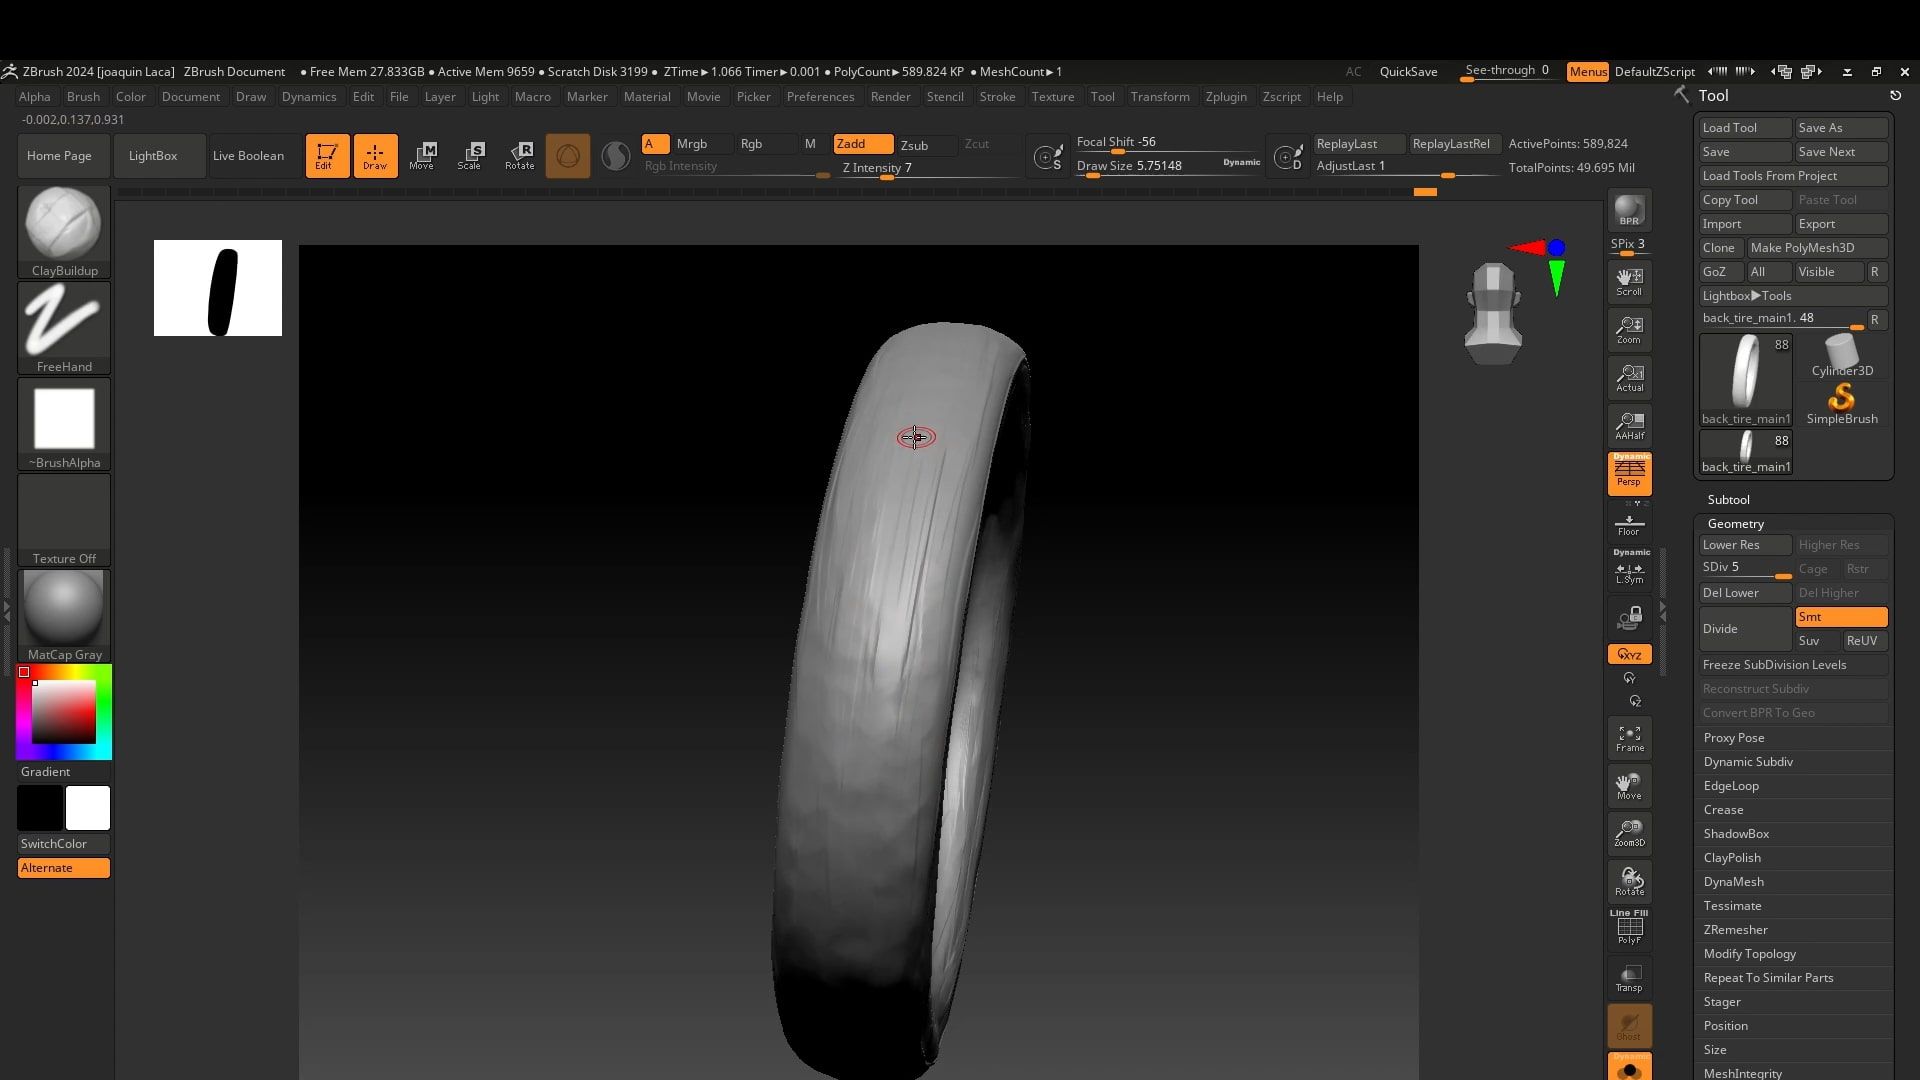
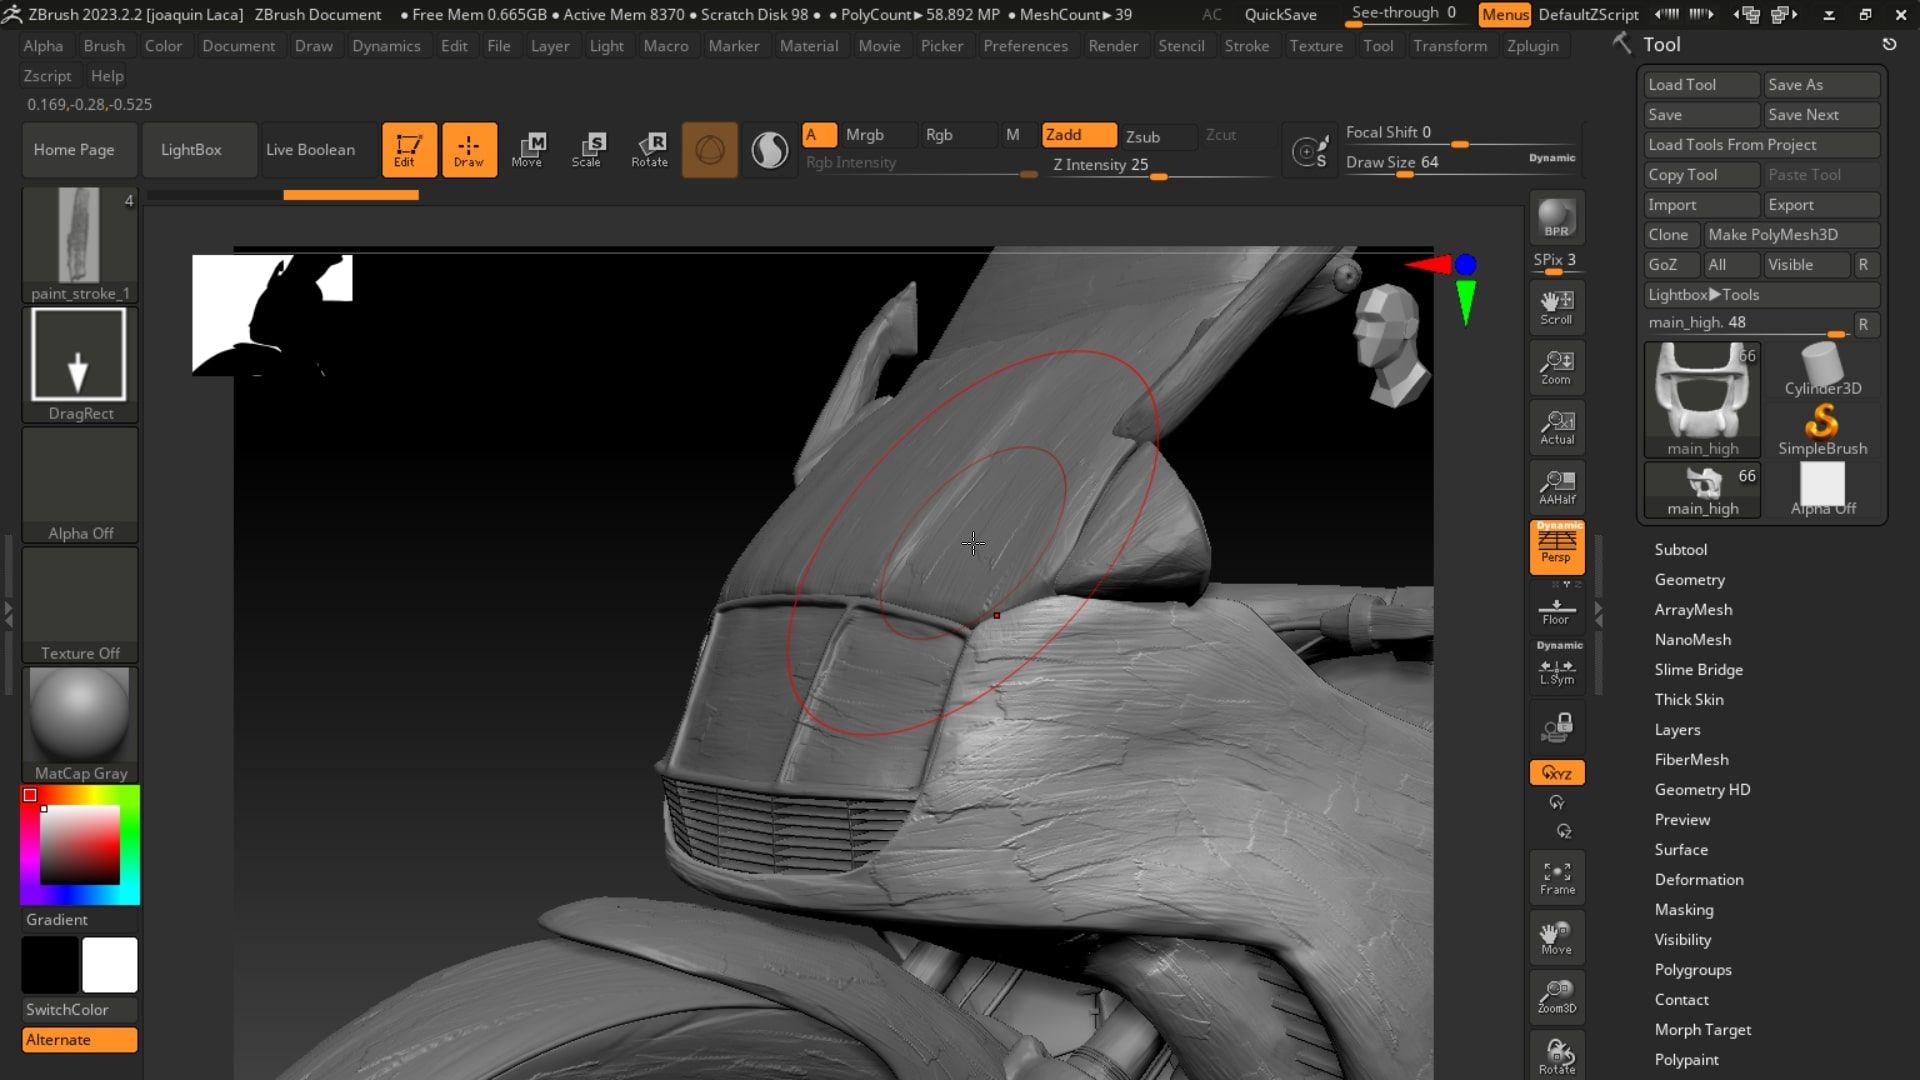
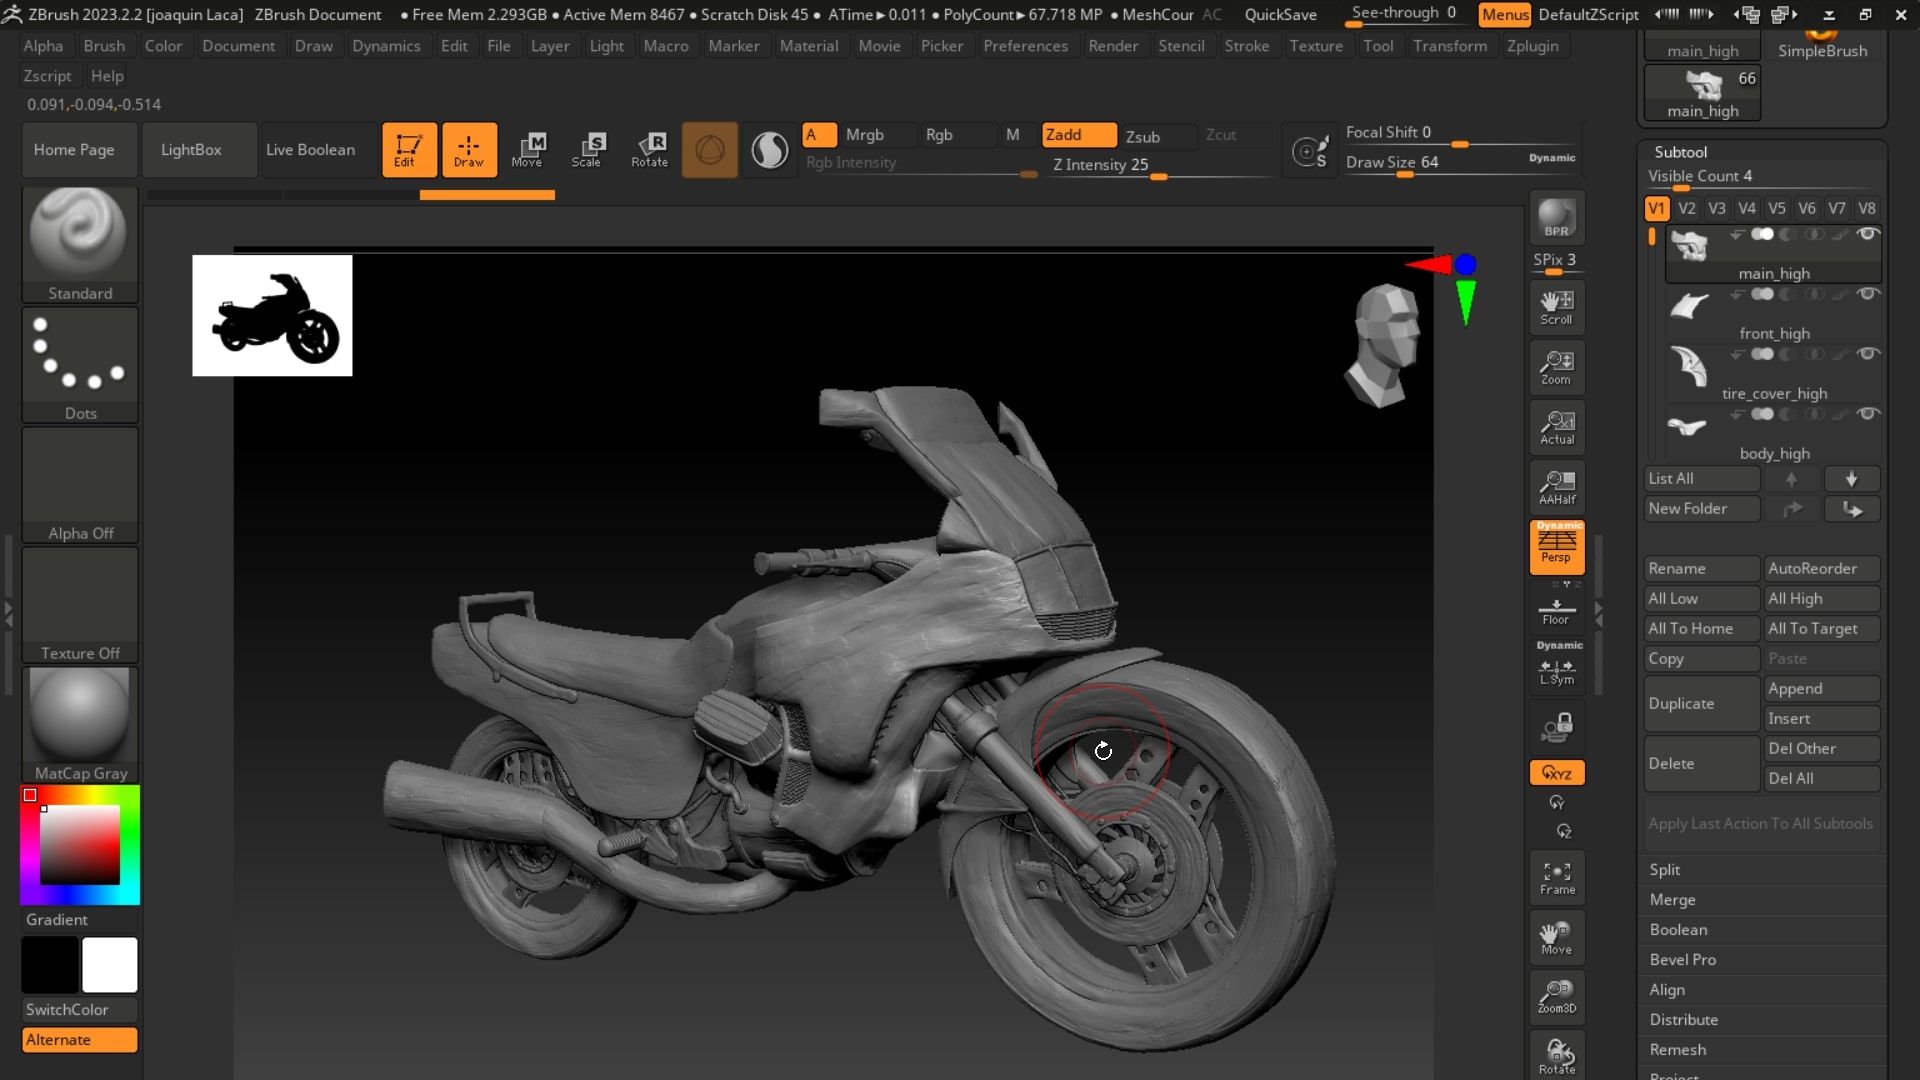
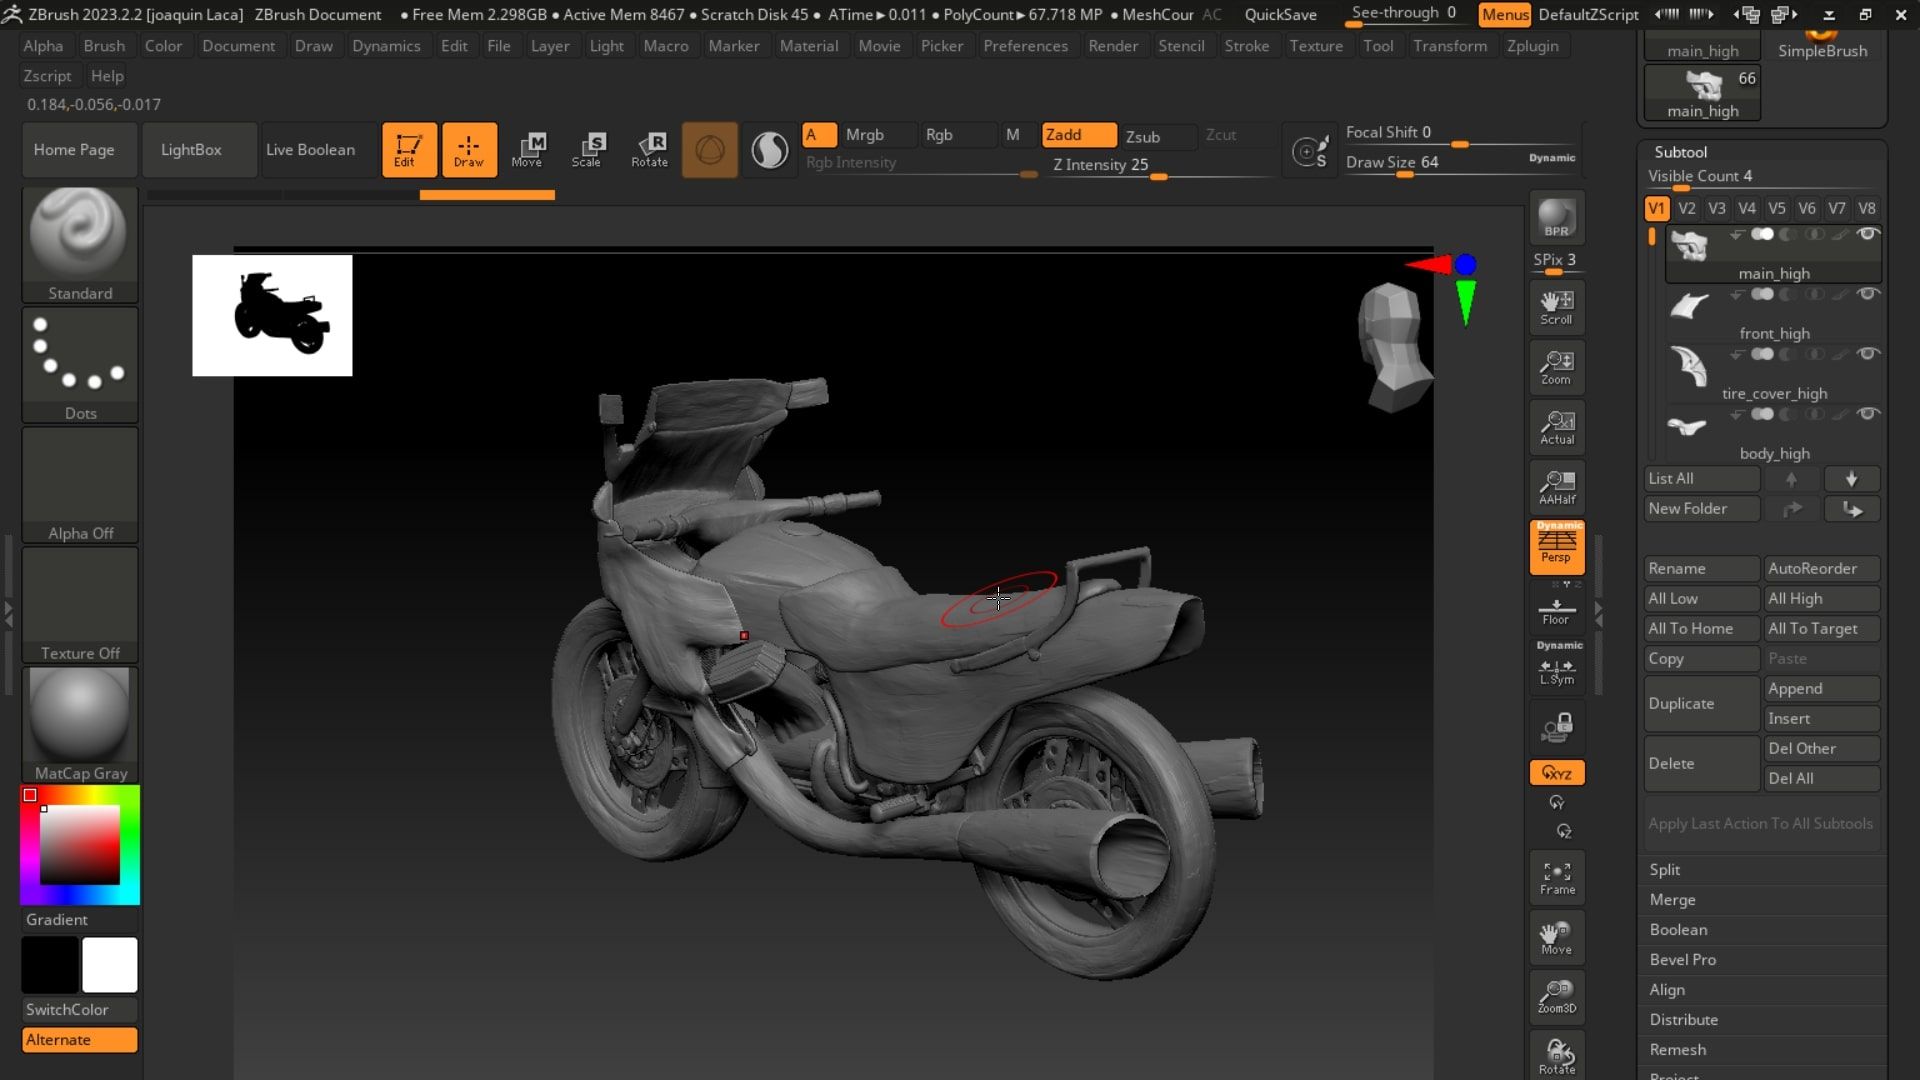
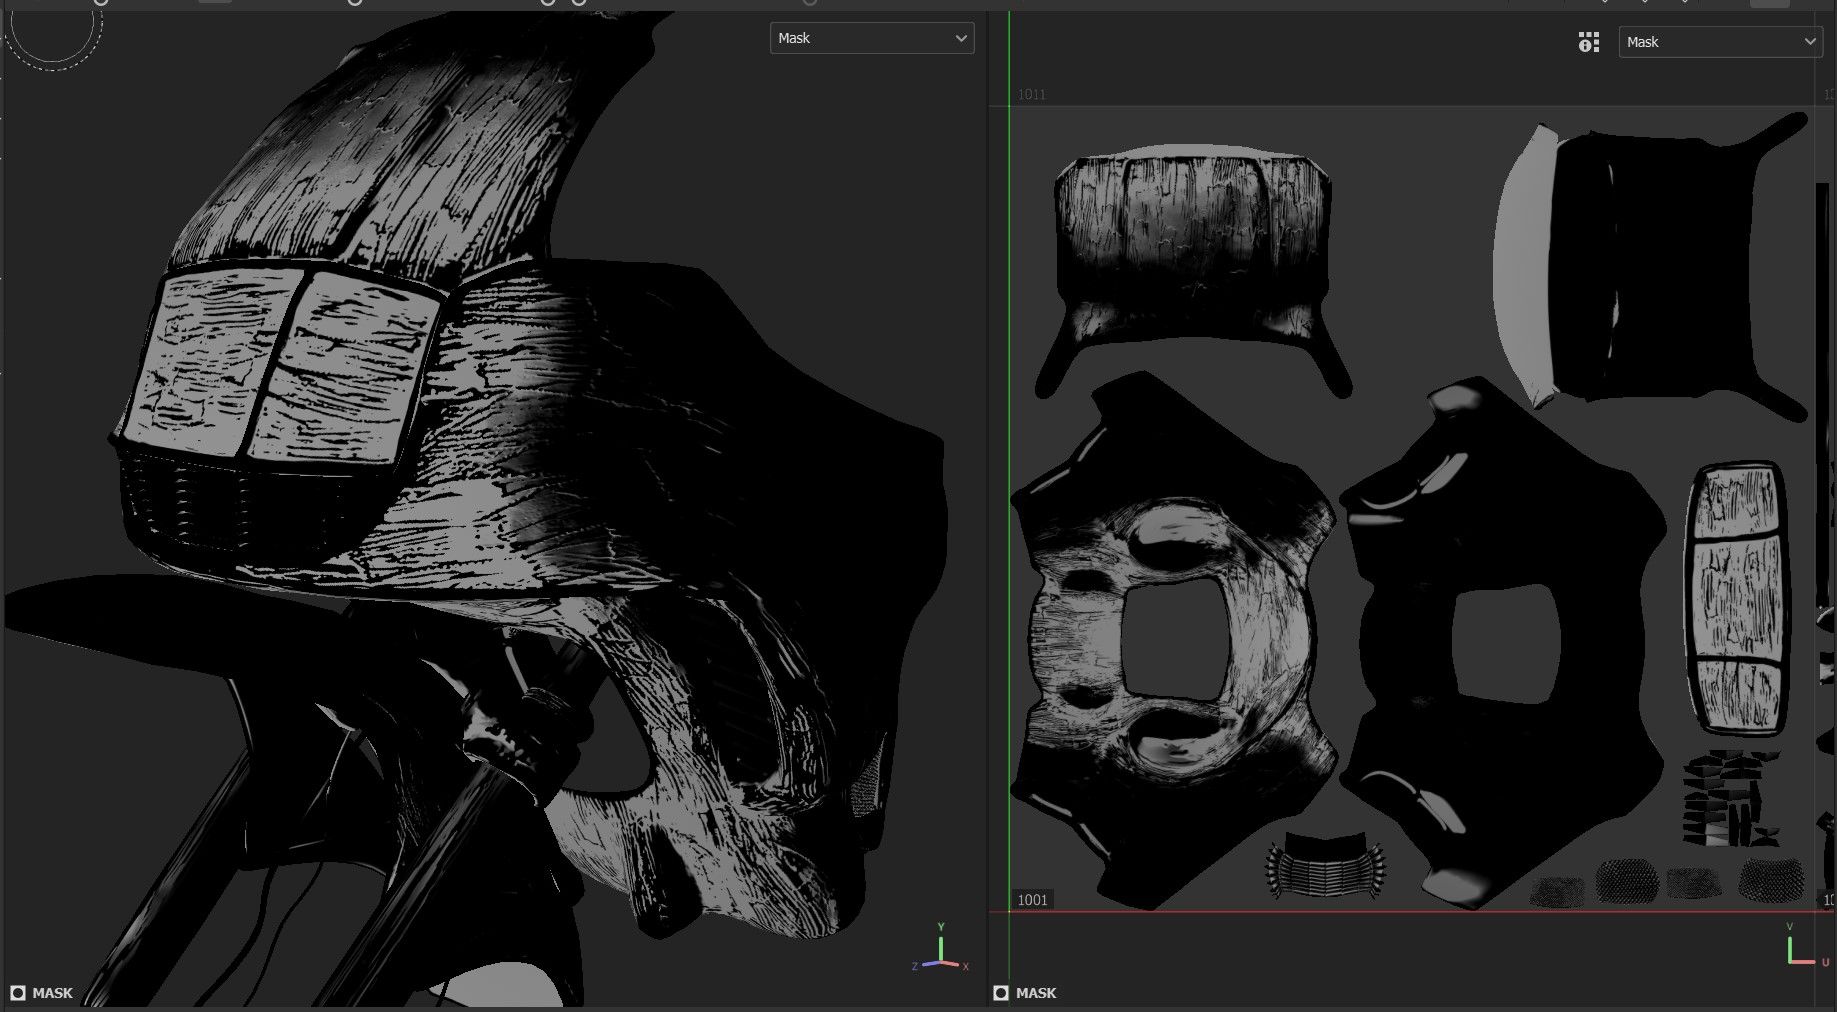
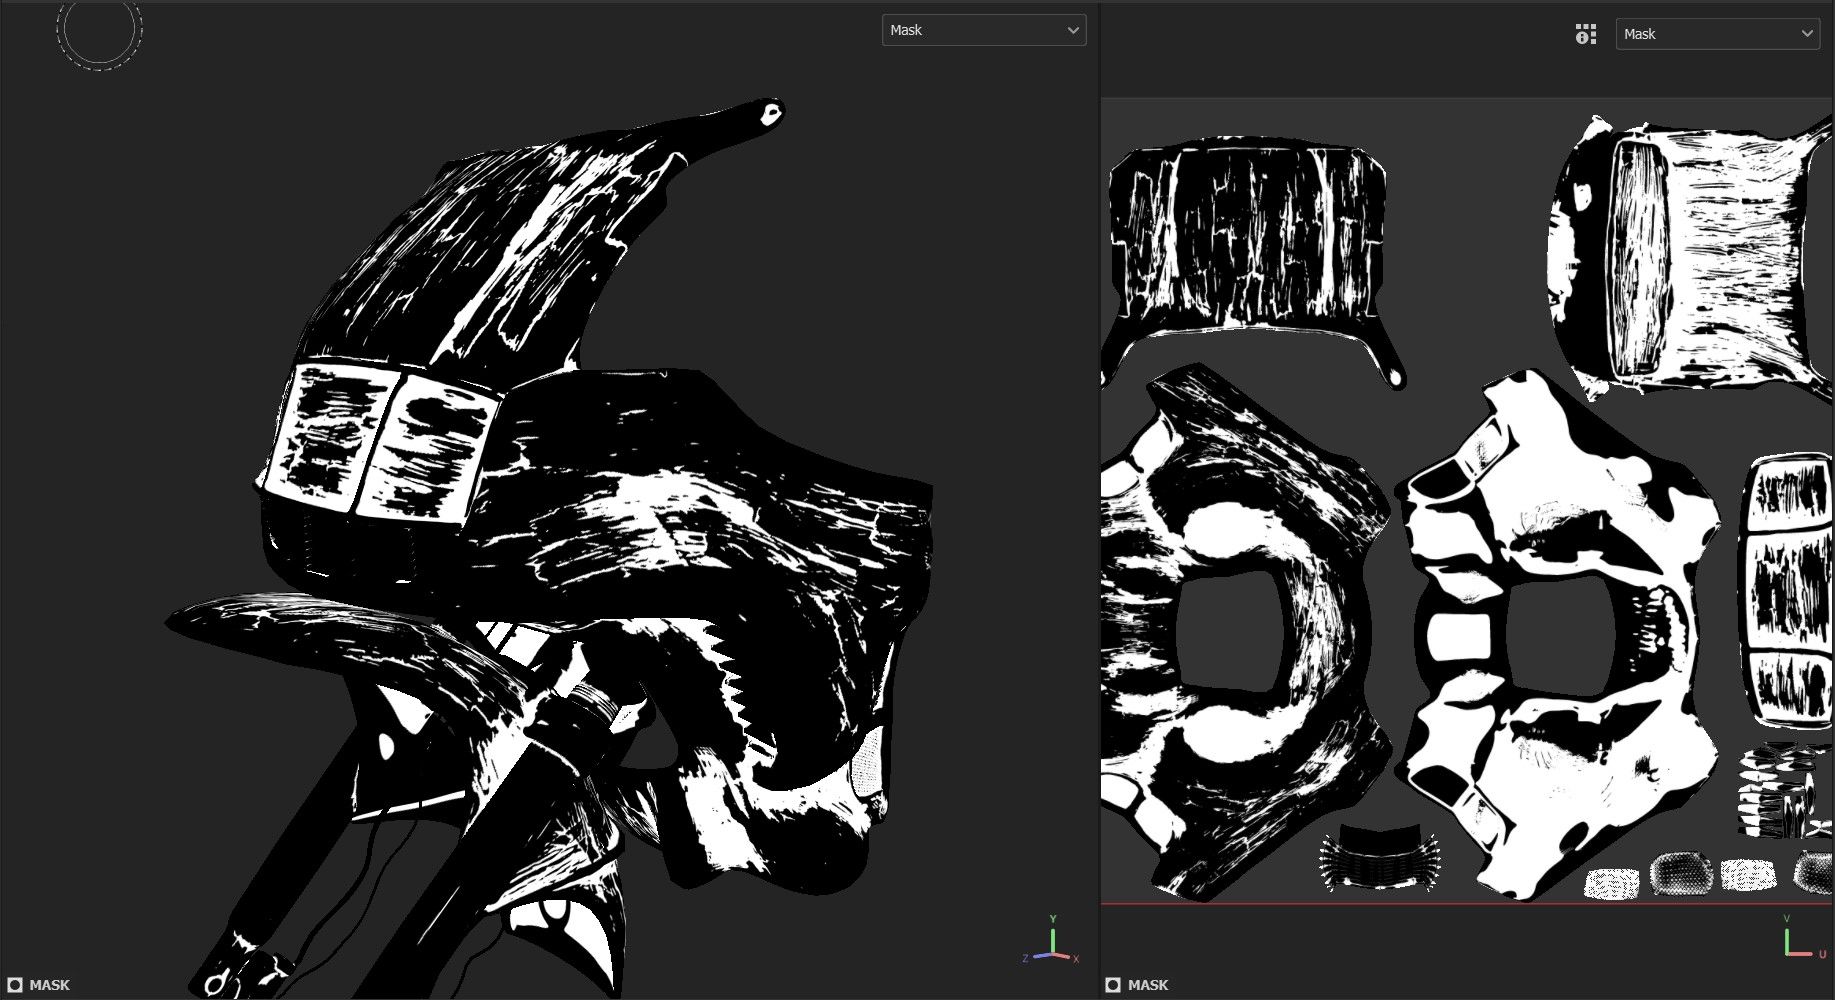
For my sculpting process, I was still indecisive about what exactly I wanted my tertiary details to be like. I opted for using a lot of the “Clay Brush” plus the “Trim Dynamic” brushes to get the base of the details.
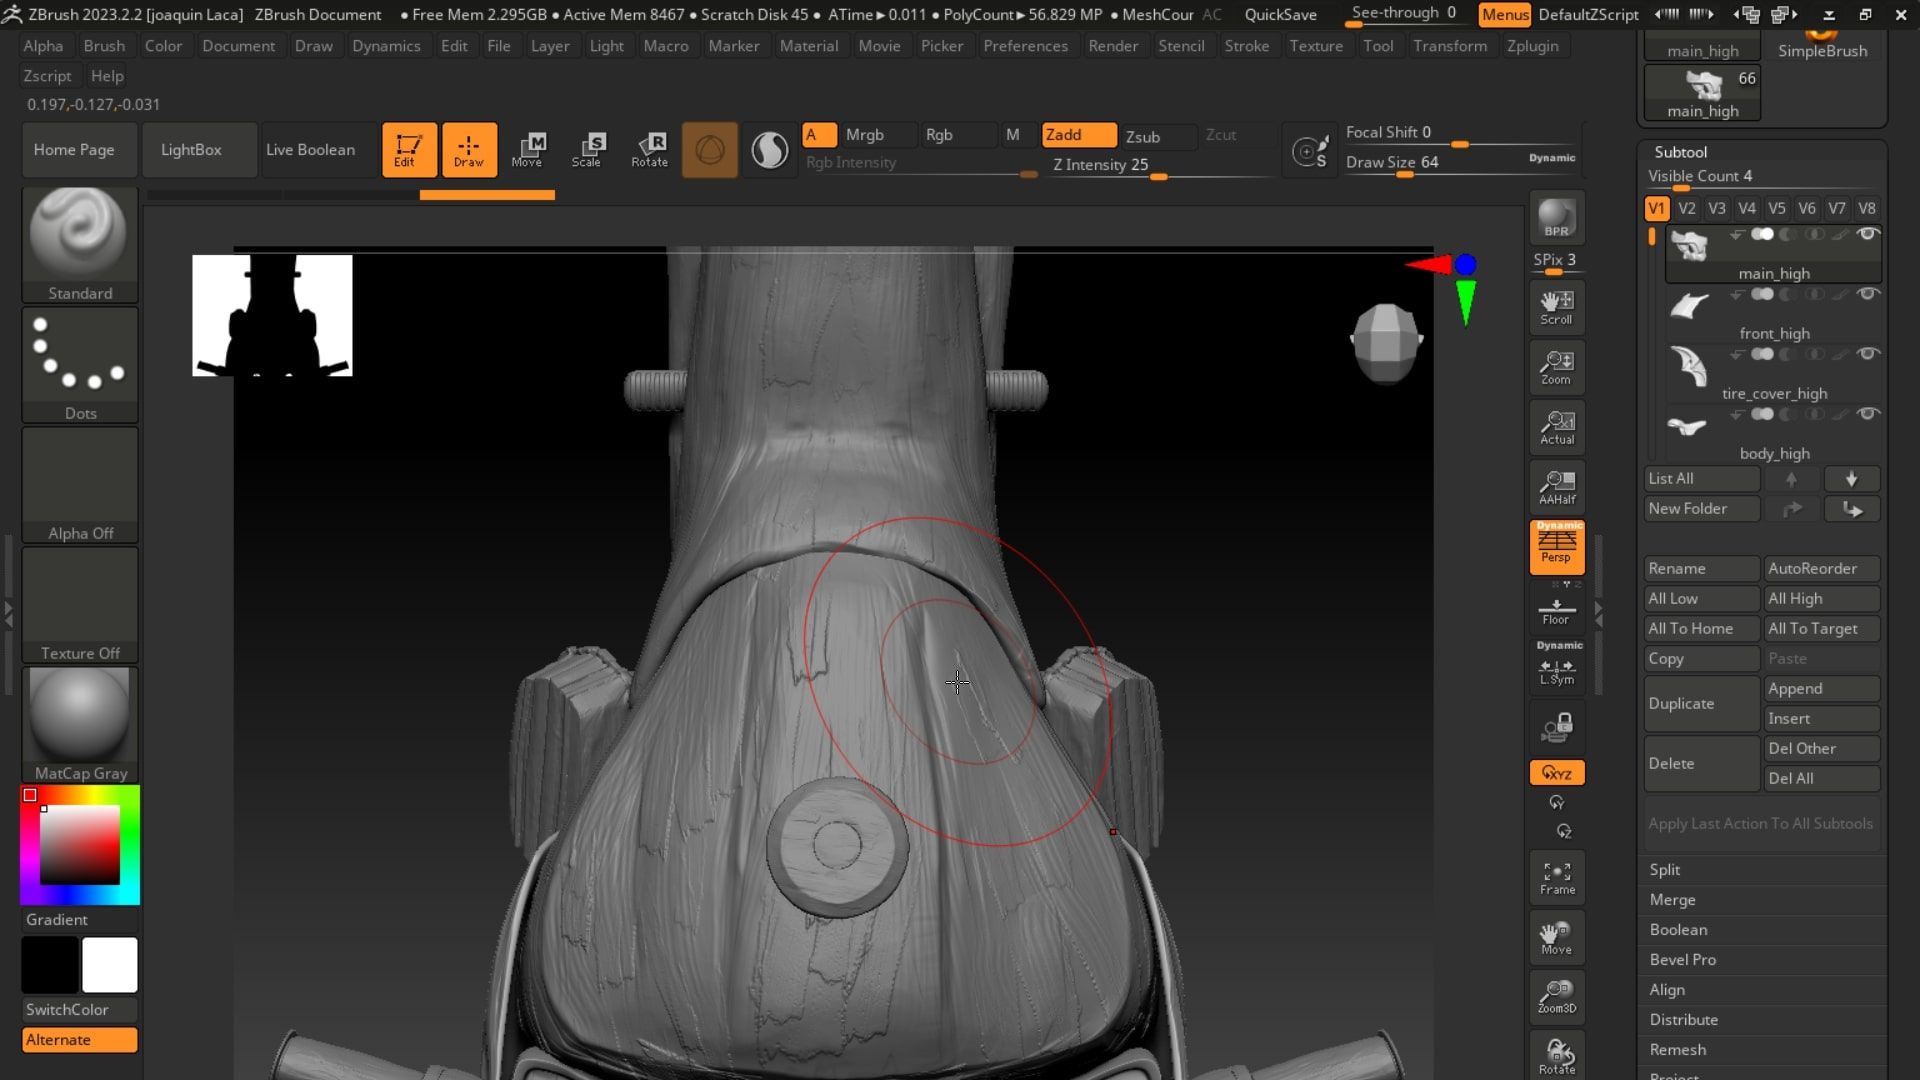
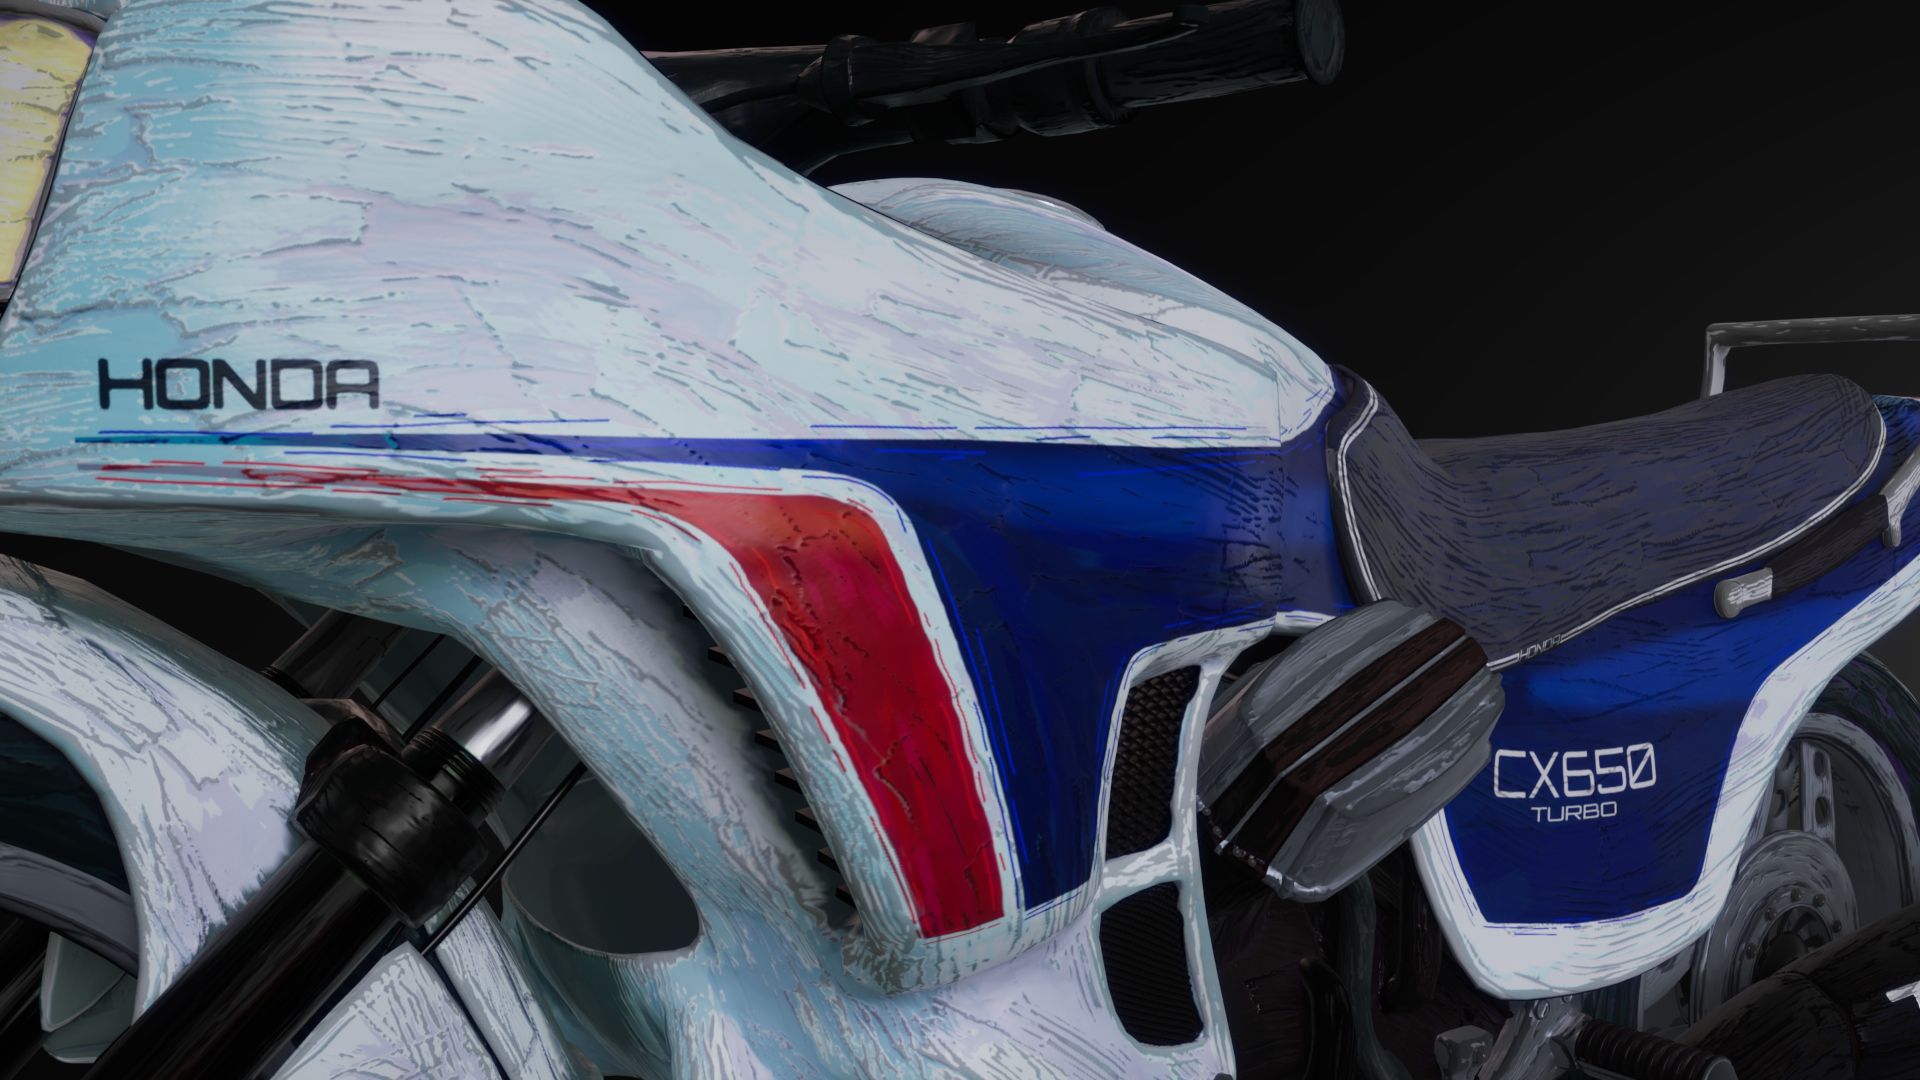
Later, I incorporated detail using the 'DamStandard' brush along with a custom alpha. The alpha was created in Photoshop specifically for the 'Standard' brush, simulating a paintbrush stroke. Adjusting the opacity allowed me to achieve the desired textured effect on the model. I repeated this process numerous times, overlaying strokes and ensuring they all faced the same direction to convey a sense of motion and speed.
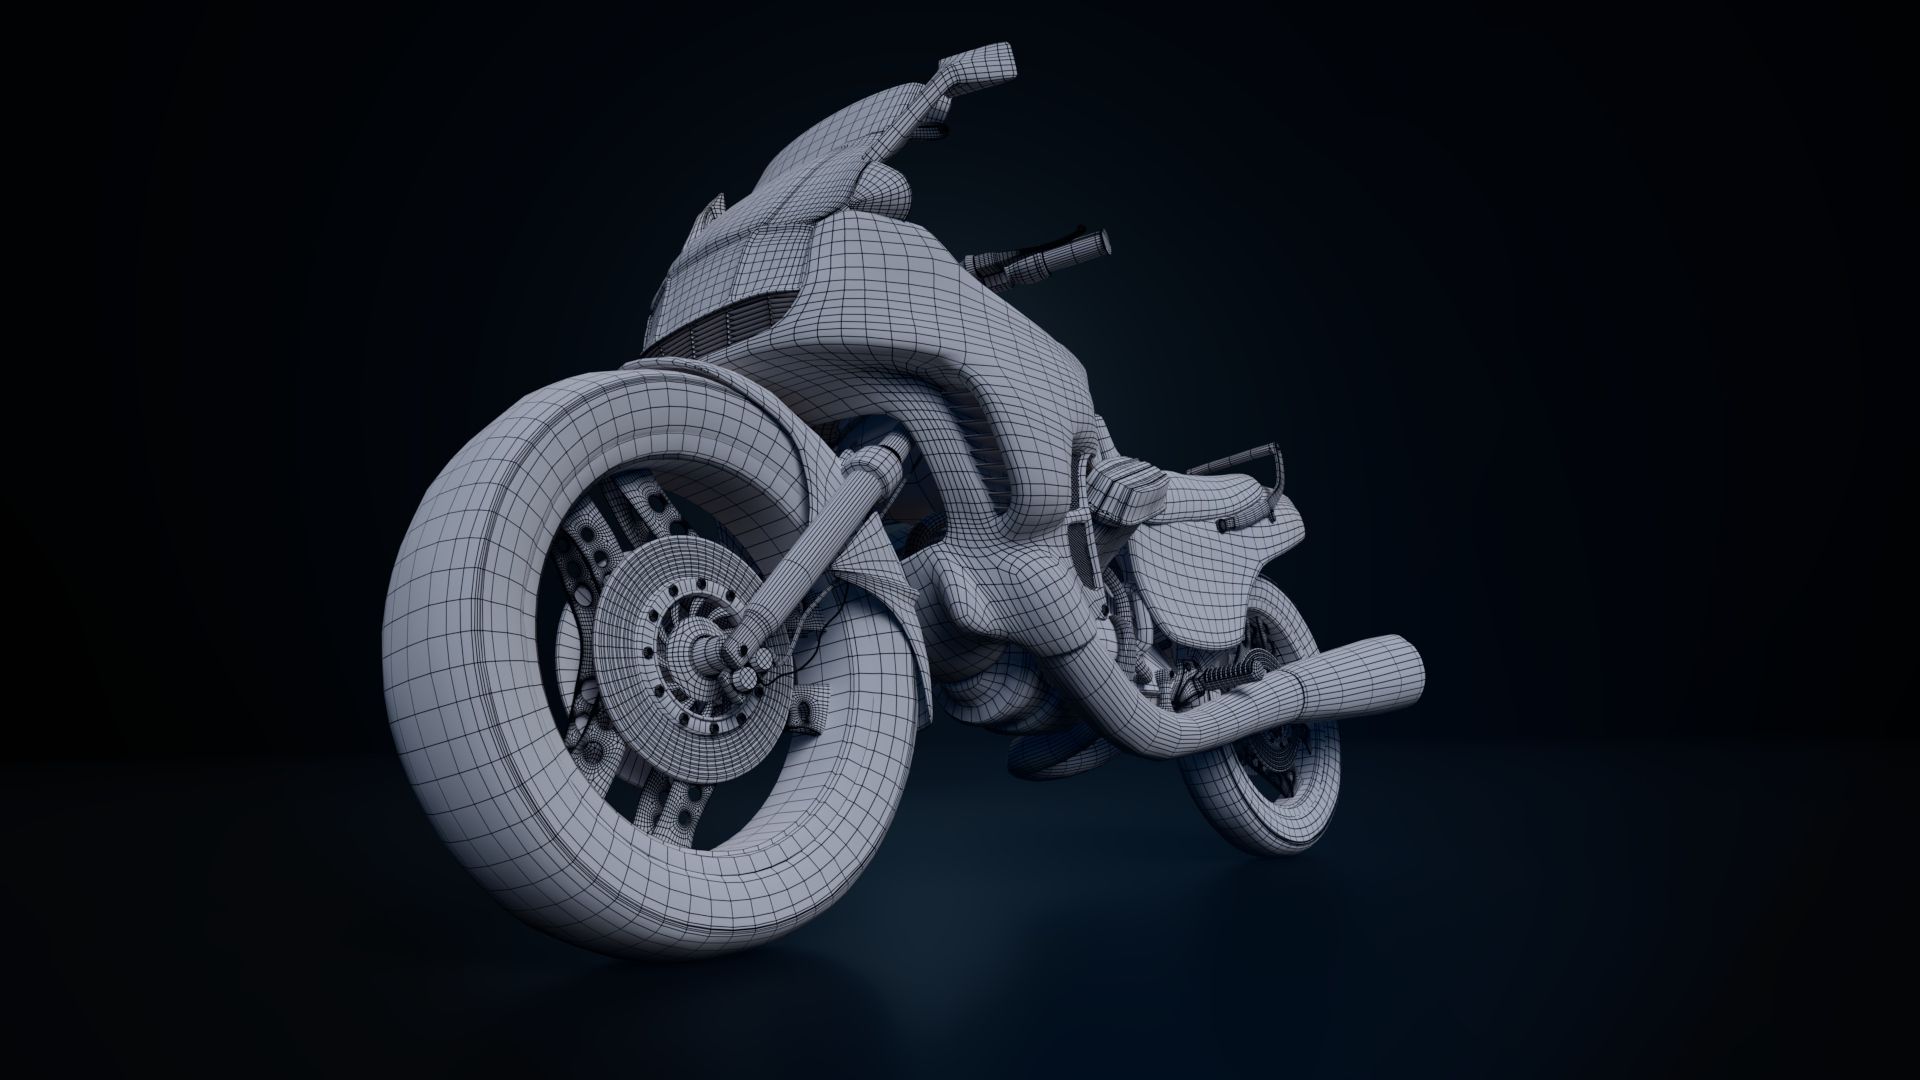
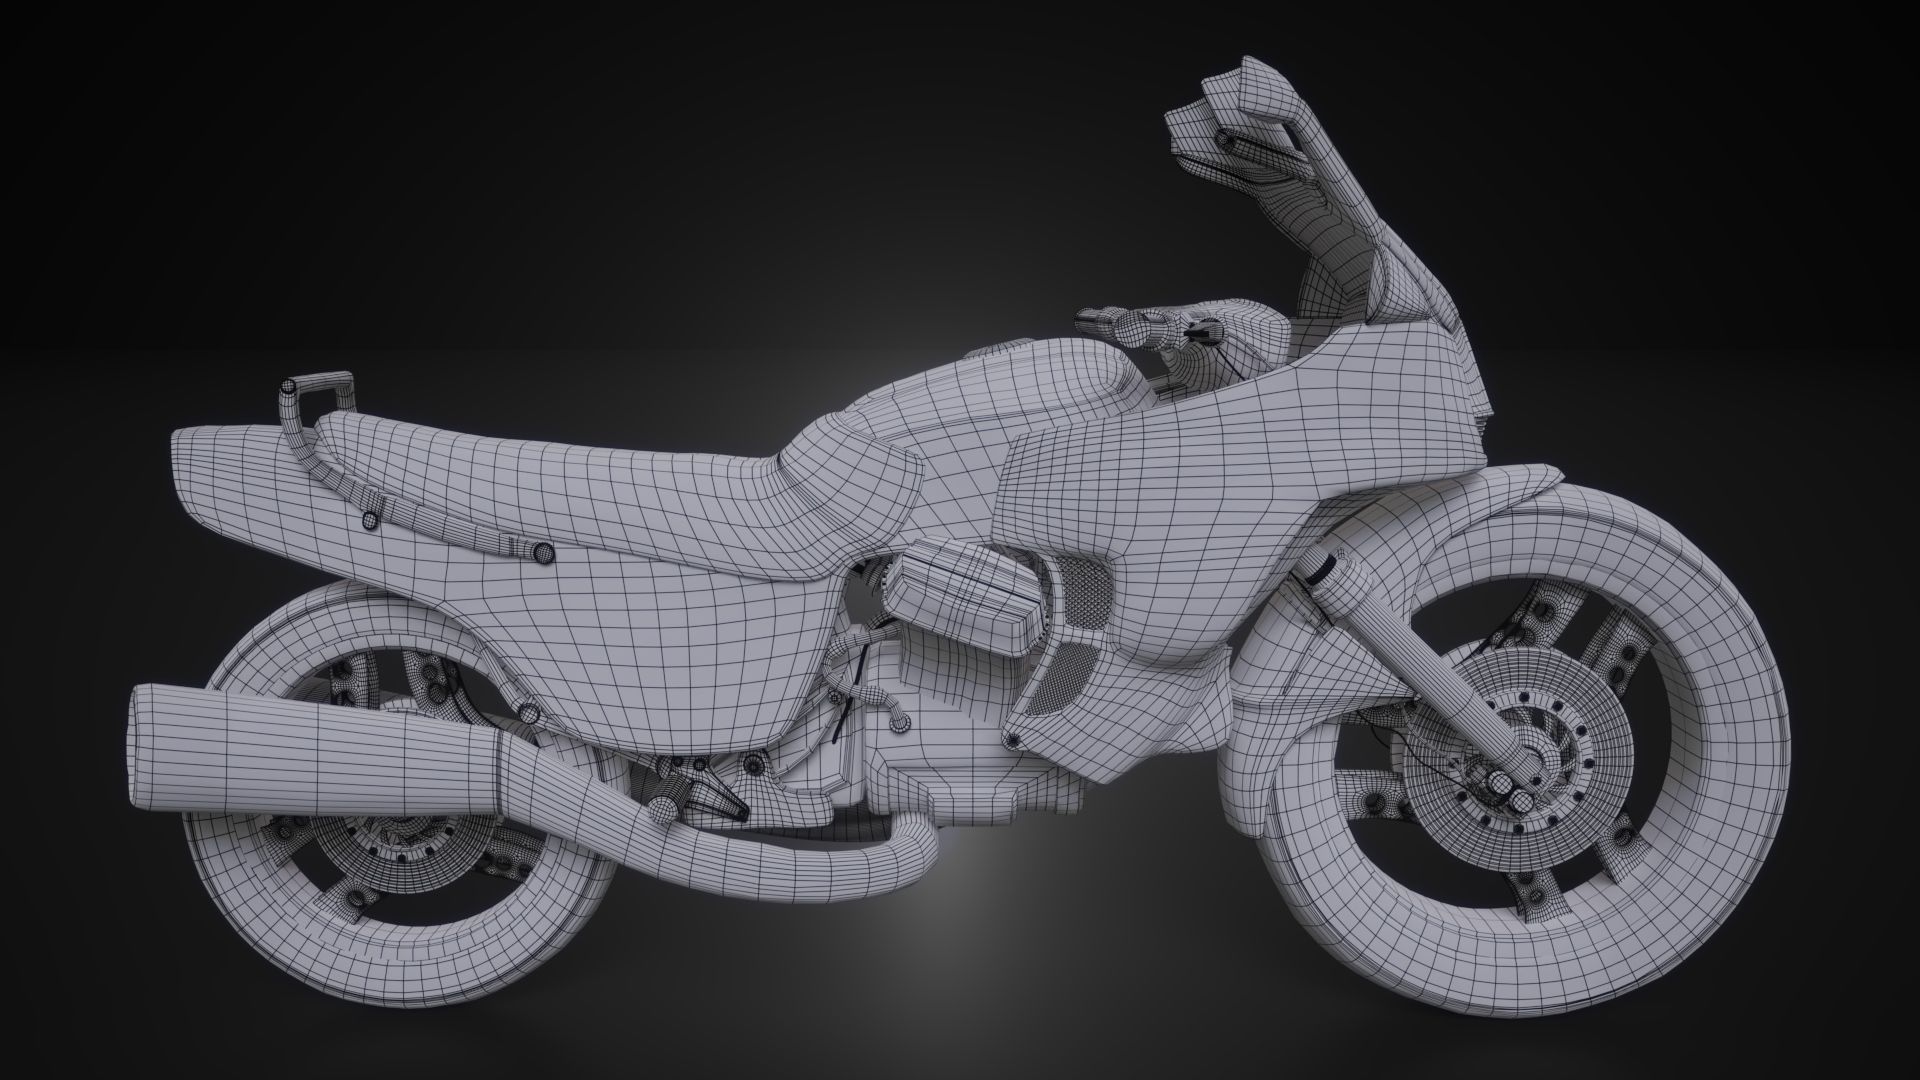
In preparation for texturing, I exported the lowest subdivision layer as my main asset, which I utilised moving forward. Subsequently, I exported the highest subdivision layer to serve as my high-poly mesh for baking textures.
I began by baking my high-poly mesh. One of my goals when texturing is to always work with the baked map, incorporating as much detail as possible that corresponds to the baked mesh across every channel. This approach allows for the observation of how attributes such as 'roughness' or 'colour' vary when switching between different channels.
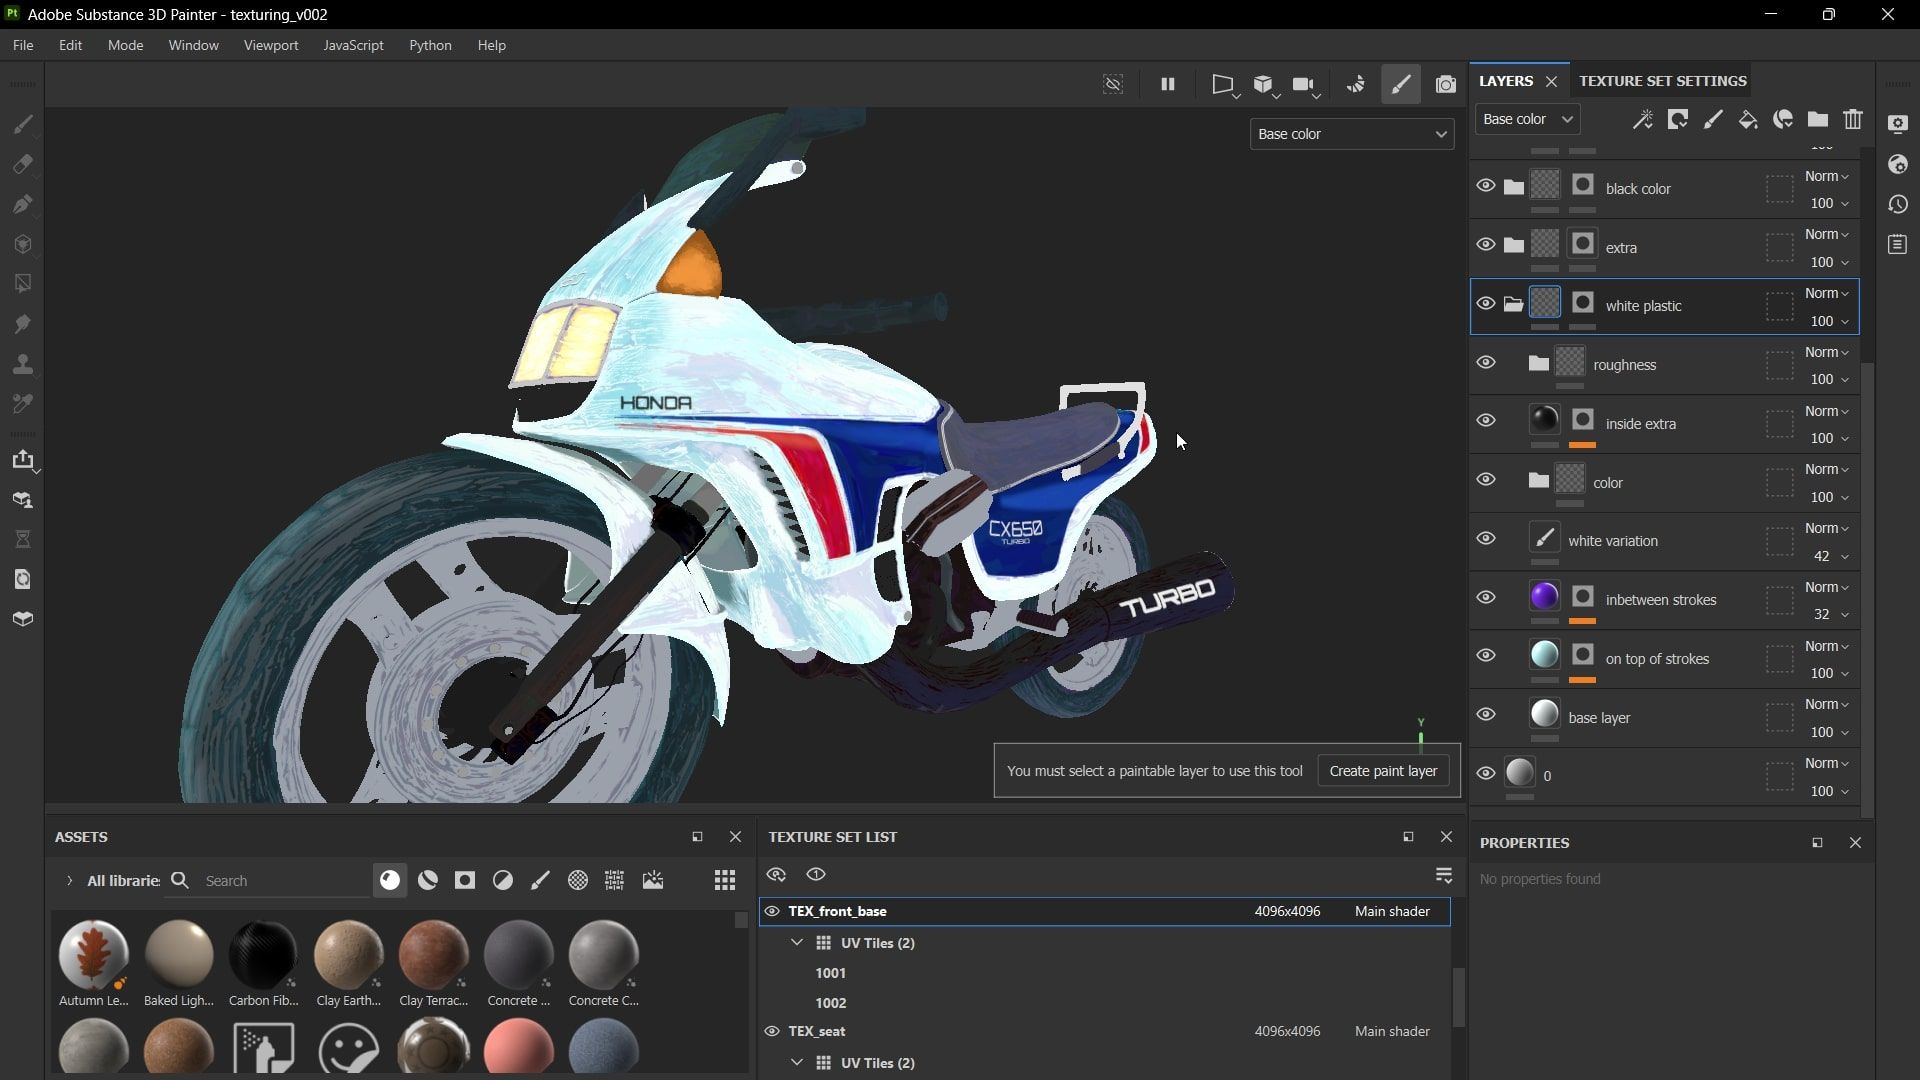
I begin by assembling my base layers of colour, which are applied throughout the model in a procedural manner using generators and various maps. The 'light' generator is particularly useful for establishing a brighter colour in areas directly facing the model, creating a transition in saturation. Additionally, I utilise the 'dirt,' 'ambient occlusion,' and 'curvature' generators, along with the curvature map, to enhance attributes in different parts of the baked maps, thereby adding depth to each baked detail in a more procedural manner. This is where the custom alpha used for sculpting becomes more evident.
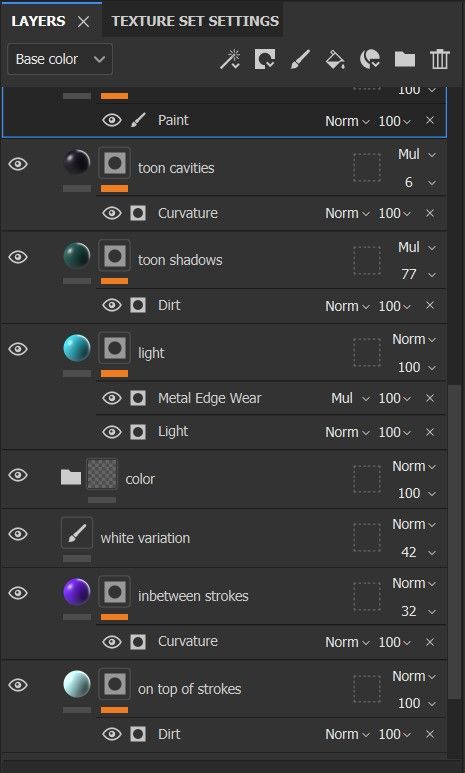
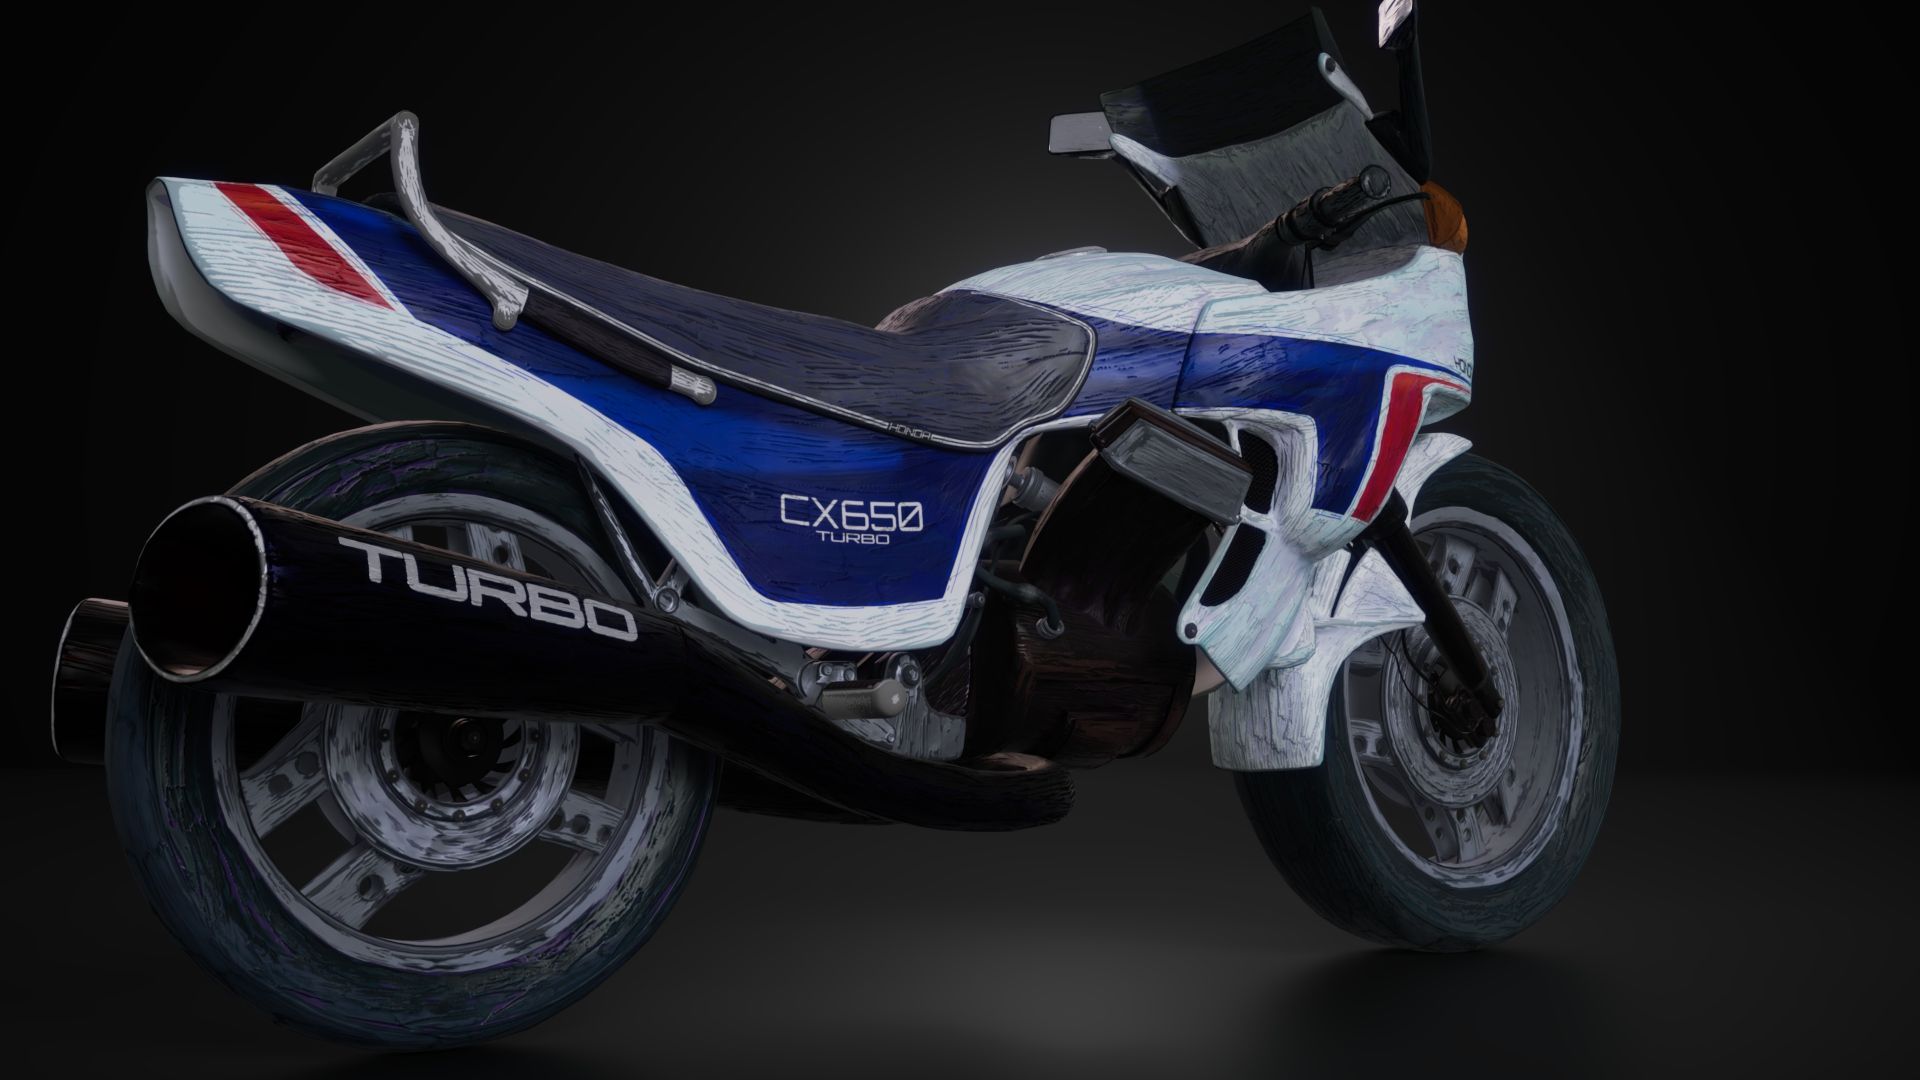
Later I established the colour landmarks seen in the realistic pictures of the bike, like the red and blue lines, or the “Honda” logo. Afterward, I worked on adjusting the different values trying to replicate a soft-like texture, simulating the feeling of dry paint.
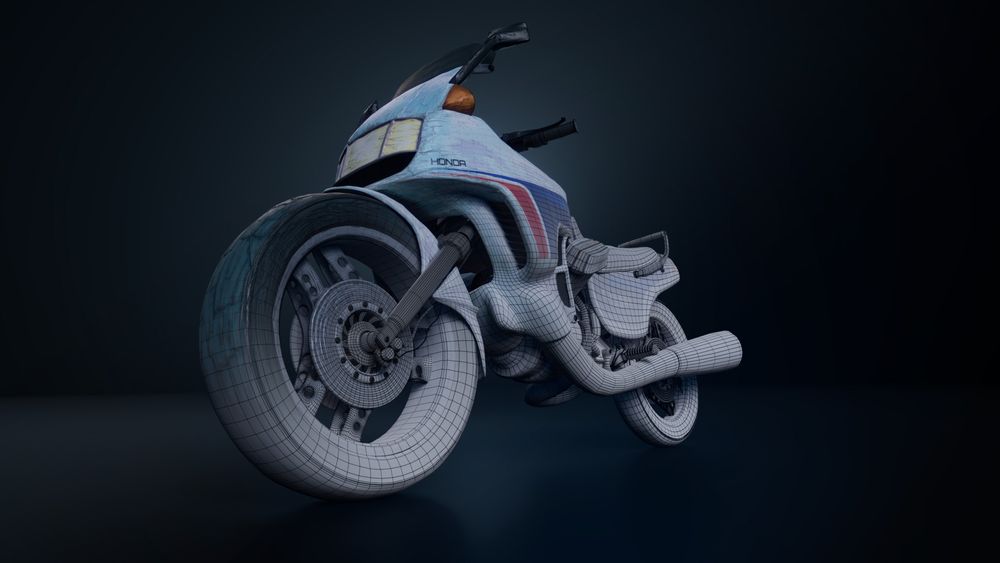
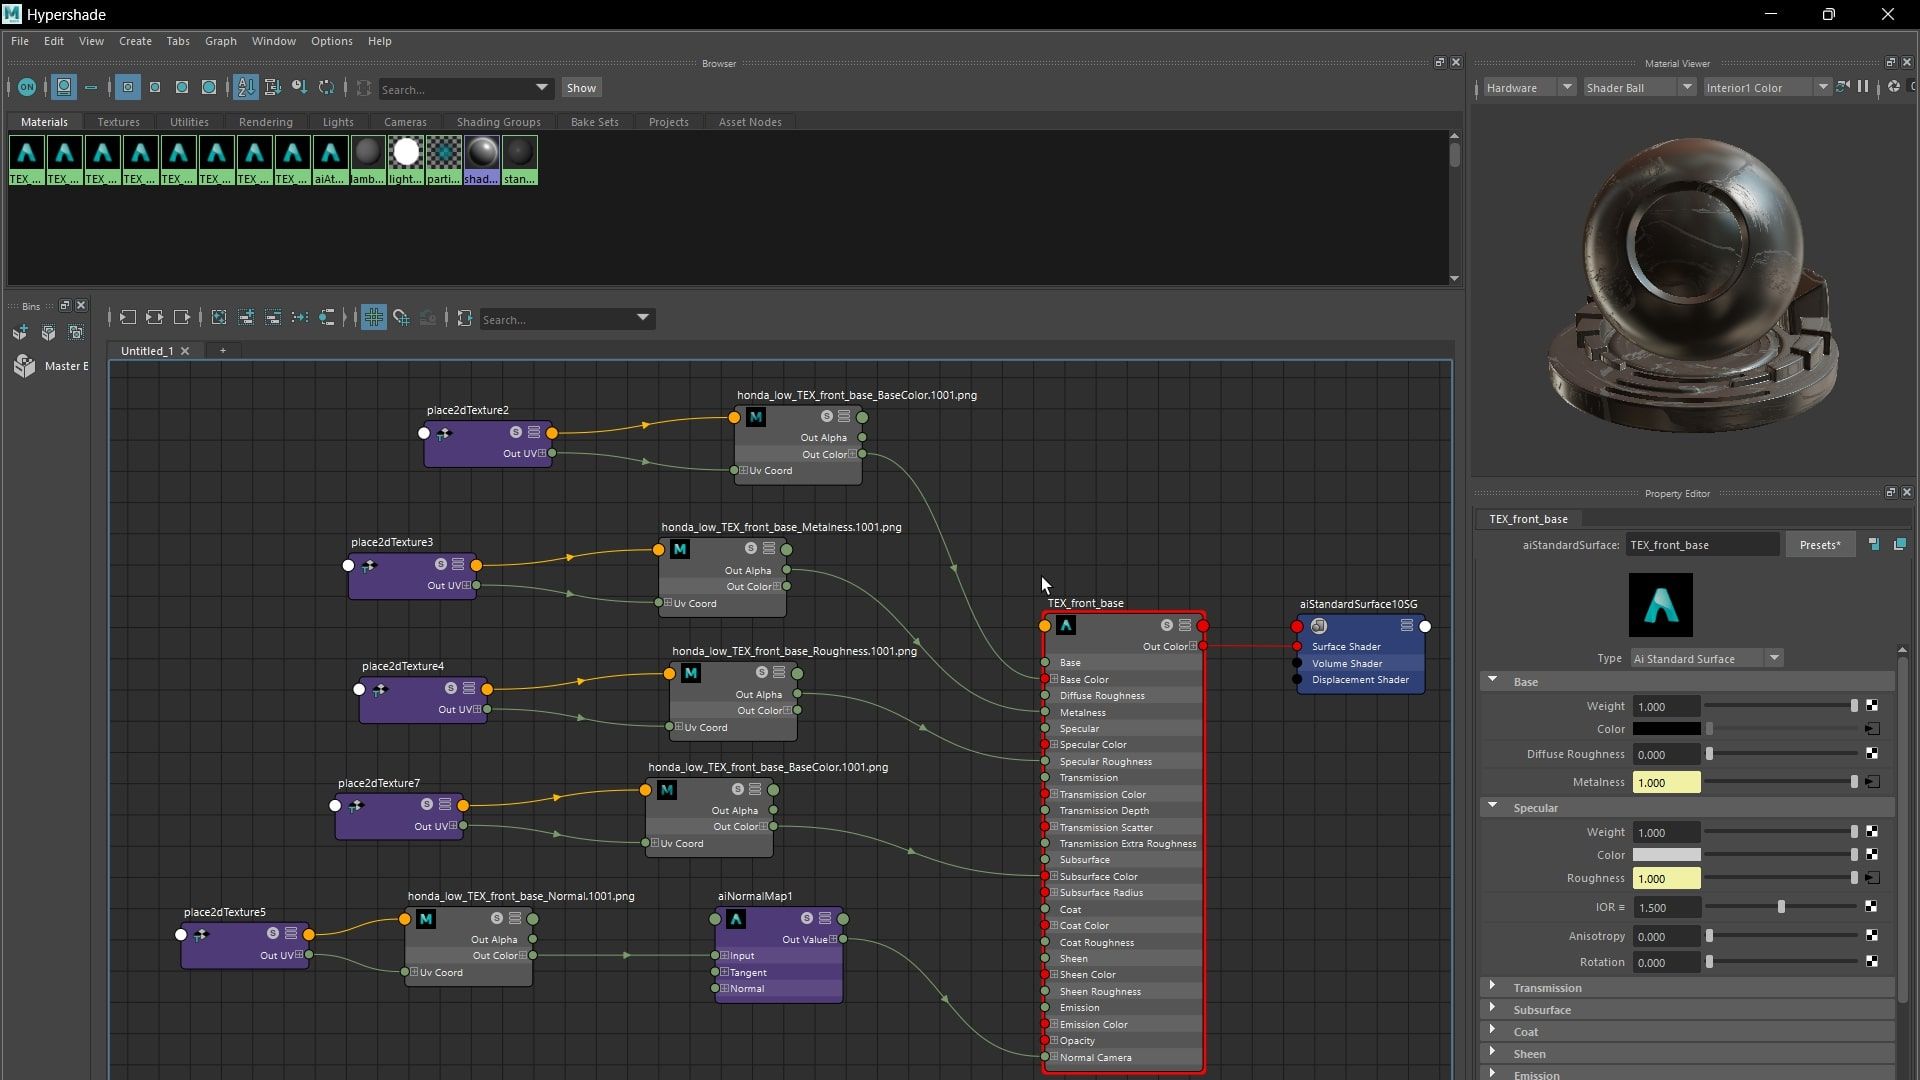
When it came to rendering, I used Arnold Maya with an AiStandard shader on my bike, where I plugged all my exported textures from Substance 3D Painter.
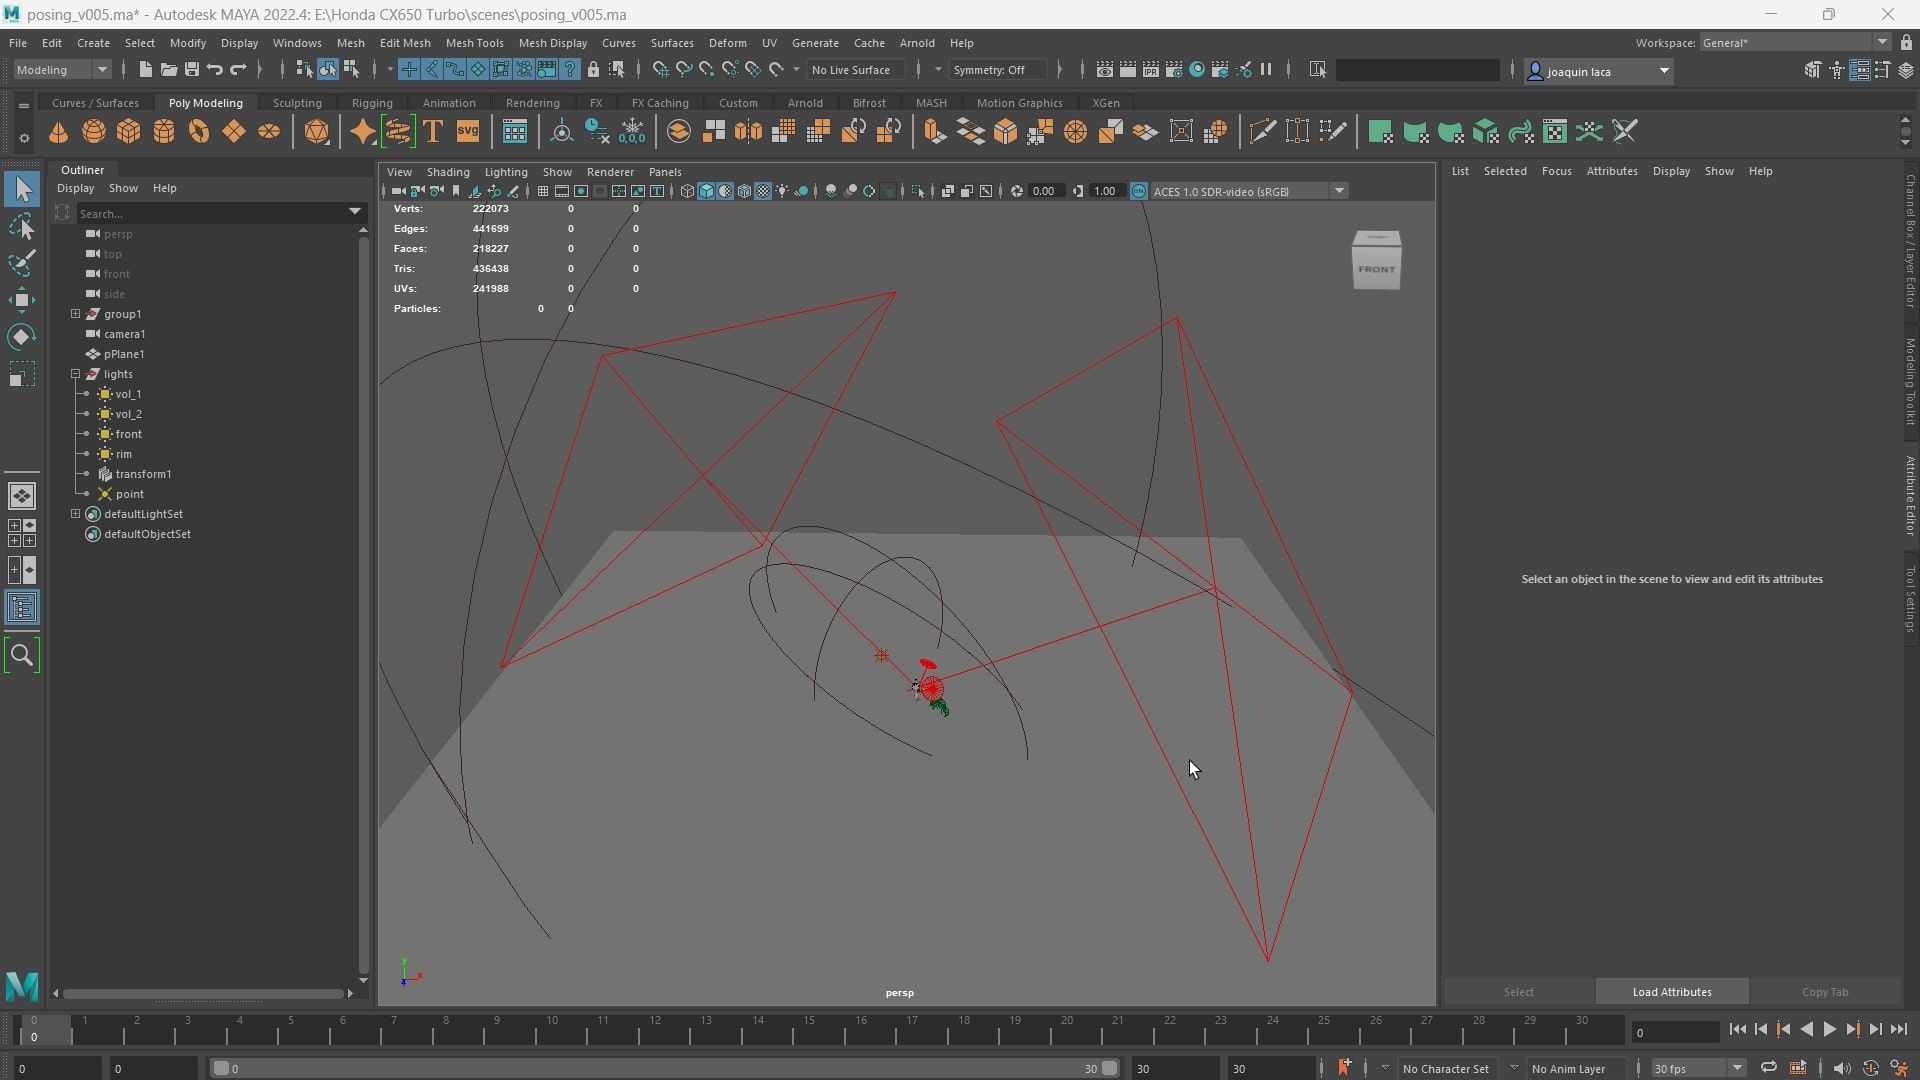
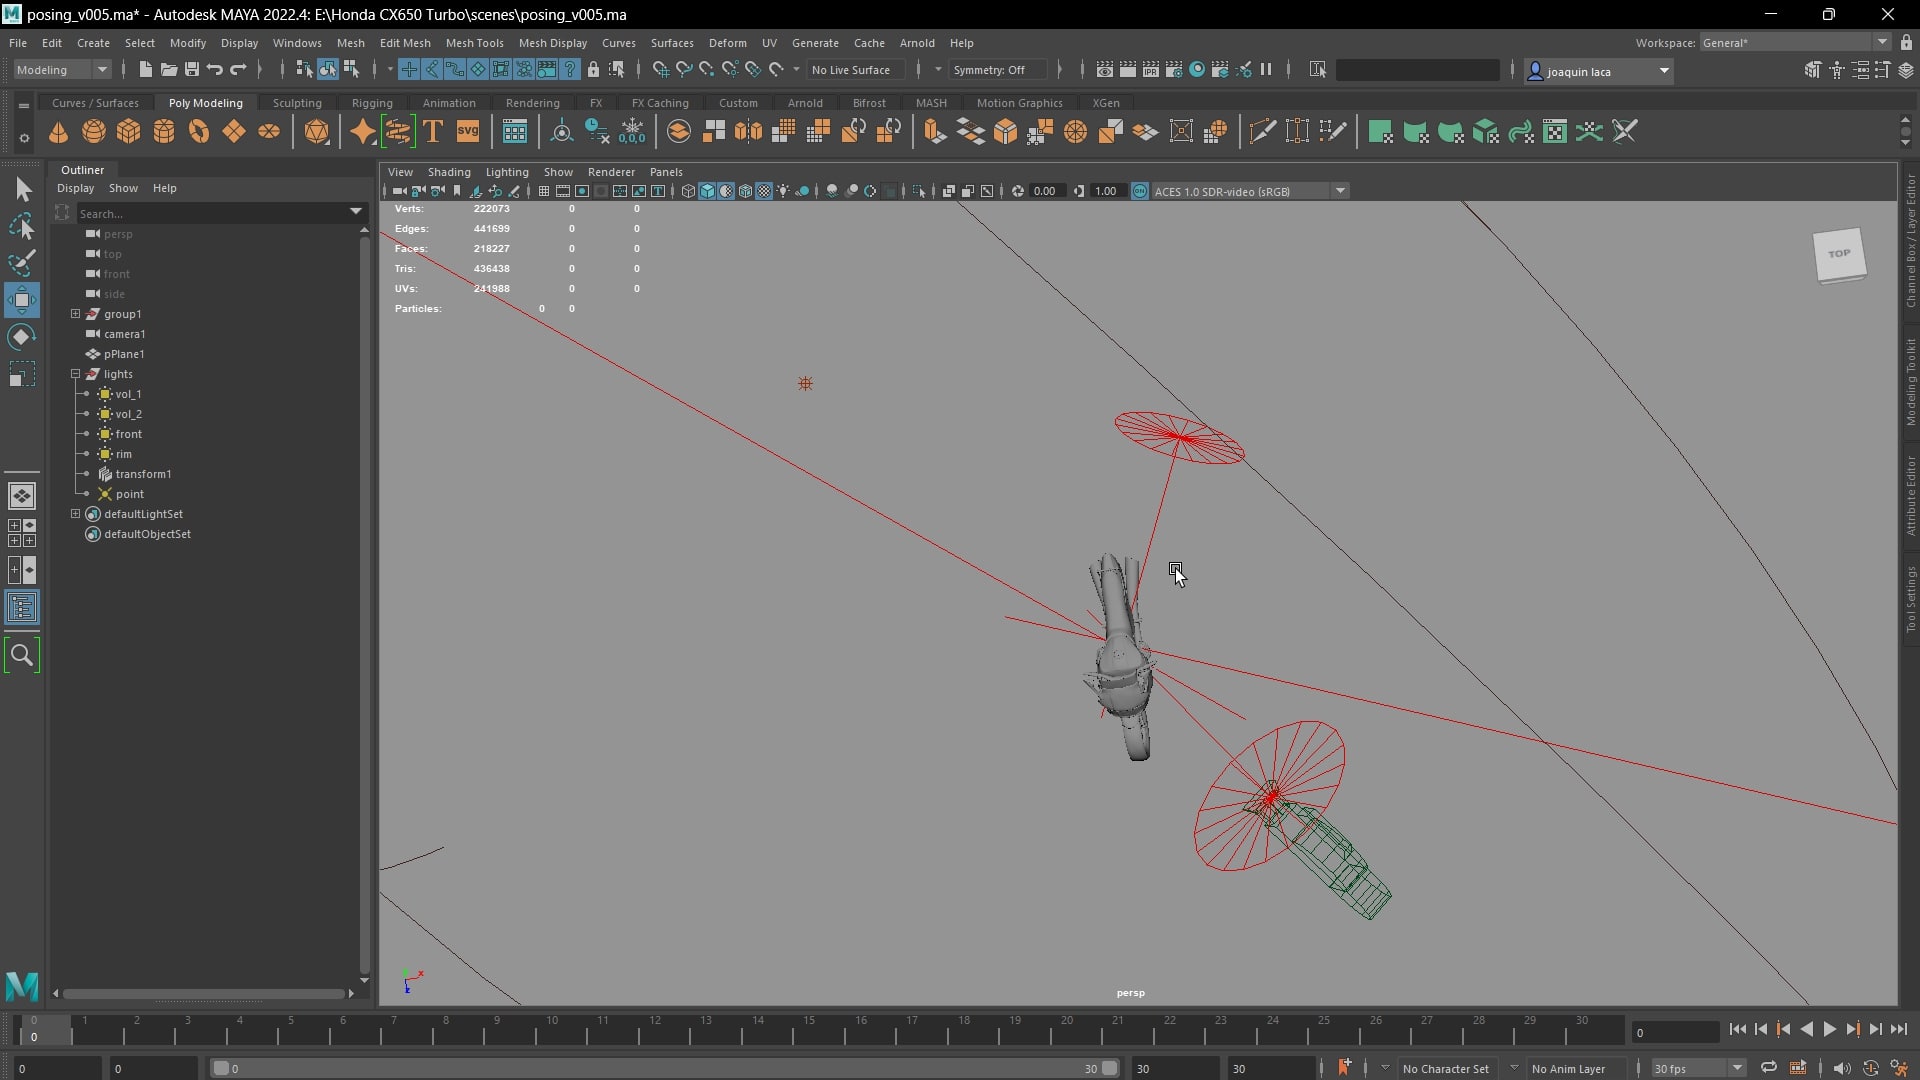
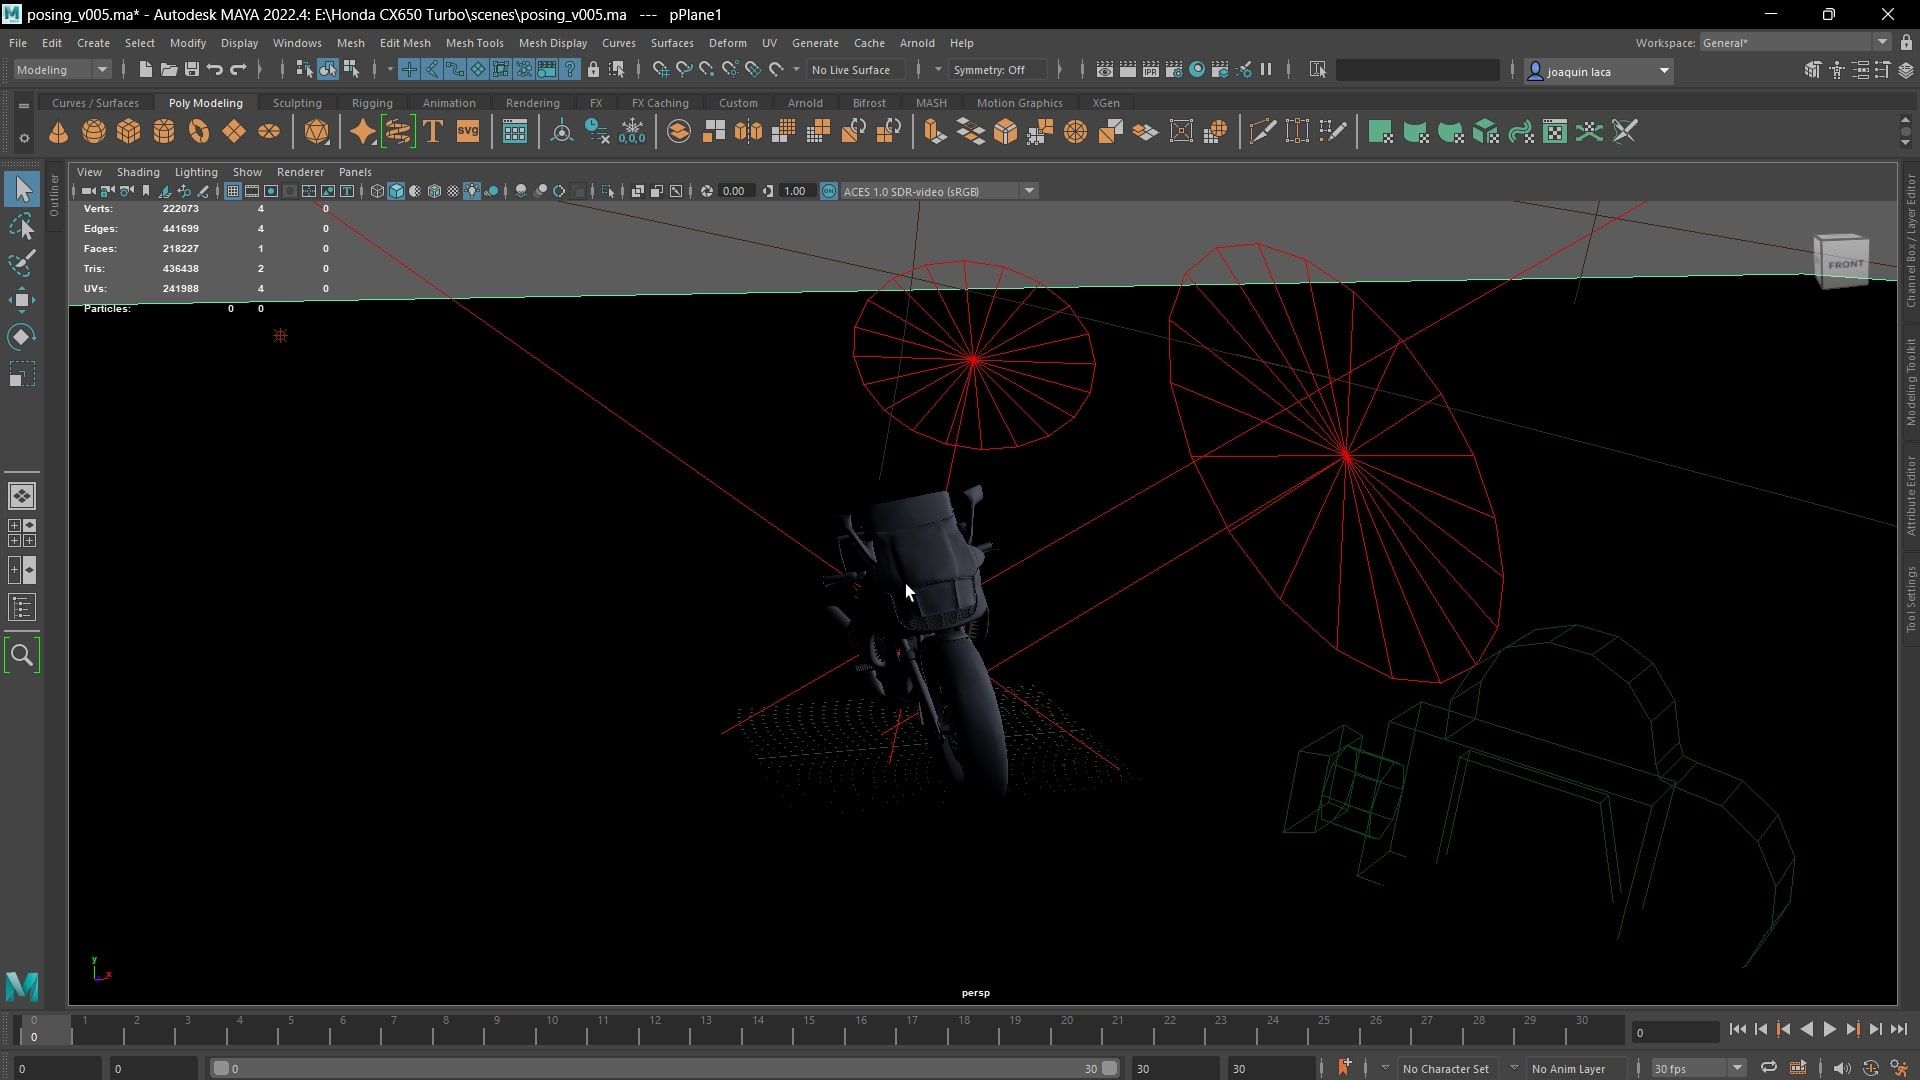
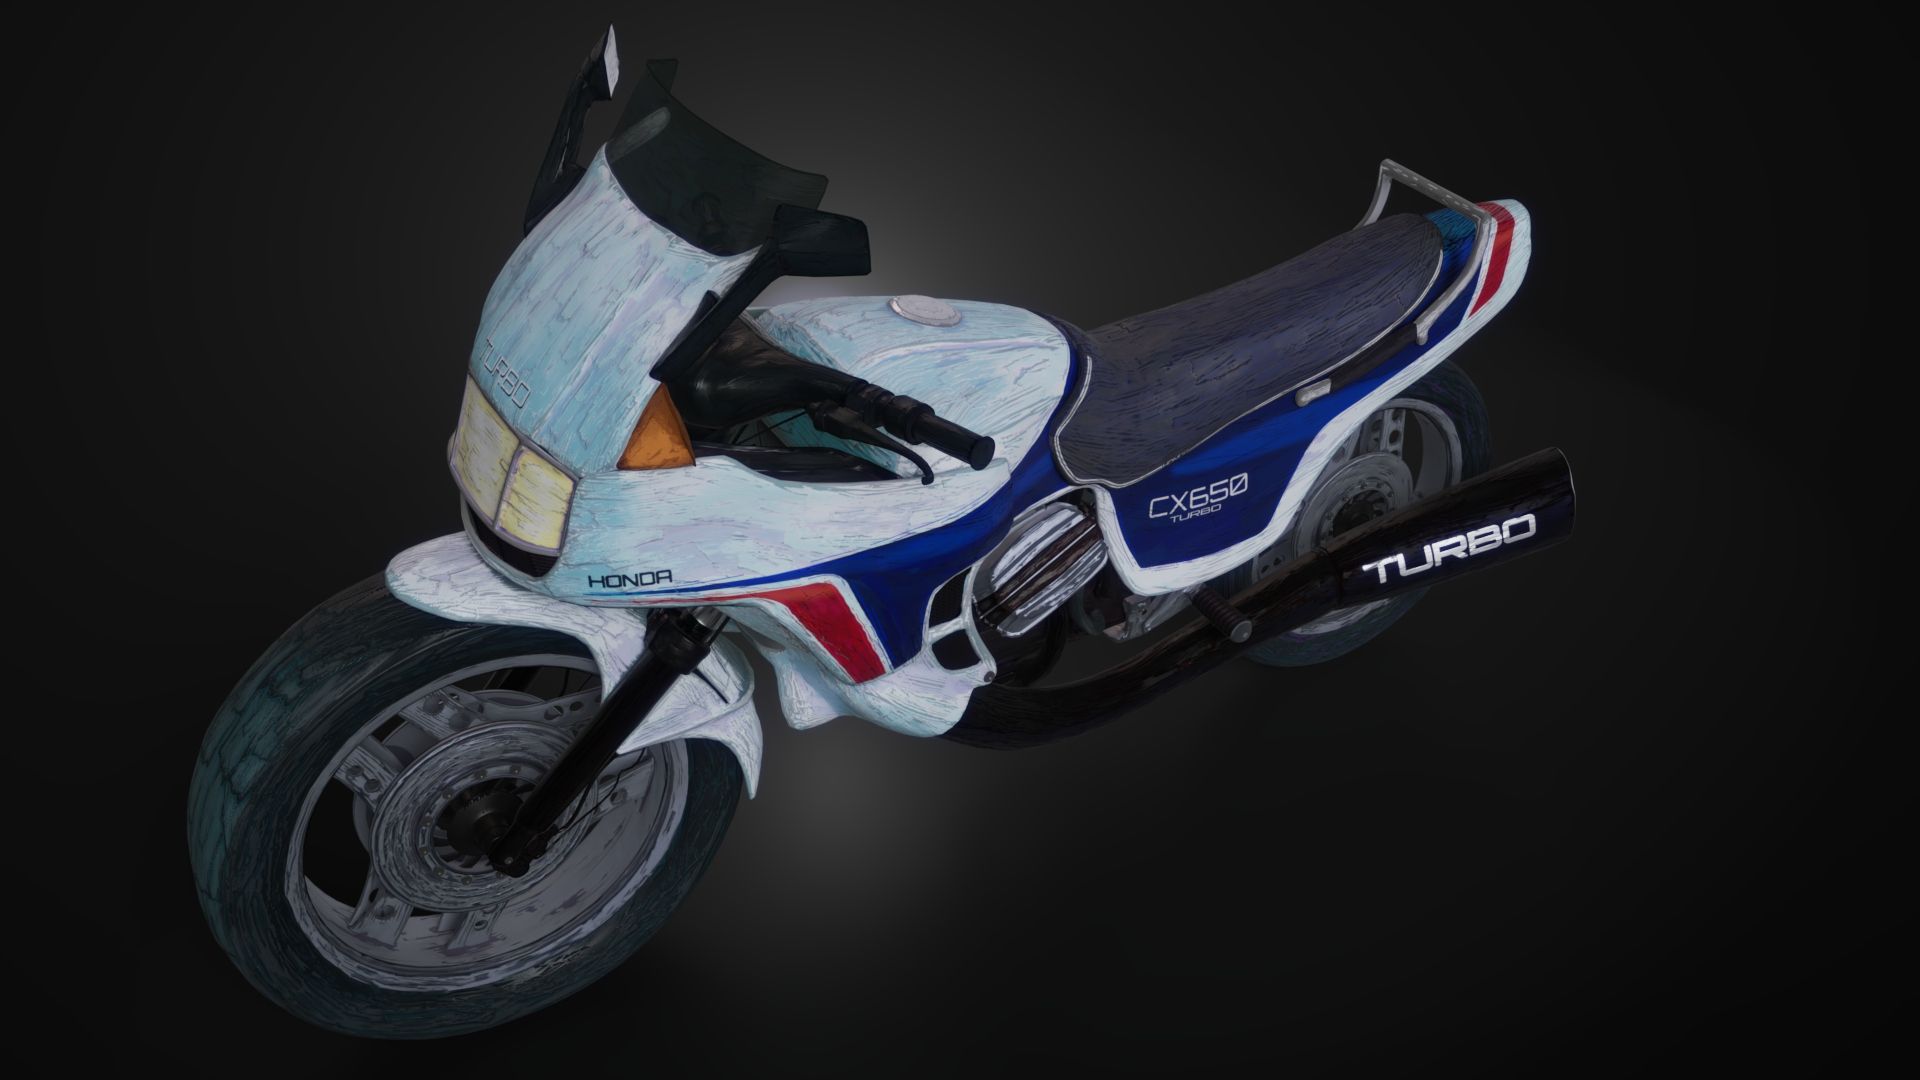
Setting up my scene involved placing two volume lights to cast atmospheric volume from the front and back, scaled down and oriented towards the base of the bike. This ensured visibility of the light volume from all angles. Additionally, I positioned my keylight to be scaled up and pointed at a 3/4 view of the bike, while a rim light accentuated the silhouette by facing at an angle from the key light's orientation. Furthermore, a point light at the back of the object created a focal point, directing the viewer's attention to the bike upon seeing the render.
Throughout this project, I learned a lot about every step of the pipeline and how to fully complete a 3d model on your own from start to finish.
Workflow consistency played a significant role in my process. Rather than confining myself to a single software, I embraced working across multiple platforms, seamlessly transitioning between them for each necessary step toward completing the final piece. This involved manually inserting vertices and meticulously shaping every small face of each plane, essentially simulating a retopology process from the start. Through this approach, I experienced substantial growth in my understanding of topology and edge flow.
When creating a stylised model, it's important not to shy away from grounding yourself in realistic references. Everything in the world has a basis in reality, so starting from there helps you to be more specific about your model and how it will function.
A valuable lesson that I believe would be beneficial for any aspiring 3D artist is to model everything. Try to model as much as you can, encompassing everything around you. If realism isn't your goal, then put your own twist on it. Afterwards, seek out additional references related to the twist you're considering. Practice modeling both organic and hard surfaces, continually improving your understanding of topology with each project, and consistently refine your entire process.
Check out Joaquin's Rookies profile here.