Creating a Game Environment Based on an Existing Level Design
Elisa Binz, an Environment Art student at Artside School, shows us her workflow to create a full environment, based on a Wayfinder's Level Art and Uncharted 4's Artistic Direction.
Elisa Binz, an Environment Art student at Artside School, shows us her workflow to create a full environment, based on a Wayfinder's Level Art and Uncharted 4's Artistic Direction.

Meet Elisa Binz, a 22-year-old 3D Environment Art student at Artside School, currently immersed in her third year of studies. With a focus on refining her skills in the Environment Art workflow, Elisa embarked on a new project in January 2024, which she shares in this article. Enjoy!
The goal of this 4 weeks-long class was to create an environment using a Modular Workflow.
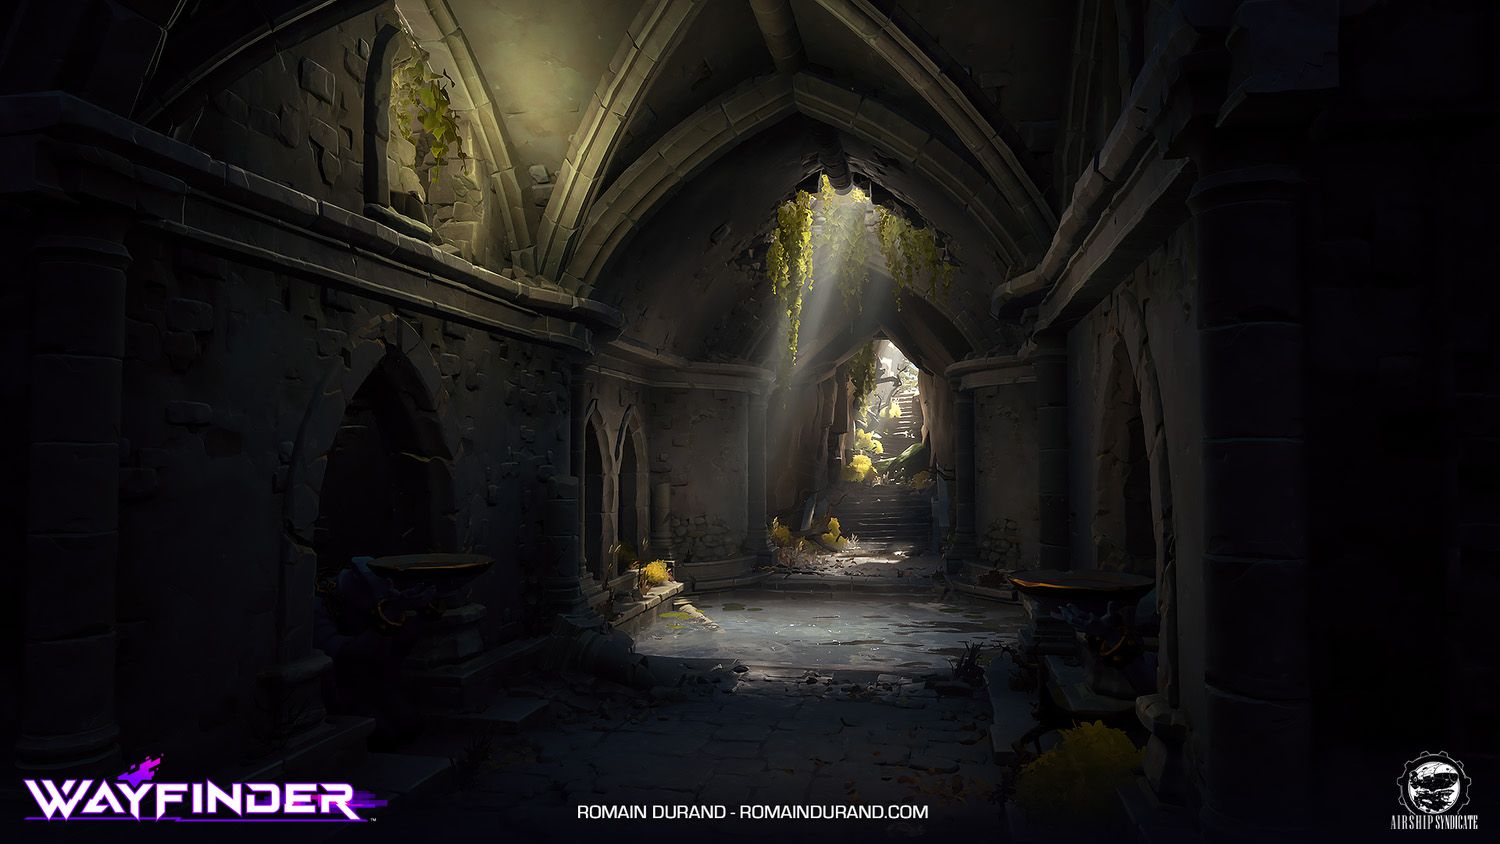
We had to base our whole project on a Wayfinder Level Art from “The Ruins”. Finding the main reference on Romain Durand’s website. The class was given by Matthieu Laude, Yoan Autin and Sophie Almecija.
Before starting this project, we had one “warm-up” week with Matthieu Laude.
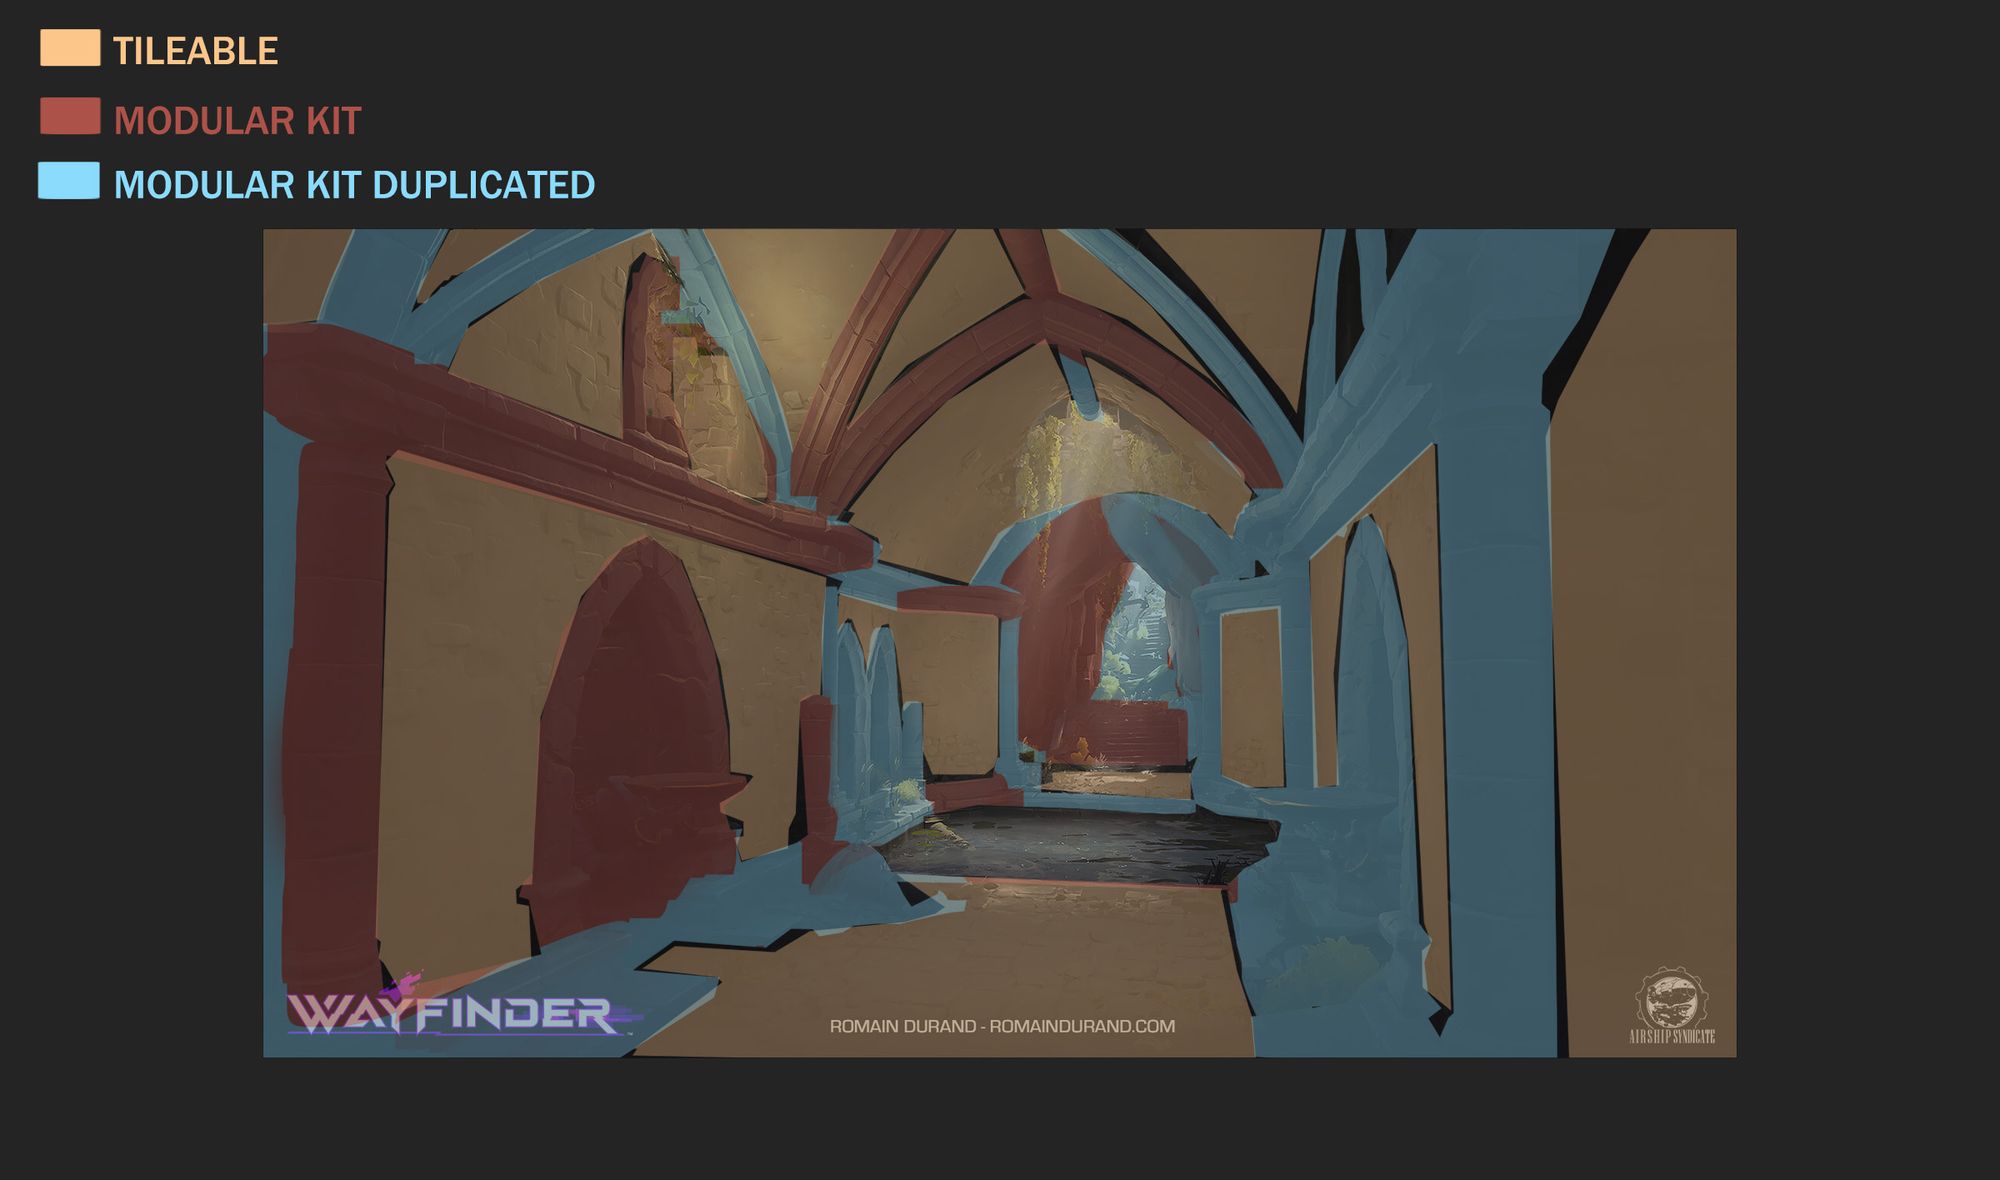
The goal was breaking down Wayfinder’s environment and re-creating it into modules. Since we didn’t have a lot of time, it was ok if they weren’t finished and if things were missing. For that class, we had to pick a stylised artistic direction.
That warm-up week helped me understand how to break down modules and how the whole environment would work in these pieces.
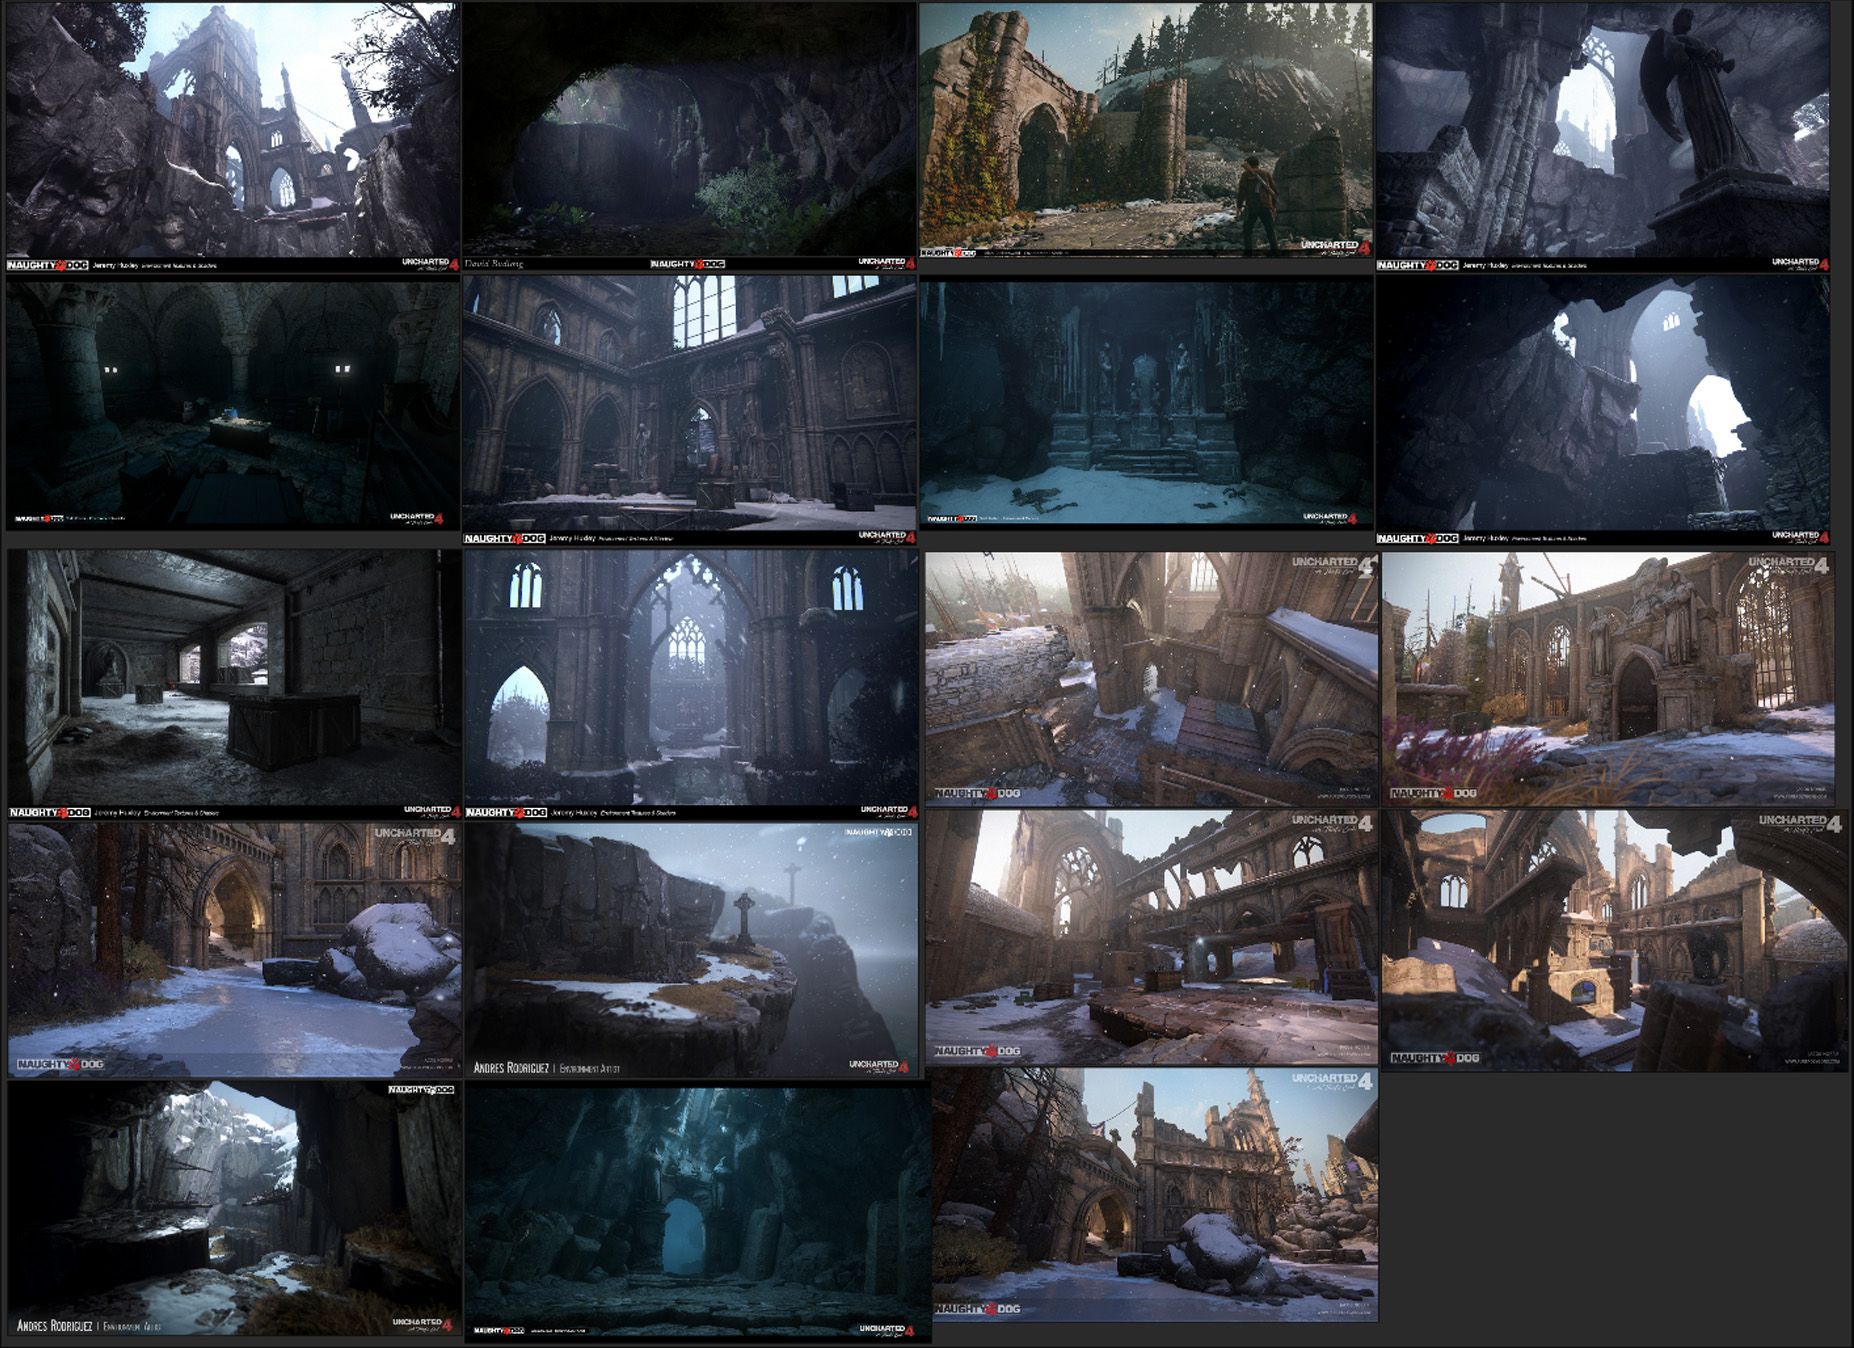
In contrast to the warm-up week, the Artistic Direction (AD) choice for the full project was unrestricted. We had the freedom to recreate the environment in either a stylised or realistic AD. For my reinterpretation, I opted for the AD seen in Uncharted 4 for several reasons. Firstly, my admiration for the game itself, particularly its stunning visuals. Additionally, I have developed a passion for crafting realistic environments, prompting me to delve deeper into this style.
To bring this AD to life, I researched references from the game, particularly focusing on the Cathedral encountered early on. Given my appreciation for Gothic Architecture, I chose to use this element as the primary reference for my modules.
To save us a bit of time, Matthieu Laude gave us a Level Art (LA), to get the proportions right. I rescaled it a bit to get the scale I was looking for.
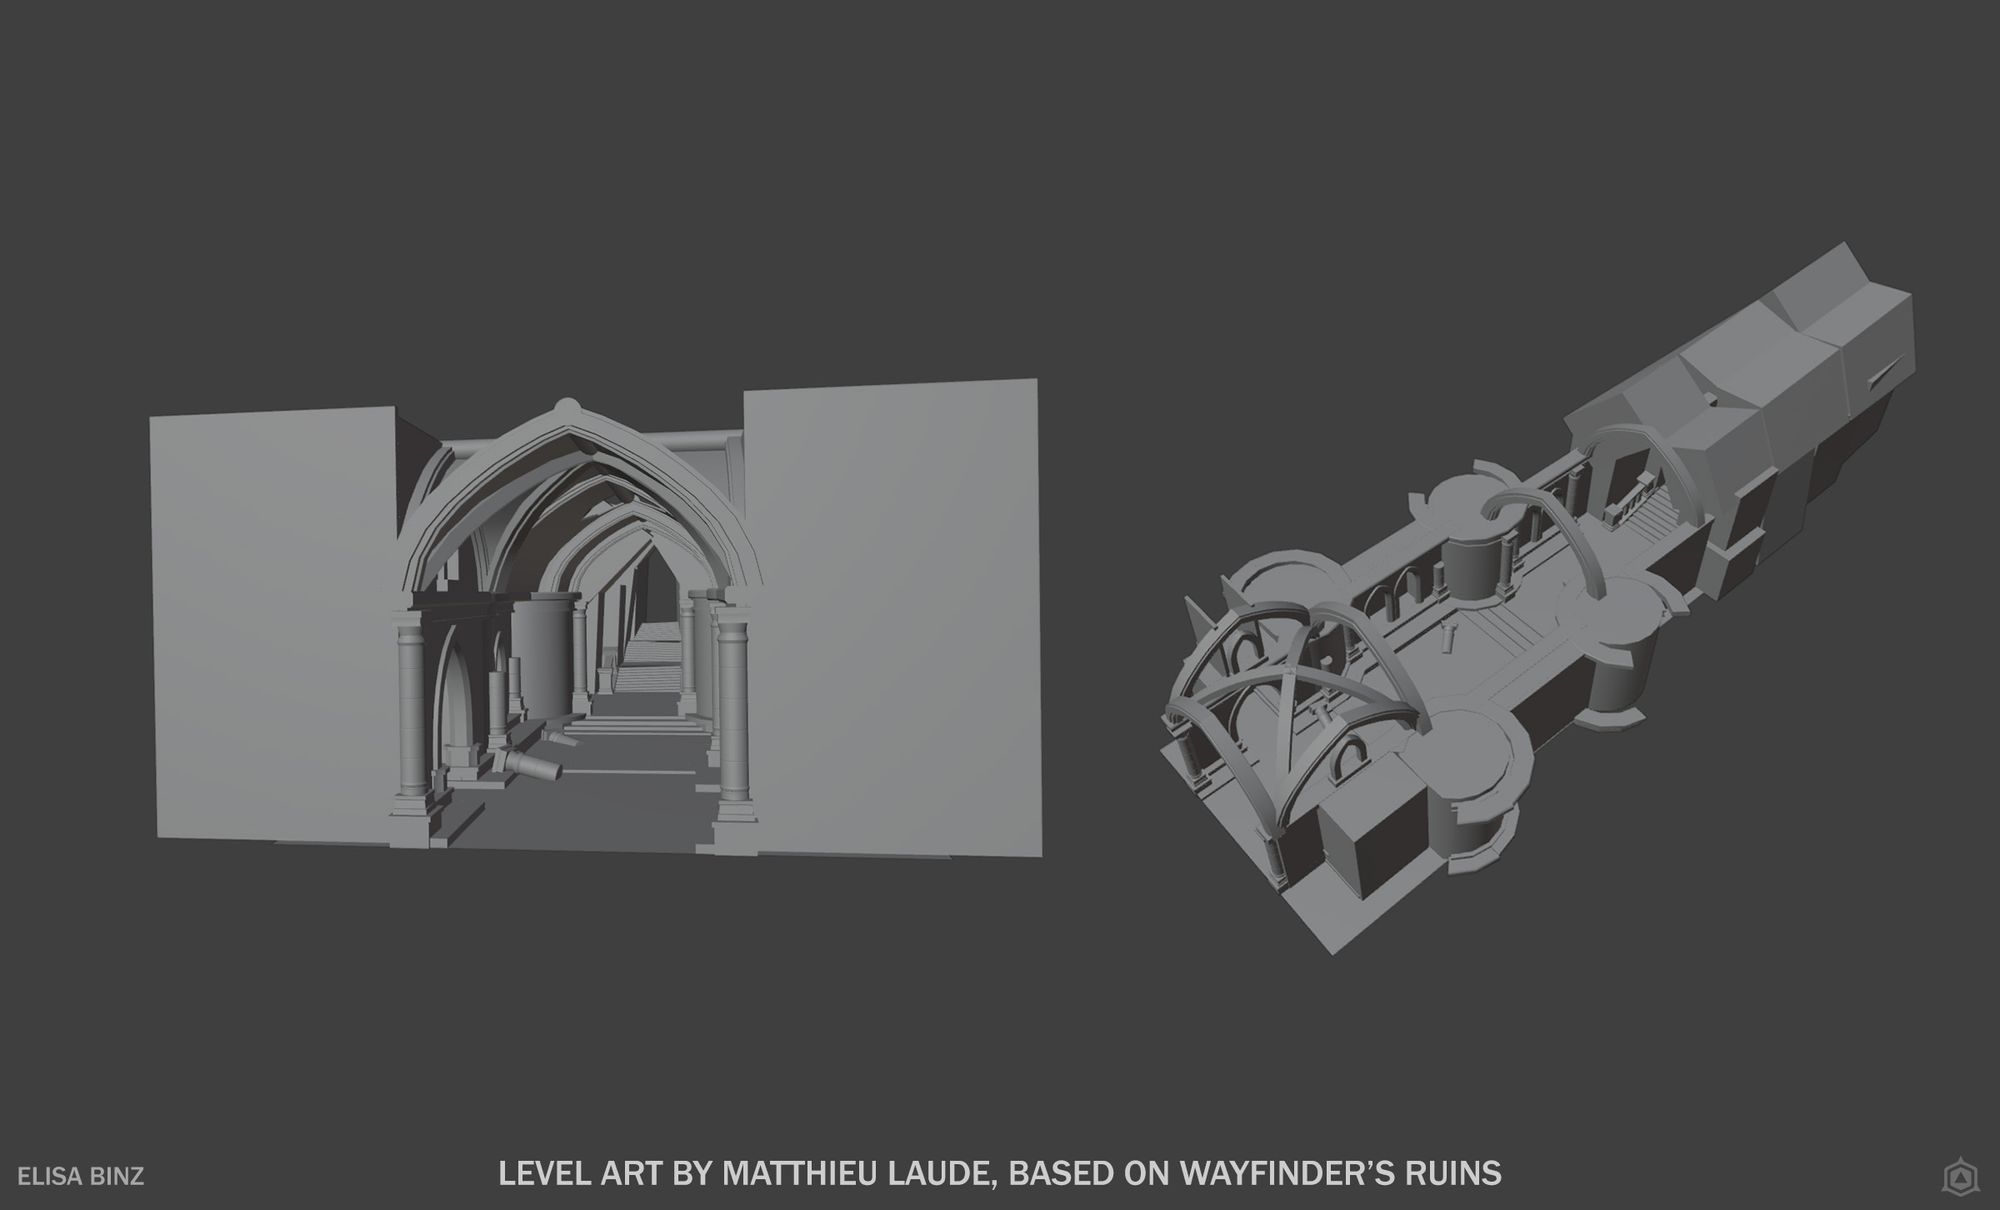
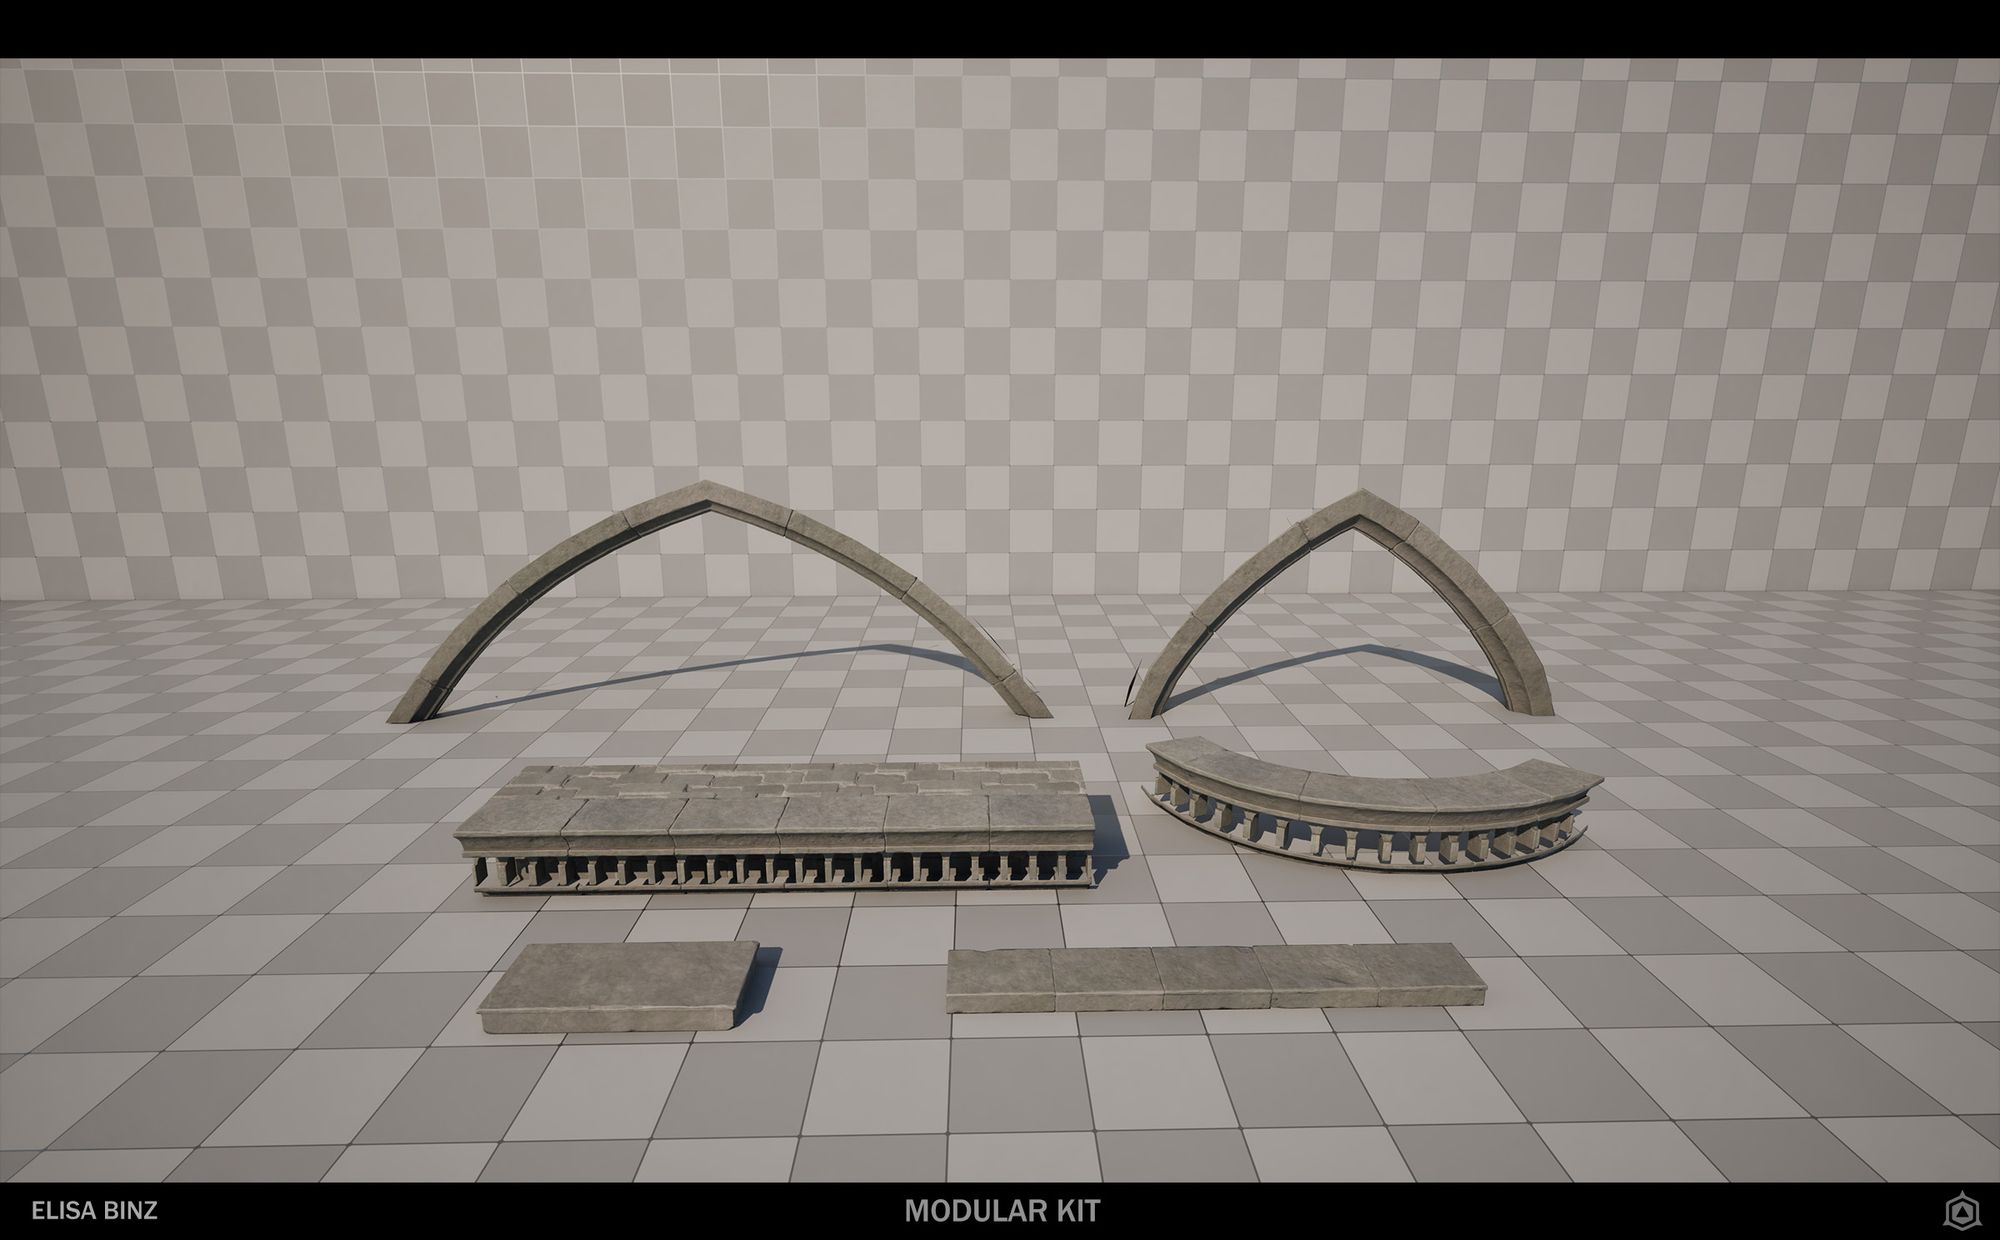
Now, based on my references and this level of detail (LOD), I began separating the entire environment into a Modular Kit. I modularized all objects as much as possible, separating each piece to gain greater control and modeling the arches in a straight manner. This approach allowed me to easily adjust the length of all my objects by duplicating the various parts. To achieve the curved appearance of the arches, I utilised the Curve modifier in Blender.
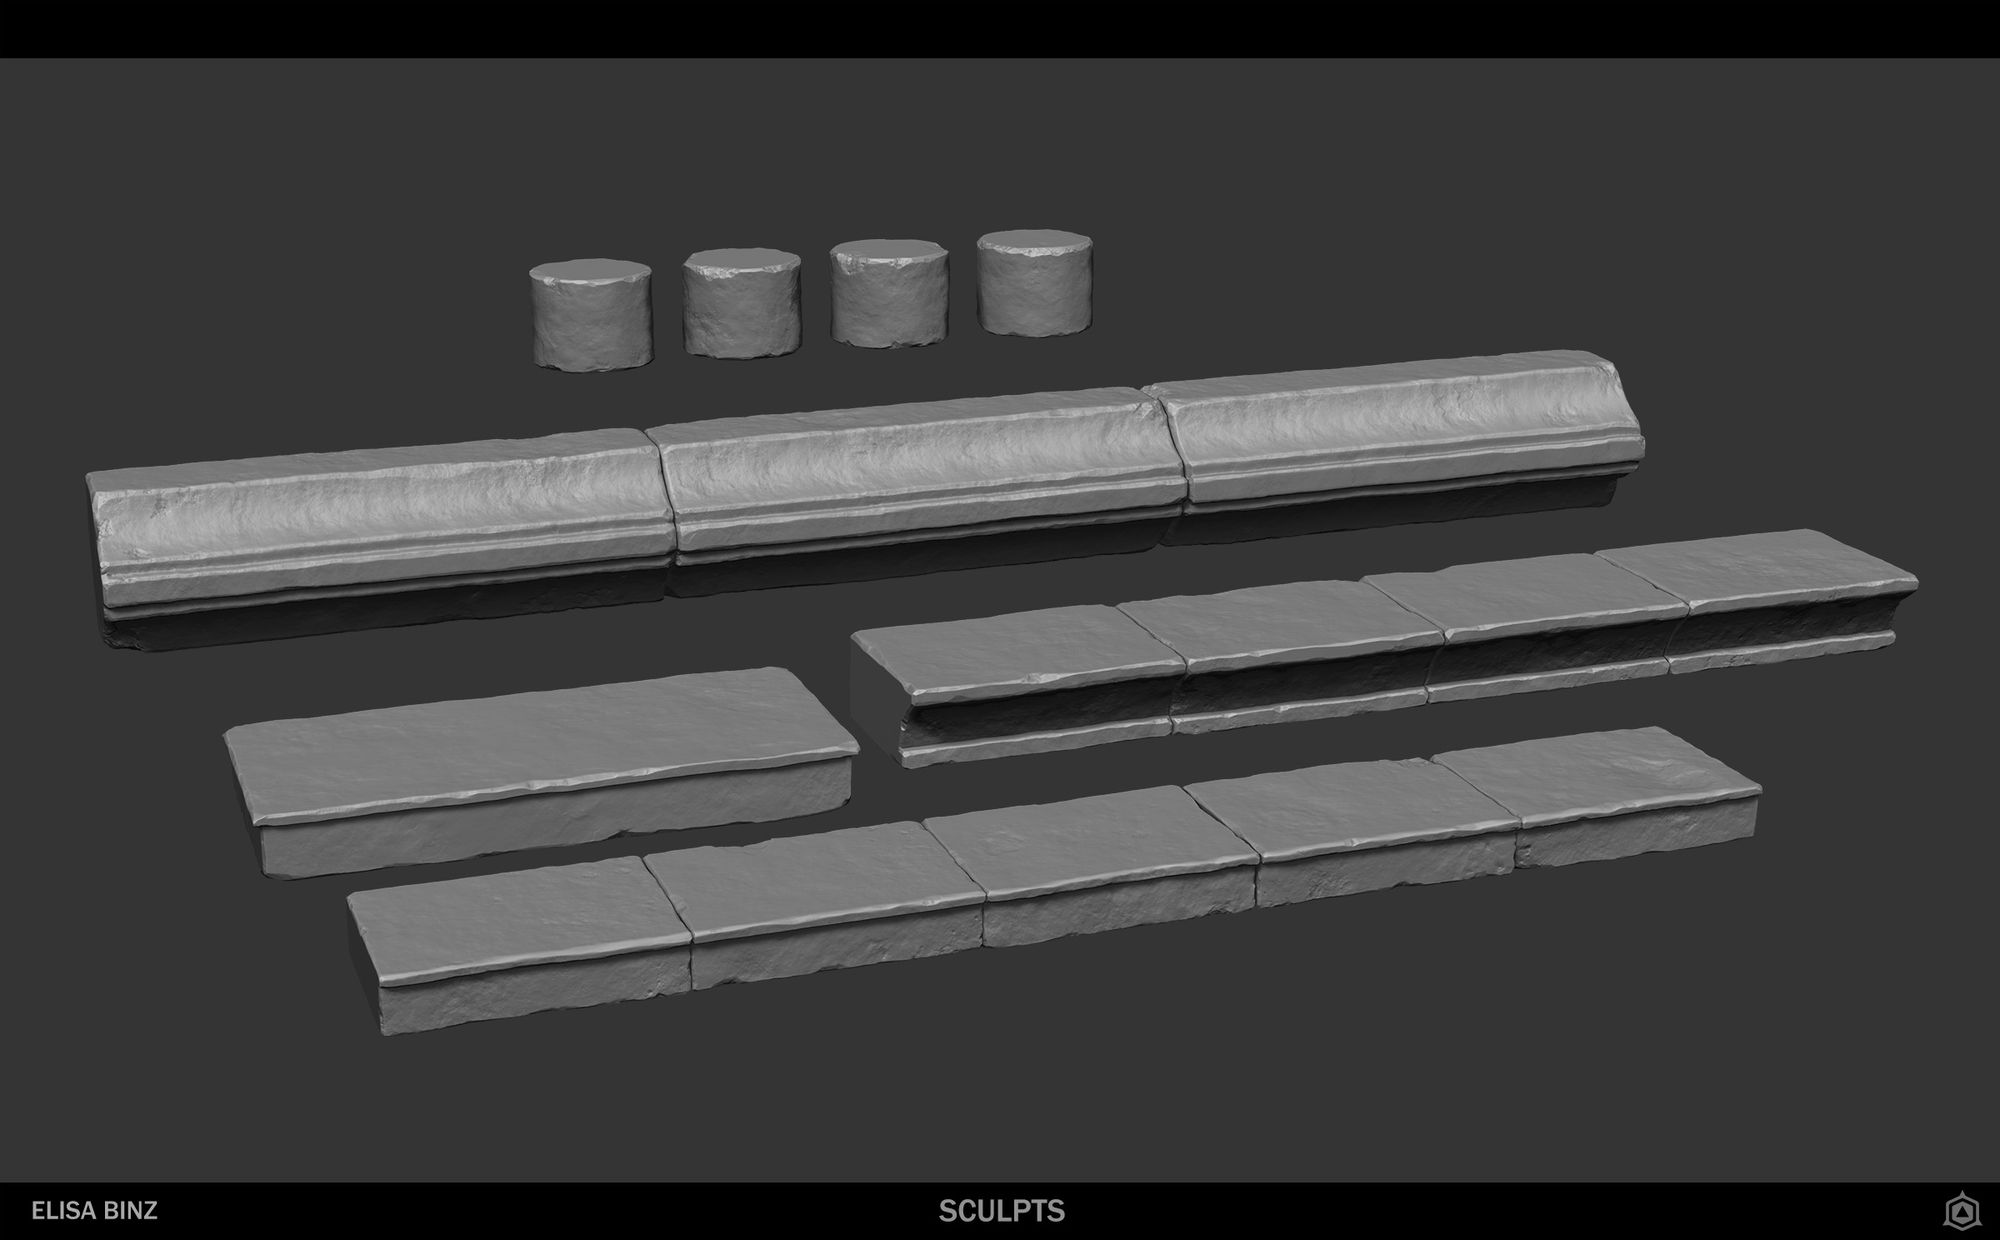
After getting all my modules blocked, it was time to sculpt them! To be a bit faster, I used the Blender add-on GoB.
Now, the topologies of my modules are quite bad for sculpting anything on them. To improve the topology, I creased my edges using the ZBrush tool located in the Geometry section. By using the shortcut shift+F, I am able to view the creased edges. If I want to crease specific edges, I use the ZModeler brush. Once that is done, I subdivide the mesh to around 100k vertices. Now, to achieve a clean topology, I use the ZRemesher tool with “Keep Creases” checked. Afterward, I have to uncrease it when I achieve a nice bevel, subdivide it several times, and voilà! Finally ready to sculpt!
It wasn’t my first time sculpting realistic rocks, but sculpting them as detailed as I did in that project was a first. To achieve this desired rock texture, I primarily used the Trim Smooth Border brush with a square alpha. It helped me to create damaged edges and cracks.
For surface detail, I used brush packs by Dannie Carlone and Andrew Averkin, which can be purchased for a few dollars. To create something visually engaging, I incorporated various noises and damages, adjusting their intensity. To maintain flexibility, I used ZBrush Layers to keep the project as editable as possible.
After sculpting comes a very important part of the process: retopology and UV mapping. Not going lie, I really like this part! Once again, to transfer the sculpts back into Blender, I used the GoB addon, which saved me tons of time! Since I kept the blockings of my modules, I could reuse them to create my low-poly models. The main shape of the objects didn’t change much during sculpting, so I only needed to add some vertices and edges to improve the silhouette of my objects!
After finishing my low-poly models, it's time for UV unwrapping! Thanks to my friend Kostia Perry and the custom add-ons he created, this process was done quite quickly! Using the Textools Blender addon, I made most of my UV islands straight to save as much UV space as possible.
When I finished my UVs, I exported both the high-poly and low-poly models into Marmoset using the Quick Loader tool in a Bake Project. This also saved me tons of time since my nomenclature was set correctly in Blender. Usually, I bake the Normal, World Space Normal, Thickness, Curvature, and AO maps. I bake the Position map in Substance Painter to avoid triplanar artifacts.
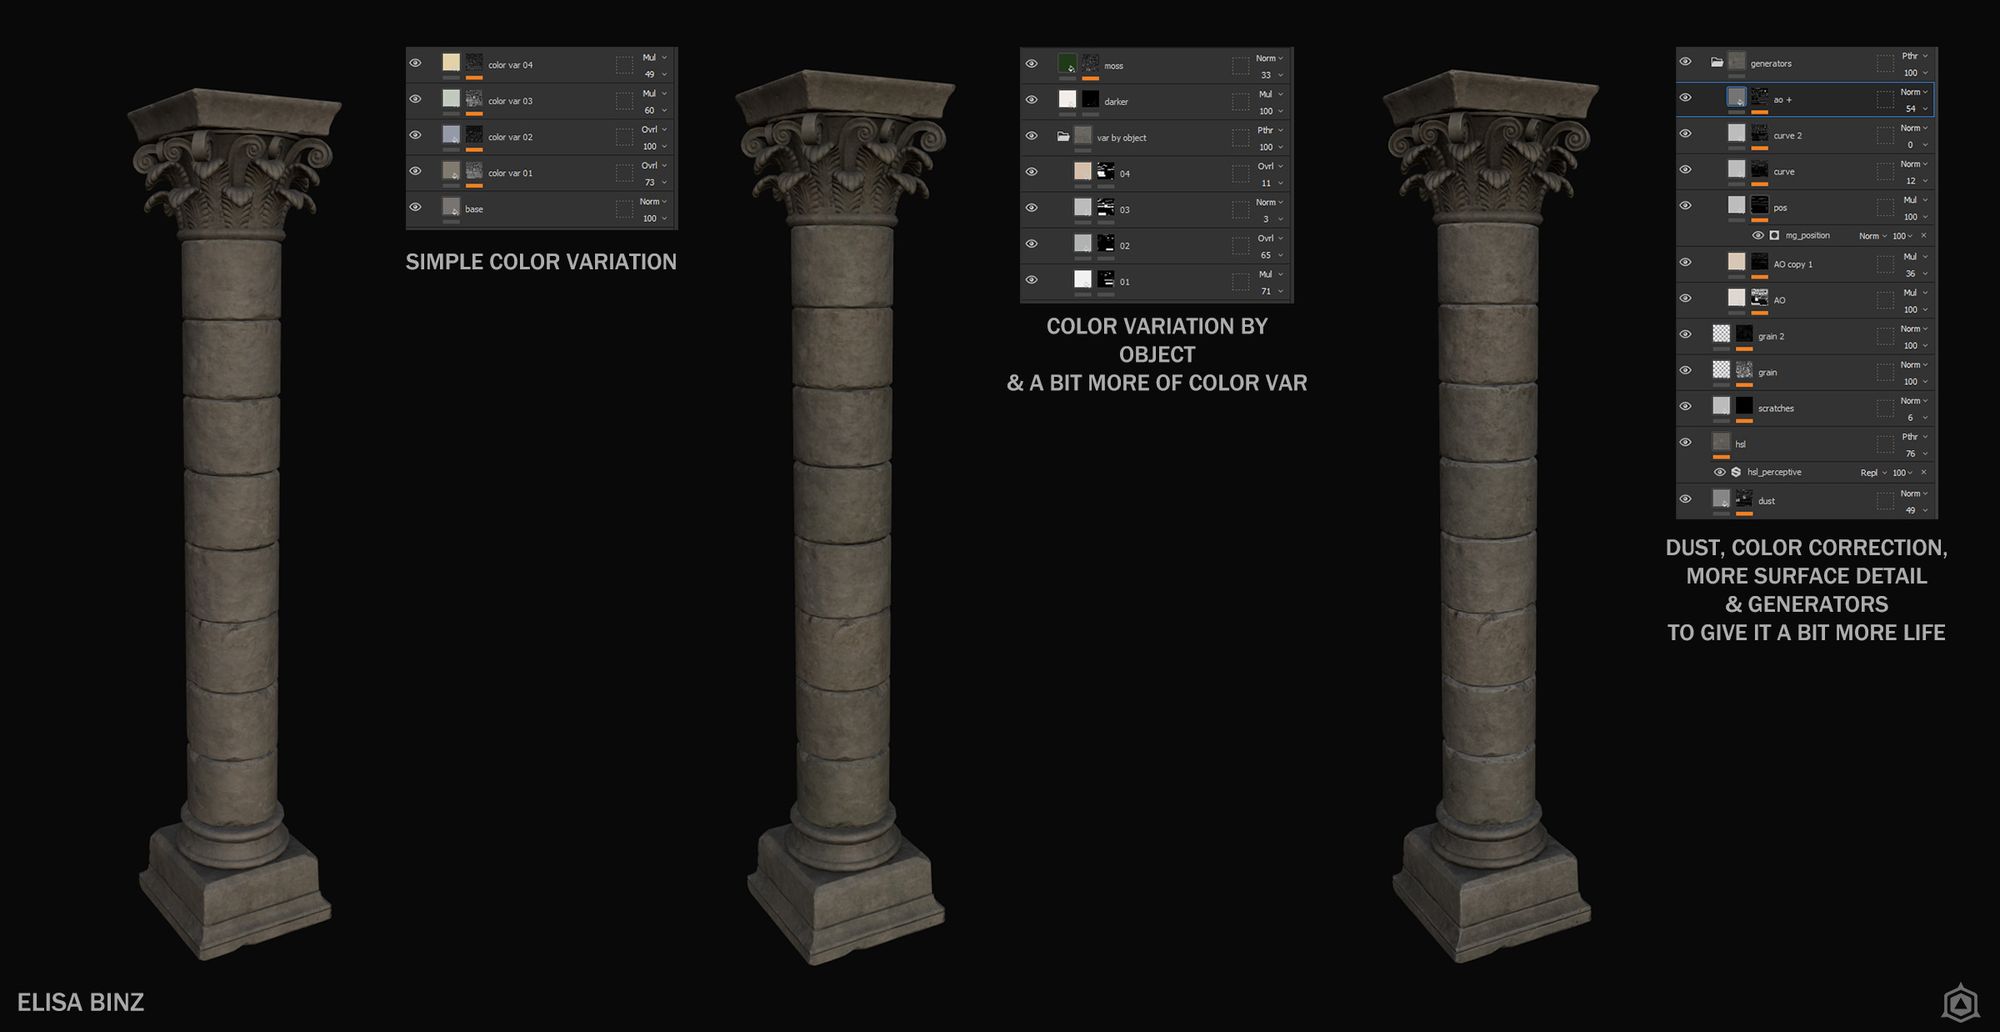
The texturing was quite simple, since I sculpted most of the details. At first, I only did a blocking texture for my columns, to quickly get the feeling I wanted on my scene. Then, I made it a Smart Material to be able to re-use it on my other objects to save me time. Here is how I made my textures:
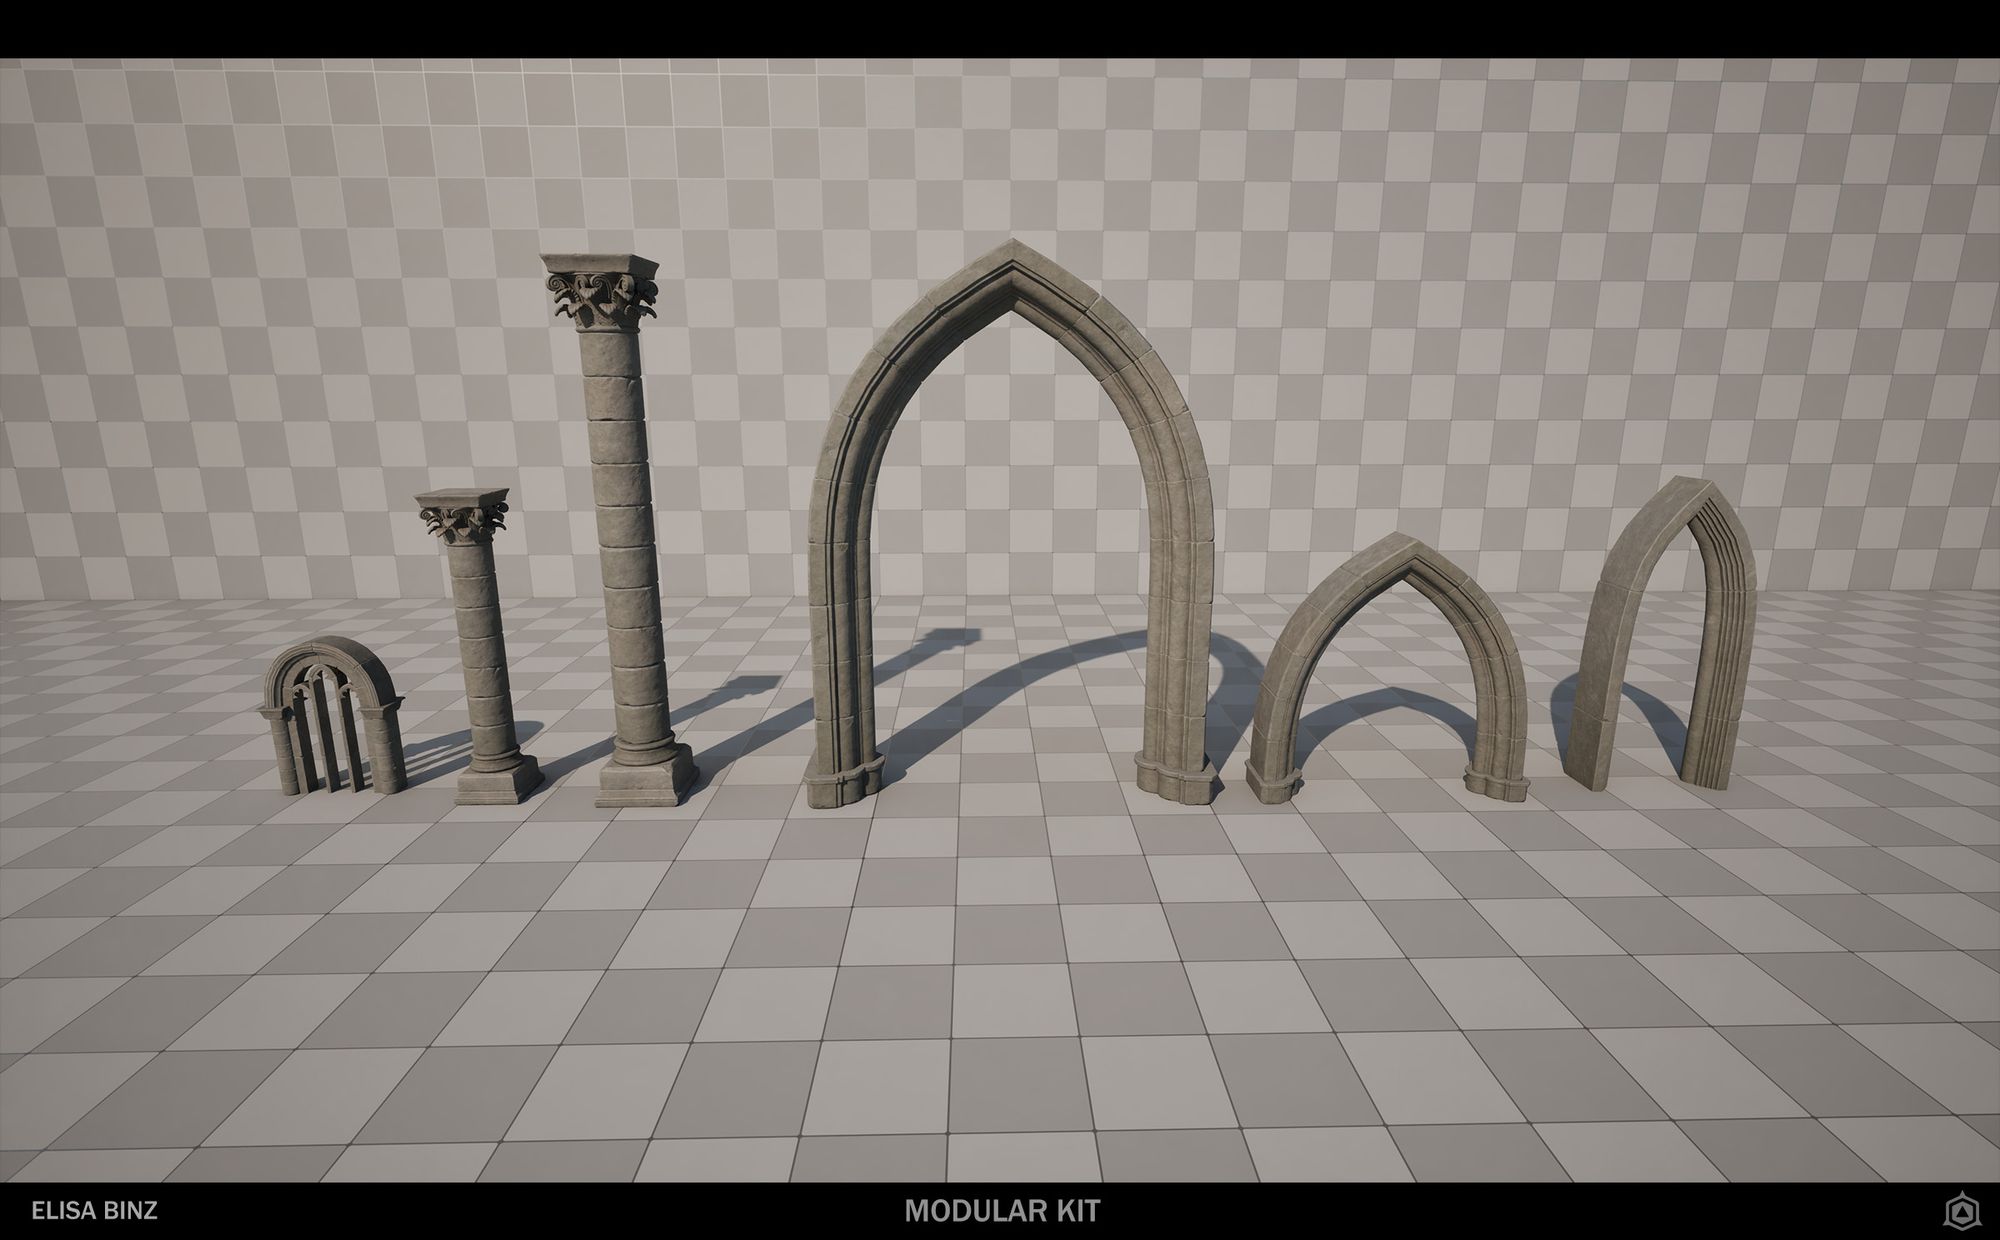
With my textures ready, I only needed to import them in my Unreal Engine scene. And here is the final look of my modules:
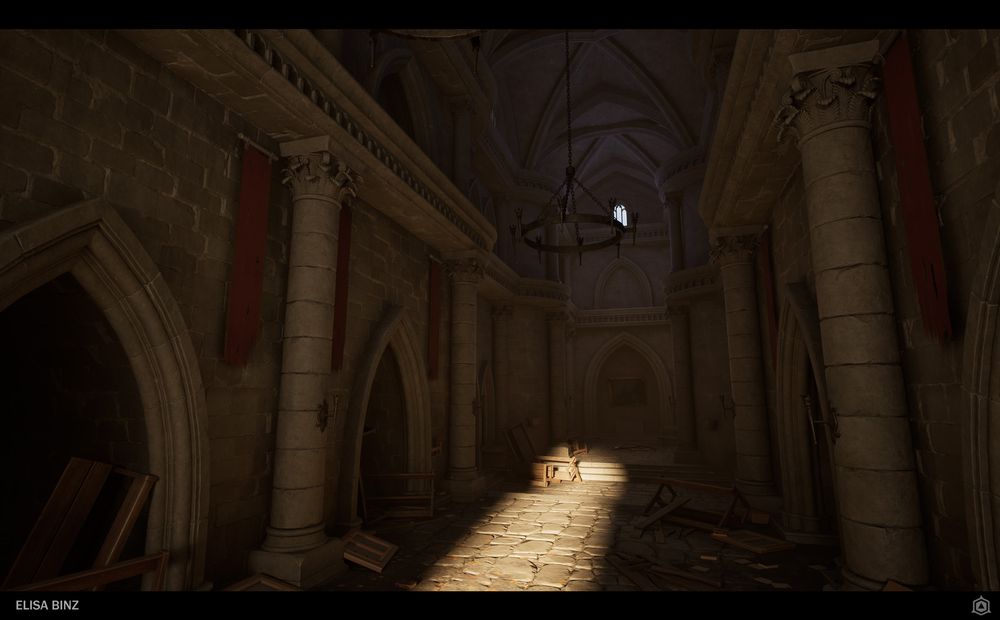
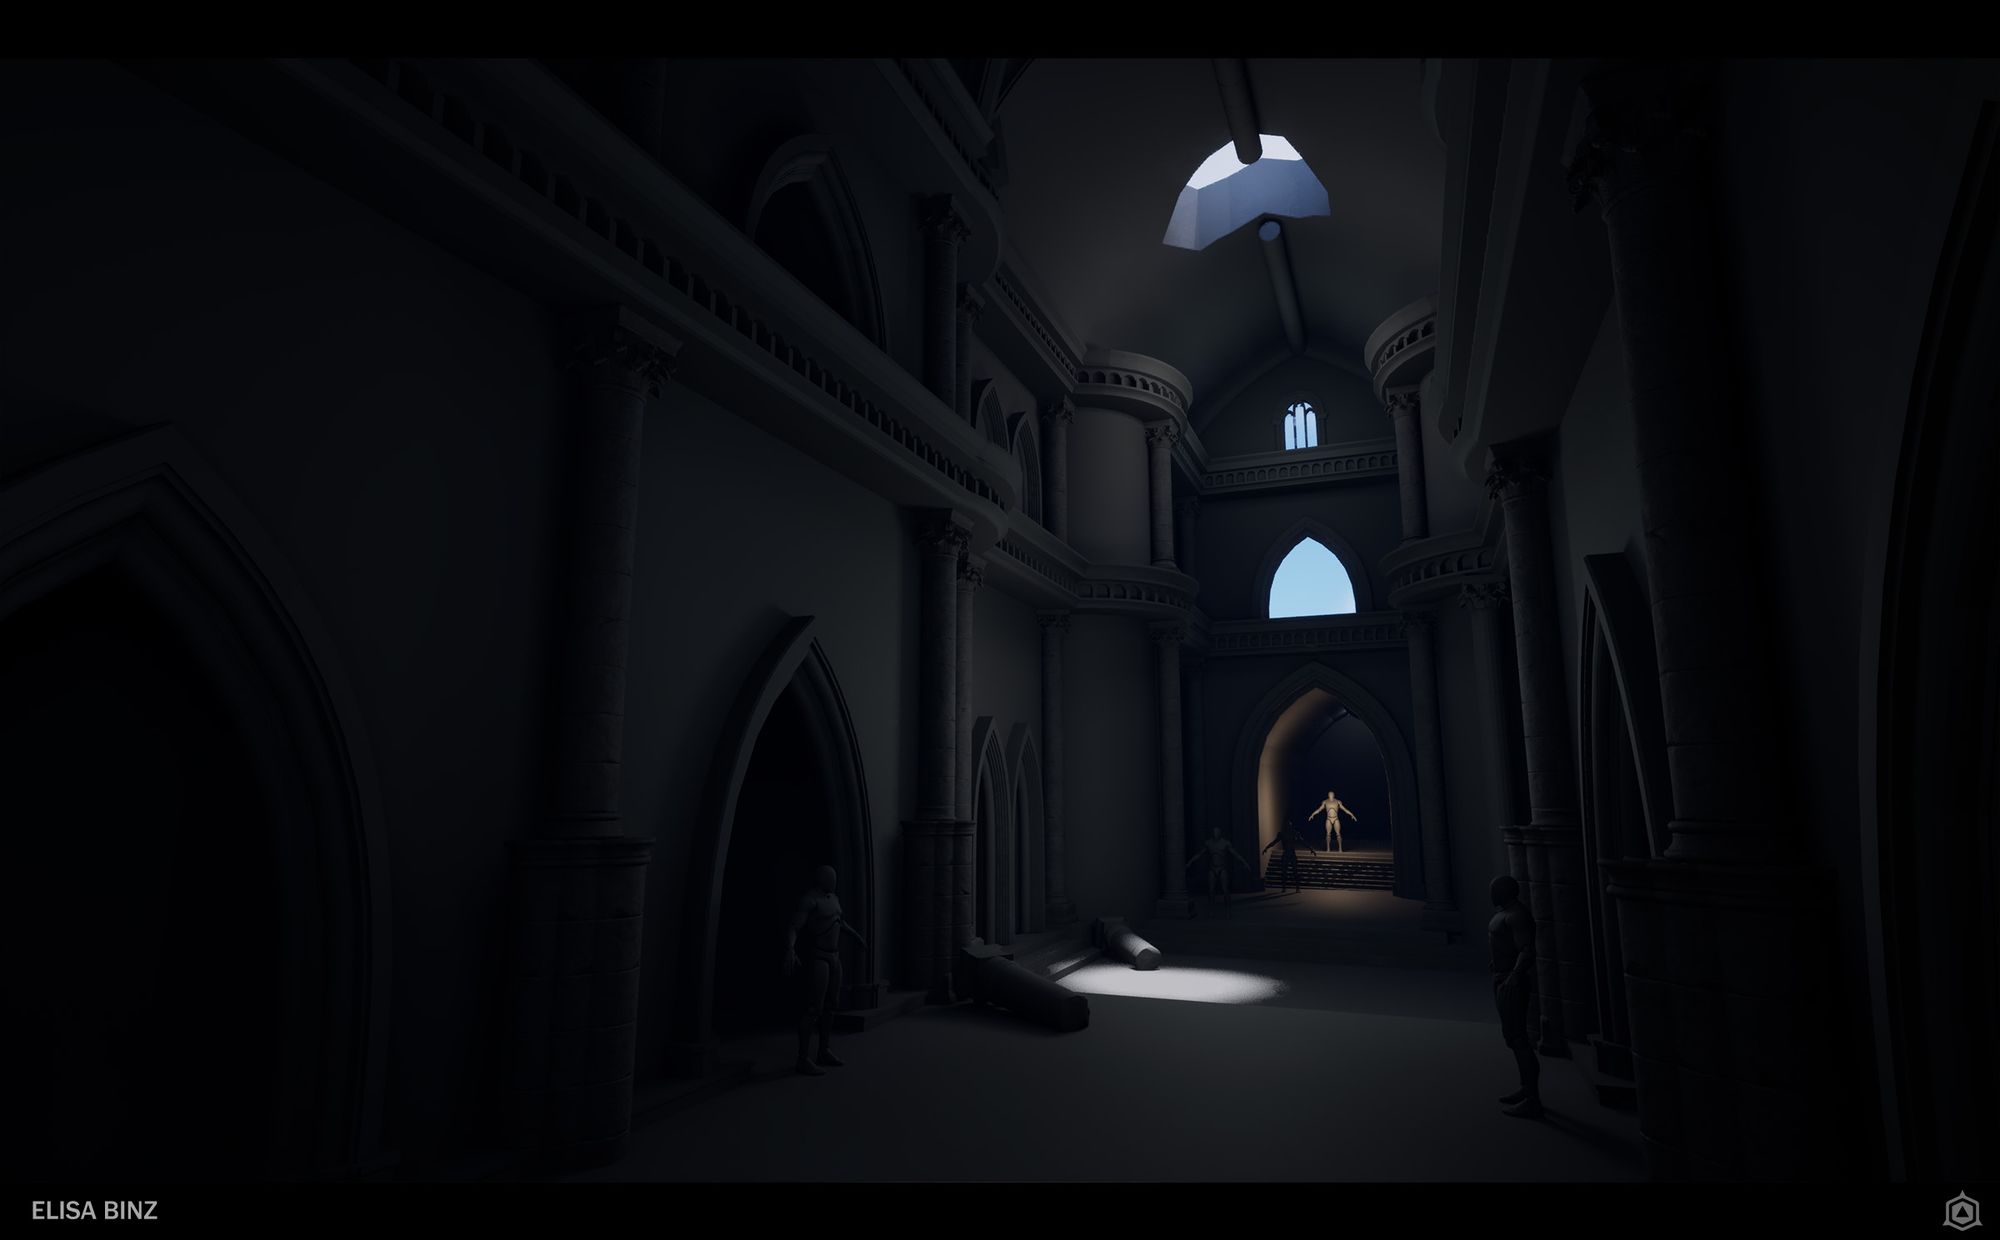
Now, you may have noticed that my environment is much larger than the original Level Art. Since I aimed to achieve a similar look to Uncharted 4’s Cathedral, I couldn’t confine it to a small space. My goal was to make it bigger, more expansive. Not only did I increase its height, but I also widened the corridor based on Matthieu’s feedback. Thus, I scaled up the elements and ensured they harmonized well with each other. With a now better-built scene, it became easier for me to achieve a grand appearance that would evoke a sense of awe.
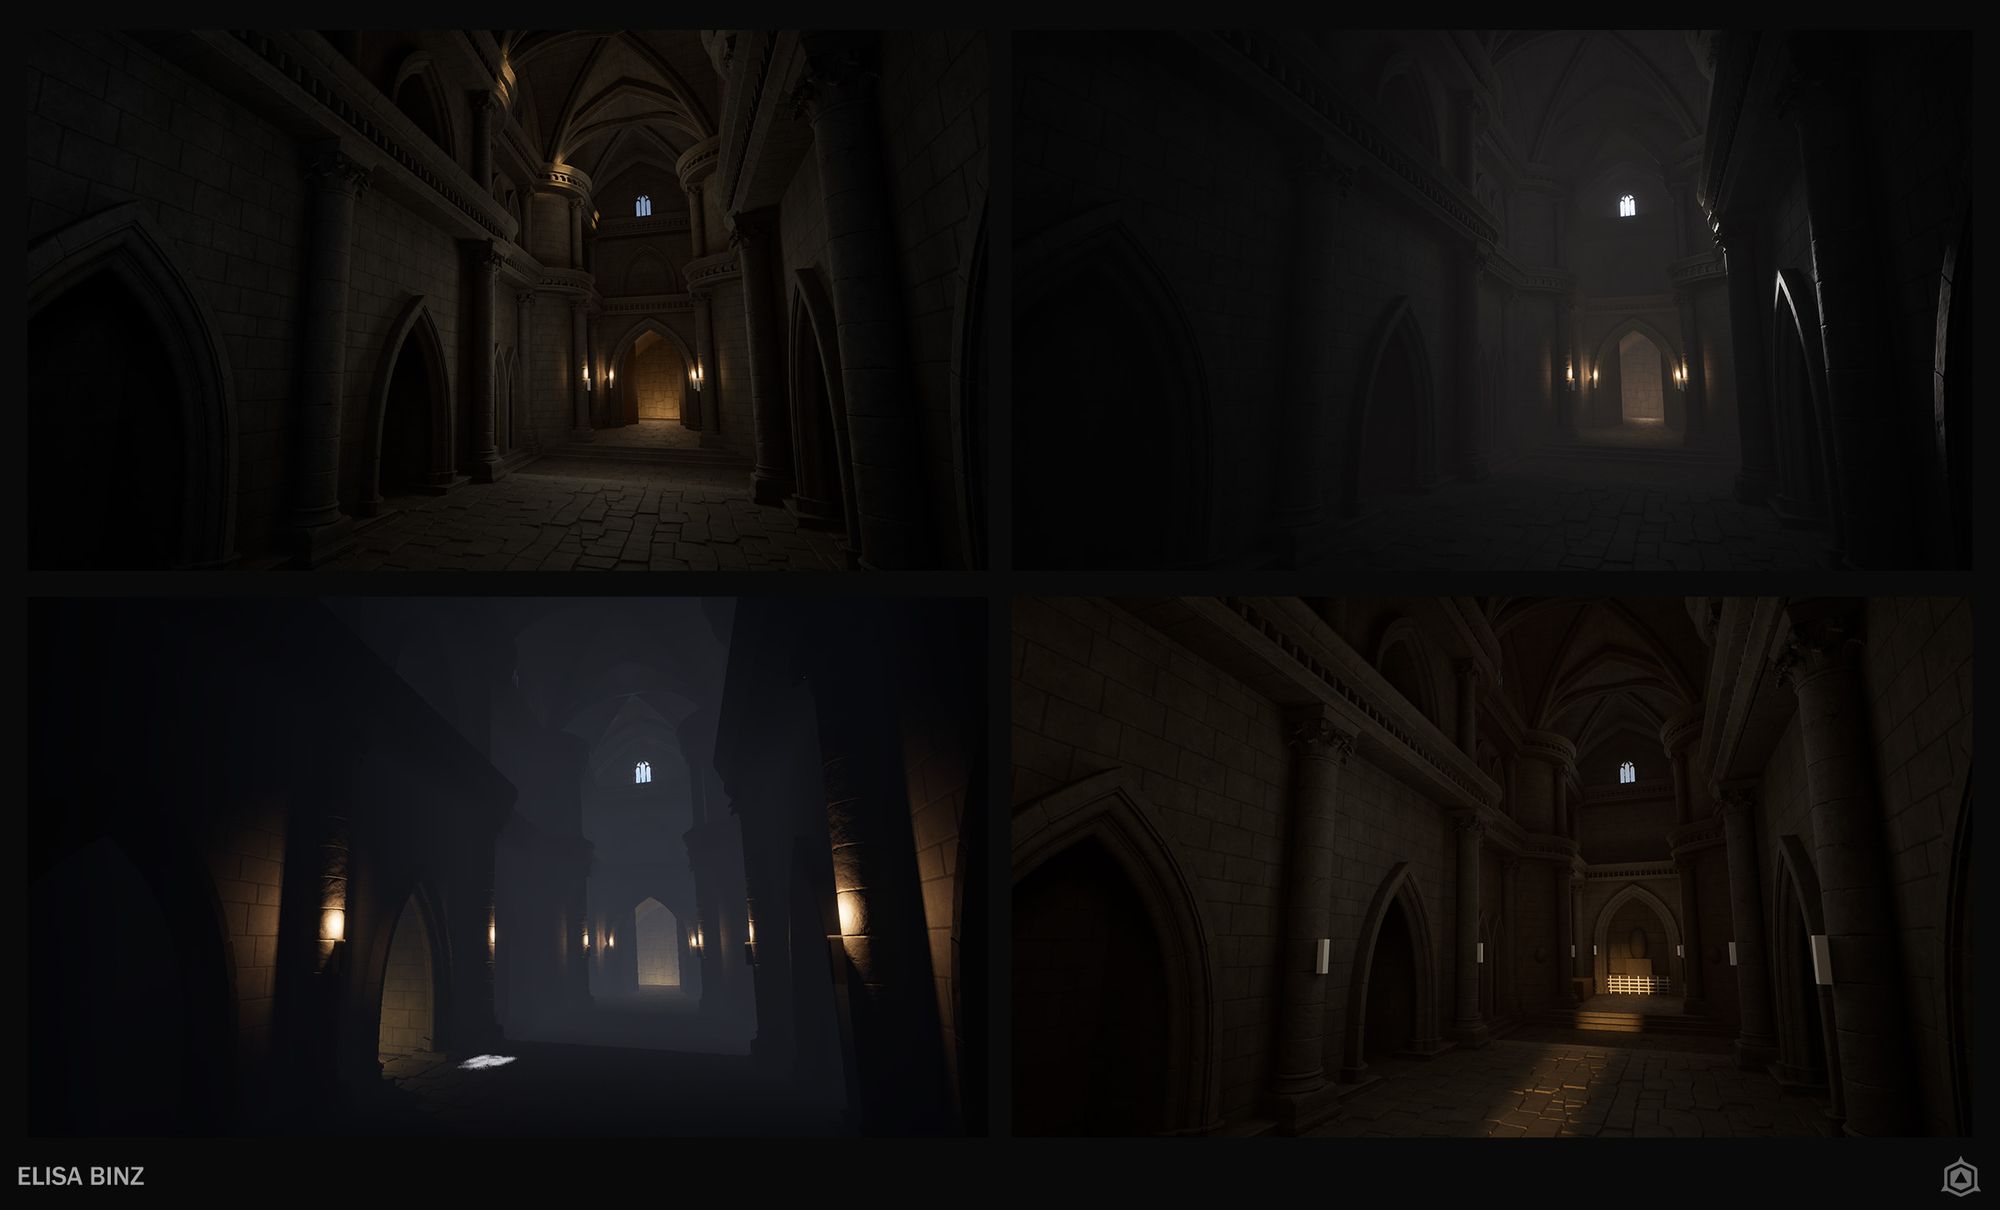
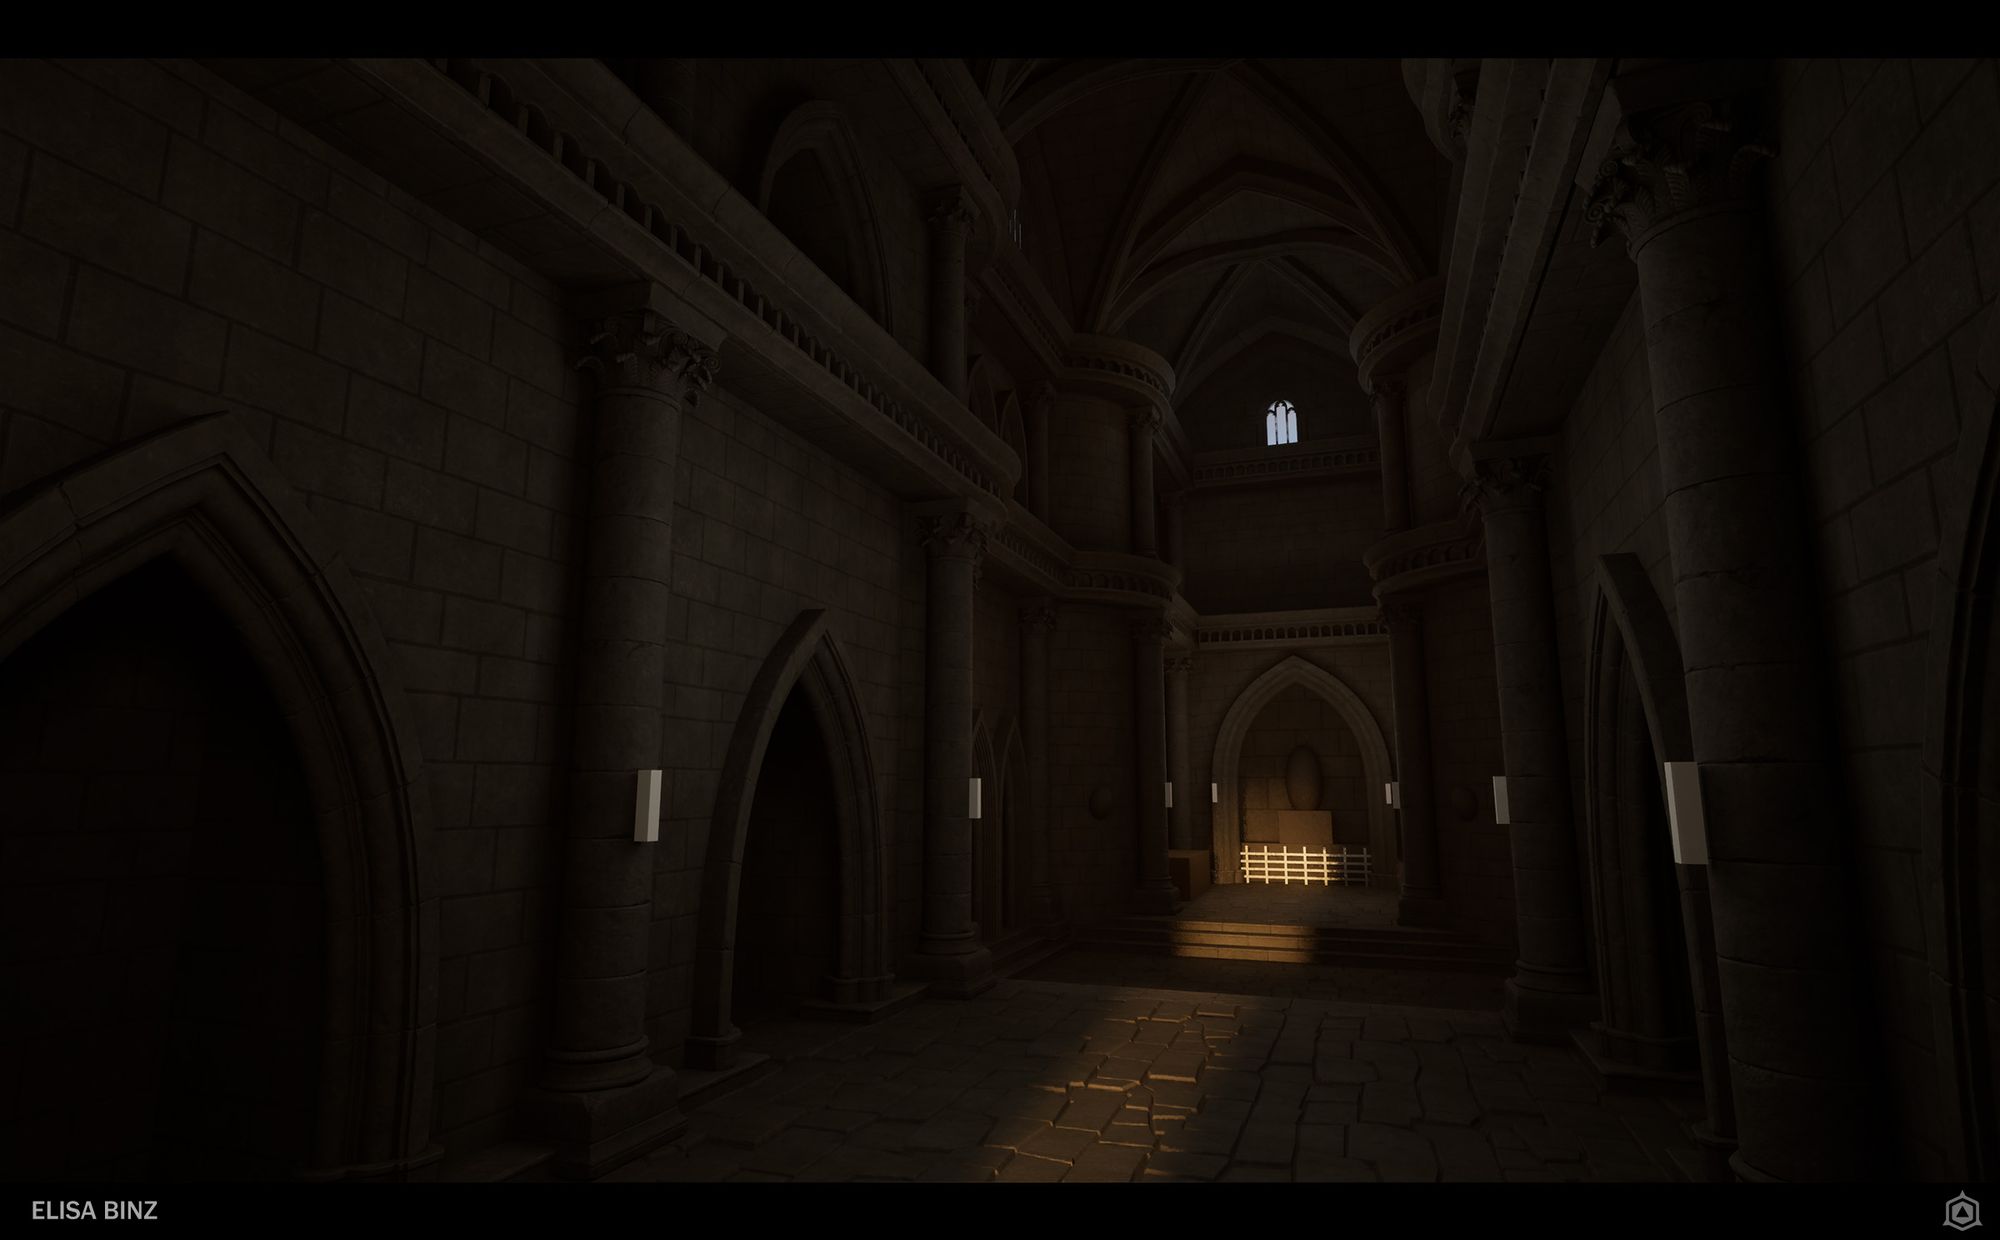
Finding the perfect mood wasn’t an easy task. Before achieving the final result, I conducted several tests. Lighting can be tricky, but William Faucher’s video helped me understand it better. Here are the few moods I tried before settling on the last one, which I have since changed:
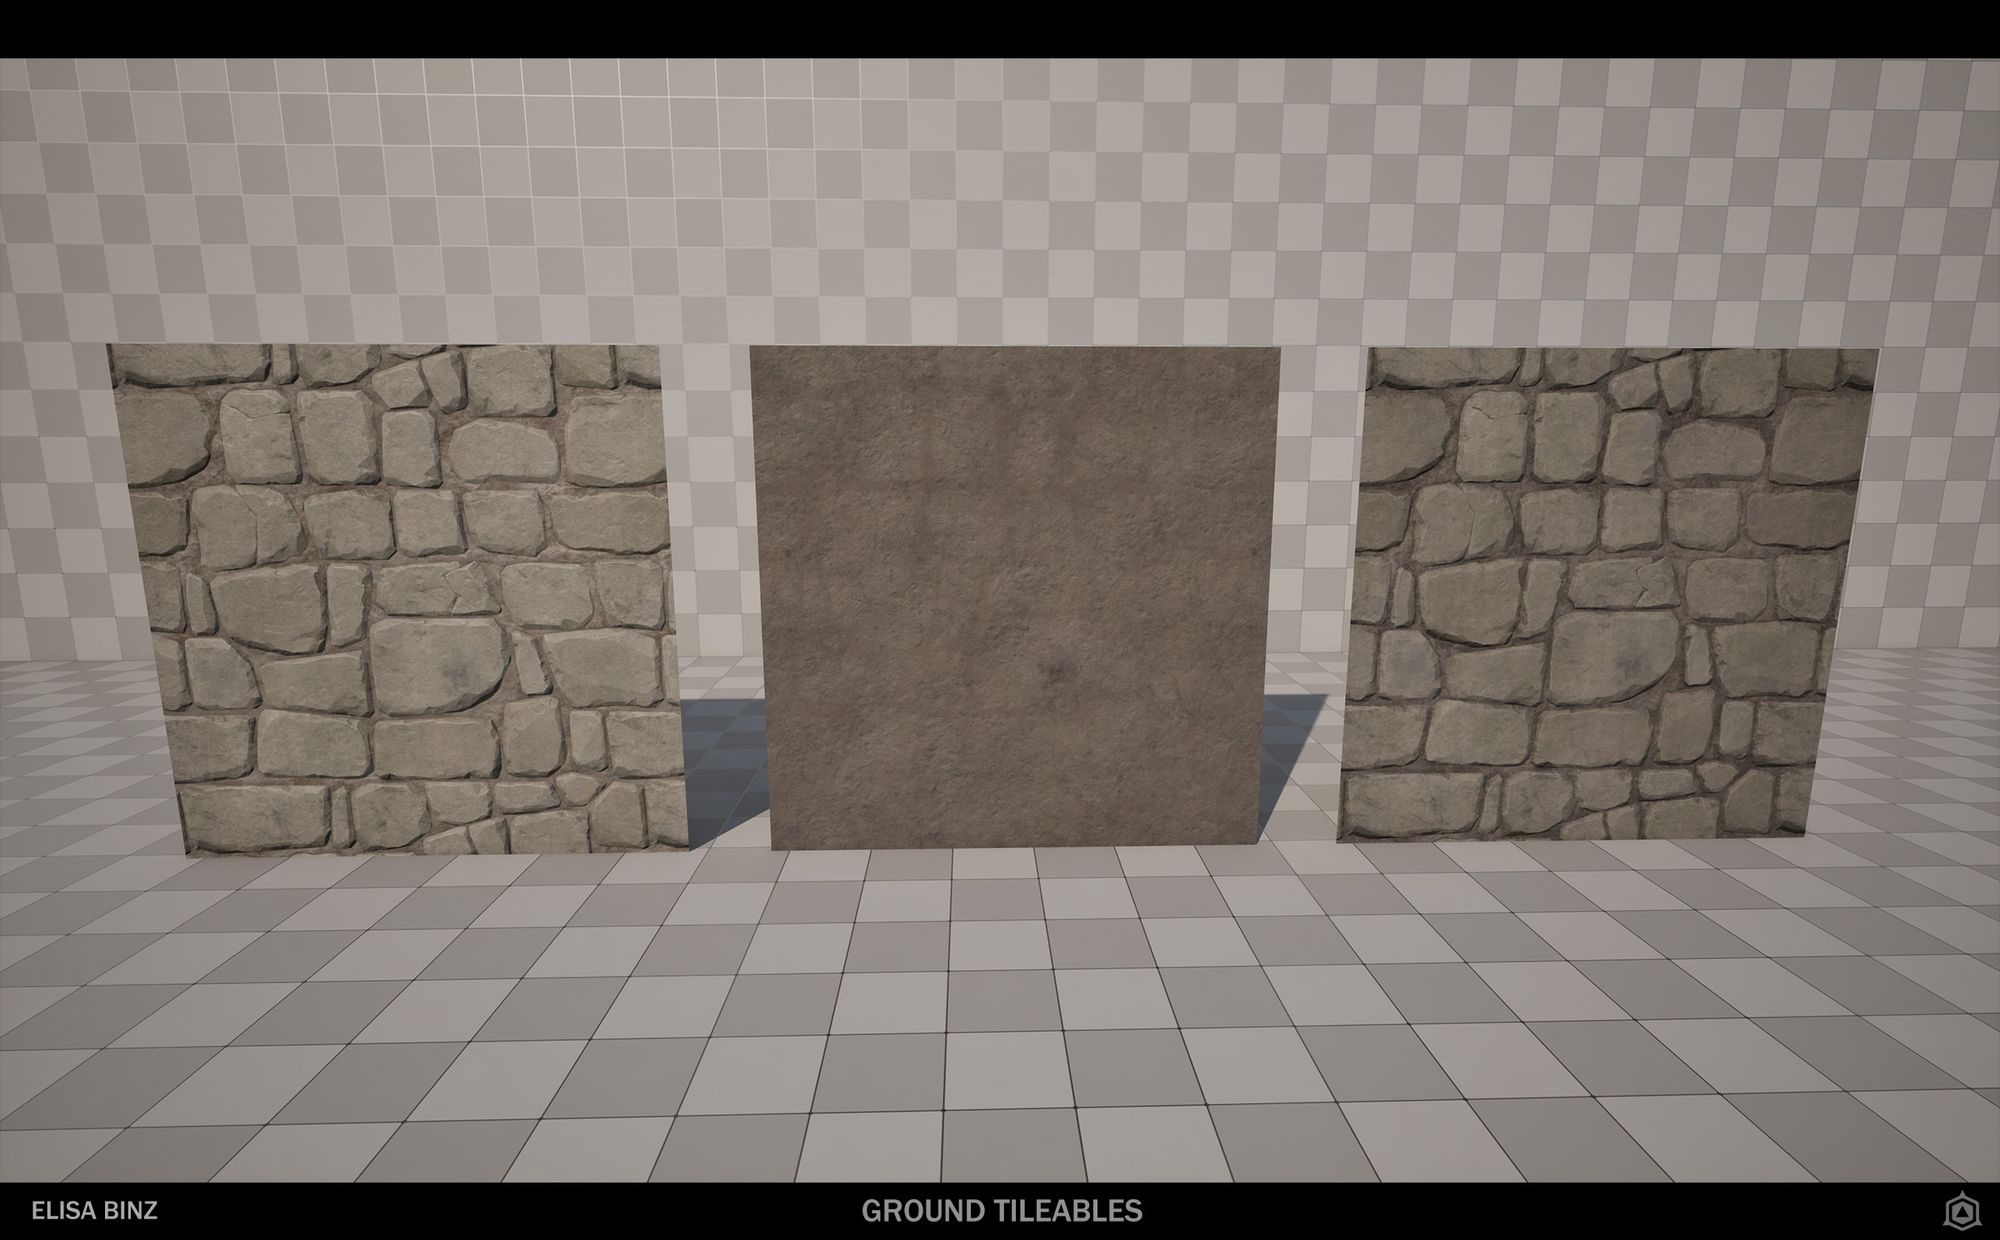
The tileables are a good way to fill the space. Without them, it feels a bit sad. To avoid this, I blocked out my tileables at the beginning of the project. They weren’t finished, so the scene still looked 'meh'. You can see the initial look of my tileables above.
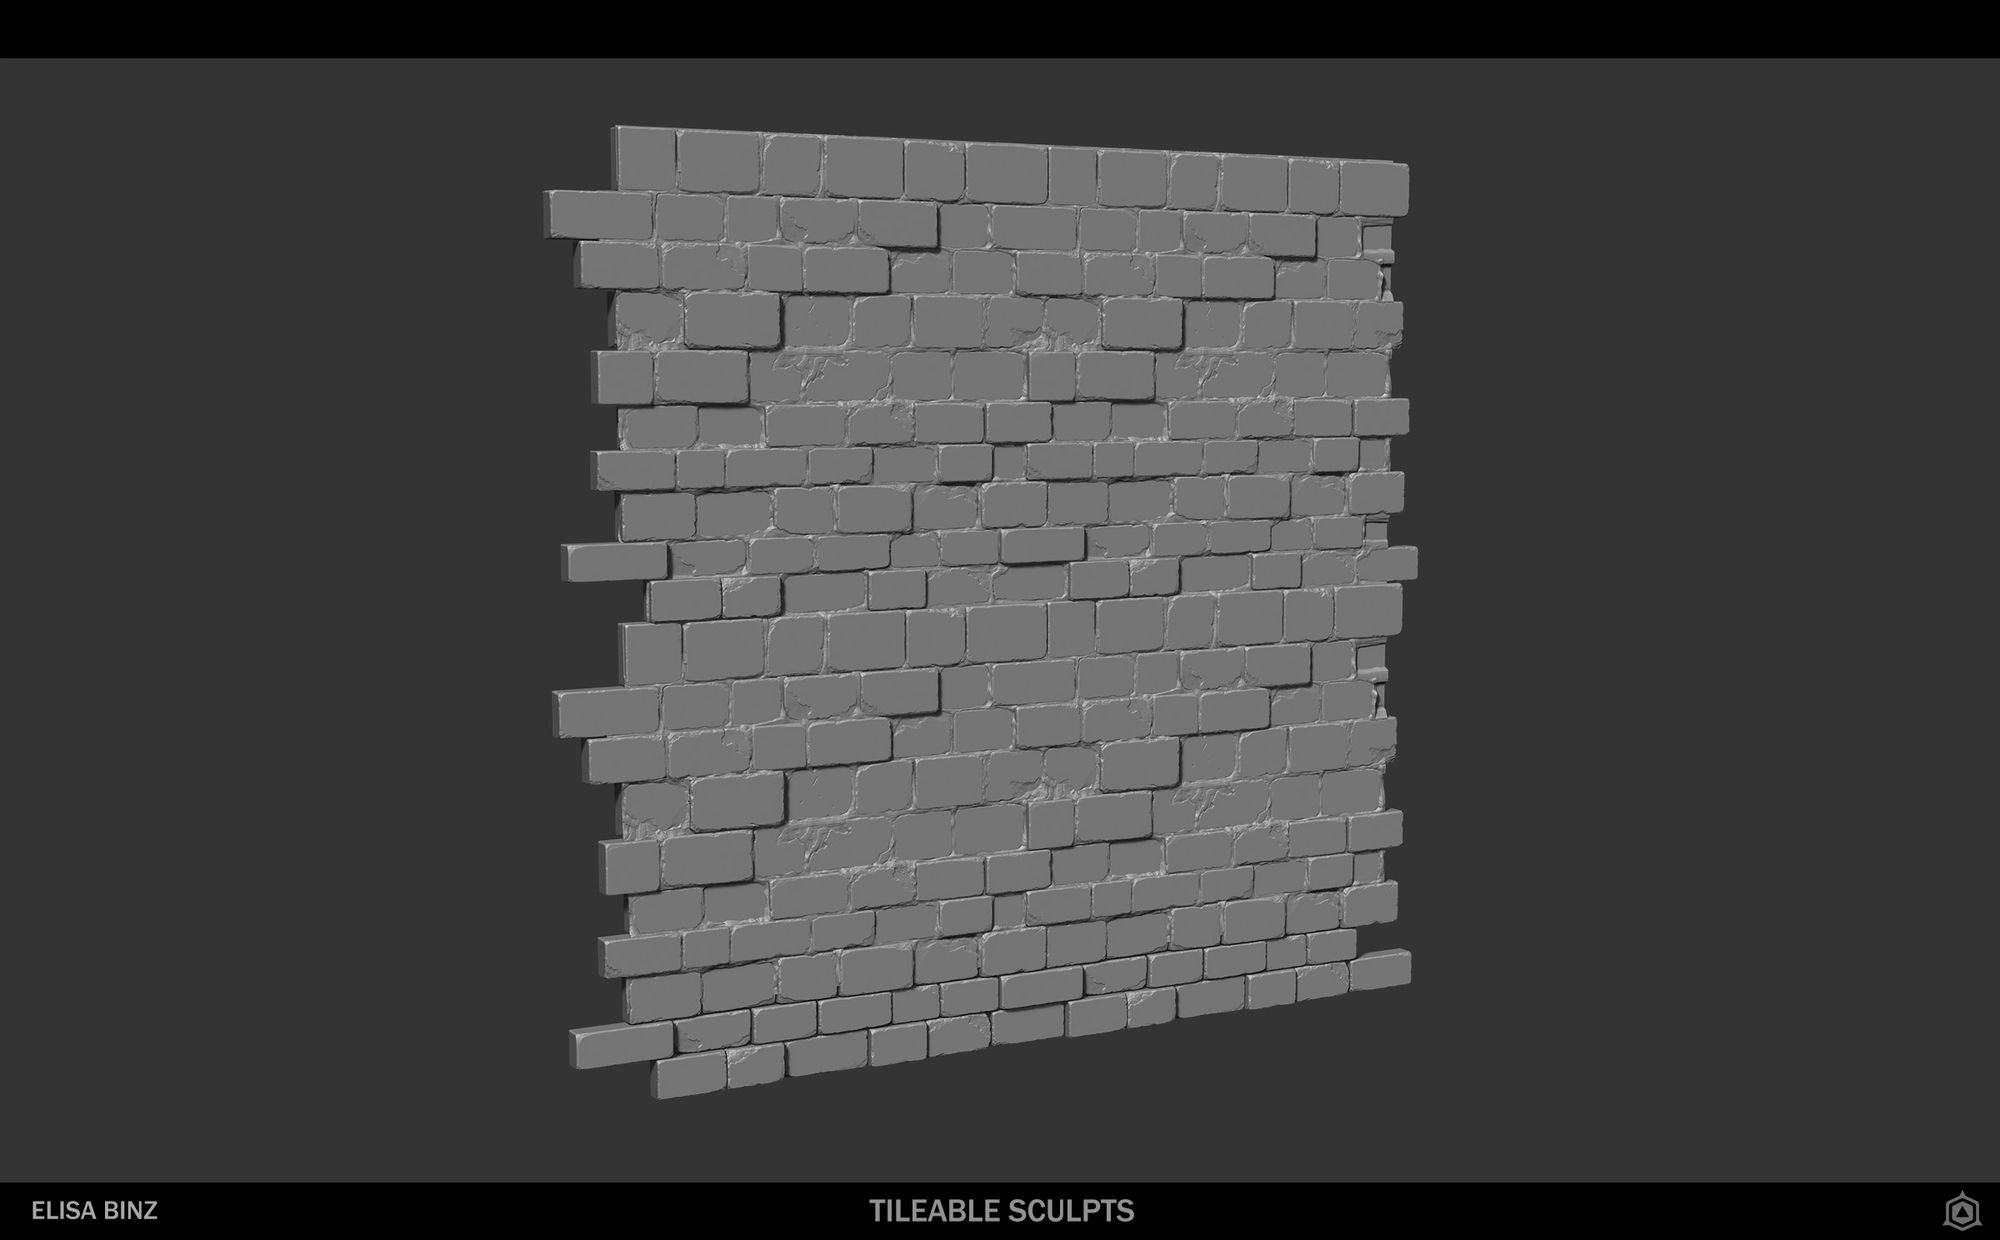
Creating a tileable from scratch isn’t easy. I started my tileables with a clean blockout in Blender. I began with a 2x2 meter plane. Then, I blocked out my rocks with simple shapes and used the Array modifier to repeat them every 2 meters. This helped me keep track of each rock after tiling. After achieving a nice rock composition, I sent them to ZBrush (without the Array) and sculpted them. Since there are numerous rocks in my tileables, I duplicated some of them and made slight adjustments.
The texturing process I’ve applied to my tileables is similar to that of my modules. The main difference is that I baked an ID map to facilitate the selection of rocks and color changes. I created variations for each tileable. The ground consists of a total of 3 tileables: one normal, one slightly dirtier, and another that is entirely dirt. For the walls, I have only 2 tileables: one clean and one dirty, with leaks.
With these variations, I created a simple Unreal Shader to blend these textures together. Using the Material Attributes makes it much easier for me to blend them. By utilizing one or two custom noises and vertex painting, I achieved a pleasing look that avoids being too repetitive. You can view my final tileables below:

I had a moment during that project when I was stuck with what to do next. My modules were nice, I had the base of my tileables but the scene was too empty, almost sad.
So I had to think :
What story do I want to tell in my environment? If it is a cathedral, then it might be a religious place. What do we find in religious places?
I decided to visit a church to see what was there and what could be interesting to add to my scene. Afterward, I added more props such as benches, paintings, banners, and so on. Gradually, my scene started to look much better. Following the Uncharted 4 artistic direction, I decided to distress the benches and paintings, resulting in a pleasing outcome that would further improve with some VFX and additional small objects.
The project was coming to an end and even the small things added life. I could stay with this result or make it even better.
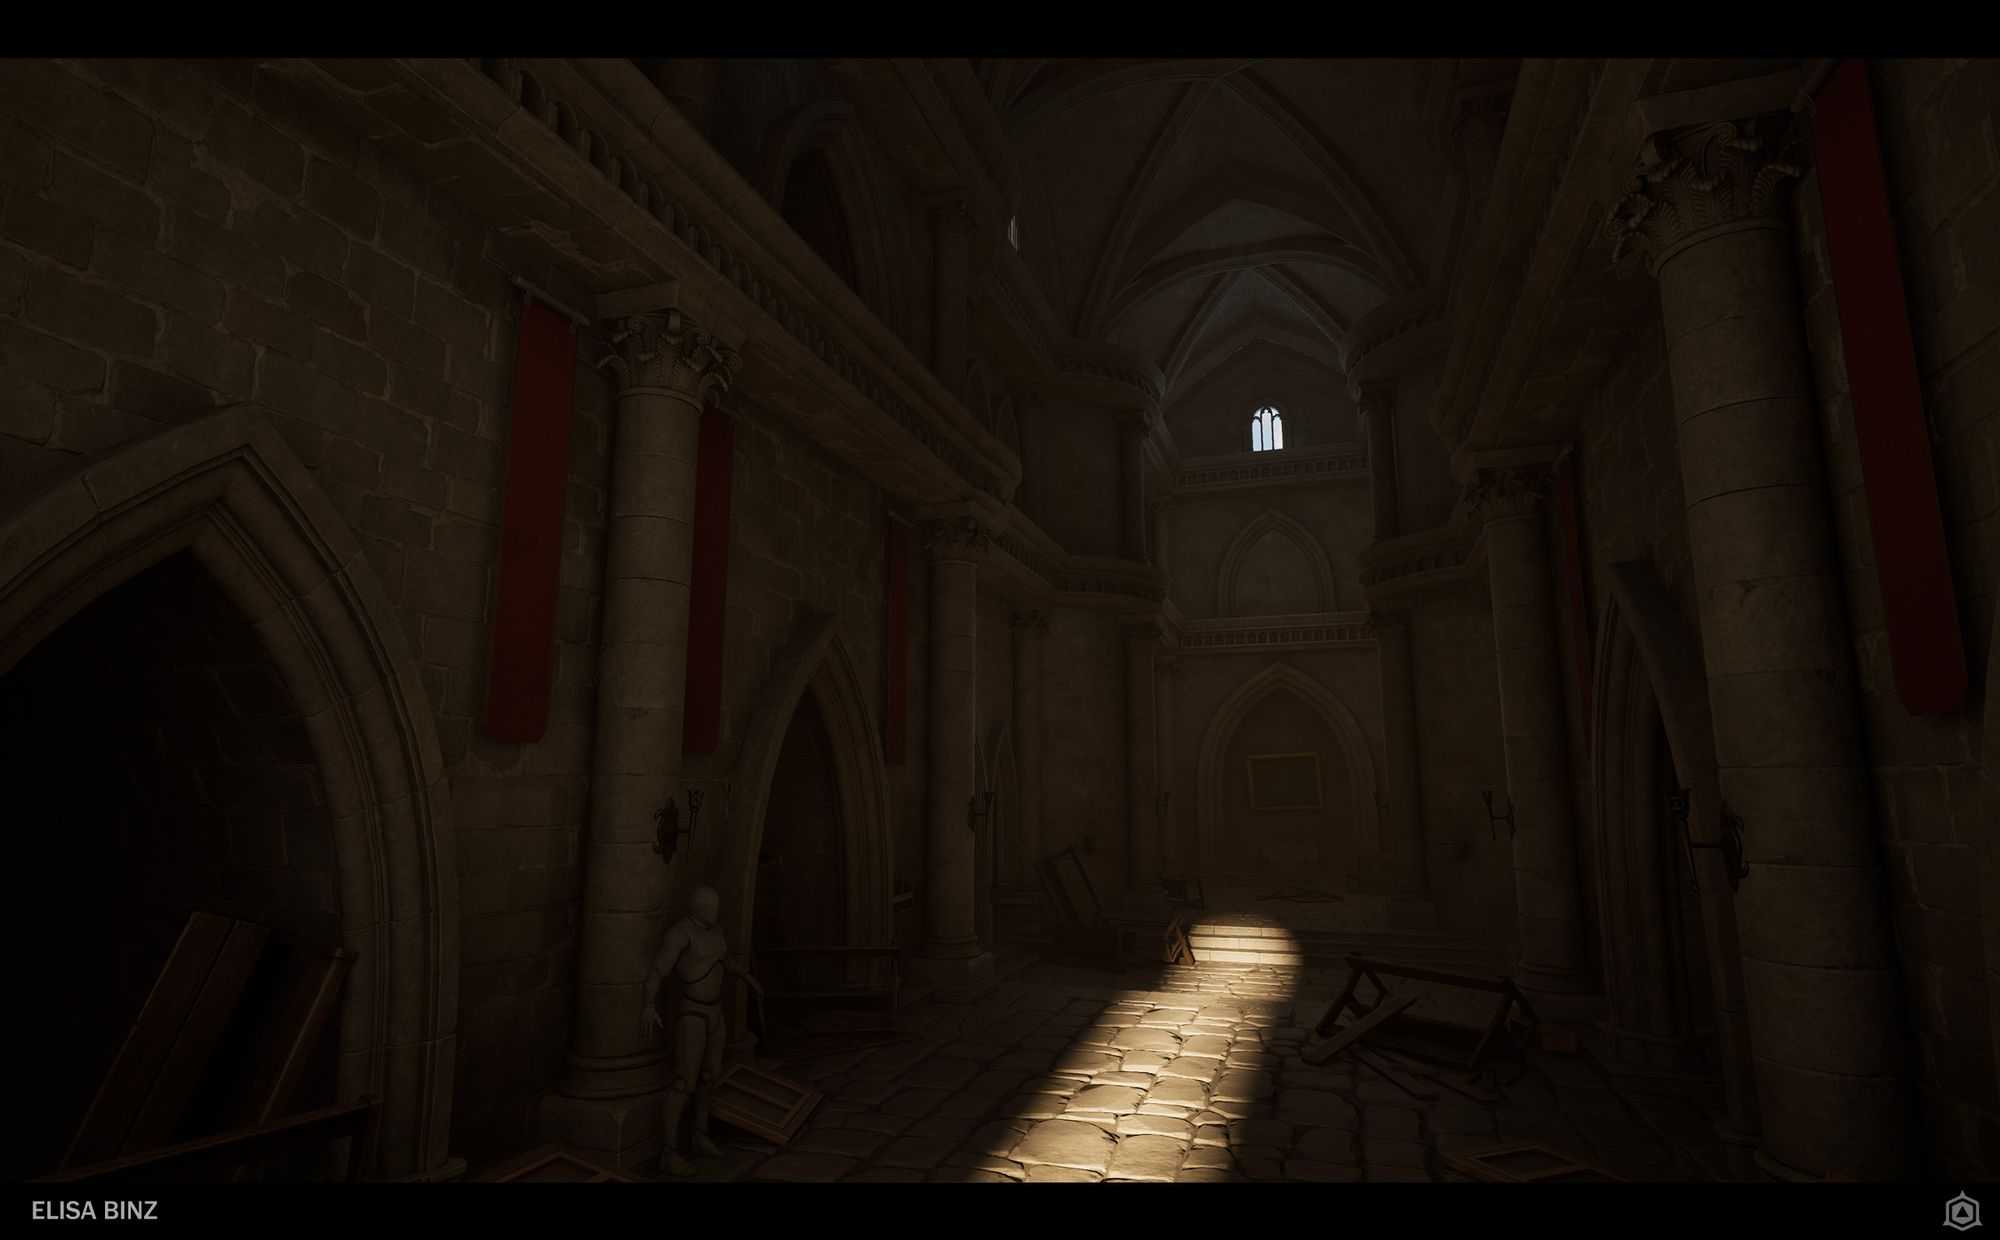
So, with the help of Sophie Almecija, I added a chandelier to fill the void above our heads. I also reused leaves from a previous project, my Norwegian Telephone Booth. Additionally, I created some books, sheets, and simple rocks to add more small details. The final touches included some lighting tweaks and VFX. Using Niagara, I created a simple dust effect to enhance realism. And... Tada! Here we are!

Thank you so much for reading this far; it means a lot to me! A big thanks to our teachers Matthieu Laude, Yoan Autin, and Sophie Almecija for the class, as well as to my friends for their feedback and tips. I also want to express my gratitude to anyone who provided feedback and assistance on this project. If you enjoyed my work, you can check out my profile on The Rookies or my Artstation portfolio. Feel free to ask if you have any questions; I'd be glad to answer them.