The Production Process for 3D Vehicle Assets for Games
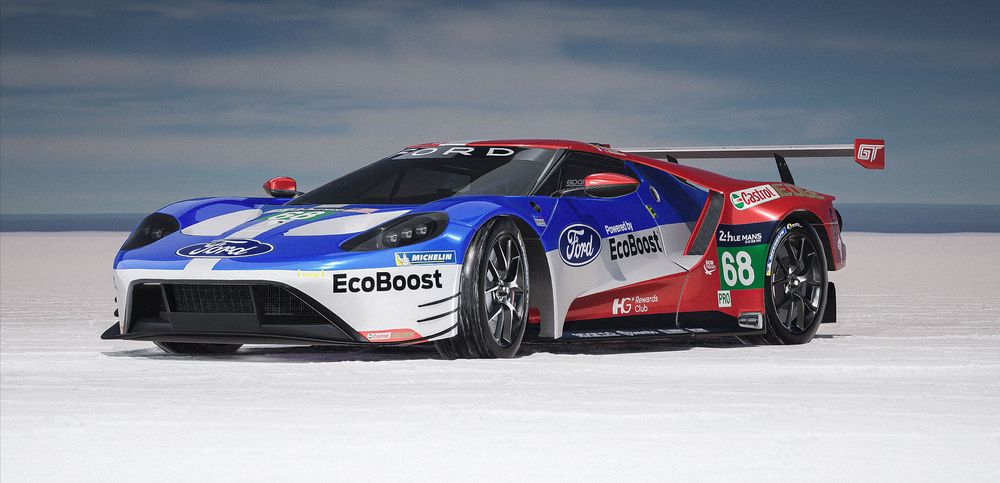
Staffordshire University student Rinalds Bitte, aspiring to be a 3D Environment Artist, showcases his recreation of a Ford GT in his impressive Rookies portfolio.
Staffordshire University student Rinalds Bitte, aspiring to be a 3D Environment Artist, showcases his recreation of a Ford GT in his impressive Rookies portfolio.

Rinalds Bitte is a current student at Staffordshire University, whose goal is to become a 3D Environment Artist. Impressed with Rinalds' Rookies portfolio, we invited him to share details about his recreation of a Ford GT. In this article he shares an easy to follow production process for 3D vehicles for games.
I created this project as part my hard surface course at Staffordshire University, during my second year of studies. I decided to create the Ford GT 2016 with the LeMans #68 livery.
The colourful livery, flow of shapes and the general design caught my eye. Yet, even before I began I knew this would be a challenge. Especially when I had never attempted to create a car before.
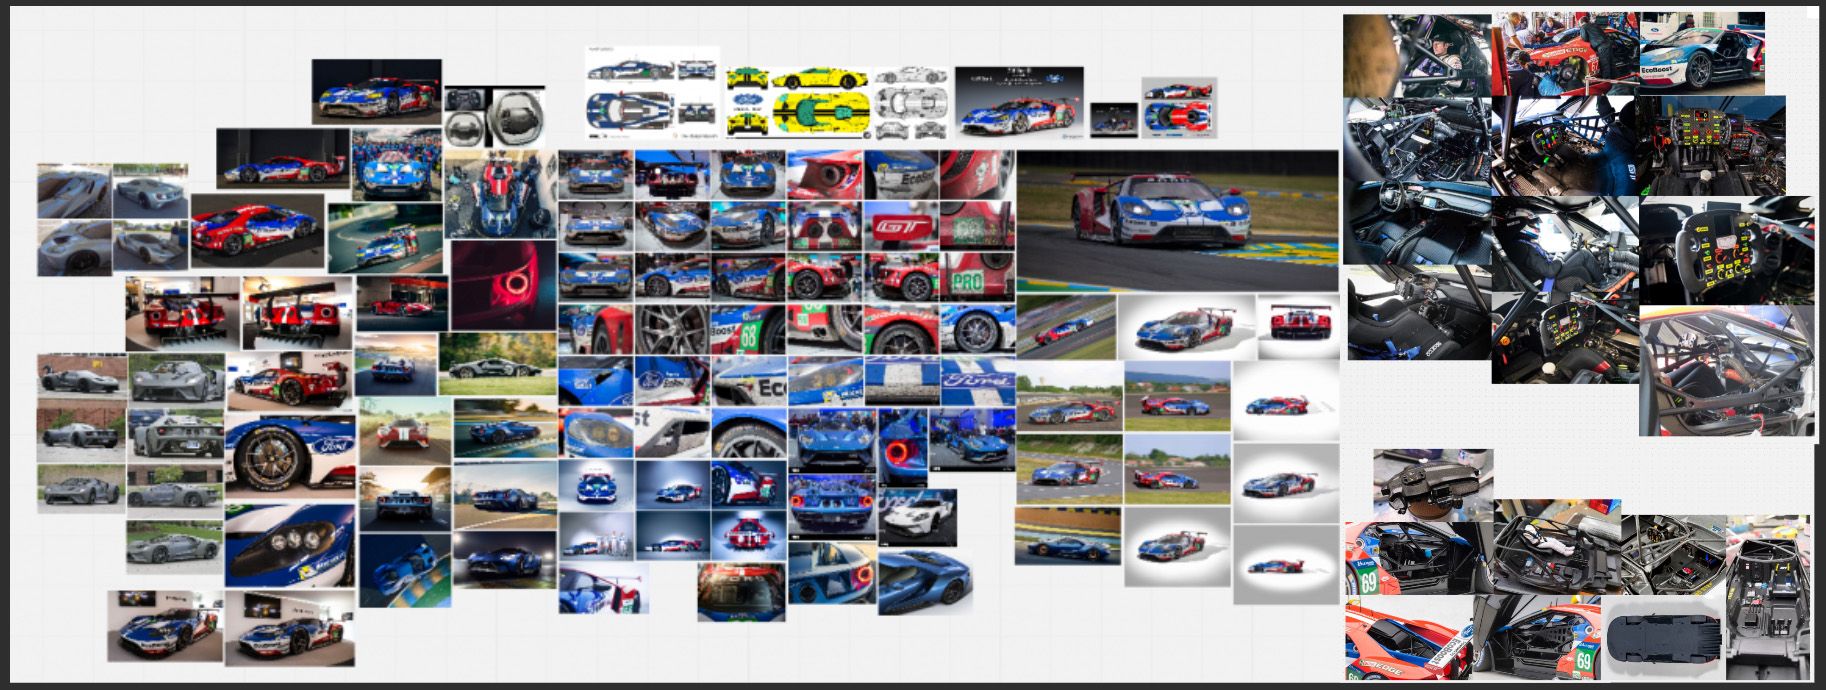
I gathered as many reference photos from every angle I could find. At this stage, it was vital that I got all the correct details so that I knew exactly what I needed to model.
I used Miro to group all the imagery I found. In general, I find Miro more accessible compared to PureRef since sharing and access over the web is a simple process. This is particularly useful for students, such as myself, since I don’t always have the access to the same workstation.
I was lucky to find a few galleries of photos with close ups of the exact livery I required. References for the interior of the car were a lot harder to find, so I had to fill in the gaps with other versions of the same car model. On that note, I also found that using miniature scale toy models as reference helped with establishing the correct proportions and layout. Especially for the interior elements in this case.
Before starting any sort of modelling, I set up my workspace. I imported reference blueprints and sized them accurately to the real world scale of the car. Since I was modelling the LeMans (2016) version I had to find specific blueprints for that model.
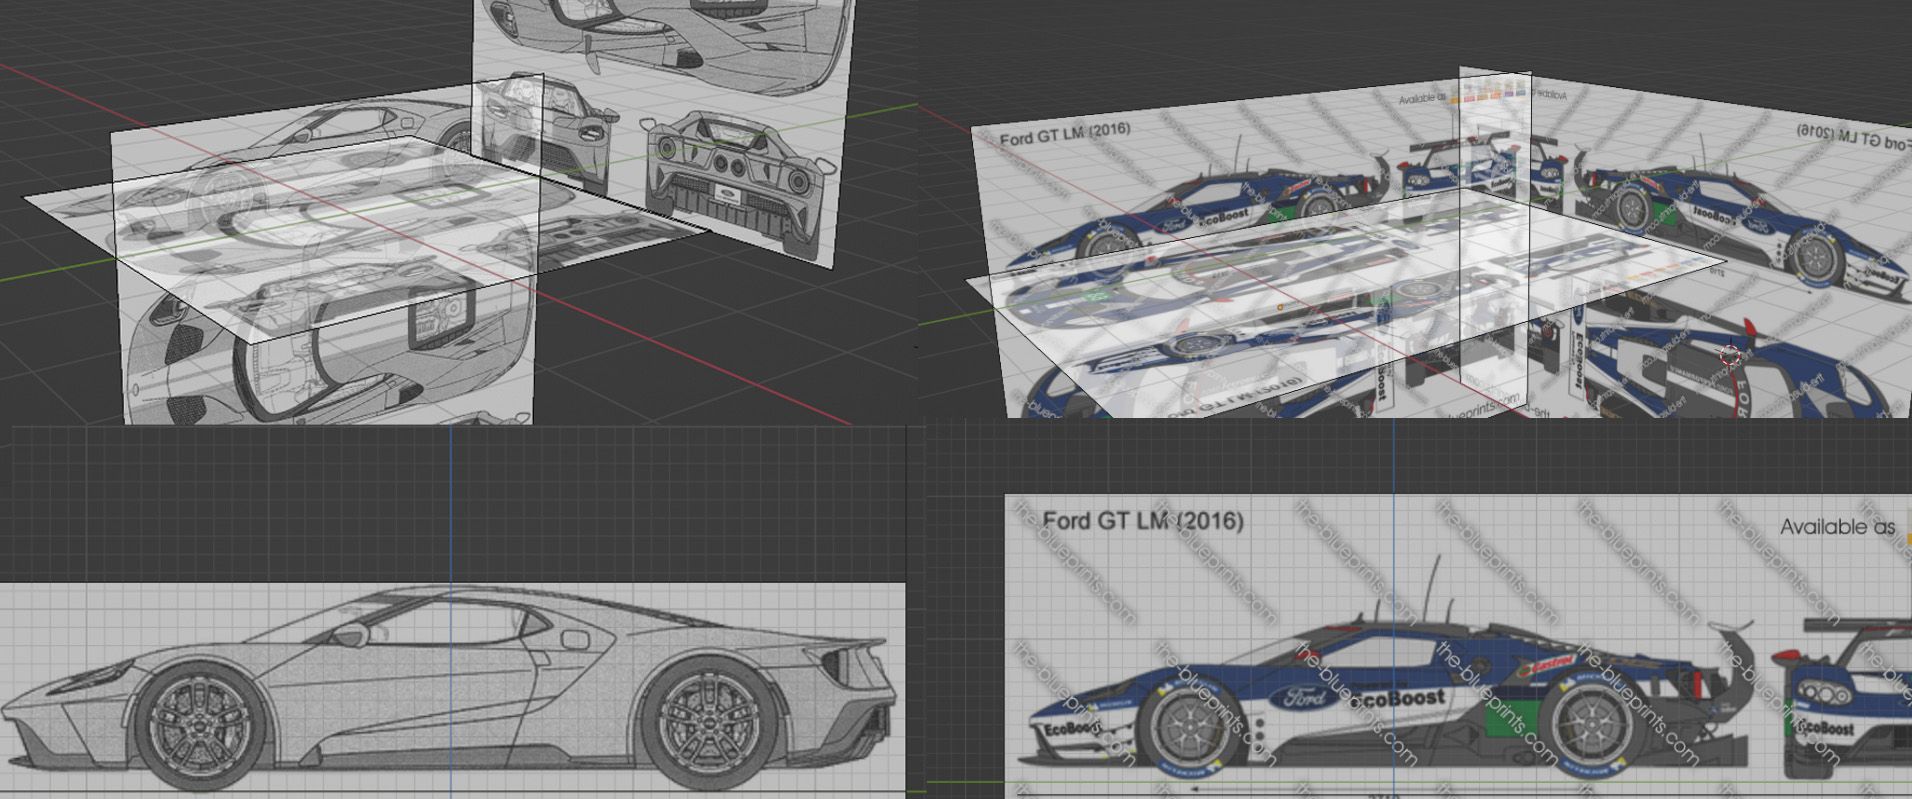
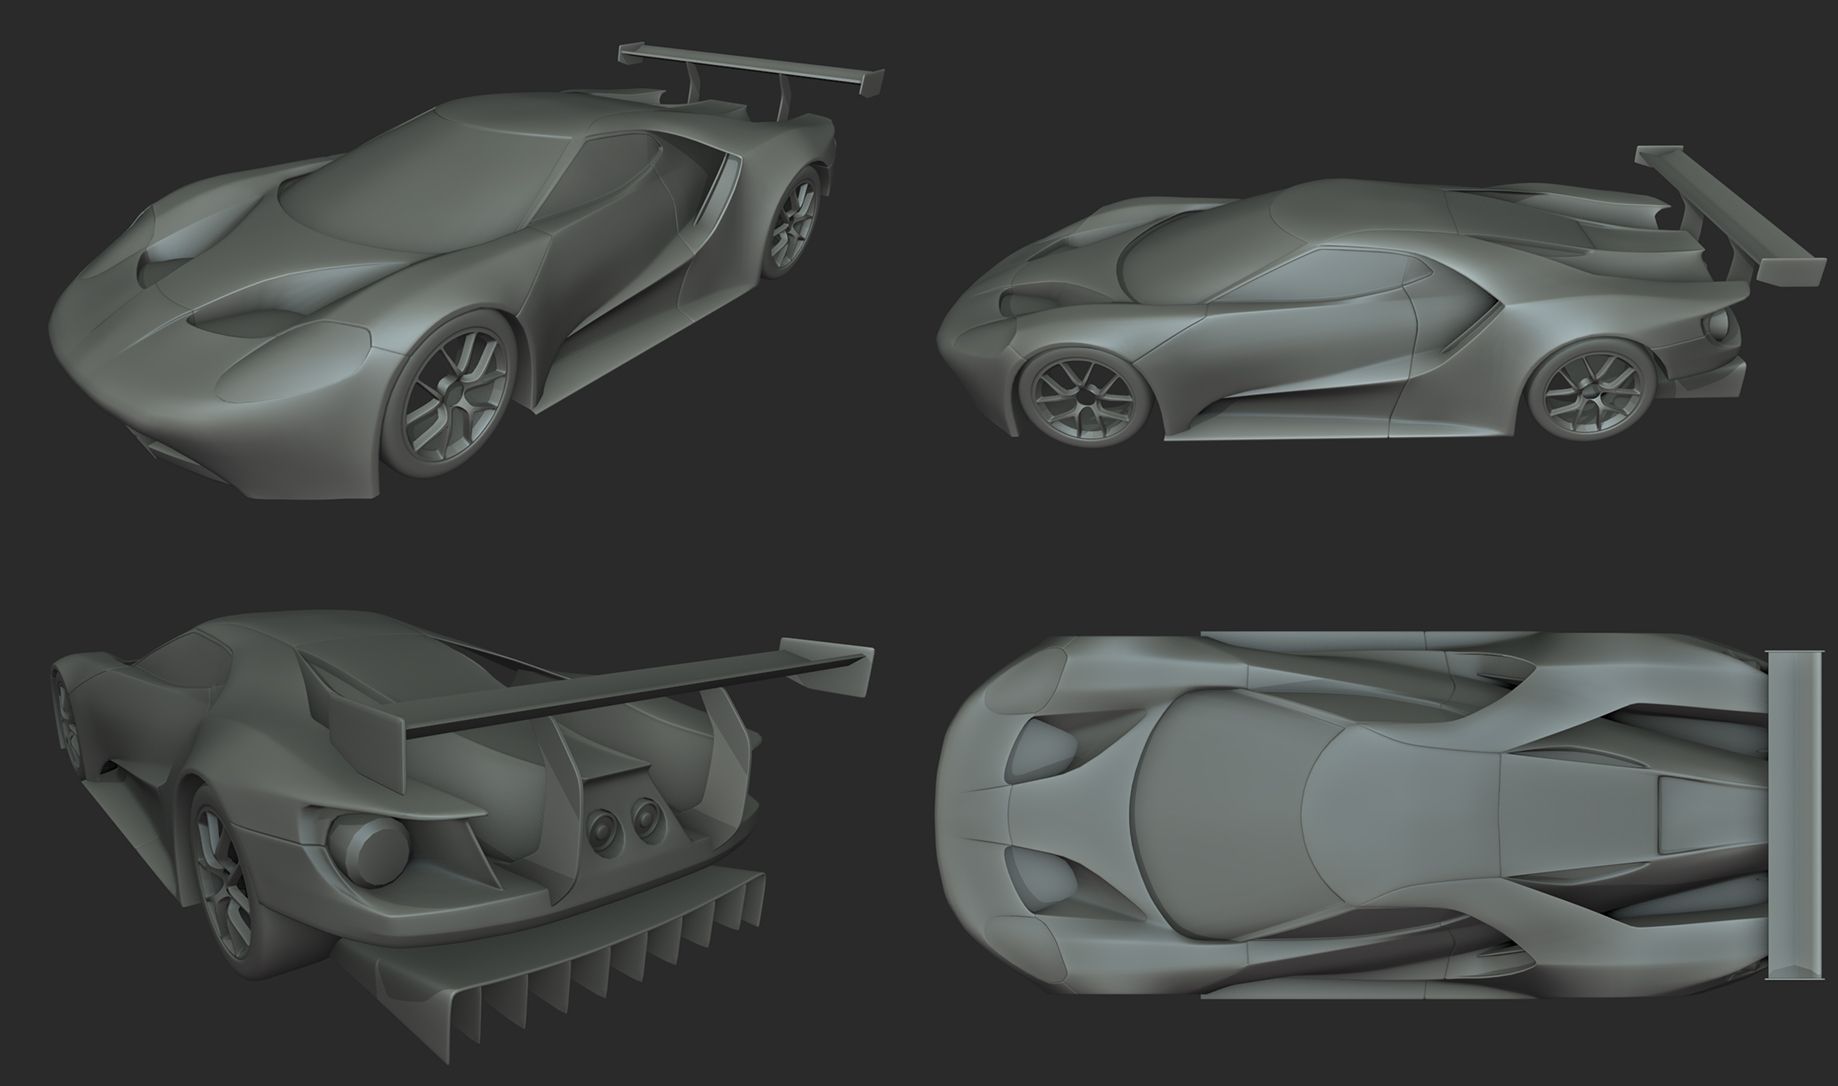
To model the car I used the subdivision modifier inside Blender. There weren’t any specific techniques used, I utilised the gizmo tool to move the edges/vertices to match with the blueprint lines. I made use of the mirror modifier at the centre line - this meant that I only had to model half of the car since both sides are identical.
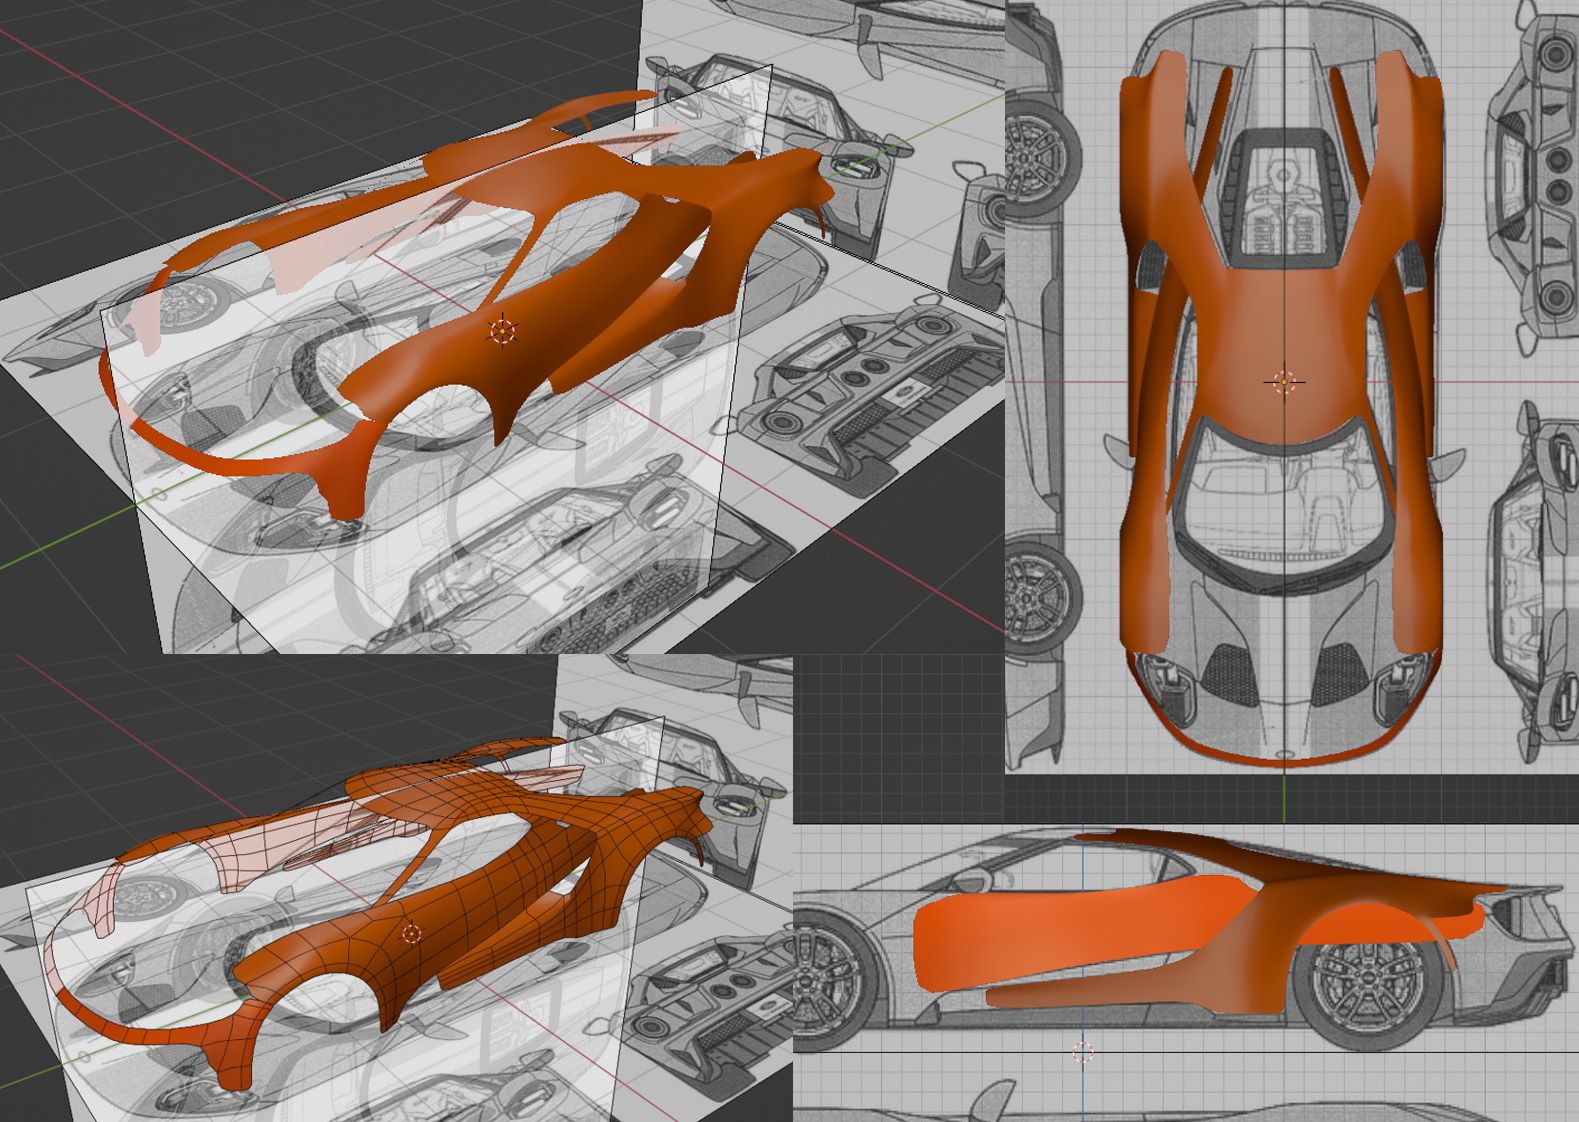
Wherever I needed tighter/more pronounced edges I added supporting loops. It was vital to keep the mesh in quads to ensure no pinching or artefacts appear. This is common practice with subdivision modelling.
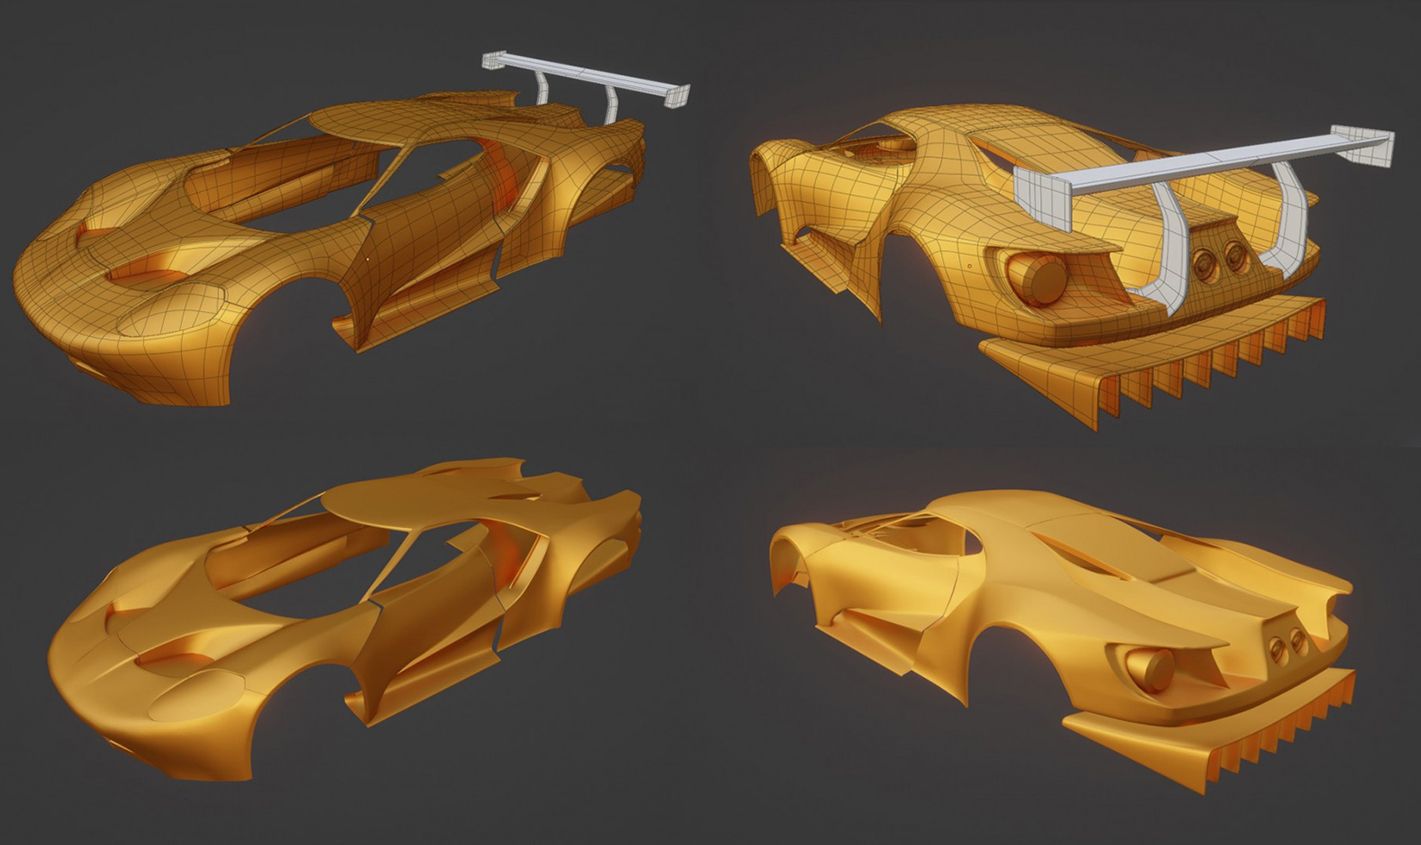
During the initial modelling stages, the most important thing to me was to capture the flow of shapes and contour lines of the car. I continually observed the model from various angles and made sure the shapes read correctly.
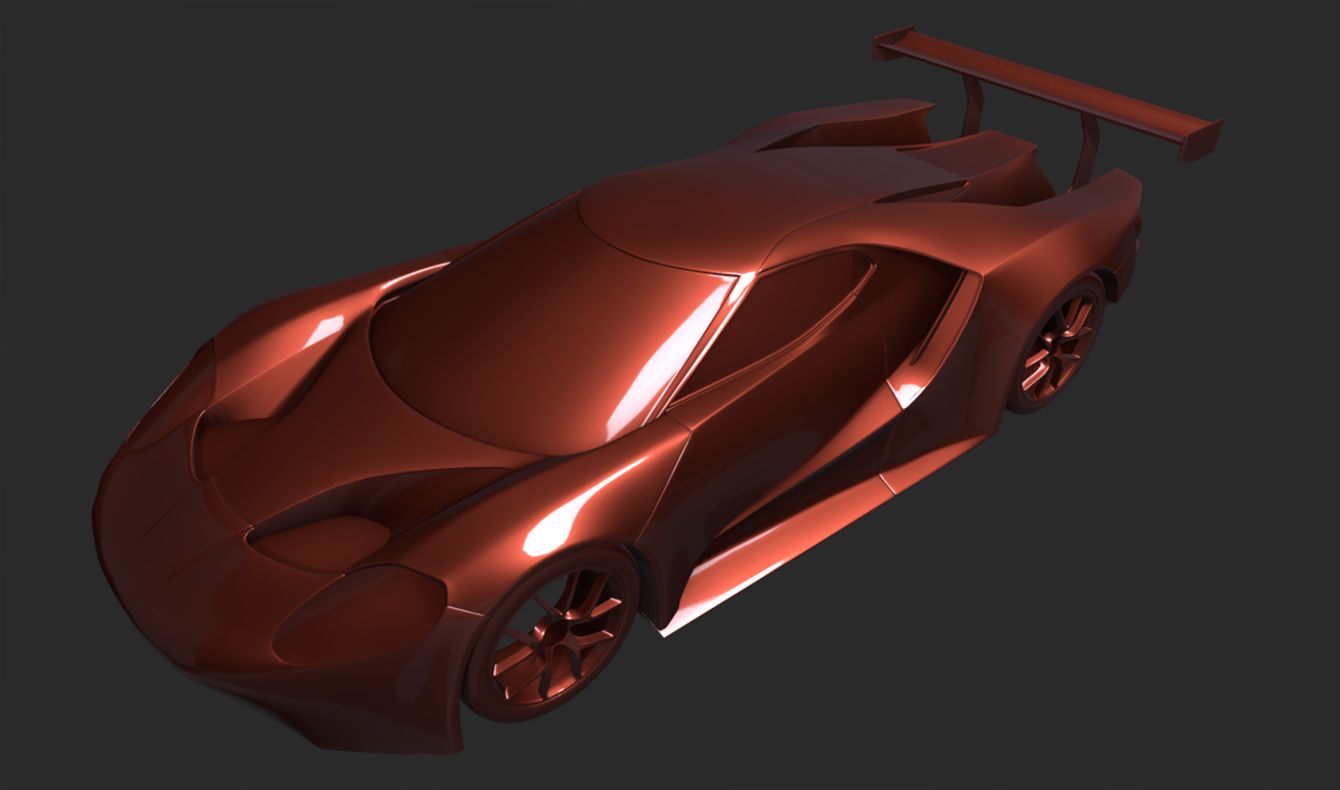
It was very helpful to apply a reflective Matcap frequently throughout the modelling stage - I used the default blender one (any reflective one will do). It helped me spot any shading errors or inconsistencies with the topology.
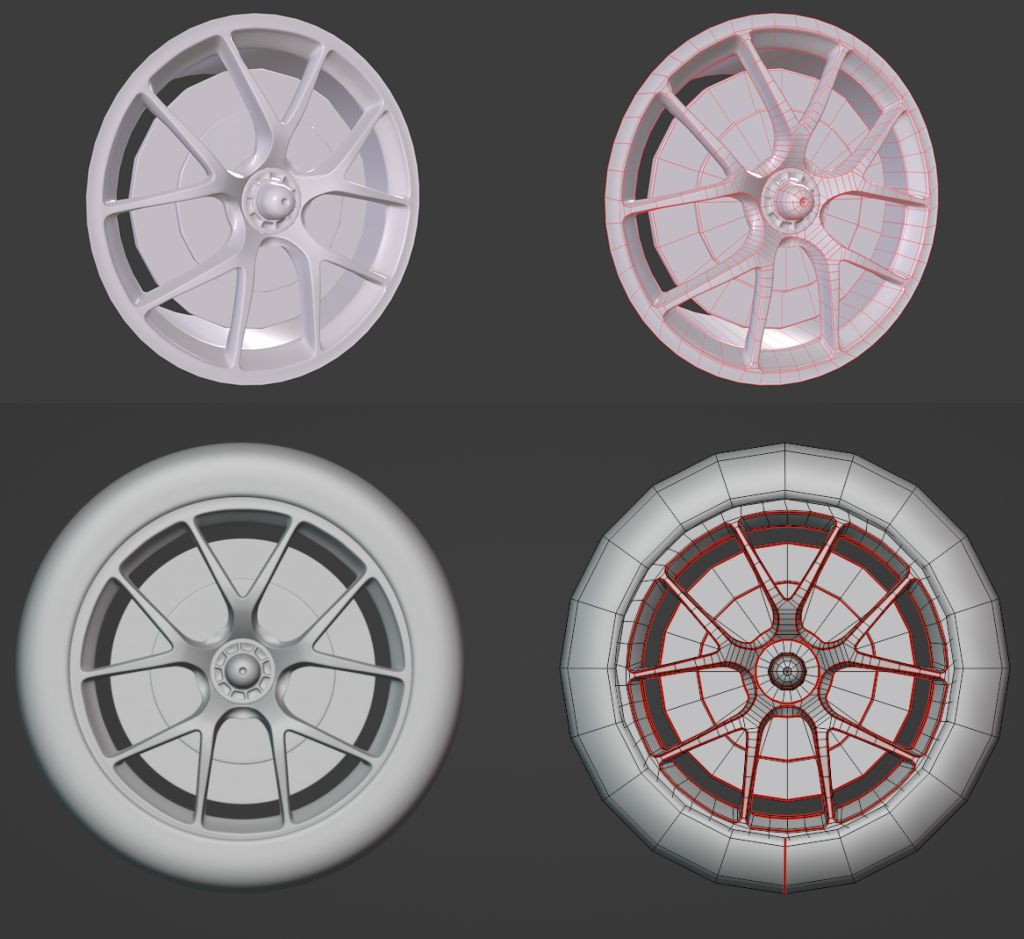
Another tool that I made use of when modelling was the array modifier. This meant that I only had to model a single section of the alloy and repeat it over. Saving me valuable time in the process.
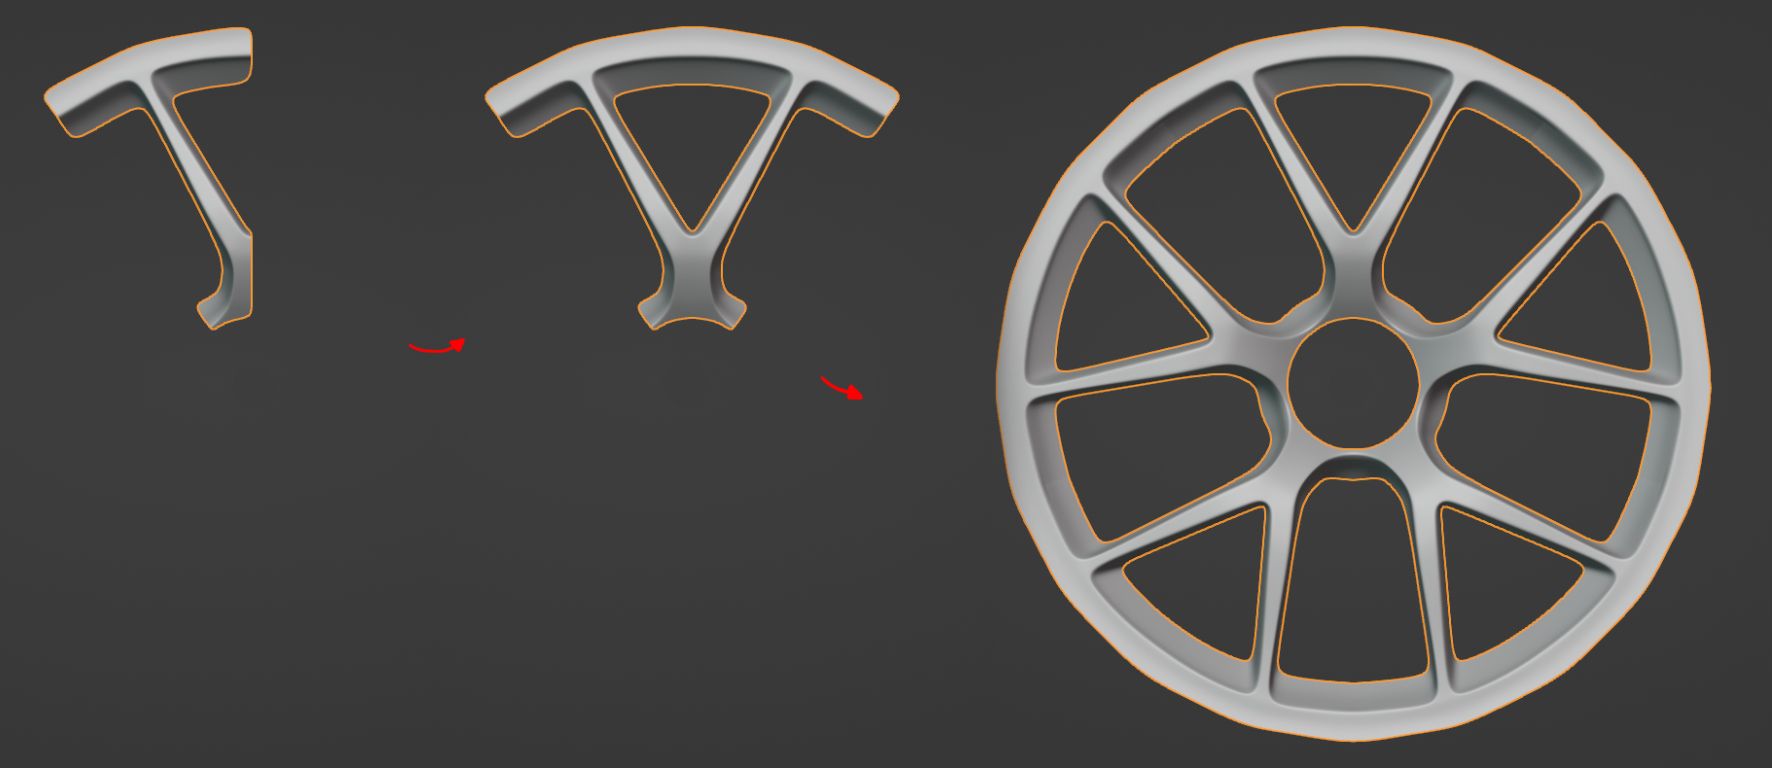
The alloy was one of the few elements that I had to create a high poly mesh for and bake it down onto a low poly to generate a normal map. I wanted the edges and light reflection to appear smoother when rendering.
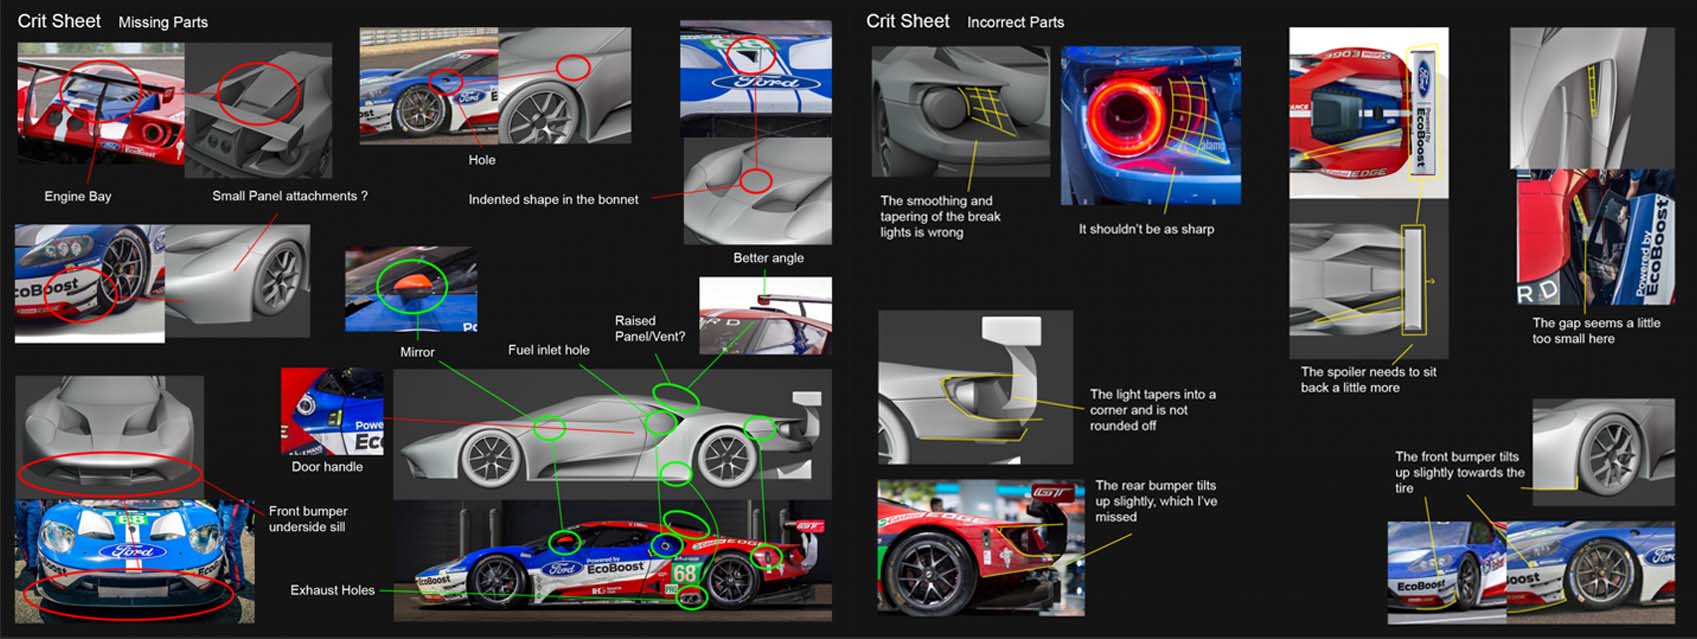
Something that I did throughout, which I highly recommend, is to continually critique your own model. I compared my work directly to reference and highlighted the parts that needed more work. At the end of the day, I rarely expect to get everything right the first time, by pointing out my own mistakes it helps develop my eye in catching these issues early rather than late in development.
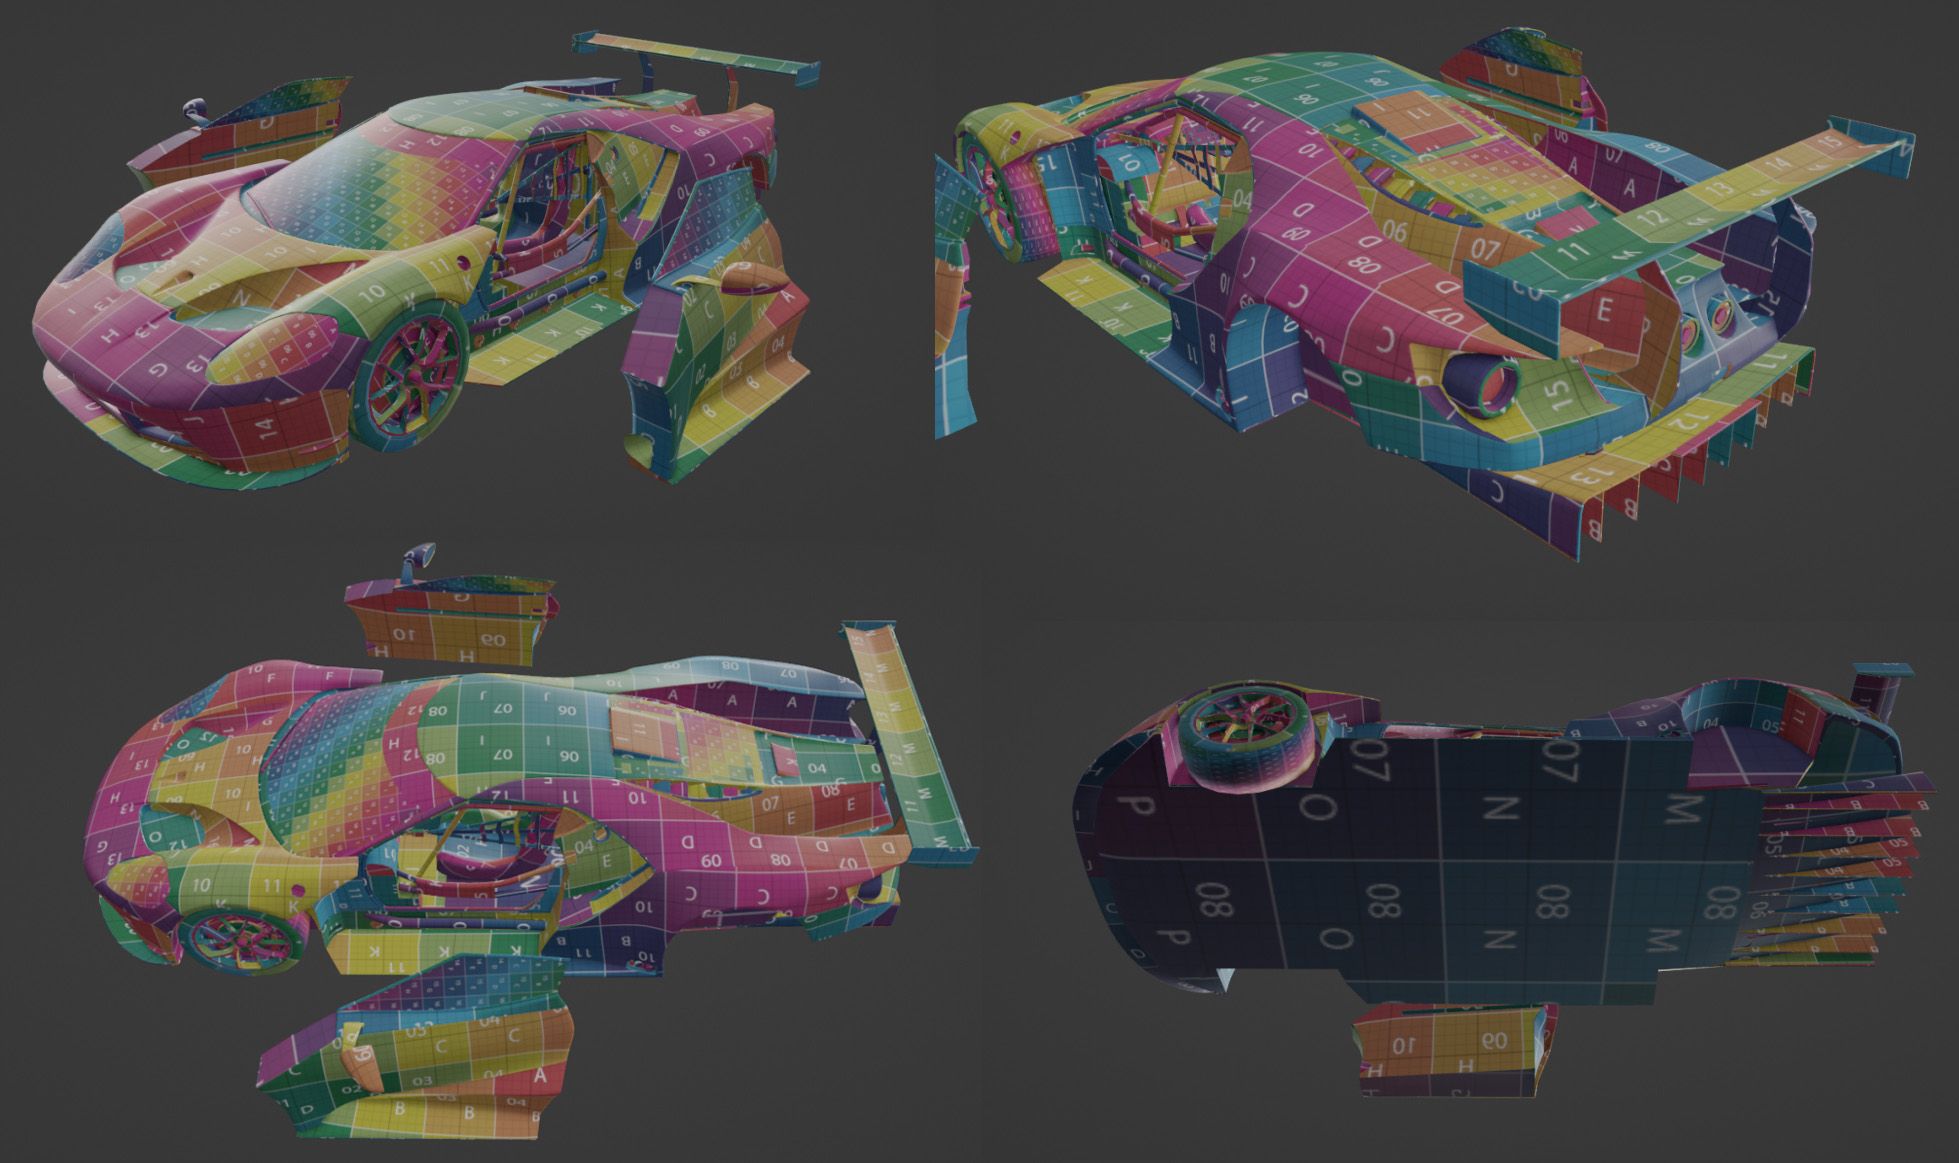
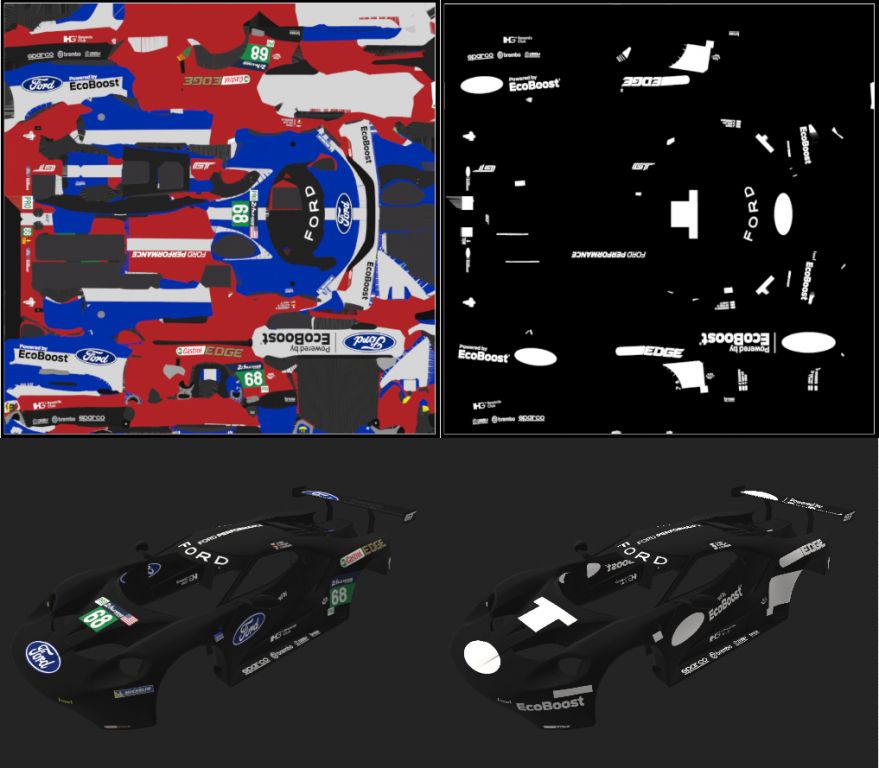
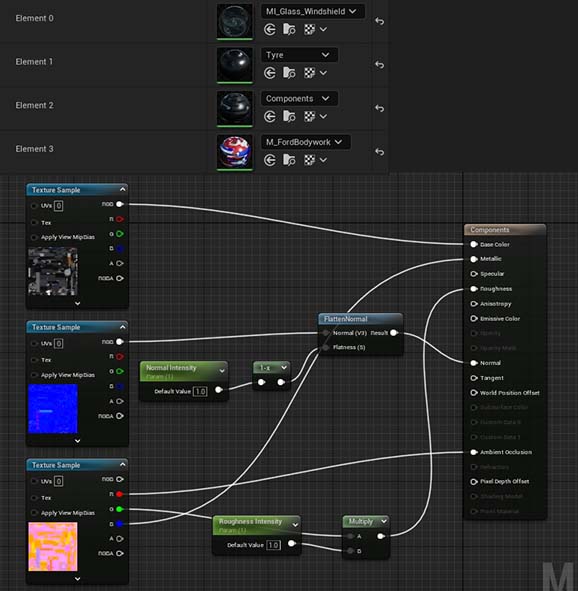
I was allowed 4 texture sets for my car, I separated all the components into their respective sets:
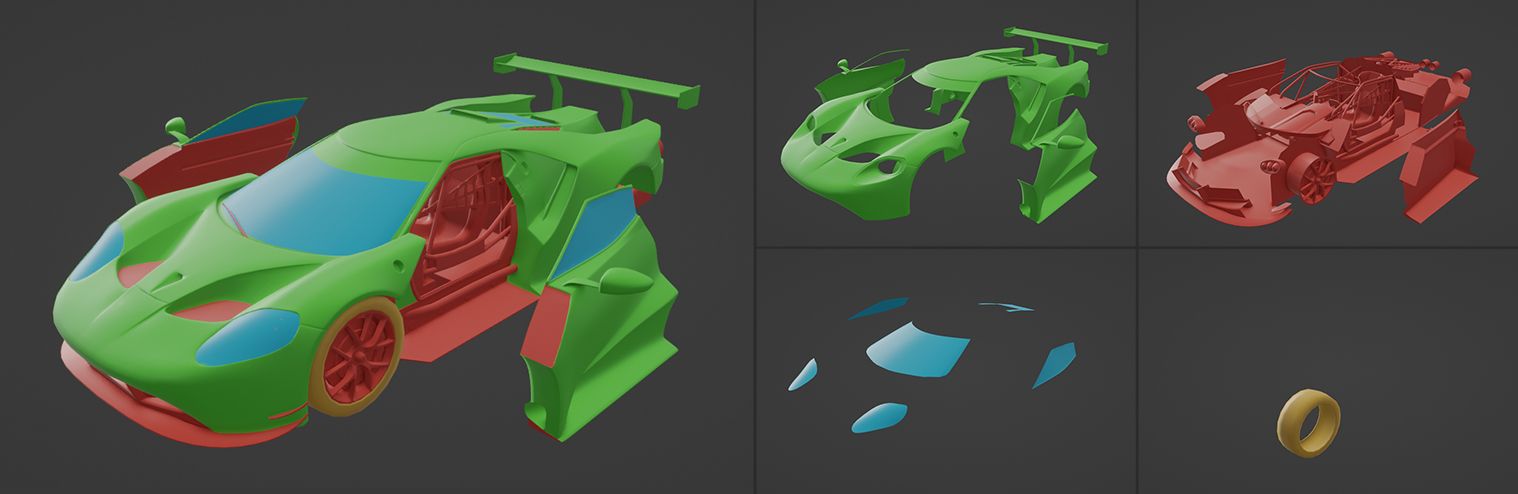
Since I had separated all my textures, I was able to hide or show the texture sets and the meshes associated with them whenever necessary.
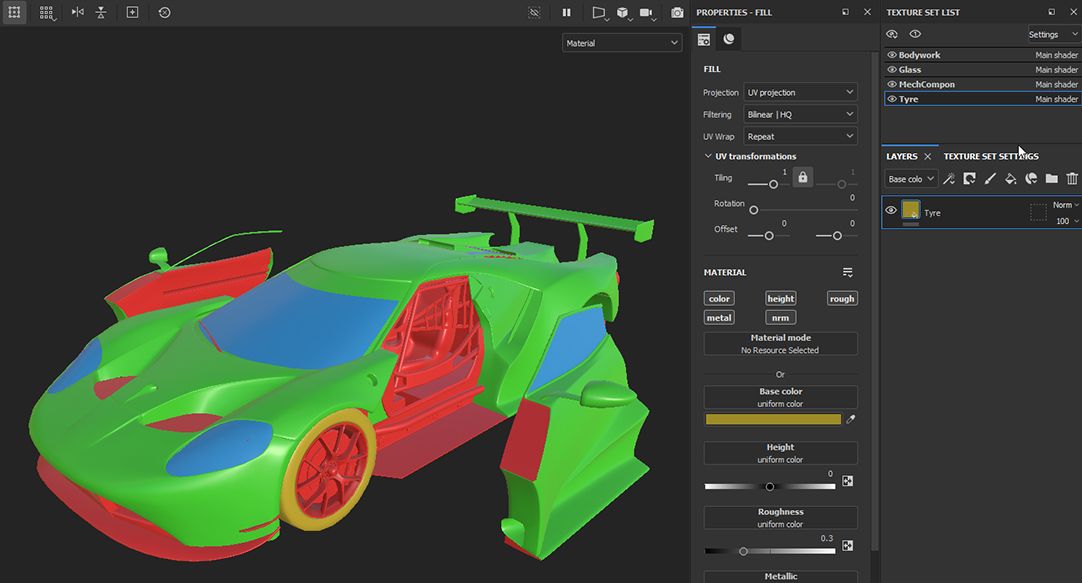
I kept my texel density even throughout the mesh to avoid any issues when texturing. The glass was going to be its own separate translucent shader in Unreal Engine, therefore I wasn’t worried that it was slightly higher texel density.
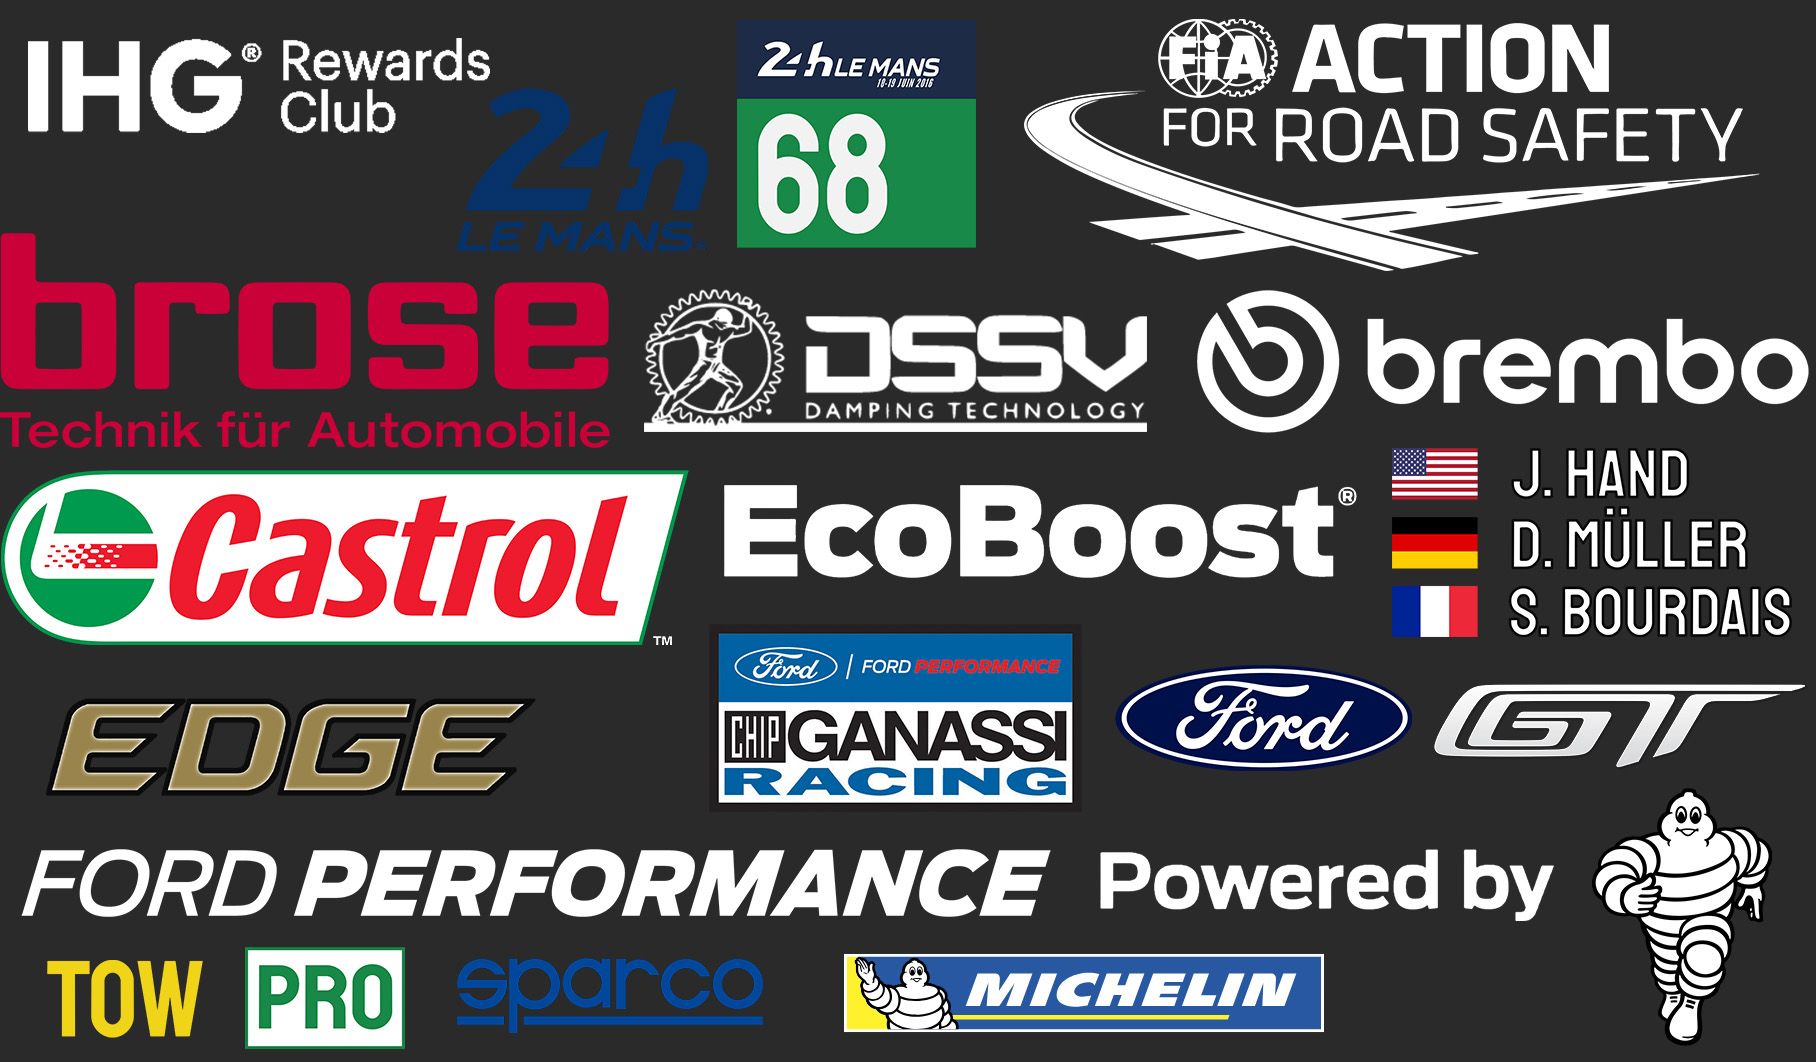
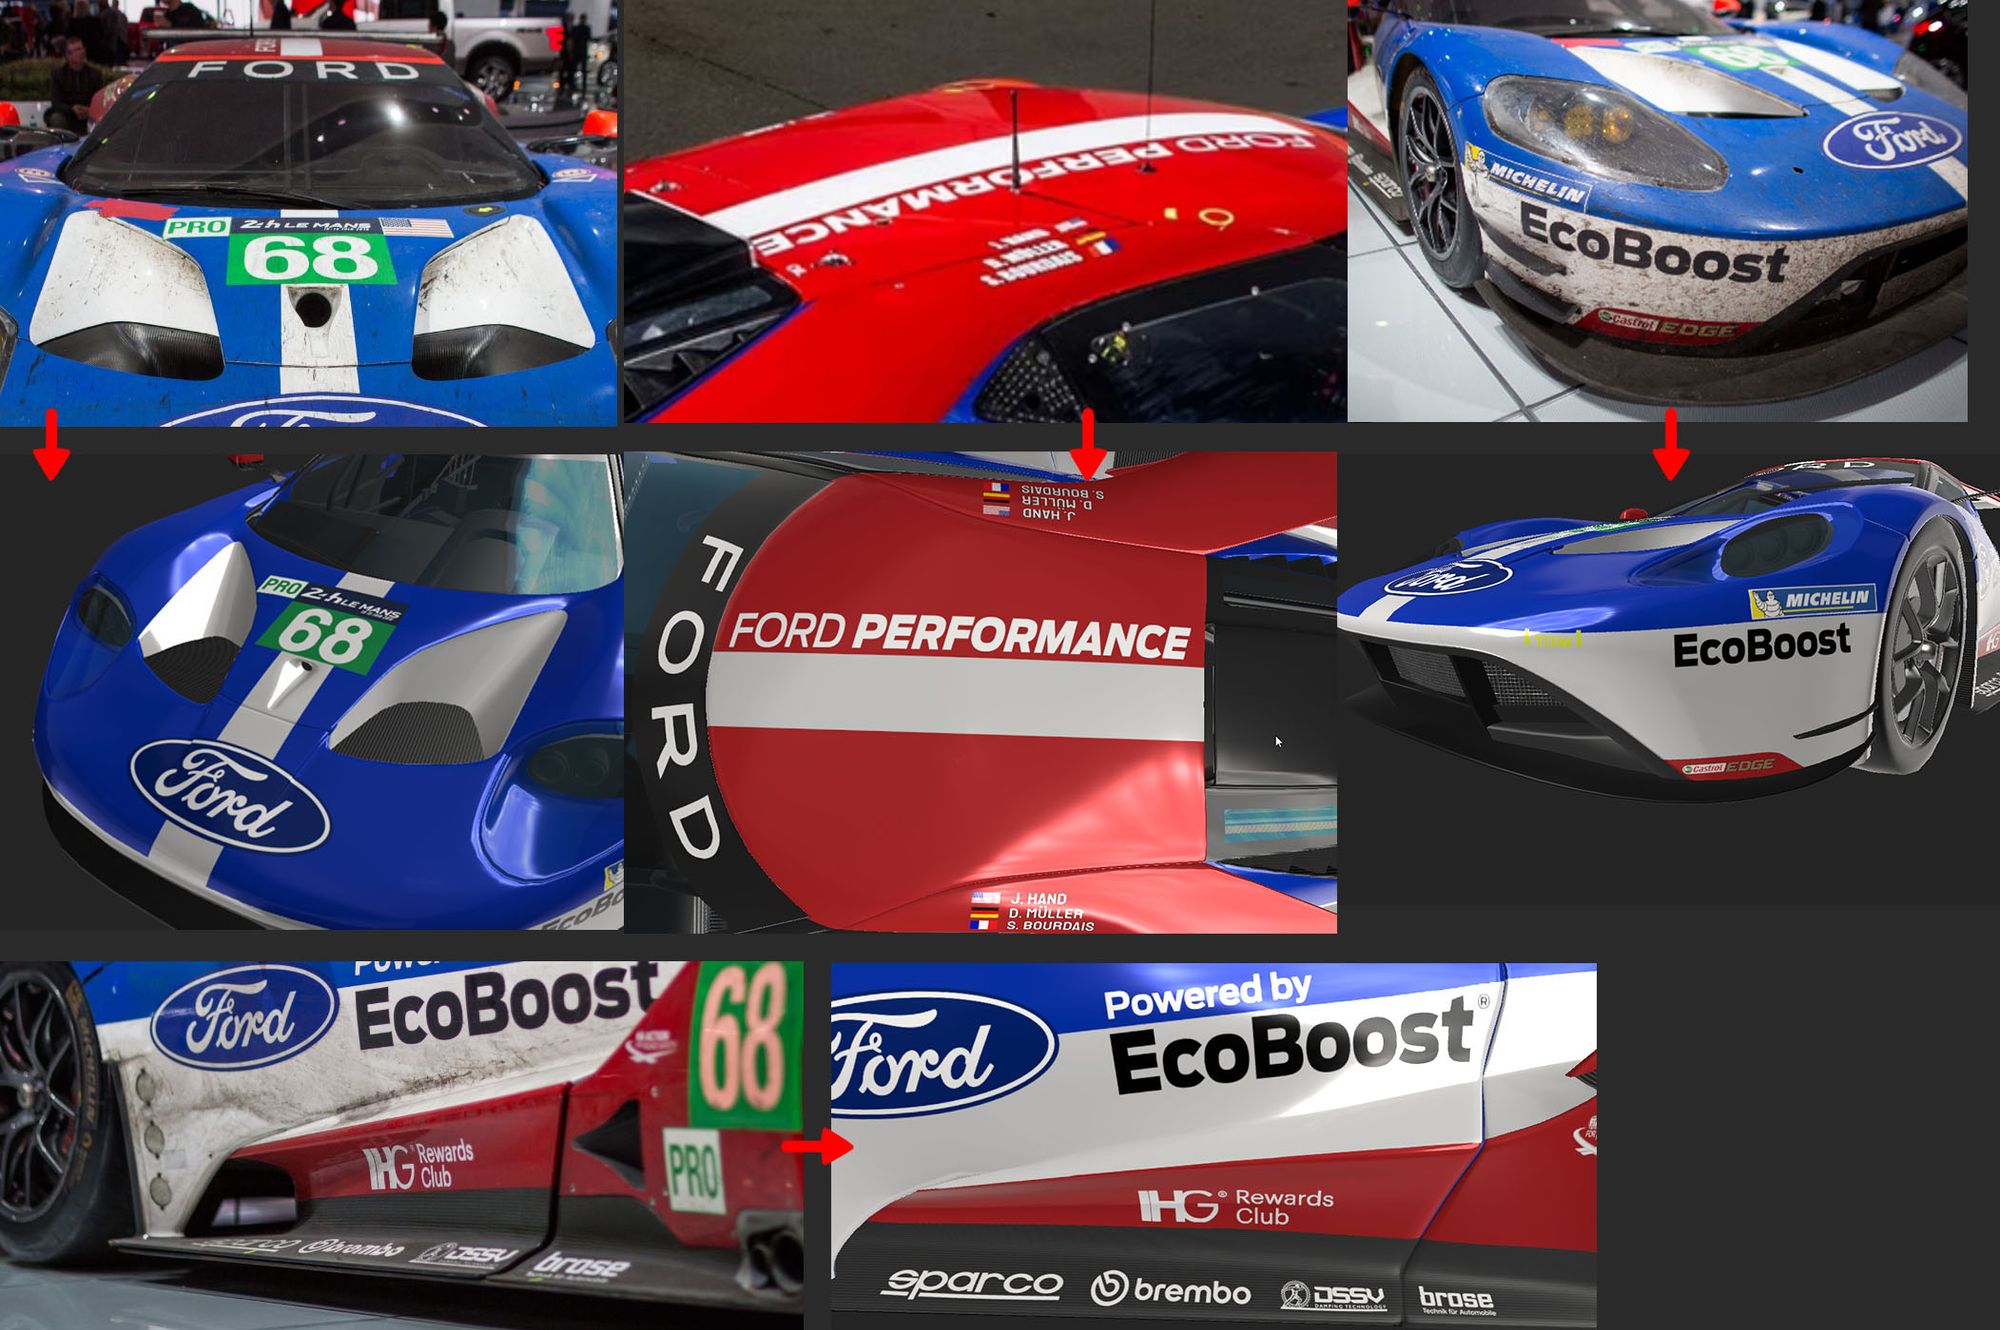
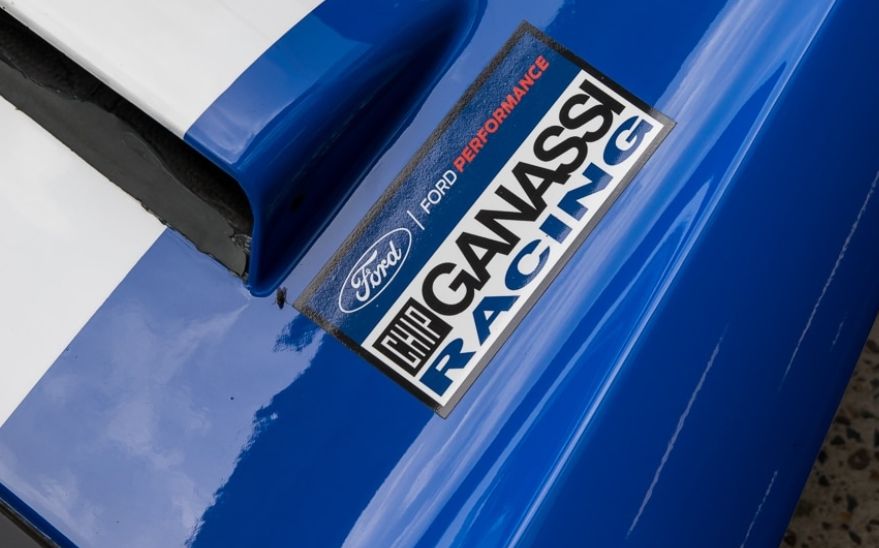
I was closely matching my chosen livery, so I had to search the internet to find various logos. Some of these I had to modify or in some cases create from scratch in photoshop to match the reference. Some stickers required complete rework from their original logos.
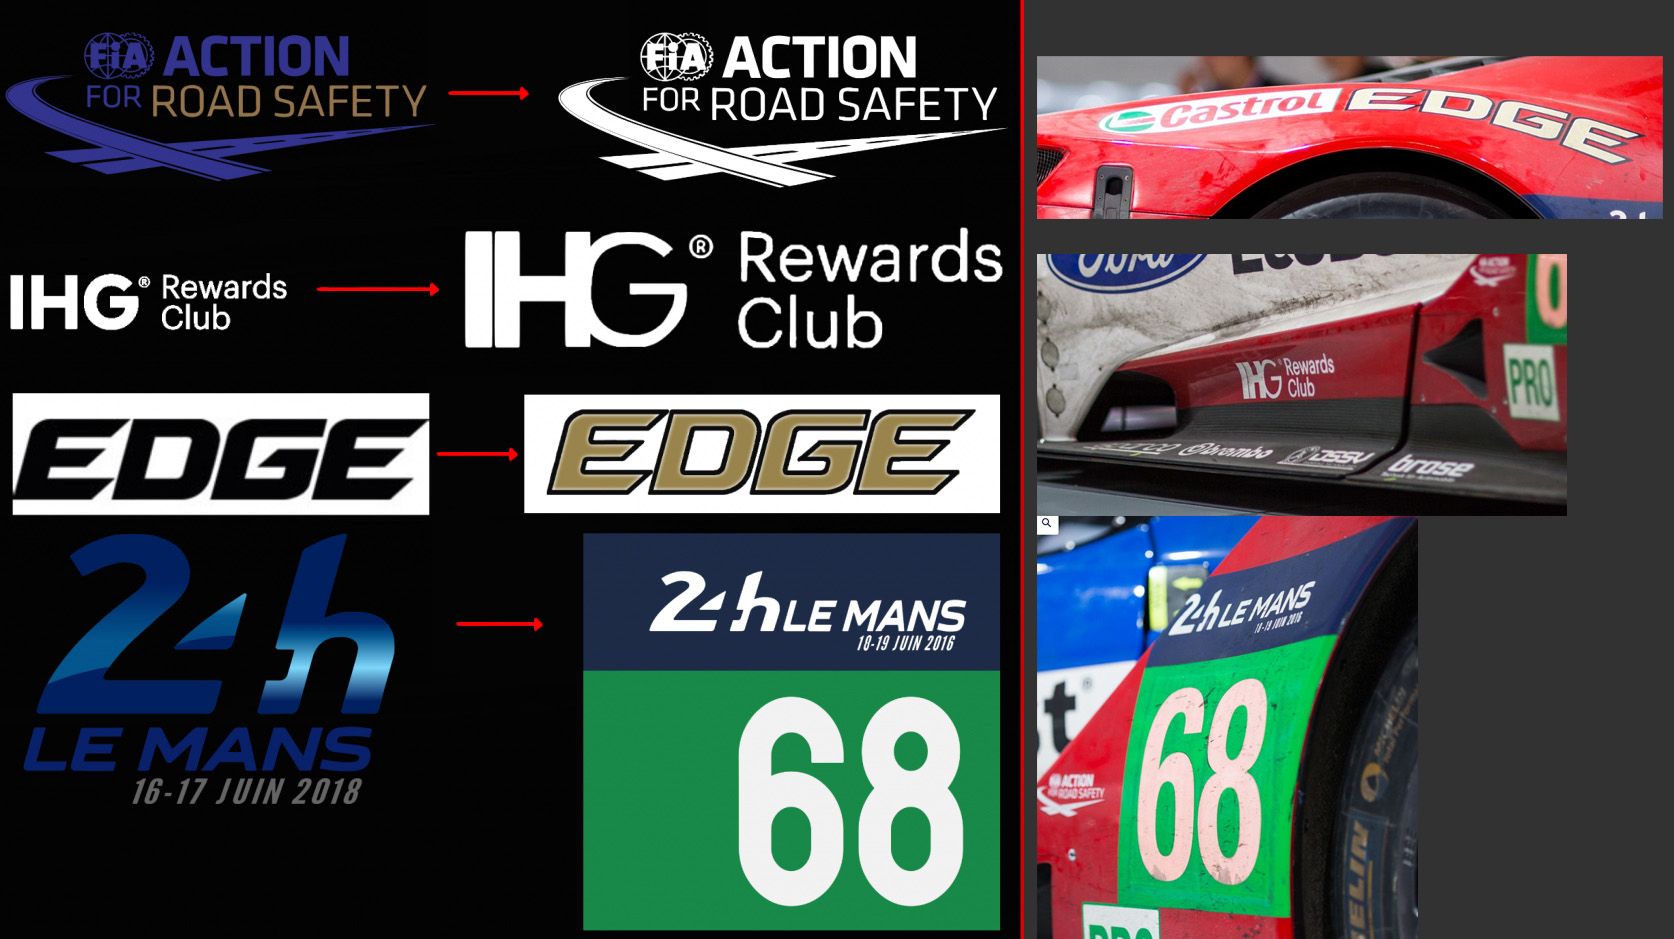
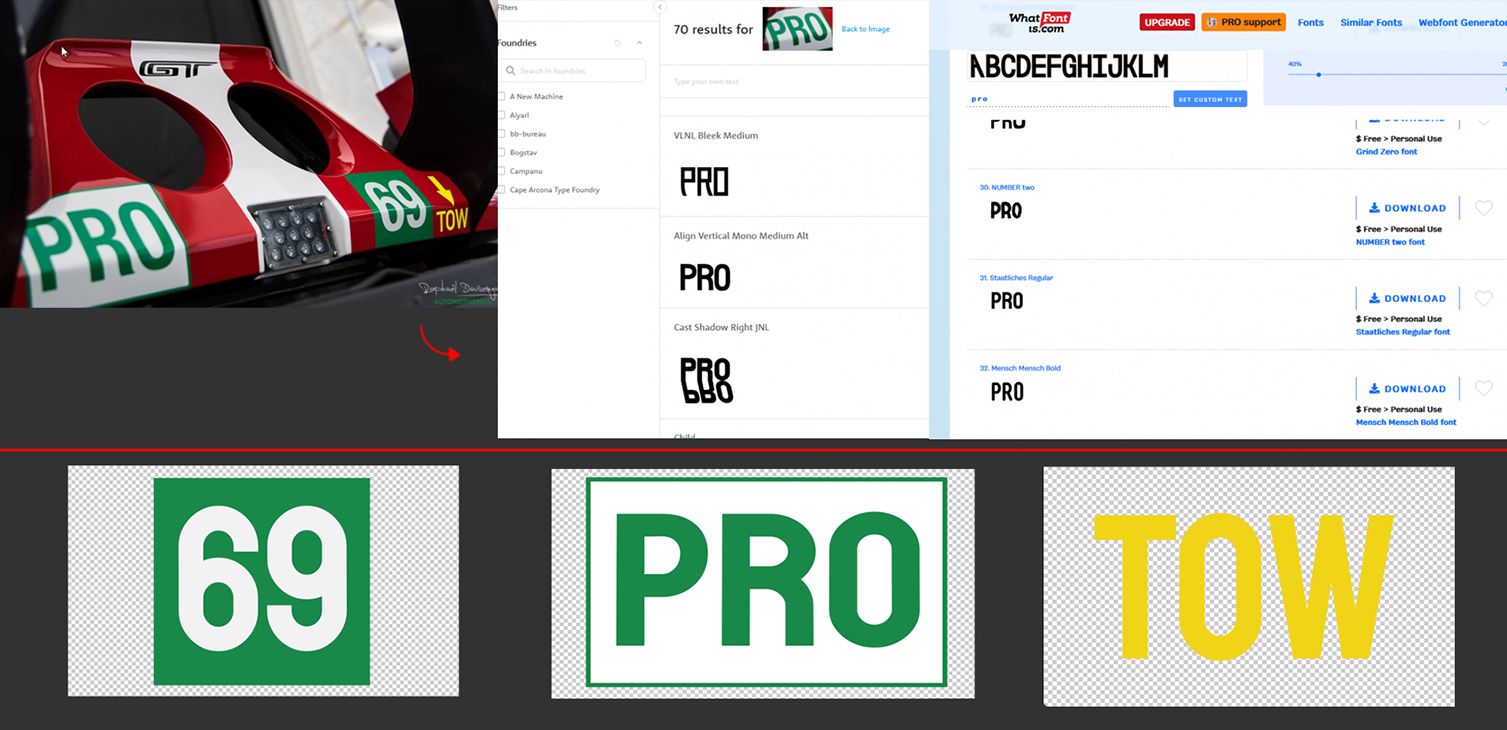
Here are most of the alphas and logos that I had gathered and created/modifed.
I also generated a black and white map for all the stickers. The mask will be used inside Unreal Engine to mask the stickers - purpose of which I will explain in the next section.
Generally, with PBR texturing the base colour needs to be high value/bright. This is to make sure that lighting is correctly bouncing off the surface with the correct intensity and not appearing too dark.

Continually referring back to the photos was key in achieving a believable livery.
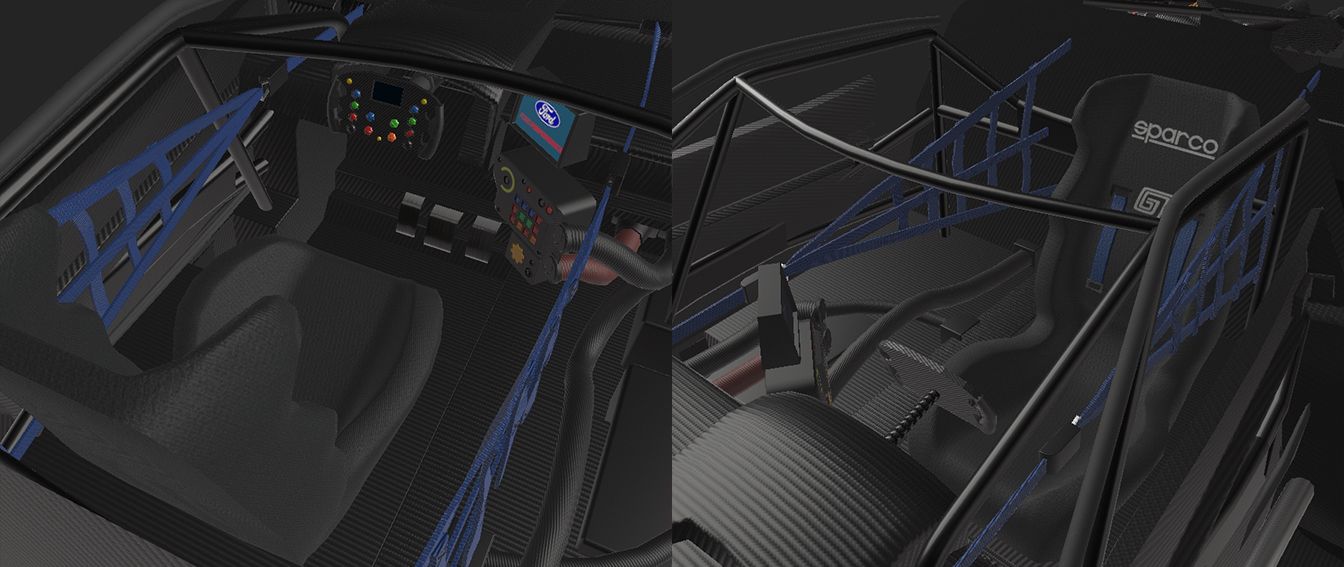
I didn’t spend much time on the interior since that wasn’t the focus of this project. It was detailed enough to appear believable from a distance and that was good enough for me.
I did not add any dirt or roughness imperfections to my texture in Substance 3D Painter due to using an existing shader in Unreal Engine. This shader included micro details such as speckles and slight surface roughness variation.
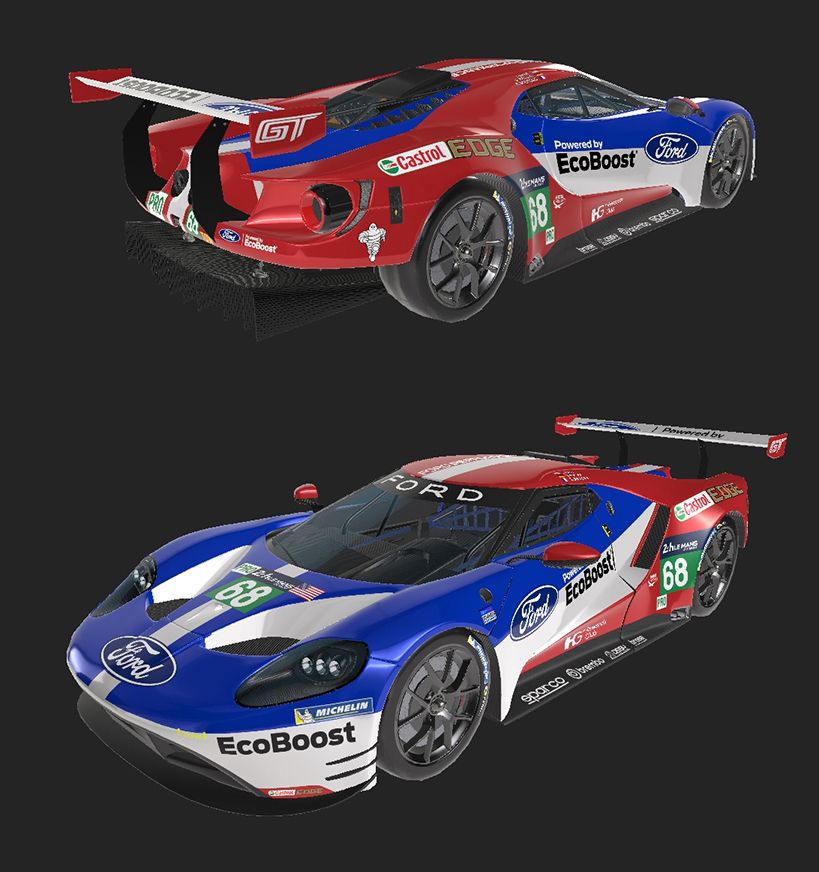
The car was also presented as a factory new model in a pristine state. Therefore details such as dirt or grime were not necessary. Apart from the tyres, I’ve added slight dirt/salt stains.
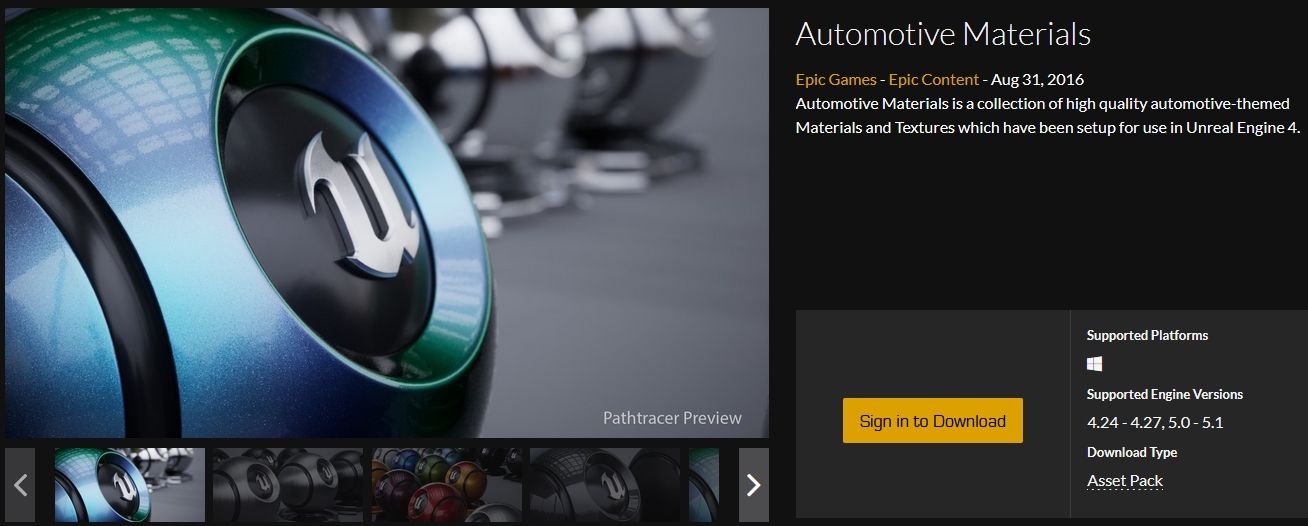
I set up my materials inside Unreal Engine 5, using the ‘Automotive Materials’ pack provided by Epic Games. This was a requirement by the university course.
I imported my maps in to the master material M_CarPaint_Master: Base Colour, Normal and Sticker Mask
From here, I set up the base colour so that I could change saturation of the paintjob.
The normal map was blended using the BlendAngleCorrectedNormals node.
The only significant addition to the material was the sticker mask - used to mask out the clearcoat.
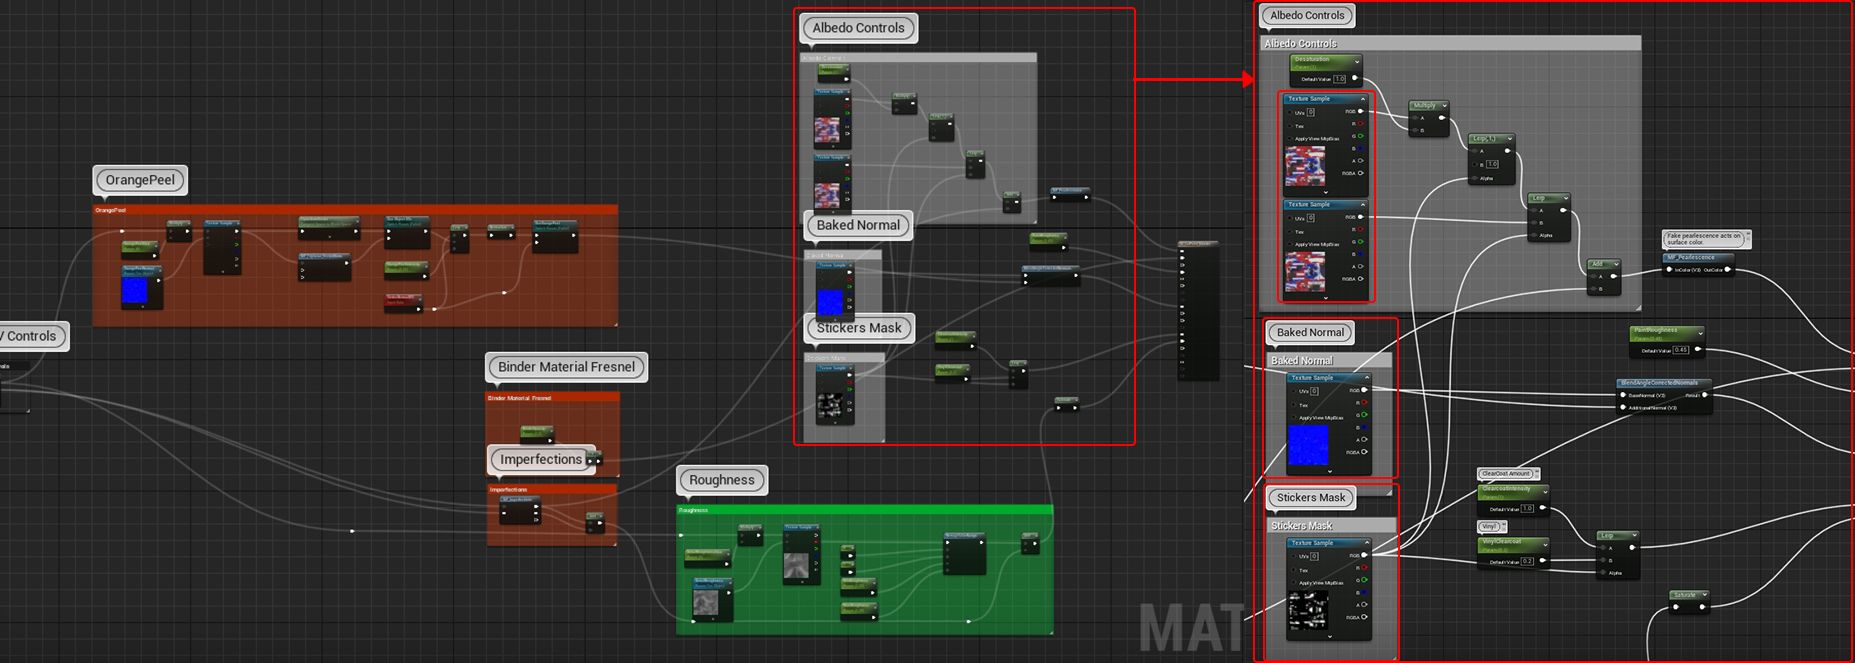
Since the stickers are usually stuck on after the paint job they will not inherit the same glossy clear coat texture.
There is a slight variation in the surface reflection between the masked and unmasked parts.

For the glass, I used the Glass_Windshield material provided in the pack.
The rest of the materials were set up with some simple controls for normal and roughness, values of which I didn’t end up changing.
(I’m using RGB packed maps for R - Ambient Occlusion, G - Roughness, B - Metallic)
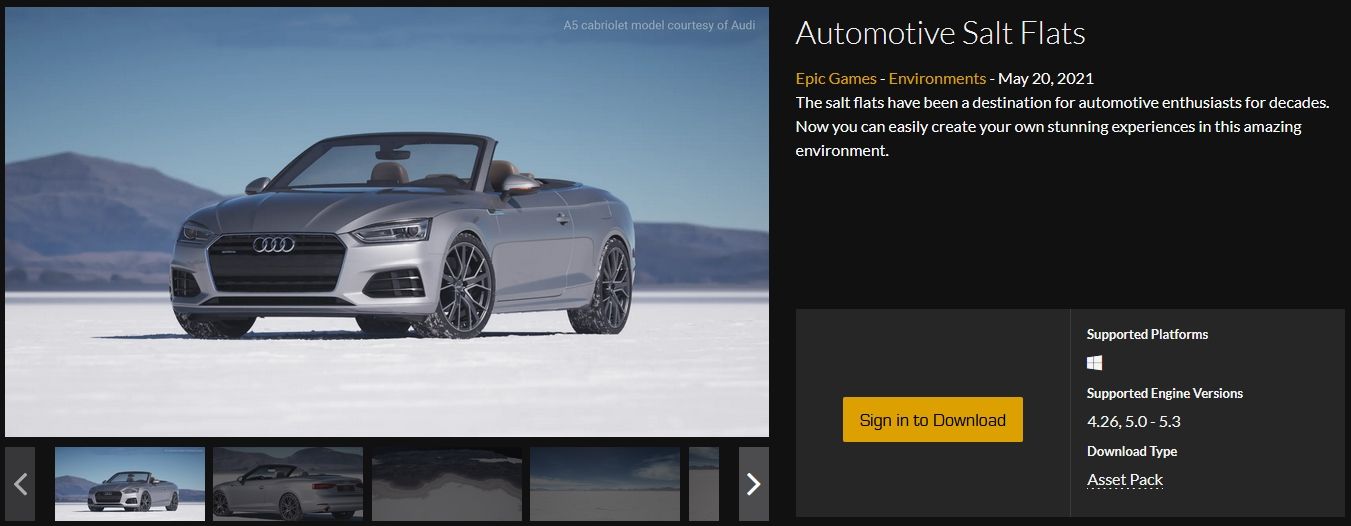
My primary renders were taken in the Automotive Salt Flats, provided by Epic Games.
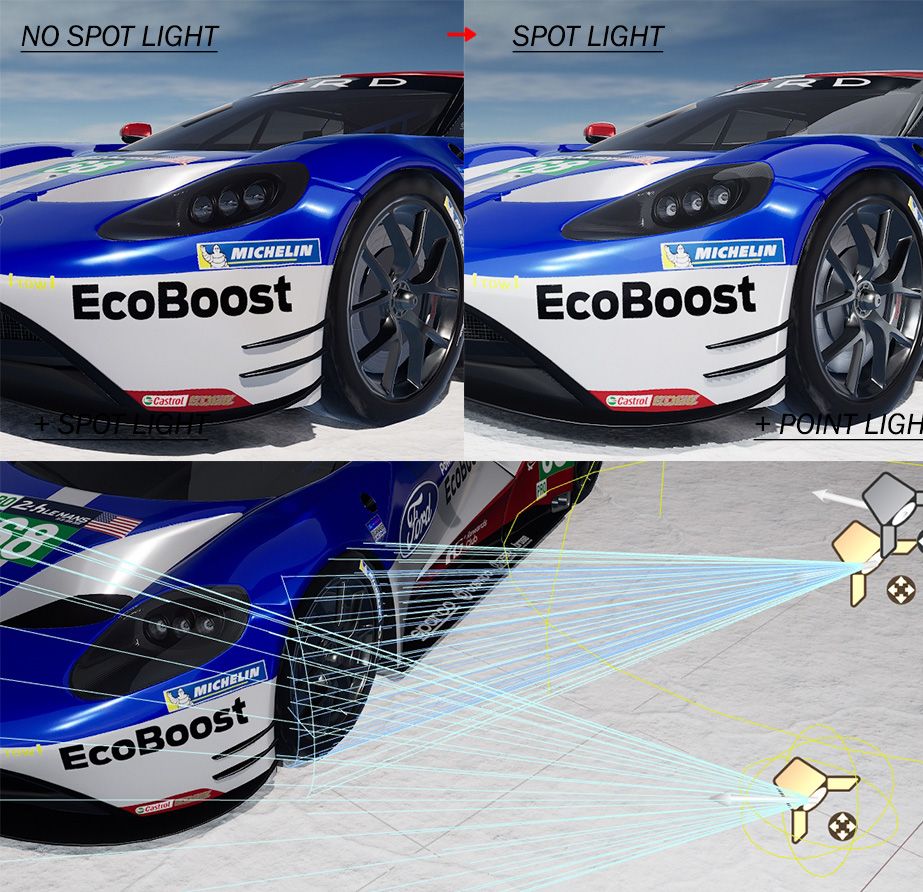
I used lumen and I approached lighting my model in layers:
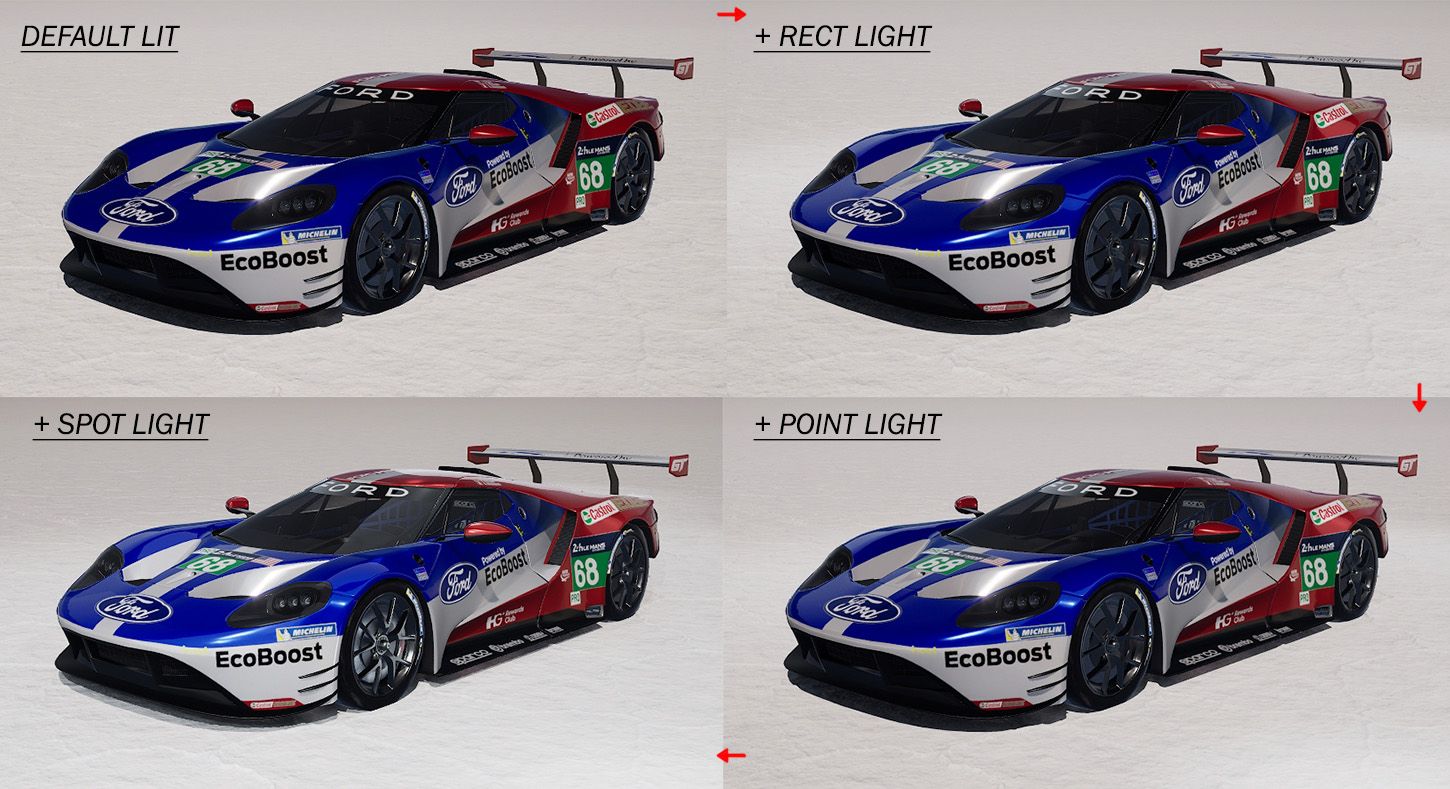
They helped define certain forms of the car and bring out the more reflective materials.
I used Movie Render Queue to render my scene and I highly recommend it.
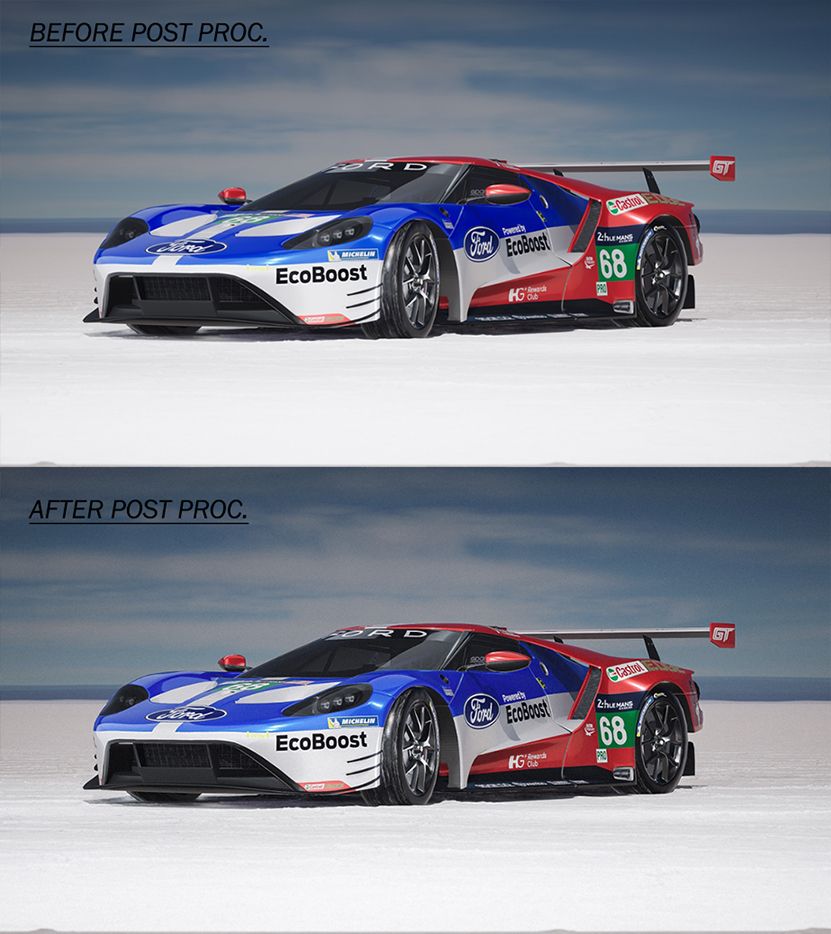
The post processing was done inside Photoshop, using the Camera Raw Filter. I chose photoshop since the renders are only still images and I find the processing tools easier and more manageable than Unreal Engine.
I added slight image adjustments (exposure and contrast) and general effects such as grain, vignette and sharpening.
The final result is subtle but it helps achieve a more photorealistic look.
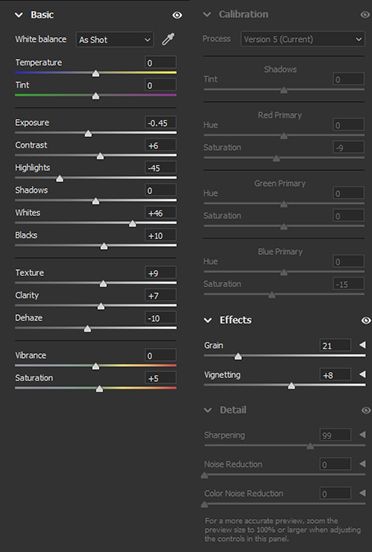
Here are the raw numbers inside CRF:
At the start of this project I dreaded what I got myself into, on several occasions I found myself rethinking my choice. My belief was that I picked an overly complex car & livery to tackle for my first model and that I would never get it finished. However, by finishing this project I proved to myself that jumping into projects that appear as impossible challenges should be the standard. This is the thought process I’ve applied in all my subsequent projects and I’ve managed to develop as an artist at a much faster pace.
The project also served as a great stepping stone in understanding the subdivision modelling workflow. I still have lots to learn when it comes to modelling but I feel that much more confident. I genuinely enjoyed texturing the most, scouring the web to find the various logos and fonts - authoring them in photoshop. It felt like solving a puzzle which was very fun. I was very satisfied with the final renders and felt like they were one of my stronger parts of the project.
There are a couple of things I would like to improve in my future projects. One of which is paying closer attention to smaller details in my references. There are certain parts I completely missed even when looking at the reference on a daily basis. This could be assisted by reaching out to other artists for feedback more throughout the project.
Furthermore, I would like to improve my optimisation skills, mainly covering topology and triangle count but also extending to UV layout. I felt I rushed this part but I’ve learned that technical skills are as important as the final product.
Thank you for reading through my article and I hope that this breakdown was somewhat useful. I also want to express my gratitude towards The Rookies for enabling me to publish my article on their platform.

Reached out to Rinalds via his Rookies profile here.