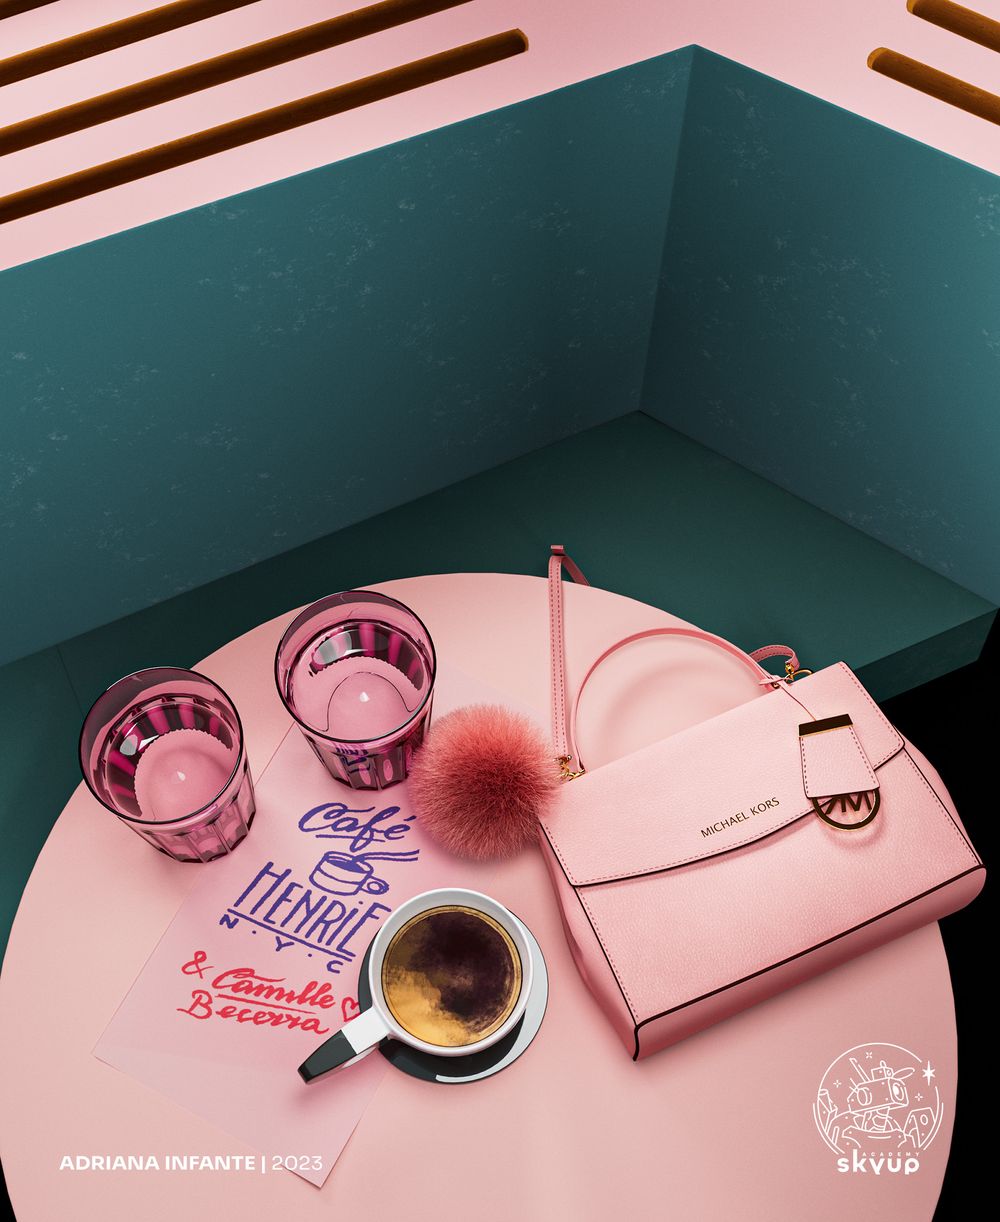
A Quick Guide to Photorealistic 3D Visualisation: Cafe Henri NYC
Adriana Infante, a Skyup Academy student, showcases her latest project: a photorealistic 3D visualisation from concept to reality.
Adriana Infante, a Skyup Academy student, showcases her latest project: a photorealistic 3D visualisation from concept to reality.

Introducing her latest article, Adriana Infante, a Skyup Academy student, shares how she created a photorealistic 3D visualisation from a concept, drawing from her lifelong passion for expanding and refining skills in 3D modeling and animation. Join her on this journey as she explores the techniques behind bringing 3D scenes to life.
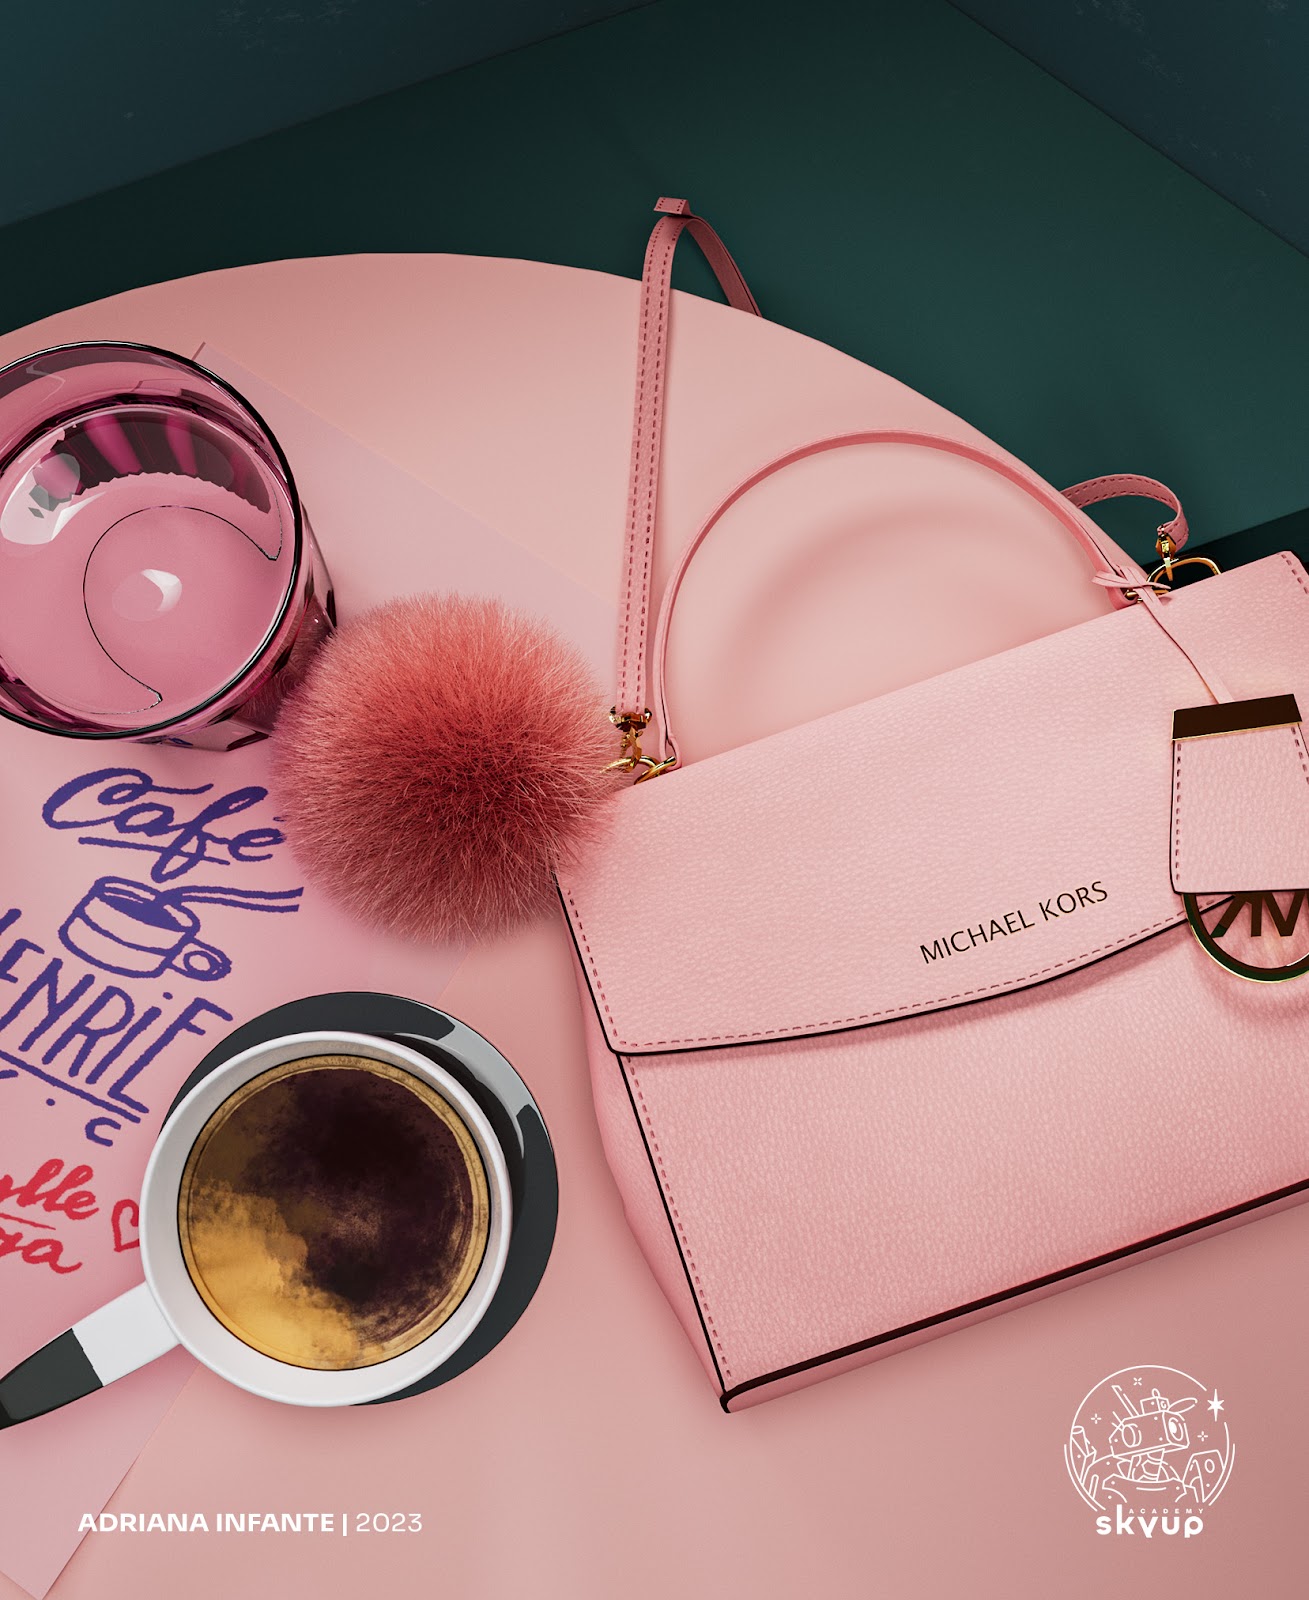
My journey in creating this photorealistic 3D project began at Skyup Academy, where I was assigned this concept. The details of the references would test my skills, but I love a challenge and welcomed this opportunity to try something new (I gravitate to cartoons). However, I have always been drawn to anything that constitutes meticulous attention to detail, so moving on to the very first step!
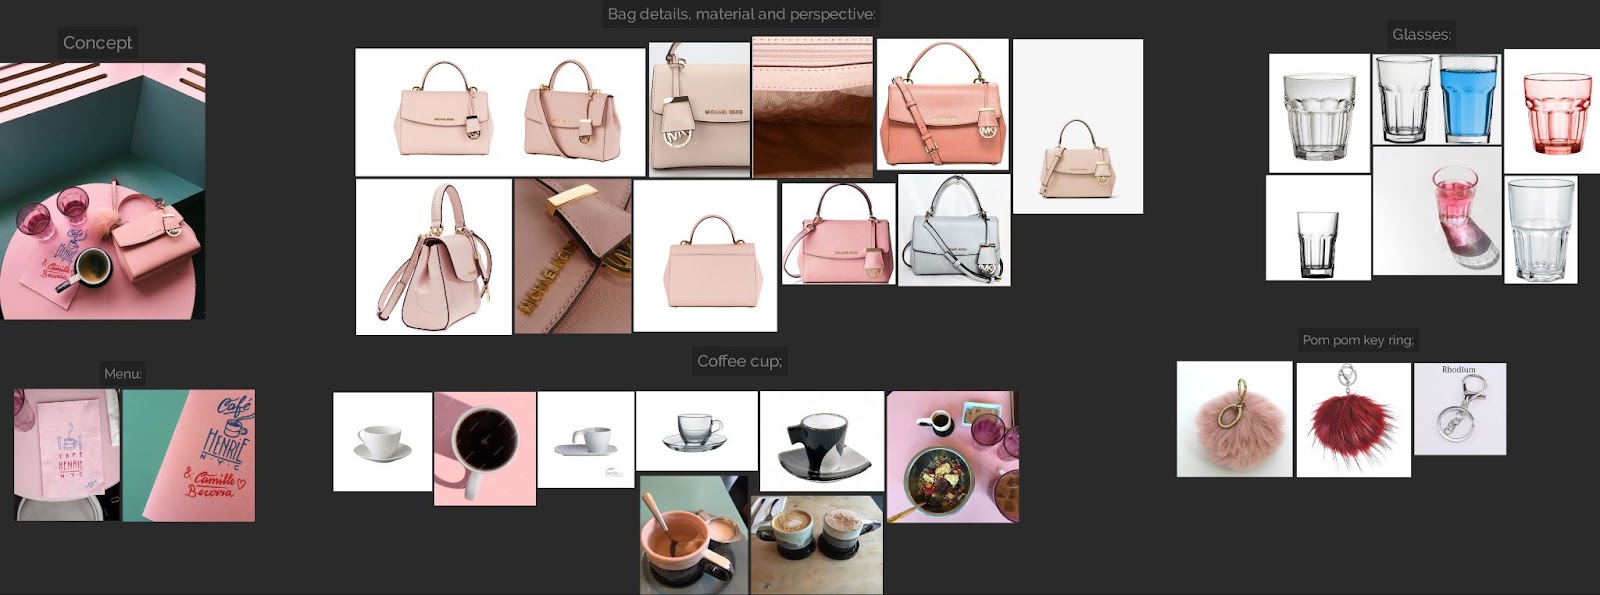
When aiming for photorealistic rendering, the reference study becomes essential to capture every detail of reality. Observe textures, lights, reflections, shadows; having multiple perspectives of what will be modeled.
References are also a great tool to avoid distortions and reproduce the 3D model as faithfully as possible.
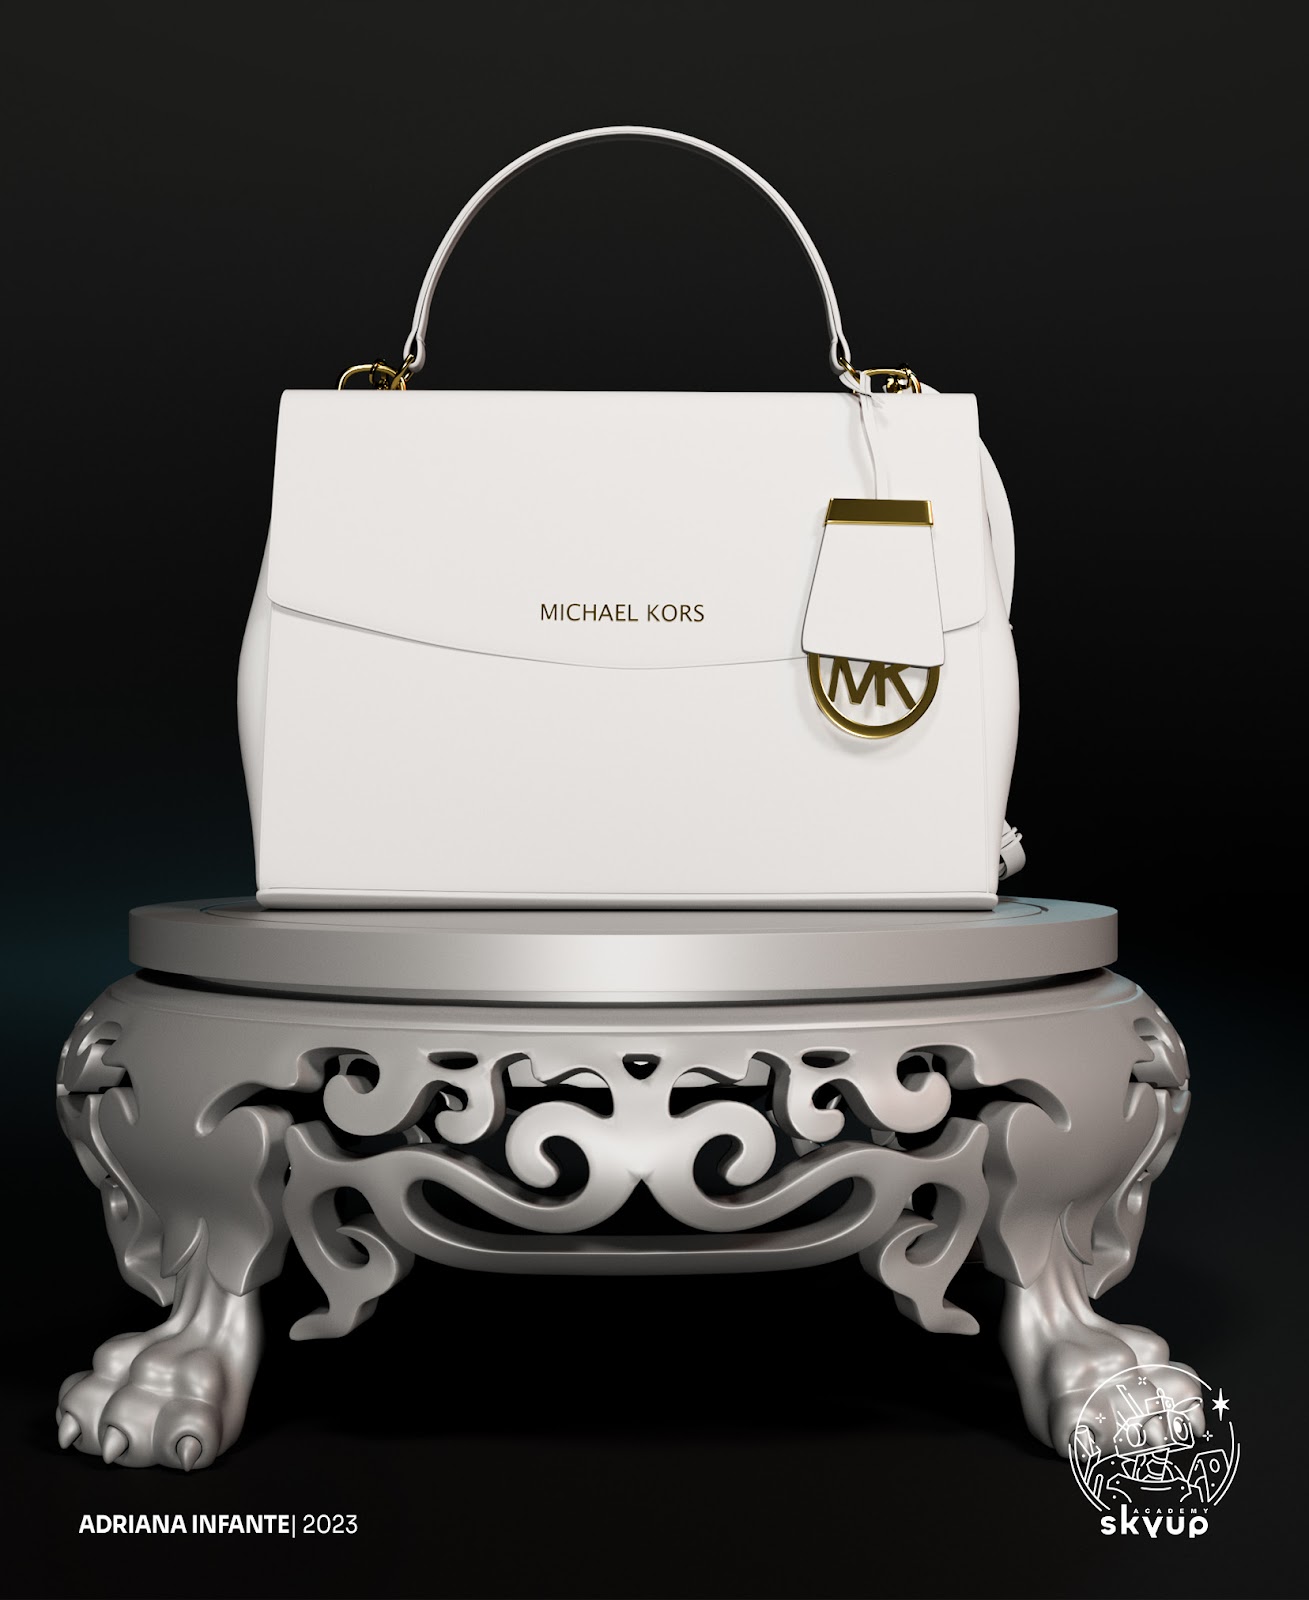
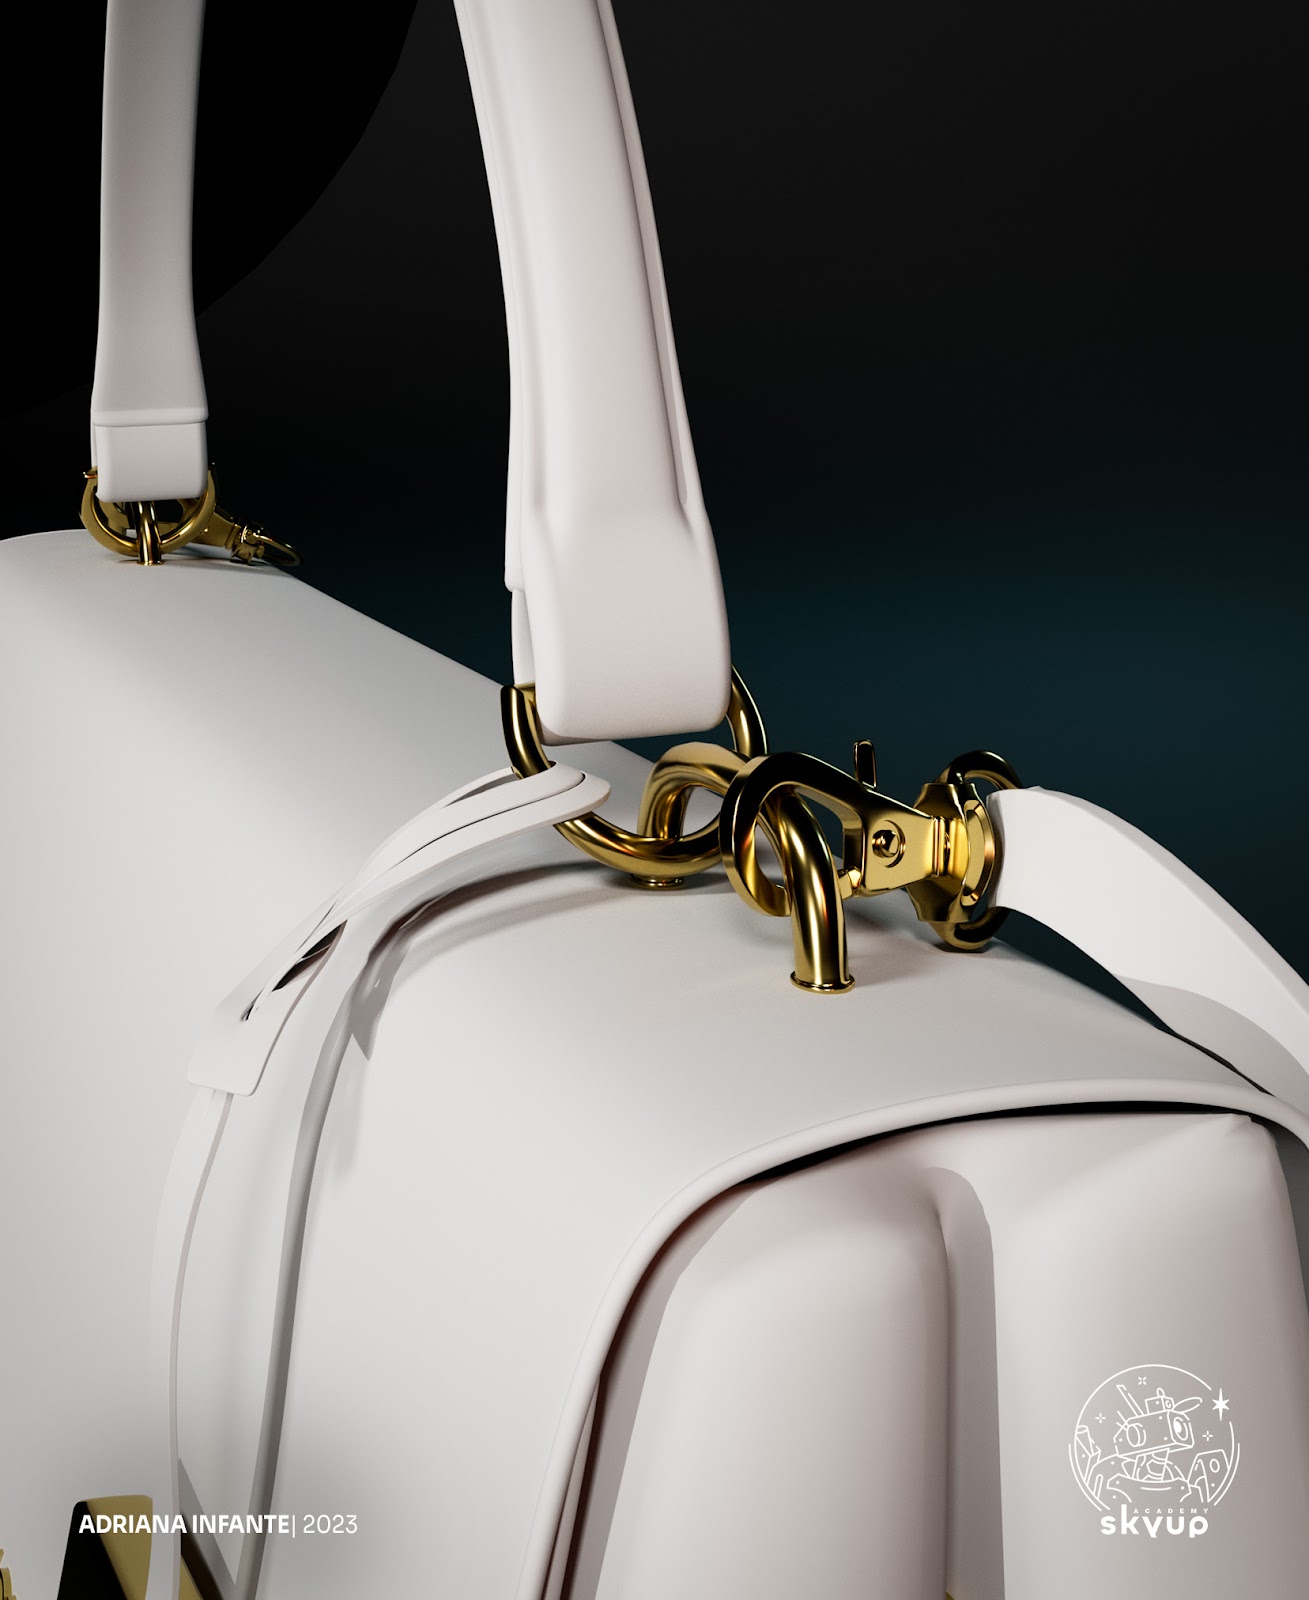
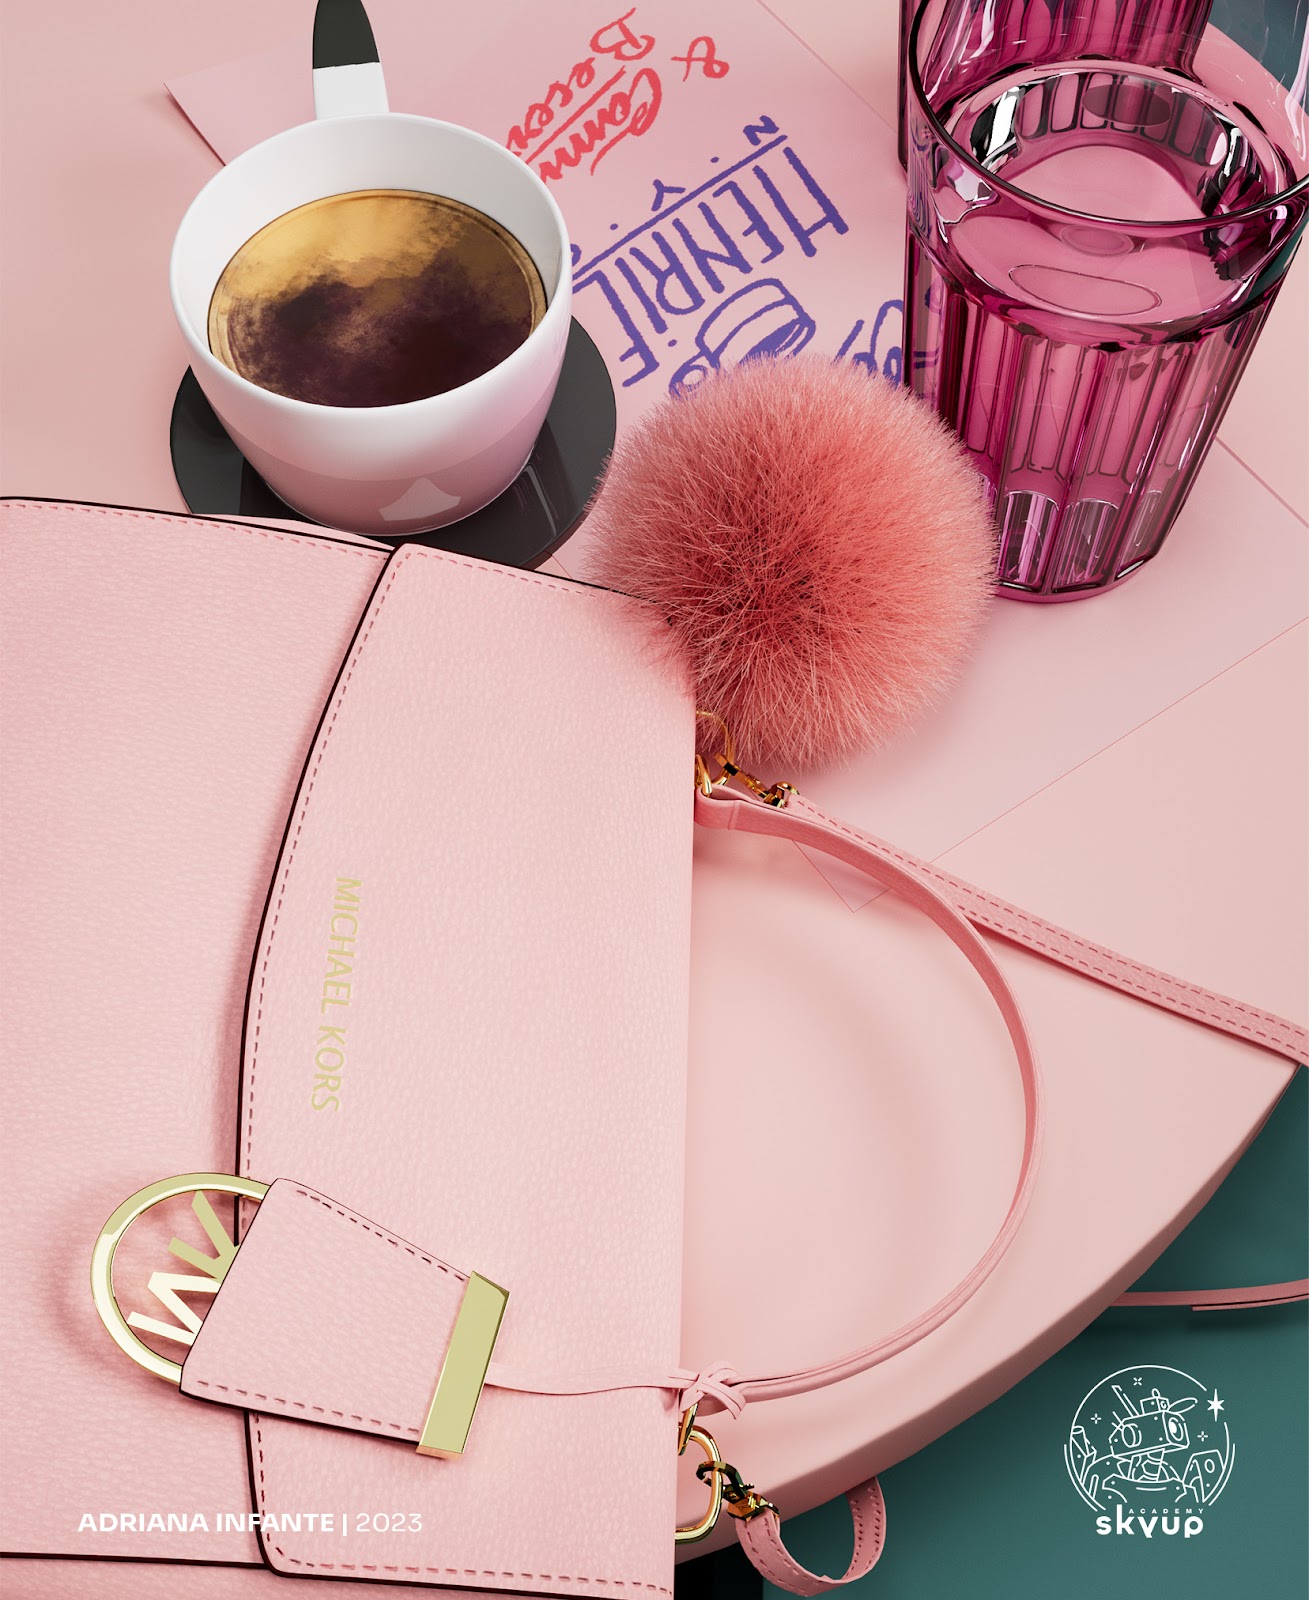
In my case I looked for many references for the textures of the bag and other elements present in the scene, secondary but fundamental details such as hooks, chains, closure clips and many others.
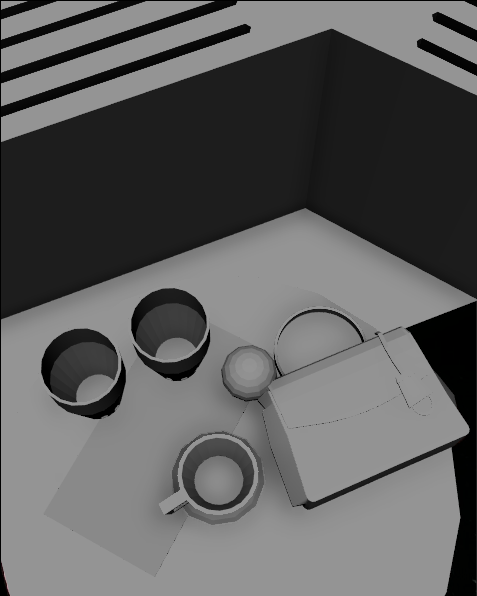
After gathering all the necessary materials, the modeling phase begins. In my case it was important to create the camera match with the reference to set the block, focusing on the overall distribution of the polygons to have an idea of the volume already in perspective. It is not important to have a finished model at this stage, but to understand the proportions that the object must have.
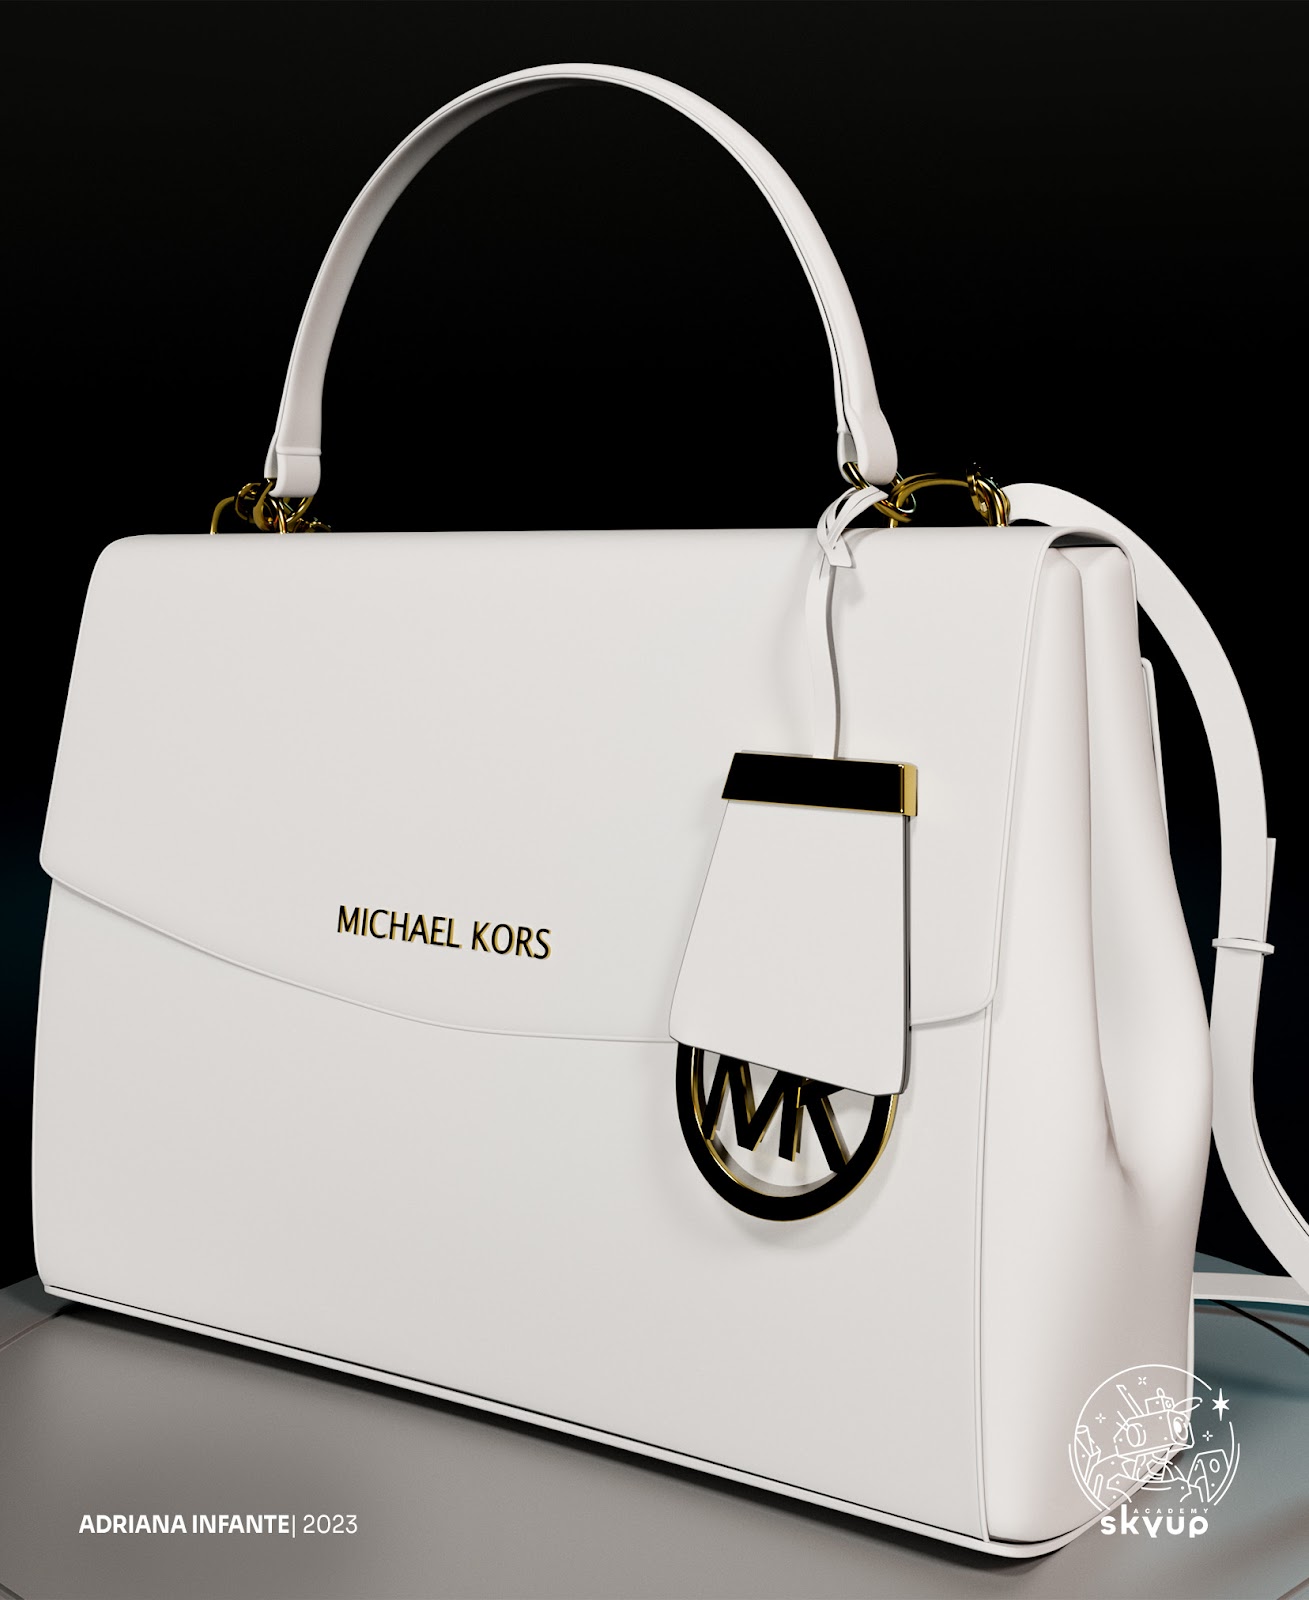
The most complex part was undoubtedly the bag. It's a deceptively simple visual rendering that requires precise, cleanly thought-out structure to maintain an optimised polygon count and avoid Tris and nGons. After giving the bag the basic volumes starting from a cubic mesh and adapting its dimensions, I decided to start modeling its components. I used "Soft Selection" to create the fold of the leather. Gradually changing selected vertices/edges or faces - this allows you to edit 3D objects or their vertices and surrounding areas.
I then selected the relevant faces to extract and separate the magnetic closure. Similar to the base, I thought it was topologically correct to give them an offset using the "extract" tool. This allowed me to keep the edges clean without dense areas of edge loops that could cause "pinching" which is problematic as they can lead to visual anomalies on the mesh surface, such as strange lines or points, resulting in undesired deformations or visual artifacts. This approach ensured UV mapping without distortions and facilitated texturing; evenly distributed polygons reduce texture distortions when applied, preventing them from appearing warped. But in any case, no issues!
Perfection is the art of the pretentious; imperfection is that of geniuses.
- (Anonymous)

UV mapping is a crucial stage in the 3D modeling process as it determines the correct application of textures to the model's surface. When done well, it ensures that textures fit consistently and realistically onto the geometry that needs to be transformed into UV coordinates. It is for this process, as mentioned earlier, that it is crucial to consider the distribution and density of the topology, avoiding overlaps and distortions.
To create UVs in Maya, I used the "UV Editor" tool, which allowed me to manipulate and optimize the coordinates, ensuring that each polygon was positioned correctly, of the right size, and without overlaps on the UV map. When proceeding with UV unwrapping, it's important to try to create cuts on the mesh in areas that are less visible. In my case, I took advantage of the presence of leather edges to conceal them and avoid potential issues during texturing.
Another fundamental aspect is setting the density. Density refers to the amount of space on the UV map occupied by a polygon. It helps to avoid resolution differences between parts of the model. If some parts have significantly lower UV density compared to others, they might appear blurry or less detailed in the final rendering. In general, this phase adapts to the needs of each project. Some models require more details, such as characters, faces, or foreground objects. These details require higher resolution. However, it's also helpful for conserving resources and space in UV shells. That's why background objects can comfortably have lower resolution.
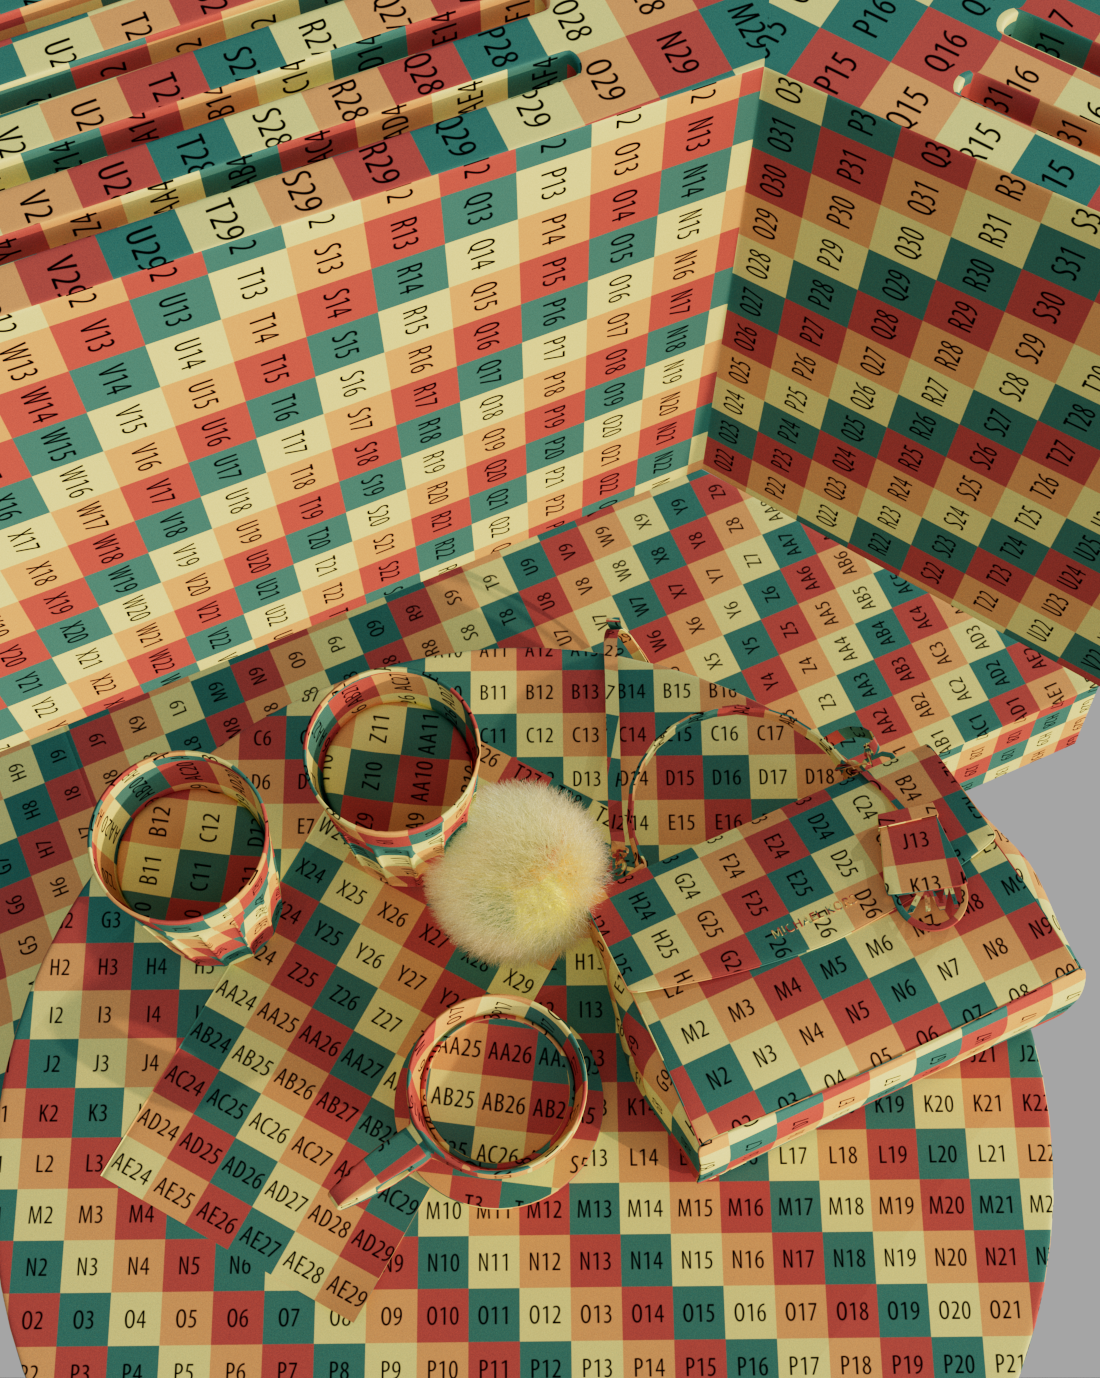
For my concept, maintaining density consistency was crucial, so having a reference value to distribute to the rest of the UVs was helpful. I took the density of the largest mesh in my project, which was the table, and after arranging it in the shells, I assigned the same value to other objects. As we can see in the following images, I used a texture checker. It allowed me to preview the work and ensure that everything was set up correctly.
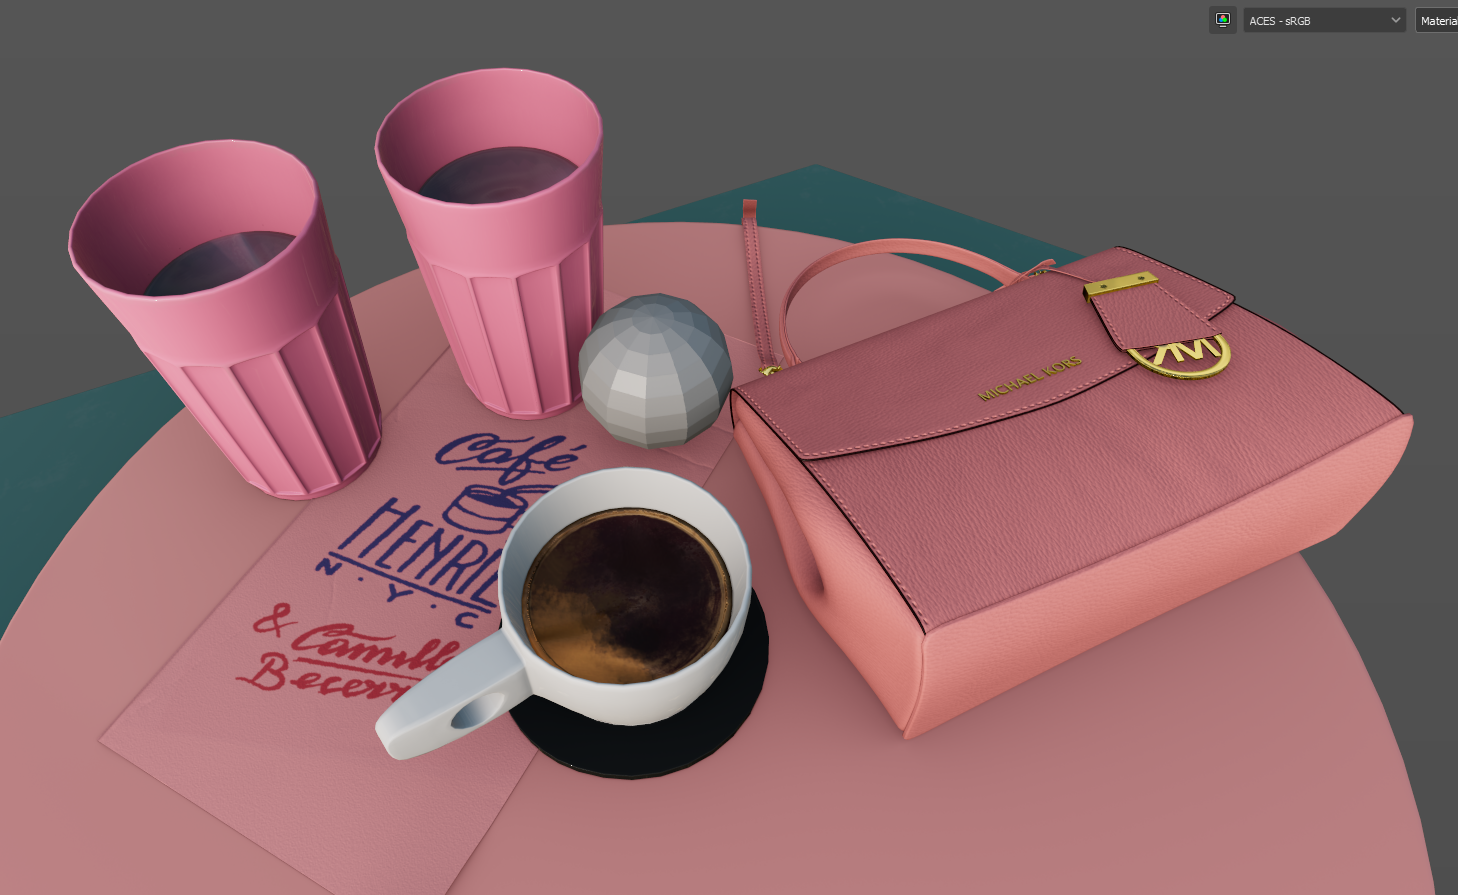
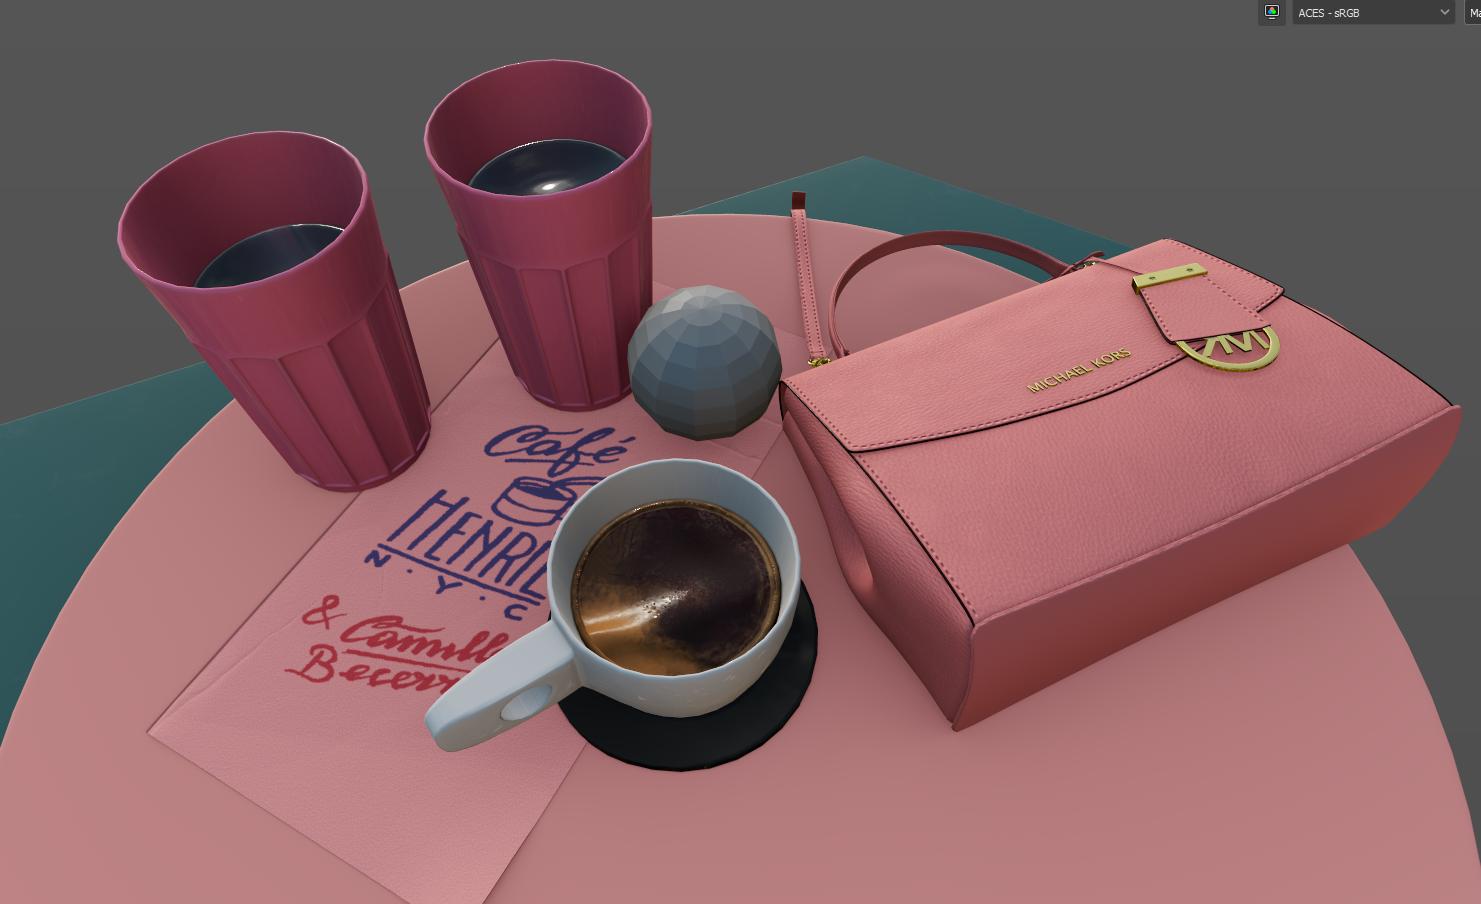
To create the textures I mainly used Substance 3D Painter, with the support of Maya. For better workflow, I have assigned materials to each main category. This allows me to easily disable layers in Substance 3D Painter. When importing a model with distinct materials, the software creates a texture group (texture set). This is useful because it allows you to work on each material independently and apply specific changes to each part of the model without affecting the other materials. I applied the same methodology to my project, dividing the materials into three main categories: glass, water and the rest of the objects. Once the model was imported, I created various folders, each containing layers, masks and textures of each mesh present in the scene, maintaining order and organization. For convenience I will continue to describe the making of the bag, but the entire process is applicable to other props as well. To start, I created the channels, the main ones I used are: Base Color, Roughness, Metallic, Normal, Height/Shift and Ambient Occlusion.
I worked until I got a good result. Then, I moved on to details, such as stitches. I then created a new displacement layer, found the appropriate brush, and for better directional control, I used the "stroke" tool. Importantly, the stitch layer should always be above the layers of the leather and other materials of the bag. I applied similar procedures for all other props and completed the texturing phase by defining some details in Maya, such as the glass and water, before moving on to lighting.
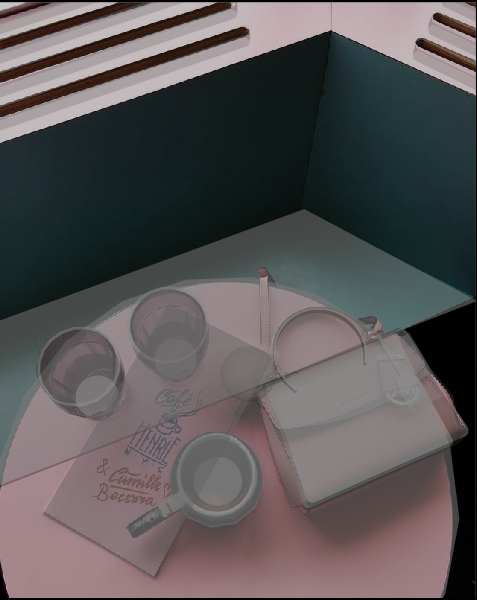
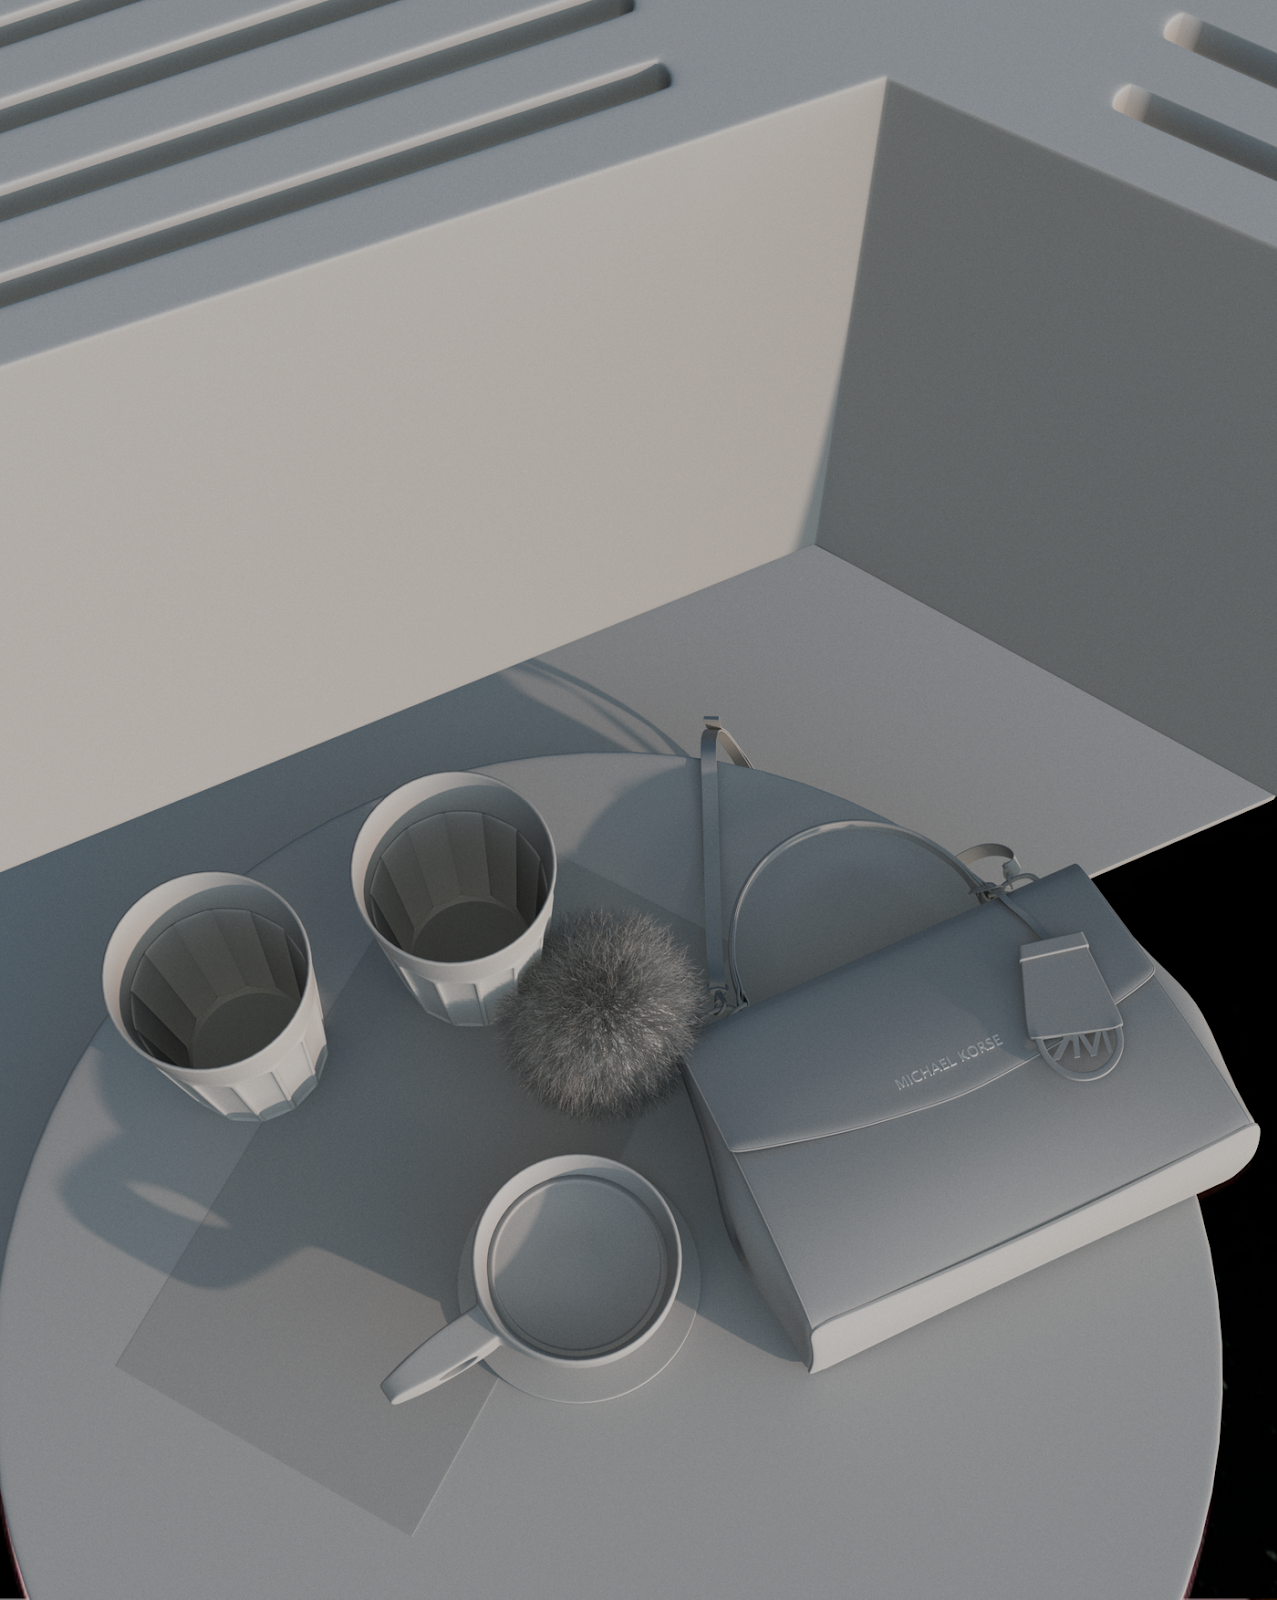
For lighting and rendering, I used VRay in Maya. The HDRI is crucial. It defines the look of the scene. Always consider the environment you want to show. Make sure it fits the reference or idea.
There are several types of lights available, each with different functionalities. The first one I used is the VRay Dome Light. This type of light provides global illumination and simulates the light from the sky and the surrounding environment, making it very useful for creating realistic lighting with ambient reflections. During the reference research phase, I discovered the real location where the photo I had to recreate in 3D was taken. It was a restaurant (thus, an indoor environment) with very large glass windows, so I looked for an HDRI that generally simulated the same environment. However, this was not my only concern. Although I decided to recreate points of light and shadows as similar as possible to the reference, using the Directional Light and Rectangle Light, I considered it fundamental to start with a good base of general lighting that already provided coherence with the concept, testing various HDRIs and rotating them to achieve the right resemblance to the reference.
As mentioned earlier, I subsequently used a Directional Light that started from the top and pointed slightly to the left. Through the render preview, I still felt that the lighting was not intense enough. The challenge was to increase the intensity without creating too much variation in the shadows that had already been approved and risking "overexposing" the scene in the final rendering. I then added "VRayLight Rect" lights, adjusting the "Directional" and "Directional Preview Length" settings to focus the light primarily in the desired area.
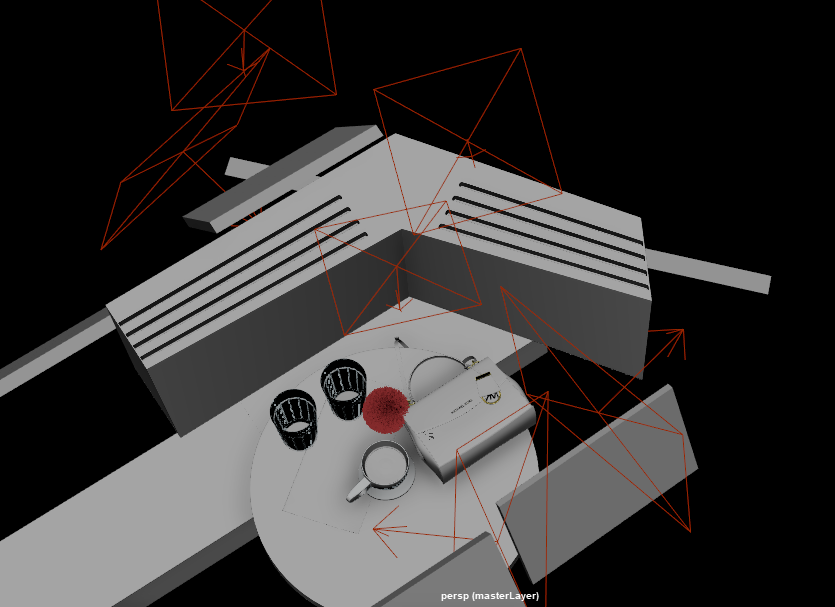
To intensify shadow areas and improve overall lighting, I placed cubes in the scene and positioned them above a light source to create a projected shadow. Additionally, assigning materials to the cubes and planes can be very useful. For example, transparent or semi-transparent materials allow light to pass through partially, adding to the realism of the scene.
During my academic journey, I had the opportunity to deepen my knowledge of the fundamental principles of lighting through online courses and workshops with industry experts. These experiences have undoubtedly influenced my decisions regarding the placement and intensity of lights in my work.

An important aspect is to experiment. While there may be some basic “rules” to follow, these simply provide guidance on the correct workflow, but nothing is more important than improving our problem solving skills and finding unconventional solutions. The secret is to try, fail and try again until you reach the desired result without fear of taking risks.
During the realisation of my project, I faced several challenges that were crucial in overcoming my limitations. For example, the lighting and textures weren't as simple as expected. They are closely related and one affects the management of the other. The lighting often failed to make the scene look realistic and the seat was not aligned with the backrest as it was completely distorted in the final camera view. I had to model the two components separately, which made managing the lighting setup difficult since they were on completely different planes. This is why I used many cubes to simulate the closed areas and the shadows coming from the back of the seat. It's common to feel stuck and unable to figure out how to proceed, but it's time to turn off the computer, clear your mind, relax, take a walk. Sometimes we focus too much on something that is not fundamentally crucial, approaching the problem with less rationality.
To conclude this little journey to realise the concept, I want to highlight and encourage everyone. We always face new challenges and push ourselves to improve. The project is not only a demonstration of the techniques and knowledge acquired but also a symbol of fun, creativity and passion! These three components allowed me to tackle the entire design process with enthusiasm. Every step I have taken has been fuelled by the strength of the passion and love I have for this work, making everything more rewarding. I hope my project and these words can help you. I hope to inspire many other artists to never give up and always be determined to make their dreams come true!
Reach out to Adriana via her Rookies profile here.