Meet Coline Laclau-Pussacq, an ESMA student driven by creativity and storytelling, naturally gravitating towards the world of 3D with a knack for drawing and imaginative ideas. Explore her latest stylised 3D project and learn about the steps she took to bring it to life.
Meet Coline Laclau-Pussacq, a student from ESMA who's driven by a passion for creativity and storytelling. With a knack for drawing and an abundance of imaginative ideas, Coline found herself naturally gravitating towards the world of 3D. We loved her latest project and in this article she agreed to share what steps she took to create a stylised 3D image.
Origin of the Idea
I was looking to make an image that I would enjoy making and that would be an asset to my portfolio. I was wandering around Pinterest looking for inspiration, and saw a series of images of children and dragons, which looked like they'd been made by an AI.
Gradually, an image took shape in my mind: a little girl standing on a dragon. She's tiny compared to it, but despite her young age she looks powerful, and she's looking right at us.
To begin with, it's not very conventional, but I didn't make any sketches. I had a clear image in my head of what I wanted to achieve.
I selected visual references on several themes, the framing, the type of dragon, the child's face, her attitude and so on. I used PureRef for this step.
Modeling and Sculpting
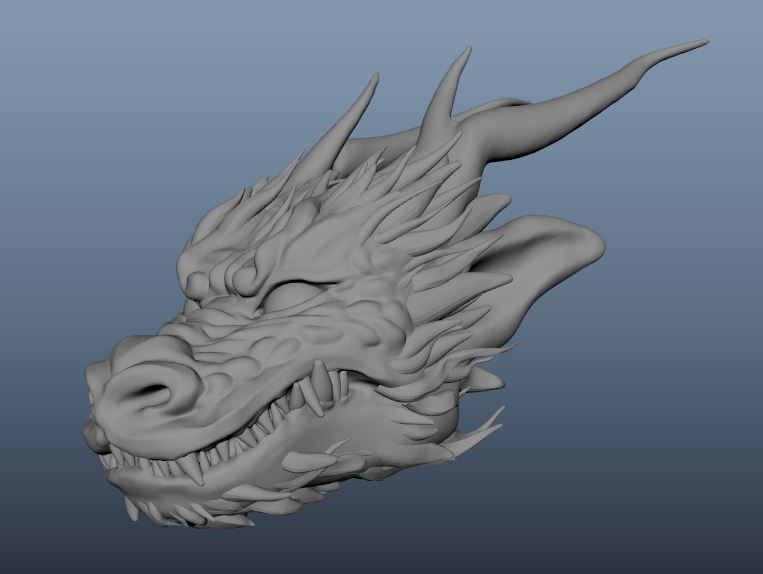
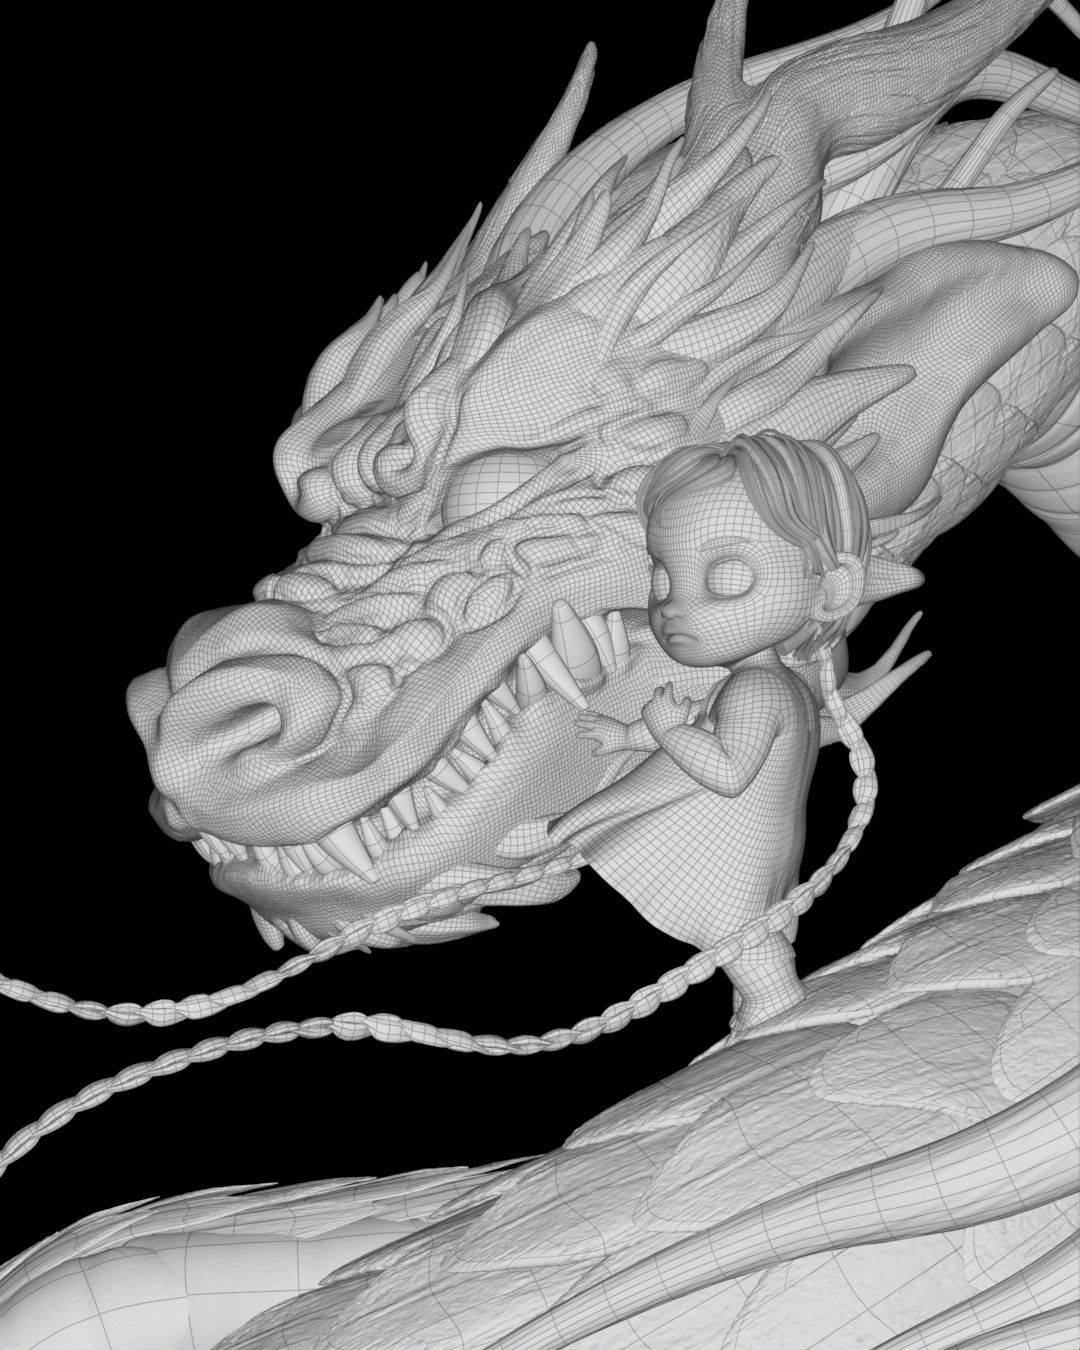
Dragon head
I started by sculpting the dragon's head in ZBrush. Not having any sketches, I took a more intuitive approach, using my visual references for different aspects.
To make the kinds of hairs on the dragon's head, I used ZBrush's Curve Tube brush, and placed them one by one. Then I added the teeth and eyes in Maya.
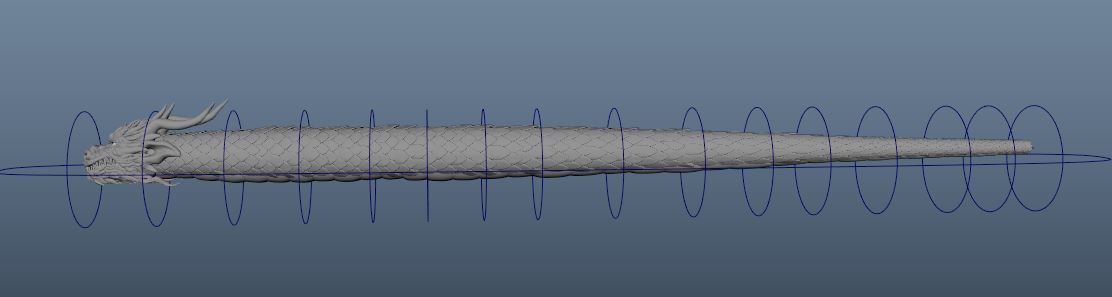
Dragon body
For the dragon's body, continuing in Maya, I first created a row of scales and then duplicated them with a Linear Mash. From there, I had a straight tube. I made a very simple Rig so that I could put it in positIon.
At that point, I could make a first sketch of the framing, and place my camera, even if the child hadn't yet been created.
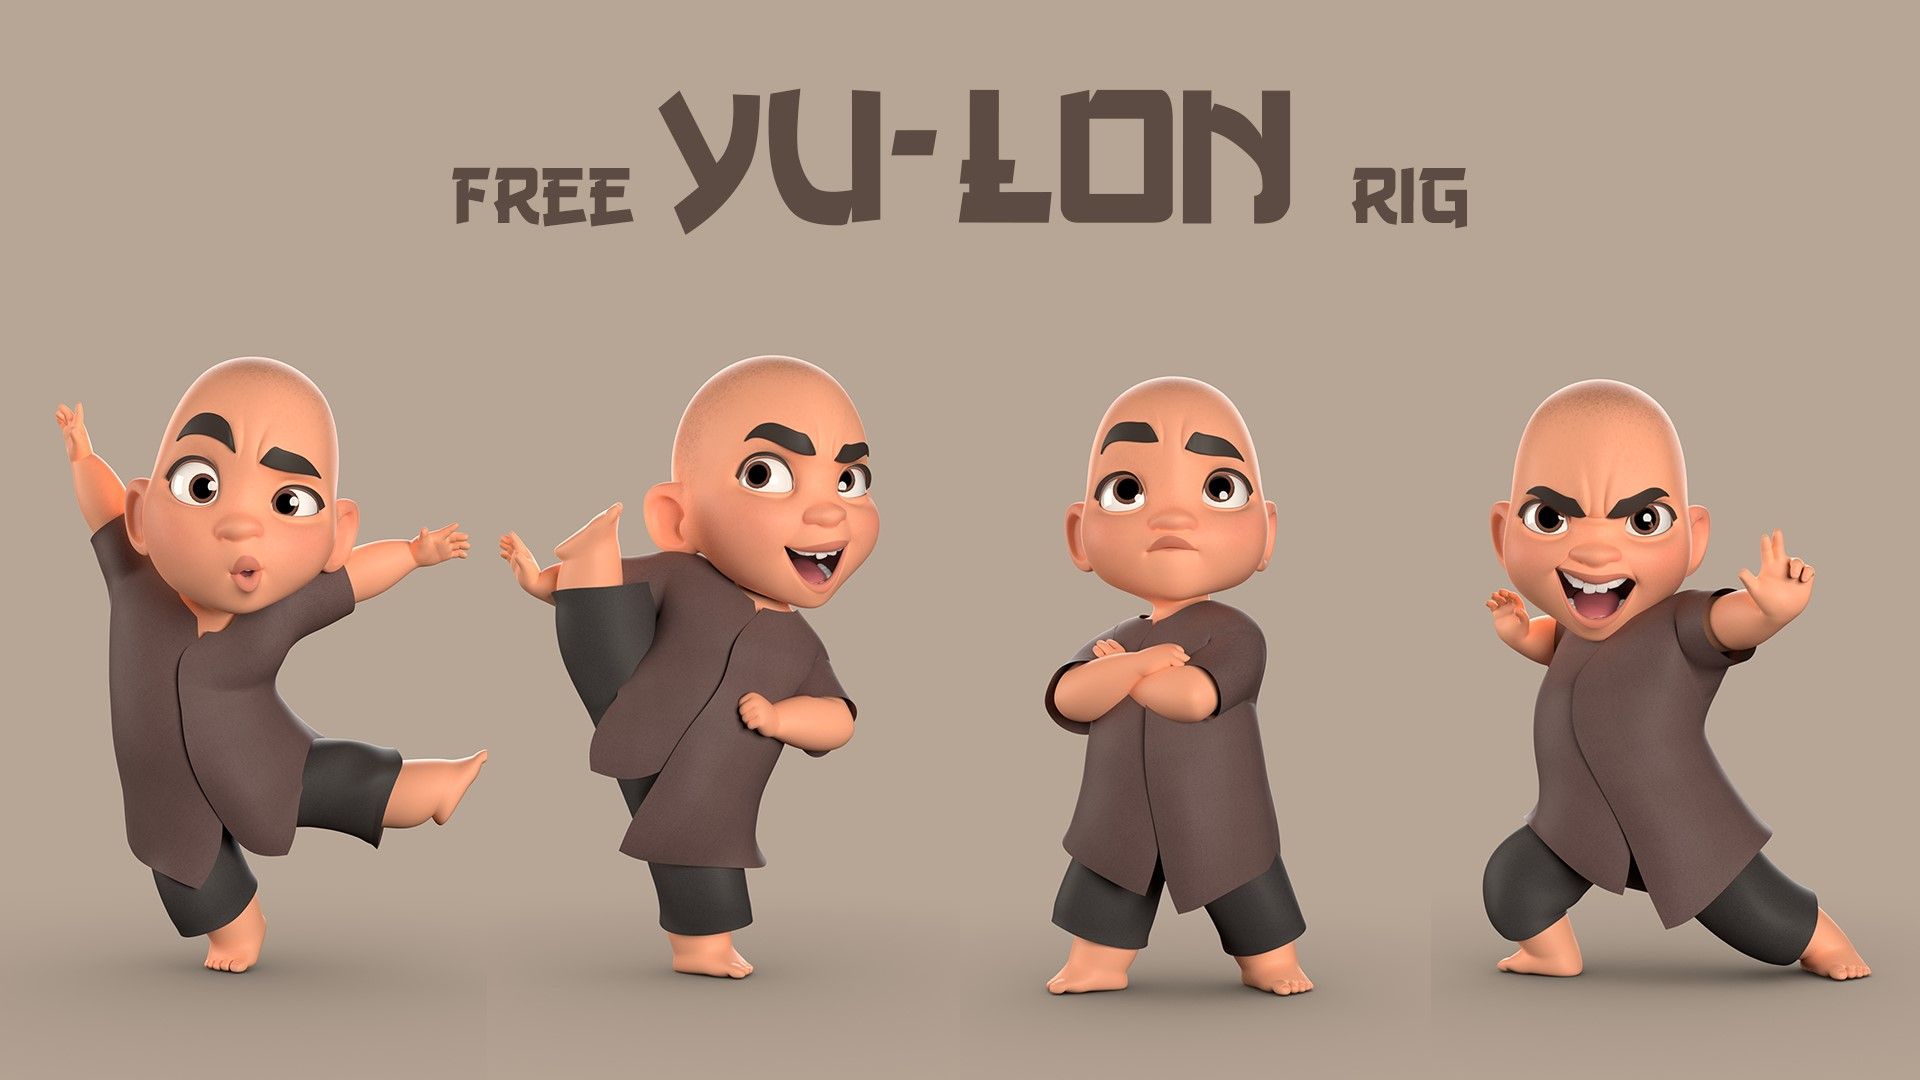
The Child
To start with, I used the "Yu-Lon" rig, which I placed on the dragon. It took me a while to find the right position for the child, as each different positioning gave the image a different intention.
Once I'd validated the pose, I detached the head from the rest of the body and resculpted it in ZBrush. However, I decided not to touch the rest of the body because it suited me. Once the head was finished, I welded it back to the body. We finally have the girl's identity.
As for the rest, I thought the hair base supplied with the rig was fine, so I kept it and added two long braids, which I created with a mash. These braids added life and movement to the image.
Finally, with the clothes, I opted for something simple. A dress, which I simulate in Maya with Ncloth, to match the wind in the braids, and to keep the dynamism.
As for the retopology, I didn't dwell on it too much, since I didn't plan to rig or animate these characters with any precision. The modeling part was over.
Preparing for Texturing
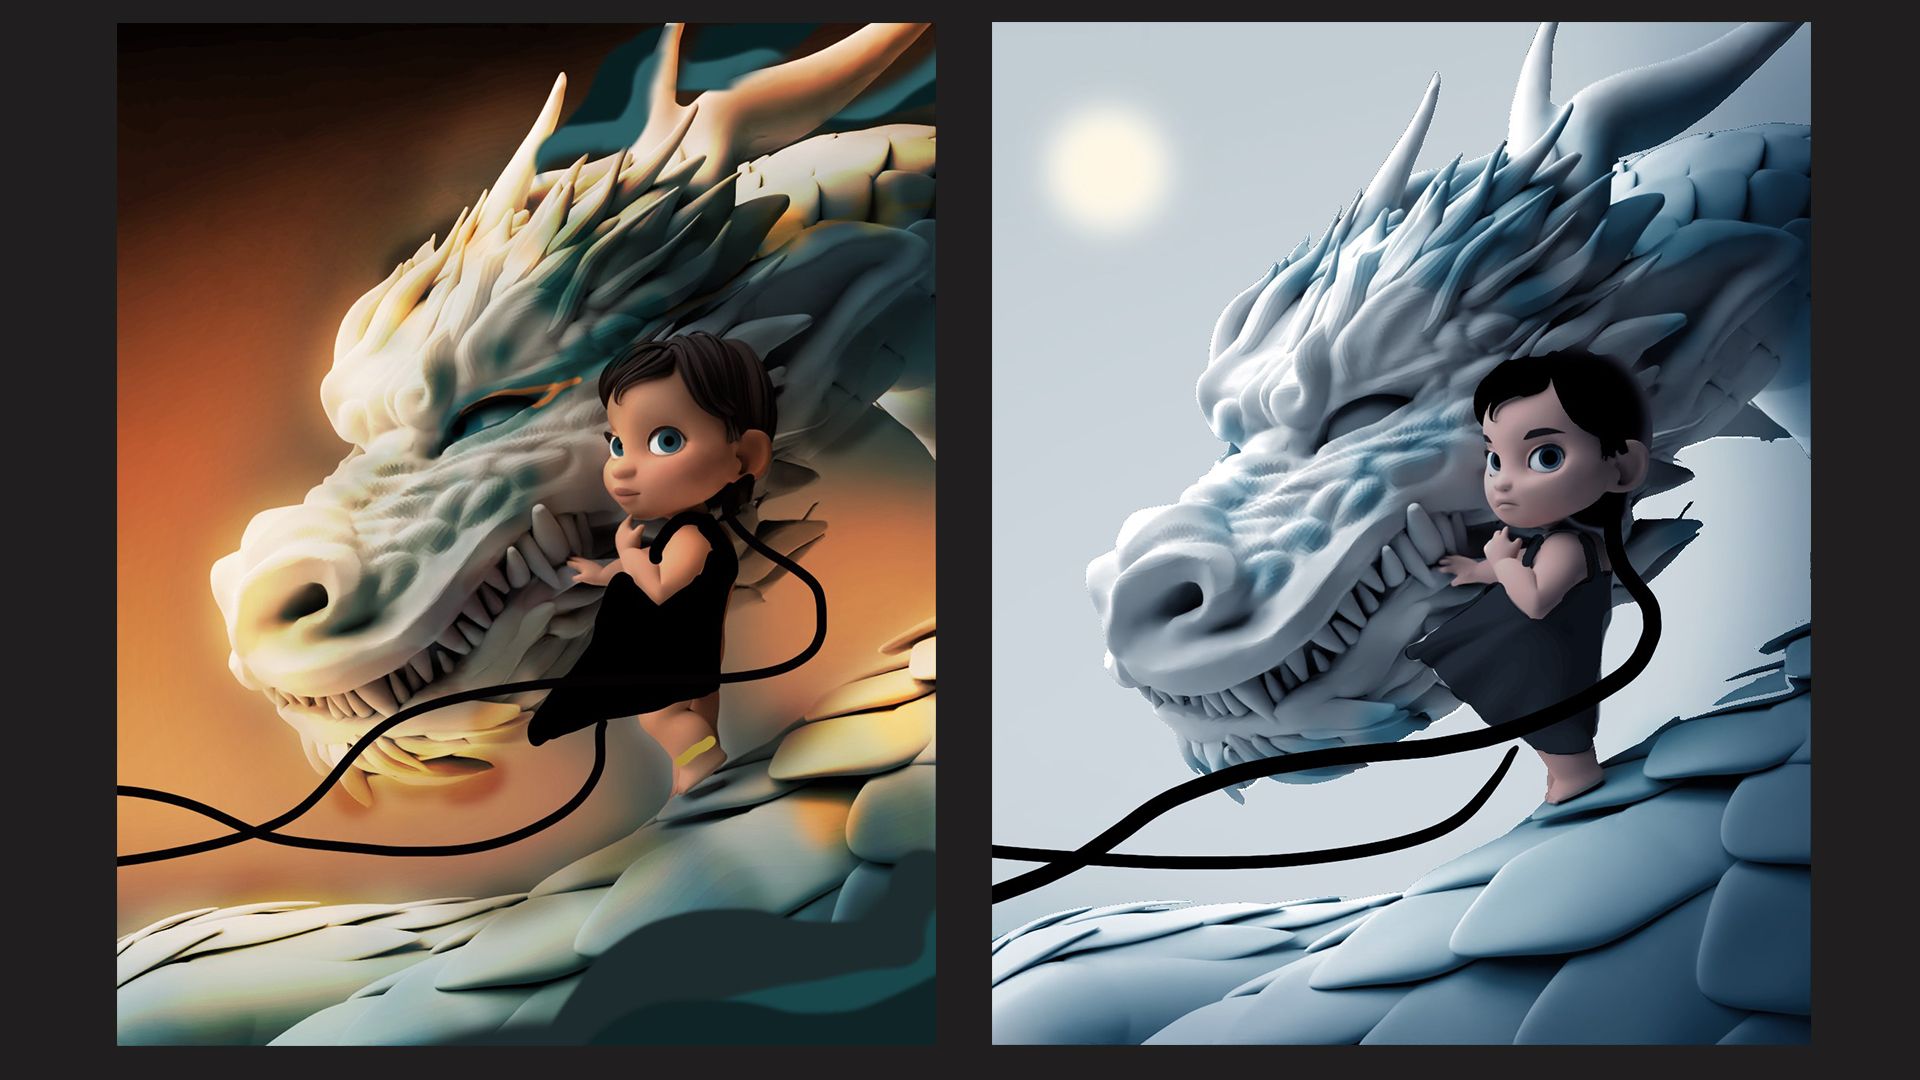
Before moving on to texturing, it was crucial to settle on a definitive idea. At that stage, several directions remained open, each of which could give a different intention to the image. Shades for the dragon, the dress, the hair, the background, etc., were not yet certain. To explore various possibilities, some tests were quickly run in Photoshop. It was found that the image that worked best was the blue-toned one with a girl with black hair and a black dress. That version was legible from a distance and gave off an air of mystery.
Lighting
Generally, it was more appropriate to adjust the lighting after examining the textures under "lookdev" lighting, which was lighting calculated to be as neutral as possible. However, at that stage, I chose to create intentional lighting for several reasons. It allowed me to better visualise the relief of my model and spot any adjustments, which were best made before proceeding with UVs and texture application. Additionally, I liked having intentional lighting to examine my textures, allowing me to better see their potential and details.
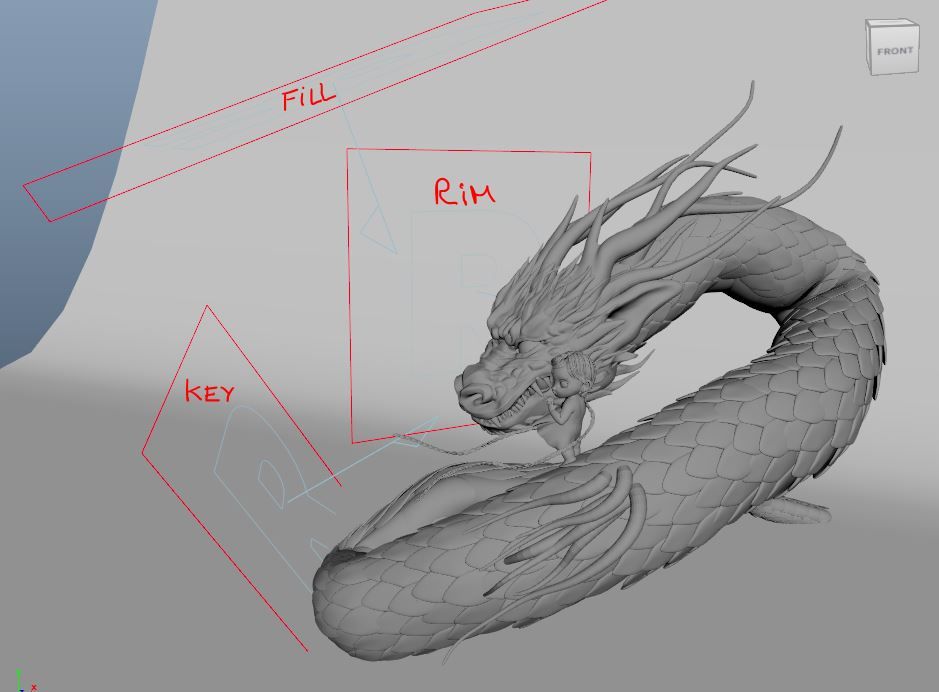
Here's a screenshot of my light setup. For lighting, I used Renderman in Maya.
I opted for something rather classic: three lights. The Keylight served as the main light source, providing the direction of the light. The Rimlight was placed behind the subject to emphasise its silhouette. Lastly, the Fill Light was used to fill in shadows.
Uvs
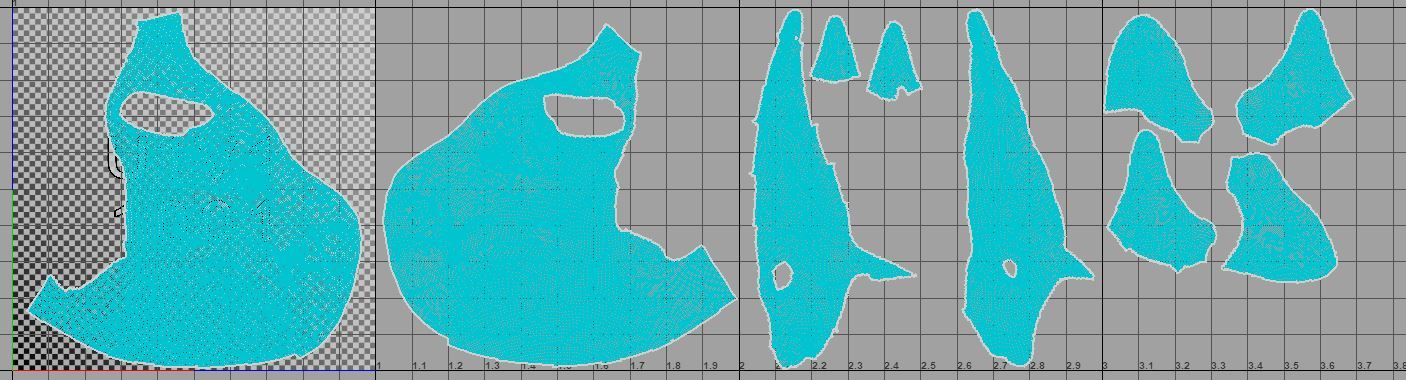
I unfolded the Uv's in Maya.
Example of uv : the dragon's head
For UVs, I ensured a texel density that was neither too low nor too high. Since didn't plan to apply any realistic texturing or focus on close-ups, it wasn't necessary to use too many UDIMs, as this would have increased rendering time unnecessarily.
Texturing
I added to my reference bank again by including texture references. All the texturing was done in Substance 3D Painter, with frequent transitions between Substance and Maya. It took me some time to decide on the texture for the dragon's skin. Initially, I aimed for a crackly and realistic texture, but it started to lose its clarity. Upon revisiting my initial references, I noticed a preference for a simpler and smoother texture, commonly found in AI-generated images. I embraced this simplicity and opted for a less dense texture.
The back-and-forth process between Substance and Maya renderings persisted, emphasizing the significance of every brushstroke detail. The texture was divided into several components, each contributing to the overall appearance. For my characters, I had an Albedo pass for color, Roughness and Specularity for light interaction variations, and Displace and Normal maps for relief information.
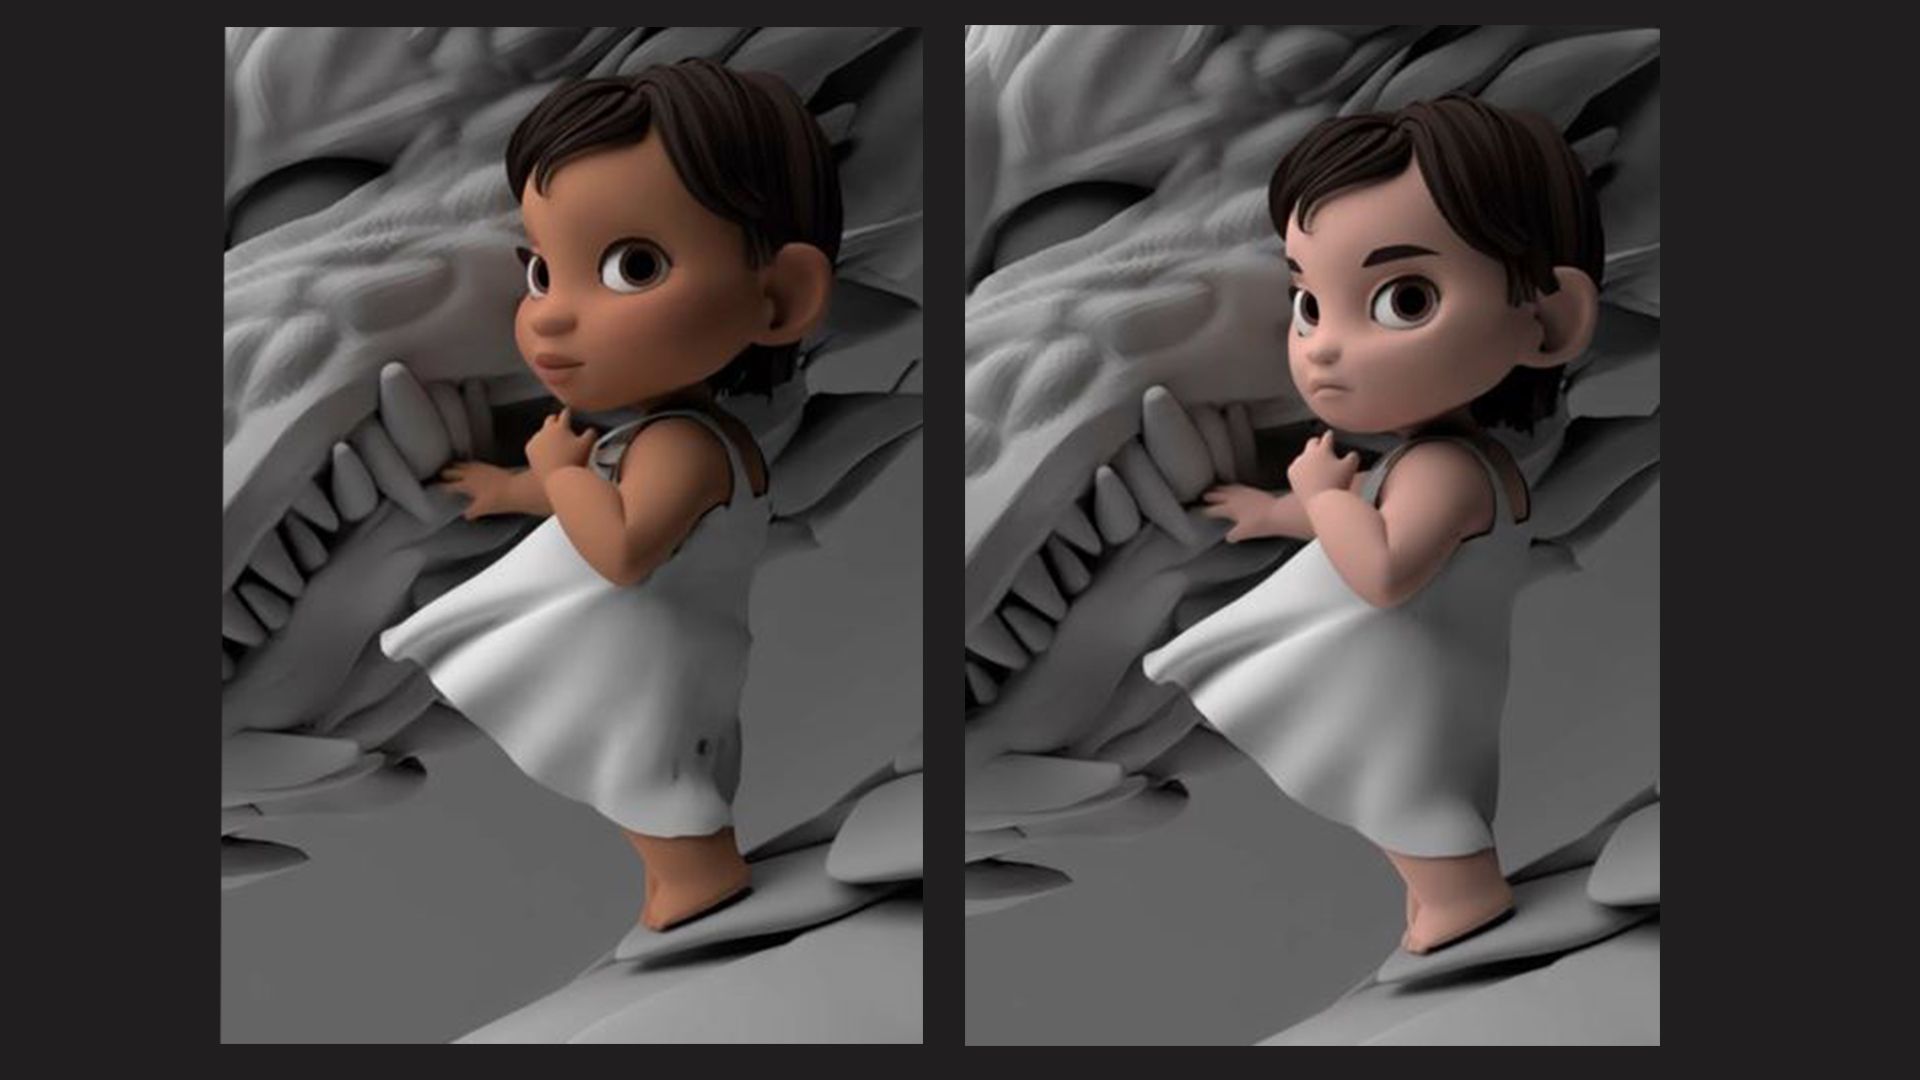
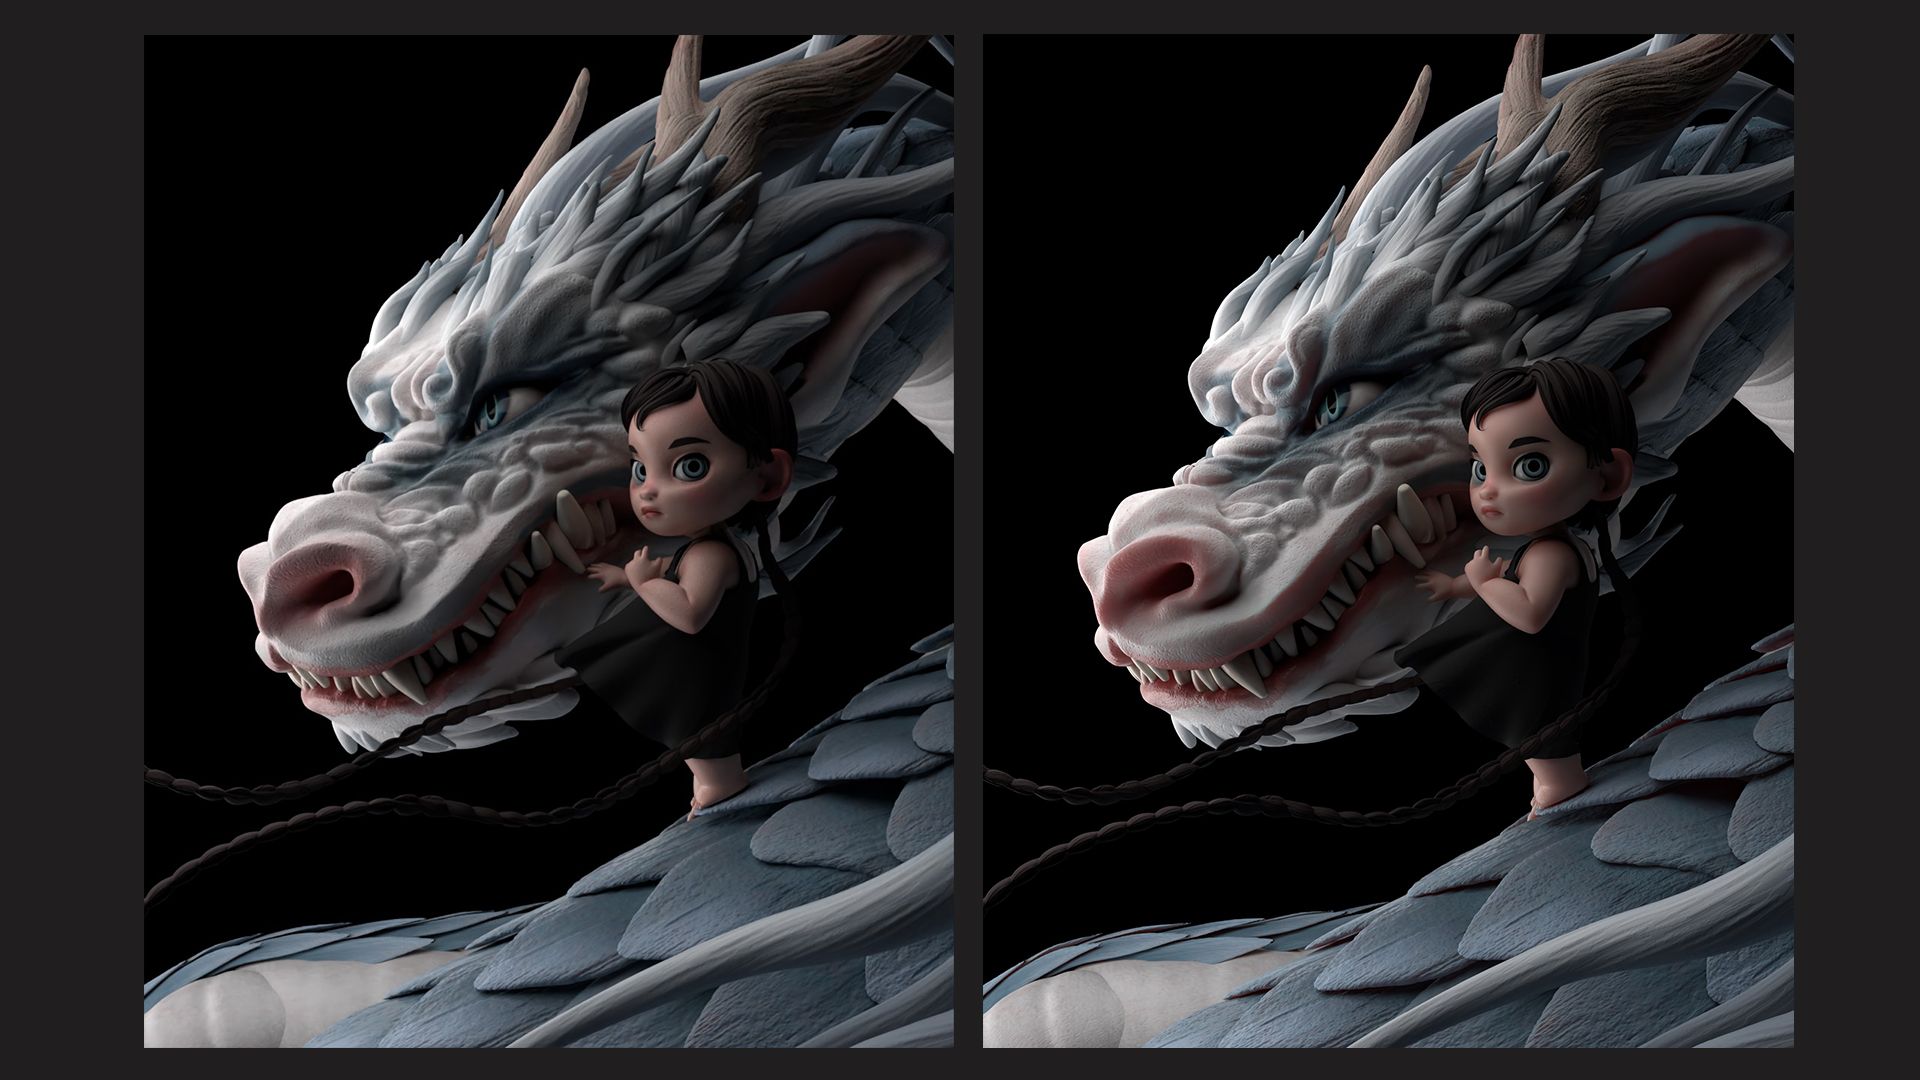
Finally, a particularly satisfying step was applying SubSurface Scattering (SSS), which instantly brought the two characters to life.
Left: without SSS; Right: with SSS (the difference is subtle but important; look at the dragon's nostrils.)
Animation
At this point, I decided to create two formats: an image and a video. The movement possibilities in the image were limited due to my constrained rigging skills, but still feasible, so I decided to give it a try. The dragon and child had slight movements, and later I had to make some adjustments in compositing. I simulated the dress in Maya, while a friend assisted me in simulating the braids in Houdini. Although I wasn't entirely convinced by the animated result, it wasn't a failure either, and at least I gave it a shot. The allure of 3D creations lies in the potential for creating animated images, so it was important for me to attempt it.
Rendering
Now, onto the less enjoyable task: image calculation (and it must be done meticulously!). Every detail must be considered, with layers divided thoughtfully and all necessary passes extracted to streamline compositing. Even the smallest mistake can be costly, especially considering the lengthy rendering times, and identifying them too late can result in significant time wastage. Rendering the animated version of the image consumed a considerable amount of time.
Compositing
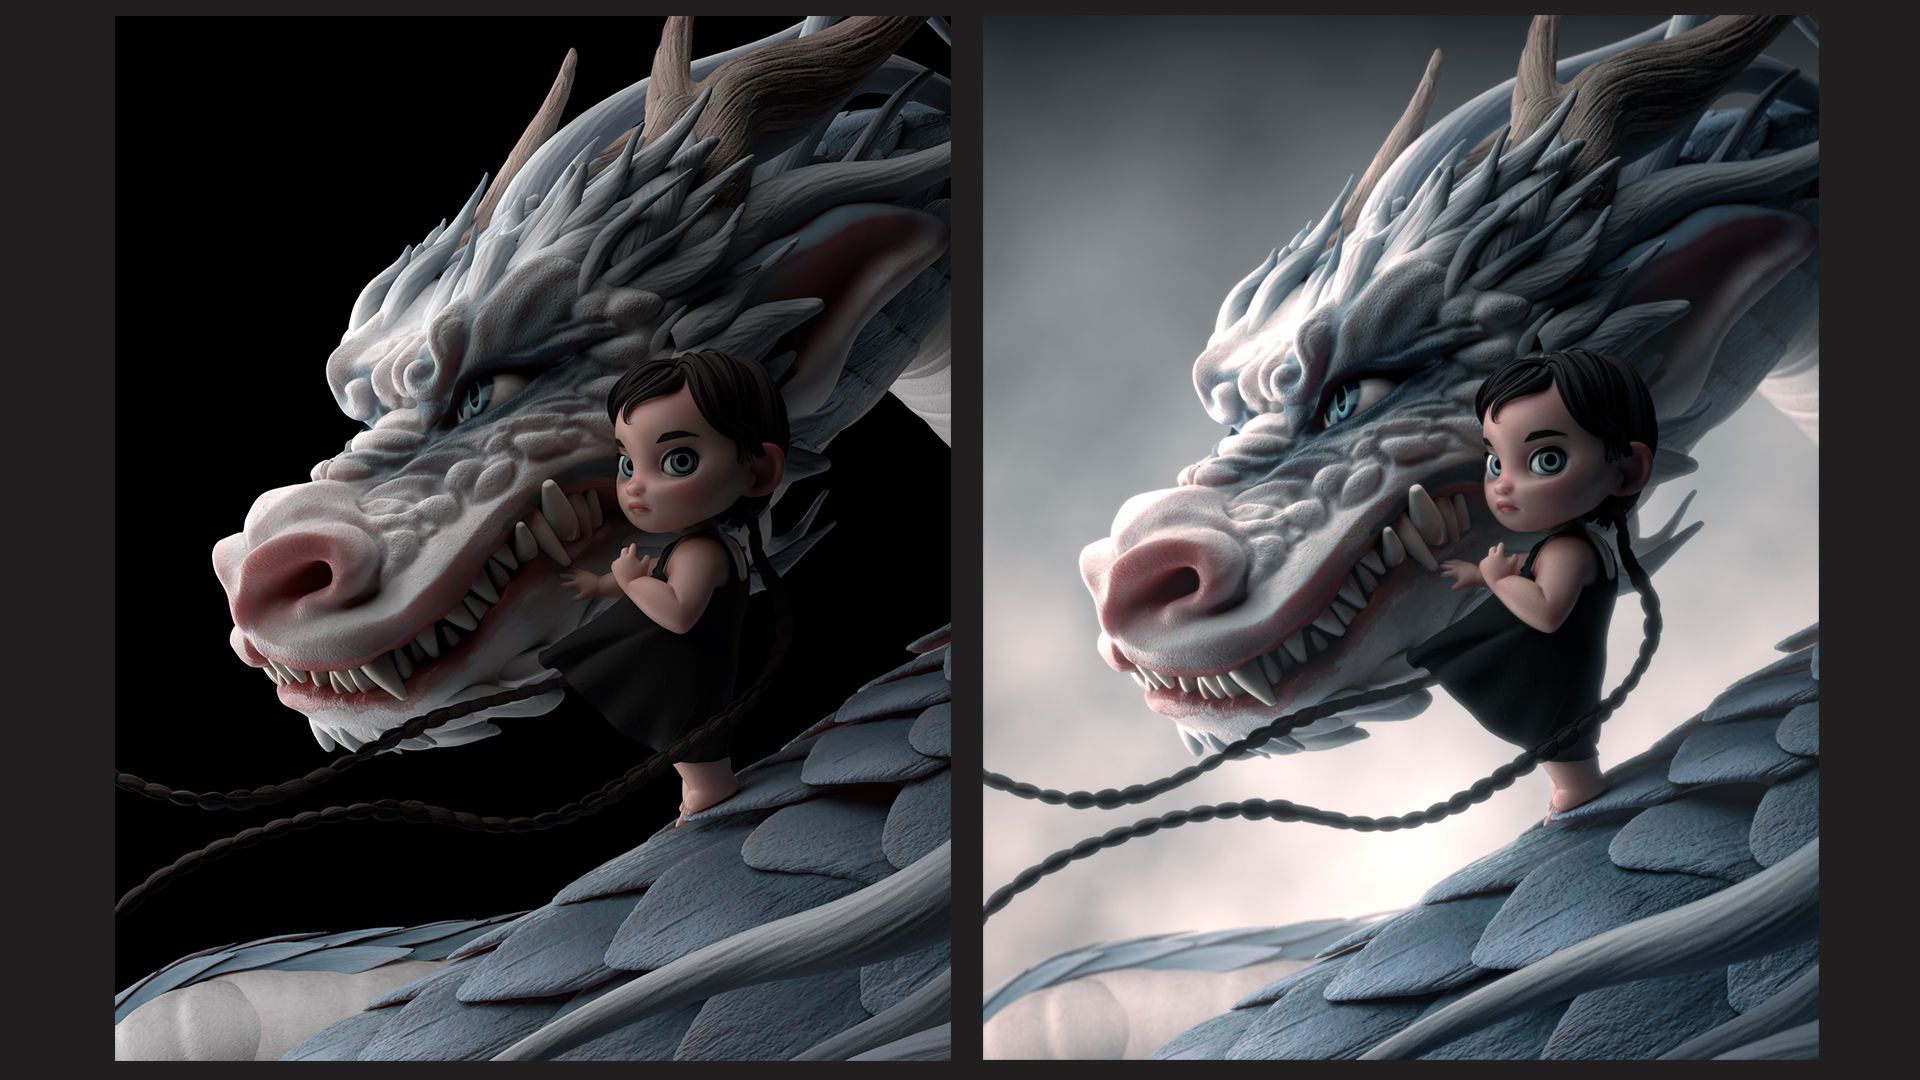
And now, onto the final step: compositing (which I did in Nuke).
Thanks to my previous tests in Photoshop, I knew which visual direction I wanted to pursue.
I assembled my different layers: the BG + the Dragon + the little girl. I used cryptomattes, which allowed me to easily select elements of my image and retouch them individually. For example, I enhanced only the sparkle of my characters' eyes. The great thing about Nuke was that I could really delve into the details of my retouching.
Thanks to the depth info I had previously batched, I was able to use a P-Matte node and create a realistic fog. I also created a depth of field with a Zdefocus. At the end of my comp, I added nodes that would act on the entire image, such as a ColorCorrect node to adjust the colors and a glow node that would enhance the brightest areas, adding a sort of halo.
Compositing was a rather gratifying part of the process, as it quickly became possible to significantly improve the image.
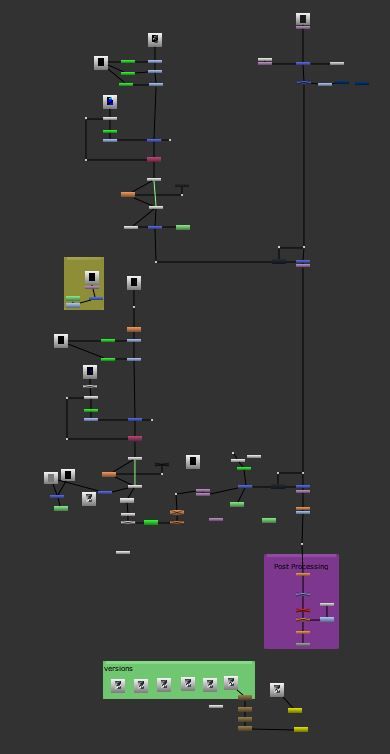
Without going into detail, here's a screenshot of my Nuke tree for this image, though it's still relatively small.
Nuke Tree & Before/After compositing
Conclusion
If I had to give advice on how to successfully complete a personal project, I'd recommend daring to explore new methods by stepping out of your comfort zone. Although learning can be time-consuming, it often proves beneficial, offering tangible benefits for future projects. However, there are also times when it's crucial to opt for simplicity, and neglect certain details that won't add value to the final image. Finding the right balance between exploration and simplicity is essential.
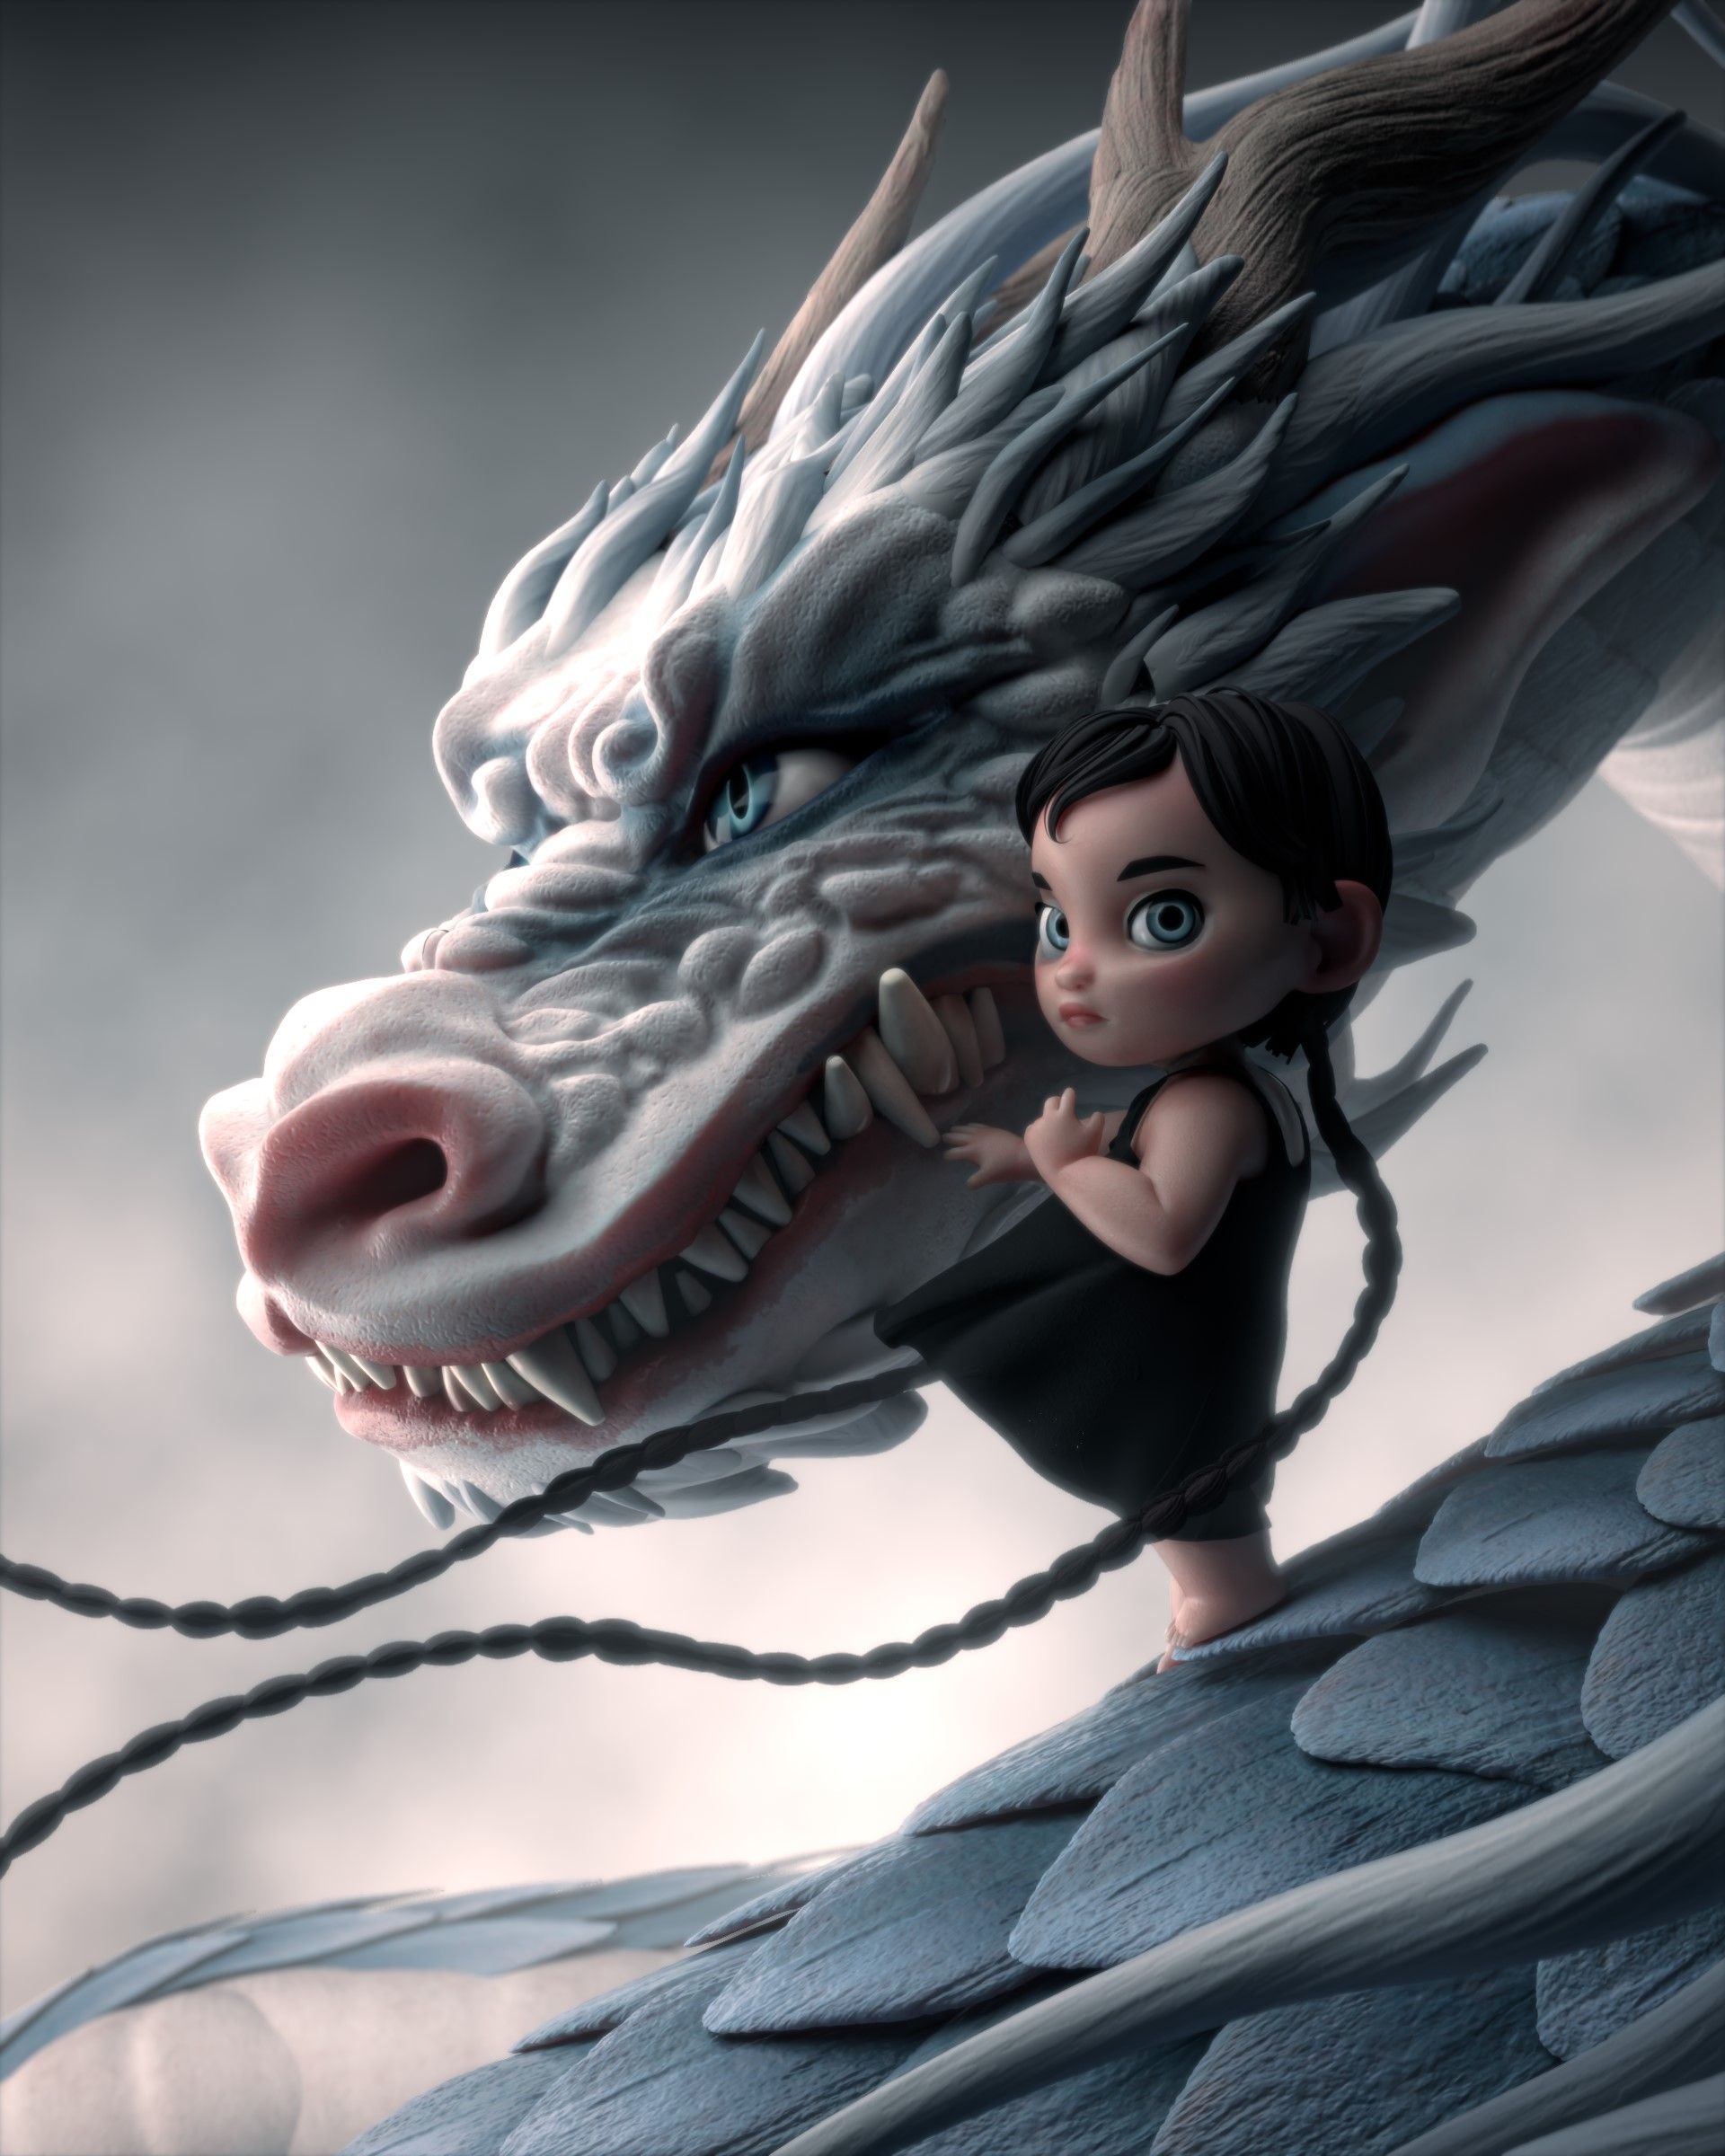
Final Image
Finally, when it comes to a personal project, keep in mind that there are no strict rules to follow. You have the freedom to improvise, to change your mind, the main thing being to have fun. However, I strongly recommend not underestimating the importance of references.
Personally, my favorite moments in the process are the modeling and texturing phases. Modeling is where the project gets off the ground, where you create something from scratch, and it's a phase that offers a certain amount of creative freedom. Texturing helps to bring life to an initially gray character. When I immerse myself in creating textures, my brain switches off, and the process becomes captivating. It's extremely gratifying to see your image become more beautiful with each detail.
To conclude, with each new project the important thing is to explore, to learn, but above all to love what you're doing!
Thank you for taking the time to read this article; it's a real pleasure for me to share and explain my work.
Check out more of Coline's work via her Rookies profile here.