The Hunger for Realism: Breakdown to Creating Katniss Everdeen in 3D
Eva Heesoo Chae, a fine arts graduate, transitioned to 3D after finding inspiration in LA's vibrant artist community. This article showcases her latest project featuring katniss Everdeen in 3D.
Eva Heesoo Chae is a 3D generalist who majored in fine arts and illustration. After graduating, she visited LA in 2019. There, she had the chance to meet many 3D artists and tour studios. This experience gave her fresh inspiration, adding new dimensions to her work.
During the COVID-19 pandemic, she studied 3D. She found solace in games and movies. This time also solidified her choice to become a 3D artist. In 2022, she began freelancing. Since mid-2023, she has been a 3D generalist at GIANTSTEP Studios Inc. located in LA, contributing to post-production efforts.
Hello! My name's Heesoo (or Eva). I'm a 3D generalist. Glad to share my project breakdown with The Rookies. Hope you enjoy it!
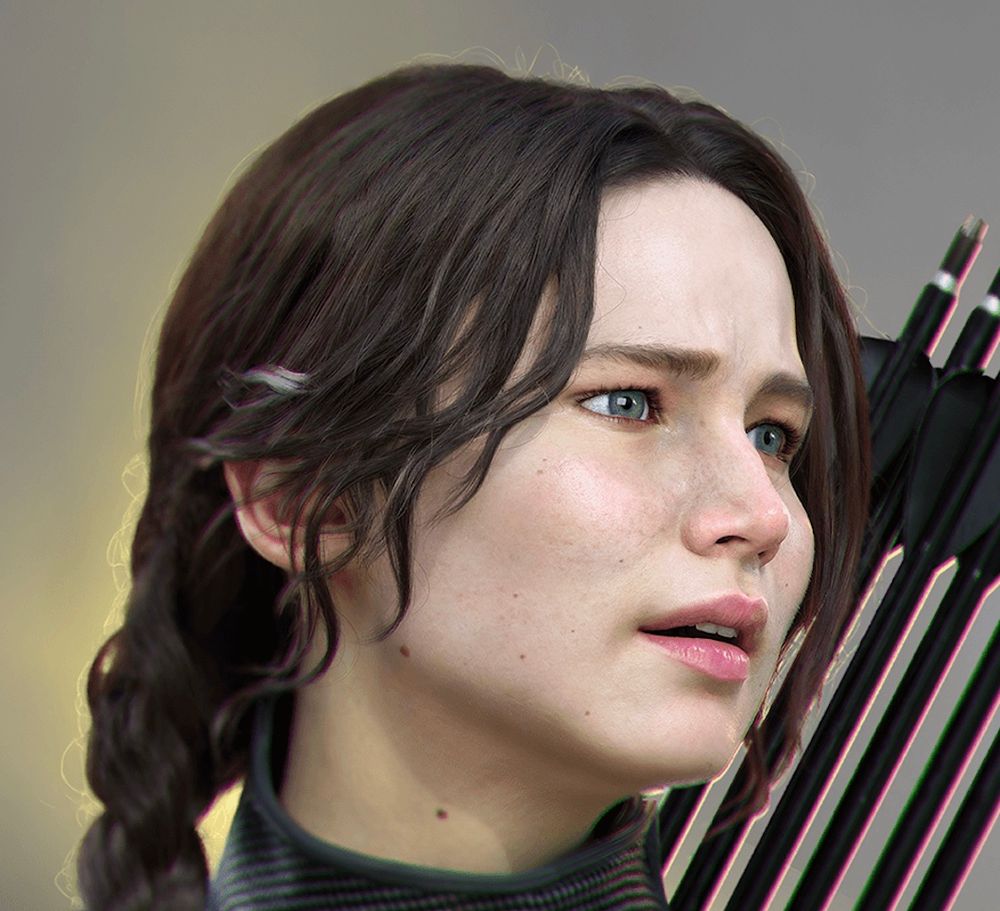
I chose to work on one of my favourite movie characters, Katniss Everdeen from The Hunger Games series. Katniss is such a compelling character. I love her courage and determination, fighting for what she believes in and never giving up. I'm also drawn to her intriguing appearance. It includes her cool costume. She has braided hair and the unique face of actress Jennifer Lawrence.
I kept the project timeline flexible. At times, I had to pause the project. This was due to job moves to the US or to time spent learning new software. My priority was always to push my art to its current limits. I revisited and tried again if there was a better approach during the project. This flexibility is one of the advantages of personal projects, isn't it? :)
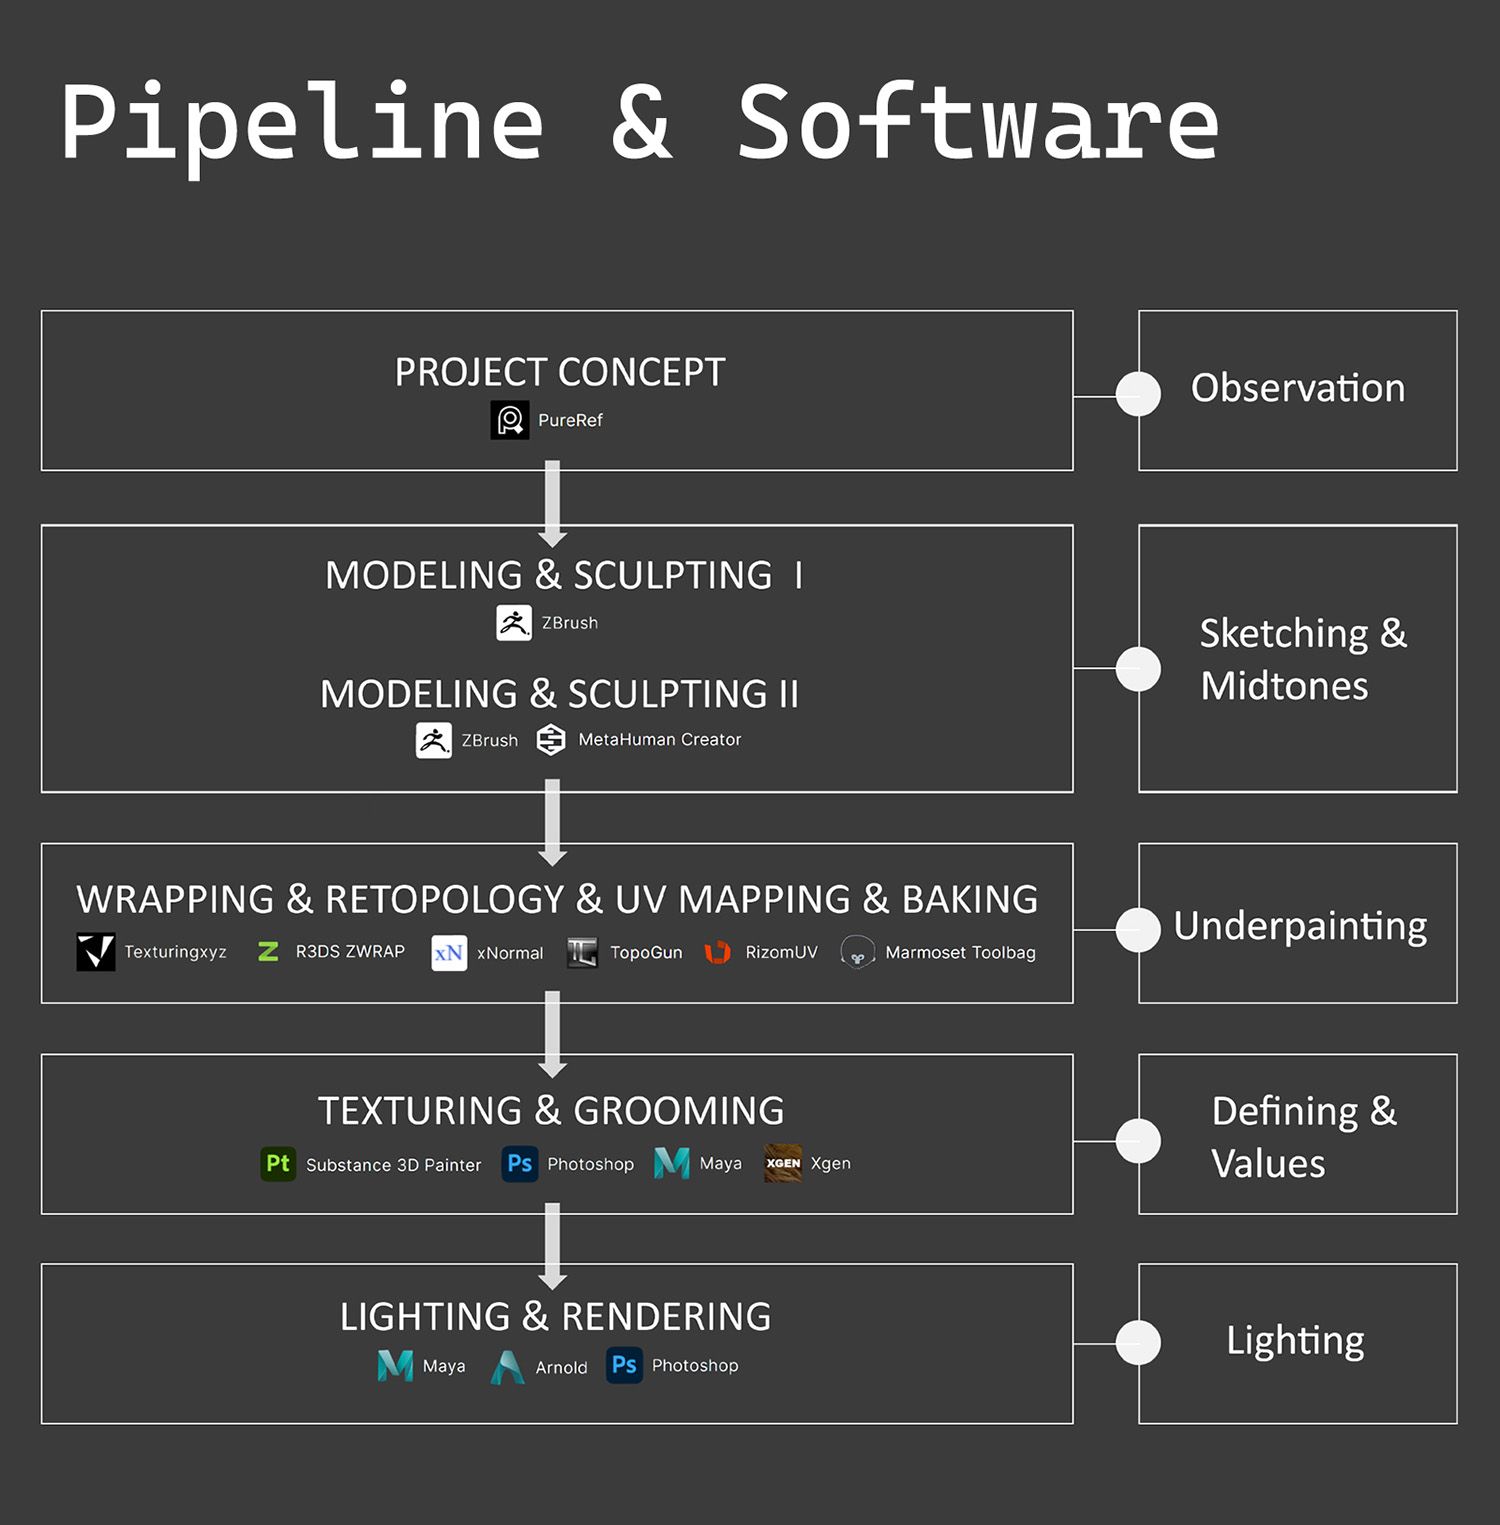
Pipeline and software
Here is the project's pipeline and the programs I used. Next to the 3D workflow, I made tags. it is the same steps of painting for realistic rendering. This helped me grasp the 3D process better because I learned it from painting before.
Project concept
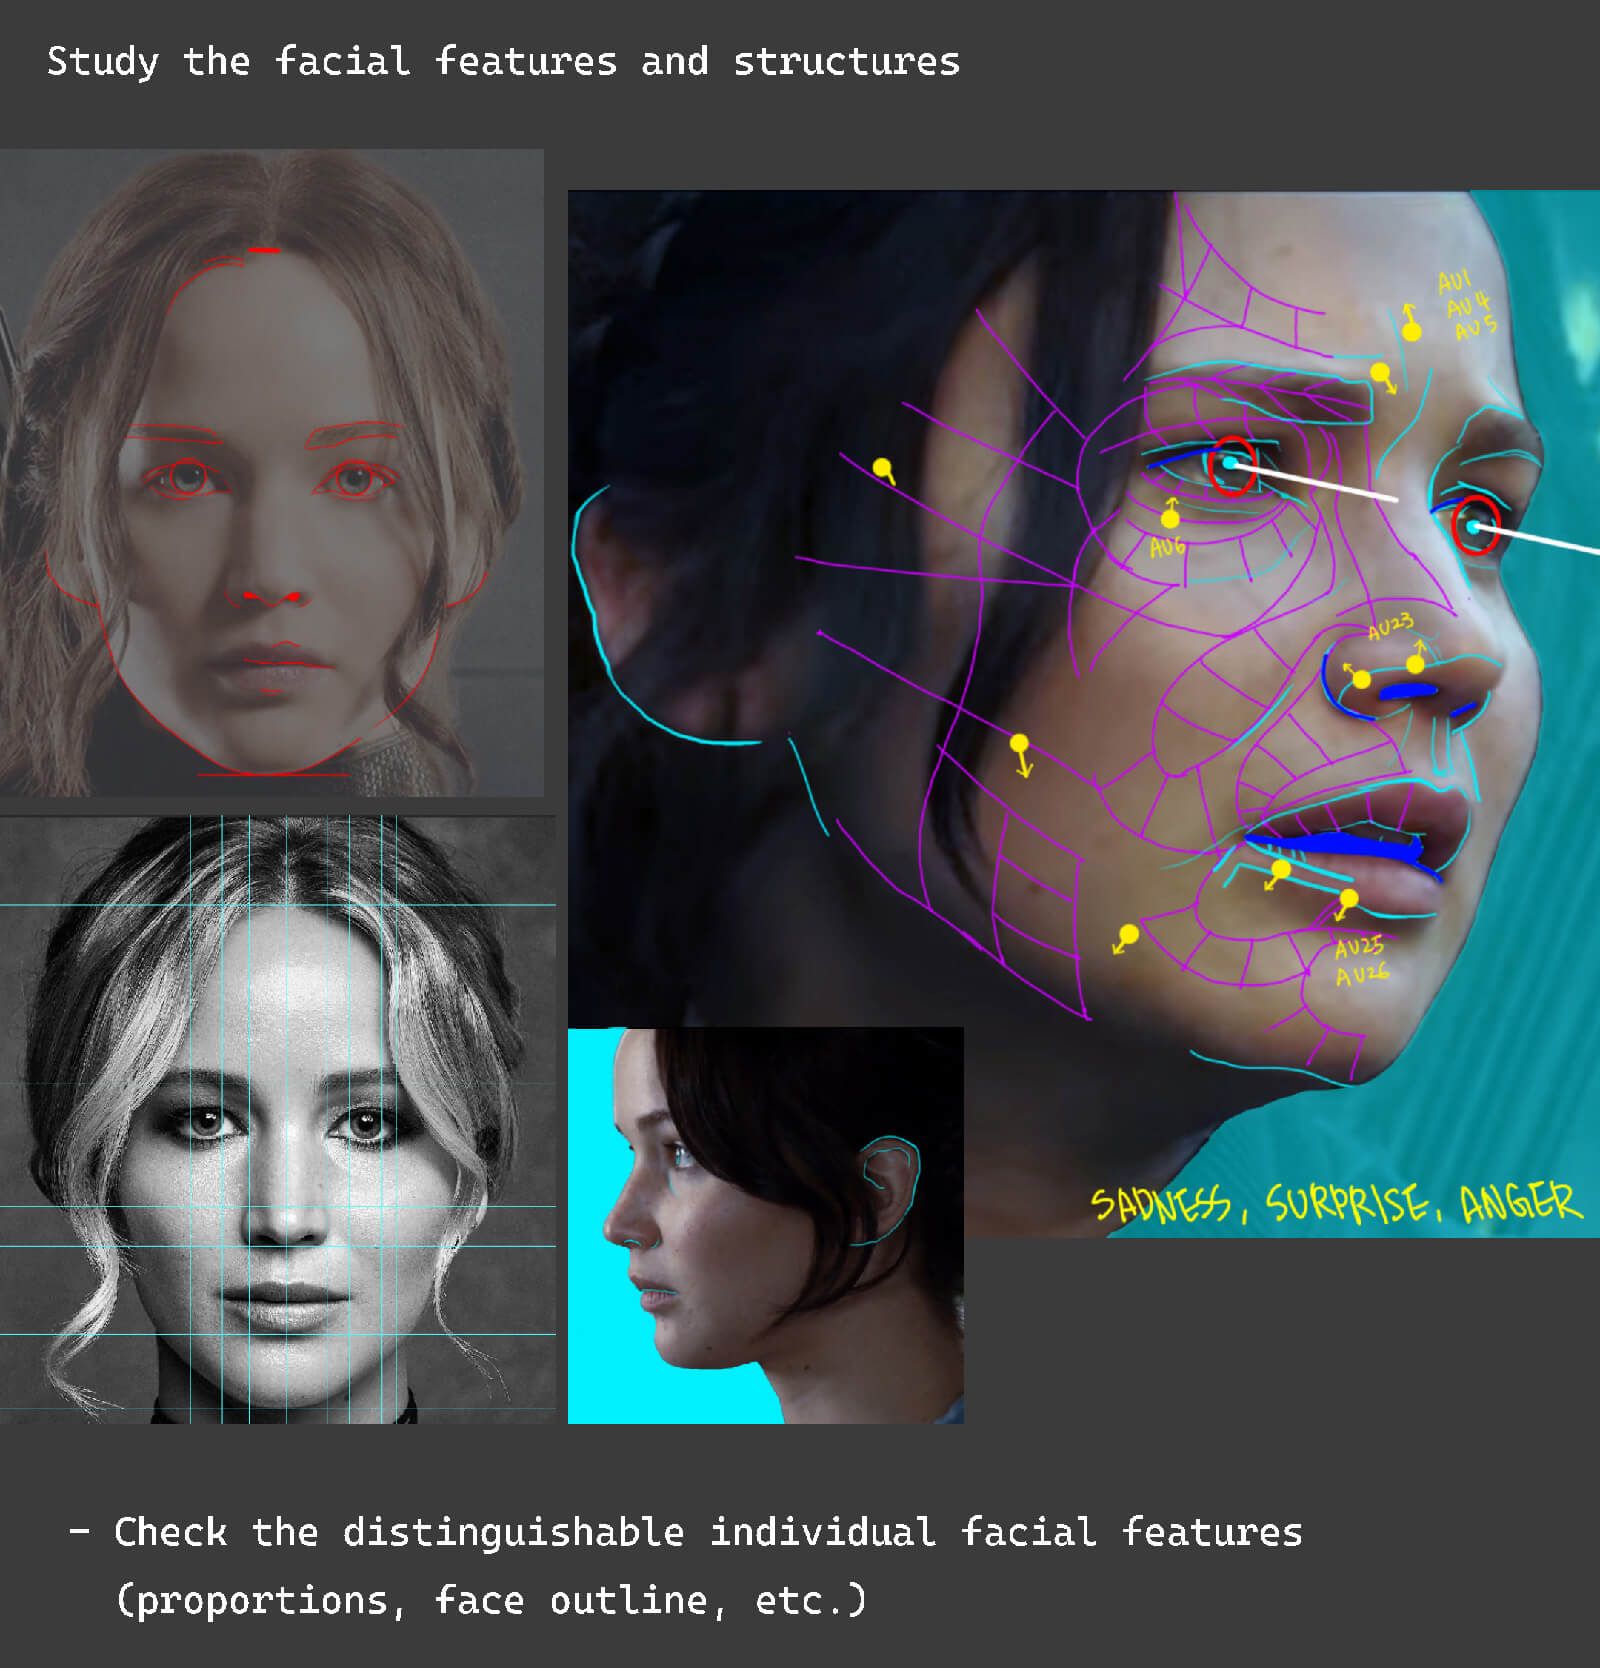
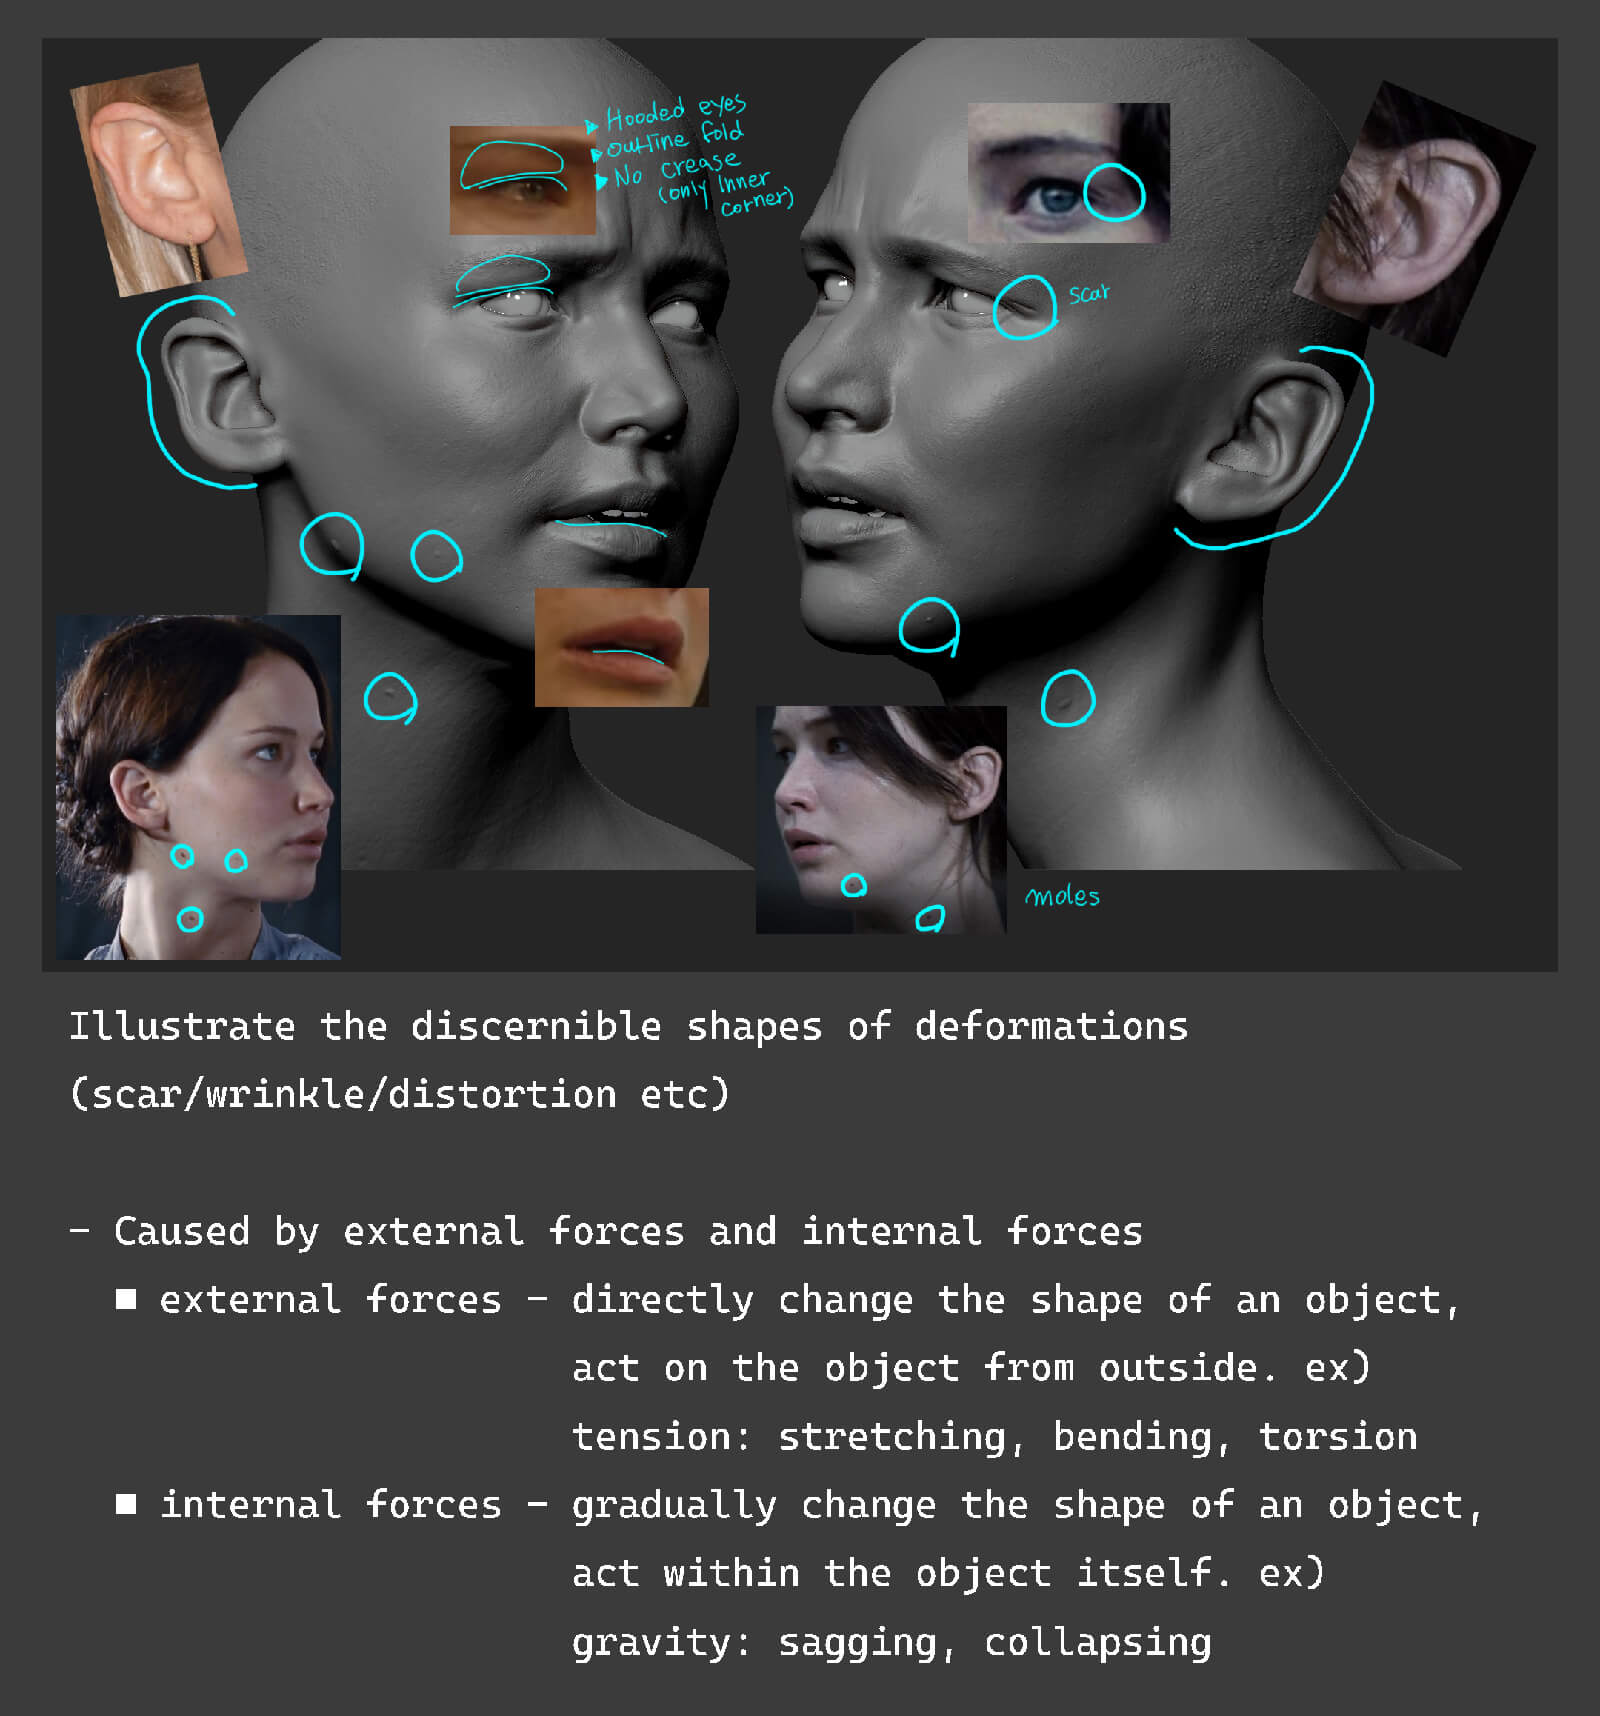
Observation
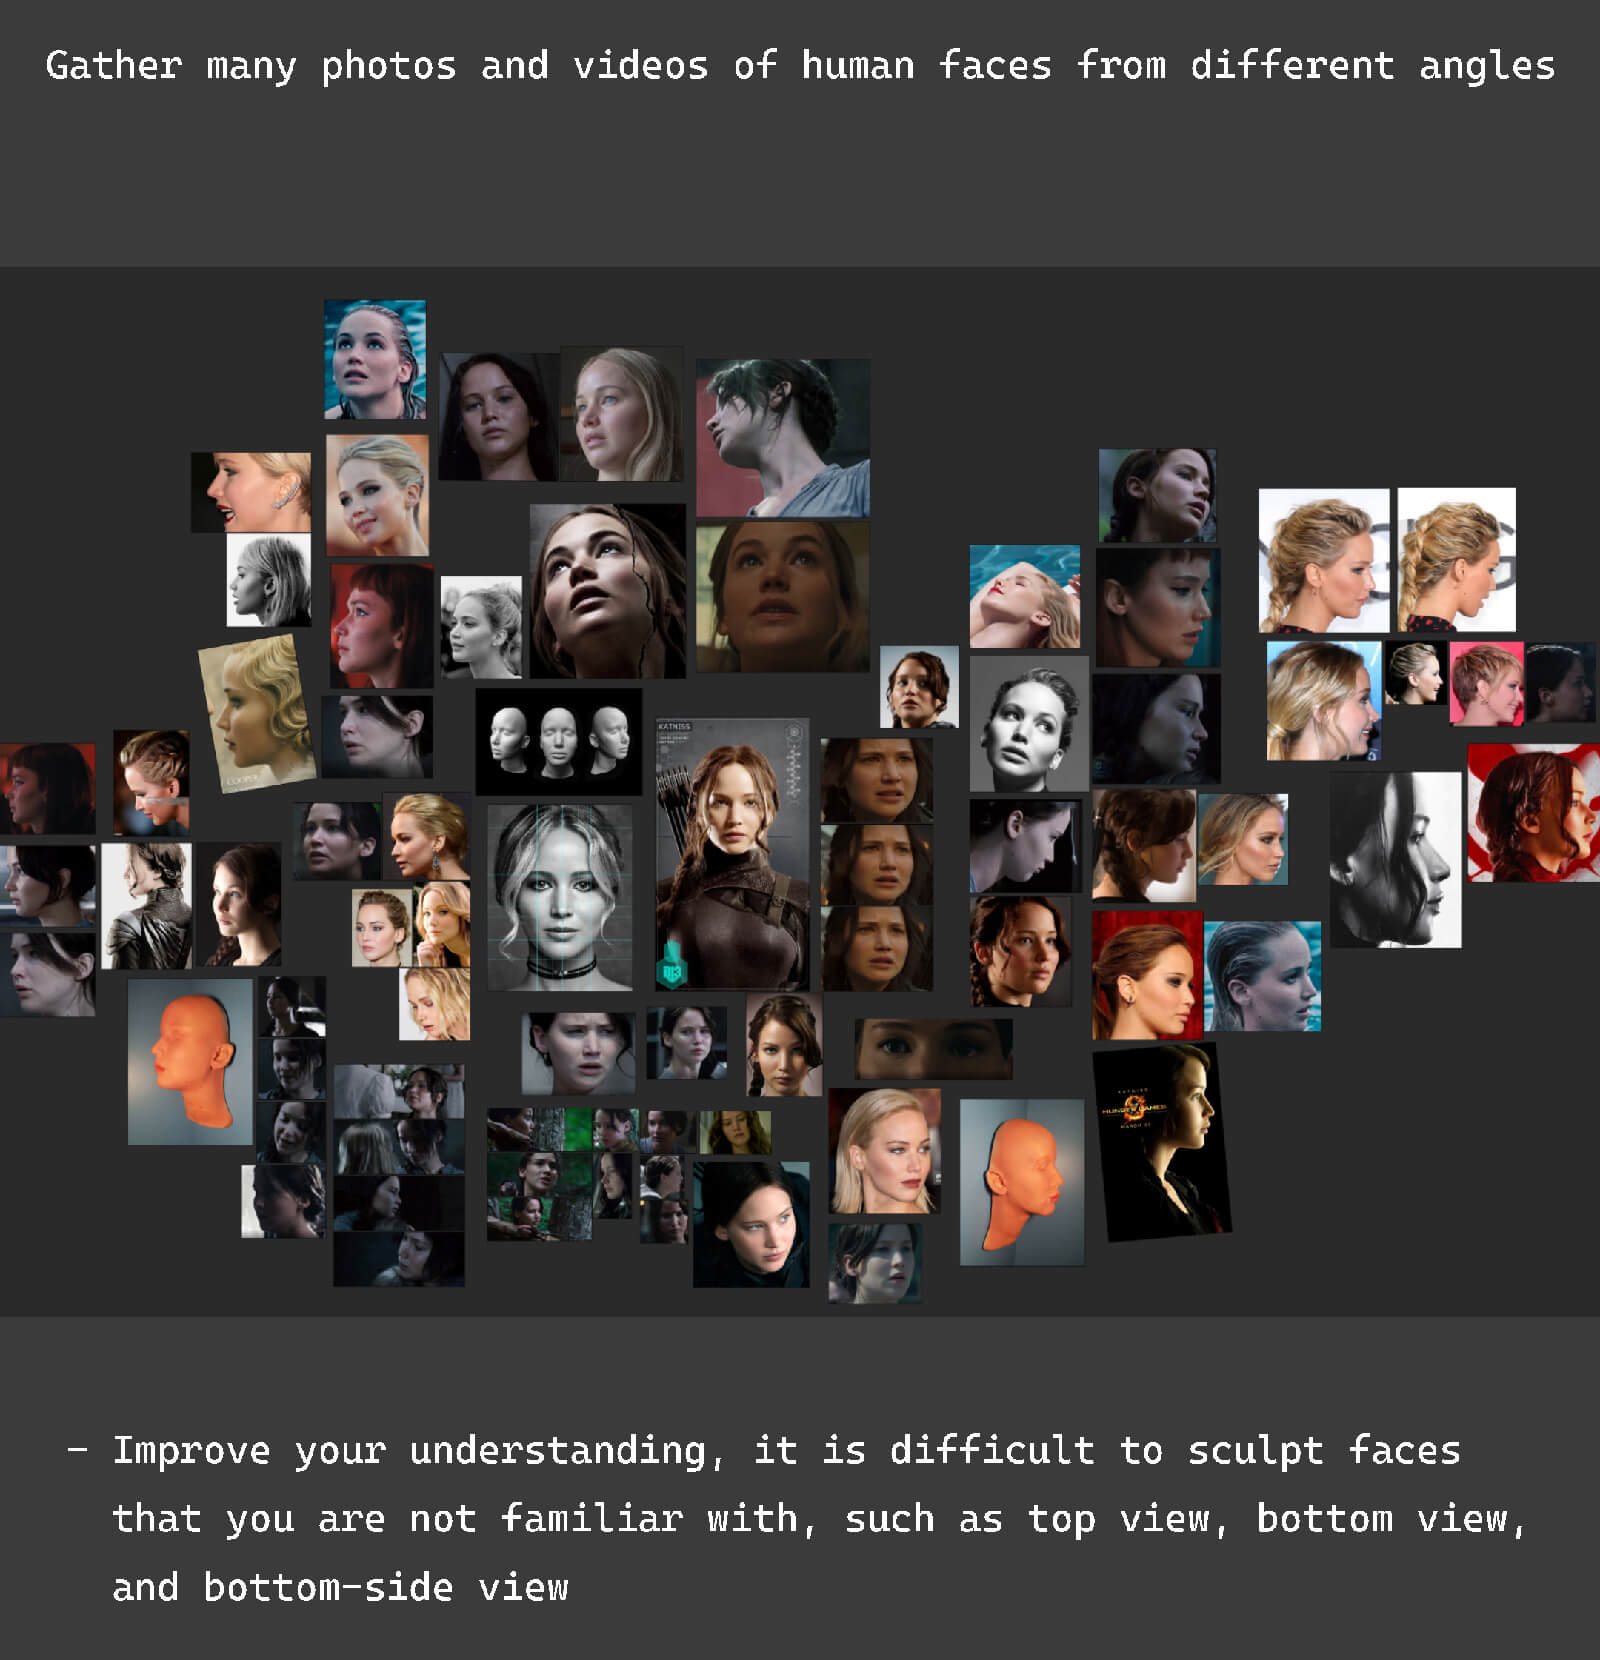
Having plenty of references is always a good thing. After gathering them, I arranged each image around the center facing forward, covering 360 degrees.
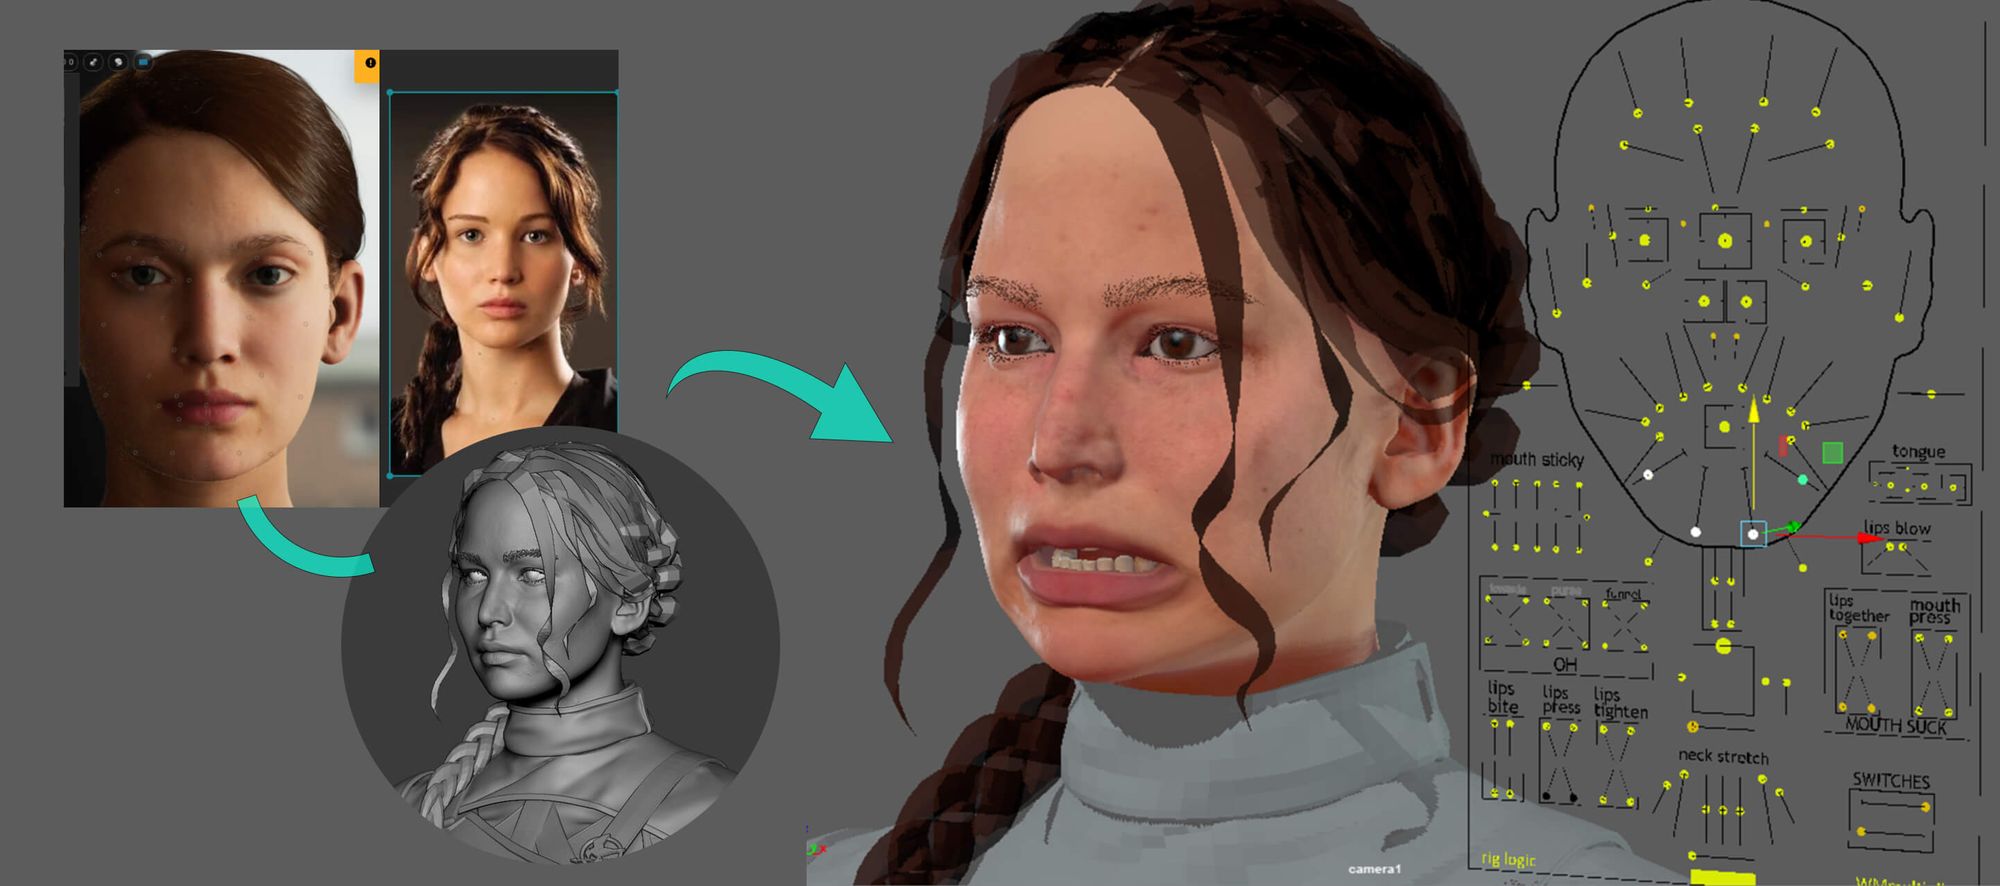
Metahuman facial rig
In the early stages of the project, I sculpted a neutral facial expression. As I progressed, I tried to project it onto a Metahuman mesh. I tried to manipulate the facial rig to test expressions. I found that the sculpt with expressions added seemed more fun, so I ended up sculpting it again.
I used ZWrap for wrapping. You can create your Metahuman, using Metahuman Animator. However, the results might not be perfect. The facial part looked fine, but the neck thickness and facial asymmetry were not ideal. To use your exact custom head with Metahuman, you can use a plugin to recalibrate Metahuman DNA. Or, you can position the Metahuman facial rig in Maya.
I chose the facial expressions from movie scenes. I also picked a portrait with a yellow background. This helped me set the final tone, as lights and environment can change clothes, skin, and hair colour.
Also, I matched the camera settings in ZBrush and Maya to ensure the final render would look as expected. It's important to note that characters can appear different due to the Field of View (FOV).
After creating the camera in Maya, I exported it as an FBX file and imported it into ZBrush. In the ZBrush Draw tab, you can adjust the camera using channels.
Here are some helpful tips to keep in mind when using reference images:
One Main Reference: It's like having a checkpoint in a game. Sometimes, when you're deep into your work, you might miss parts of what you've done before. Checking back to that main reference can help you see where you're at.
Flip the references horizontally. This helps you decide which side to follow at first. It also shows where to adjust when breaking symmetry in your model.
Mind Focal Length: Remember, reference images can have different focal lengths.
Scanned Actor/Actress Data: If possible, find scanned data images of your subject. It would be beneficial.
Modeling and Sculpting
Sketching & Midtones
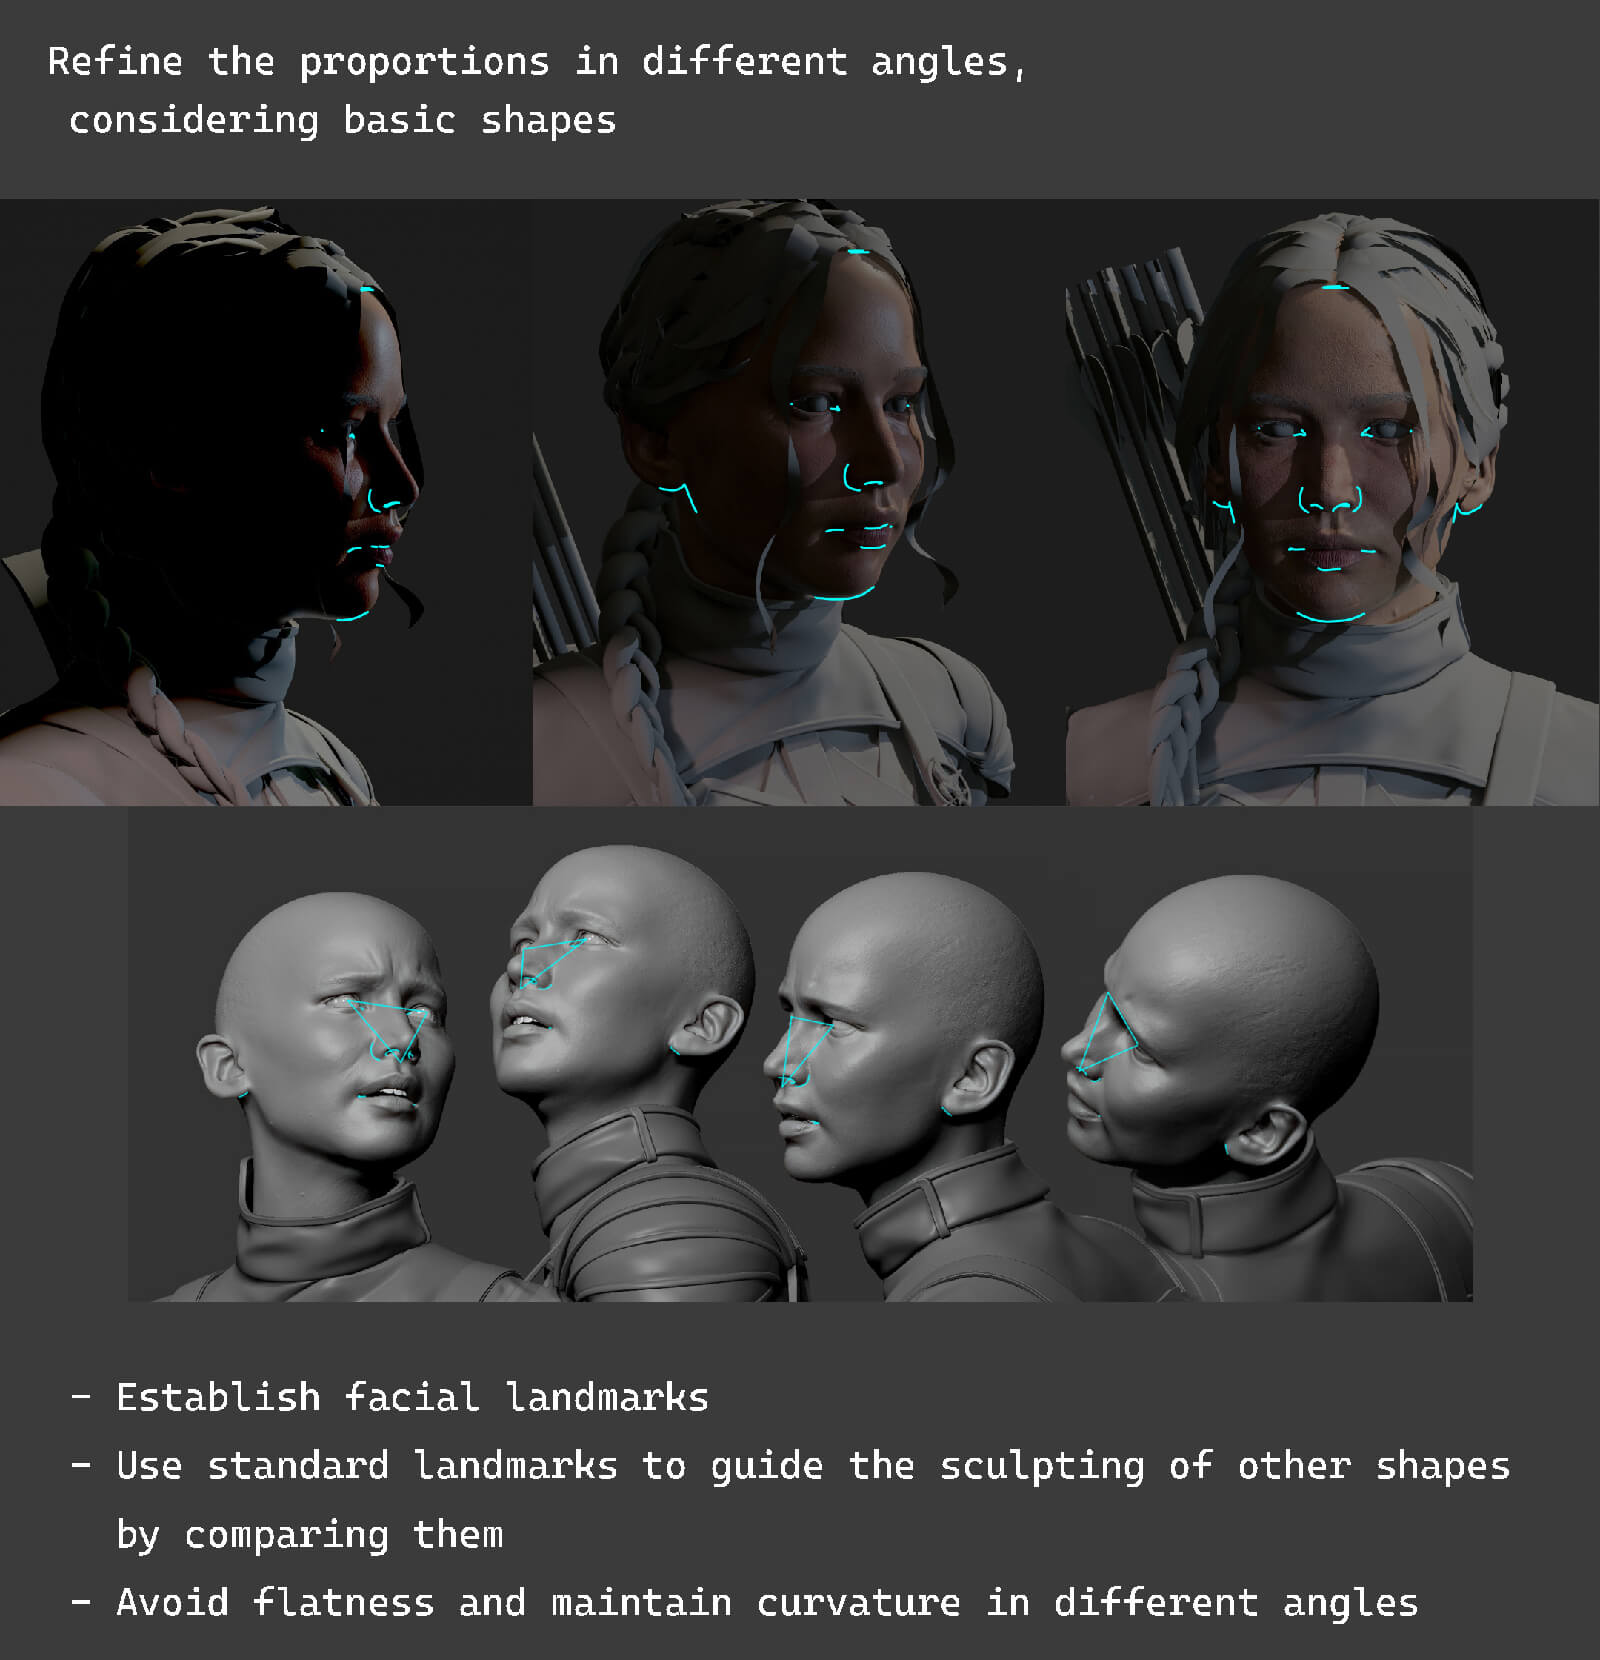
In the image above, the model is at an advanced stage of the process. But, I always begin by working with basic shapes and blocking out at the start. I pay particular attention to elements such as the volume of the jaw, teeth, gum, and the arch of the cheekbones. Neglecting these aspects can lead to the model collapsing.
Everyone has their own working method. But for me, instead of focusing on details right away, I start by sketching the shapes and proportions. After breaking the symmetry, I focused on the finer lines. They define the character's unique features. These include the earlobe, eyelid crease, and lip lines.
The solid modeling serves as a powerful foundation for the entire project. It can impact the quality enhancement of the later stages. So, I dedicated extra effort to this stage to ensure satisfaction with the final result.
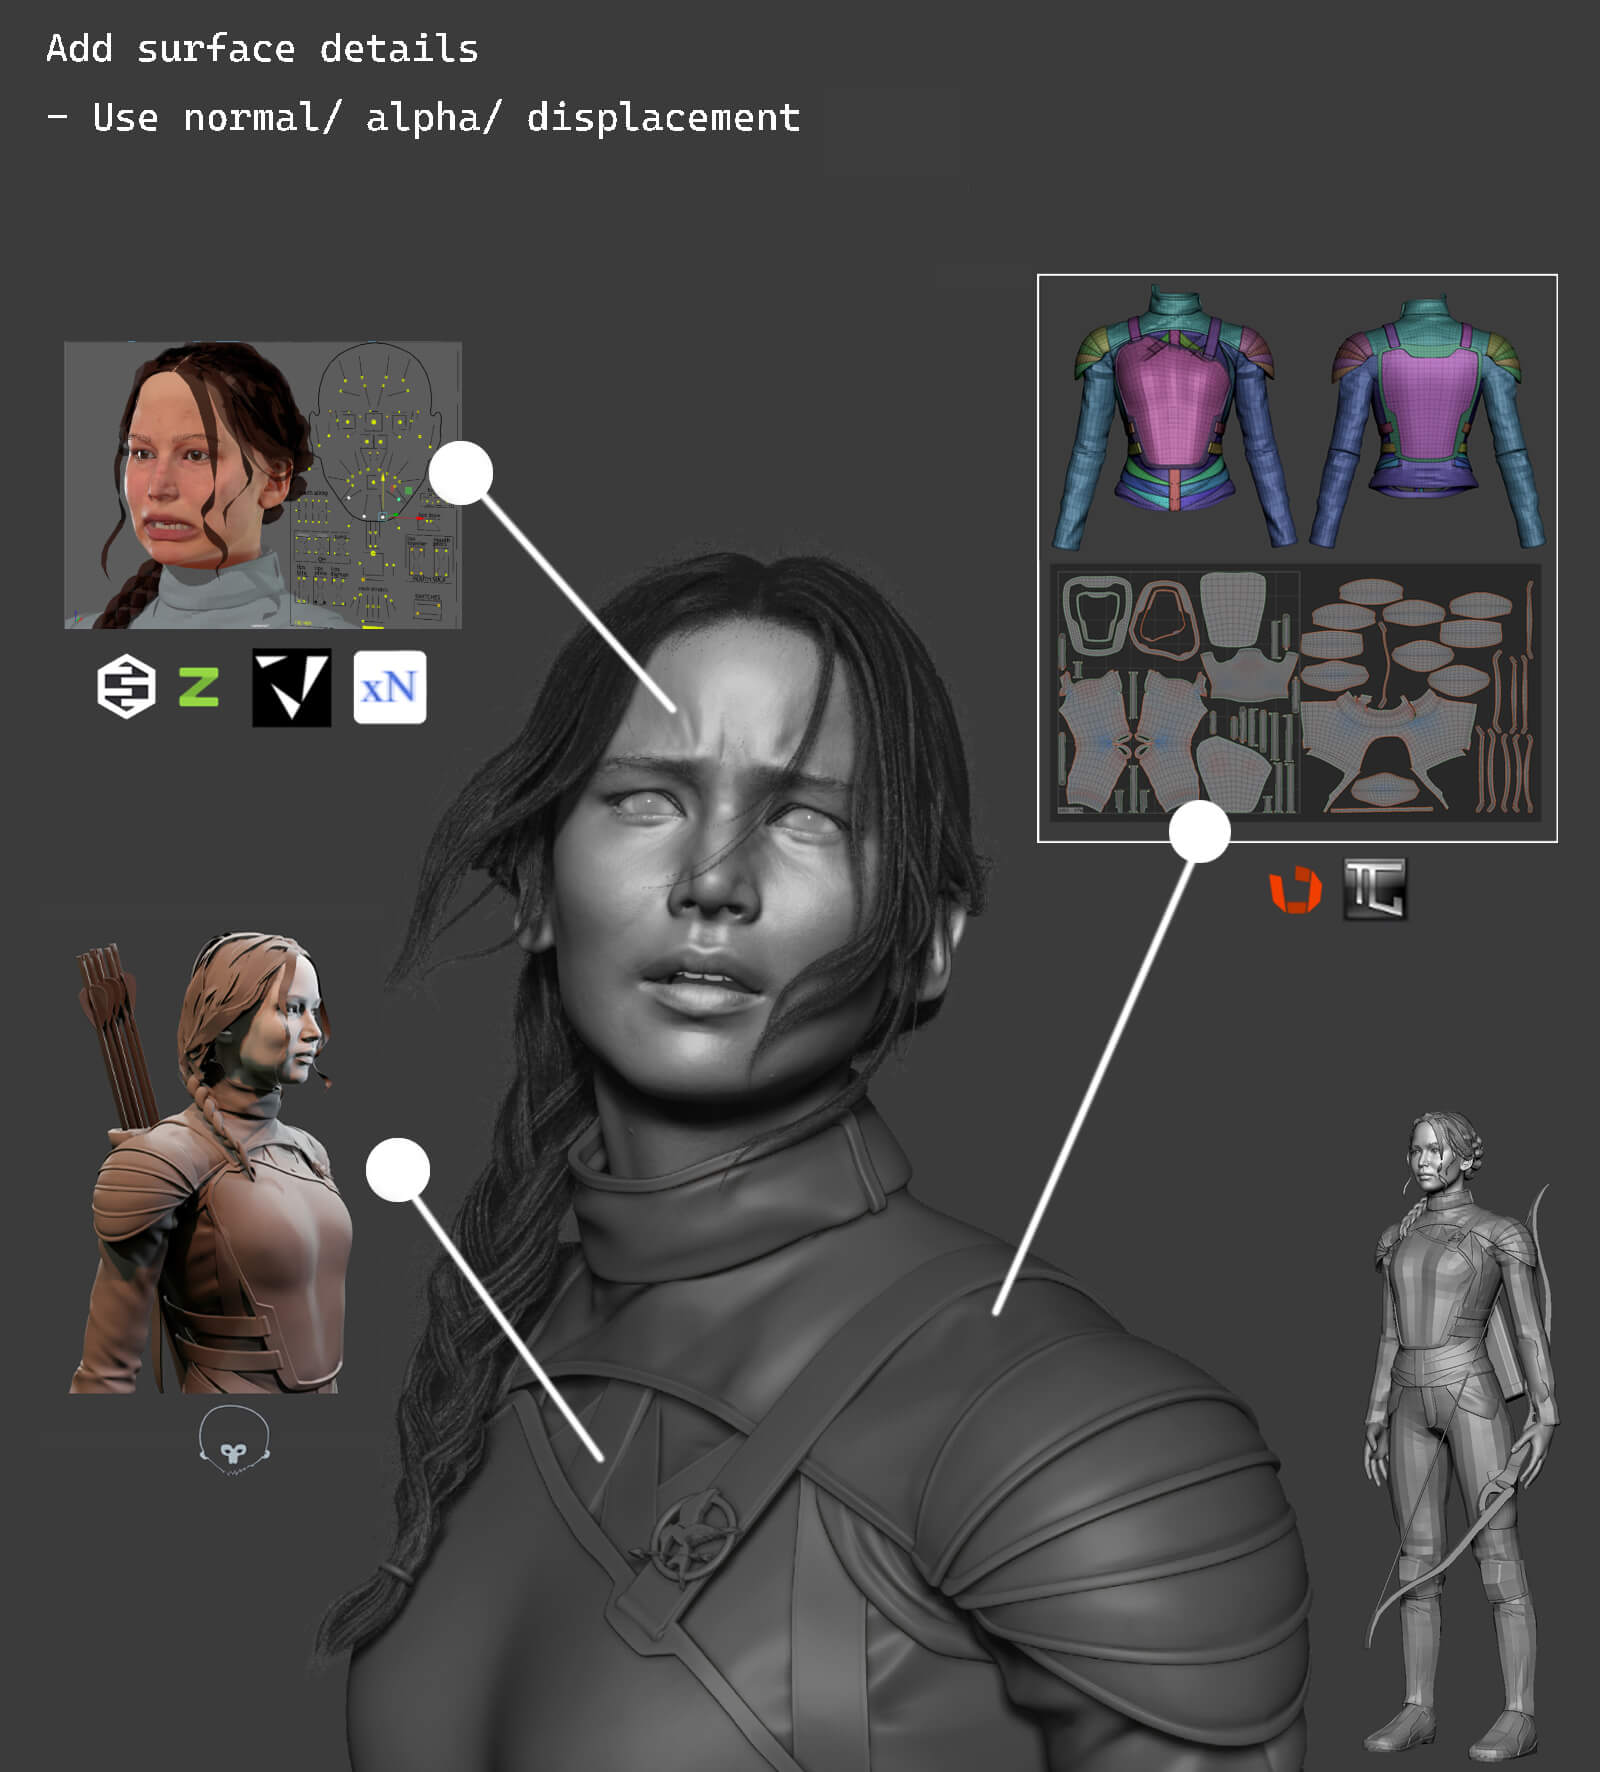
Wrapping, retopology, UV mapping and baking
This is the stage for making various maps.
They include maps for details, lighting, colours, and other roles. For skin texture, I followed the TexturingXYZ workflow. As for the clothes and props, I retopologised and unwrapped them using TopoGun and Rizom UV. Finally, I baked the base textures in Marmoset Toolbag. Then, I refined them in Substance 3D Painter.
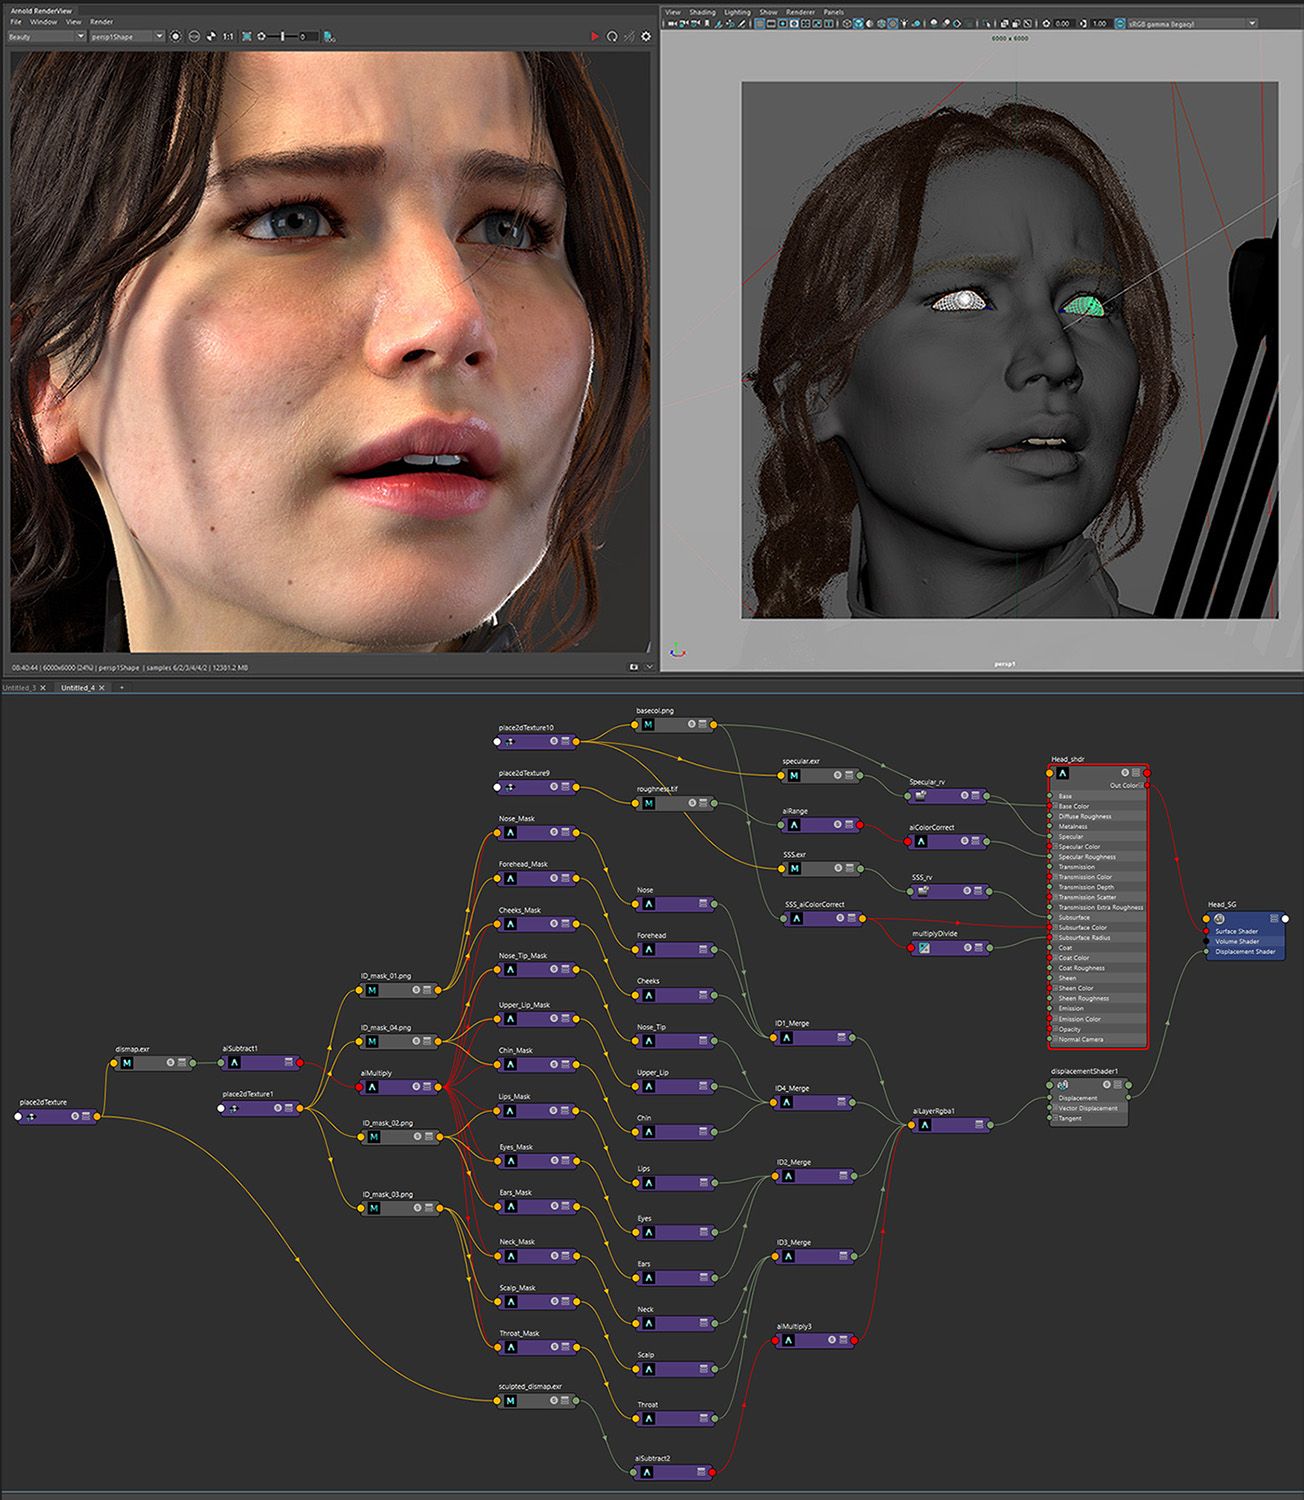
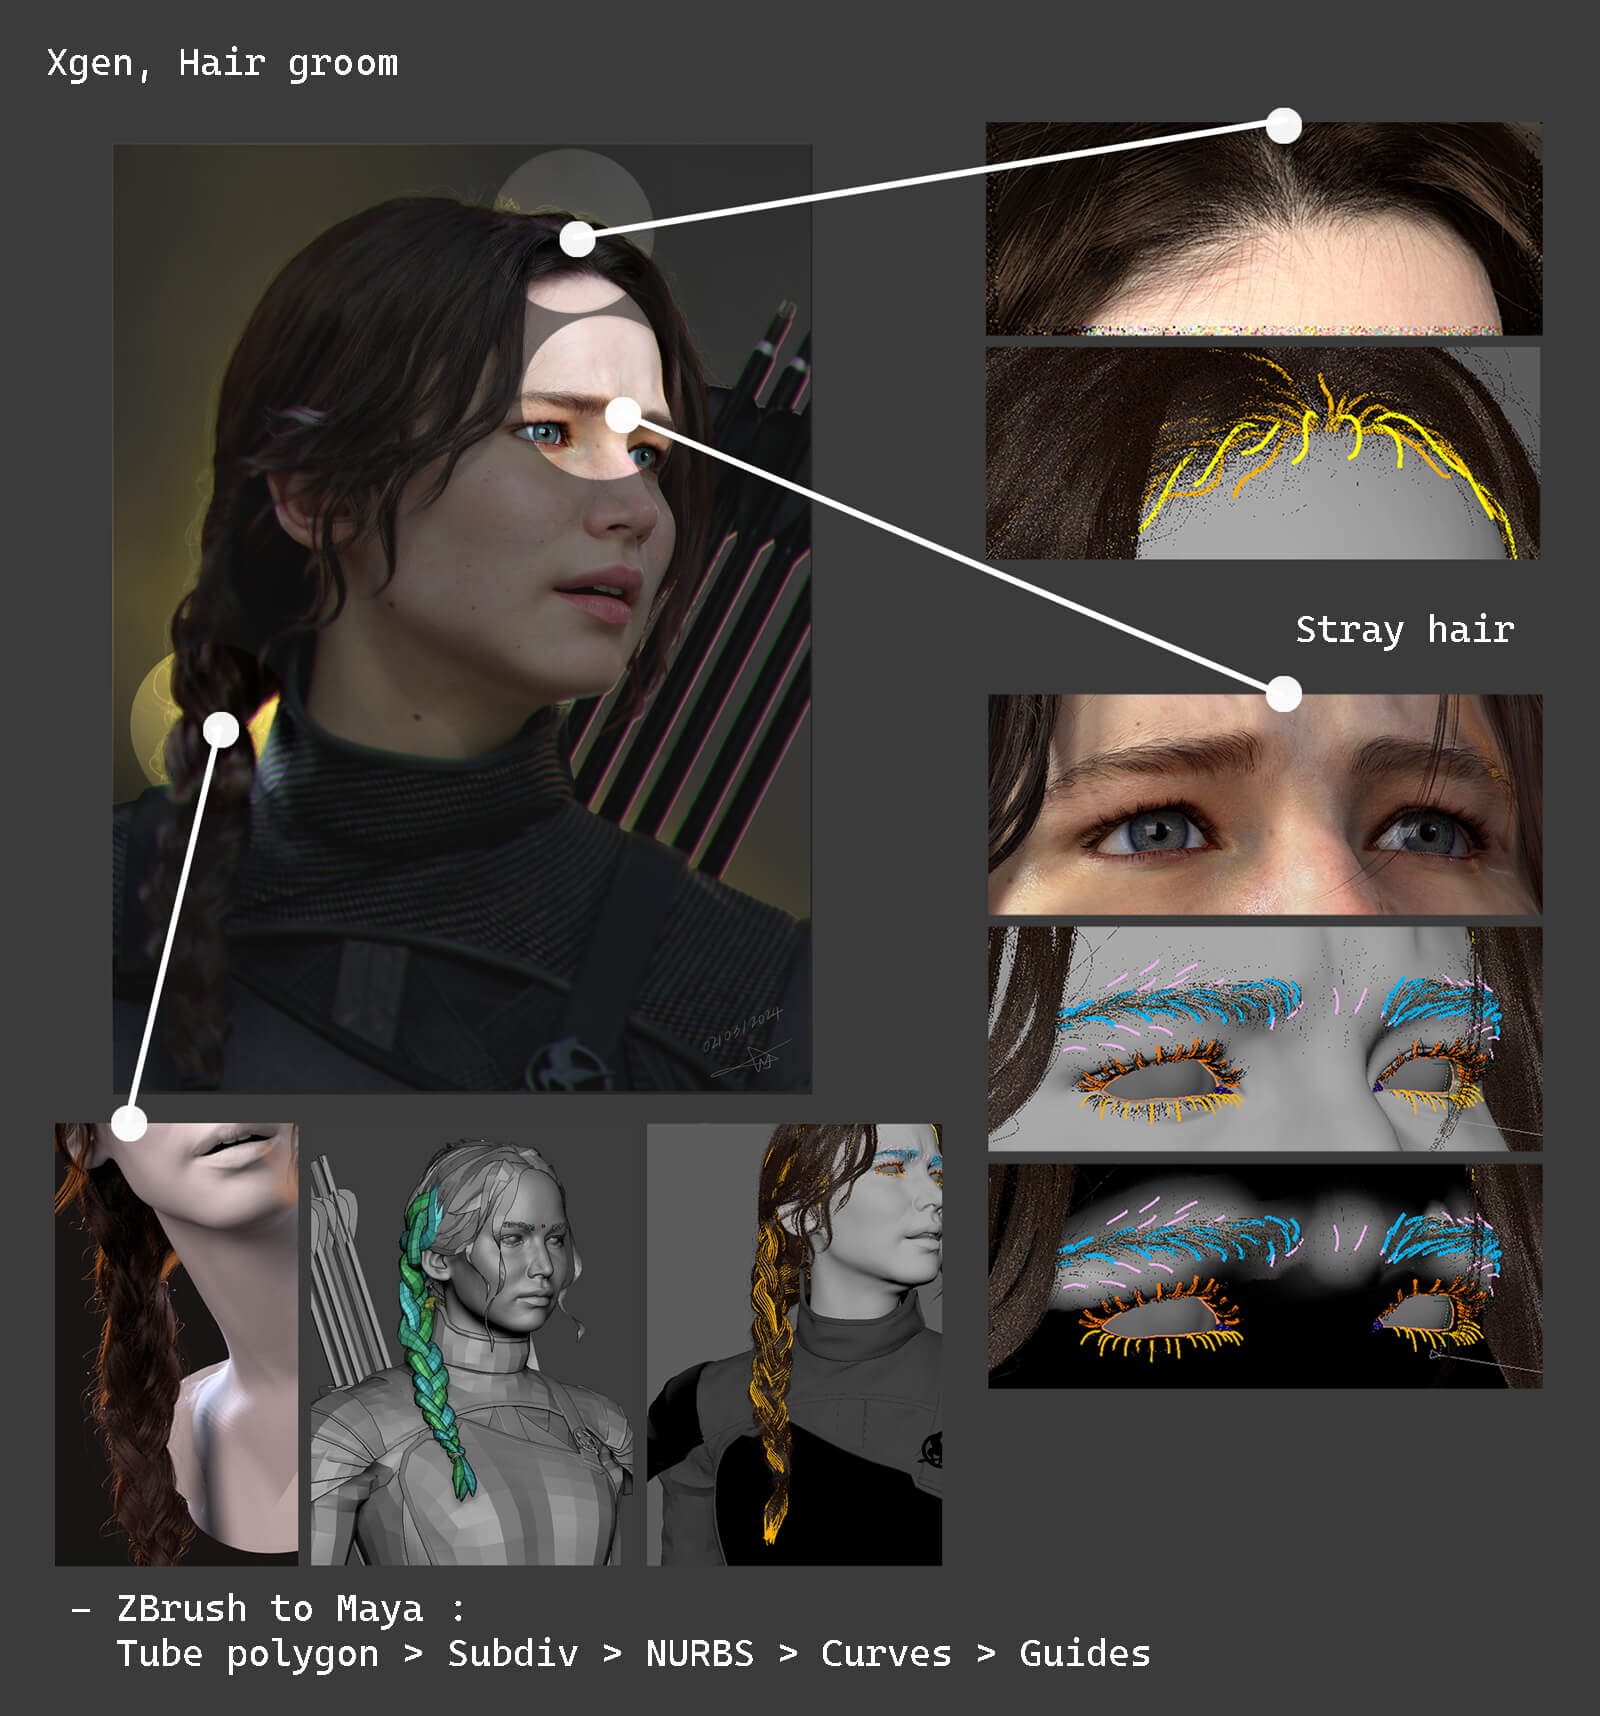
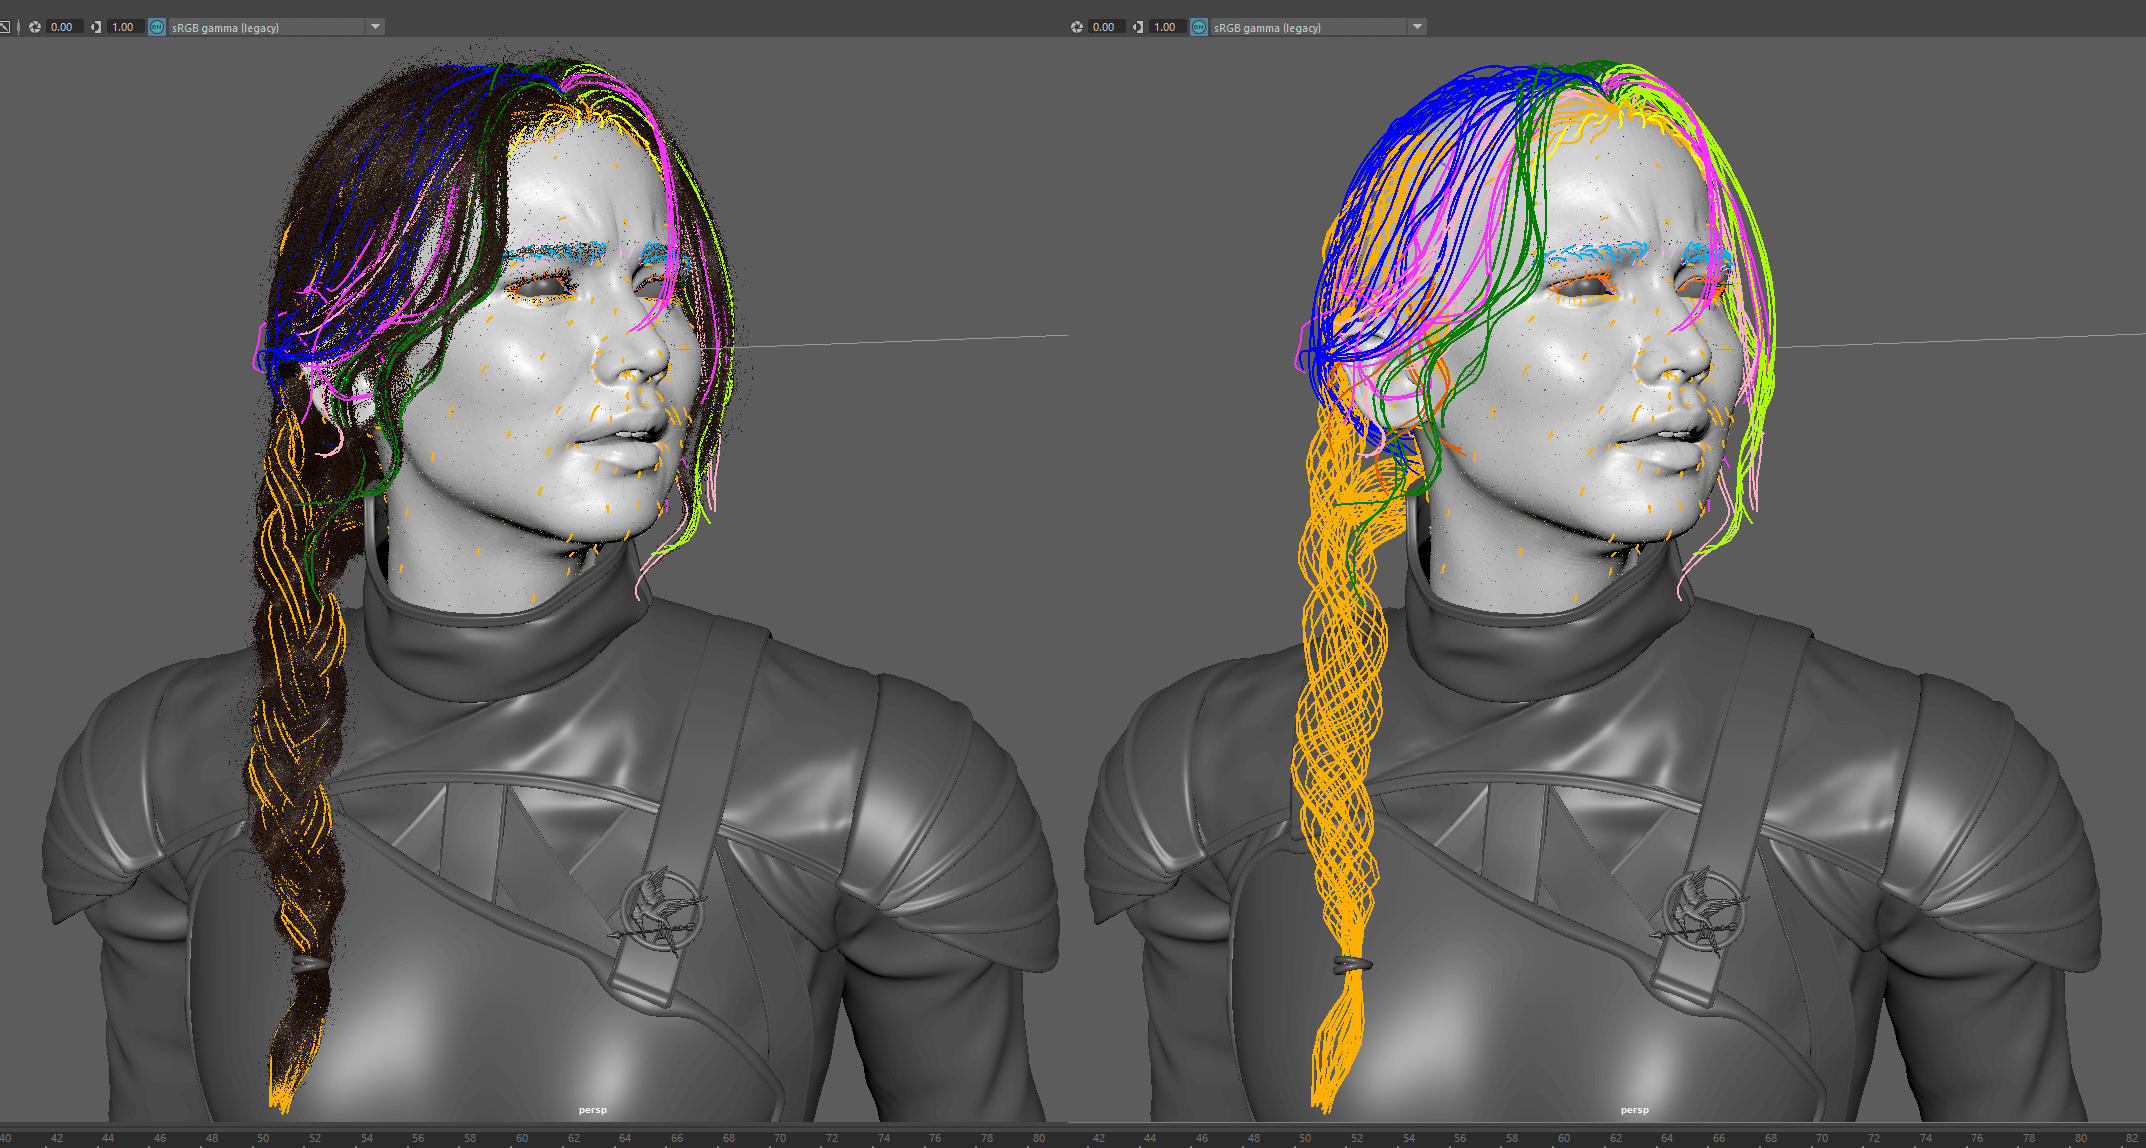
Texturing and grooming
After applying textures using TexturingXYZ, I added colour variations in Photoshop, mainly focusing on the cheeks and glabella.
I had a lot of fun with it, maybe a bit too much! Then, I added freckles and moles to resemble Katniss.
Head shader nodes, I followed 'VFace Fundamentals' tutorial on YouTube
This hair is not for simulation purposes; I used as many guides as I wanted. I added fine, fuzzy hairs to blend into the face. They are placed around the brows, lashes, and along the hairline. Katniss's character does not have neat eyebrows trimmed with a brush. Hers had a slight curl and varied in hair length, resembling natural hair growth.
For the braid, I created a polygon tube in ZBrush, then brought it into Maya and converted it to guides.
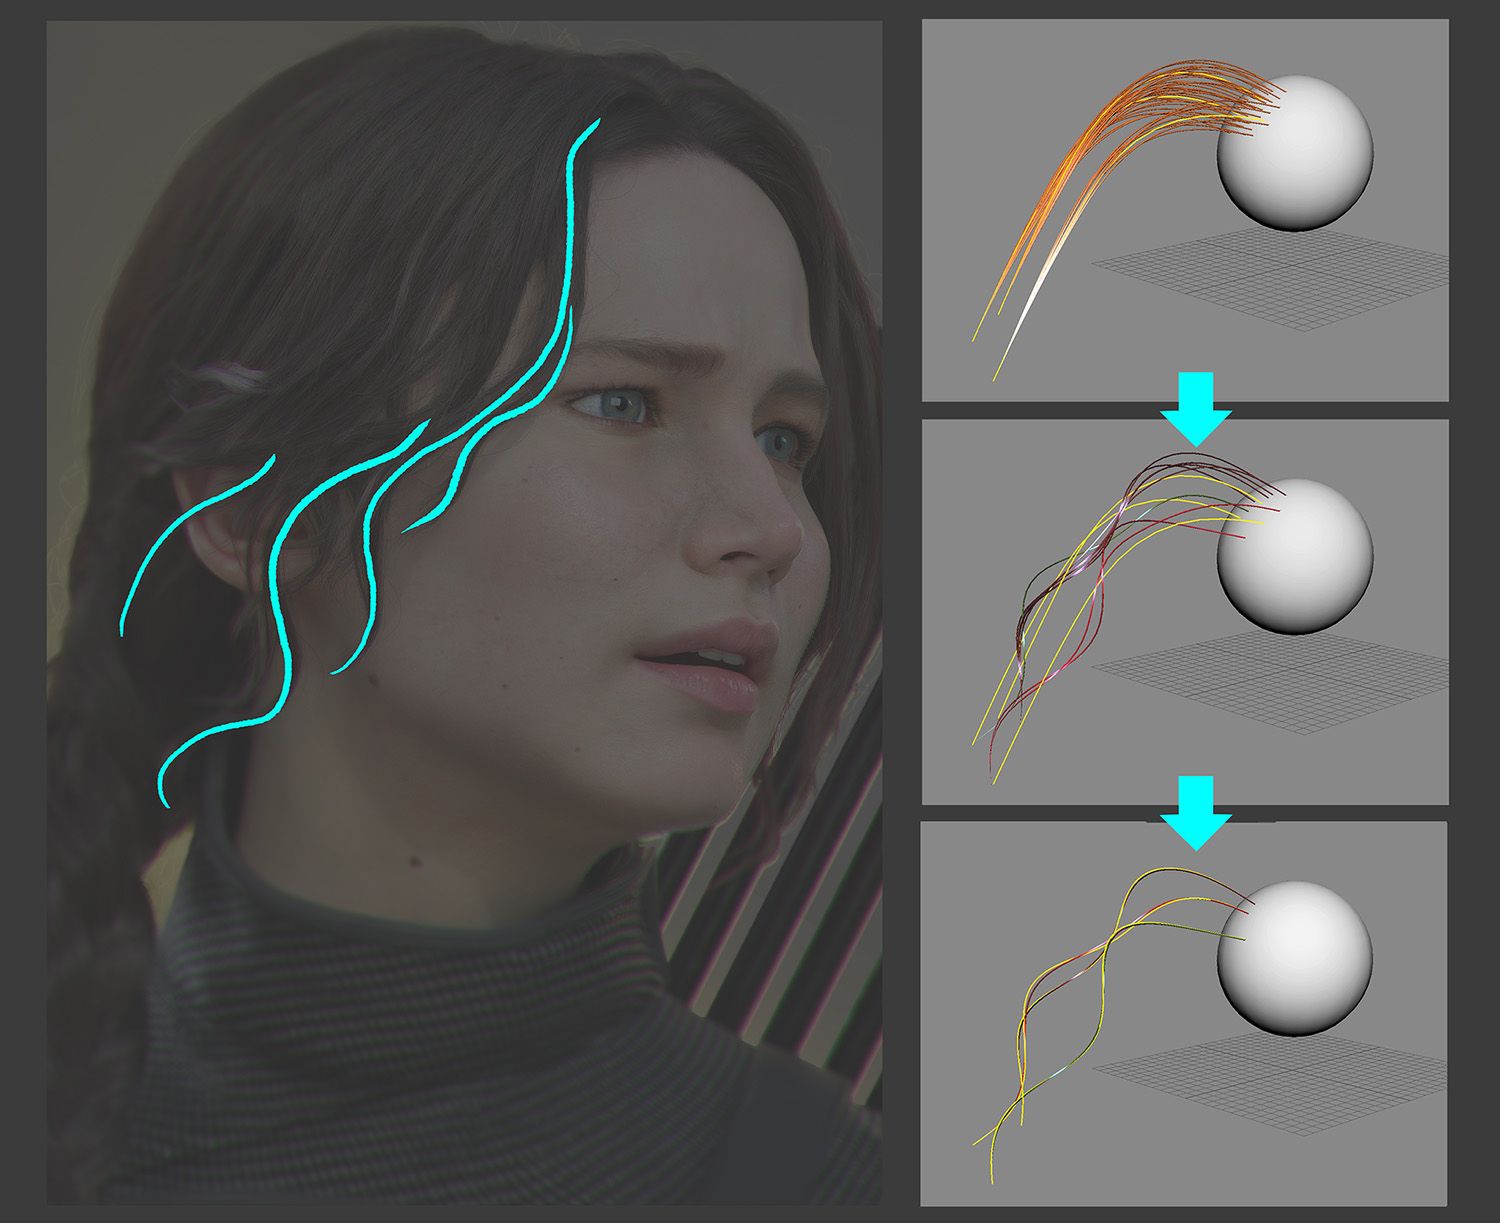
As for the curls, I first made simple straight guides for the flow. Then, I generated the curls with a small amount of them. After that, I converted them to polygons and used Modify/Utilities to turn them into guides. I selected the guides I liked and adjusted their positions. I needed to reposition and reshape each one at the end. But, it allowed for rough, initial, and natural-looking curls.
Lighting and rendering
Lighting
When it came to lighting, it was the part I was least familiar with, so I tried to approach it as simply as possible. I started with the basic studio light setup. Then, I made changes and additions as needed.
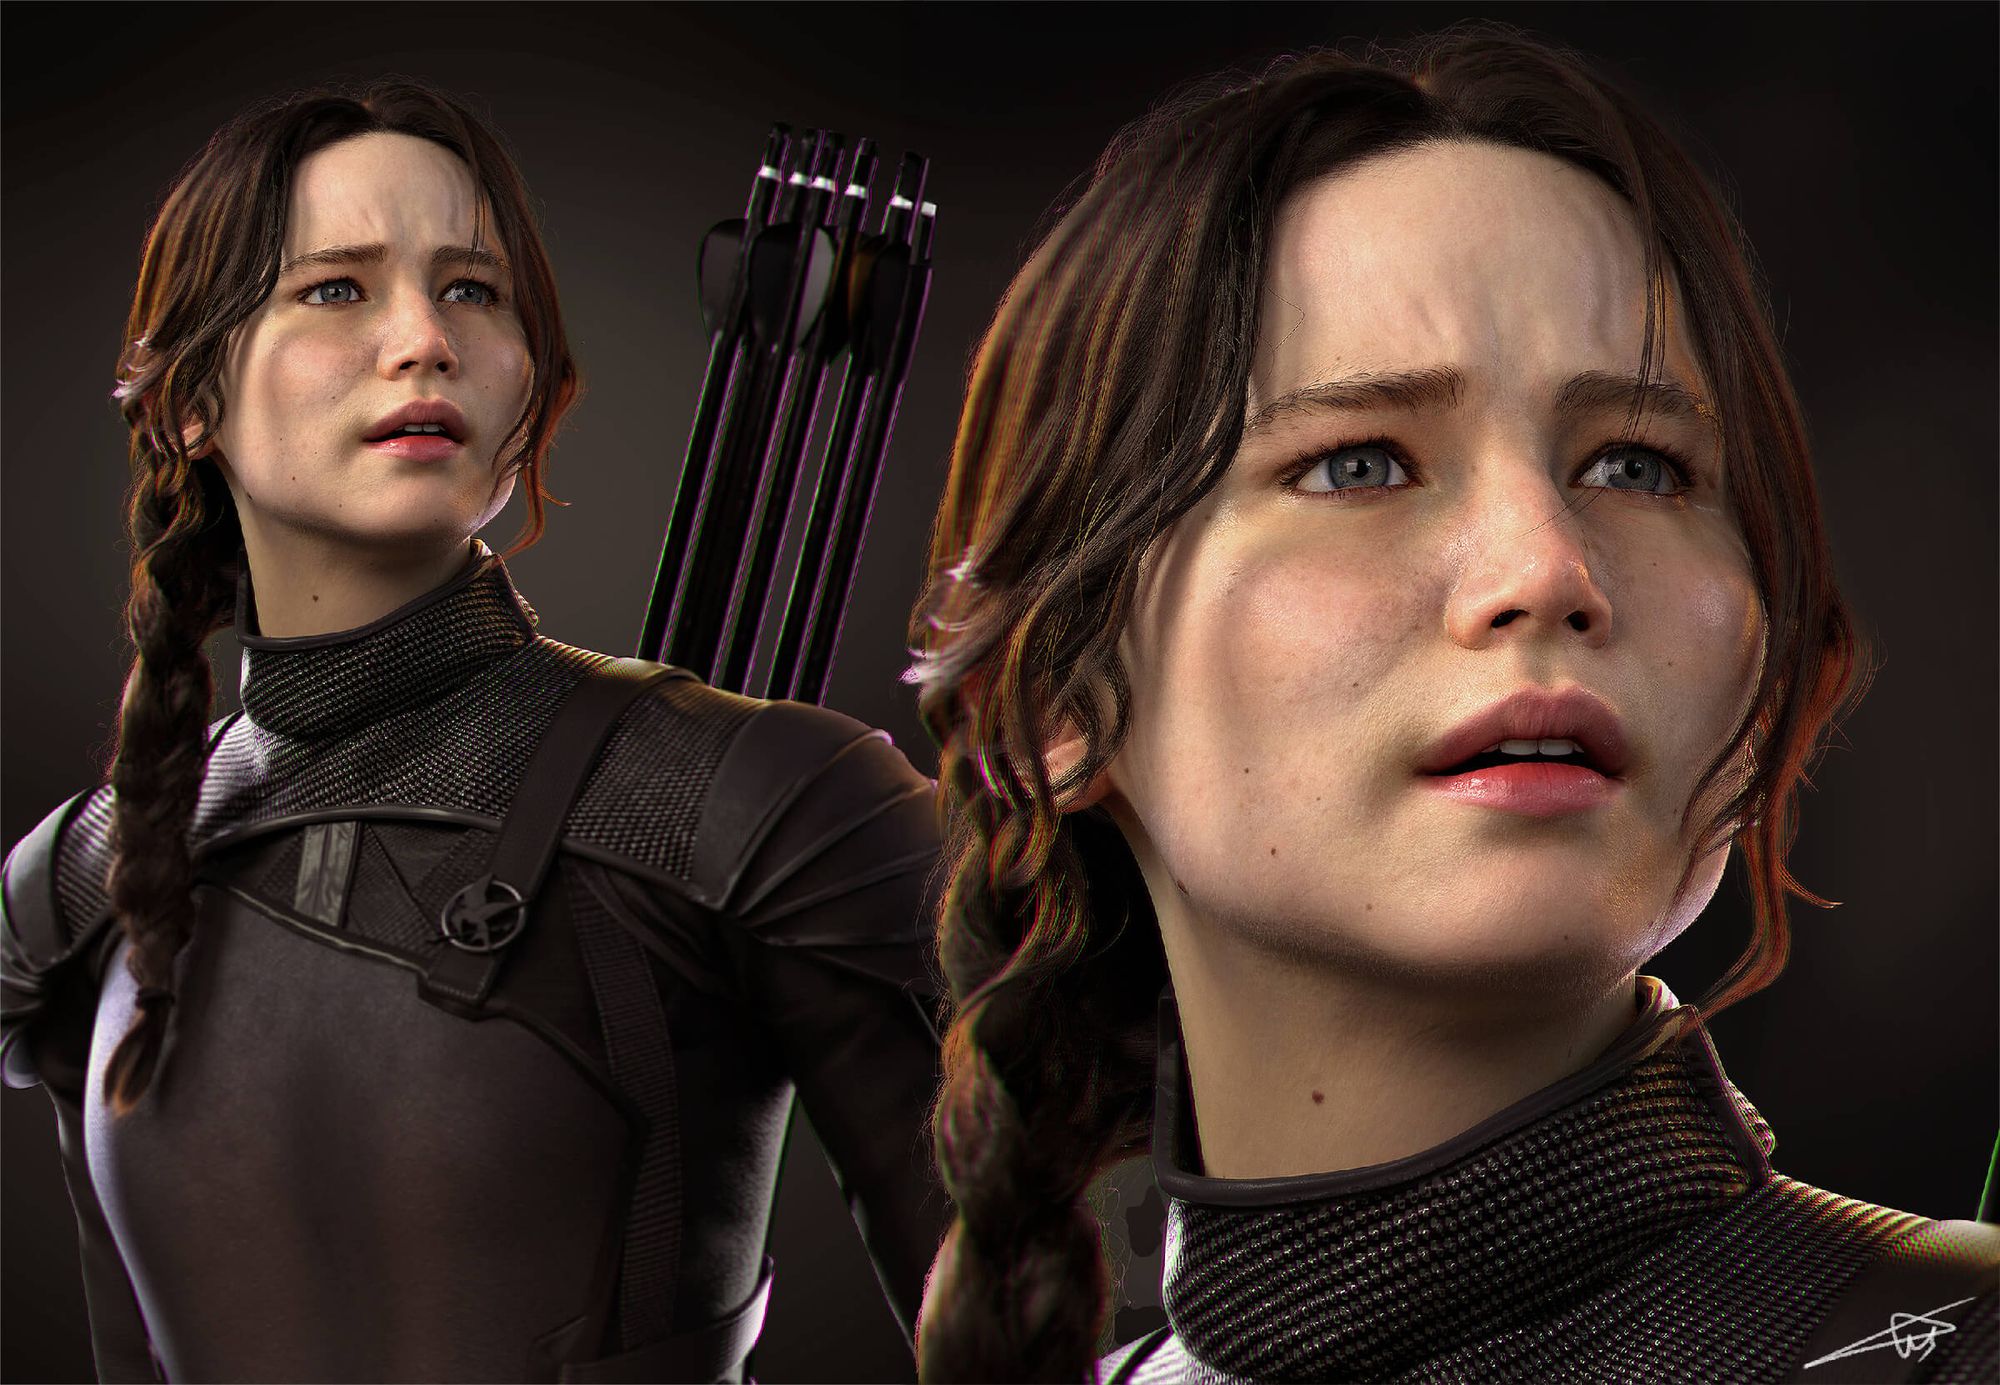
Post-Production
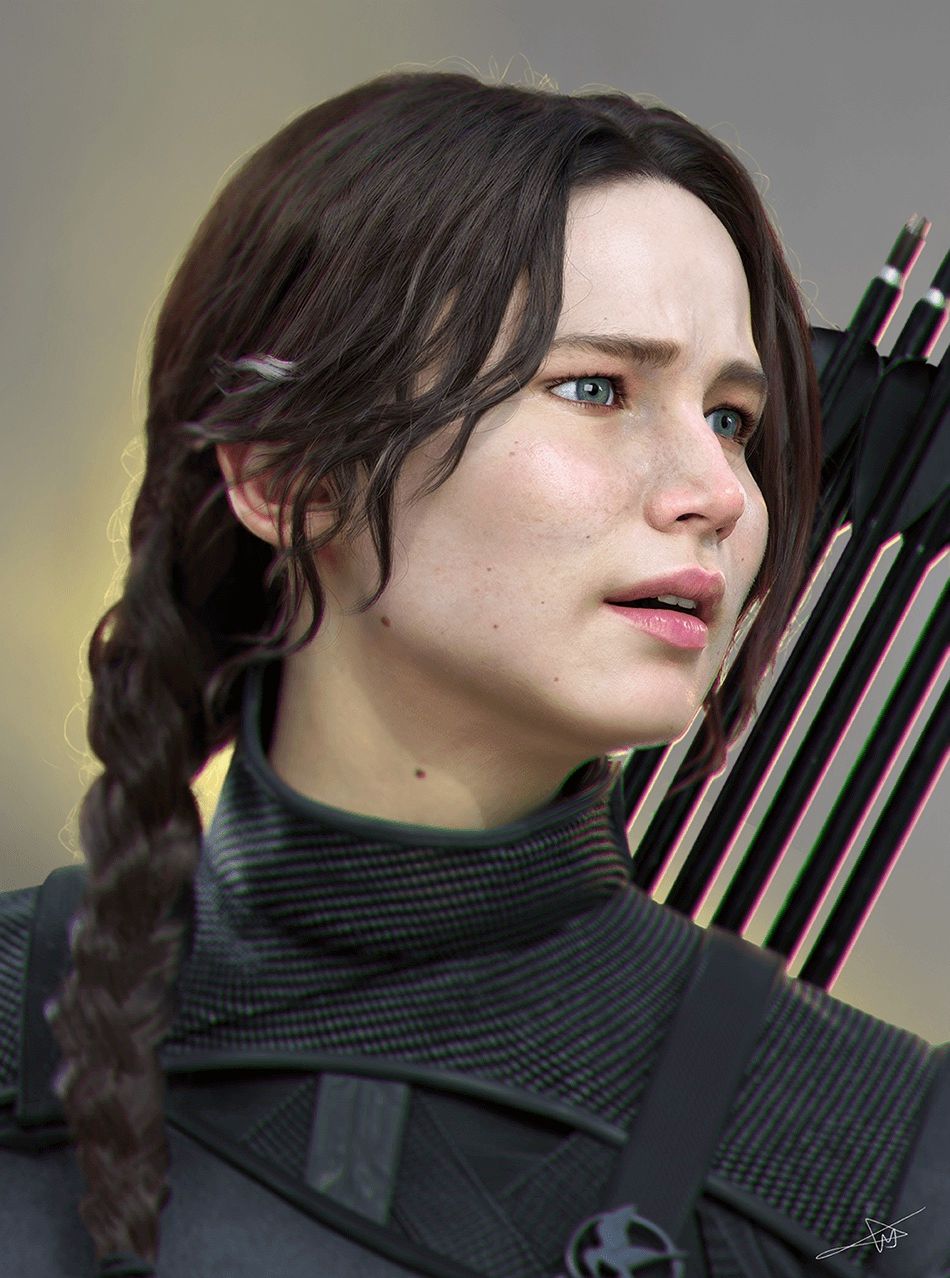
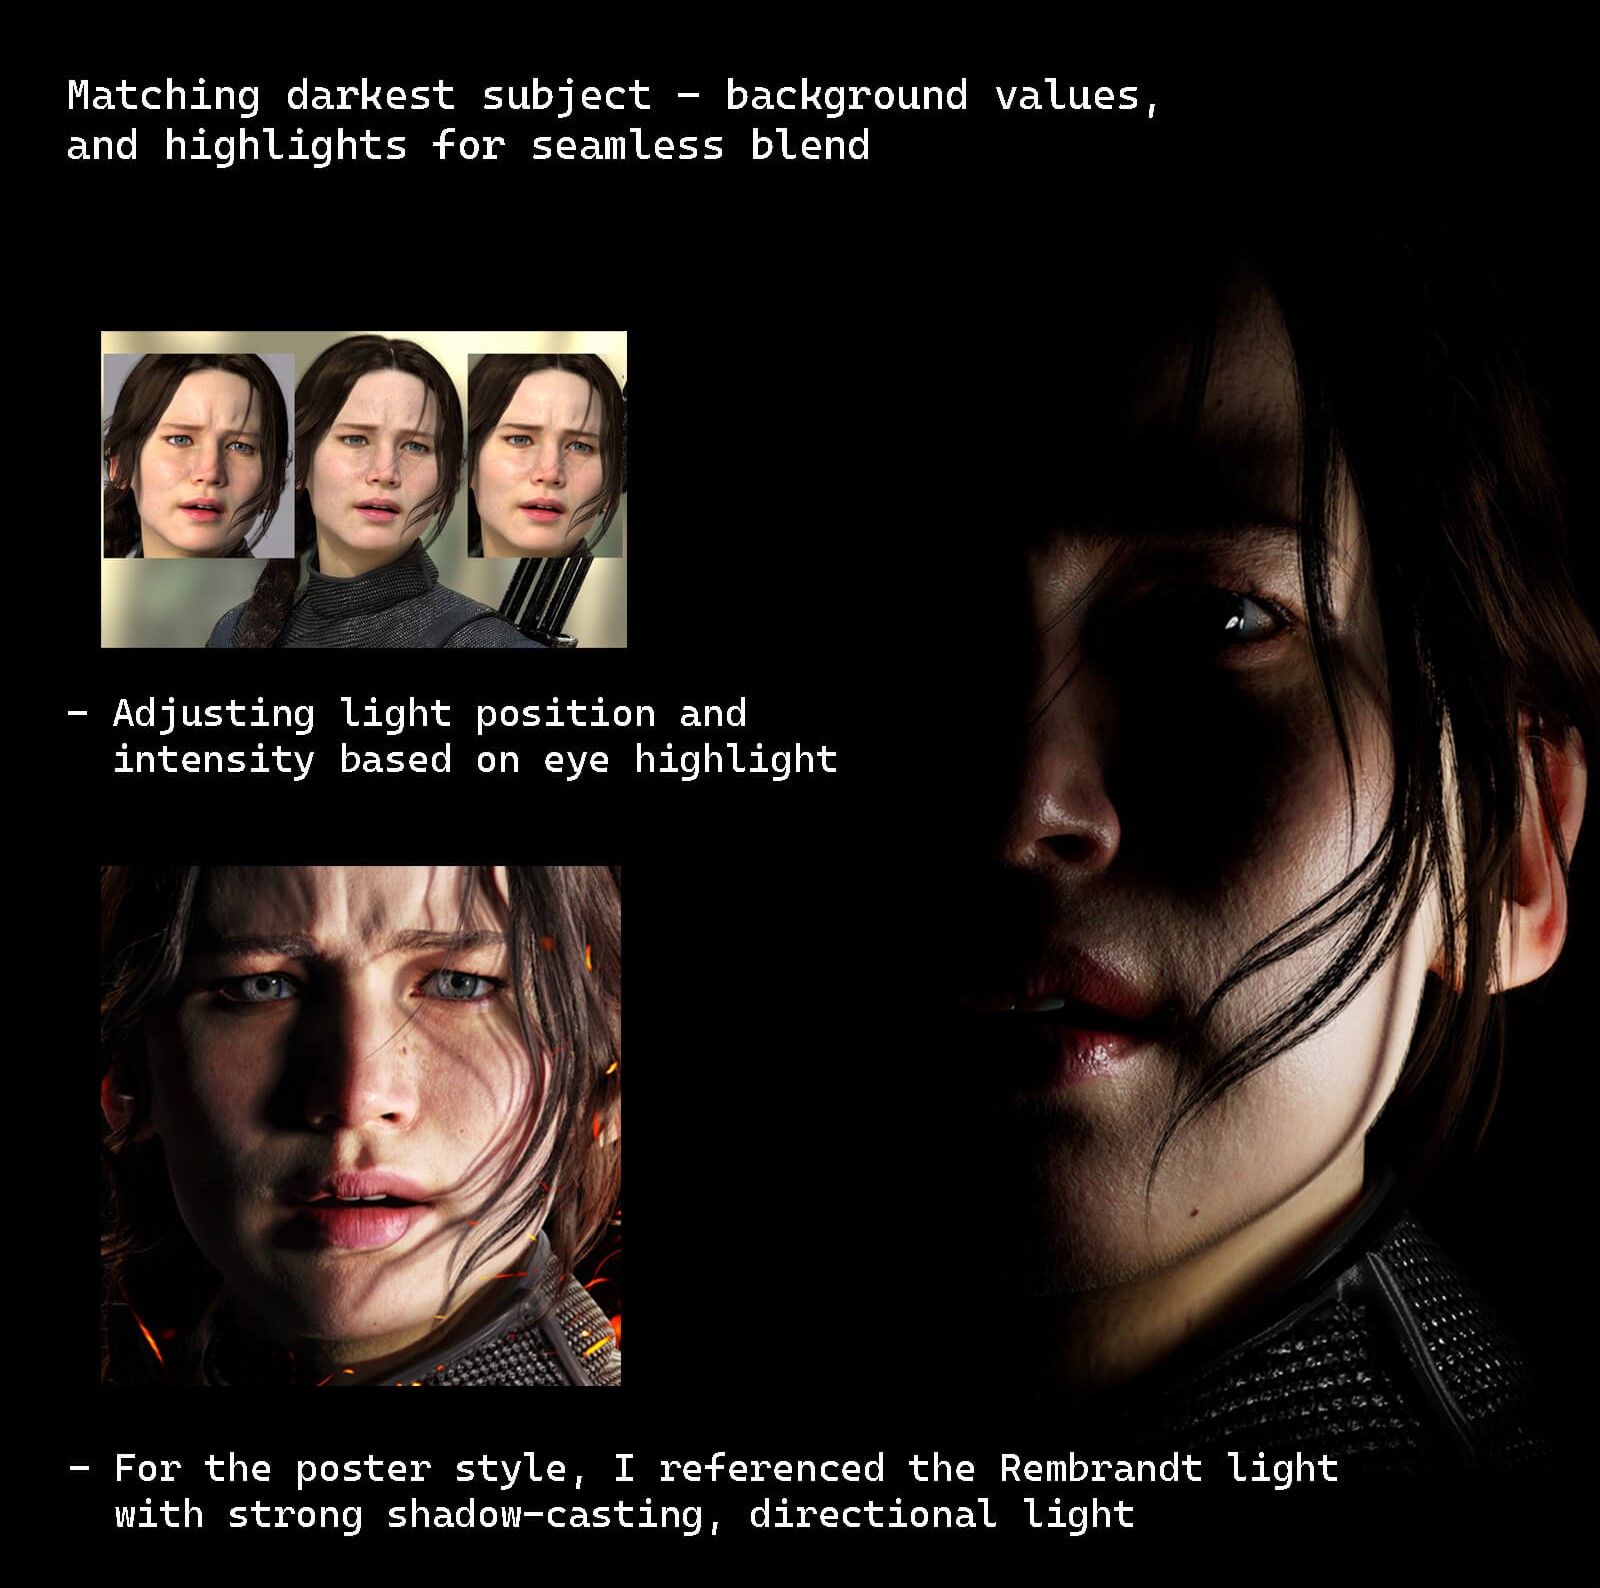
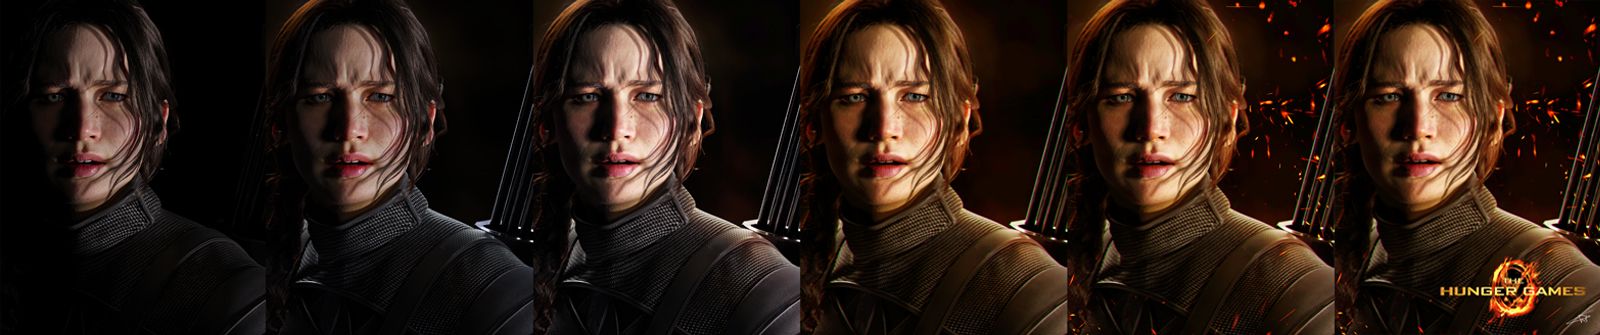
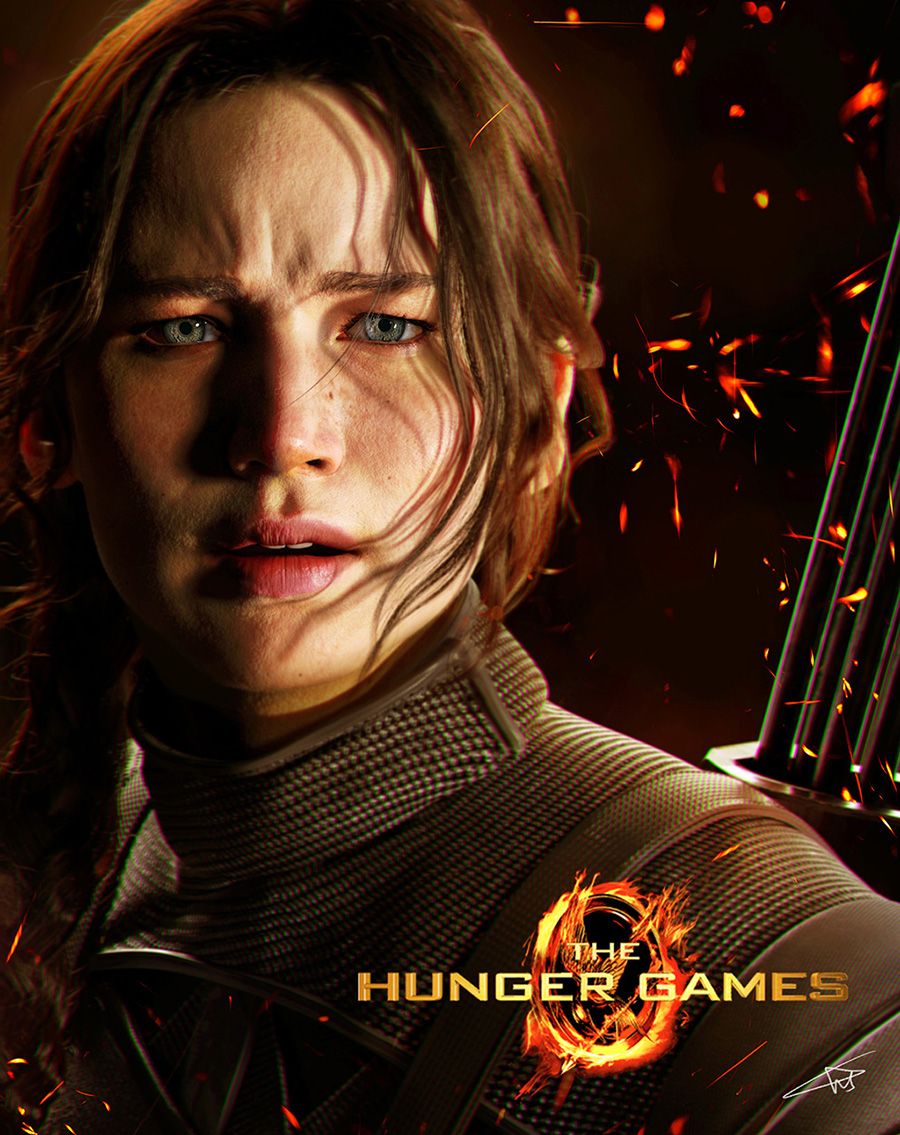
Aside from the main beauty shot with the yellow background, I aimed to create a dramatic poster that would catch the eye.
I chose a close-up shot where the character makes eye contact. Using Arnold, I exported shots from various lighting angles. Then, I combined them in Photoshop. To enhance the effect, I adjusted the colour tone to give it a fiery background. Additionally, I added details such as fireflies and sparks, including the logo.
FINAL RESULT
Conclusion
This project has been a journey into realistic 3D character creation. At each step, I've had the opportunity to explore new areas, learning the importance of patience and precision. While there is still much room for improvement, this work has given me the courage to grow step by step and create better pieces in the future.
Completing this project, I feel a deep sense of respect and inspiration for fellow artists. I am eager to support and encourage each other in our creative adventures.
Thank you for reading this article and feel free to reach out anytime!