Māori “Kaitiakitanga” 3D Environment Sequence in UE 5.1
Laura Moldenhauer-Nöthling's standout student work in Unreal Engine 5.1, inspired by Māori culture, showcases impressive visuals and narratives.
Laura Moldenhauer-Nöthling's standout student work in Unreal Engine 5.1, inspired by Māori culture, showcases impressive visuals and narratives.

Laura Moldenhauer-Nöthling's student work stood out to us and we asked her to share her first Unreal Engine 5.1 environment cinematic sequence presented in her Rookies portfolio. Taking inspiration Māori, Laura's project has impressive visuals and stories behind it. Now a recent Yoobee Colleges graduate, we are excited to see where her journey takes her. We thank her for taking the time to break down her awe-inspiring sequence to give inspiration to fellow artists on The Rookies platform.
Kia Ora. My name is Laura, and I am originally from Berlin, Germany. I started my career as a set painter in 2012. Since then, I've been working as a creative freelancer on the side. As life goes, I changed my professional focus, studying environmental informatics and worked several years for the German government as an IT project manager. But deep inside my heart, I wasn’t excited about what I was doing. I missed the creativity! In 2022, I quickly turned my life upside down and finished my one year diploma in 3D Animation at Yoobee Colleges Christchurch, New Zealand, in 2023. The best decision of my life!
I love to do for what my heart is burning for and my journey has just begun 💪🦖
What a great honour to have been invited by The Rookies to share my creative work, from the idea to a final cinematic sequence, with you.
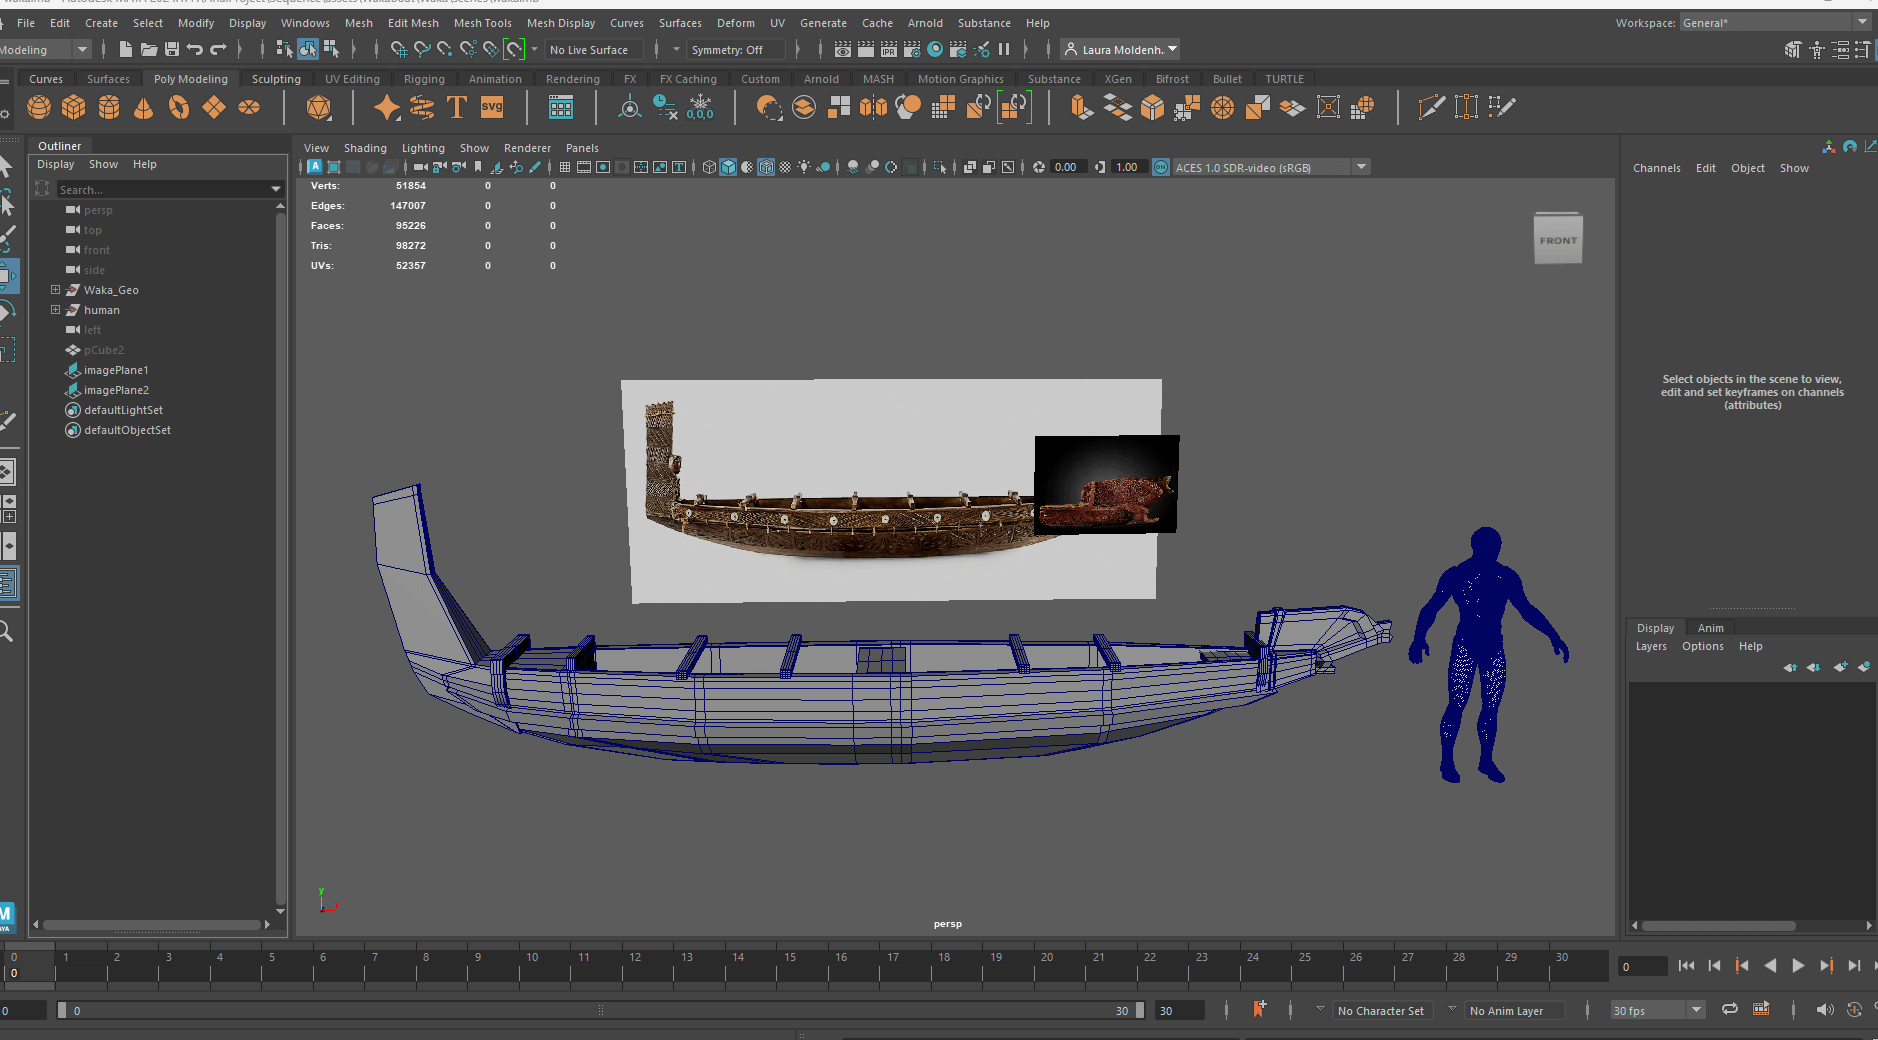
This sequence was my final 3D Animation diploma lvl 5 project at Yoobee Colleges in Christchurch, New Zealand. It was an outstanding creative journey, and I created the entire sequence by myself in only six weeks.
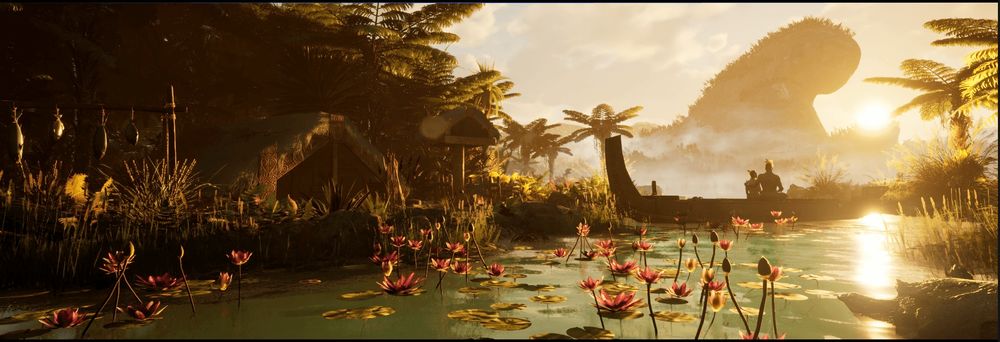
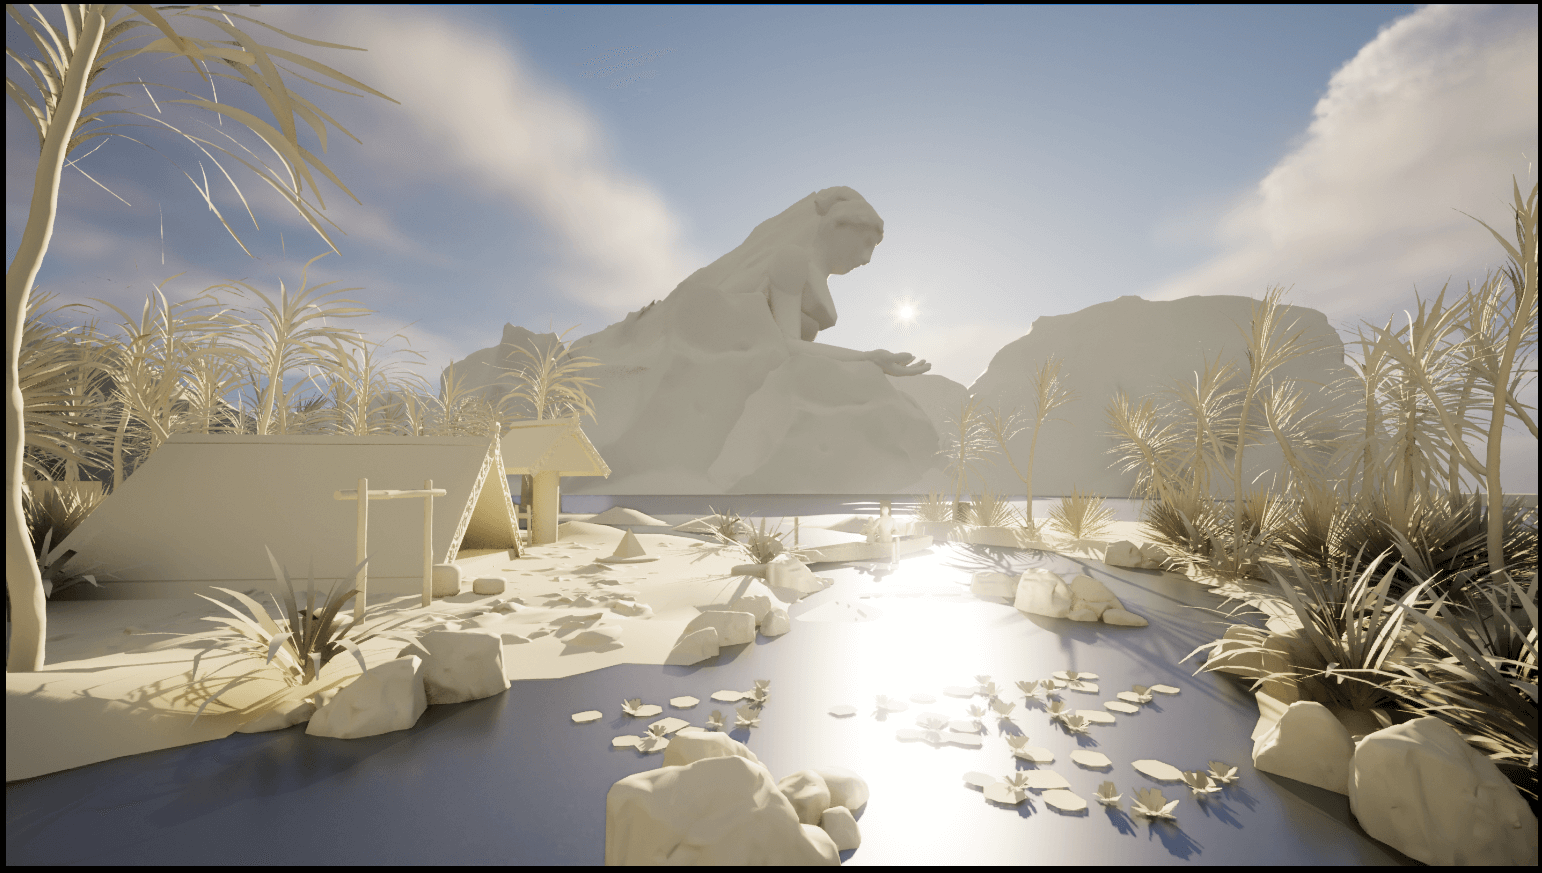
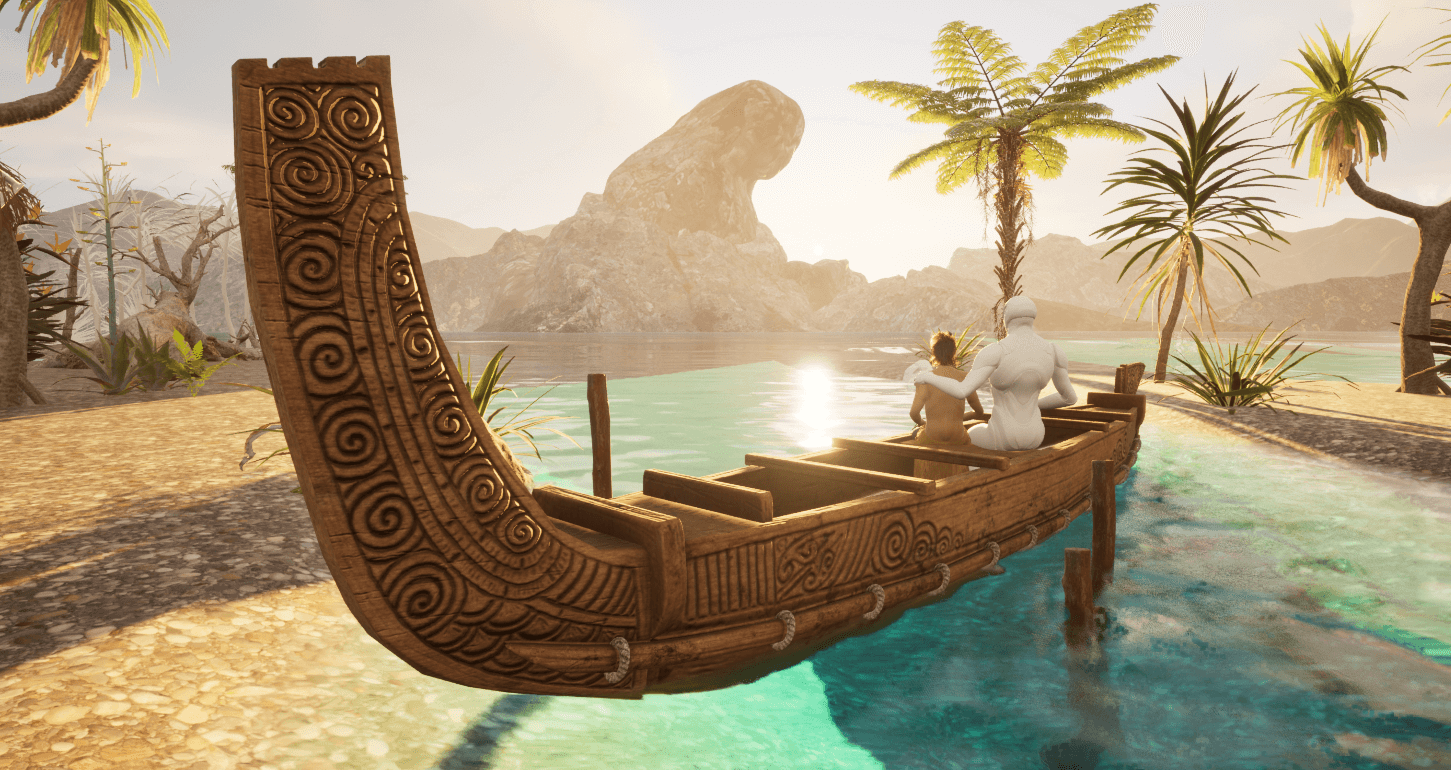
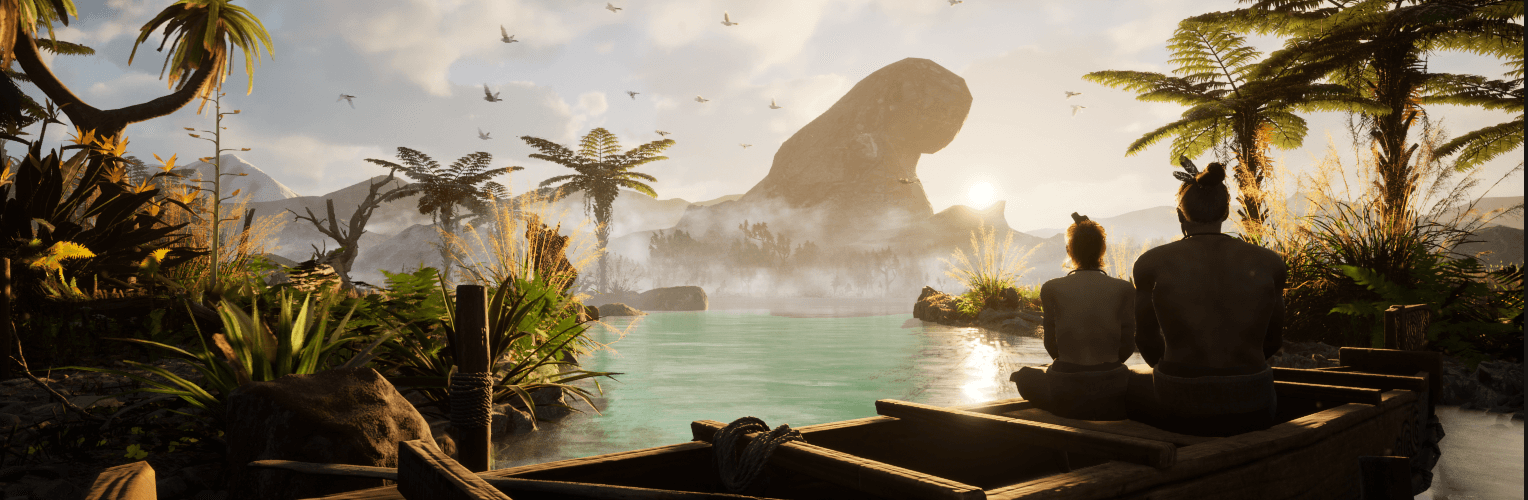
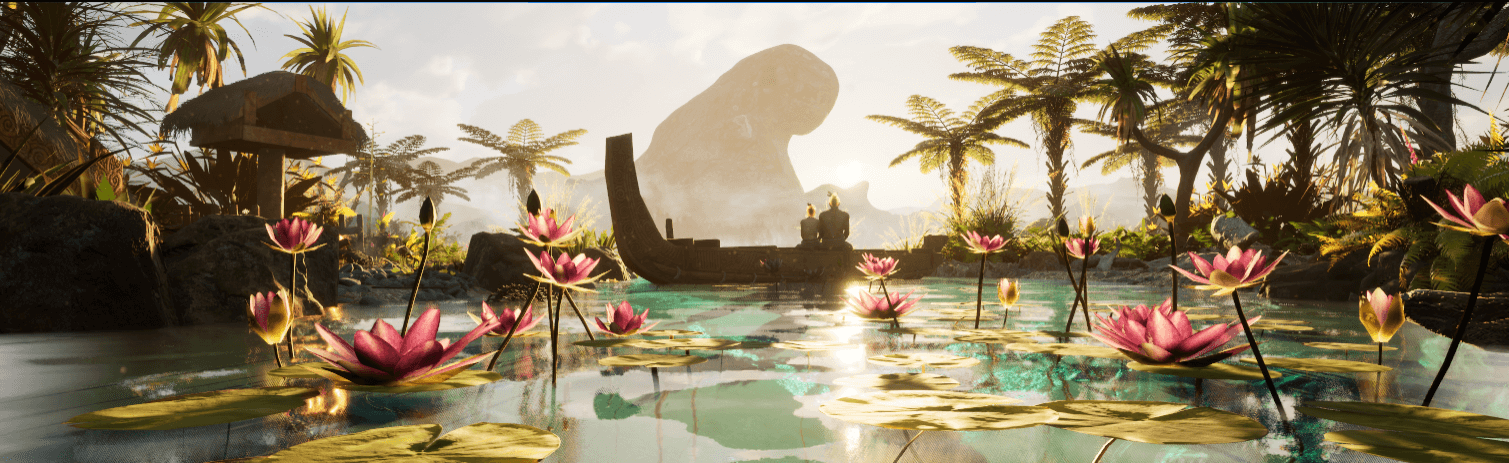
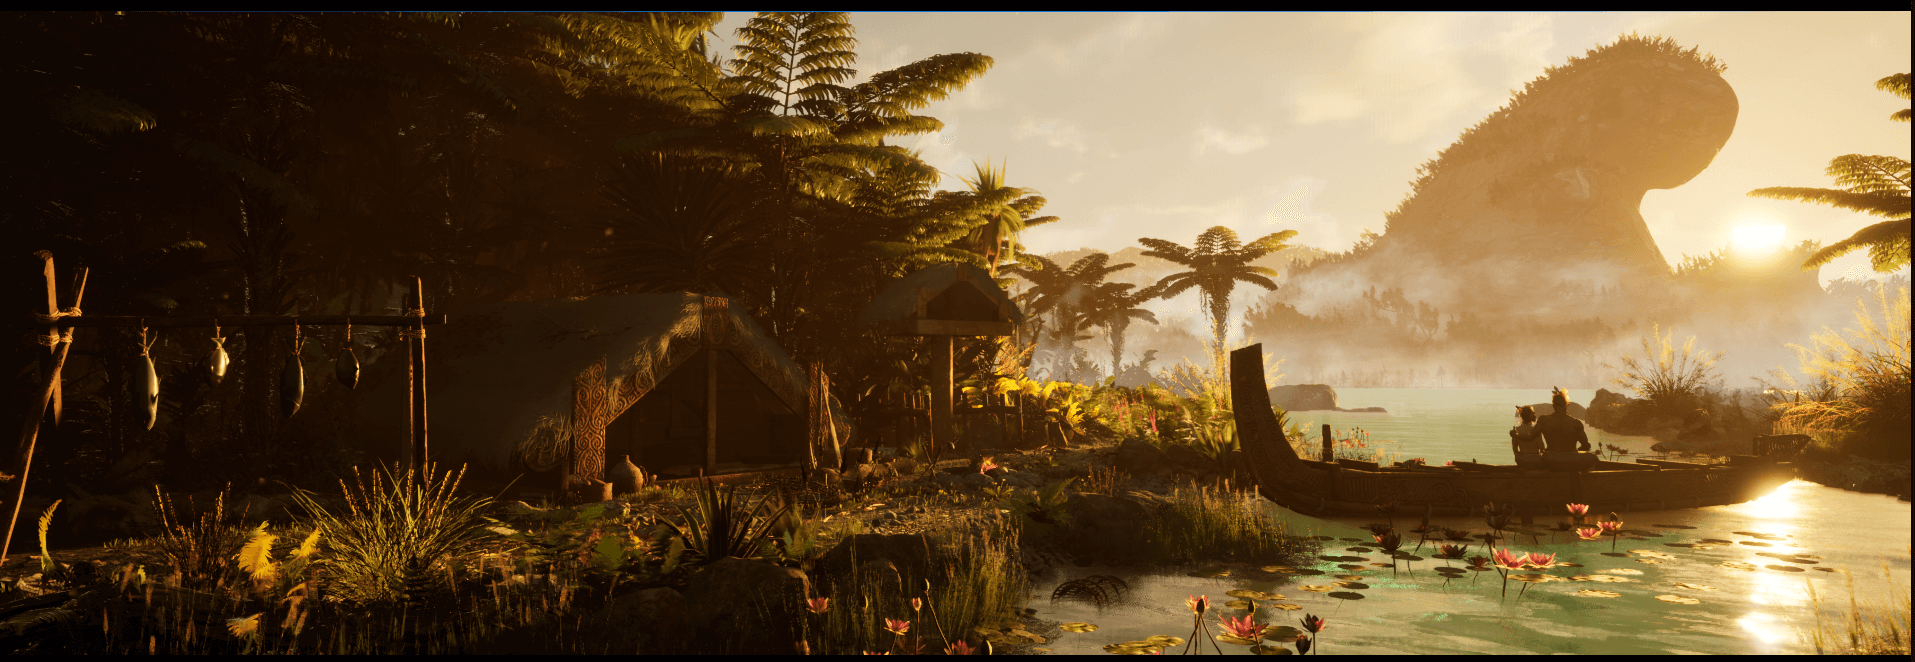
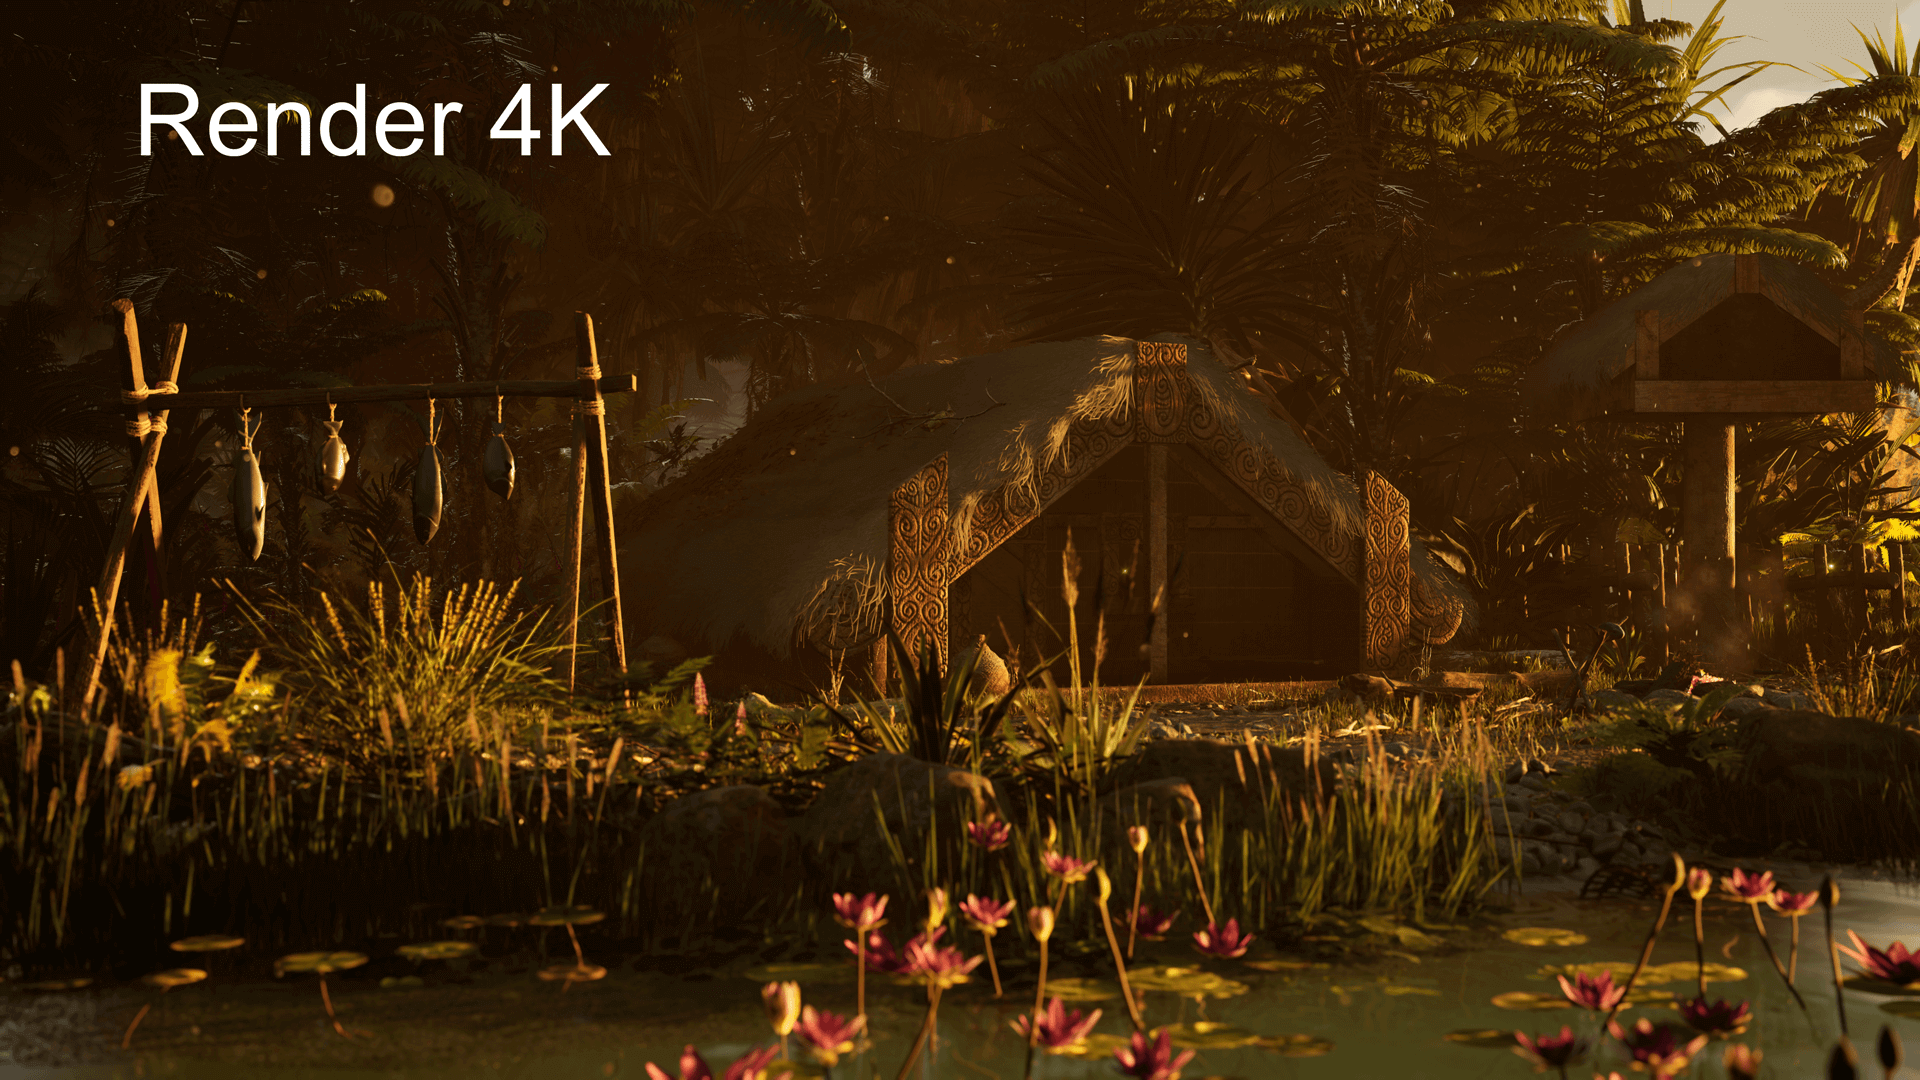
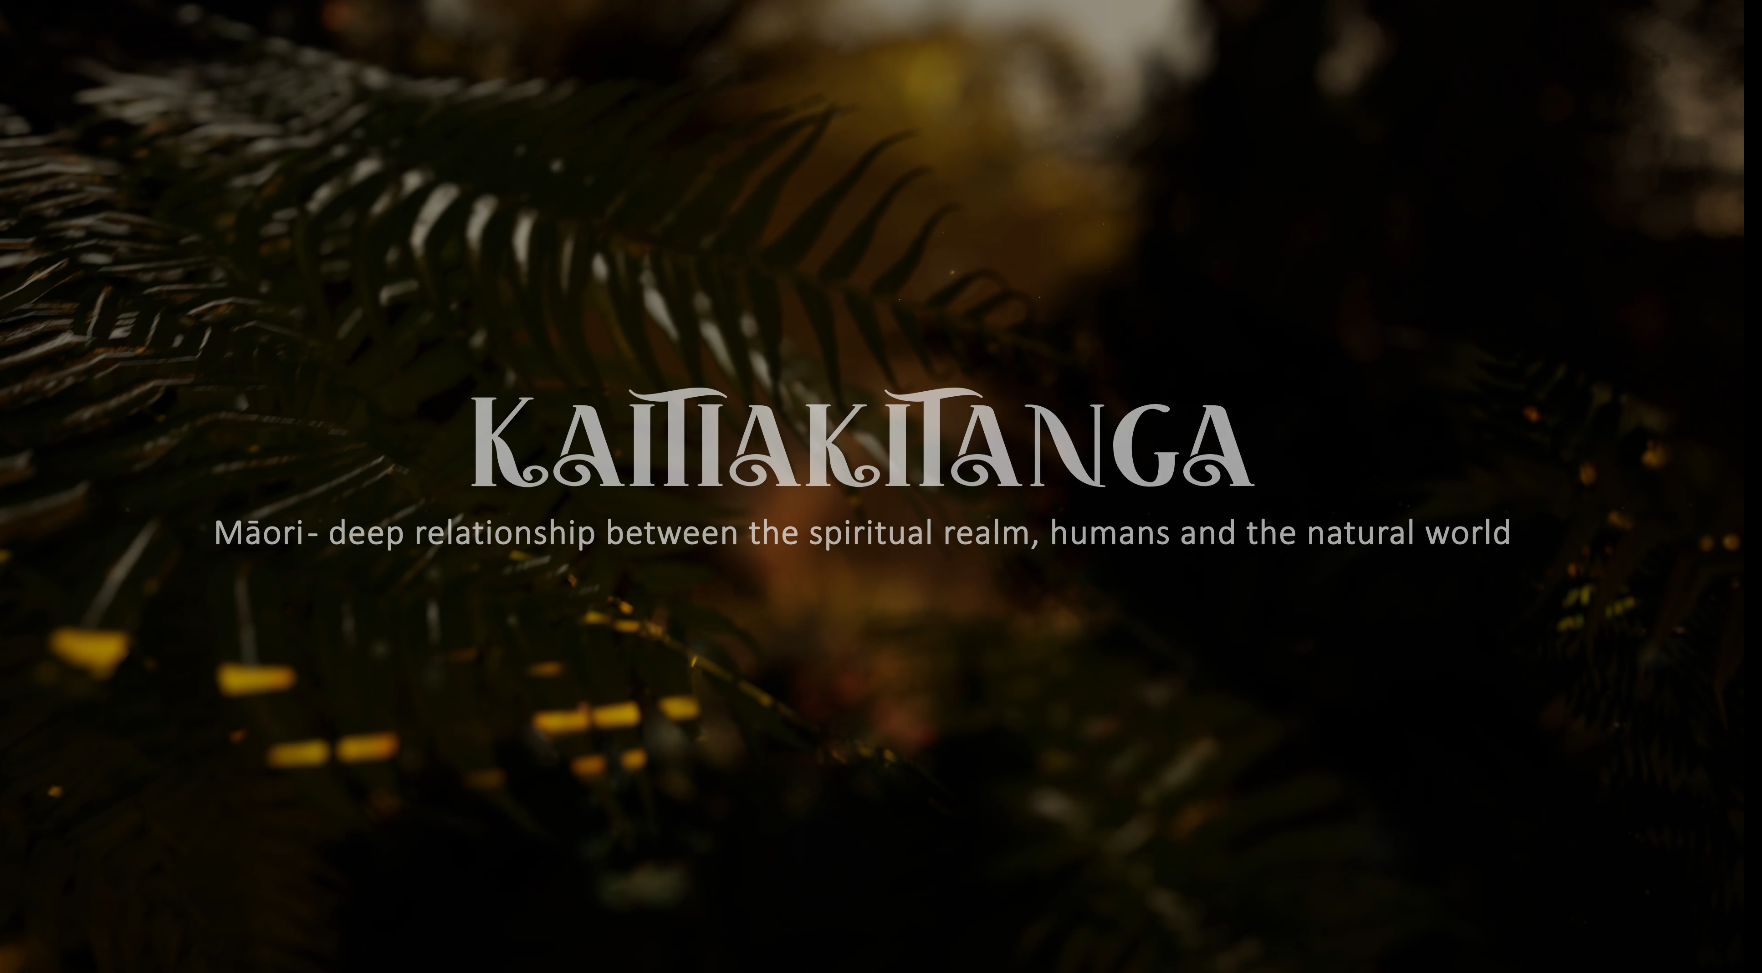
I proudly present you my first 3D Environment cinematic sequence created in UE 5.1. with the title: KAITIAKITANGA. Kaitiakitanga is a Māori word for a deep relationship between the spiritual realm, humans, and the natural world.
The traditional concept of Kaitiakitanga is part of a complex, social, cultural, economic, and spiritual system that has been established through long association of iwi and hapū with land and waters. Kaitiakitanga has been described as guardianship or protection.
One definition of ‘tiaki’ is to guard, but depending on the context in which it is used, it also means to preserve, keep, conserve, nurture, protect and watch over. The prefix ‘kai’ with the verb ‘tiaki’ denotes the agent of the action of ‘tiaki’. Therefore, a Kaitiaki is a guardian, keeper, preserver, conservator, or protector. The addition of the suffix ‘‘tanga’ denotes preservation, conservation, and protection.
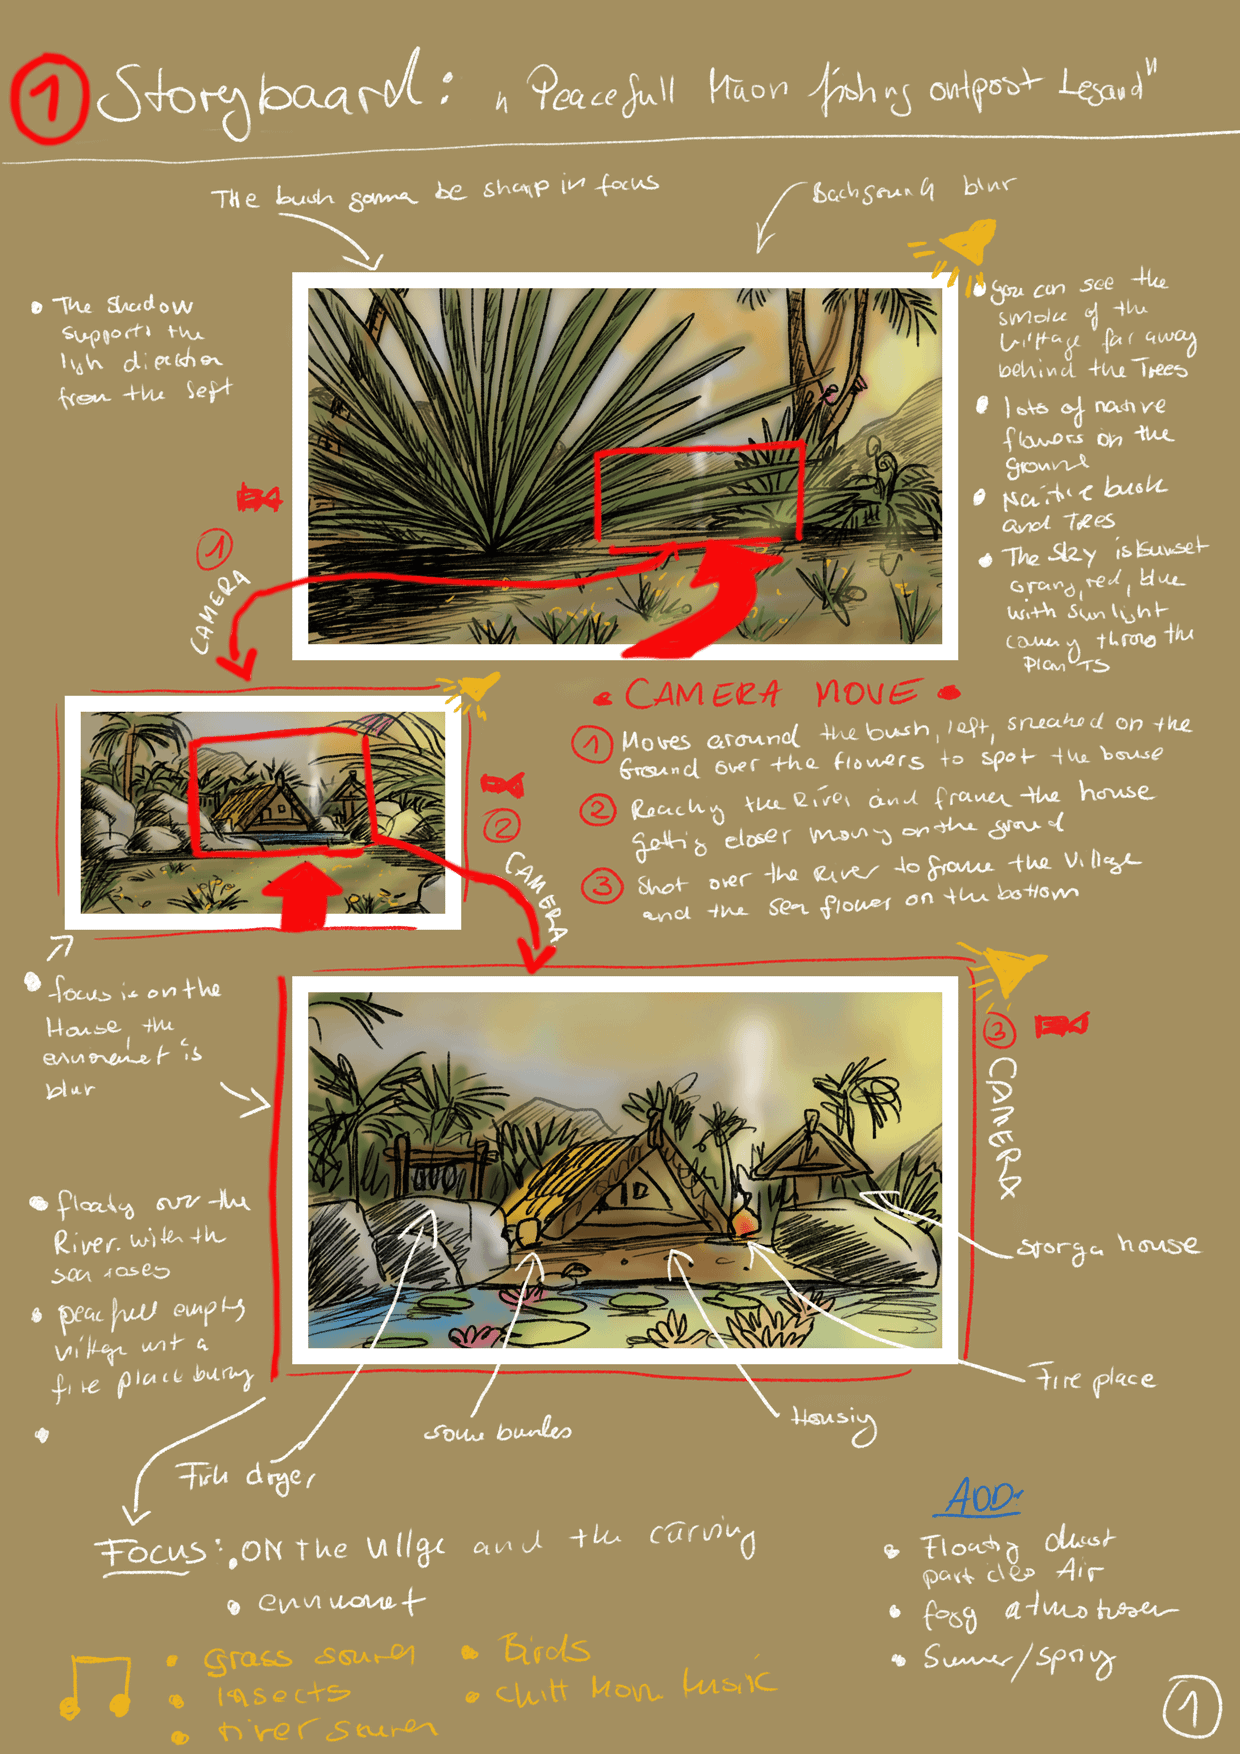
We were tasked with producing a sequence of 4-6 animated shots based on the concept and storyboard we developed in 6 weeks. The final project sequence was to evoke a sense of mood and atmosphere and incorporate storytelling and environmental elements that clearly convey a narrative concept in a simple but effective way.
Environment concept design, storyboard, VFX, cinematic camera motion, learning Unreal Engine 5, Māori culture
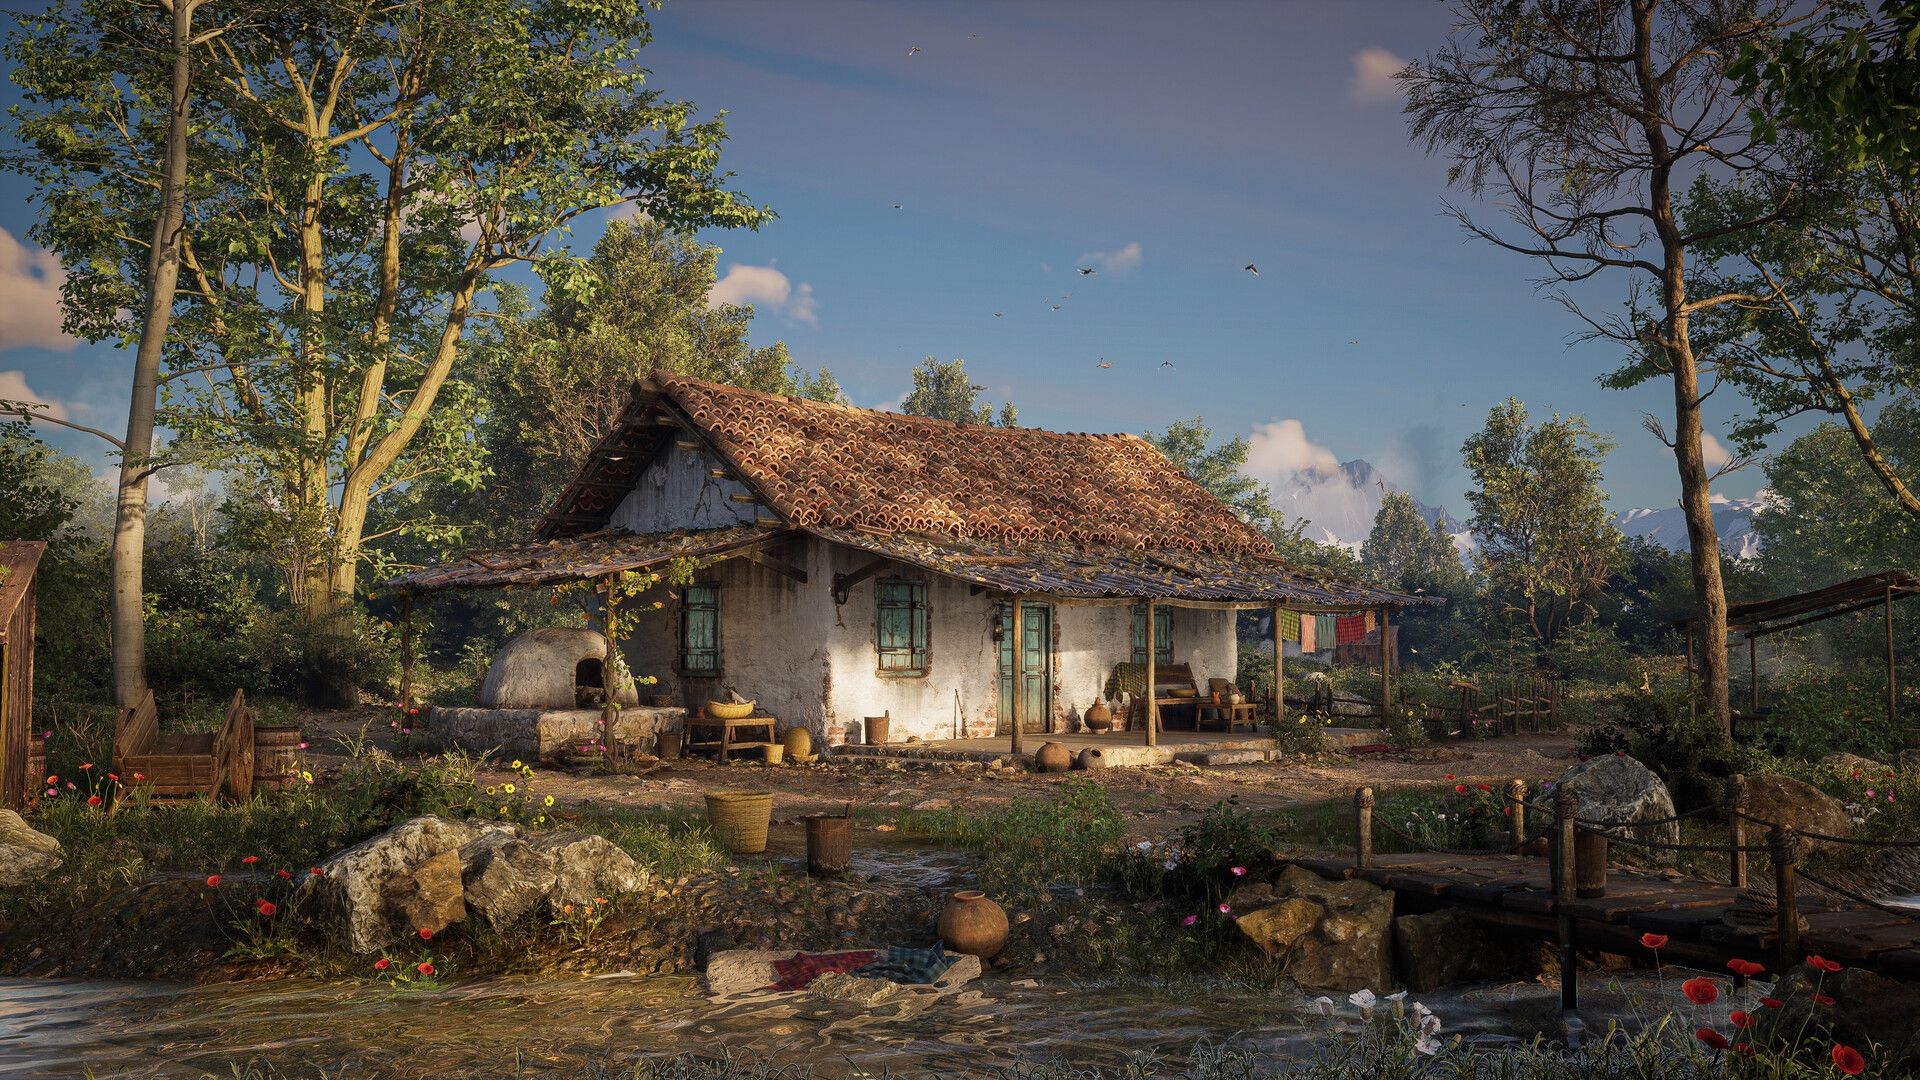
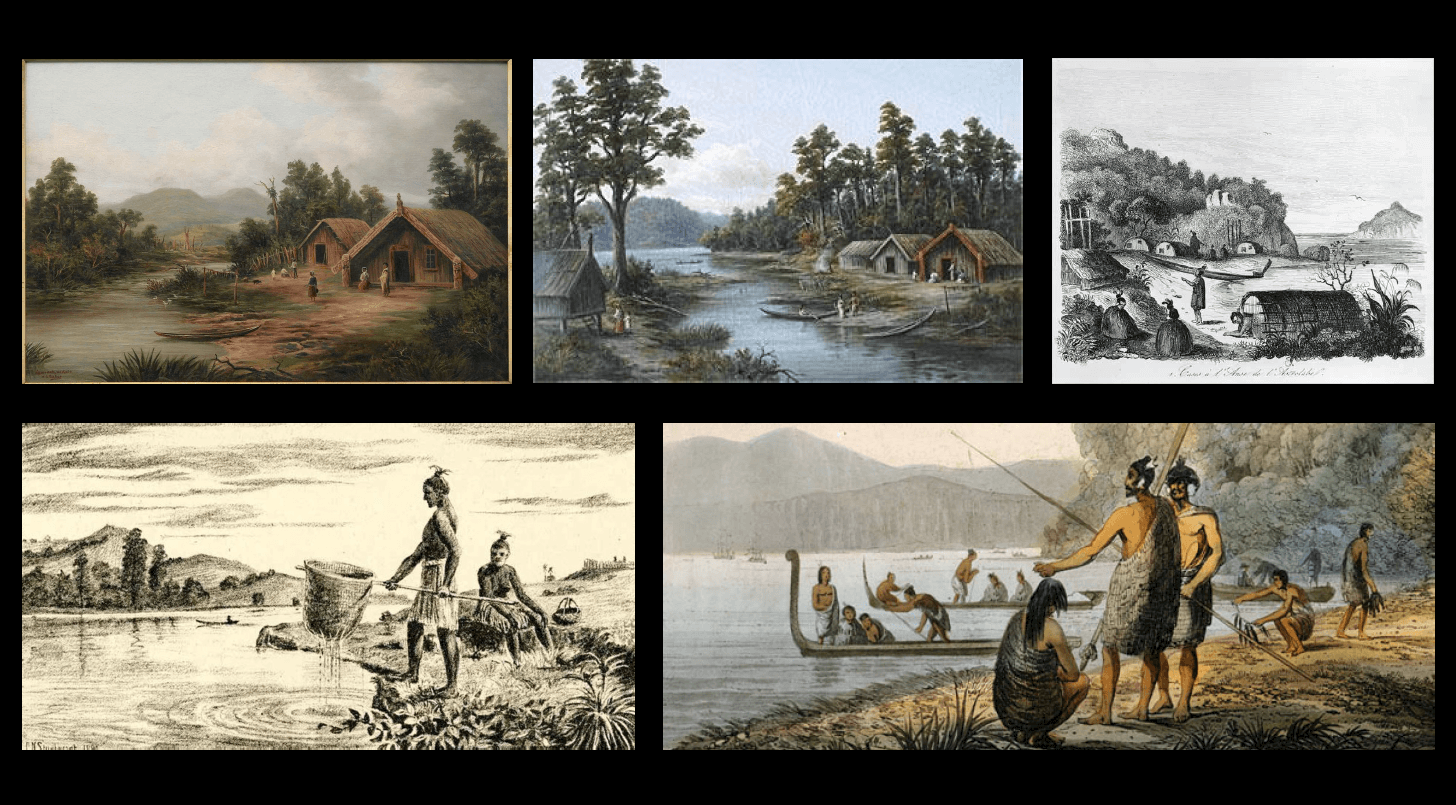
Before I started working, I looked through a lot of works of different artists on ArtStation, Pinterest, and viewed photos of various significant places in the world and nature. As a result of a long process of selection, I decided to draw from the wonderful work from Dinesh sirvi “Spanish Cottage by the river”. The colours and setting inspired me to try to create my first environment project in Unreal Engine 5.
Moving from Germany to New Zealand inspired me to create a 3D environment that captures my emotions and my new life. I've made it my personal mission to make Maori culture the primary focus of my work.
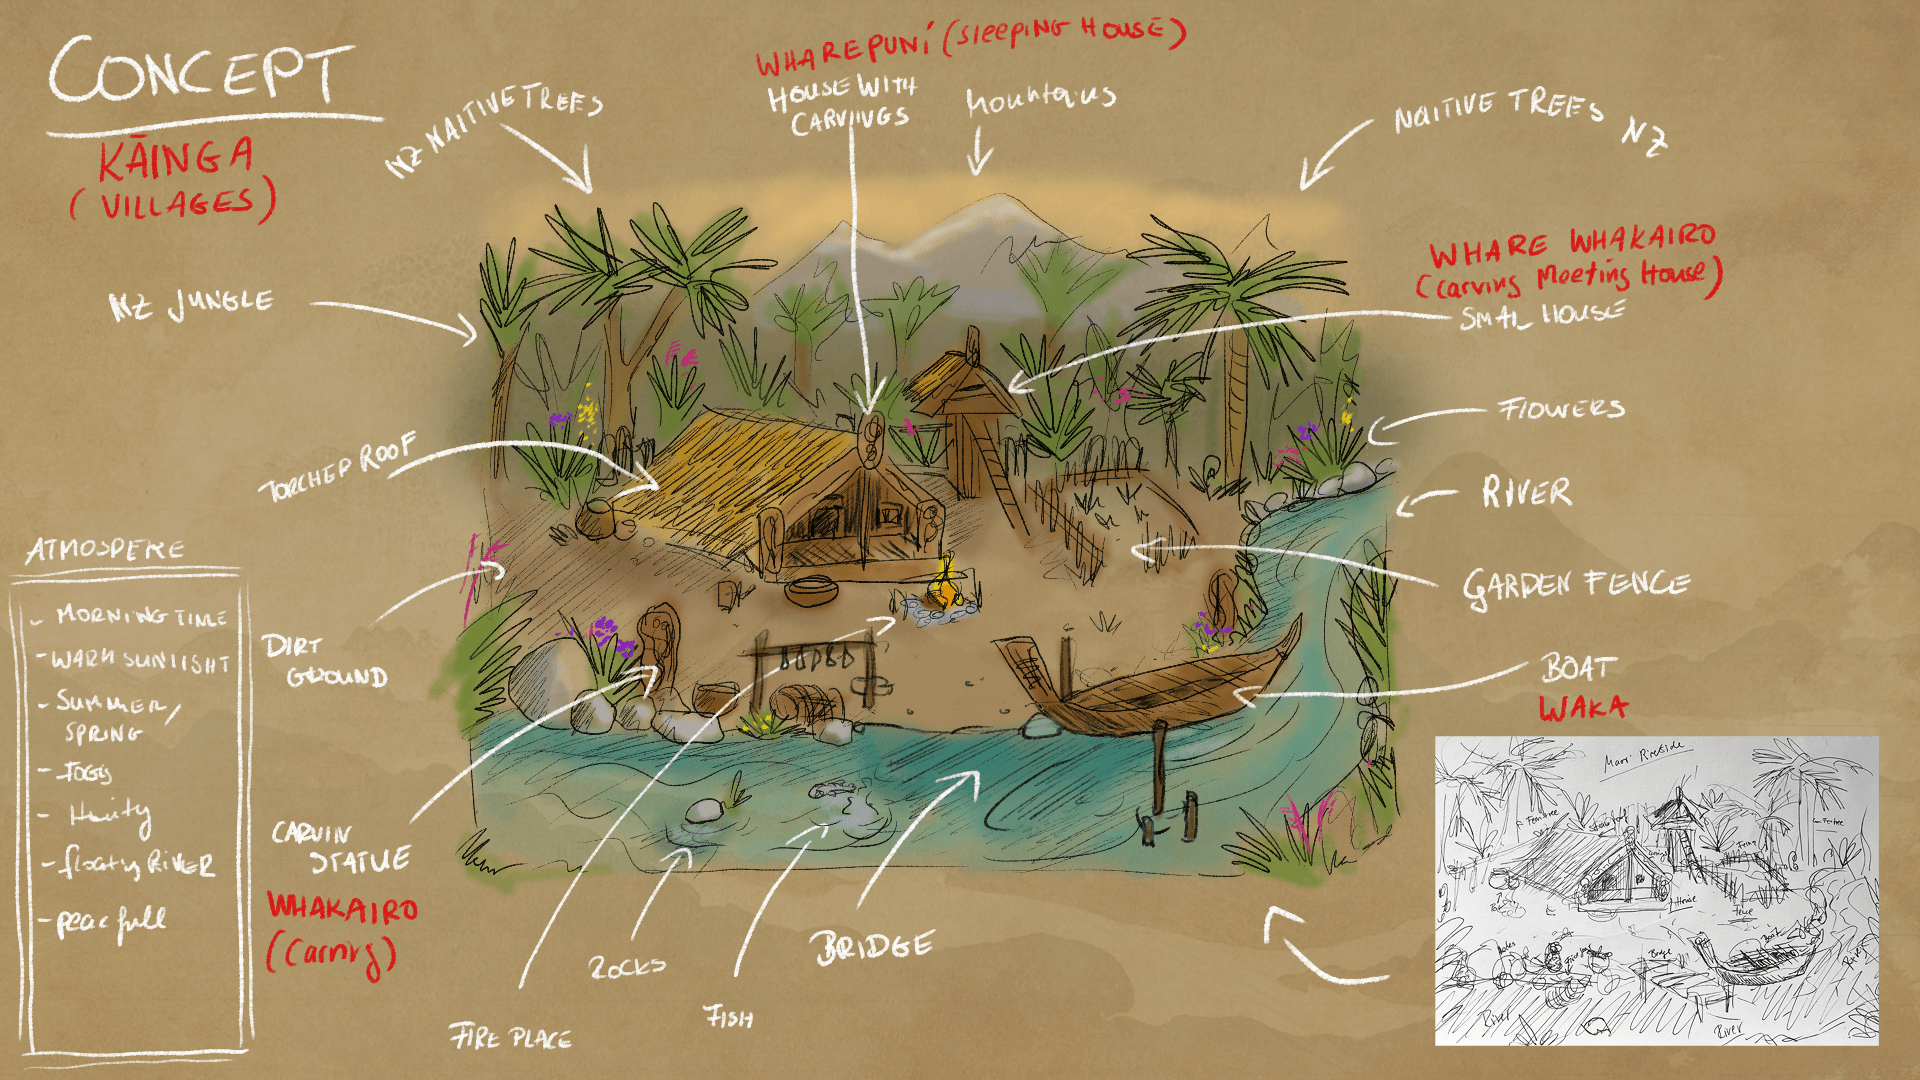
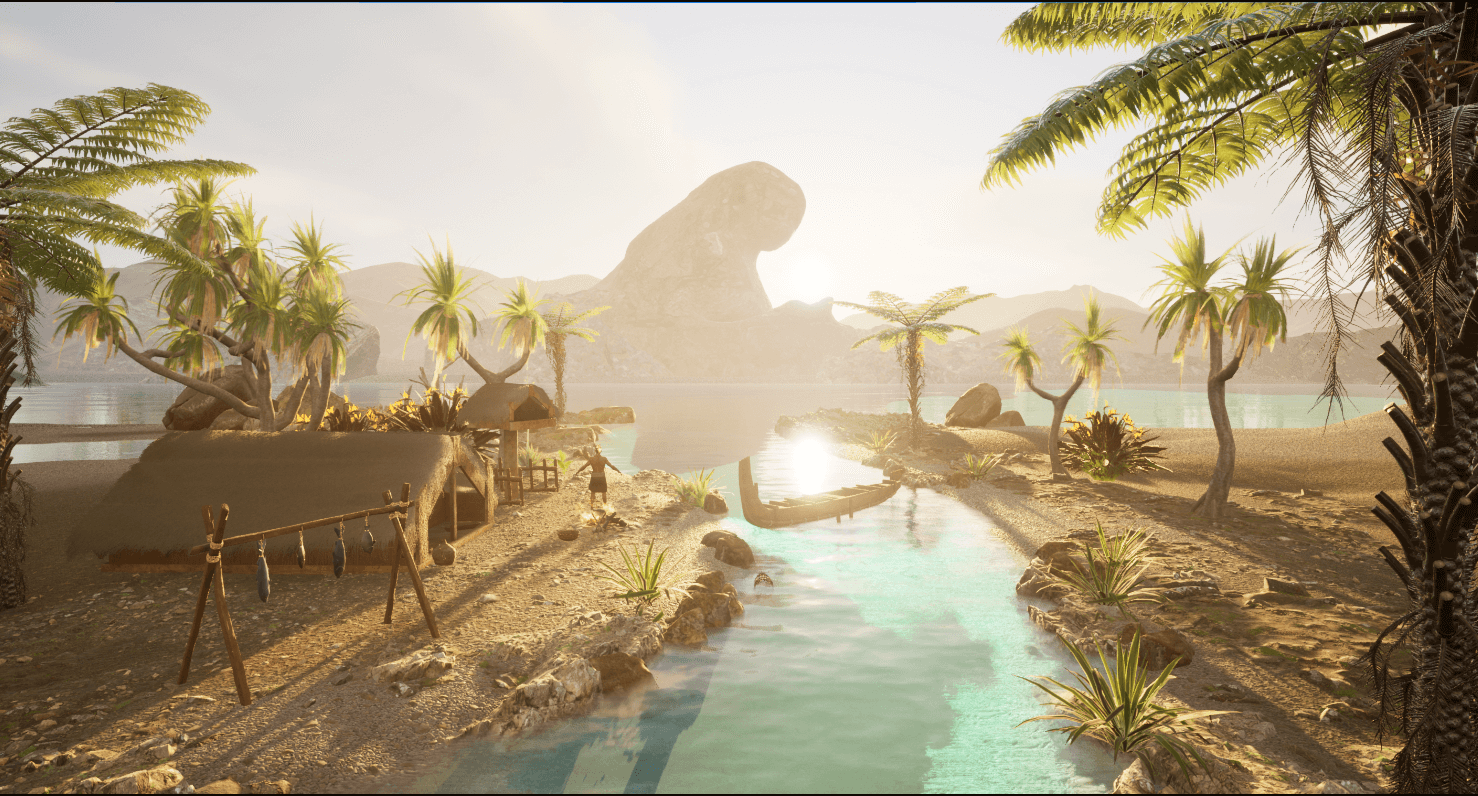
My main Idea was born: "Historical Māori village - fishing outpost by a river."
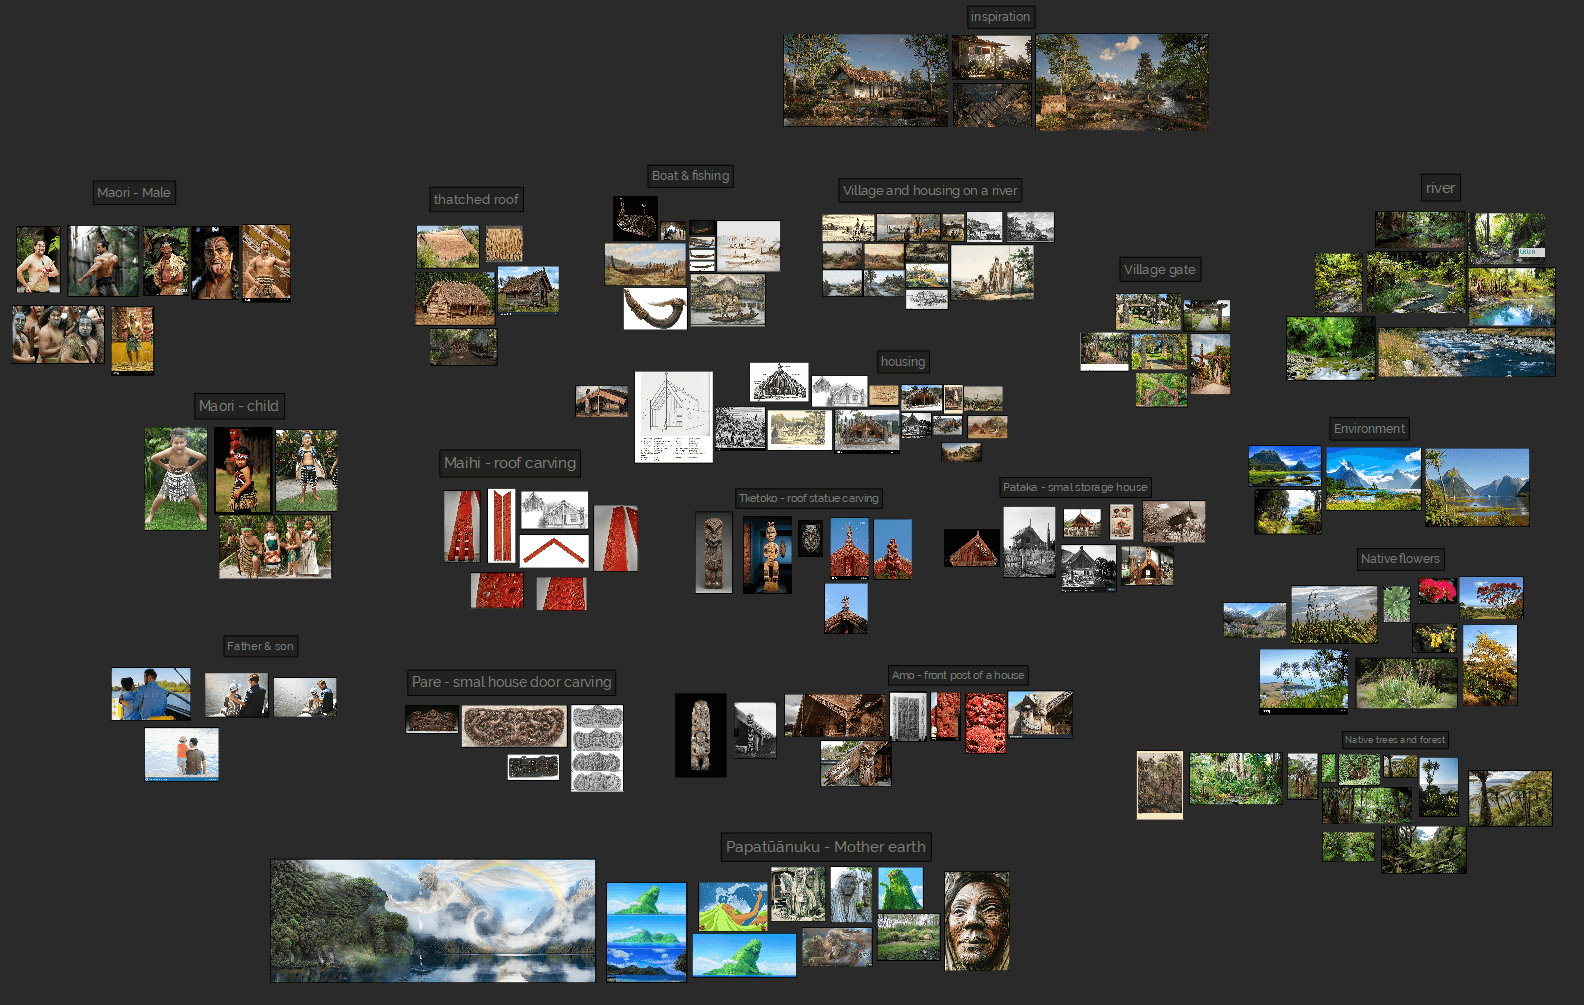
I gathered more references to learn about architecture from the past. I researched on various platforms and talked to Māori people and communities. My goal was to understand architecture and cultural artifacts better from different viewpoints.
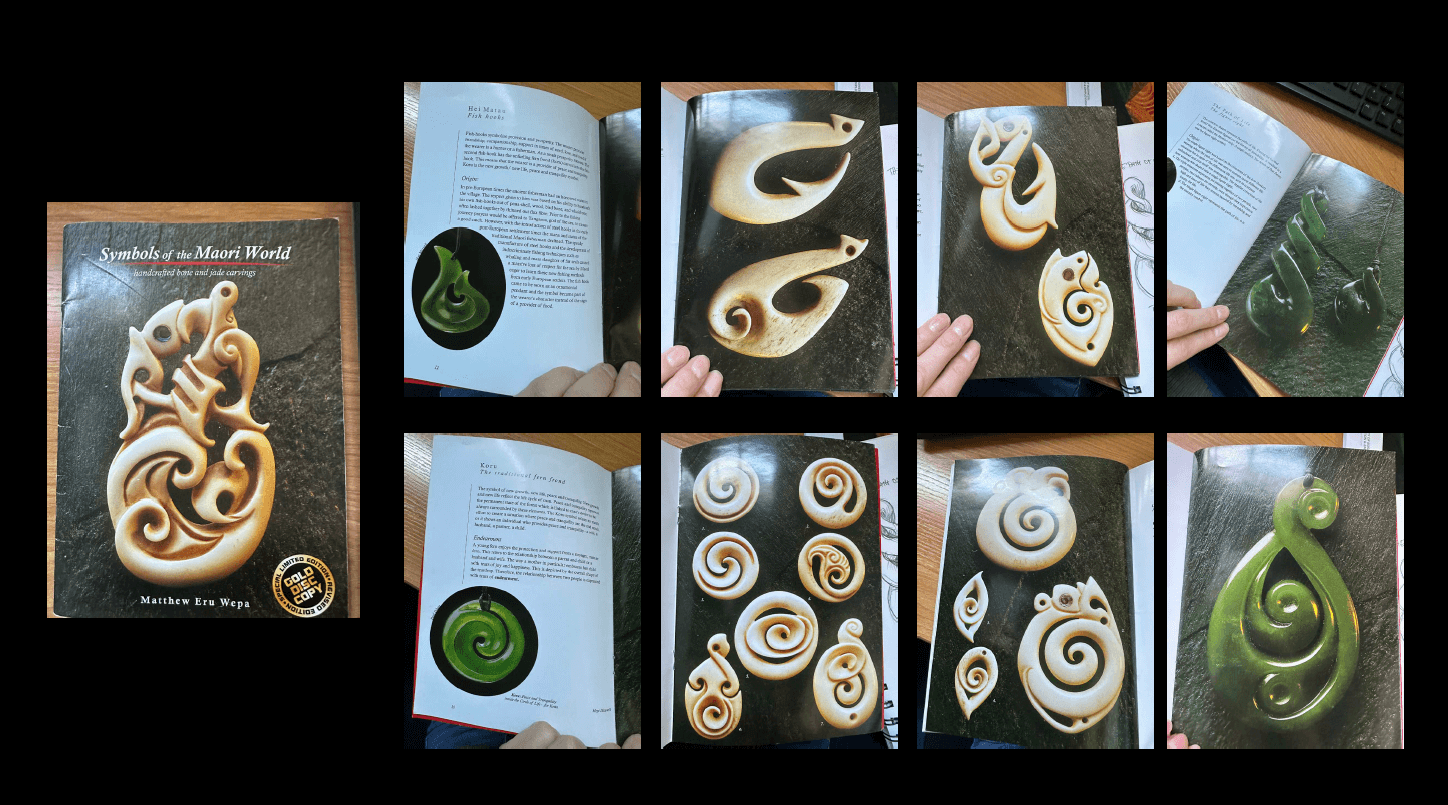
Studying Māori culture can be difficult because many aspects are protected by cultural laws, like the Treaty of Waitangi principles, which I found that I couldn't copy and show various ideas during my research.
Tattoos and carvings are good examples. Each curve or symbol tells a special story. Copying them disrespectfully is wrong; the Māori people have a rich culture that cherishes stories and traditions.
During this project, I learned a lot about Māori culture. I also learned how to treat Māori culture with respect.
I learned a lot about cultural environmental concept design through my research. To make things easier, I used PureRef for all my reference images. I find PureRef helpful for organising references. If I face any issues while modeling, I can quickly address them and understand how to proceed with the design.
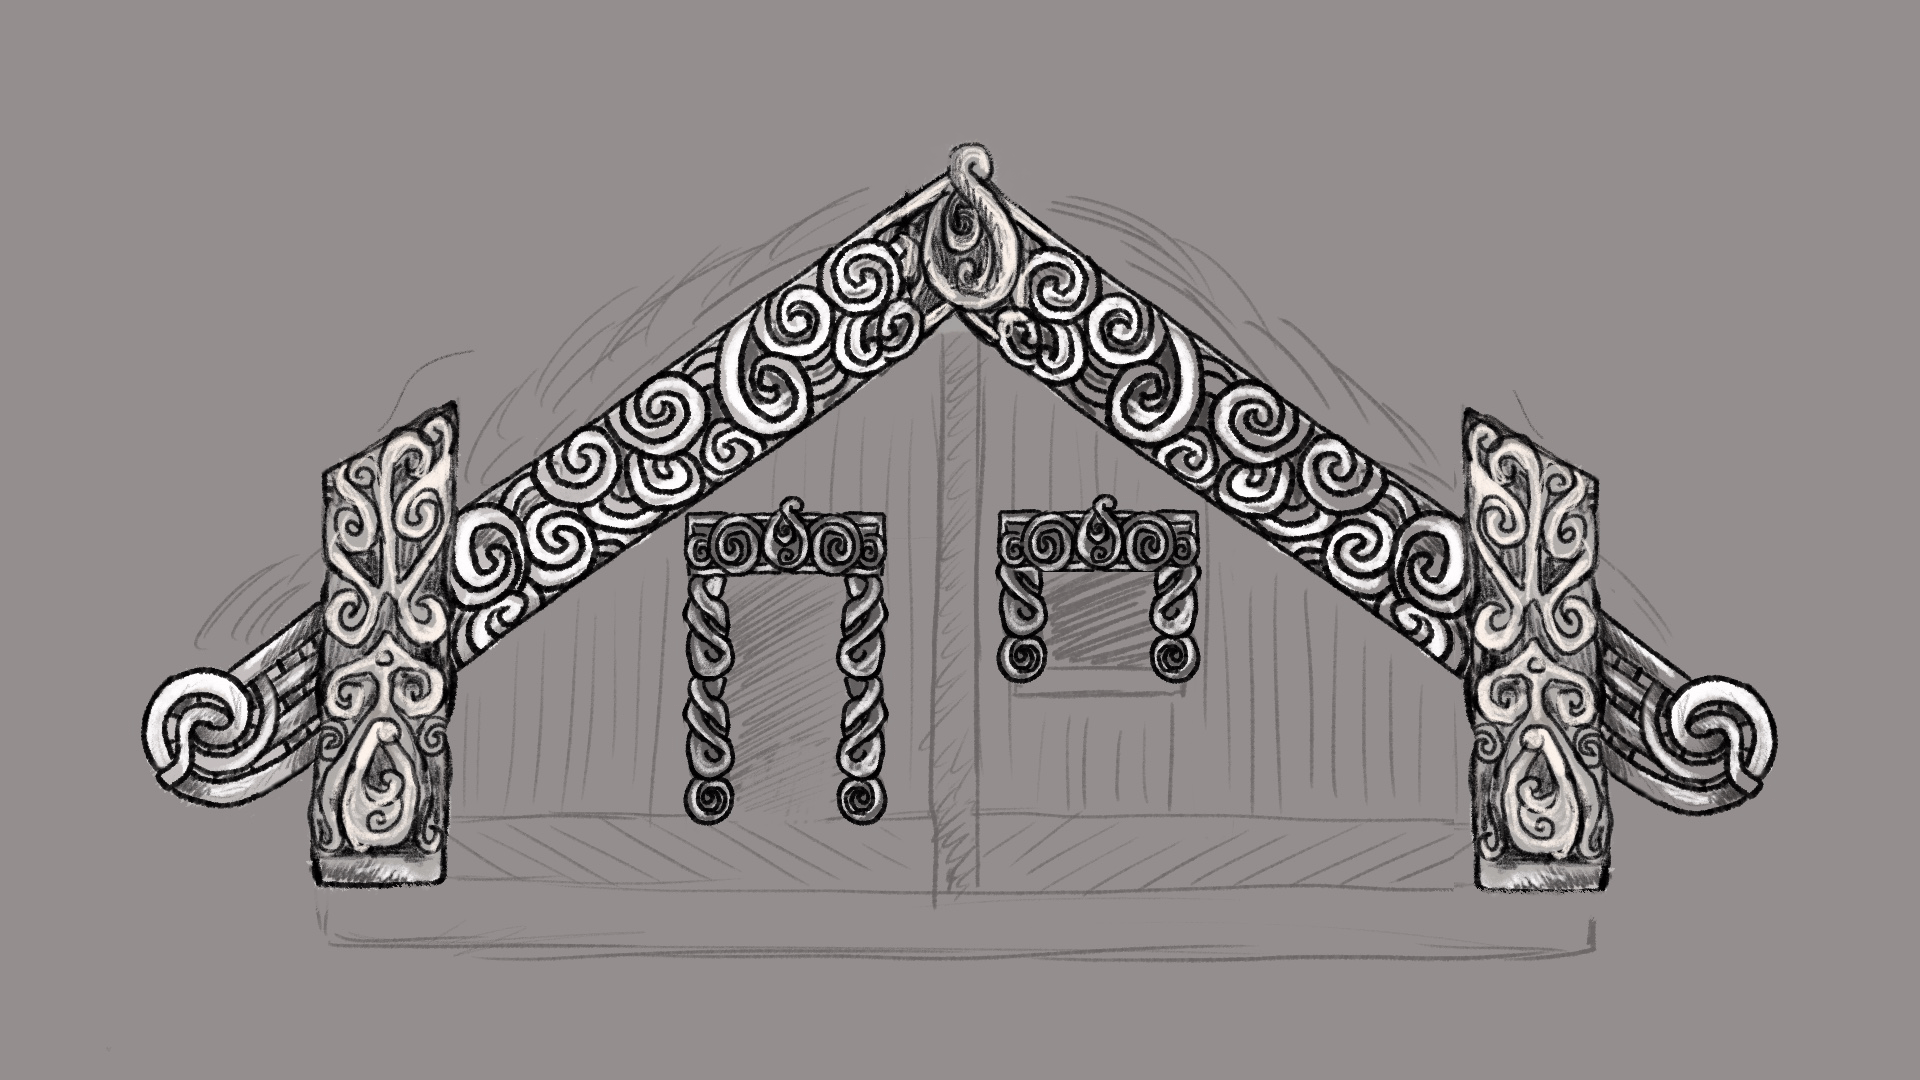
My first sketch was a basic idea that acted as a guide for the next stages of my concept work. In Photoshop, I started to choose a colour concept based on my favourite reference, the “Spanish Cottage by the river”. I already planned the assets and added a few notes.
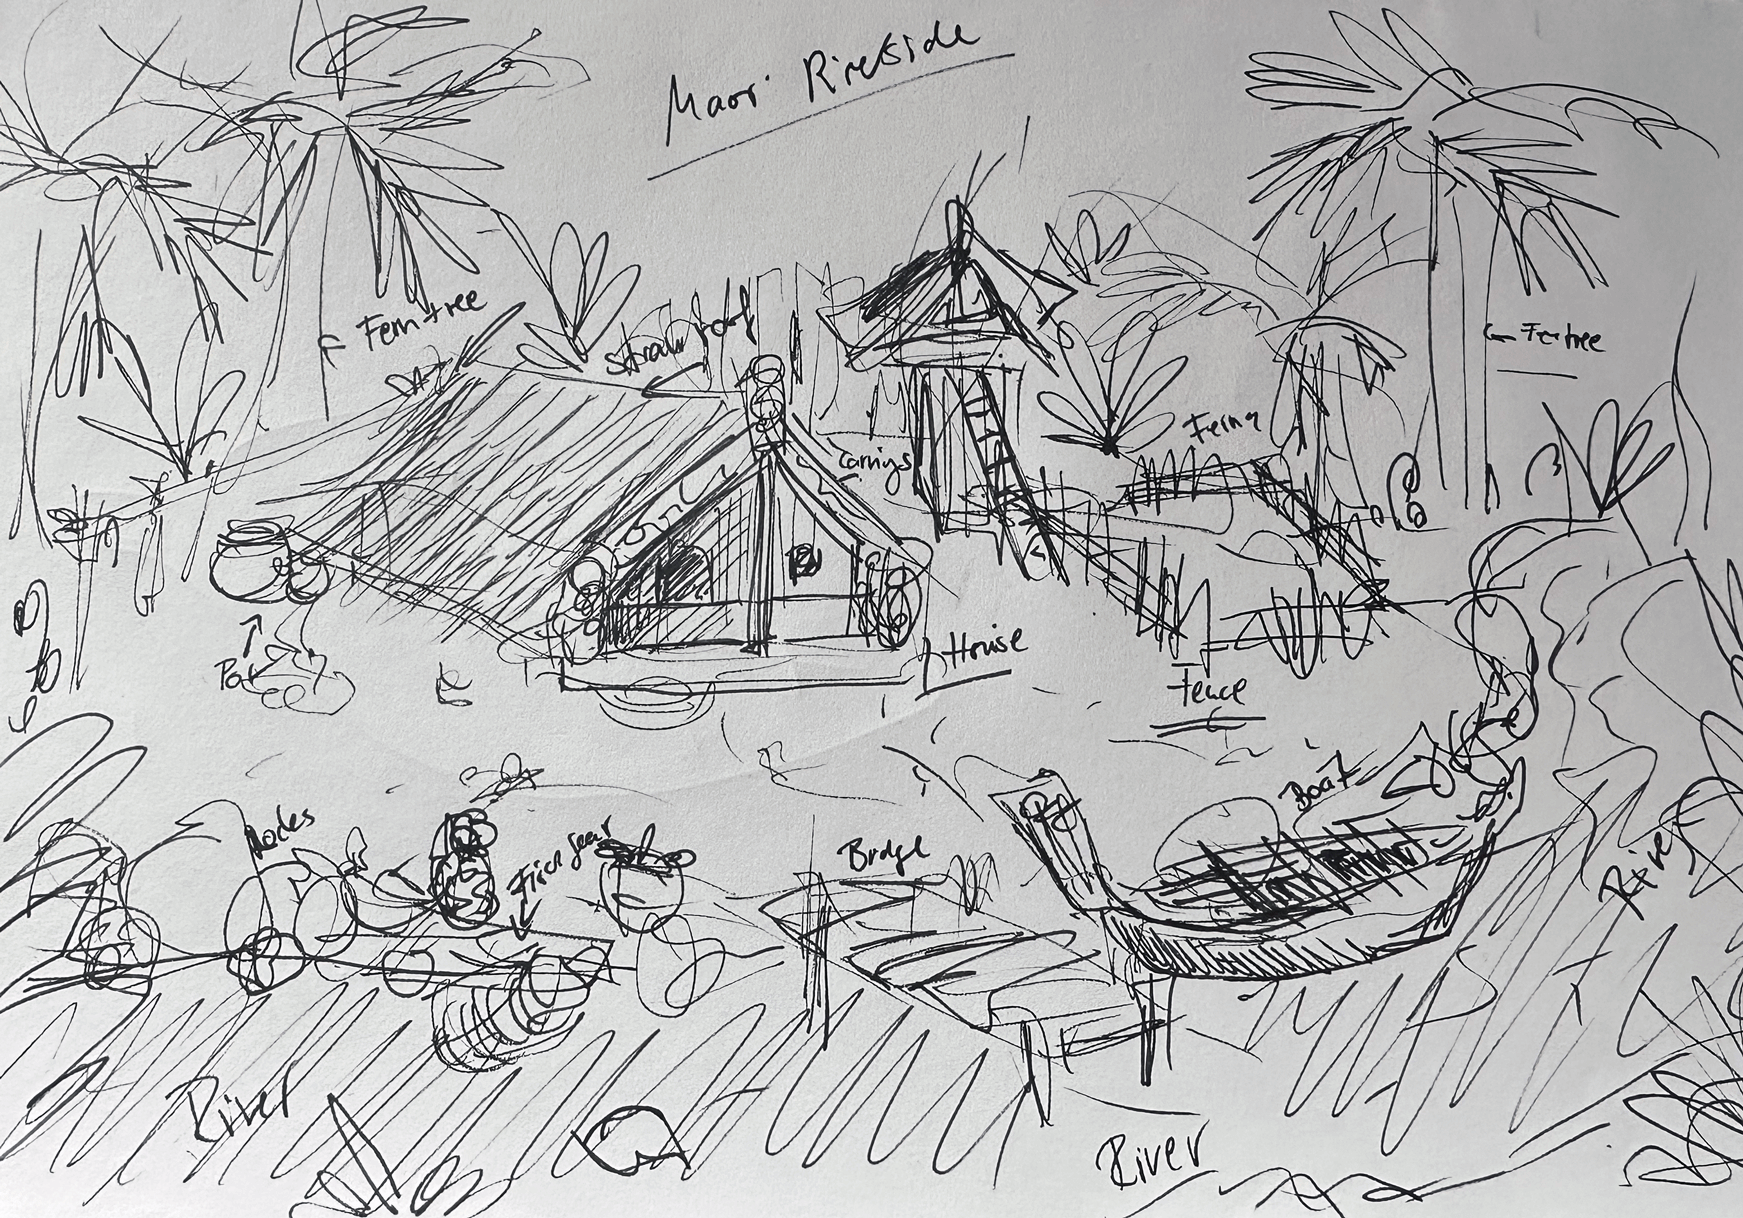
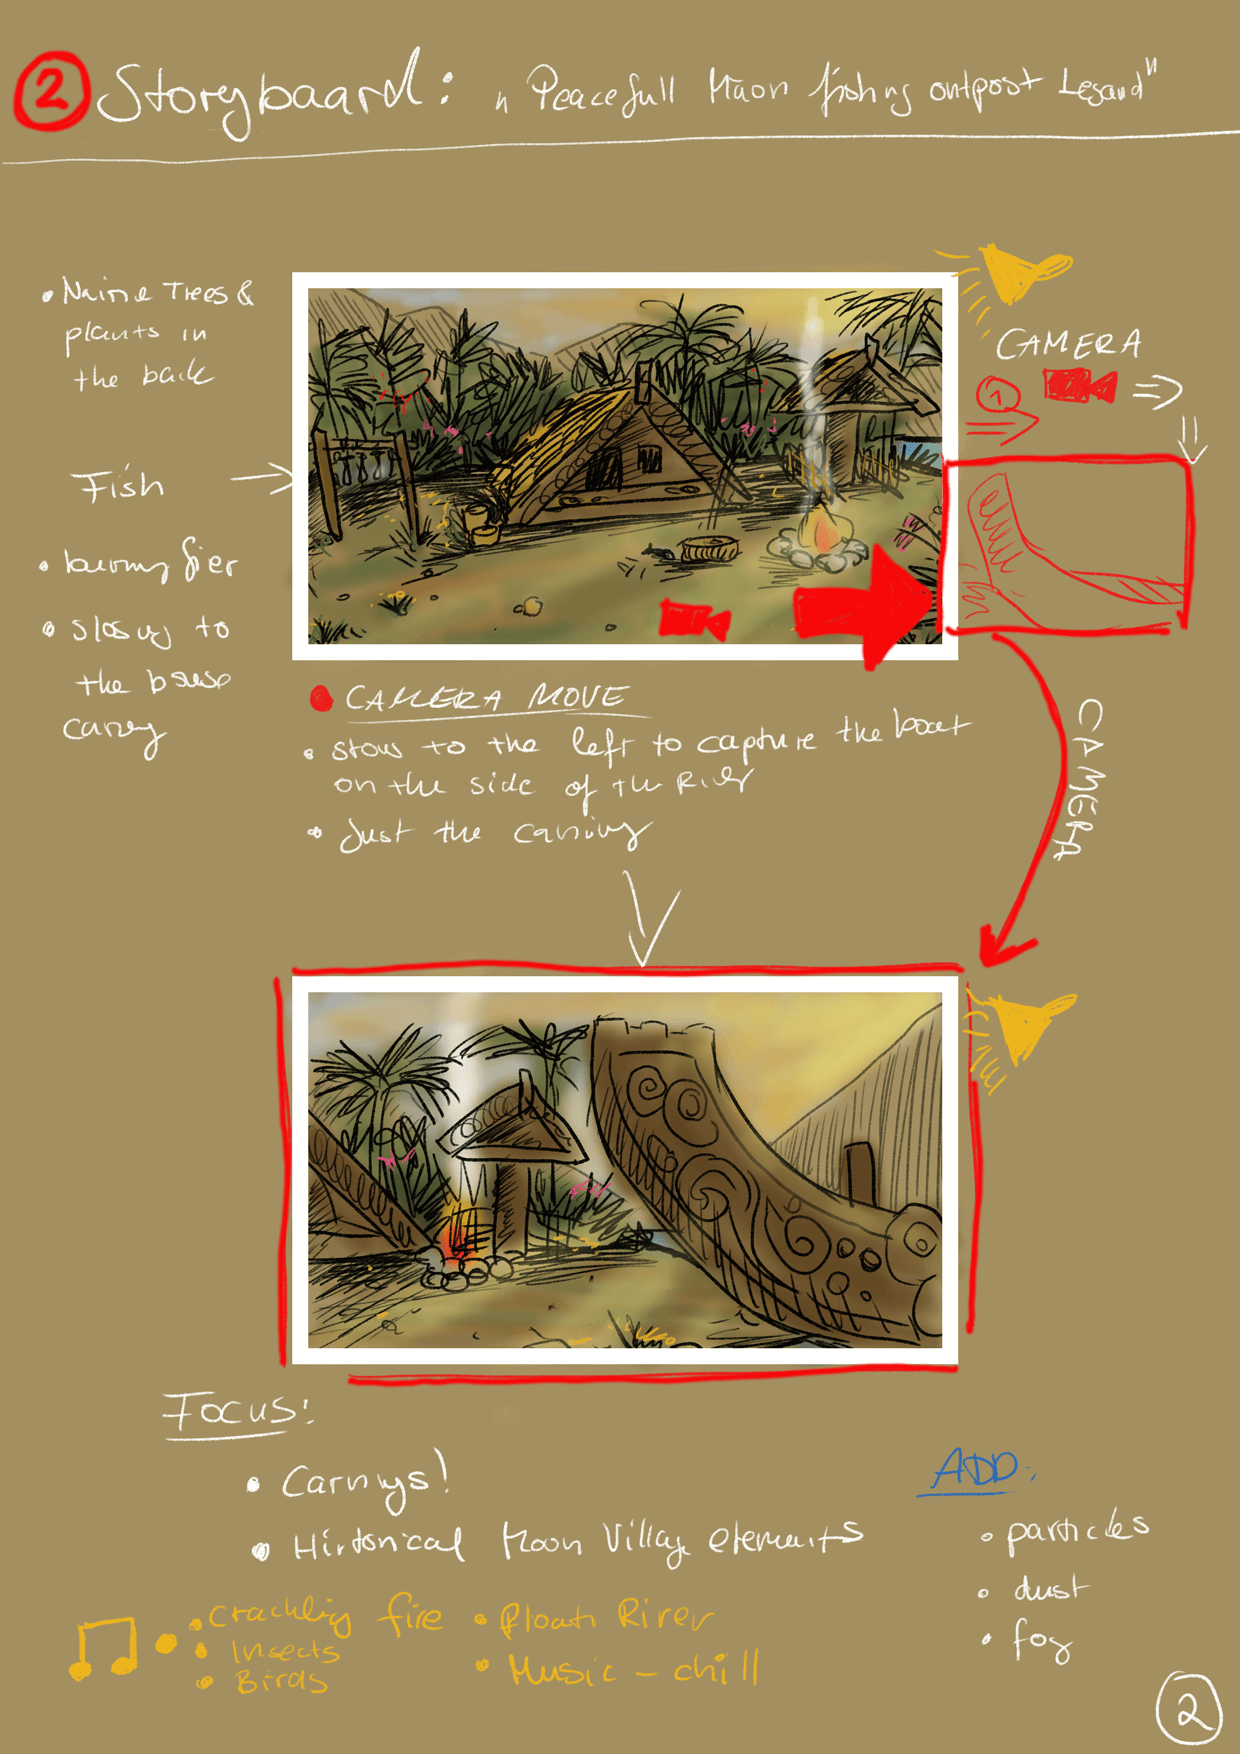
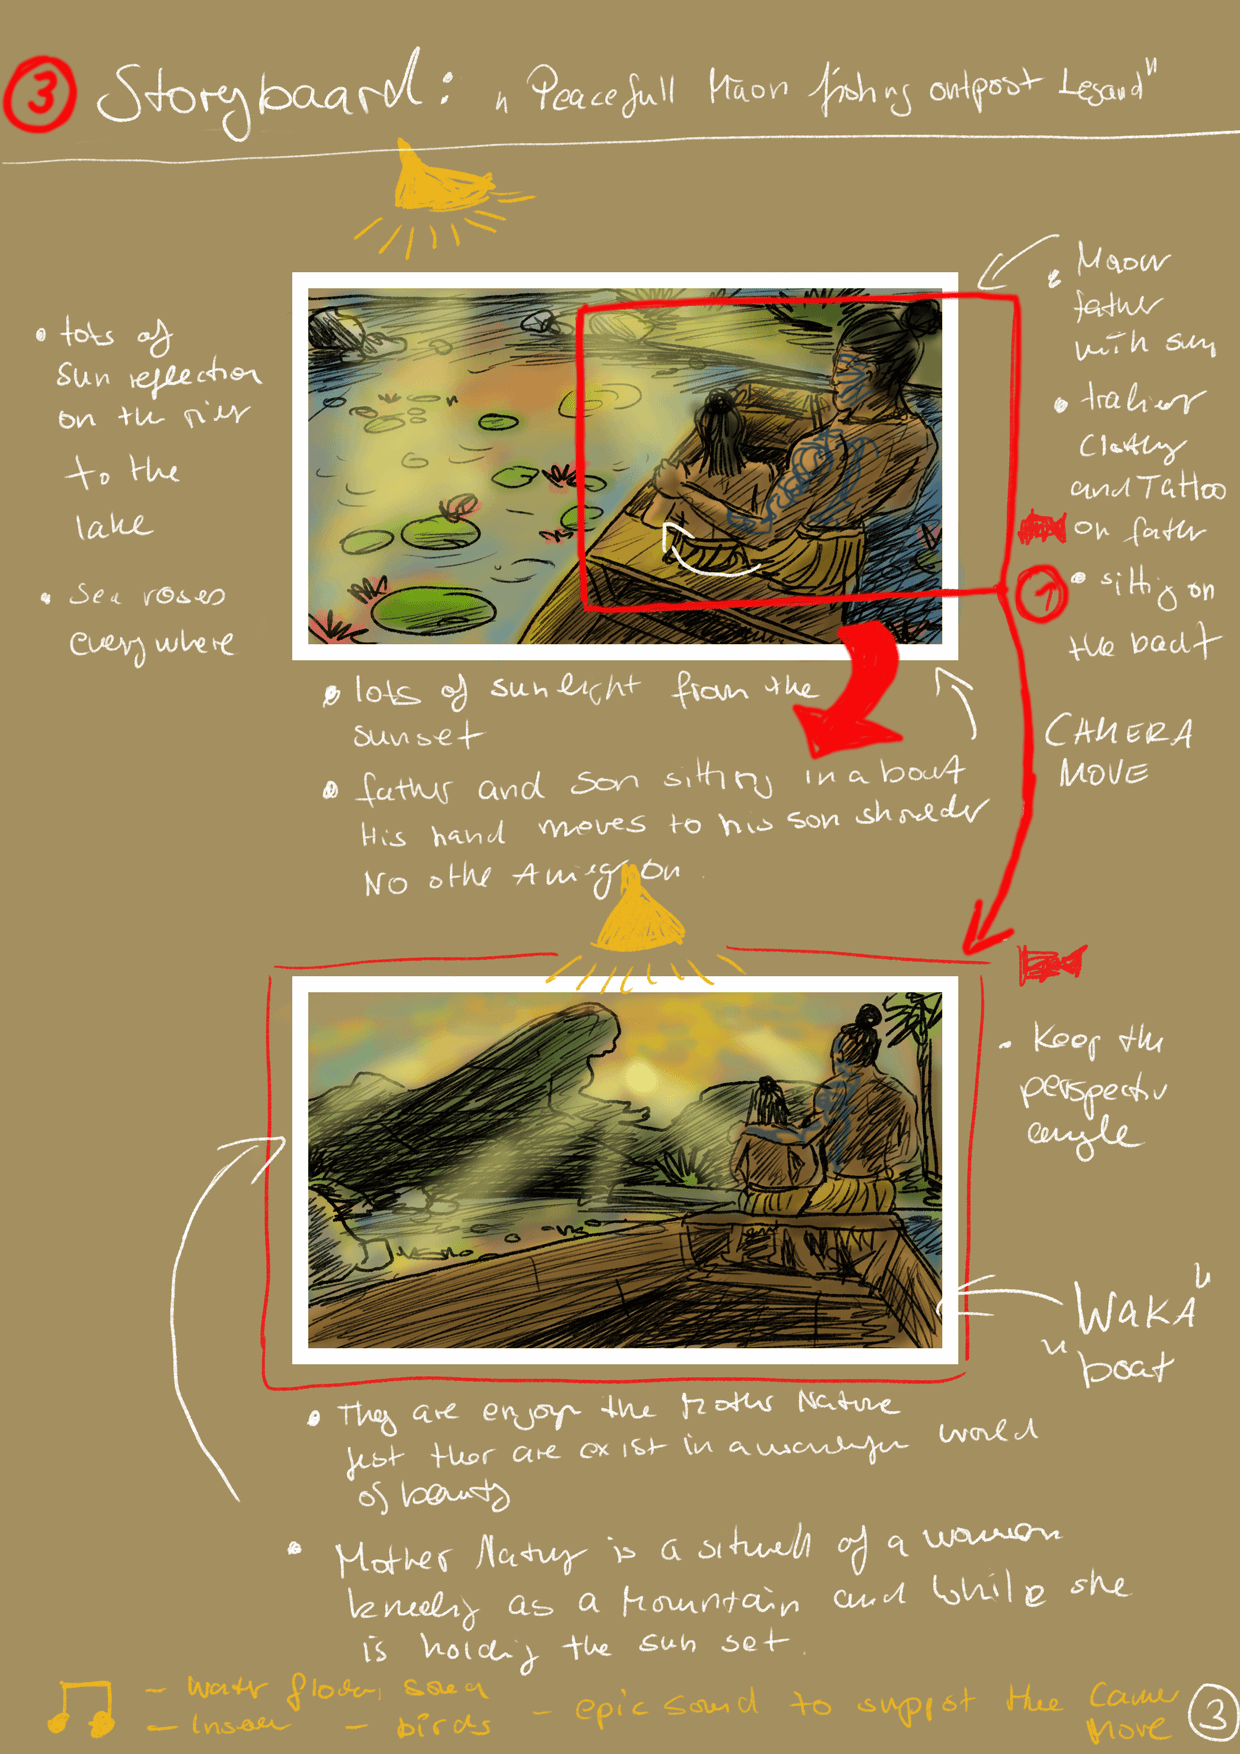
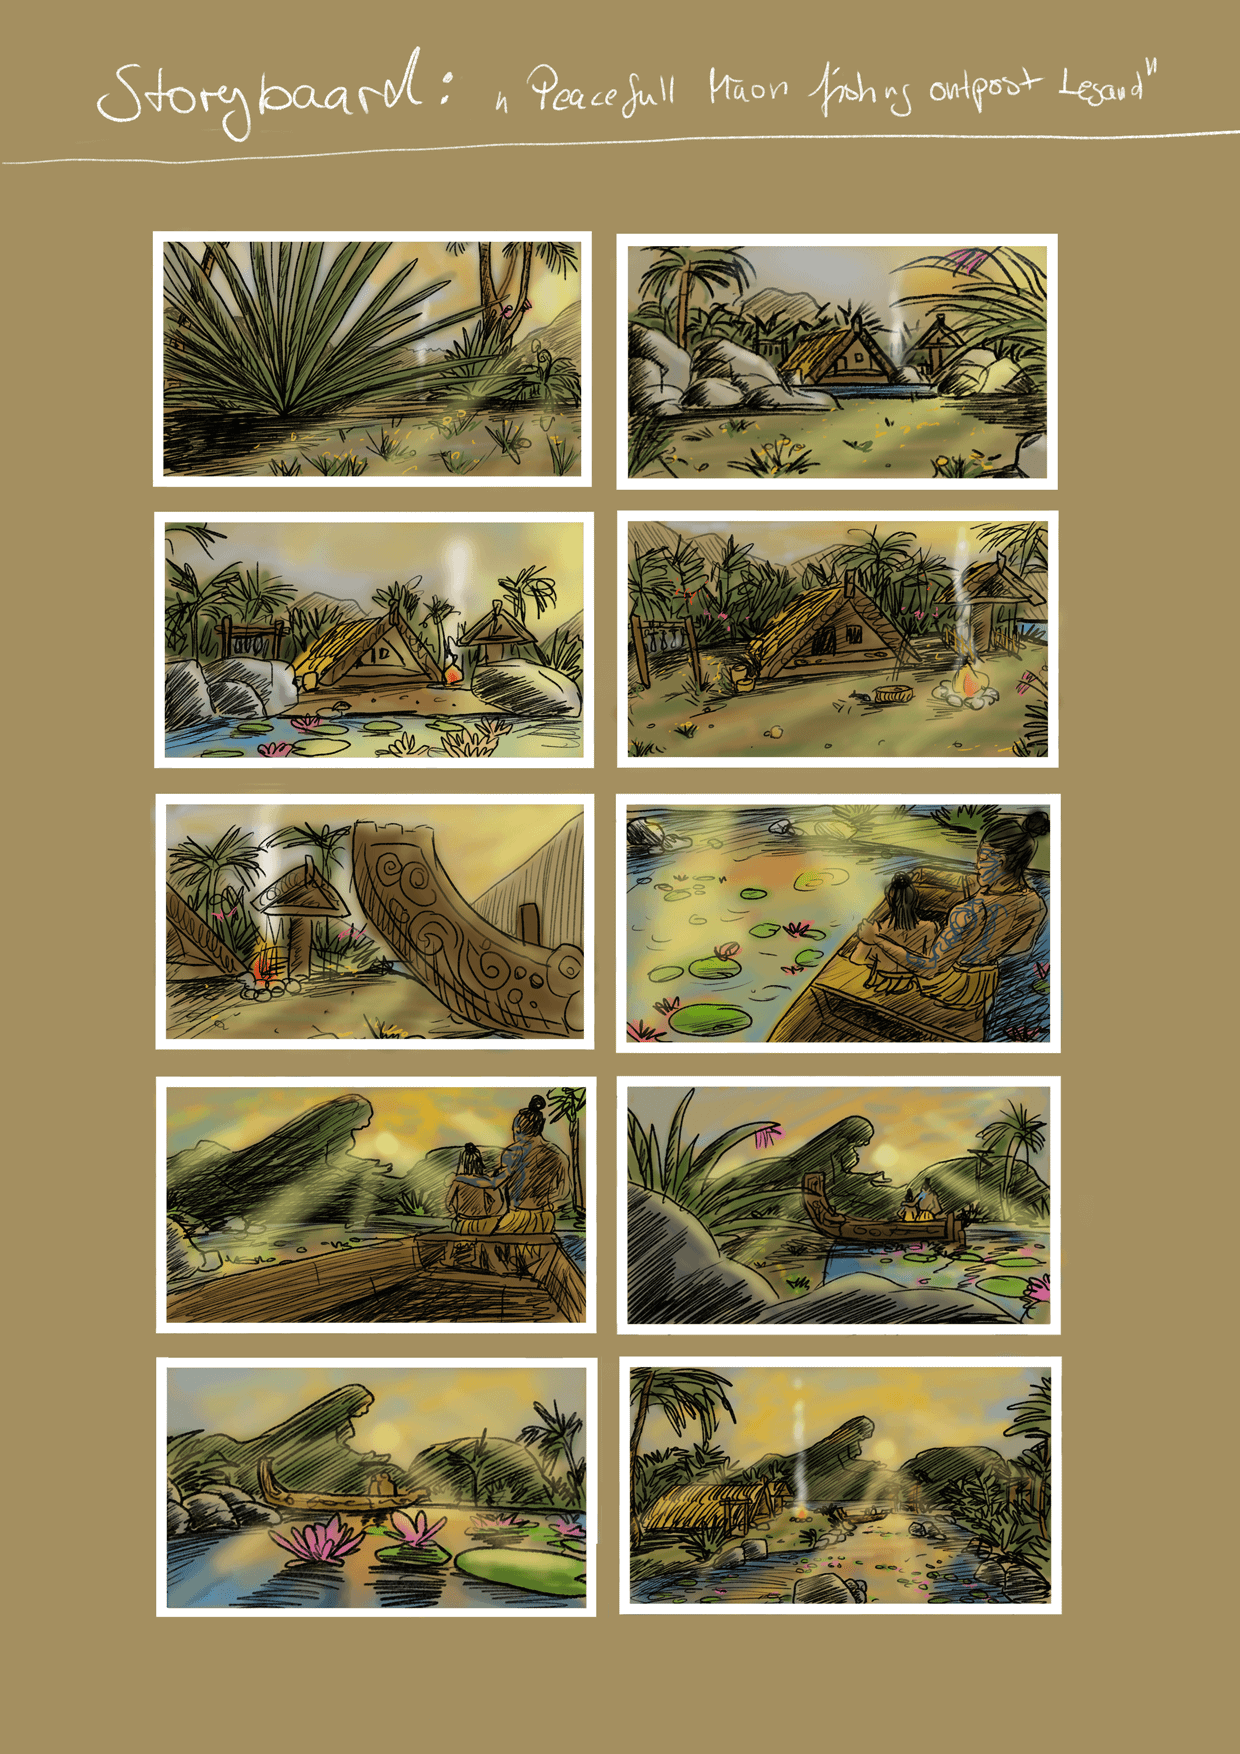
A film is incomplete without a storyboard, therefore I planned out six camera shots for my sequence. I had never done that before, and I studied camera shot types and storyboards from other projects.
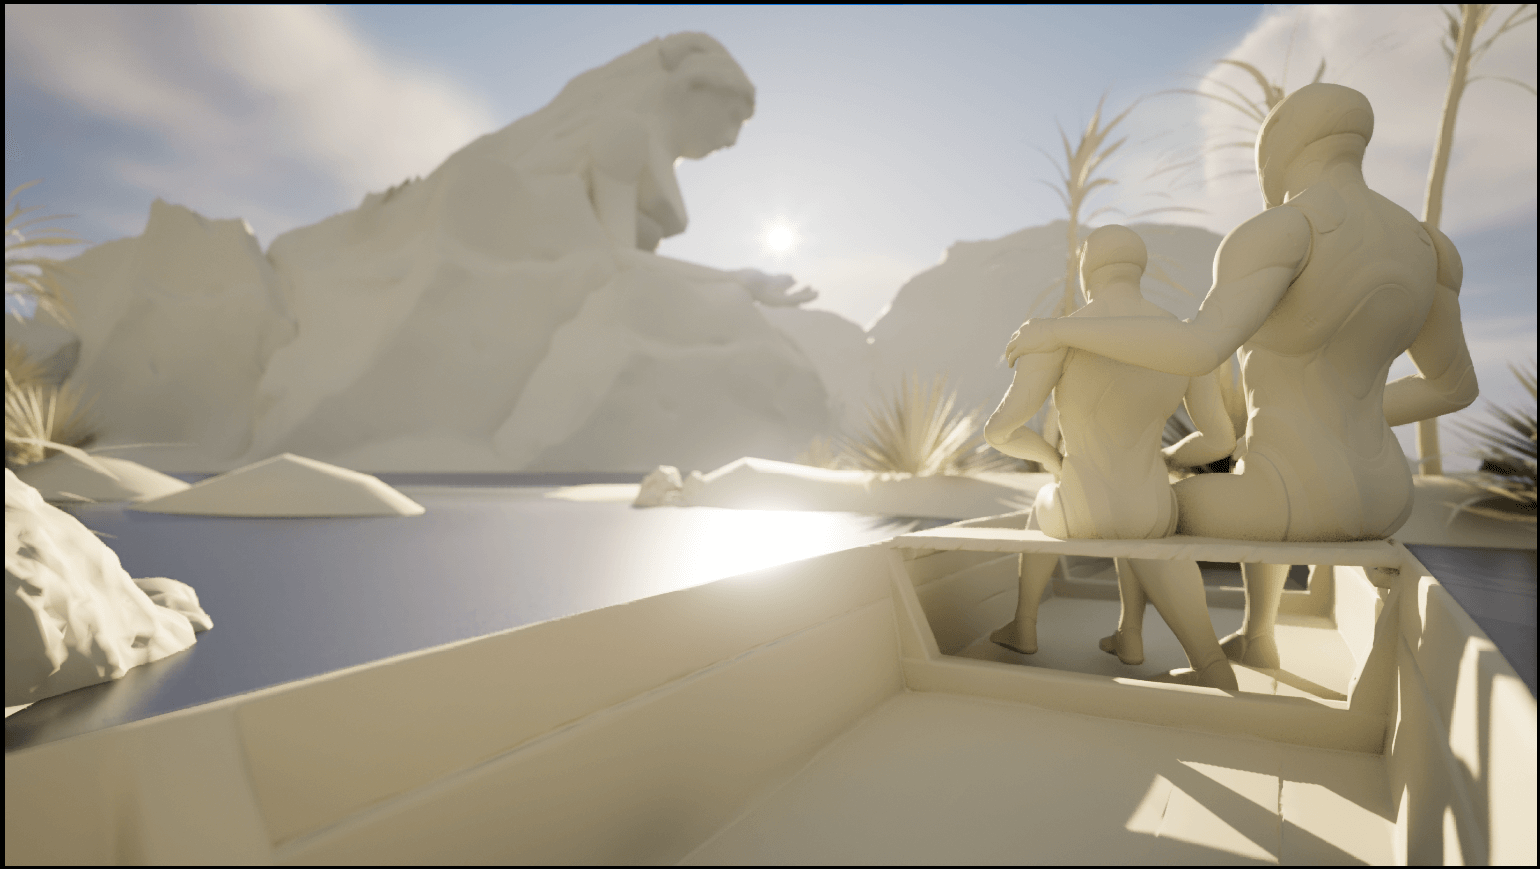
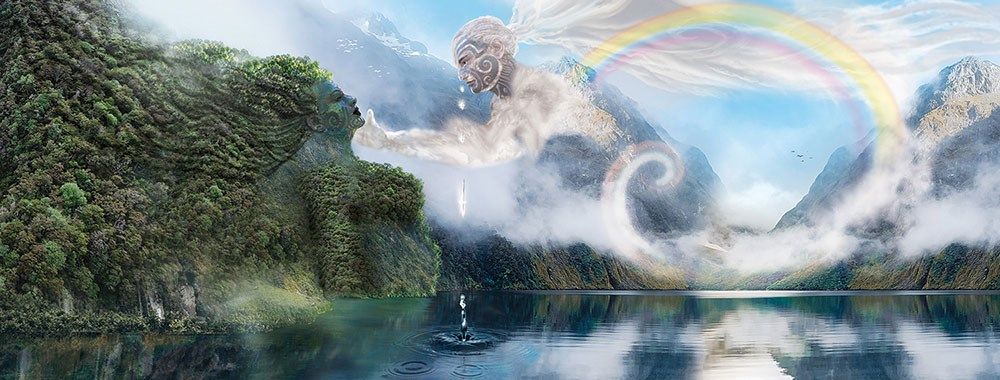
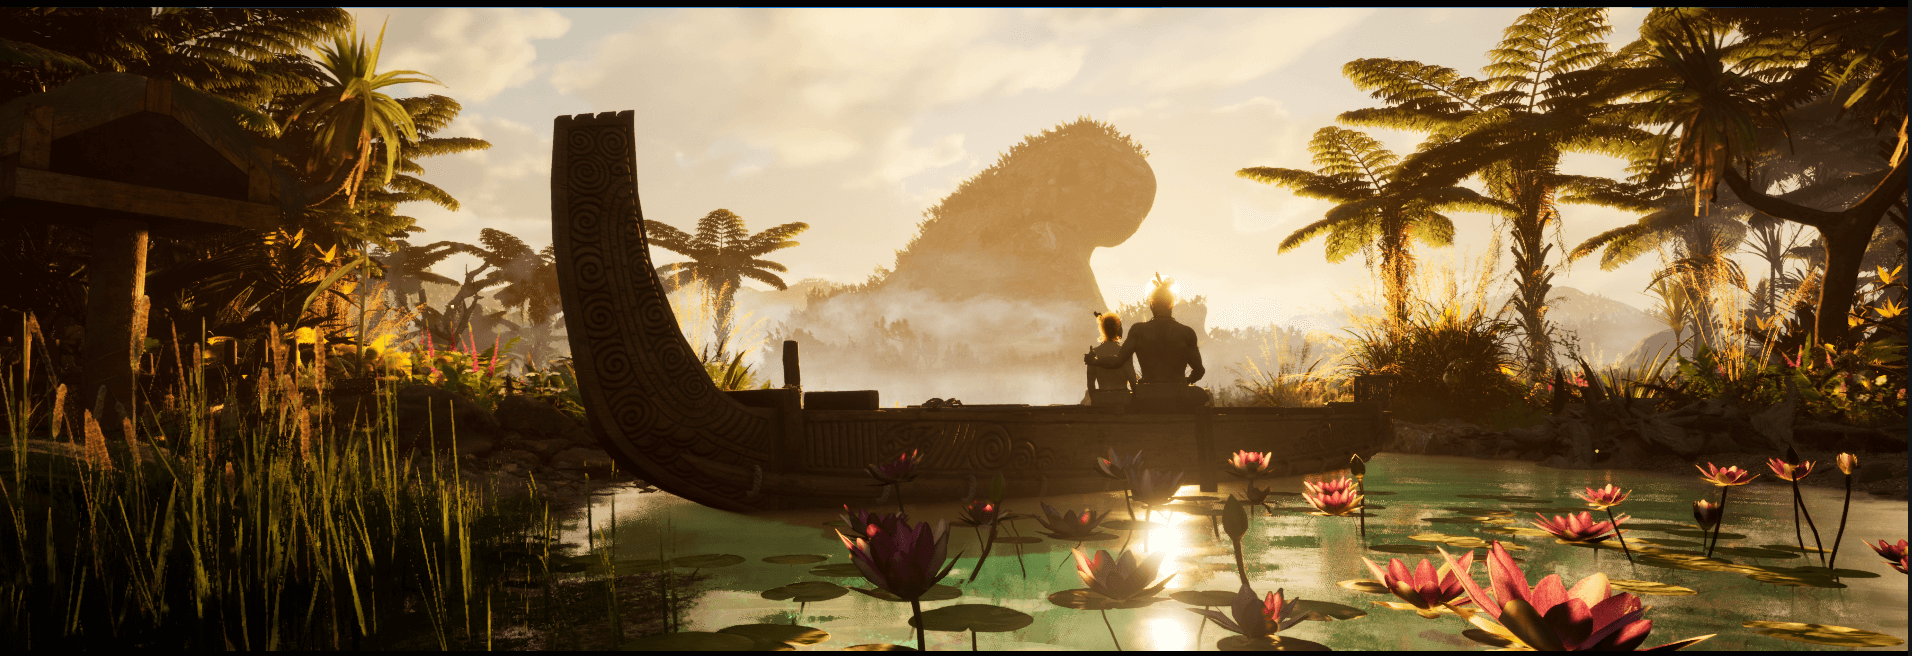
Through my research, I read stories about Māori gods and traditions. My favourite is “Papatuanuku“ (Mother Earth). In Māori tradition, Papatūānuku is the land. She is a mother earth figure who gives birth to all things, including people.
It also provided some descriptions of values and life moments in Māori history. I decided to add this Māori legend into my project to immerse viewers in this world.
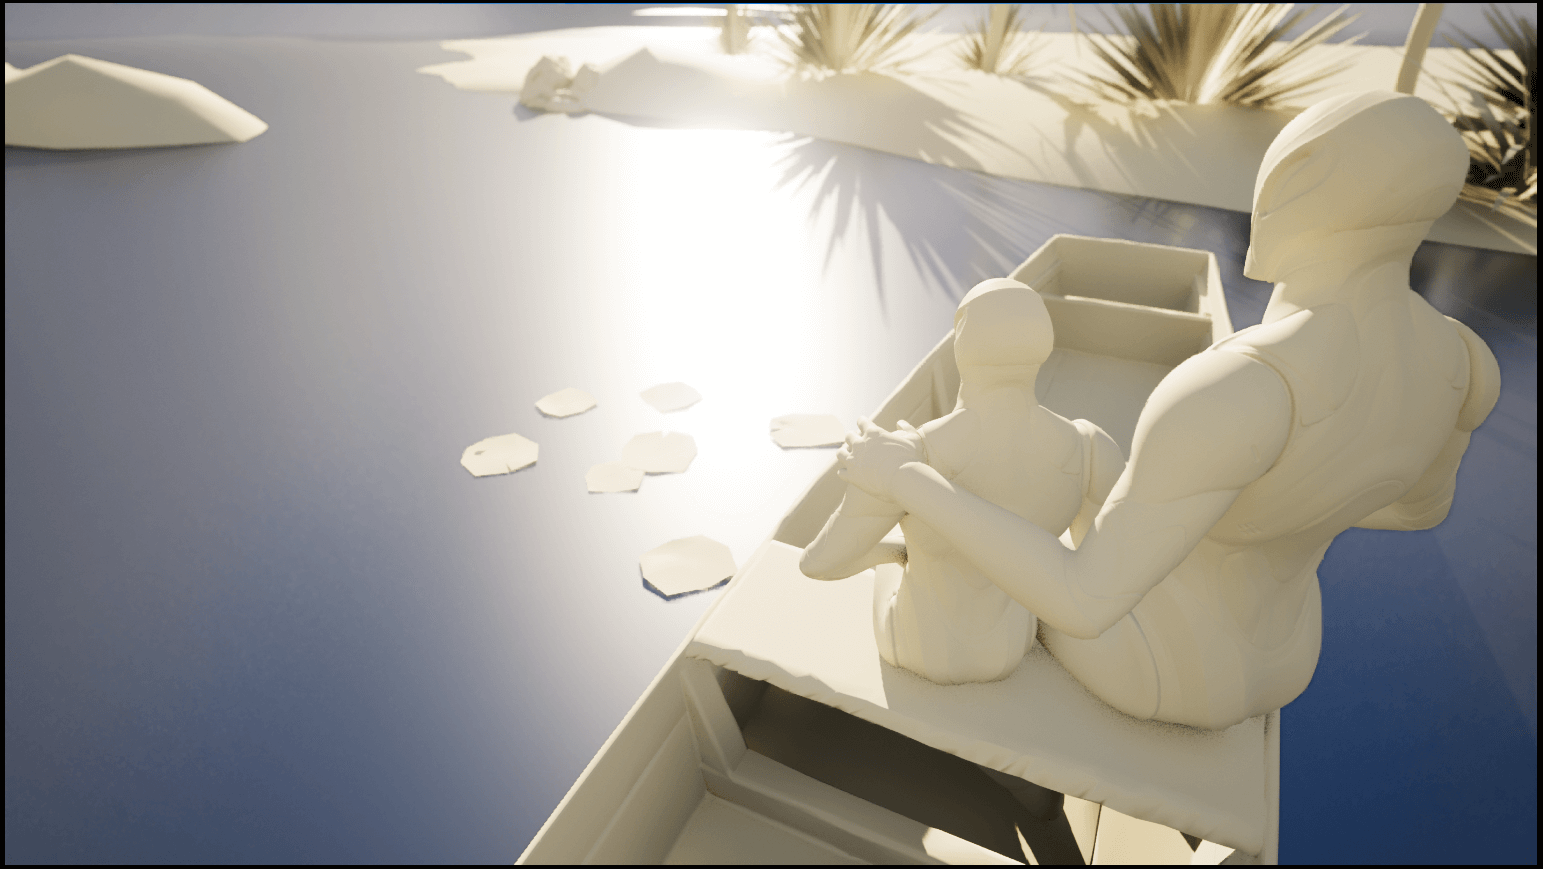
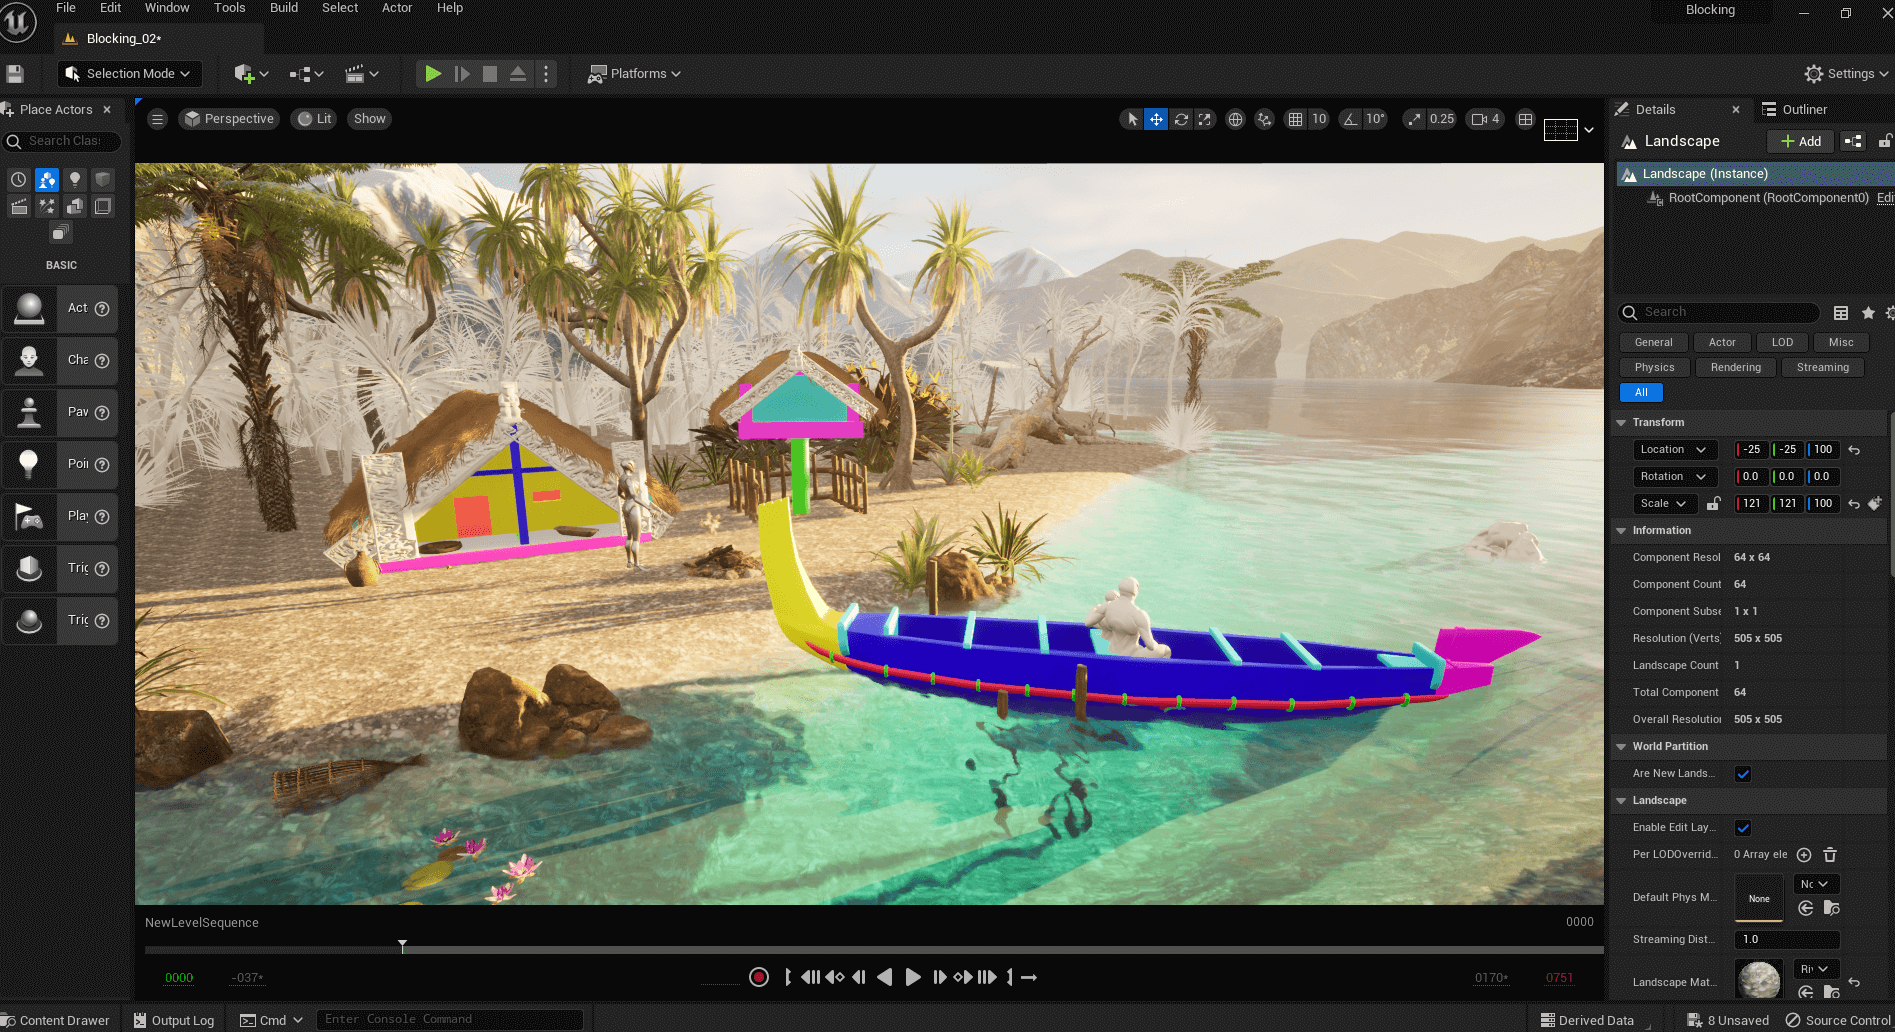
Another important part for this sequence is the story behind. To support my storyline with mother nature and the love she is giving to life. I decided to add two characters into my scene. A father with his son, sitting on a traditional boat watching the sunset. I spoke with Maori people and observed that family and the tribe are an extremely strong connection inside their culture.

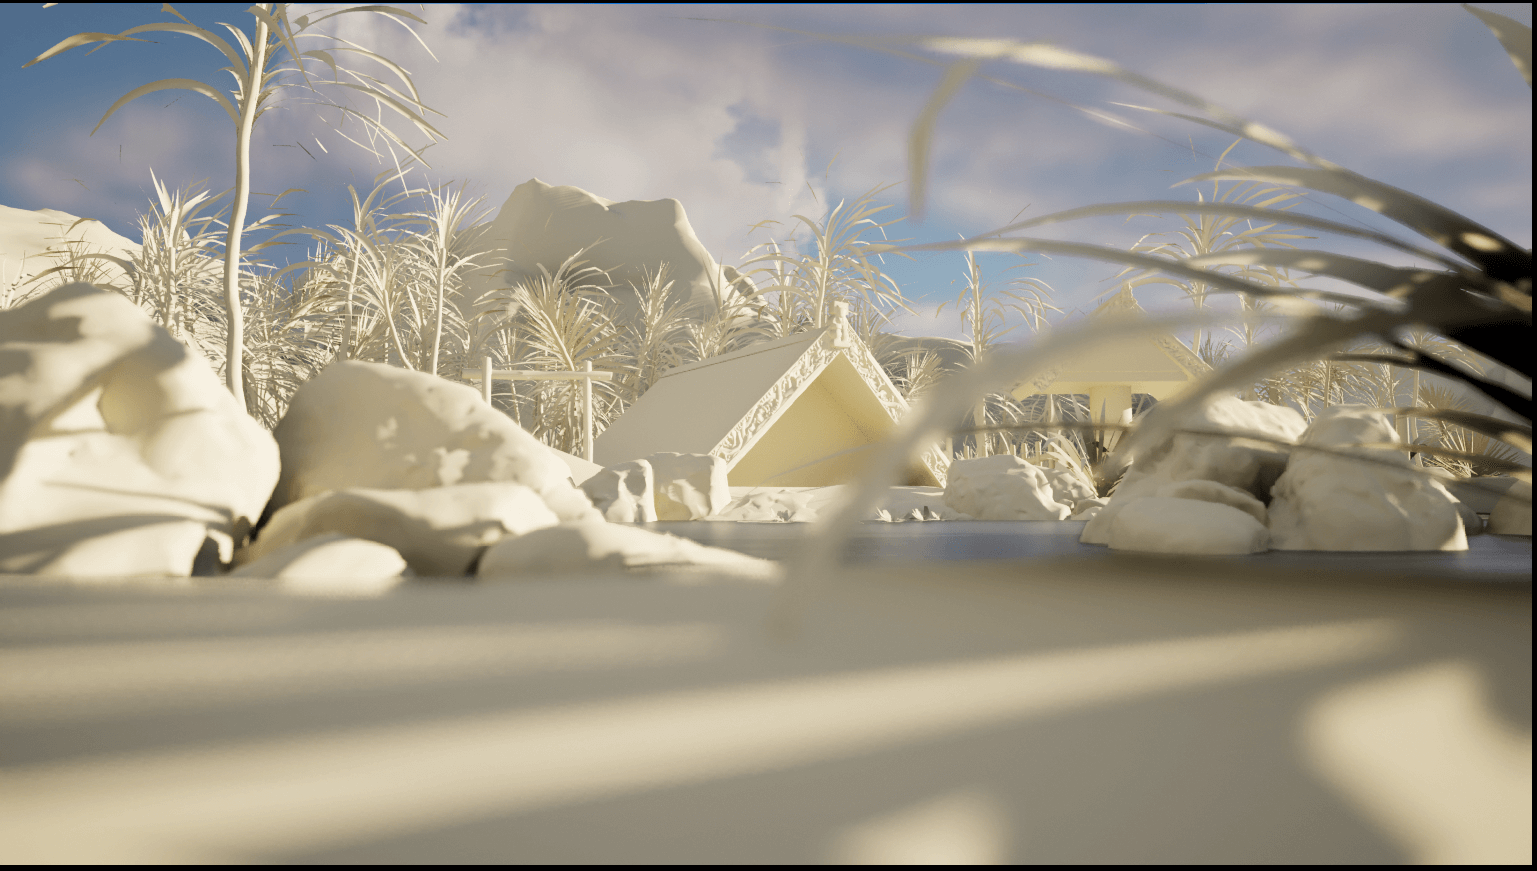
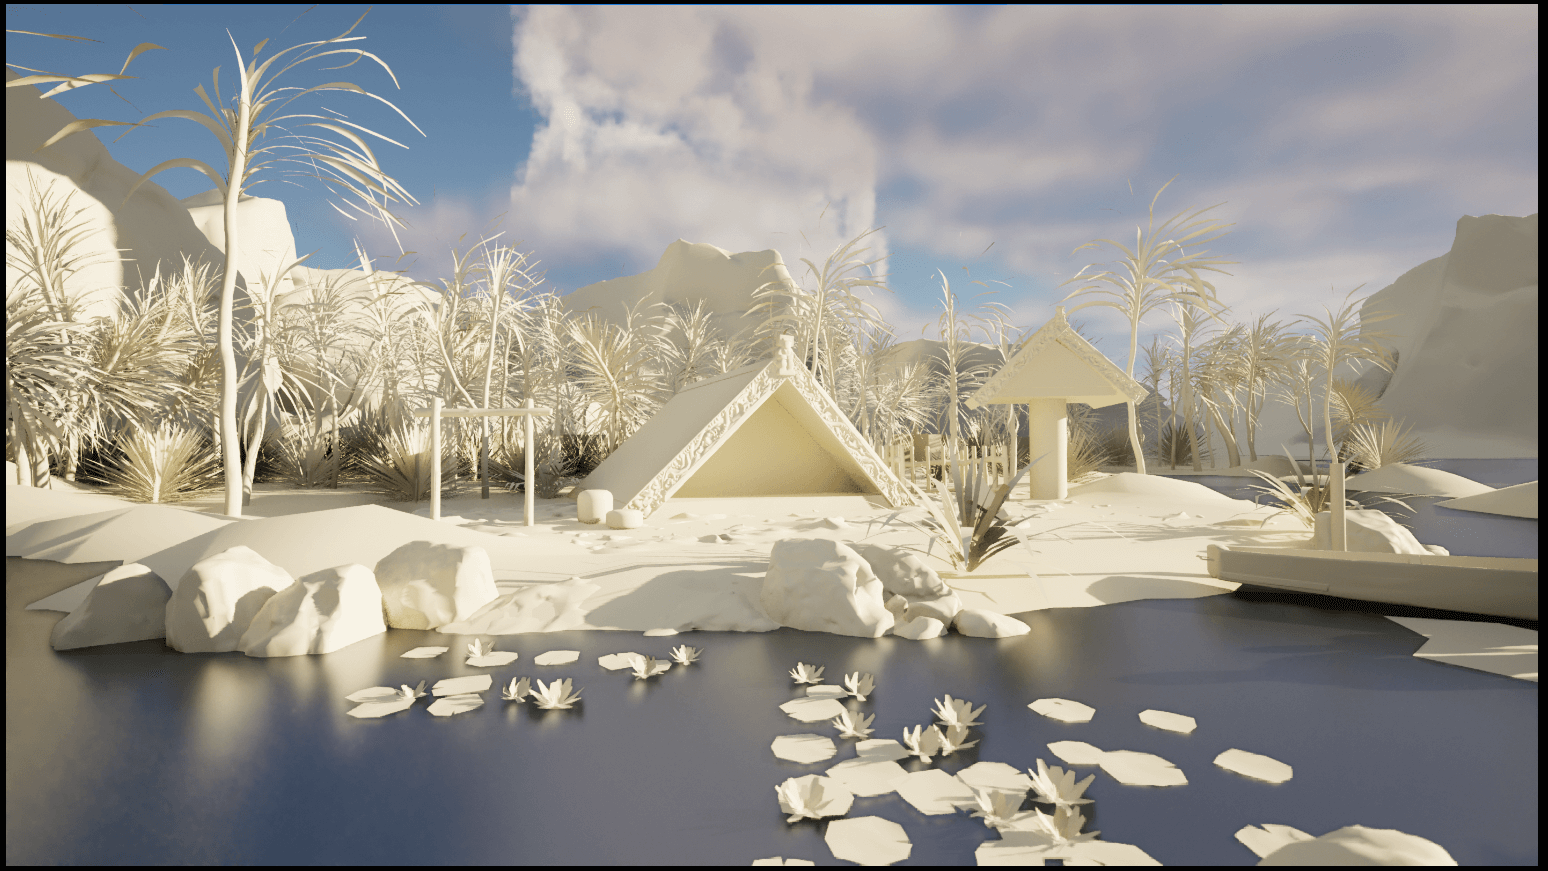
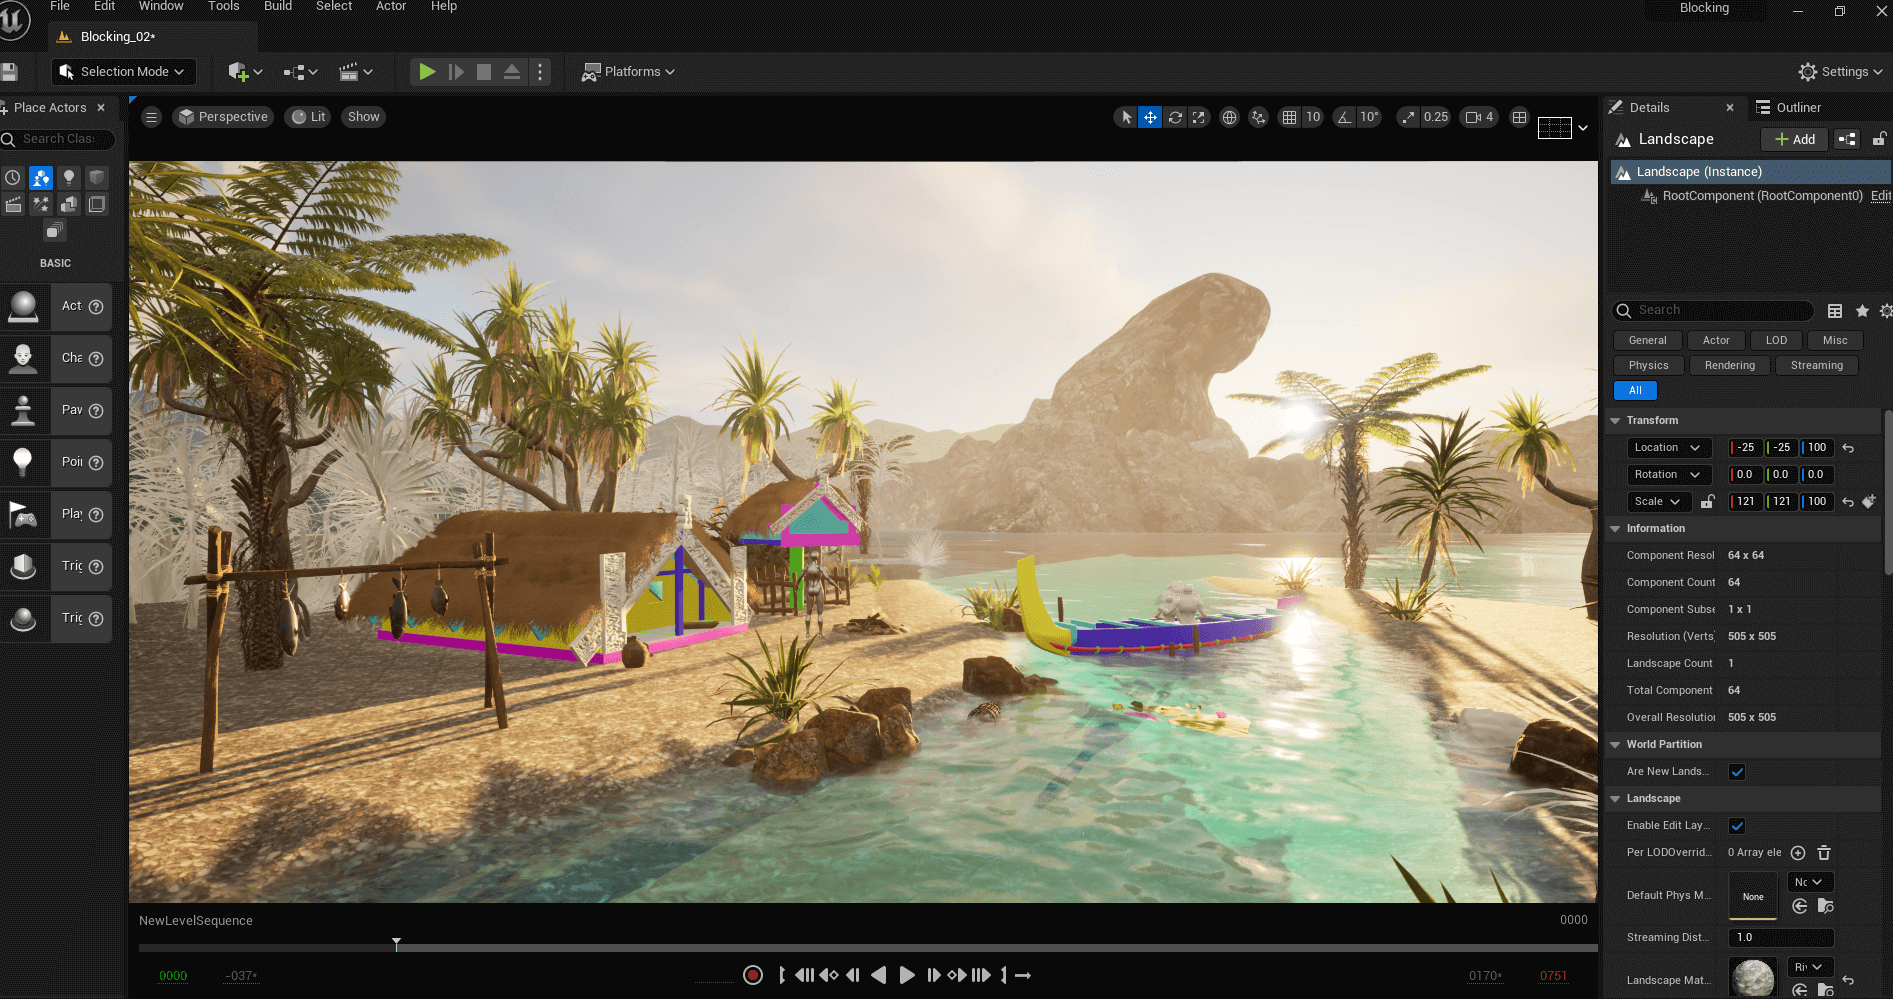
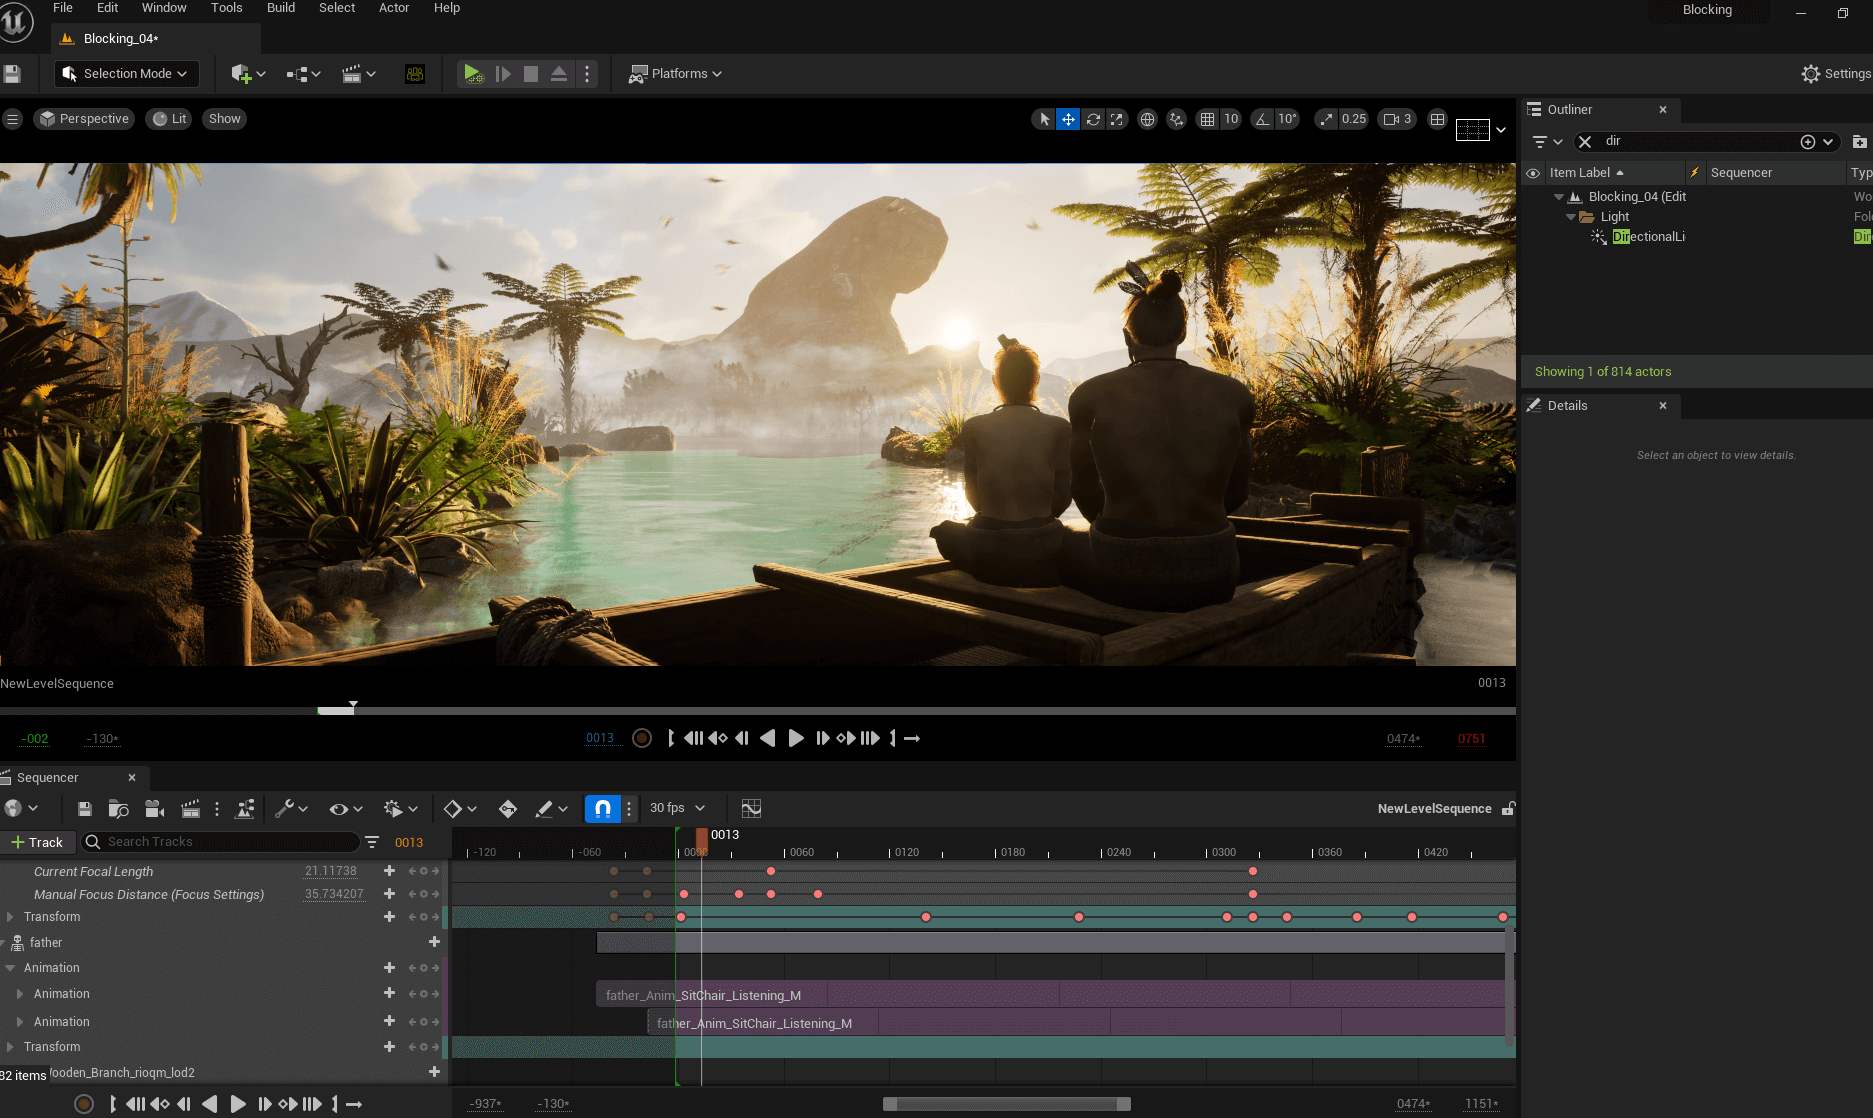
Before I started working in UE, I began with folder structure, map setup and basic light to have a good base to start working on. —> helpful UE 5 Tutorials from Magnet VFX.
While I was blocking in Unreal engine 5.1, I arranged the environment blocked assets to bring it closer to my reference concept. I learned a lot of new basic creative tools in Unreal while I blocked out my scene with simple shapes. Was a great time to get more and more inspired about the possibility in UE. It was a whole learning by doing.

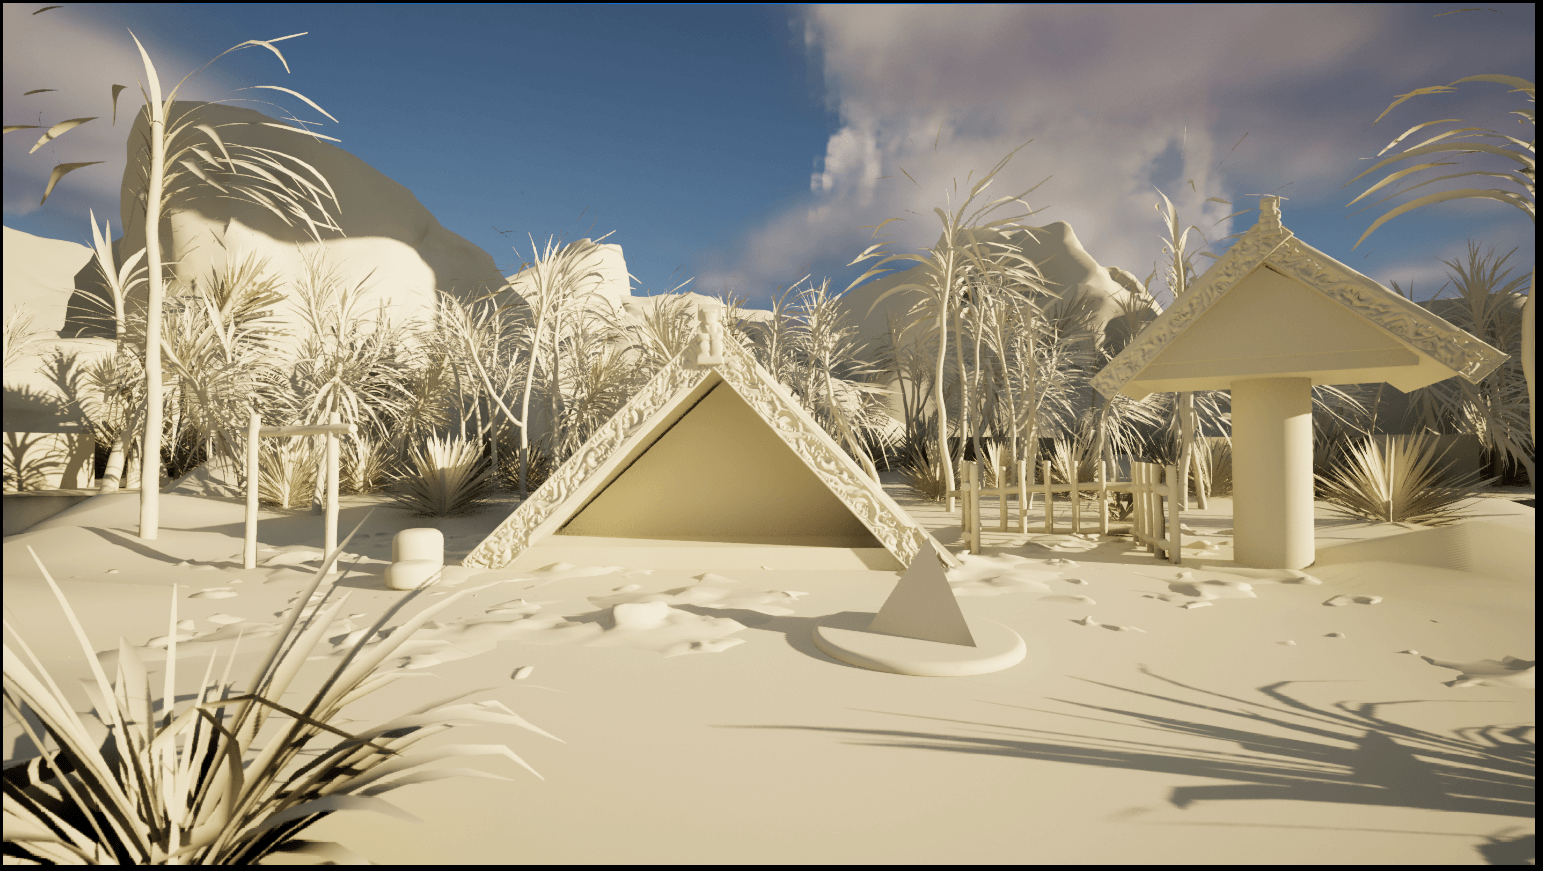
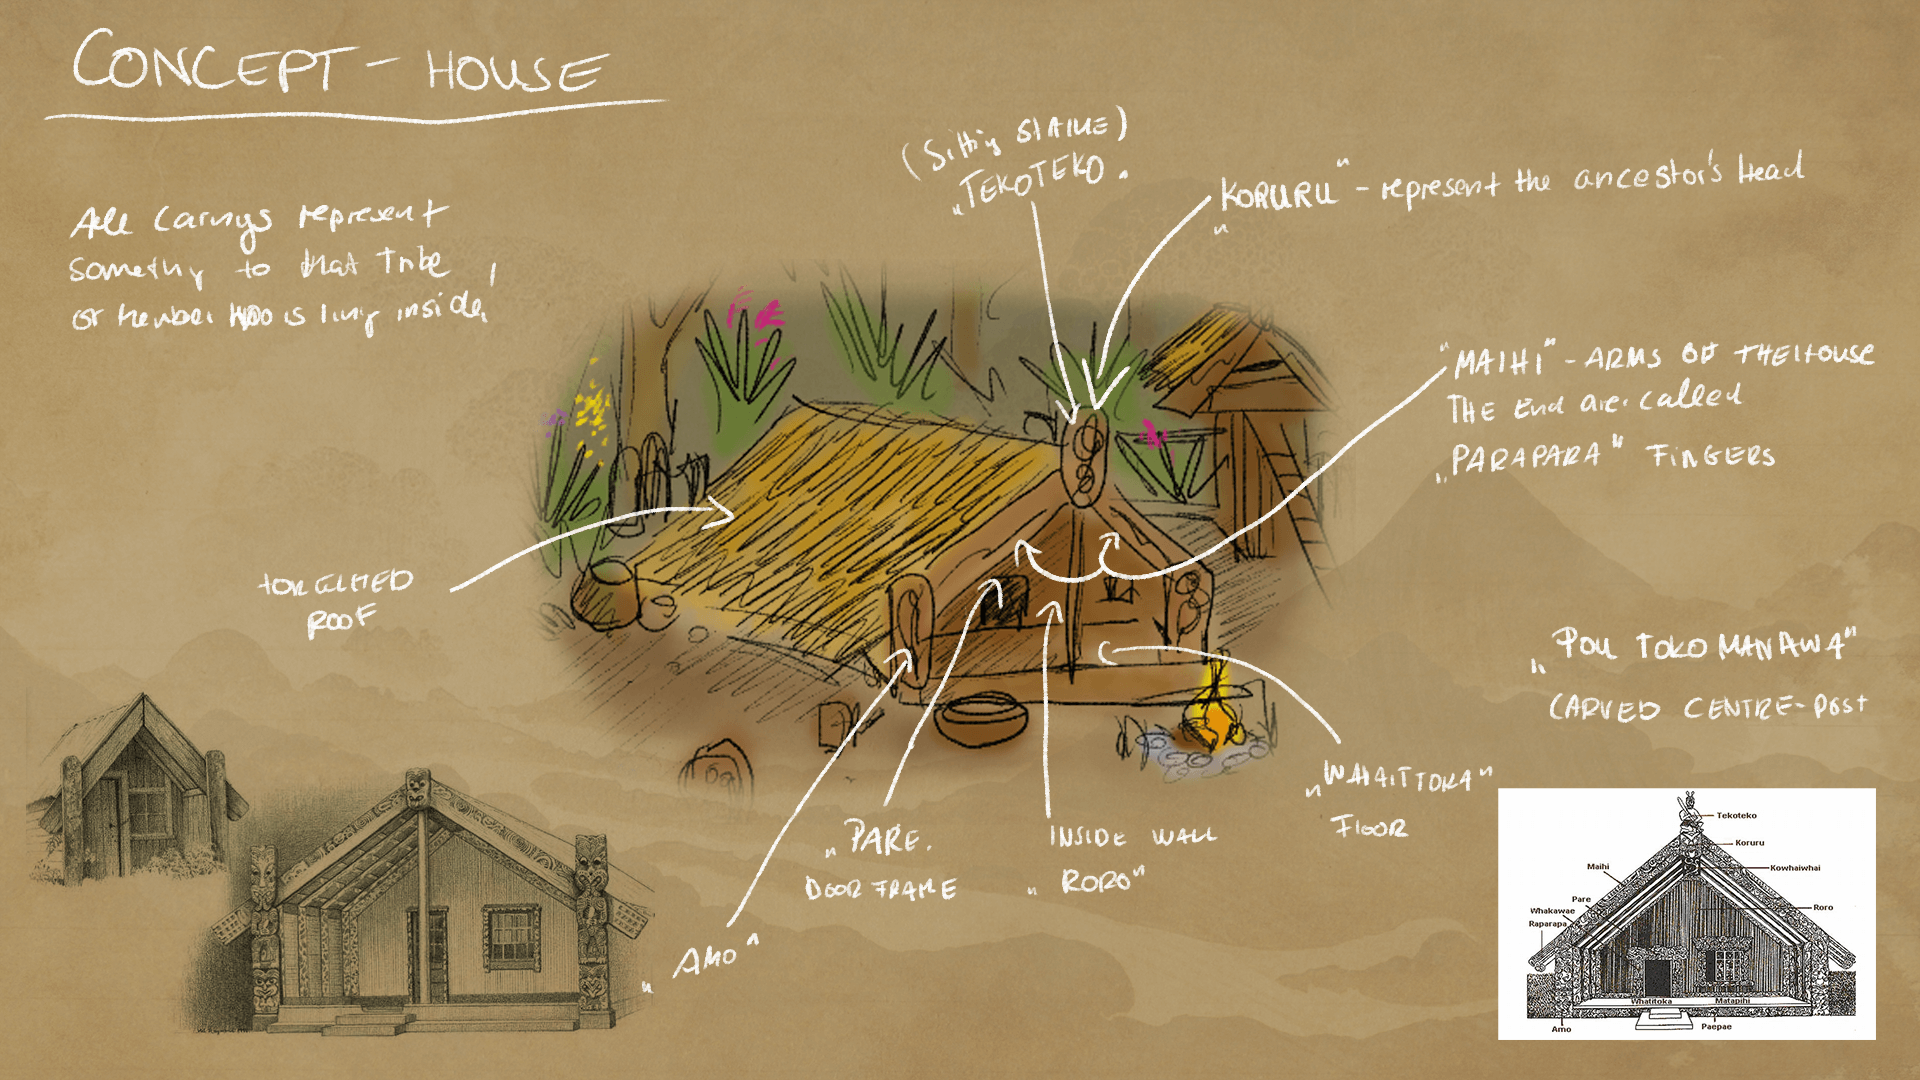
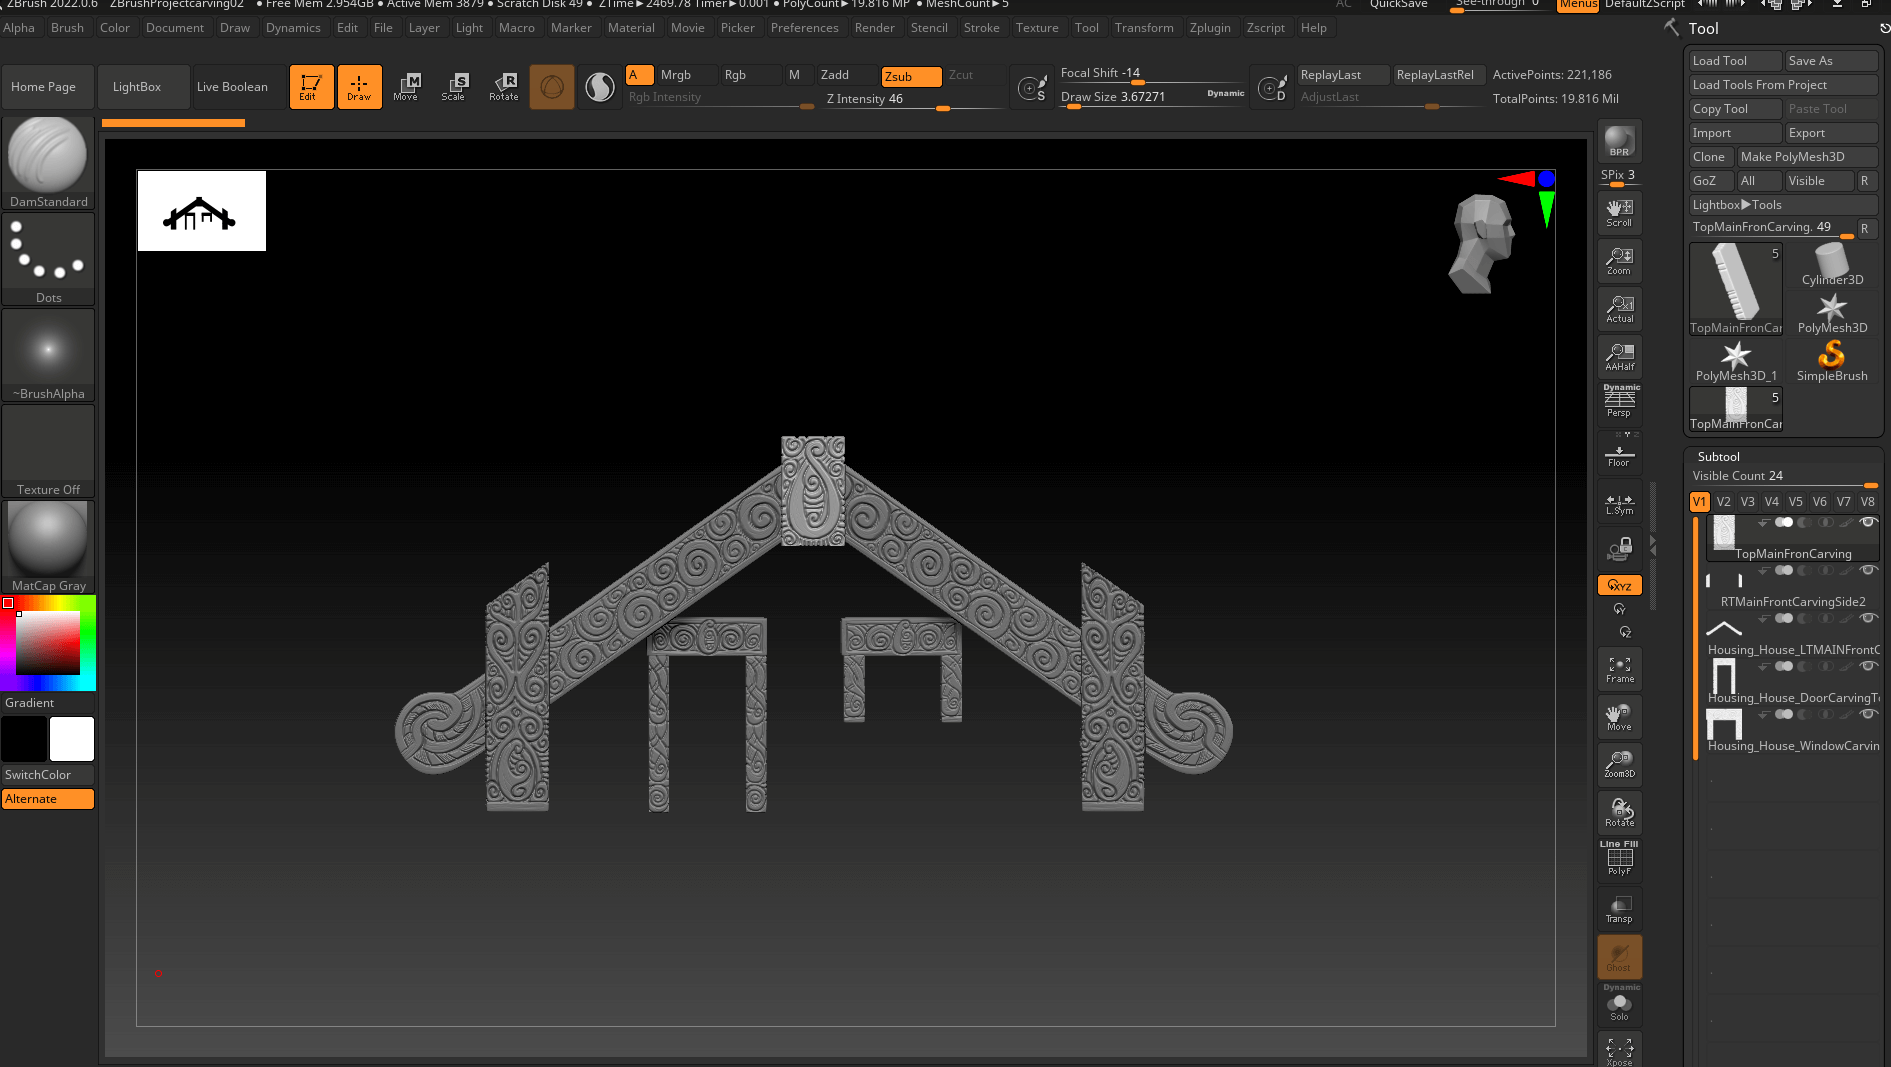
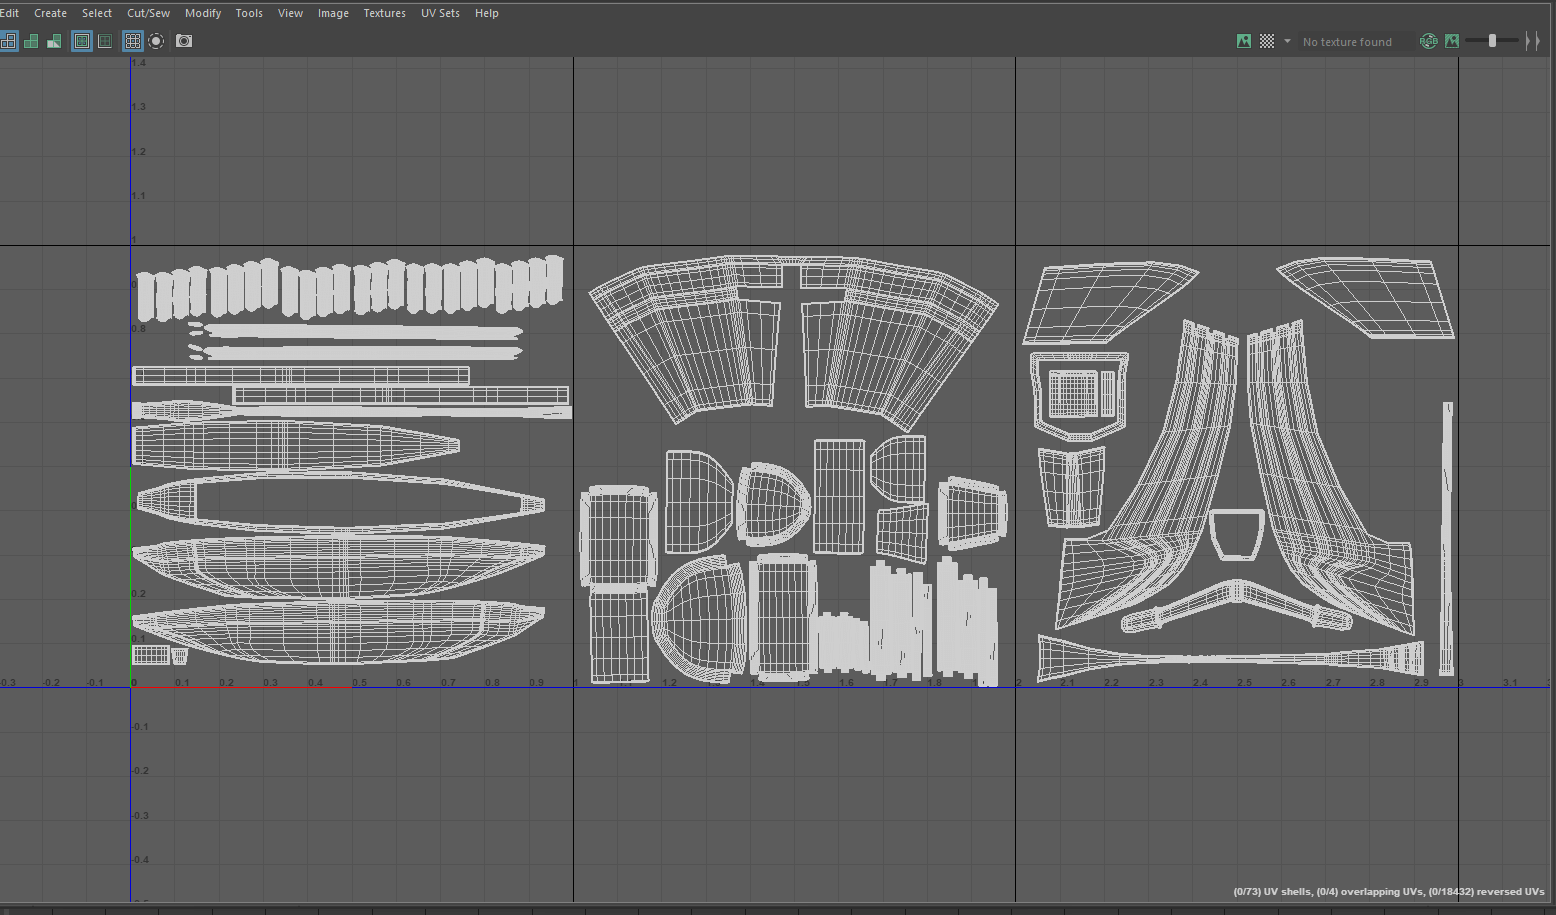
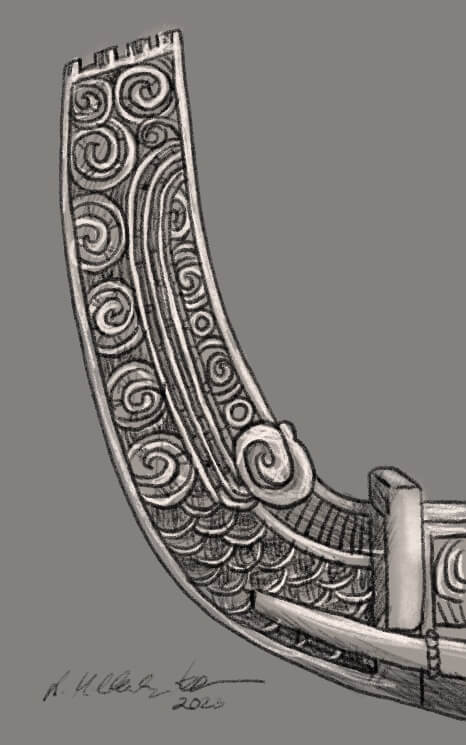
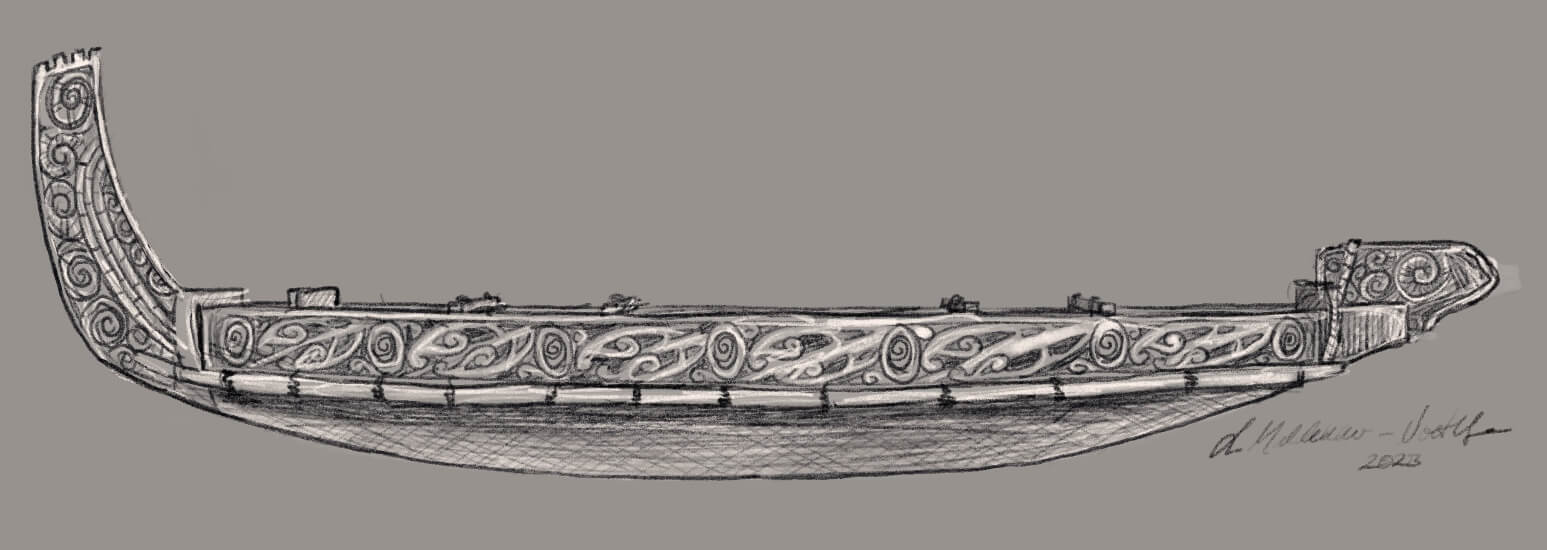
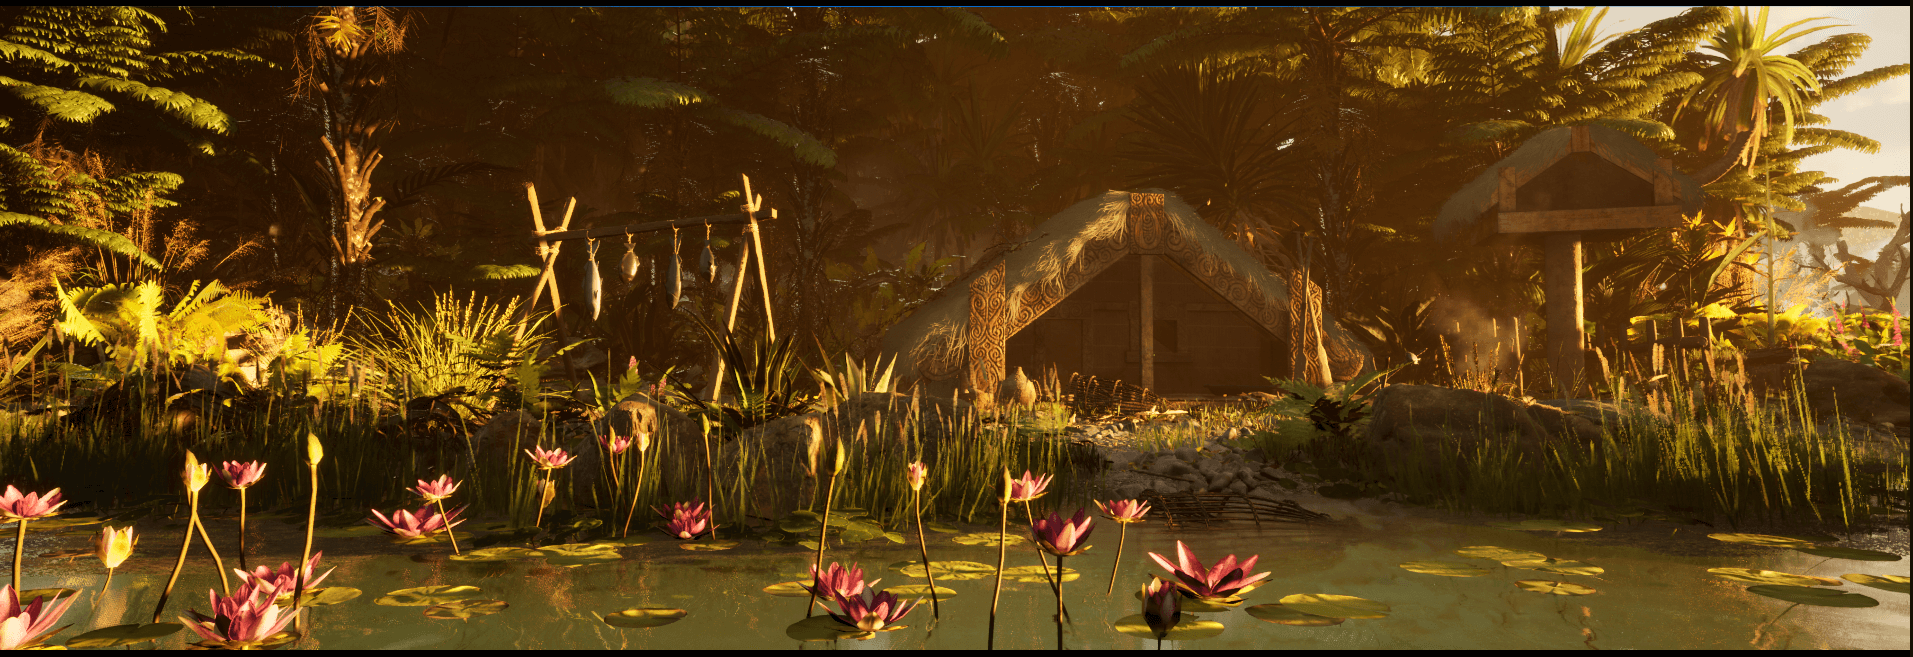
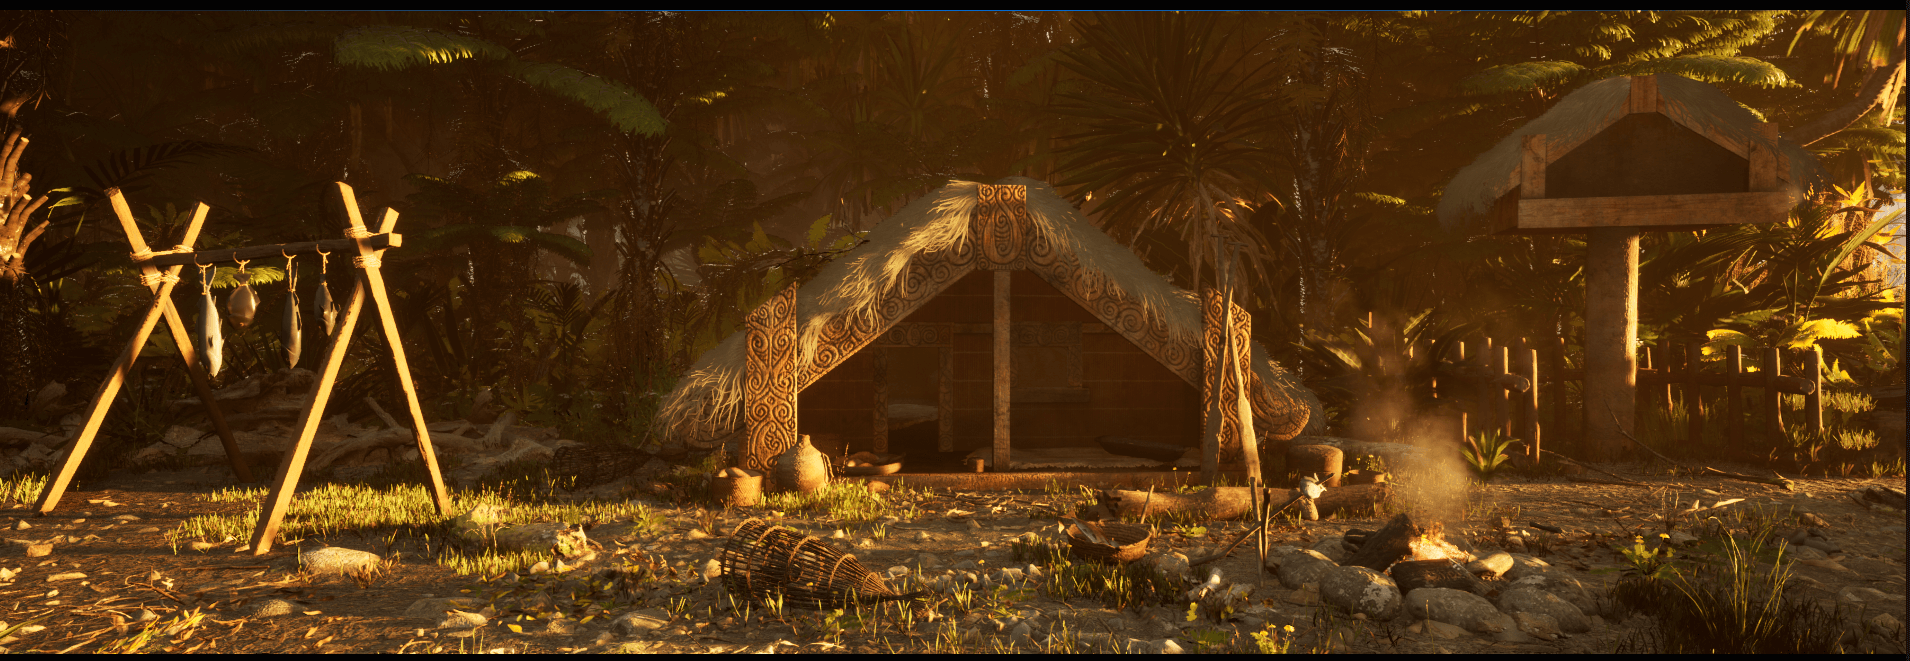
My created assets would give my environment the appropriate character! The modeling process of all my assets are based on my own drawn concepts. I used historical Māori references from the Tūranga city Library, Christchurch.
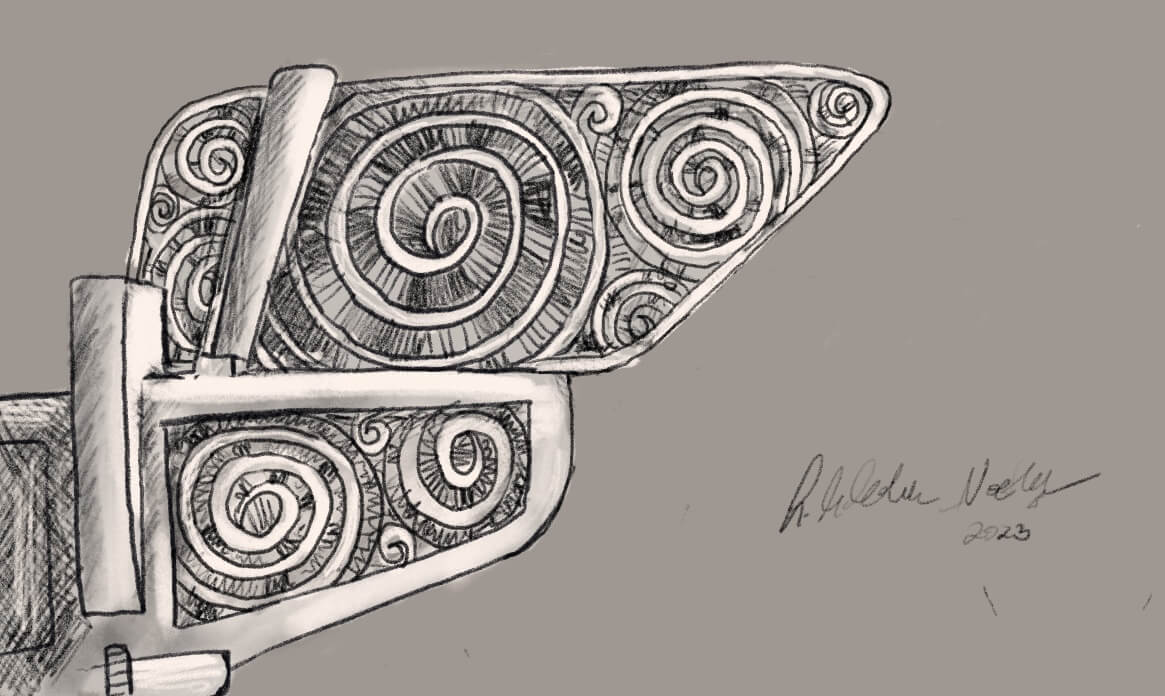
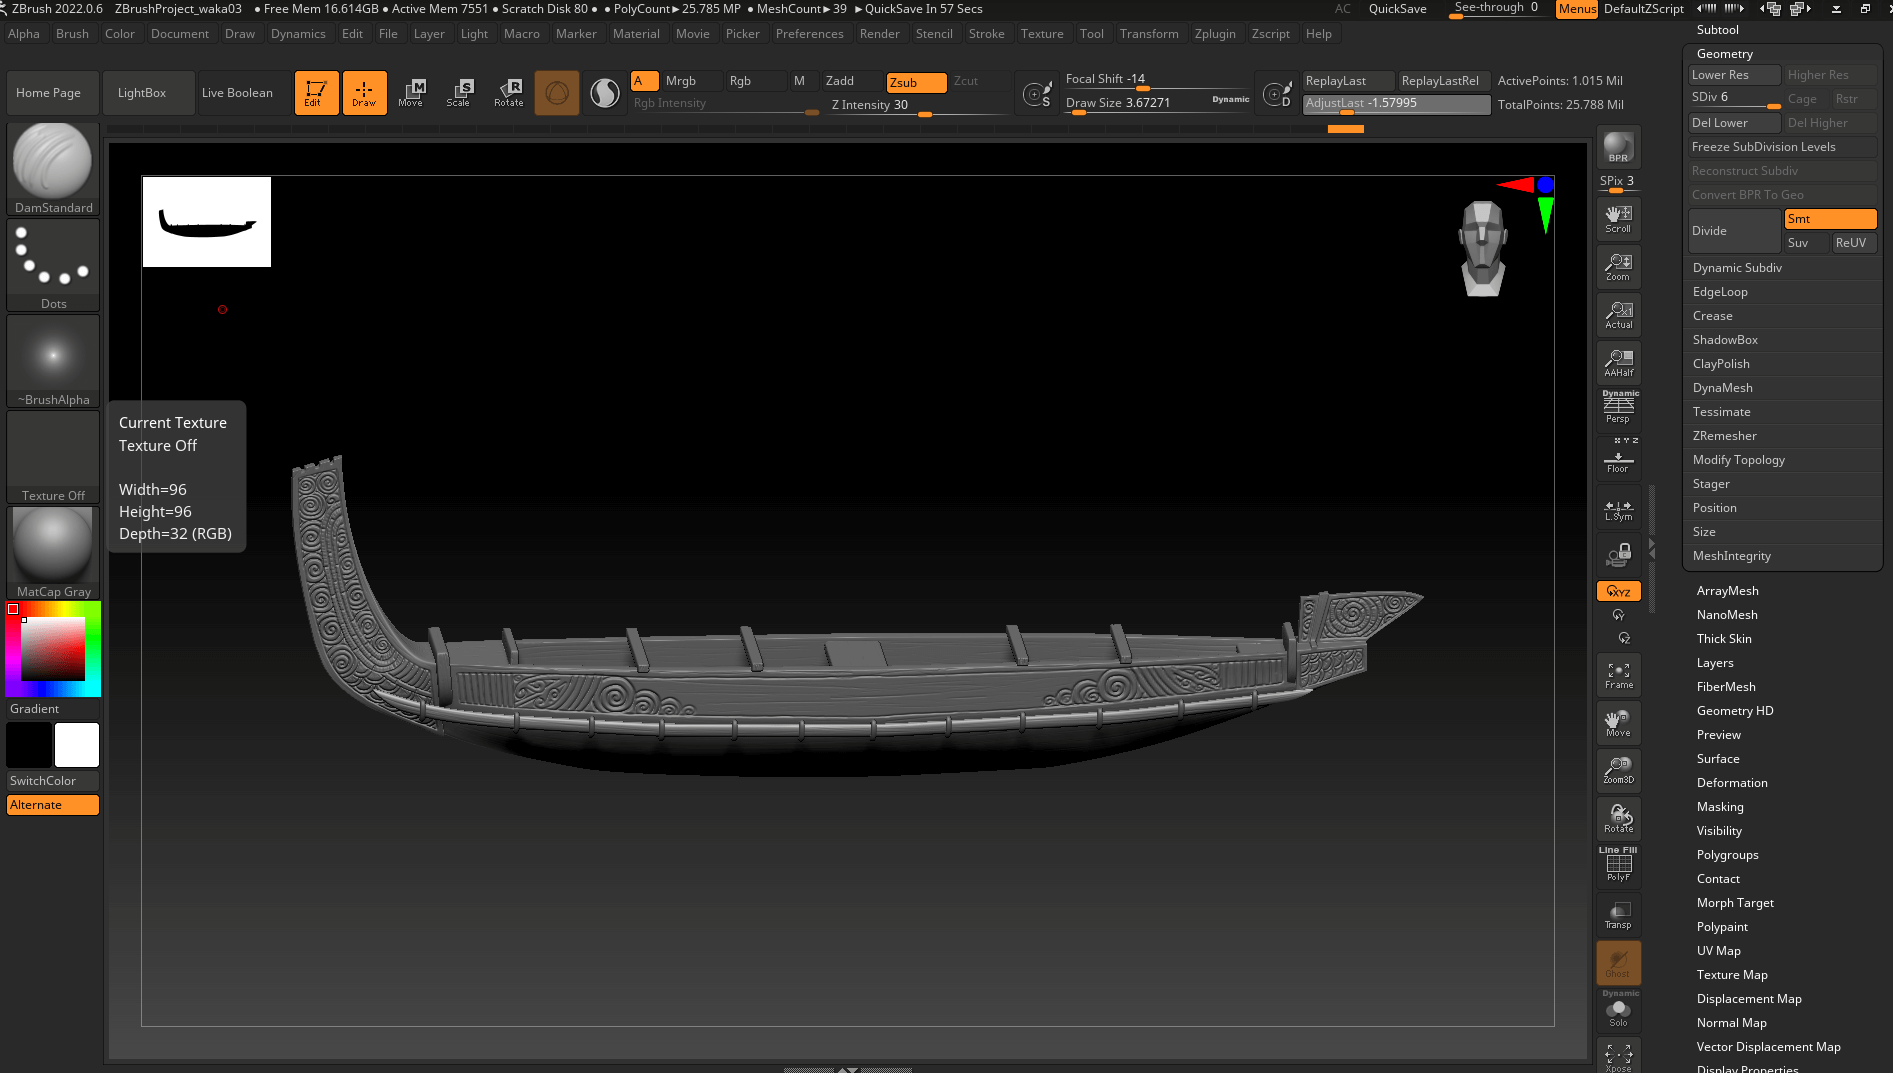
The hardest challenge was to re-create the models in a way that they resemble Māori artifacts while avoiding any culturally protected components. Many carvings, faces, and more can't be copied. I spent the majority of my time, studying carvings and meaning, generating the concepts and having them evaluated for authenticity by a Māori in person.
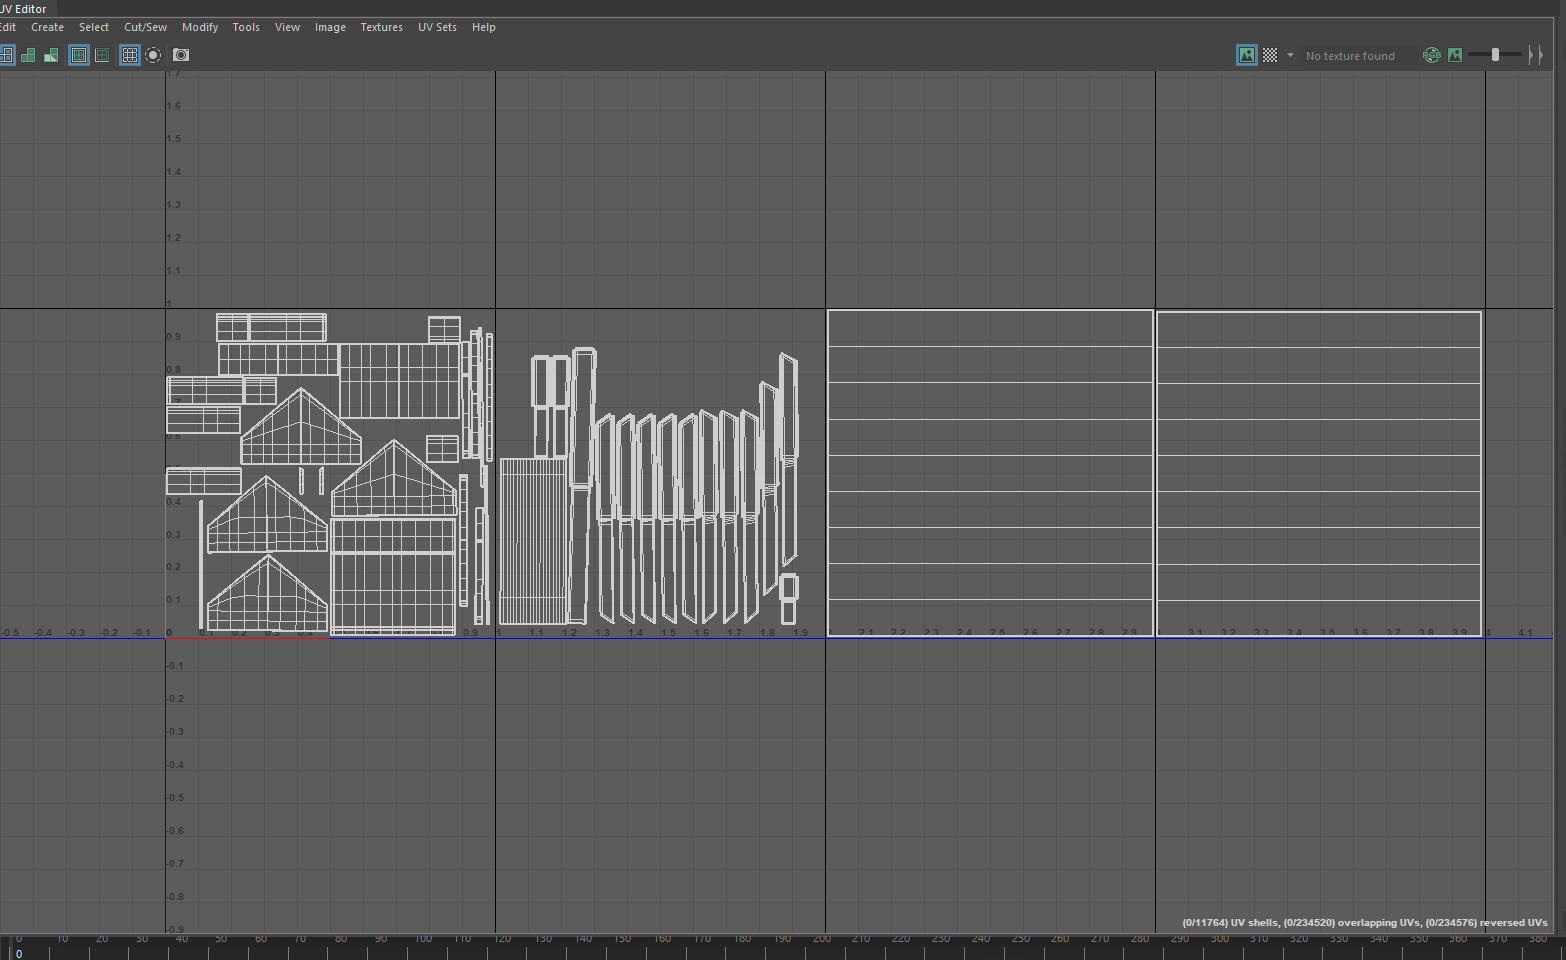
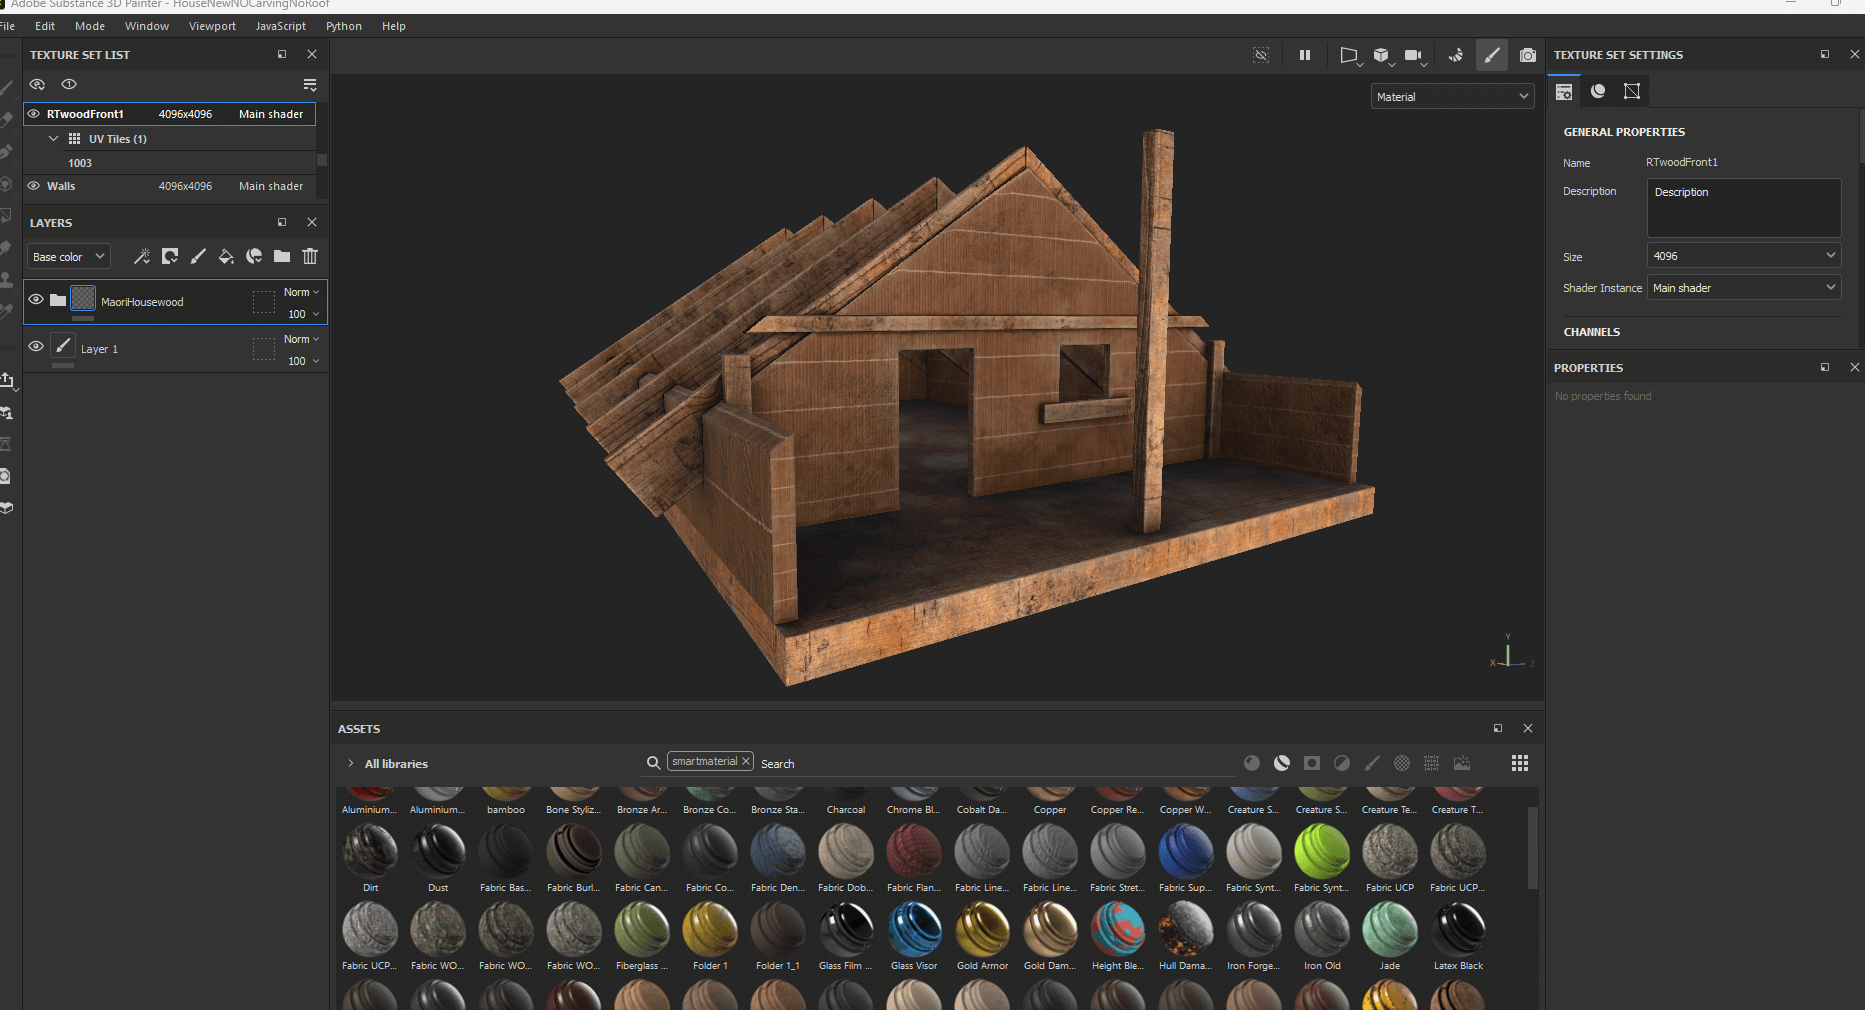
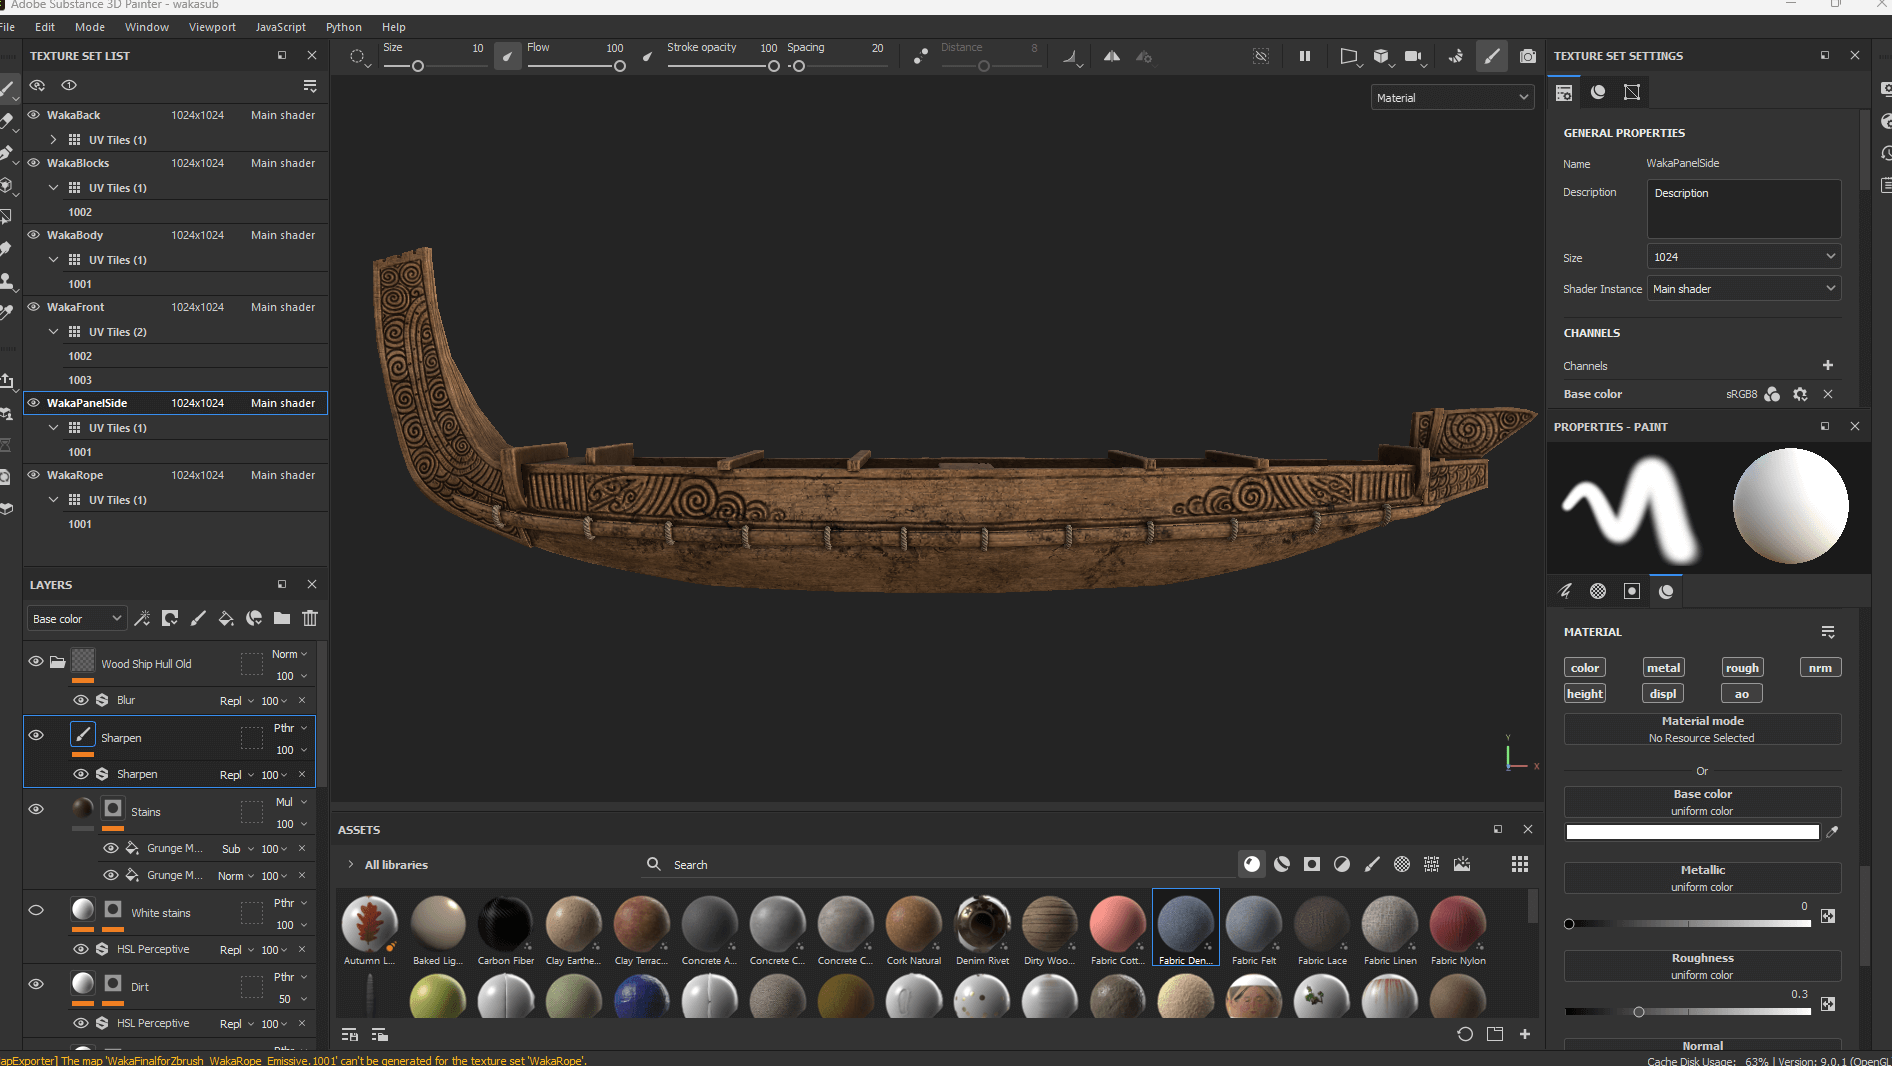
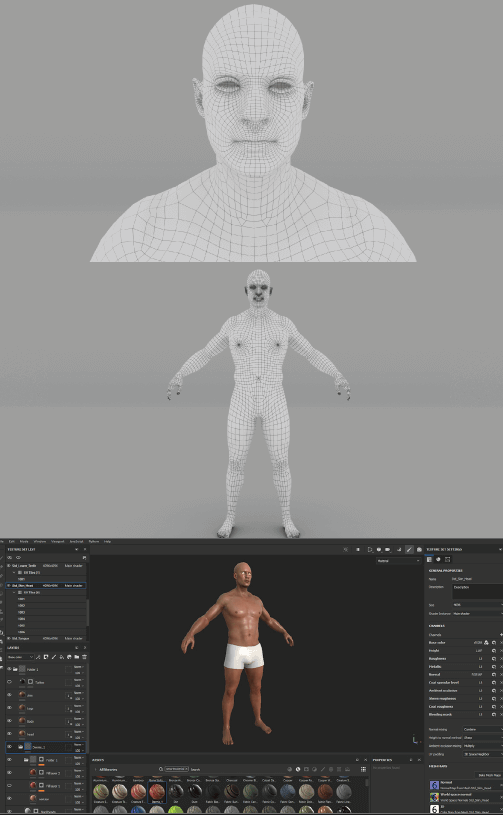
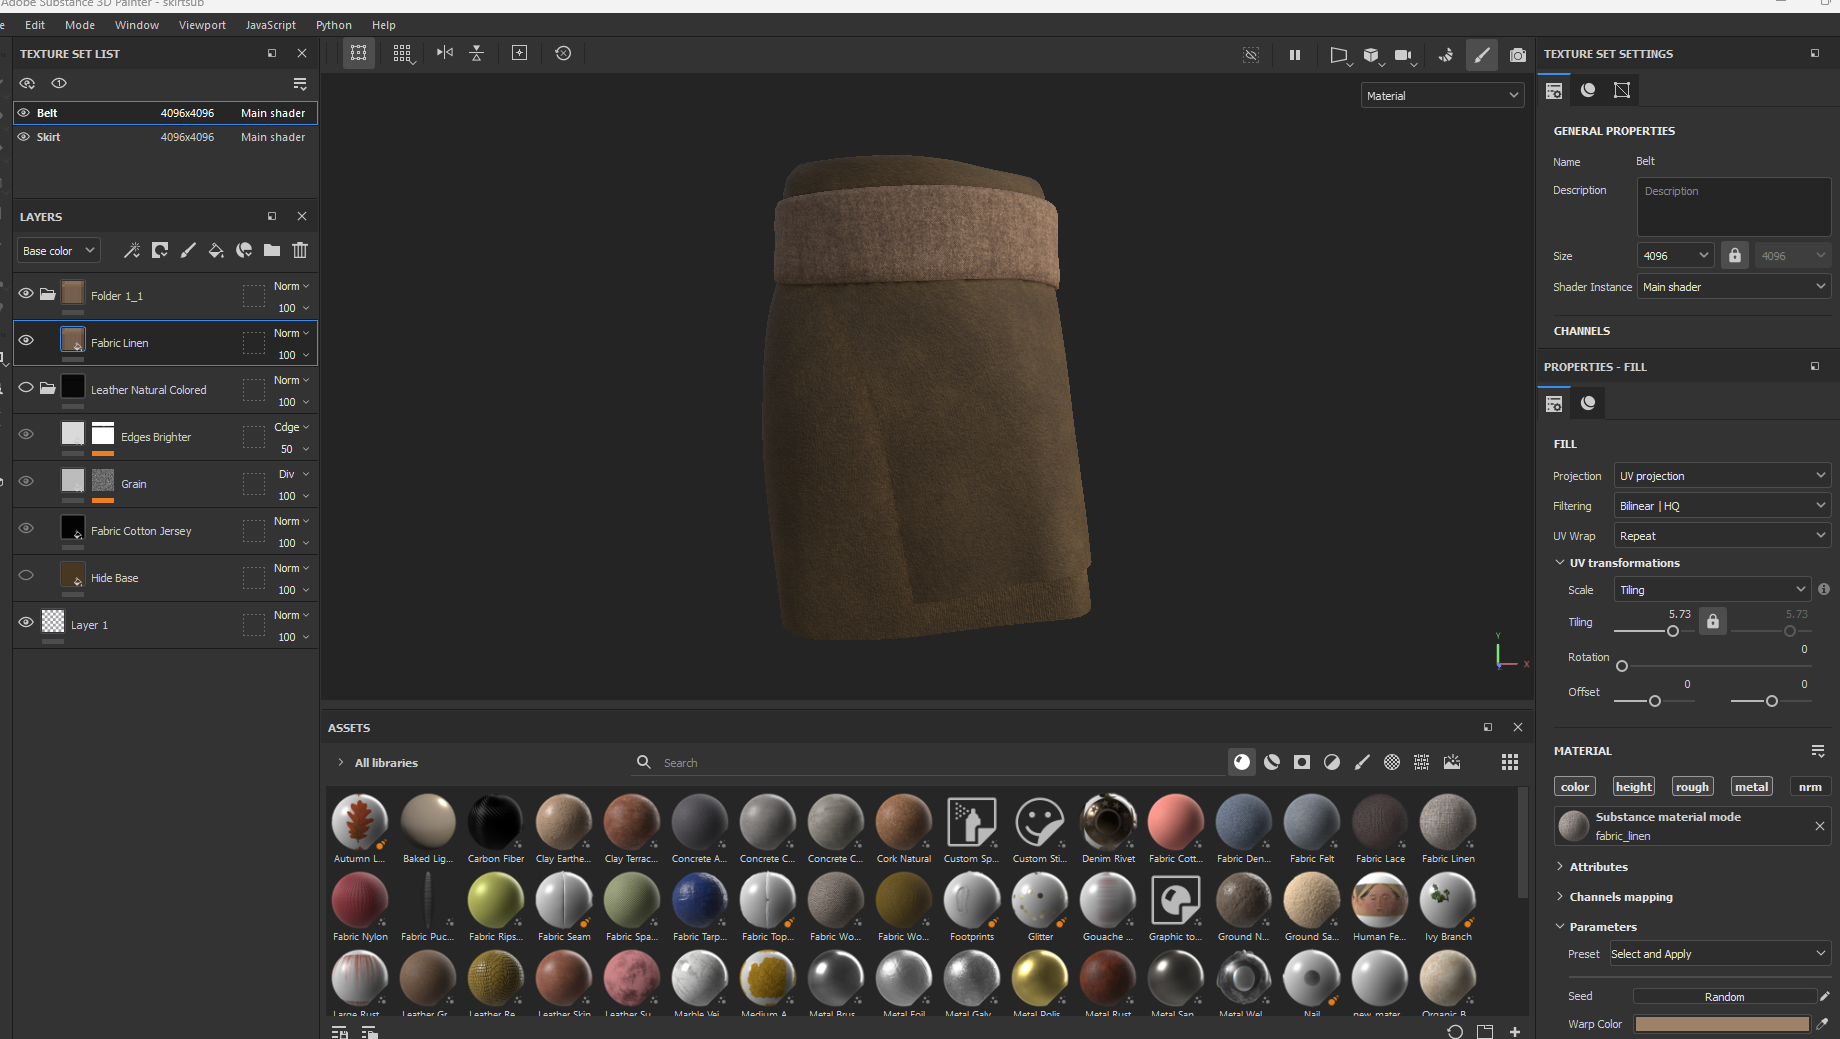
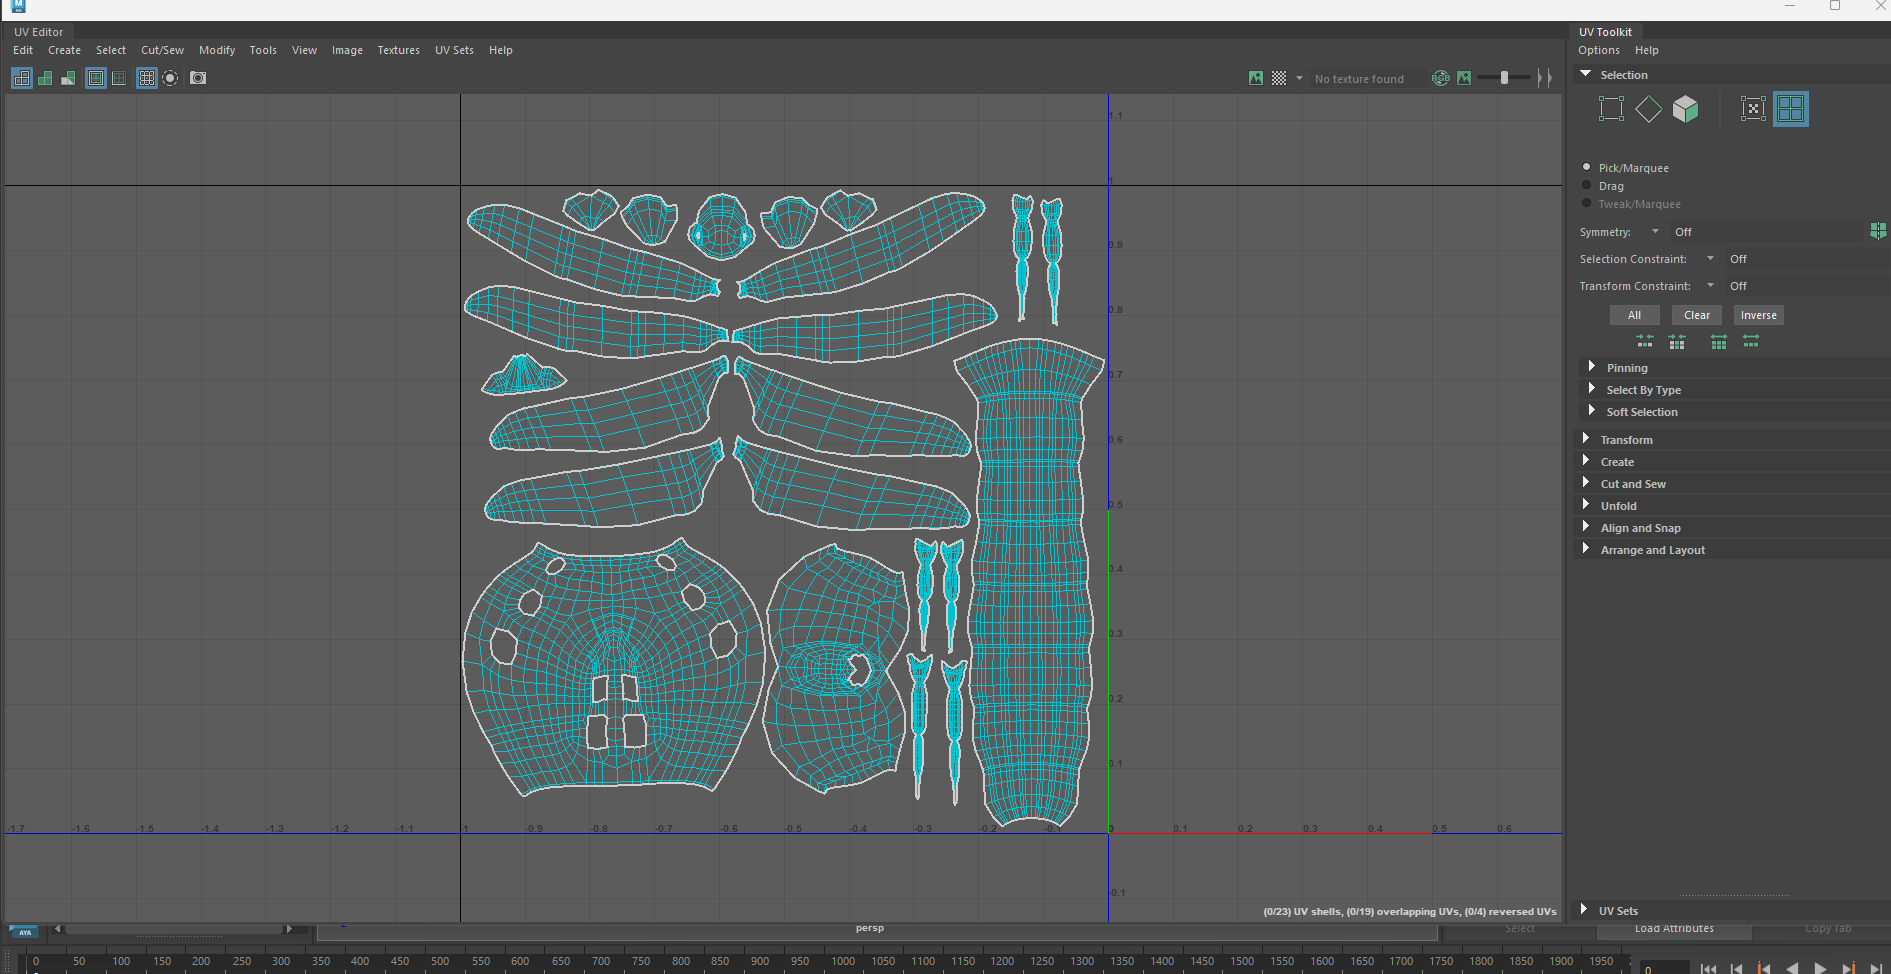
All my assets are low poly modeled/UV in Maya and detailed with ZBrush. I used Adobe Substance 3D Painter to bake ZBrush's high poly displacement onto Maya's low poly. Finally, I designed my own wooden texture material for all of my wooden elements and applied it to my models.
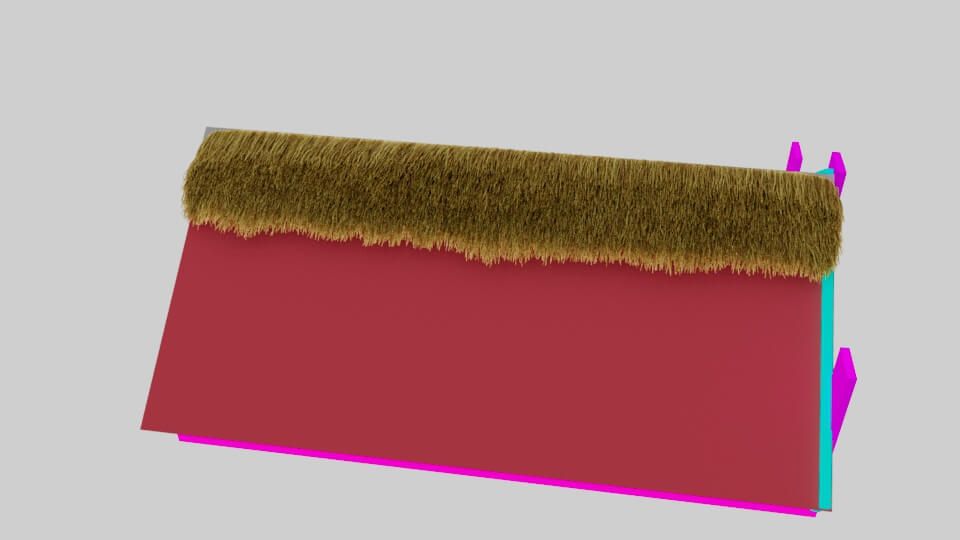
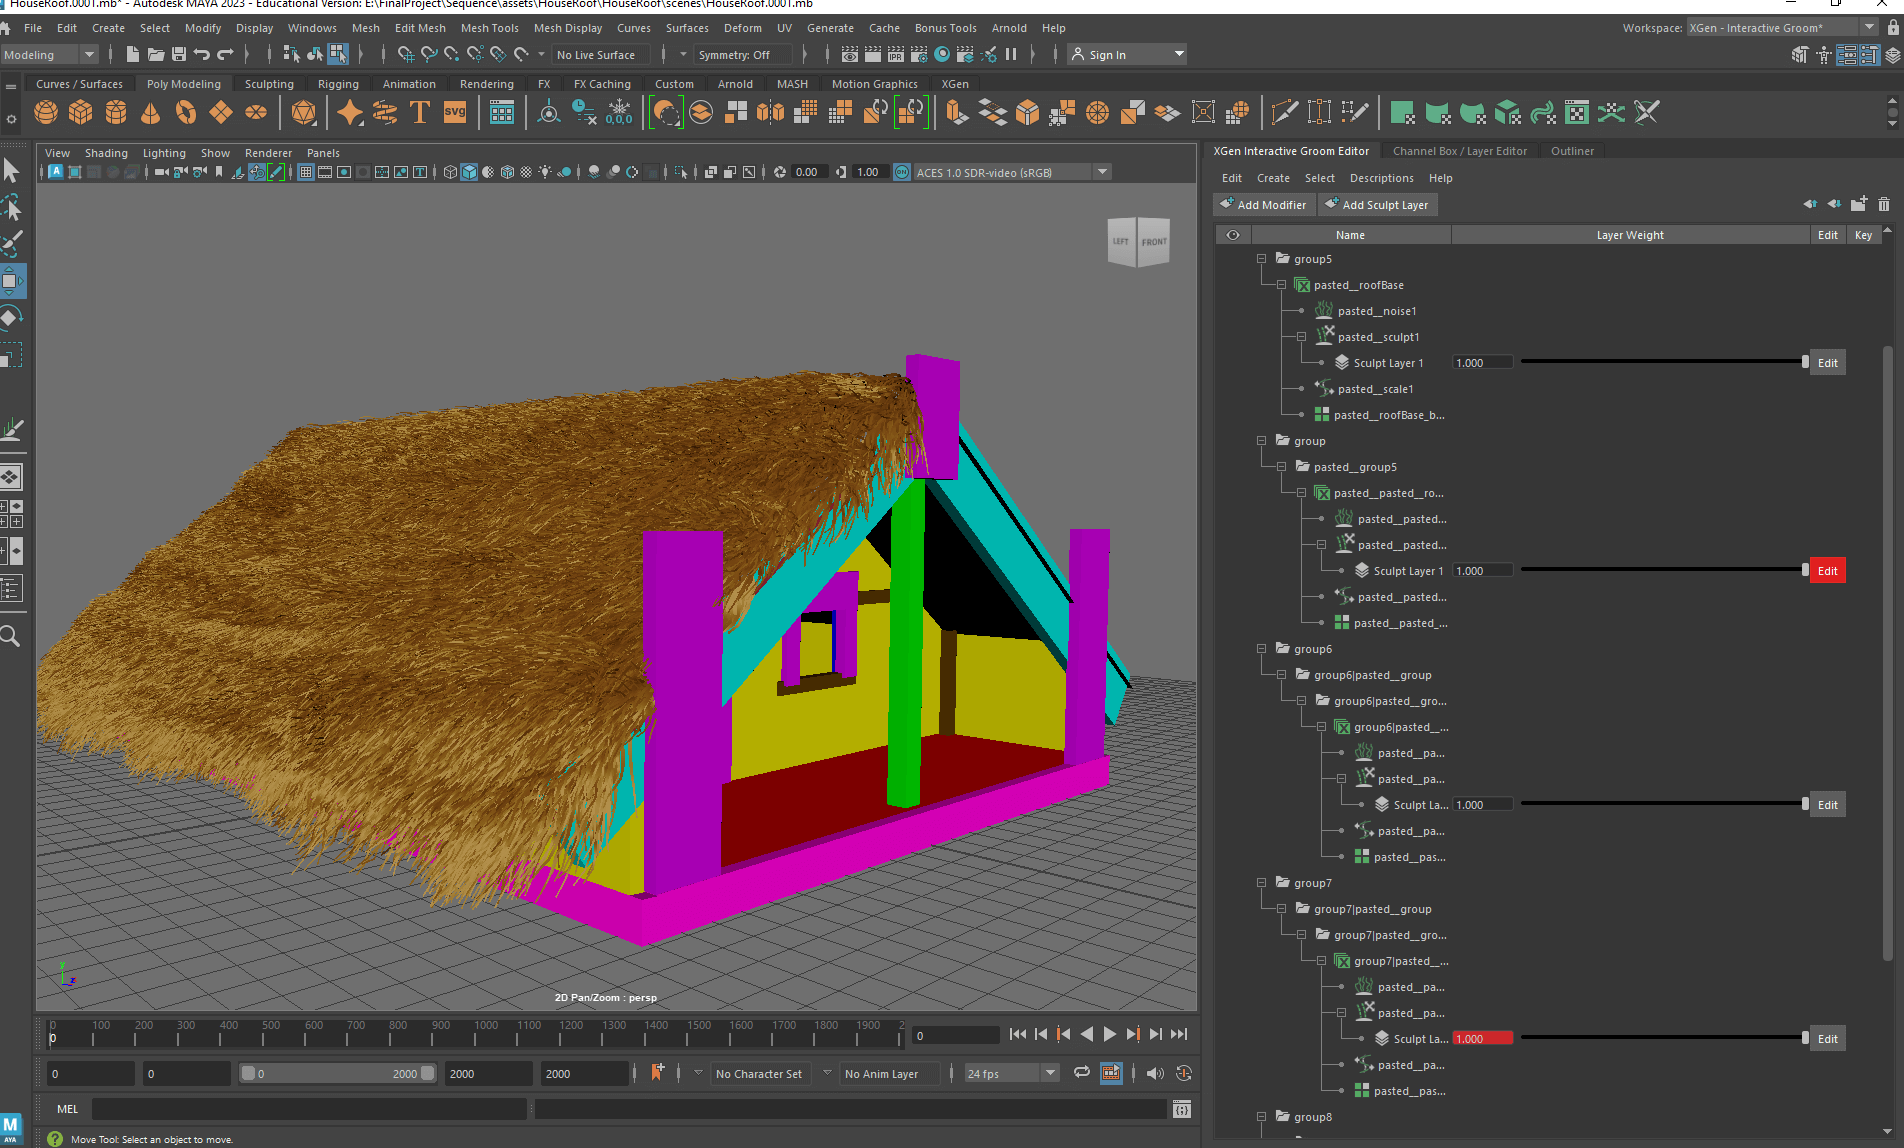
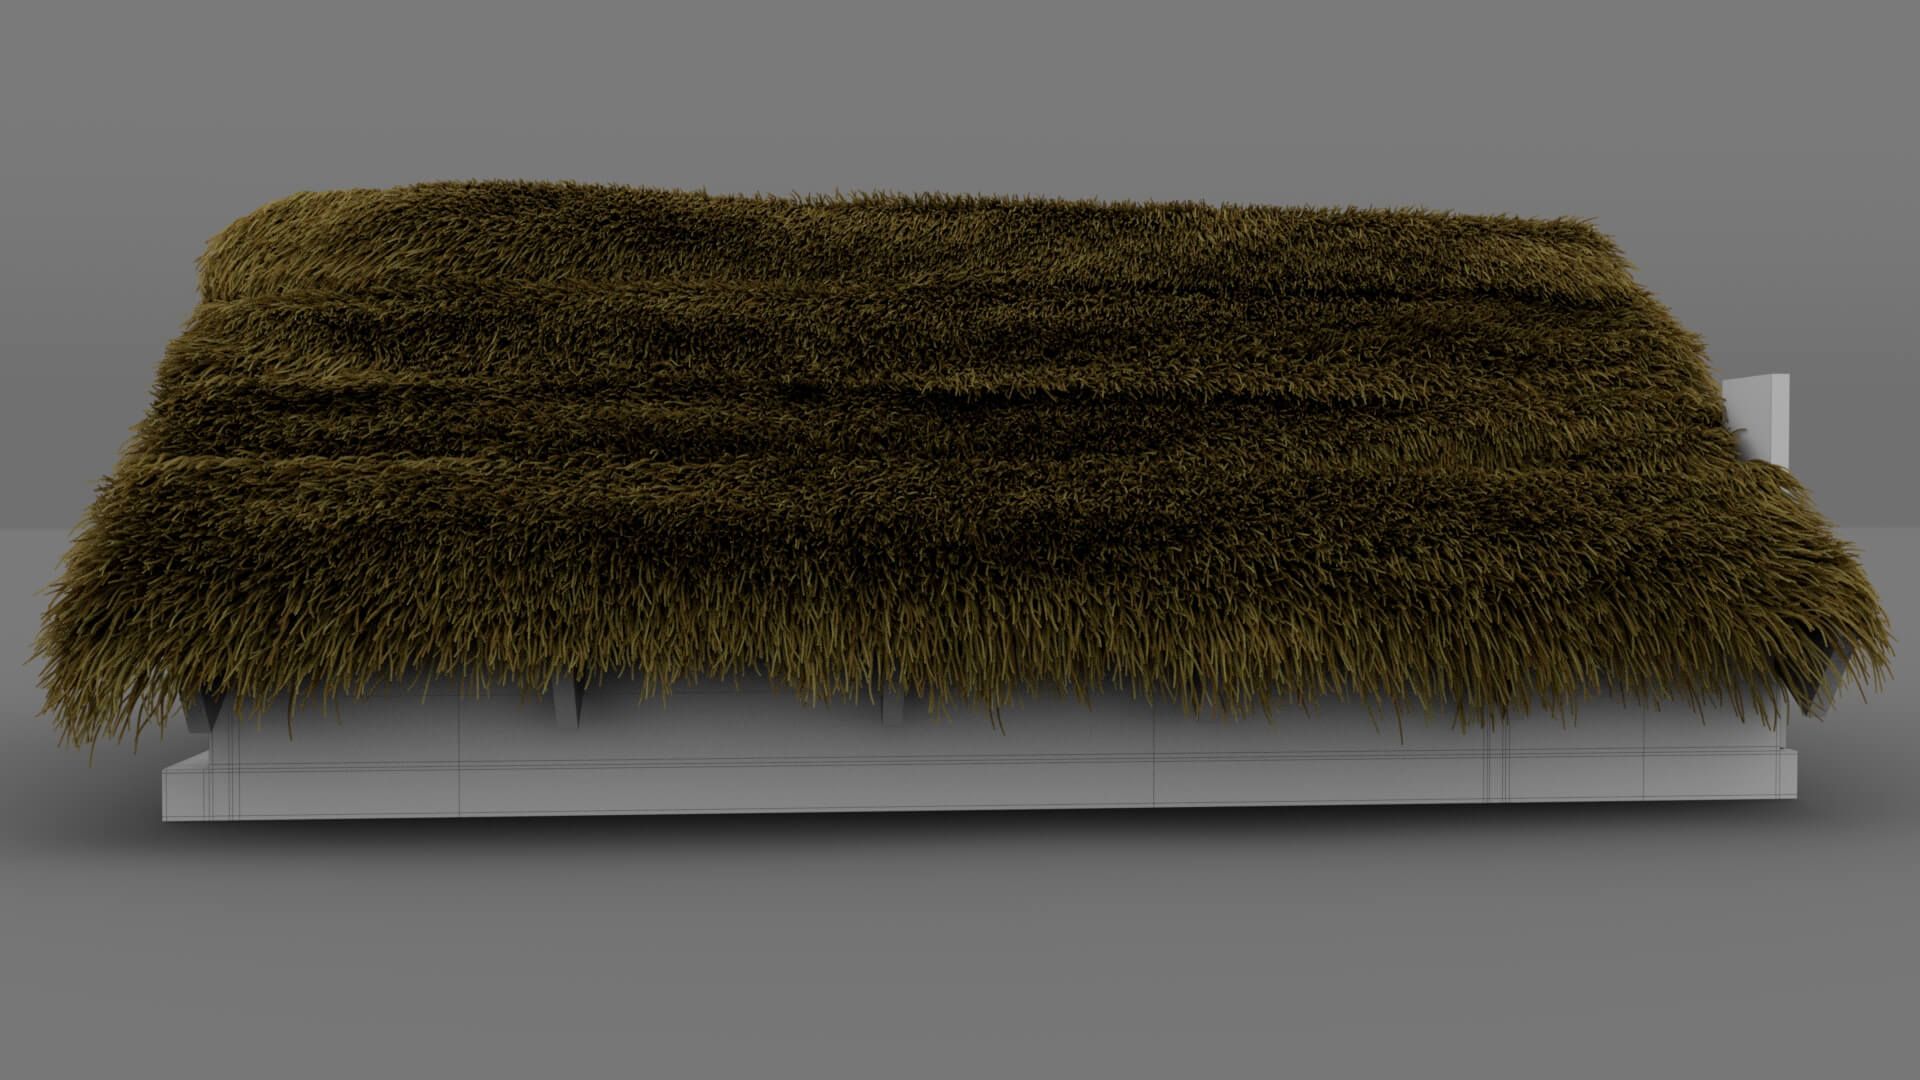
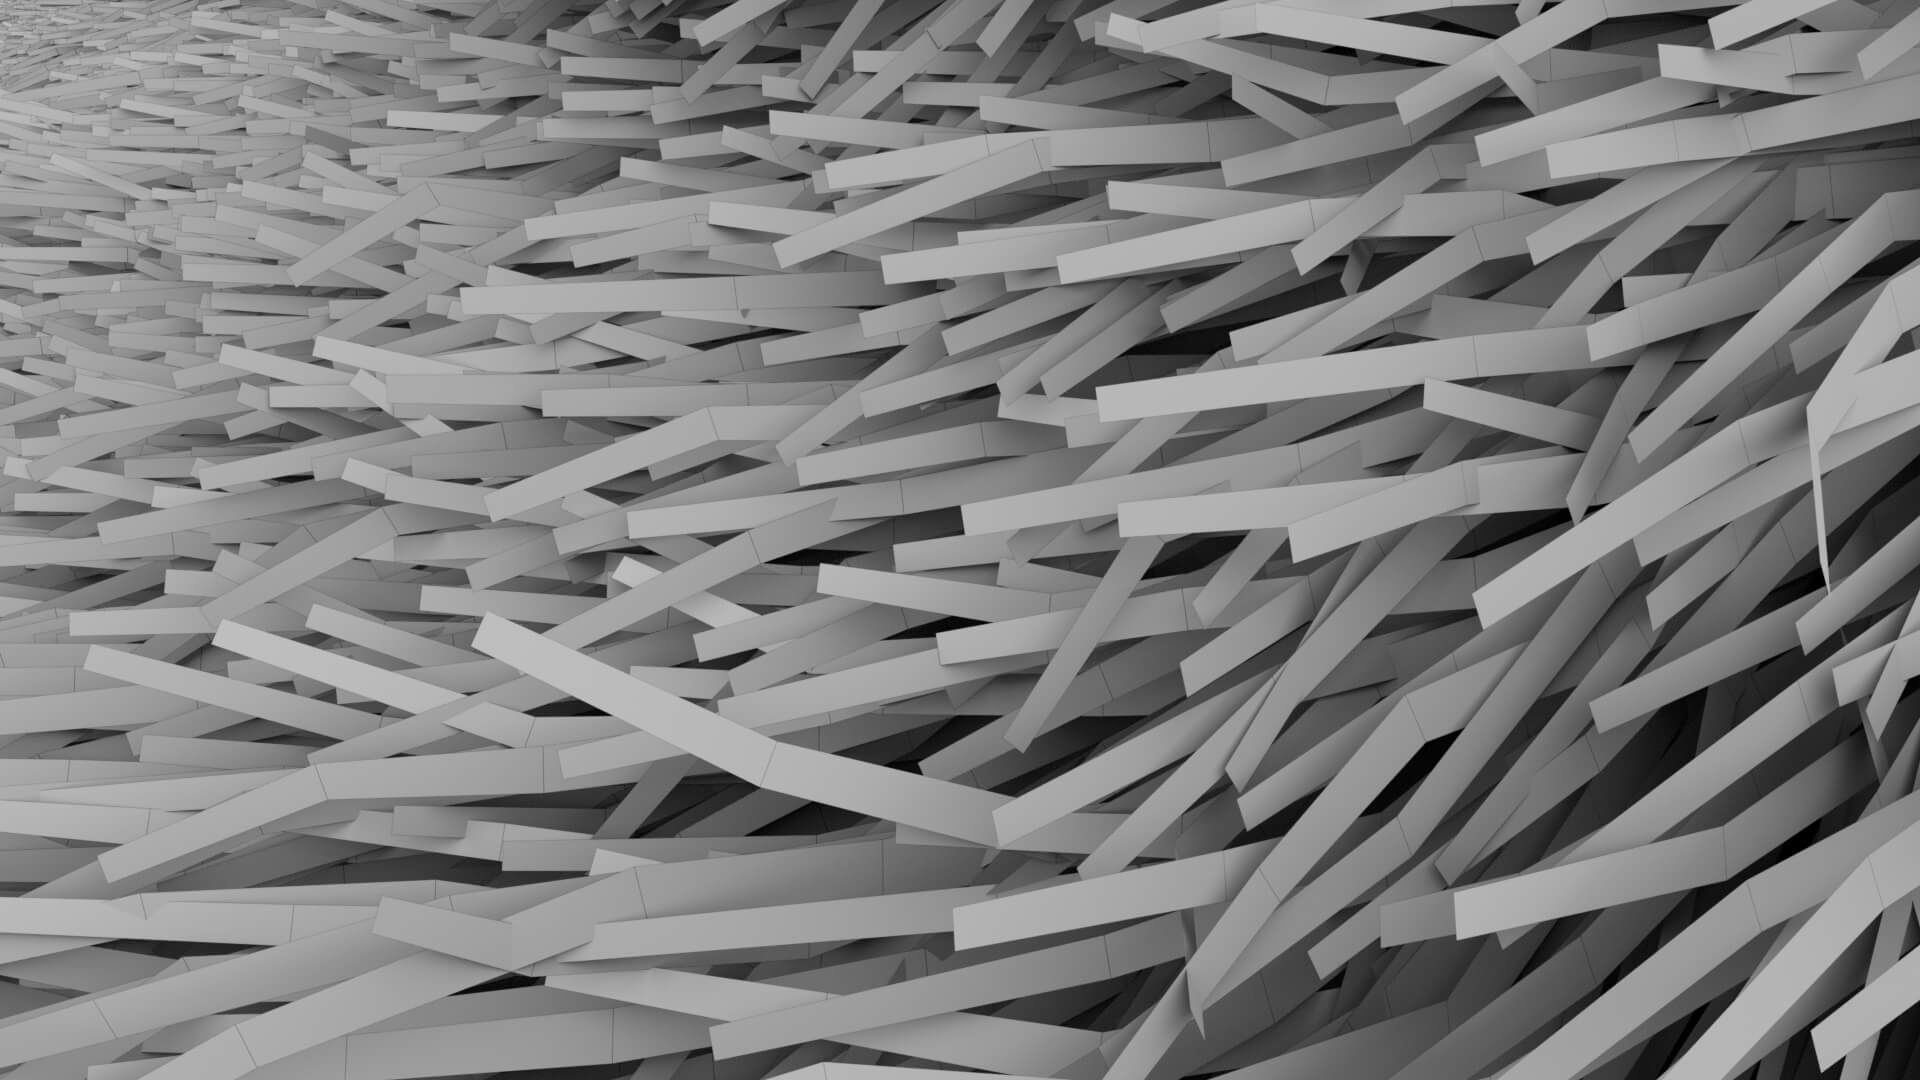
One of my favourite moments in the modeling process was the thatched roof creation. I am a huge fan of grooming in Maya, so I had the great idea to groom the roof with Xgen interactive grooming. To my surprise, my strategy worked out, and my Xgen thatched roof was born. I converted the Xgen in polygons and organised the UV tiling to export as an.fbx to Unreal. In UE, I turned two sided faces on, because otherwise it will be transparent if you move around the roof inside UE. For texture I used a basic dirt material from UE.
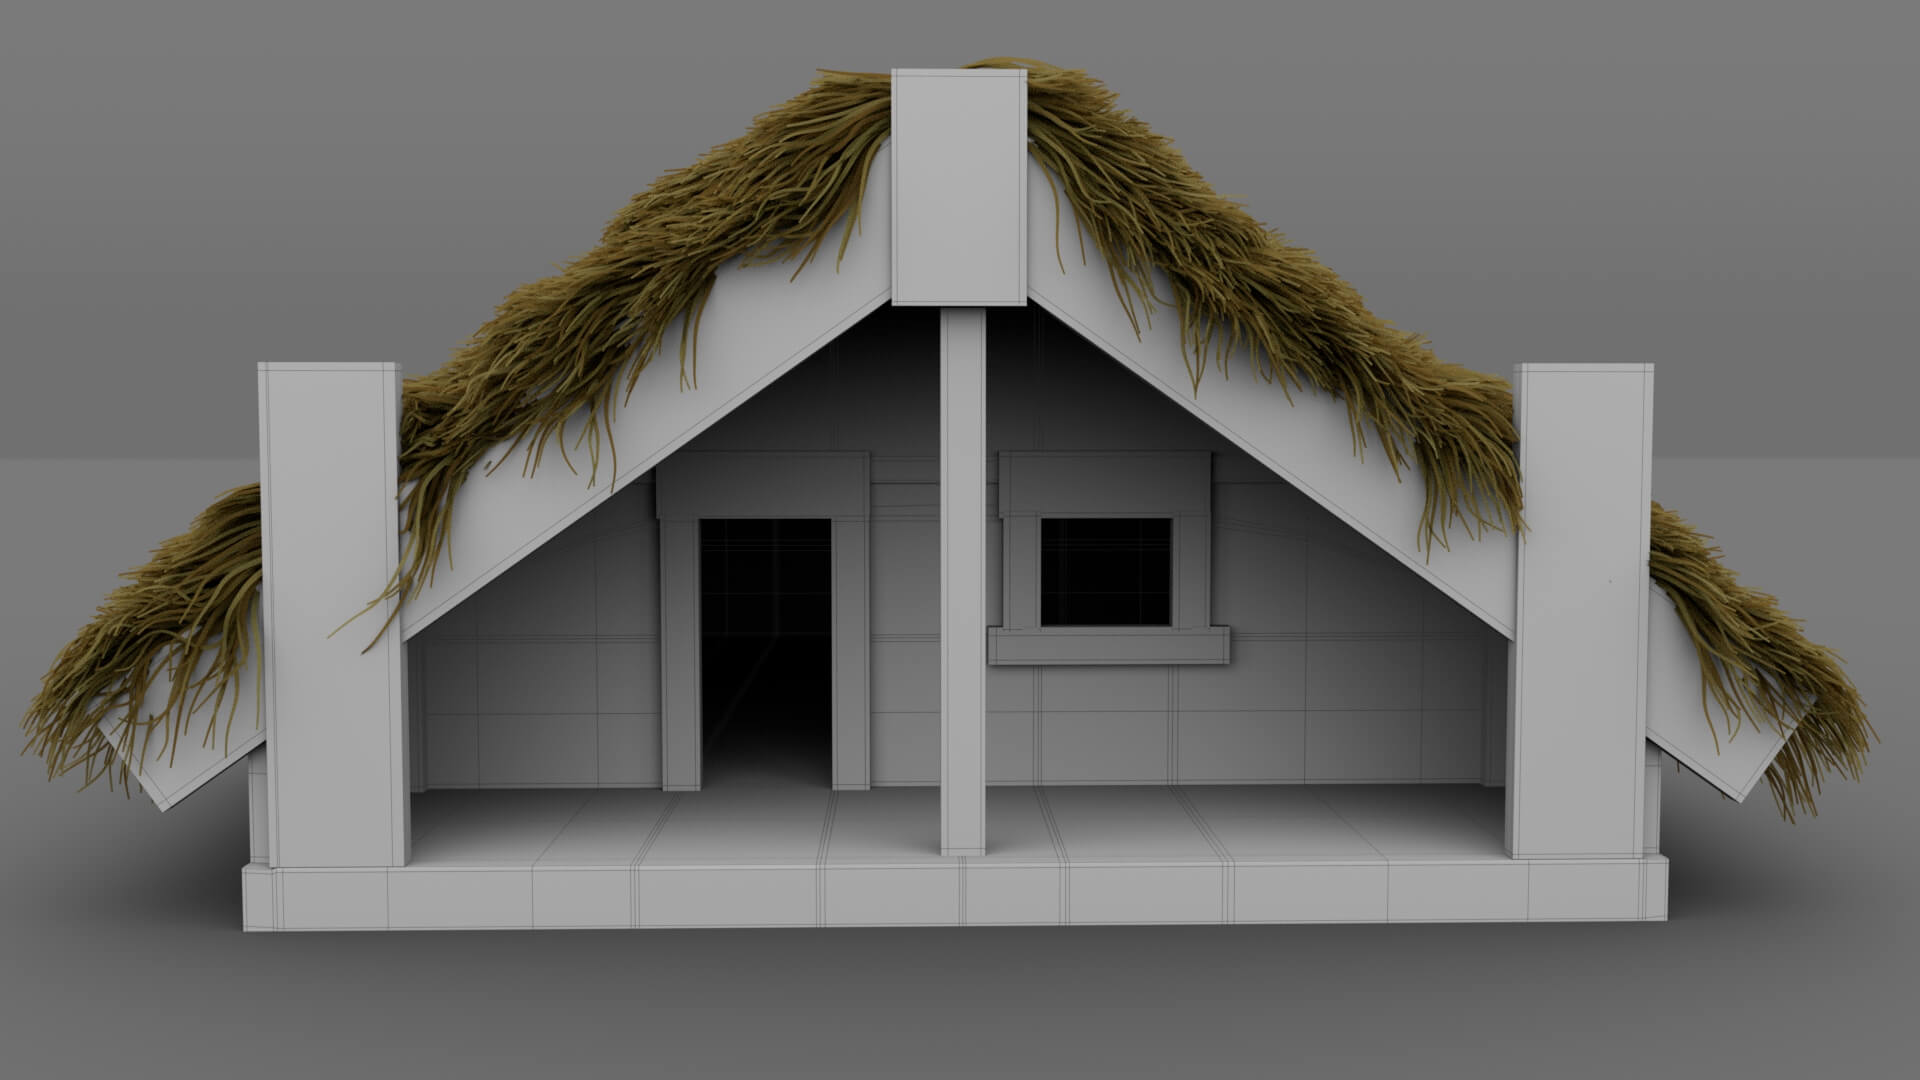
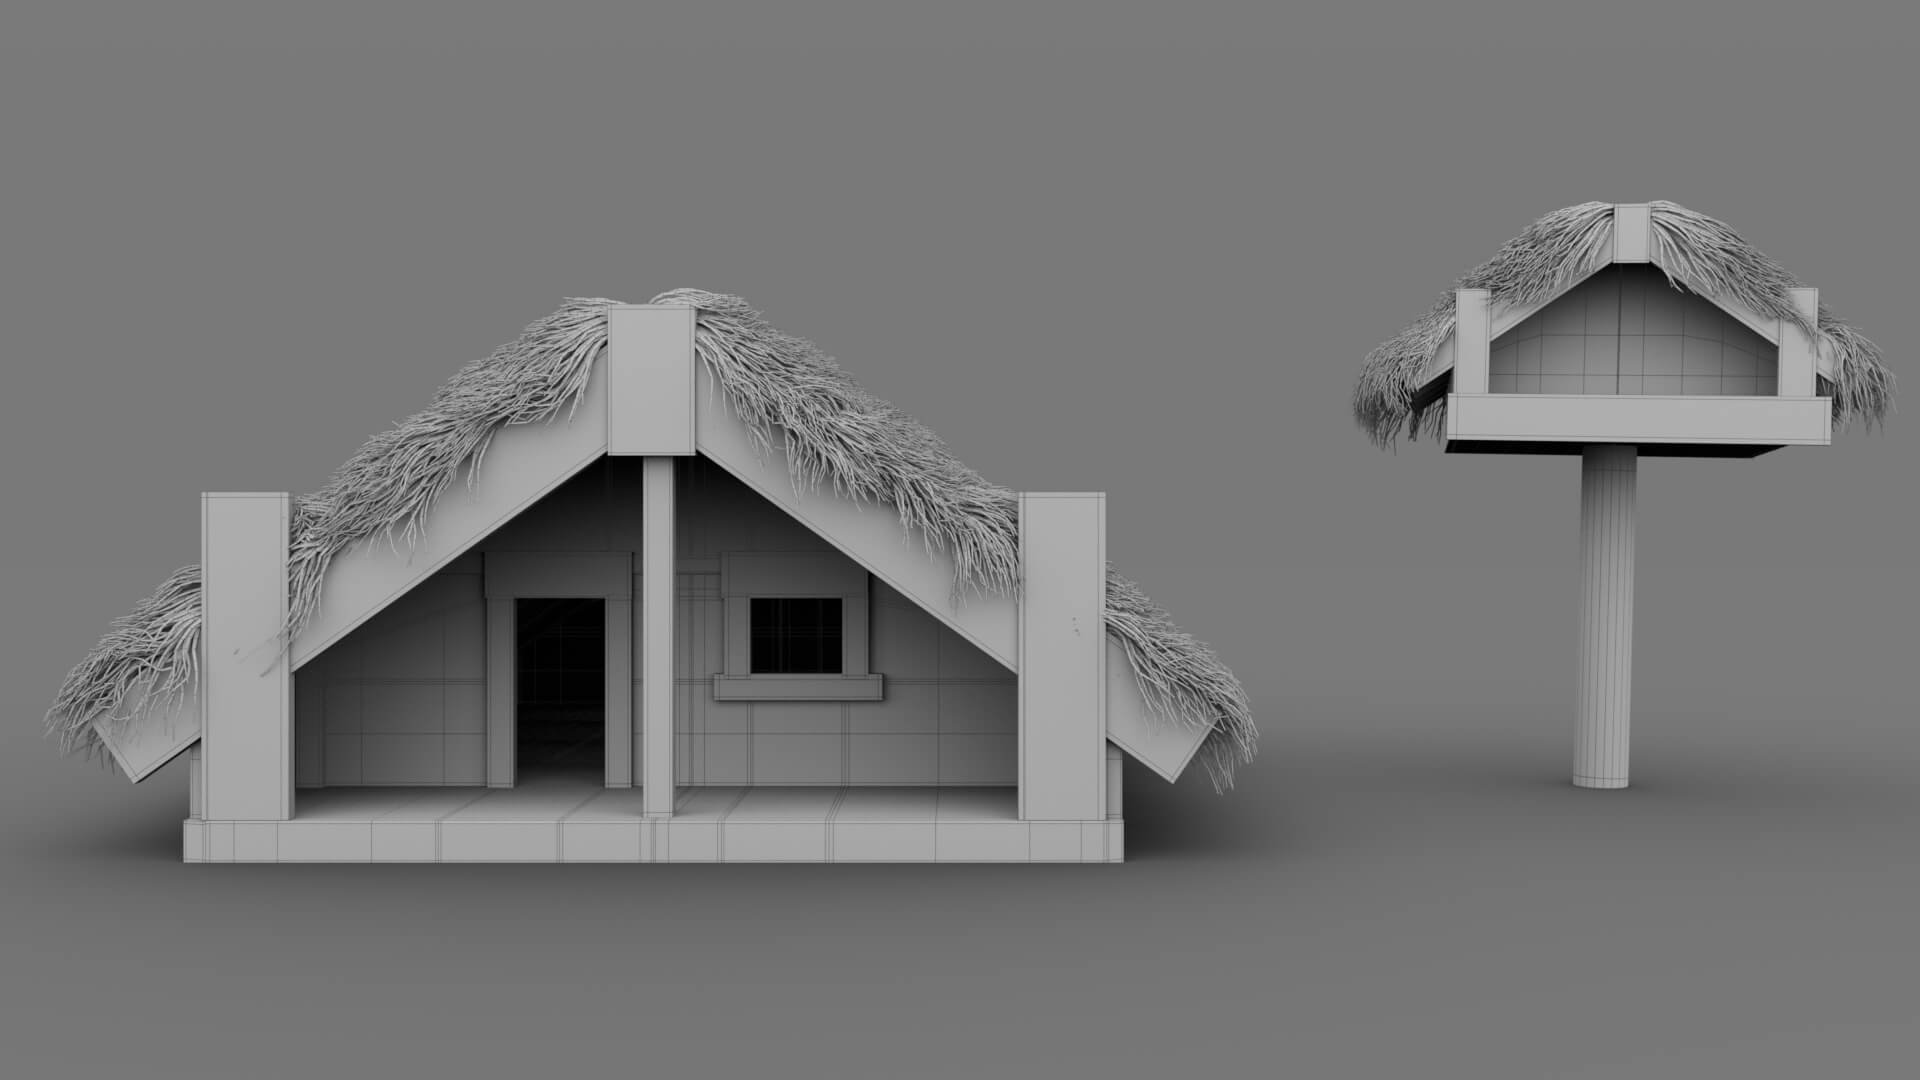

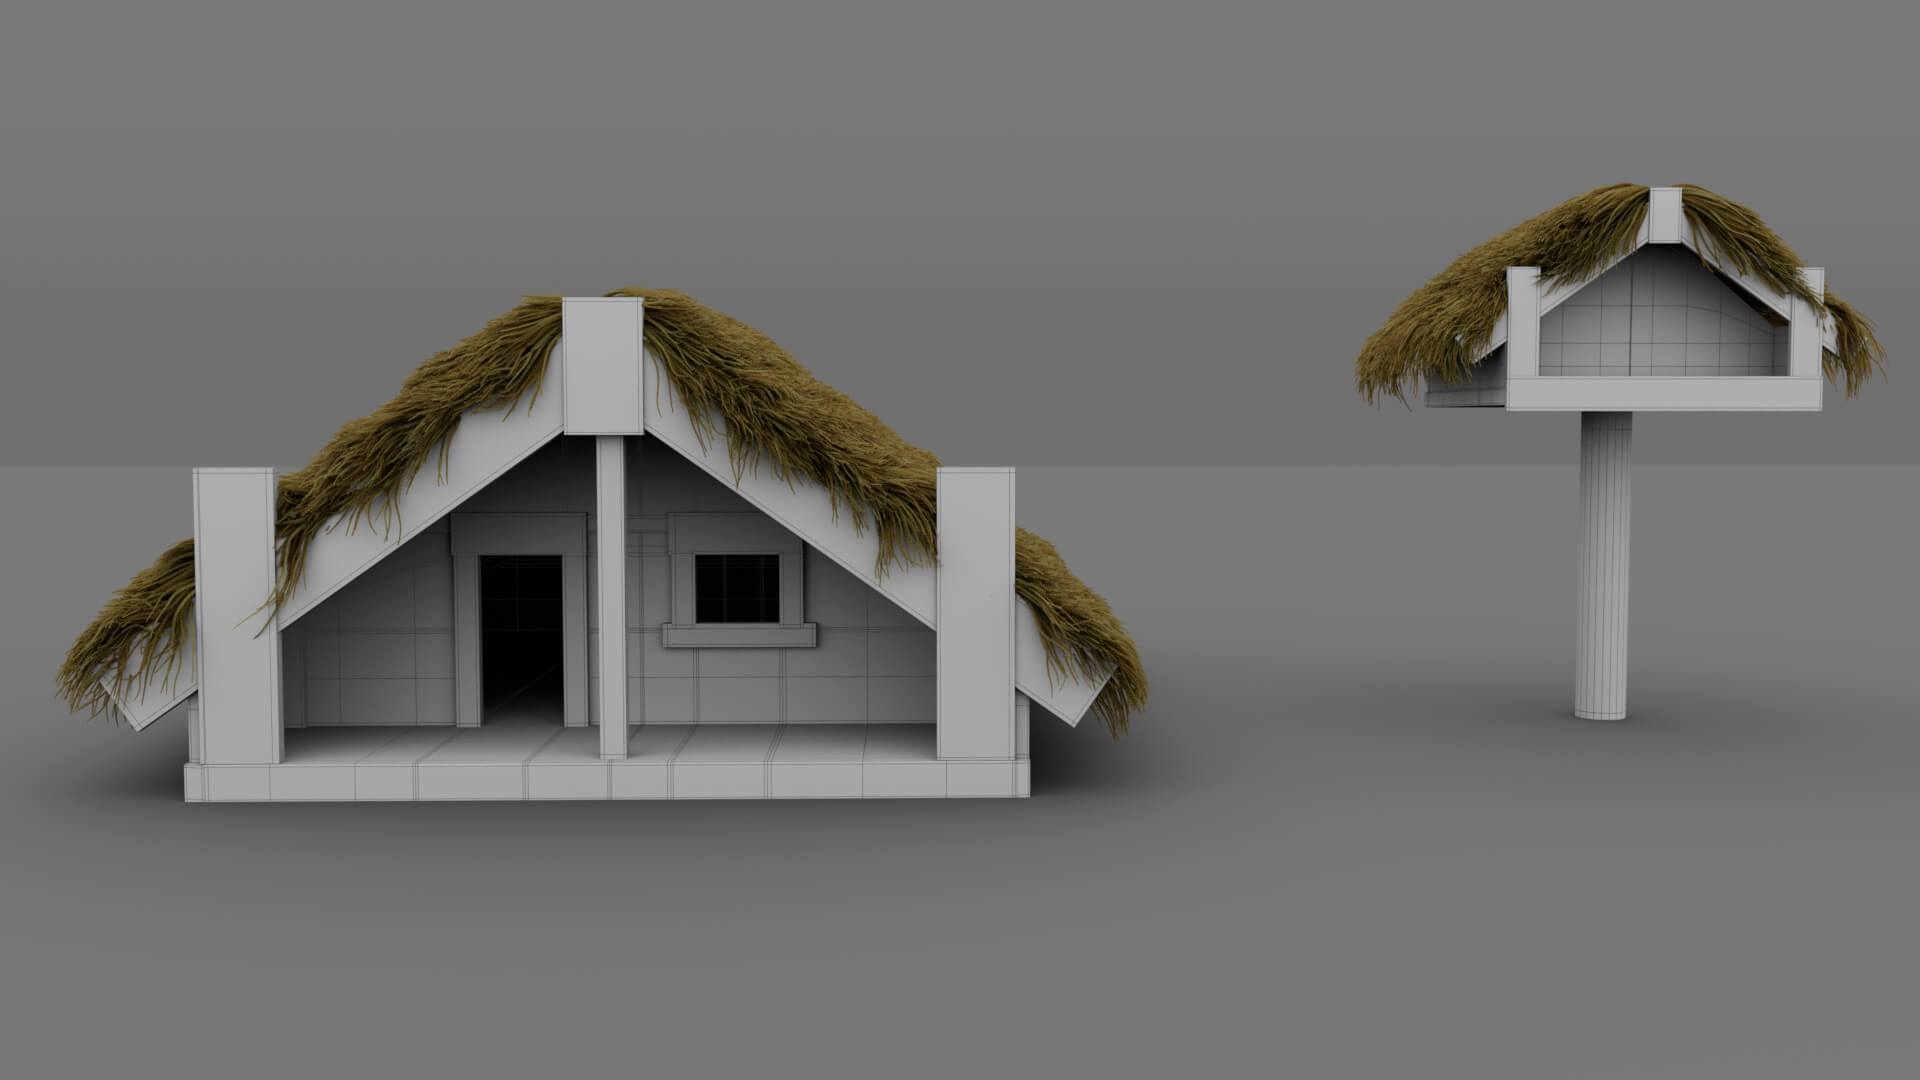
I exported the carving part of the house to ZBrush, to add my carving concept in detail for the displacement in Substance 3D Painter.
What an amazing reference. At first, I thought that it was sad that I wasn't allowed to replicate an authentic-looking canoe. After all, I created the canoe in such a way that you are able to identify it as a Māori Waka. I included several of my own ideas into my concept.
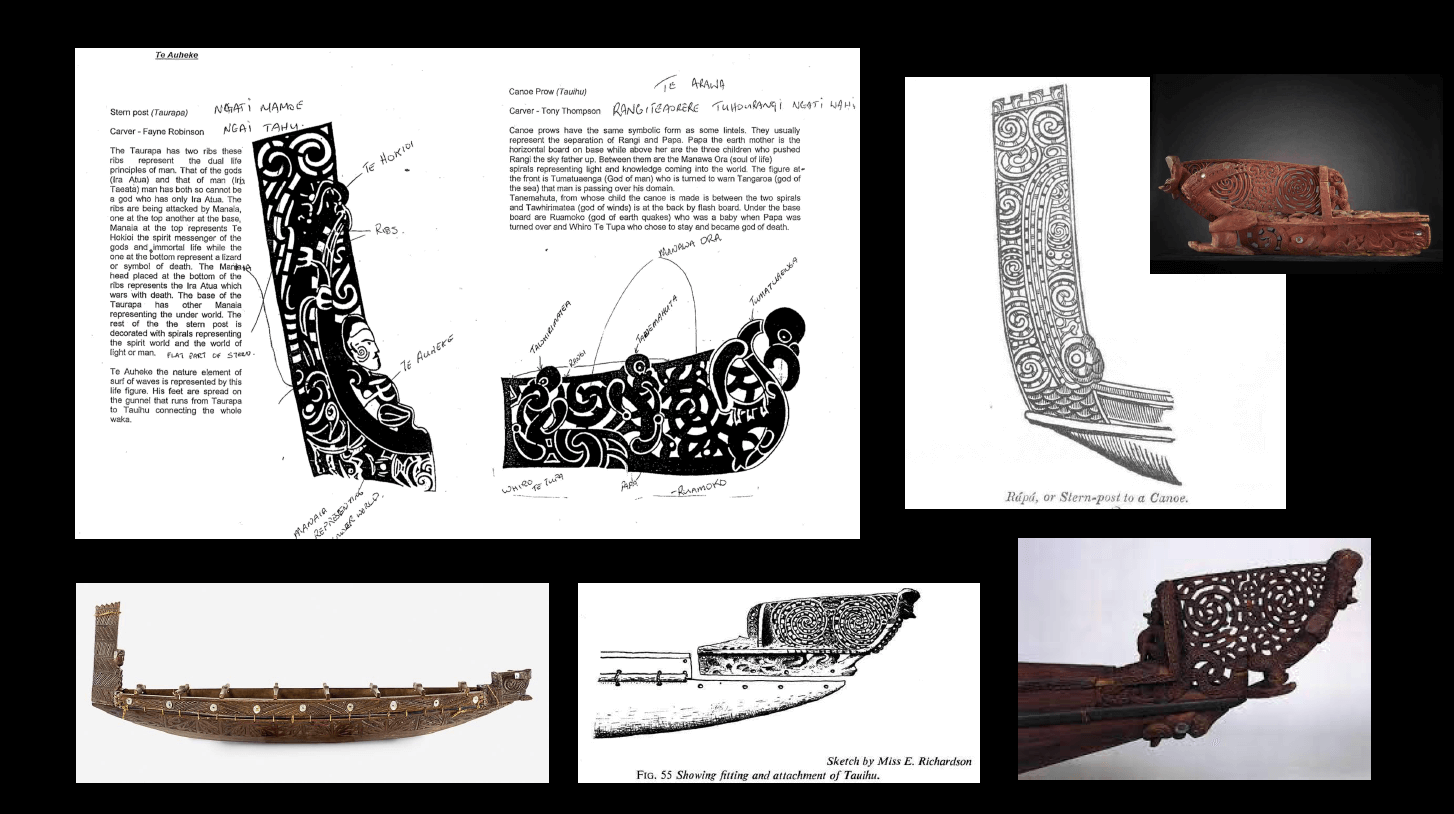
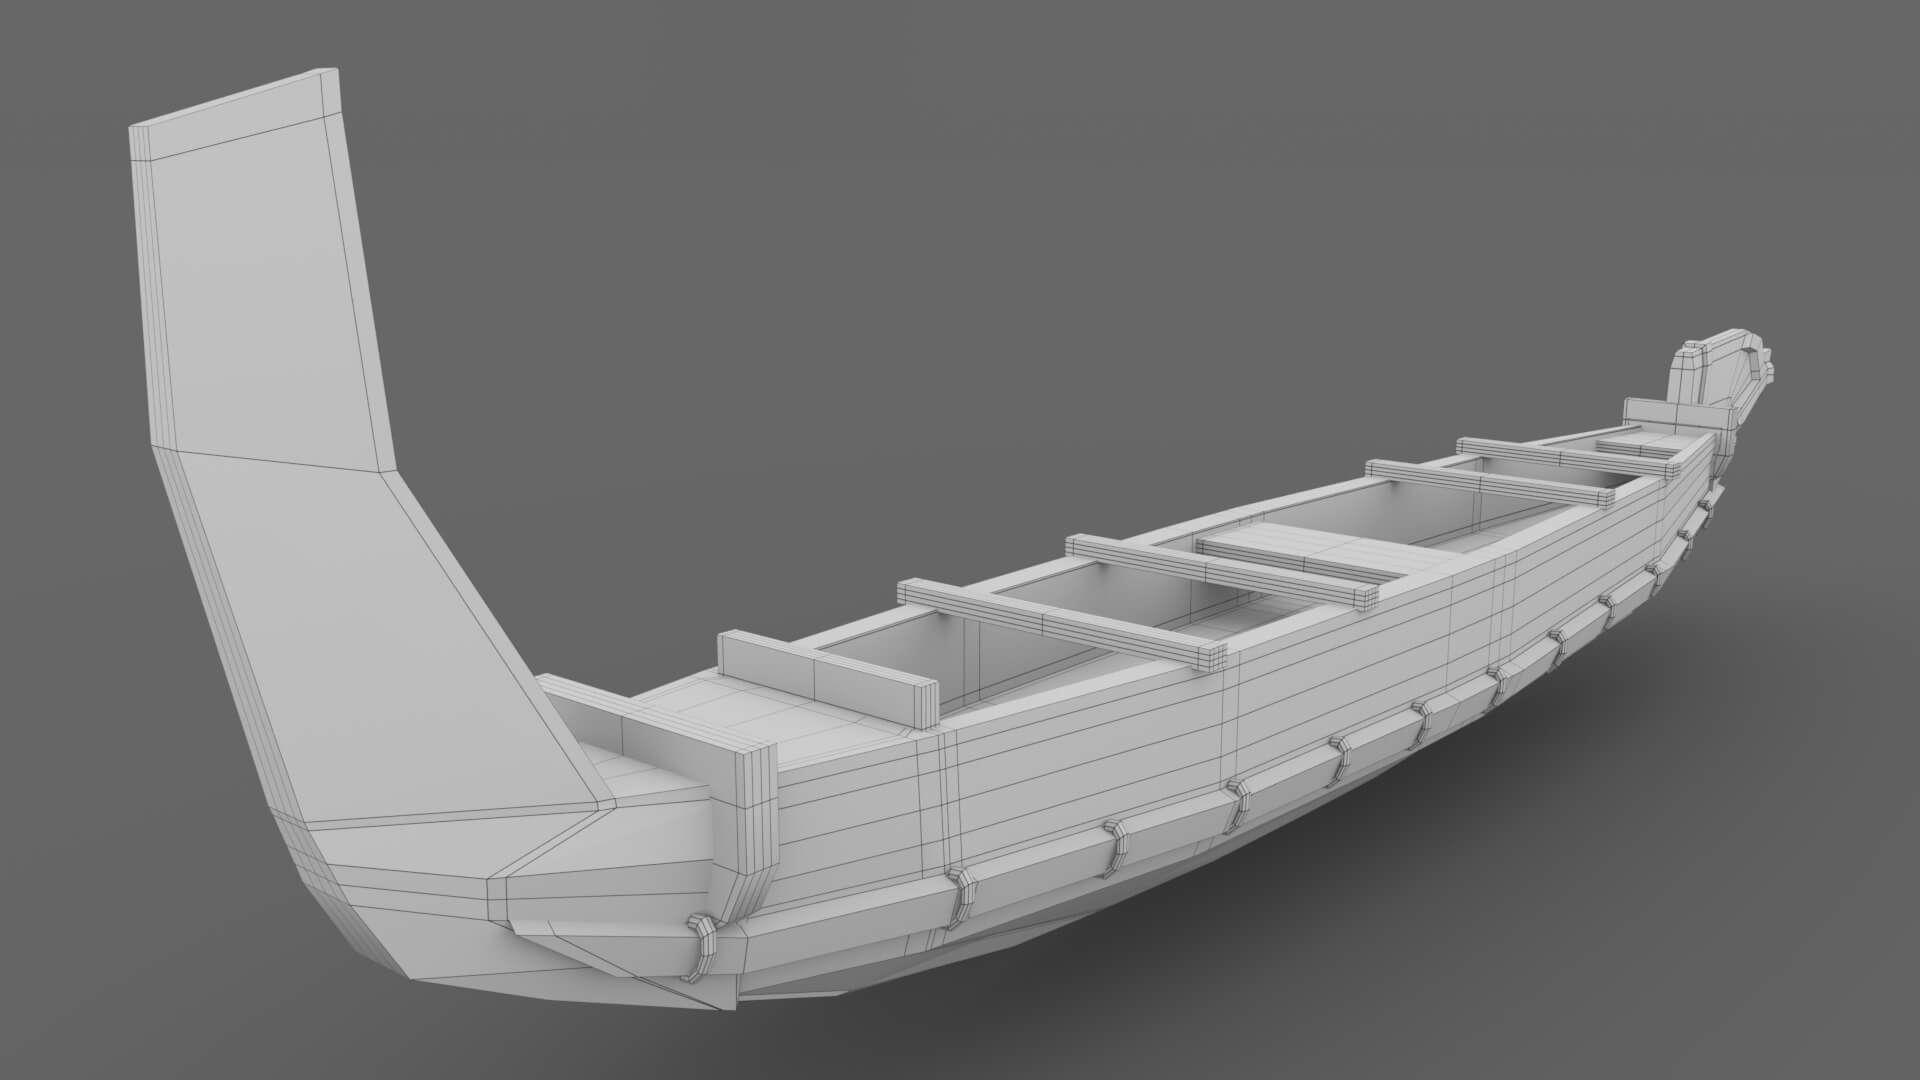
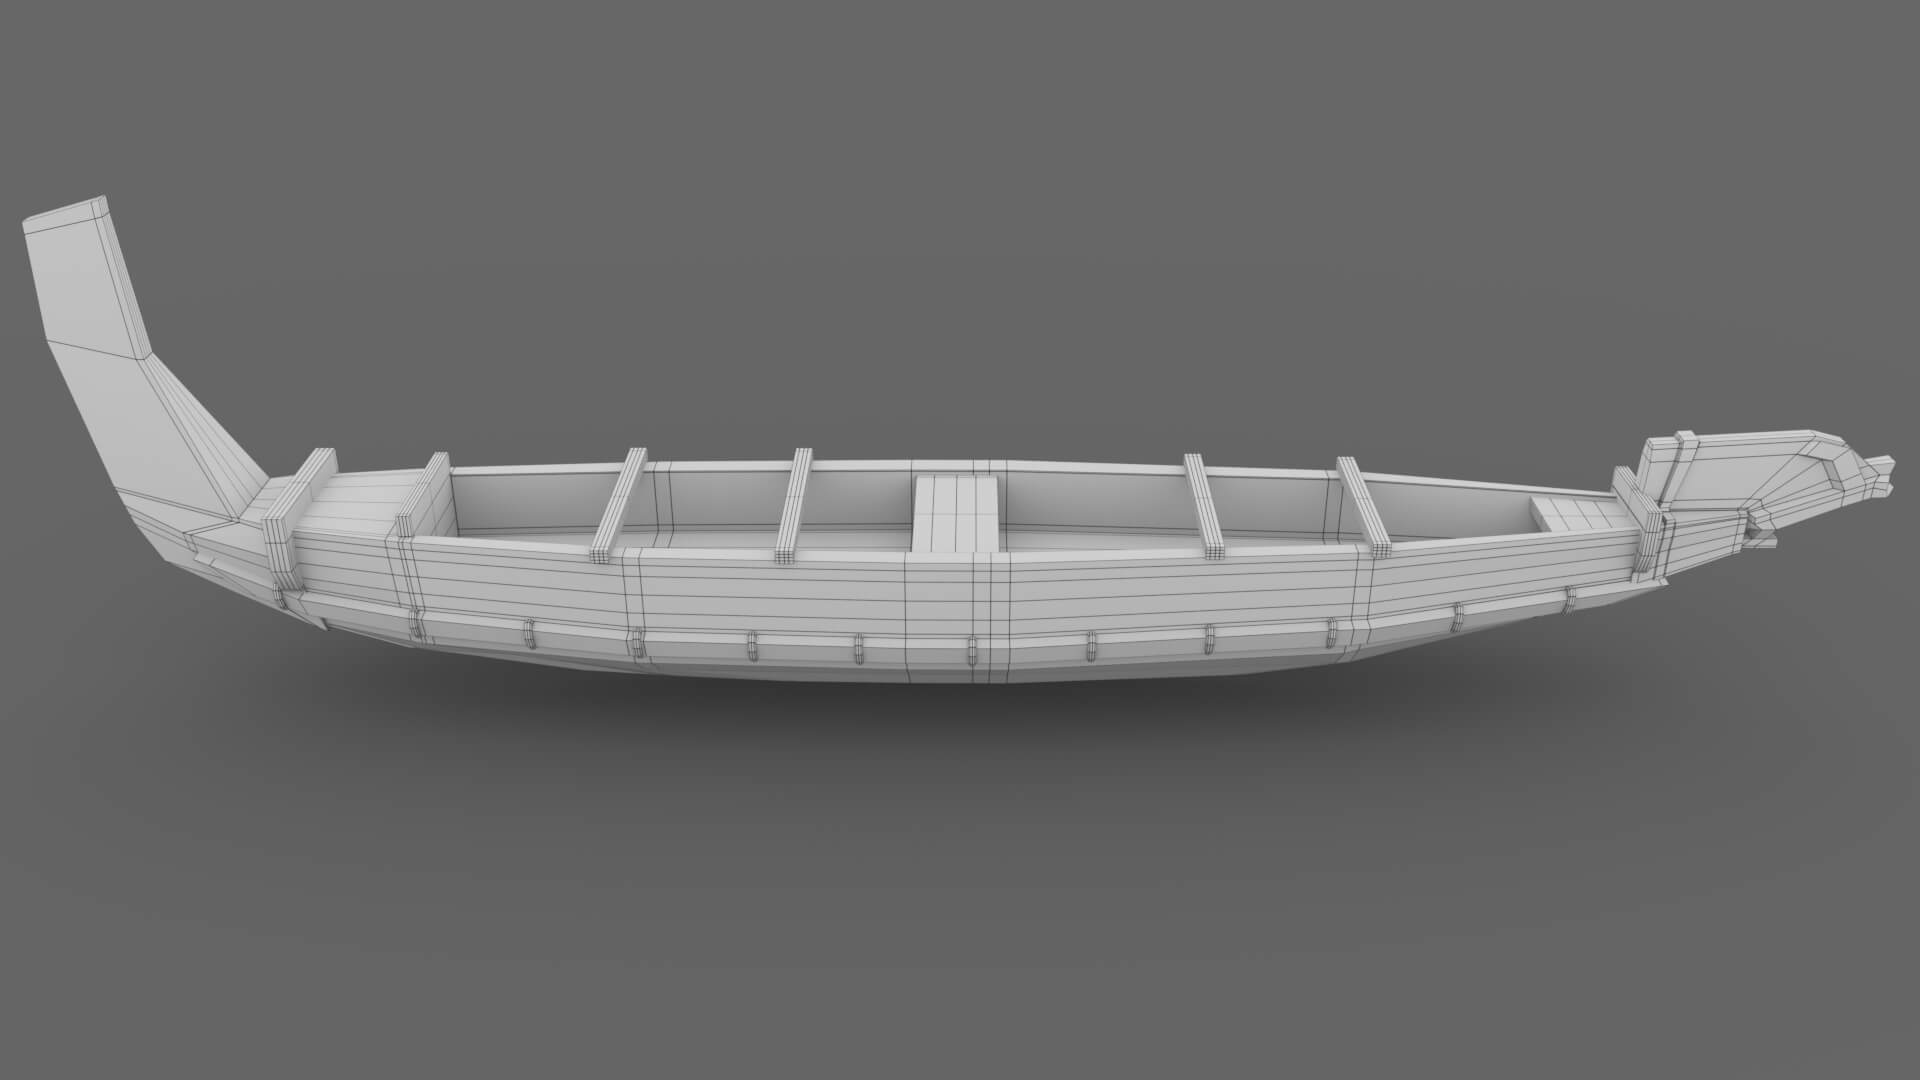
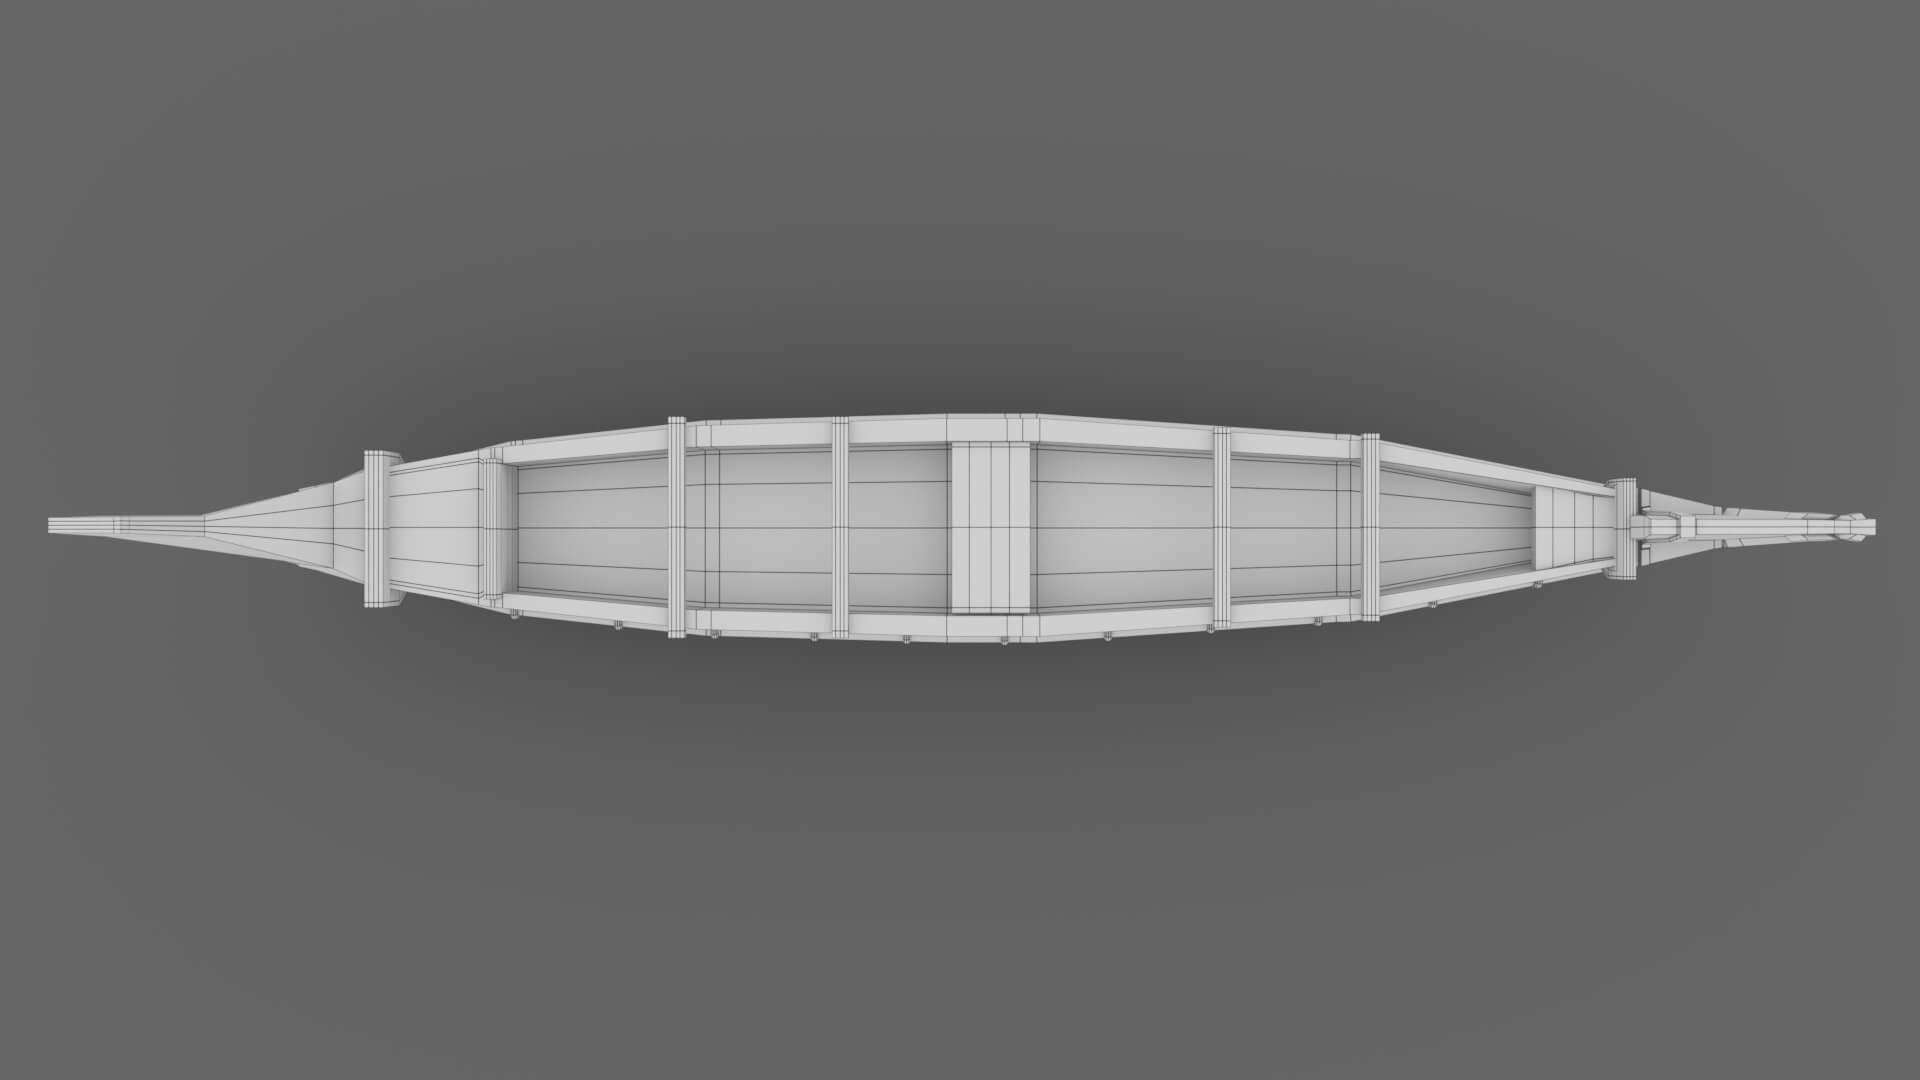
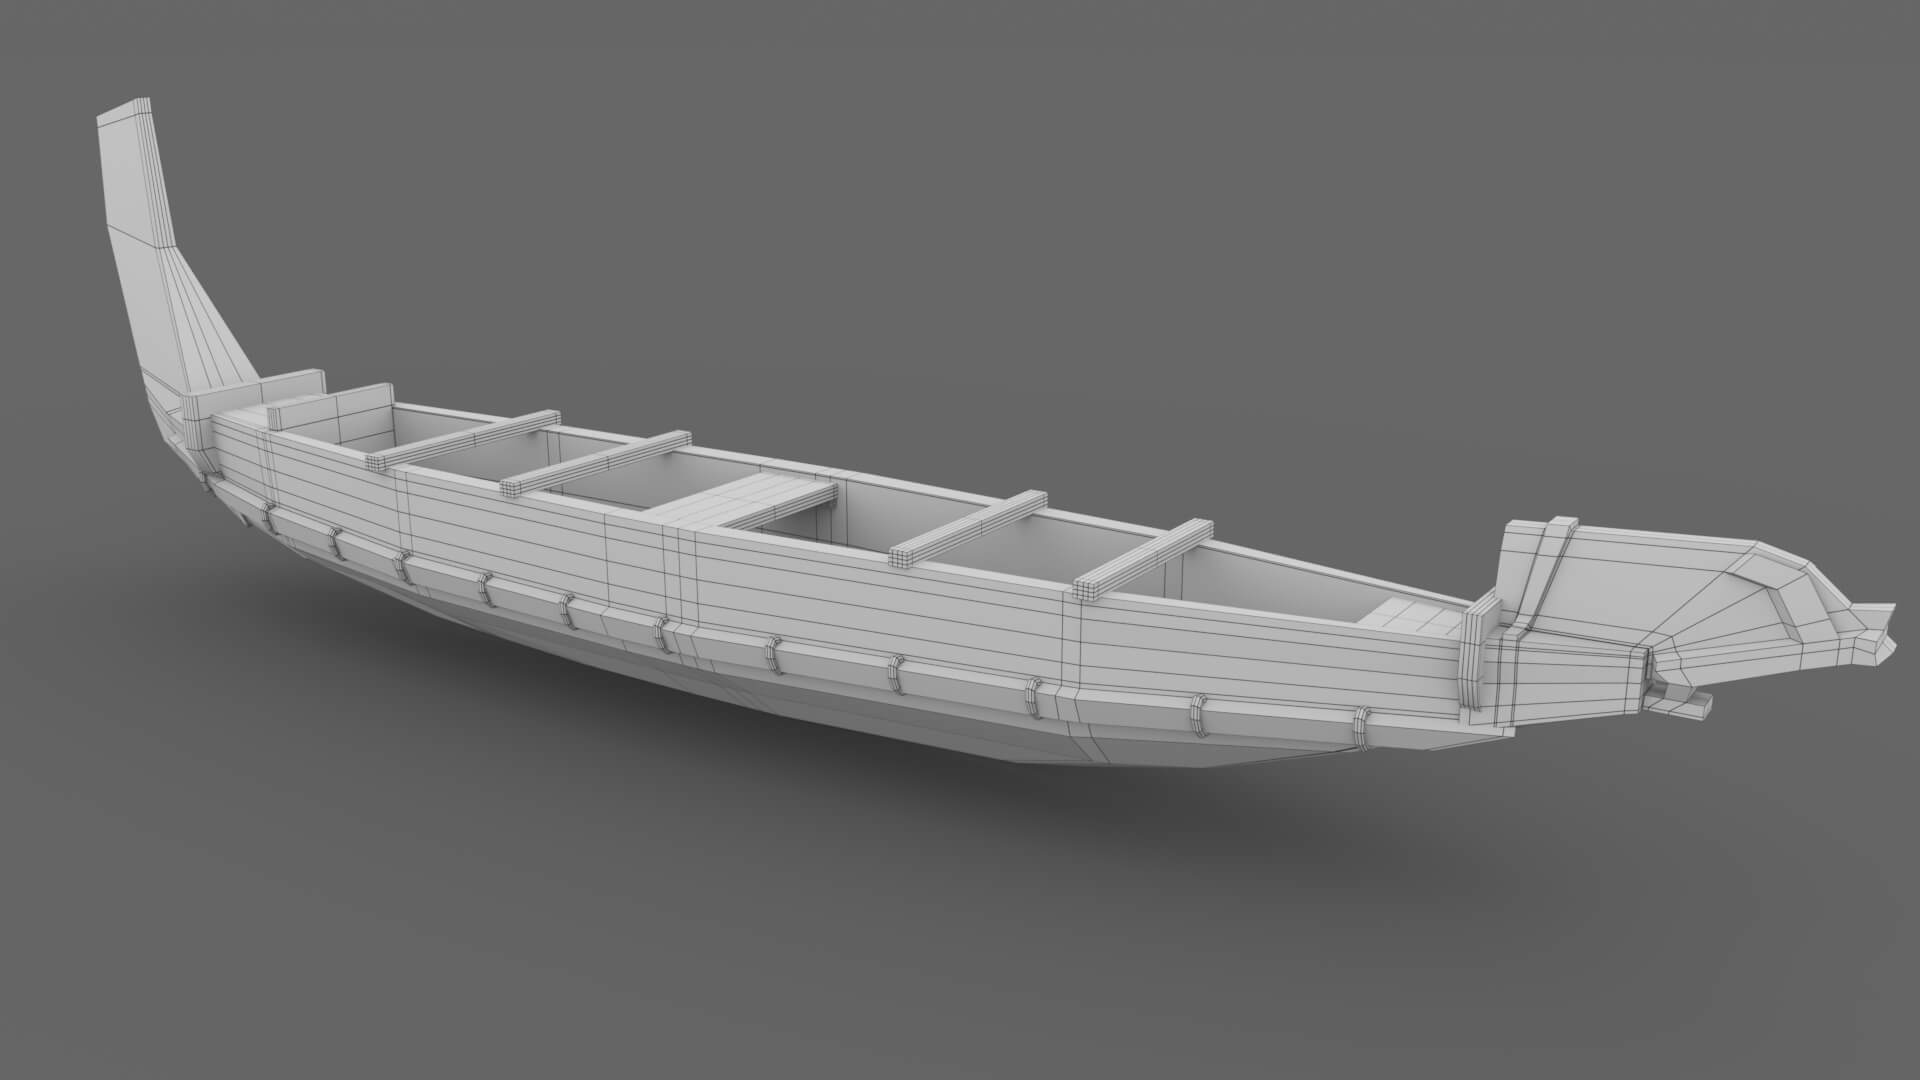
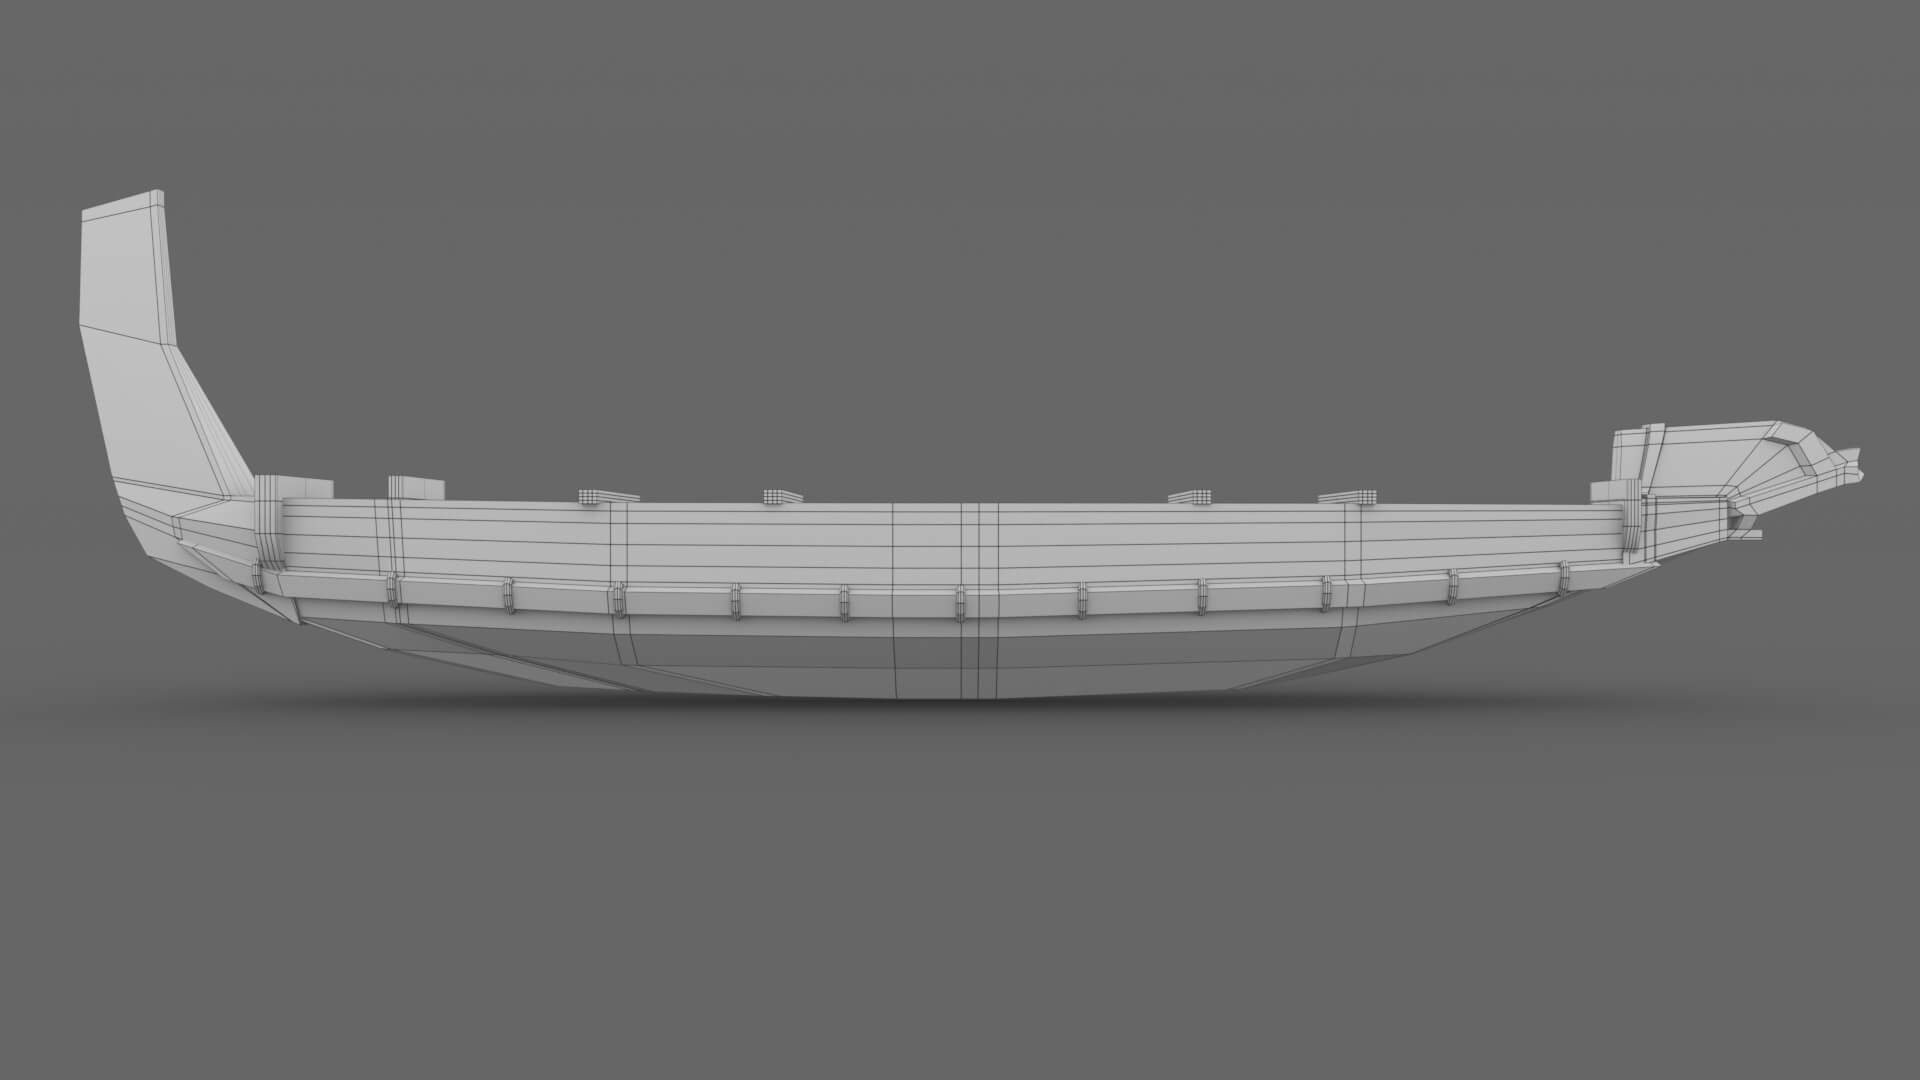
My first modeled canoe in Maya had a different front part, which I modified later because as a non-Maori, I am not authorised to use any type of a face in recreation.
Carving with ZBrush was an incredibly relaxing creative activity that I thoroughly loved. Later, I made a stand for the small canoe and printed five smaller models with a 3D printer. I kept one for myself and gave the others to my supporters as gifts.
I used the exact same Method with the displacement map in ZBrush like I did on the house asset.
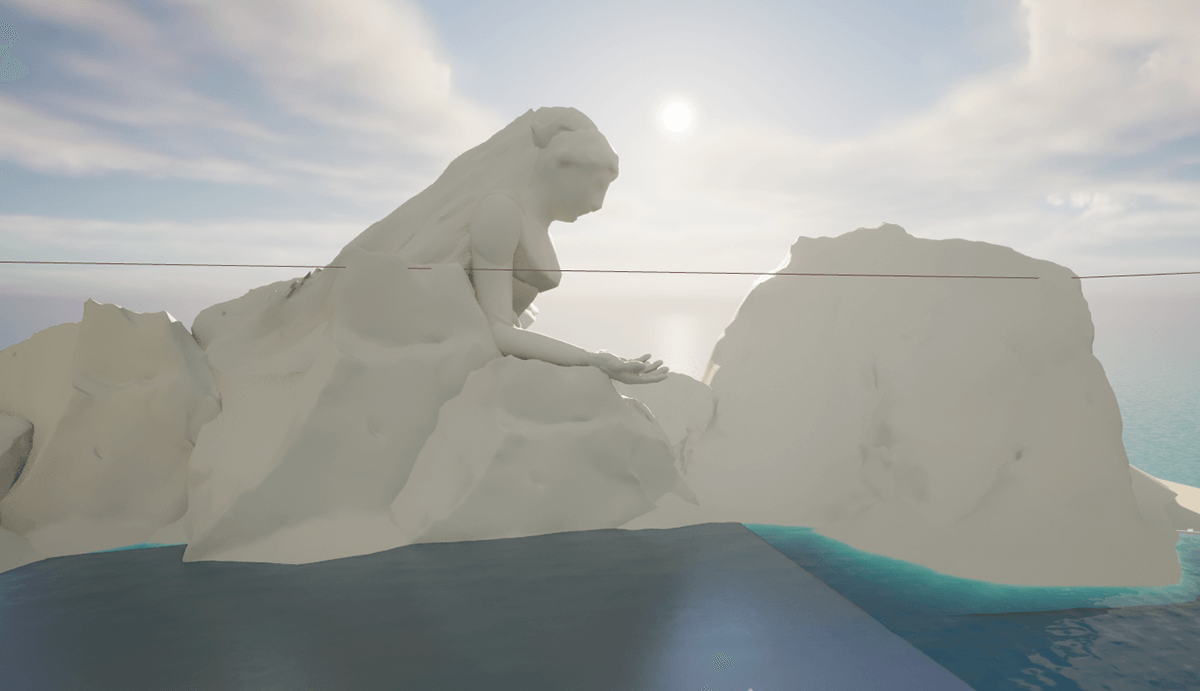
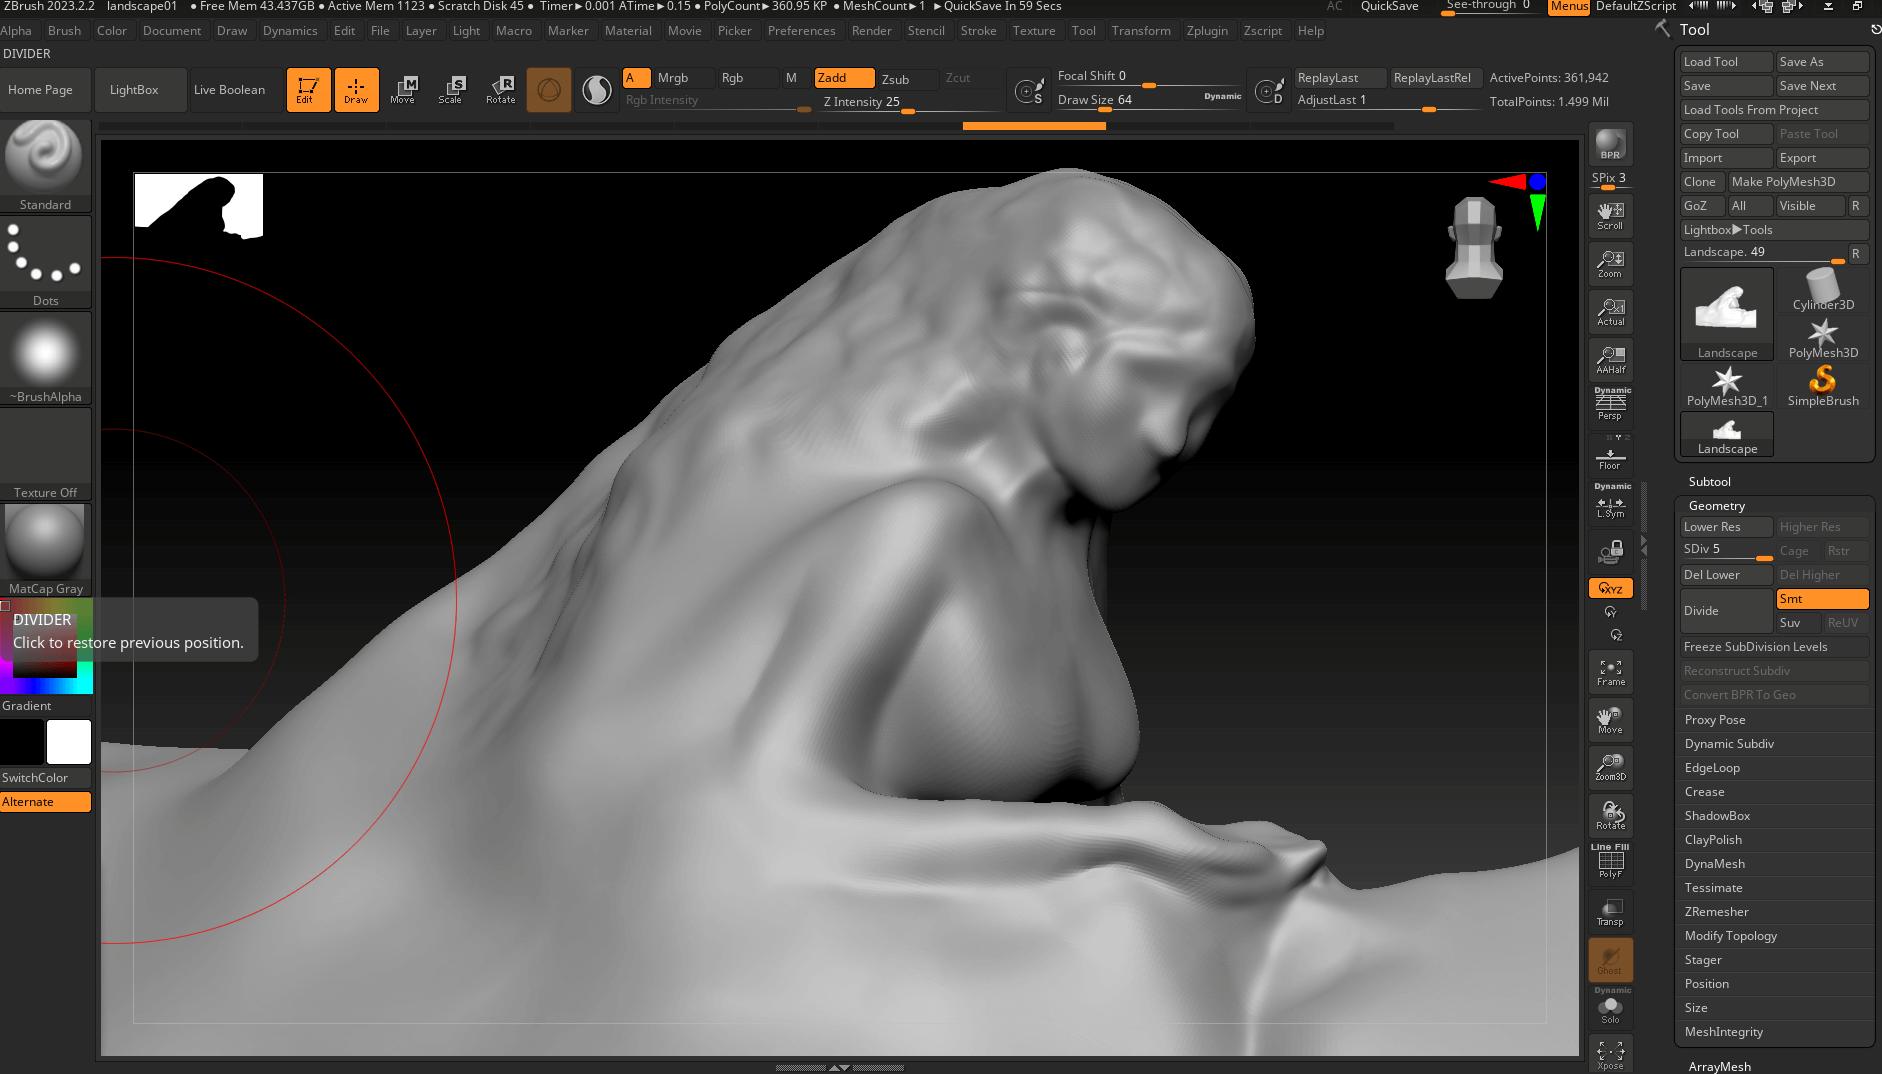
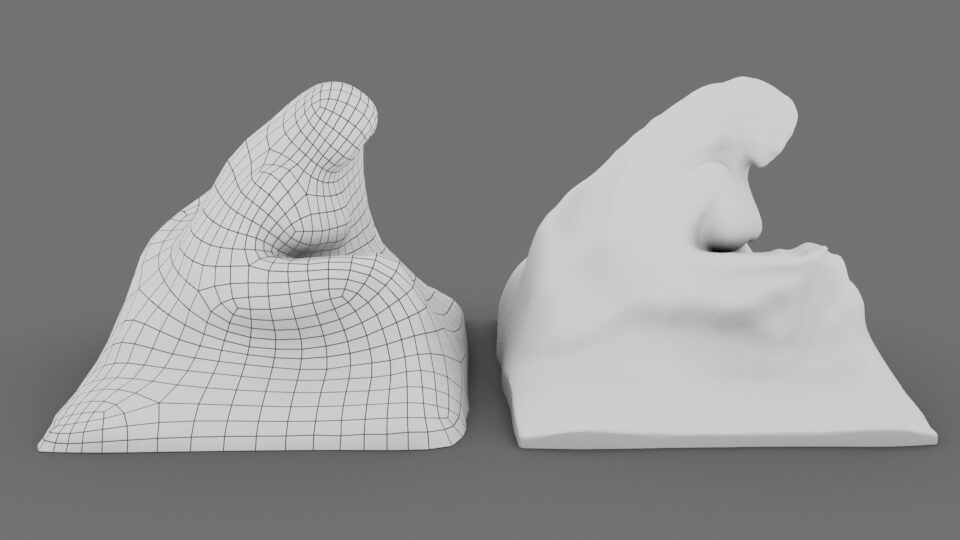
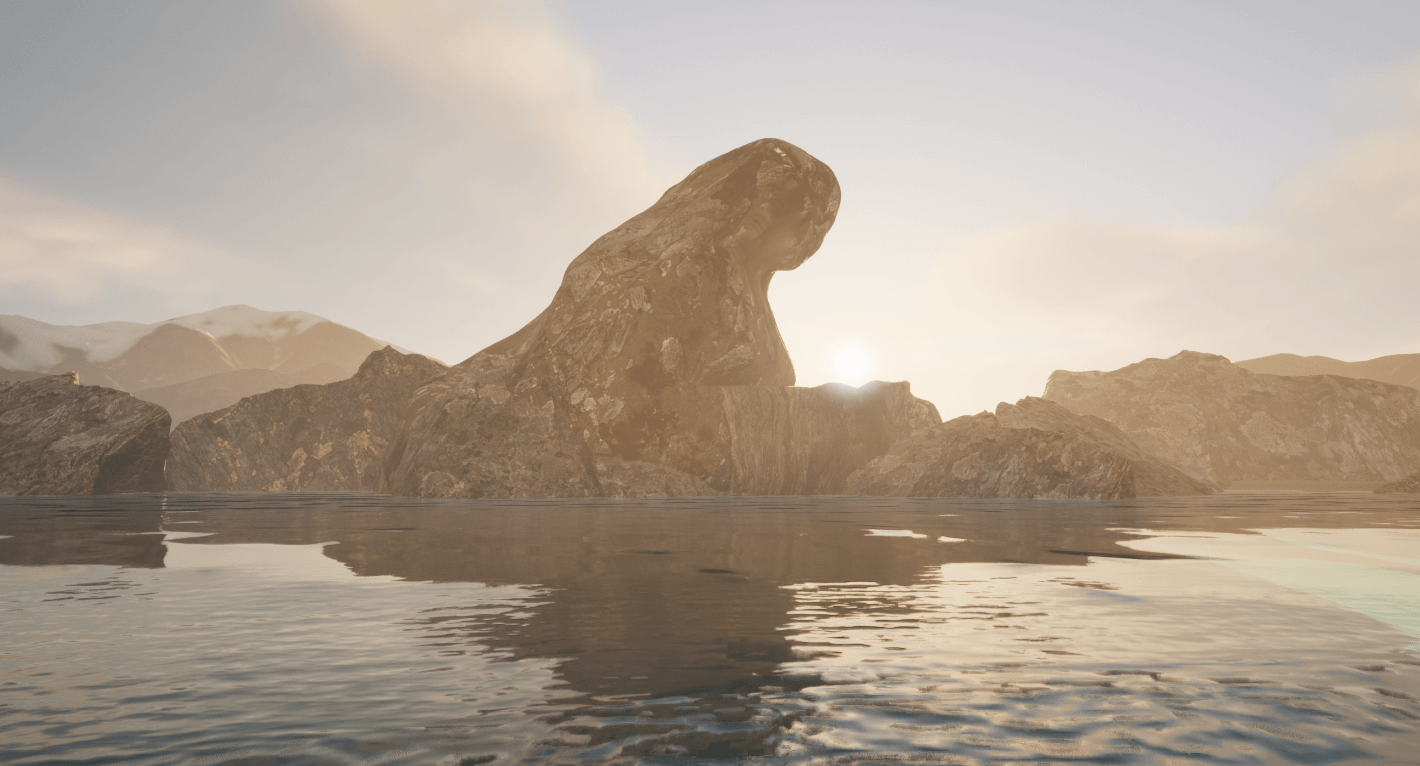
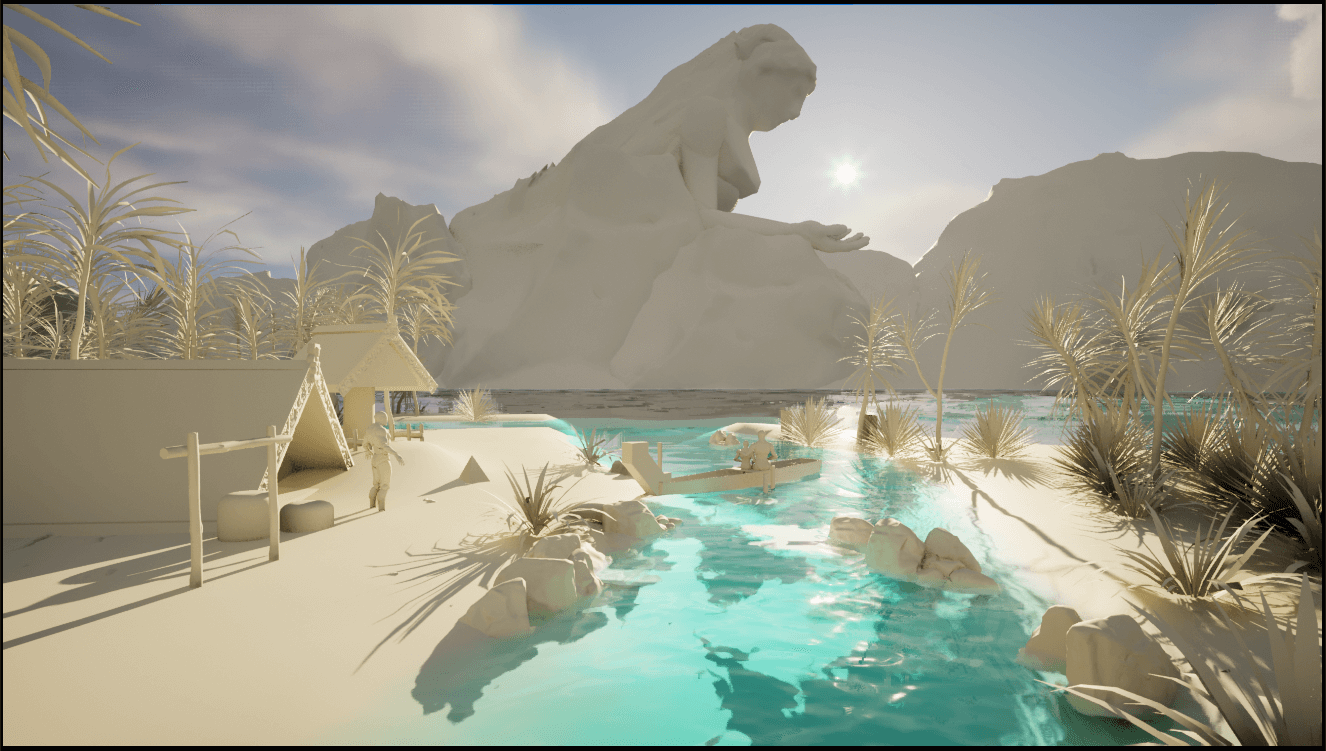
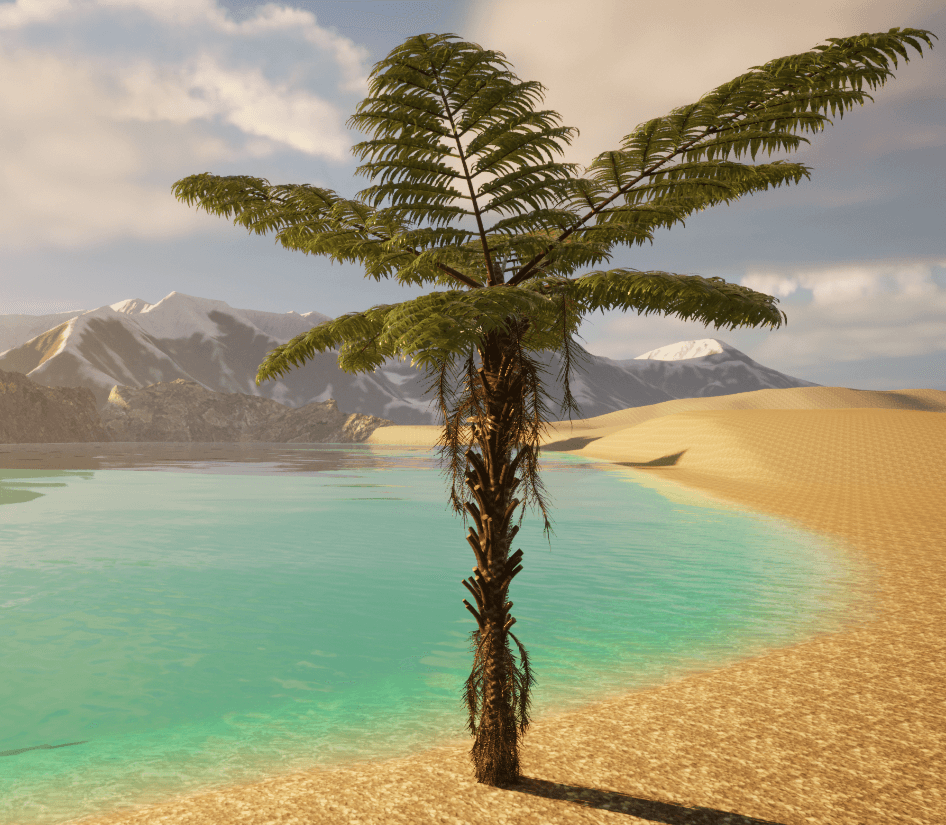
I sculpted on an element of the landscape in ZBrush after exporting it as an .fbx from Unreal Engine. I want to mention that I haven't used any tutorial, it was all about playing around with tools. My intention was to use minor details to create the sense of recognizing a woman as a silhouette. I kept this model simple by representing Mother Earth as a mountain and positioning it at a distance.
I found an excellent texture for the base in UE and brought it to life using foliage in UE on Mother Earth.
Because I was so eager and enthusiastic about working on this project, I immediately experimented with new software too.
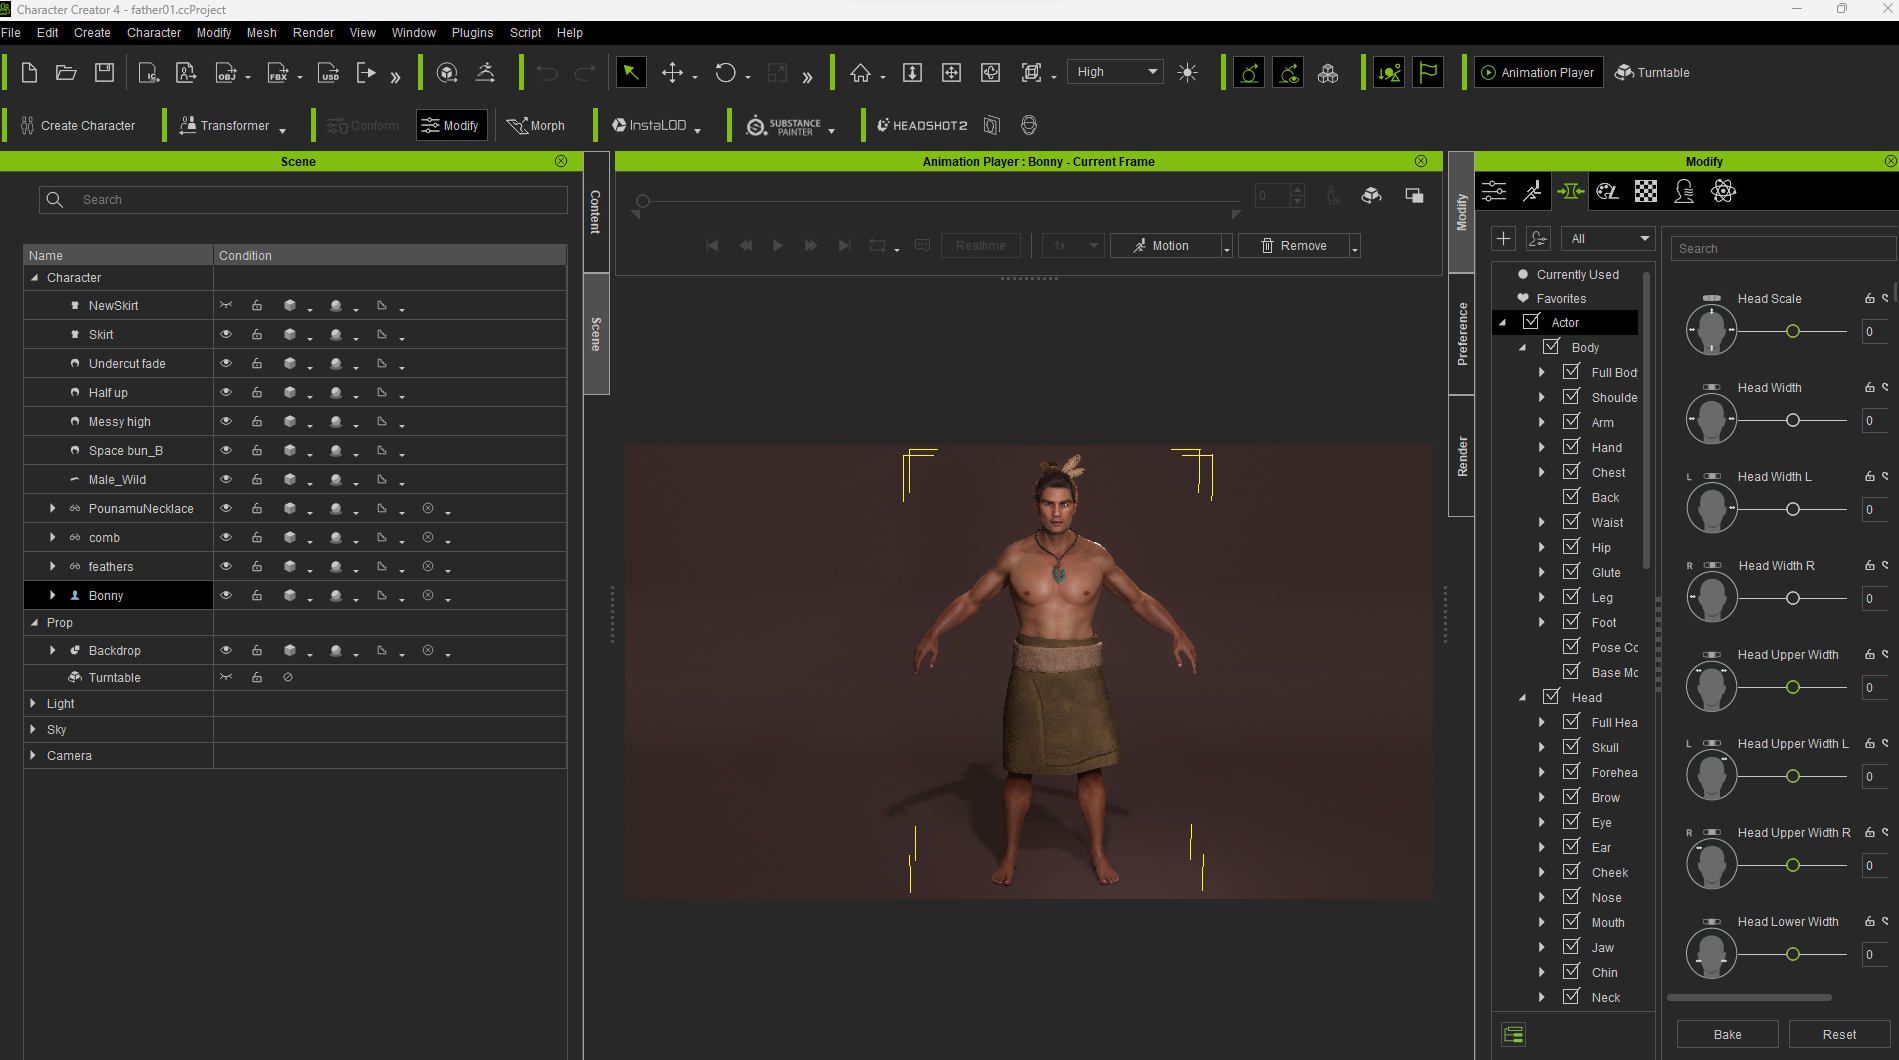
I worked extensively with the Reallusion Character Creator 4 and used the base mesh I created as the foundation for ZBrush, Maya, Marvelous Designer, and Substance 3D Painter.
The base mesh has a solid topology that is suitable for AccuRig (AI rigging) and face motion (Basics of a Metahuman for UE).
As a result of my final character design, I was able to control the face with my Iphone via motion capture app. Just for fun. —> Reallusion Tutorials
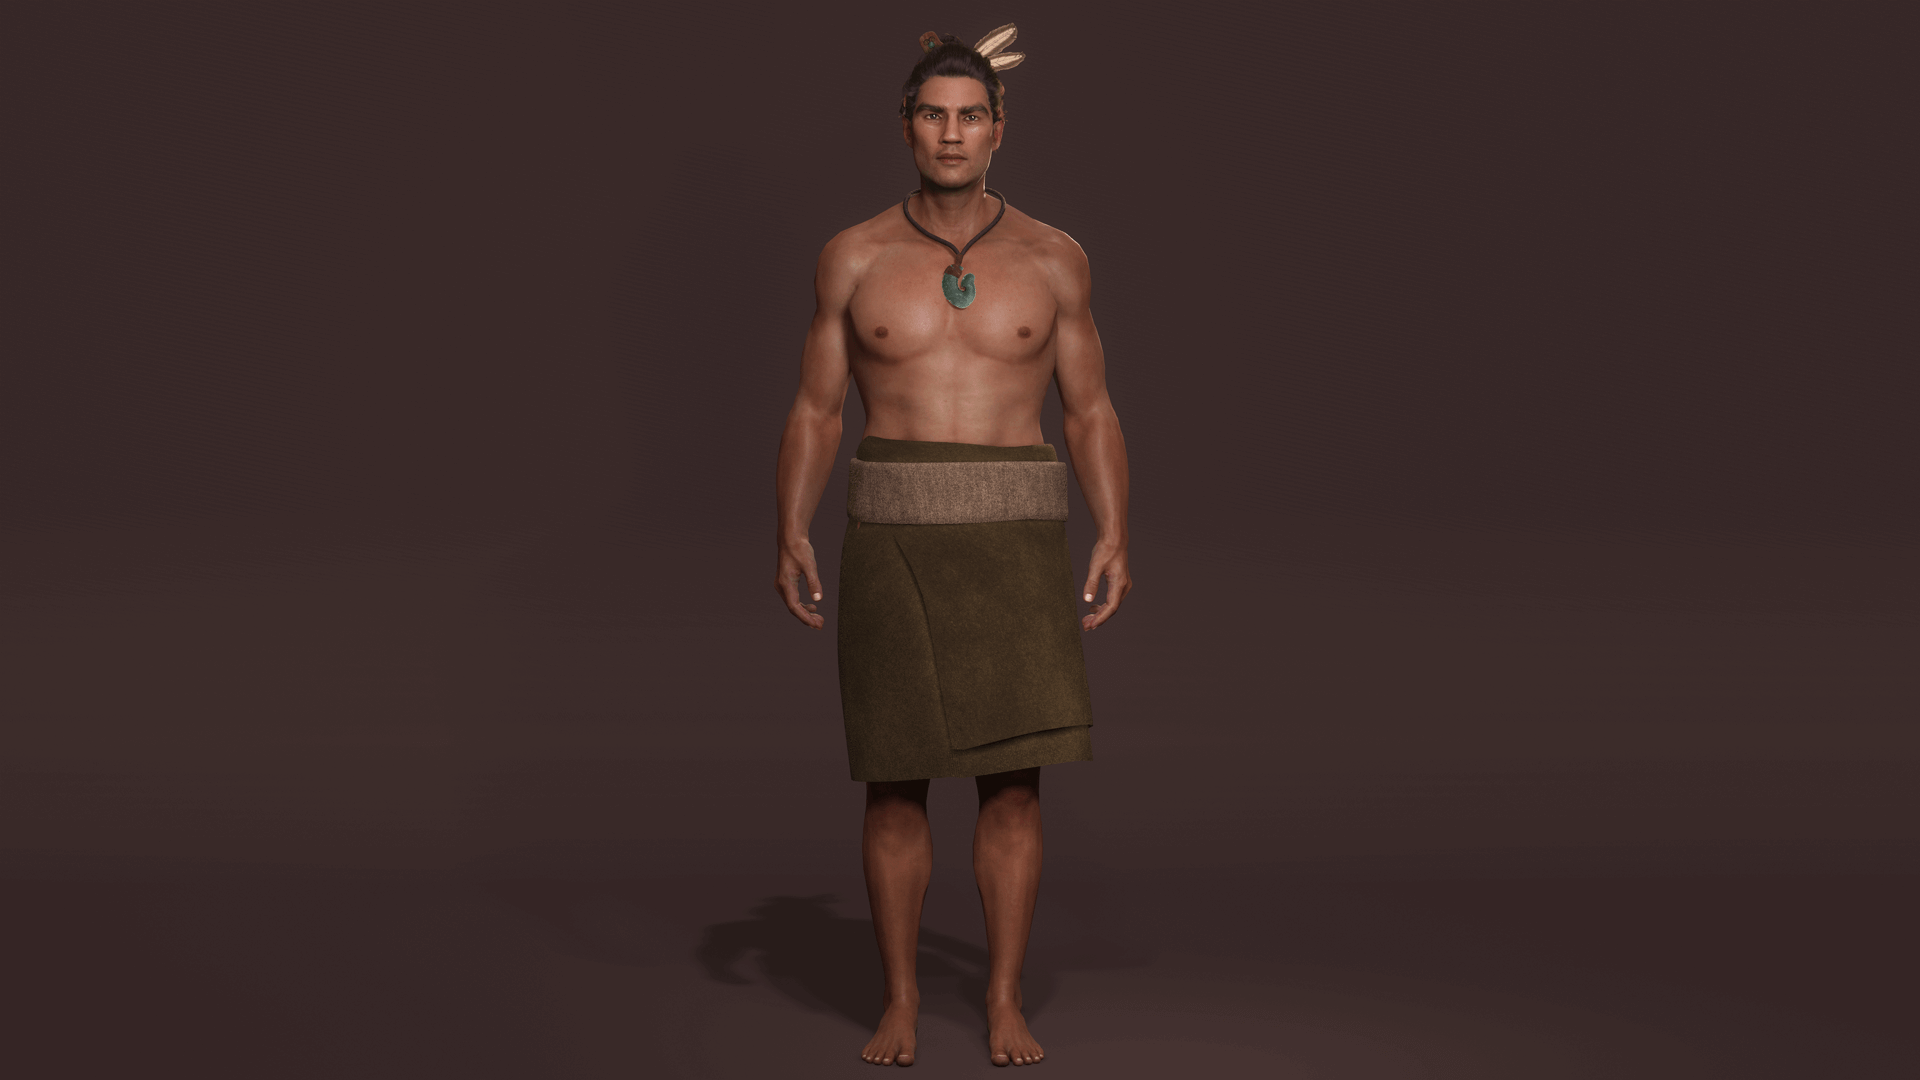
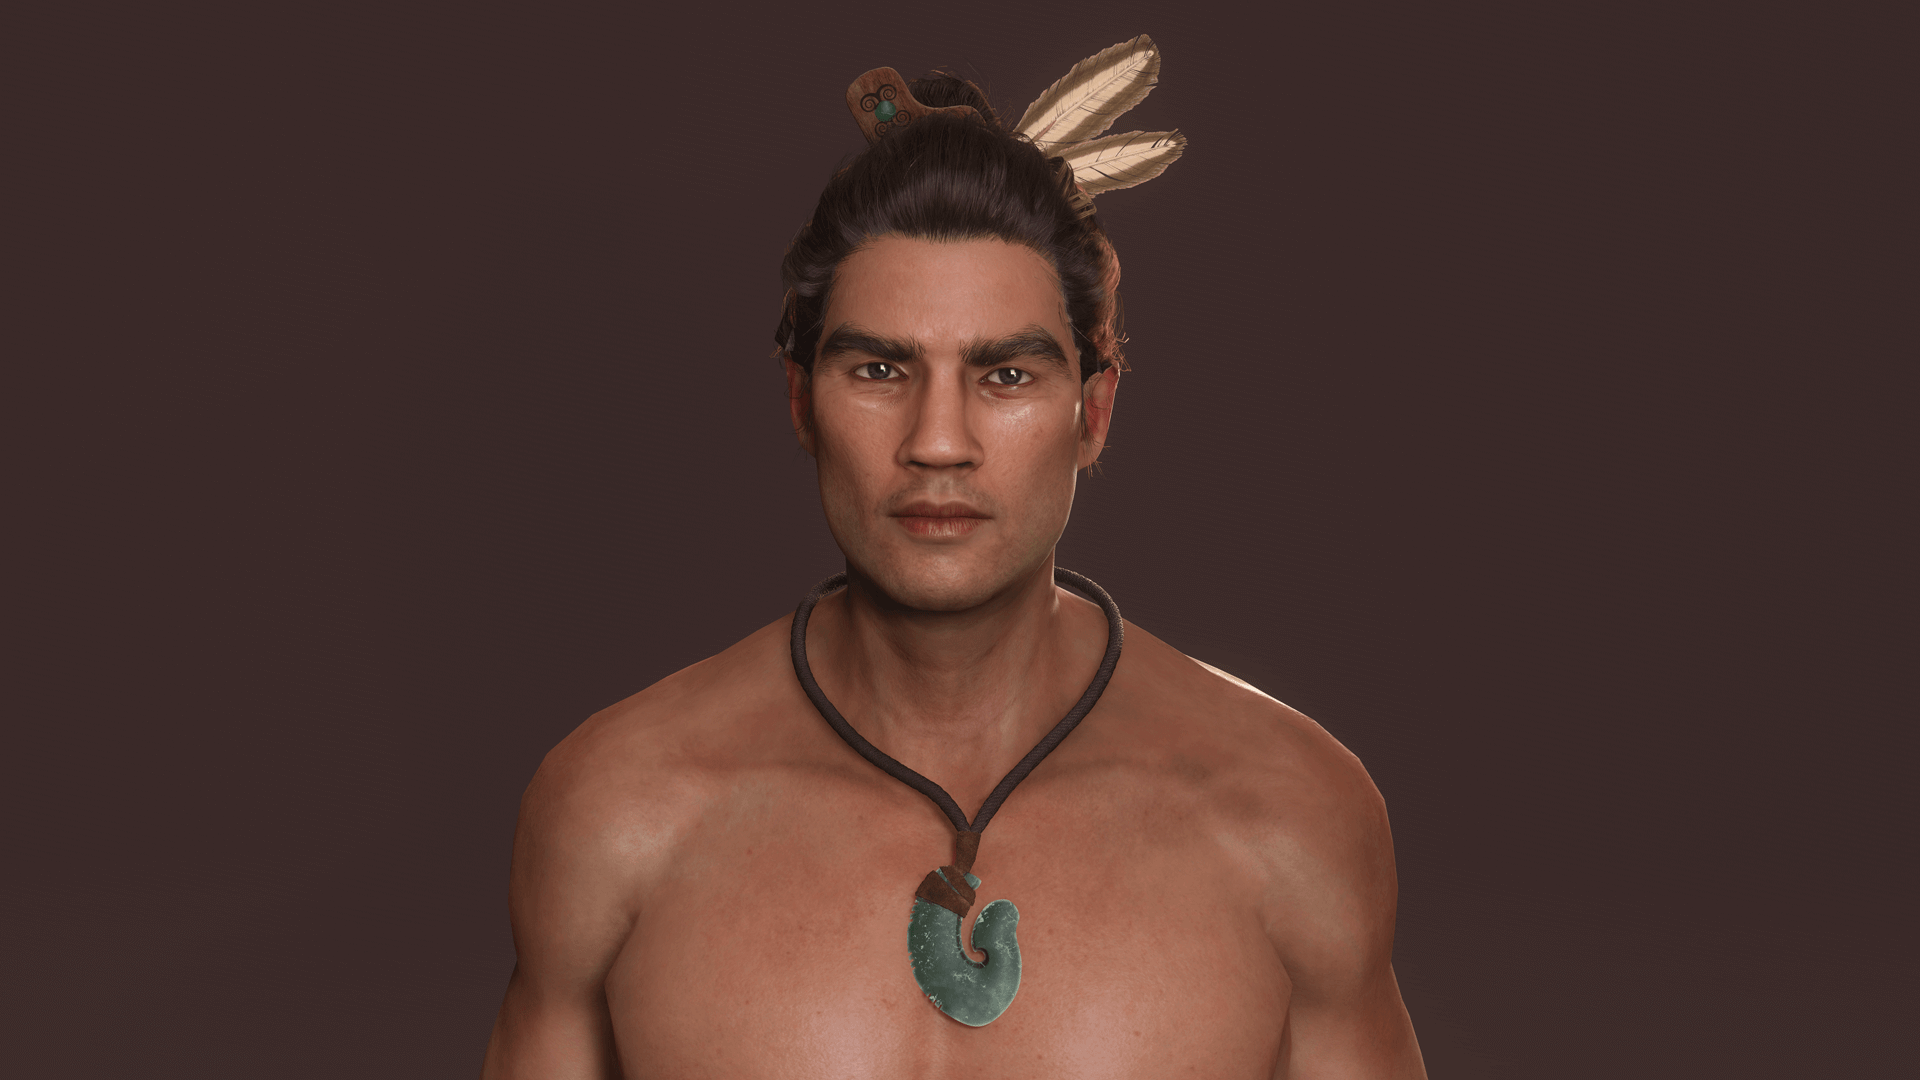
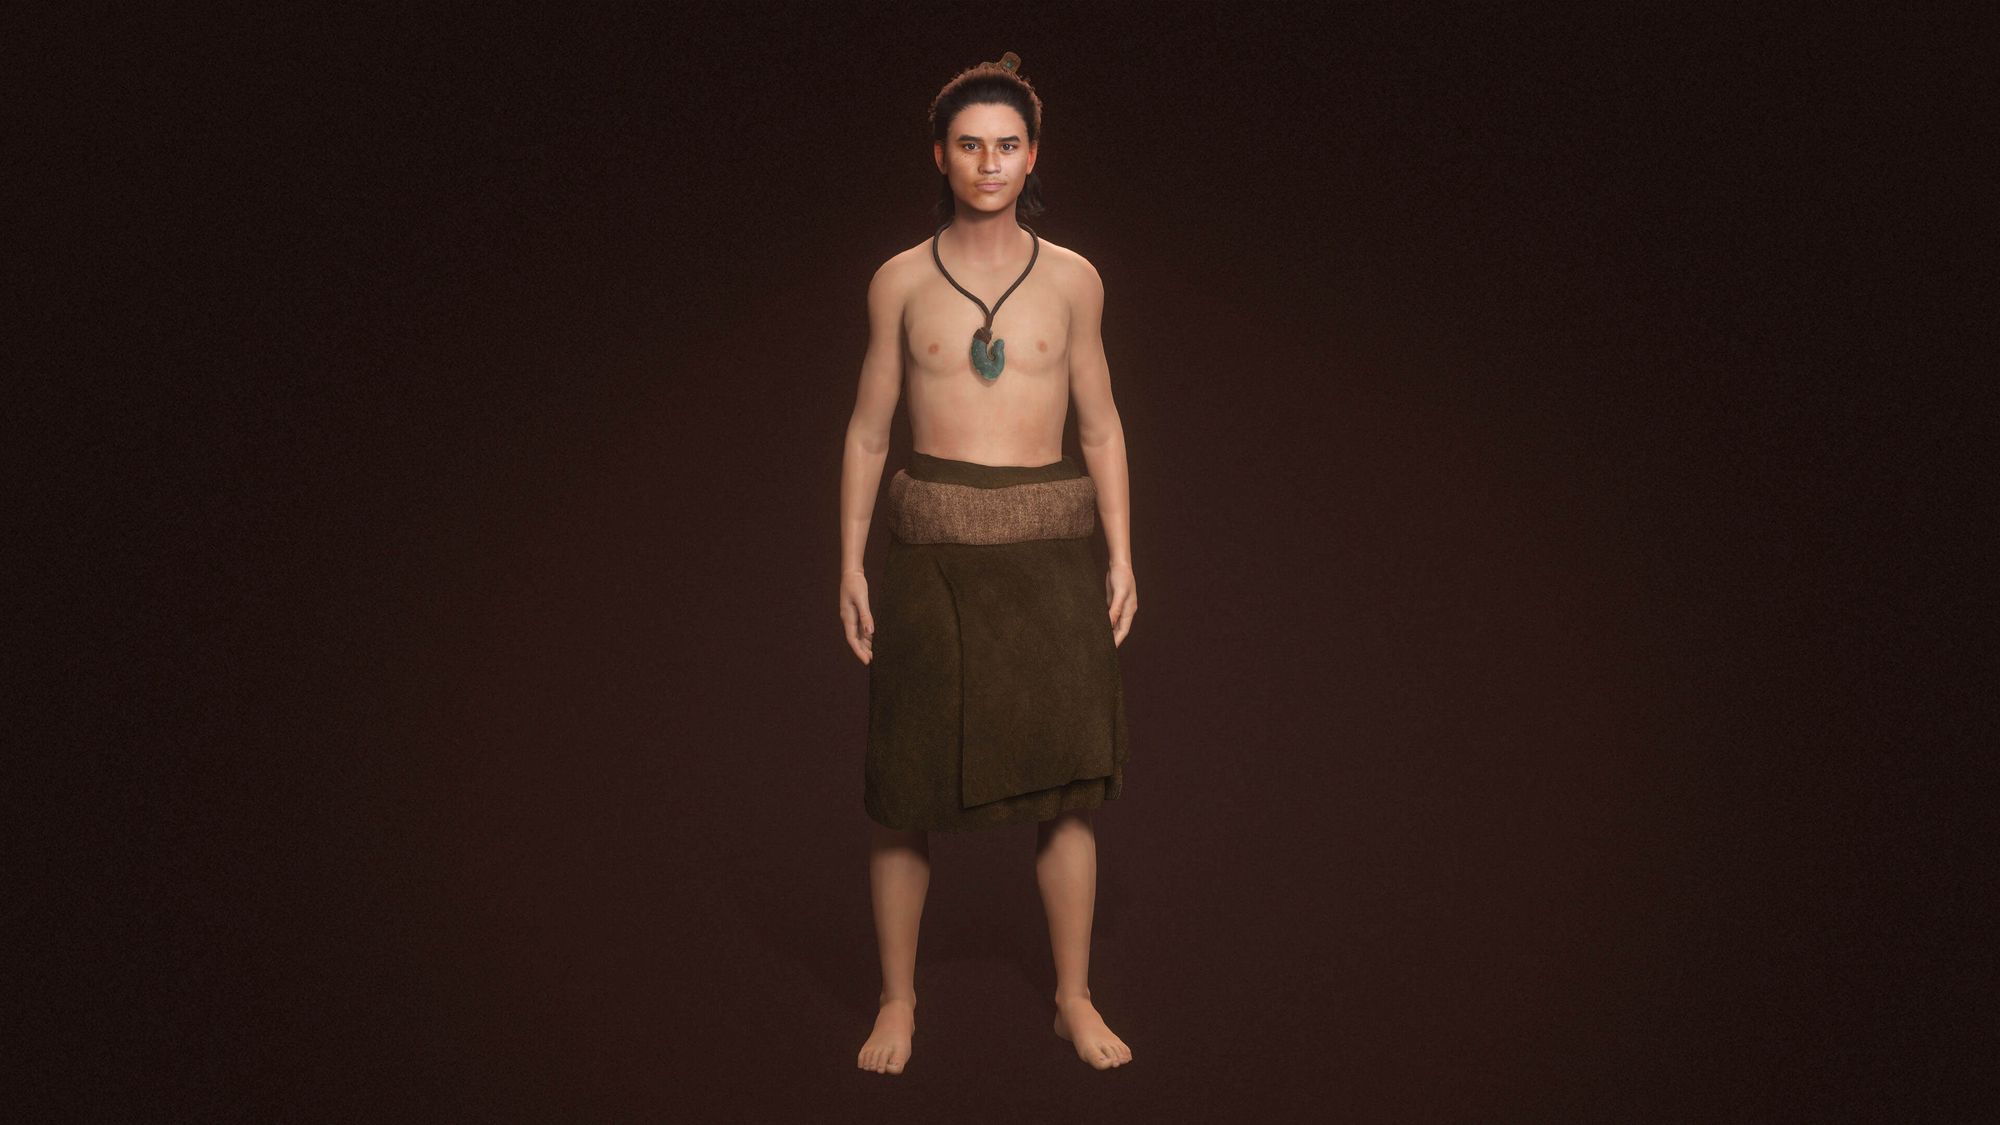
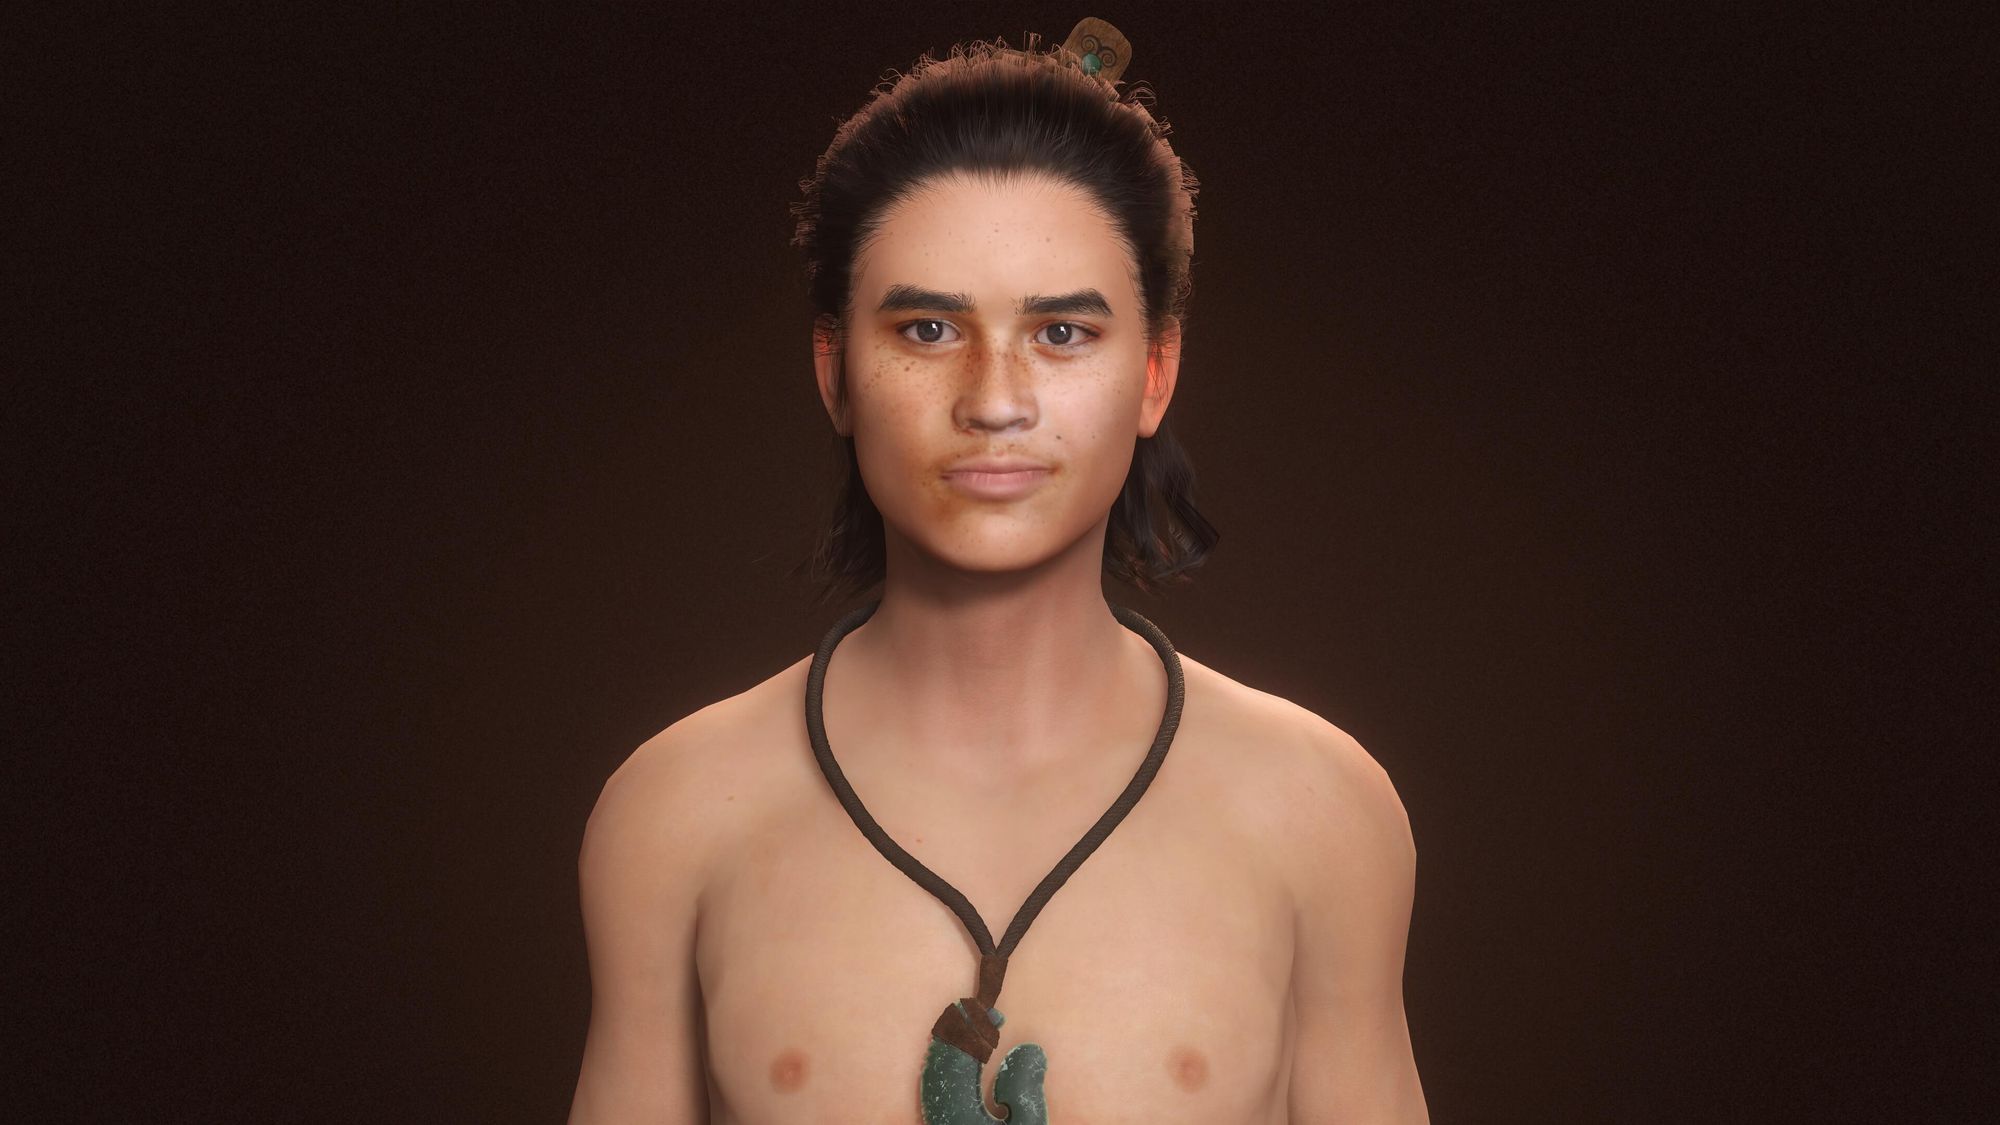
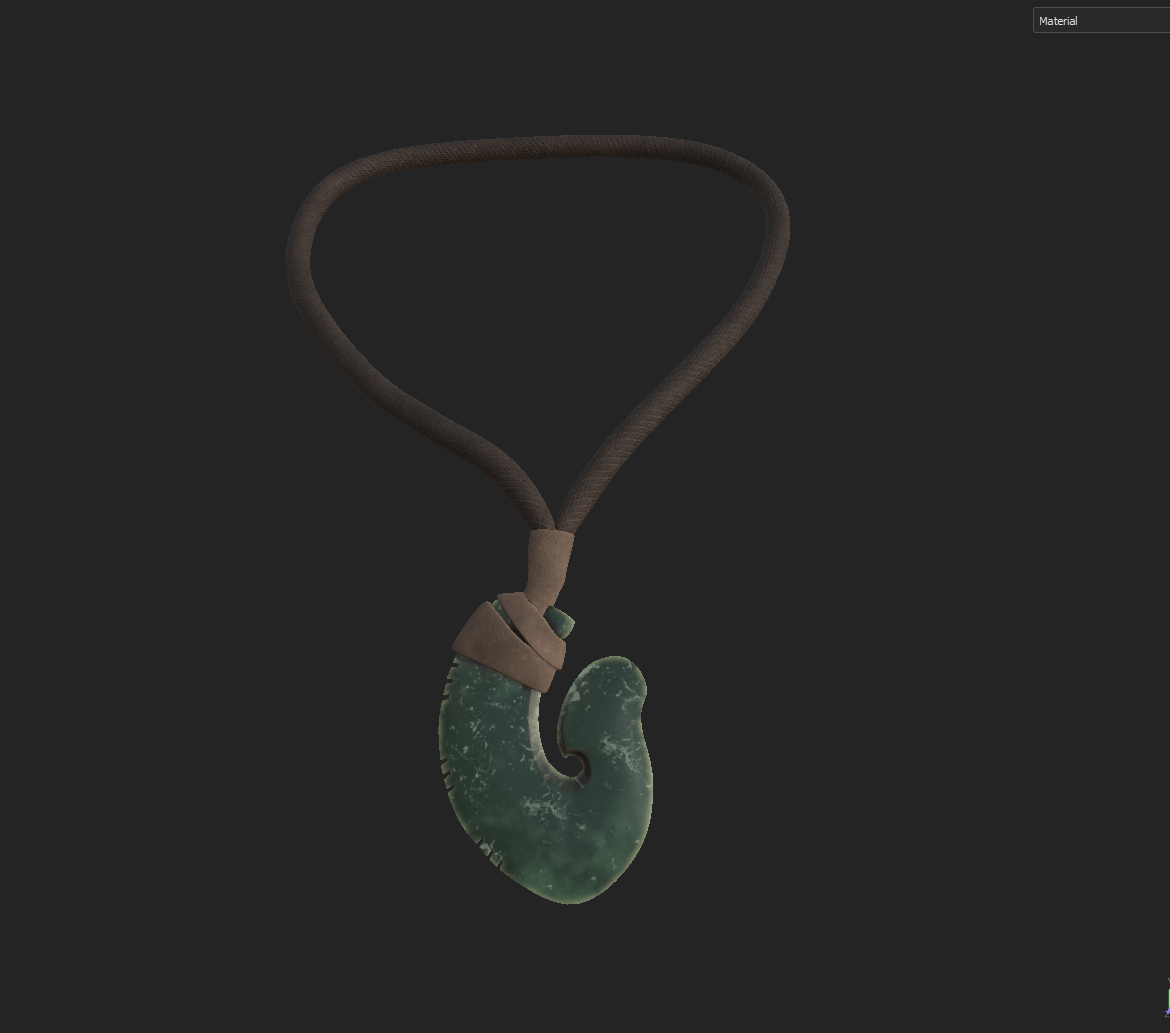
I modeled a Māori “Pounamu” a traditional greenstone necklace, comb “Heru” with feathers and a skirt.
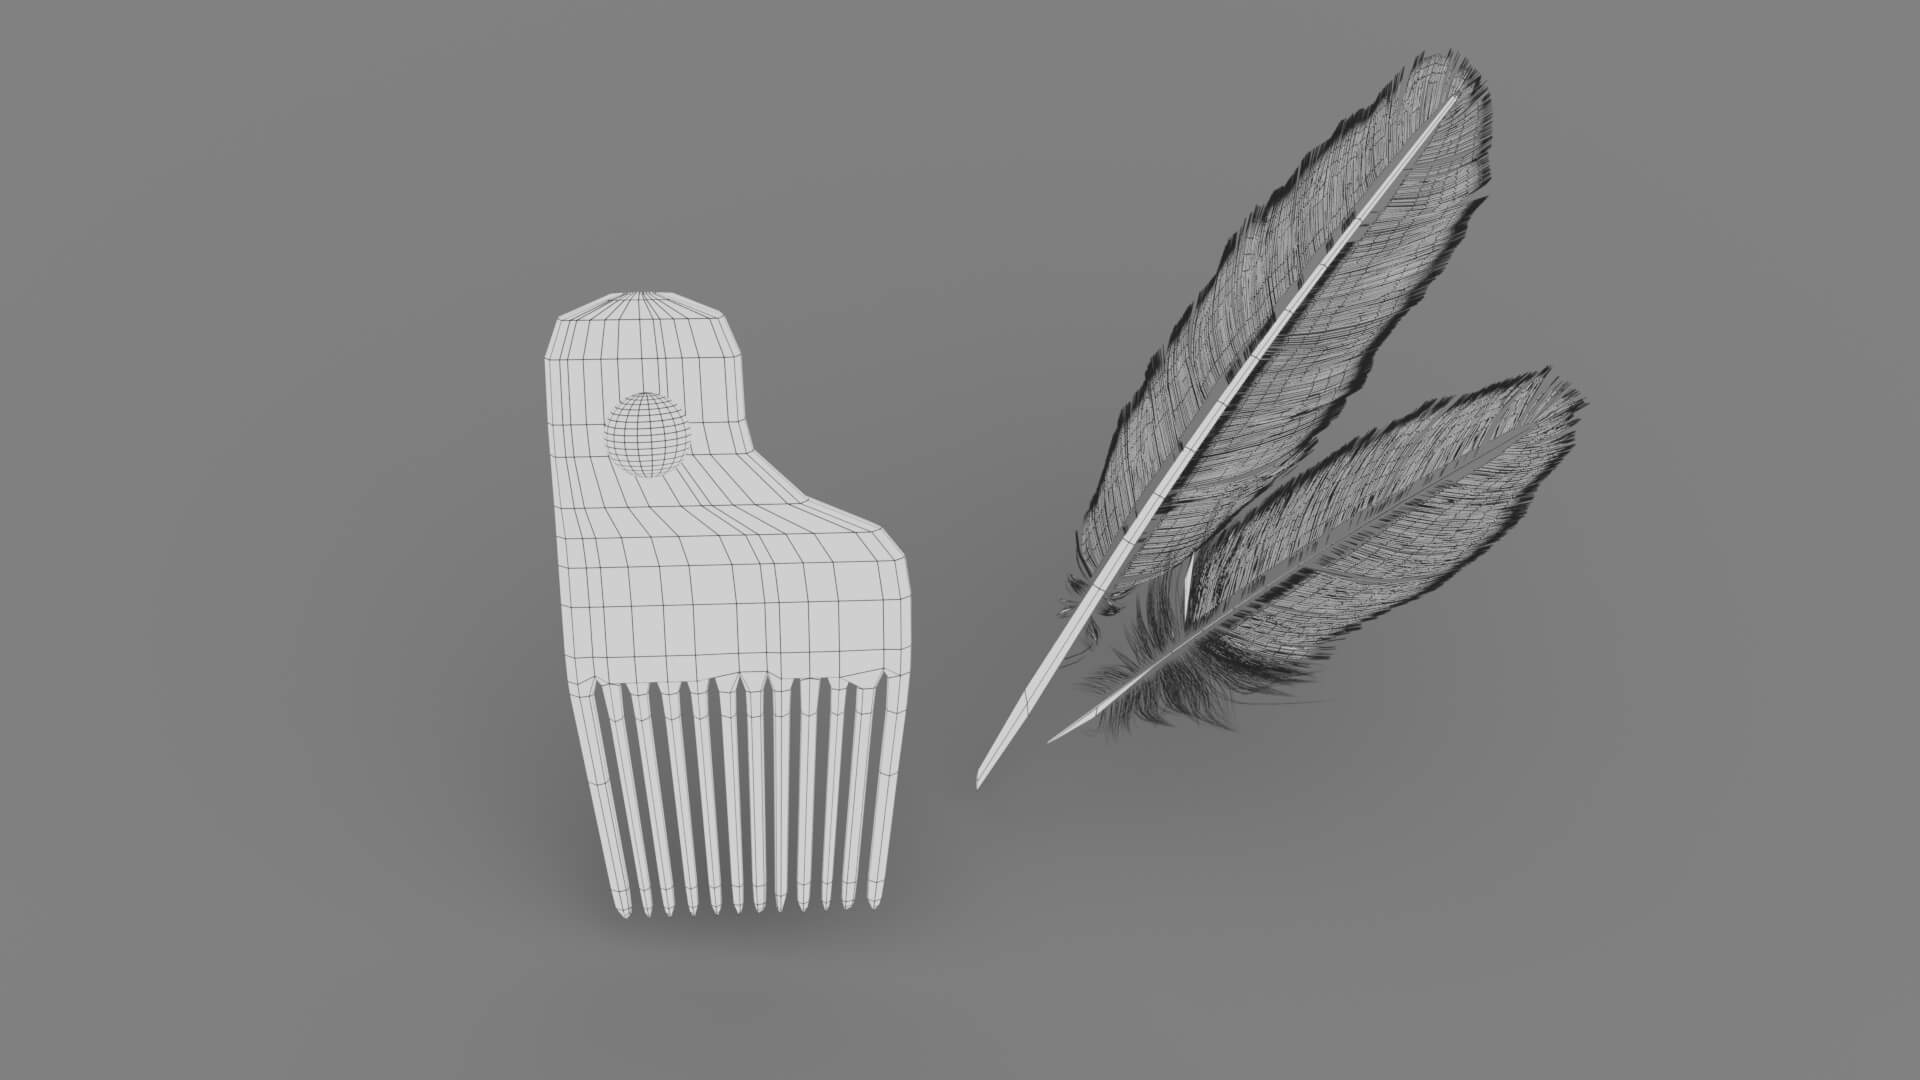
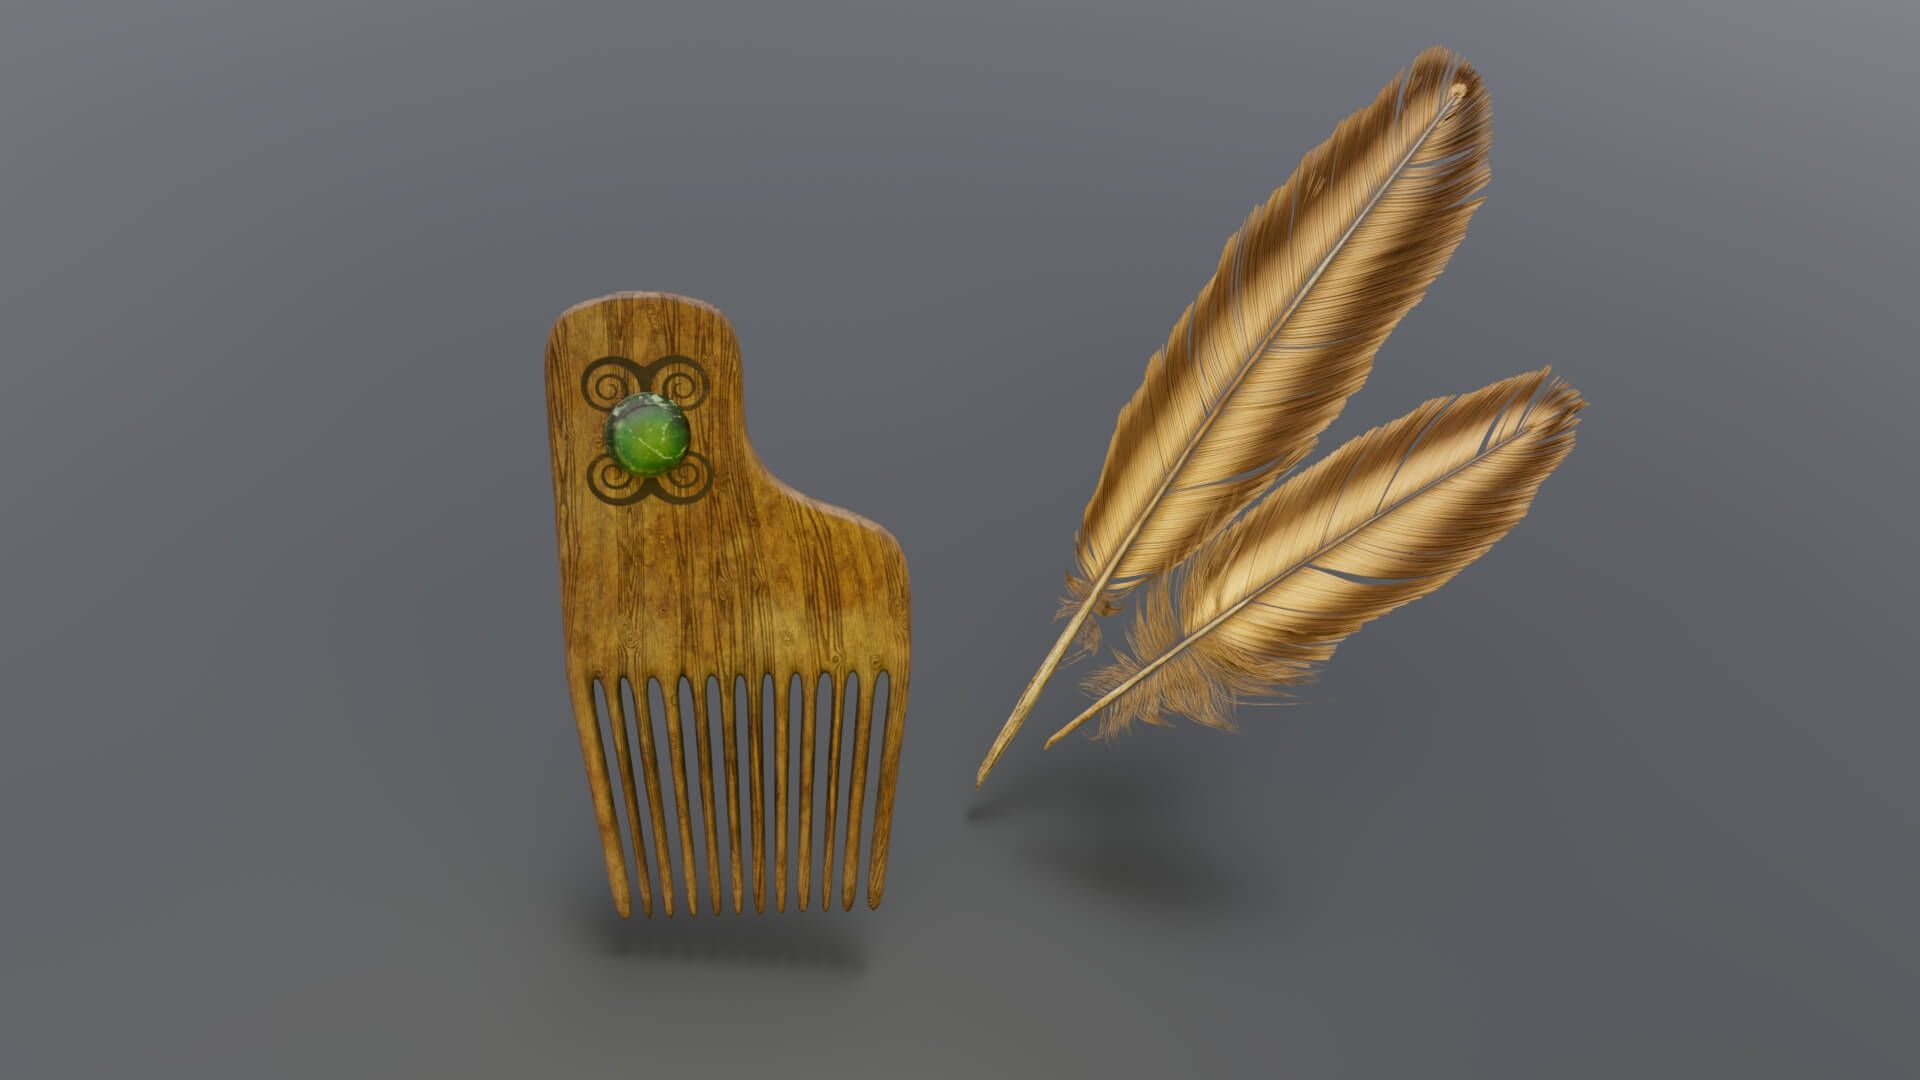
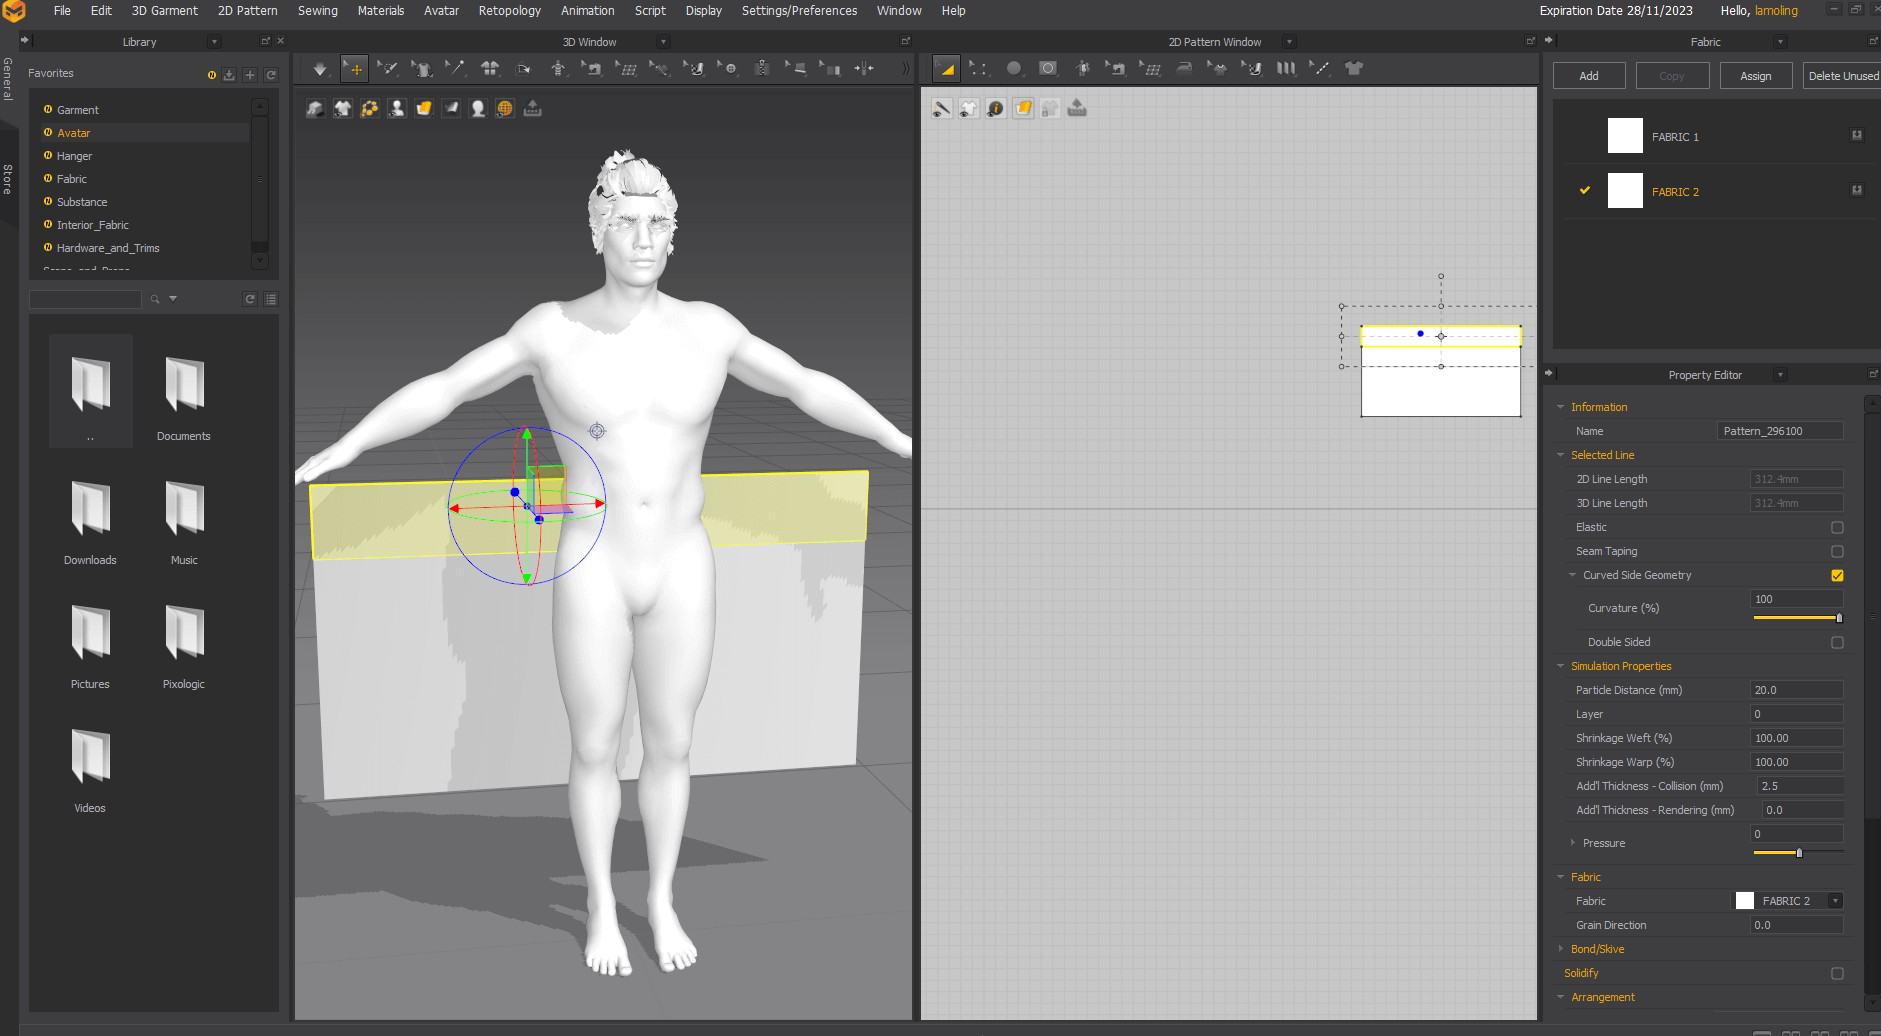
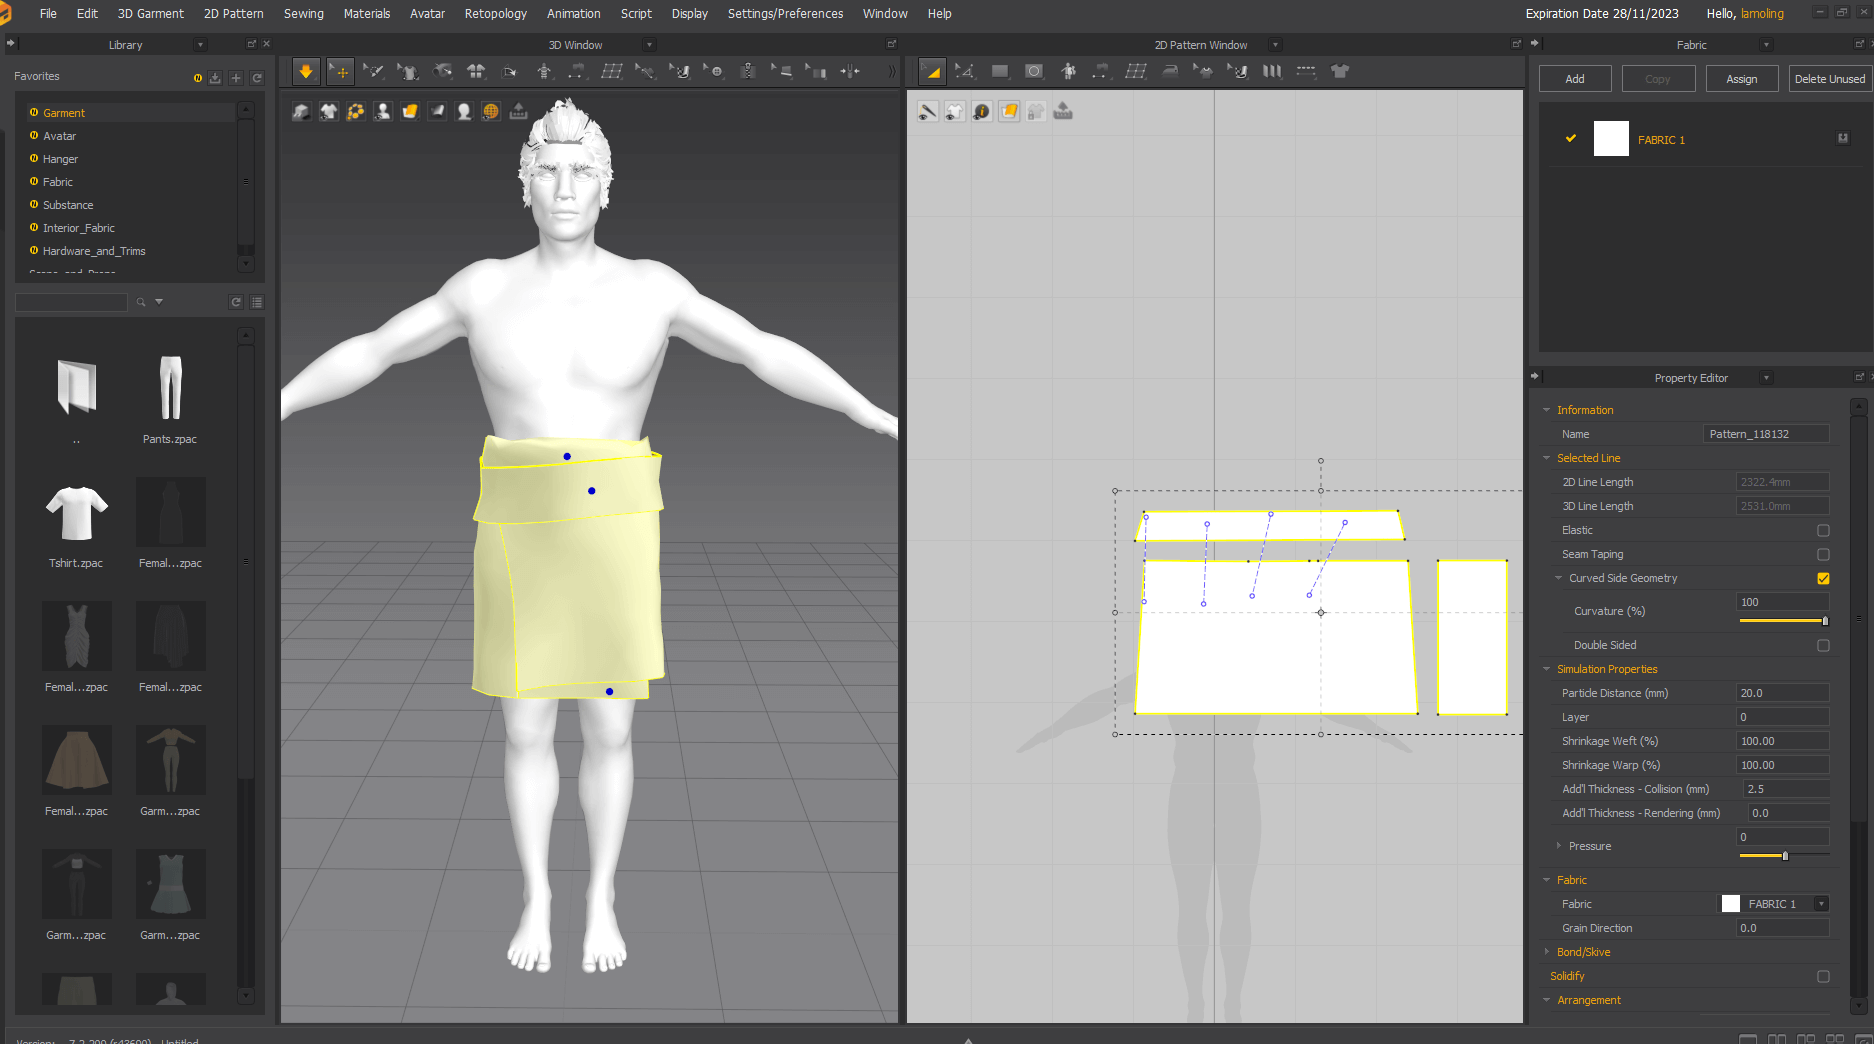
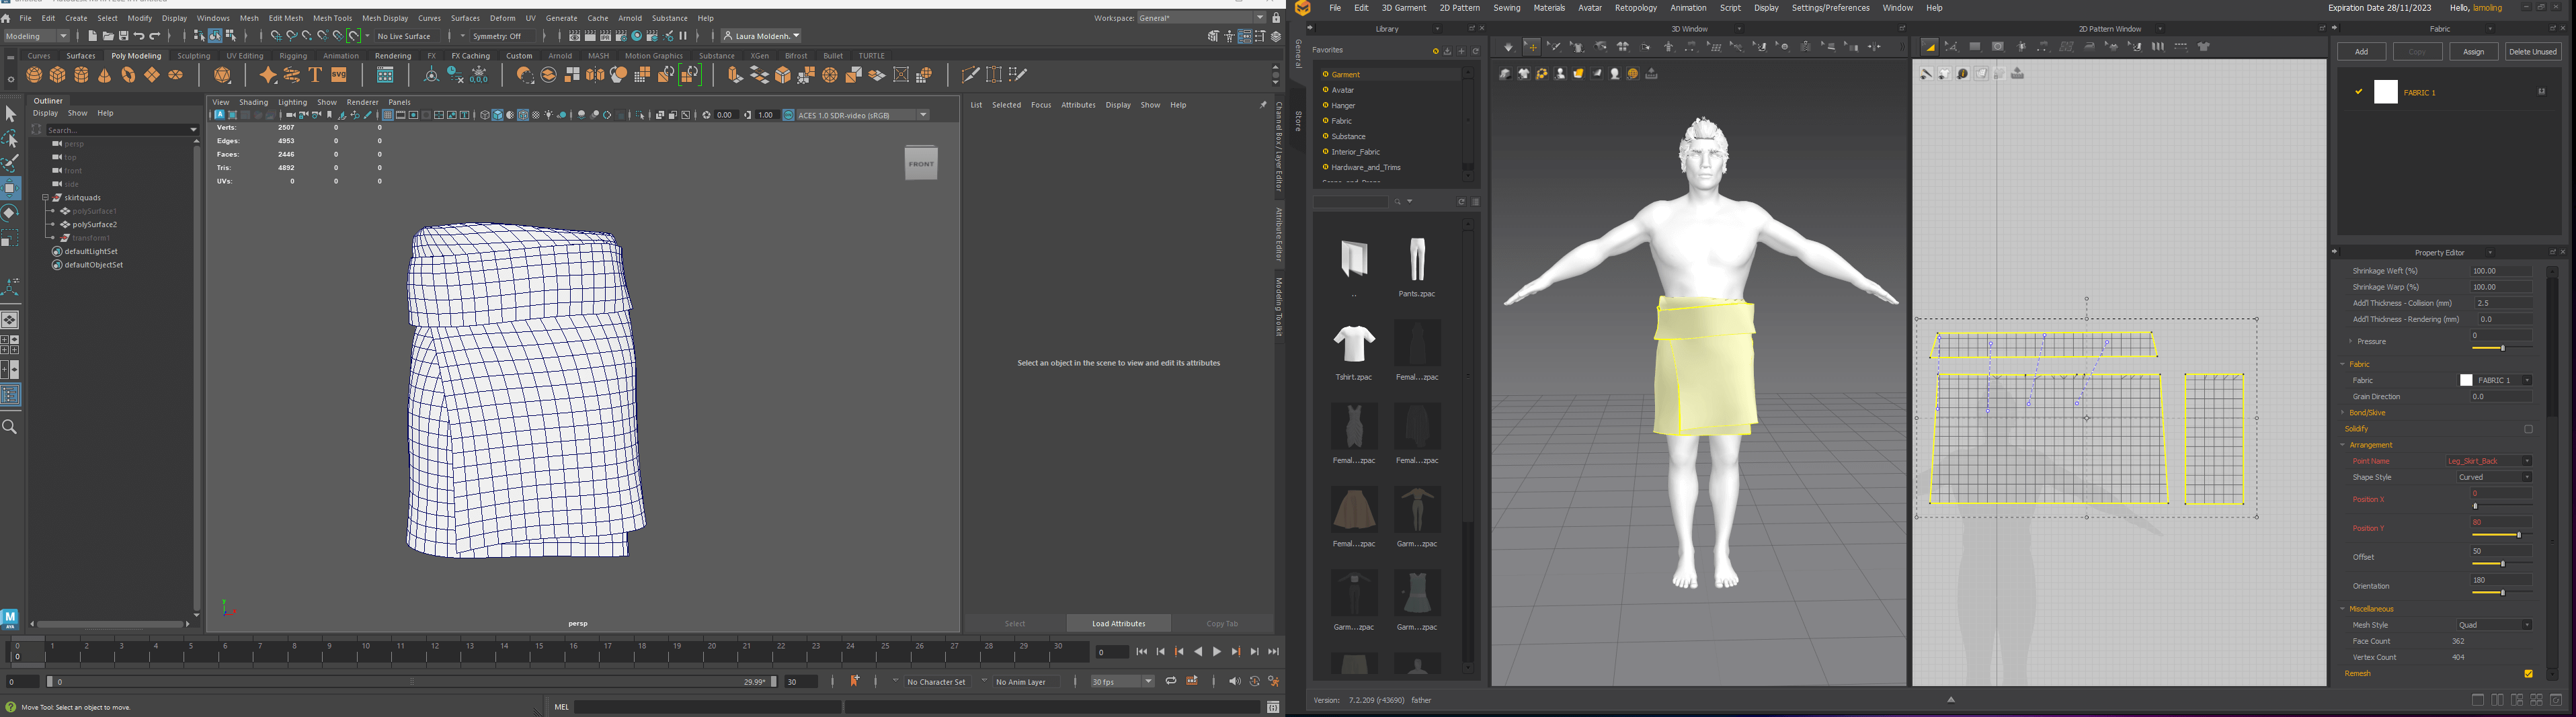
Besides to Xgen grooming, texturing, and modeling, I also tested my tailoring talents in Marvelous Designer for the first time to taylored the skirt. —> FlippedNormalsMD Tutorial
That wasn't easy. After several attempts, my idea worked, and I was even able to adjust the physics slightly.
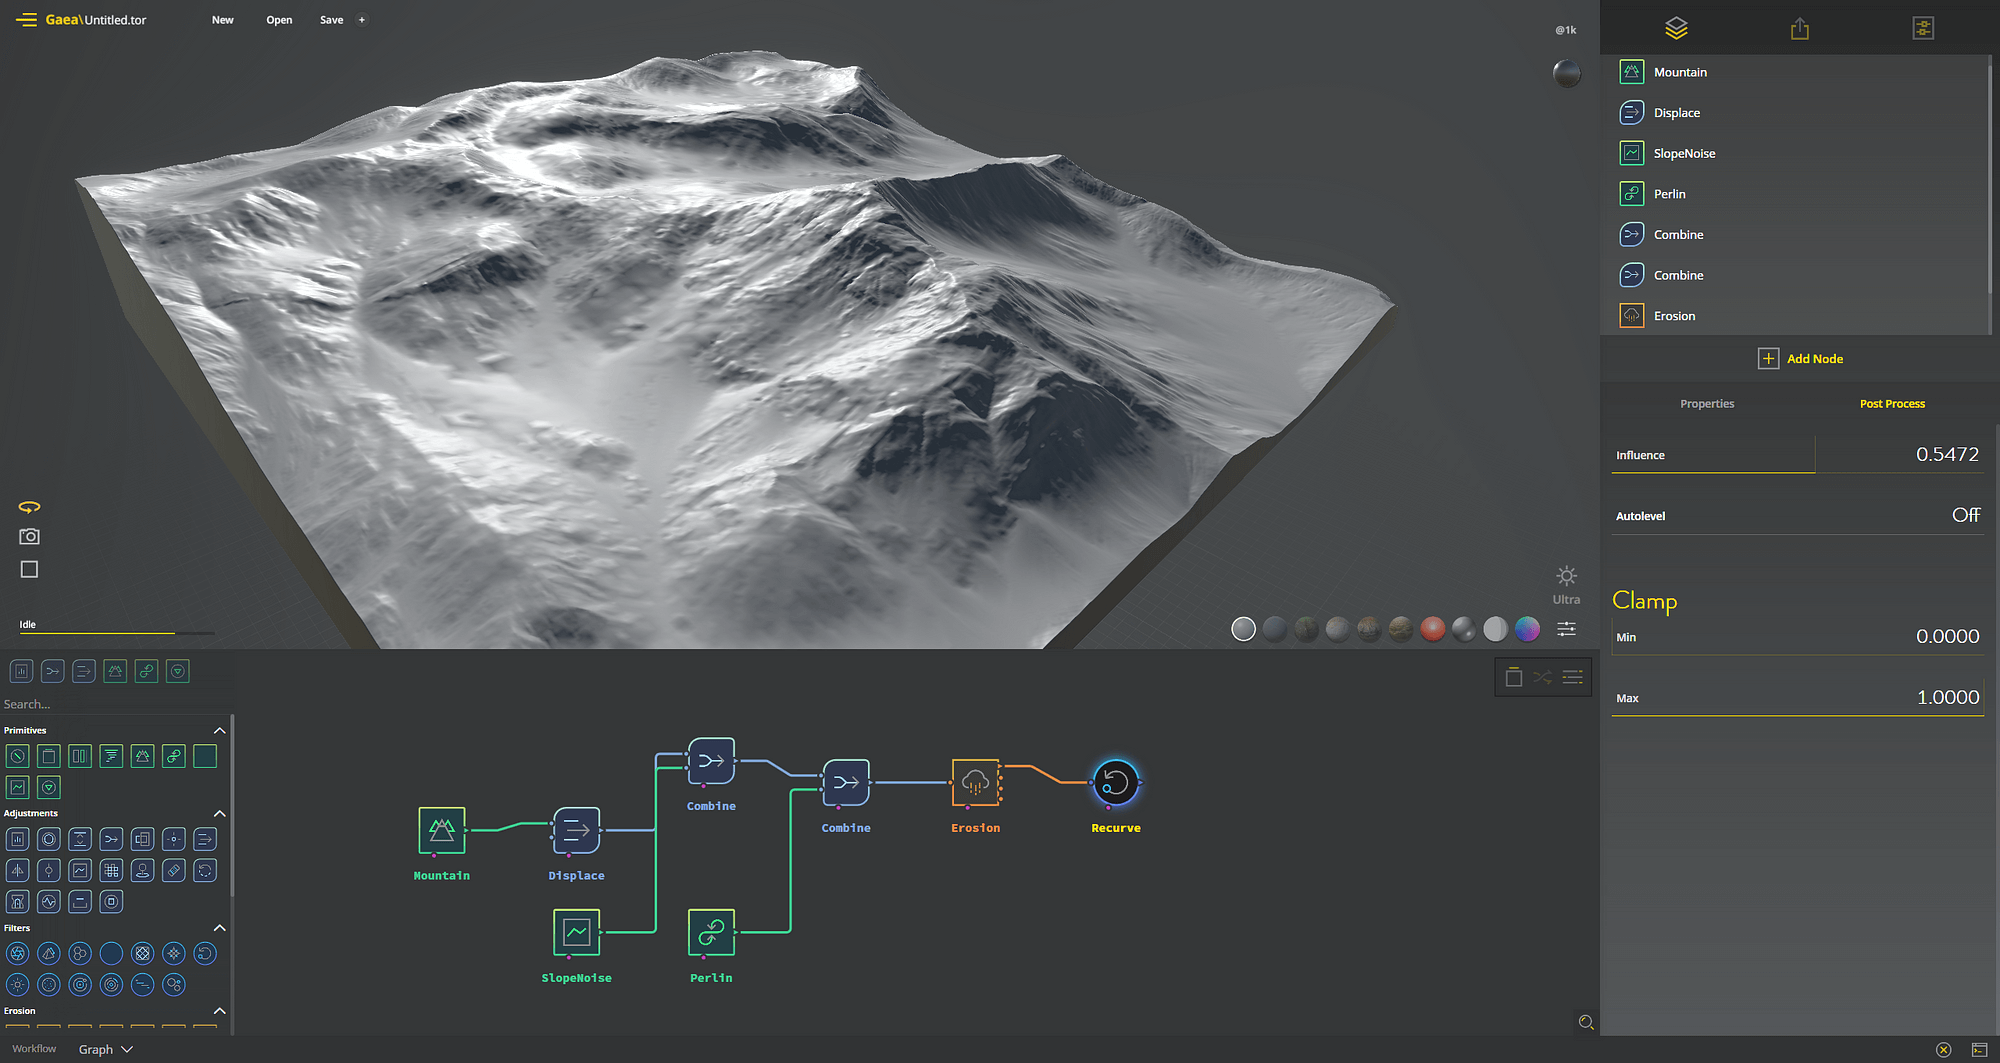
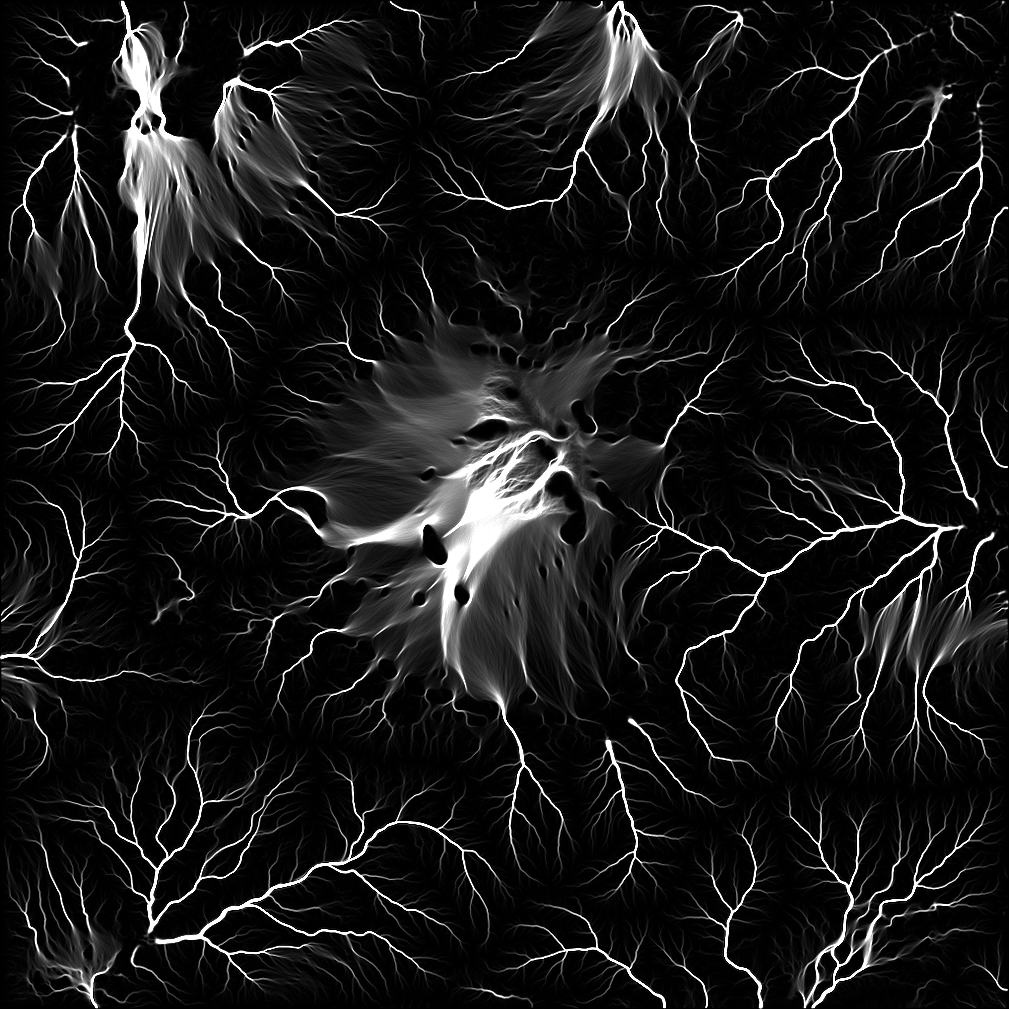
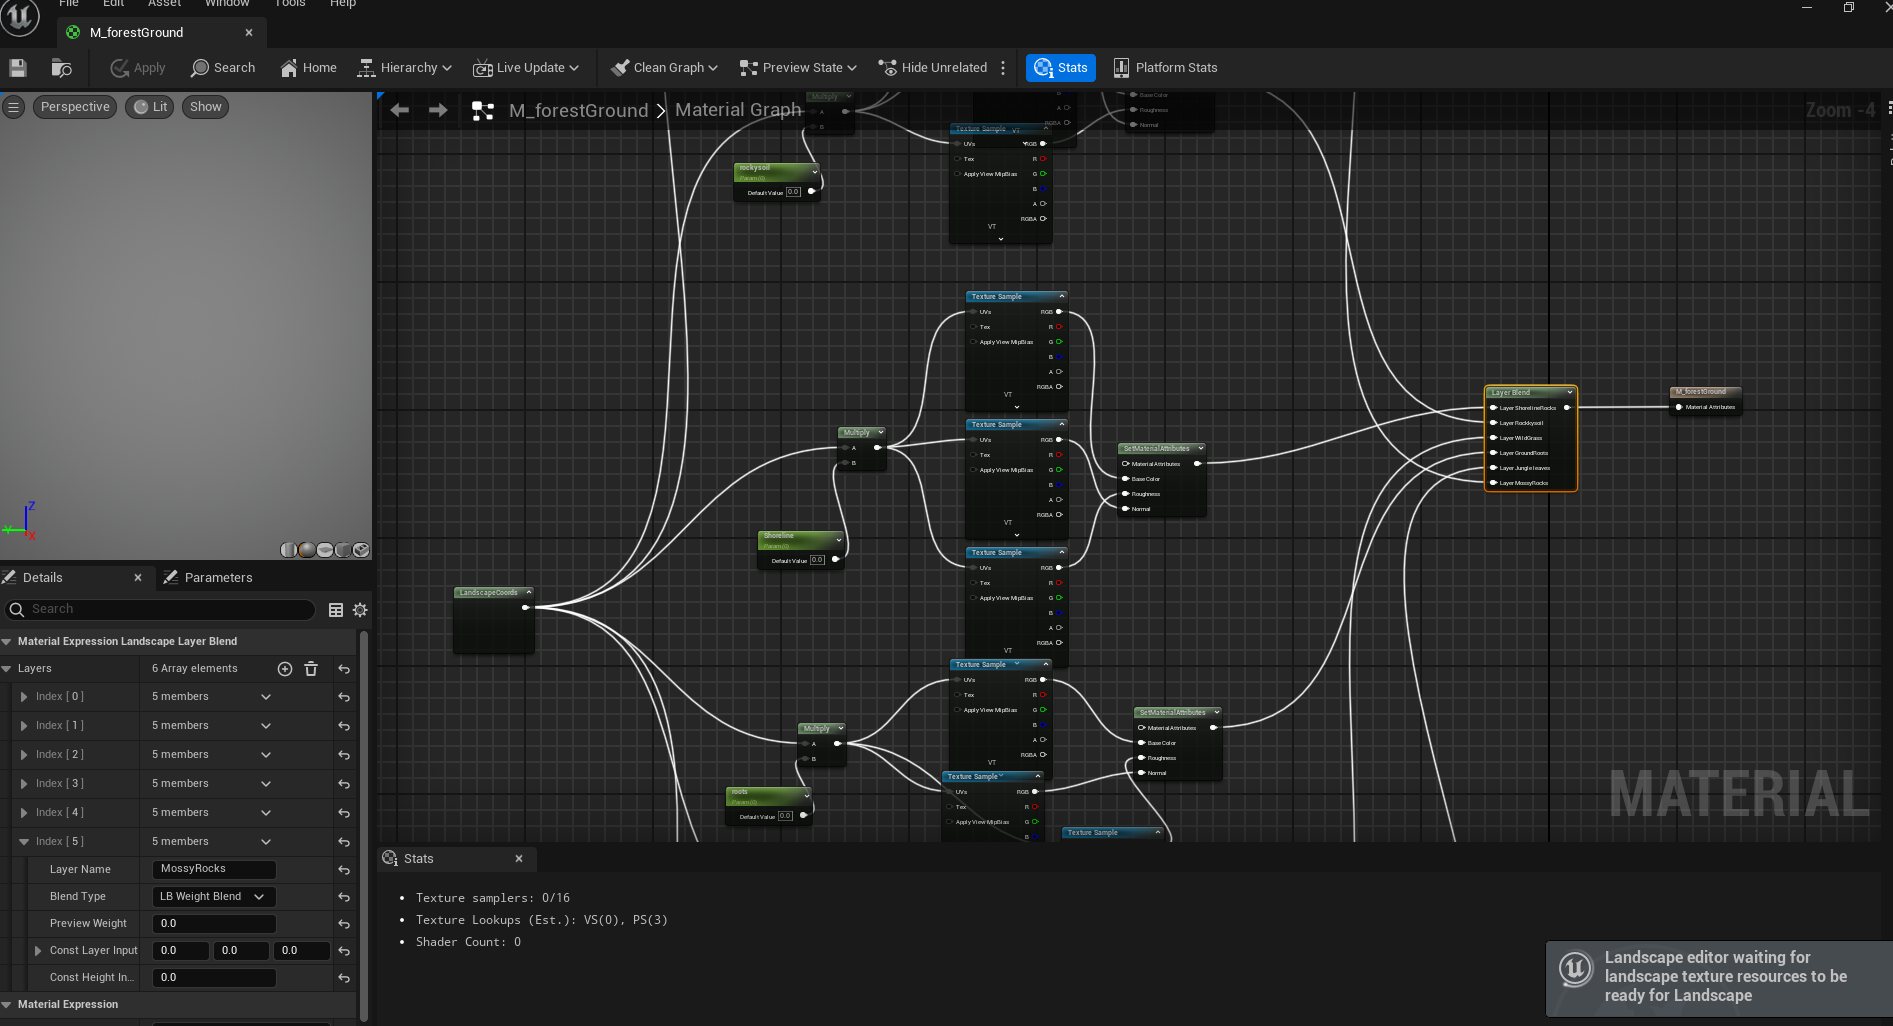
I used the free Gaea software to create different height maps for my background mountains. As an environmental engineer, I know how to work with geographic data like height maps from the real world. And Gaea is a stunning powerful software. I could spend hours creating landscapes. The possibilities in UE to automaterial them after are impressive! But I kept it simple and after the landscape creation with the Gaea, I cut a copy of it out into many different flexible mountains to arrange them as background mountains. I painted them with the landscape painter, after I set up the blueprint materials for that. I worked through a lot of tutorials to learn more about painting landscapes and creating blueprints. —> Gaea Tutorial

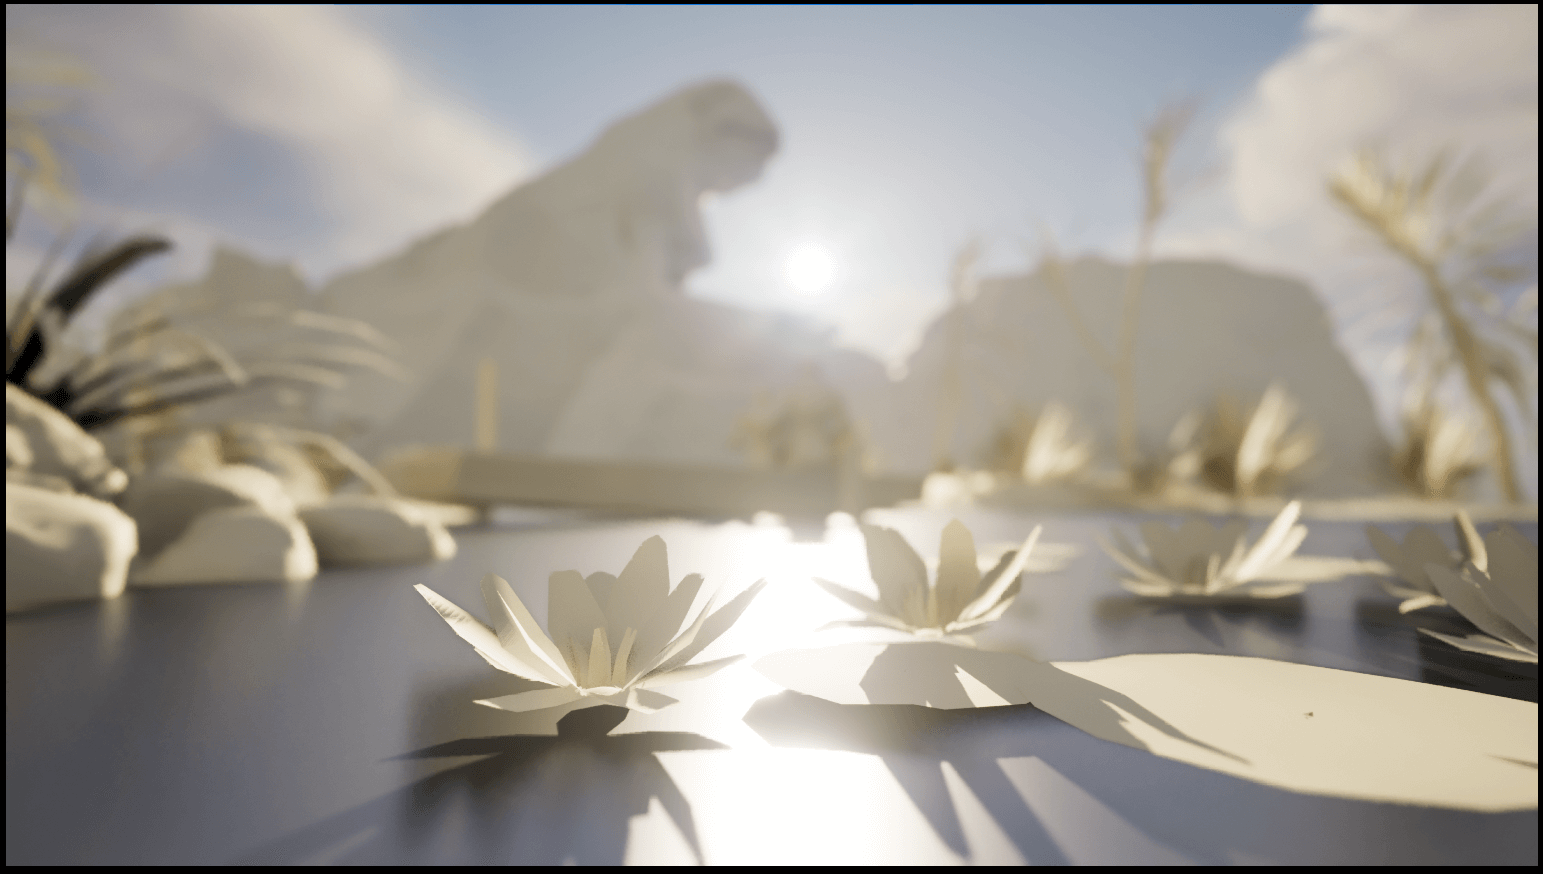
For my water, I used the standard river/lake body in my environment. —> Helpful UE WaterBody Guide.
I placed all my foliage materials on a white plane, to have an overview about my used meshes. Also to test my LOD settings or texture issues. Most of my rocks are all the same but in different sizes and different LOD presets. All natural assets I used are mega scans from Unreal Marketplace.
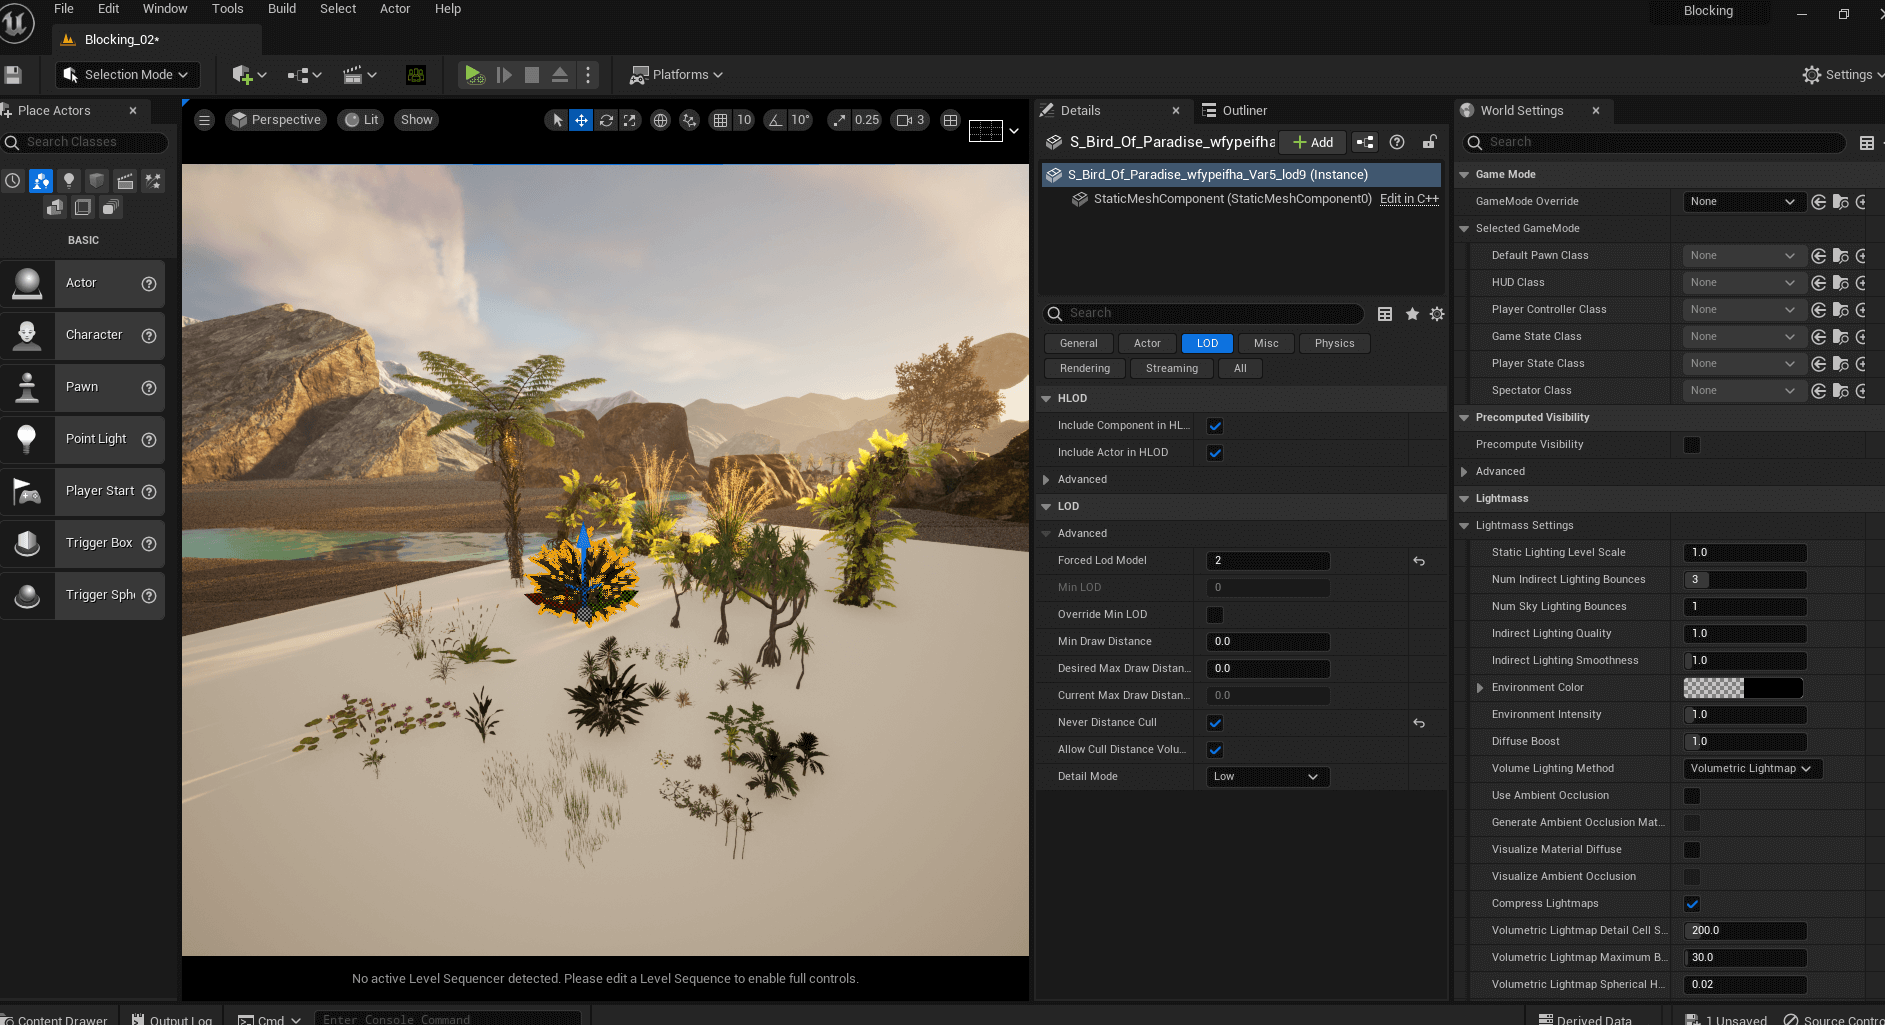
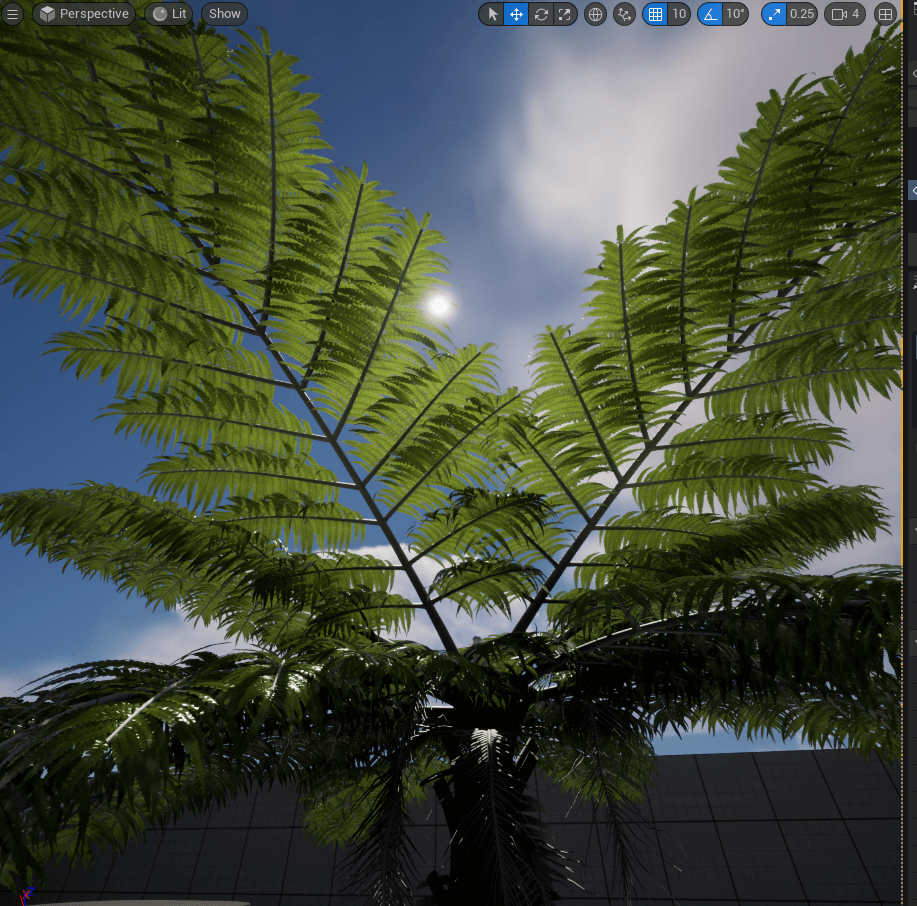
I bought a fern tree as a maya file from CG trader, because I wanted to have the most famous native NZ plants inside my sequence and there was no similar tree on UE Marketplace. That was another good lesson, to work with objects from other resources.
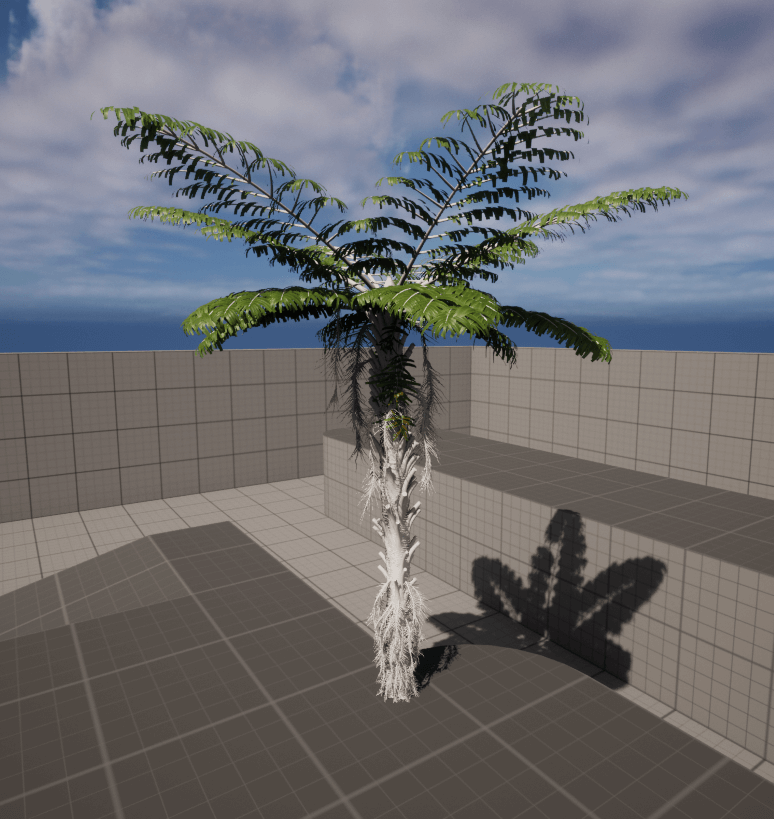
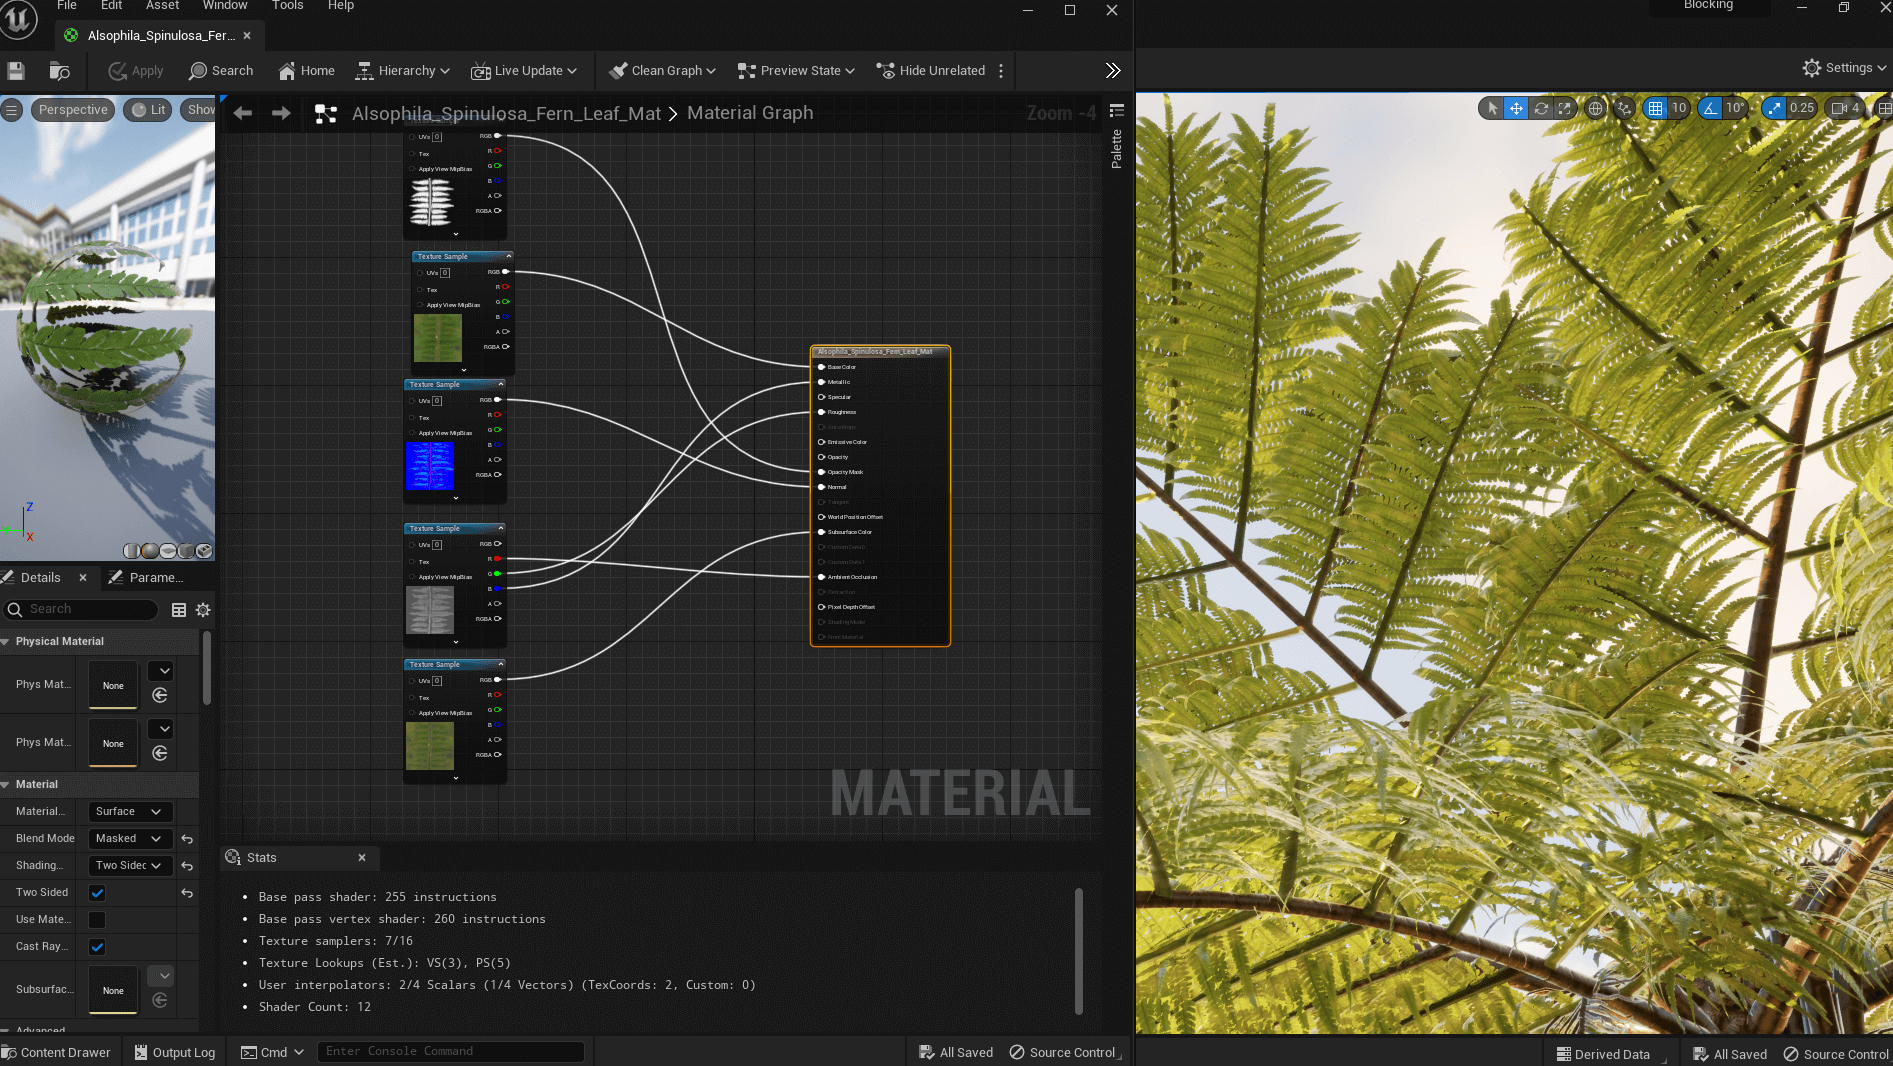
I prepared the .fbx in Maya and learned to create leaf materials in UE with subsurface, two-sided faces and translucency. The Fern tree wasn't originally made for UE, so I had to set up everything on my own after I tested the mesh in Maya. —> UE-Foliage Translucency leaf Tutorial
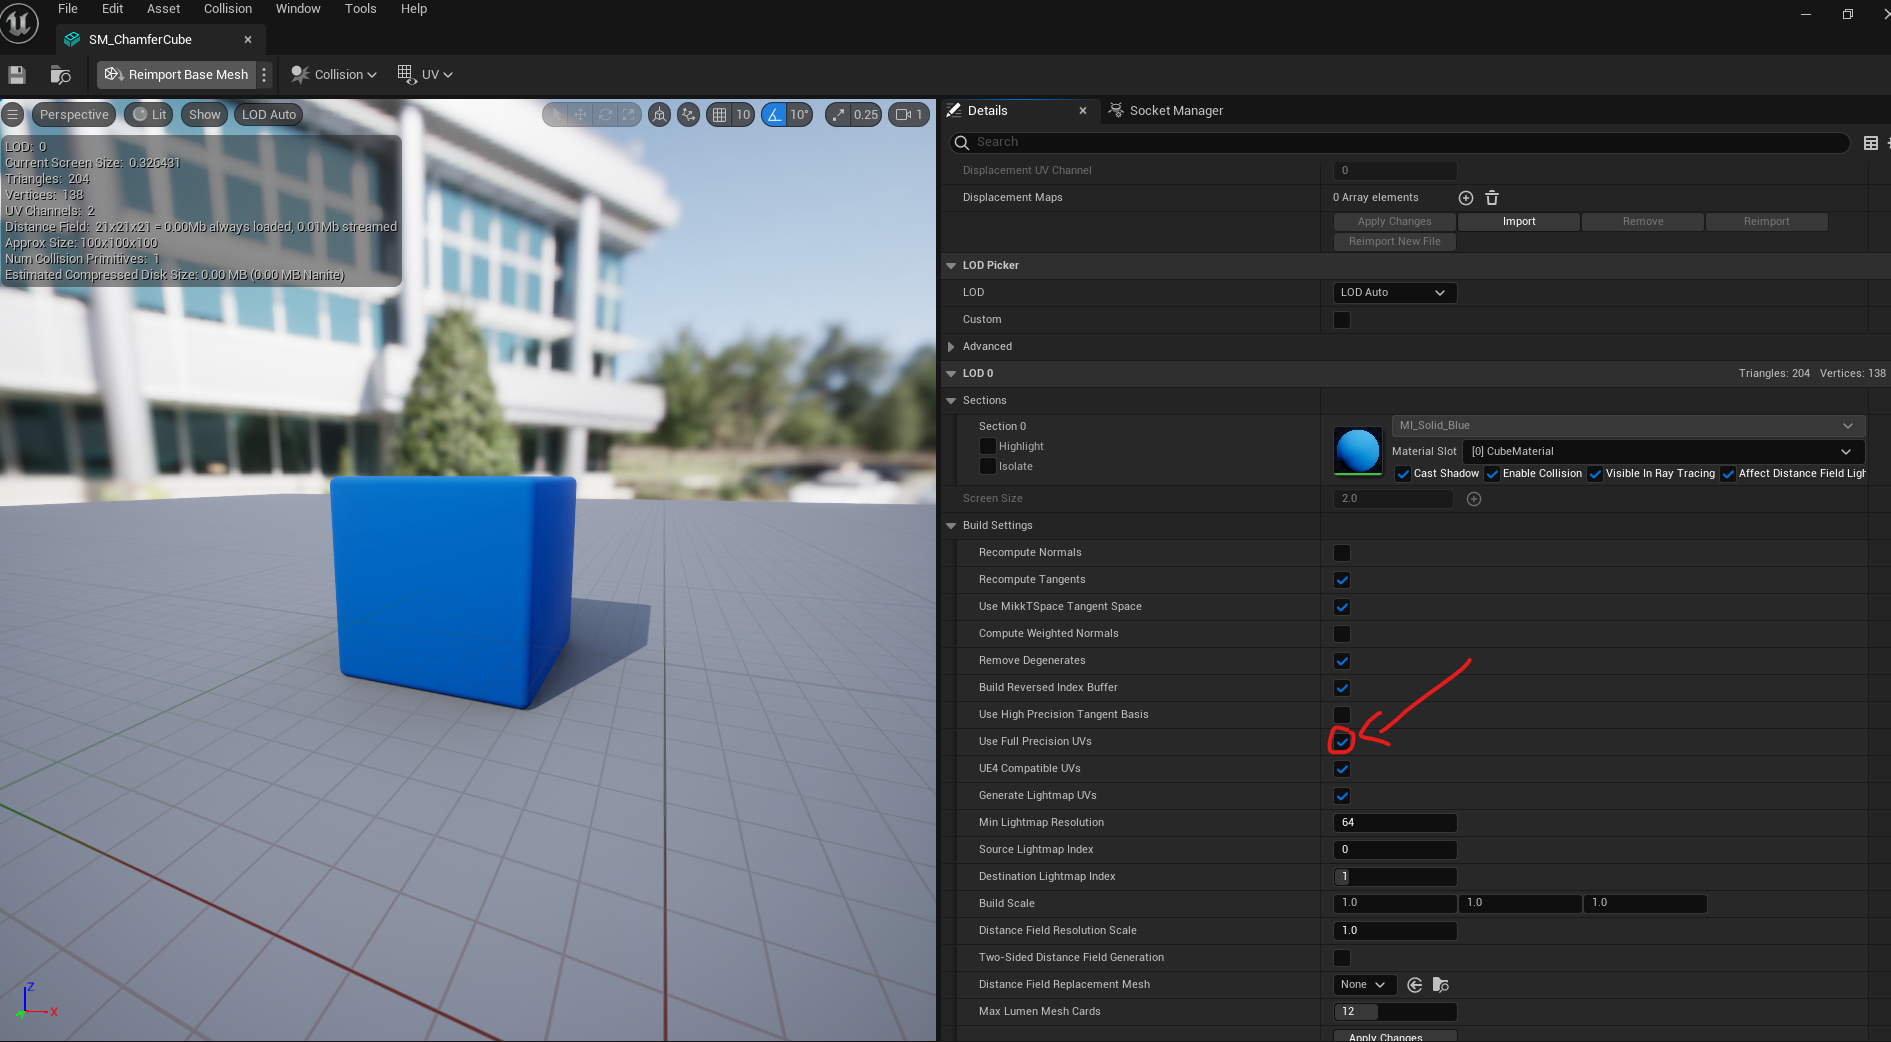
I had an interesting texture issue on my canoe and house. The texture tiling seemed offset, but the UV was ok. It took me a while to find a simple solution for that texture issue in UE on my own.
If you import your own meshes to UE, your UV´s seems to be offset if you assign your texture from Substance painter. Inside the build setting, in edit mode of your mesh and the materials you must Enable Full Precision UVs on meshes. By default, UE is set to half. If you want to use textures from substance you have to turn that on in UE. I haven’t found this solution online and hope that will help others.
LOD, raytracing, nanite, and lumens were first extremely challenging for me to understand. But after many hours of online tutorials and testing, I have achieved a strong fundamental knowledge of how things work with UE. Thanks to William Faucher for uploading your awesome tutorial for free online.
While I adjusted the light, I ran into shading issues. Some of them were black and not a simple shade. It took me another 3h to figure out what caused this problem. I changed lights, placed new lights, checked all the settings and after all I found the solution. Select your mesh, under details the is the option under build setting - build scale where you can increase the value for distant field shadow base. Sometimes If you have very dark areas in UE on a mesh, light can cause this issue. Another thing was a similar shade issue on my rocks, I easily fixed that with ray tracing on.
At this point I learnt a lot about ray, nanite and light in general in UE. And there are many settings/ features / plugins they´re not automatically turned on or installed in UE by default.
Nanite is a great tool for creating high-quality models with lots of triangles using fewer resources. By enabling Nanite for all objects in UE 5.1 except foliage, plants, and trees, you can improve rendering speed and boost frames per second. This is how I made my rendering process more efficient.
That’s the way I optimised my render time.
I started to adjust the light as well. But at this stage it wasn’t my final light setup. In some areas I fixed LOD changings to have a nice-looking dense jungle without clipping plants. —> William Faucher Tutorials
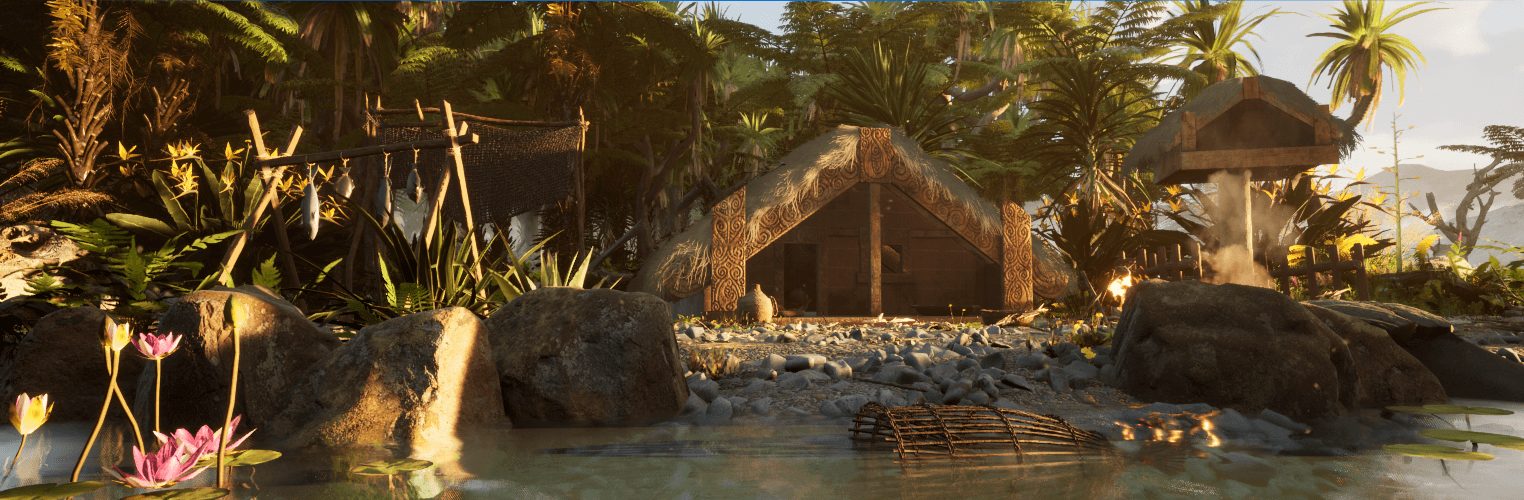
After I finalised my foliage and I was happy with the general look of my scene, I started creating environmental effects to reach a naturally dynamic looking environment. First, I created a simple noise planes until they looked like fog. I placed them in front of the mountains and jungle with random noise on it and adjusted the fog noise. It worked out and I got a nice foggy scene with a flat image plane.
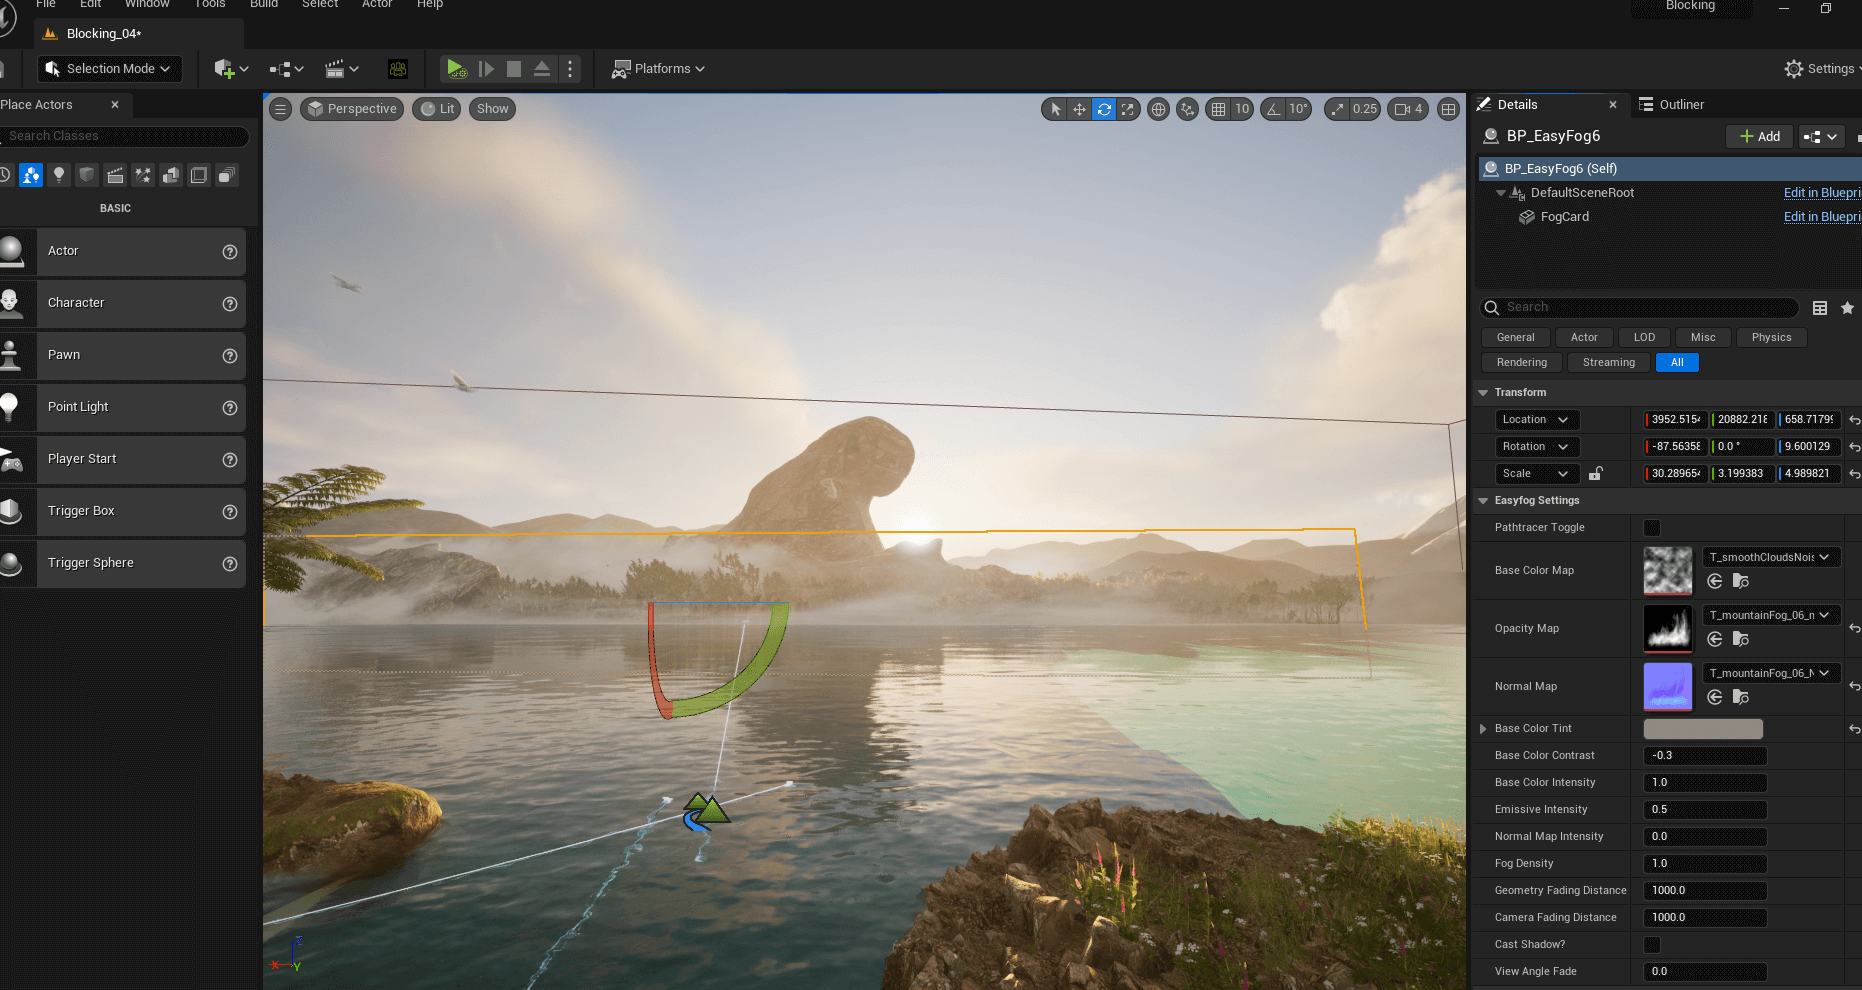
The atmosphere fog makes this even better.
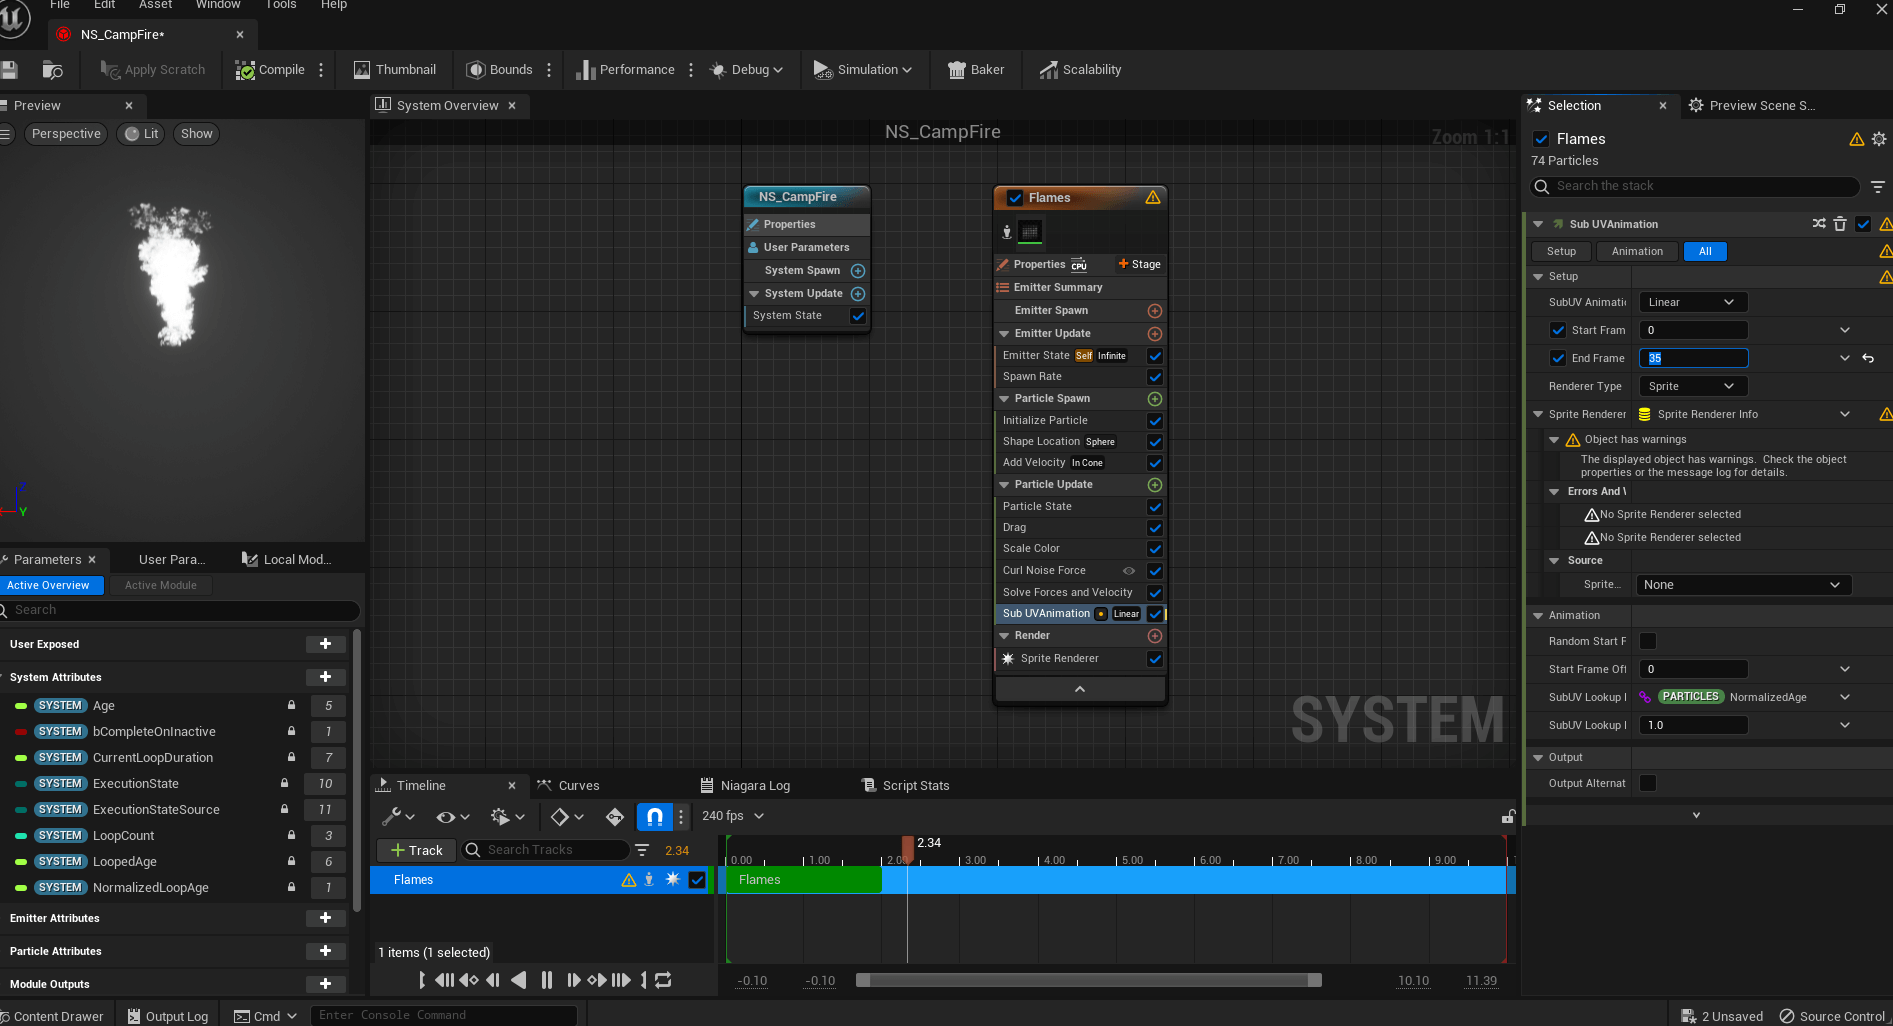
The entire configuration for an NS emitter in UE resembles Maya. I experimented with several values and added settings for modifications like color and velocity. The NS campfire wasn't as simple because I wanted to achieve a specific appearance.
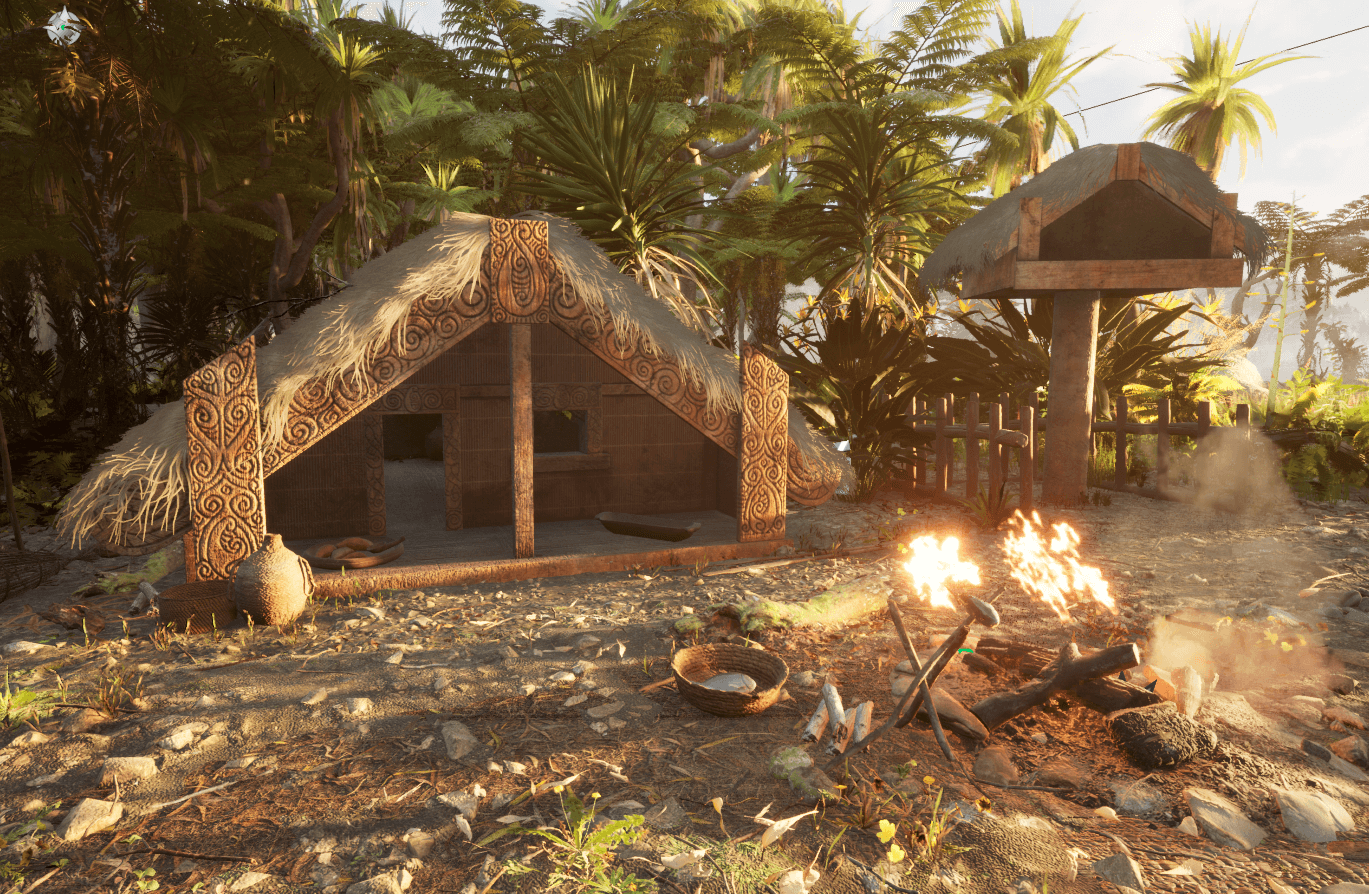
I also created a fireflies emitter.
After that I placed some dust and falling leaf emitters from the free Australian Mega scan marketplace package and adjusted the bird emitter with flying birds from right to the left in front of my mountain background. For a suitable animation, I keyed their start for my render.
I struggled to get my objects to float on the river with a blueprint. I manually animated the boat parts and a few other objects. Because of my schedule, I focused on other main parts of my project.
After character import to UE, I placed my two created characters, father, and son inside the boat in UE. I was able to use the rig to deform their position in a static way. Unfortunately, because of the short project time, I couldn’t set up full animated characters in Unreal. Without a control rig in UE I wasn’t able to animate them.

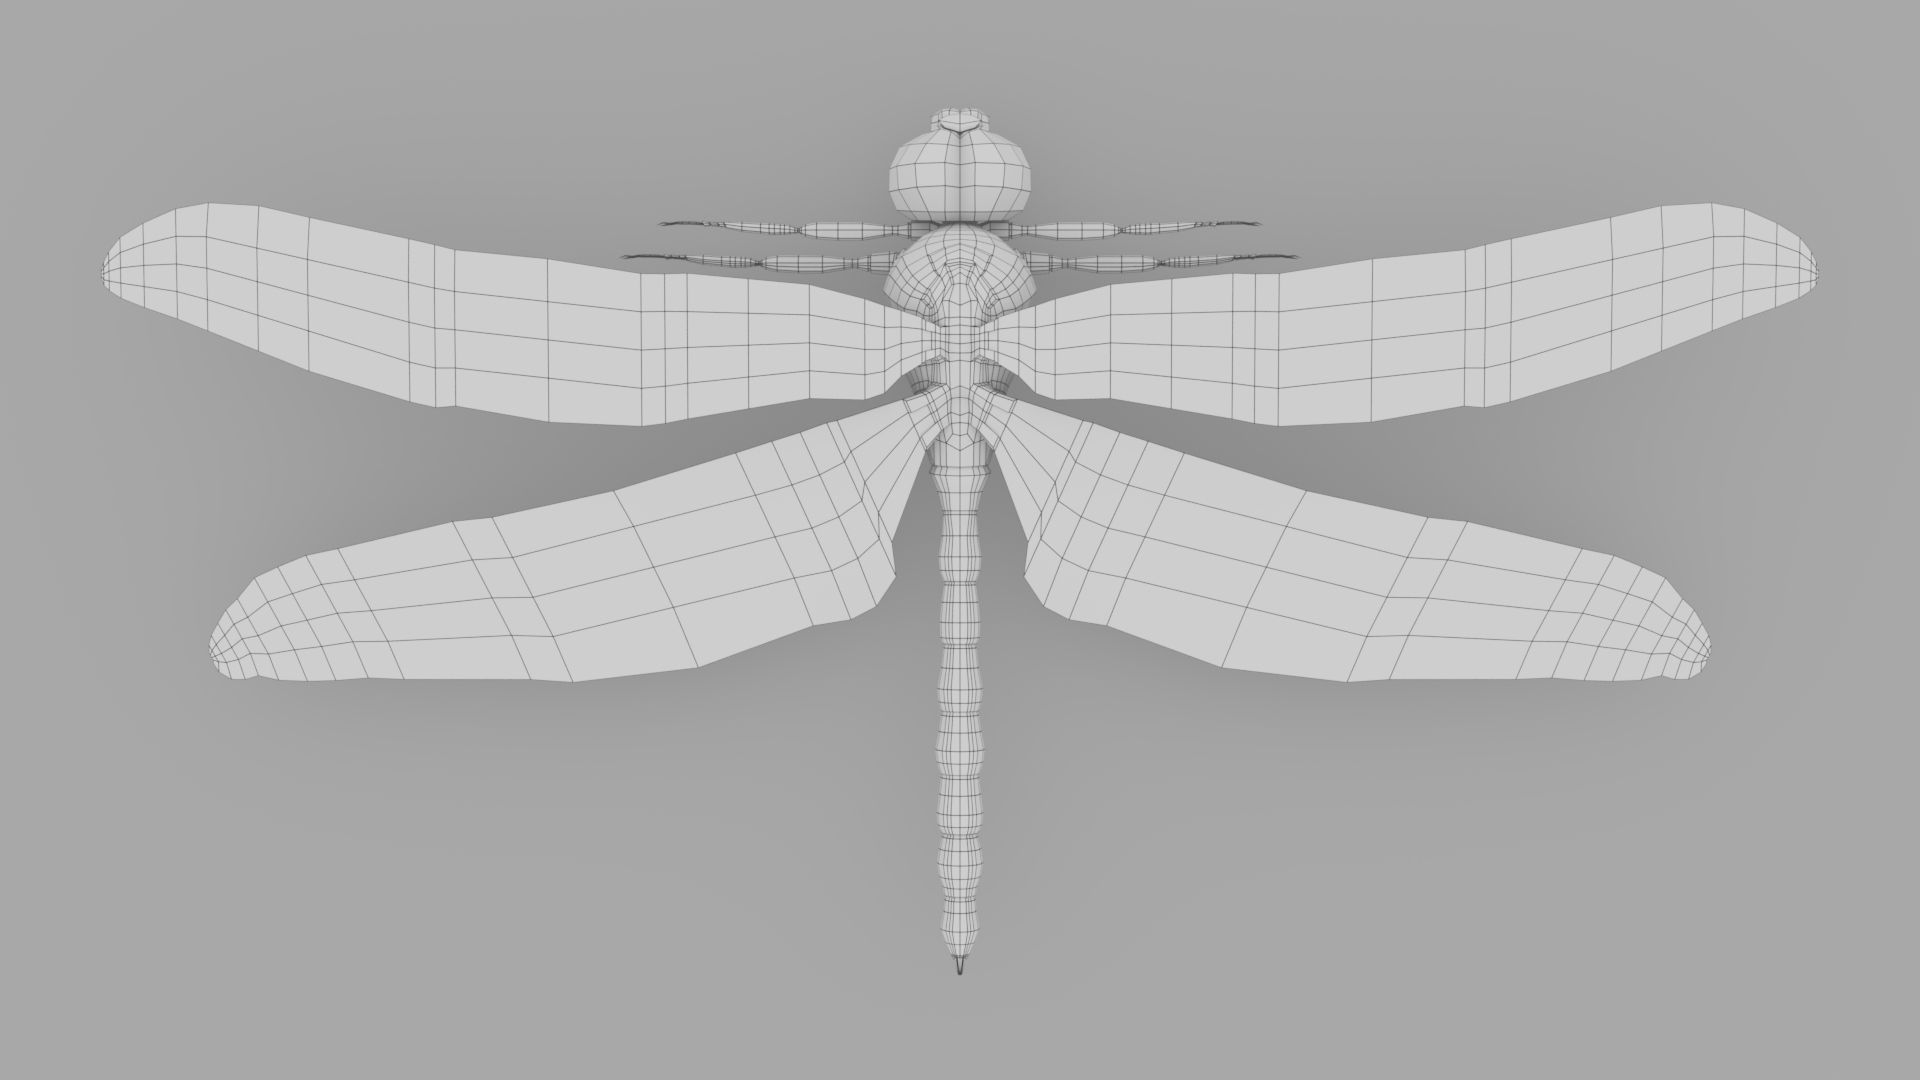
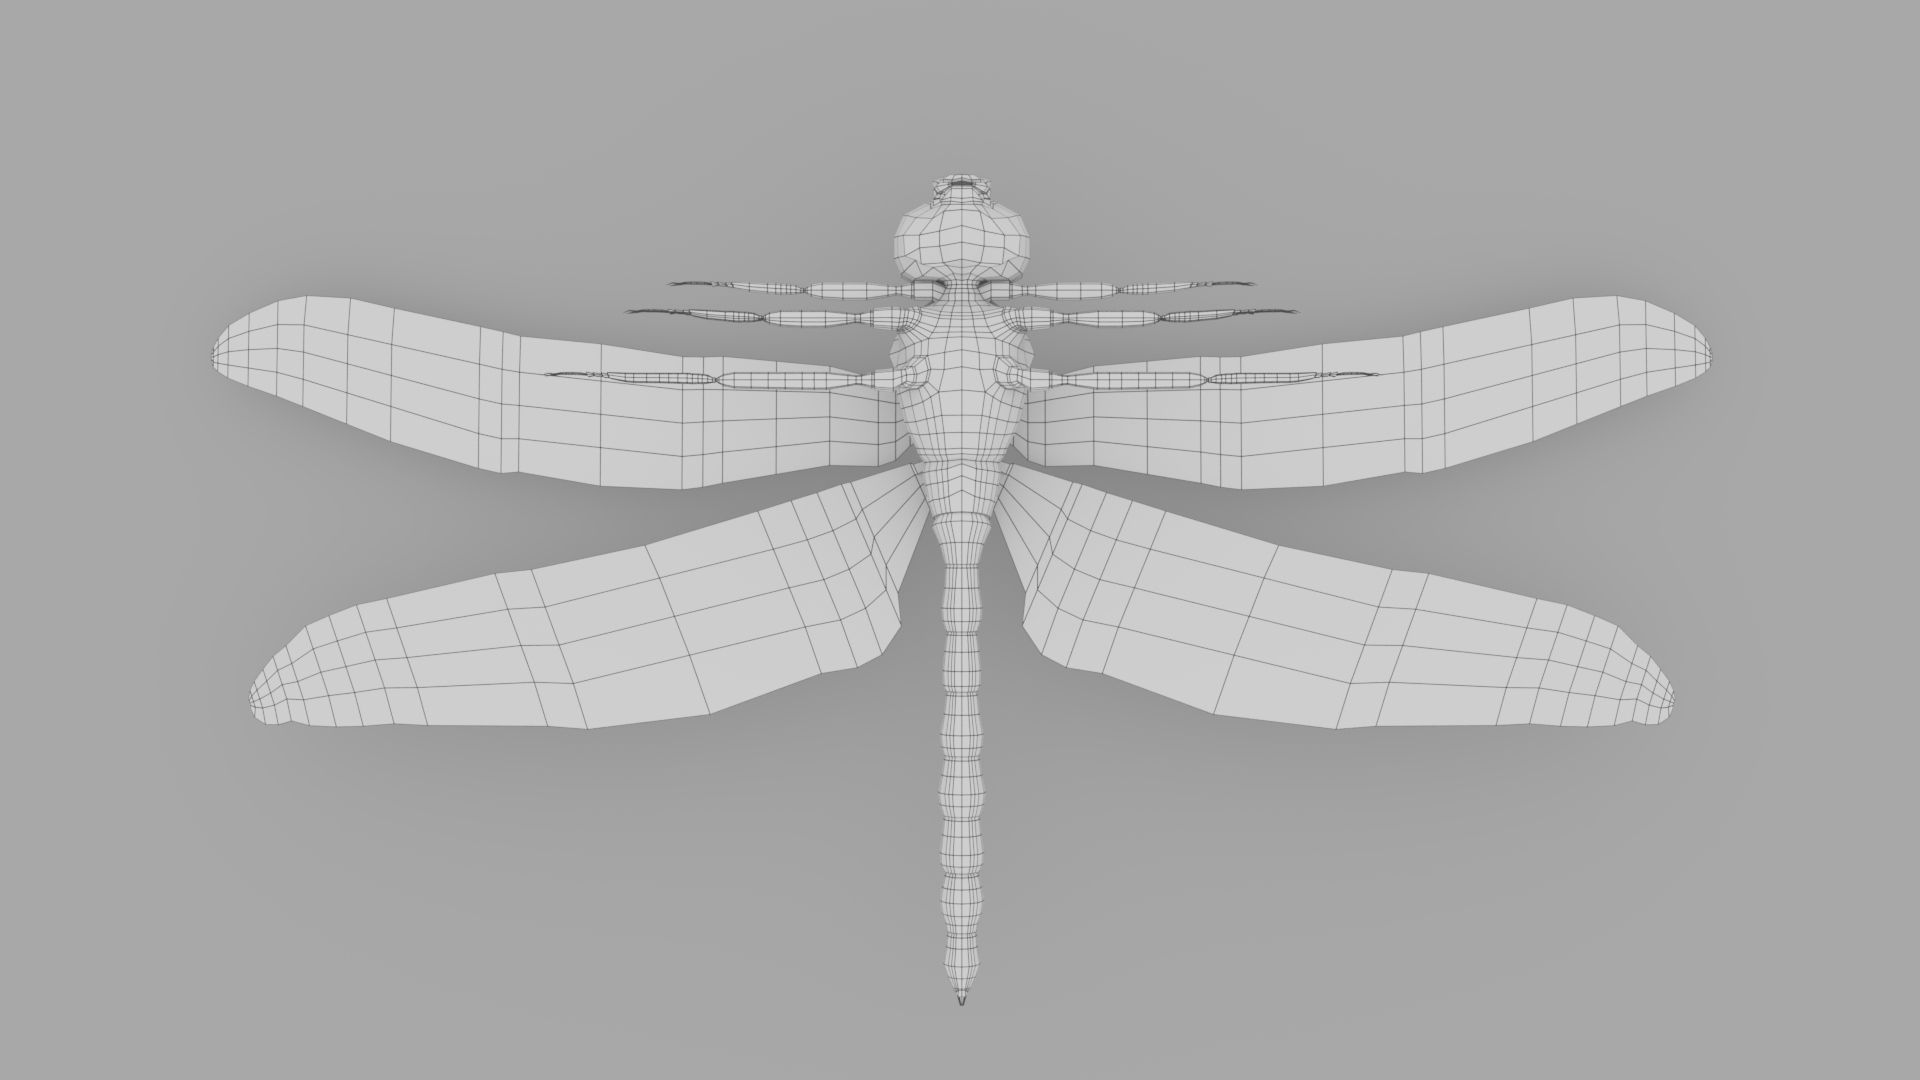
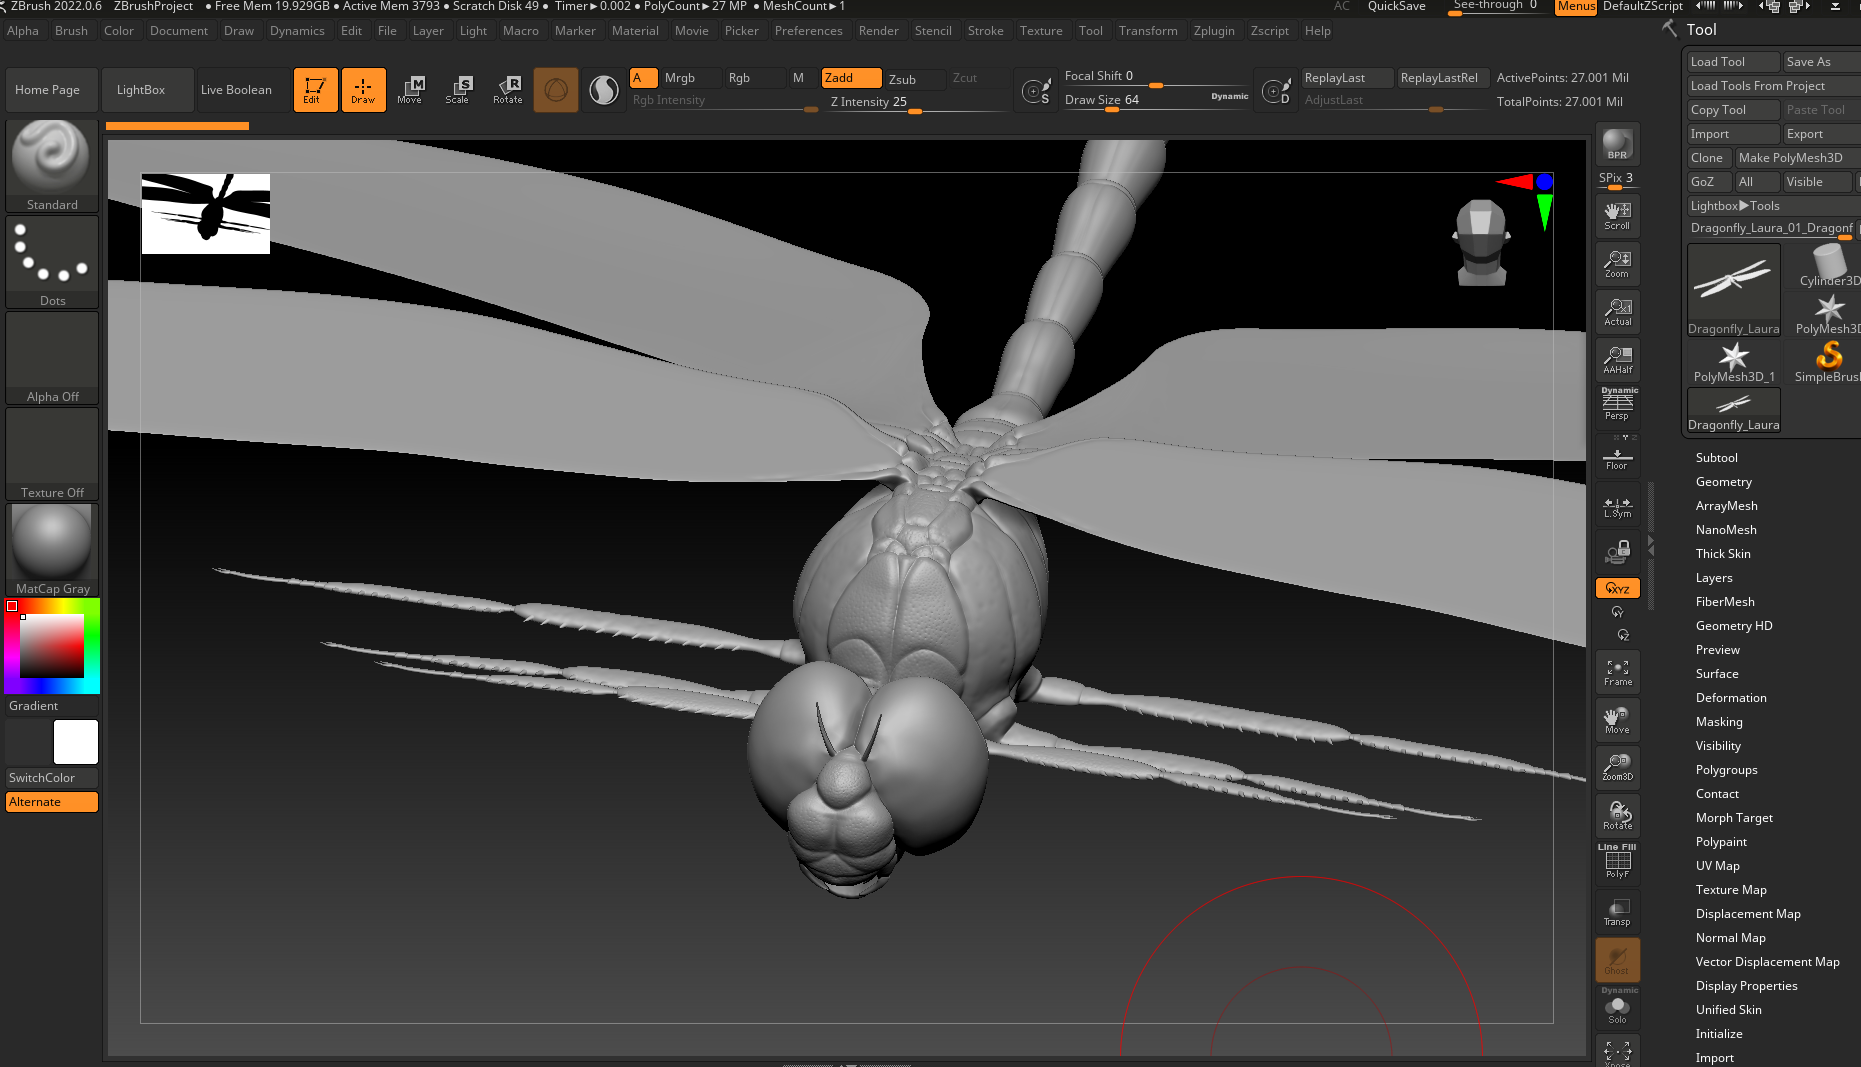
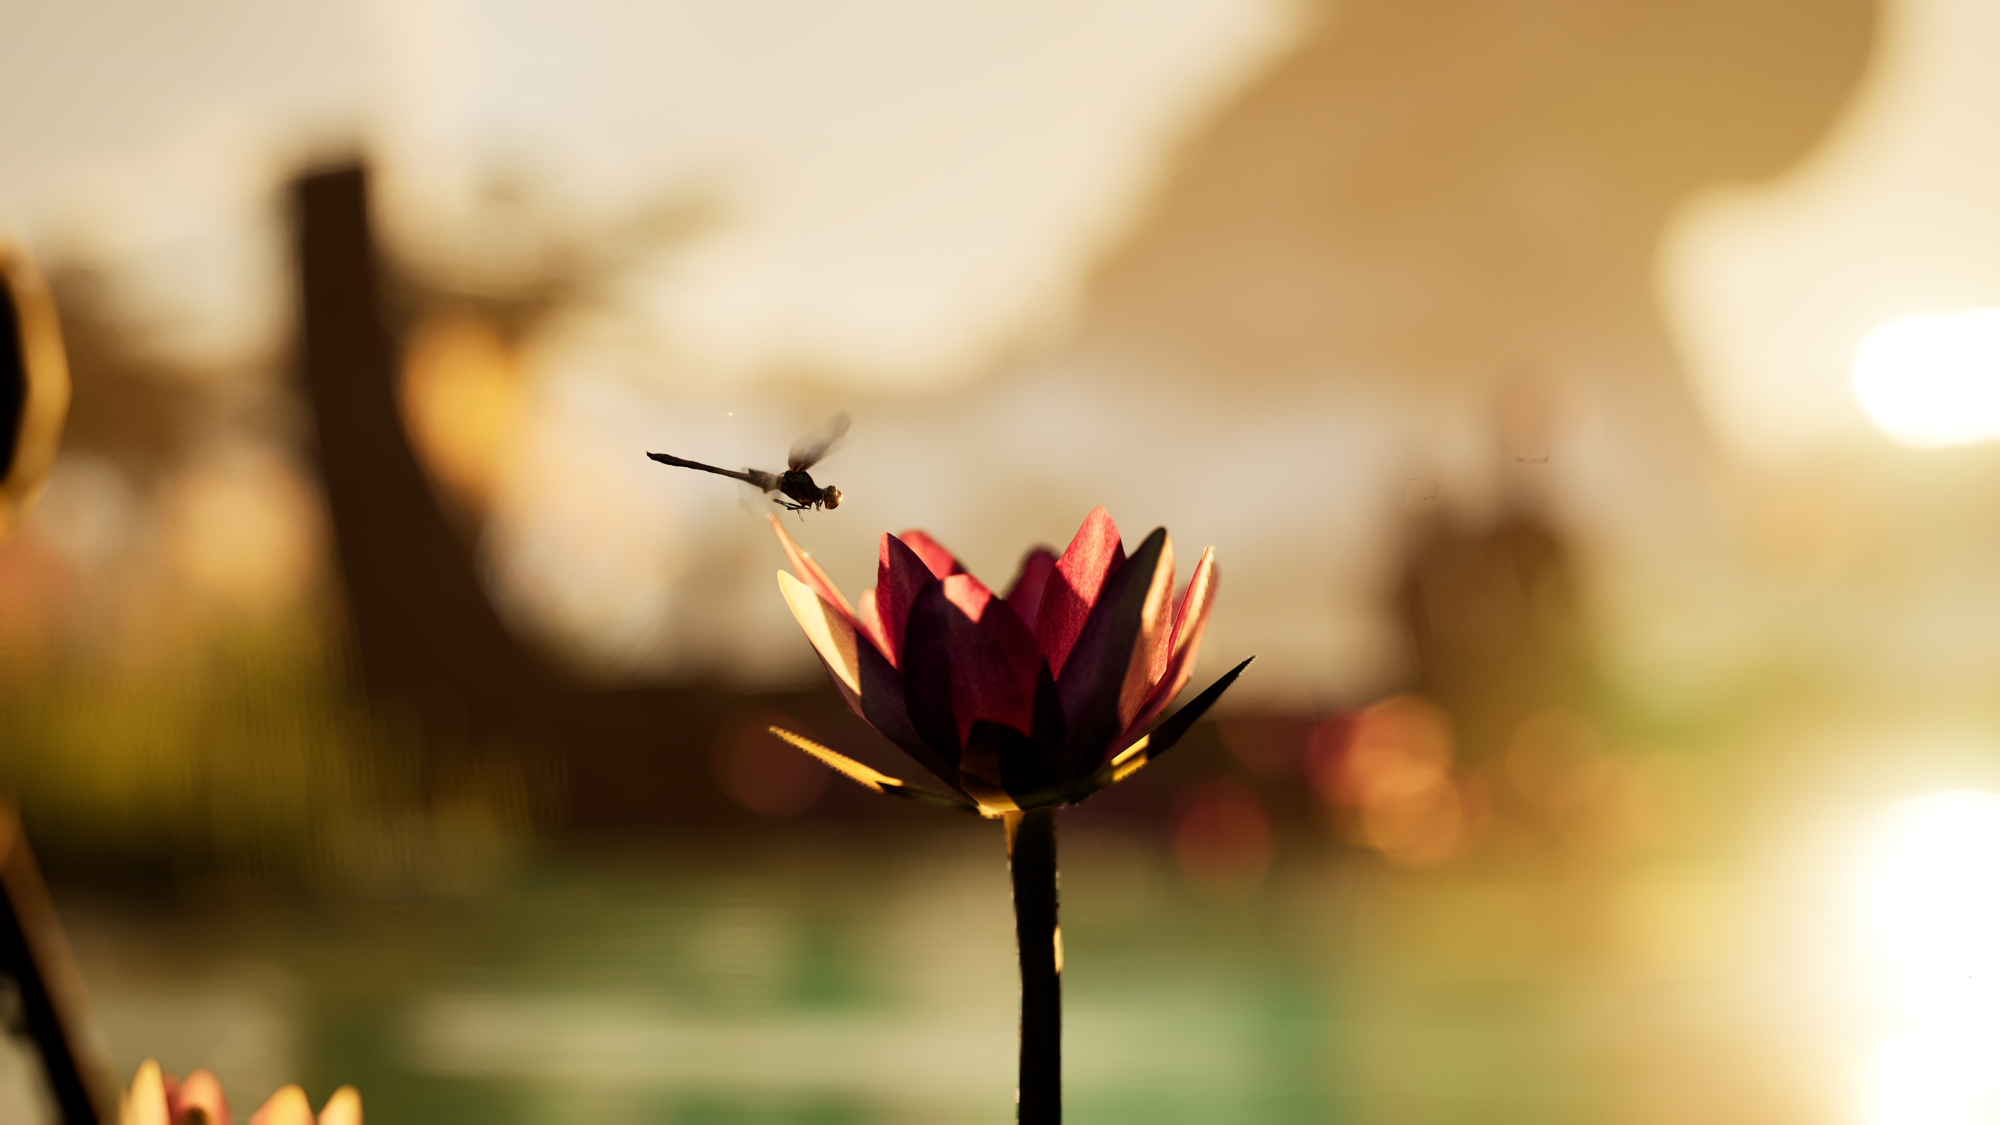
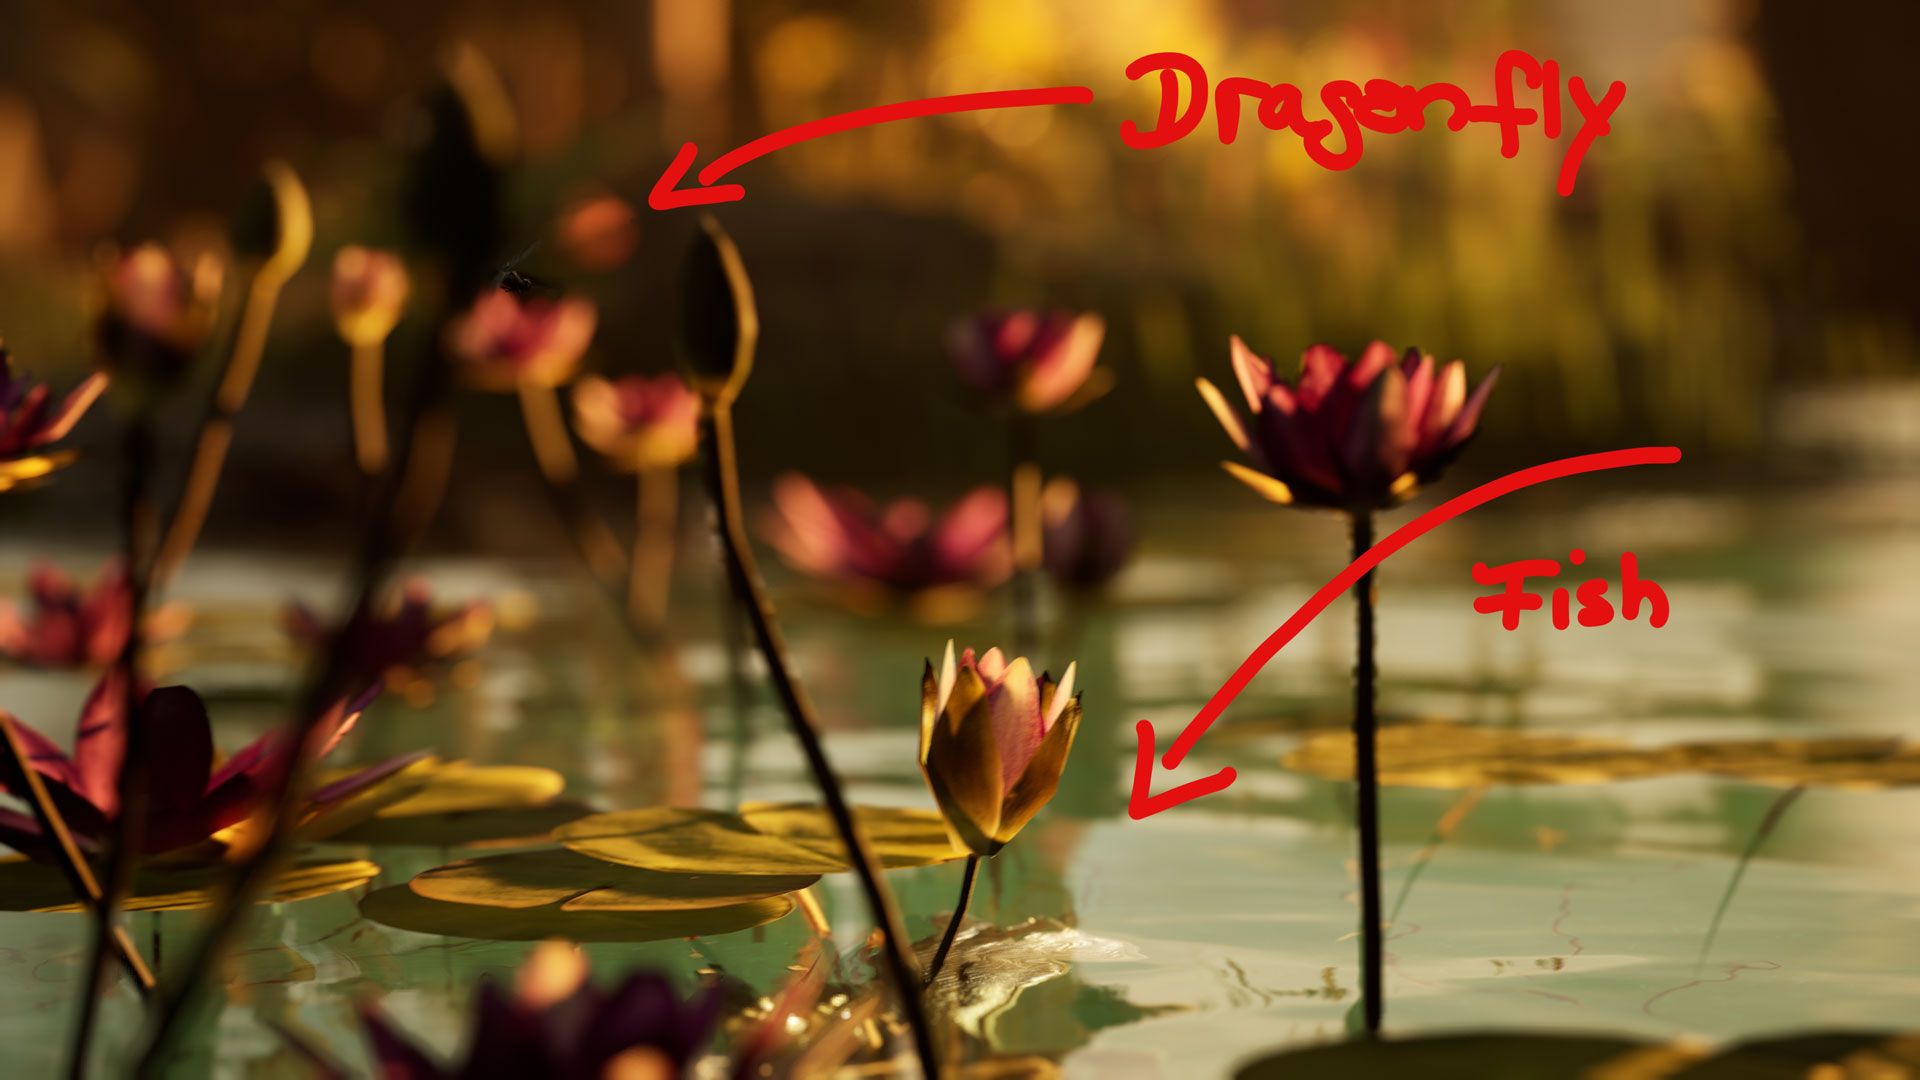
For an unplanned and spontaneous sequence, I quickly modeled a small dragonfly in Maya. I had the feeling that the dragonfly should be there. I also used one of the fishes from the UE Marketplace inside the river and added a swim animation.

While working on my environment, I had already tested different atmospheric light positions and volumetric clouds. I experimented with HDRI heavens as well, but I chose not to use them because they made no difference in my scene. Finally, I modified the clouds' density and movement speed, as well as the sun's ankle and colour, to their final positions.
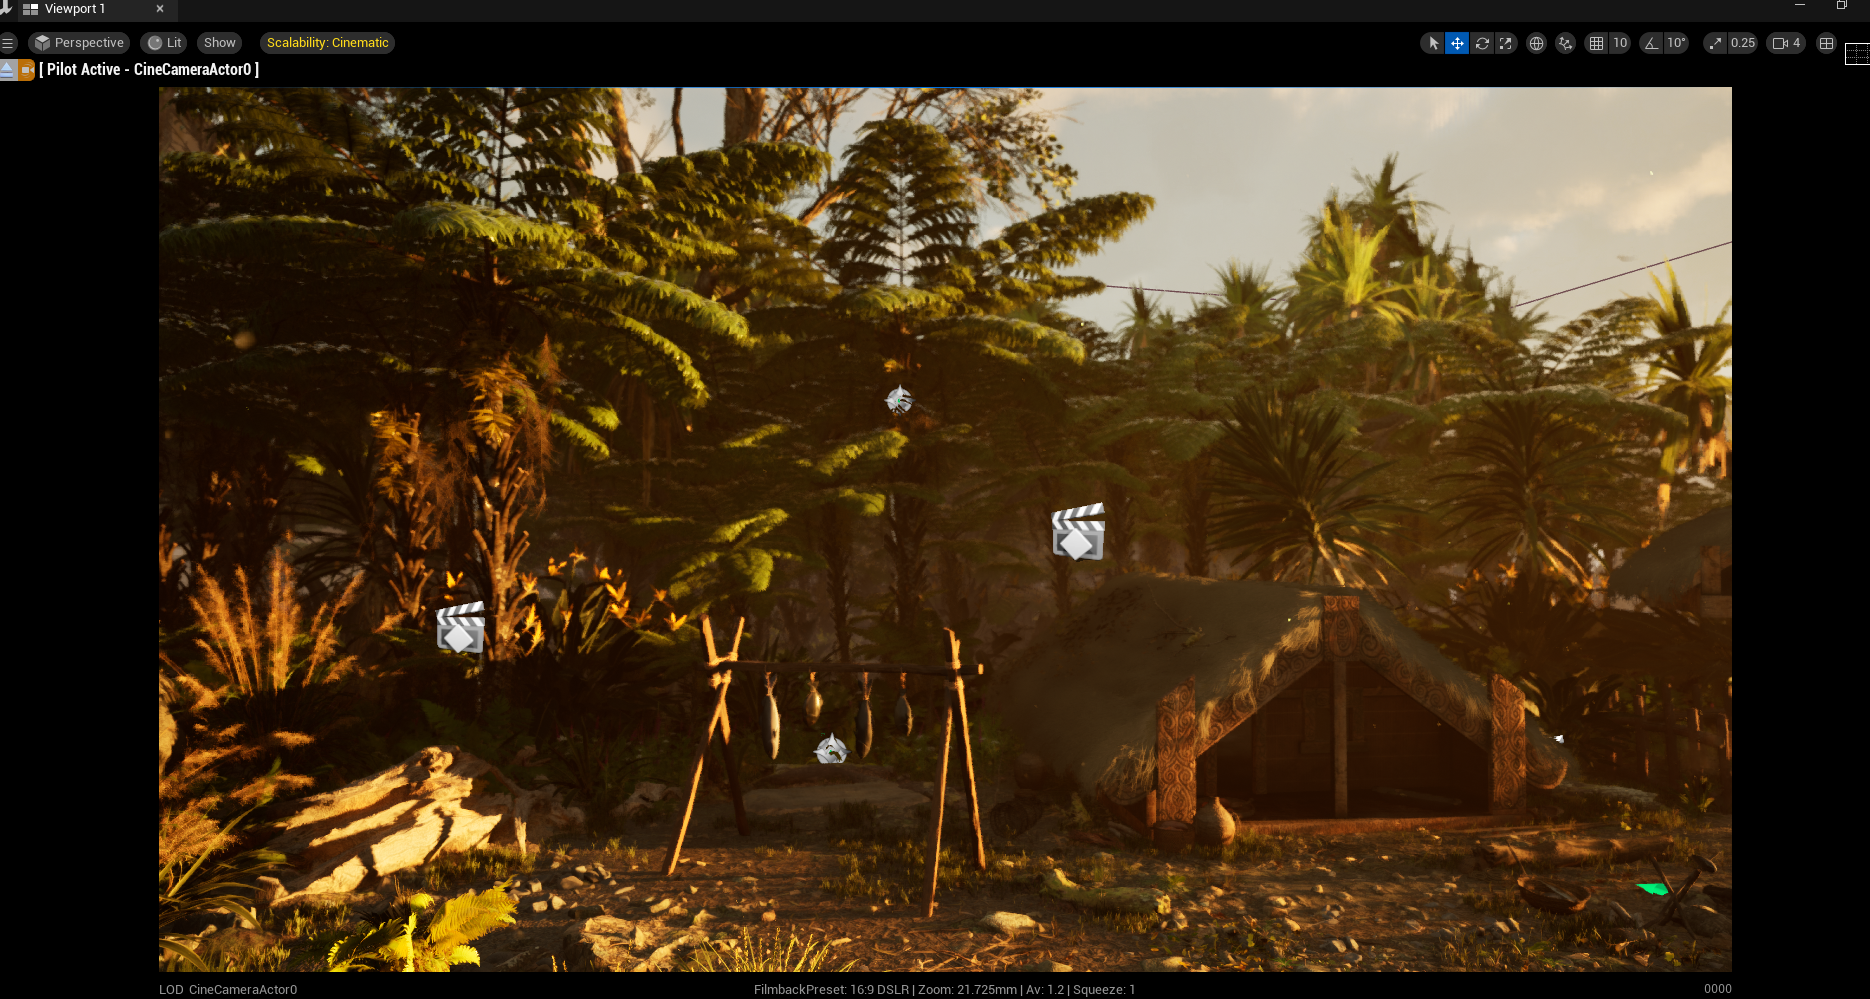
First, I used my planned shots of my storyboard and timed the frame duration per shot in UE. During the blocking process, I already set up the initial cameras and animated them based on my storyboard and imagination. I am a huge fan of cinematic motions. I researched and learnt a lot about it. In addition to all the research and modeling, the final compositing was, next to the research, the most time-consuming component of this project, as this was completely new territory for me. It was an outstanding joy to see how you can progressively add so much emotion to your own creation using camera motion and sound. William Faucher
Depending on your computer's specifications, I recommend you to run a test render. There are three simple reasons.
First, your render may be very different from your viewport or vision. Second, animations (LOD, light, shade, textures ...) might clip or not show in render. Third, realistic render time is influenced by your settings and hardware! There are a few more reasons, but these are my main three.
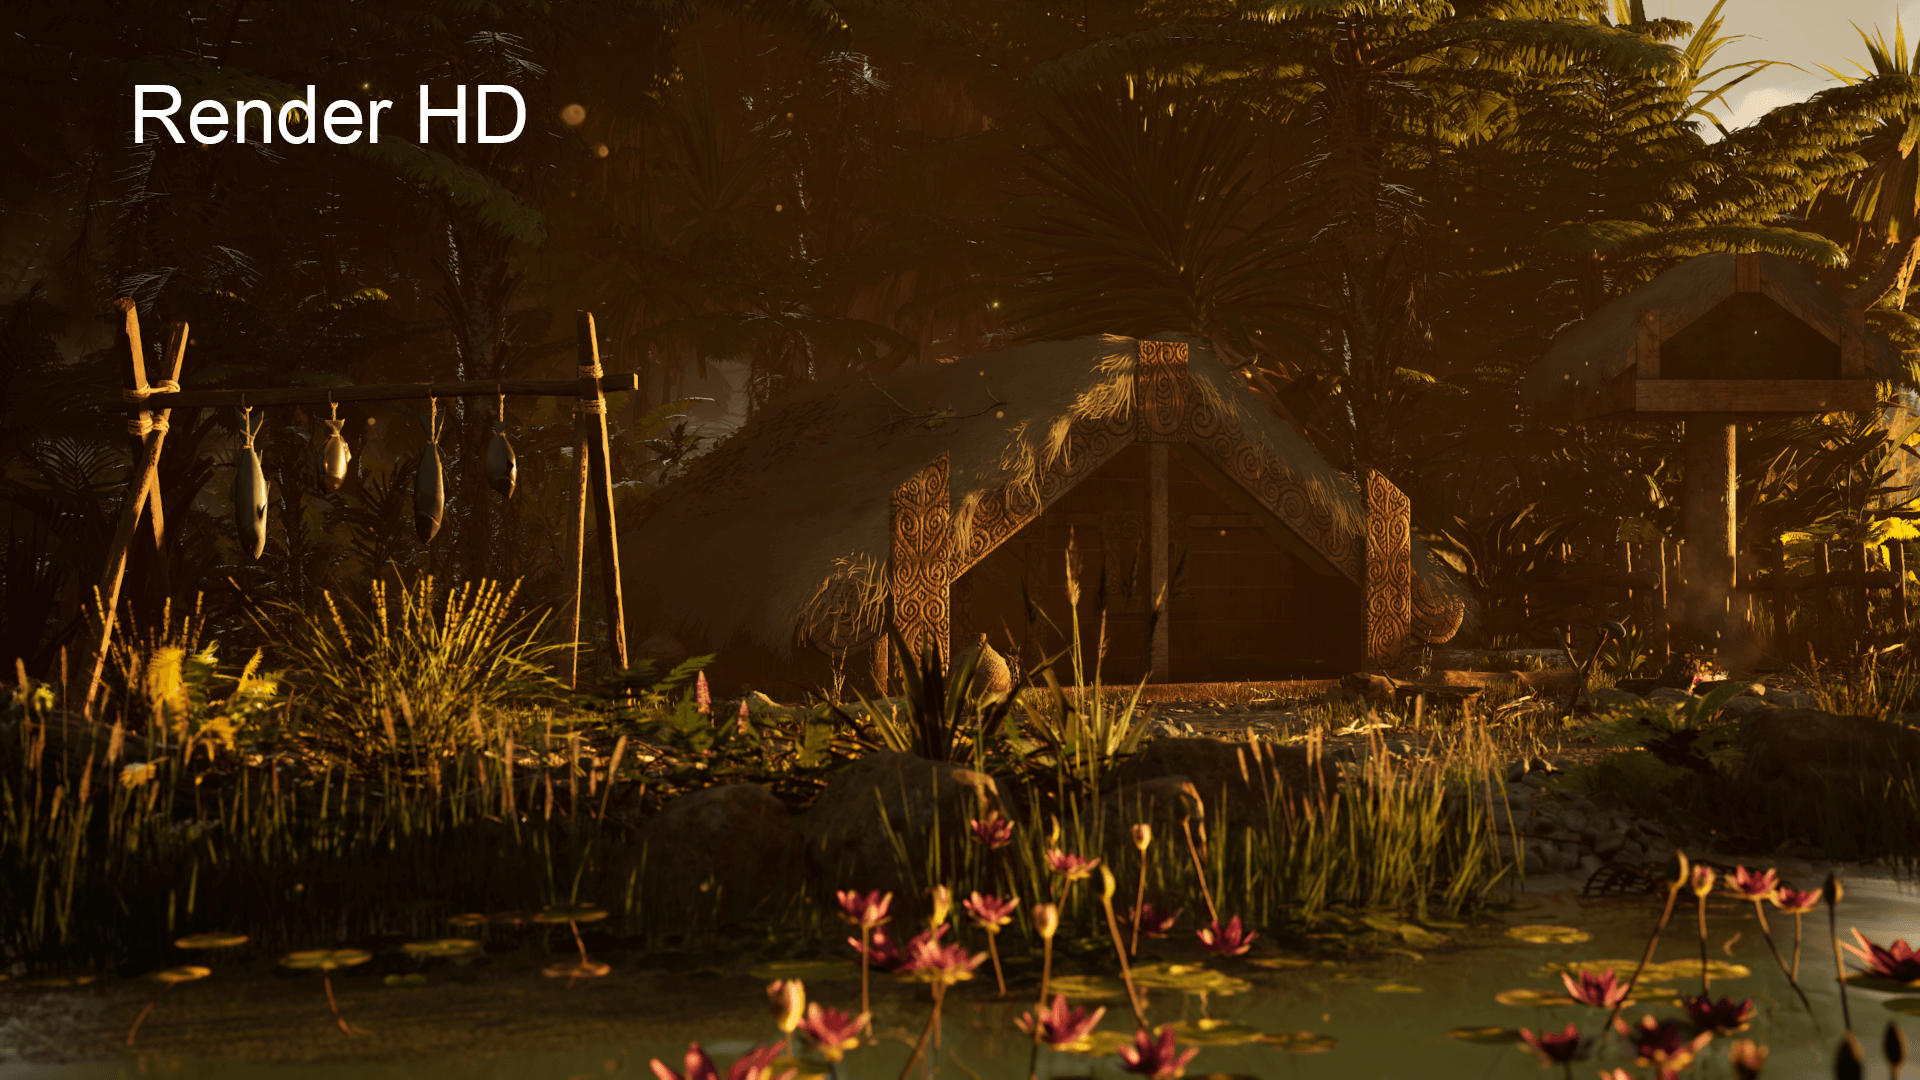
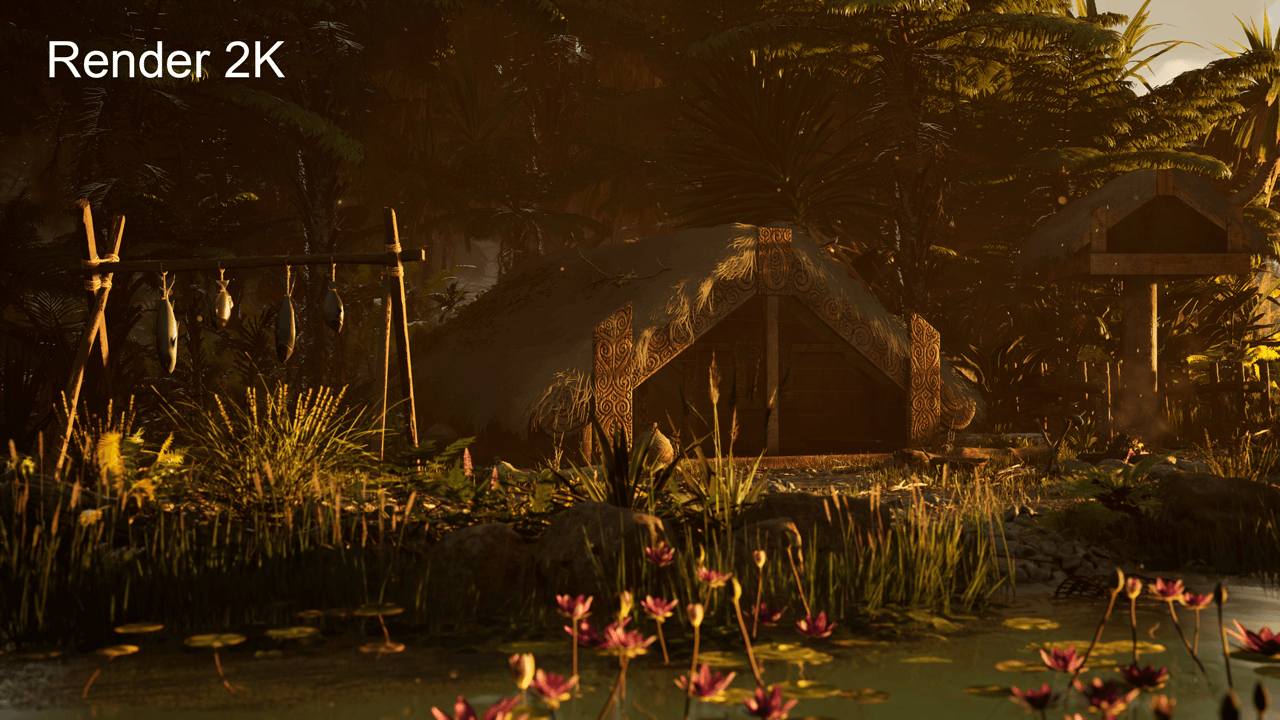
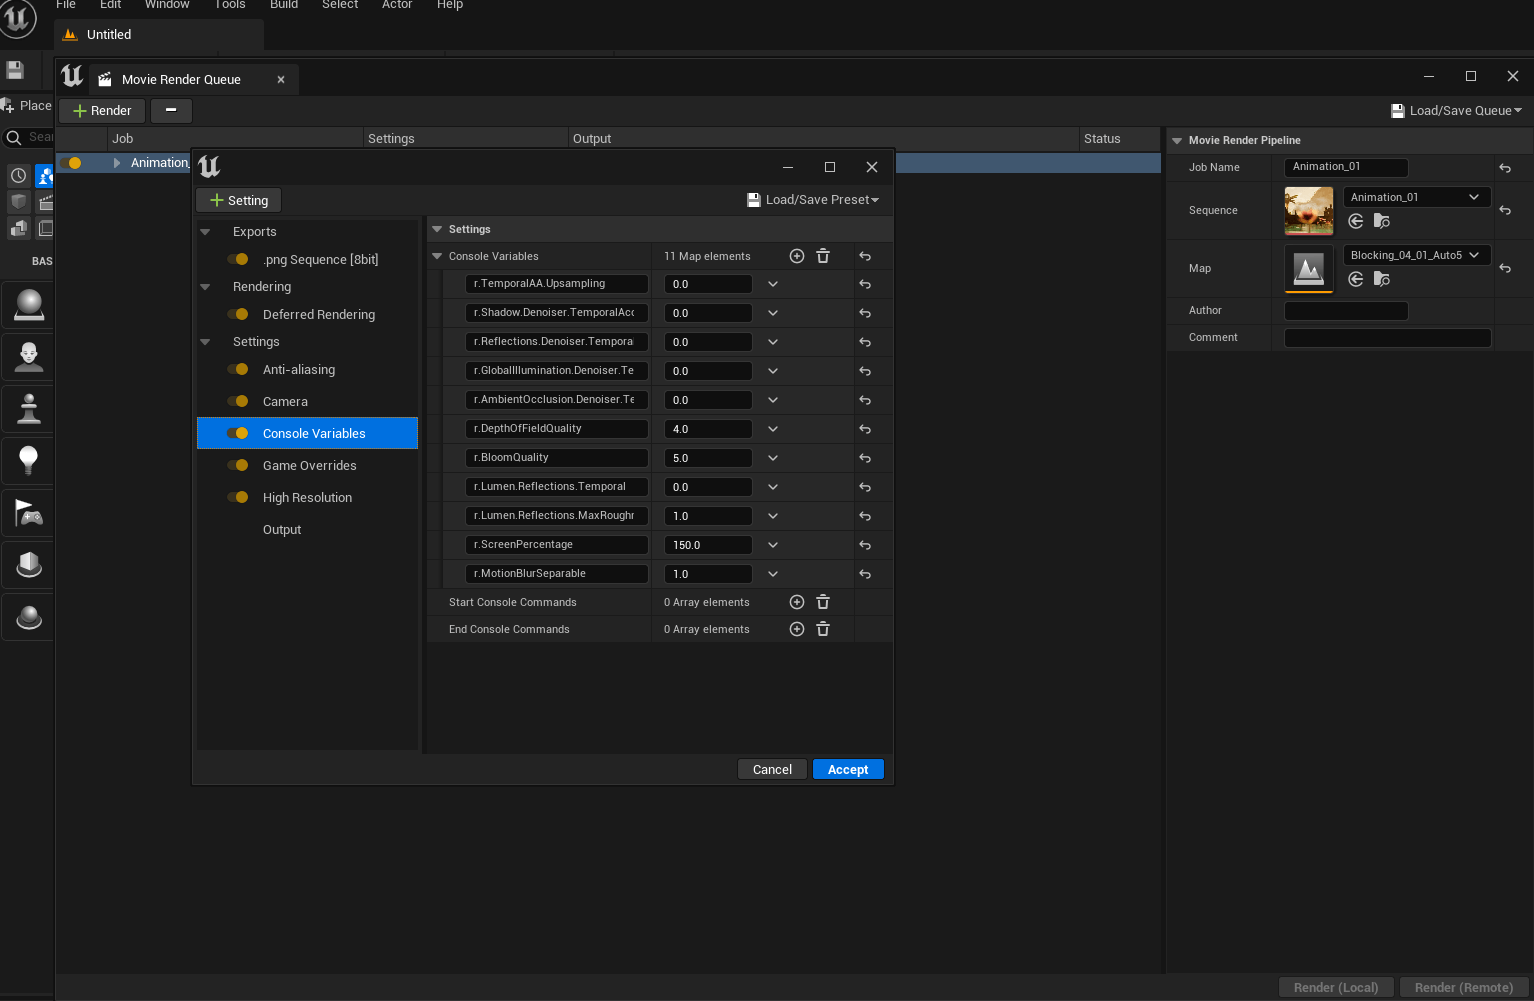
That's why I compared my render tests from low HD to high 4K. Because of my hardware baby at home, I was able to render the entire sequence at 4K. 5 shots, 1673 frames at 24fps took me 18 hours to render. I rendered shot to shot and not all at once. I used several console variables in the Movie Render Queue to achieve high-quality render output.
The free online tutorials from William Faucher helped me in all my stages of creation. To setup your render, he showed the difference between basic UE render vs Movie Render Queue,
I used the Movie render, because you have more flexibility for setting up your render and the output looks much nicer. The most important point is to understand the difference from UE rendering compared to Maya Arnold renderer. Inside the movie render settings, you can add Cmd commands with values to force the render to use this setting while it is rendering.
Another very important cmd command is:
depth of field r.TemporalAA.Upsammpling 0
That command will fix the halo effect around blurred out meshes. I fixed my leaf’s that way, so that they look nice and smooth on the edges while it is rendering.
Finally, force LOD to 0 in cmd. Usually the it will automaticky force it. I rendered all in 4K.
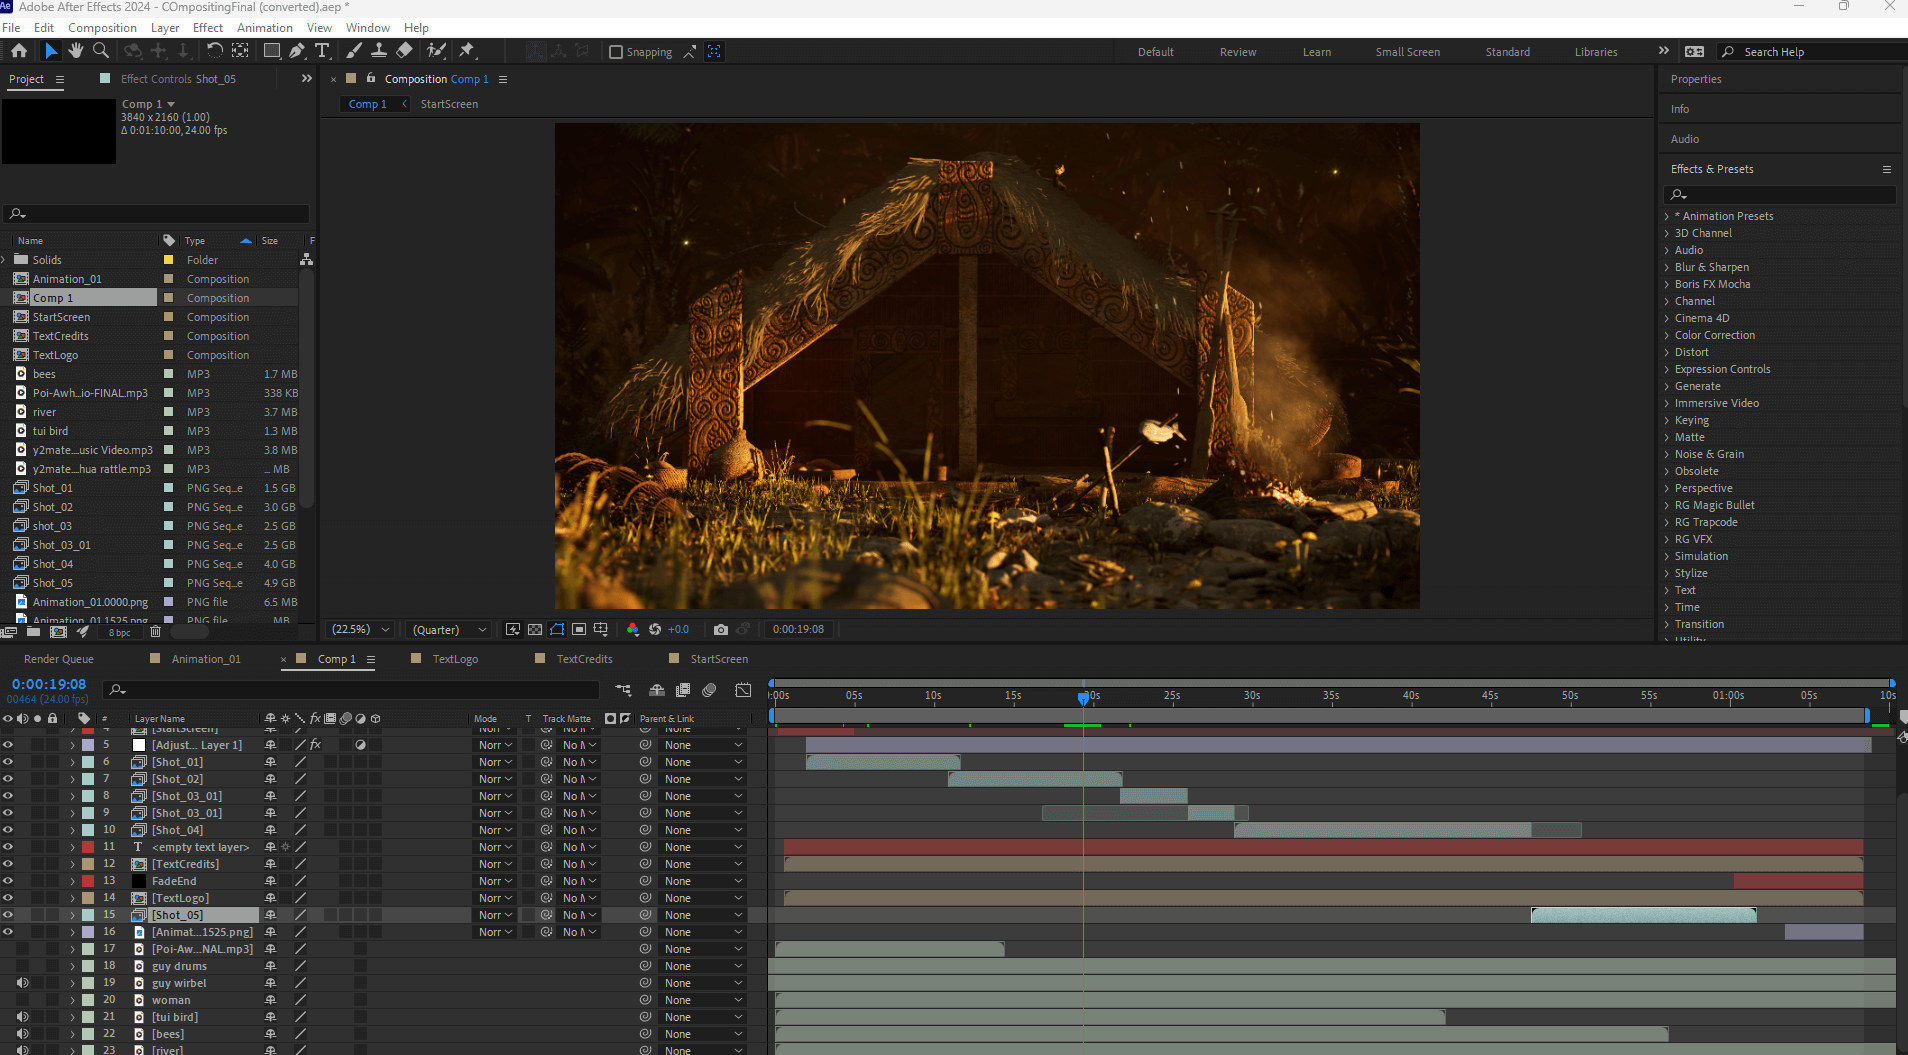
I comped all the shots in After Effects and added free sounds from pixabay.com. I used Red Giant by Maxon, a film-makingToolkit. All-in-one solution for video editors, compositors, and content creators. I used mainly Trapcode and Magic Bullet in After Effects.
It was a wonderful creative journey! I learned a lot through this project. Most of the time, you are learning by doing. I love taking on new tasks and confronting a variety of challenges, whether I enjoy solving or not. My main advice to young artists is to keep going and explore the unknown! There's always a solution. Don't just adhere to tutorials; they're useful, but it is even better to explore the creative world of software and instruments on your own. The most effective way to learn new things! Take your time gathering references and putting together a mood board! Things may look cool by only creating them, but they are not believable.
In addition to my hard work, feedback is essential for achieving amazing results! That is why I would like to thank everybody of my supporters, especially those who have supported my Maori content. Thank you, Johnny Knight, for being a great Tutor and friend! It was an incredible experience to work so closely with such great culture and history. I learned for life.
Ngā mihi - Thank you! - Vielen Dank!

Check out Laura's Rookies profile here.