Giving Shape to Your Inspiration: The Process of Creating Realistic Characters
Rubén López Fernández, an Animum Creativity Advanced School graduate, shares his latest work to inspire students tackling 3D likeness reproduction projects. Explore Rubén's process from inspiration to final render.
Animum Creativity Advanced School graduate Rubén López Fernández agreed to share one of his latest works, to hopefully inspire students who are currently taking on projects showcasing their skills in 3D likeness reproduction. Read on for Rubén's process from initial inspiration to final render.
Before delving into this post, I find it important to offer a brief introduction about myself and acknowledge how life's twists and turns can present unexpected opportunities. By sharing my journey, readers can understand that the path to success is seldom linear, but with determination and perseverance, remarkable results can be achieved.
My interest in 3D modeling stemmed from adversity. In 2016, I experienced a workplace accident that rendered me unable to continue in my profession. I had to pivot and reevaluate my life trajectory. Subsequently, I embarked on academic pursuits, completing a 4-year degree in digital design at university. Following this, I pursued a master's degree in character creation for film and video games at Animum school. This year-long program provided me with a solid foundation to further my education through various online courses, including Art Heroes, ShaneOlsso, Fly On The Wall Studio with Kris Costa, and many other economically accessible courses that facilitated my gradual and profitable progression.
As mentioned, this article on creating a realistic character from scratch follows a workflow that I will share with you, with the hope that it serves as a guide and enables you to apply it to create your own character. In this article, I will demonstrate the process of crafting a realistic character based on an actor. Previously, I had the opportunity to write another article on this same platform focusing on an animated character. Read the full article here.
As reiterated, this article on creating a realistic character from scratch follows a workflow that I will share with you, with the hope that it serves as a guide and allows you to apply it to create your own character.
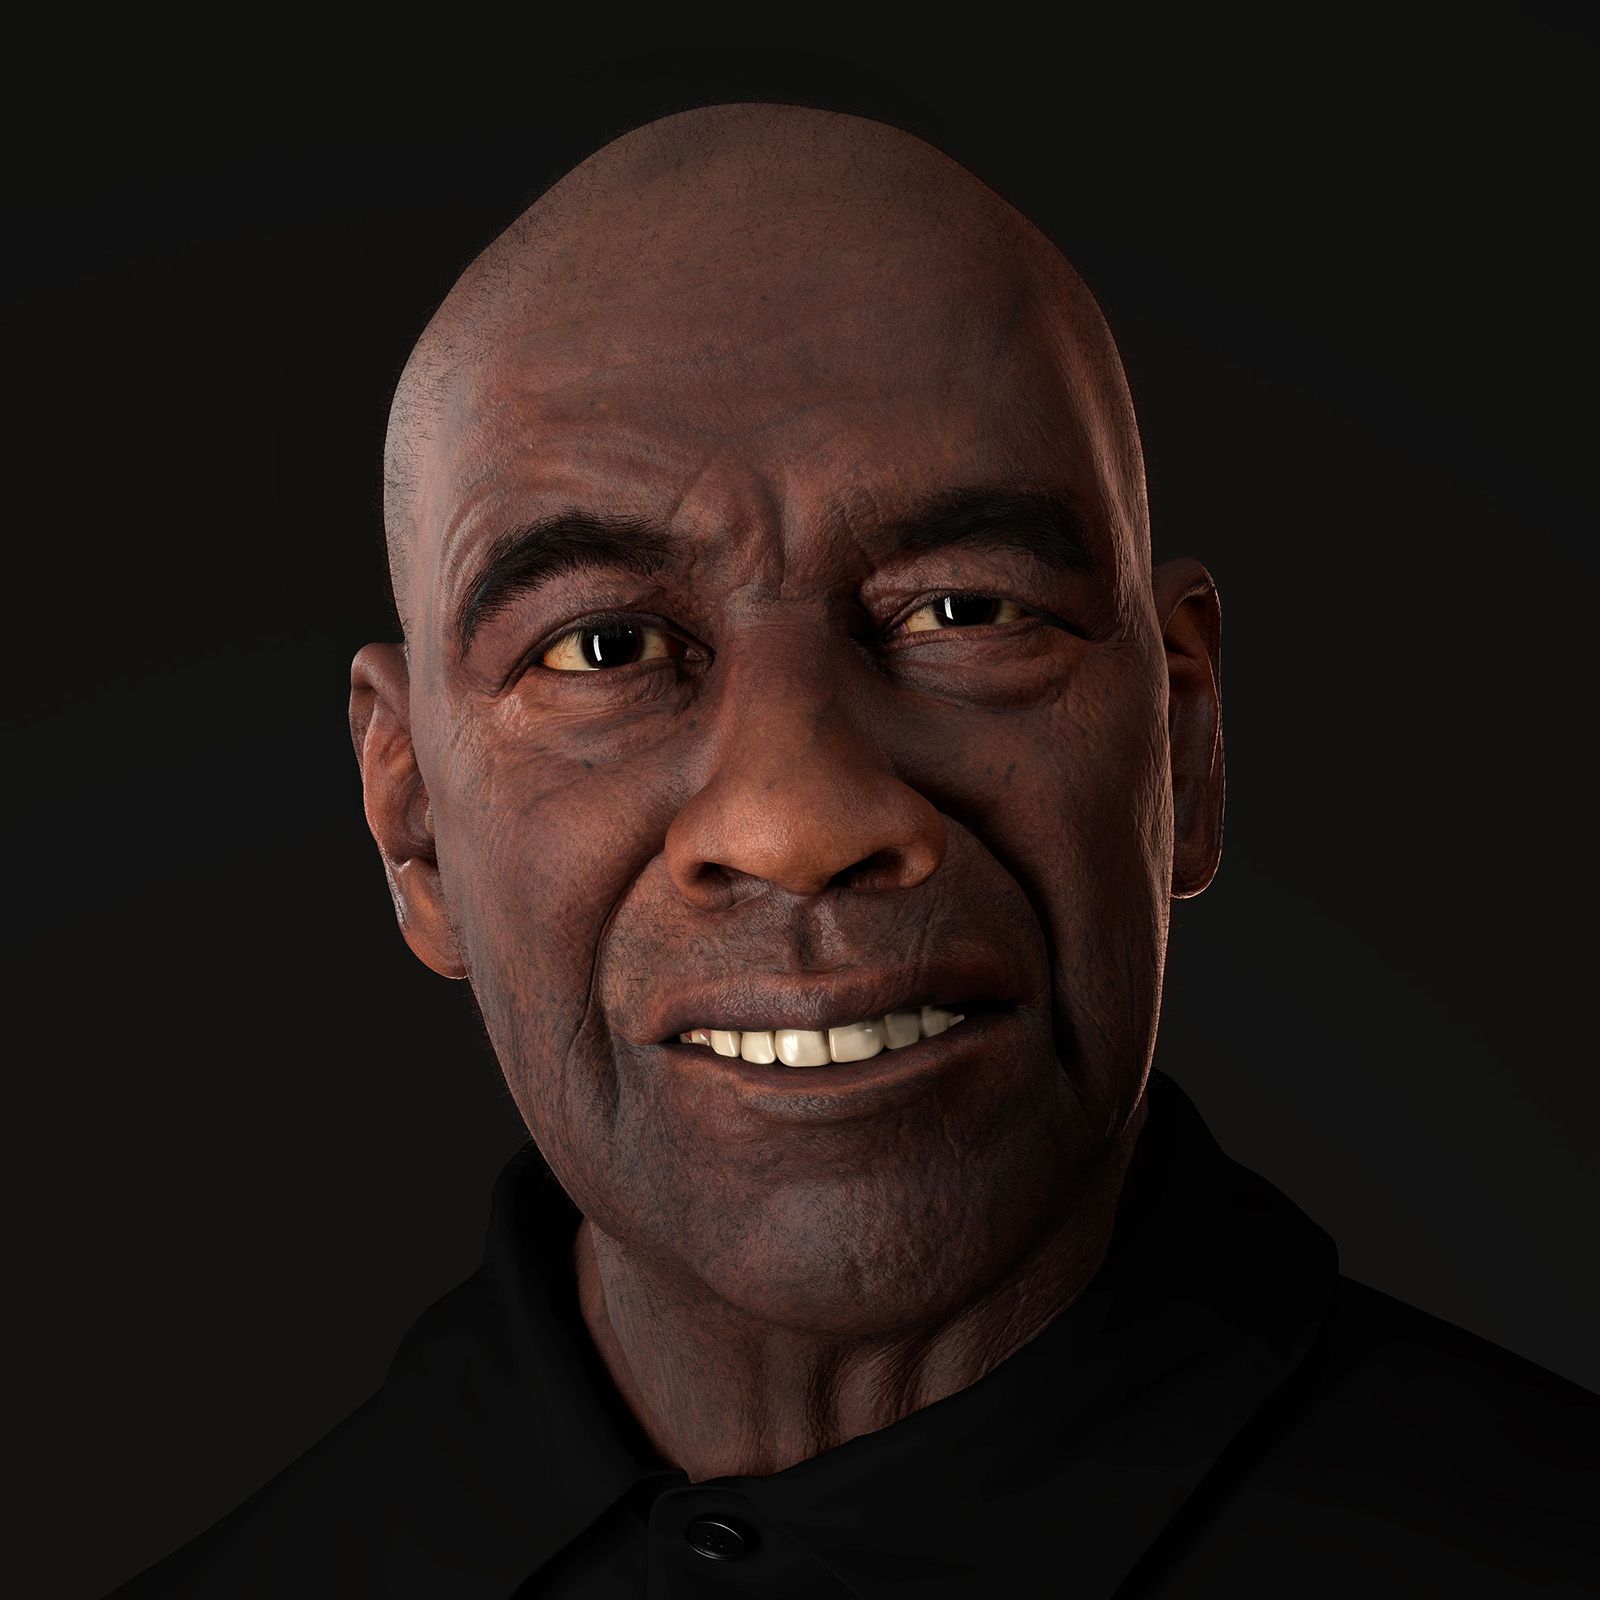
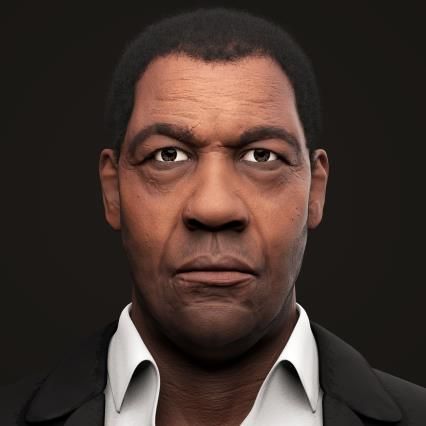
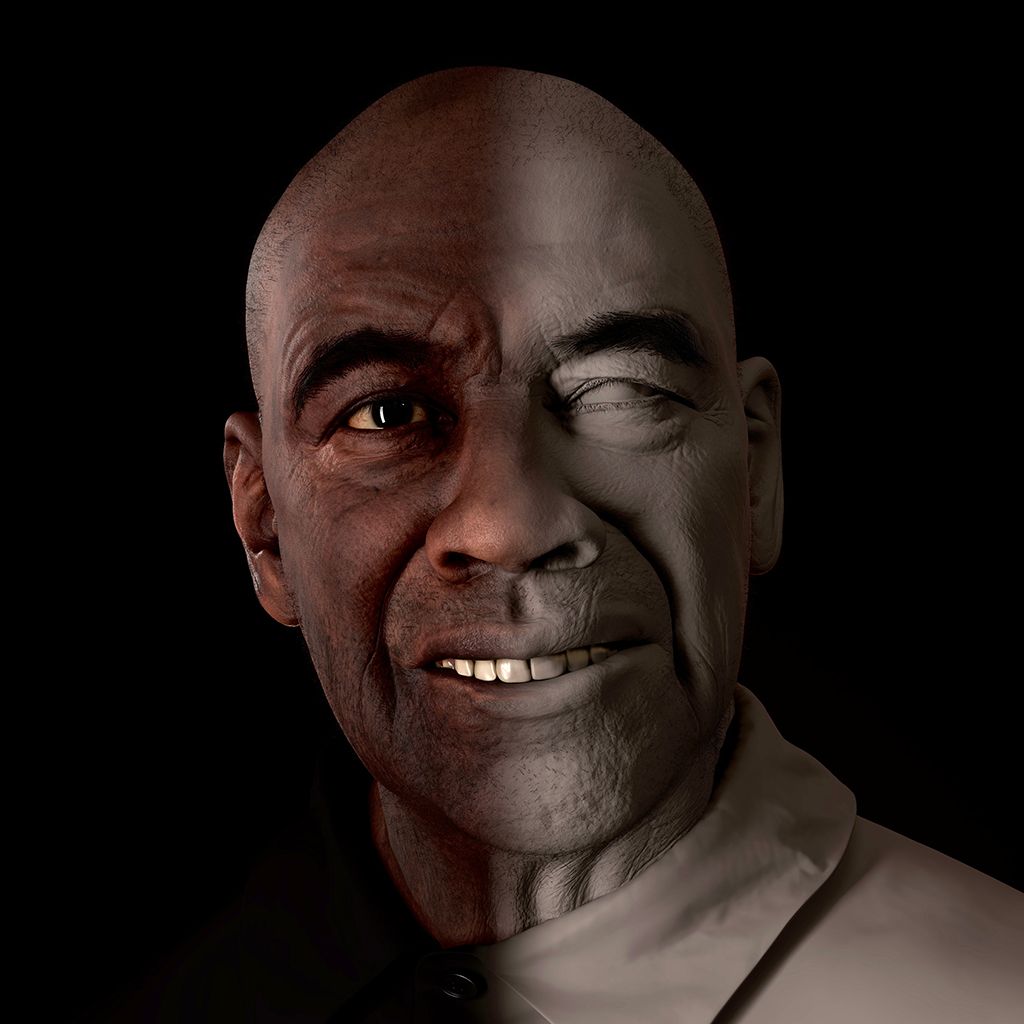
My primary inspiration stemmed from my endeavour to enhance a character I created with Art Heroes. During that course, I set ambitious goals, aiming to depict Denzel Washington. However, due to my limited experience with likeness at the time, the outcome fell short of realism. Nonetheless, after some time and with a deeper understanding of facial anatomy, I felt compelled to revisit the character from scratch. The result was a significant improvement, which proved to be a gratifying experience.
Proyect in ArtHeroes
Reference
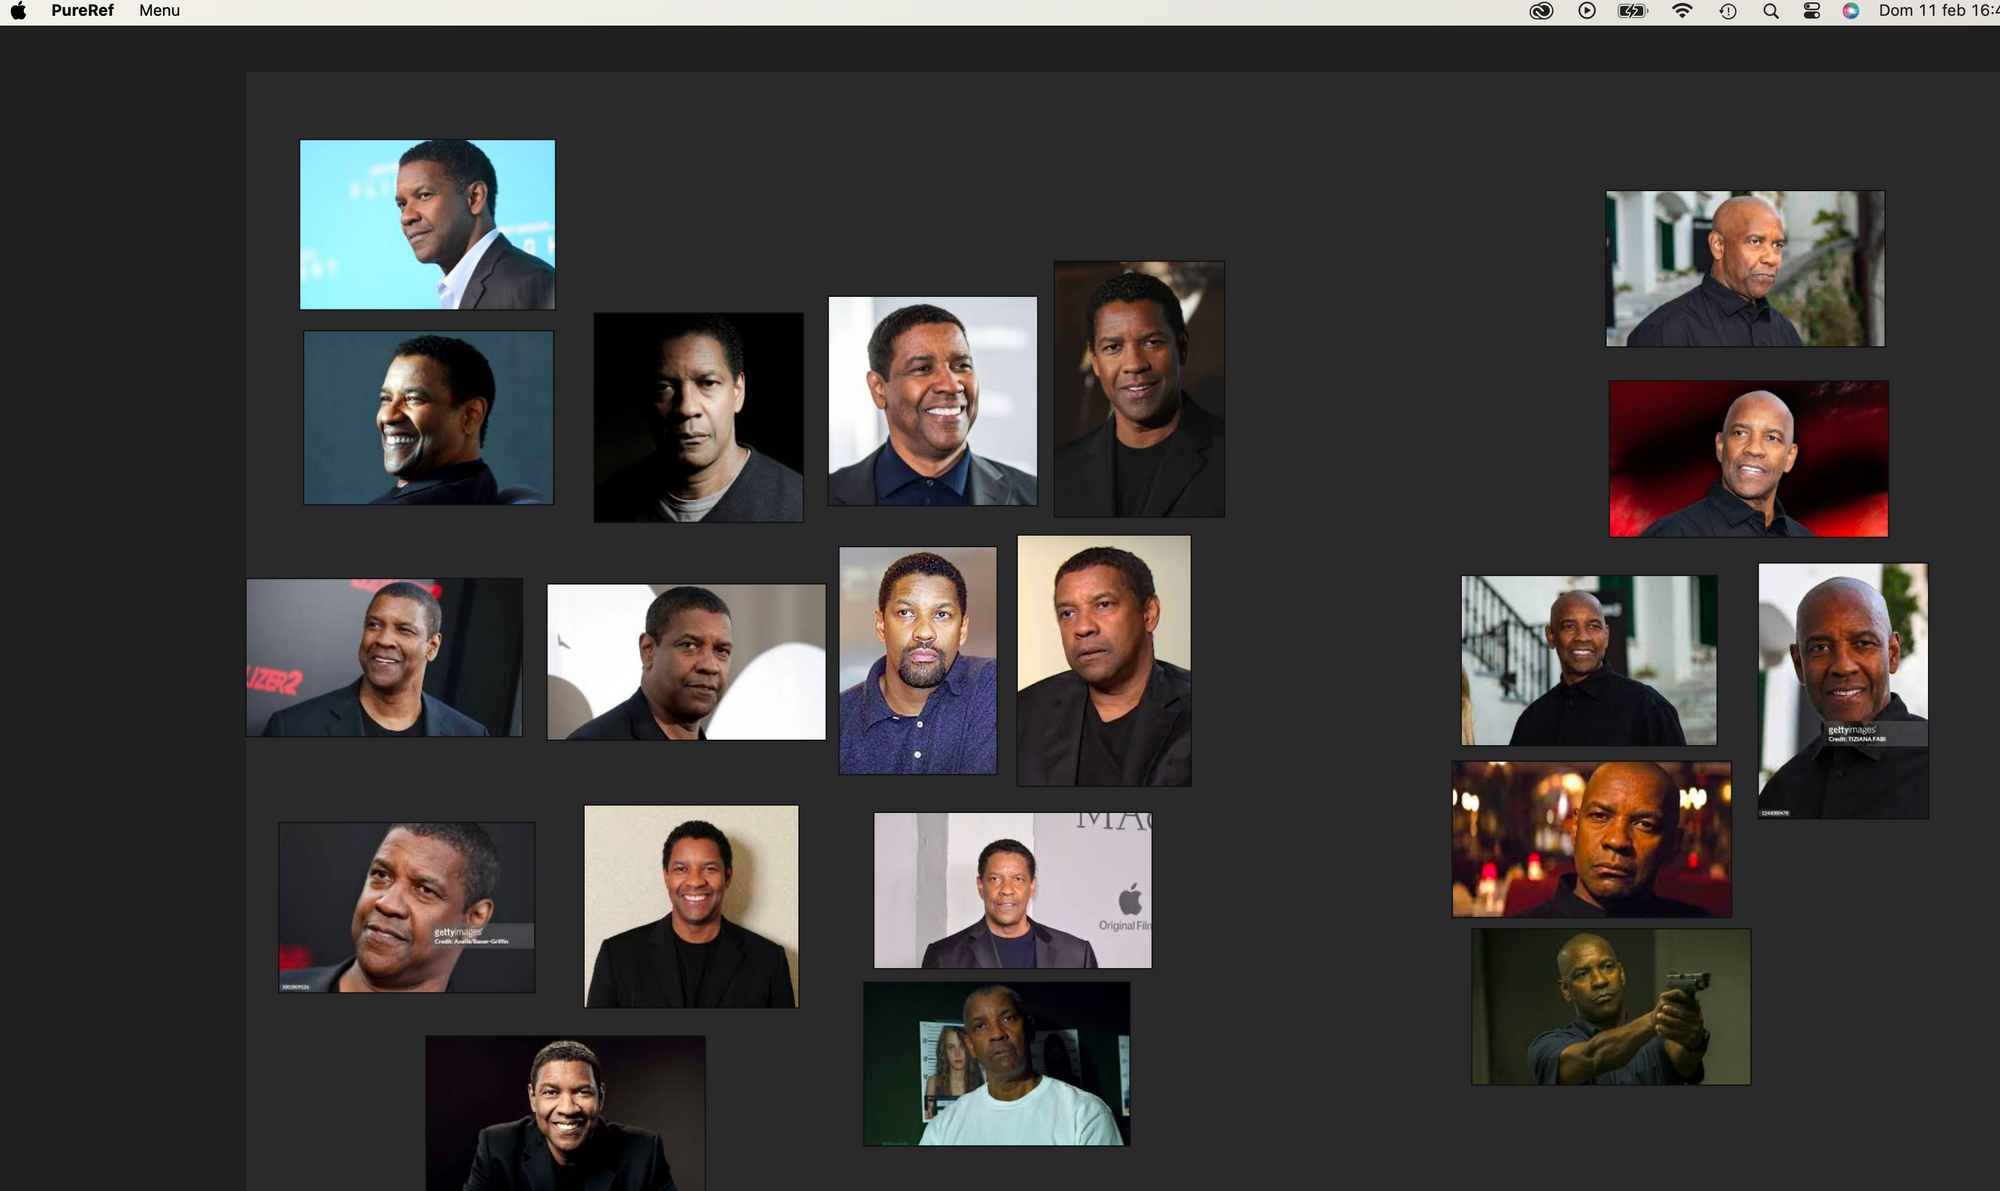
Gathering reference images is an essential part of the creation process, and I used PureRef to organise them:
References Images
PureRef is a visual reference tool for artists to gather, organize, and visualize images efficiently. It allows drag-and-drop functionality, unlimited zoom, and easy sharing of reference boards. Popular among digital artists and designers for keeping inspirations organized.
I find it incredibly valuable to locate photos that enable me to construct a 360° view of the subject, facilitating a thorough understanding of the correct facial proportions.
However, I often encounter discrepancies in the focal points of the camera in various images. In such cases, I've found immense assistance in watching Denzel Washington movies. By observing his performances from multiple angles, I can appreciate the nuances of his anatomy, which greatly aids in sculpting the character with a high degree of accuracy.
Modelling Head and Eyes
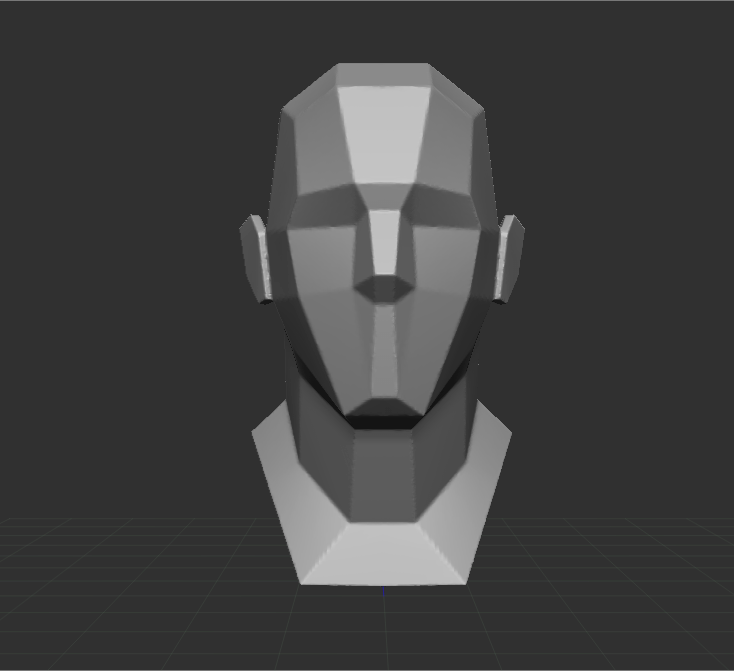
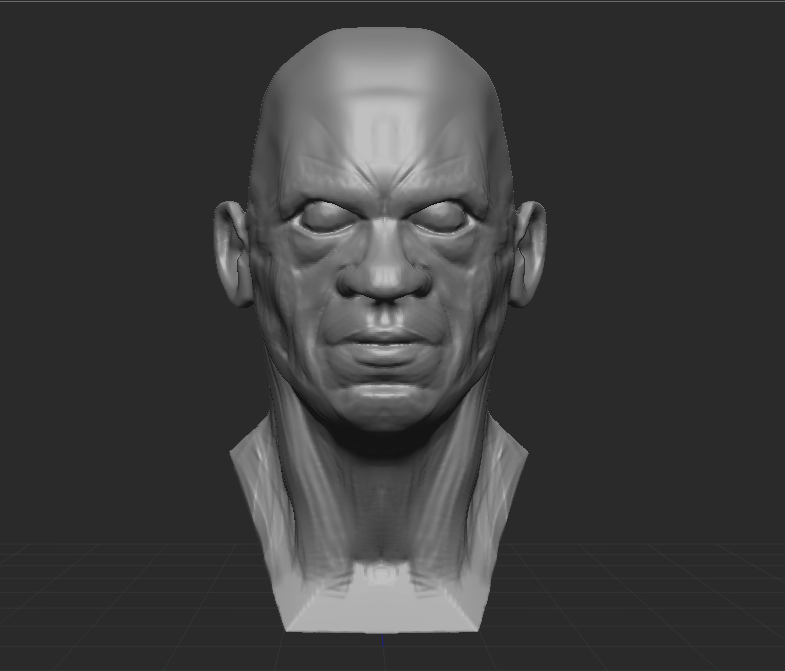
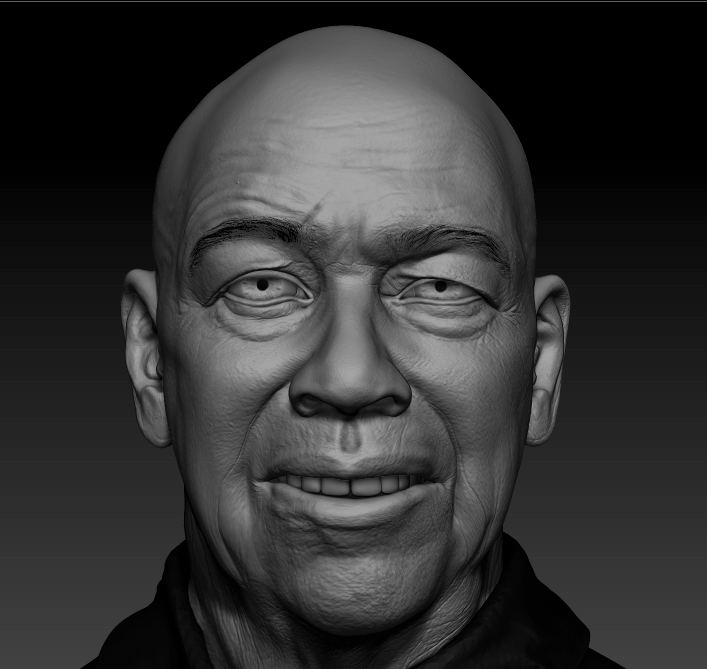
Modeling was exclusively carried out in ZBrush. For this project, I opted to begin from scratch, a practice I occasionally undertake to refine my workflow and fully leverage facial anatomy. This allowed me to have complete control over the entire modeling process, ensuring that every aspect of the character's features was carefully crafted.
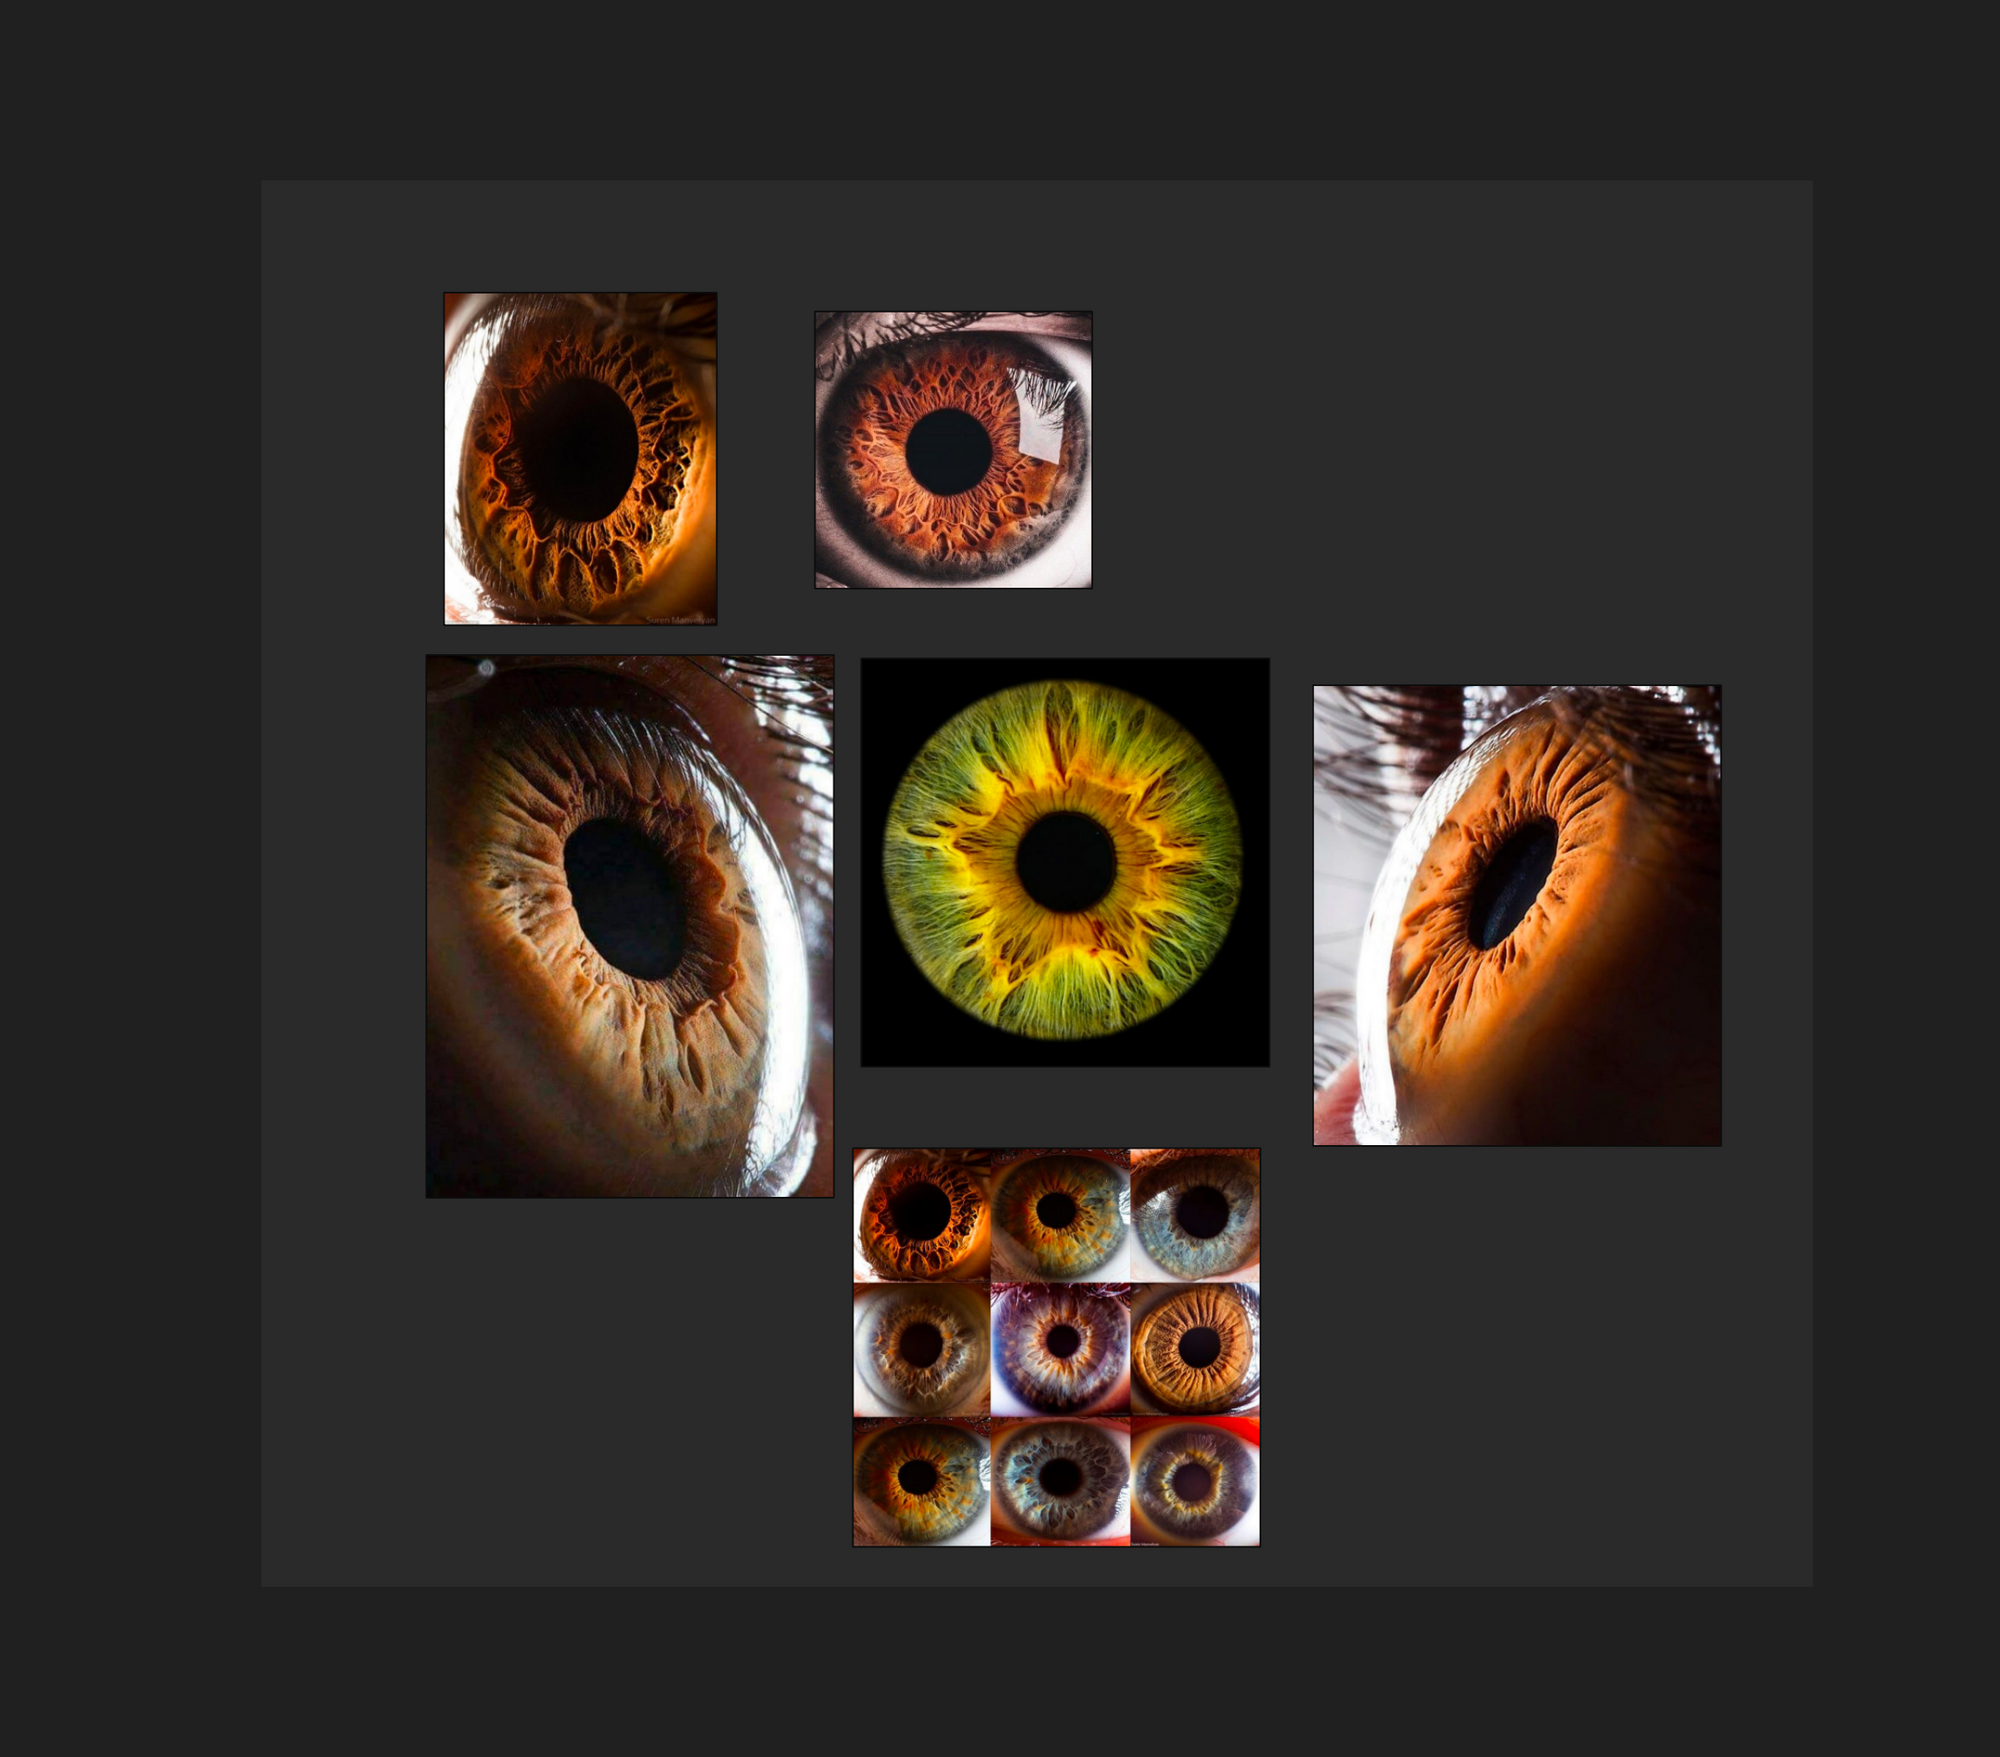
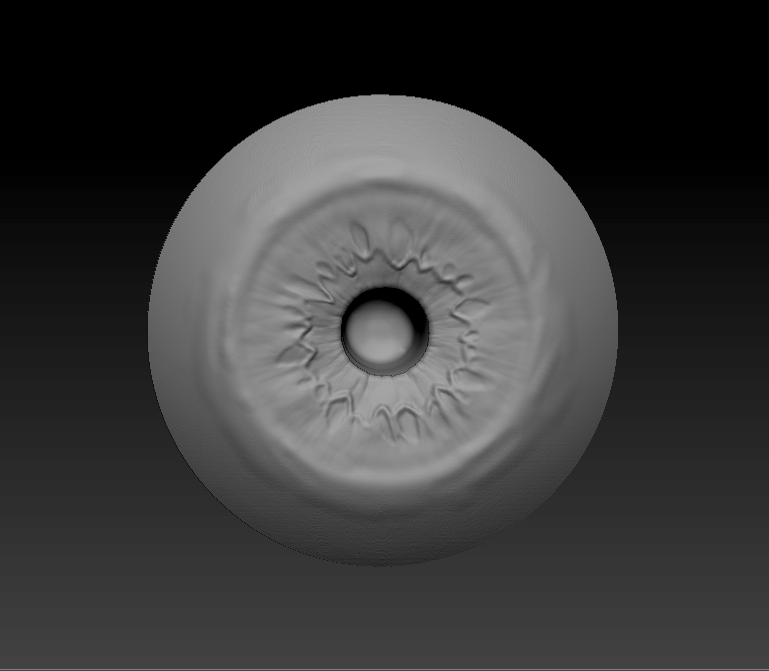
In addition to focusing on the overall facial structure, I paid special attention to the sculpting of the eyes. The eyes are often referred to as the "windows to the soul," and they play a crucial role in conveying emotion and personality in a character. Therefore, I dedicated ample time to sculpting the intricate details of the eyes, including the eyelids, iris, and cornea. This involved studying reference images and observing real-life anatomy to ensure accuracy and realism.
By starting anew, I ensured a meticulous approach to maintaining facial shapes and meticulously considered every angle of my artwork. This meticulous attention to detail not only enhanced the realism of the character but also contributed to a more lifelike and engaging portrayal overall.
Sculpting process
ZBrush is a premier digital sculpting and painting software used by artists in various industries, including game development, film, and animation. It offers a wide range of tools and features for
sculpting highly detailed 3D models, including dynamic subdivision, customizable brushes, and advanced masking capabilities. With its intuitive interface and powerful sculpting tools, ZBrush enables artists to create intricate organic and hard surface models with ease. Its real-time rendering and texture painting capabilities further enhance the creative workflow, making ZBrush a go-to software for digital sculpting and character creation.
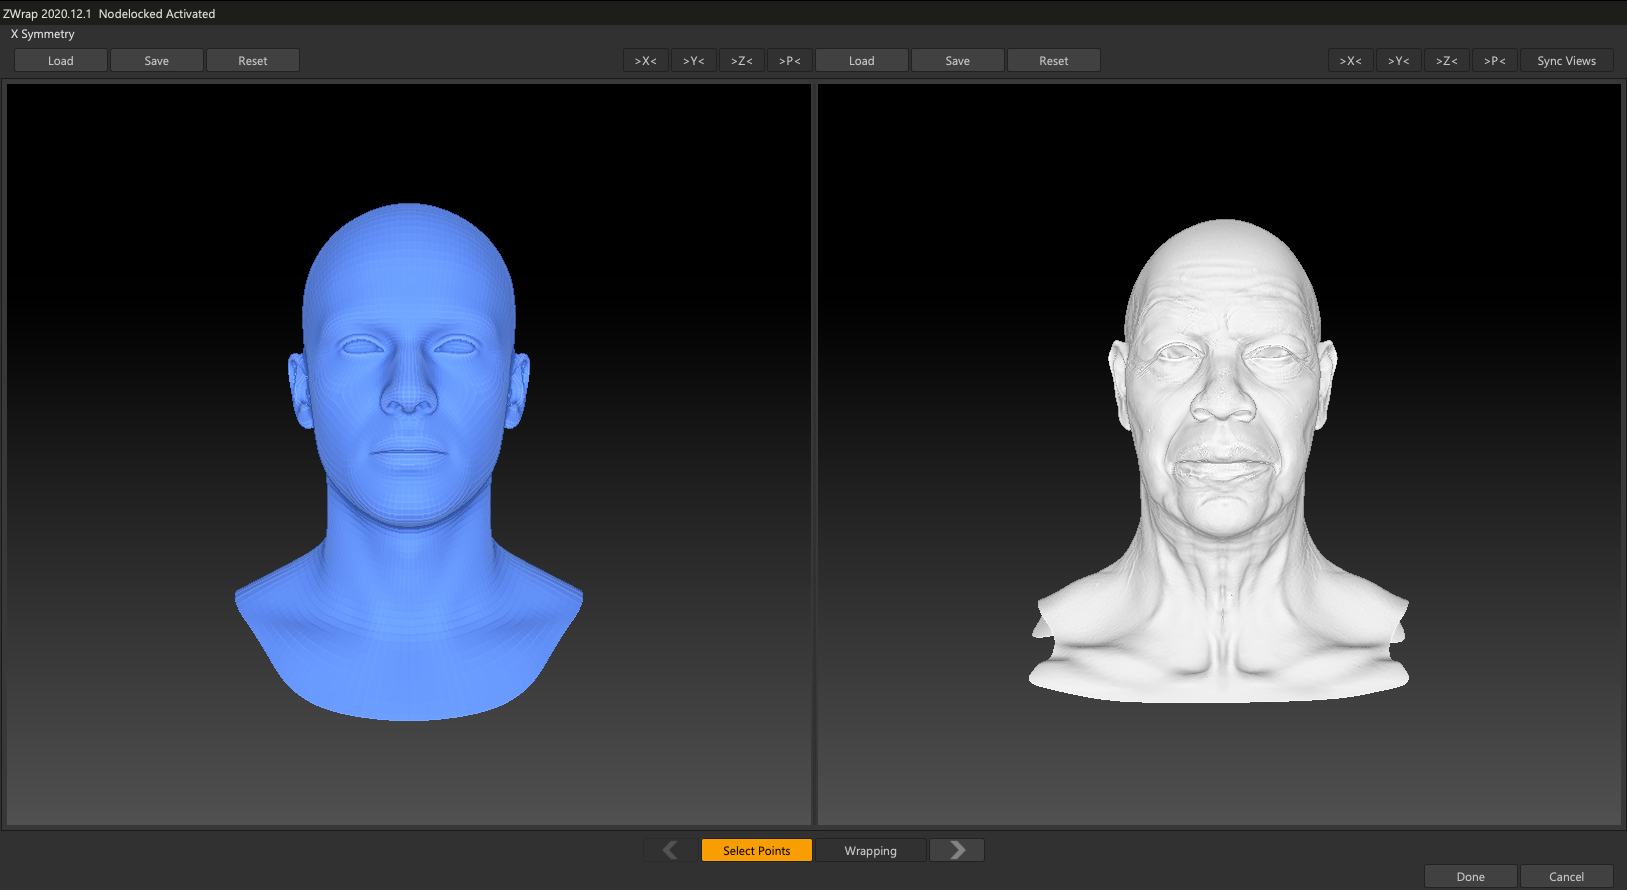
Once I've achieved the approximate shape that satisfies my vision, the subsequent step involves taking the mesh to 3RDS Wrap for proper retopology. In this instance, I made the decision to execute this step to circumvent the necessity of conducting a retopology process in Maya, my usual platform for such tasks.
ZWrap Capture
R3DS Wrap is a node-based software renowned for its array of features, with its primary function being the projection of one mesh onto another, aligning their shapes. This capability is frequently employed for rapid retopology or detail transfer. The software boasts user-friendly navigation, supported by numerous free online tutorials.
In this instance, I utilised R3DS Wrap to expedite the retopology process while adhering to my specific requirements.
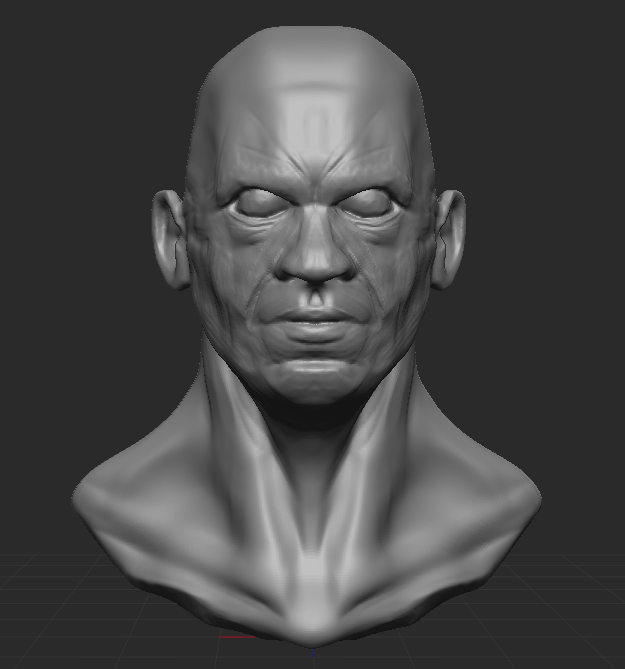
With the topology now refined, the next phase entails adding intricate details, bringing me closer to achieving the desired outcome.
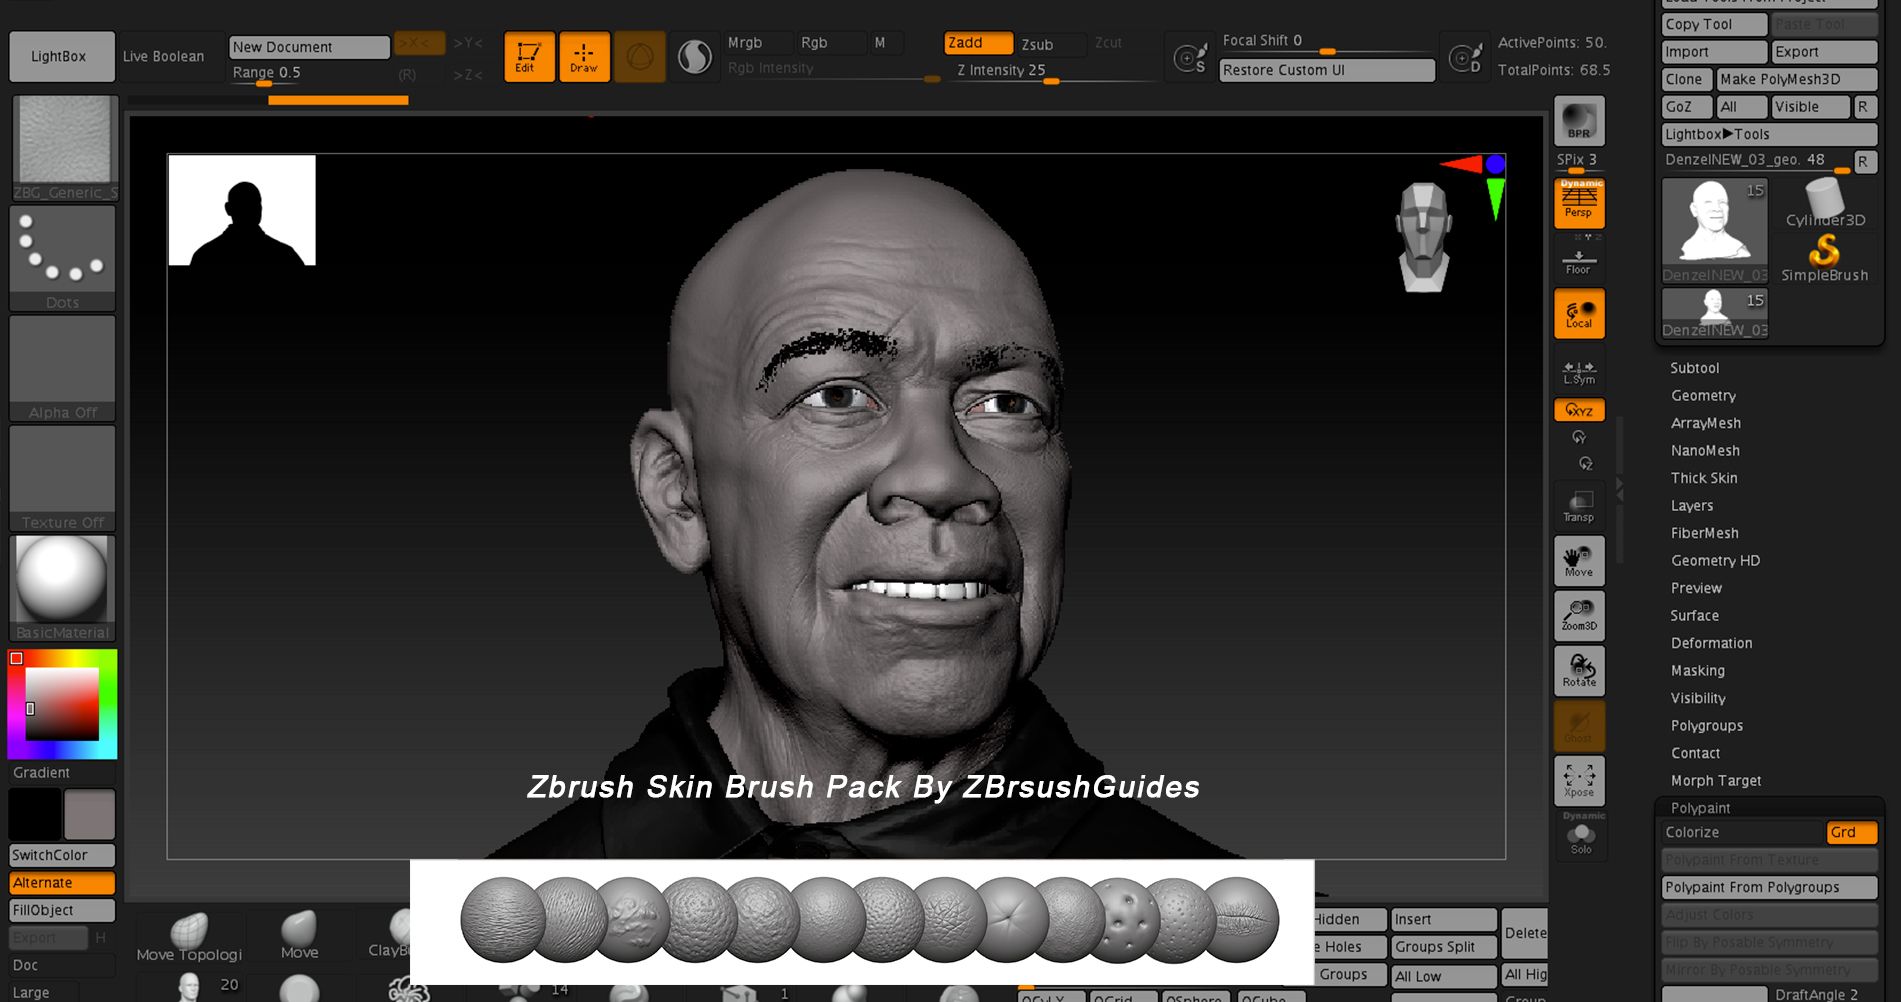
Skin Details
Already in the part of applying details to the skin, I used some brushes that are fantastic for this type of work. Pablo Muñoz has a pack on his website and the truth is that it made my work task much easier.
Brushes Details
The process of adding skin details in ZBrush starts with the basic sculpting of the character's 3D model. Once the general shape is established, you can proceed to add fine skin details. Here's the detailed workflow:
Model Subdivision: Before adding skin details, it's crucial to subdivide the model multiple times to increase its resolution. This provides more polygons to sculpt fine and smooth details on the skin.
Brush Selection: ZBrush offers a variety of brushes that are useful for sculpting skin details. Some of the most common ones include the "Dam Standard" brush for wrinkle lines, the "Clay Tubes" brush for organic textures, and the "Alpha" brush for adding texture patterns.
Visual References: It's helpful to have visual references of real skin to guide the sculpting process. This can include high-resolution skin photographs or even anatomical studies to better understand skin structure and patterns.
Brushes Details
Layering Details: Start by sculpting skin details on a large scale, such as major folds and prominent wrinkle areas. Then, progressively refine the details, working in layers to add more subtle textures and small details like pores and imperfections.
Use of Alphas and Textures: ZBrush allows the import and application of custom alphas and textures to add variety to skin details. These can include predefined alphas provided by ZBrush or user-created alphas for specific texture patterns.
Asymmetrical Sculpting: Skin naturally has asymmetrical variations, so it's useful to apply these principles in sculpting. Work on each side of the model independently to add variation and realism to skin details.
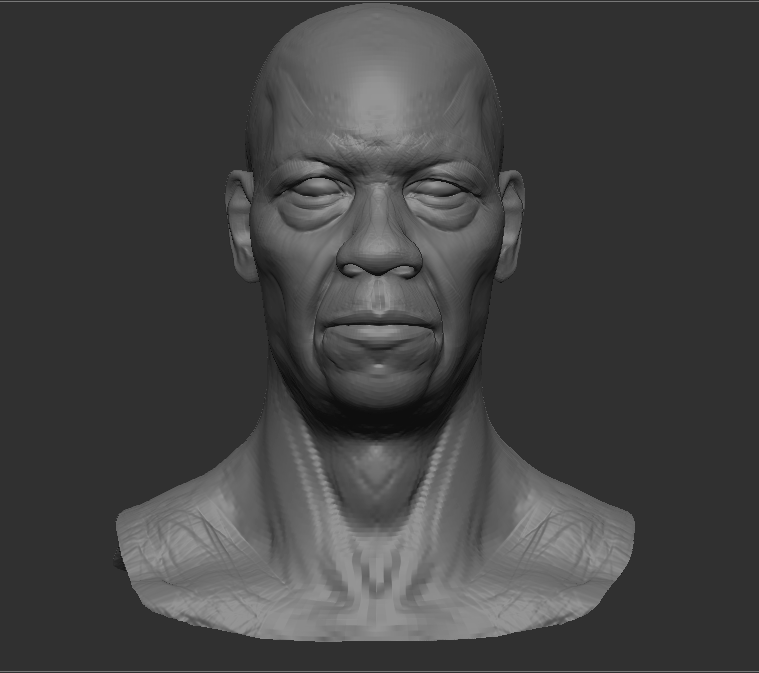
Review and Adjustments: It's important to periodically review the progress of the sculpt and make adjustments as needed. This may involve smoothing out overly rough areas, adjusting the depth of wrinkles, or adding more details where necessary to enhance the overall appearance of the skin.
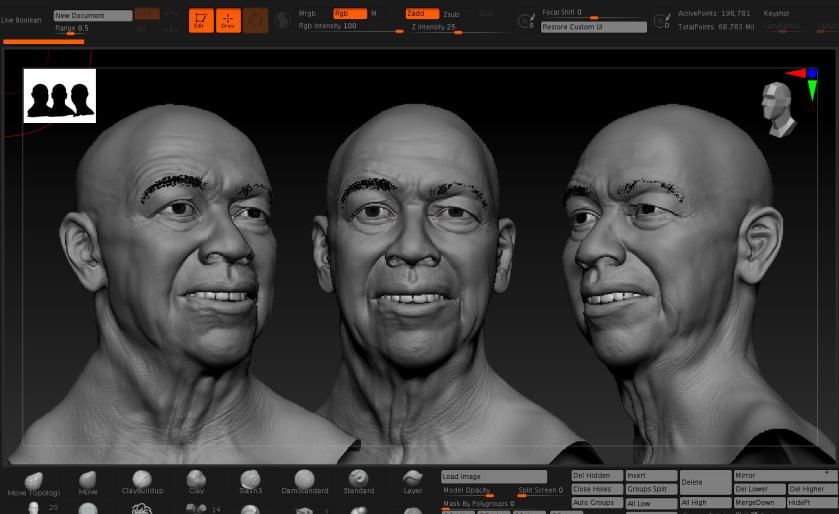
Details
Texturing and Polypainting: Once the skin details have been sculpted, you can proceed to texturing using ZBrush's polypainting feature. This allows you to paint directly onto the model to add color and variation to the skin, which helps enhance the sculpted details.
By following this workflow in ZBrush, you can create realistic and convincing skin details that significantly enhance the appearance of 3D characters.
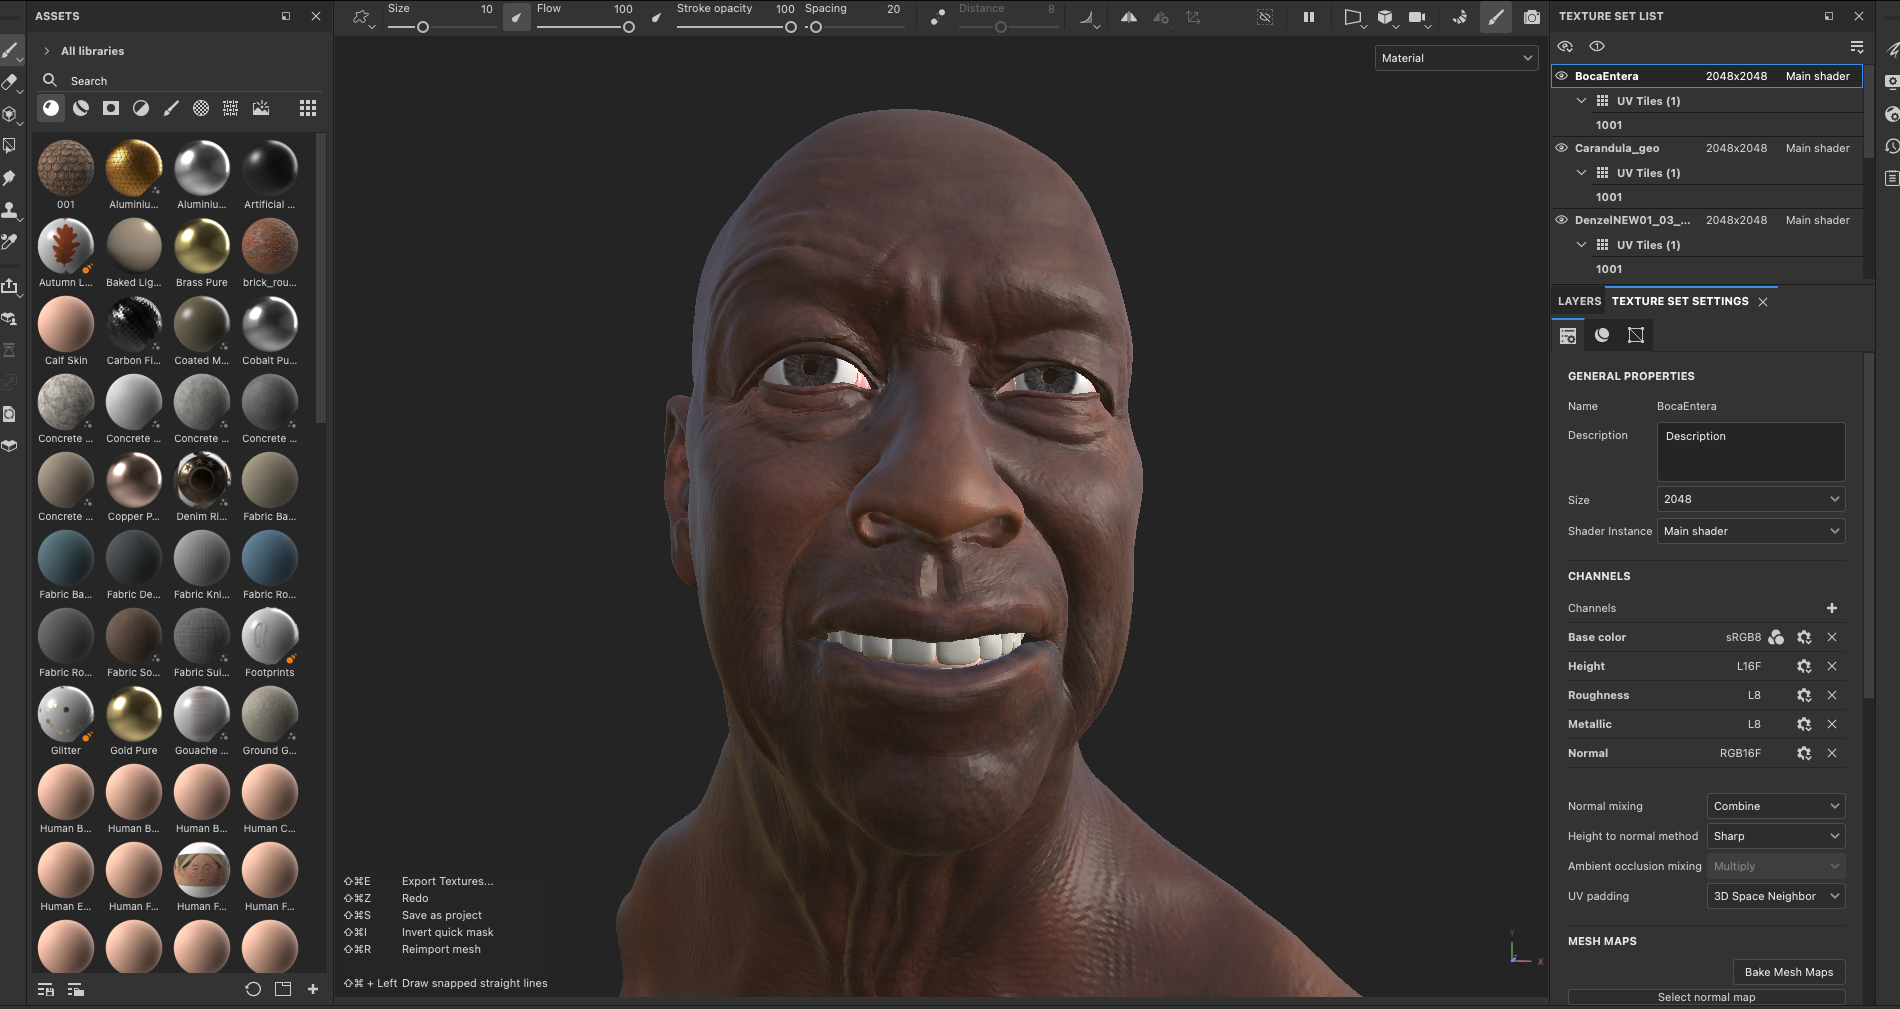
Skin Texture Head and Eyes
When it comes to texturing, I typically rely on Substance 3D Painter, a software renowned for its efficacy in this domain. It offers a robust set of tools tailored specifically for texturing tasks, making it an ideal choice for achieving lifelike skin textures.
My typical workflow involves extracting all possible maps from Substance 3D Painter, with the exception of the displacement map, which I prefer to extract from ZBrush.
Capture Substance Painter
Substance 3D Painter is a leading texturing software used in game development and VFX. It features a user-friendly interface with powerful tools for creating high-quality textures directly on 3D models. Its real-time painting and PBR support allow artists to achieve realistic results efficiently. With smart materials and procedural textures, Substance Painter streamlines the texturing workflow, making it a popular choice among artists for creating stunning textures quickly.
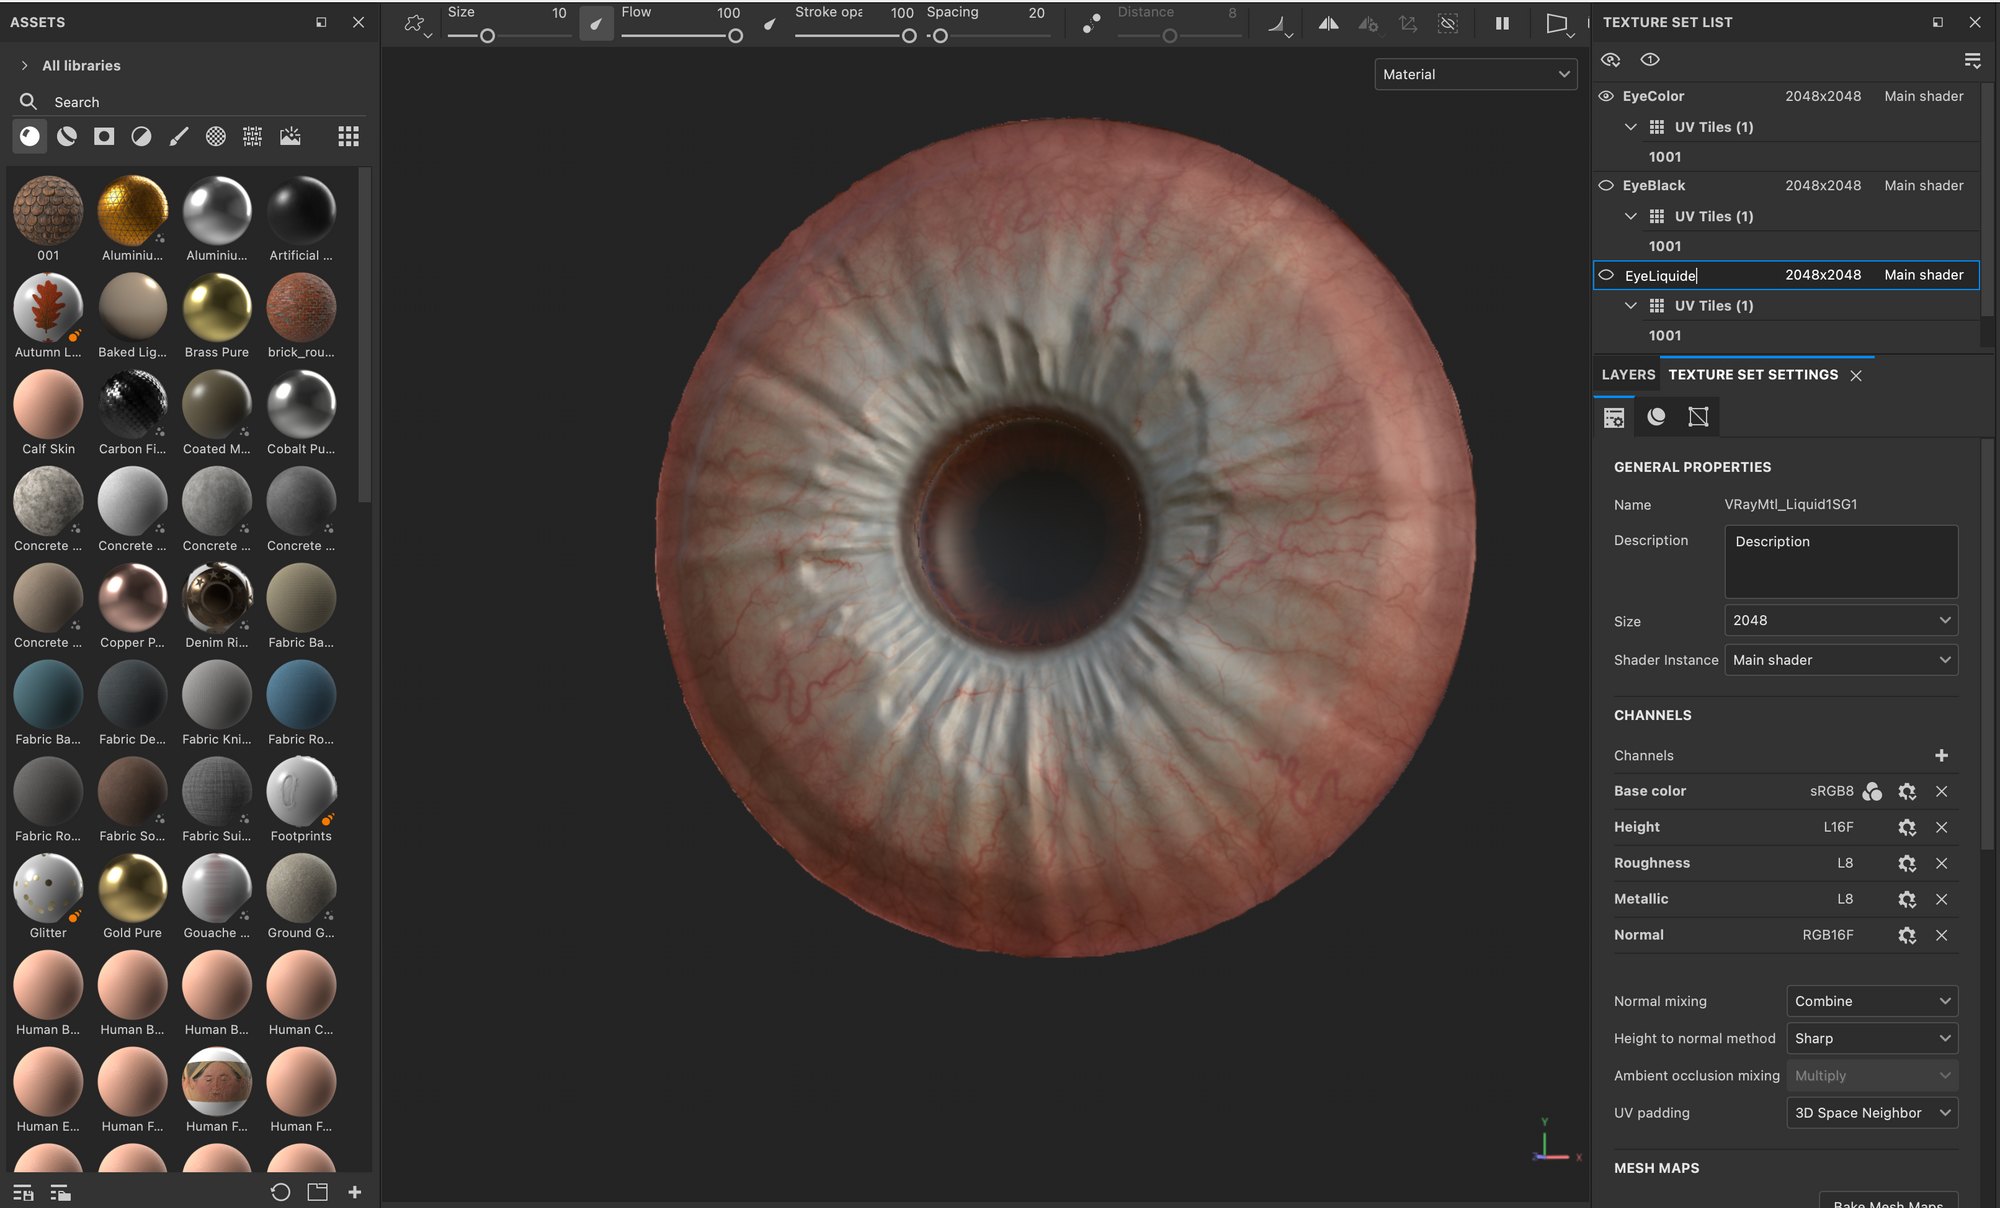
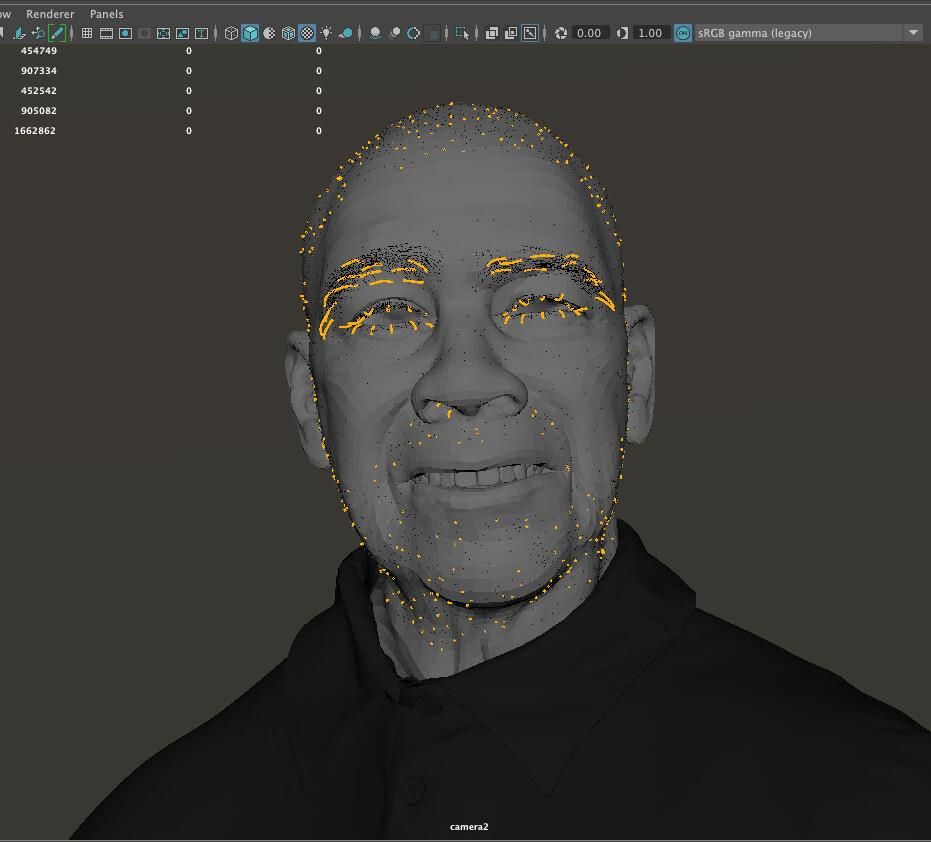
Grooming with XGen
I opted to utilise XGen Interactive to groom all the hair on the model: including the eyelashes, eyebrows, and peach fuzz. While some individuals may find sculpted eyebrows sufficient without adding peach fuzz, I aimed to exceed expectations.
Instead of duplicating and cutting out the main mesh, I chose to work directly on it. Since my primary mesh was already in the first UDIM, I preferred working with masks.
Once I created a collection and multiple descriptions along with masks, I commenced drawing out the guides based on my references and the chosen hairstyle. Following this, I adjusted the hair behavior using XGen deformers, primarily focusing on Clump, Cut, and Noise with various formulas.
Xgen Guides
XGen is a powerful instancing and grooming toolset in Autodesk Maya used for creating hair, fur, feathers, and other complex geometry. It offers a wide range of features including interactive grooming, procedural instancing, interactive previewing, and shading capabilities. With XGen, artists can efficiently create and manipulate large amounts of hair or fur, achieving realistic results with ease. It's widely used in the production of animated films, video games, and visual effects for its versatility and effectiveness in handling complex grooming tasks.
Final Steps
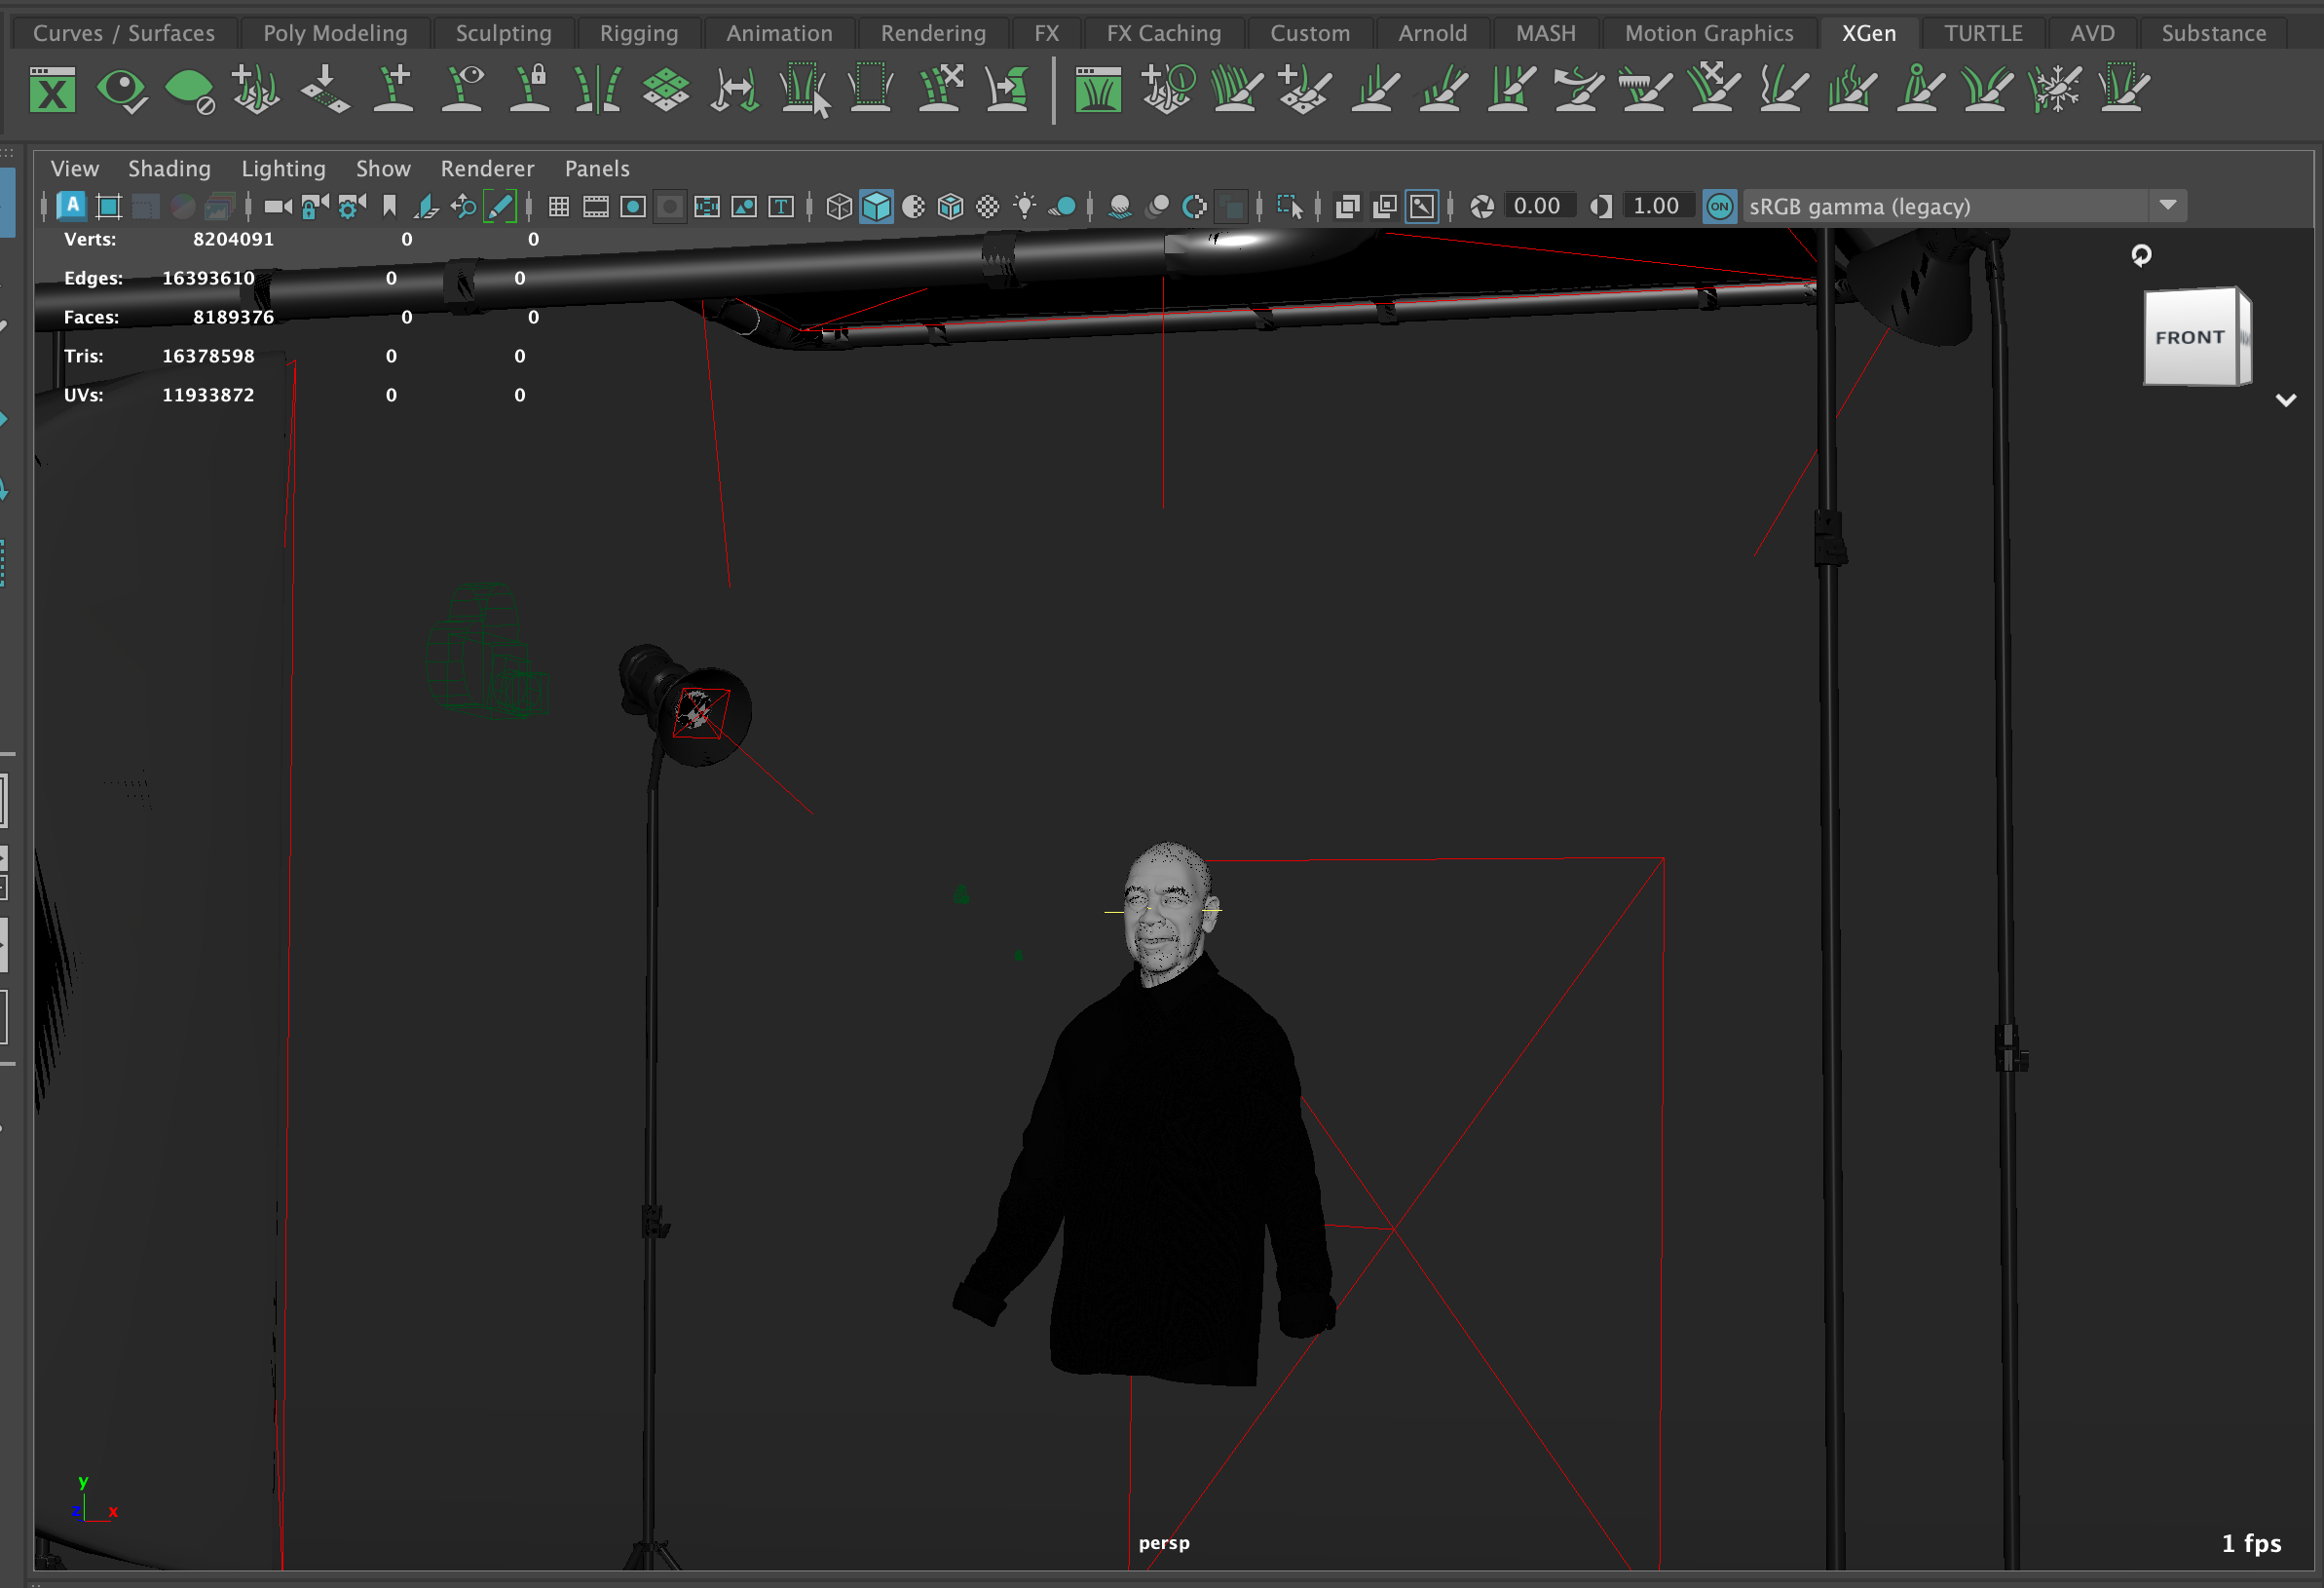
The final stage involved meticulously lighting the scene to accentuate the correct volumes for this model. Even the most flawlessly crafted model can be diminished by inadequate lighting.
To ensure optimal lighting, I chose a comprehensive approach, utilising multiple light sources strategically positioned throughout the scene. Among these, I incorporated two primary lights: a frontal light placed at a ¾ angle relative to the subject and a rim light positioned behind it. Additionally, I introduced supplementary lights to illuminate specific areas and enhance the overall ambiance. This multifaceted lighting setup enabled me to effectively highlight the contours and intricate details of the model, resulting in enhanced depth and dimensionality throughout the scene.
Additionally, I incorporated a free HDRI from PolyHaven into the scene. This not only provided additional color variations in the light bounces but also enhanced the overall ambiance and realism of the scene.
By carefully balancing these lighting elements, I was able to achieve a visually striking result that complemented the intricacies of the model, ensuring that it was presented in the best possible light.
Capture Light
Arnold is a powerful rendering engine integrated into Autodesk Maya, used to generate photorealistic images in animation, visual effects, and 3D design projects. Some of its features include global illumination, advanced shading, support for complex materials, and GPU rendering. Arnold stands out for its efficiency and quality in producing realistic images, making it a popular choice in the entertainment industry.
Renders Pass
I present a composite render of my character, incorporating various render layers including wireframe, Clay render, and others, to facilitate the supervision of my work.
Composite renders are created by combining multiple render layers in software such as Photoshop. Each render layer contains specific types of information, such as color, lighting, shadows, reflections, etc. By merging these layers, a comprehensive view of the character can be obtained, allowing for easy evaluation and refinement of the final image.
These composite renders are invaluable tools in post-production, as they provide flexibility in fine-tuning the final image. They allow for adjustments to lighting, color correction, adding effects, and more, ensuring that the character is presented in the best possible light and meets the desired standards of quality and realism.
Render Pass
Additional Notes
Embarking on this project, I dedicated a solid two months of relentless effort, traversing every phase of the journey with unwavering commitment. The culmination of this endeavor was made possible through a deep-seated understanding of the intricate 3D workflow, serving as the cornerstone of my creative process.
Delving into the realm of character creation, I quickly grasped that it transcends mere modeling and texturing; it encompasses the nuanced artistry of shading, the transformative power of lighting, the captivating allure of rendering, and even the often-overlooked intricacies of rigging. Grasping the intricacies of deformations proved paramount; without this understanding, ensuring that each edge loop harmoniously supports the character's form, even in a seemingly static pose, poses a formidable challenge.
One profound realisation that dawned upon me was the non-linearity inherent in any artistic workflow. Iteration became my steadfast companion as I revisited each step time and again, relentlessly striving for perfection until the desired outcome materialized before my eyes.
This project served as a catalyst for a profound shift in perspective, leading me to abandon the futile habit of comparing my journey to that of other artists. Instead, I embraced the disparity in experience as a testament to the diverse paths we traverse, recognizing that true growth lies not in emulation but in the cultivation of one's unique artistic voice.
While the artwork may bear imperfections, I fervently hope that this article serves as a beacon of inspiration for aspiring artists, emboldening them to venture into the realm of realistic portraiture and forge their own creative legacy.
Should any queries arise, I wholeheartedly encourage you to reach out. The invaluable insights, guidance, and unwavering support generously bestowed upon me were instrumental in shaping the trajectory of this project.Embarking on this project, I dedicated a solid two months of relentless effort, traversing every phase of the journey with unwavering commitment. The culmination of this endeavour was made possible through a deep-seated understanding of the intricate 3D workflow, serving as the cornerstone of my creative process.
Heartfelt gratitude is extended to The Rookies for providing a platform to share the narrative of this transformative journey. It is my fervent wish that this account resonates with fellow artists, offering solace and inspiration akin to the profound impact that the progress of others has had on my own artistic evolution.