Leandro Leijnen, a character artist and student at Creative Seeds, delves into the creation process of a character for a student short film, sharing techniques and tools to inspire fellow creatives on The Rookies platform.
In this article, Leandro Leijnen, a character artist in his third year at Creative Seeds, offers an interesting overview of the creation process behind the character featured in a student short film project. Leandro covers the techniques and tools used hopefully offering some valuable knowledge to inspire fellow creatives starting out on The Rookies platform.
From idea to concept
Inventing a character for a short film
During the second semester of our third year, I was part of a group of 8 people, with the responsibility of creating the characters for the short film.
It was created for the AFCA festival in Rennes, situated in France. The movie's pitch was as follows:
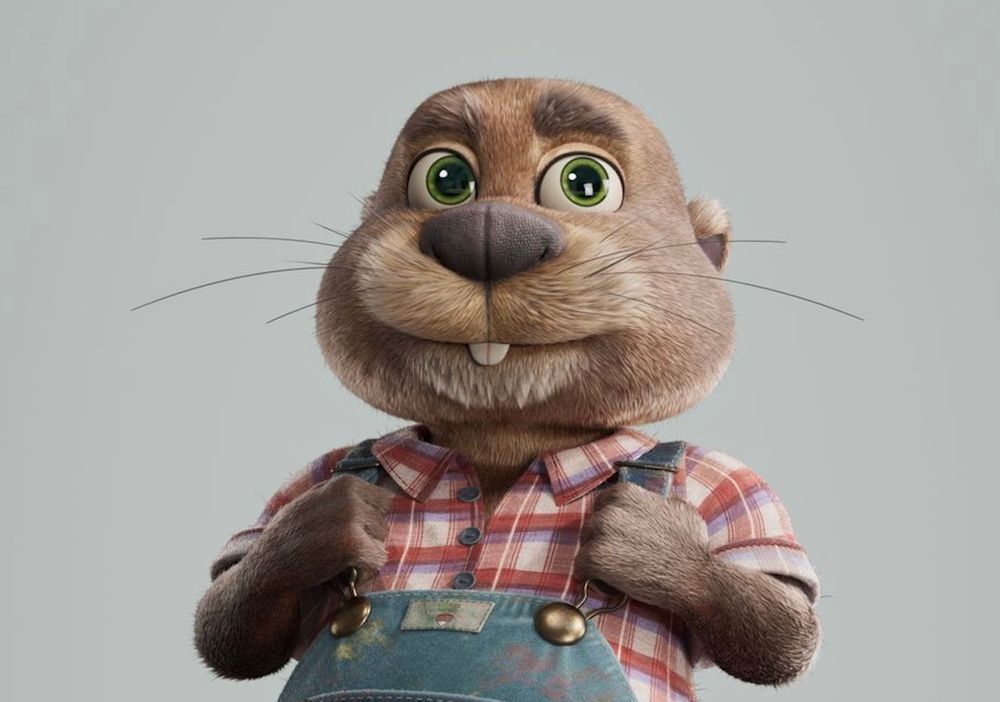
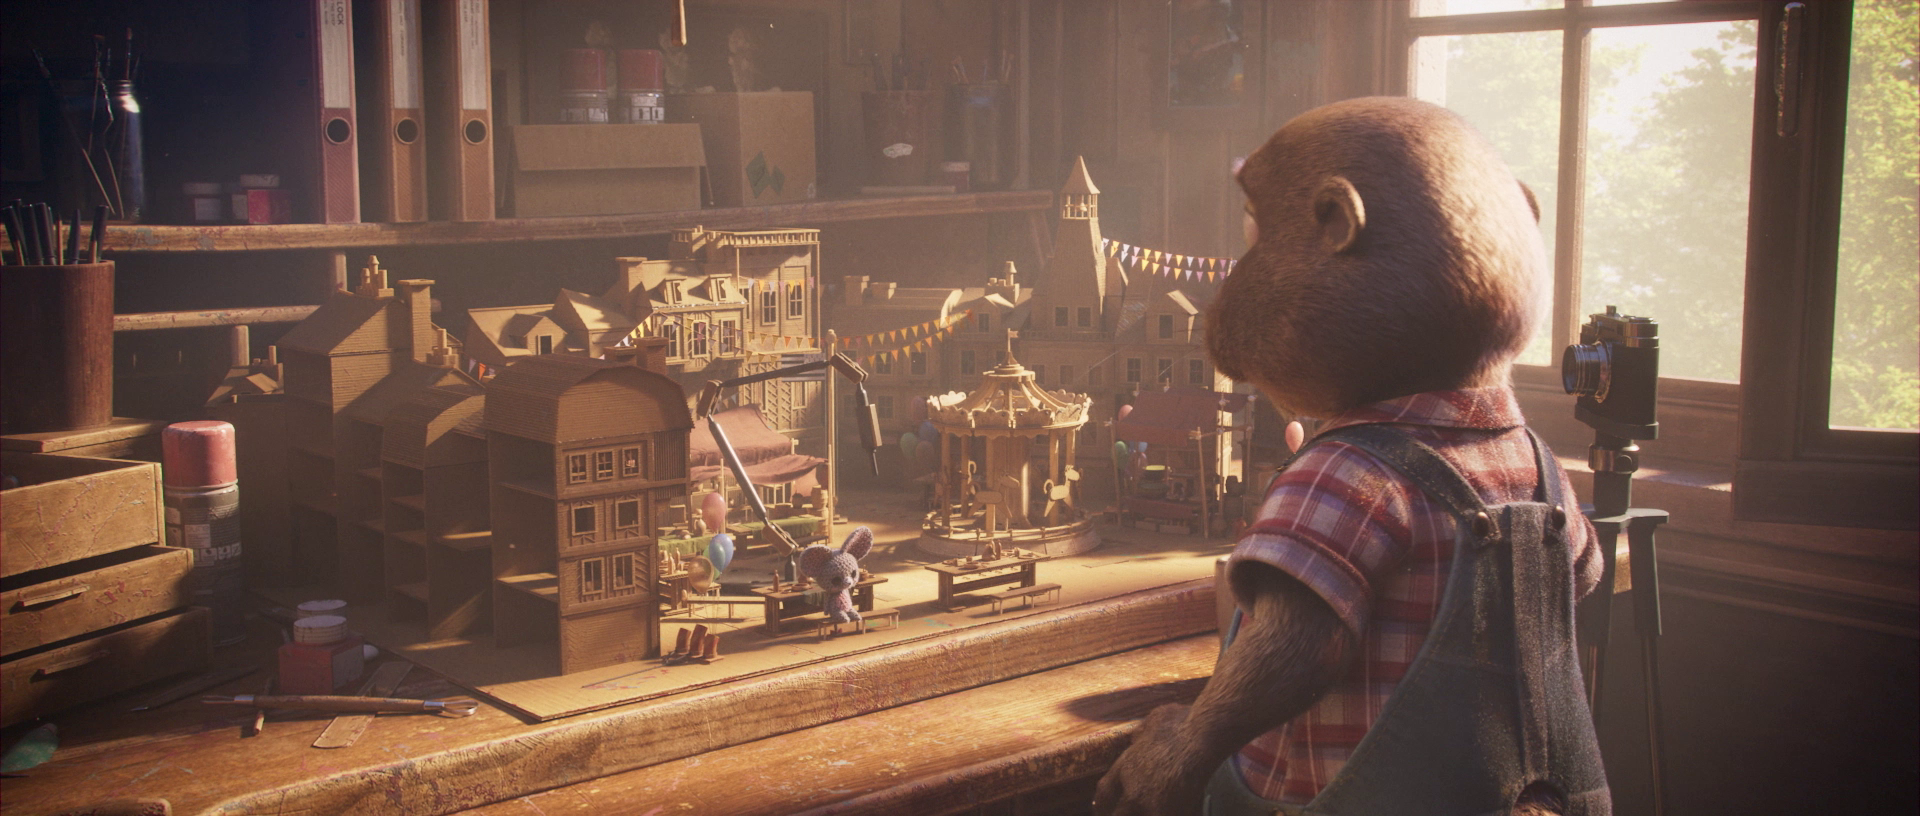
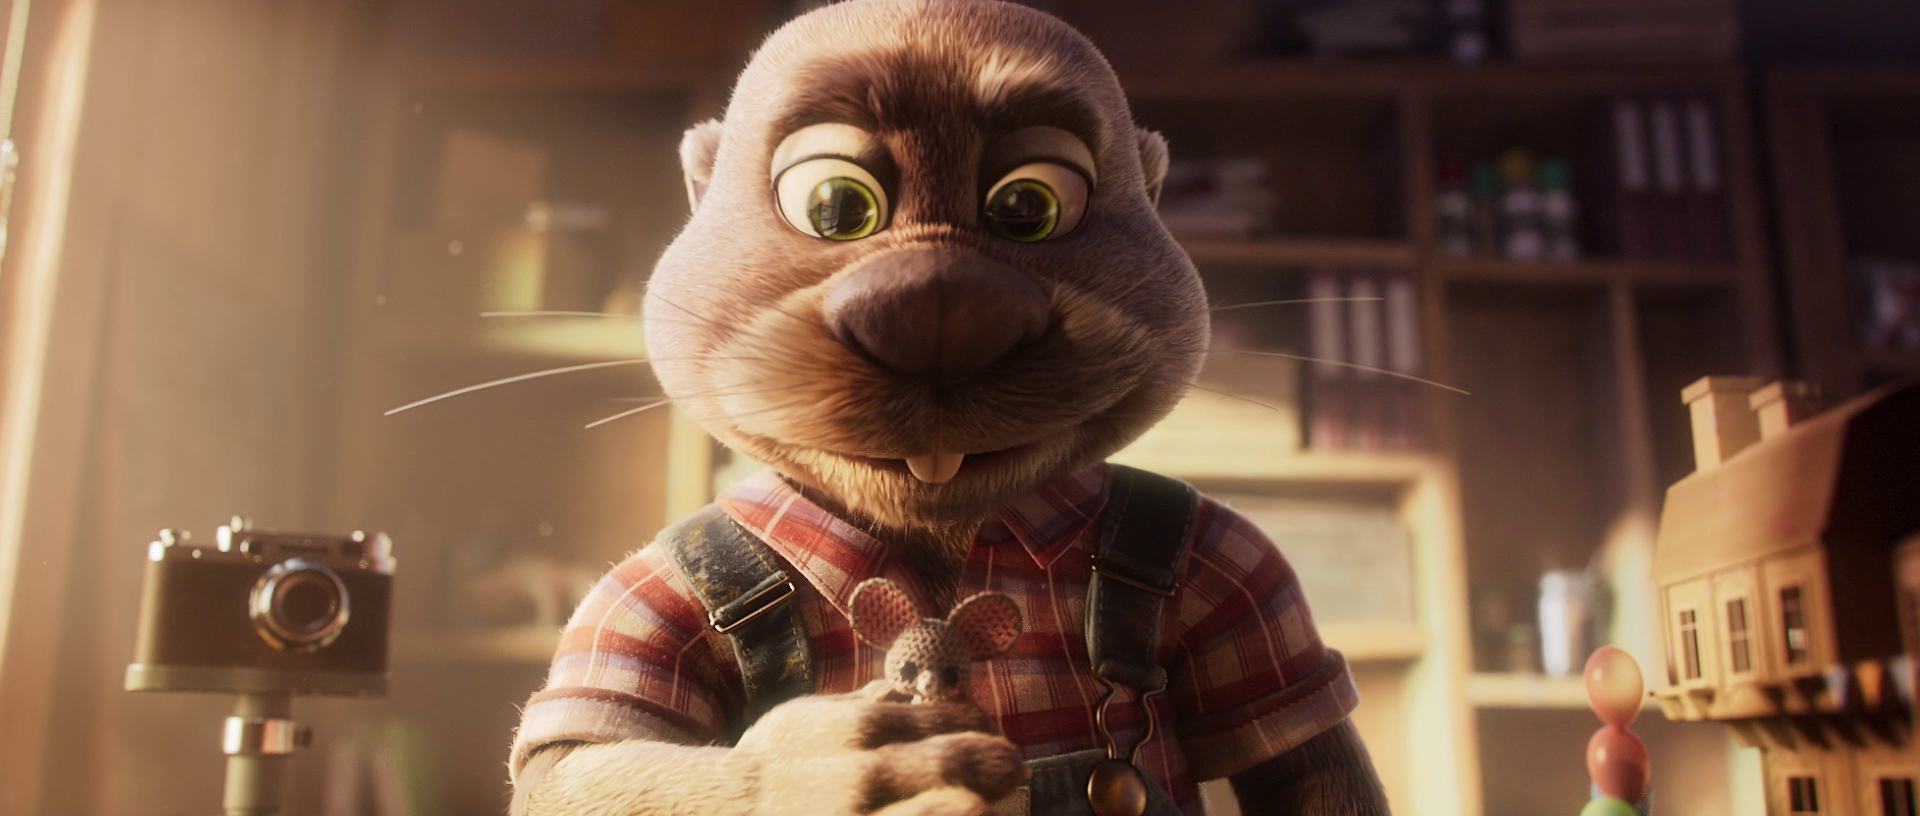
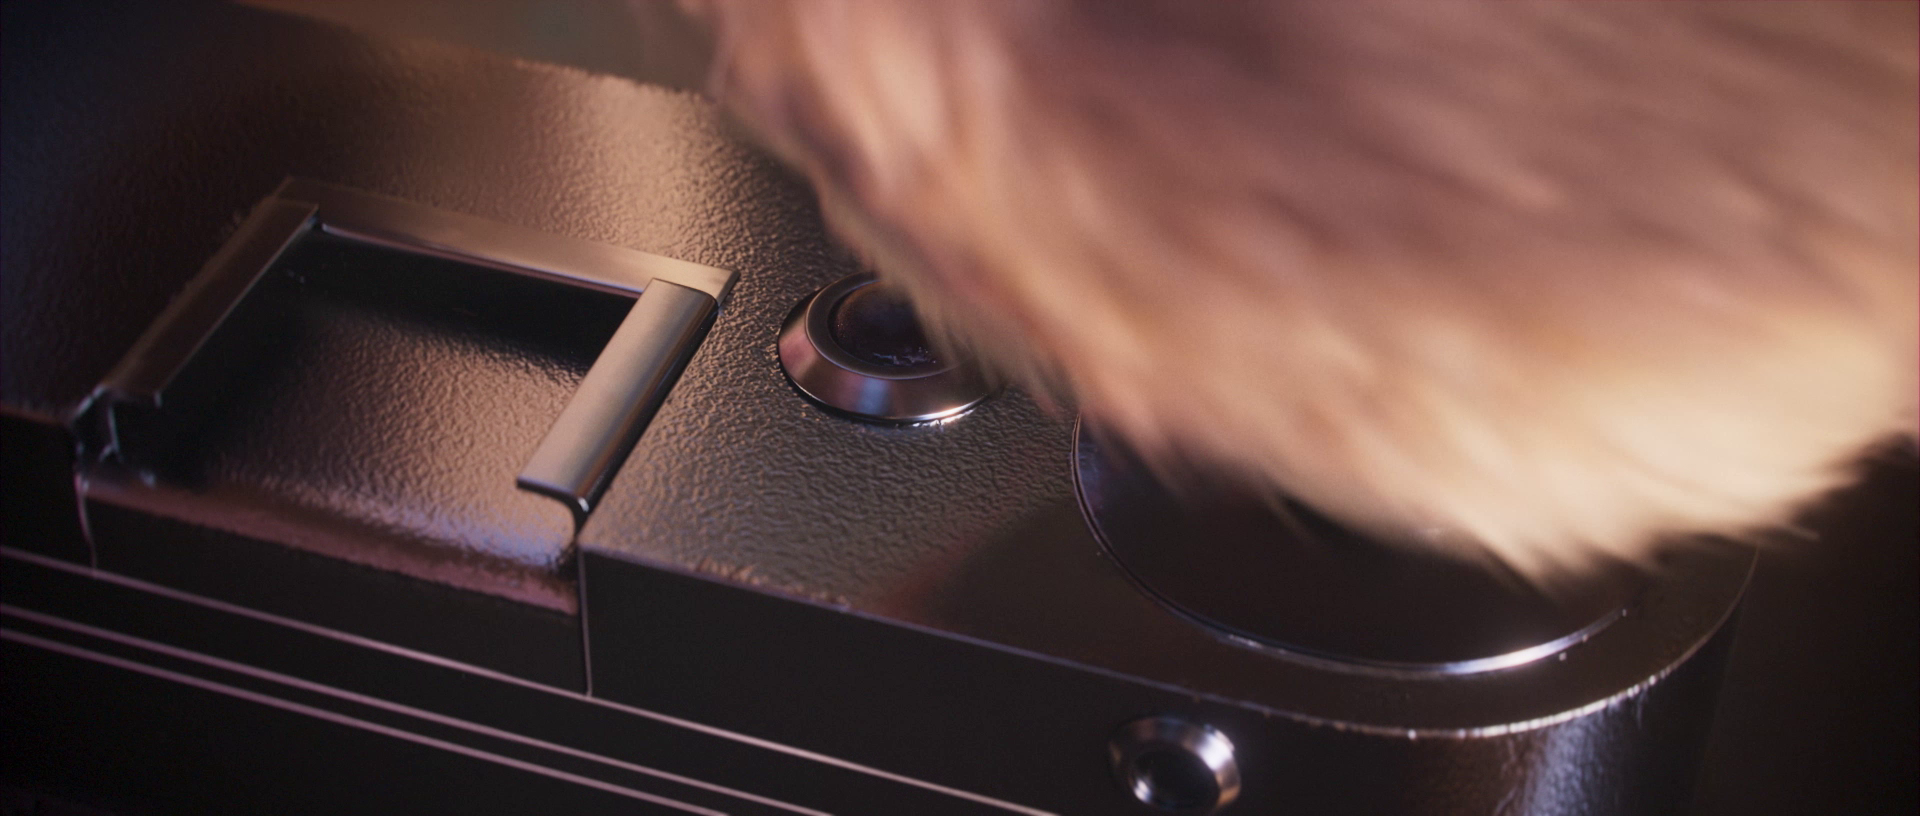
In his workshop, an old, passionate beaver animates a small knitted mouse using stop motion. The little creature eventually interacts with the old man, plugging in a socket that reveals the words "Bon Festival" (Good Festival).
The opening shot of the film
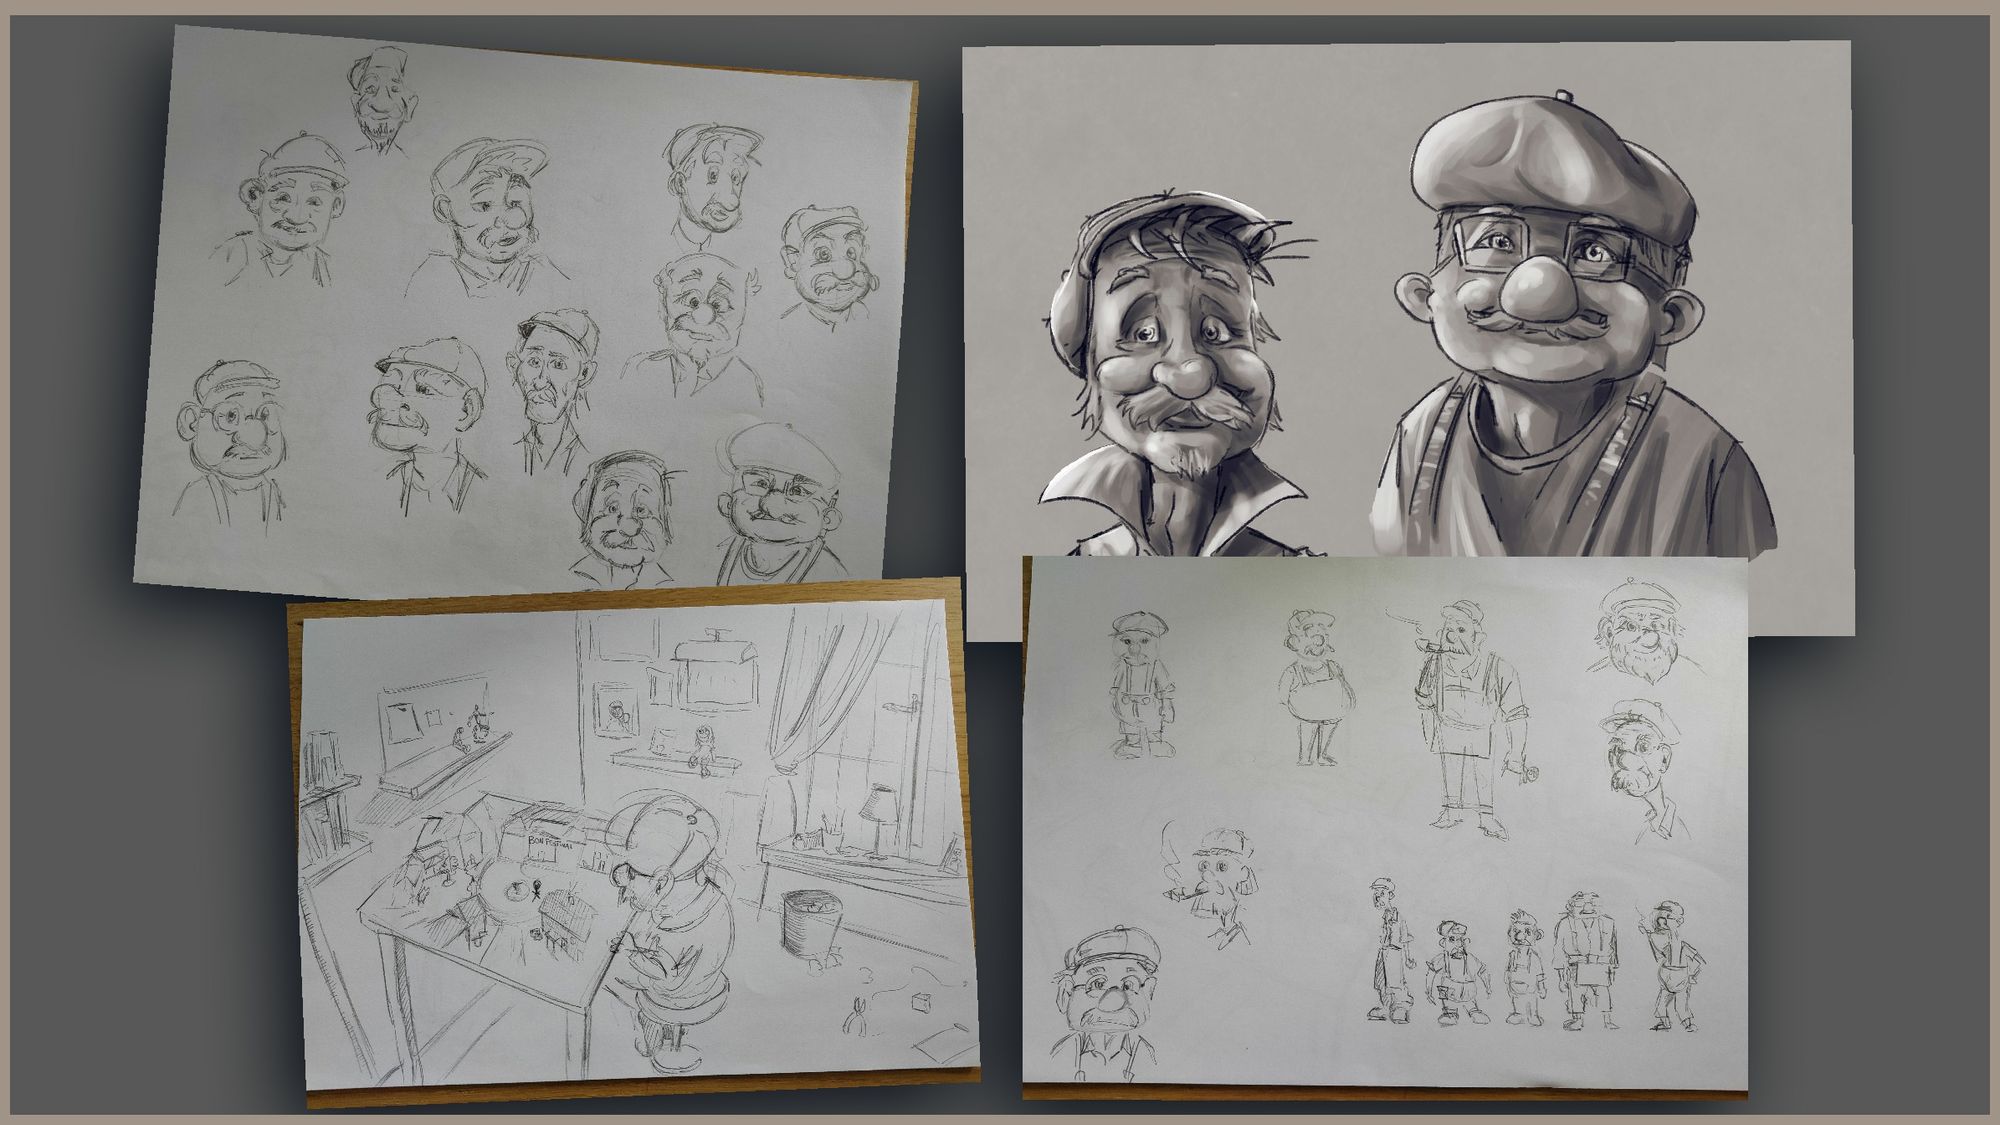
With this crucial step decided and validated by the festival, we proceeded to work on the actual concepts. The old man needed to appear kind and calm, yet firm and decisive in his movements when animating the small knitted mouse. We drew inspiration from many movie scenes, for example from the repair scene in Toy Story, where the old man fixes Woody.
Initially, I drew many human faces, experimenting with various ideas, but I was never quite satisfied with the results. Then, a friend suggested the idea of creating an animal, like a beaver, and that resonated with the team. We all agreed that an animal would be a more unique and less frequently seen choice in student short films.
Creating an animal also simplified our task, since we only were in our third year.. Making a convincing human character for a one-minute film, including close-ups and demanded a level of proficiency that we felt was too complicated.
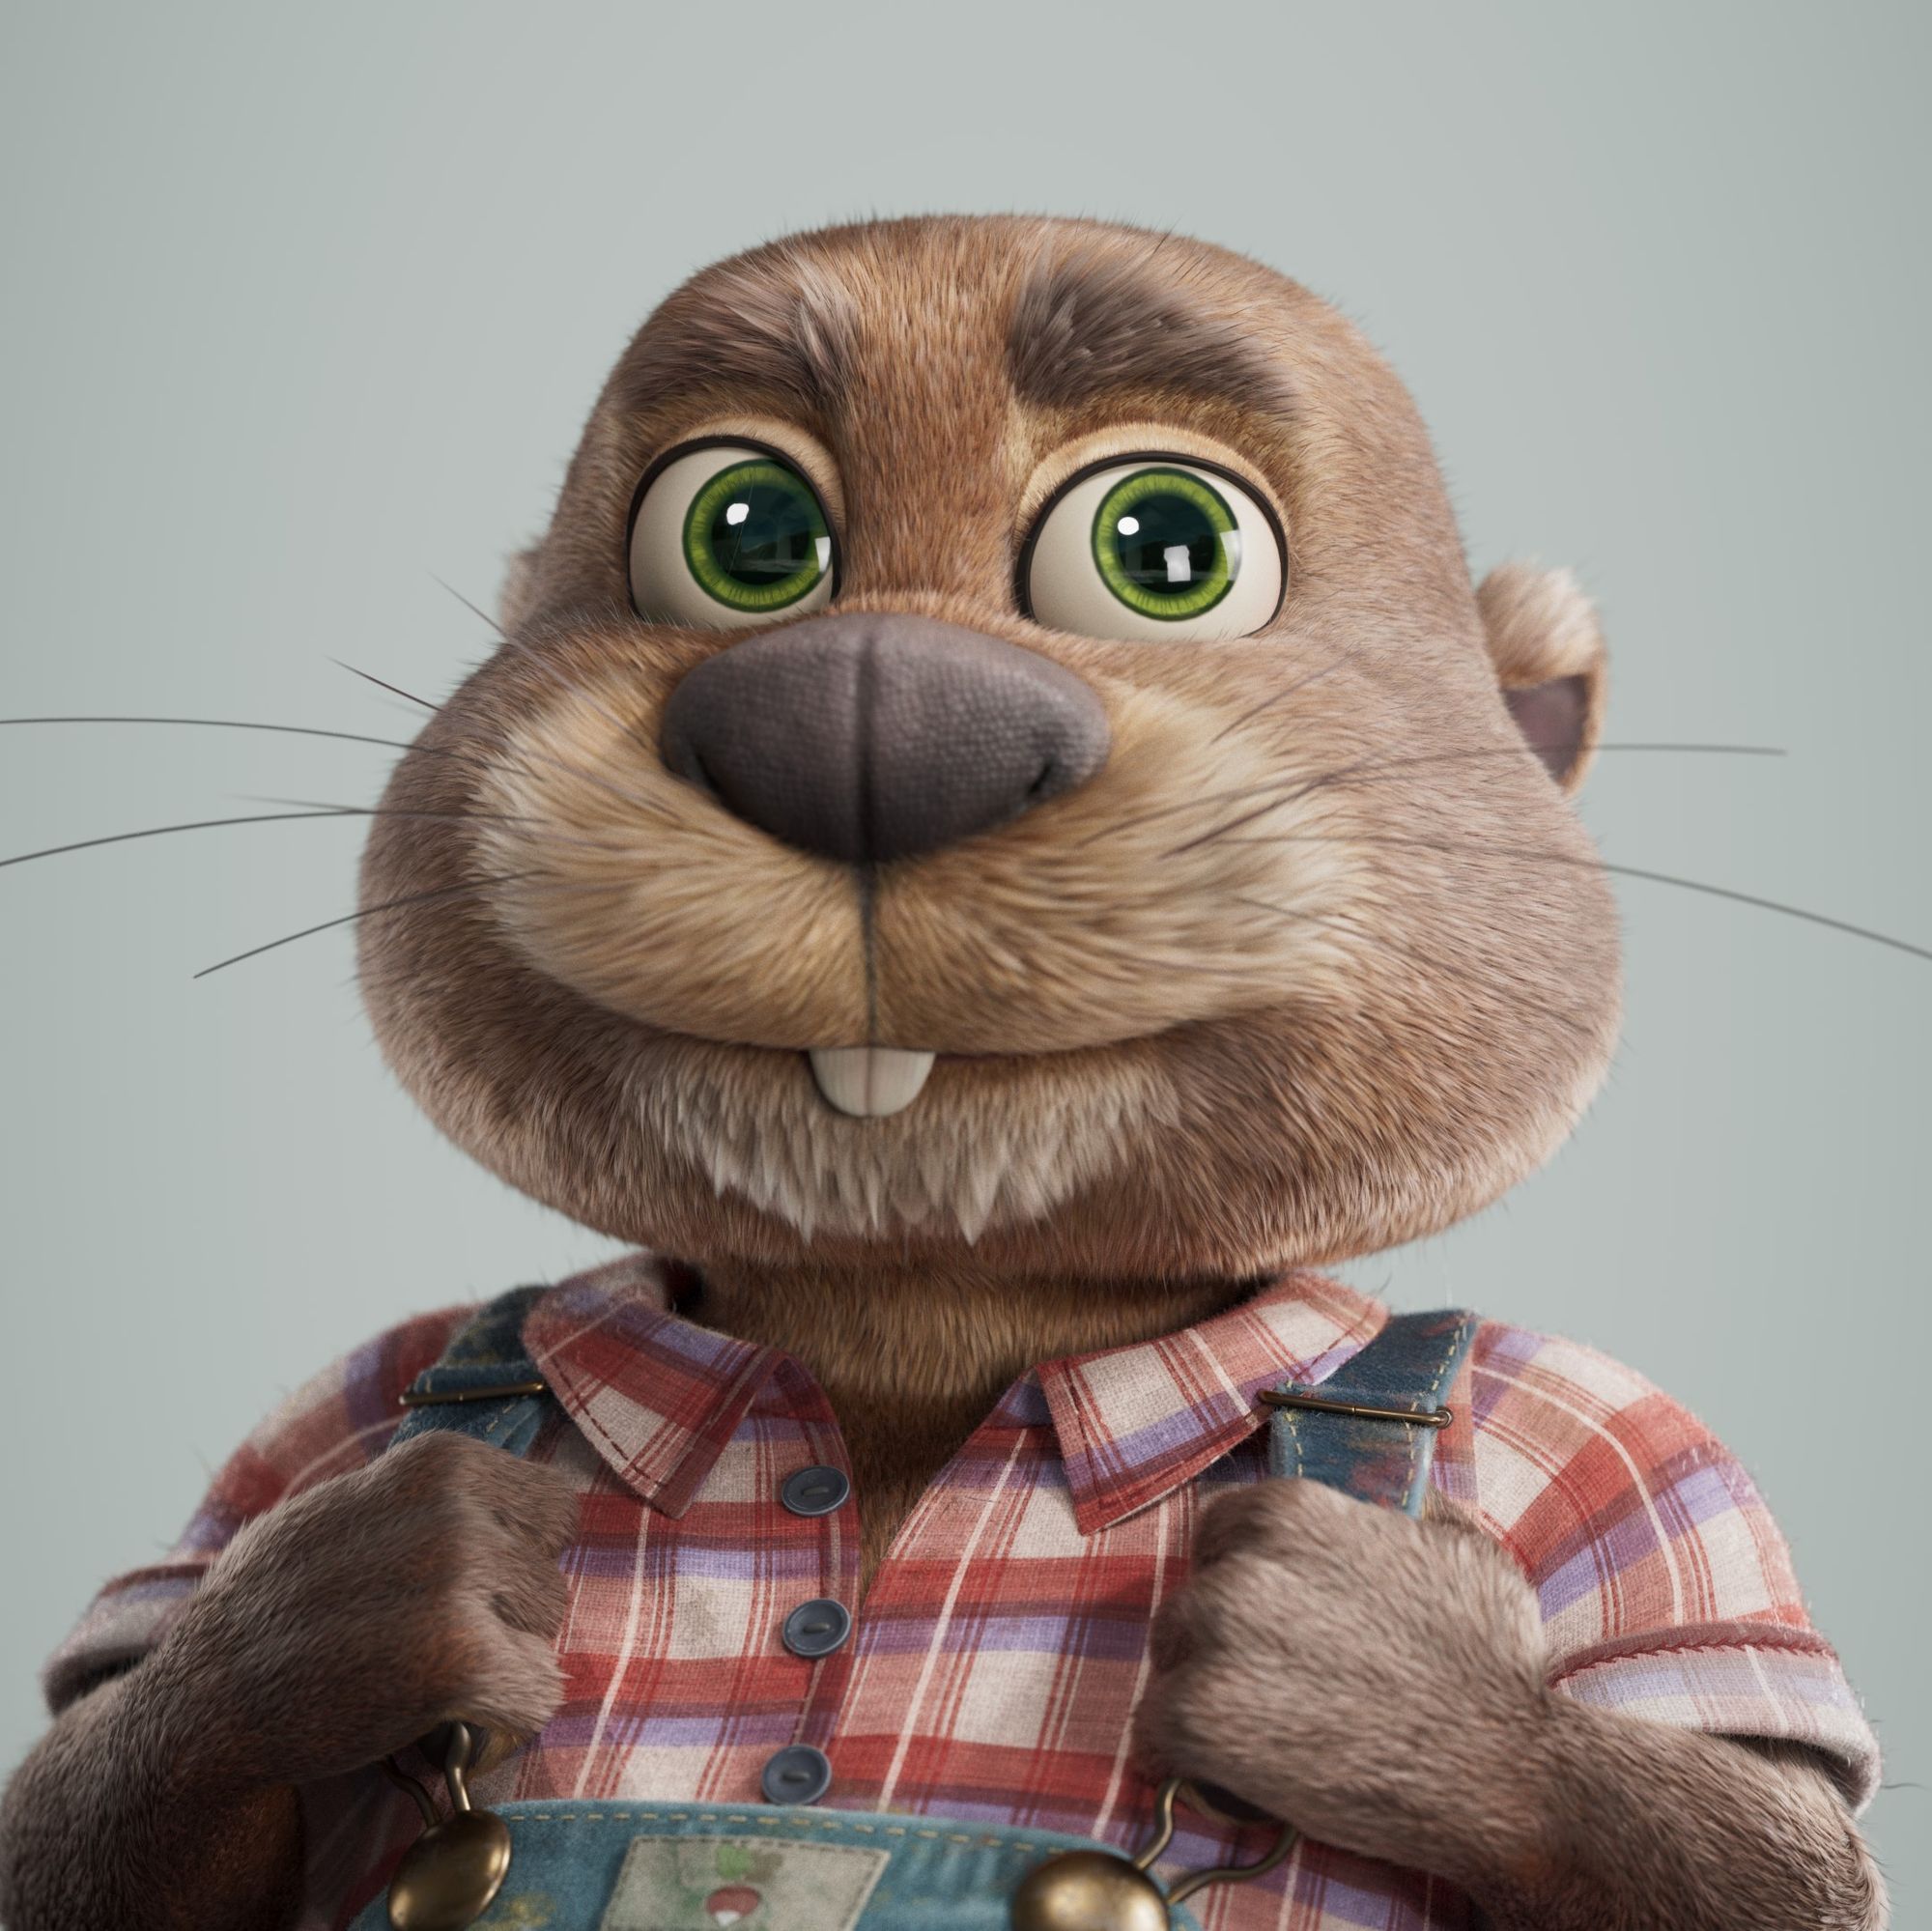
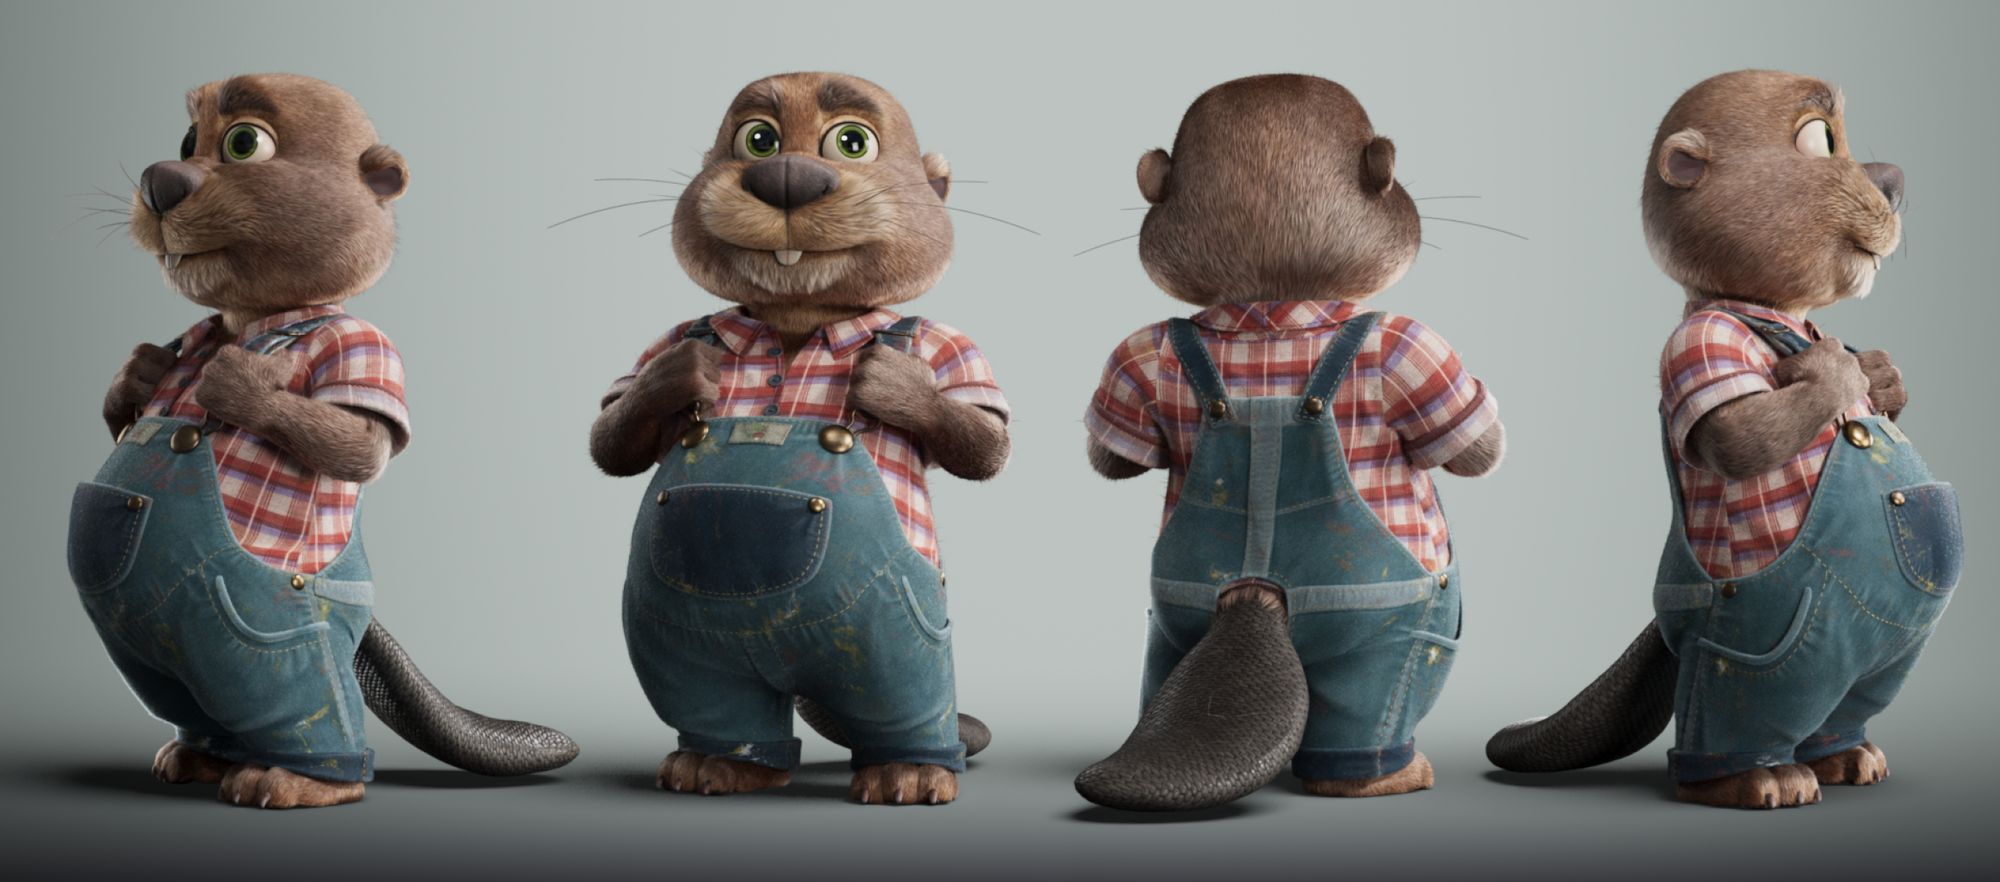
So a beaver it was!
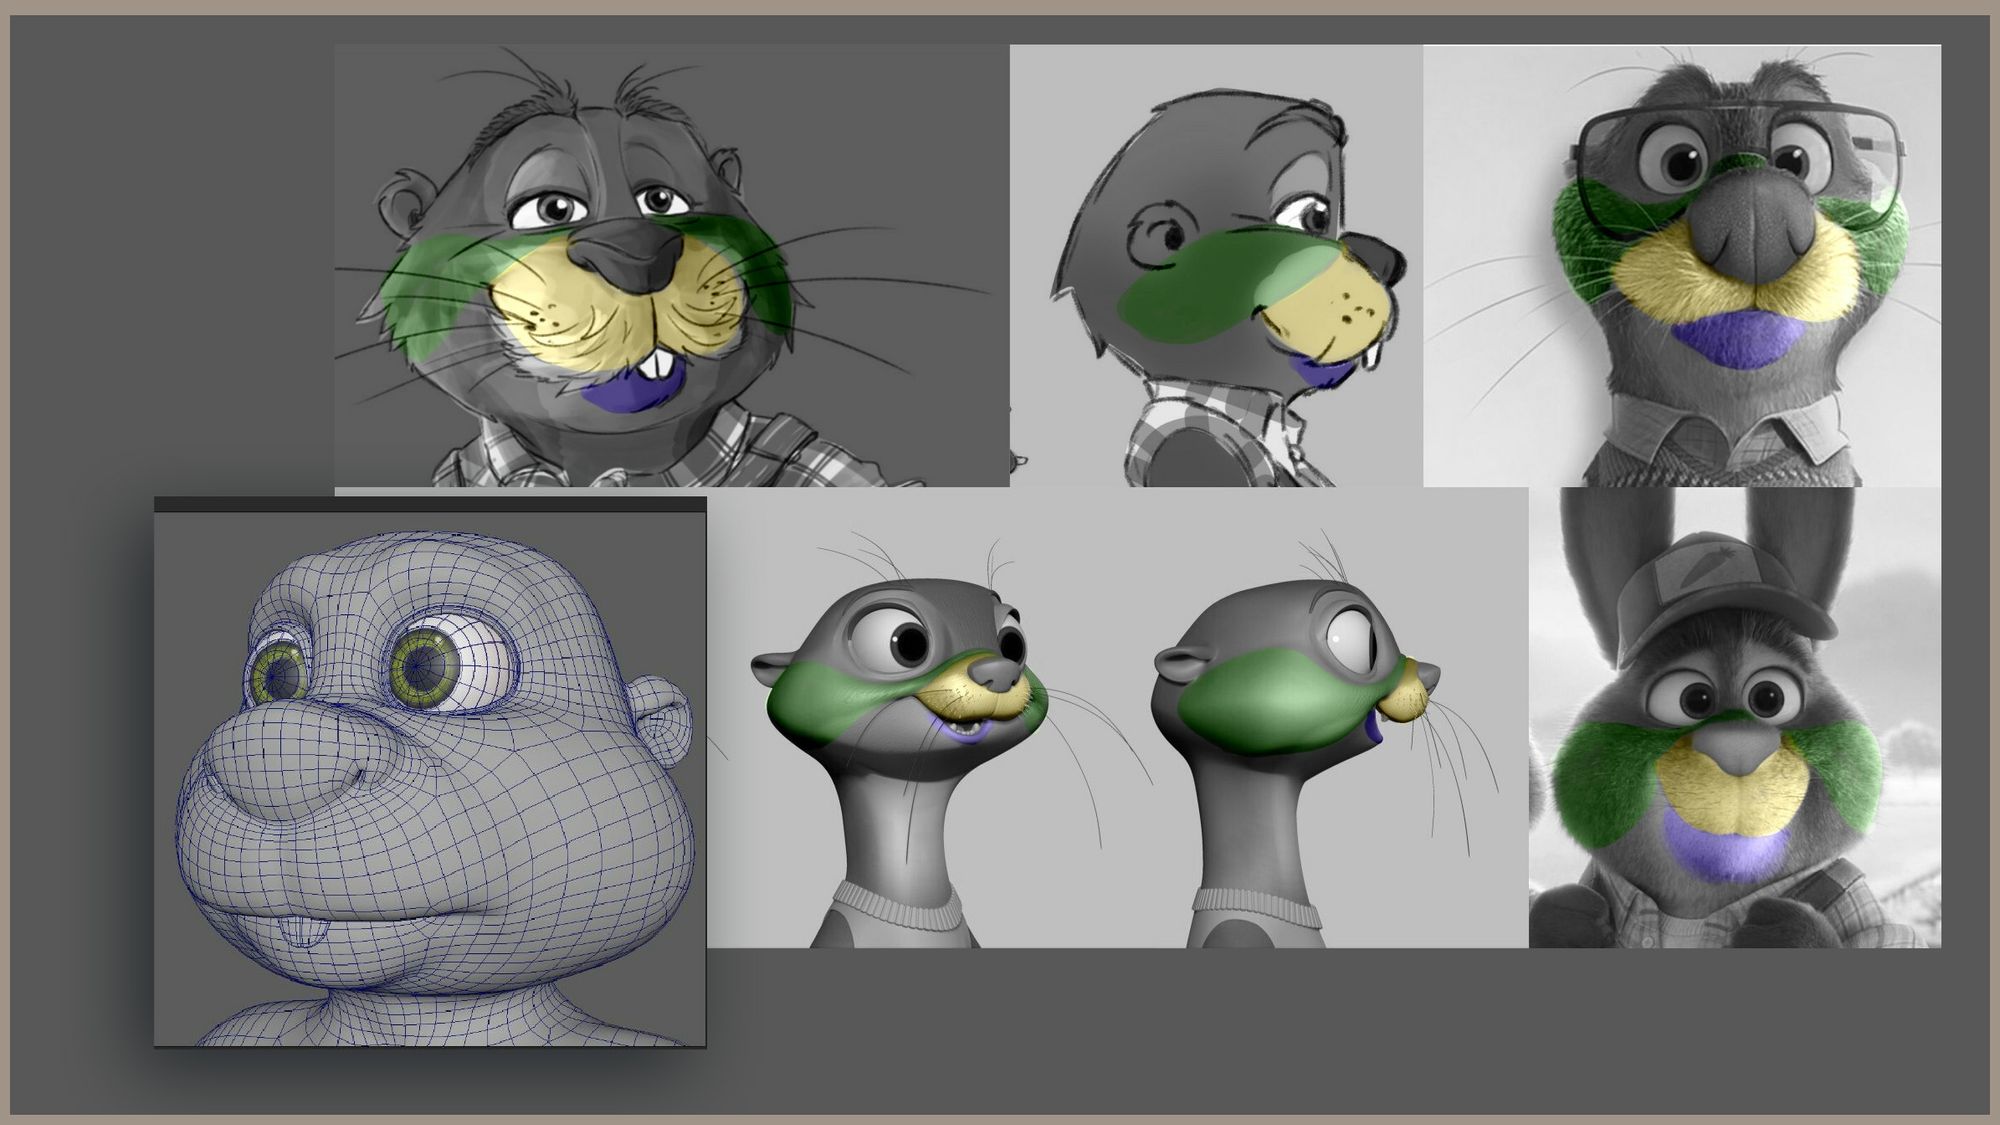
Making the concept art
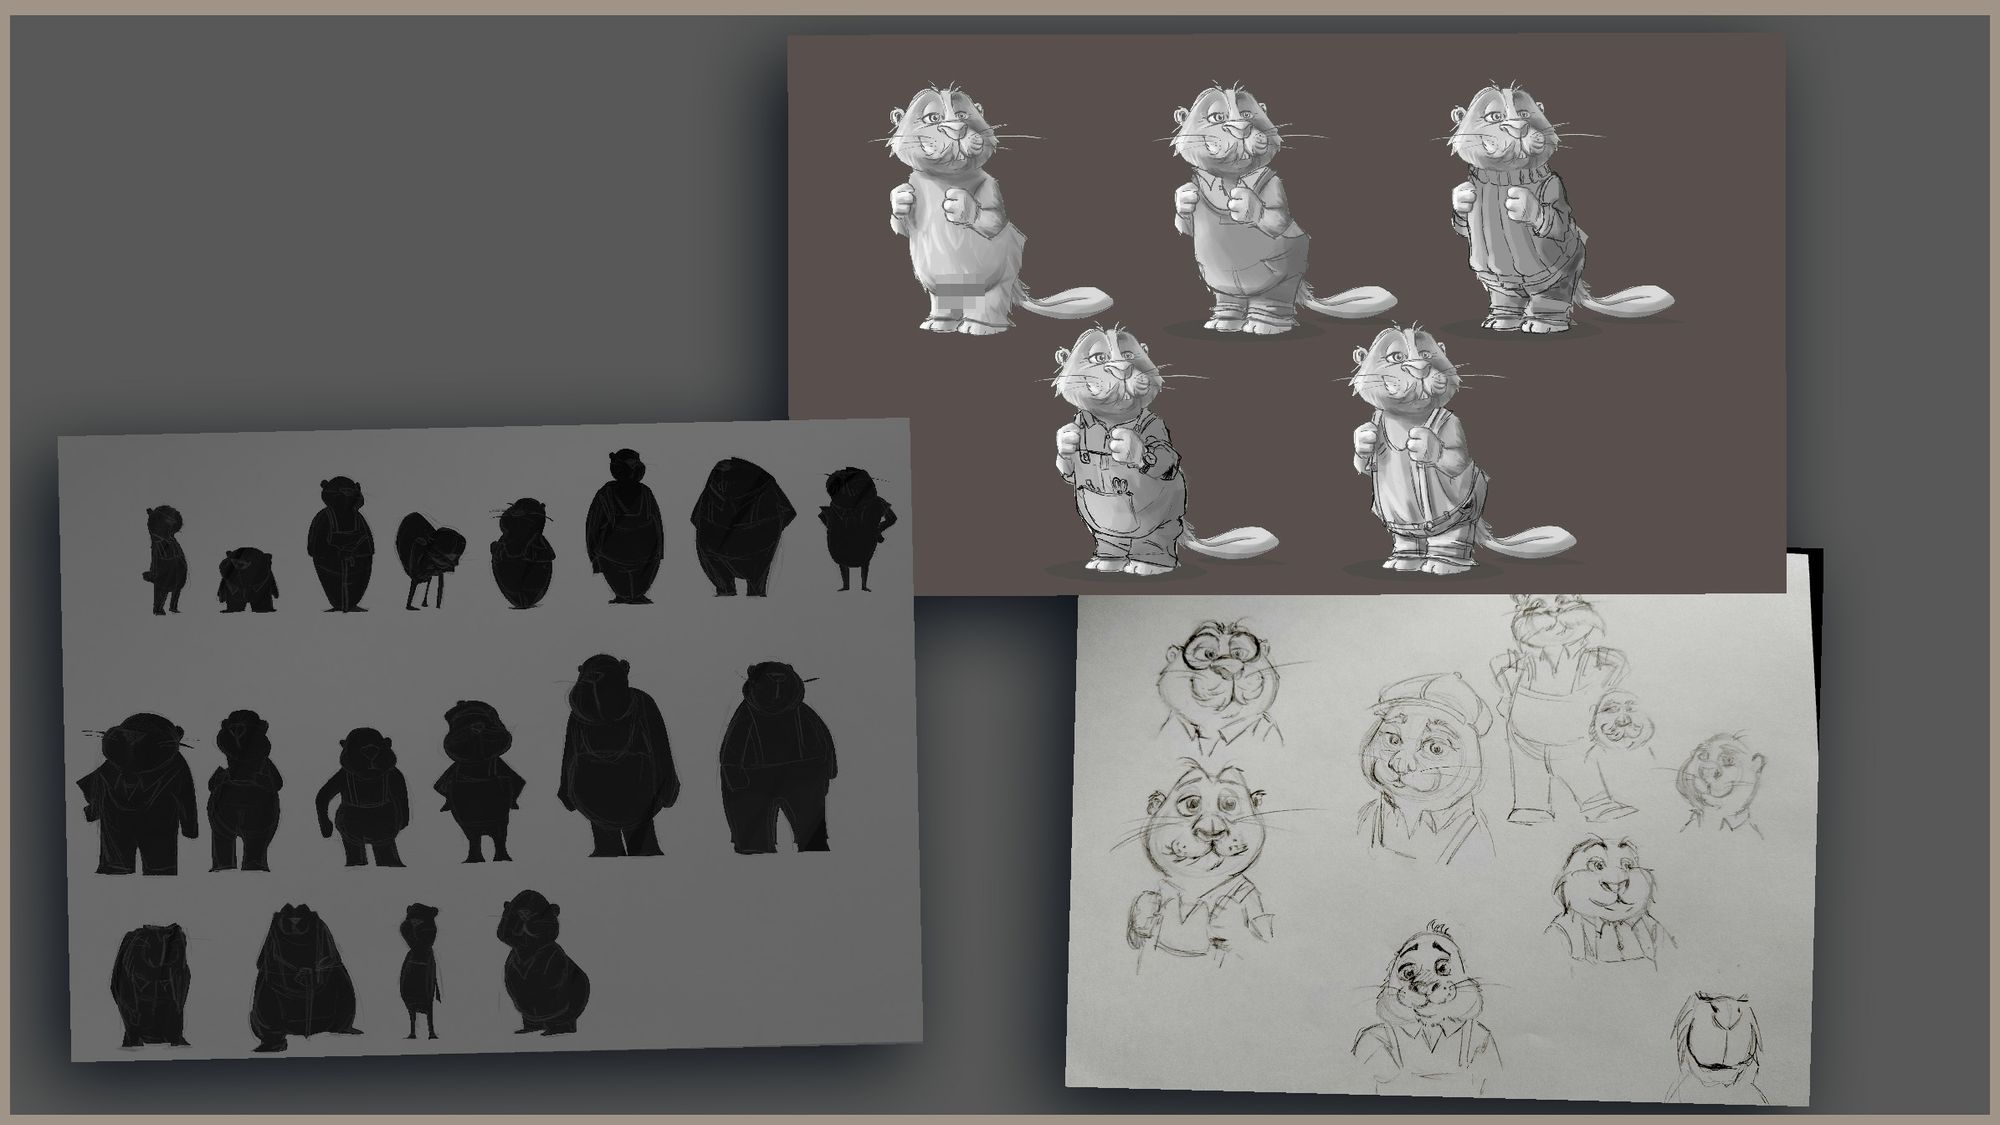
I used to draw a lot, so I began with quick sketches to explore the main shapes. Determining the silhouette was crucial, so that's what I focused on first.
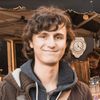
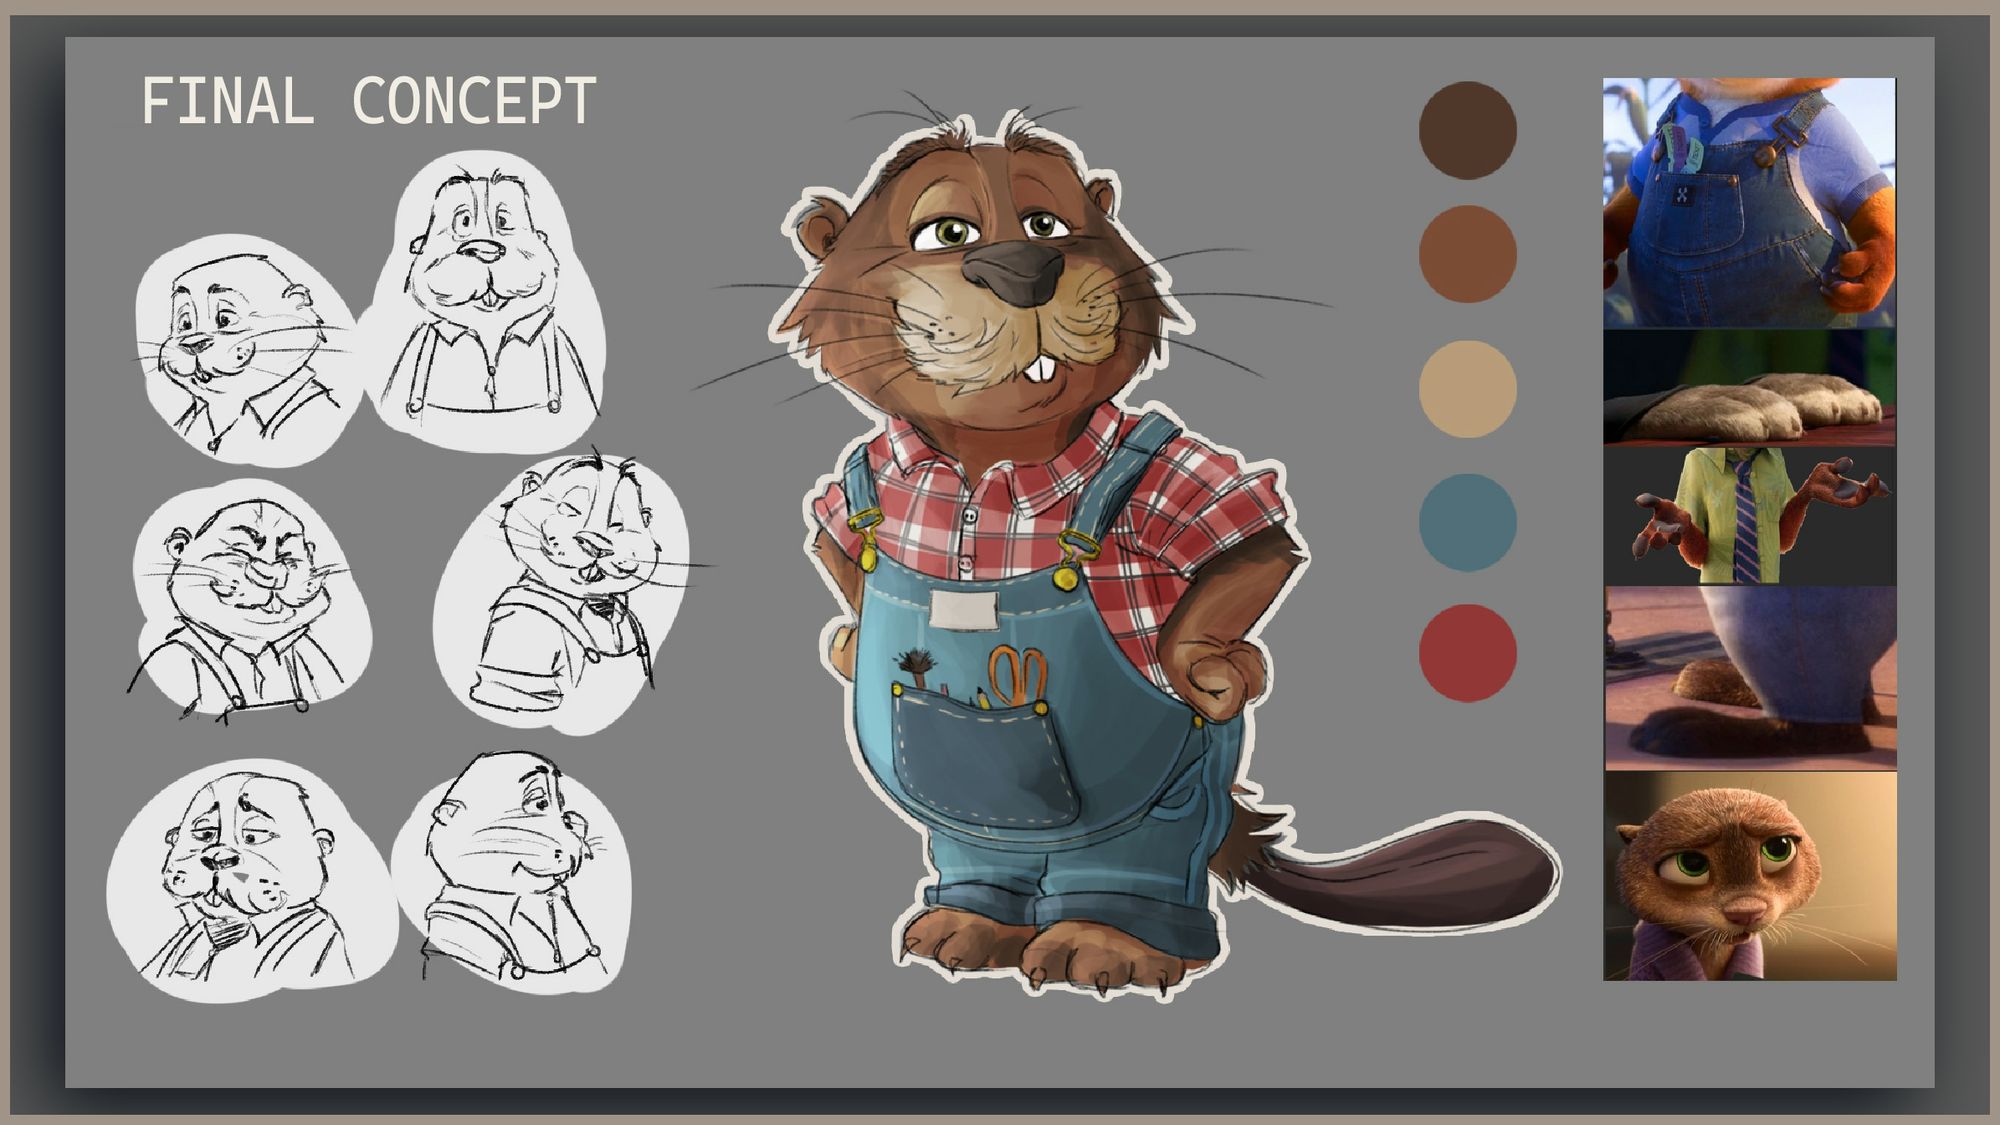
We decided to depict him as small, in good health, and serene.
Moving on to the face, I experimented with serious and jovial traits before settling on a final design with a colour turnaround. My primary references included Zootopia and characters from various movies and concept arts.
From concept to 3D
Sculpting in ZBrush
With the concept done, it was time to start making him in 3D. This meant going to my favourite software, ZBrush. Some people might want to start in a modeling software such as Maya or Blender, creating everything with primitives and poly-modeling, but I prefer going directly into ZBrush. Both can work as long as you are most comfortable with it. The reason I choose this software above all is because of its artistic freedom, as you don't need to bother with topology. You can quickly create, merge, and deform objects in the way you want.
And so I started sculpting during the first few days, trying to quickly have a first version to show, also to have already a proxy character that we could place in the scene to see if the proportions were right.
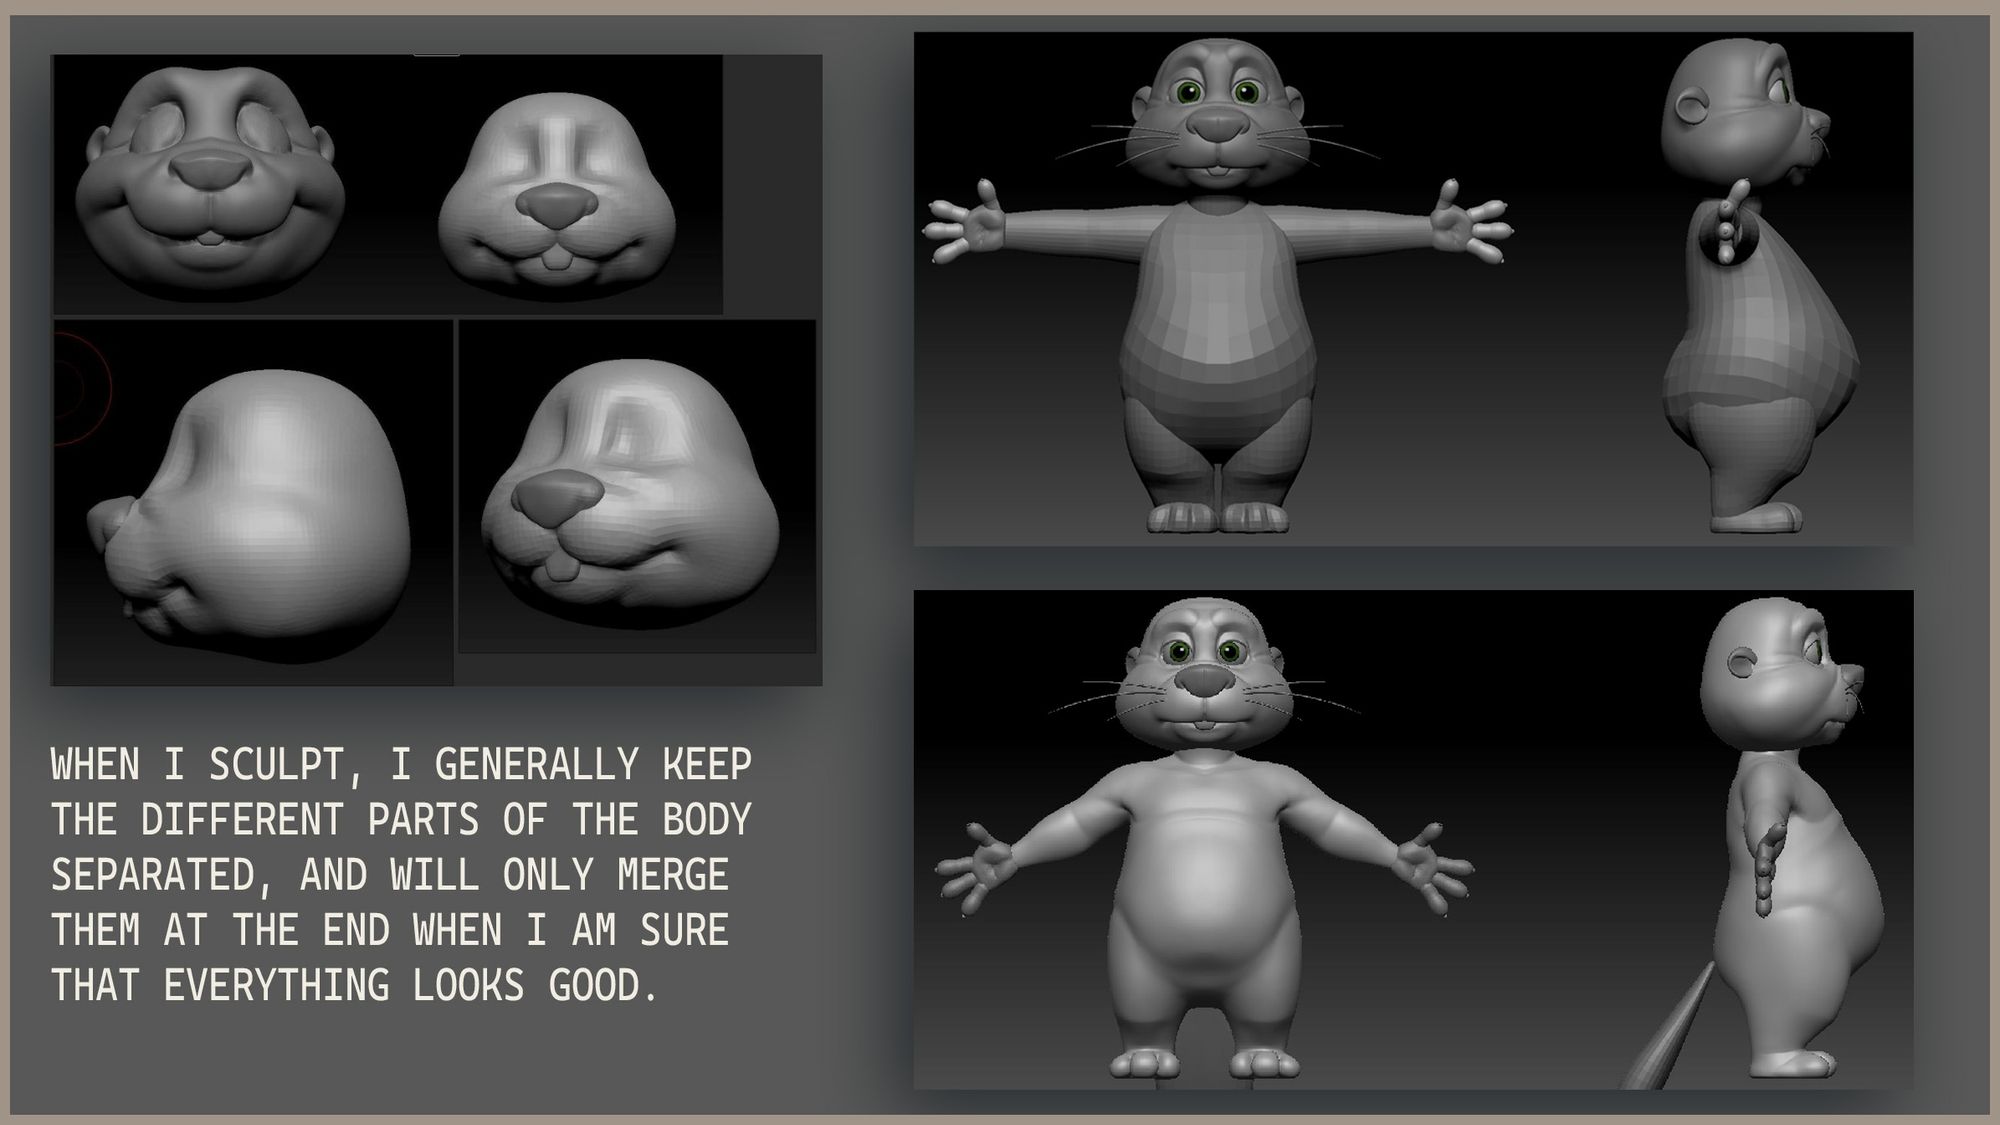
In ZBrush, it is important to not go too fast in the process. This means that you should only increase the subdivisions when you are sure of the shapes you already have. It is true that in Zbrush you can often forget the topology, but nevertheless with less topology, it will be easier to deform your mesh and sculpt the primary shapes on it. Just like when you draw, you should first start with a sketch before getting to the details.
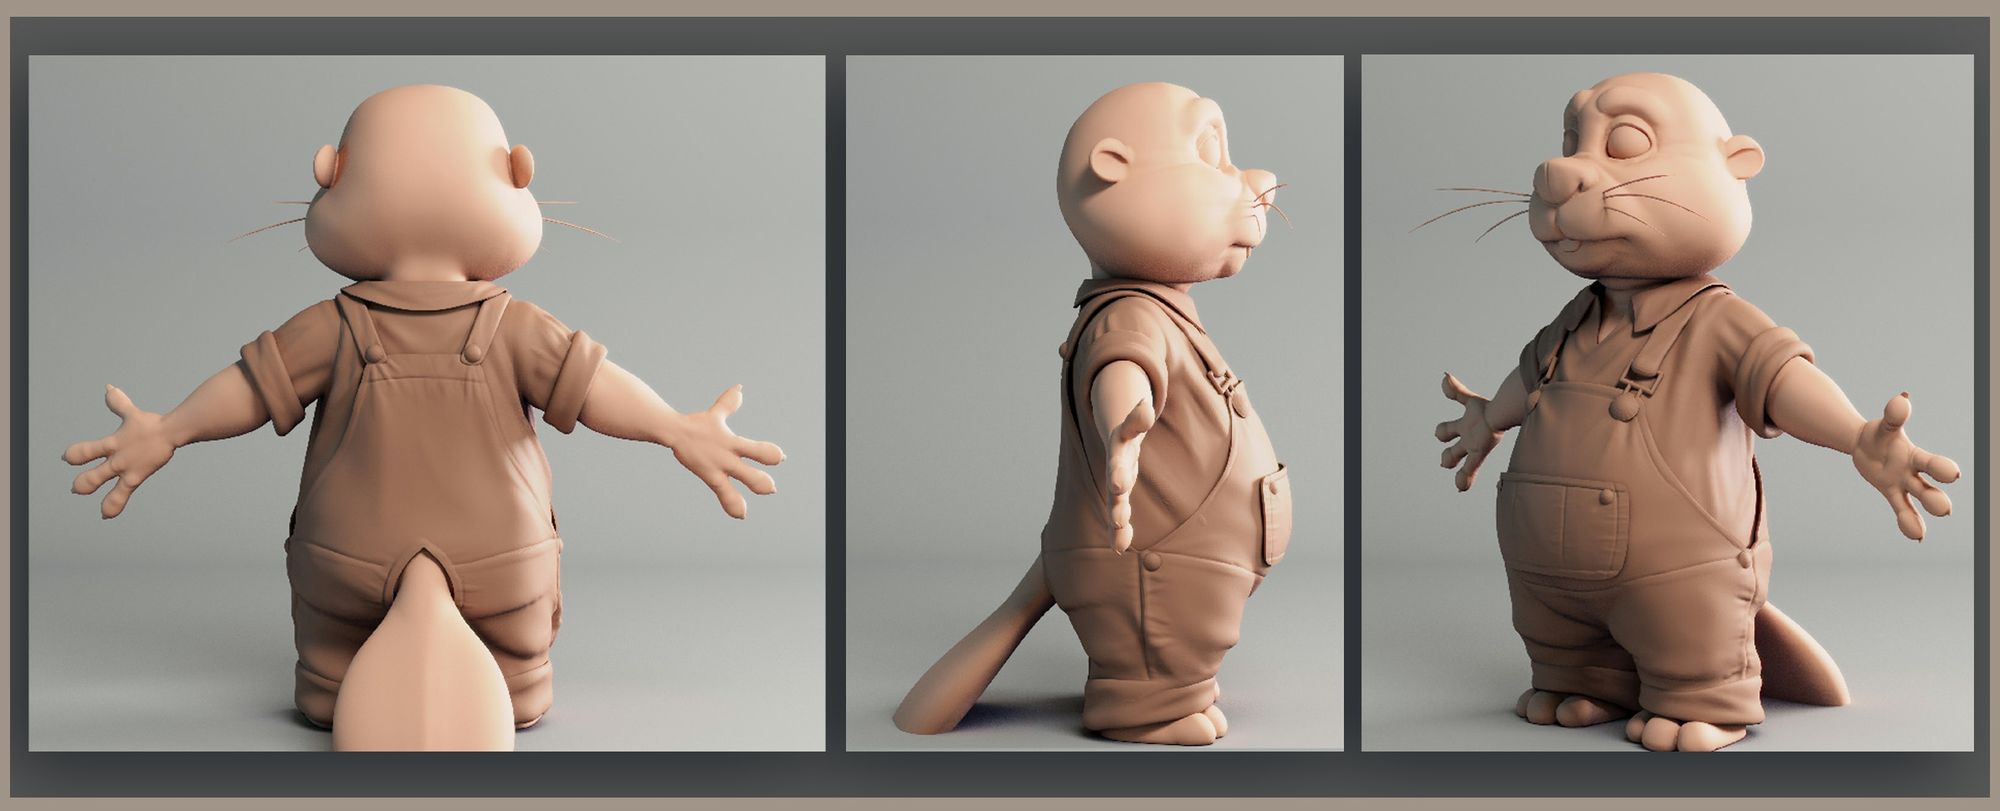
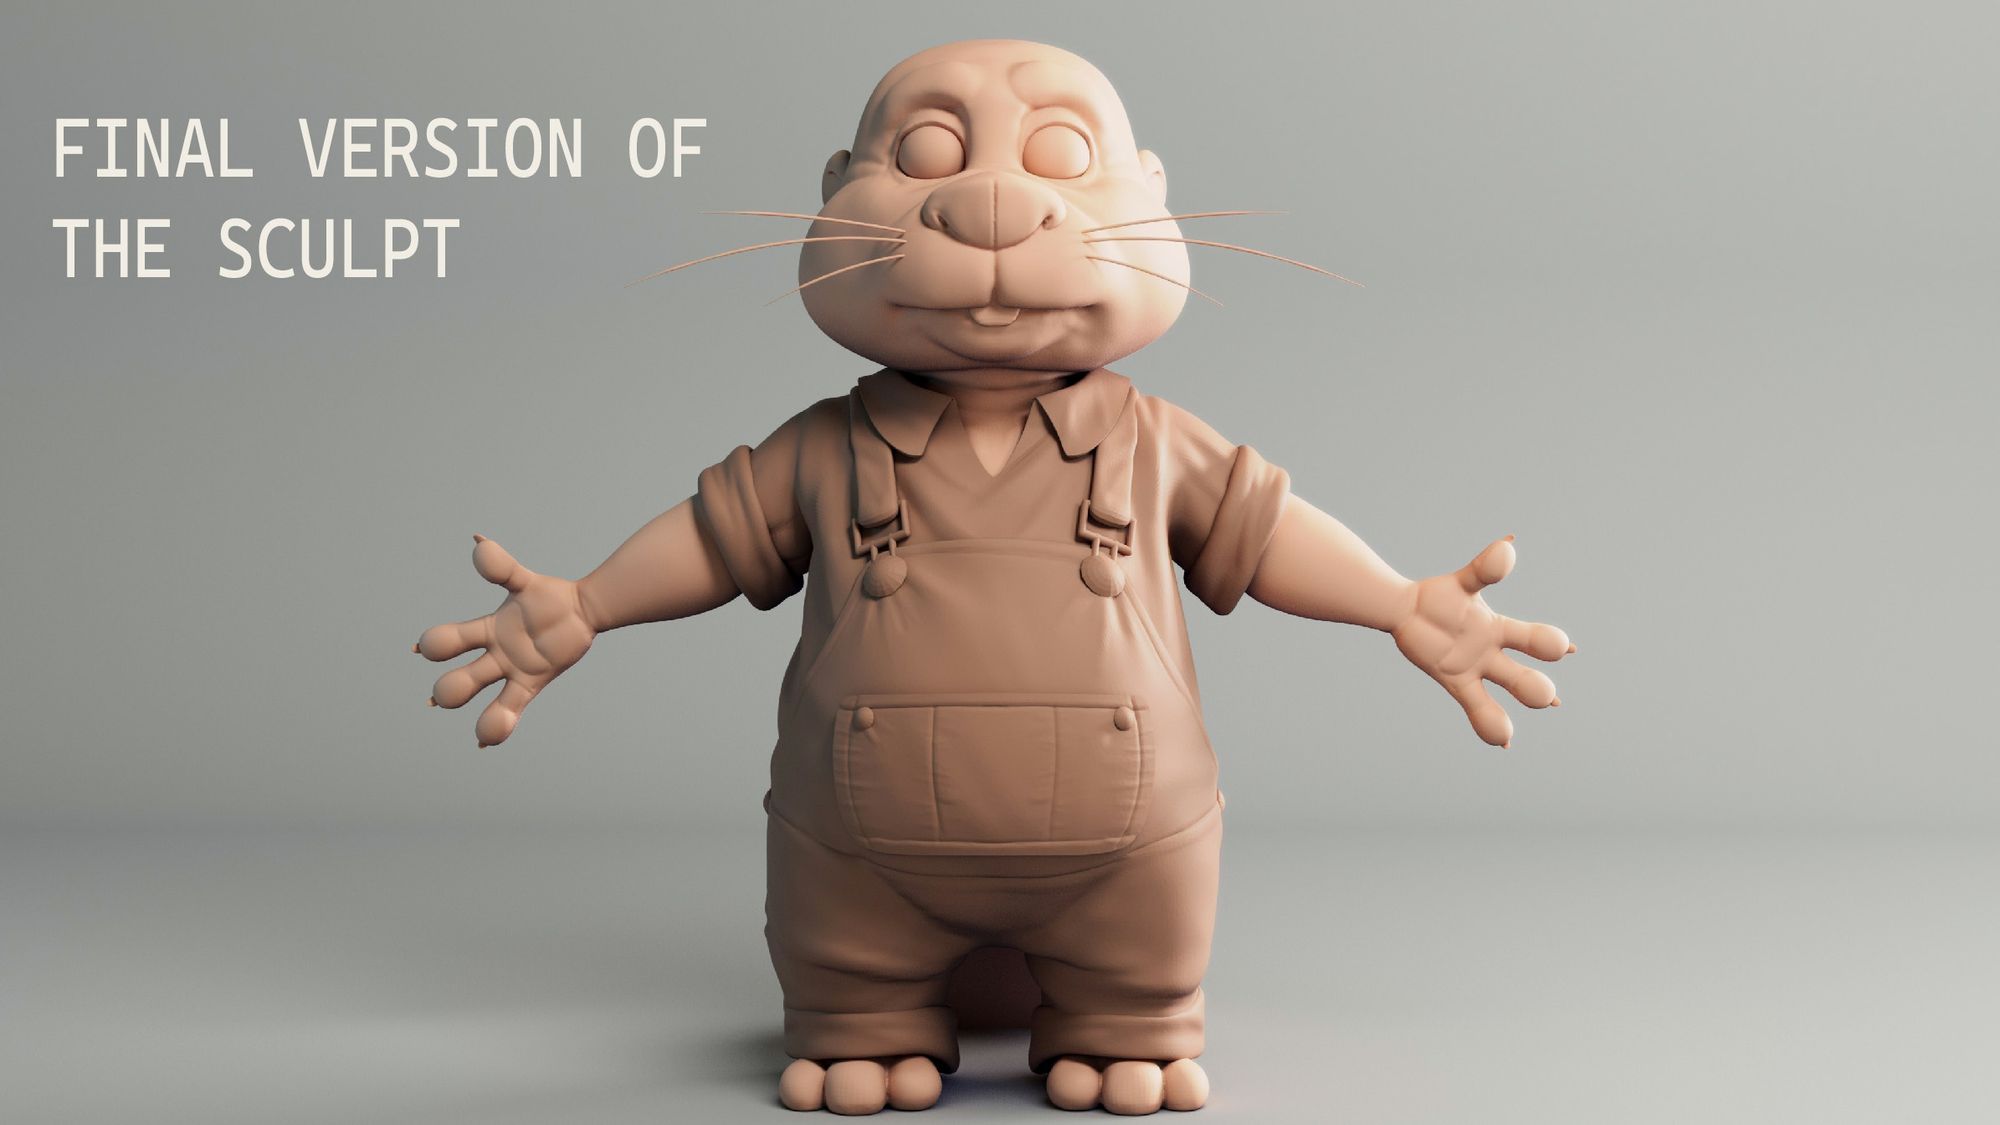
When I sculpt, I generally keep the different parts of the body separated, and will only merge them at the end when I am sure that everything looks good. Once the body was done, I did a rough sculpt of the clothes to see how they would look like.
Making quick elements like the hair for characters or here the clothes (even if it's just sculpted and only for visual purposes) is very helpful to know if the character will look right at the end. It will also reassure you and your teammates to see if the character is going in the right direction!
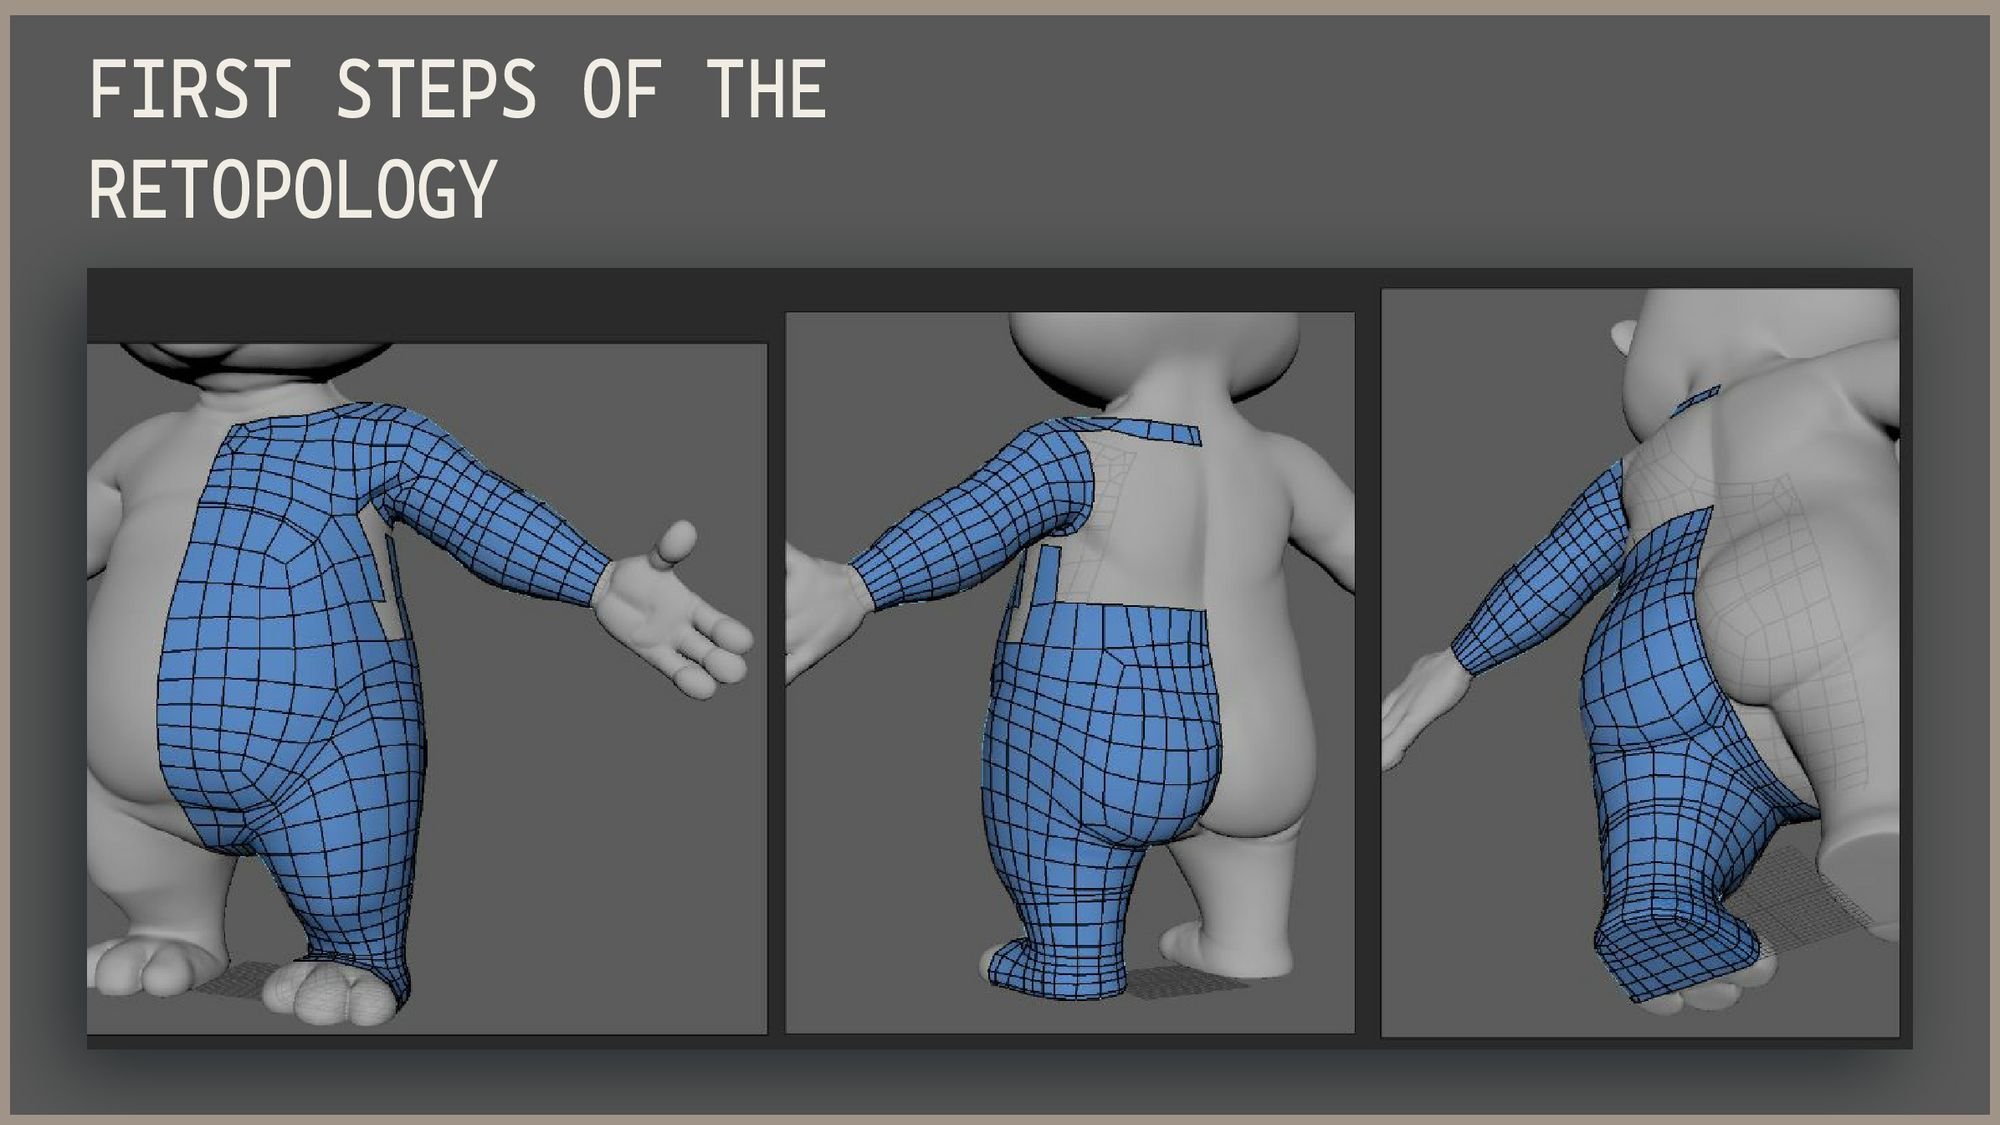
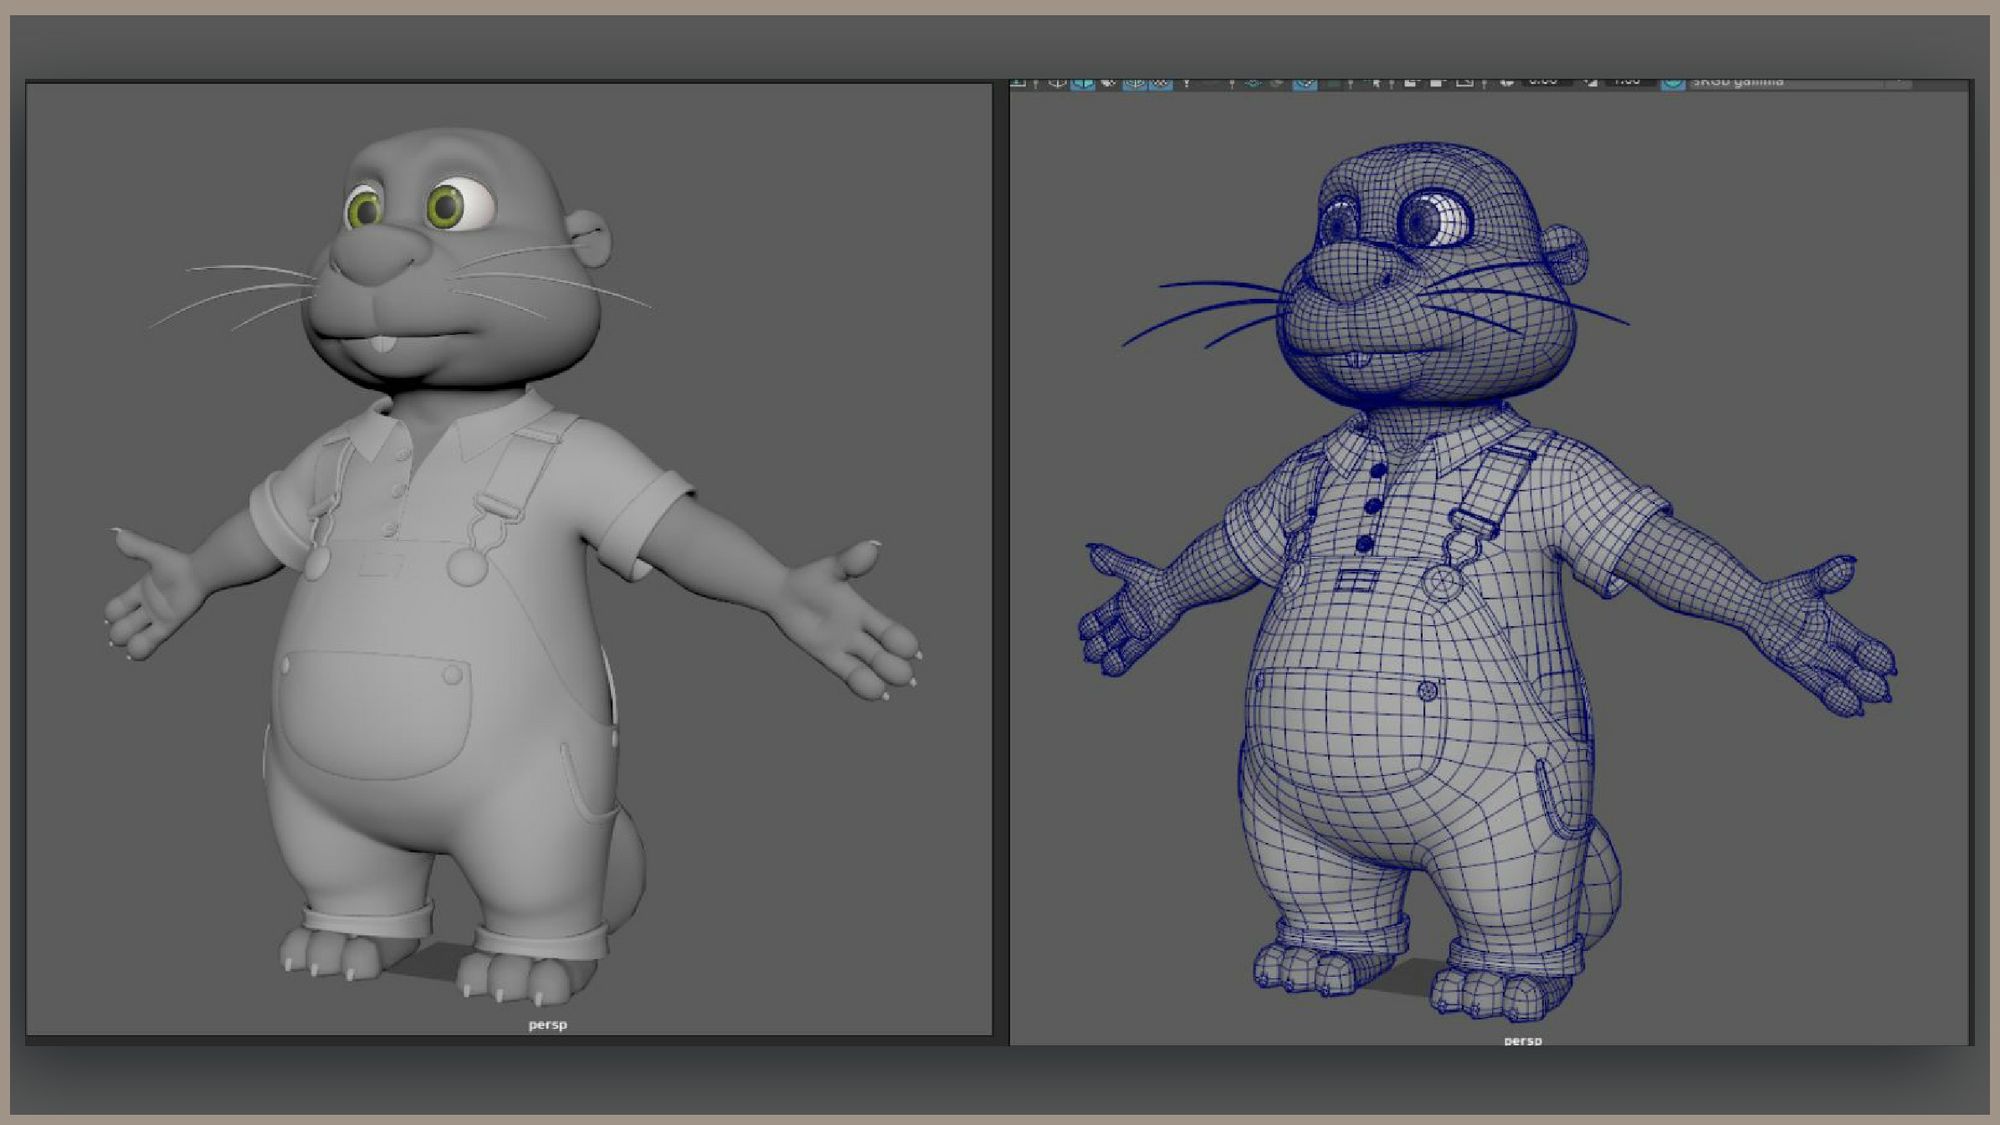
Topology and modeling
The sculpt was done, now it was time to do a more tedious yet very important part: the topology. I sent the sculpt into maya and started creating the topology with the quad draw tool.
Some parts would have to be done entirely in Maya like the mouth and the feet, because those would be respectively closed and merged in ZBrush. I do those things at the end when I don’t really need the quadraw tool nor the sculpt anymore.
The most challenging part was his face, as he needed to have human-like facial expressions but with animal traits. With the help of many references mainly from Zootopia, I could determine the different parts of the lips, cheeks and skin around the nose.
Once the topology was done, I moved on to the clothes which I directly modeled in Maya. I tried to have as much as the same topology flow as on the body, which would be easier for the skinning process.
At this stage the model was done. As the topology and the proportions wouldn’t change anymore, I could send the model on to the person in charge of the rig. I could at the same time, move on to the UVs and then textures. We just transferred the UVs when there were some UV changes.
As soon as there was a first version of the rig, it would be sent to the animators who could begin to animate the first versions of the shots.
We worked with references so everything updated and followed accordingly, allowing everybody to do their work at the same time.
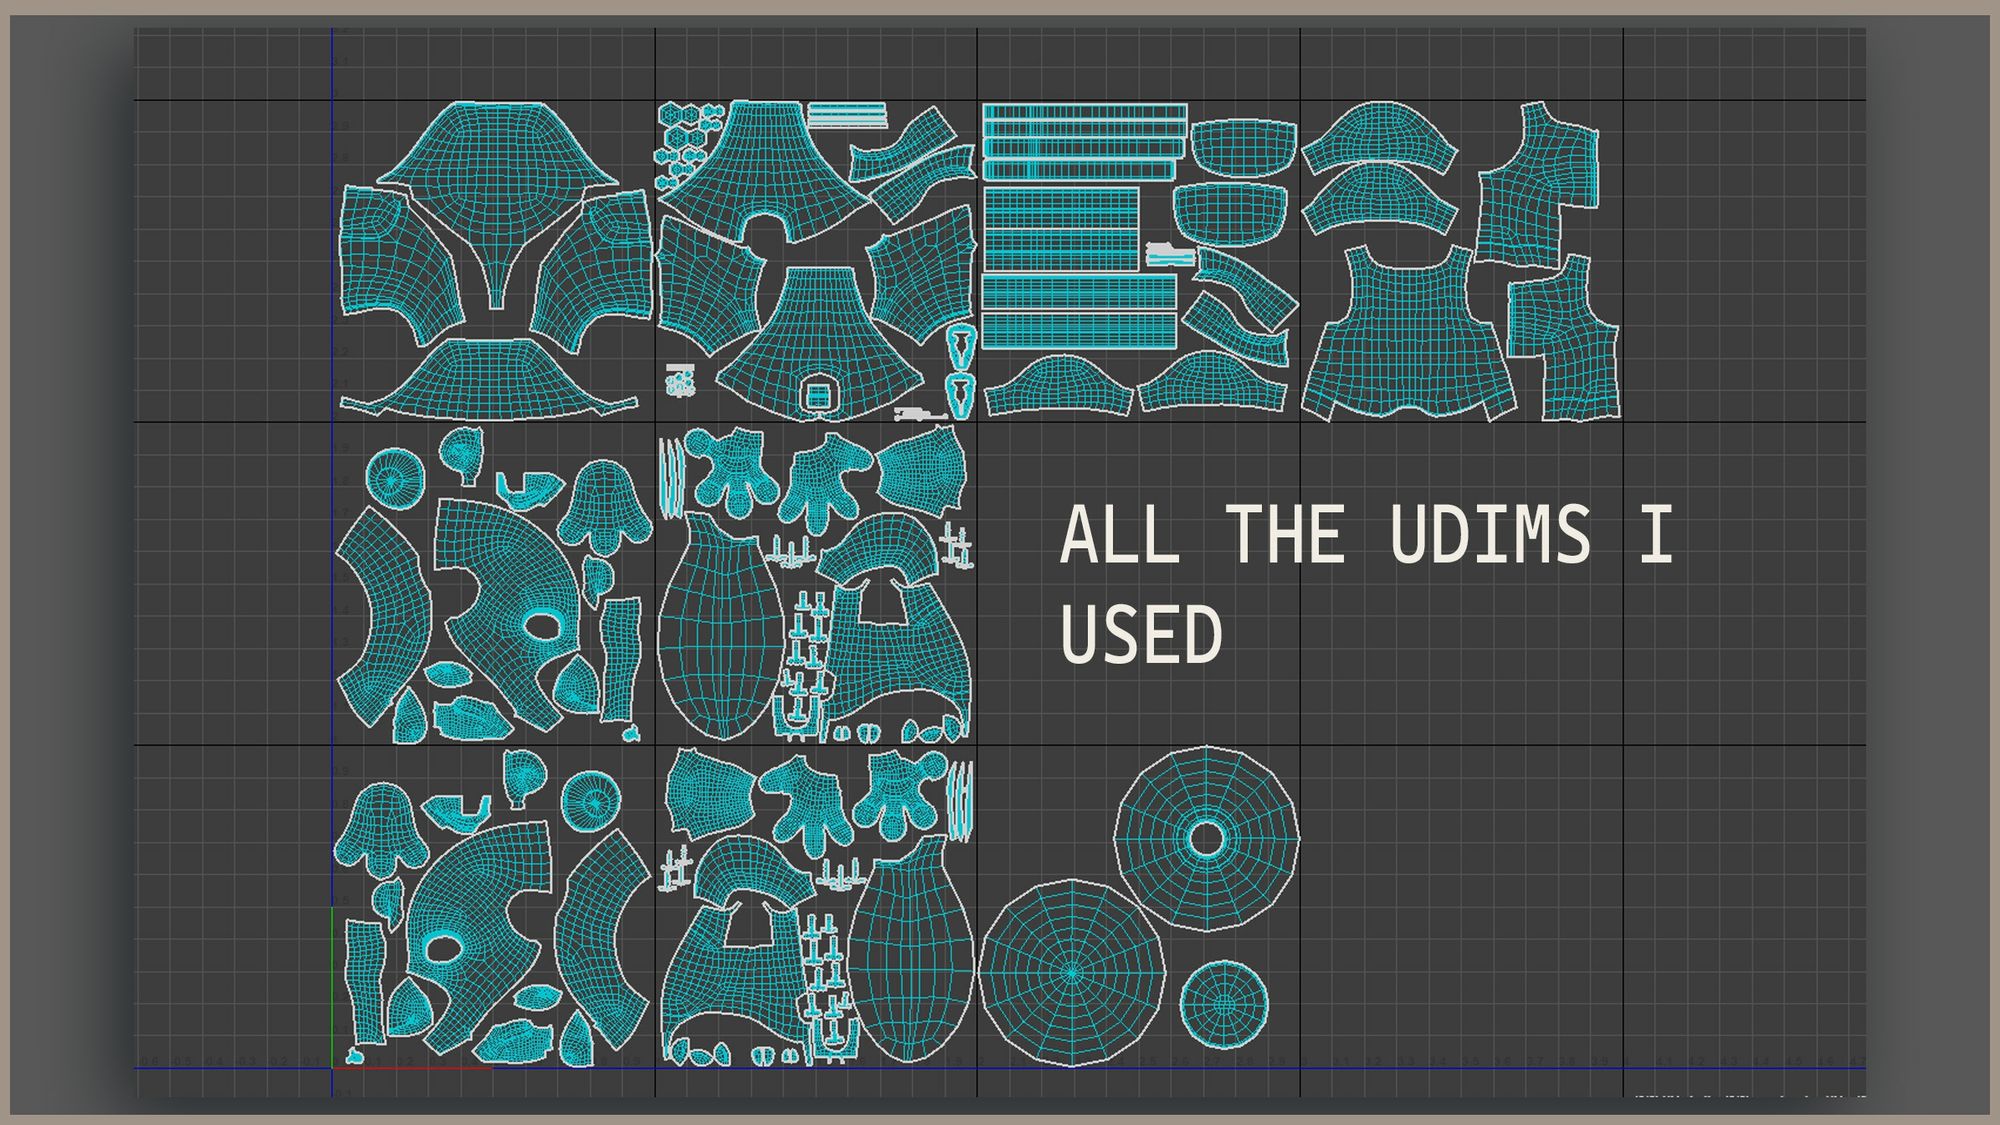
UVs
I didn’t use a huge amount of Udims, as the body would mostly be covered with fur so I didn’t need to have a lot of details on the skin.
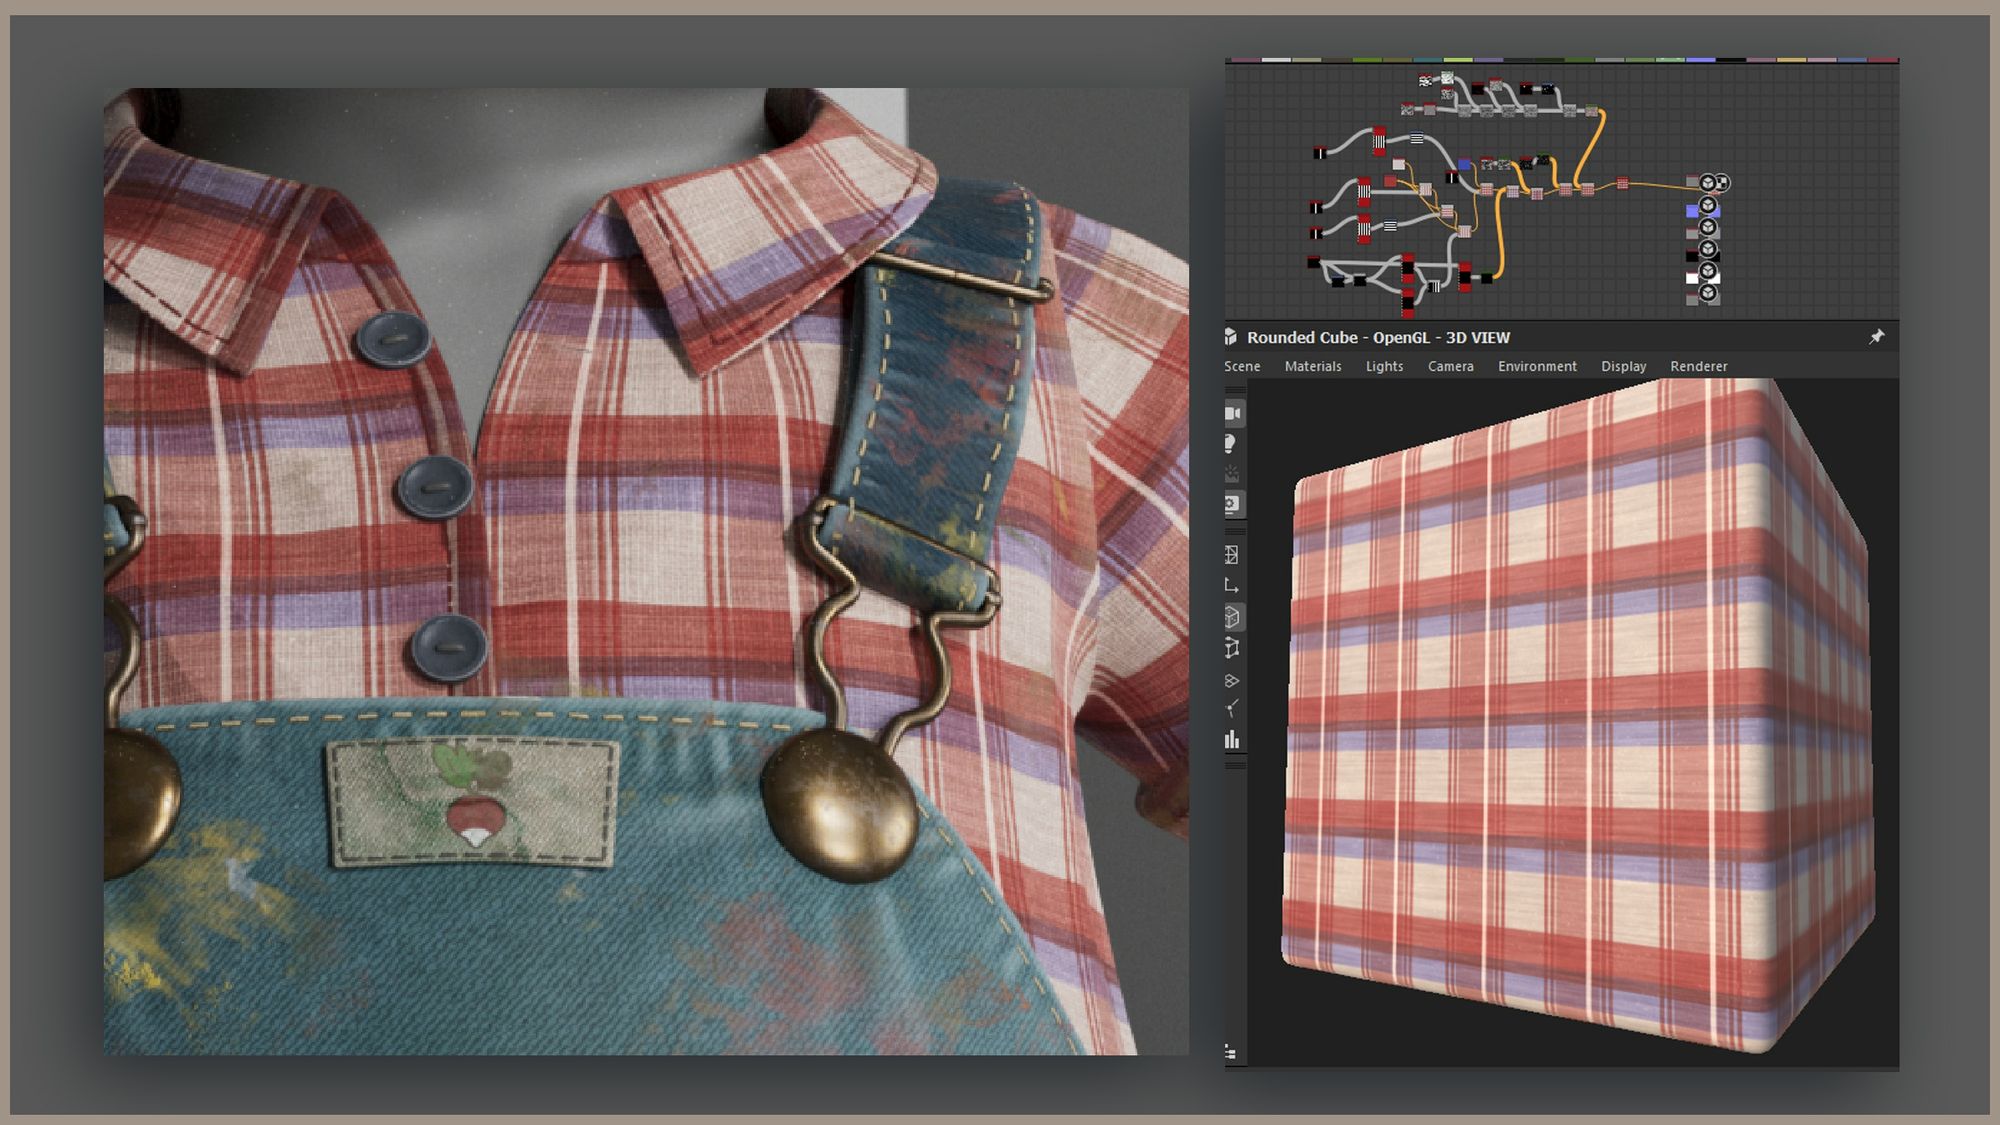
For the UVs of the cloths I placed my cuts on the sewing cuts like on real cloths. That way if each part is unfolded and rotated in the right way, the motif that one will put as texture will behave properly. I knew his shirt would have a checkered pattern, so the UVs needed to be done carefully.
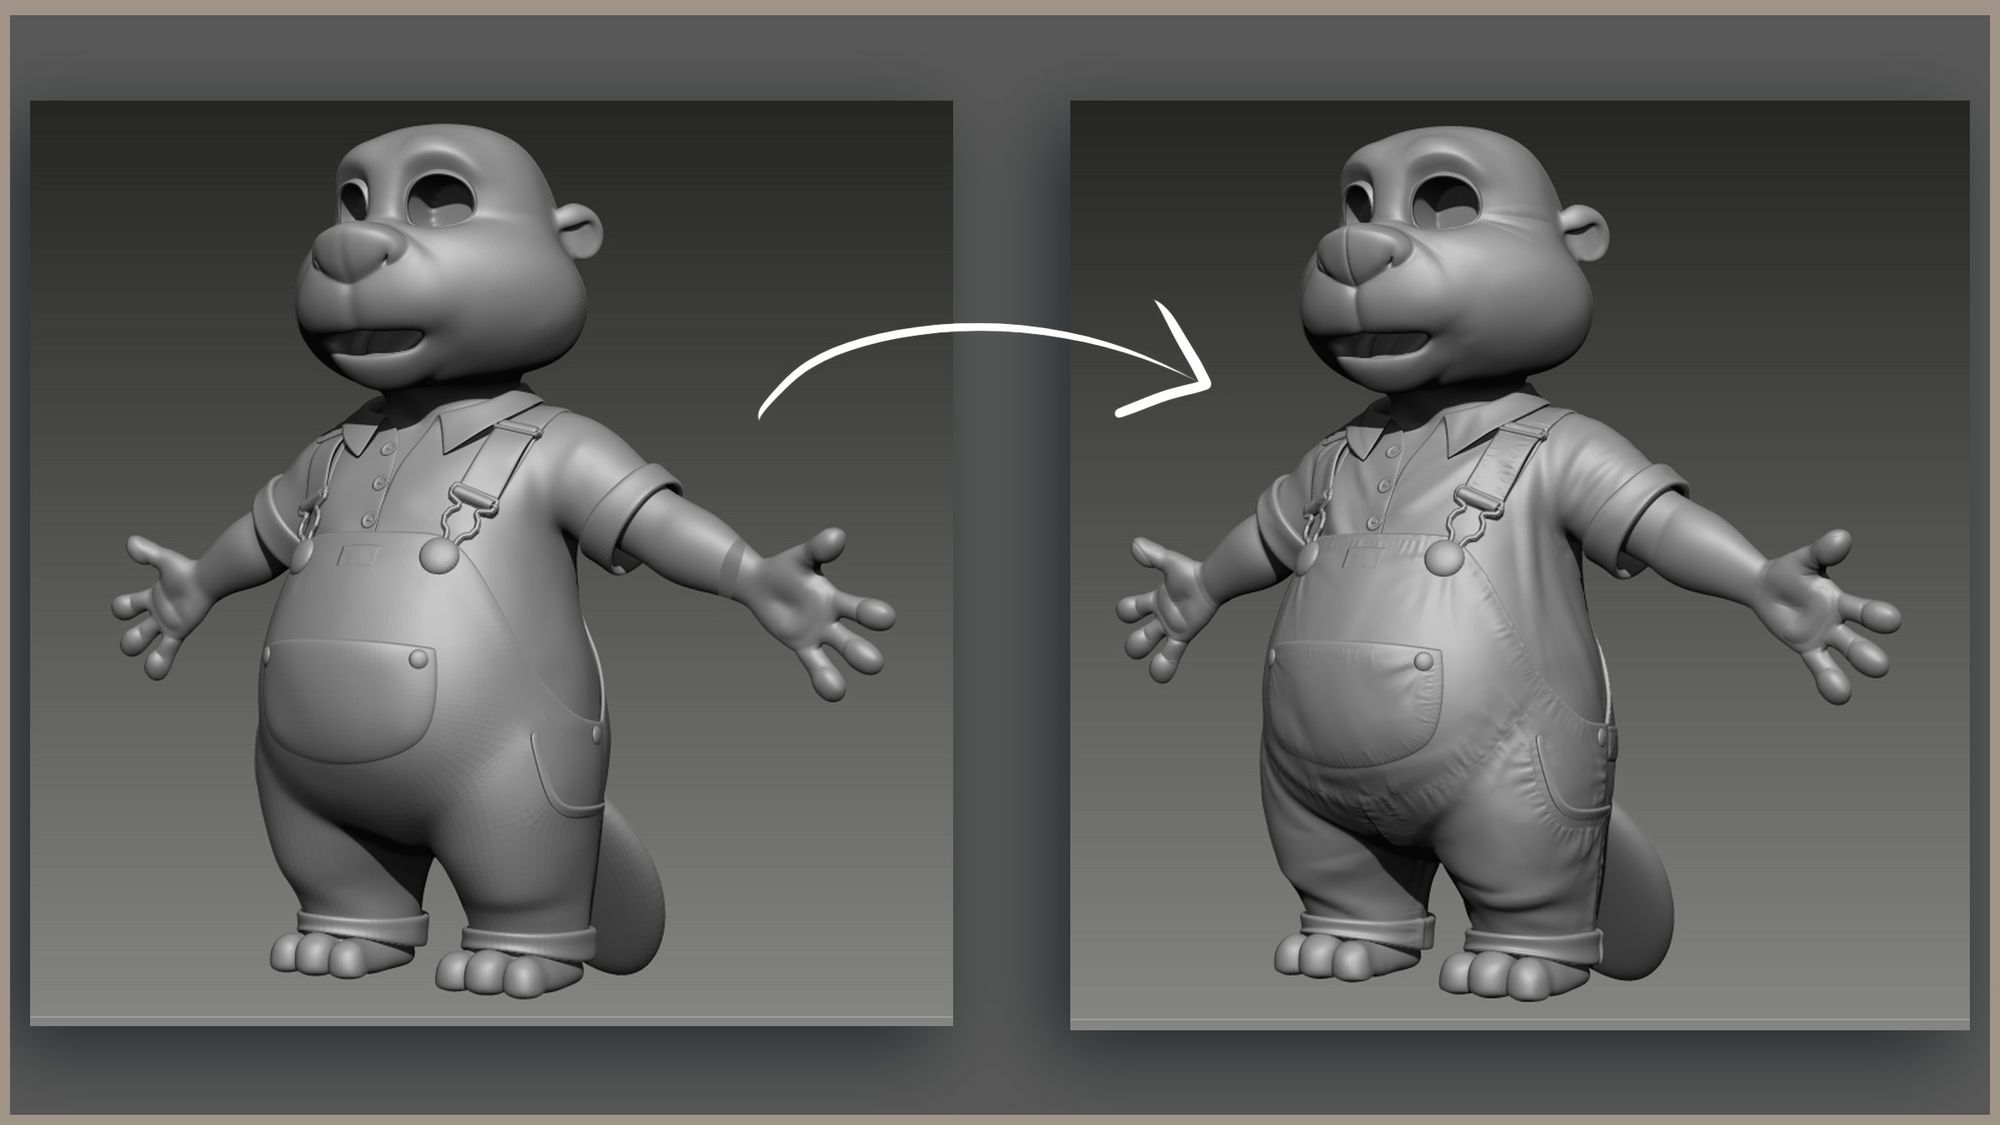
Sculpting the details in ZBrush
Before doing the actual textures in Substance 3D Painter, I sent the model in ZBrush again, and started sculpting the missing details that would serve as a displacement map. Some details I could project back from the original sculpt, but since I moved a lot of body parts I needed to sculpt them again.
These extra details shouldn’t add a lot of modifications in the shape of the mesh, because this mesh is already validated and sent to the rigger and animators. This was especially tricky for the clothes, as they would partially be simulated in Houdini after the animation. So the folds that I sculpted needed to be placed in places where they would make sense in whichever position he would be. They shouldn’t go in the opposite direction than the simulation.
That’s why having references is the key, in order to understand better how folds behave. Each tissue folds differently, not always in the same directions and the same sizes.
Texturing
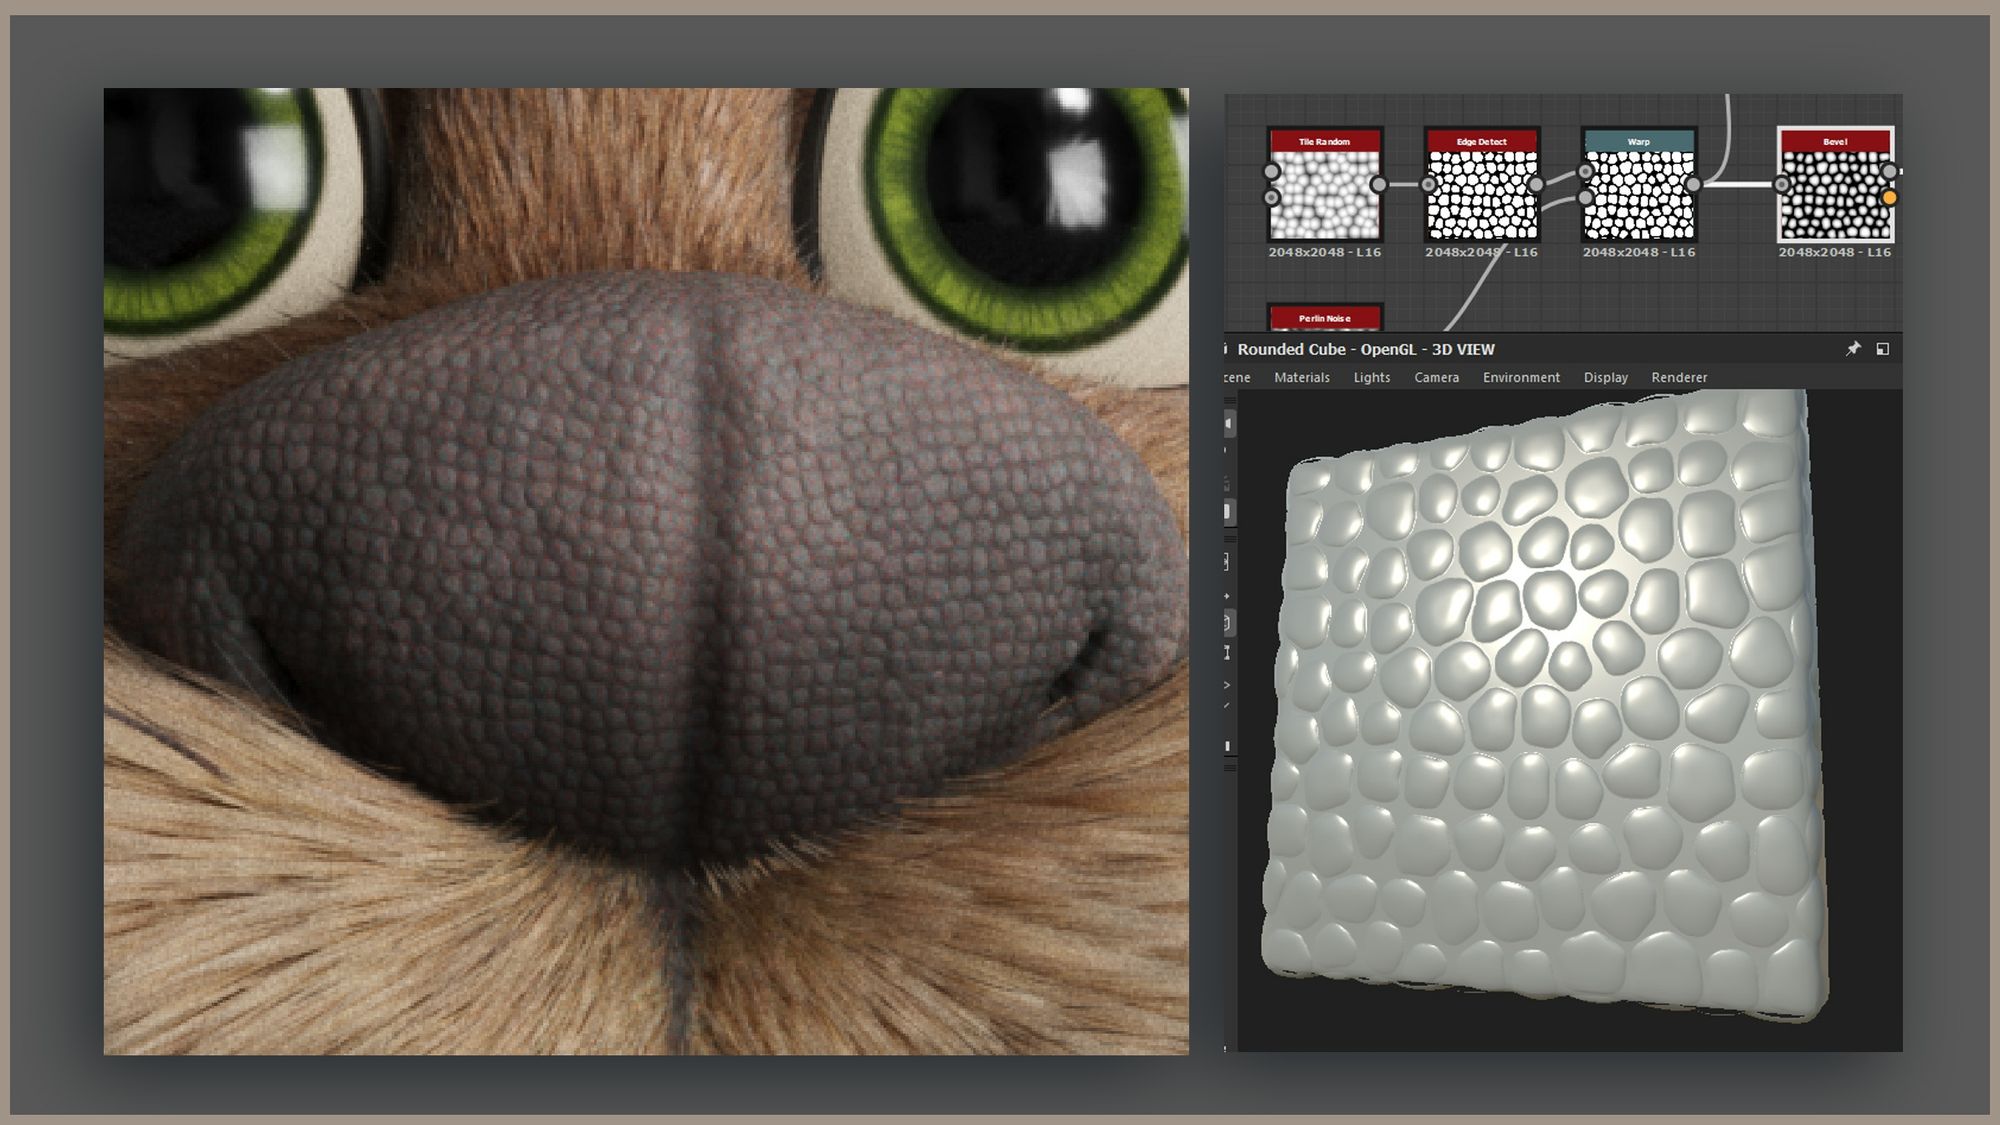
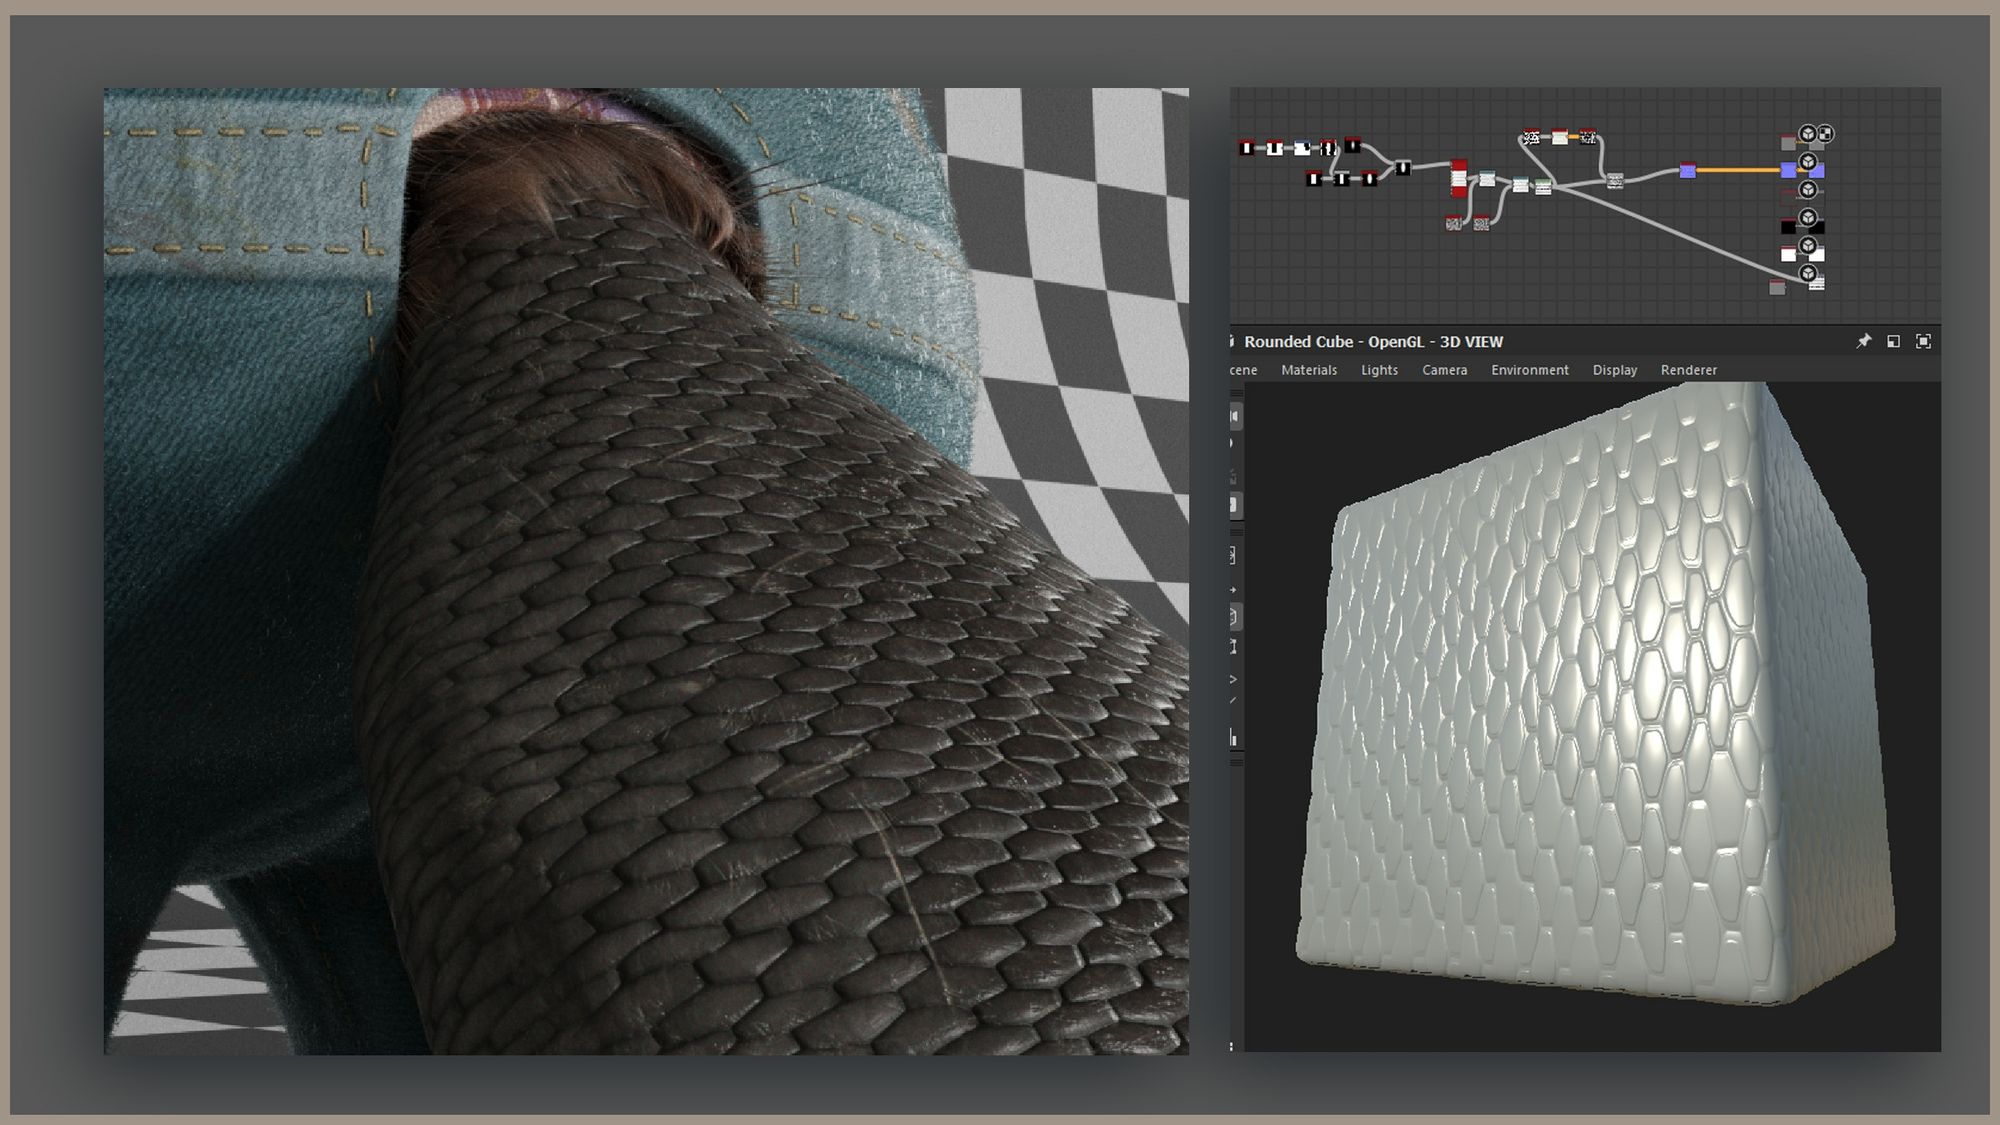
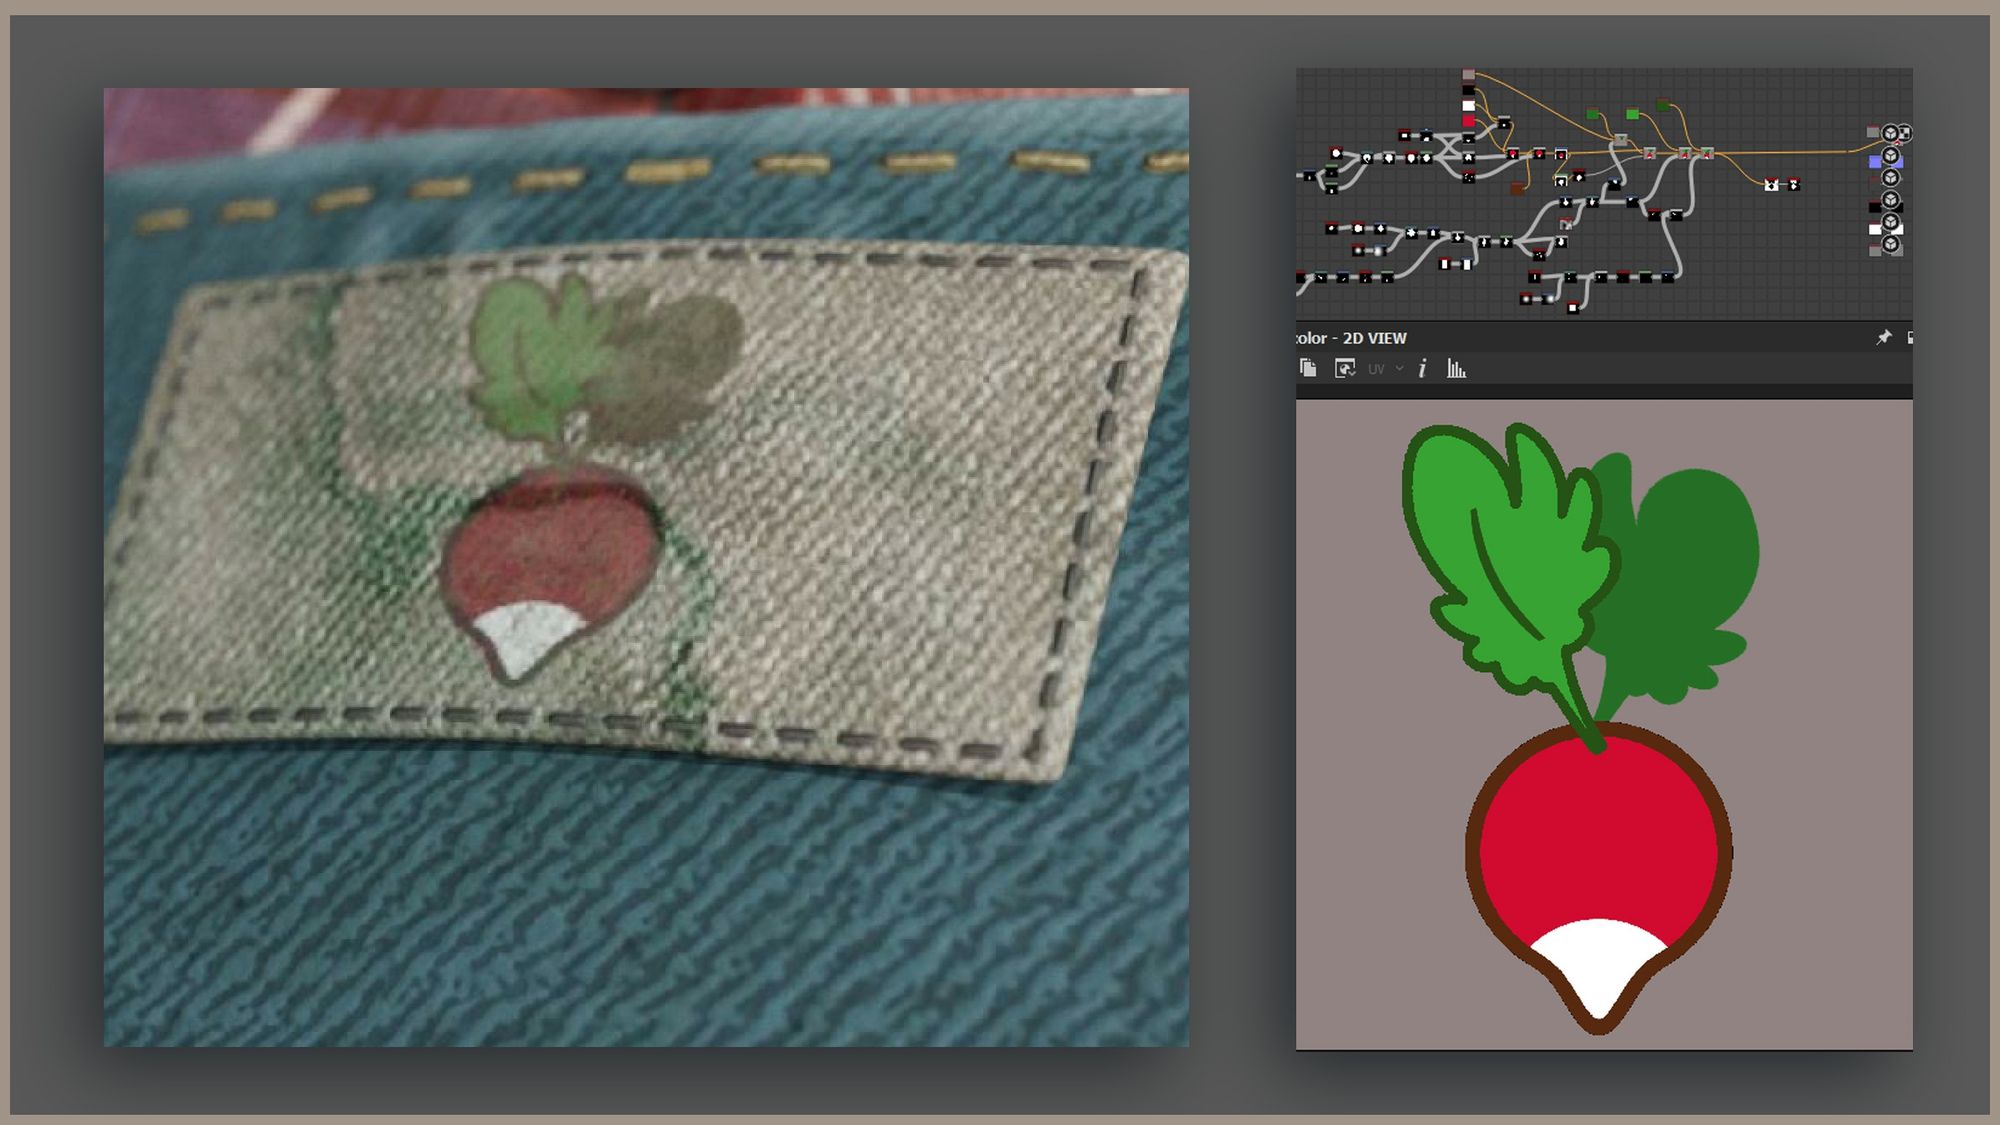
Substance 3D Designer might not always be the first go to software when you think of characters, however I think it’s quite a useful tool to know. I used it a lot for this character: for the checkered motif, the tail, the nose, and even the radish symbol on his patch.
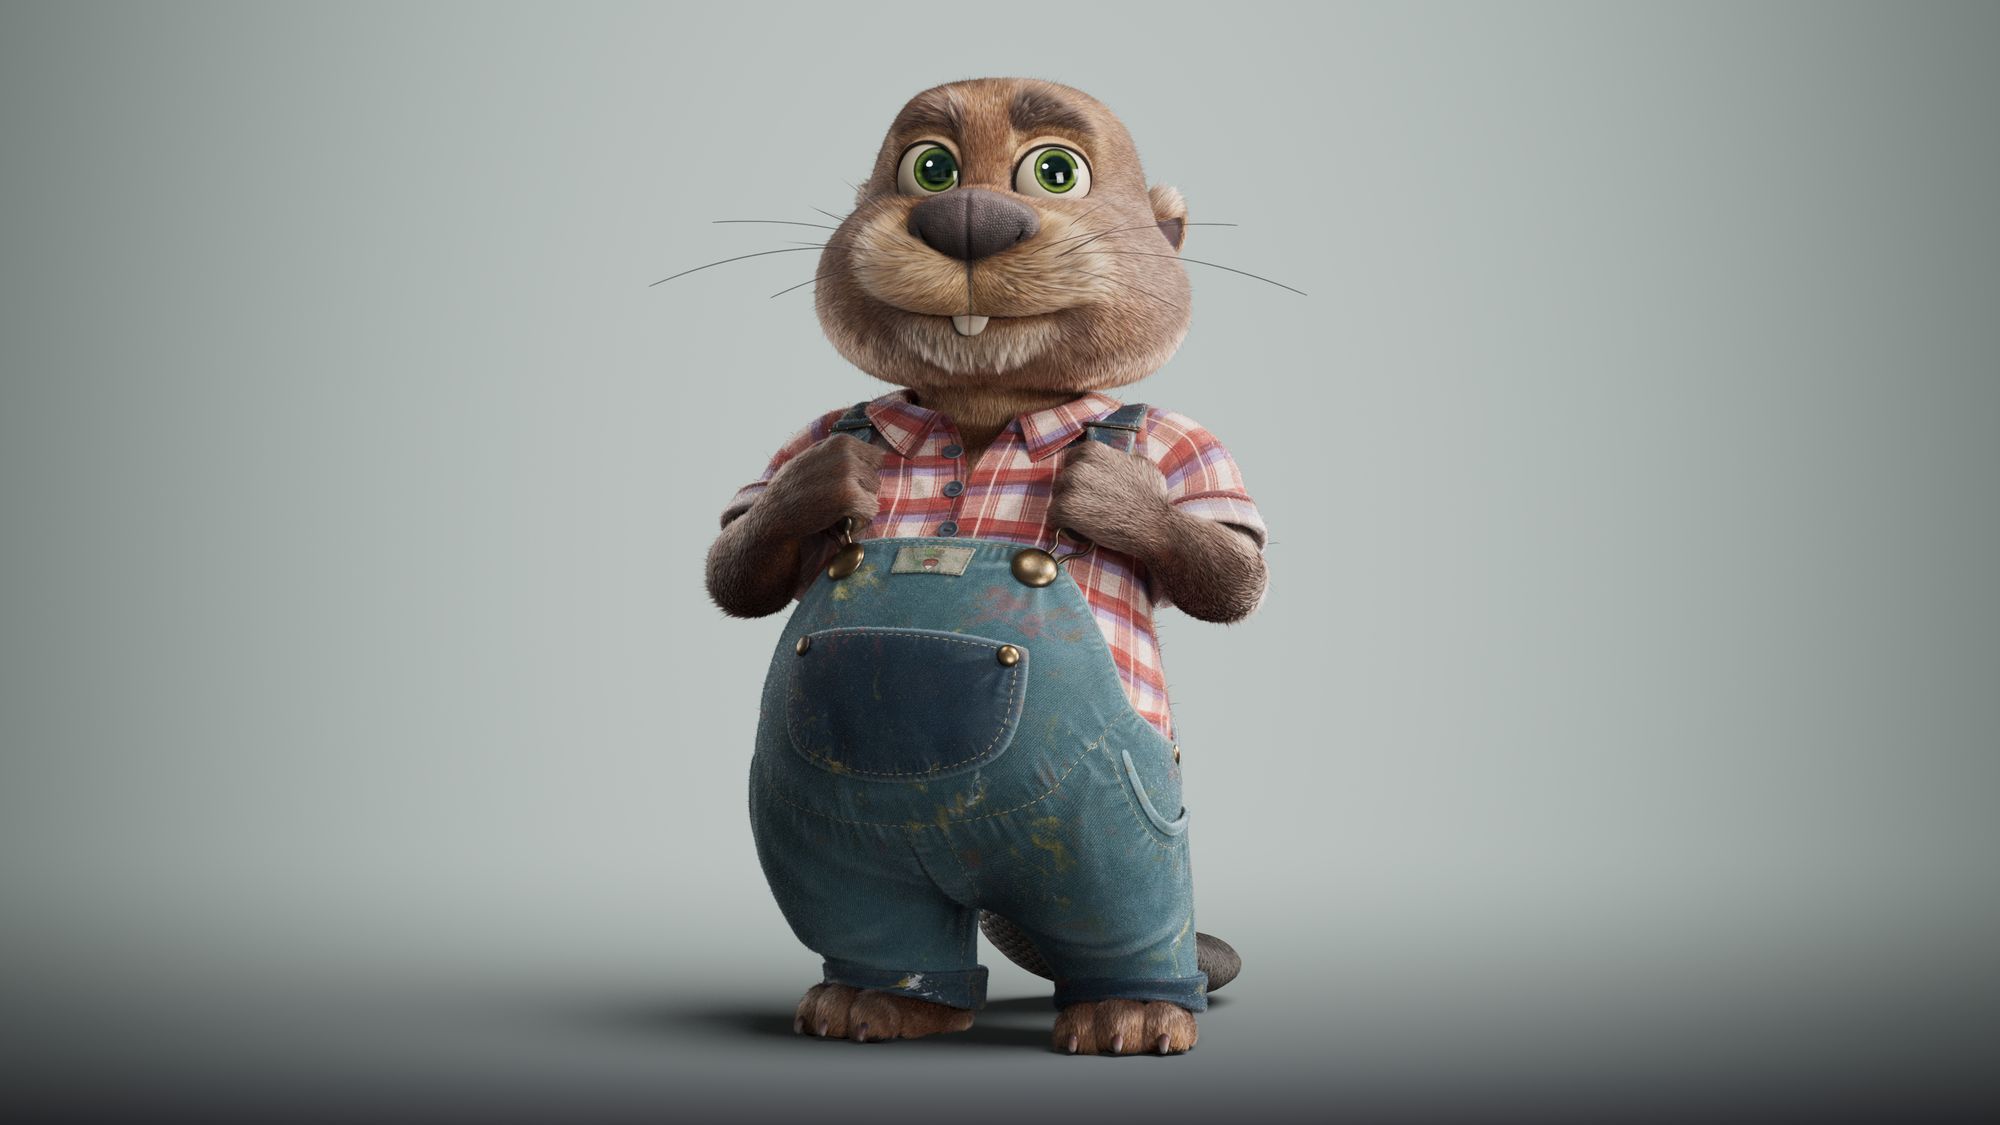
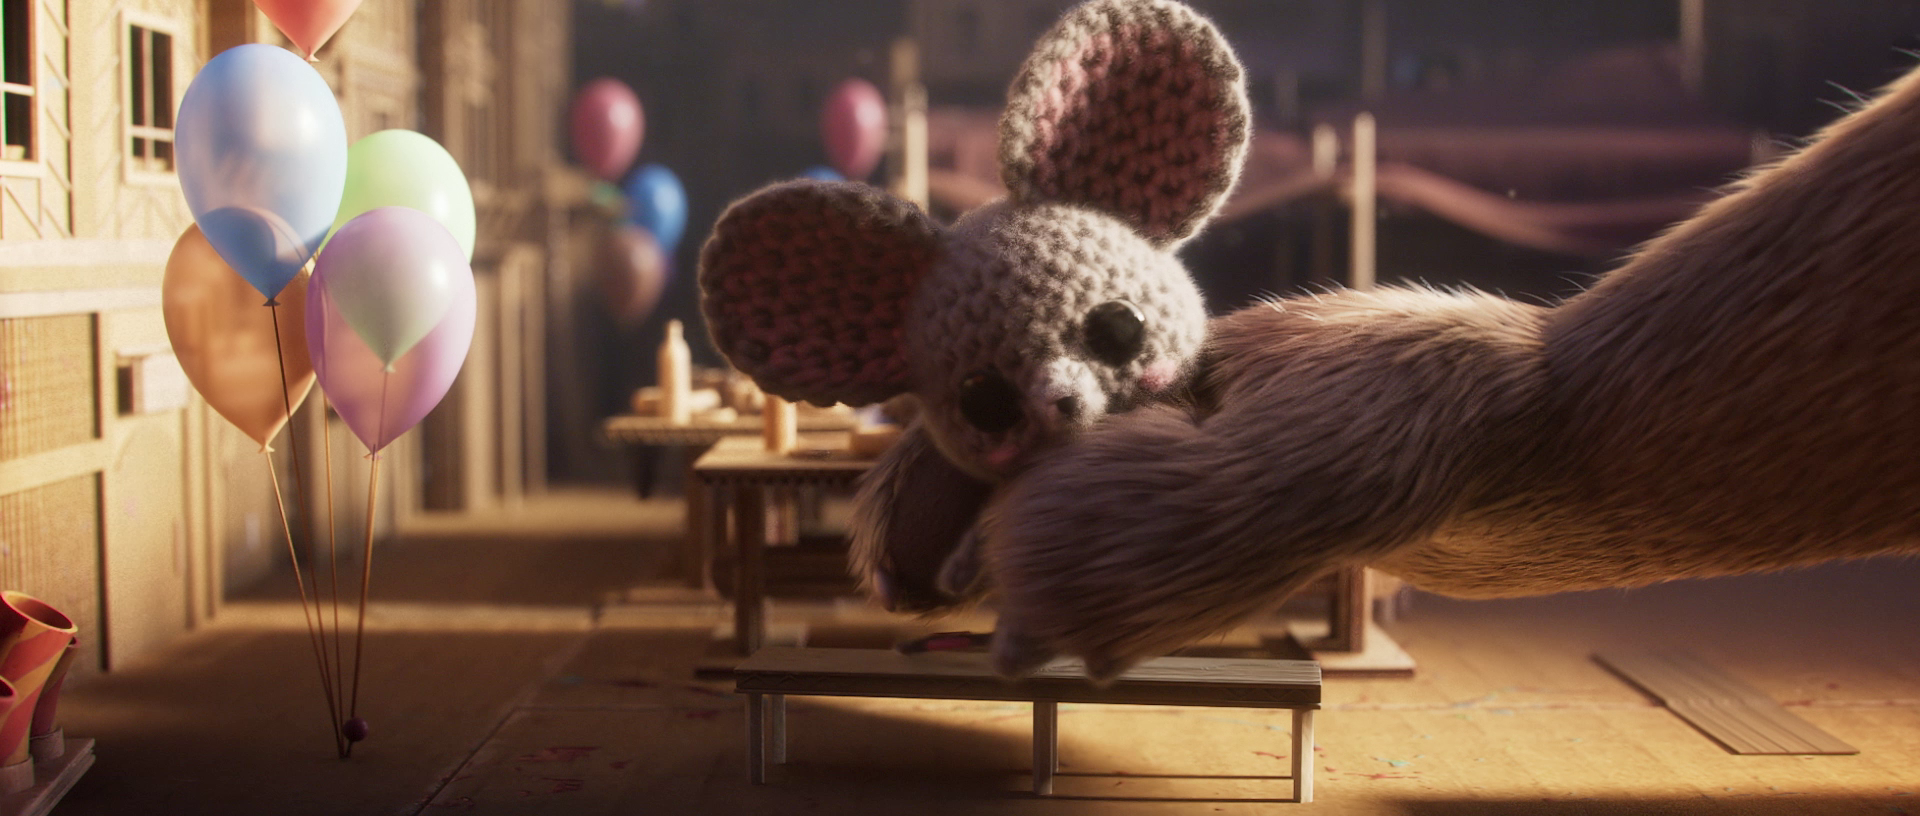
a shot from the film
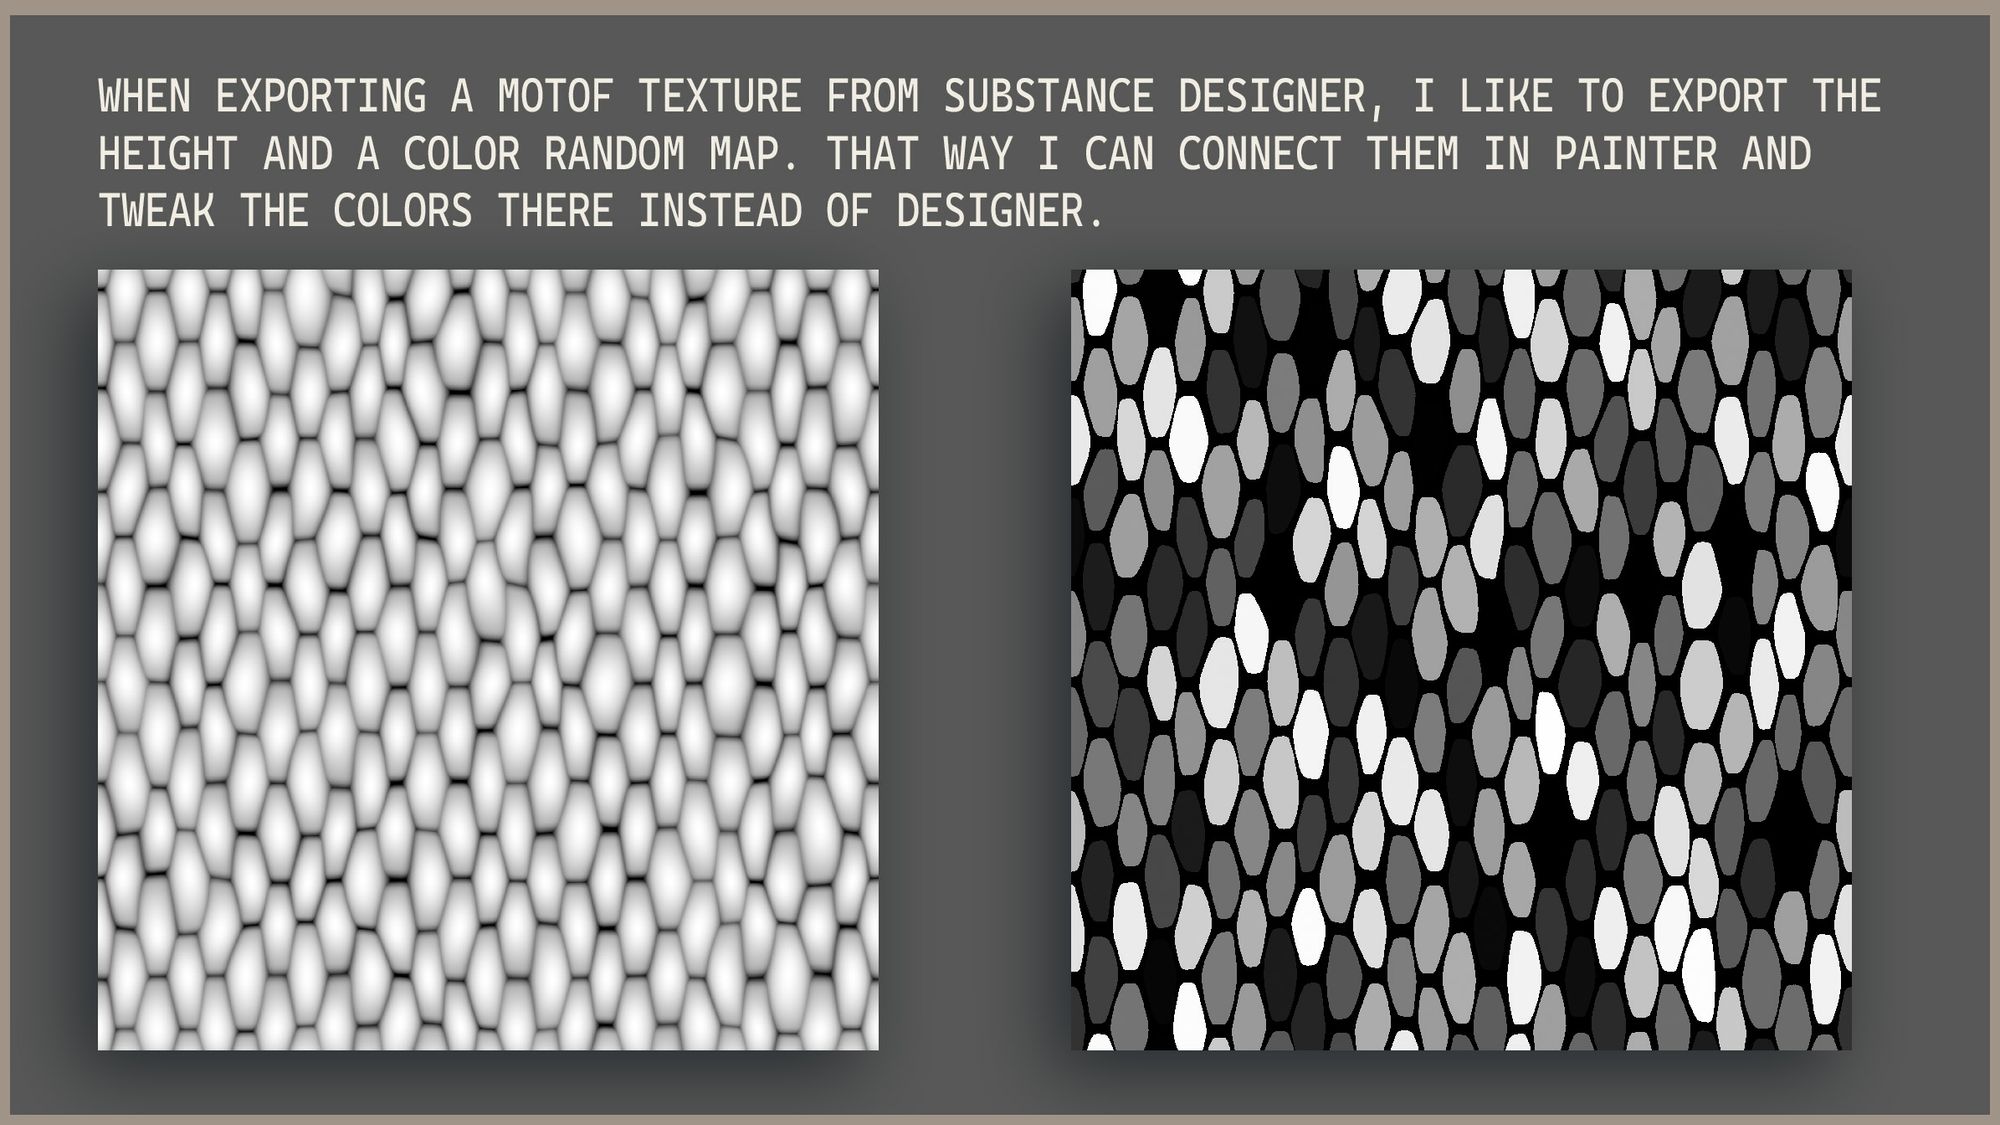
With Designer I could make a lot of tileable maps that I exported and sent to Substance 3D Painter.
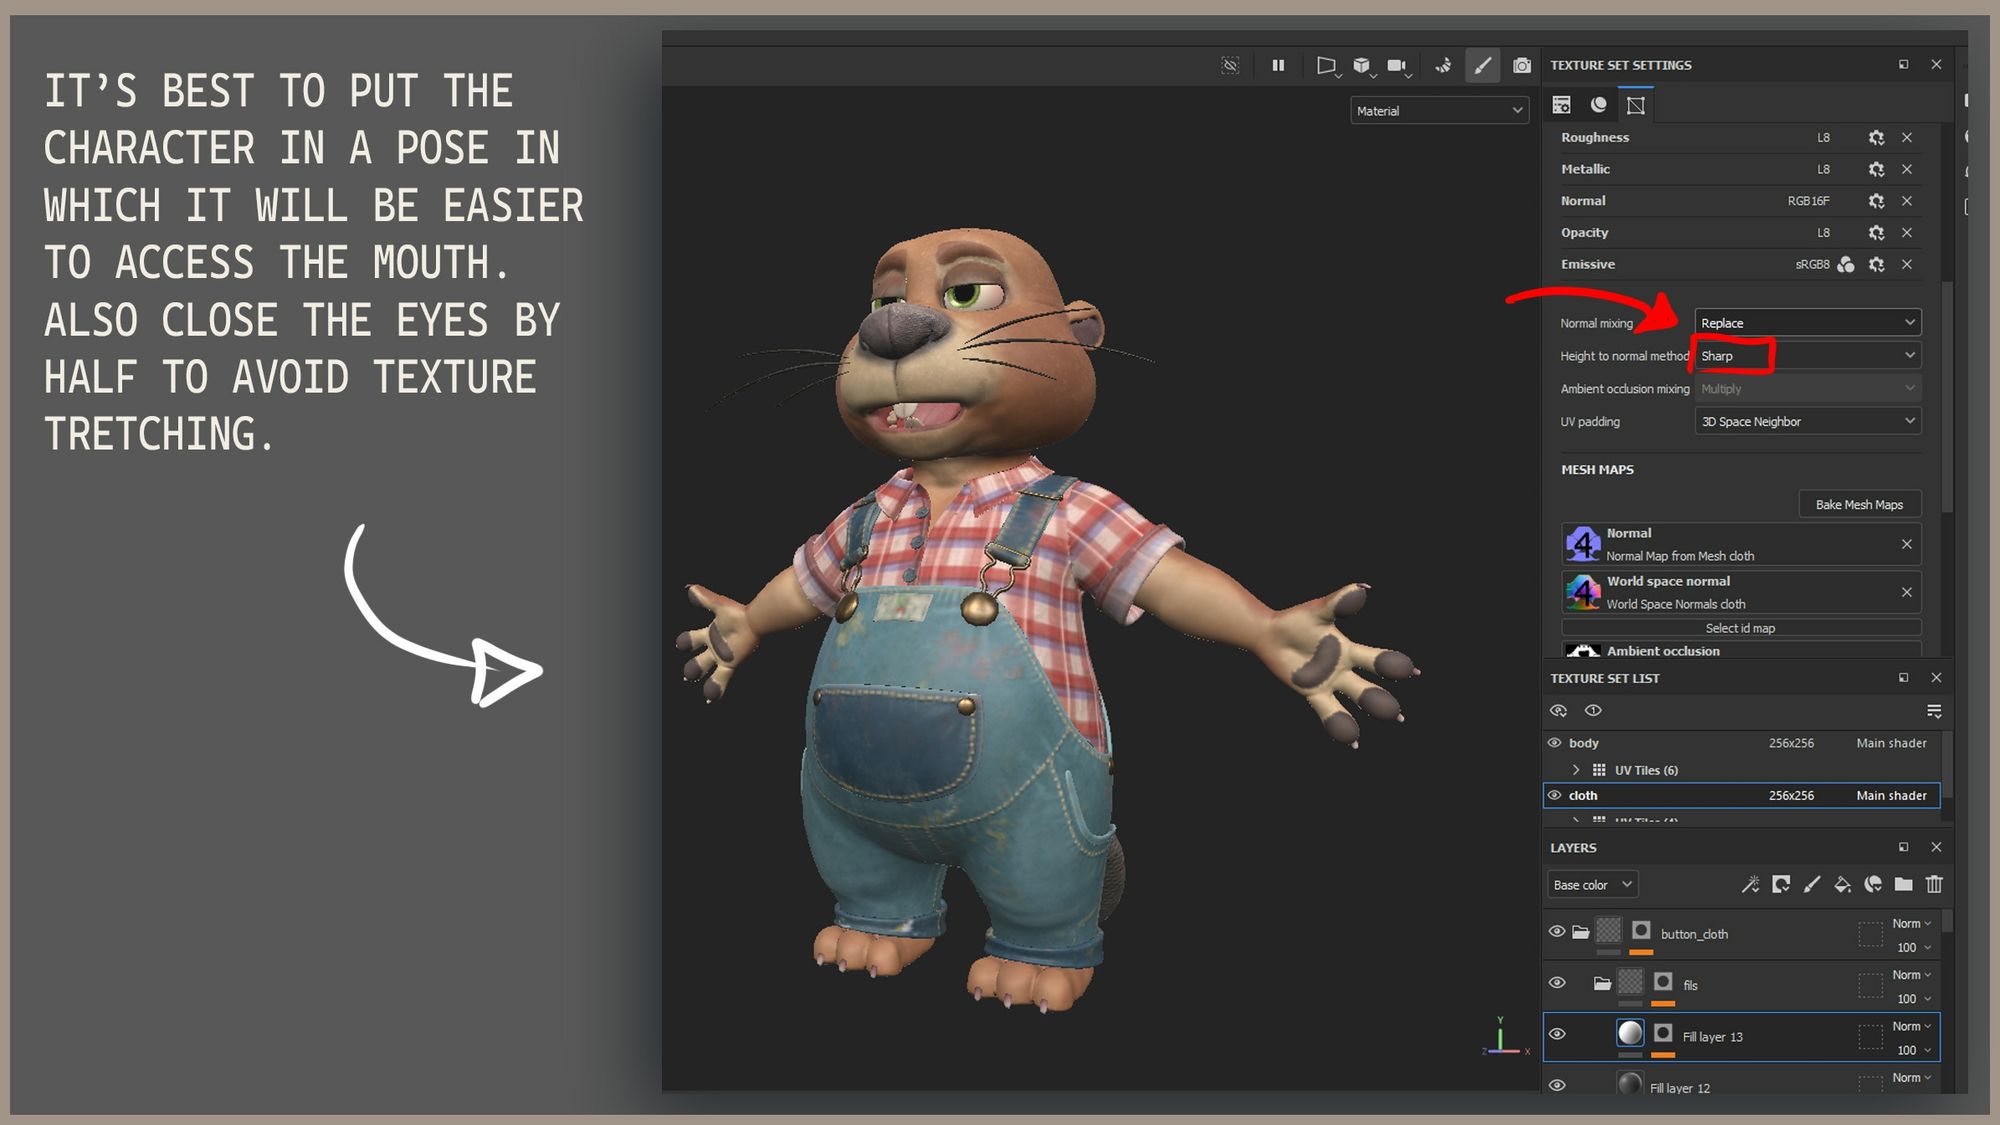
In order to have the right details during the baking, I baked the high poly model from ZBrush to have all its information in the software. This was useful for the clothes as I could then combine the details from ZBrush with extra information added in texture, such as the stitches. Making such small details are easier to make in Substance 3D Painter. In guerilla (the render engine) I then combined the displacement from ZBrush and the normal map from SP.
When exporting your normal maps you just need to remember to switch the normal mode, from combine to replace, otherwise the normal map will also have the baked high poly information in it. And since you already have this information with the displacement map, you don’t need it twice.
Once the textures were made, I added a lot of things directly in the render engine. I added subsurface scattering on the skin, translucency and sheen (or velvet) on the cloths, and I also added some cloth fibers using the hair generator in Guerilla (explained right after this).
Making the fur
The first thing to decide was which software to use ? There was Xgen, but I never had the chance to learn it, and there was Houdini that we learned then a few months ago.
However I didn’t feel quite comfortable yet with Houdini to use it on the main character. It would also add some problems for the fur to be animated and simulated properly, a simulation and export that would be needed each time there was an important change in the animation if we wanted to do test renders.
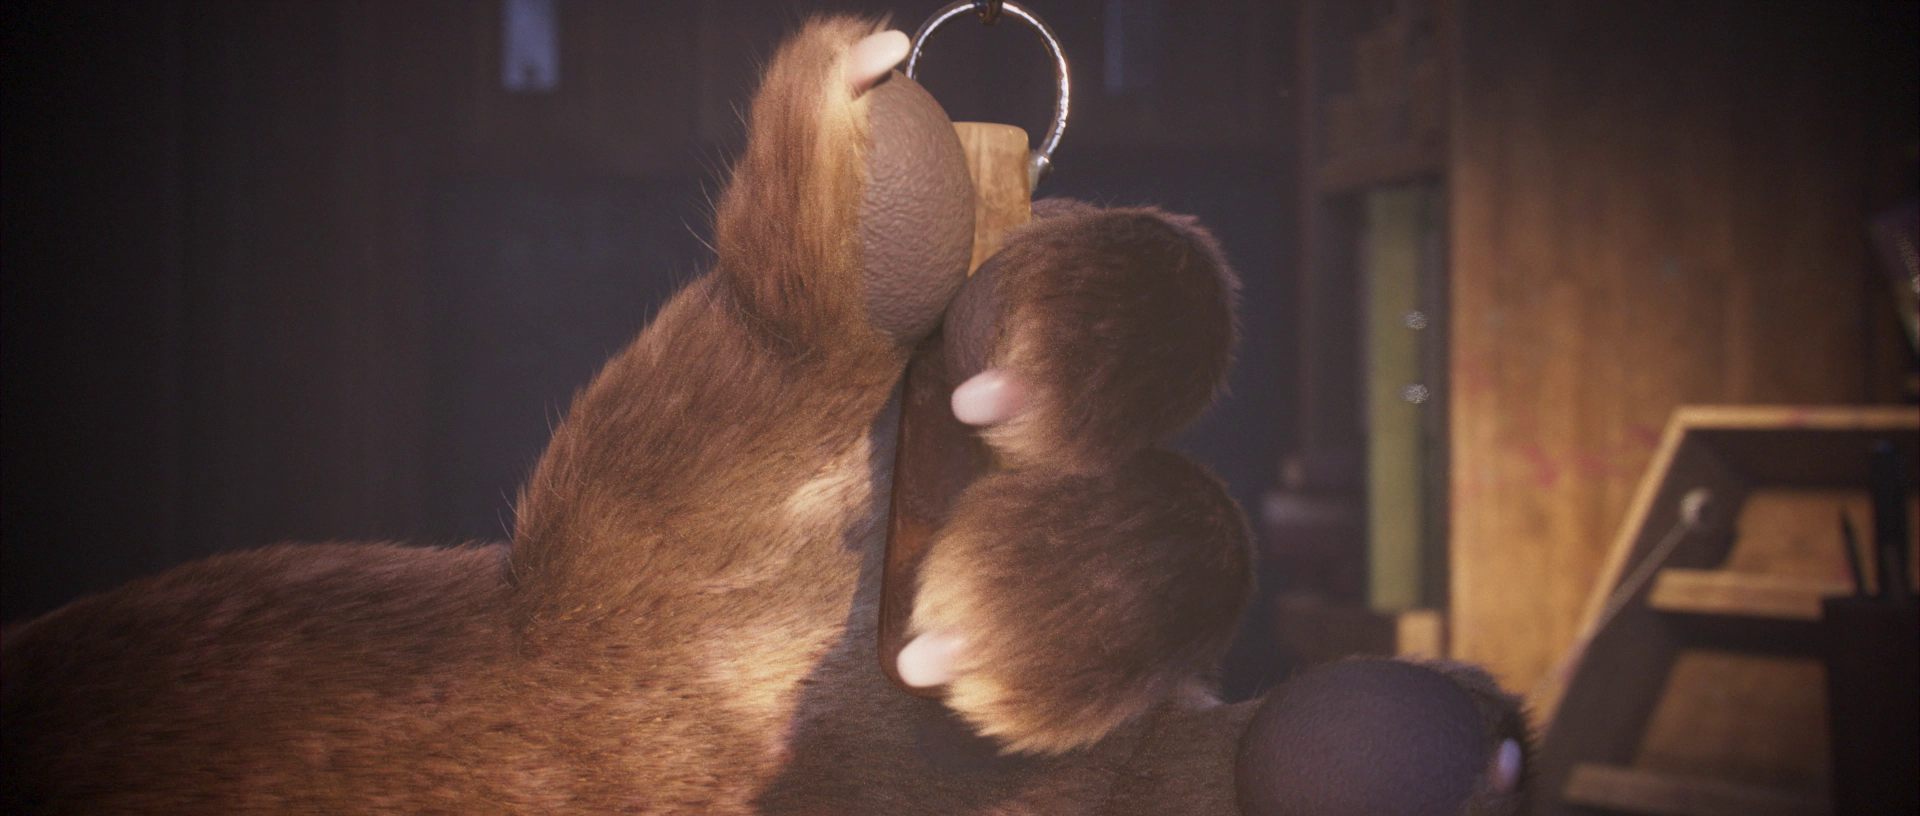
a shot from the movie
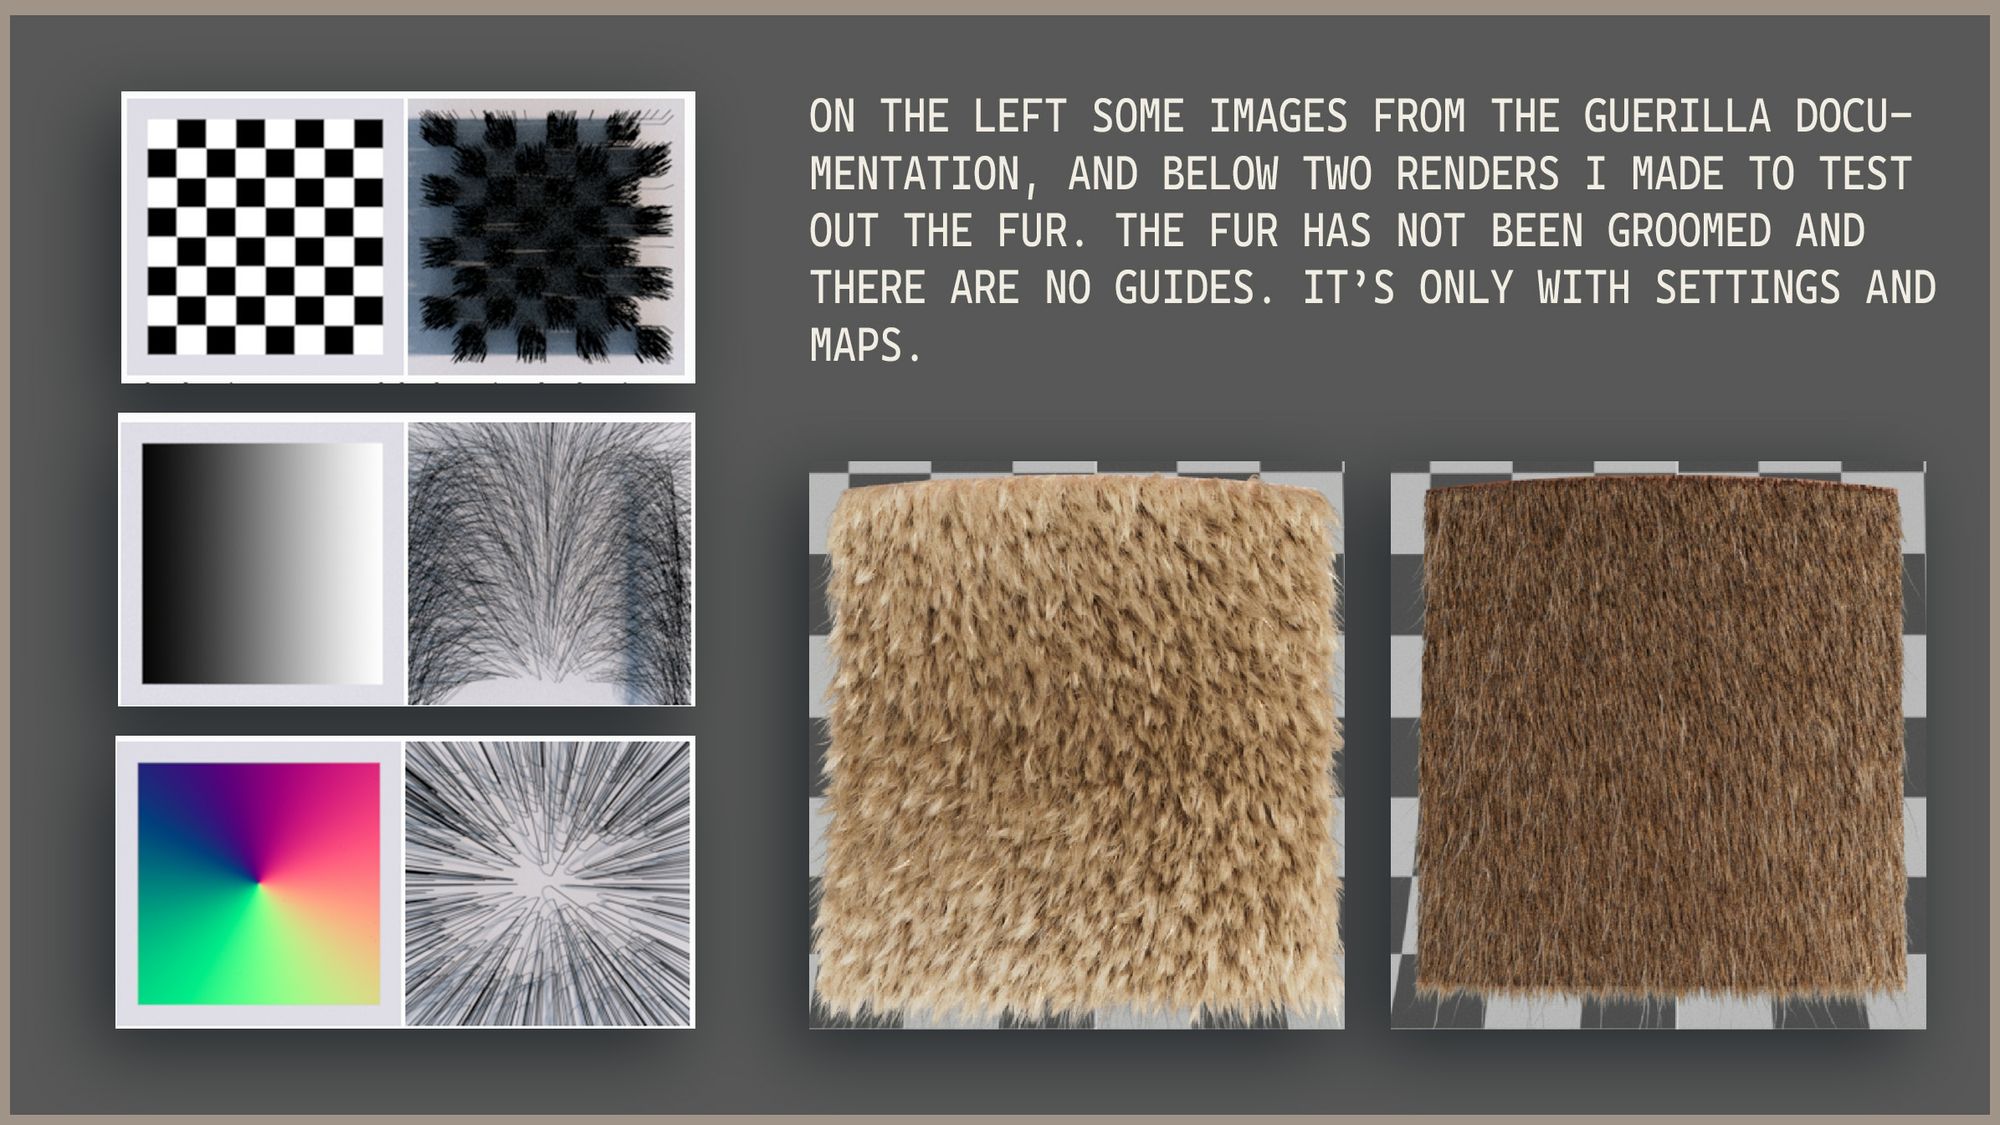
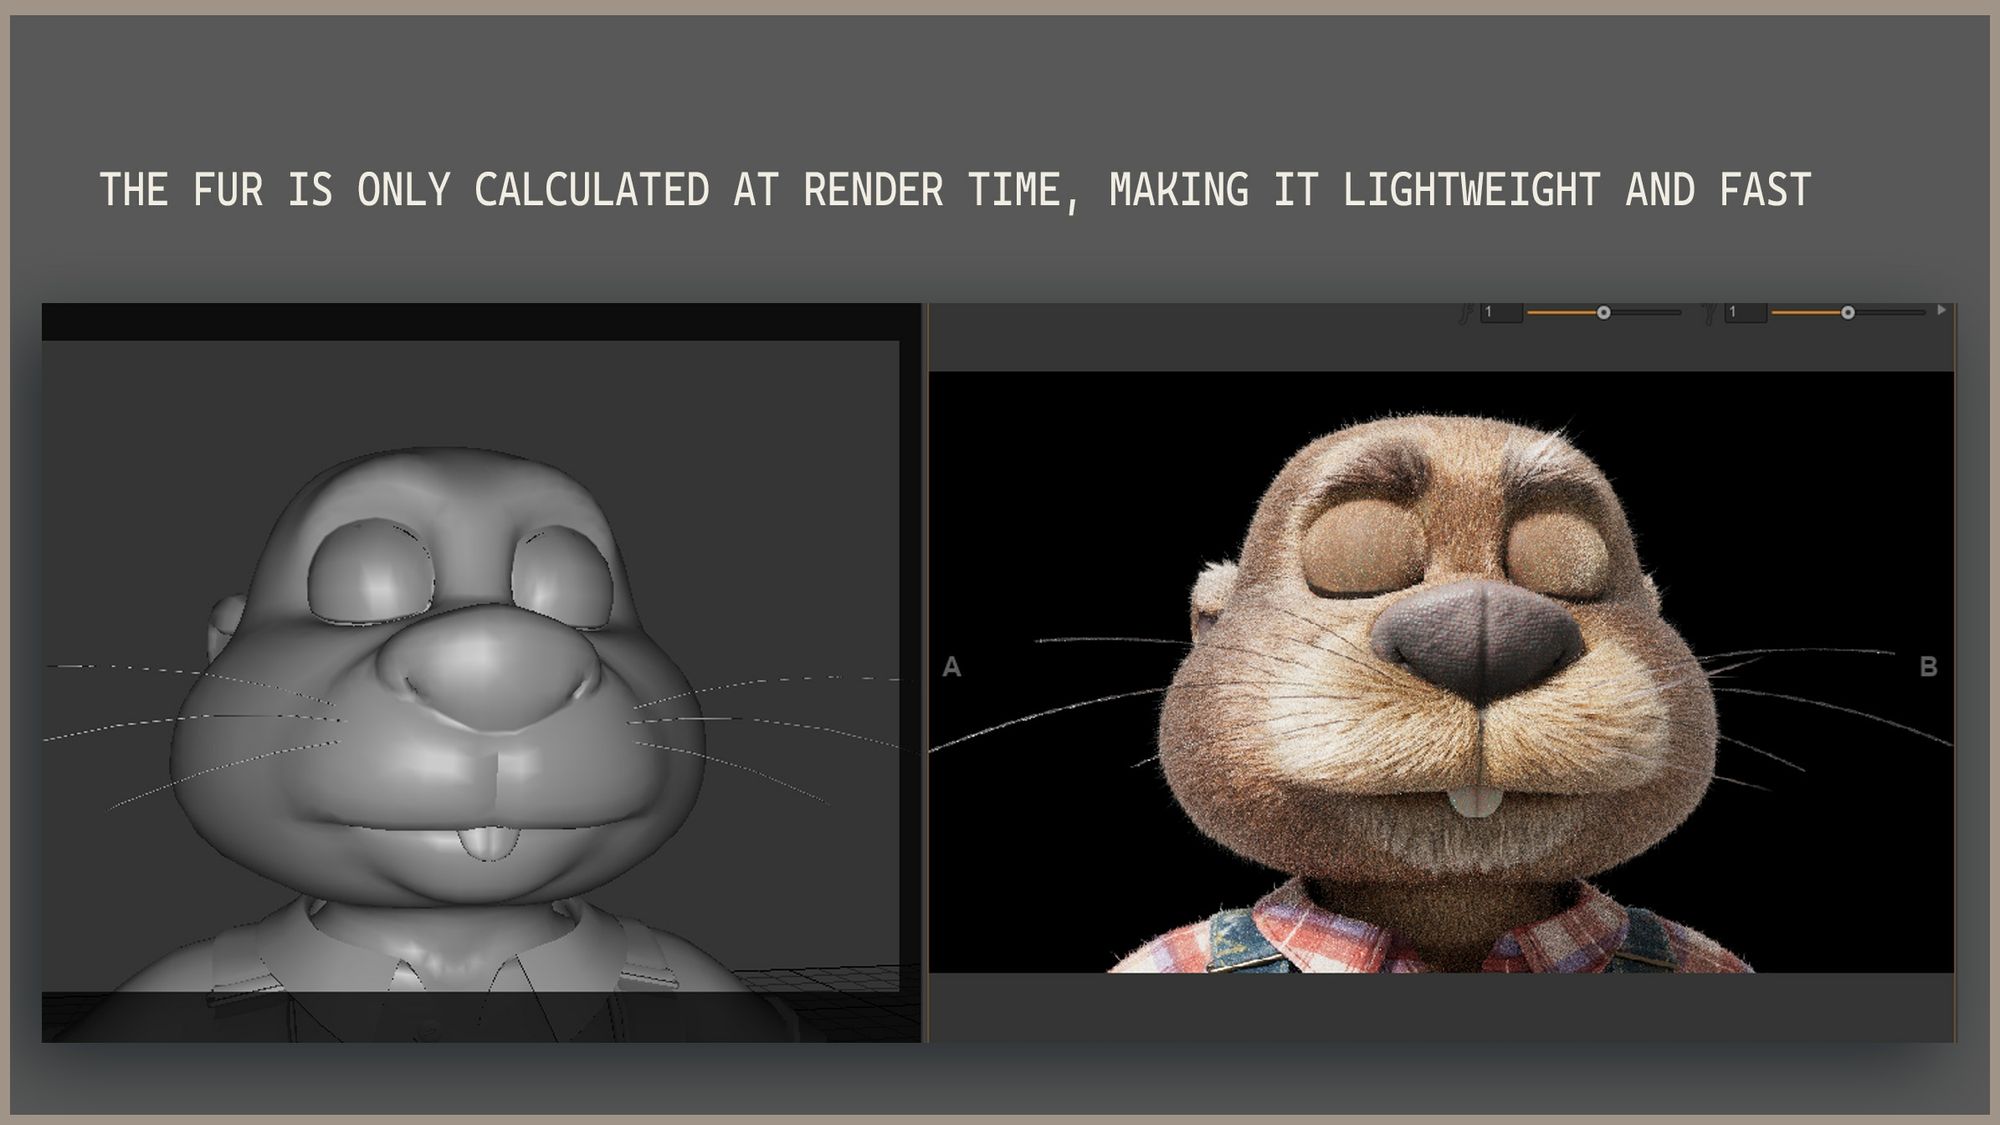
I thus decided to use the procedural hair generator in Guerilla Render. Guerilla render being the render software we use starting from our third year. The reason I chose this method was because of the simplicity of the hair generation and the smoothness it added in the pipeline. Because everything was mainly generated by maps and this directly and only during render time, the animators could export as many versions as they wanted. As long as the character mesh and UV’s stayed the same, it worked in any render scene.
This workflow added a lot of flexibility, however it wasn’t of course perfect. Since the fur was generated from maps and settings, the fur used a direction map painted in Mari to grow in that direction, but the hair strands couldn't actually follow any guides to bend in the way I wanted. In other words, every hair strand would point in the right direction, but it stayed perfectly straight. That’s an issue that I haven't been able to fix, but since the fur wasn’t too long and didn’t need actual grooming, it still did the job.
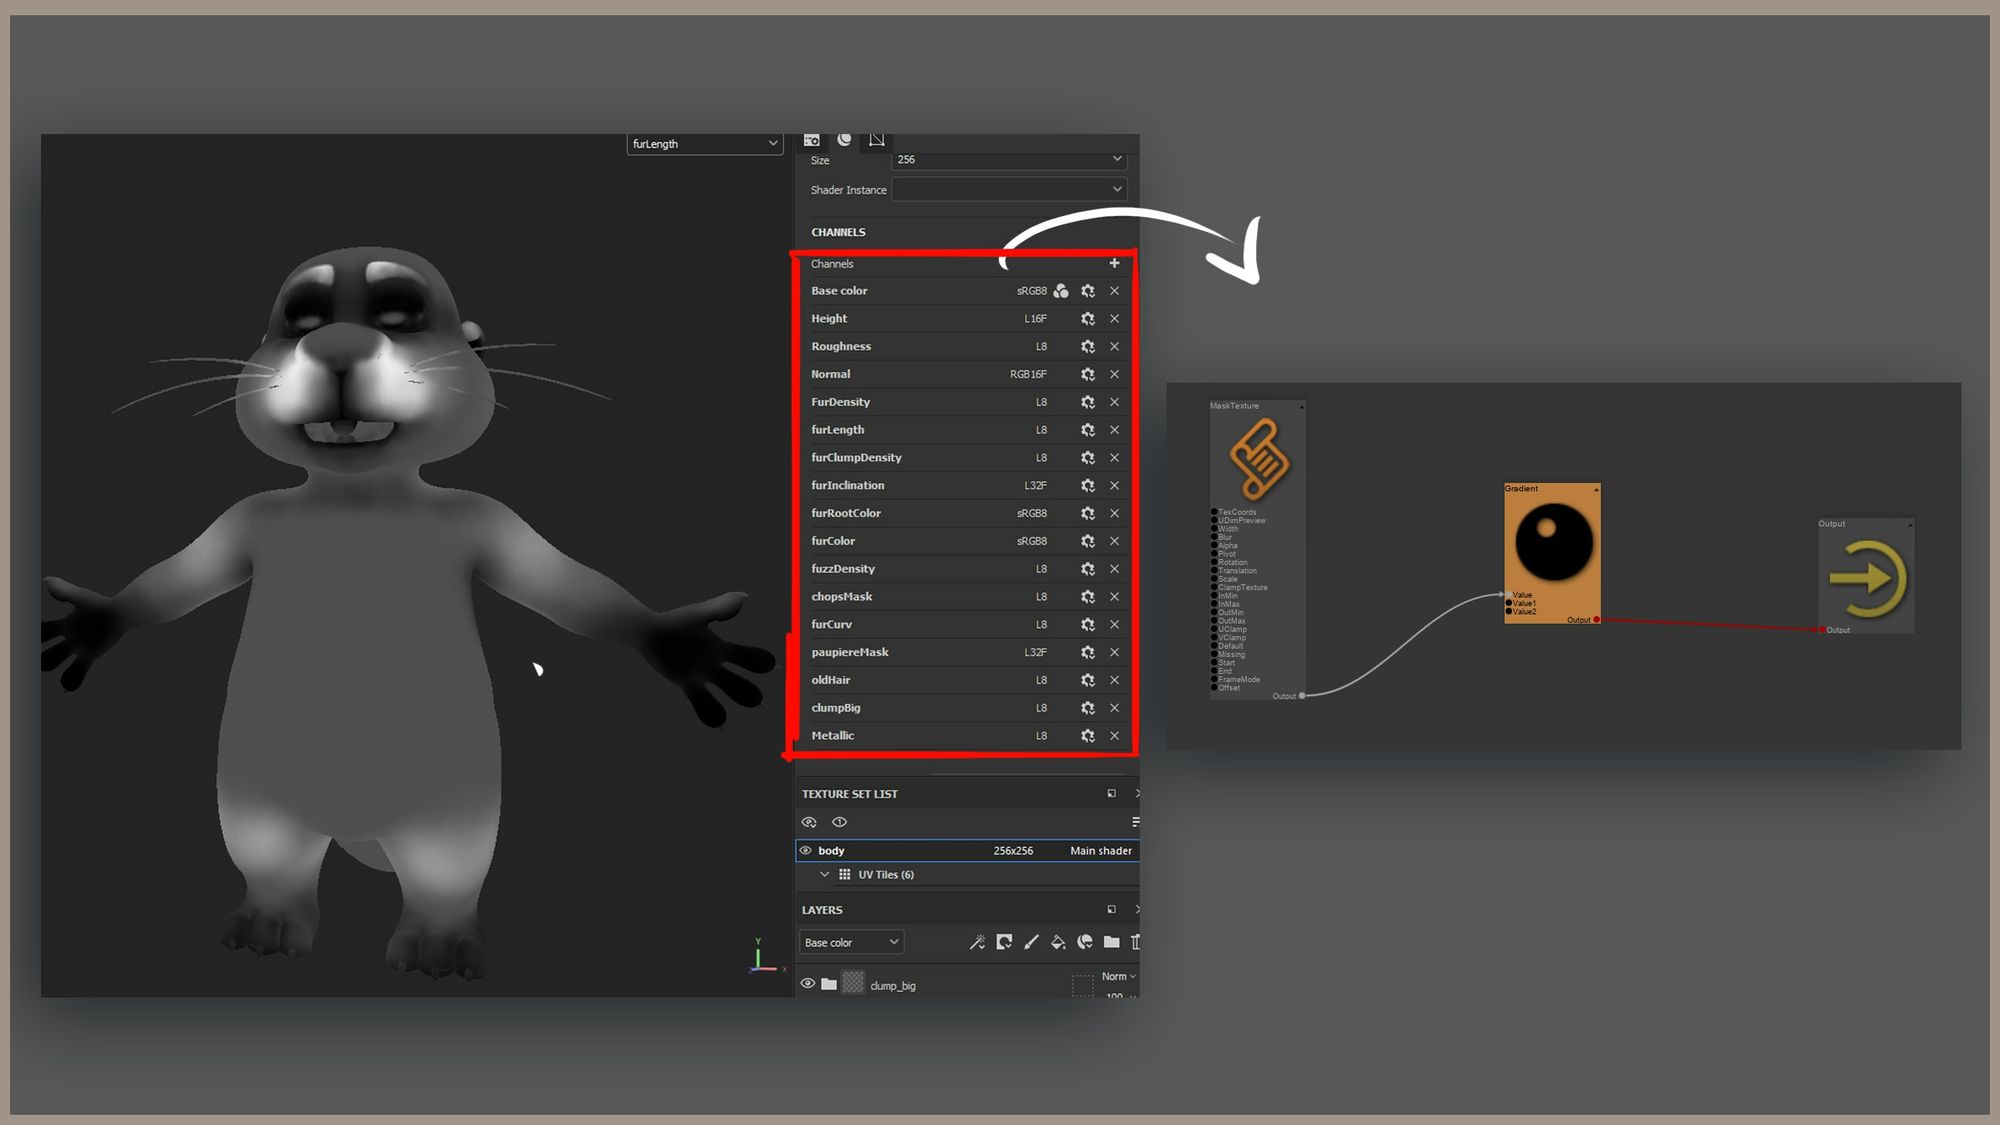
The interesting part is that I could drive everything based on maps. I created a lot of separated user channels in substance painter, in which each would drive a specific parameter. To name a few I had for example a map that drove the length, one that drove the clumping rate, one that drove the elevation from the skin, and a lot more.
Even if that generated a lot of maps, the whole texture file size still stayed around a gigabyte or two. Compared to that, if I would have done the groom in Houdini, an alembic export could have reached 100 to 200mo, and that per frame.
I’ll now explain what I did exactly for one map, for example the length map. This can be useful for other user-cases as well in other softwares. Here you see the painted length map in grayscale. That means short hair would be quite dark, and long hair quite bright. (so 0 to 1). This value from 0 to 1 won’t be correct in Guerilla render, as 0 would make the hair non existing, and 1 might actually be super short when you would put the map in the length attribute.
So for every map I always needed to tweak it before it goes into the node (just like when you would connect an albedo map in the shader but you put a colour correct between the two).
To do that I always used gradients (or ramps in other softwares). That way I could decide which value would be the black and the white accordingly. So black that was 0 would become maybe 10, and white that was 1 would become a value of 60, depending on the scene scale.
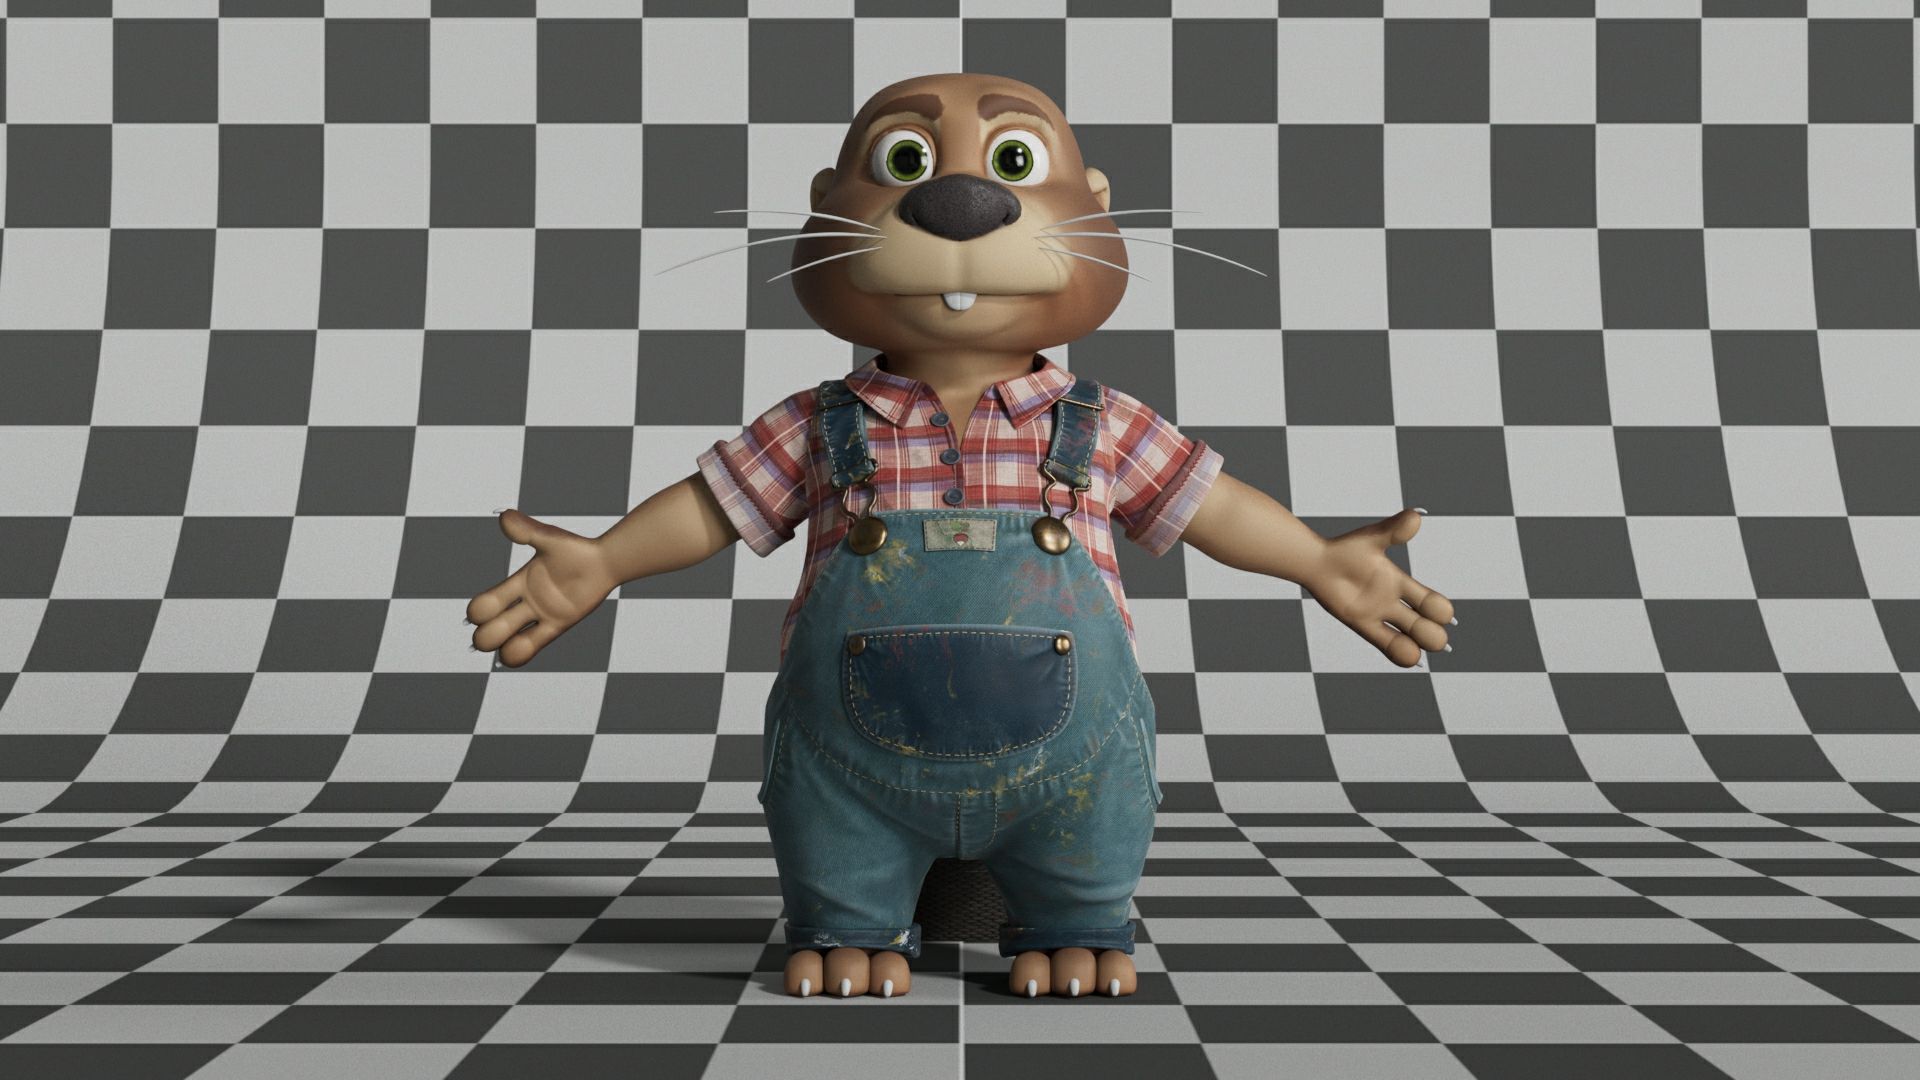
Making the character production ready
The look development was done, but I still did a lot of changes afterwards for the short movie. Even if the character looked well alone with a neutral lighting, sometimes you discover that you will need to change some things when you put the character in real lighting and animation conditions.
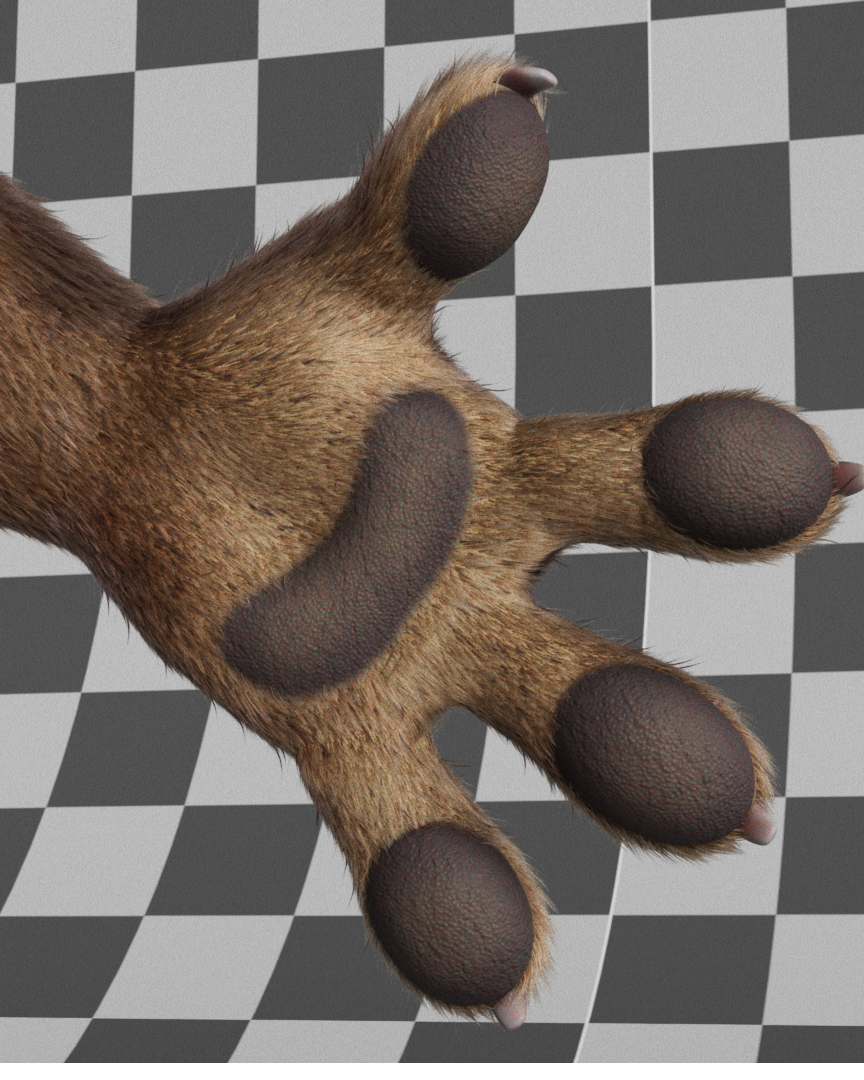
We had, for example, a problem on the shot where there was a close up on the hand, because the fur was too thick and not dense enough. You could see some parts of the skin underneath. To counter that we did two versions of the character, one with the normal amount of fur which was good enough at a reasonable distance, and another where there was fur only on one arm, but way thinner and denser so that it looked good from up close.
The two character of the film truly came alive with the collaborative efforts of the entire team. It was a great experience to have worked for a long period of time on what was yet my longest project. These months flew by so fast that I can't express my gratitude to my classmates and friends who advised and helped me during the production time.
I’d like to give a shoutout to my teammates for their amazing work:
Lilou Tiprez, Loïs Buisseau and Timothé Vergught for the animation
Here is the complete short film:
And here is the making off :
Conclusion
I express my gratitude to The Rookies for providing me with this wonderful opportunity to share insights into my recent project. Thank you for reading this article, and I hope it proves useful to the community!
Leandro
Find more of Leandro's stunning student work via his Rookies profile here.