Unlock Creative Blocks: Techniques, Tips, and Tricks for Creating Environments in Unreal Engine
Explore the creative process of "Tipi Tales" with Rafael Serralheiro, a Gnomon School of VFX student specializing in 3D Environment art for video games.
Explore the creative process of "Tipi Tales" with Rafael Serralheiro, a Gnomon School of VFX student specializing in 3D Environment art for video games.
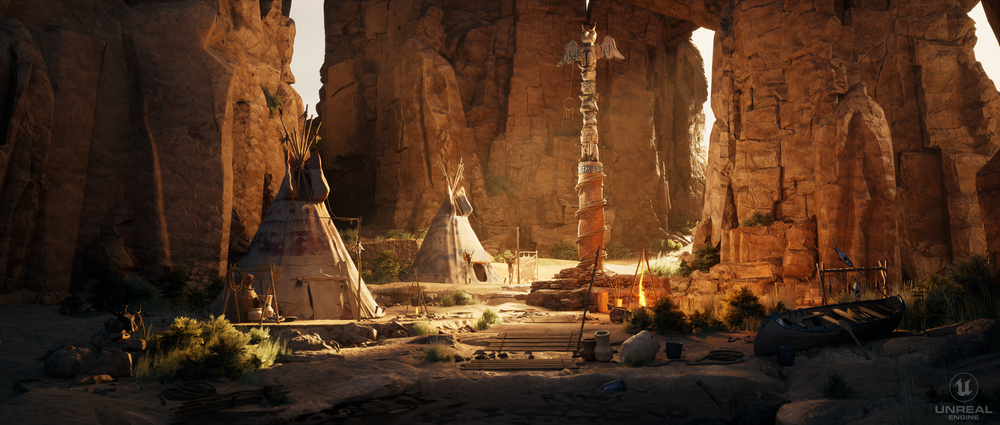
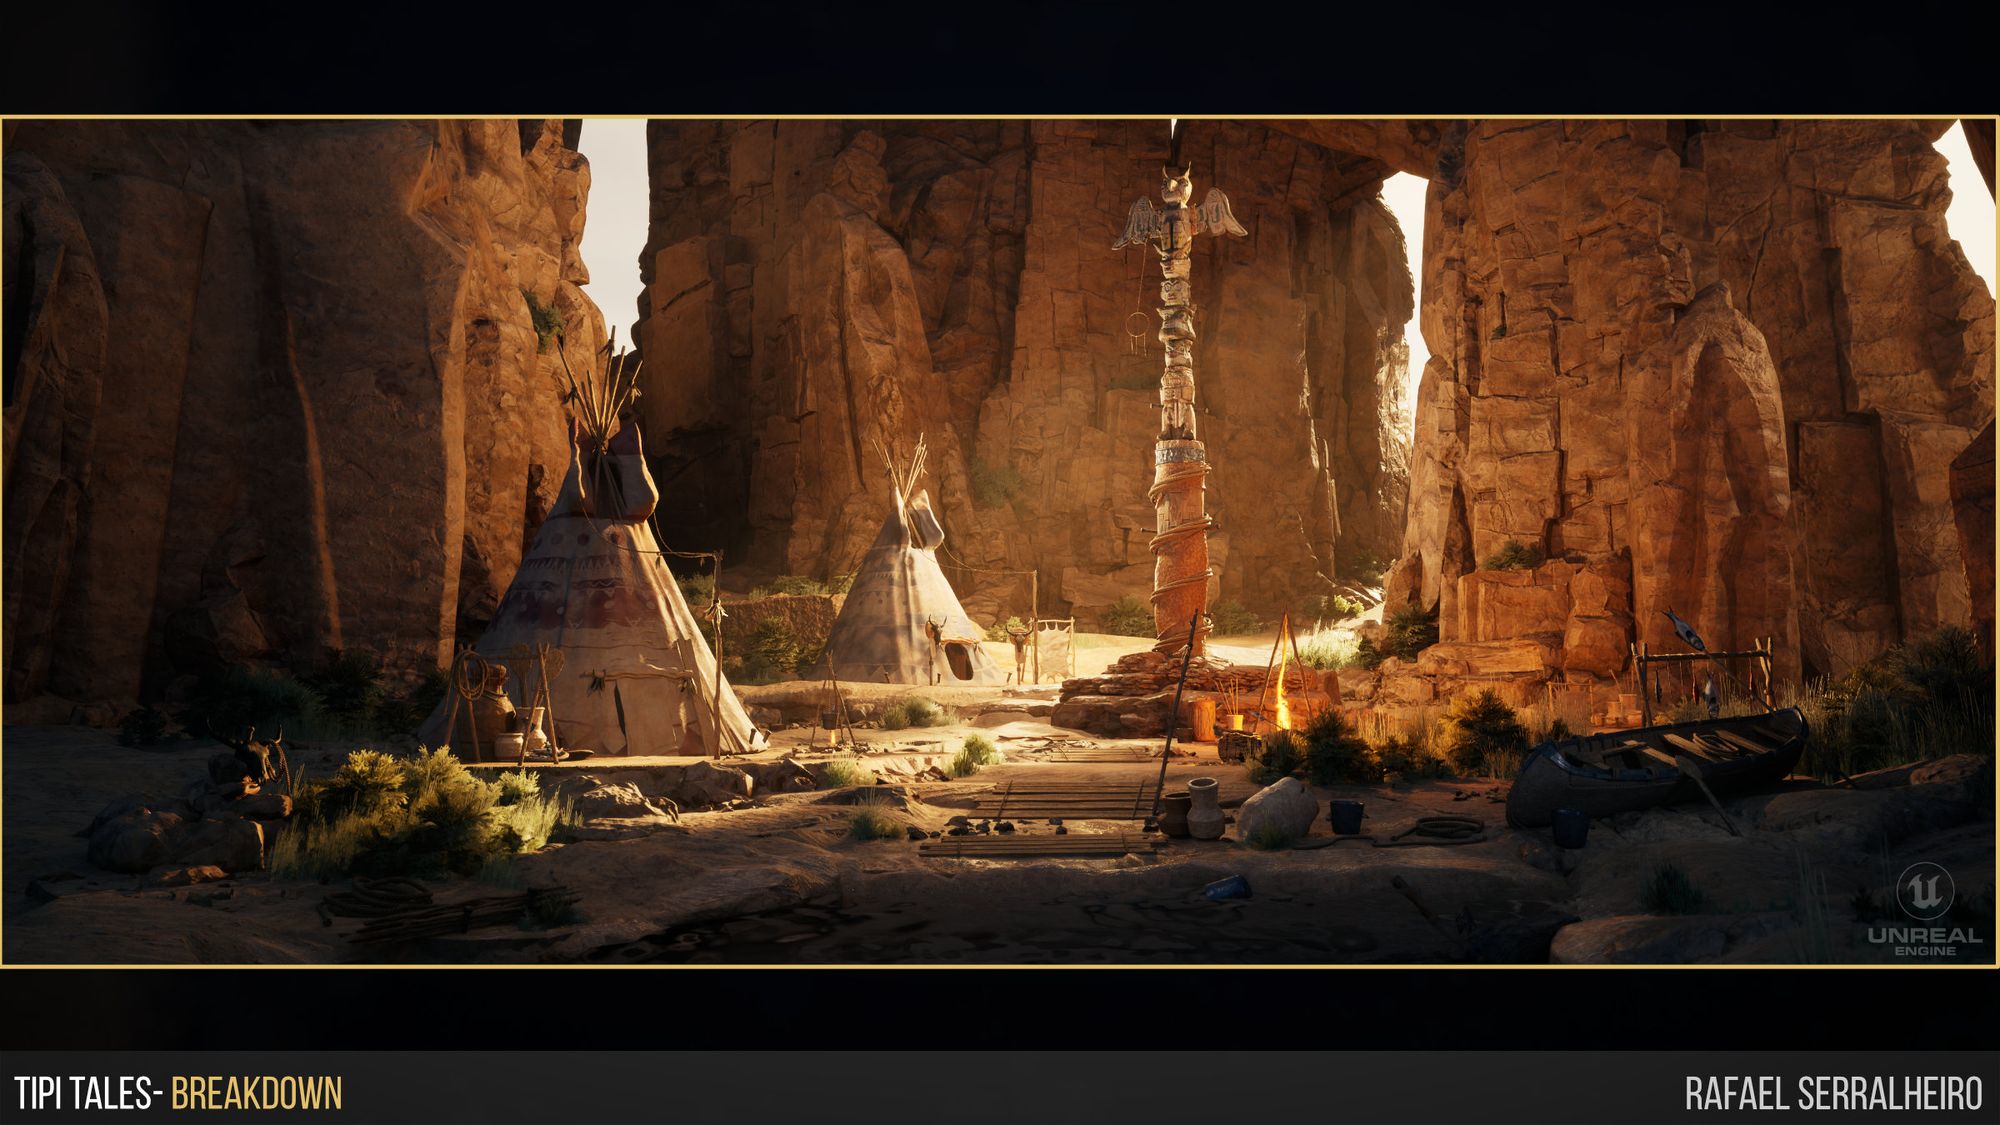
Rafael Serralheiro, a student at the Gnomon School of VFX specialising in 3D Environment art for video games, will guide you through his approach to crafting the environment named "Tipi Tales" in this article. Executed through the video game pipeline and Unreal Engine 5, this project placed emphasis on Rafael overseeing all aspects, from conception and modeling to texturing, lighting, rendering, and post-processing. Enjoy!
This article will give an overview of my process of creating this environment. I will also discuss specific techniques that I employed to make the scene appear more refined and coherent. Additionally, I will talk about the different objectives one must achieve while creating an environment, a method taught by Jon Arellano, which is highly effective for environment creation. This method progresses from the Alpha stage to the Beta stage and finally to the final result. Then, I will discuss a few design traps one must avoid. I have kept this topic for last since it will involve discussing strategies and topics that can be useful when creating an environment.
This project was an incredible challenge. It was my second time creating a scene in Unreal and my first time following a Game pipeline. In addition, it was the first time I used Substance 3D Designer to create Tileble textures for my assets. For this environment, I only used Substance 3D Painter for mask creation, like RGB masks, for example, and some custom masks. Ultimately, I did not have a concept art to follow or cover my back regarding composition, color theory, and scale.
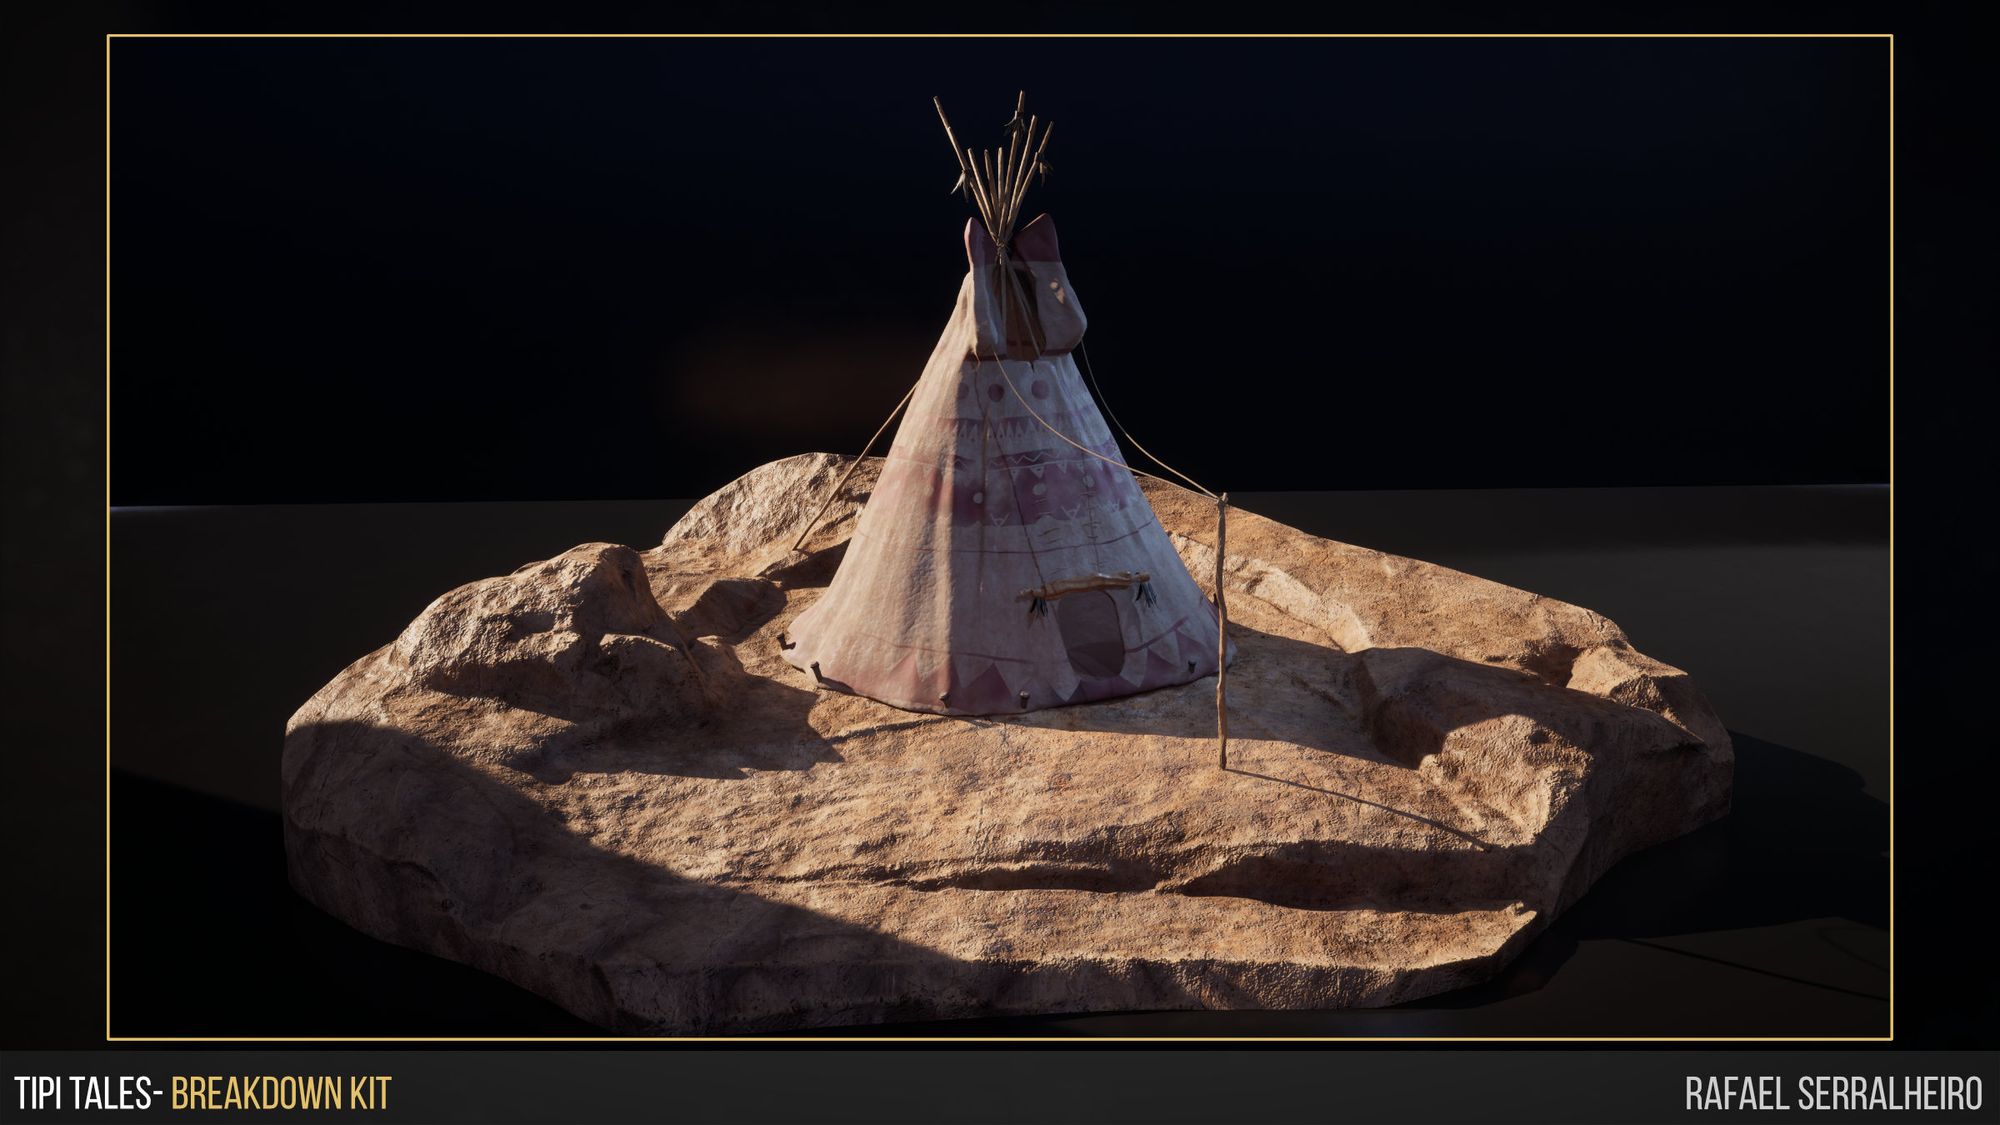
The first step to creating this environment was concepting and block-out. I have wanted to create a natural exterior environment from a cultural theme that I have been interested in for a long time. That is why I picked a Native American camp. In my previous works I had primarily created hard surface scenes, and I wanted to try something different for this one and practice my sculpting skills.
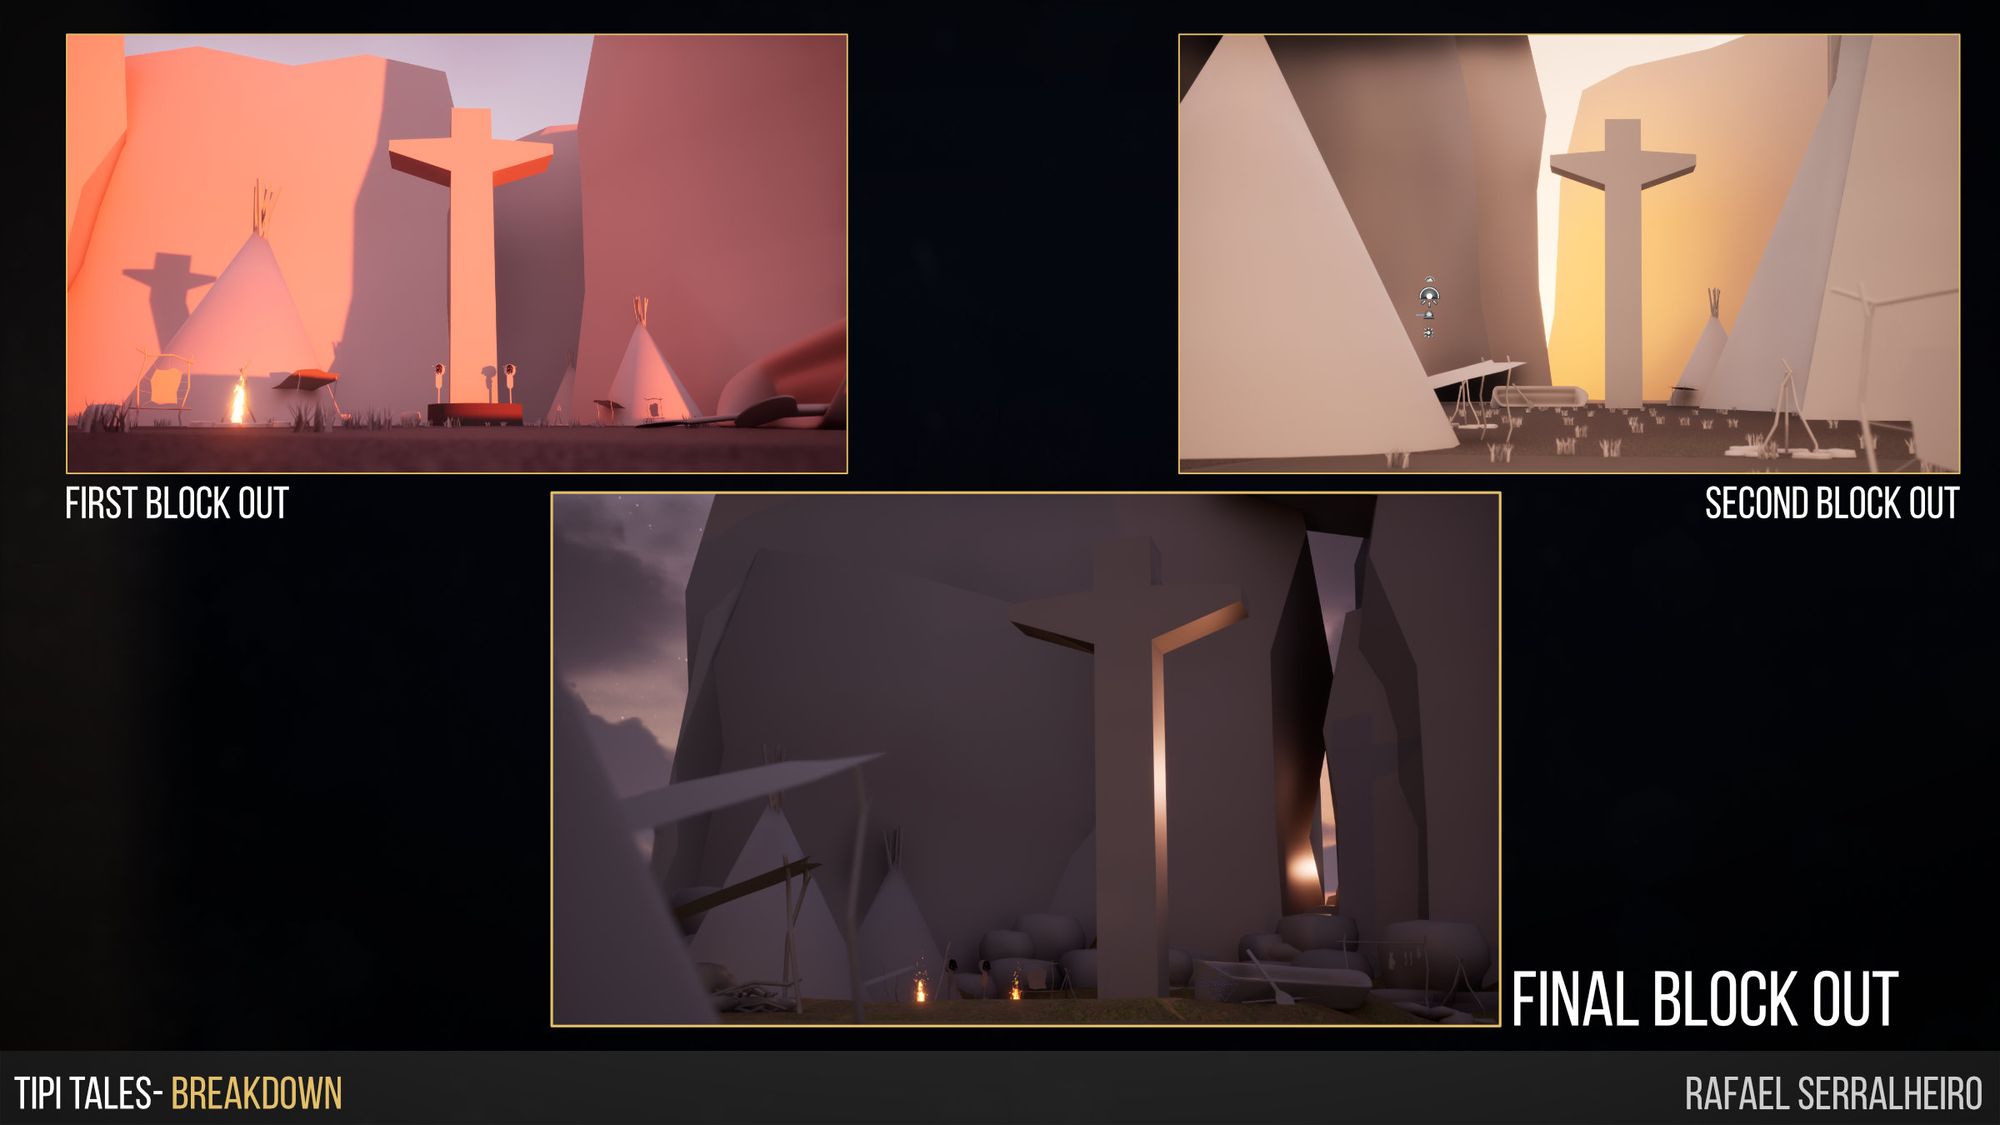
When getting the block out to work, I wanted to keep a couple of aspects in mind. These ideas are mostly taken from a fantastic book, "Picture This - How Pictures Work". In the book, the author lays down some concepts to the bare bone of composition. I will leave at the end of the article all the topics. However, the ones I used for the composition were: The center of the composition is the most "important" or predominant part of the scene. Vertical lines create excitement in the composition, and the diagonal lines create a sense of dynamic/danger. These concepts will help you define and art direct how you want your scene to look and create interest in your environment. I created this composition by playing around with simple meshes created in Maya.
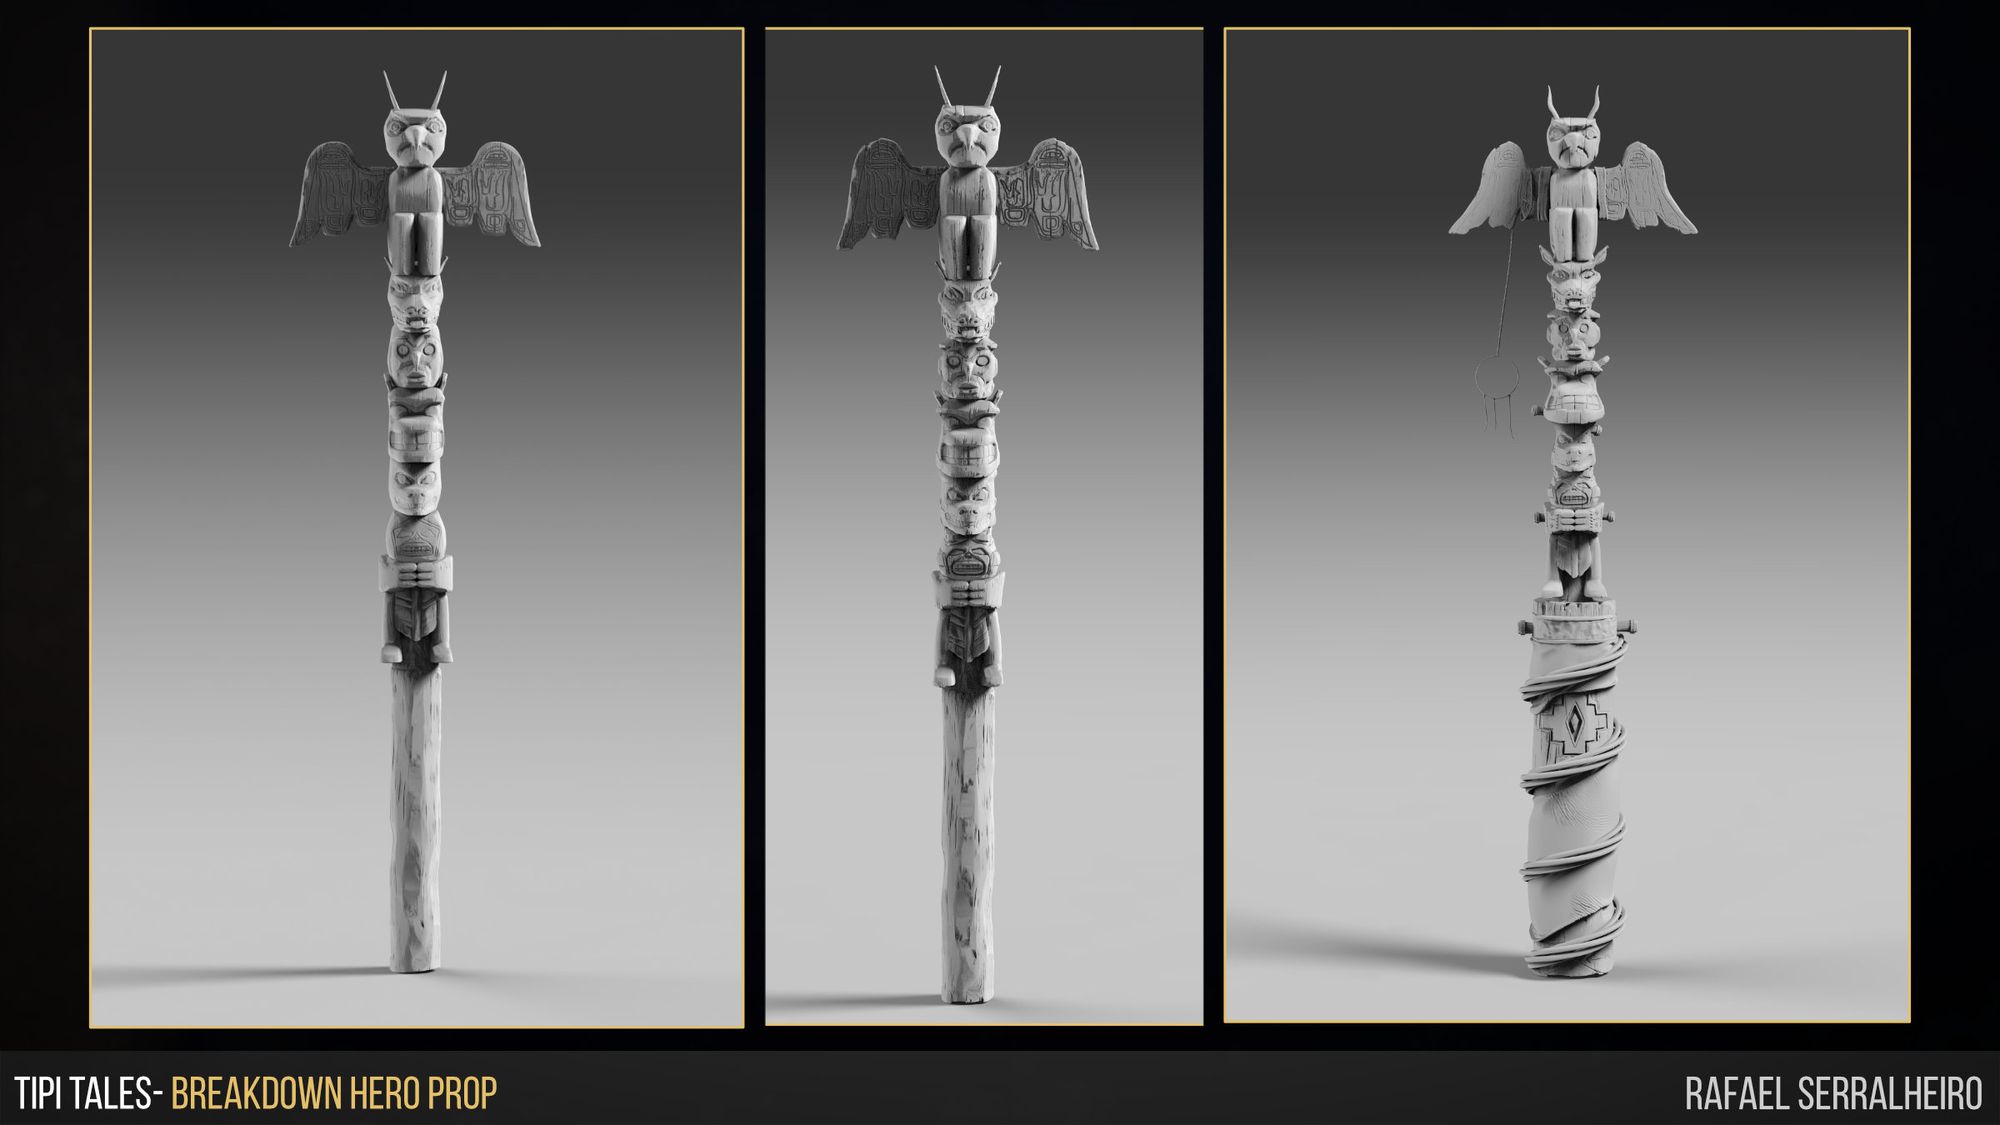
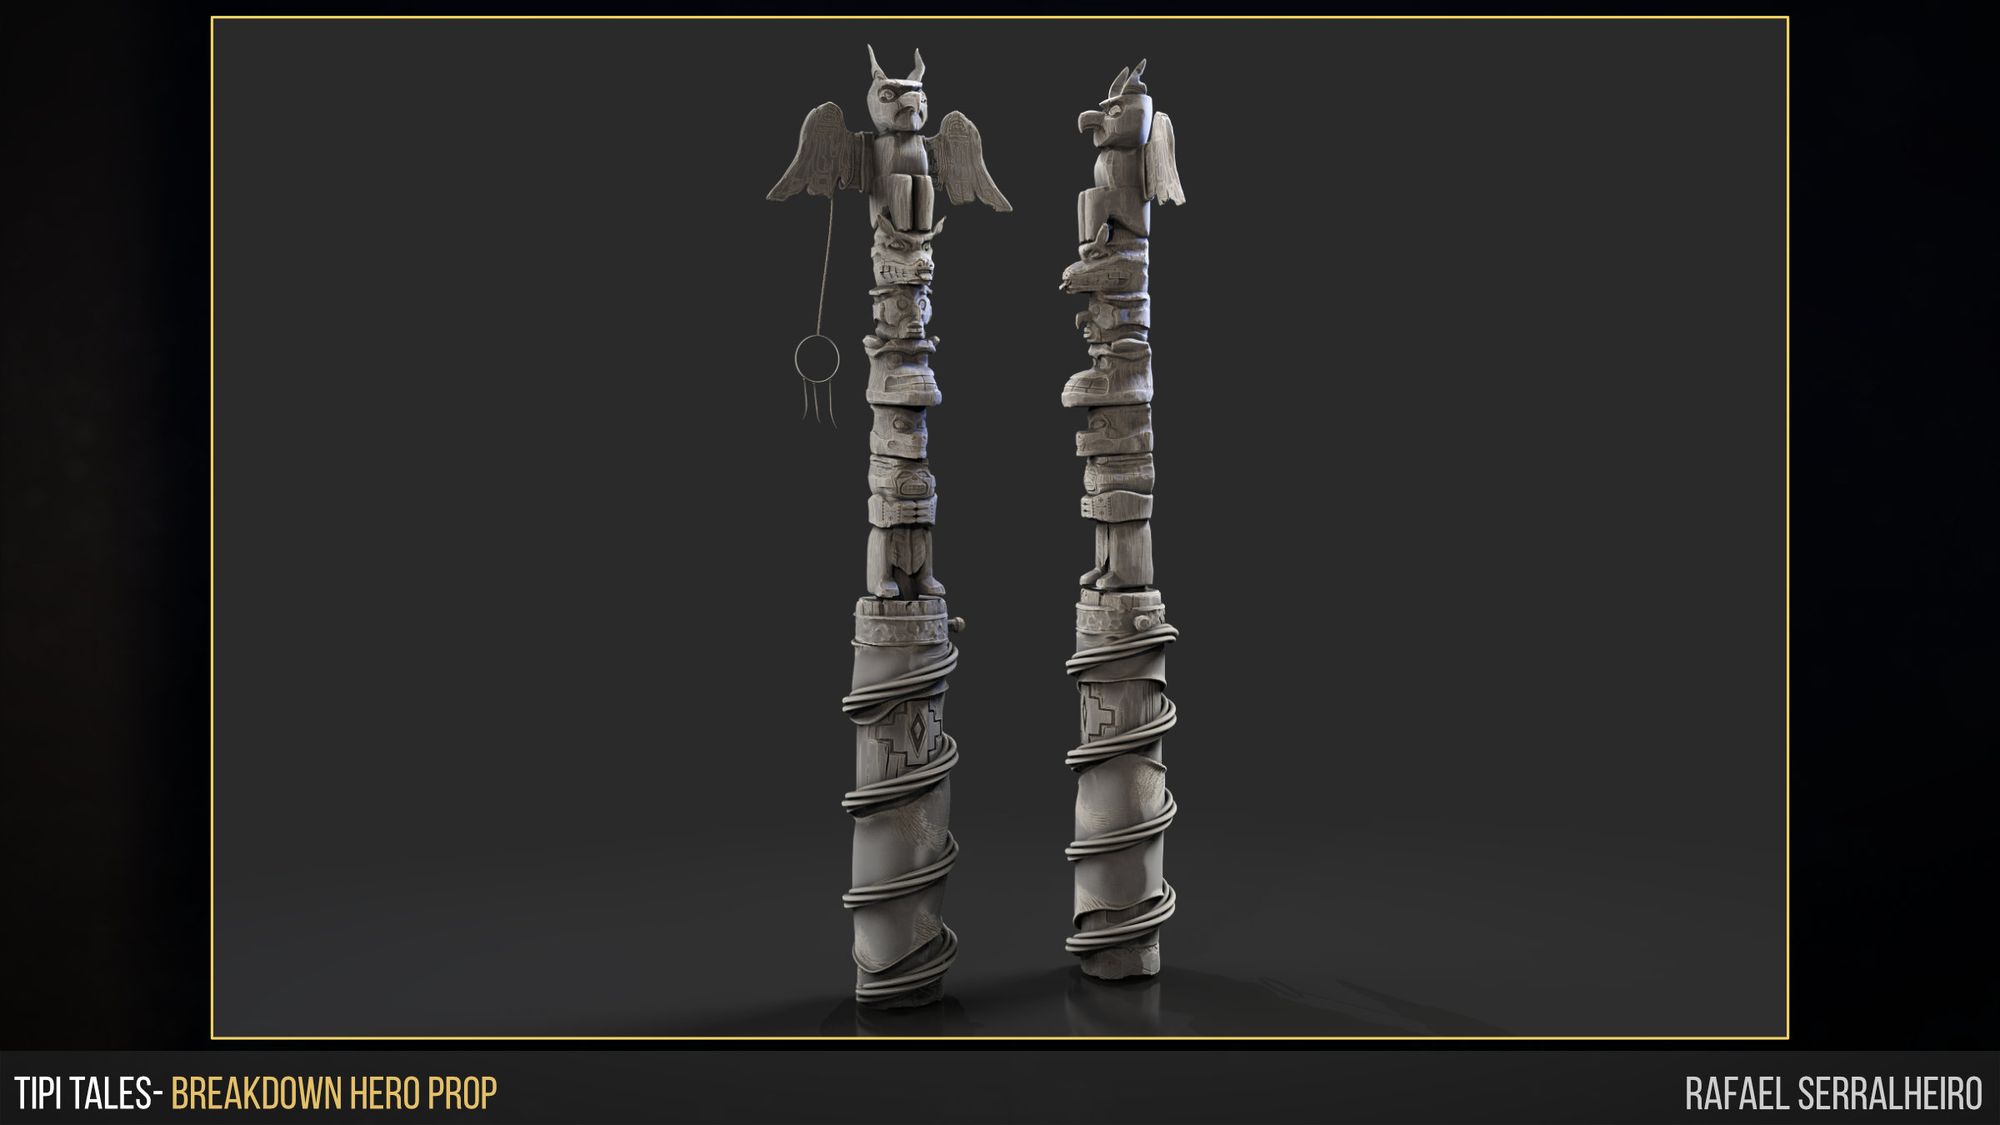
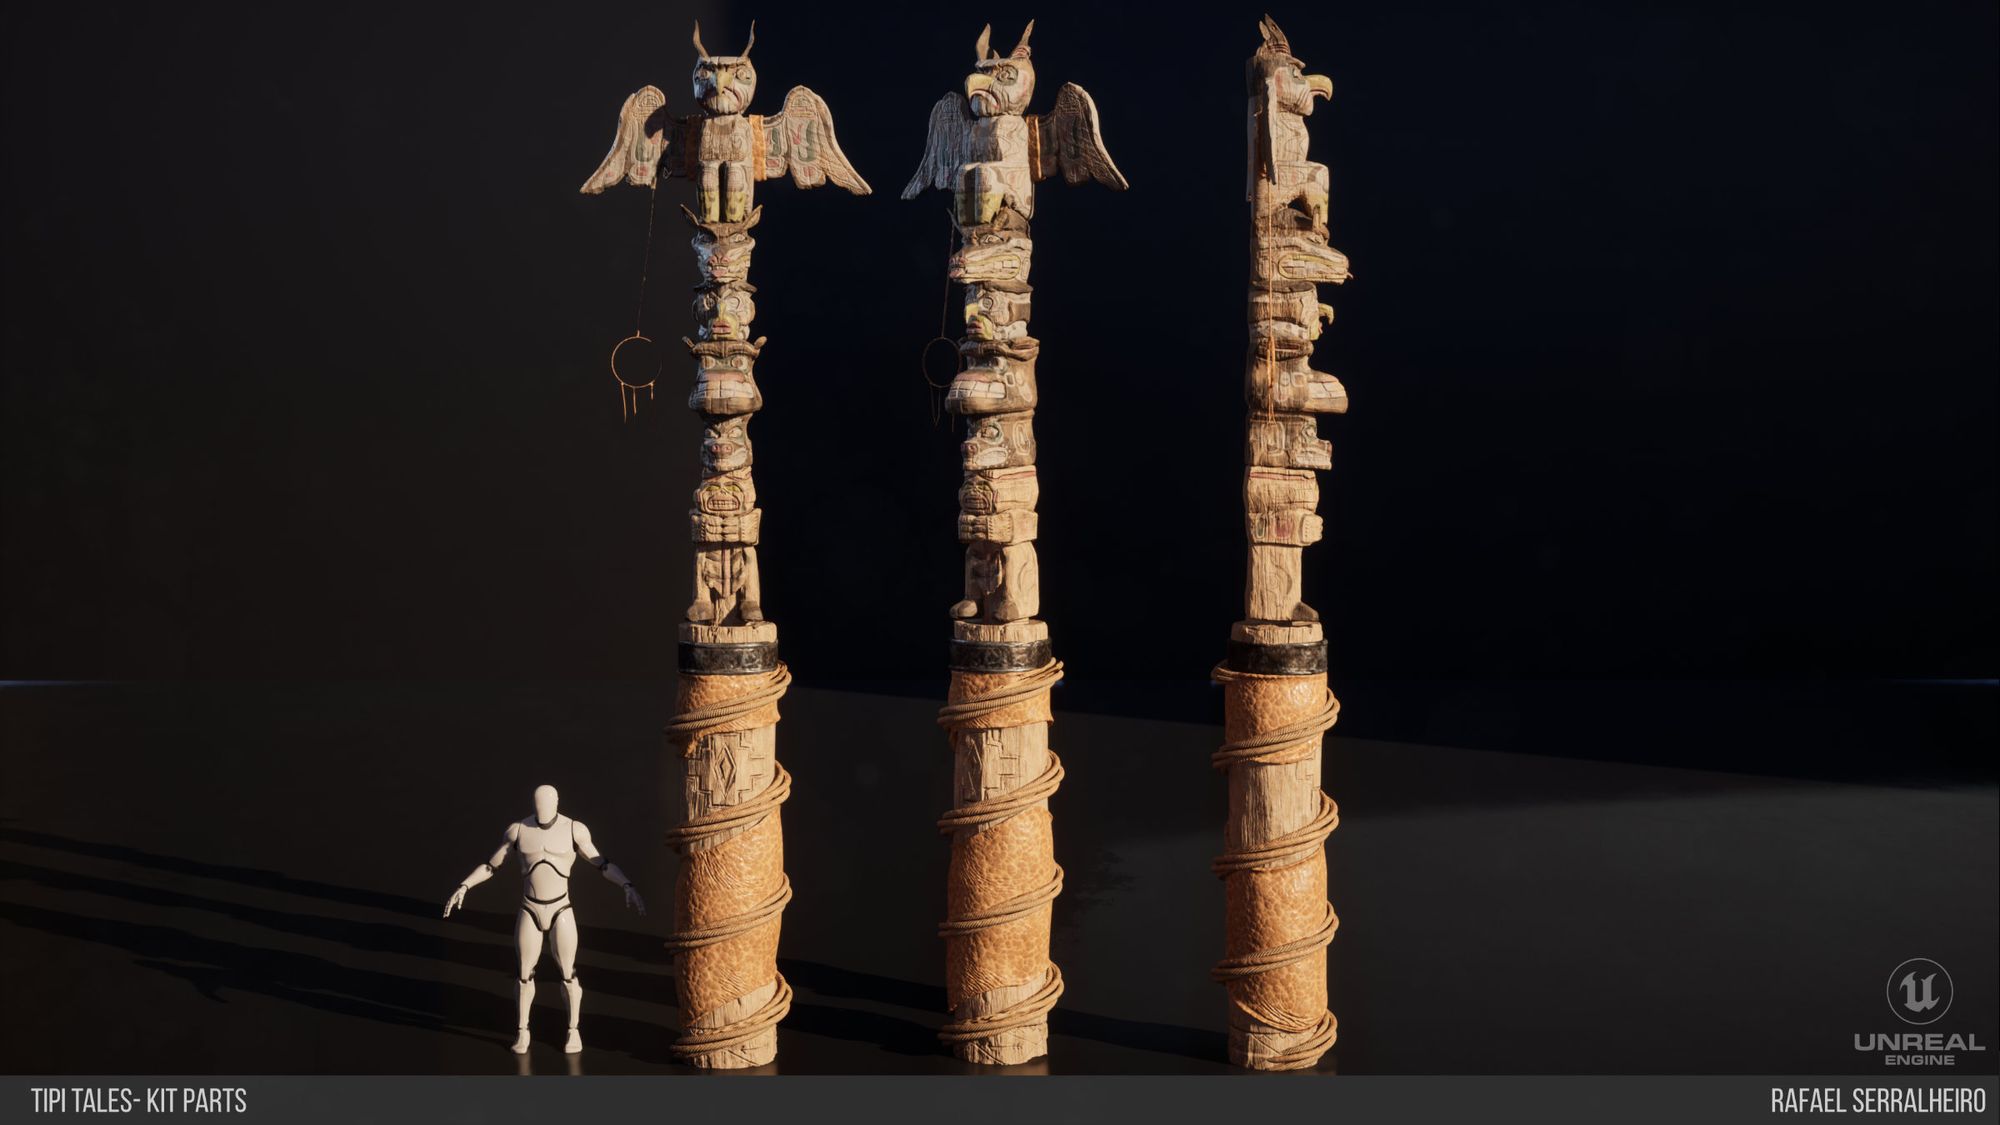
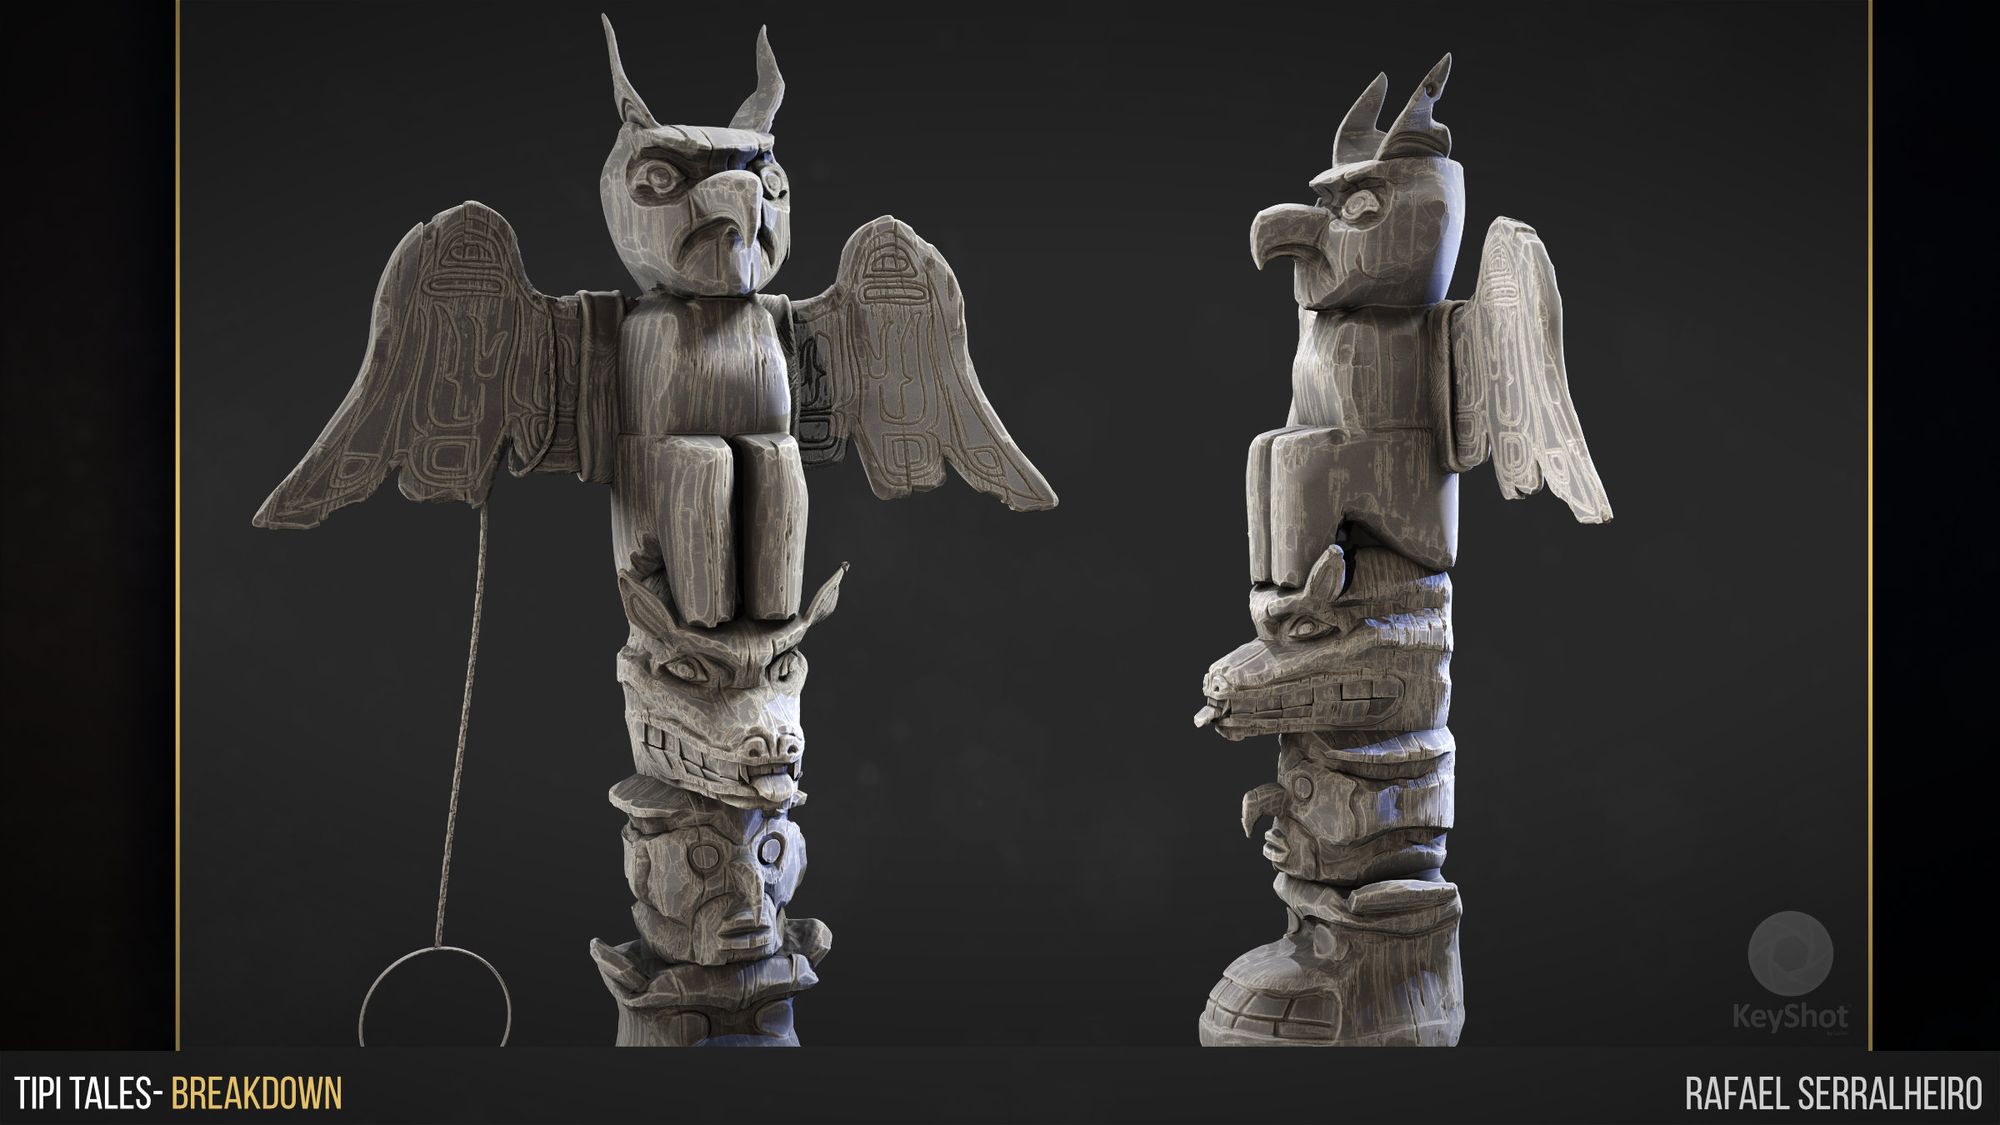
The next step was to create a hero prop for the scene to set the quality bar for the rest of the environment. In this case, the hero prop was the Totem. This asset was blocked out in Maya, sculpted in ZBrush, and textured in Unreal engine using tileable textures and Substance 3D Painter for RGB Masks. I will not go in-depth into the techniques used to sculpt the Totem, but here are some ideas to keep in mind when creating props:
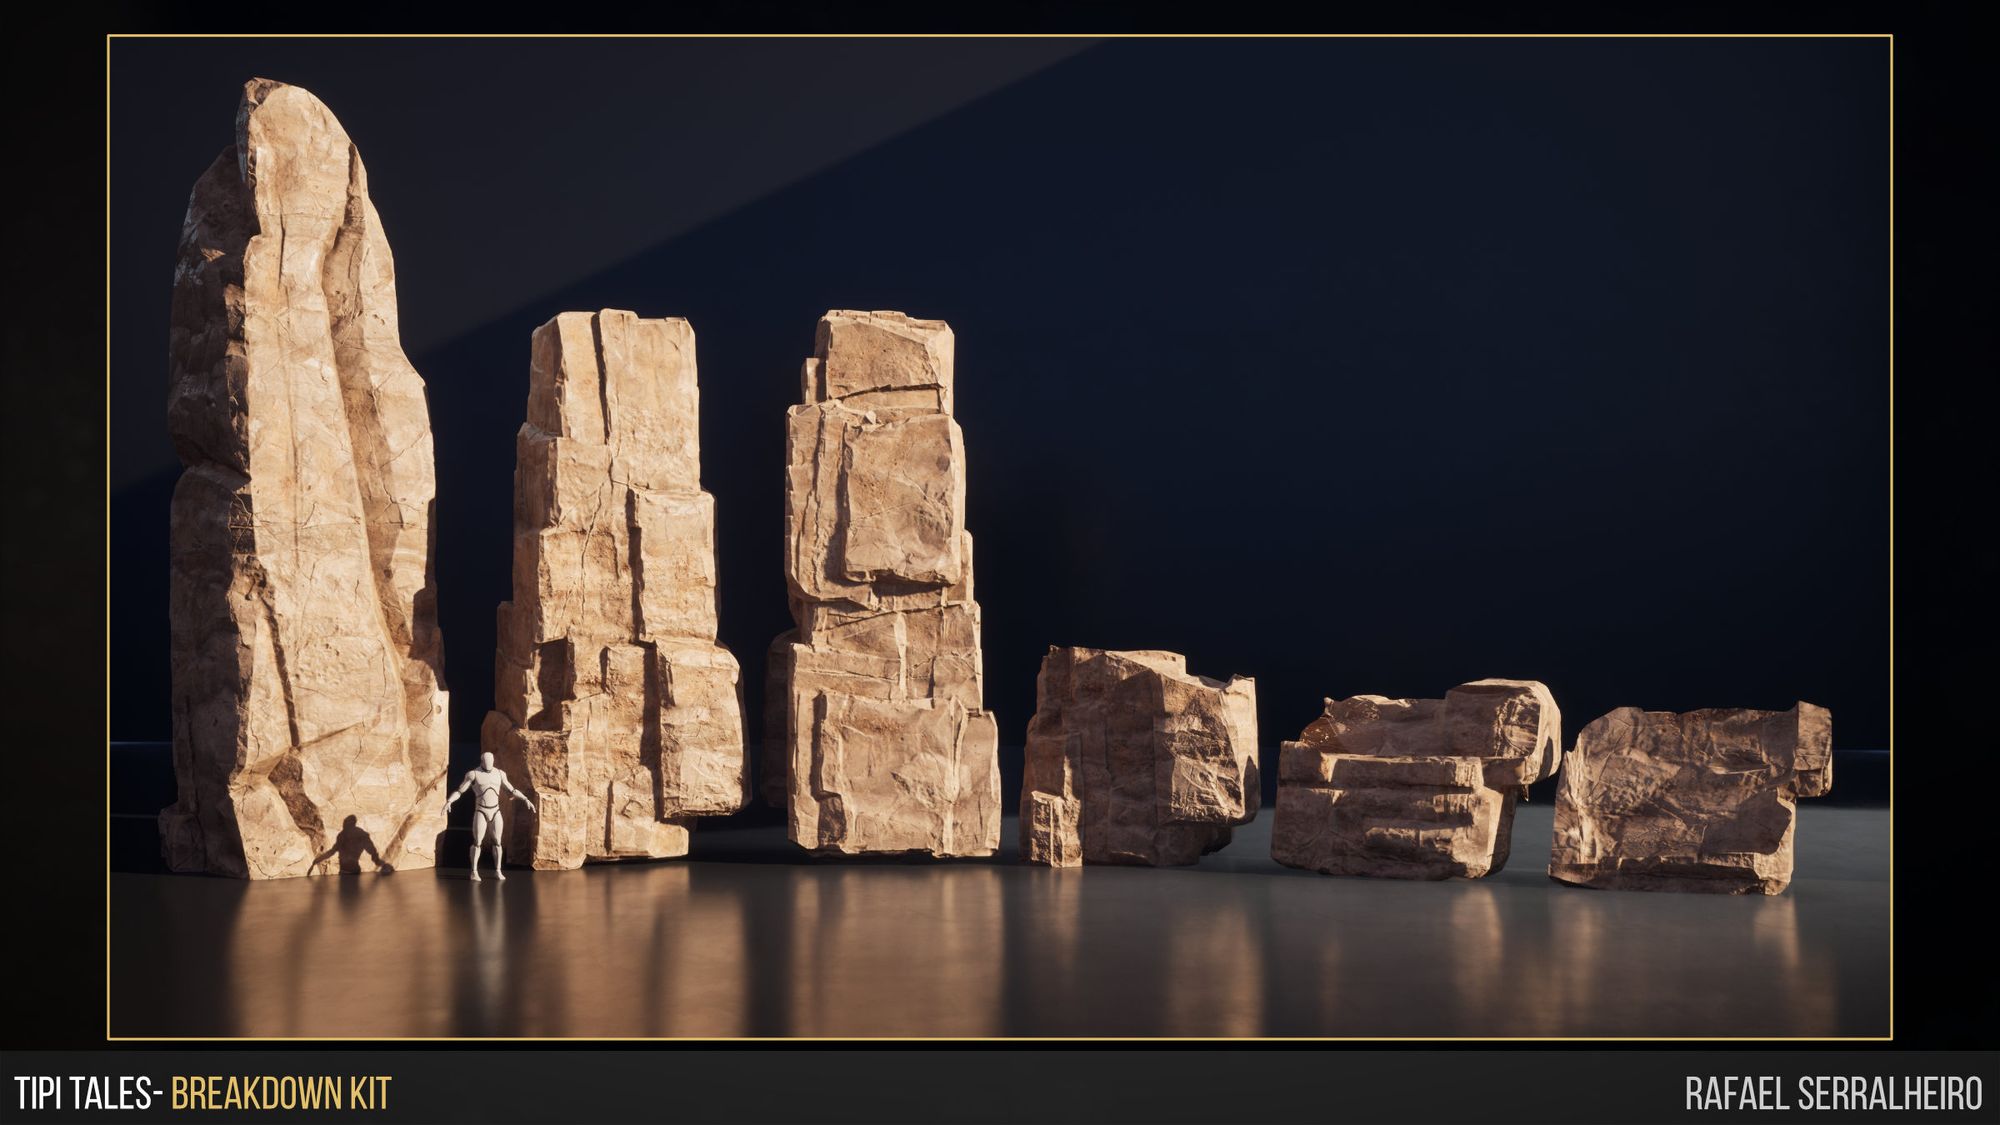
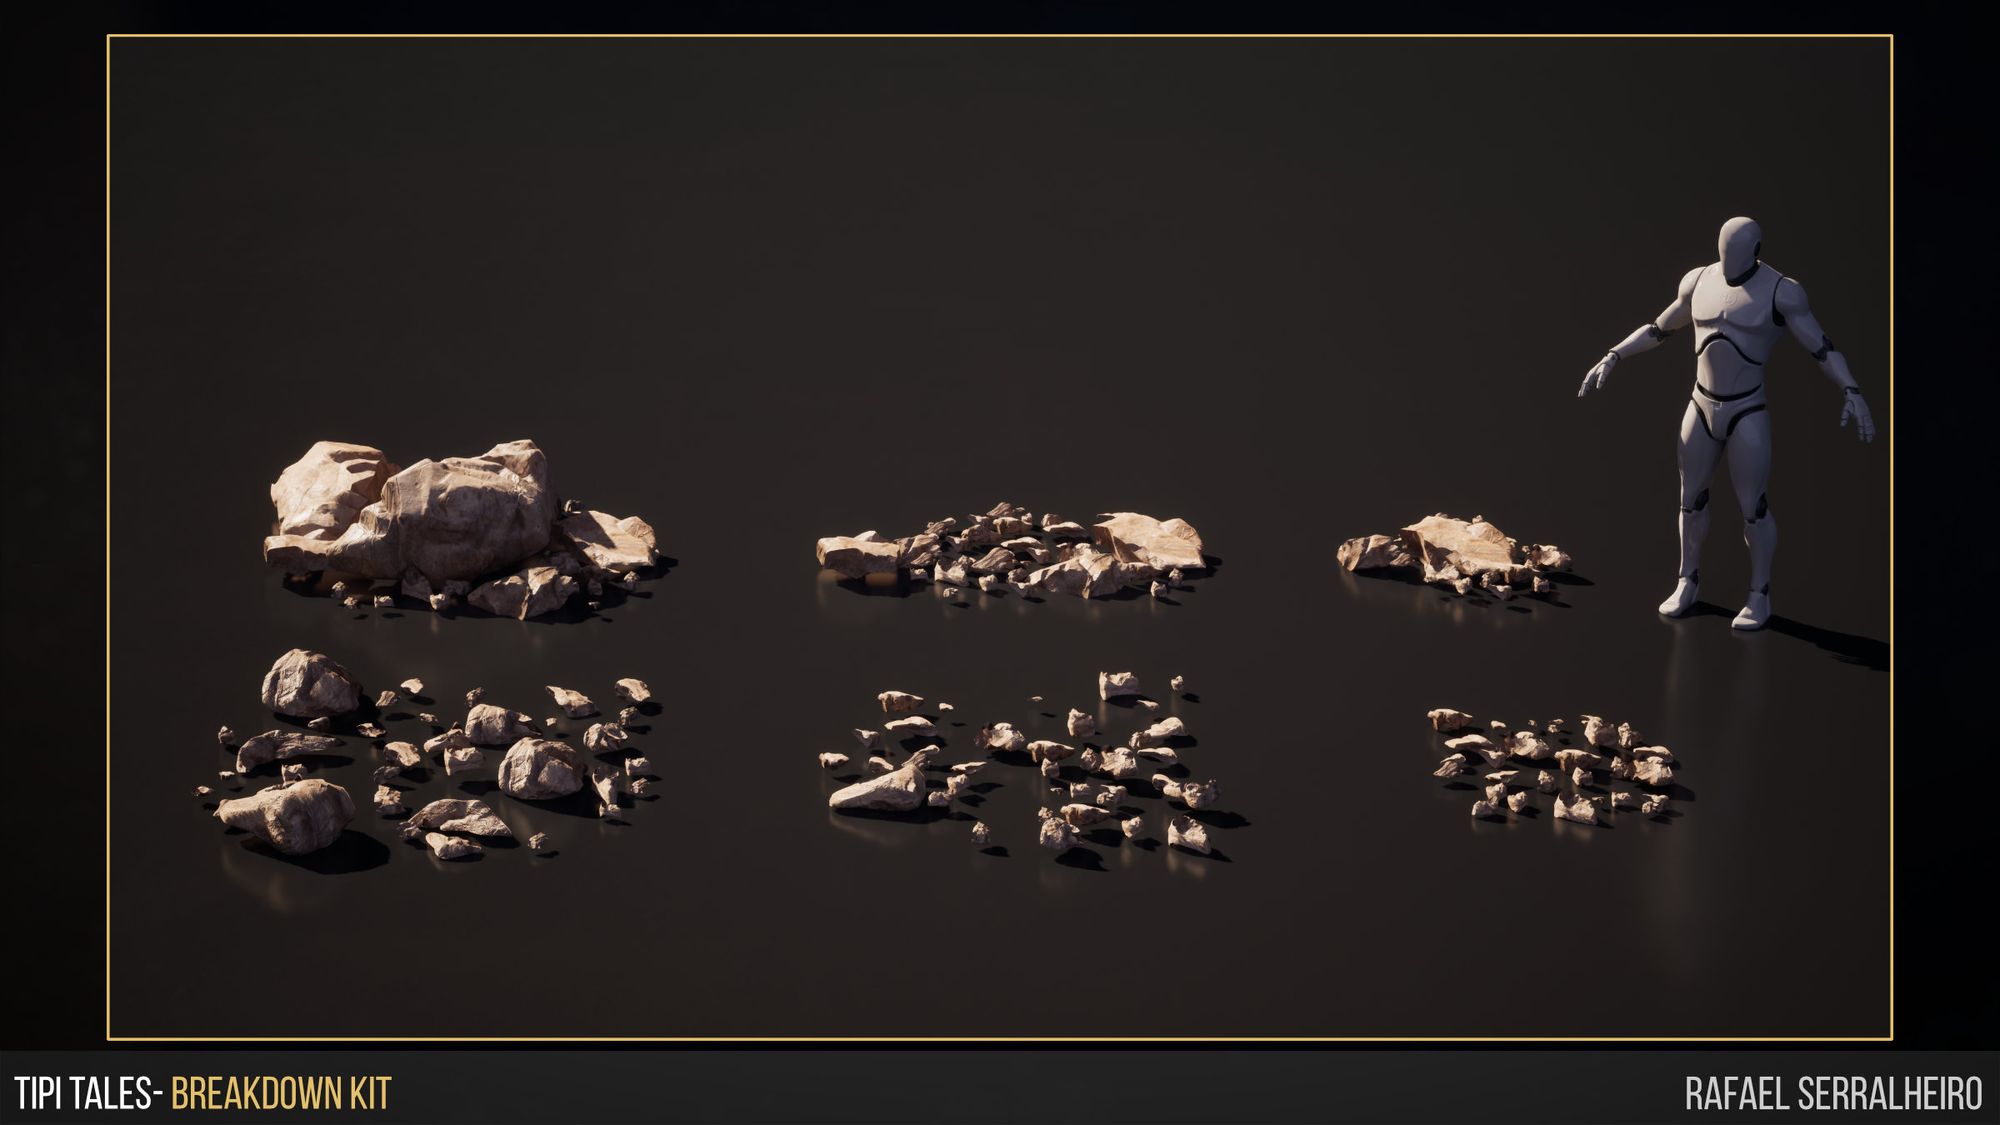
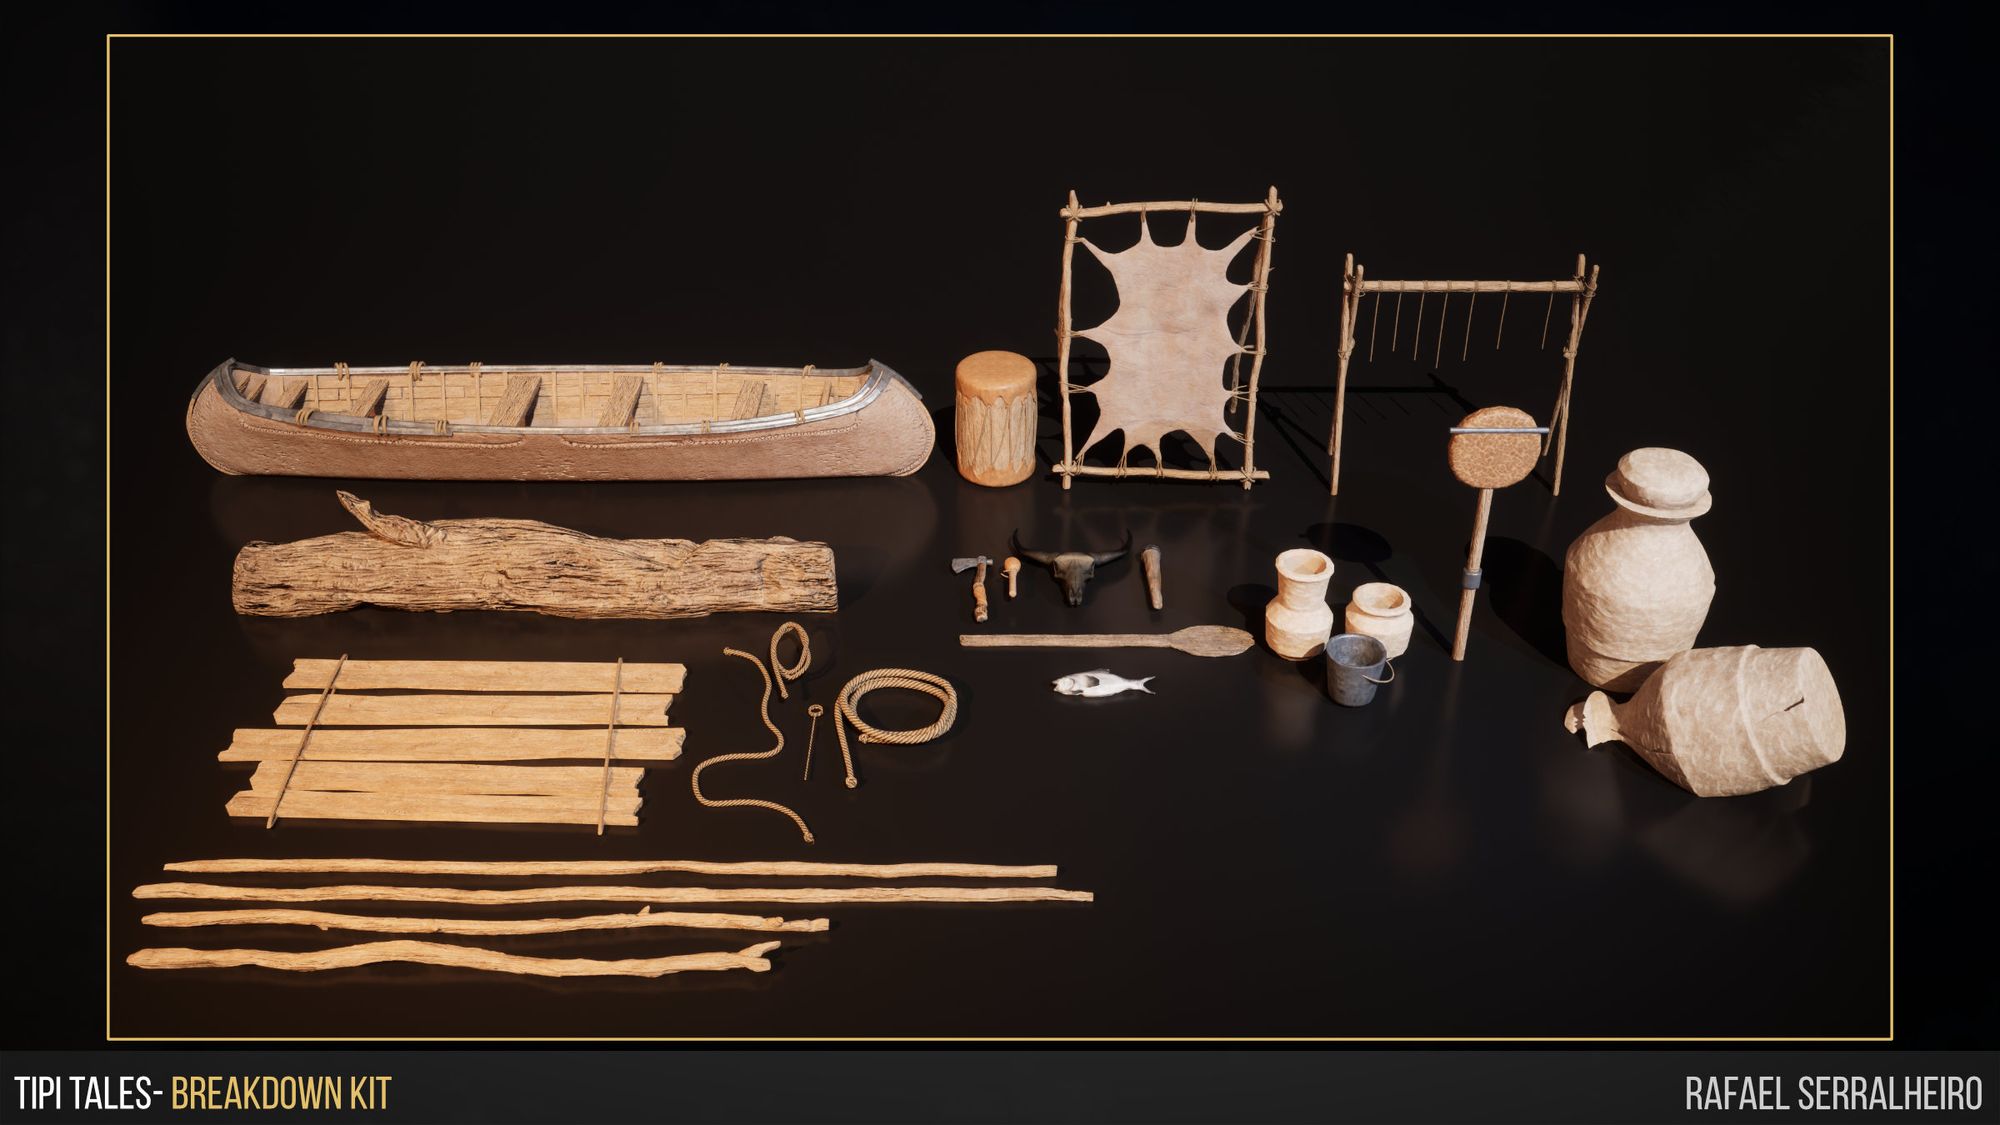
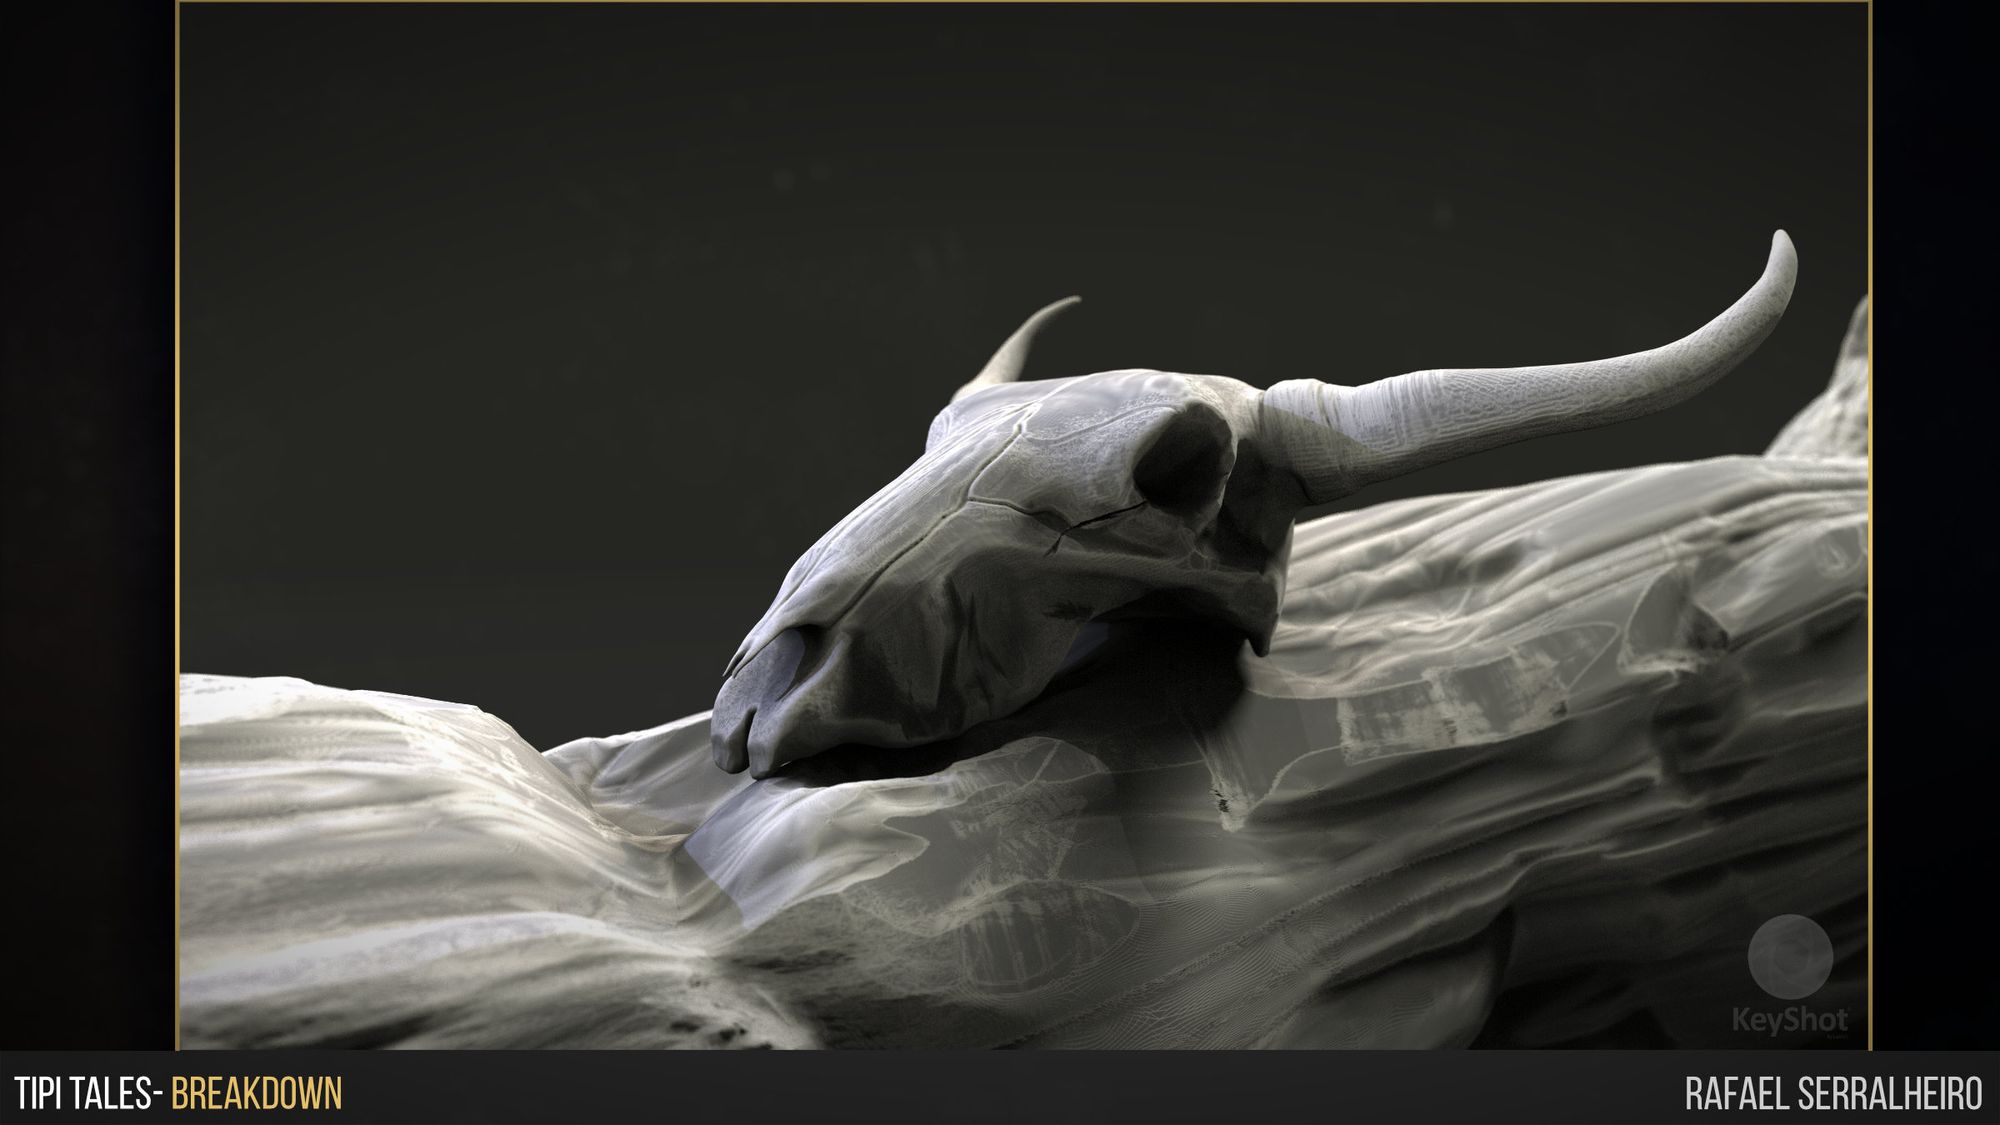
Once the Hero prop was at a good spot, the next step was to create a kit of meshes that would be reused in the environment. In my case, it was a lot of rock meshes and different, smaller props and vegetation. At this stage, you get to create many kinds of assets, and you need to get creative and imaginative about the ones you are making. Some concepts to keep in mind when creating these types of kits:
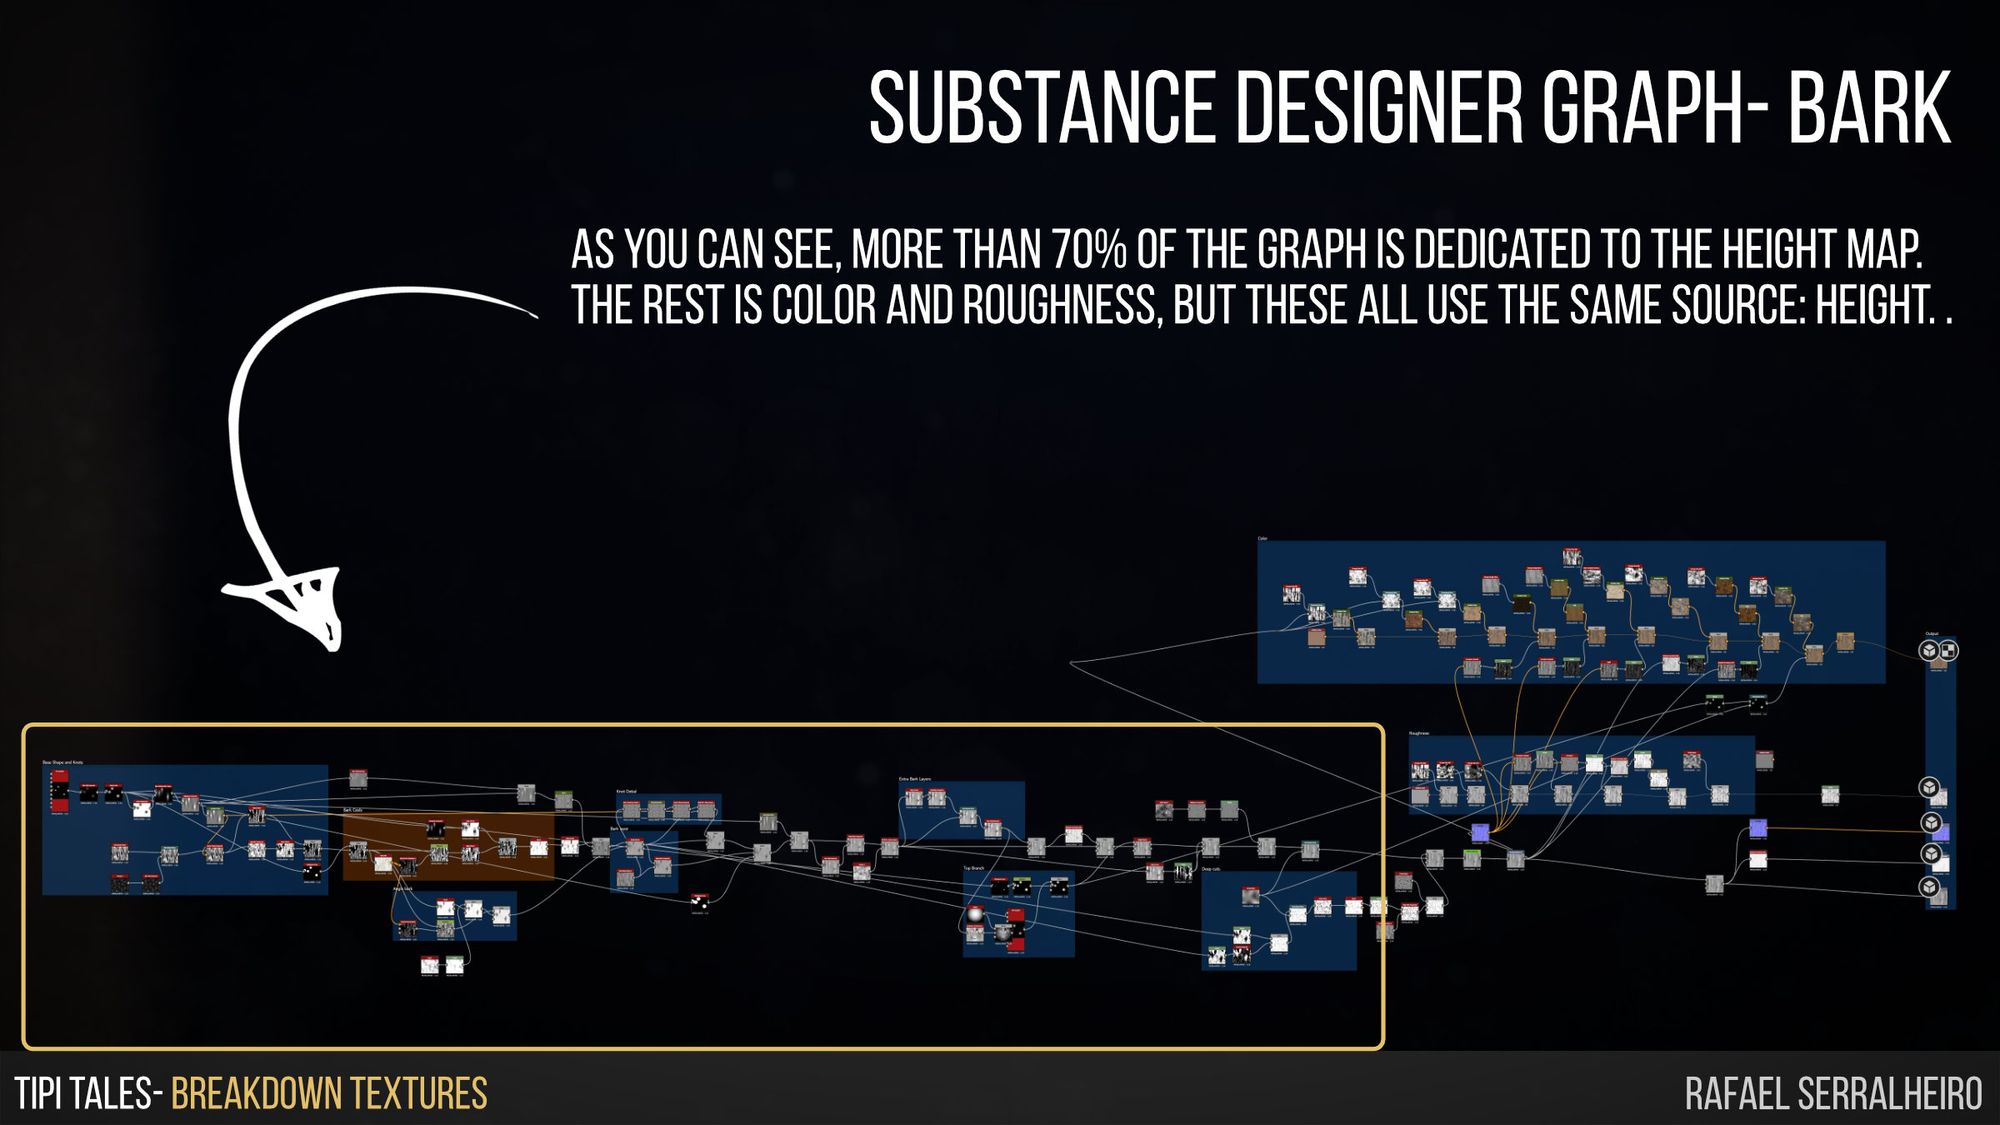
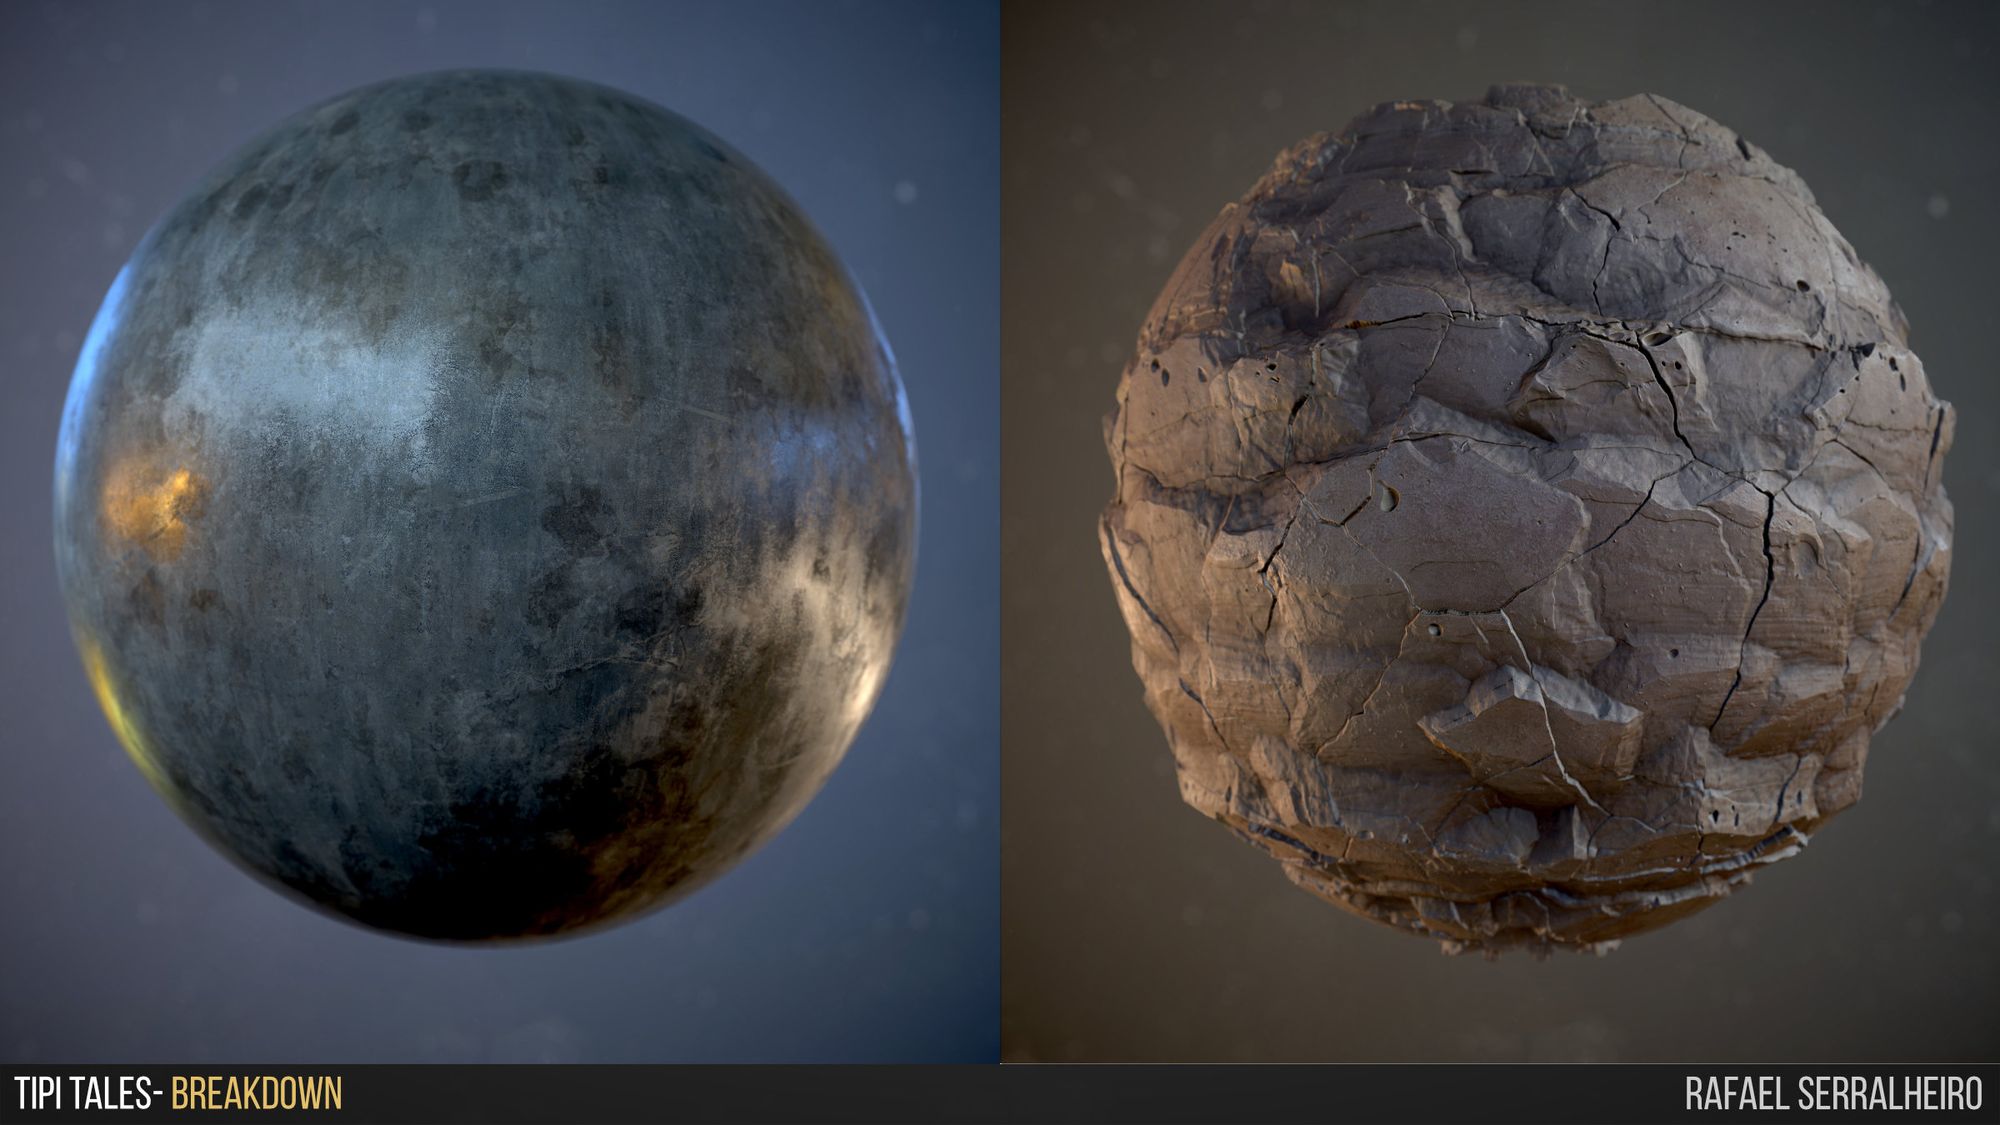
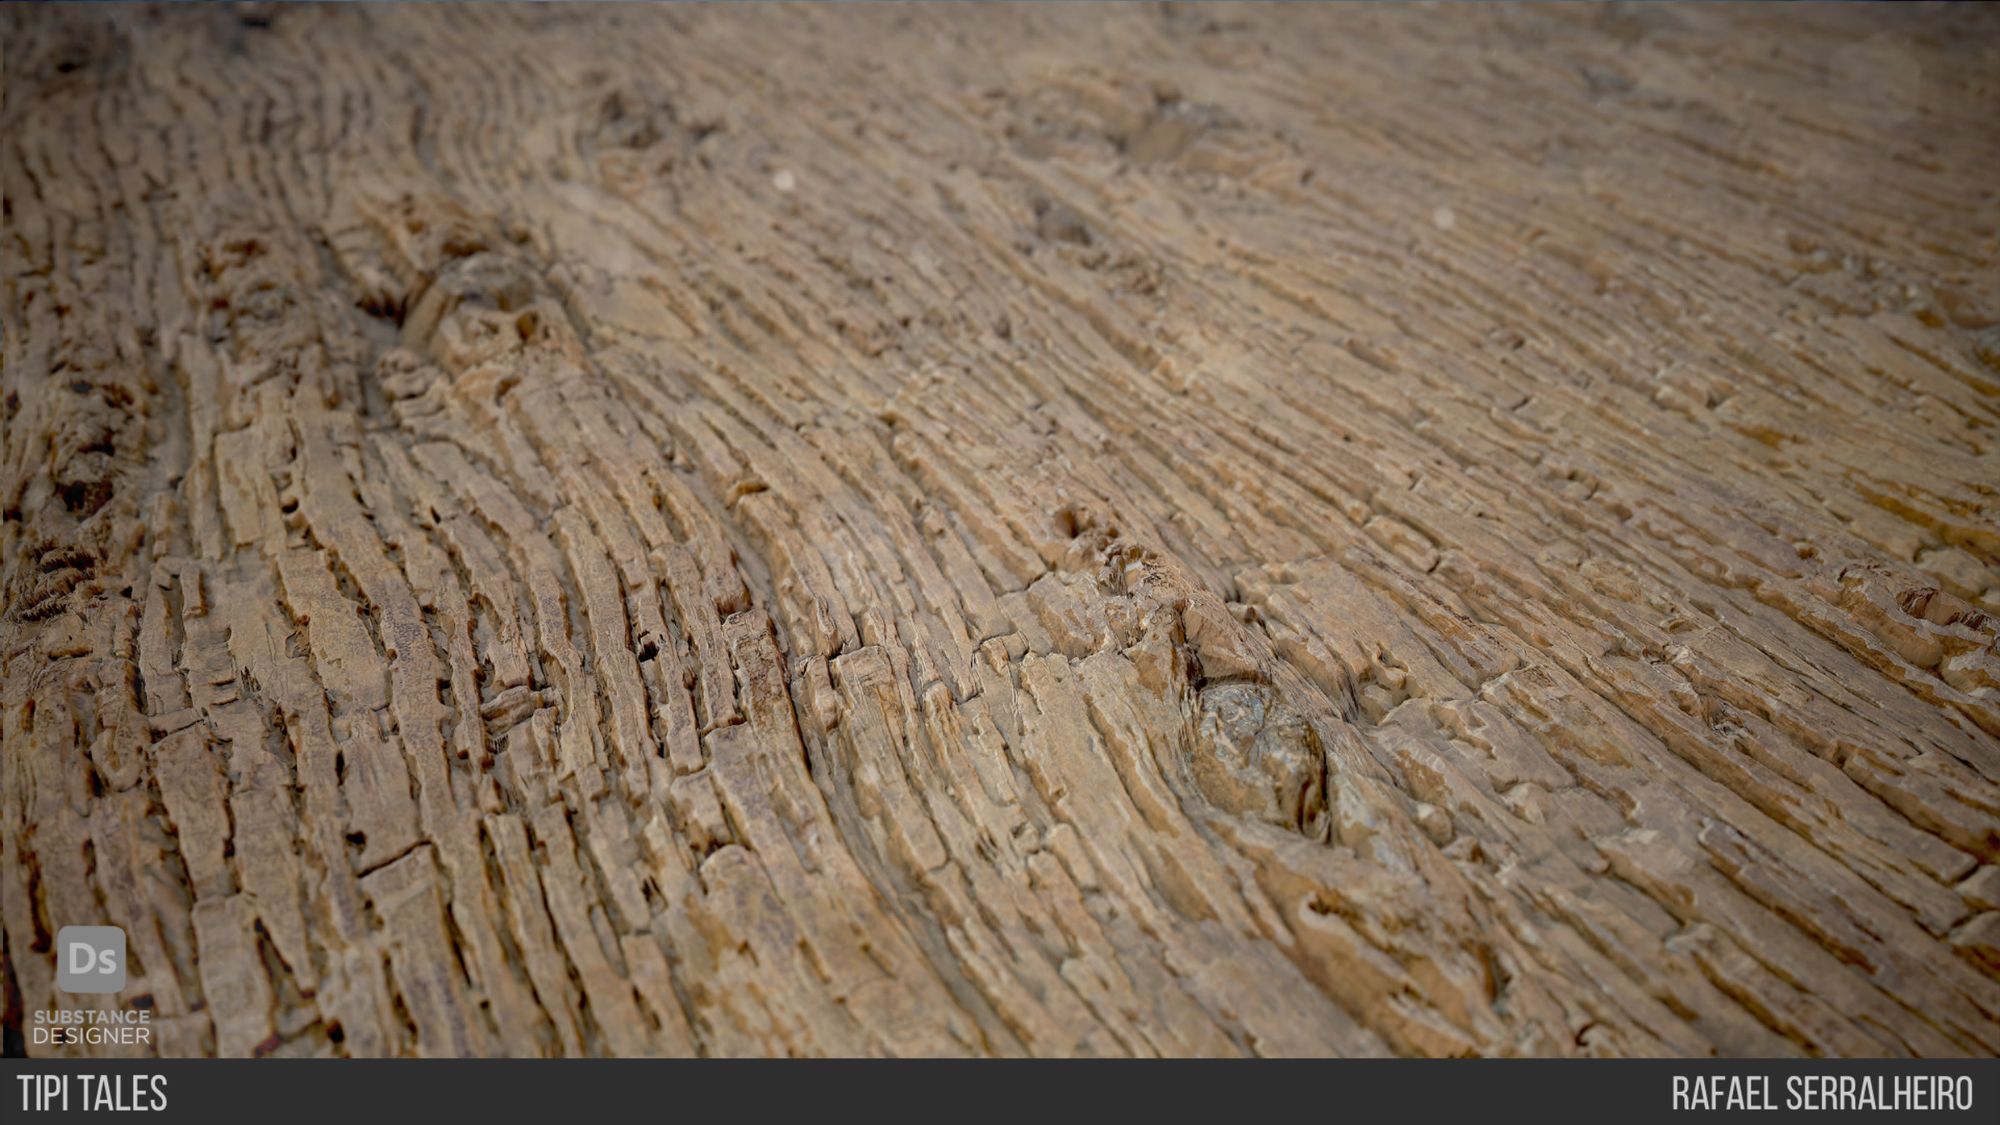
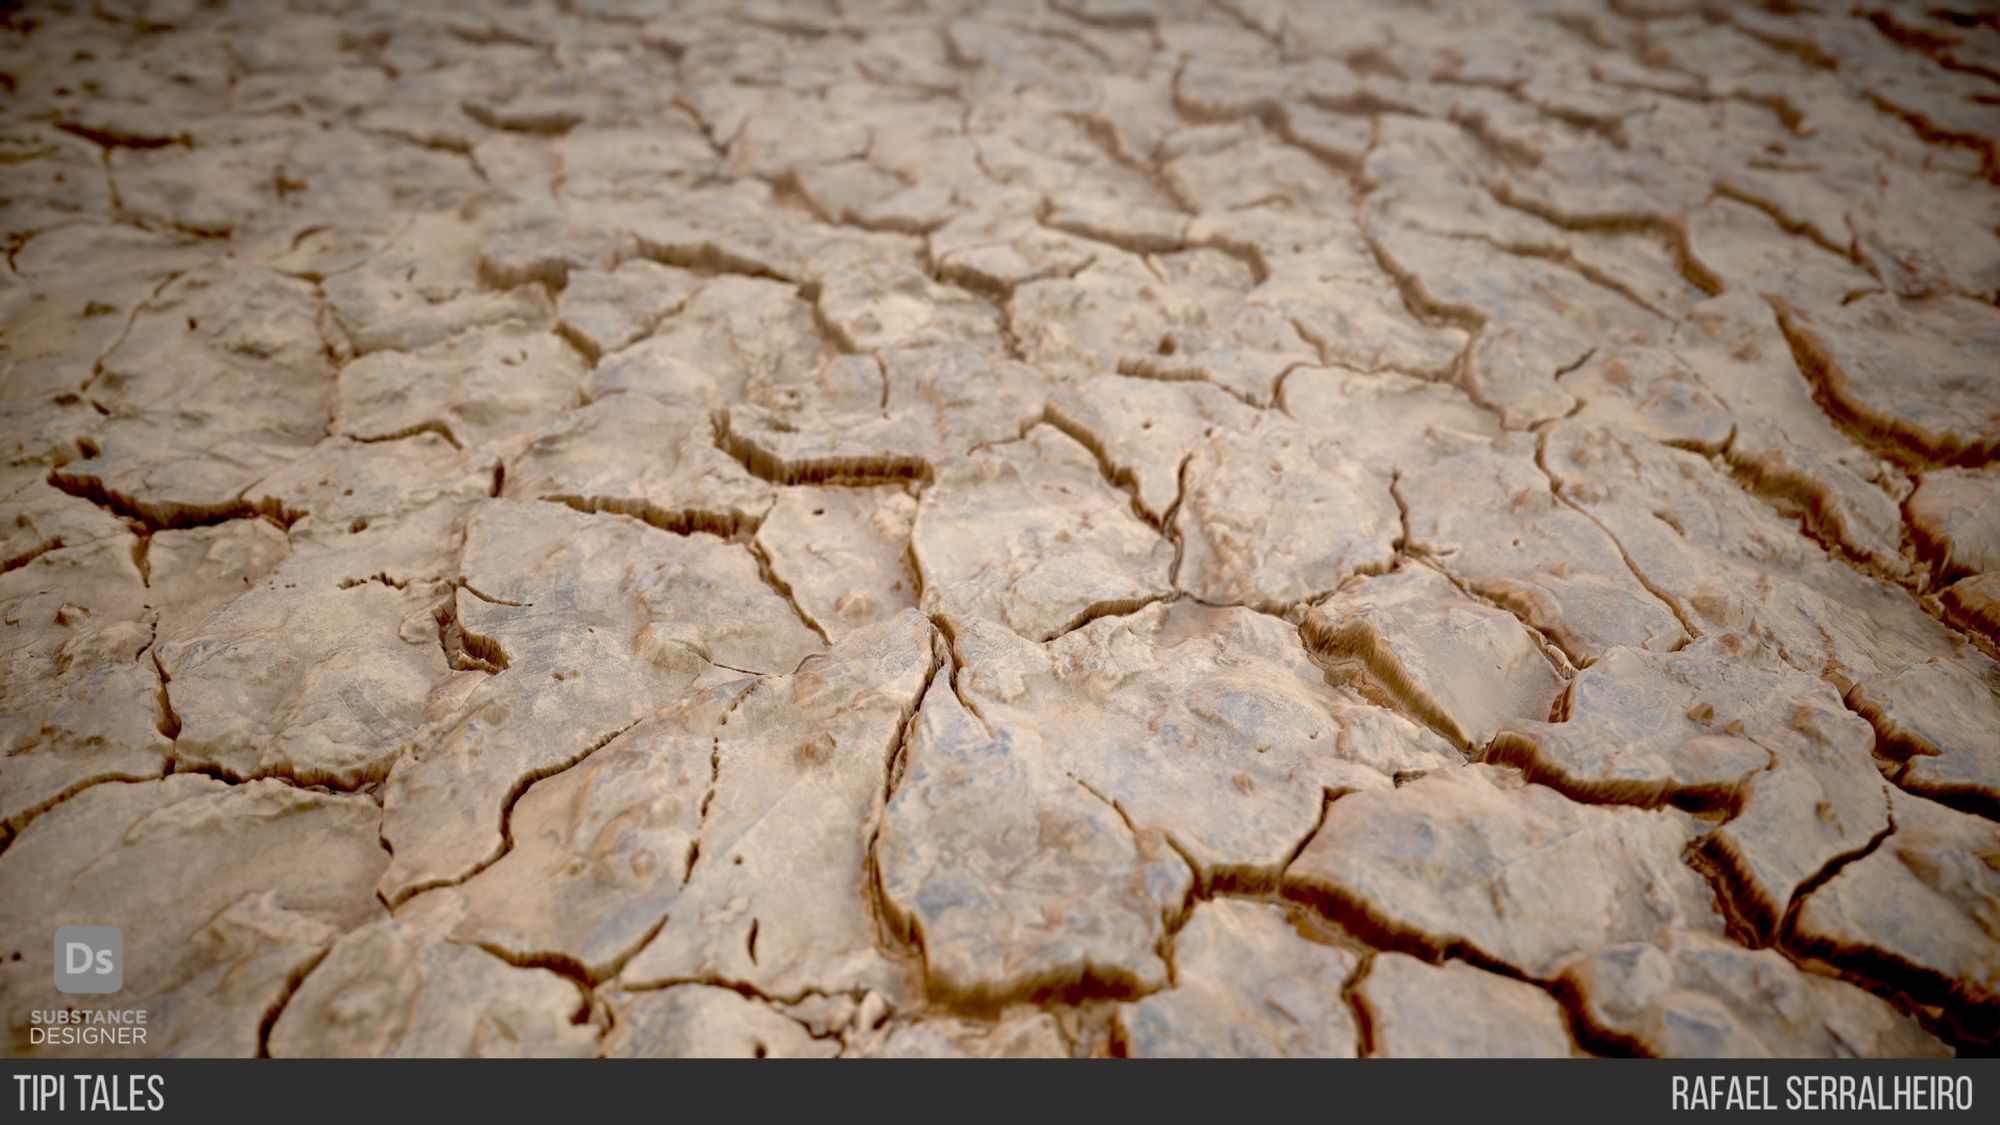
Then came texturing. This part of the process was hard for me since it was one of the first times I used Substance 3D Designer, but this proved to be a great challenge I needed to face. This project allowed me to figure out how to create an environment with only tiling textures. I wanted to use only Designer for this environment and Substance 3D Painter for masks. The main takeaway with texturing in Substance 3D Designer was:
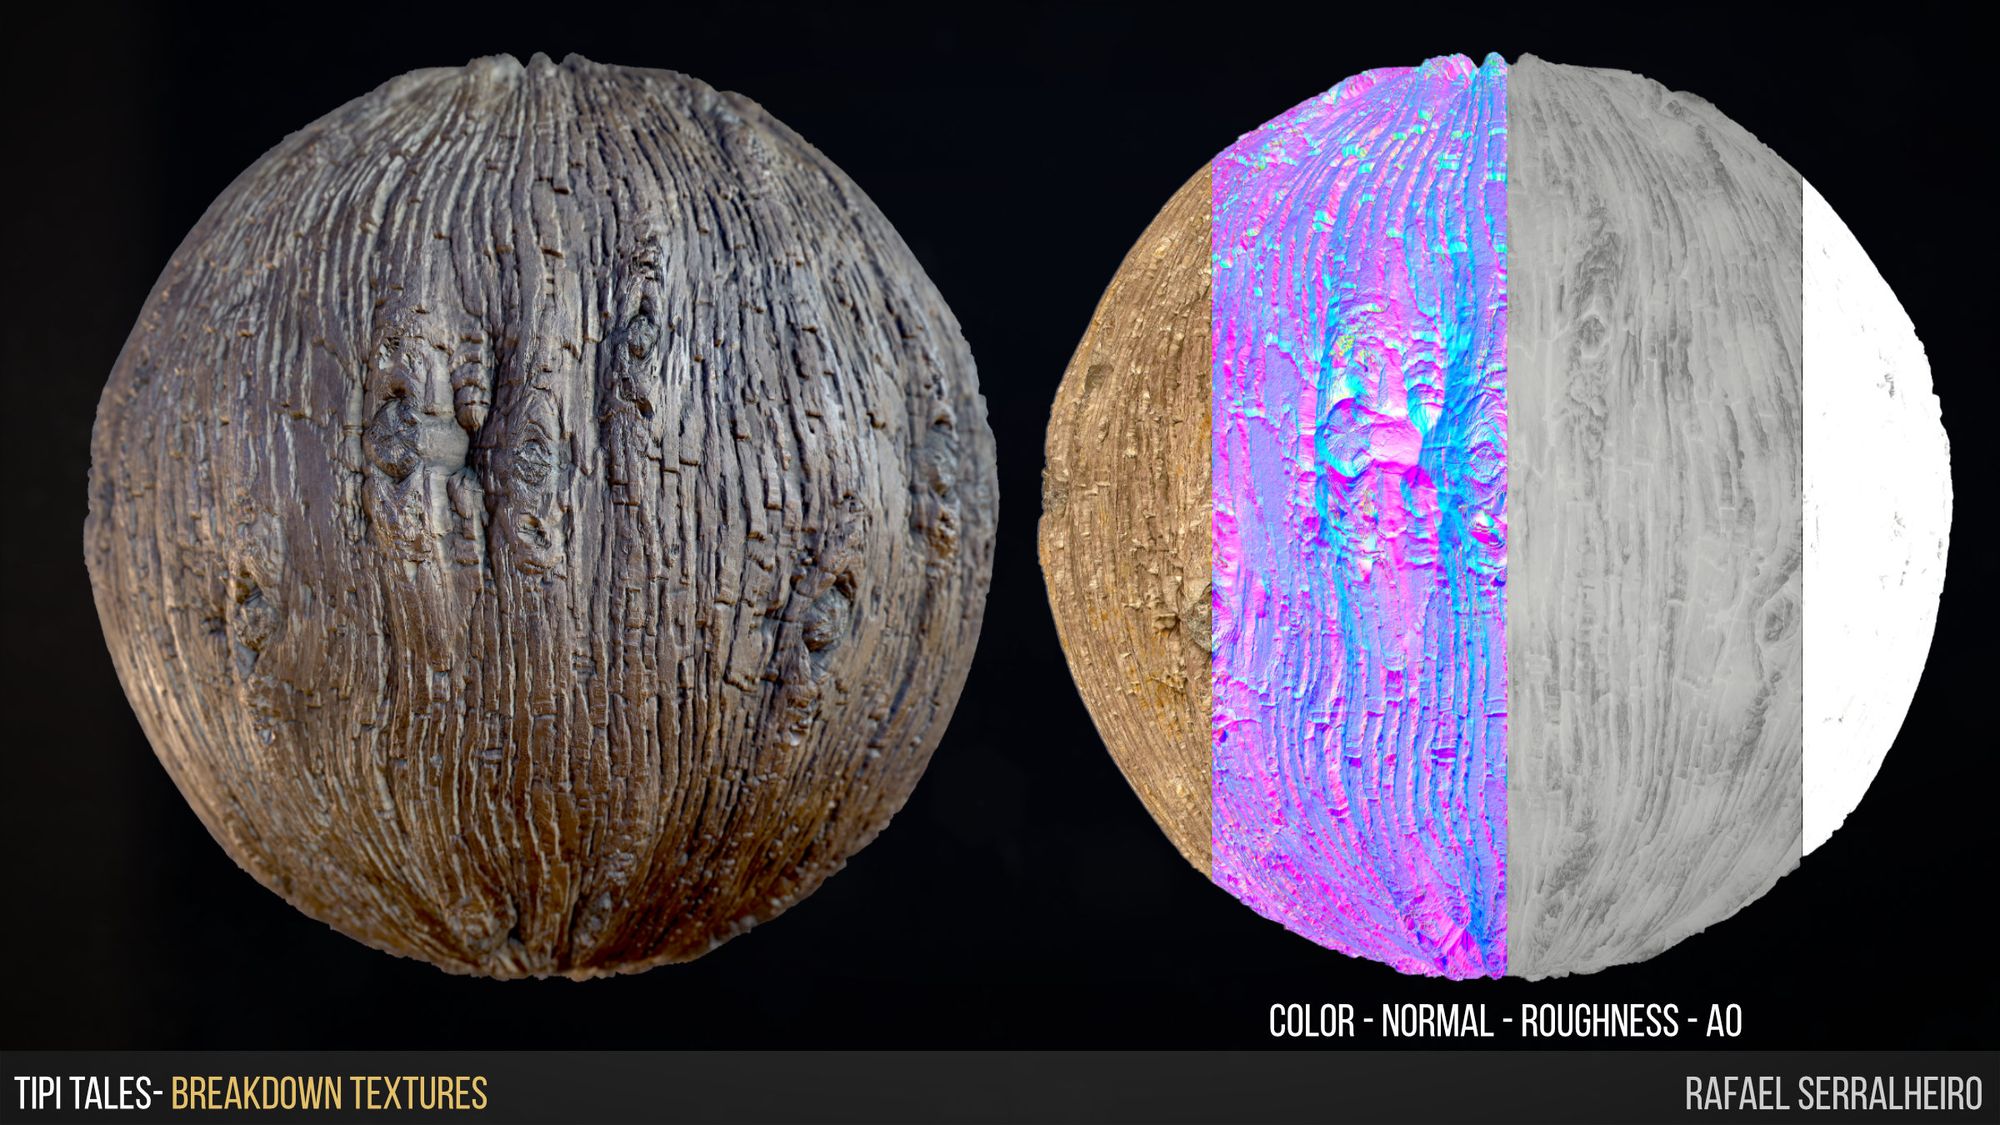
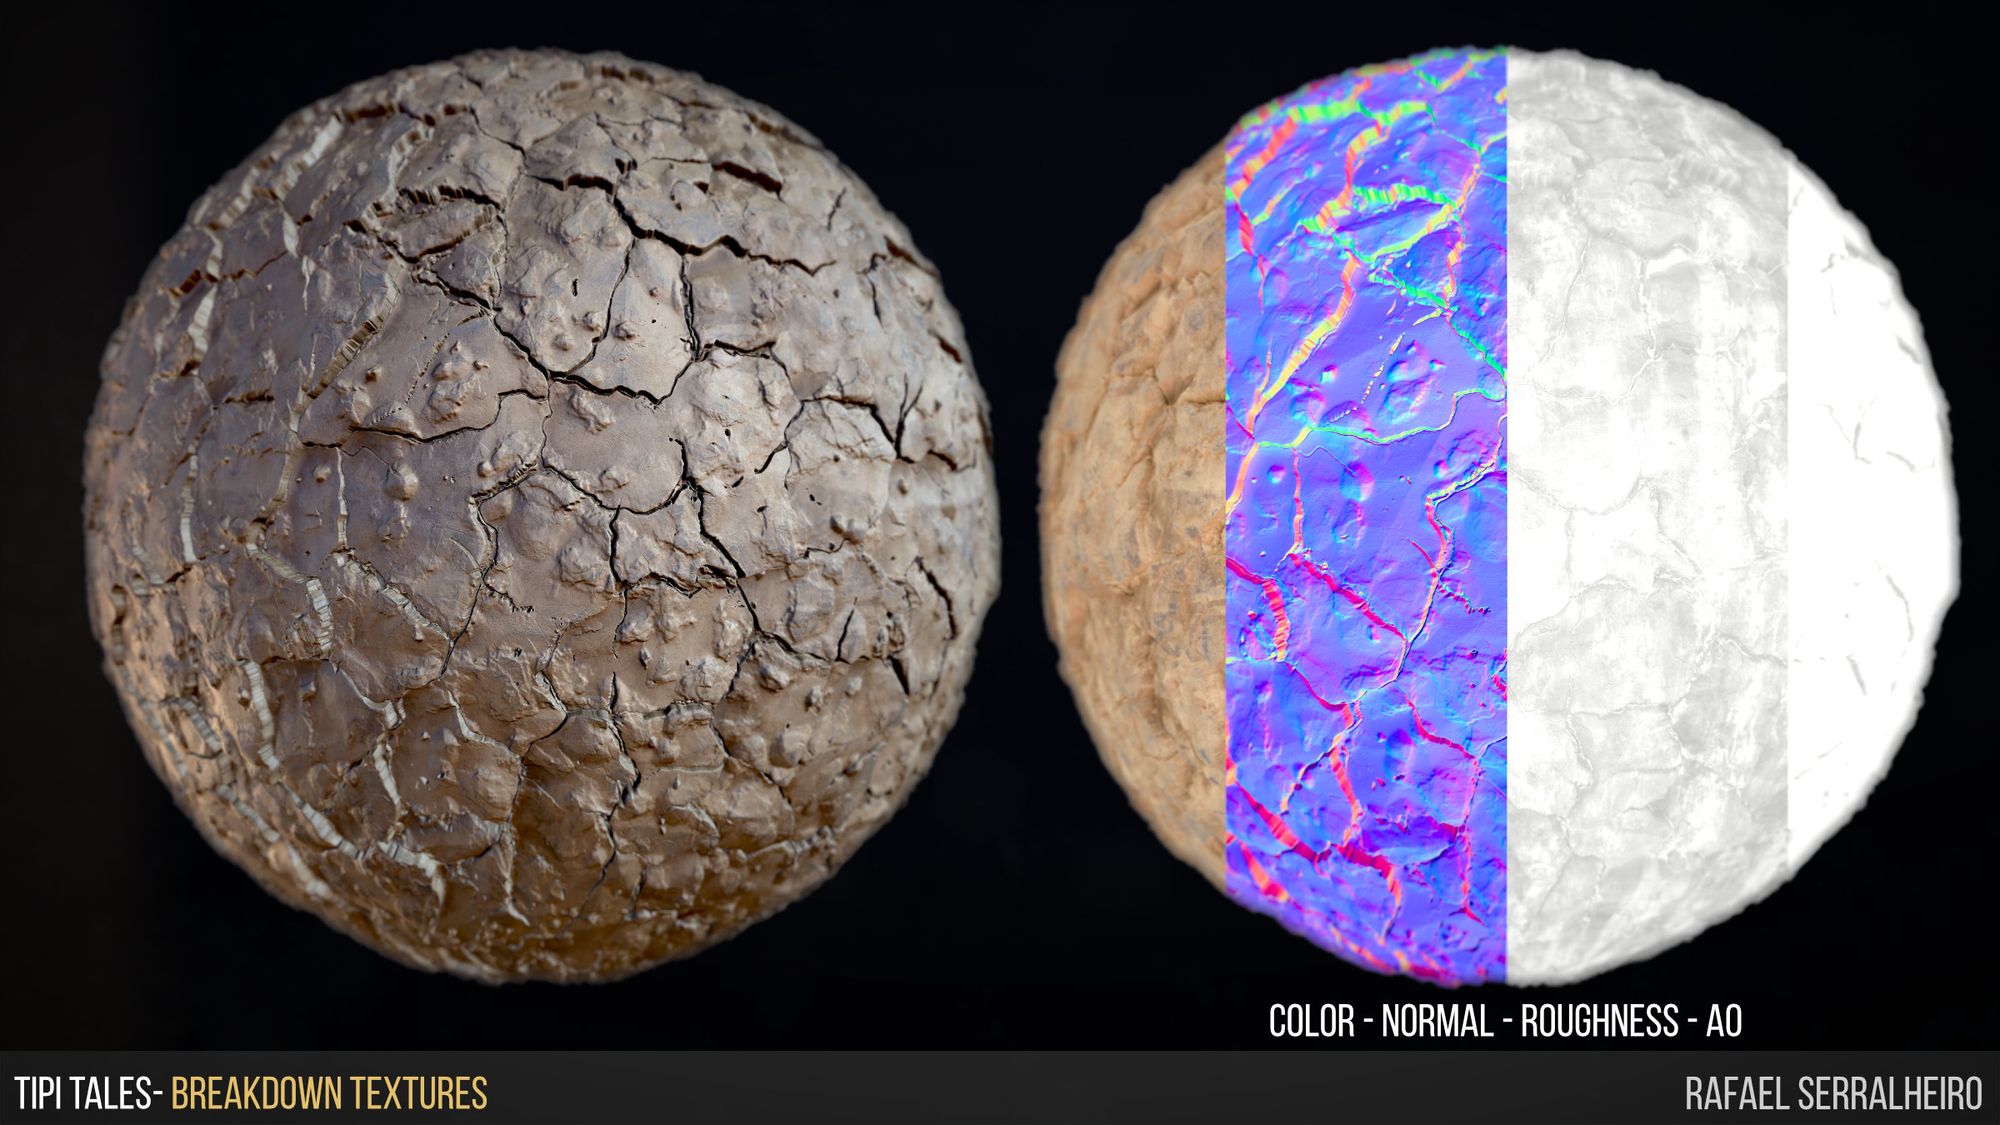
I still have much to improve and learn inside Designer since it is such a powerful tool. These were some examples of materials I created for this piece.
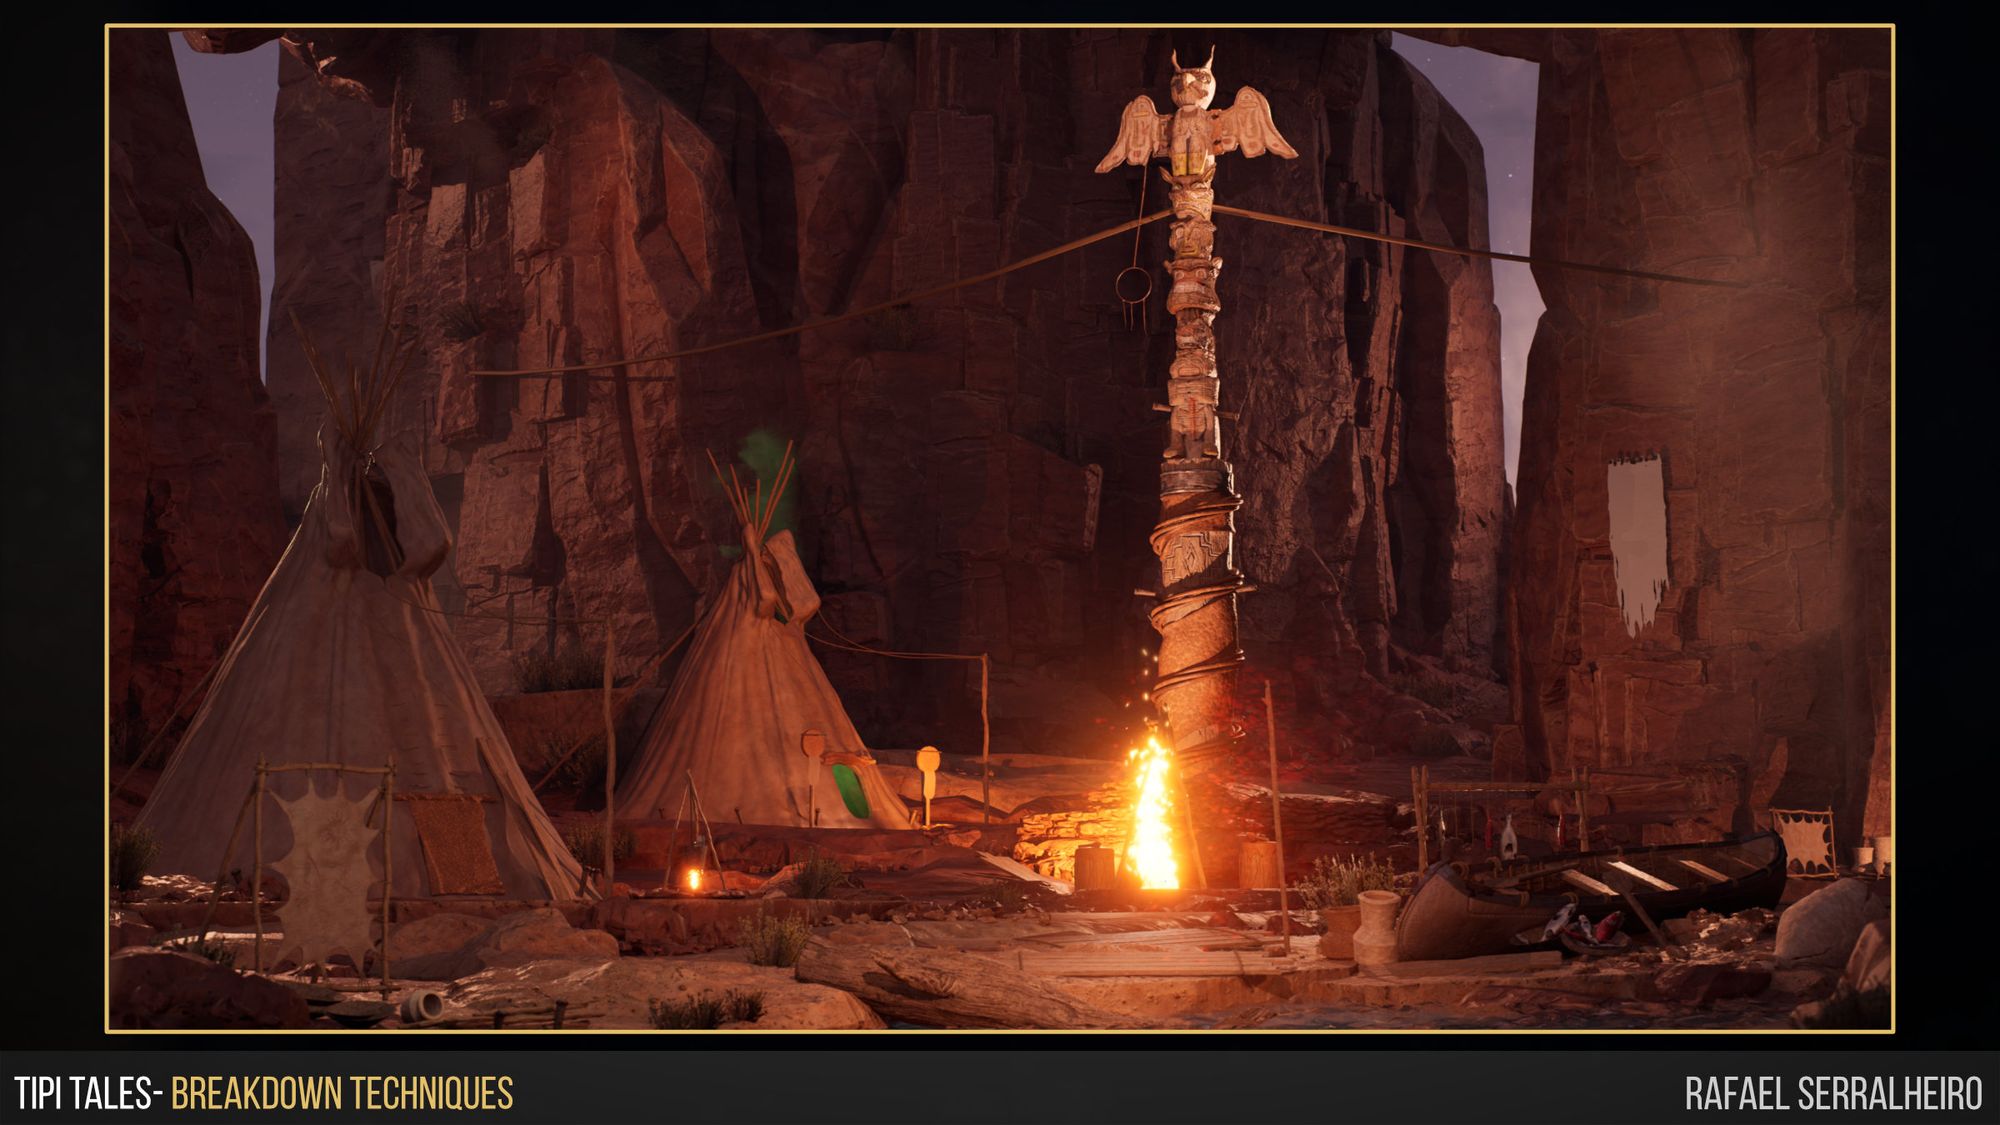
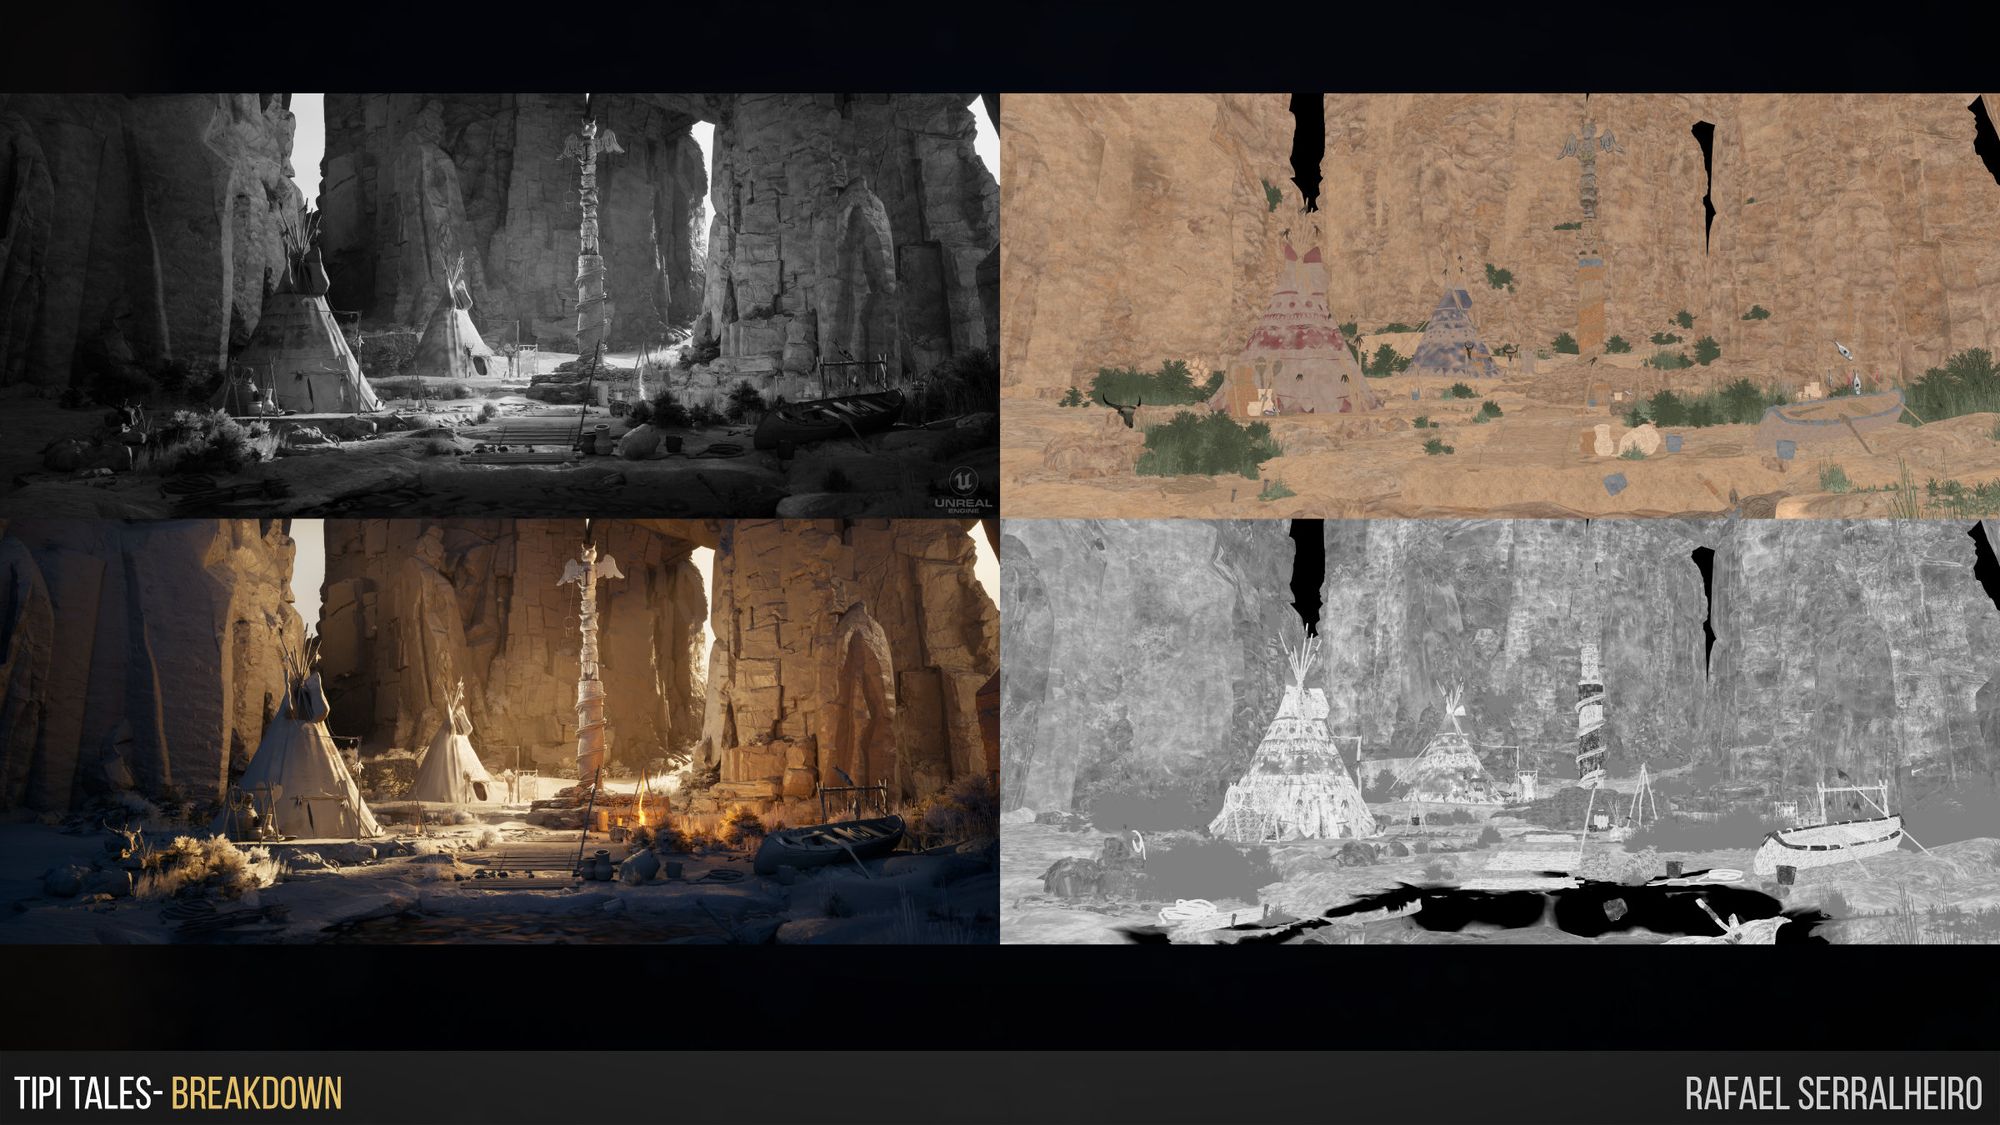
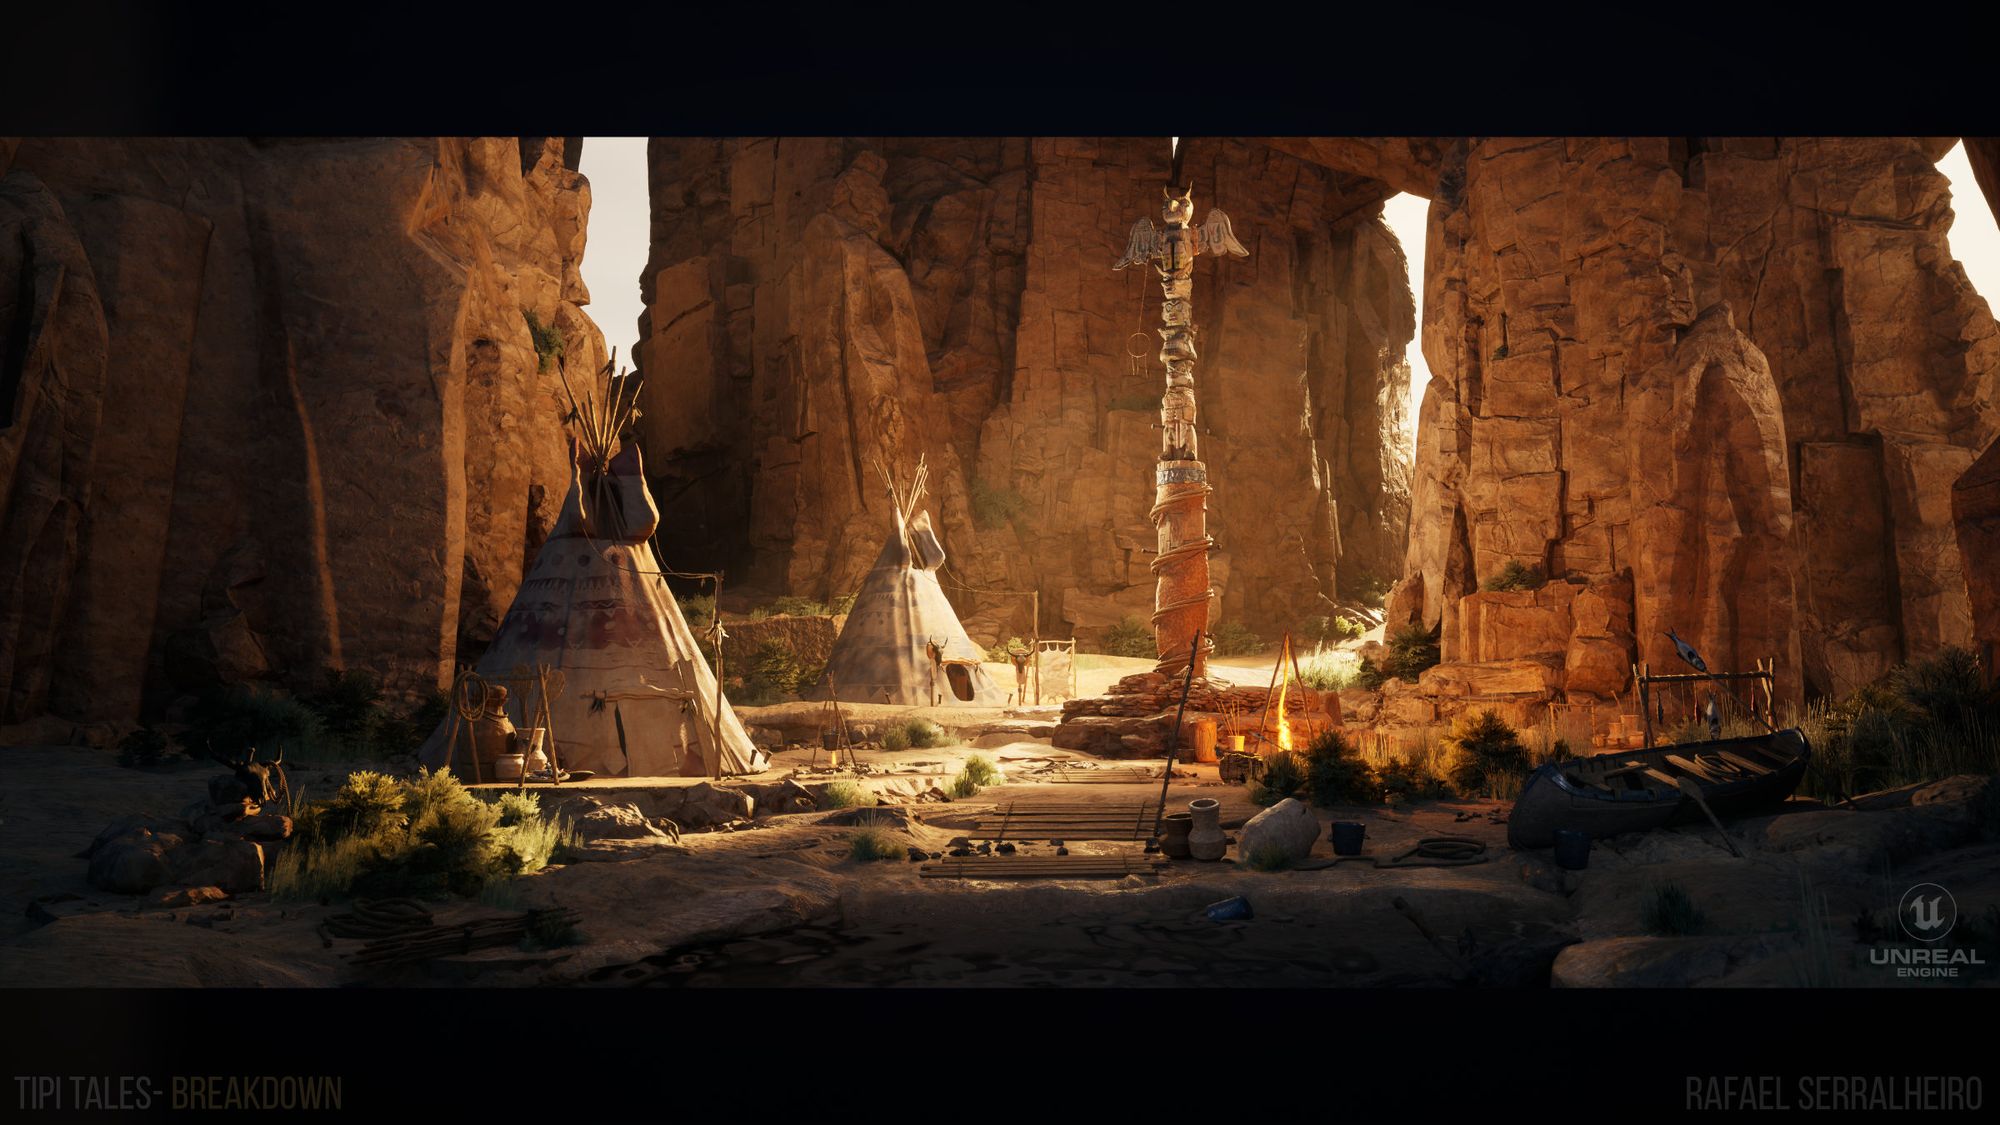
Last but not least was lighting the environment. After getting to a good spot, with polished objects and textures, it was time to make the scene pop with the help of lighting. This part of the process is a make-or-break moment for the work. Good lighting can make a bad model look good, whereas bad lighting can make an amazing model look terrible.
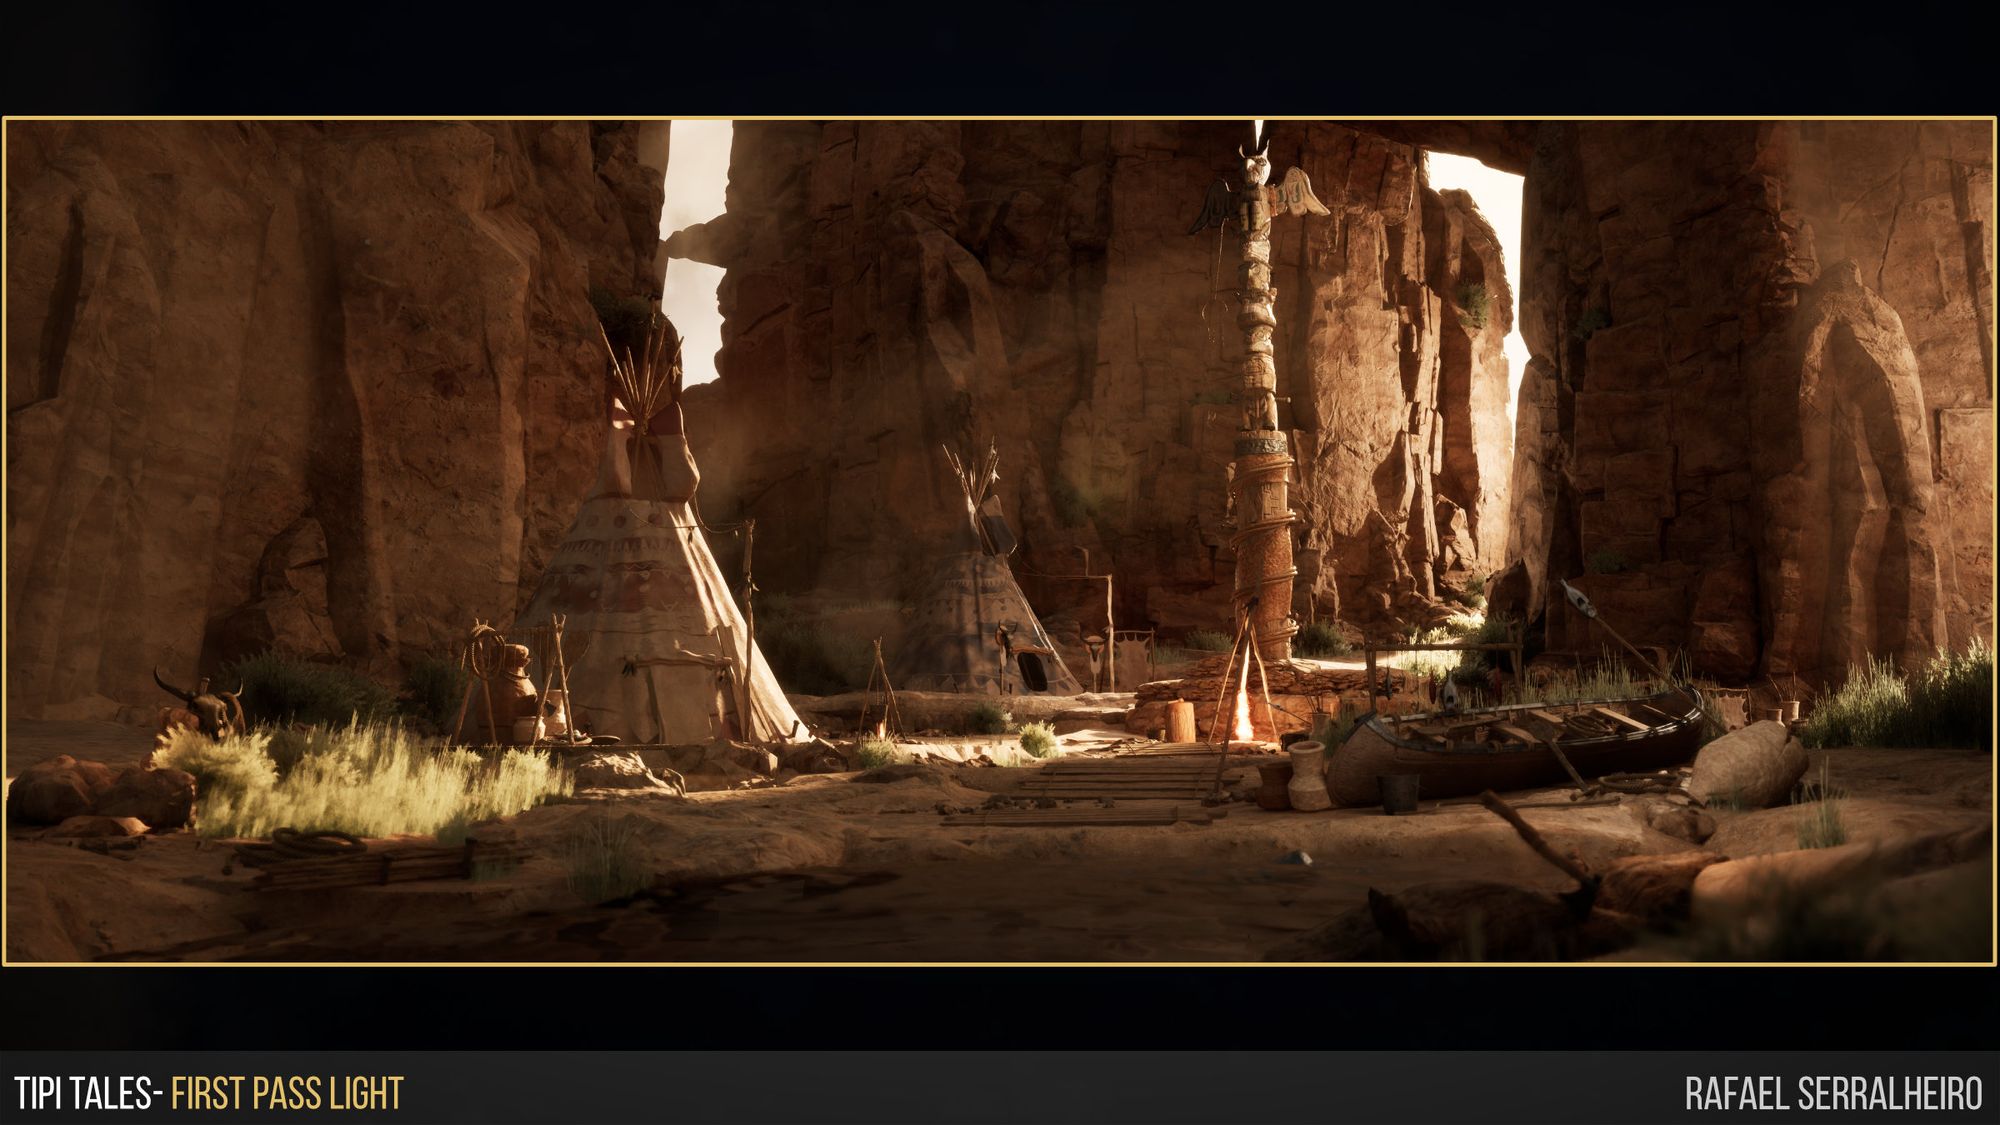
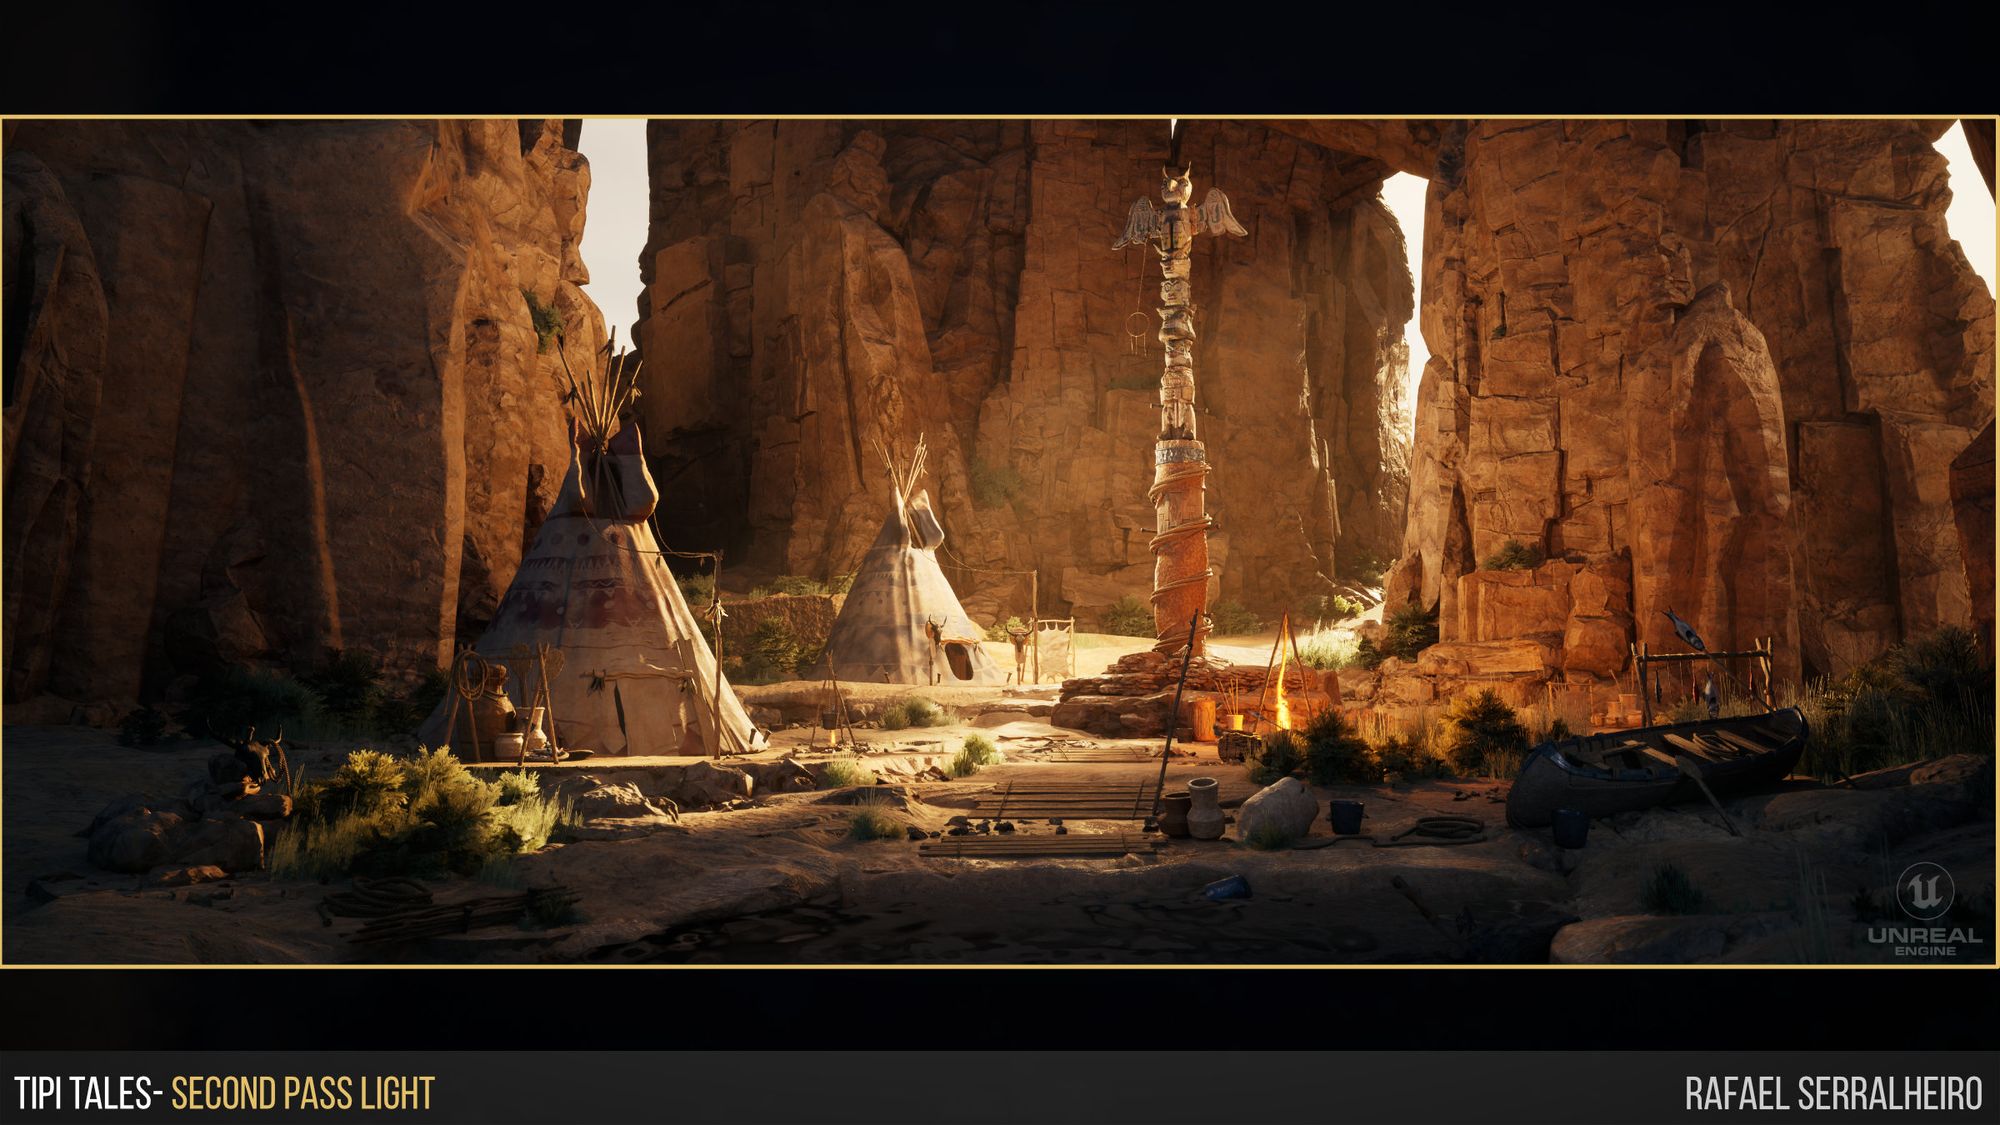
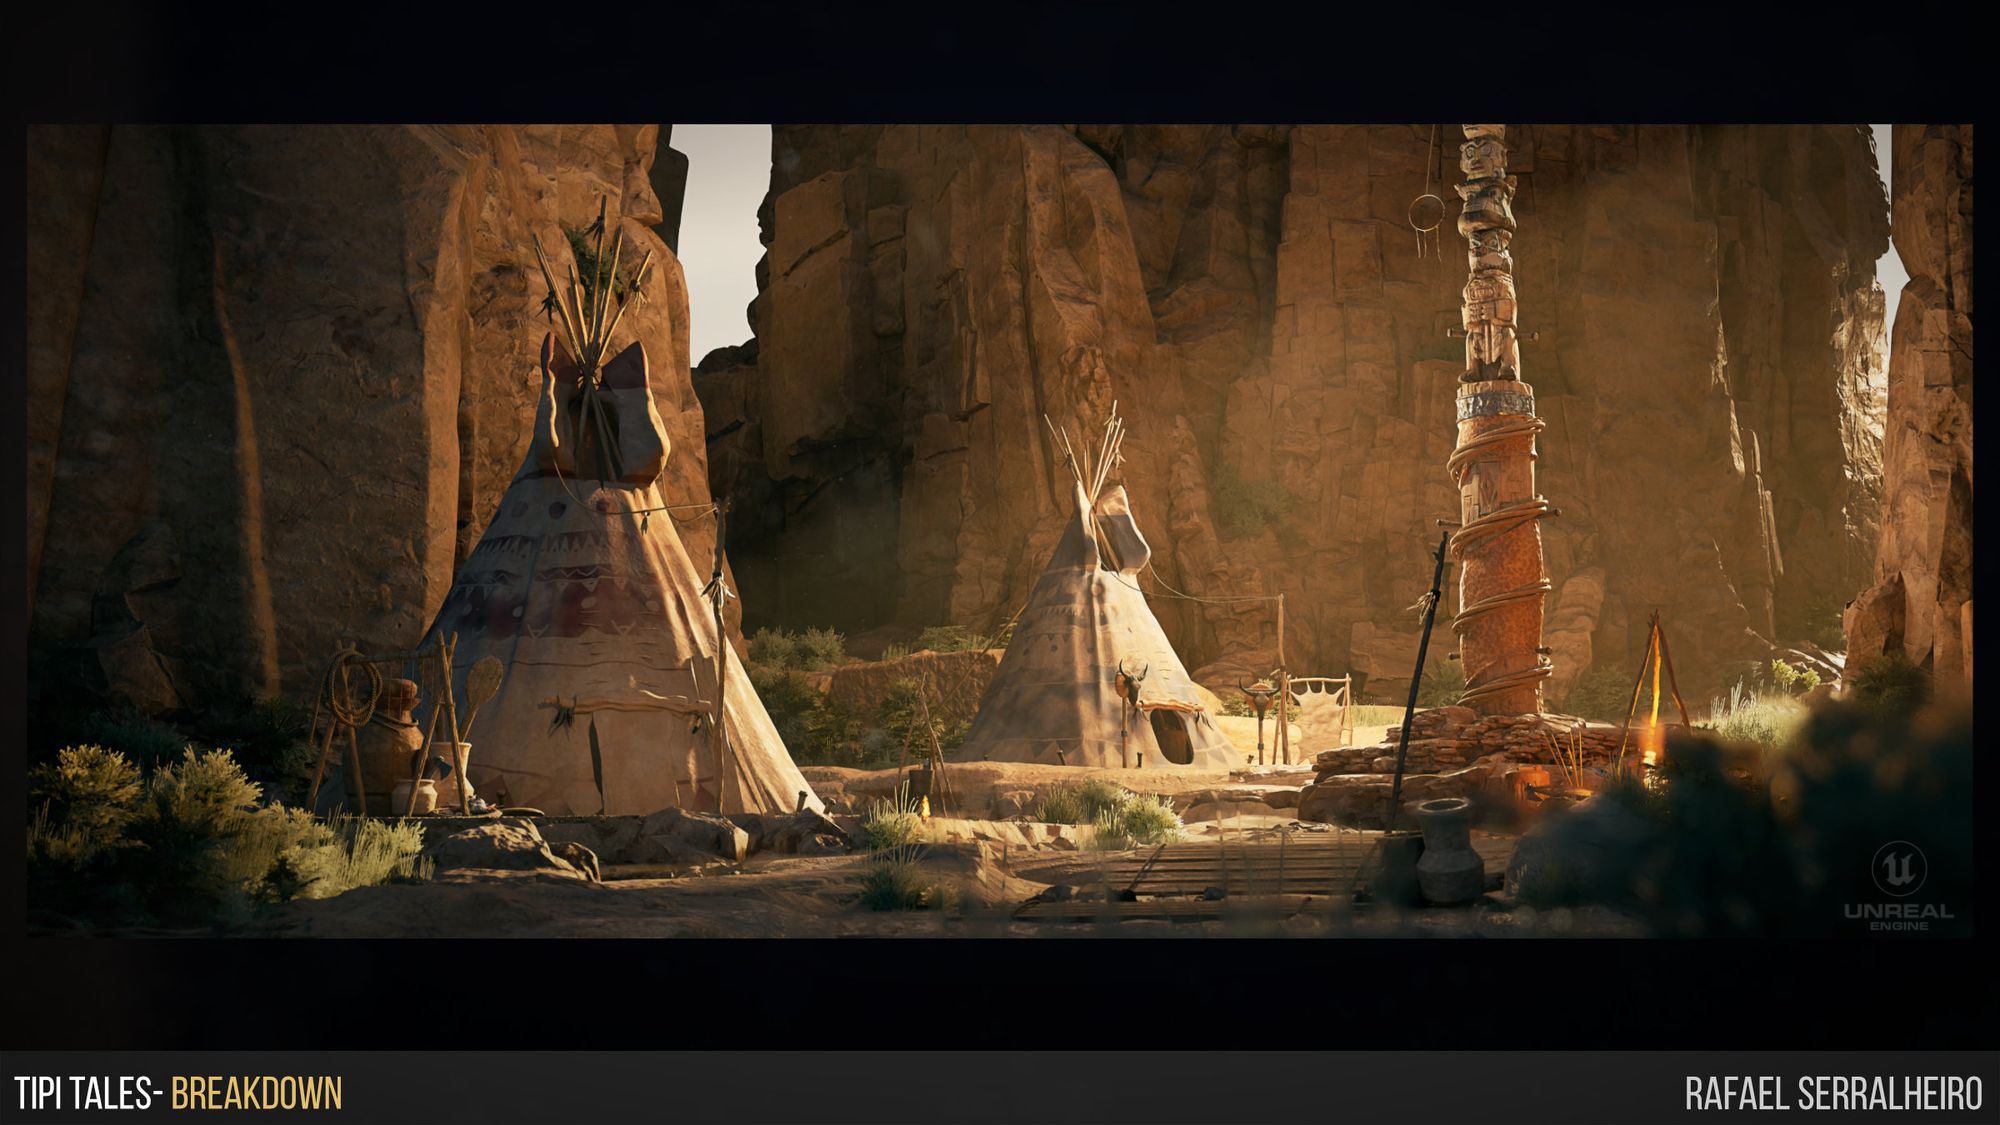
As you can see it is a big difference, but the scene is still the same. The way the light focuses your eyes is a big difference. With that said, this was the first scene I created that needed exterior lighting. The main challenge with exterior light is to make it feel natural and real, but at the same time art direct where the light goes.
I created this light setup with an overall idea of where my two light sources came from. The first is the sun, and the second is the sky. This is important since light will primarily come from those primary sources. After that it was a matter to see where the light would touch and bounce off. Where the light would bounce, I would add a point light to amplify the “Sun light” in that area. After repeating this process with both Sun and Sky, I added a couple of Rim lights. These were primarily focused on getting the silhouette from an object or making the materials pop from the object. Last but also very important were light blockers. This technique is very used in movie sets, where light artists use Flags to cover and direct light to get to a certain area.
By using a giant black cube with display off but shadows on, I could use these as light blockers but still have them invisible to the camera. Then it was a matter of getting different shoots from the scene and giving them a post-processing treatment to get a color correction.
However, there is much more to it than just this simplified version. In which I will cover in the next chapter.
All right, so creating kits and textures and placing them in Unreal to get an environment rolling is probably 80 % of the work. However, a couple of techniques can push you the extra mile and give the environment a cohesive look, as if it was truly built organically by time and nature.
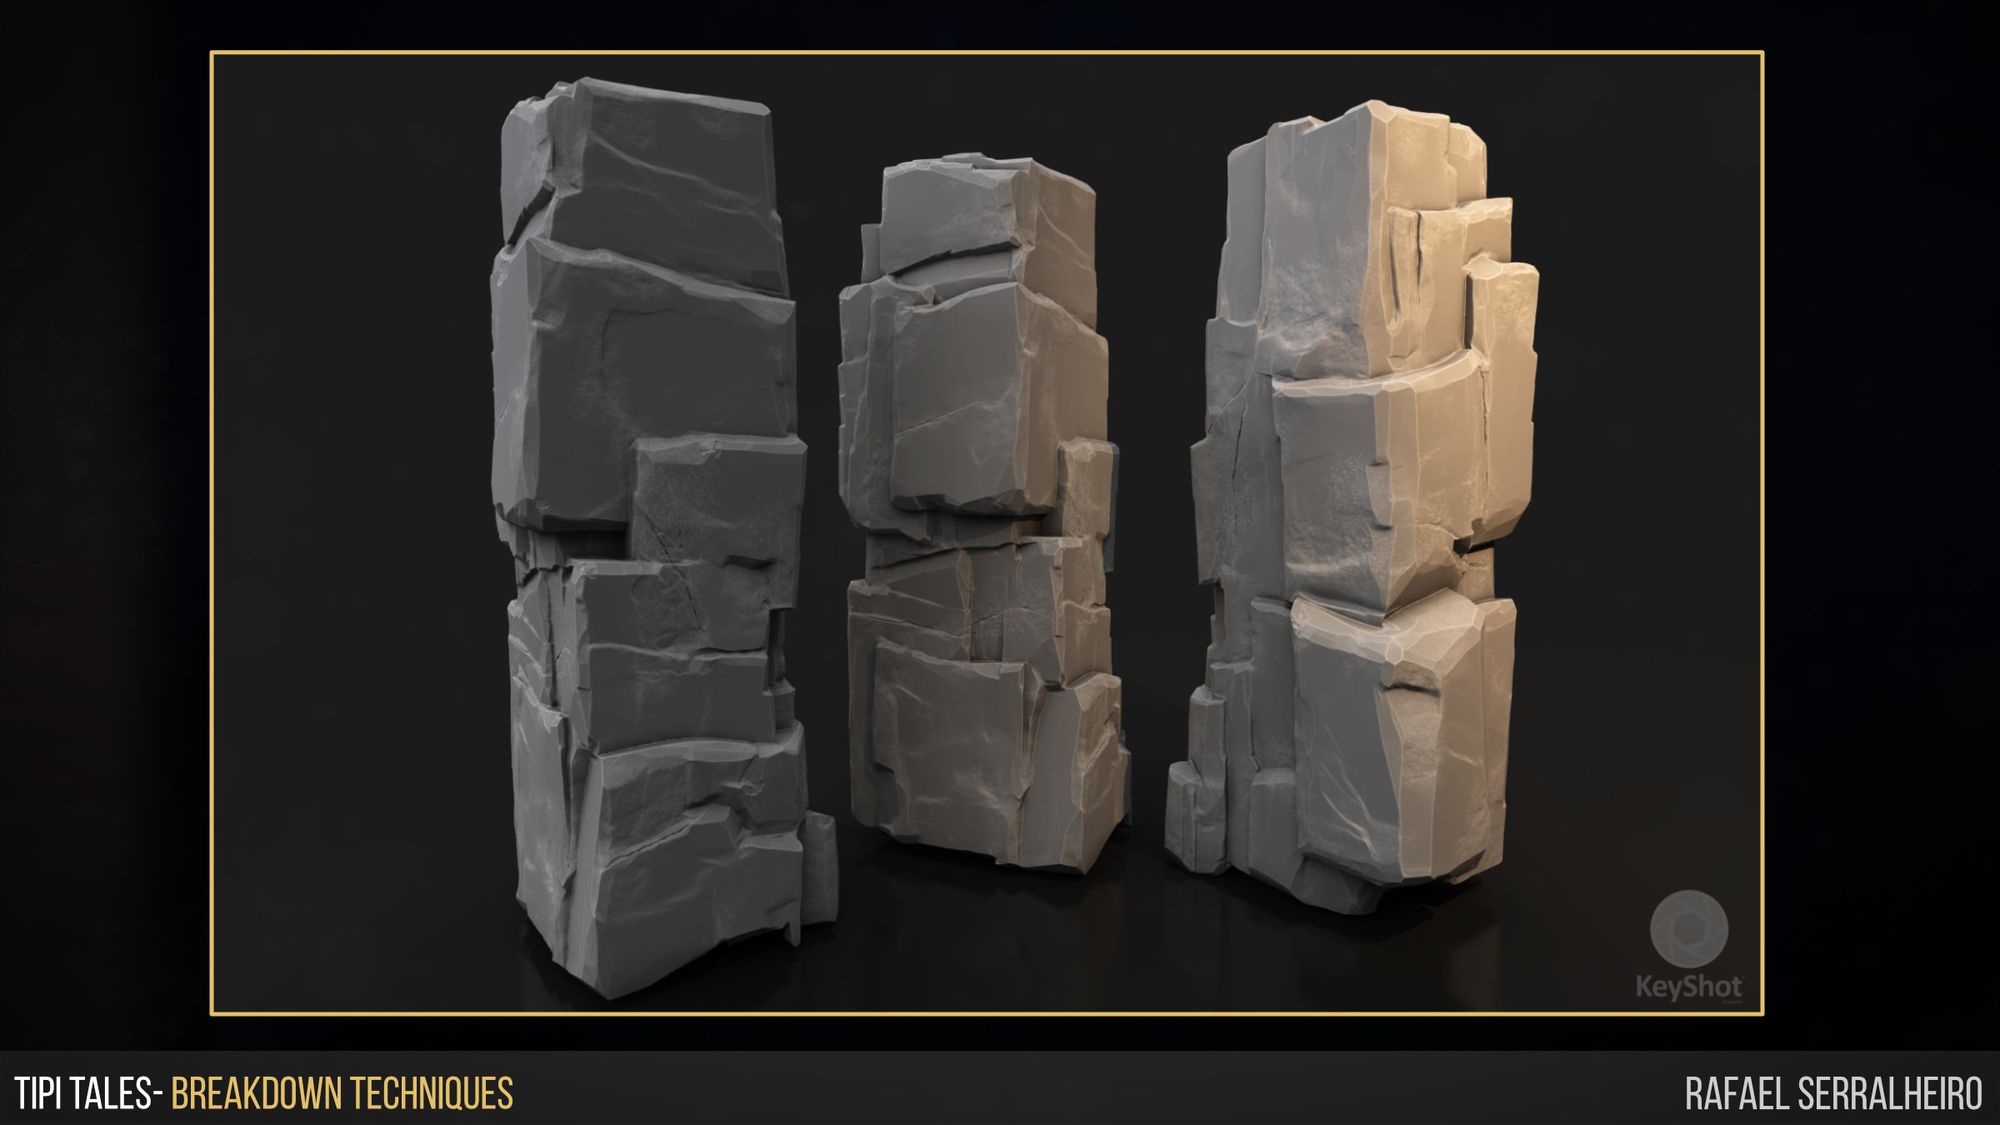
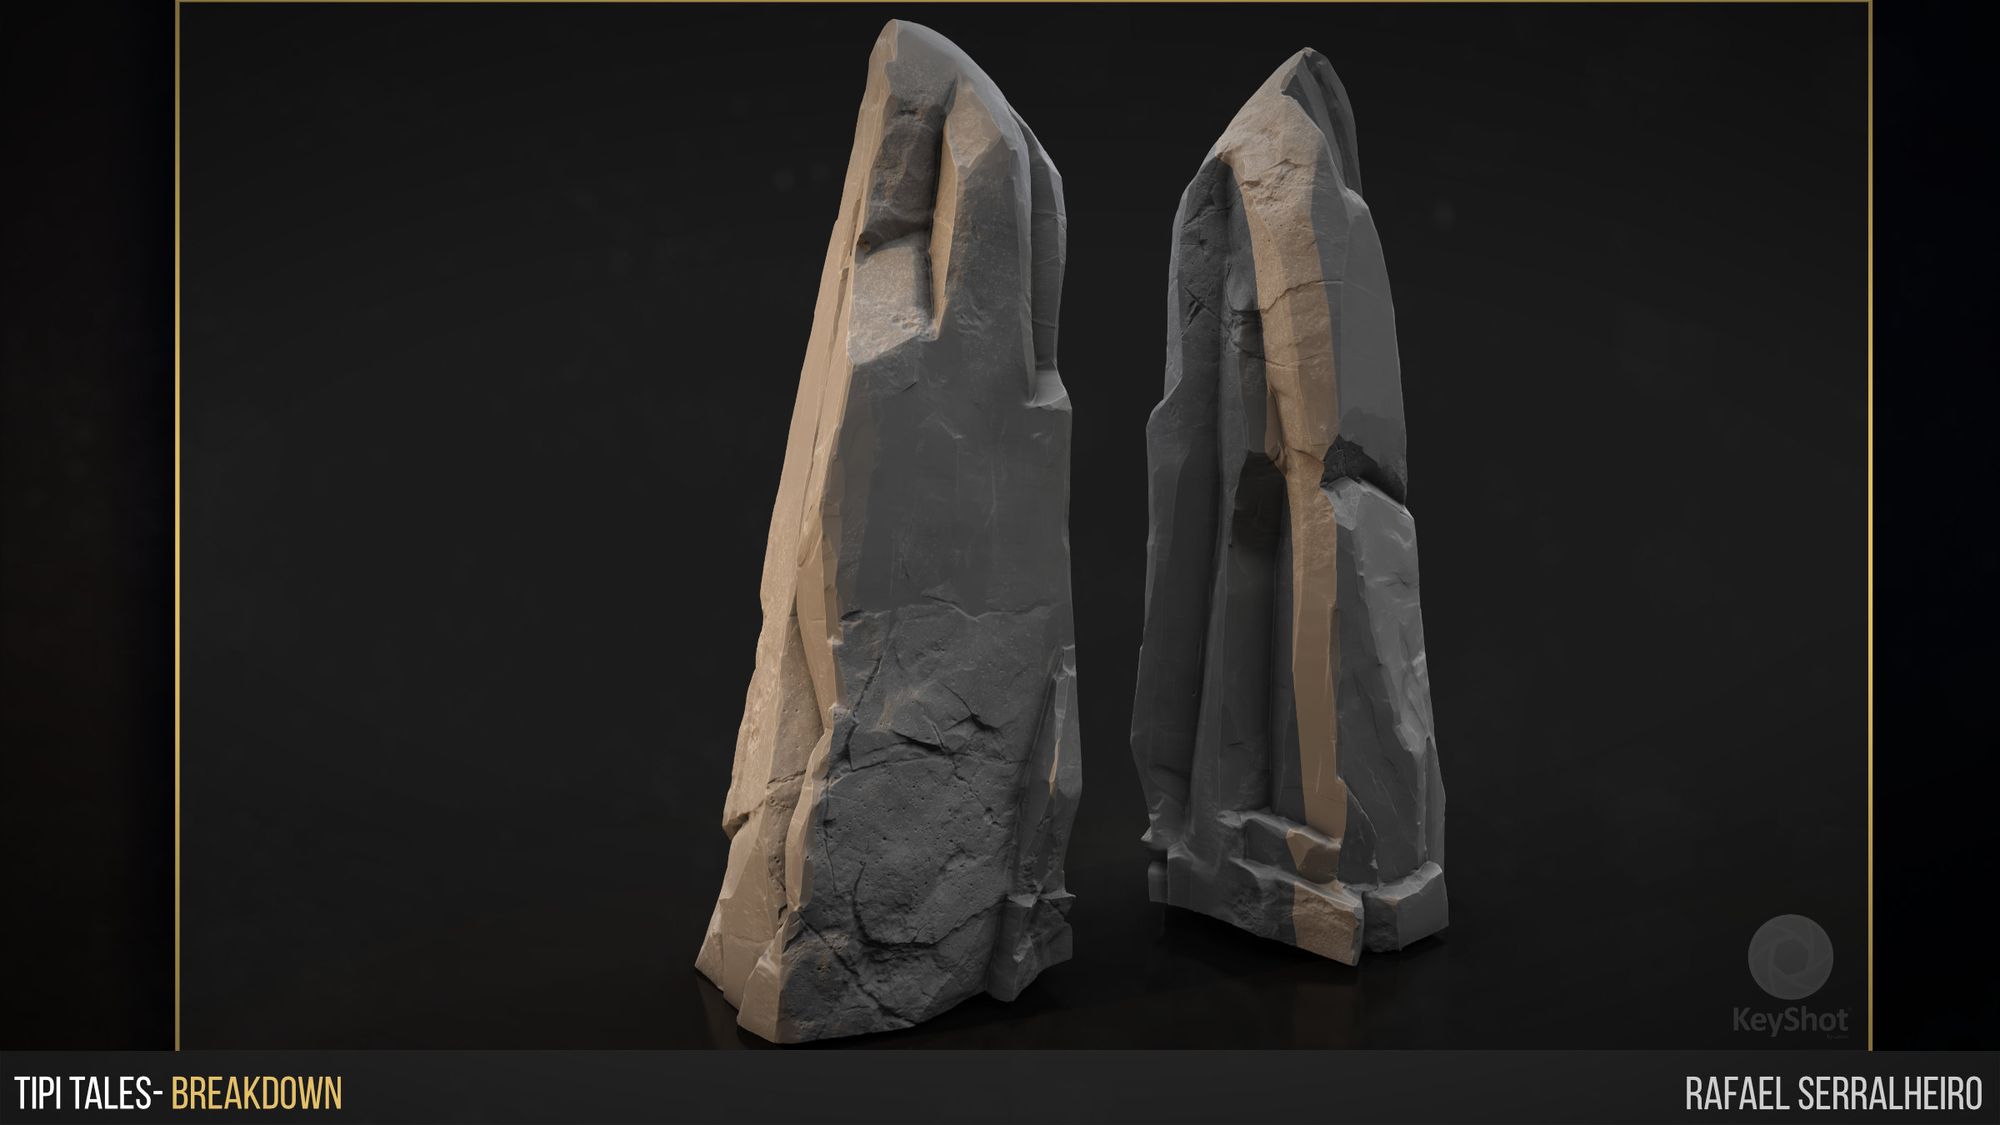
The first tip I would like to share is how to create convincing rock shapes and wood. Nowadays, and depending on the studio, rocks might be modeled or scanned. But I wanted to carve out some rock in ZBrush for this project. The important step for rocks is to get as much reference as possible. Understanding the geology and how they were formed will help create the desired shape. Then, when sculpting them, some specific brushes will bring all the sharp corners that rocks usually have to live (Trim Smooth Border). The key is to nail where the areas of detail and rest will be. Try to get areas of flat surfaces to balance with cracks and details.
Another good thing to remember is to understand the directionality of the rock. Try cutting and making the cracks generally in a motion that would make sense with the Rock formation.
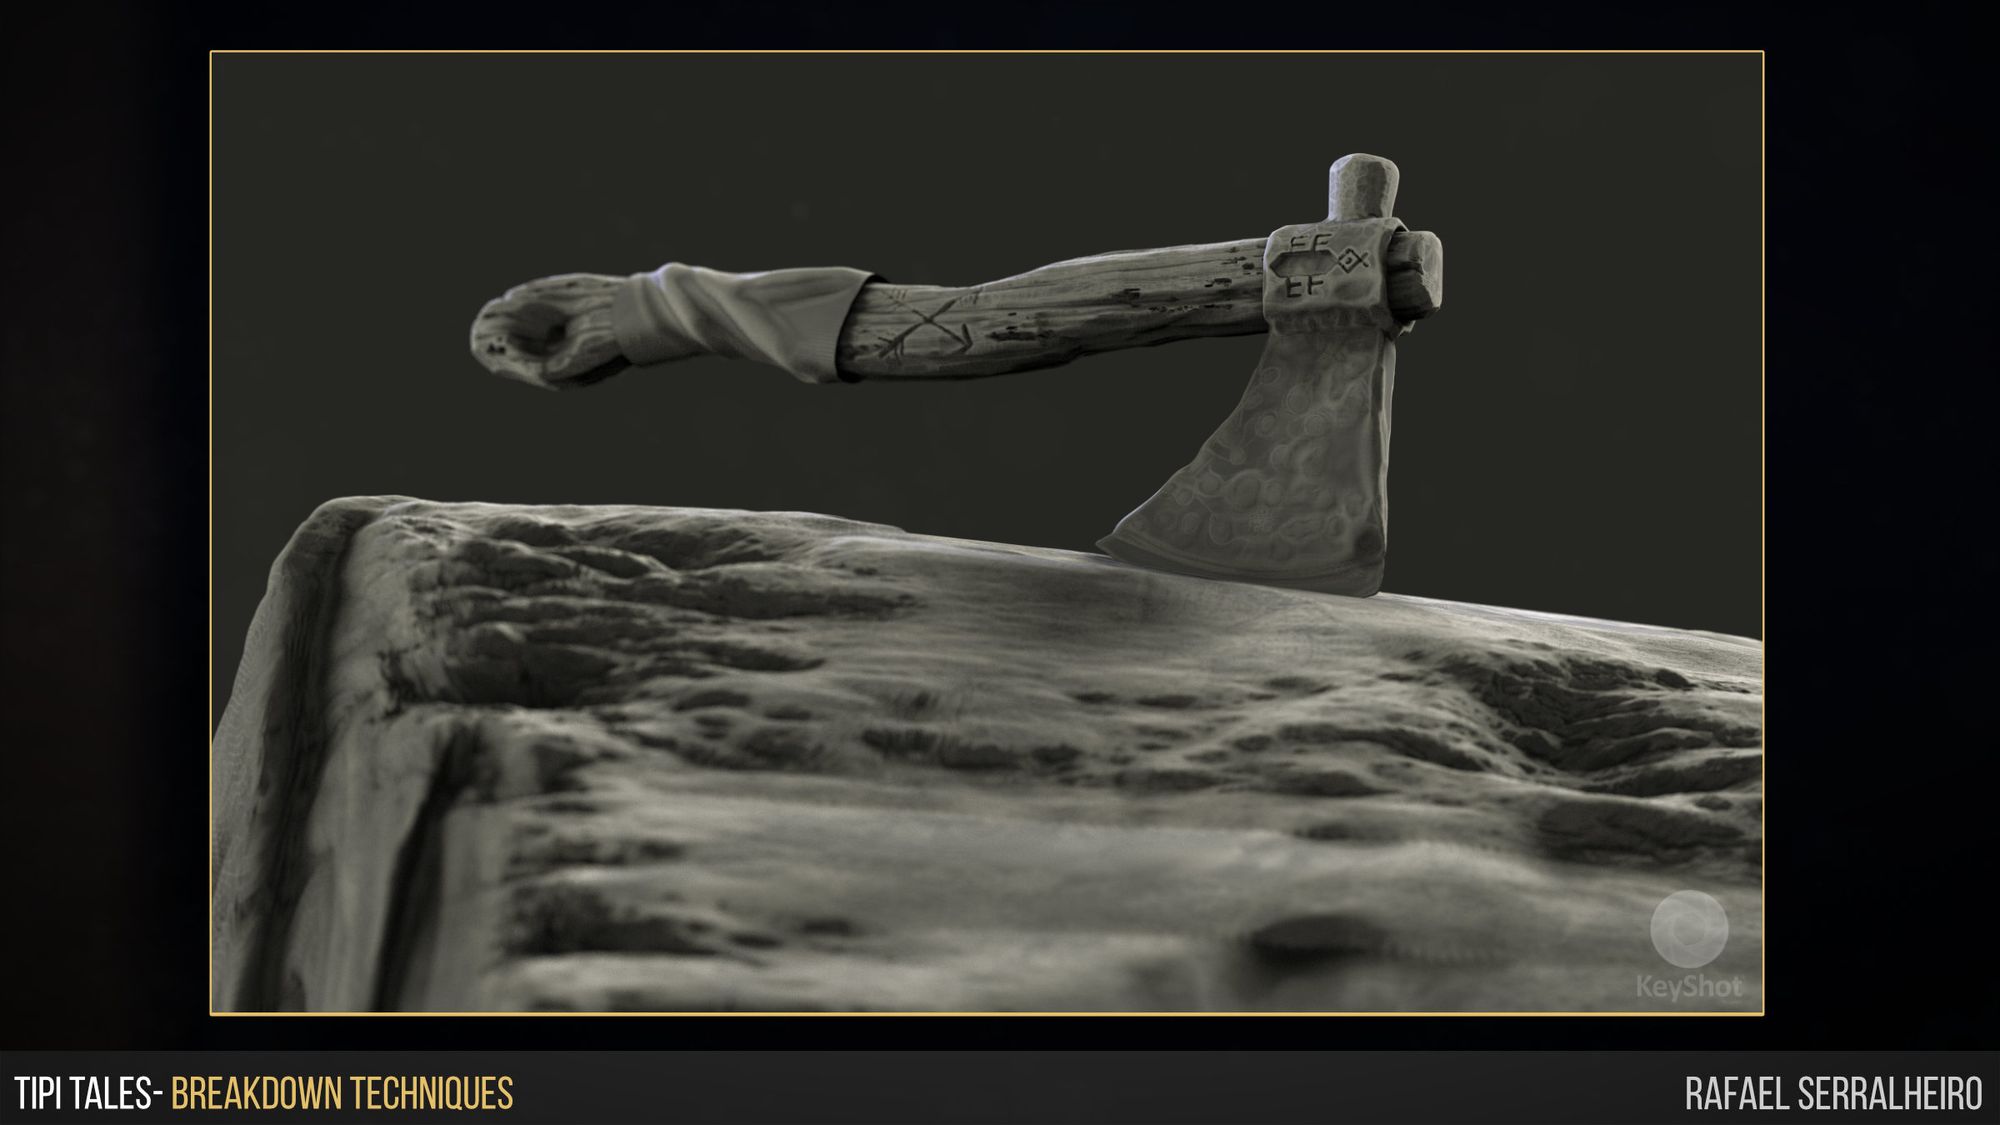
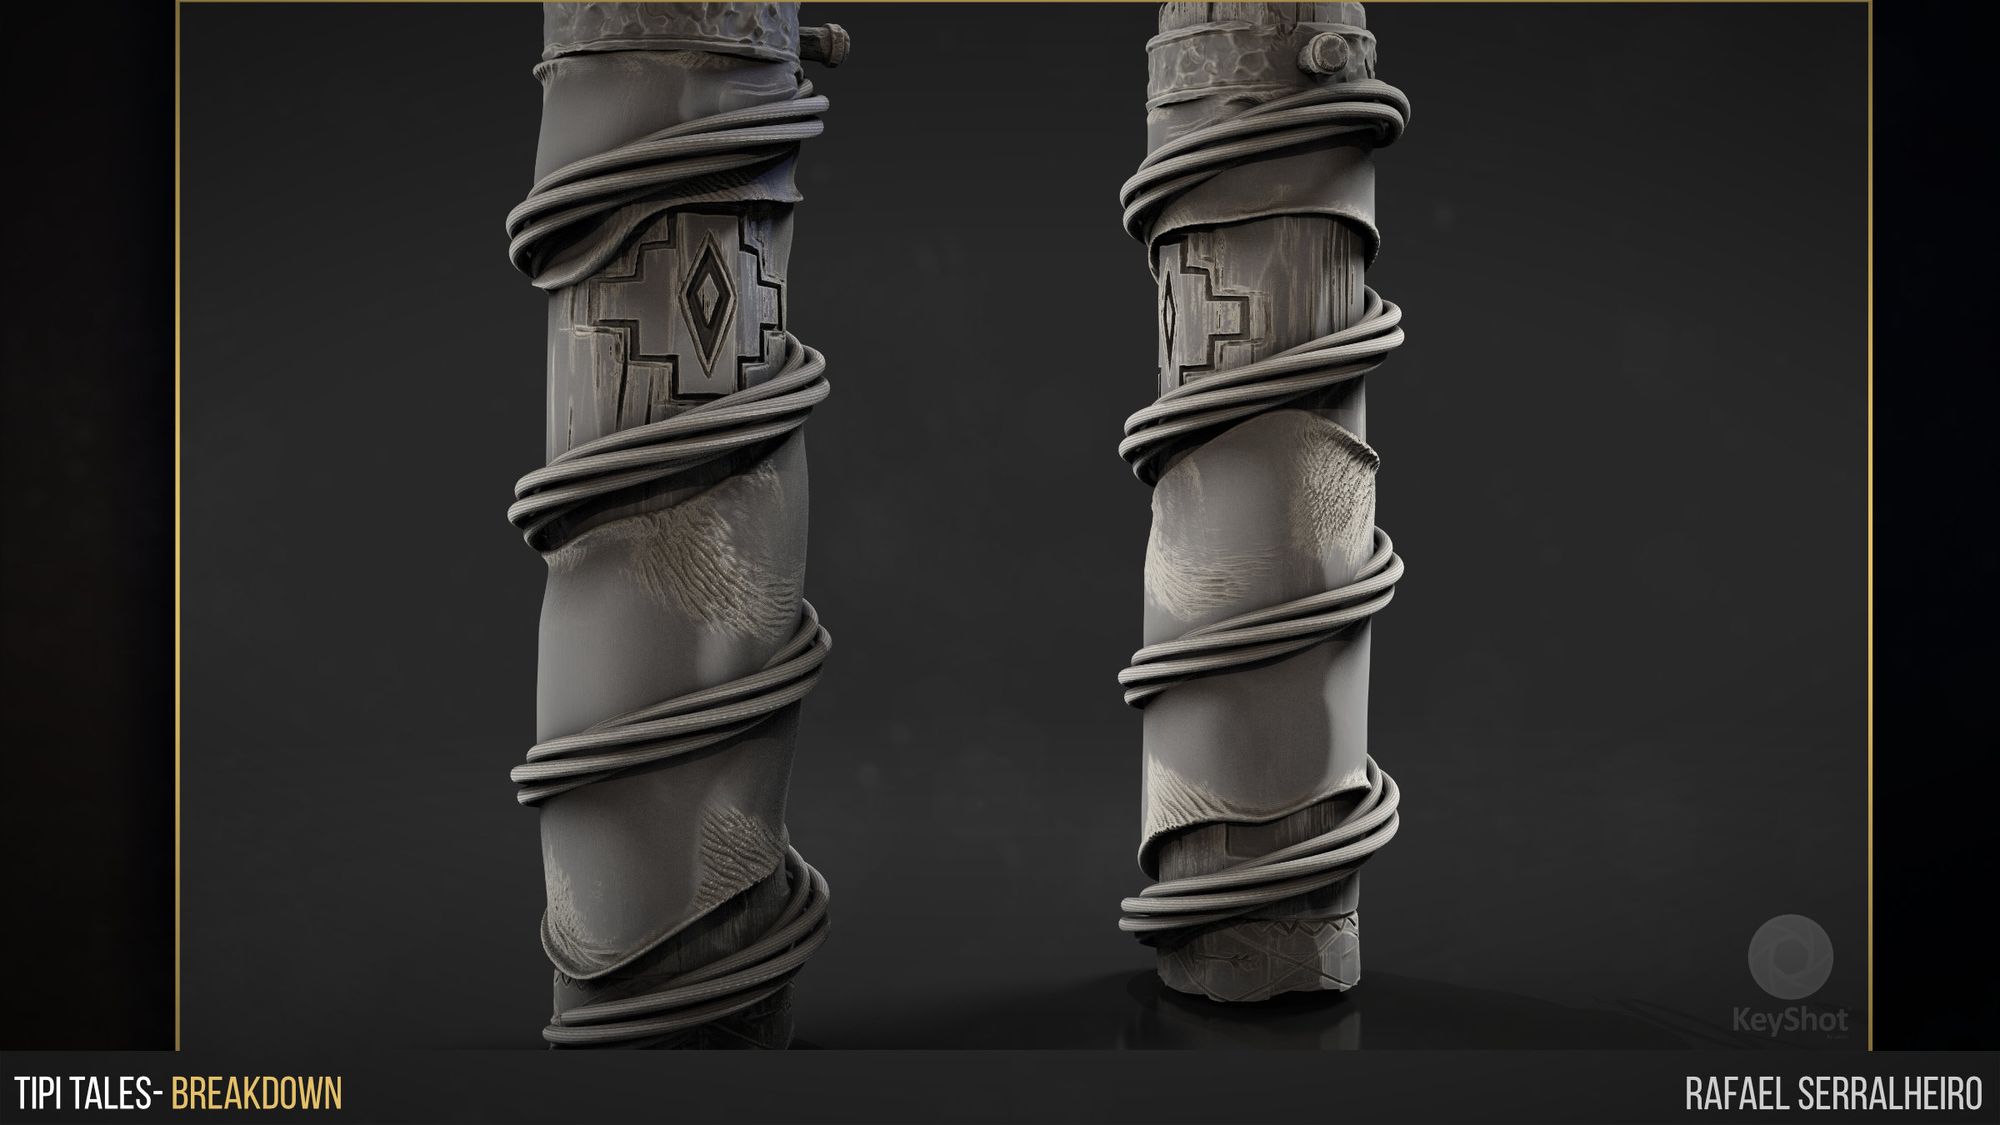
Then, wood is no big secret. Mostly, what I use for the wood surface is the Mallet fast brush to carve the wood in addition to the Trim smooth border. Another brush that will improve your sculpt will be the Dam Standart. If used with lazy mouse option ON, this one is handy for creating the fibers and lines in the wood. A little break to the edges by masking them and moving in or out will also make the wood more realistic. Again, the key is to look at references and make sure you sculpt as it would logically be done in real life.
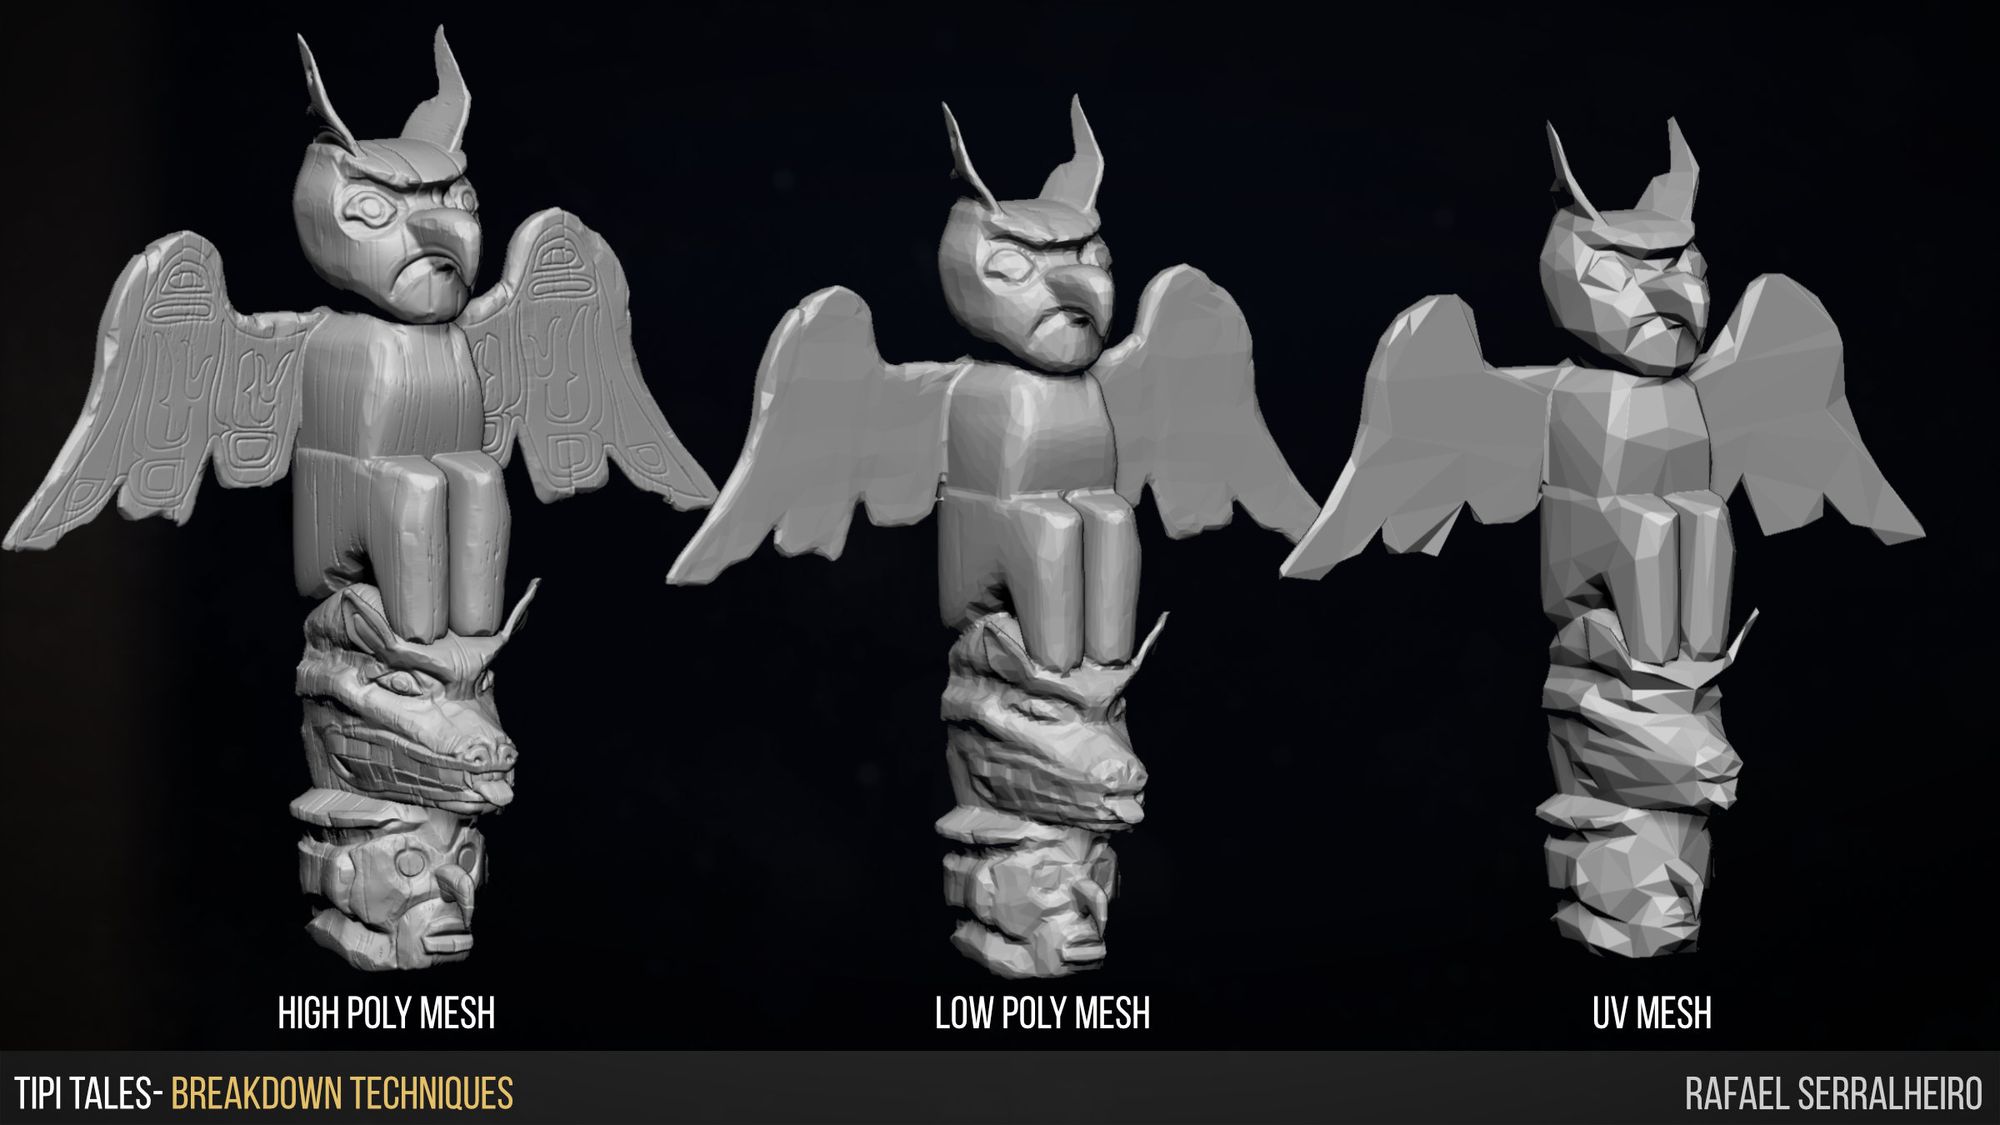
For this project, to get more freedom while sculpting in ZBrush, I used a technique that was very useful to get “quick” UVs into a dense decimated mesh. To do that, this was my process:
First, get your HP (High Poly) mesh into decimation Master in ZBrush and get that mesh to a LP (Low Poly) stage. Second, I would smooth any details that do not affect the shape's silhouette. Then, I duplicate that mesh and decimate it again. At last, this would give me a very low poly mesh, almost Playstation 2 polycount. This mesh is only usable to extract UVs out of it. Then, I would export the HP, LP, and UV mesh.
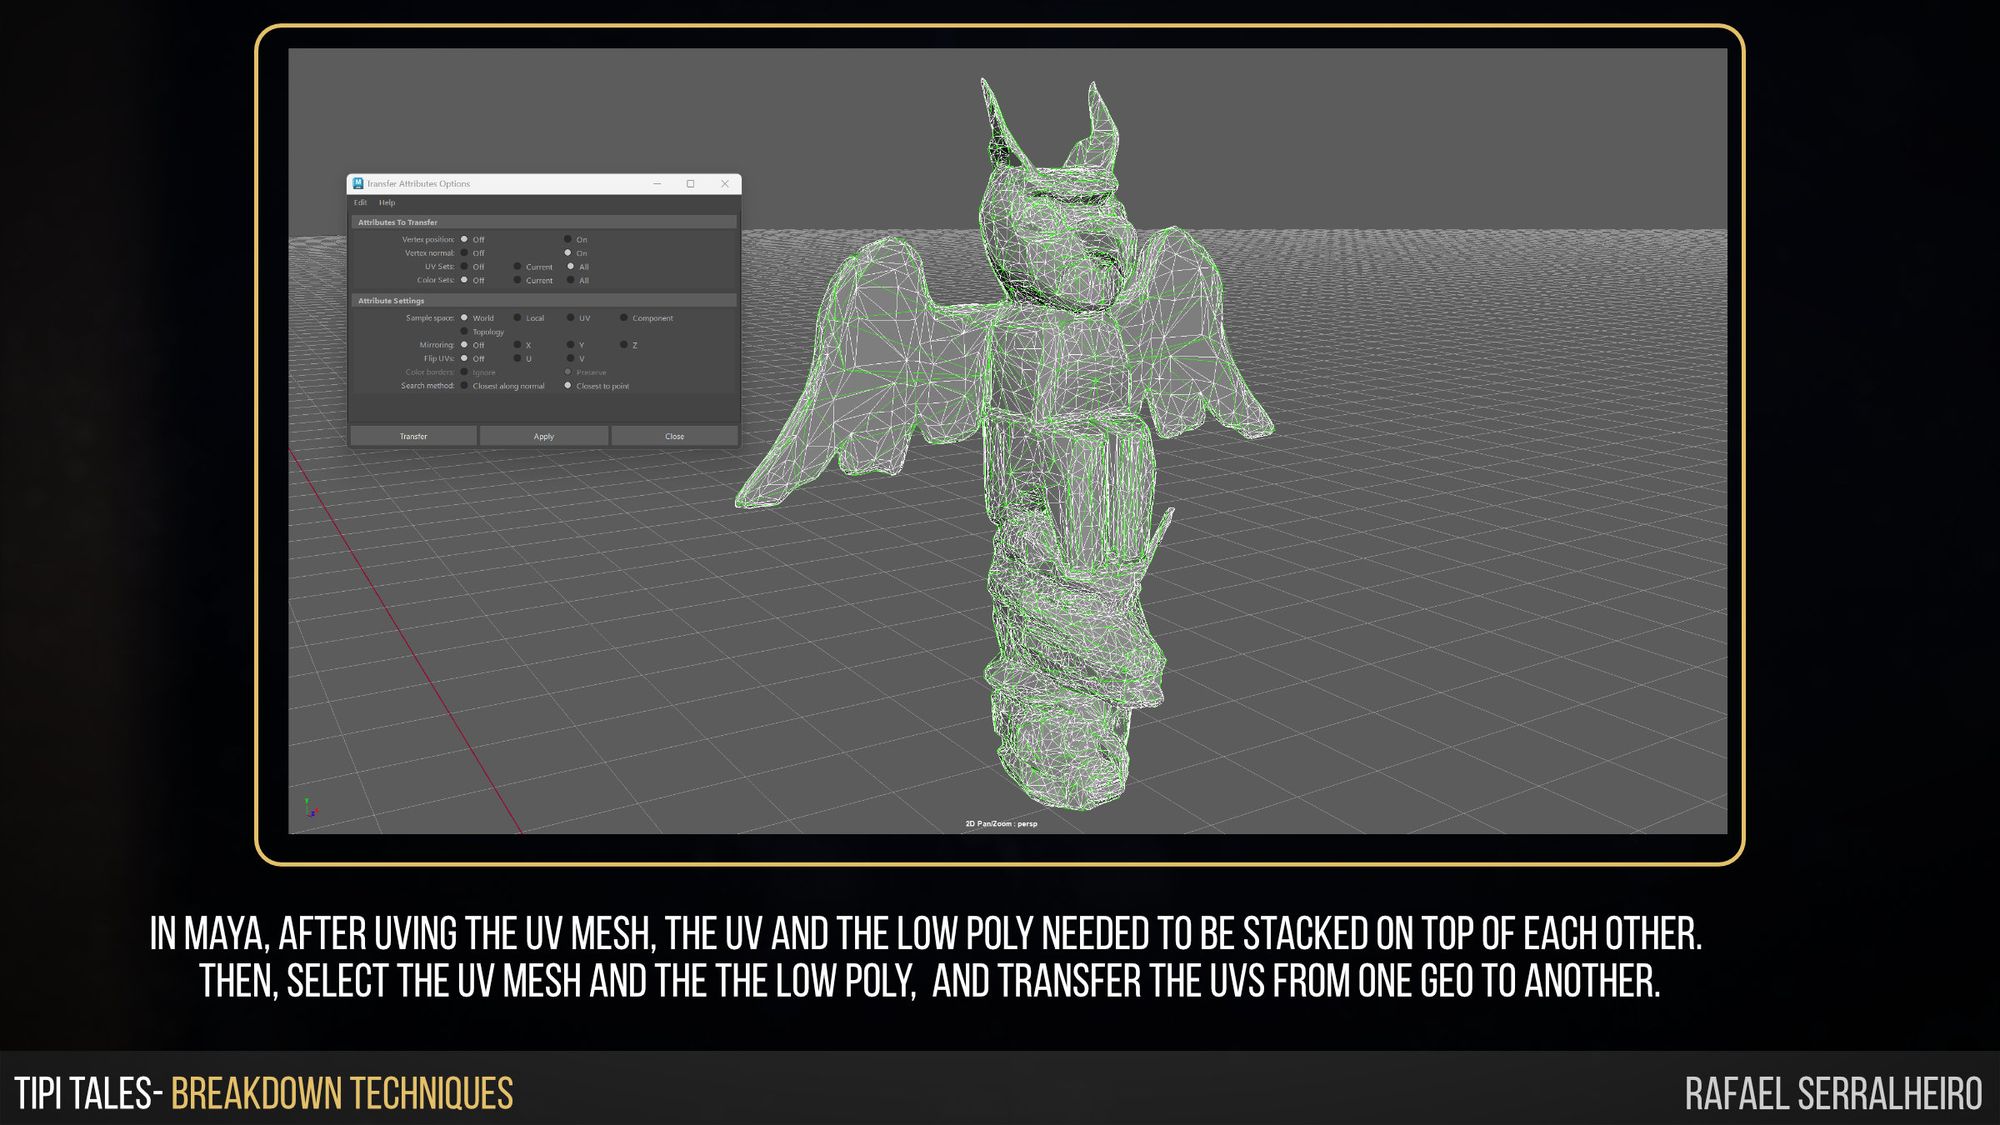
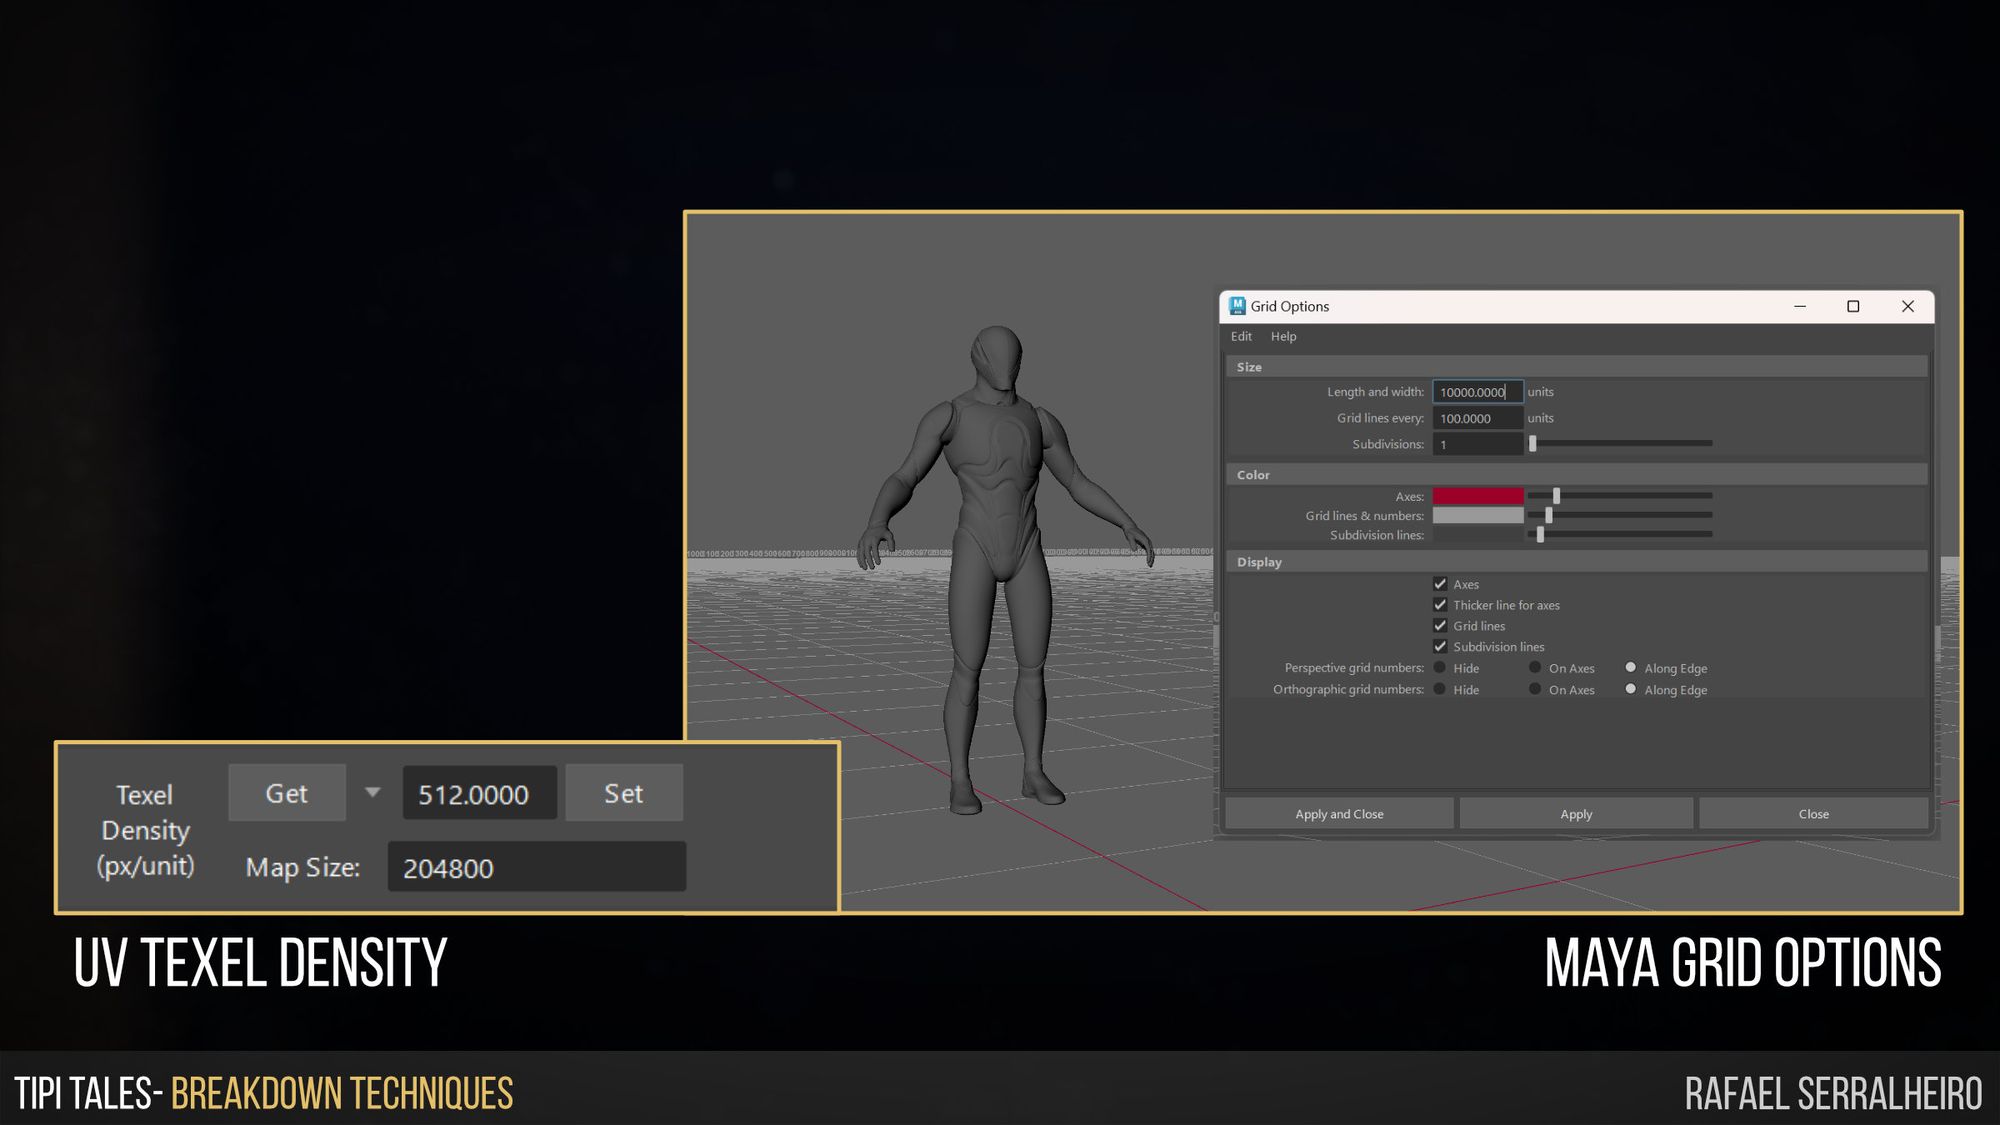
Then, inside Maya, I imported the LP and UV Mesh. In the UV Mesh, I would start with an auto unwrap and see if the UV Islands given by the algorithm would be useful. UVs are time-consuming, so if you can get a process that is simple and efficient it is definitely great. In my case, I would select the areas I wanted to, and then I would Planar project them. The key for most environment pieces is to get your UVs as flat and straight as possible. This will ensure you get your tillable materials working properly. Another topic to keep in mind is texel density. In this case, I set my texel density to 512 in a 2048 uv space. It is important to keep everything in texel density so that the environment feels cohesive and right. To prevent any problems, I also suggest when creating the pieces to get some sort of human reference scale so that you know the correct size of your scene. I will leave down below an image of my Maya grid settings and my texel density so that everything is ready and properly placed to go into unreal at the correct scale.
For some of my props, like the rocks and the Hero prop, I did some RGB Masks in Substance Painter. Even though this is a common practice, I still get questioned how to do it inside Substance Painter. So this is the process to get a RGB Mask from Painter.
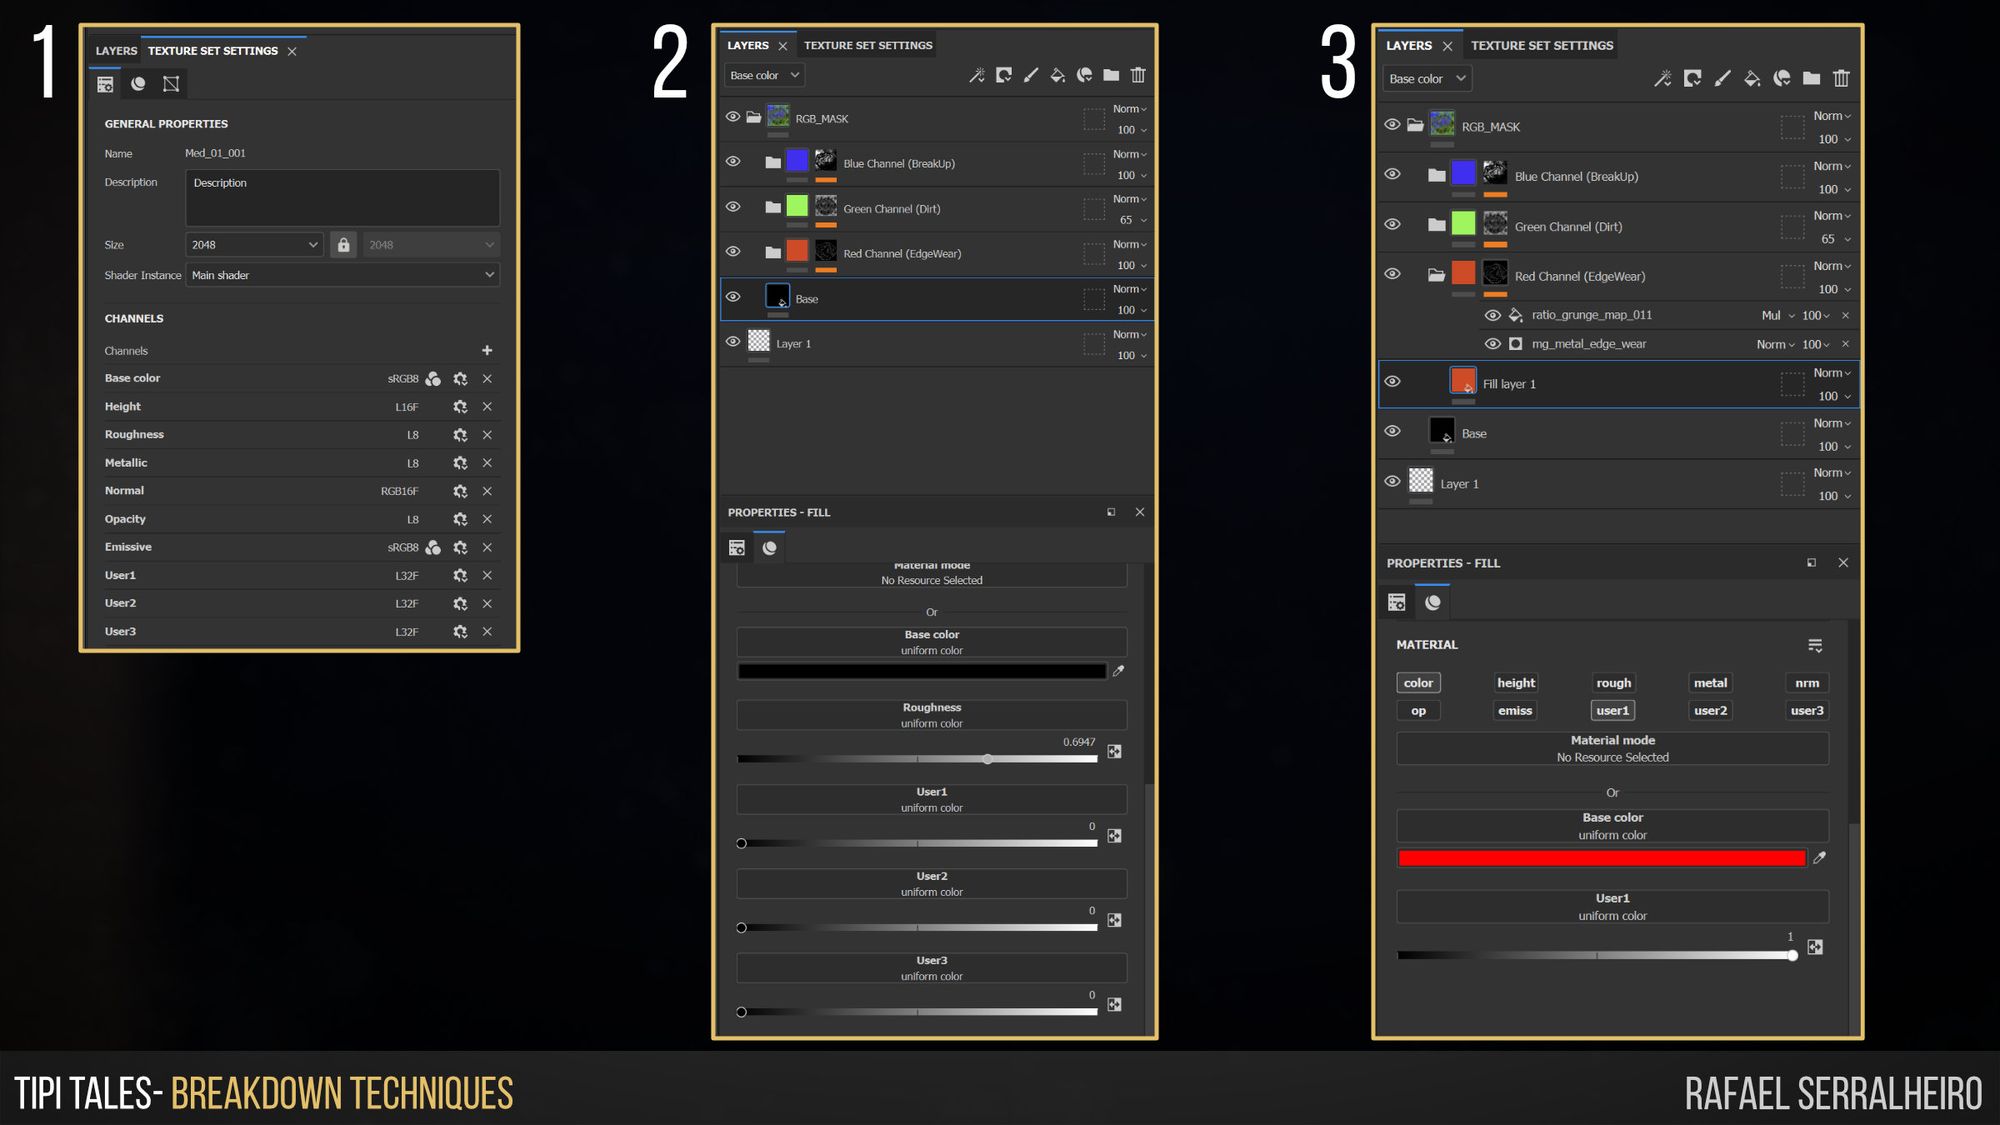
Once we have all three layers with the generators to your desire, the next step is to create an output in Painter. To do that:
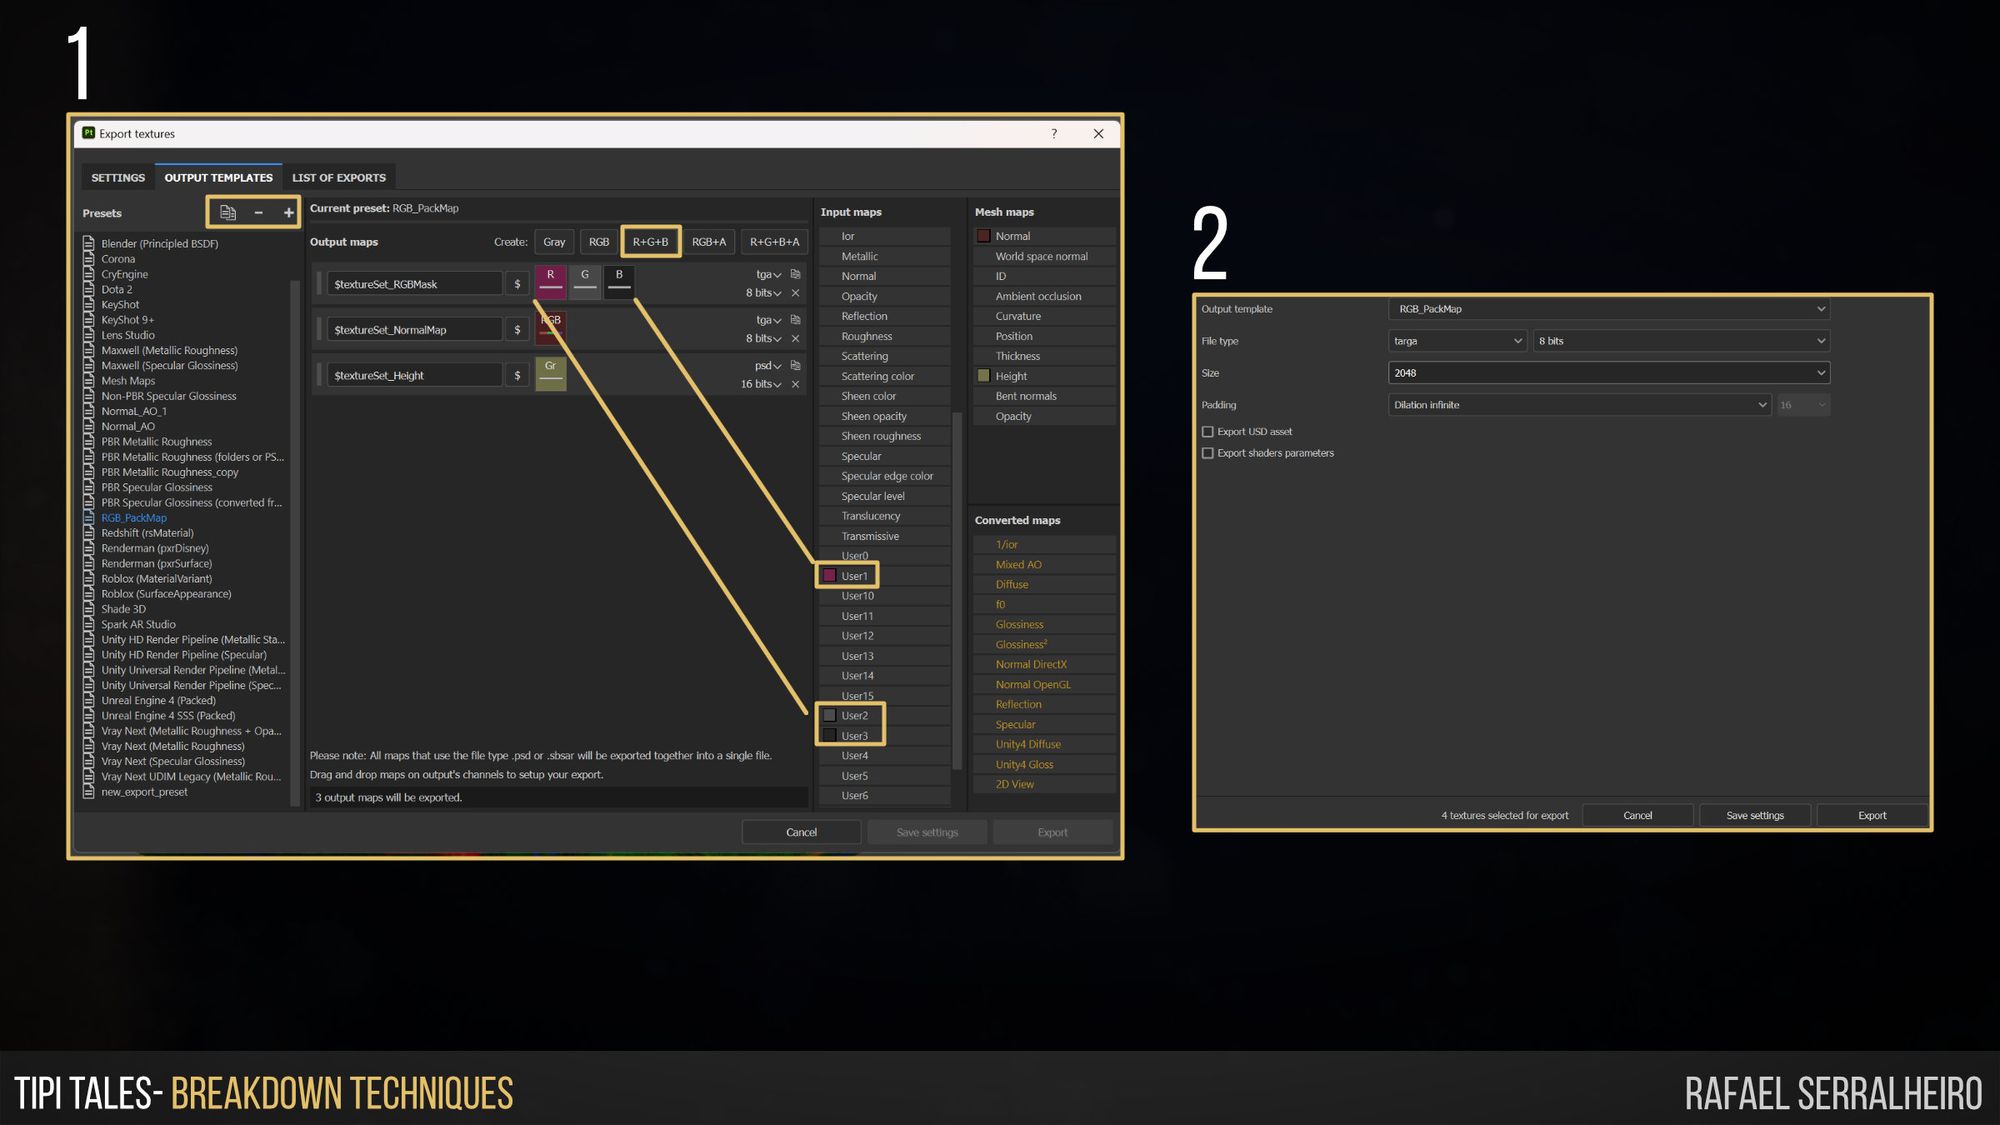
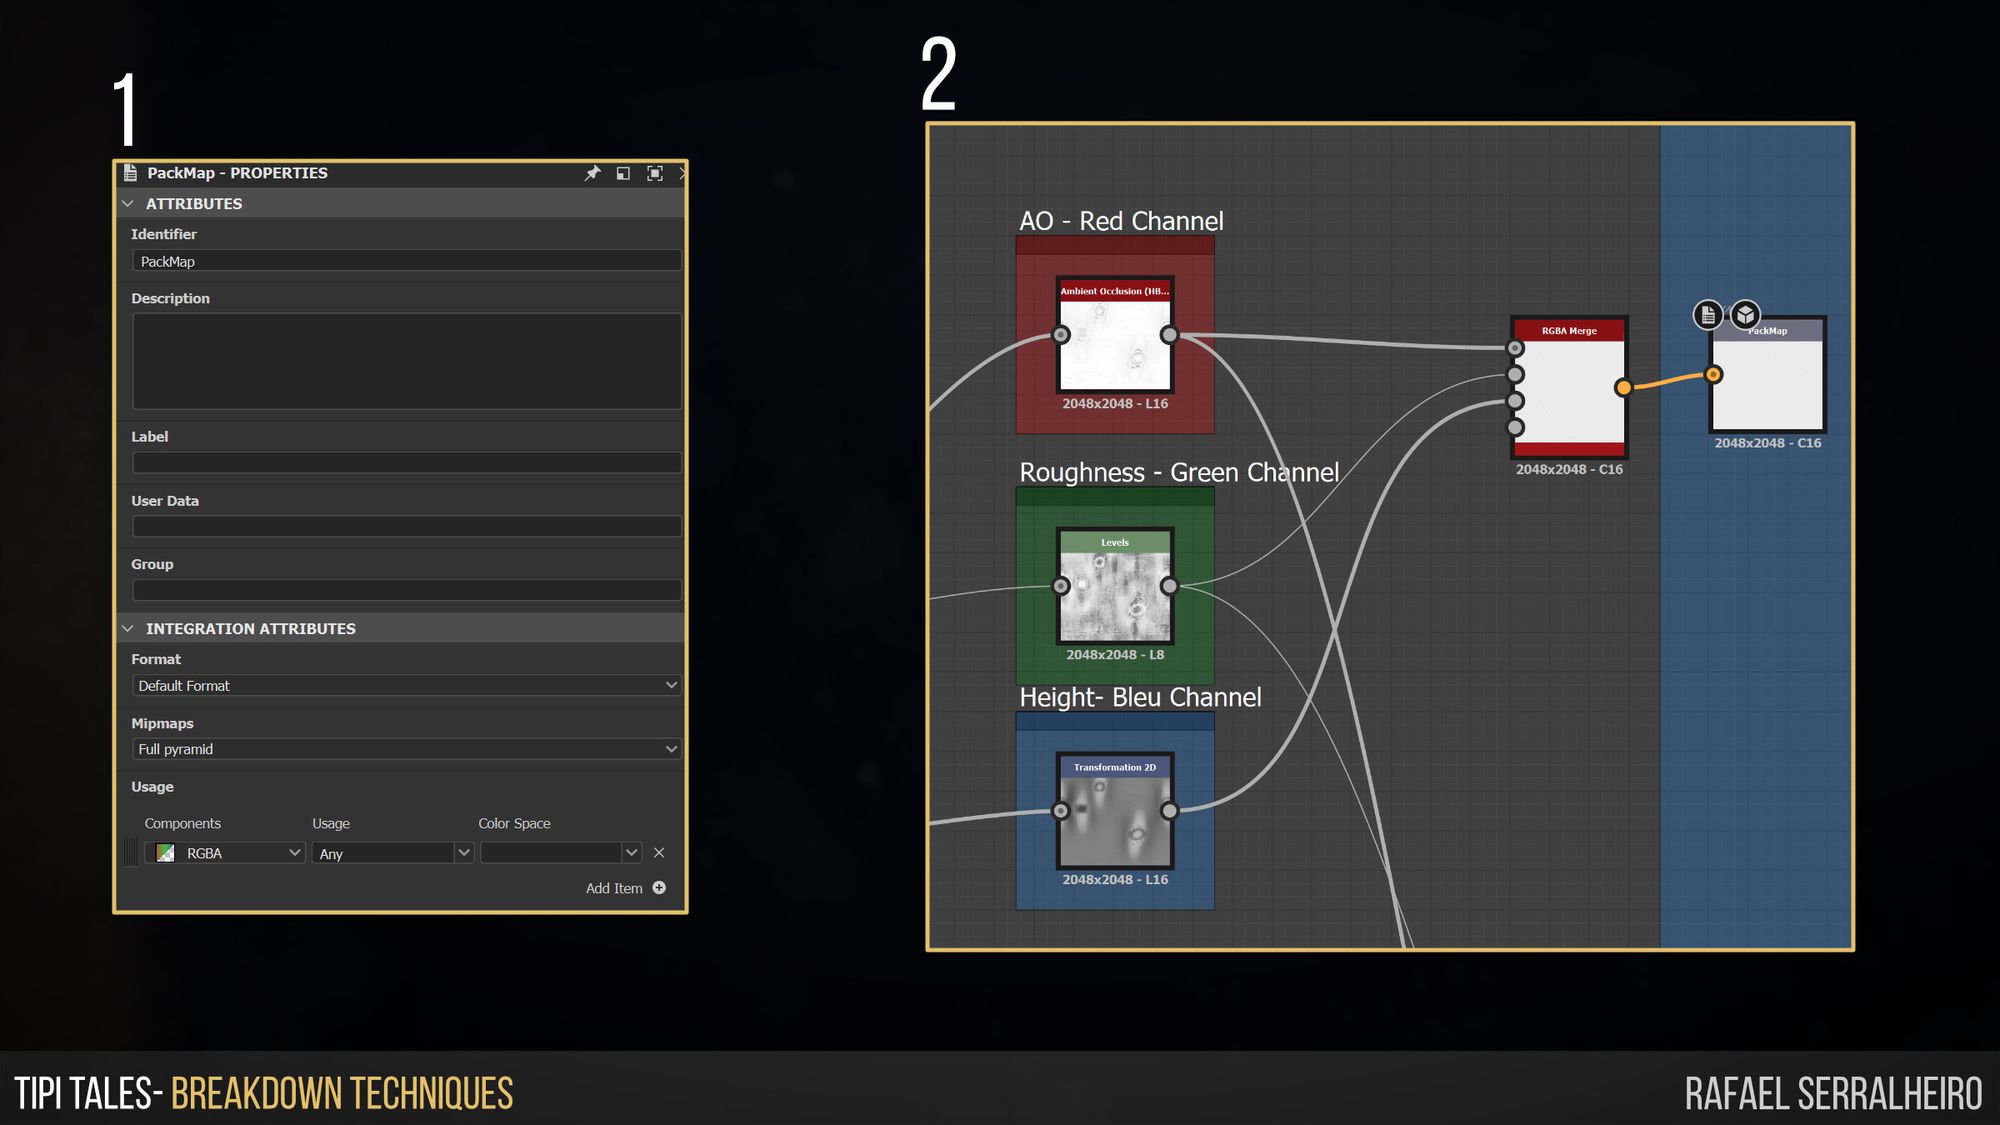
For Substance 3D Designer to get a Pack Map ( a map combining Black and White maps into 3 different channels r+b+g to save space in disk and optimize performance).
These maps are usually used in games, and exporting them directly from Substance 3D Designer is handy. To do that:
Unreal has many different ways to get the same result. The same happens when we want to Blend different textures to an object. The general idea is the same. Blending attributes based on a maks. I have used both techniques to texture and blend materials for this project. However, one was harder to set up at first but more convenient and accessible in the long run.
So, the first technique is by using Material Function. We start by creating the base Material functions that will be blended on top of each other, as well as a master material. The master material is the hoster for all the material functions and the blending mask, as shown in the picture below.
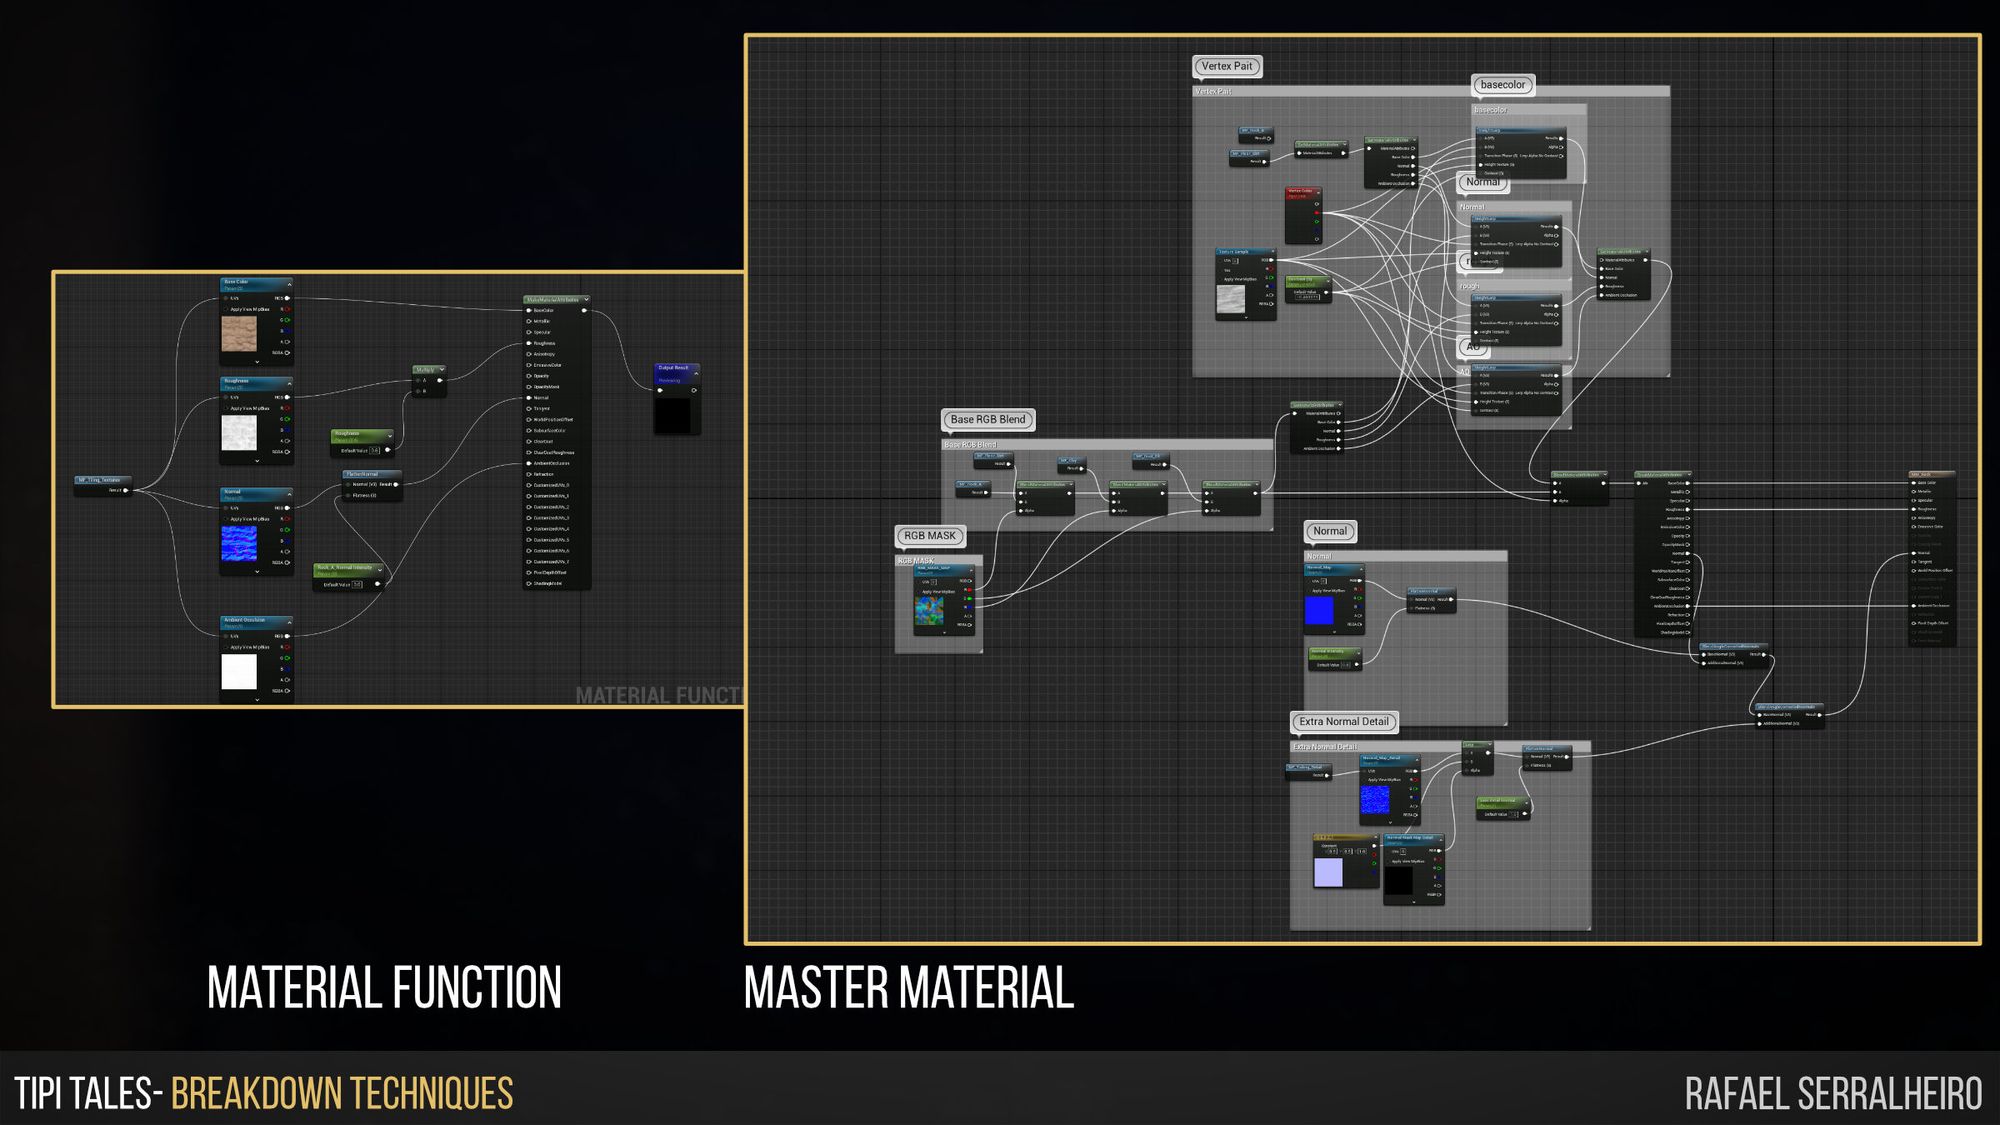
What I don't enjoy about this technique is that the graphs quickly gets bigger and more confusing. Also, it does not allow the replacement of the Material functions via exposed parameters. This means if you want to switch wood for rocks, you would need to duplicate the Master Material, switch the material function inside, and then instance that Master Material to be applied to the object.
If this seems just too much, Material Layers are the way for you. This takes a bit more setup, but the general Idea is the same.
First, you need a Material Layer. This material layer is the same as a material function, which is your basic material/ Maps.
Second, you will need a Material Layer Blend. This material will be the masking layer in between Material Layers.
Third, you need a Regular Material to be the Master. This one will be extremely simple since you only need a Get Material attribute node to connect directly to the output.
The last step is to Instance the Master Material we have created and apply it to any object. If you then click the instance and go the the Layer parameters, you will find all your previous Material Layers and Material Layer blends that you have created before at your disposal for you to pick and play with.
The Material Layer Blend is a compelling way of art directing in a more simple way and gets less cutup in the nodes and more in the instance, where we can quickly add as many layers as we want and switch Materials very quickly.


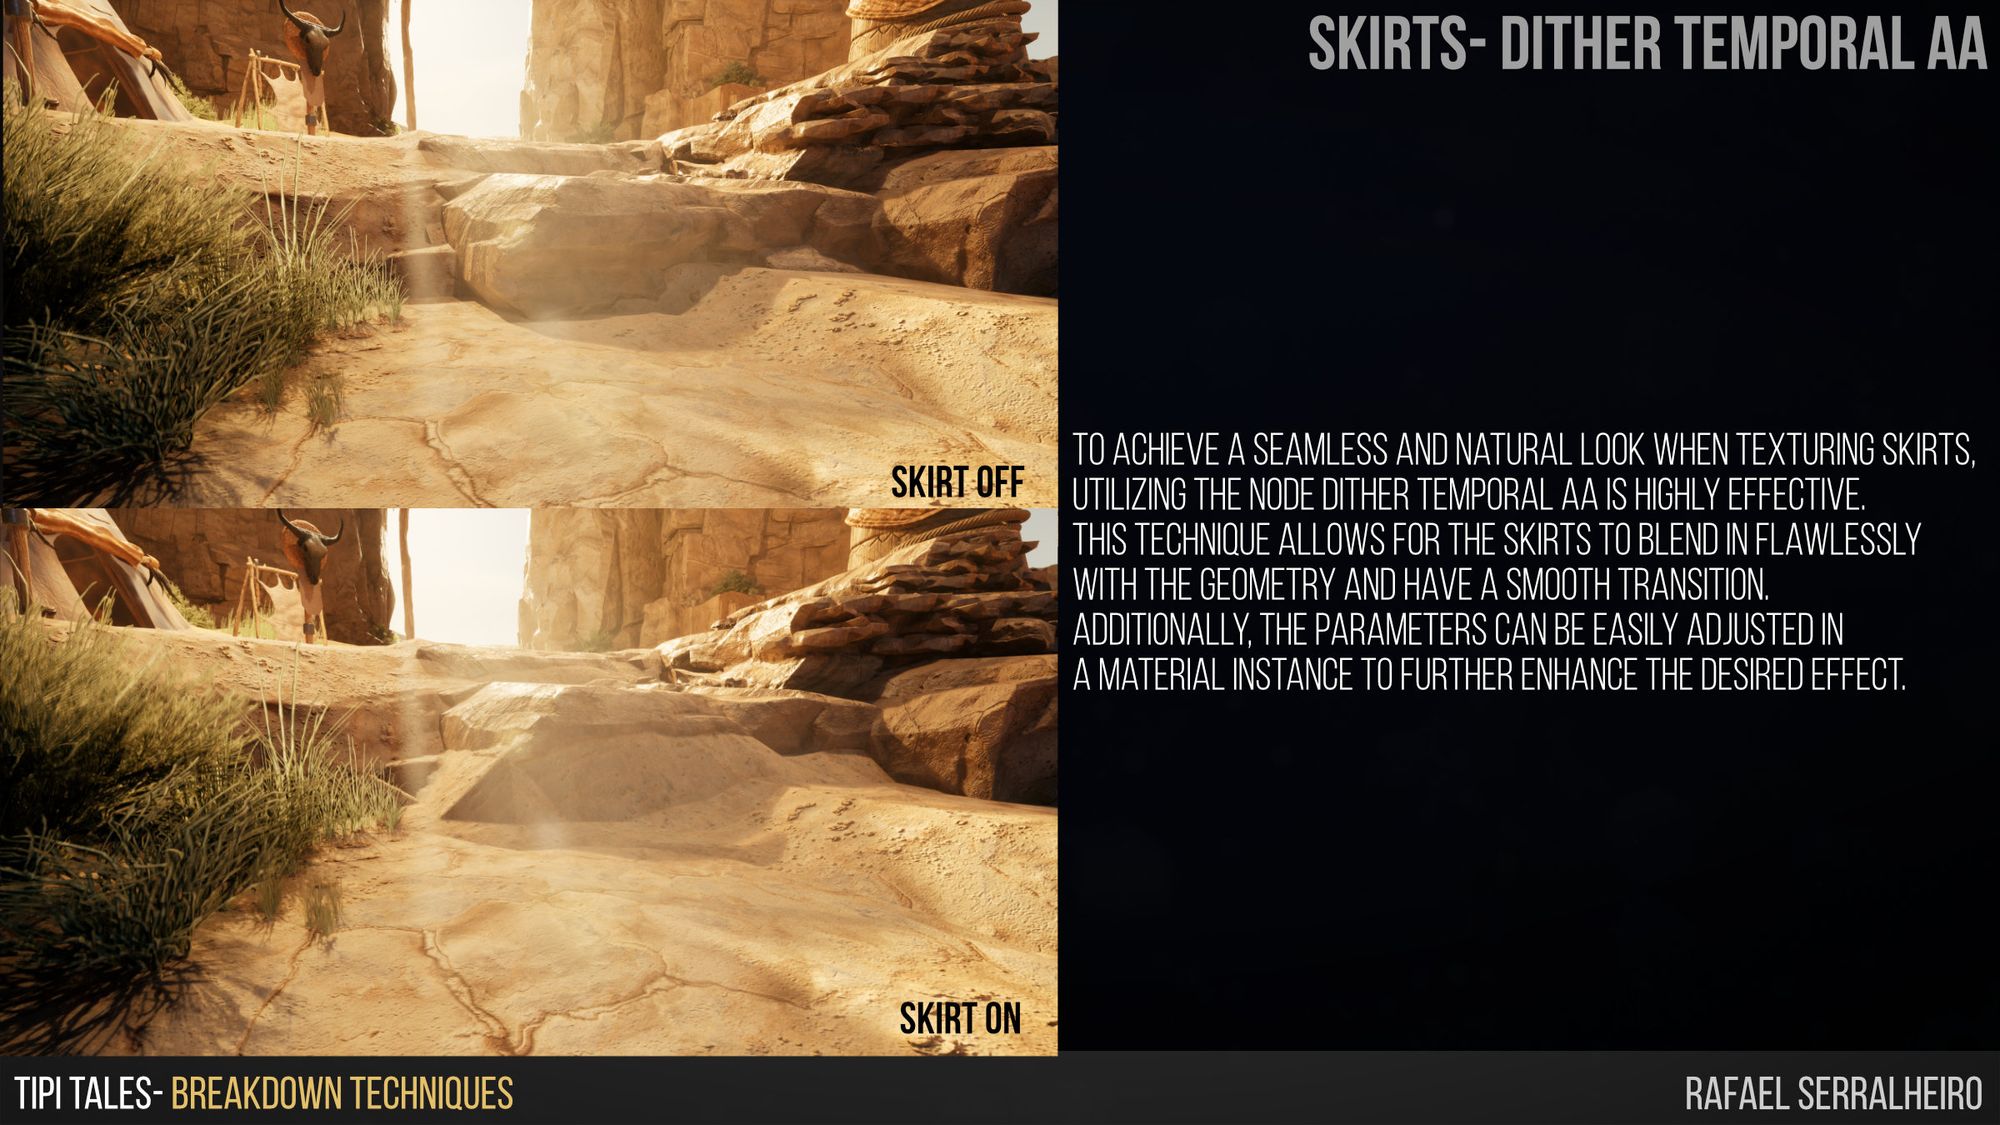
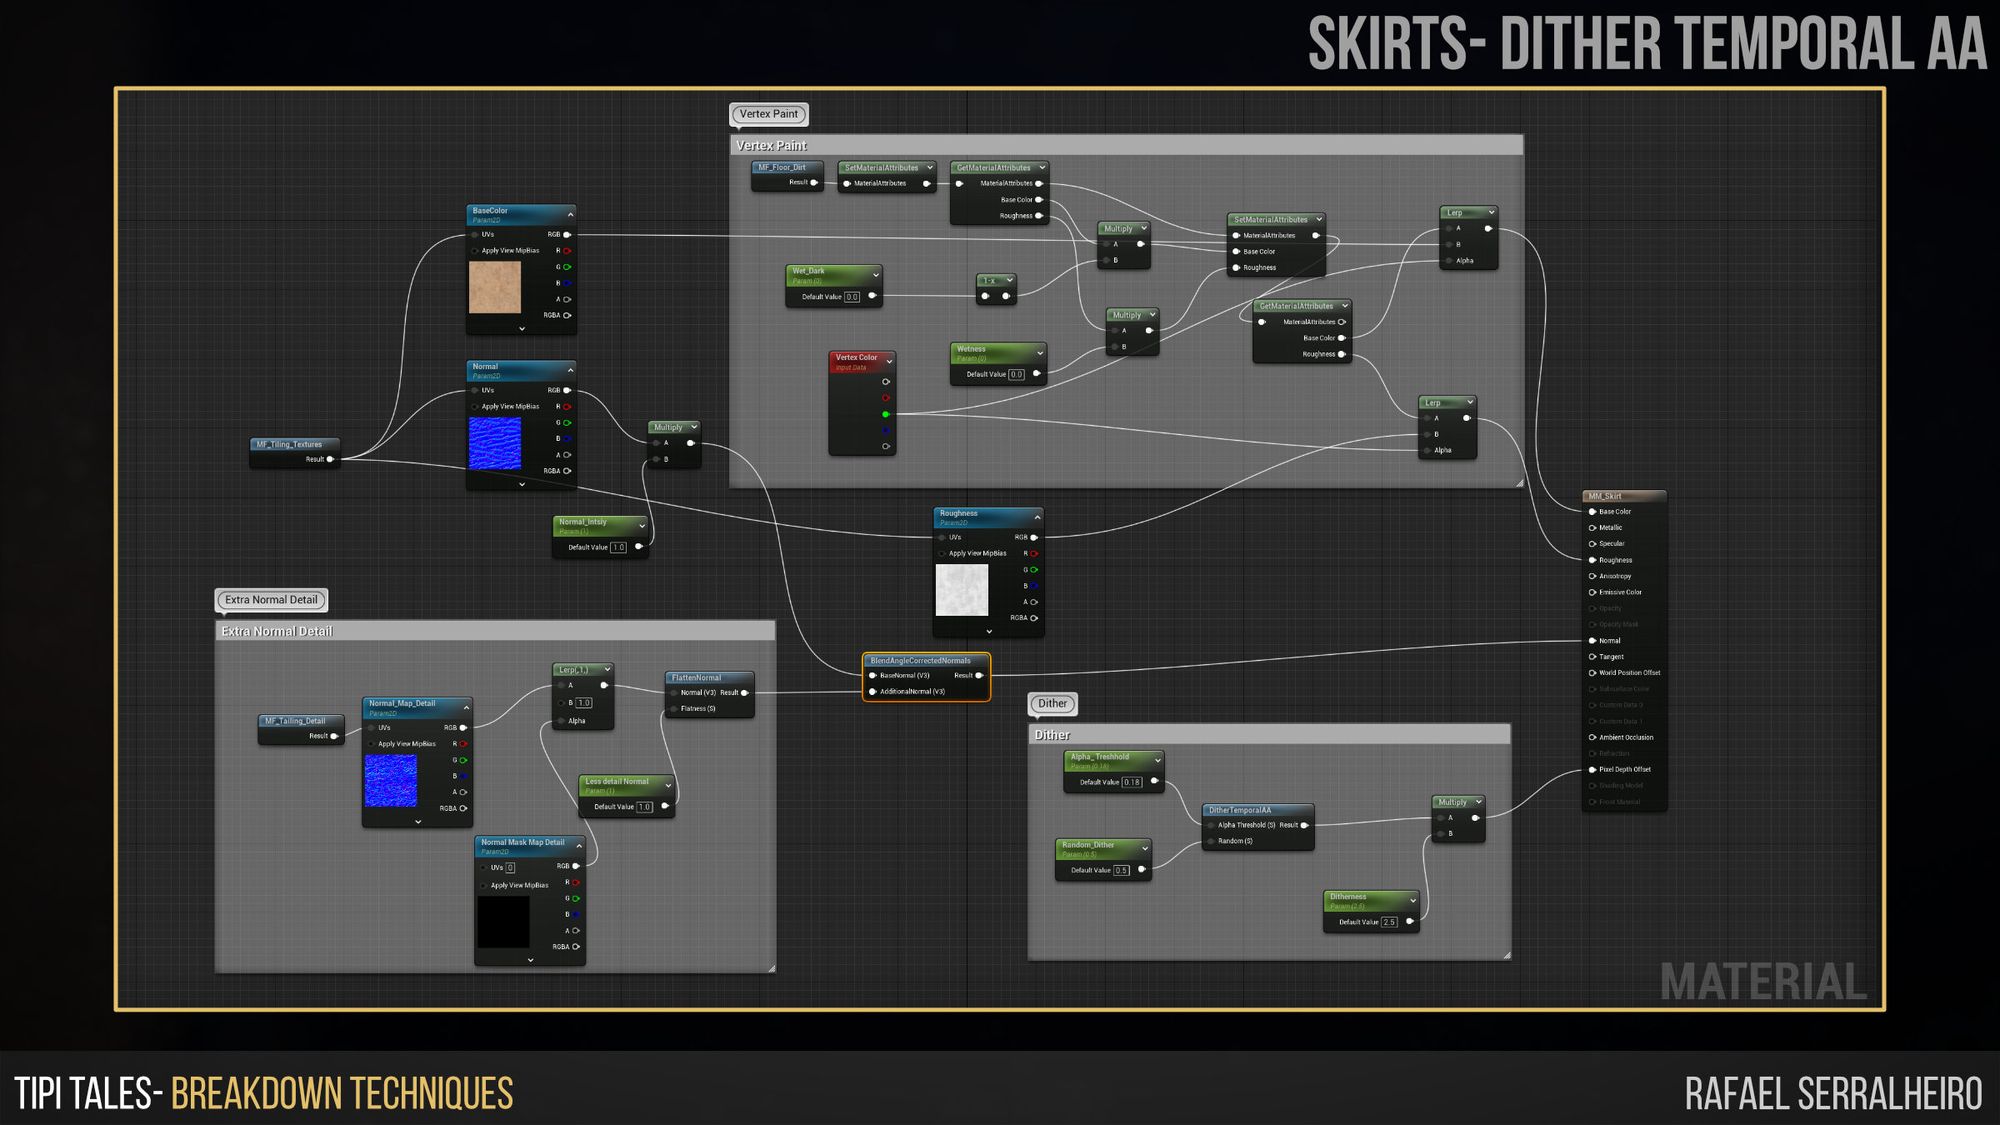
I cannot emphasise this point enough, but skirts are a lifesaver to make the environment go from good to amazing and well-blended. The skirt technique is relativity simple but time-consuming. The areas usually picked for skirts are where the camera will be close up or if it is obviously smashed geo. To blend the environment with skirts, these are the steps:
After this, we end up with a mesh that creates a smooth transition between two surfaces. However, to truly sell the smoothness of a Skirt, it is important to apply a Dither material to it, as shown in the image and Video below. The dither effect will make the geometry slightly more blended and and less lowpoly.
It was important when scheduling this scene to have achievable milestones weekly. This project took roughly nine weeks to be made. The first four weeks were mainly dedicated to getting the general Idea for the concept, blocking out, and getting a Hero Prop baked and ready to be placed in the scene. The rest of the project was dedicated to getting the kit ready, textures, lighting, and post-processing.
Creating weekly milestones was a great way to keep track of the project's progress. However, not only was that important, but understanding the difference between the Alpha stage and the Beta Stage for the project.
Around week 5, I got to an overall Alpha Stage. This means that I had made:
Getting this small list was a simple step, but it made my life easier so that I knew at what stage I should be. Environments are incredibly time-consuming and require different steps and stages of the process. Sometimes, it is easy to get lost in detailed geometry, in trying other methods, or in less-priority tasks. Having this list to guide me and as a goal improves the way I focus my efforts.
After getting to the Alpha stage, the next step is simple and is highly dependent on time. The more time you have, the better. Since from this point on, all I had to do was polish everything to get to the level of desired quality. Tweek models, improve or redo materials, finalise all props, models, kit pieces, etc. At this stage, we start set dressing and do the techniques I discussed before regarding blending the environment with skirts, textures, and overall smaller geometry like rocks, foliage, vertex painting, etc. To make this easier, here is the “list” for the Beta stage of an Environment.
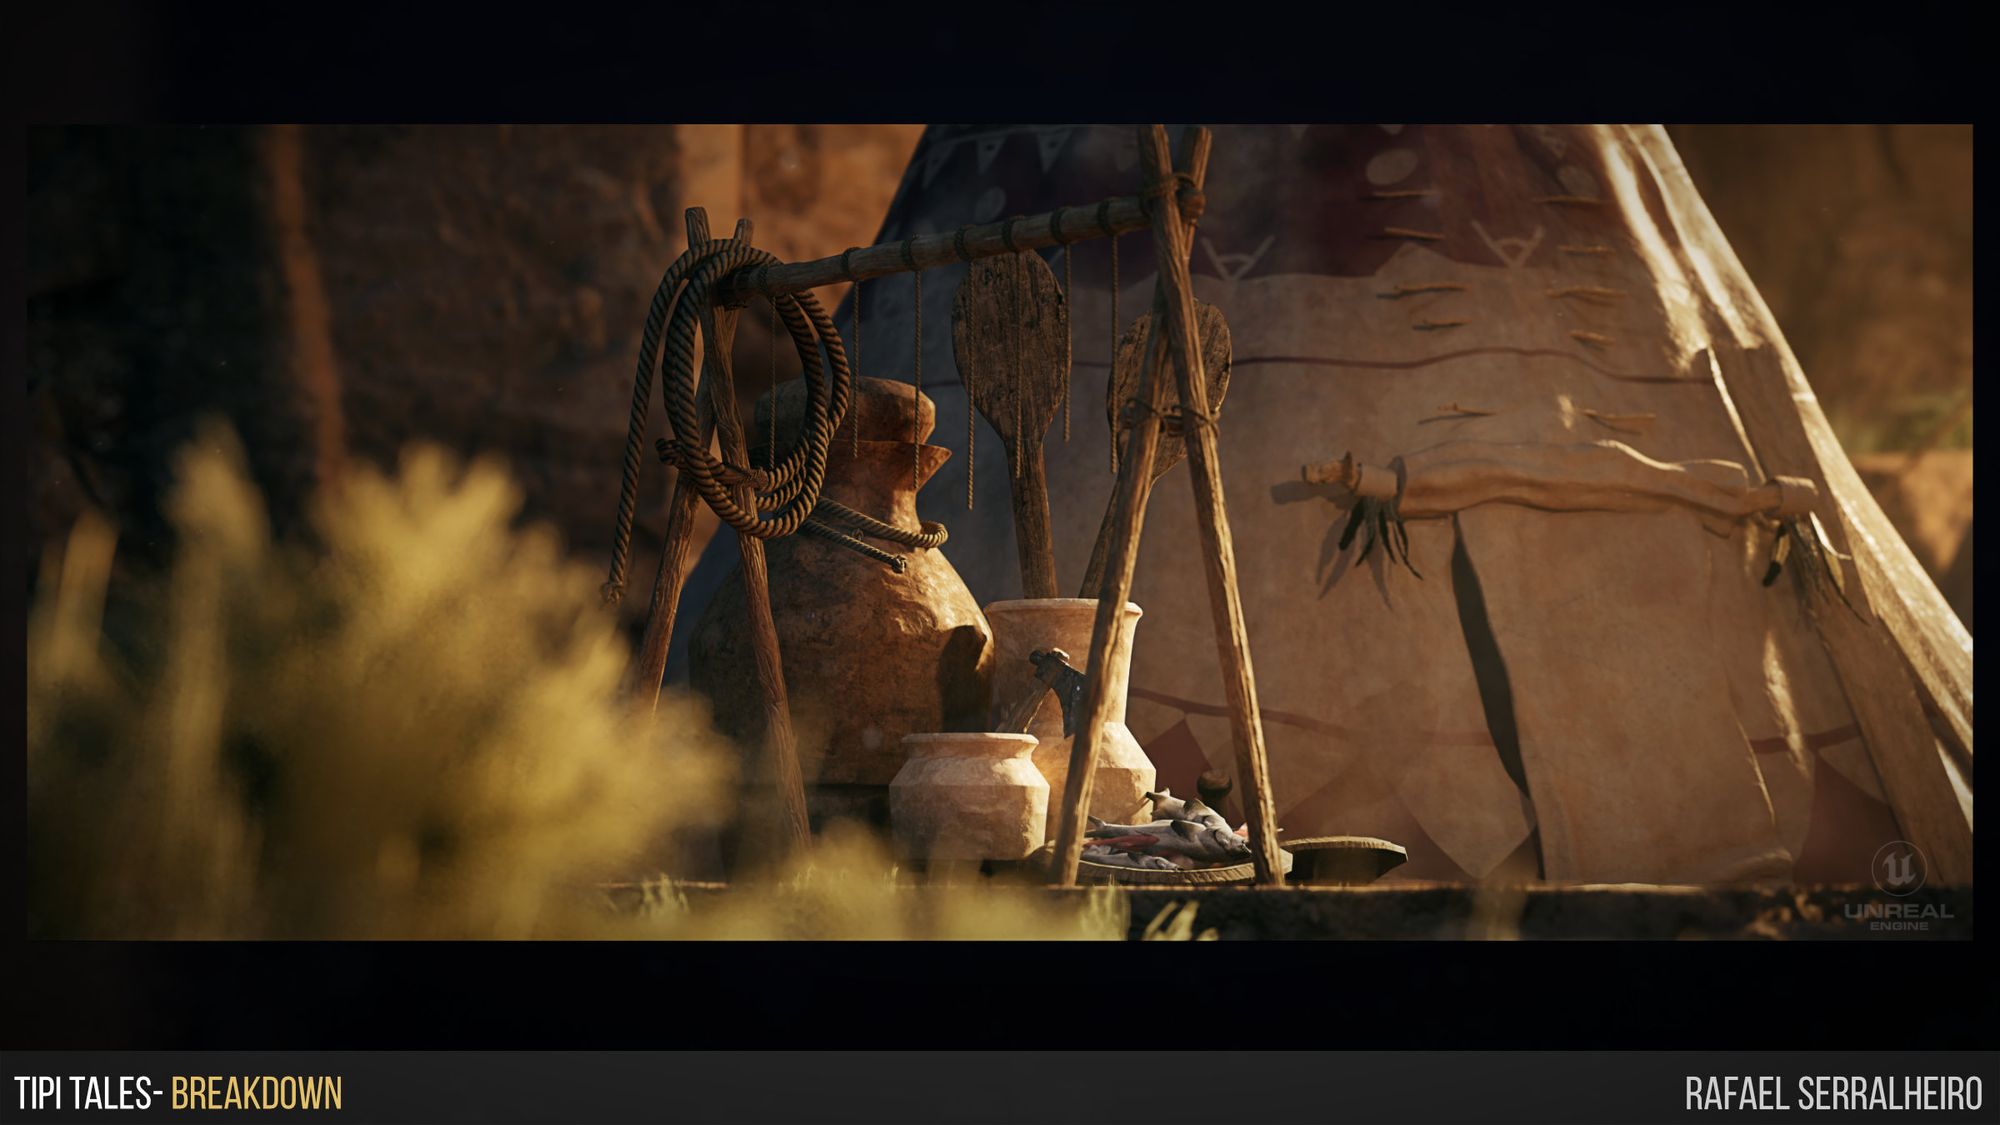
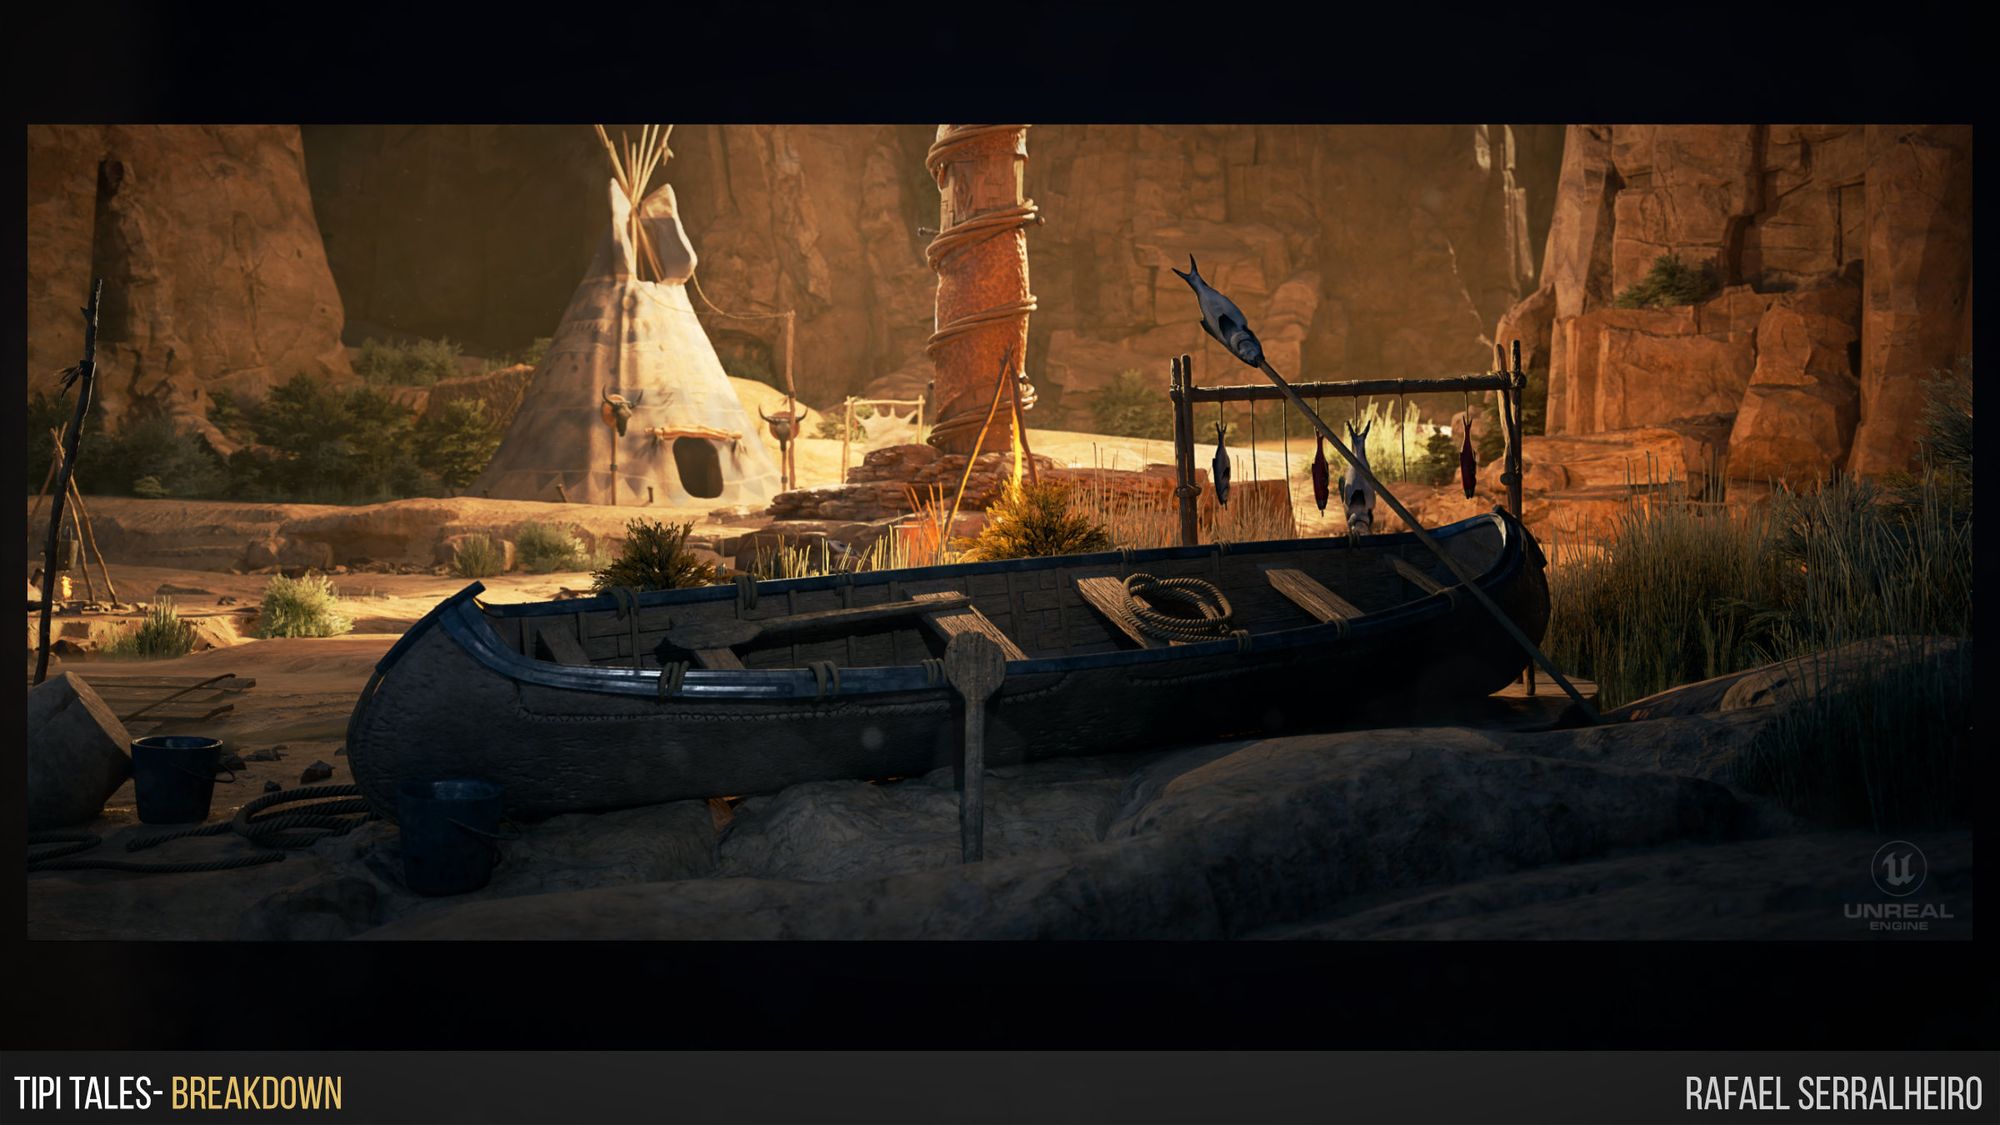
After spending many weeks designing and making this environment come to life, it was important for me to take a few days and get good breakdowns and renders from the scene and from the sculptures and tileable materials.
I took some time to go into ArtStation, look at some of the artists I follow for inspiration, mentorship, and admiration, and understand how they were presenting their work. Give the people what they want, a presentation professional as possible.
A well-thought-out portfolio will stand out when recruiters take a look at it.
I cannot stress this enough, but look at the artists you love. See how they present their materials, their sculptures, the scenes, and how they break down their environments. Spending a reasonable amount of time writing down your process in simple images and videos can go a long way to catching attention. Even if it is simple breakdowns, it shows you understand the process and are willing to offer the trick behind the curtain and share your progress.
For this scene, I looked at artists who worked at Santa Monica Studio to understand how they presented their work. Also, think about your thumbnail on ArtStation, or on your Rookies portfolio. Be careful with colours and composition, and make sure your work is all of the same quality. Below, you can see some of the renders I took to present the work I did.
So, to conclude the article, I decided to save the best for last. I will share with you some ideas to keep in mind when creating an Environment so that you keep track of your project goals.
First advice: When creating a piece, it is essential to understand what skill you want to learn or improve with the project. In my case, I wanted to get better at Designer and explore the tool as much as I could.
Second: Choose the appropriate environment depending on the skill set you want to improve. In this case, I wanted to improve my sculpting skills, so I picked an environment that was primarily organic that allowed me to create many assets in ZBrush and get the most out of it.
Third: This is trivial, but I find making a written list of assets that will integrate my environment helps me schedule when and how to create those pieces. I also start by writing down large, medium, and small assets. This is also a great way to visualise the references you must gather and collect. I tend to get lost when gathering references for my scenes, and by doing this it helps.
Fourth: Try to block out different variations of your environment a couple of times. The faster you “fail”, the quicker you will get the ideal composition for your shoot.
Fith, aim for the Alpha Pass and Beta Pass. As I referenced before, getting these project milestones will help you get your environment done on time. And guide you throughout the way and to stay focused on the tasks you need to get done.
Sixth: Keep some ideas in mind, such as:
Last but not least, you must remember that some art fundamentals, such as colour, composition, and scale, are the most important. Also, as referenced before, think about your composition and how your scene/ Image will translate your thoughts and vibe. I recommend checking a book called “Picture This- How Pictures Work” by Molly Bang. In the book the author goes over 12 concepts to keep your composition and Image based on human feelings. So, I will leave a list of those below:
To conclude, thank you to The Rookies for the fantastic opportunity for me to write this article on my latest work as well for the amazing community built around the young generation of CG artists. In addition, none of this would be created without the unbelievable mentorship and guidance from Jon Arellano whom I sincerely thank for the fantastic feedback, knowledge, and patience. Most tricks I have shared in here were taught by Jon! Hopefully, this article will be of good value to the community and will be useful for people to start creating their environments or learn a new tip or trick.
You can reach out to Rafael via his Rookies profile here.