Tim Van Wassenhove, a 24-year-old 3D Character Artist with a Bachelor's degree in Game Graphics Production and Animation from Howest - Digital Arts and Entertainment, shares insights and tips for sculpting and rendering game-ready characters in this article.
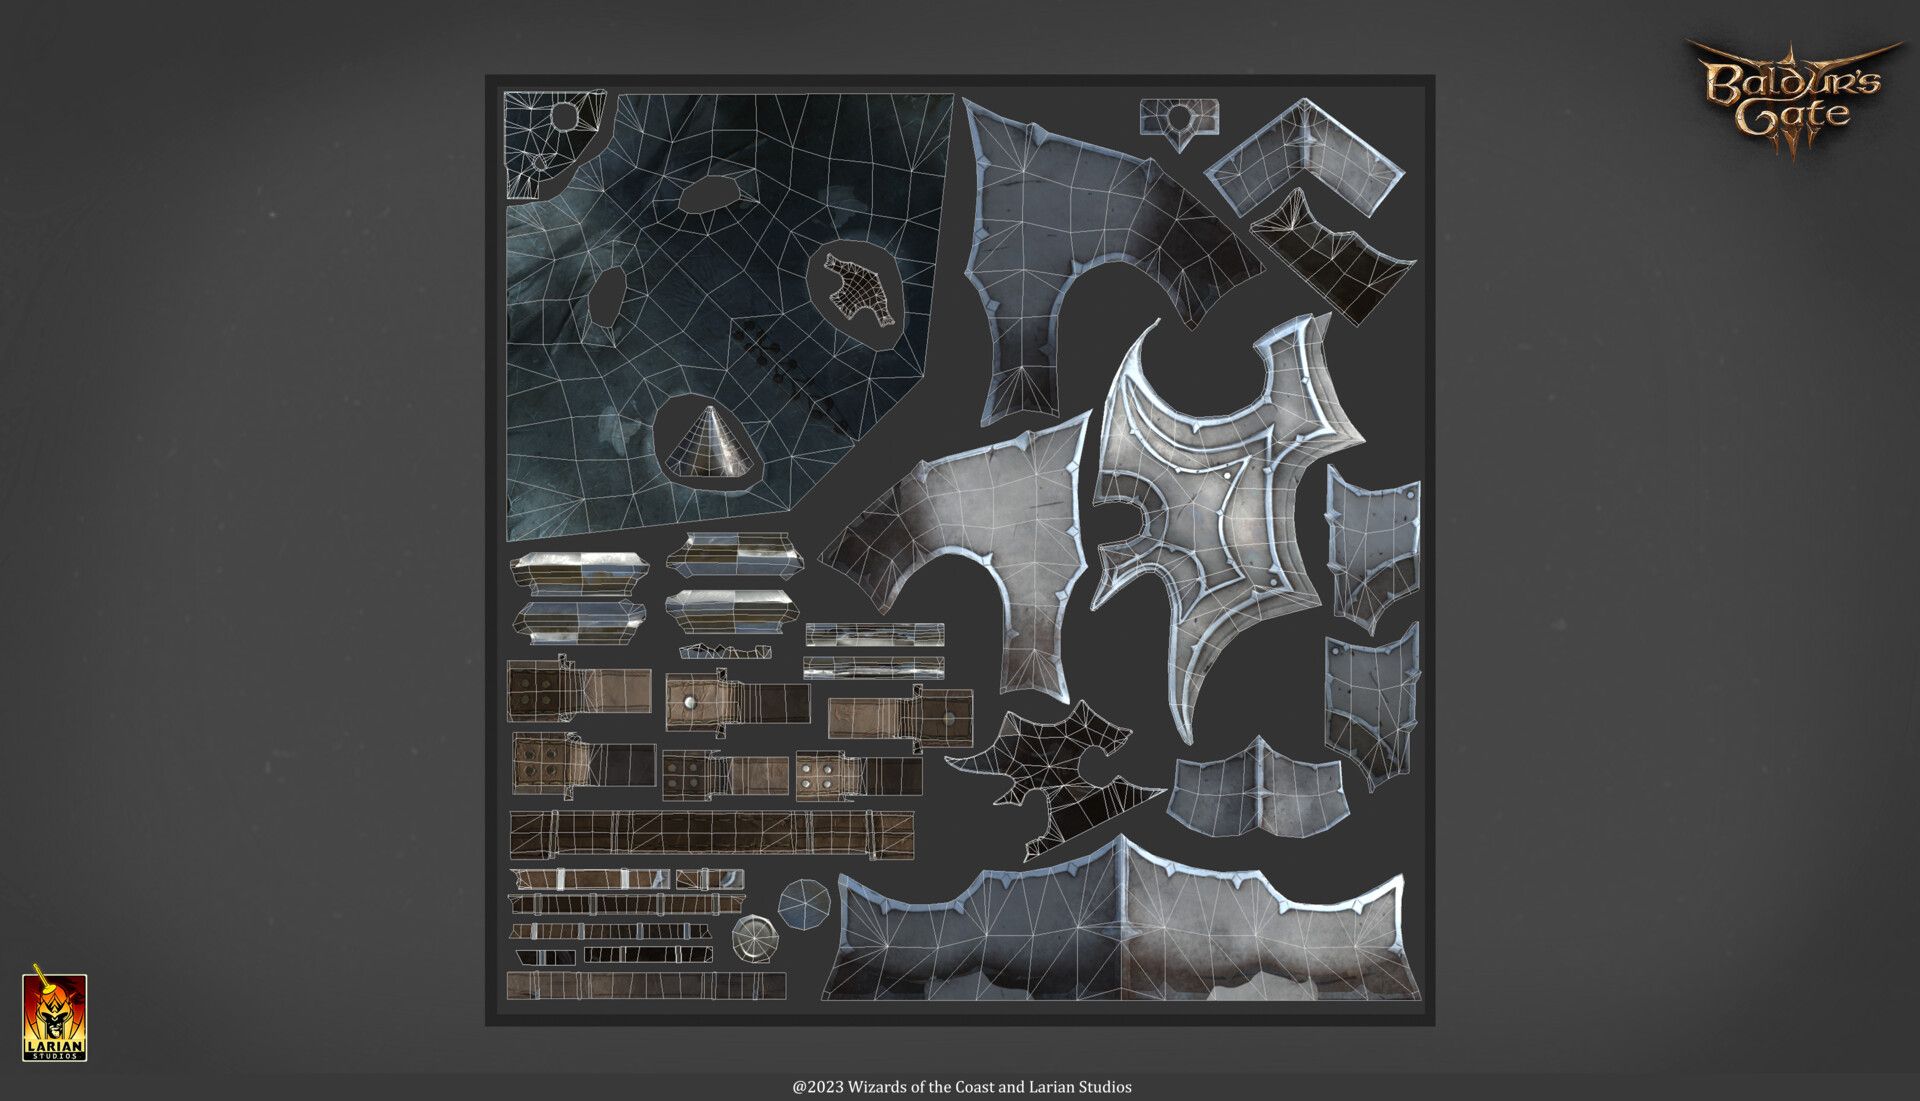
Tim Van Wassenhove is a 24-year-old 3D Character Artist holding a Bachelor's degree in Game Graphics Production and Animation from Howest - Digital Arts and Entertainment. Tim has had a deep passion for video games since childhood, with favourite series including ''Dark Souls,'' ''Dragon Age,'' and ''Dead Space.'' Notably, he had the privilege of contributing to his first video game project this year, ''Baldur's Gate 3.
In this article Tim shares a breakdown of one of his favourite projects and gives tips for sculpting and rendering game ready chracters for your portfolio.
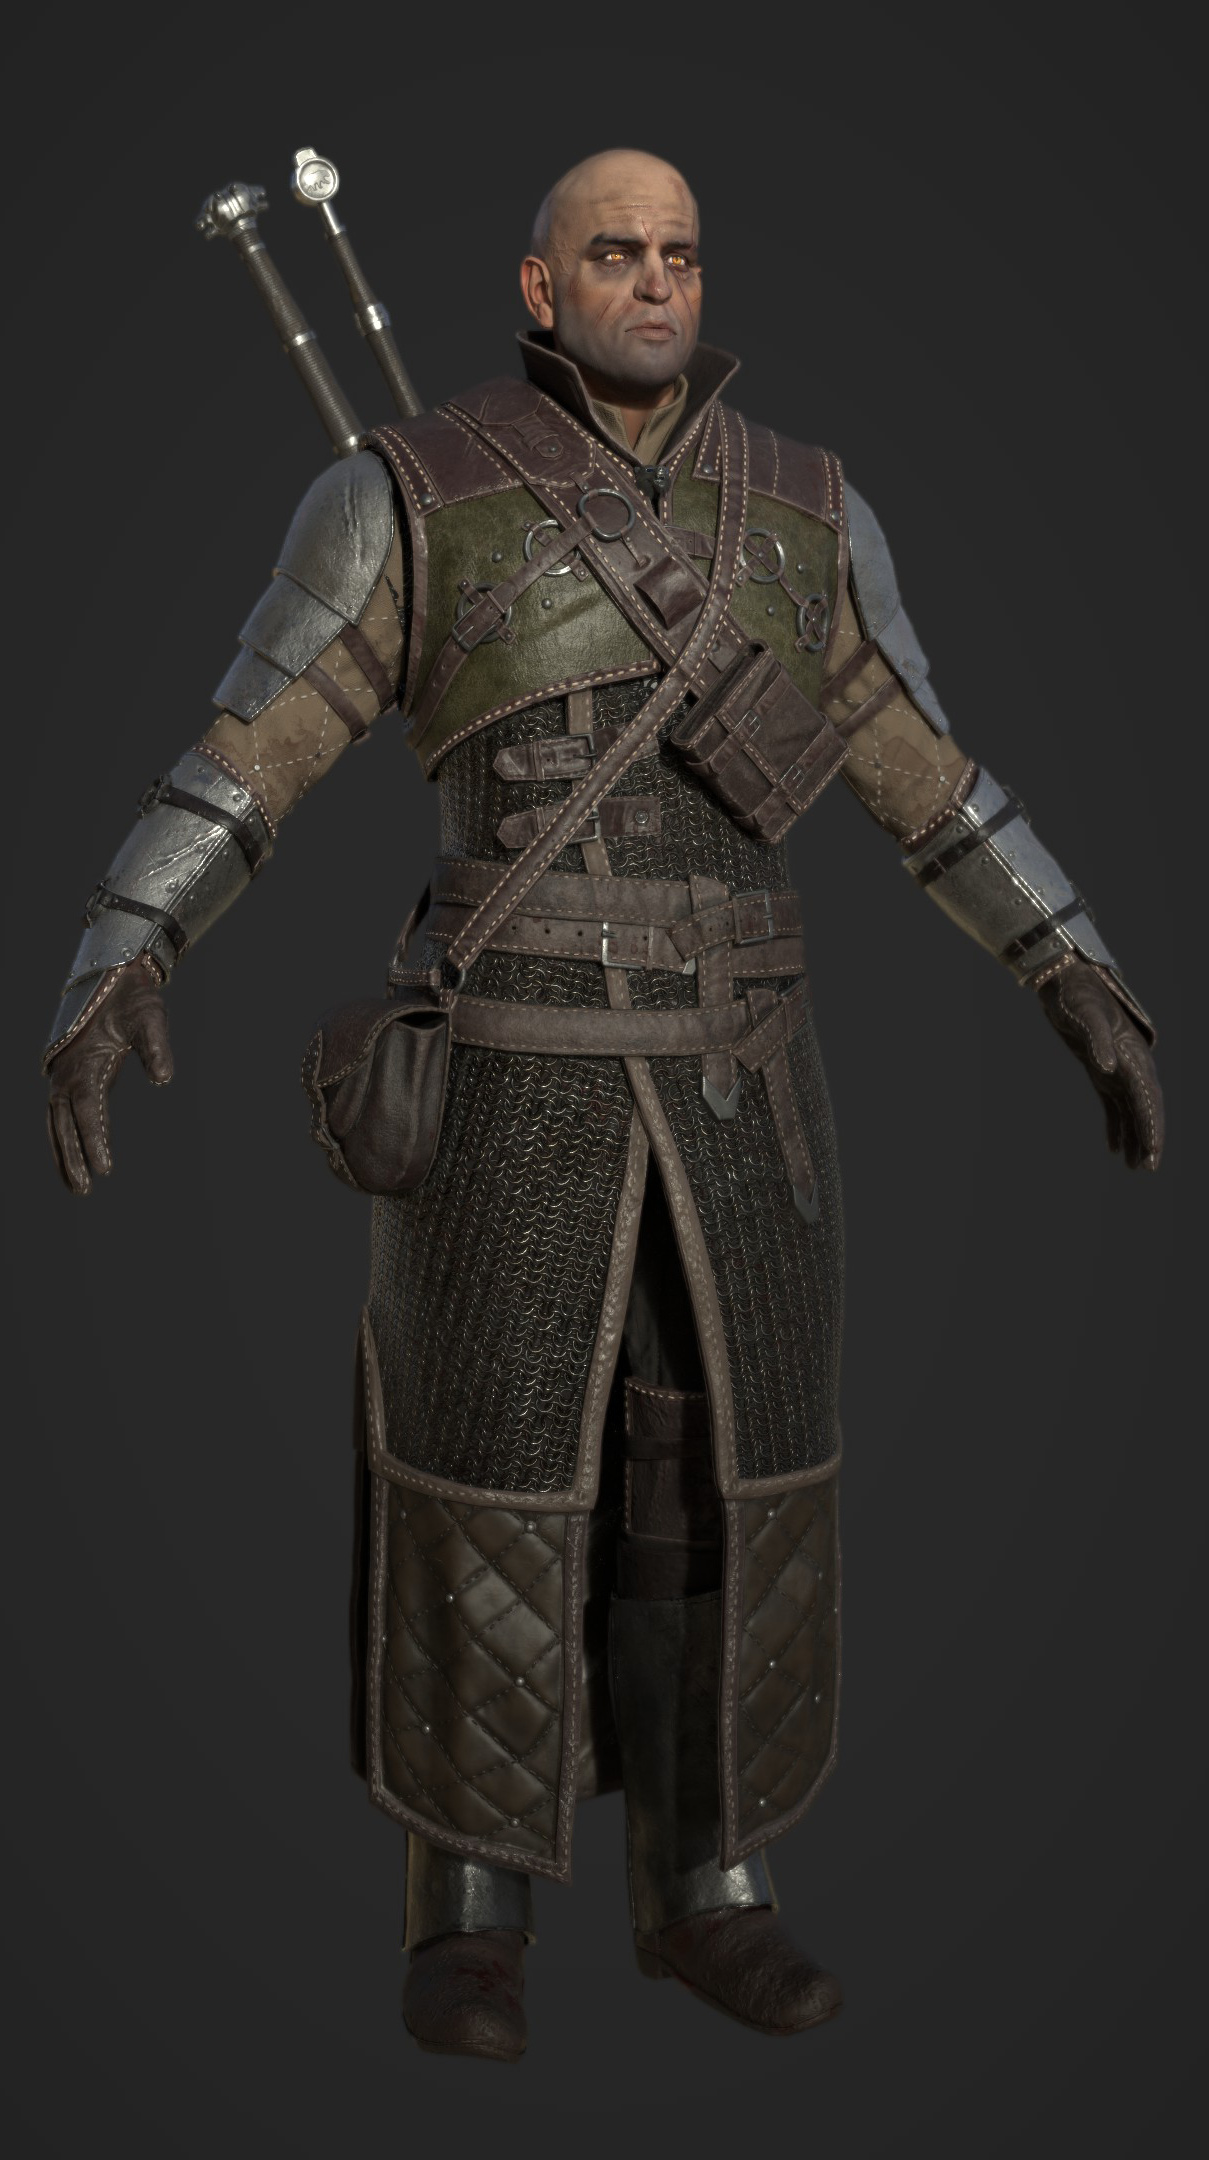
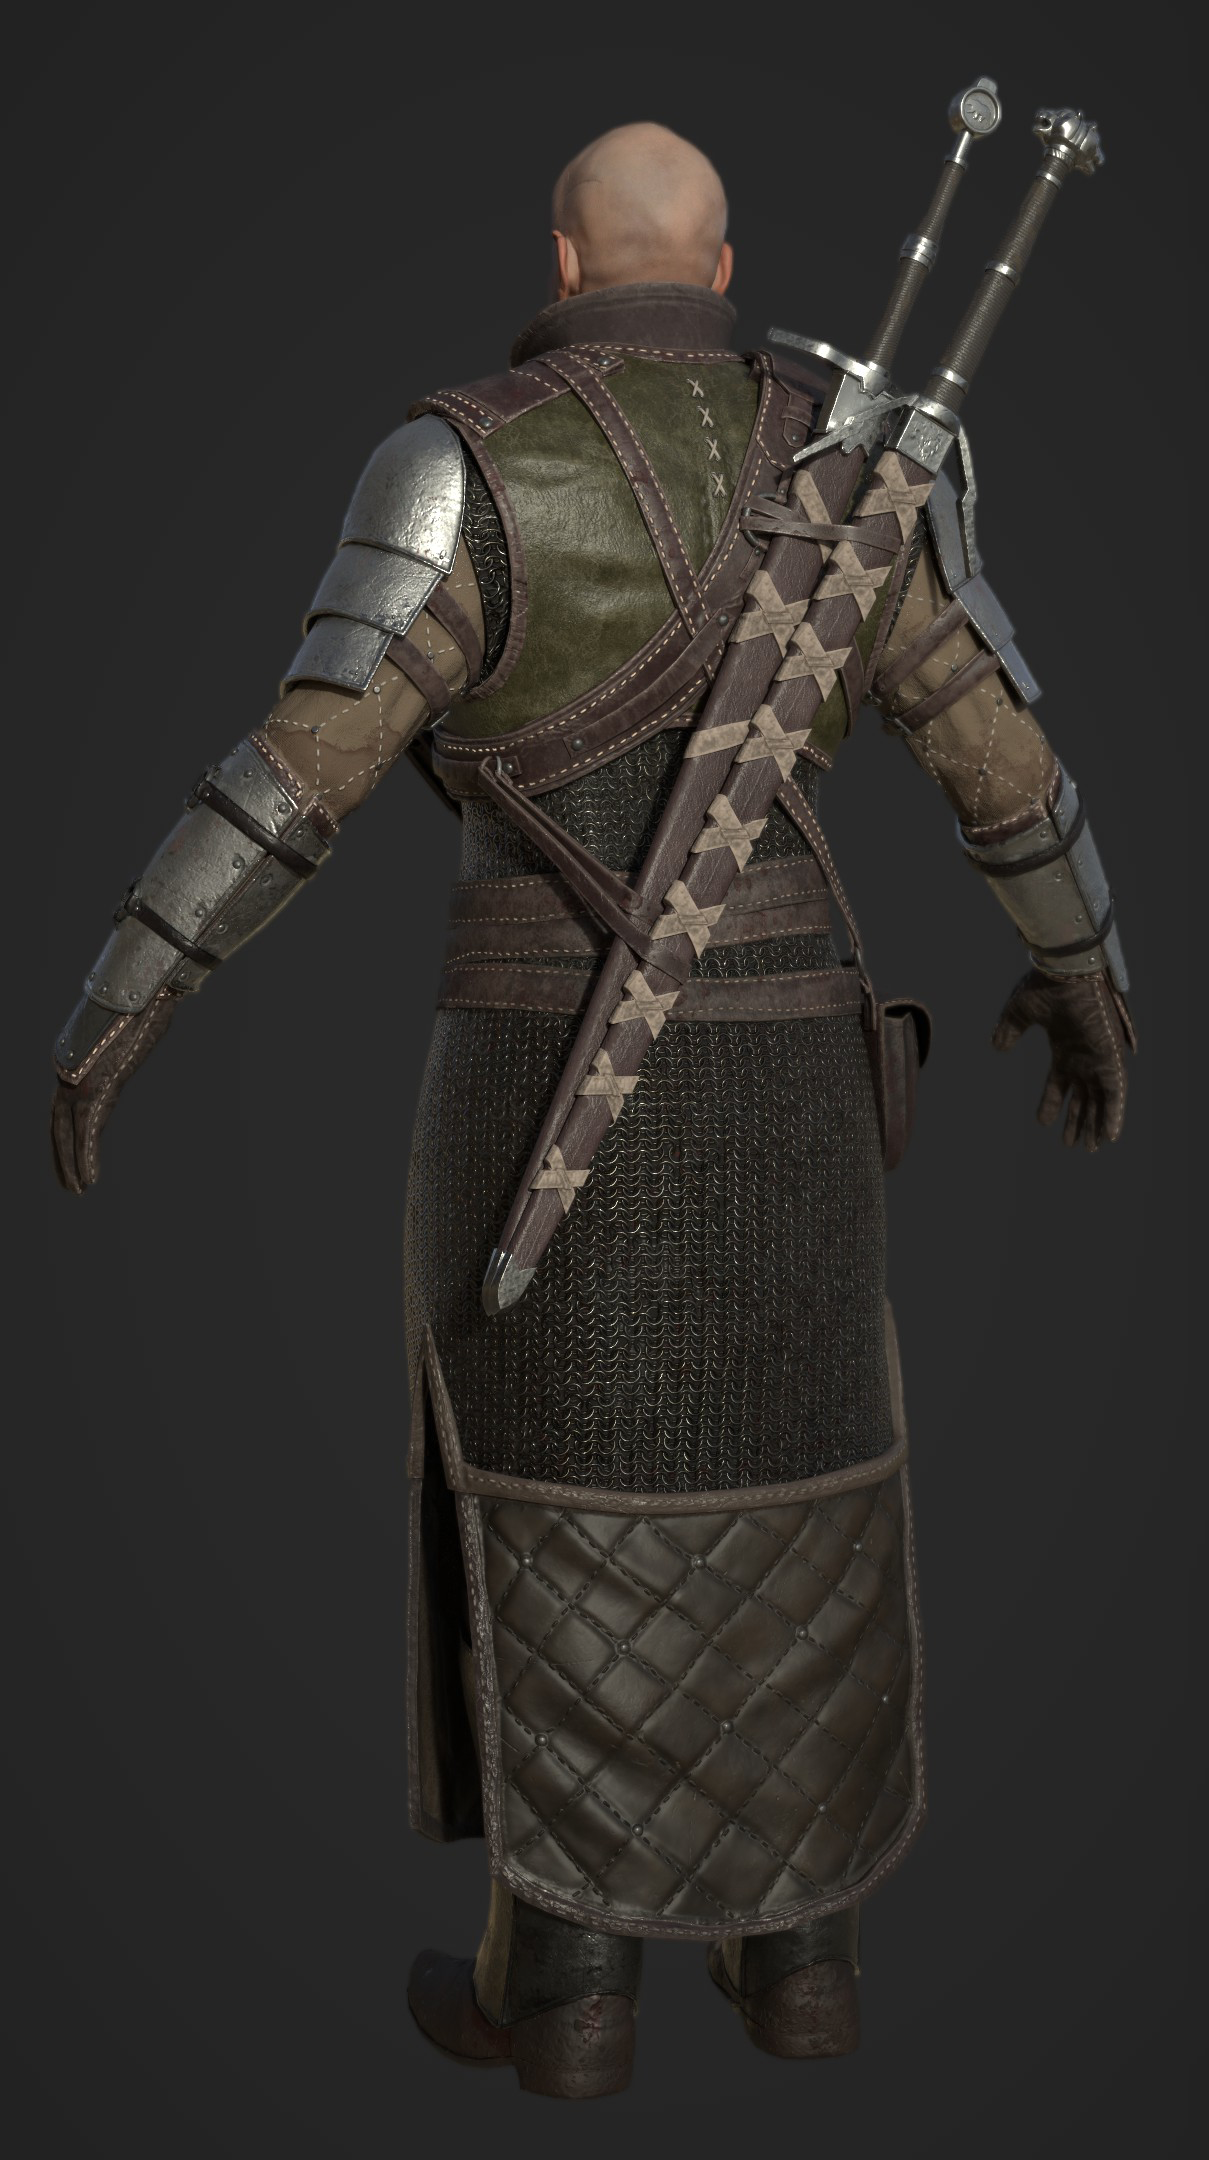
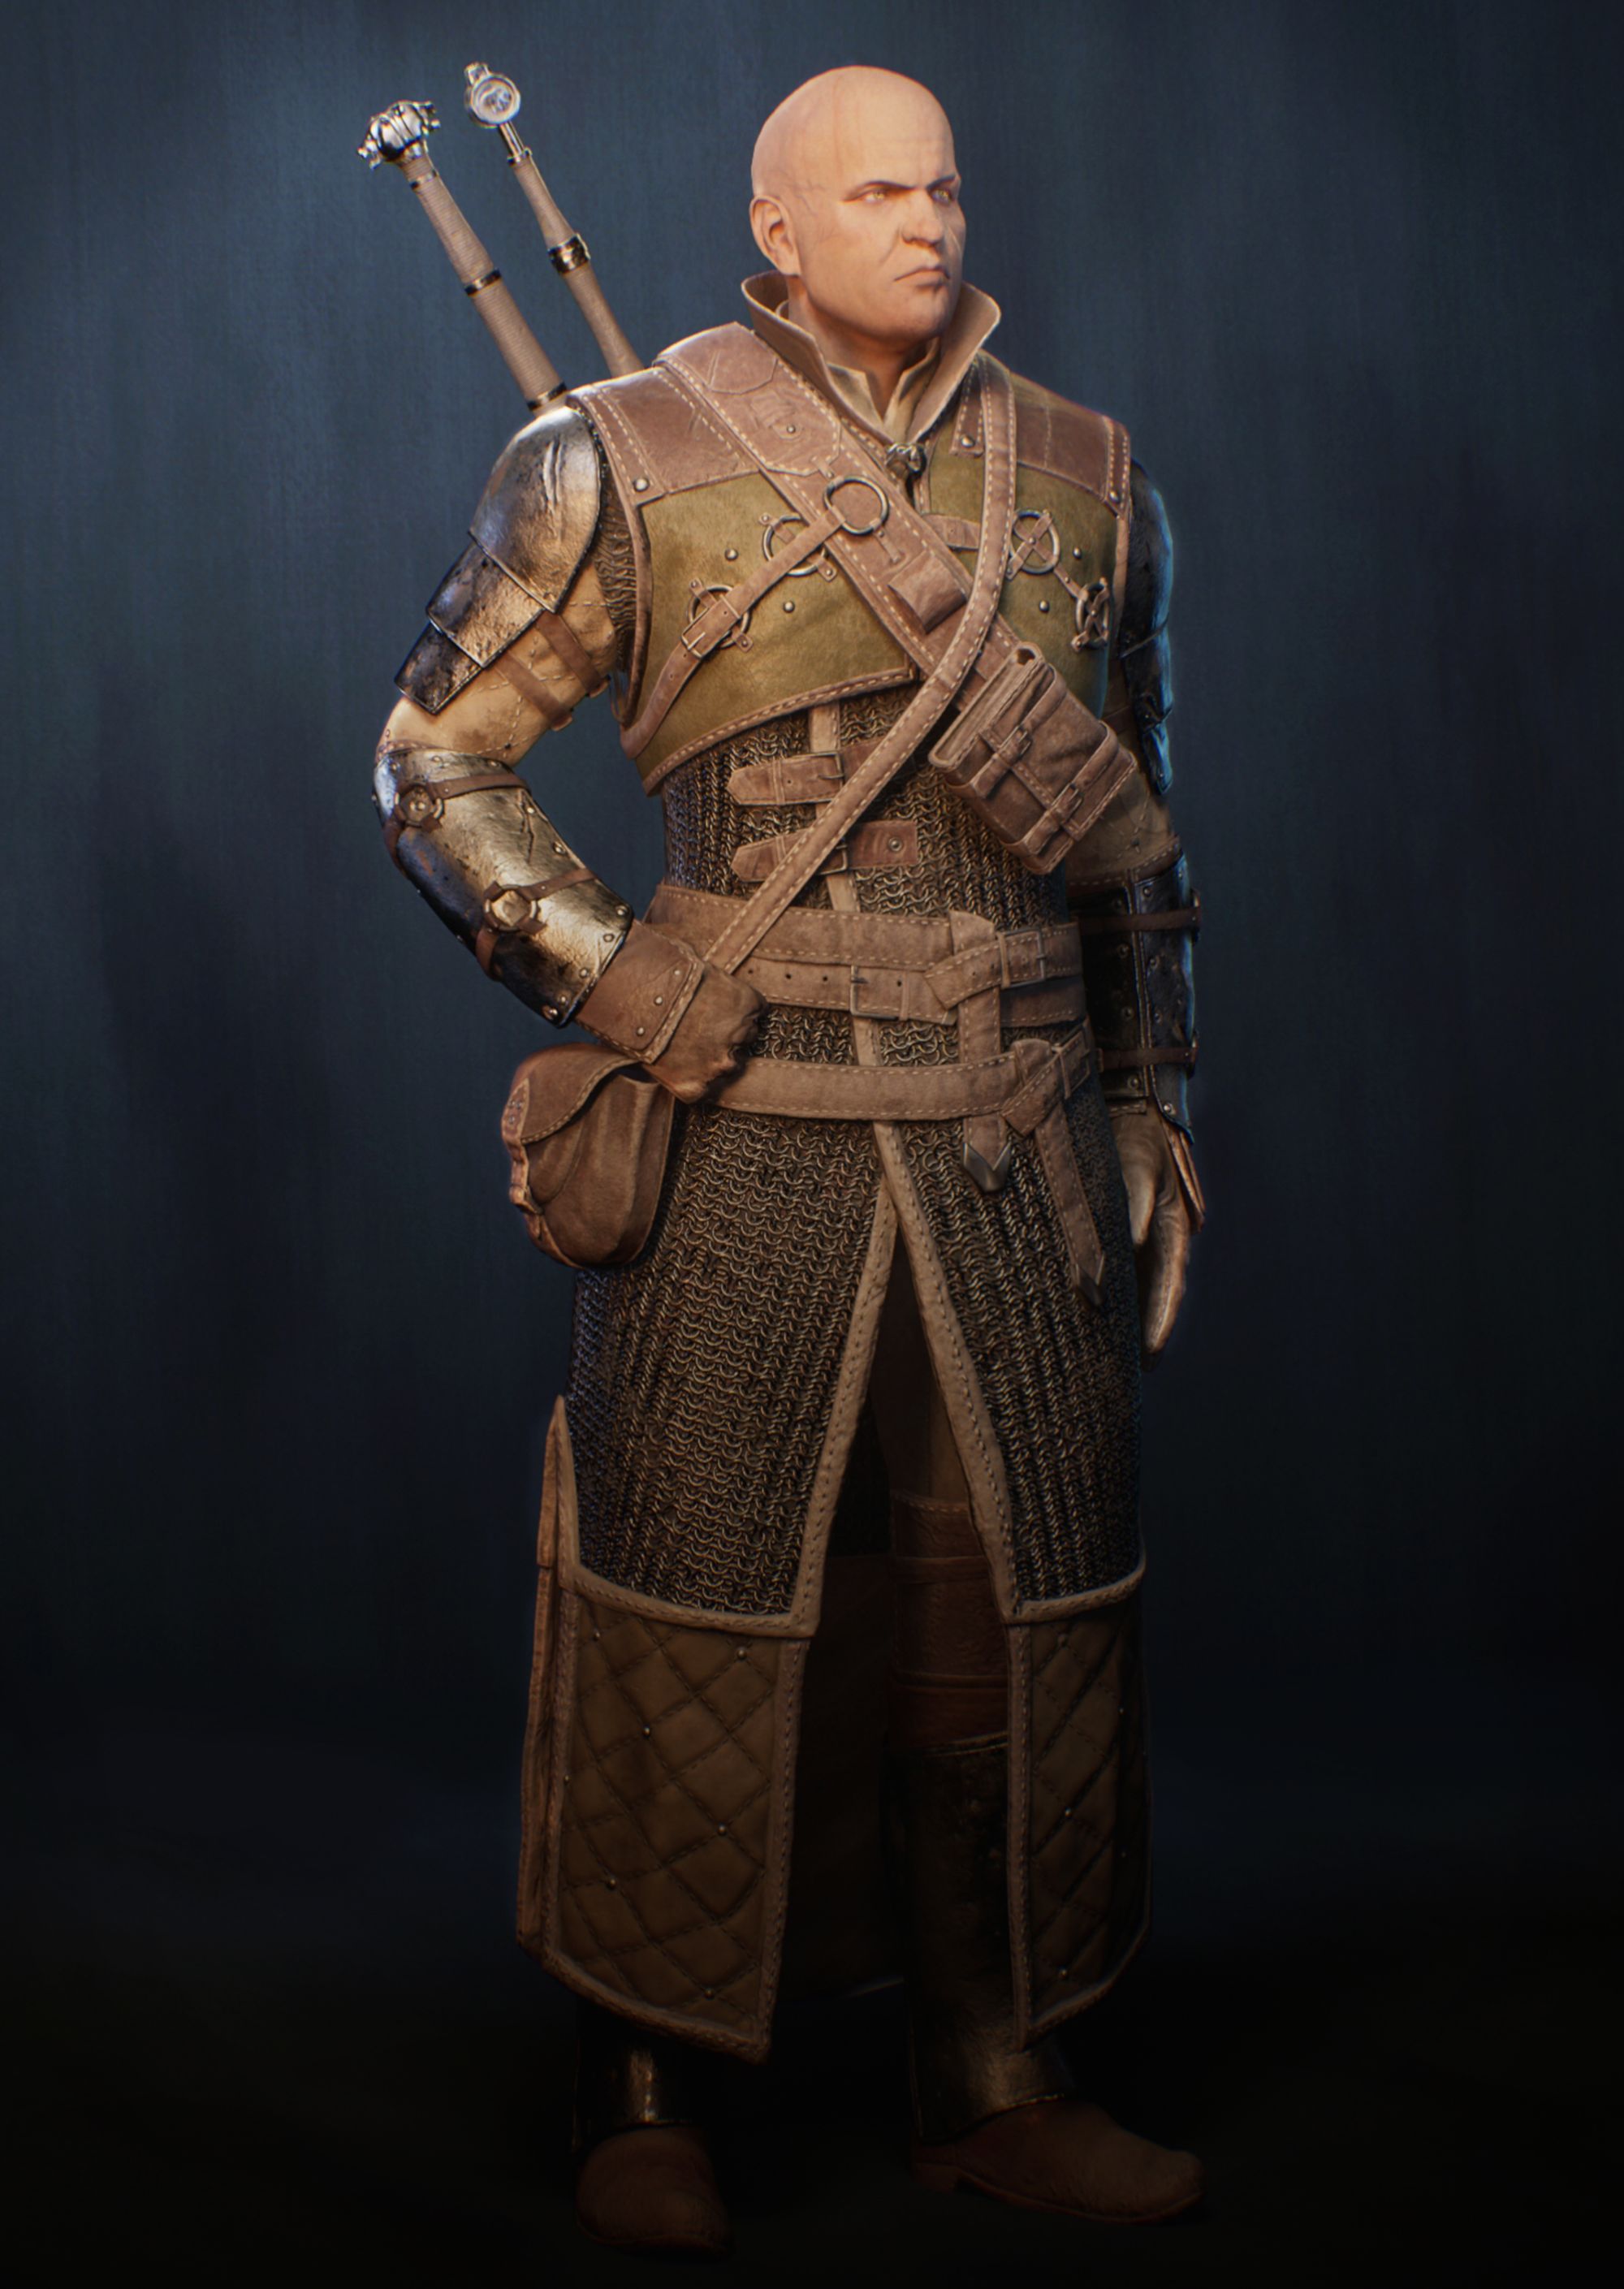
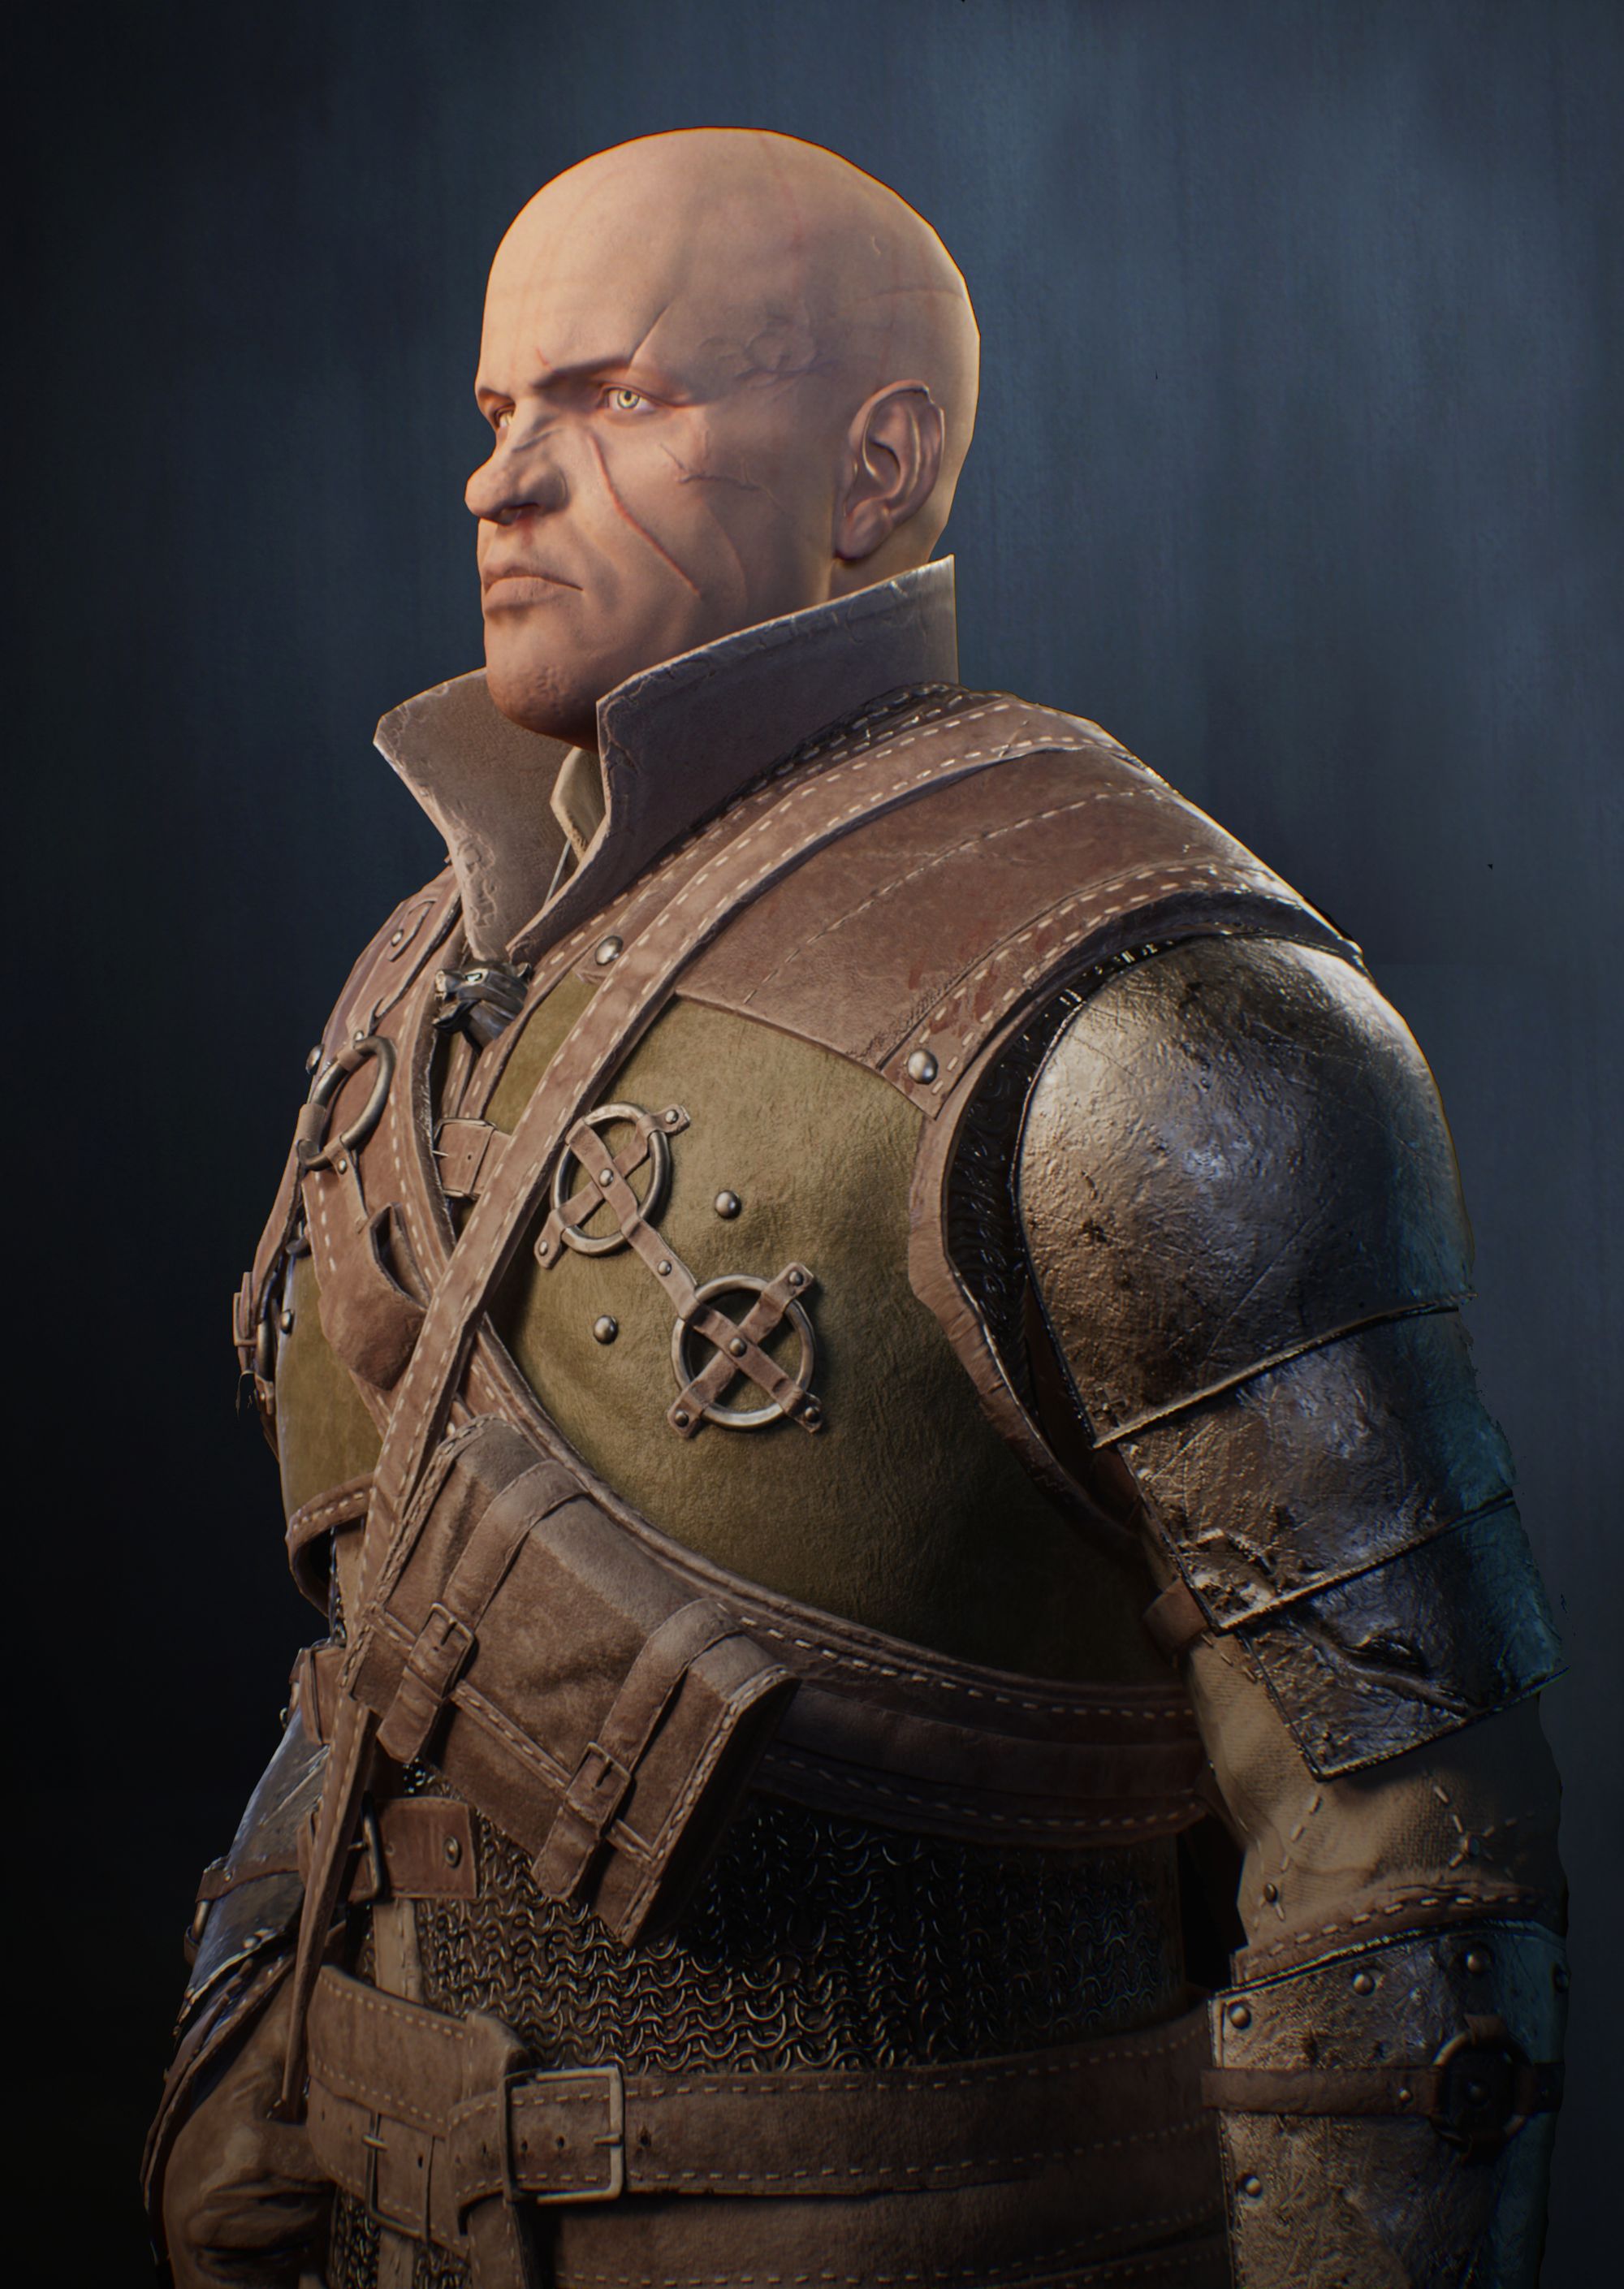
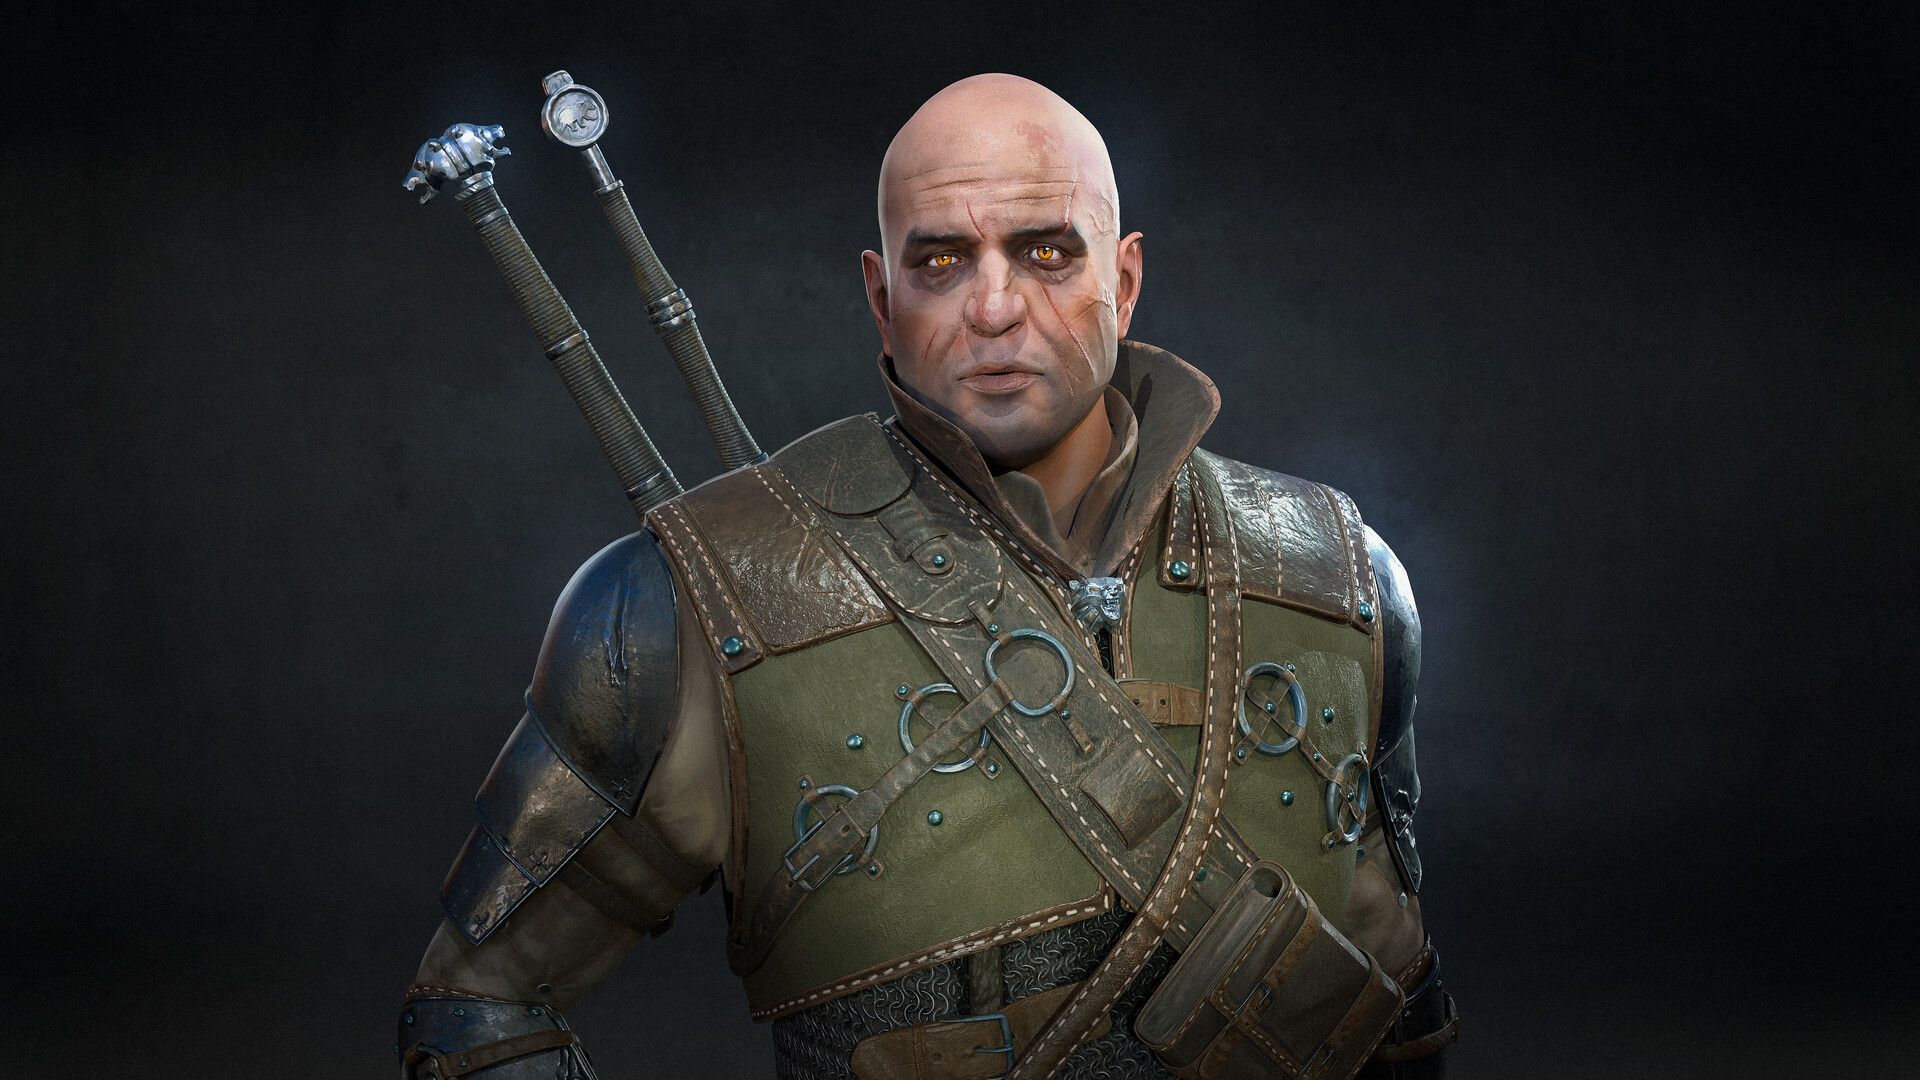
When the Rookies reached out to me and asked me to write an article about one of my artworks I didn’t believe it at first but my mind started racing to which project would be the most interesting to explain my process. So, I decided on the character that got me my internship at Larian Studios, The Witcher Gerd of the School of the Bear.
But first things first, I want to thank Rookies for allowing me to write my very first own article and showcase my workflow. I hope I can inspire and get people excited about character art with this project.
Workflow and Software
The programs I used for this project:
Workflow Step: Before Now
Sculpting: Zbrush Zbrush
Retopology: 3Ds Max Topogun
Uv mapping: 3Ds Max Rizum Uv Editor and Maya
Baking: Substance Painter Marmoset
Materials: Substance Painter Substance Painter
Rendering: Unreal Engine Marmoset/Unreal Engine
Finishing: Photoshop Photoshop
During my internship, I had the opportunity to explore the tools and software that other character artists use for various aspects of project creation. I dived into these programs and as a result, my workflow underwent significant changes.
Discovering a workflow that aligns with your style and preferences is a process that evolves with time and experimentation.
There are a lot of software options available, ranging from subscription-based to open-source. Personally, I found that using specialised programs for specific tasks suited me best. For instance, tools like Topogun and Rizum UV editor are purpose-built to streamline their respective functions, making my work more efficient.
I'll delve into the details of why I chose specific programs as we progress through the different phases of the project pipeline. It's important to note that there is no one-size-fits-all workflow. If a particular workflow enables you to achieve the desired results efficiently, then it's a successful one.
Phase 1: Idea/Reference
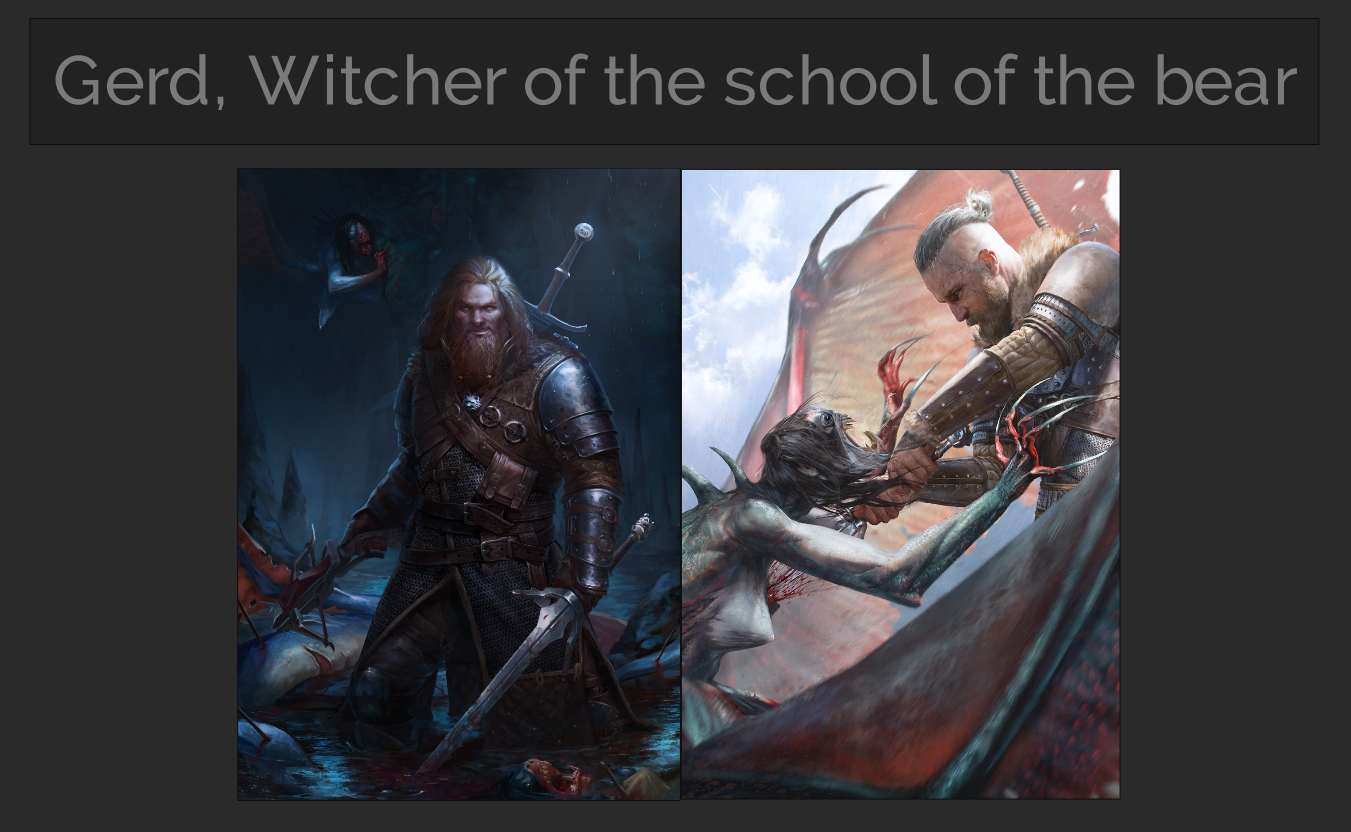
For this project, I decided to delve deeper into the Witcher universe after being hooked by the books. I found out that the school of the bear hadn't had much love online, only being mentioned in the books and games a couple of times, so, I wanted to bring one of the members of the bear into the spotlight.
Gerd the Witcher of the School of the Bear was the one I went with, but only having 1 drawing made for Gwent and a fan-made one to go off, I had my work set out for me to find the needed reference.
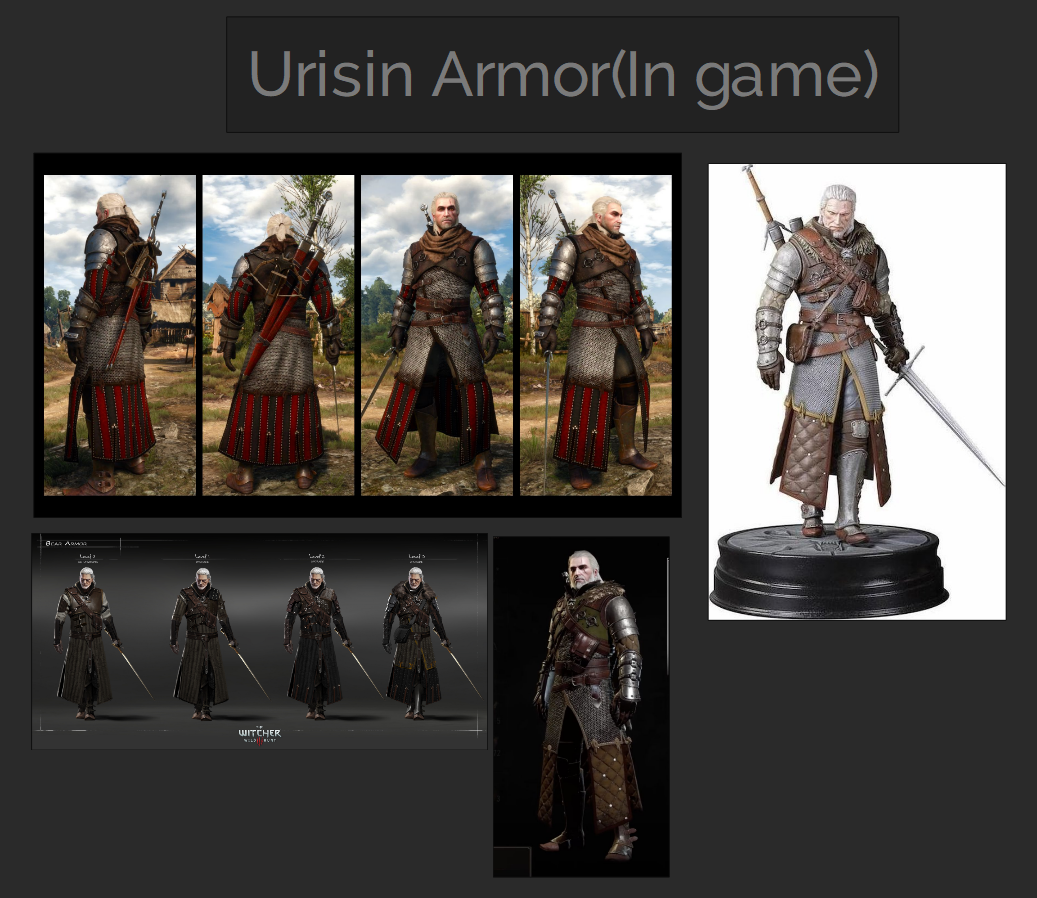
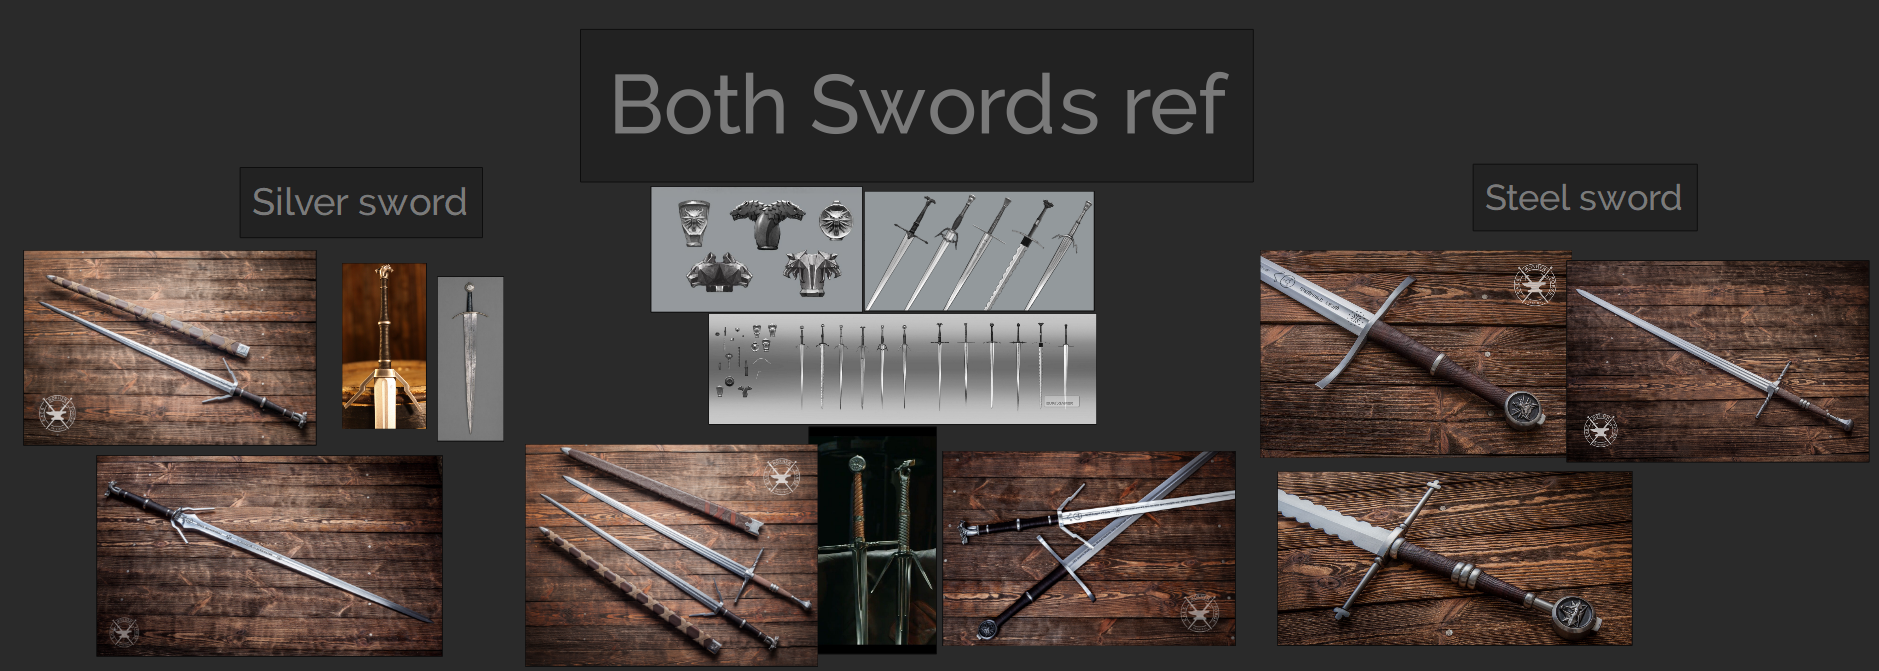
For my reference gathering, I like to split it up into categories to make it less daunting and easier to segregate.
Examples of some parts of my reference:
Avoid overwhelming yourself with too many references. Start with 4-5 key pictures per subject. If necessary, you can always add more later. Once you have a solid foundation of references, you can move on to the next phase.
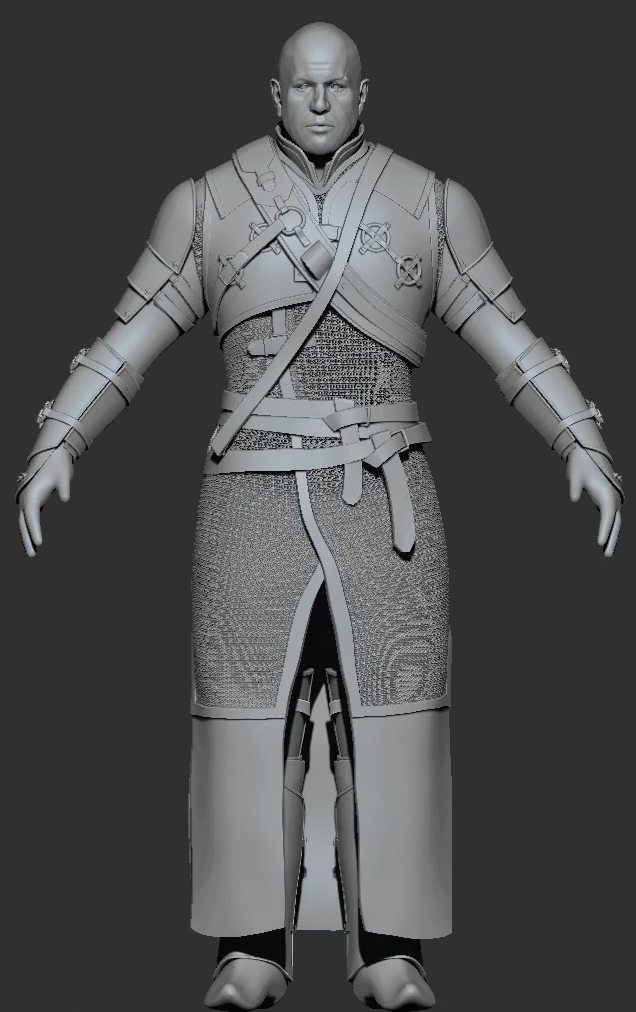
Phase 2: Sculpting/Modeling
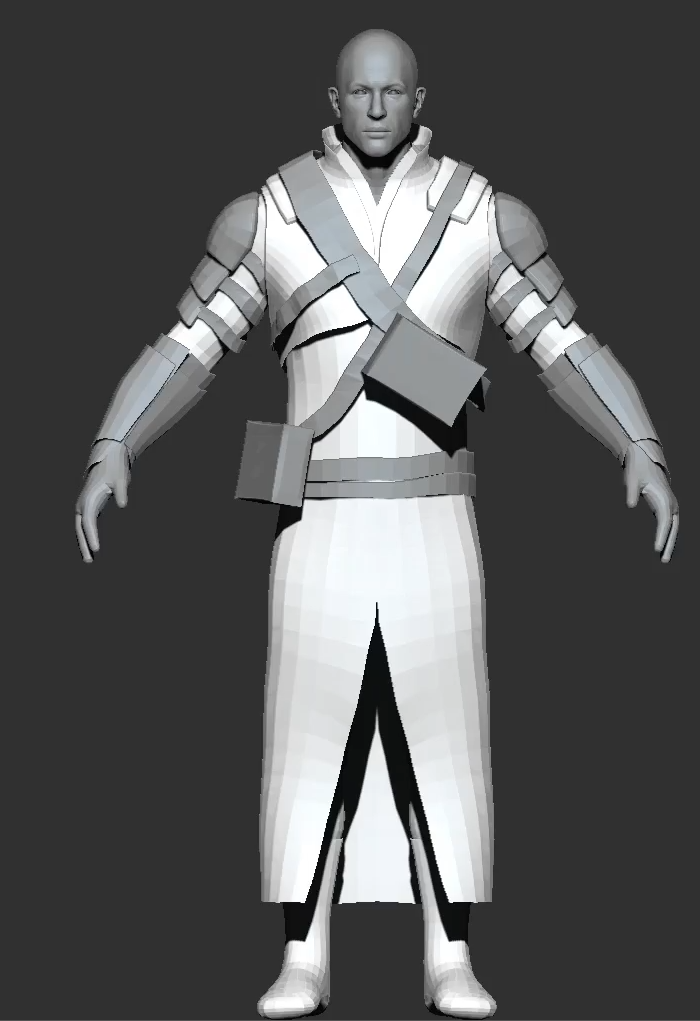
First, I decide whether to use a basemesh, which is usually my choice for saving time and ensuring a solid foundation. When I begin sculpting, I start by blocking out shapes. This can be done using low-poly meshes for a cleaner appearance, or my preferred method - free sculpting with a dynameshed ball, using brushes like move, clay buildup, and dam standard. If I need a mesh that conforms to the body's shape, I use the masking tool to isolate the part I want and then extract it for a more convenient base.
Once you have you’re shapes and meshes in place you can start refining the shapes more; don’t worry it may look weird or not what you were intending, just remember, it will look bad before it starts looking good again!
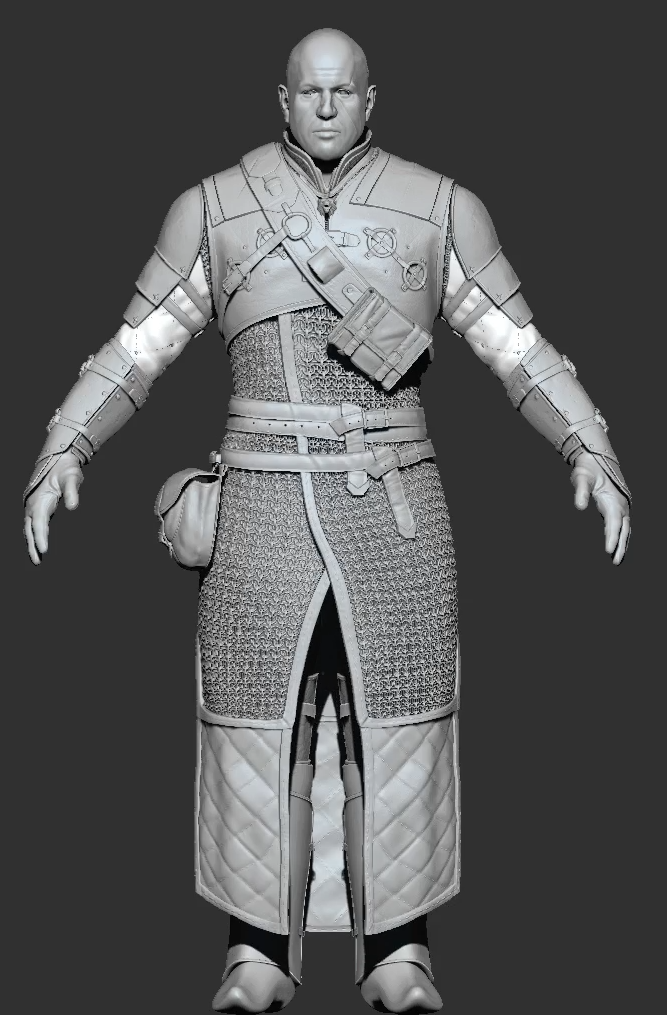
While sculpting, you have various options for creating different meshes. For hard surface modeling, programs like Maya or Blender are commonly used. In my workflow, I prefer to use ZBrush's Zmodeler tools for hard surface modeling. This choice reduces errors when transitioning between programs, allows me to easily adjust shapes to the body, and provides the flexibility to modify polygons and vertices within the same software.
After completing all the major steps, there's one additional step, particularly useful for achieving a realistic feel. It involves adding small or micro details to your meshes. This can be done in various ways. You can use pre-existing alphas, create your own using the surface tab in ZBrush, or manually craft micro details using an array of brushes within ZBrush.
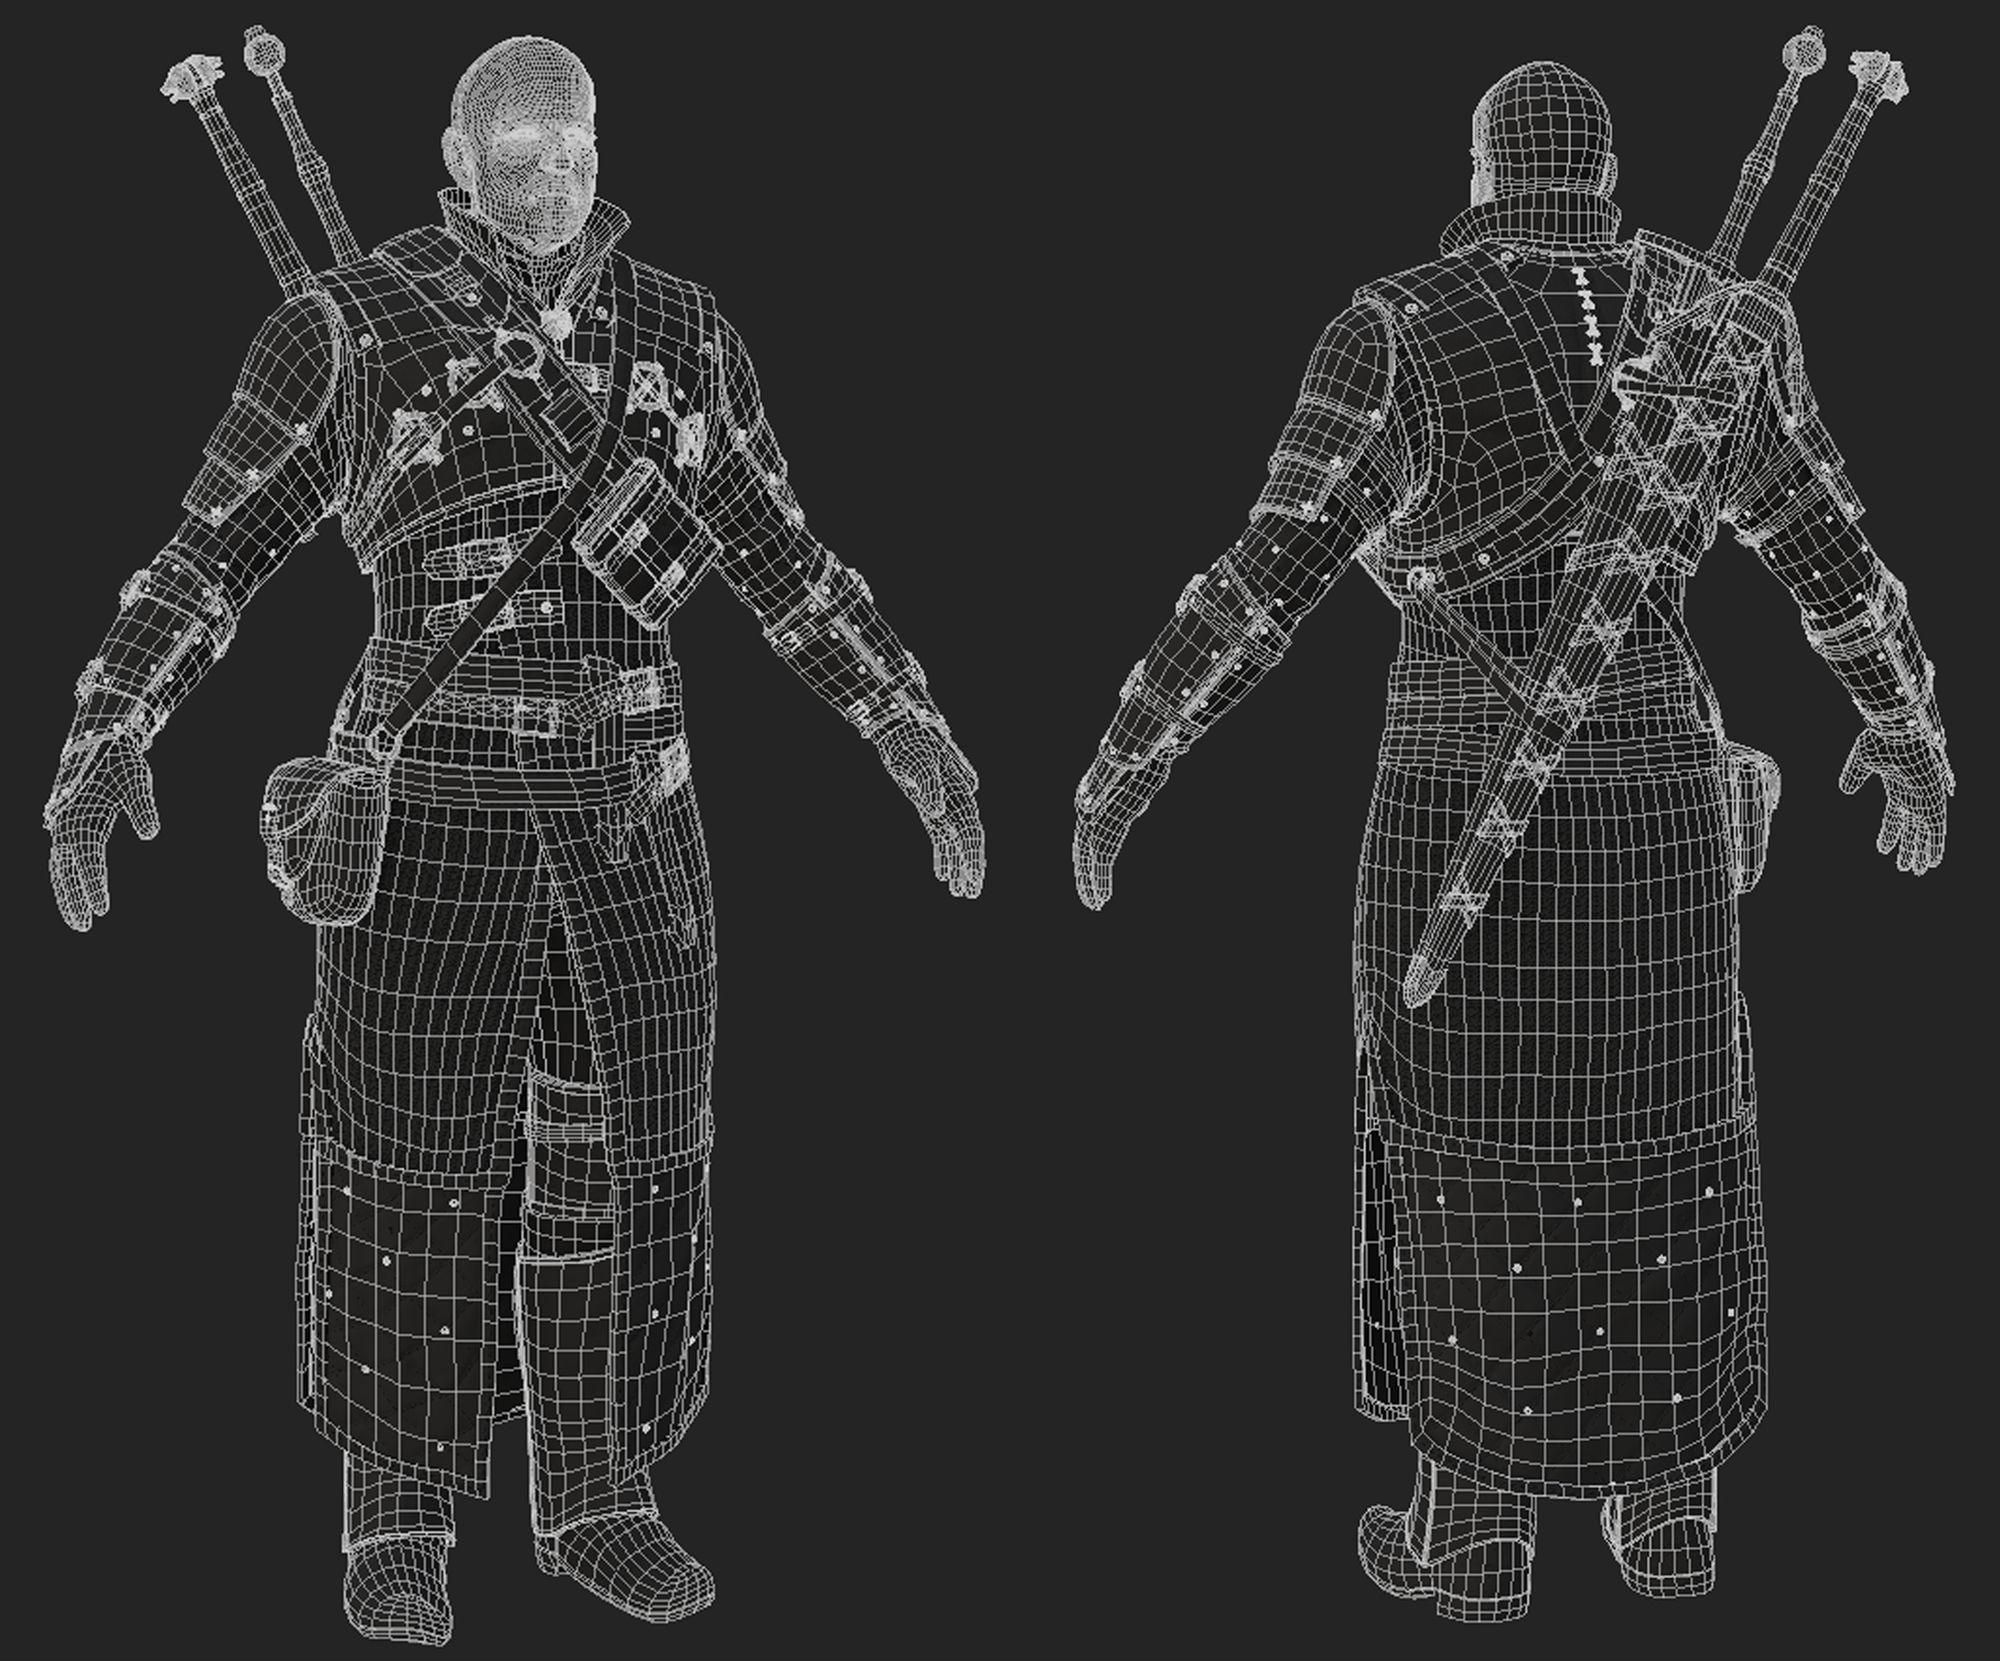
Phase 3: Retopologising/UV Mapping
After completing your sculpture, you can prepare it for games by optimizing it through retopology and creating UV maps. Before starting these steps, consider performing a test bake in Marmoset or Substance 3D Painter to ensure everything appears as expected.
When retopologizing your project, focus on achieving good mesh flow for smoother animations, like allowing more polygons in areas such as the armpits for cleaner stretching. It's crucial to strike a balance between keeping the polycount as low as possible without compromising the sculpt's appearance. For example, prioritise adding more polygons to the face for fluid facial animations while keeping the back of the head at a lower polycount. A well-balanced approach prevents clipping and excessive polycounts that could impact performance.
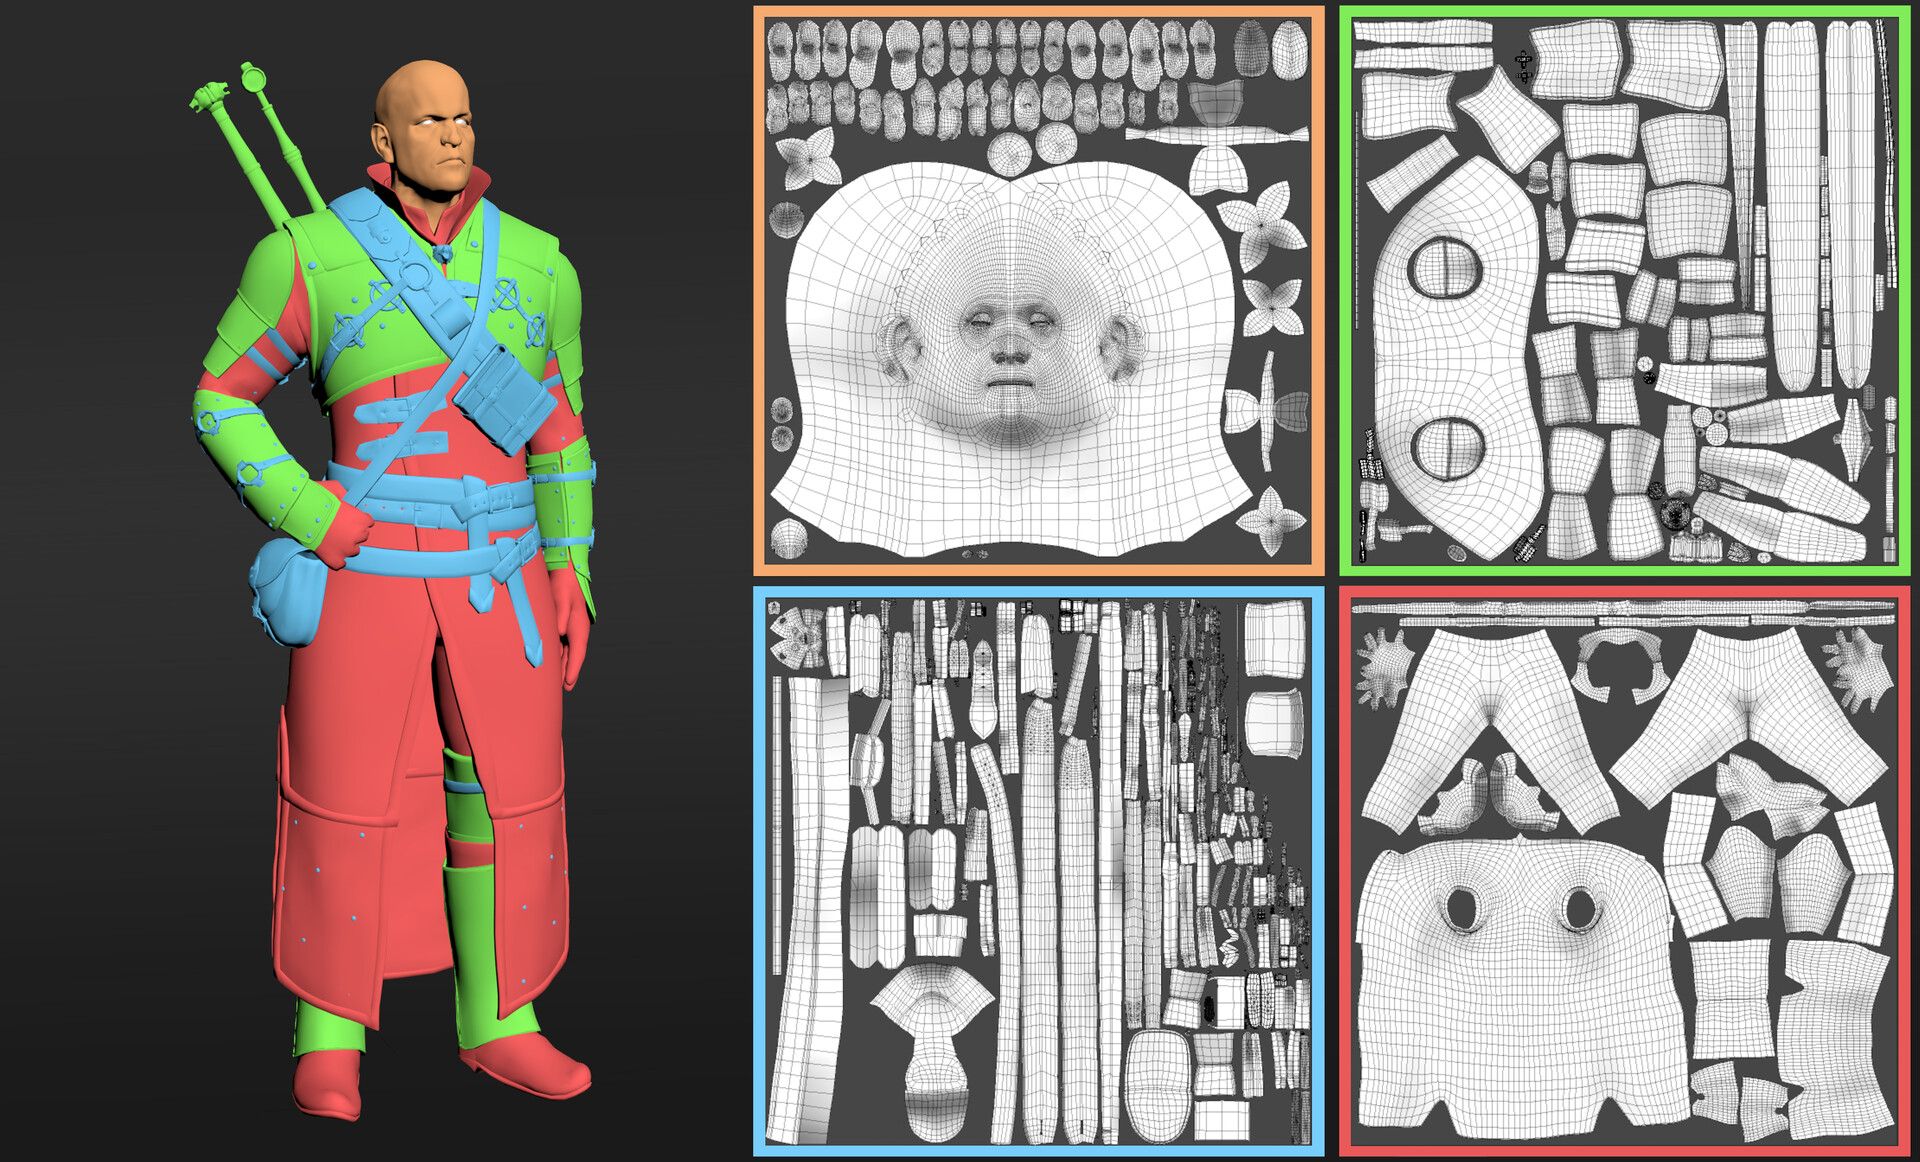
After achieving a clean topology that meets your satisfaction, you can move on to creating UV maps. When working on your UVs, remember:
Maintain consistent resolution across meshes to prevent texture discrepancies.
Optimize UV space usage to its maximum potential.
Keep UV lines straight and maintain uniform mesh direction.
If necessary, split UV maps, such as separating the head for different outfits.
I personally learned these steps through various projects, which helped evolve my UV mapping skills.
Phase 4: Texturing/Materials
After completing your retopology and UV mapping, you can proceed with baking your high-poly sculpt onto the low-poly retopology. This can be done using software like Marmoset or Substance 3D Painter. The goal is to transfer all the intricate high details from your sculpt to the low-poly mesh. It may take some experimentation to achieve the desired result, but once successful, you can delve into the creative aspects of texturing.
I begin by establishing a base color palette for the entire project. Next, I create basic materials such as metal, leather, and skin. These materials don't need to be the final result but should provide a visual understanding of each material. As you progress, you can refine these materials, but keep in mind that Substance 3D Painter's render engine may differ from those in Marmoset, Maya, and Unreal. I've found Marmoset to produce results closest to Substance 3D Painter, but it's important to check your work in your chosen render engine. When crafting materials, reference real-life examples to achieve an authentic look and feel.
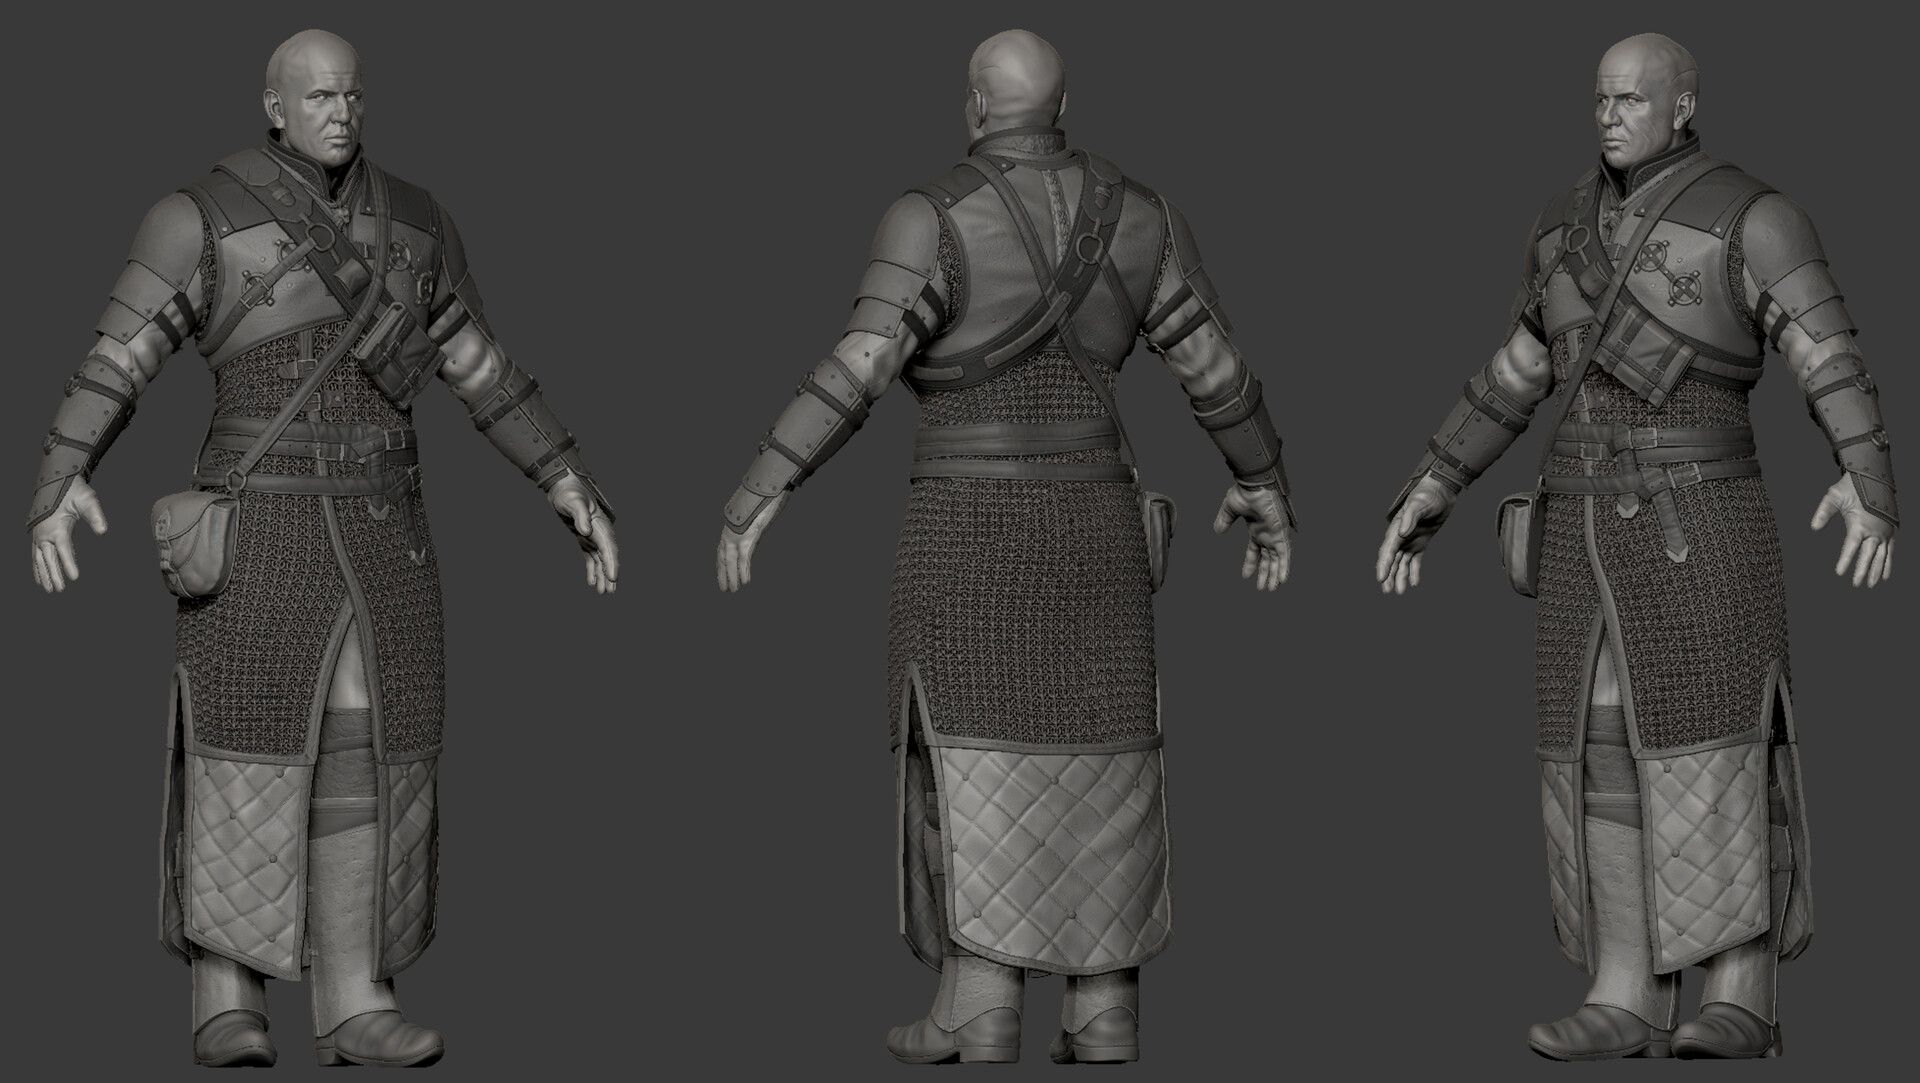
Phase 5: Posing
To create a pose for your character, you have a few options:
Rig your character (the method I used).
Use Zbrush's transpose master.
Manually adjust the low-poly model in any modeling program.
Phase 6: Rendering/Finishing Touches
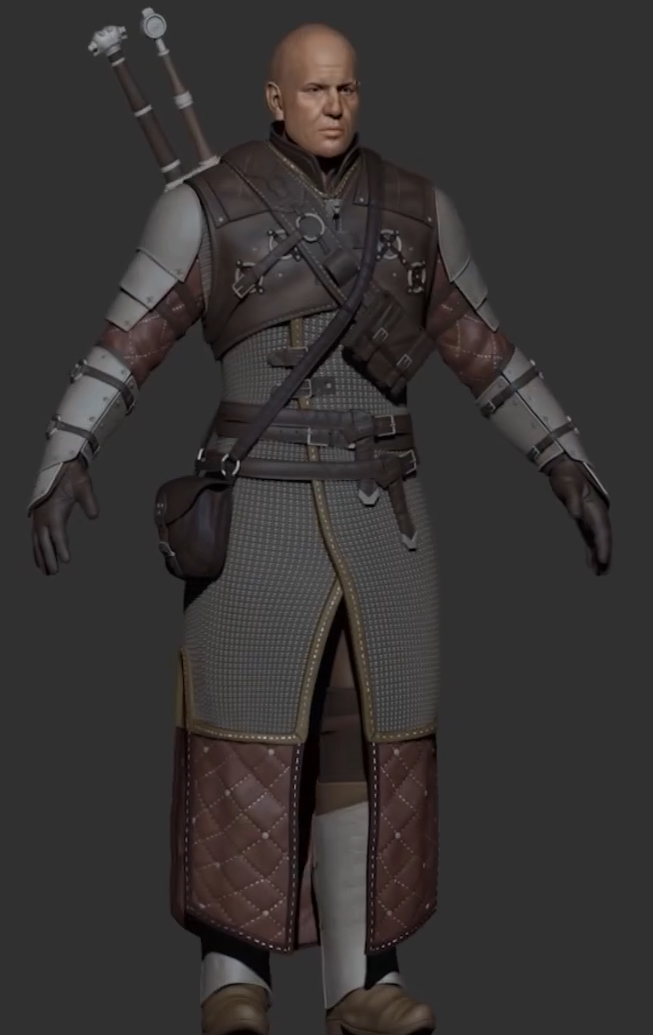
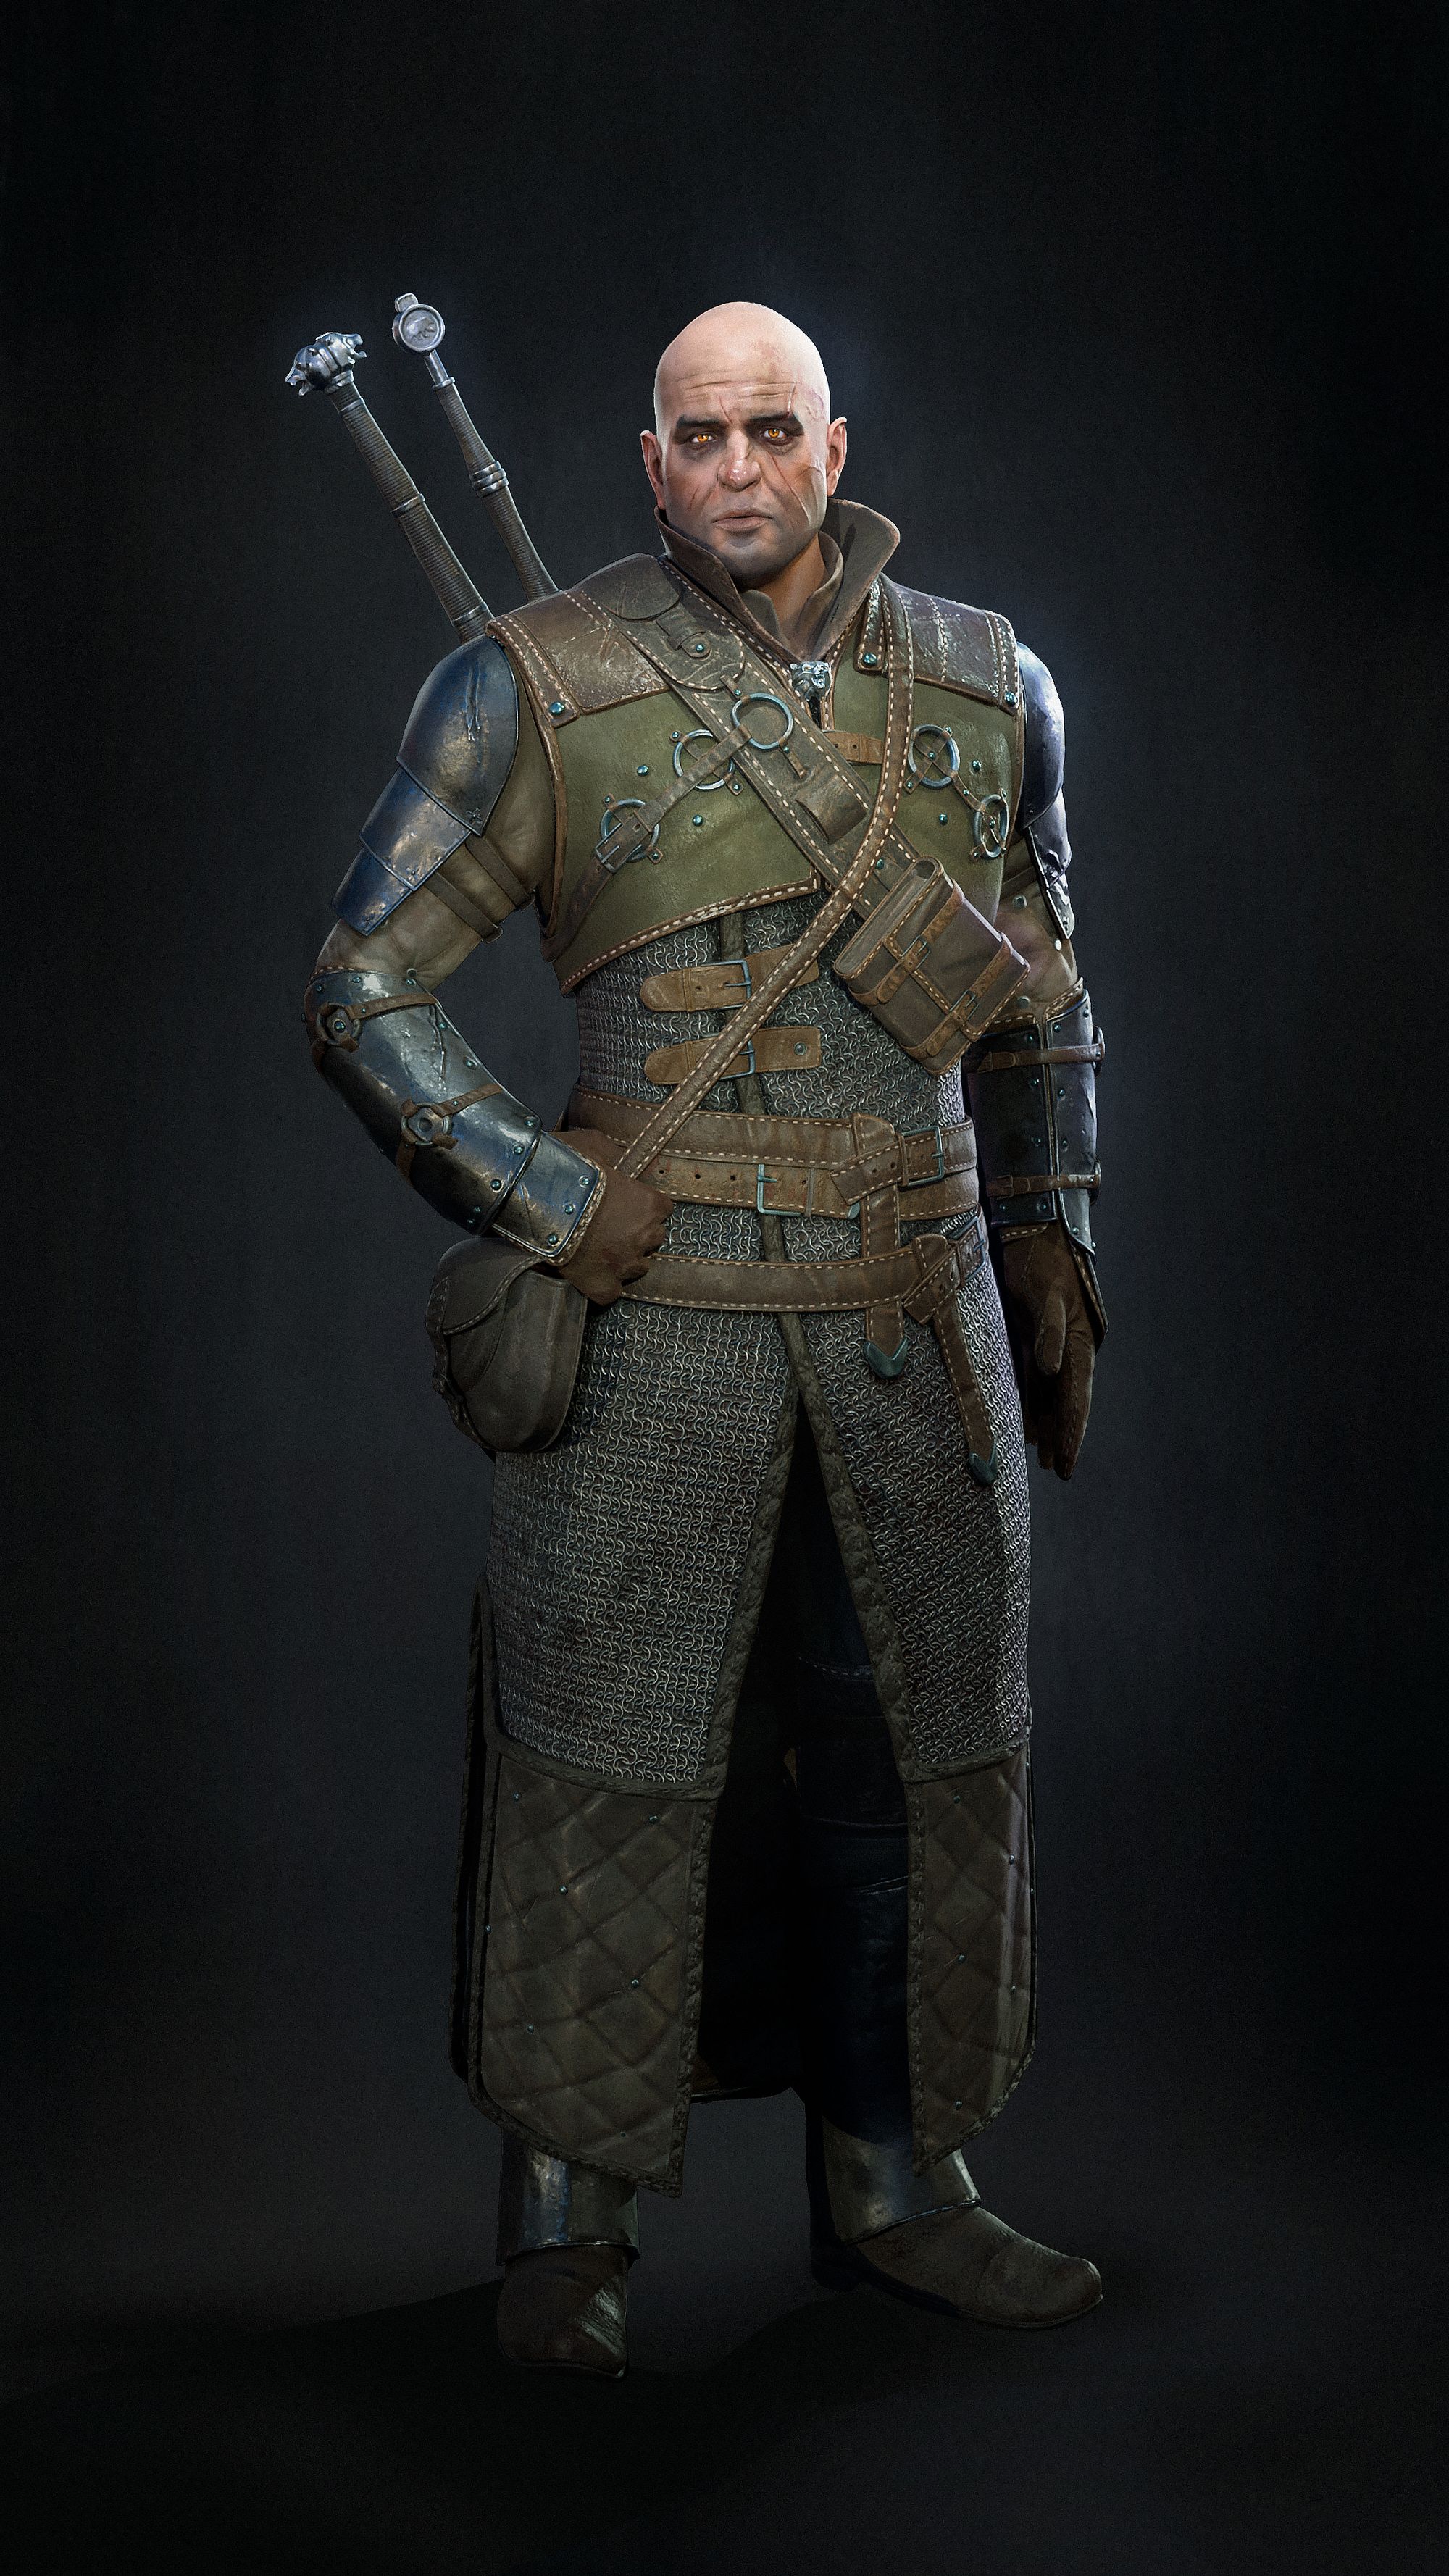
After completing the high-poly, low-poly, and materials, you can proceed to assemble your project in your chosen render engine. For my first attempt, I opted for Unreal Engine 5.
This was my initial result for the project. Unreal Engine offers incredible lighting for renders, but it may be less beginner-friendly because materials don't always translate the same way as they were created in Substance Painter. You'll need to set them up using Unreal's node system.
After some time I went back to this project to update it, clean up some more shapes and materials, and rendered with Marmoset.
After completing my renders, I import them into Photoshop to make adjustments, correct any minor errors, and enhance colors and overall appearance. Don't hesitate to do this, as it's a step that every artist takes to make their work even more compelling.
Conclusion
In the end, there are numerous ways to create a fully game-ready character. This was a brief glimpse into my character creation process and how I've evolved this workflow over time. Remember, your workflow will continuously evolve as you gain experience with different programs and techniques. The key is to persevere when faced with challenges and consistently work on improving your skills, step by step.
Thank you for taking the time to read my article, and I wish you the best of luck on your artistic journey.
You can reach out to Tim via his Rookies portfolio here.