How to Create a VFX Shot with Body Replacement and Background Integration
In this article, Sondre Fagerborg shares insights into his VFX shot process, blending CG elements and compositing techniques. As a Kristiania University College student, he's pioneering his work while honing skills for a promising VFX career.
In this article, we chat with Sondre Fagerborg, where he discusses his creative process in crafting a VFX shot through experimentation with CG elements and compositing techniques. Currently a student at Kristiania University College, Sondre is consistently pushing the boundaries of his work while acquiring the skills needed for a successful career in VFX.
Shooting for CG Integration
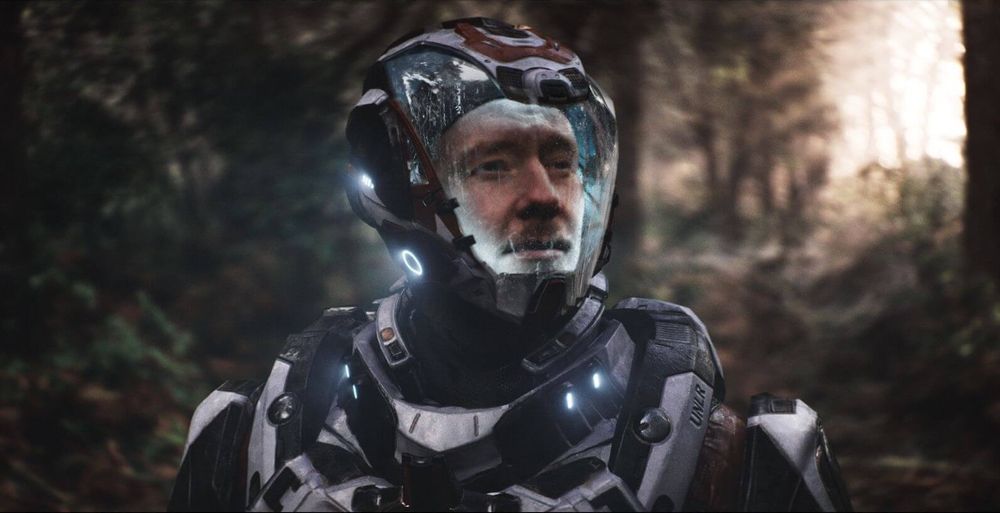
The original scope for the project was to keep some of the filmed background, extending some parts, and integrating the suit around the actor.
Using the right techniques when filming for Visual Effects, will make for an easier post production, and a simpler integration process later.
Tracking & Set Scan
When shooting for CG integration you'll need to solve to get a camera in 3D space. This is especially necessary if you have a scene with parallax.
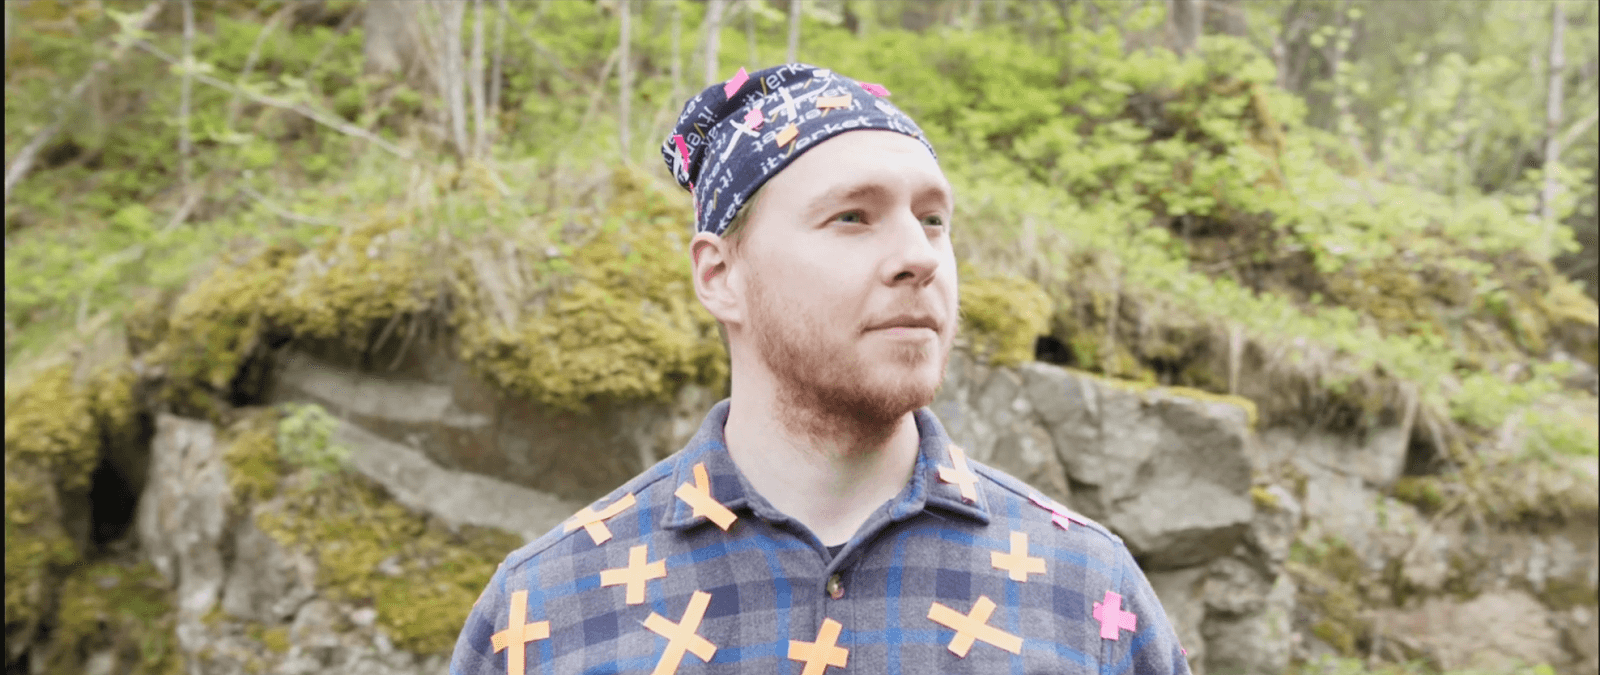
In this case I also needed to track two parts of the body, which later would become two separate moving objects in 3D space, matching the 3D camera. I put quite a lot of tracking markers on the actor to make sure I had a lot of points to take information from - contrasting points makes it easier for the software to distinguish what pixels are where between different frames.
Tracking With Photogrammetry
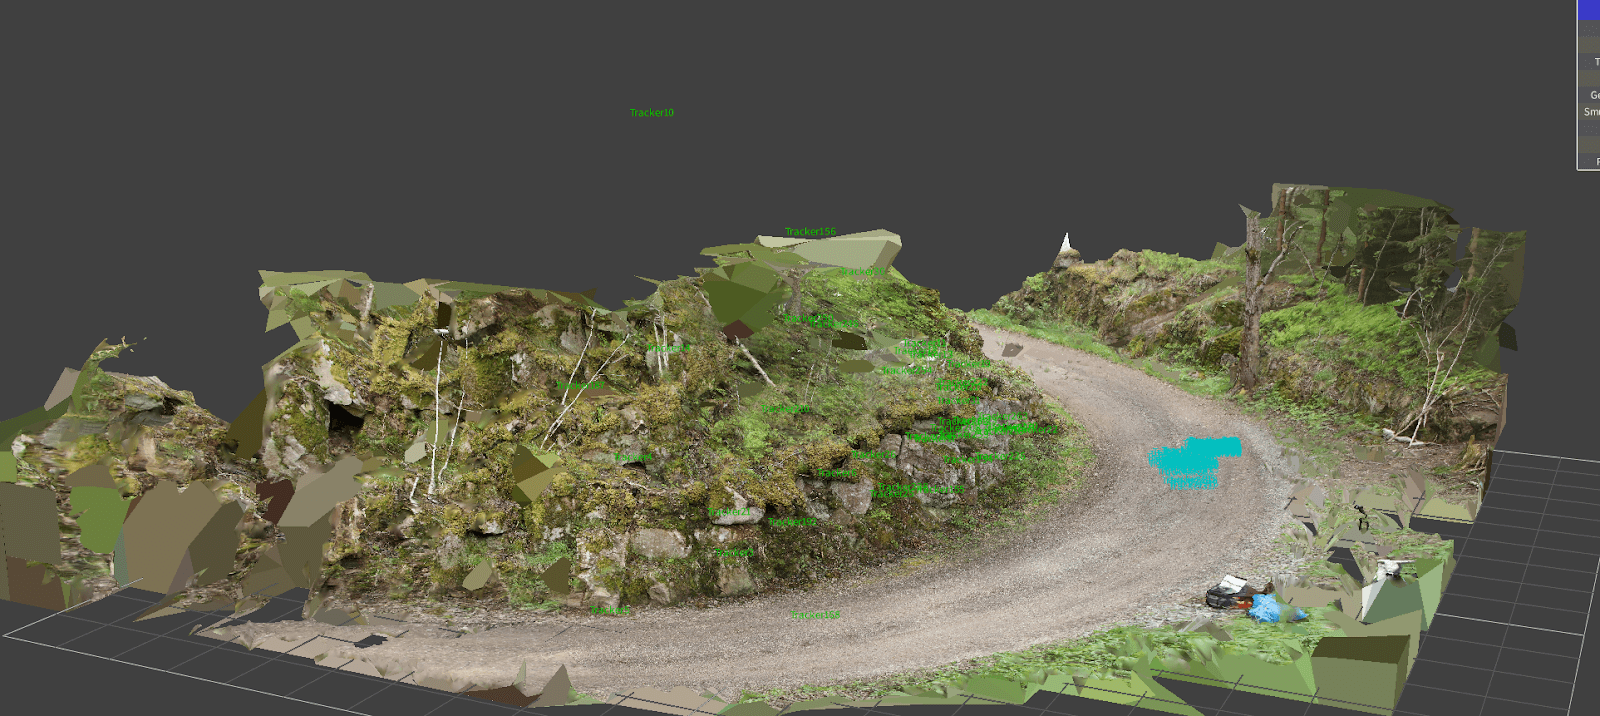
When tracking complex scenes, having a 3d model of the set is very useful for making sure your camera has the right movement and parallax. That's why we're trying to do photogrammetry when shooting projects like this.
In short, this process is about capturing hundreds of photos of the set, putting them into a program like RealityCapture and getting a dense mesh of the set.
When tracking and solving for a 3D camera you can tell the software where your 2D points should be in 3D space and the camera will be calculated from that information. This will often make it easier for the solver/software to understand the actual movement and give you a more accurate solve error if it struggles.
Body Tracking
When the camera has solved, the next step for matchmoving, is getting the information from the actors movement as well. -At this point i'm super happy i took the time to tape down the actor!
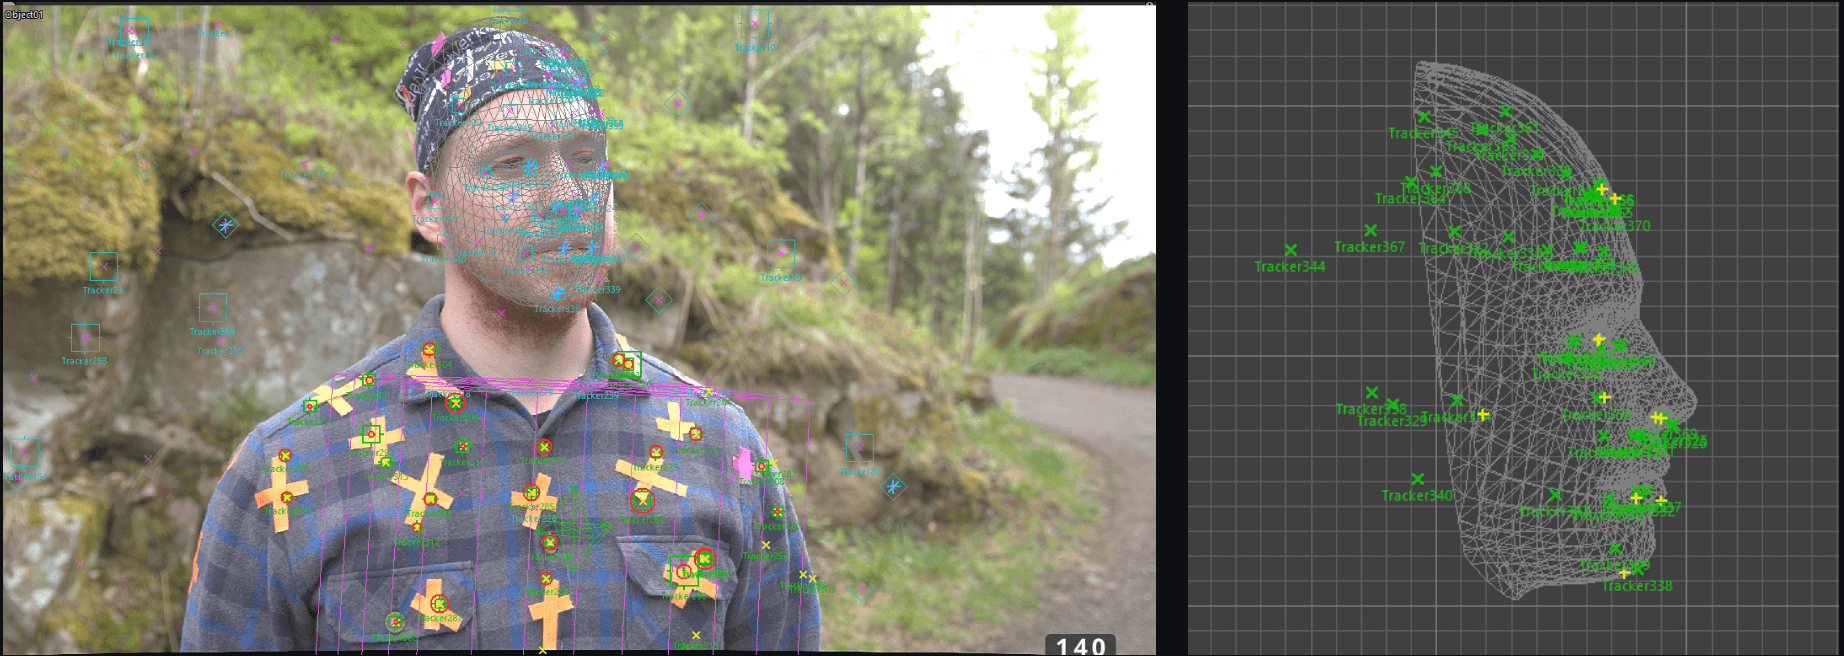
For tracking the face the techniques are quite similar, placing a lot of trackers on his face, then lining up a generic 3D model of a face, and let the software sovle from that information. It was the first time tracking objects for me, so I spent a lot of time on this stage of the project.
HDRI
I used High Dynamic Range (HDRI) panoramas for post-processing CG lighting. We achieved this by using an 8mm lens on a DSLR camera, capturing 5 stops of exposure, getting all the details in shadows and highlights. With just three different angles, thanks to the 8mm lens, we created a full 360-degree panorama. I utilised ptgui for stitching and stacking these images together.
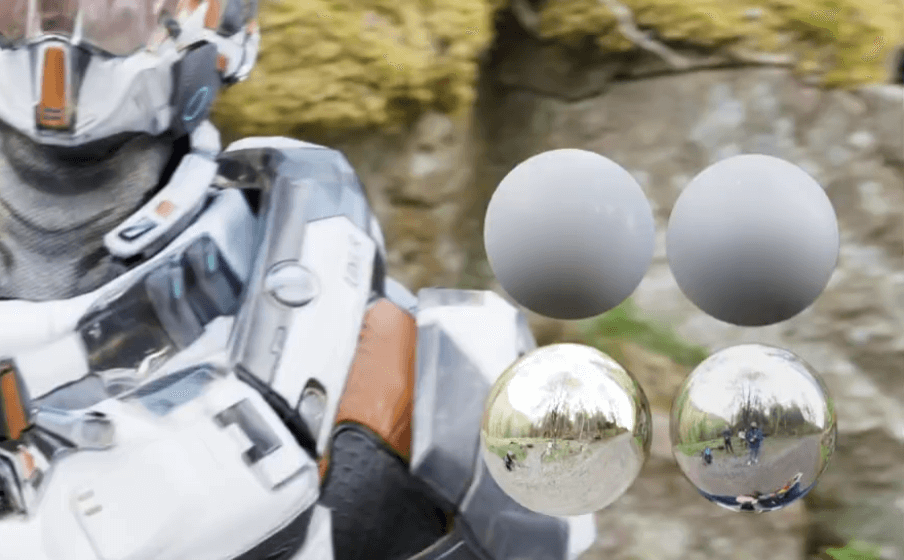
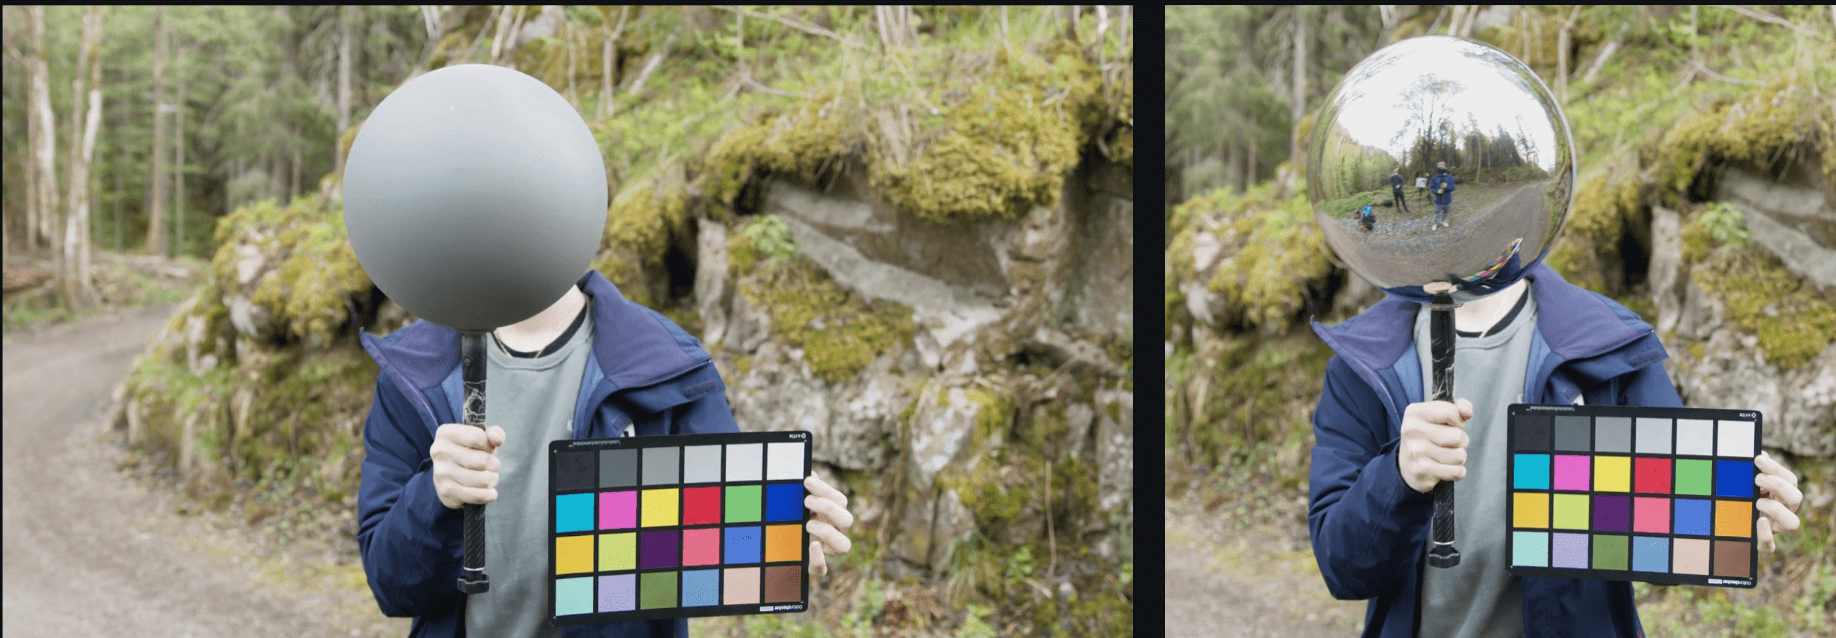
Chrome/Greyball Ref
The chrome and greyball reference from set will be used for later matching the cg to the plate. I also captured the colorchart from the main camera and from the HDRI camera, so I could match the two as well.
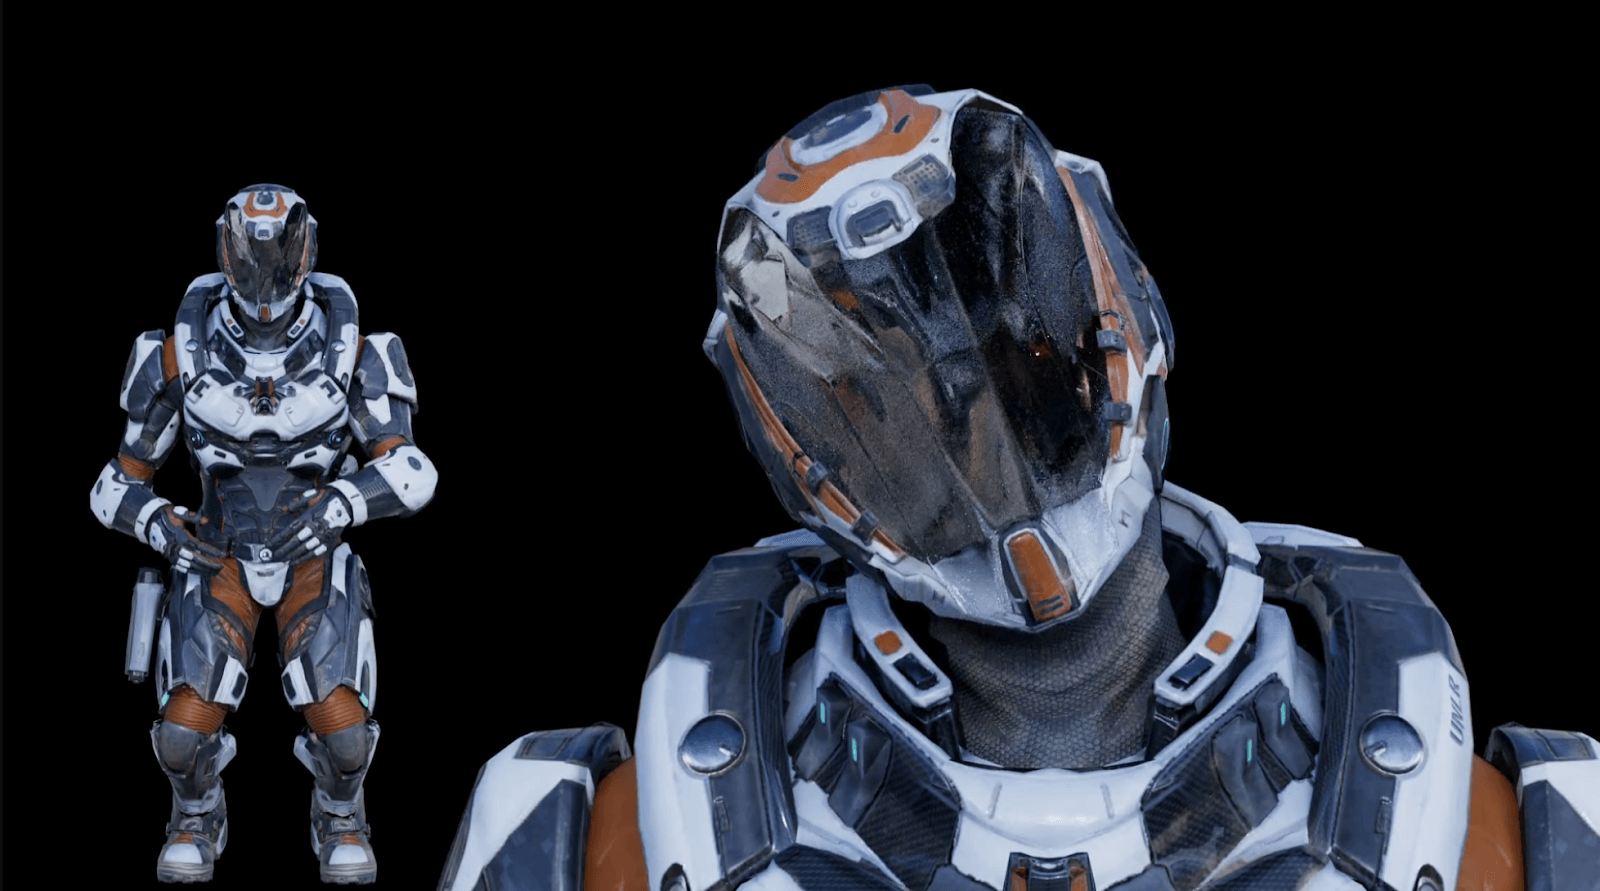
Finding and Prepping High Quality Assets
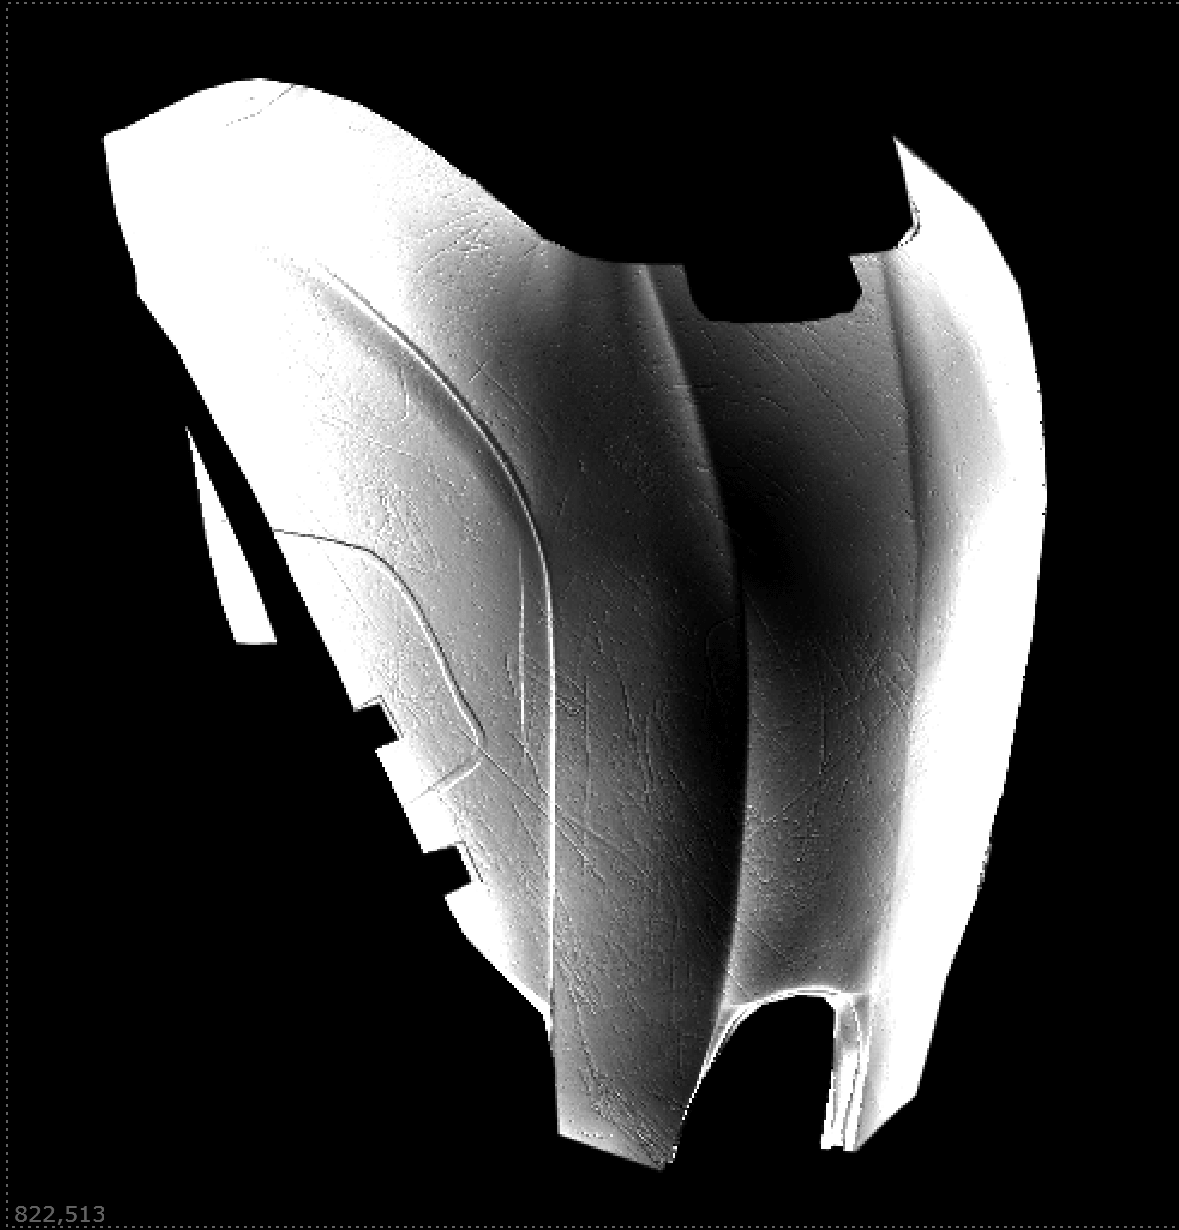
Before even starting the project I had to make sure I could get hold of the right asset. I bought this textured suit model, played a bit with the textures adding some roughness etc. The model also needed a simple rig to be paired with my object tracking of the actor.
Suit Rendering
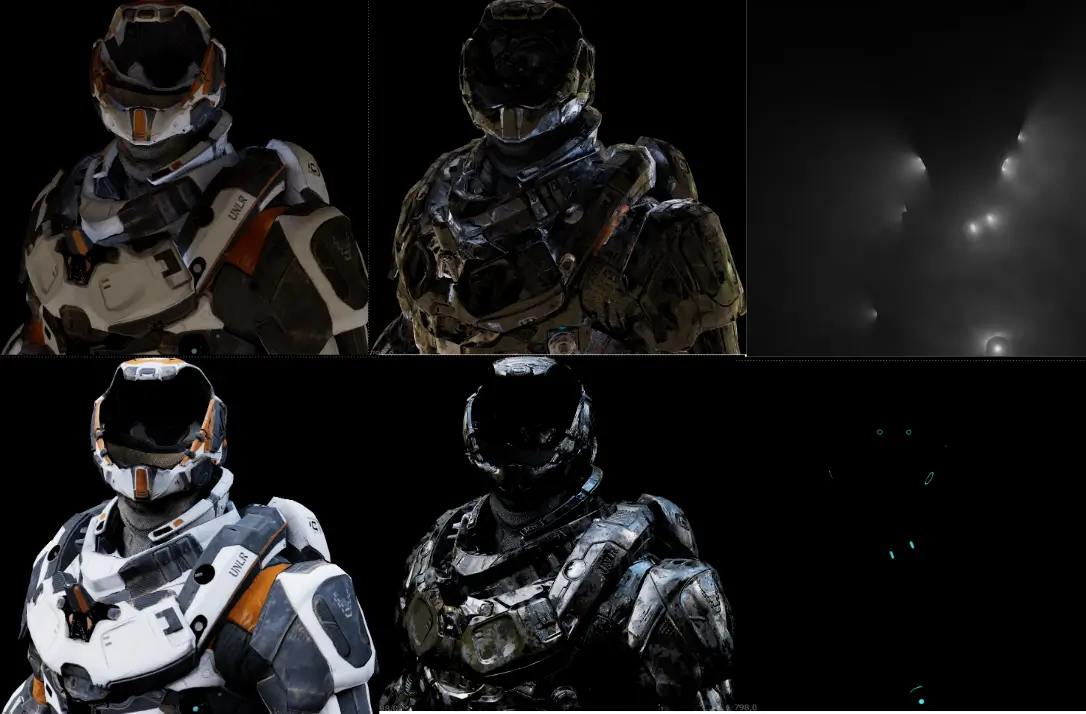
Since I'm mainly specialising in compositing, that's where a lot of the work is done on this project. For getting the most amount of flexibility I wanted to output a lot of different render passes.
Beauty passes
These are basically different parts of the final render split together in groups, for example specular direct and indirect. When bringing them together in a compositing software like Nuke you can manually control the amount of specular or other groups.
If the scene has many lights I often work most with light groups, which is splitting the scenes into the different lights. When bringing the light groups together you'll also get the final rendered image, usually called "beauty".
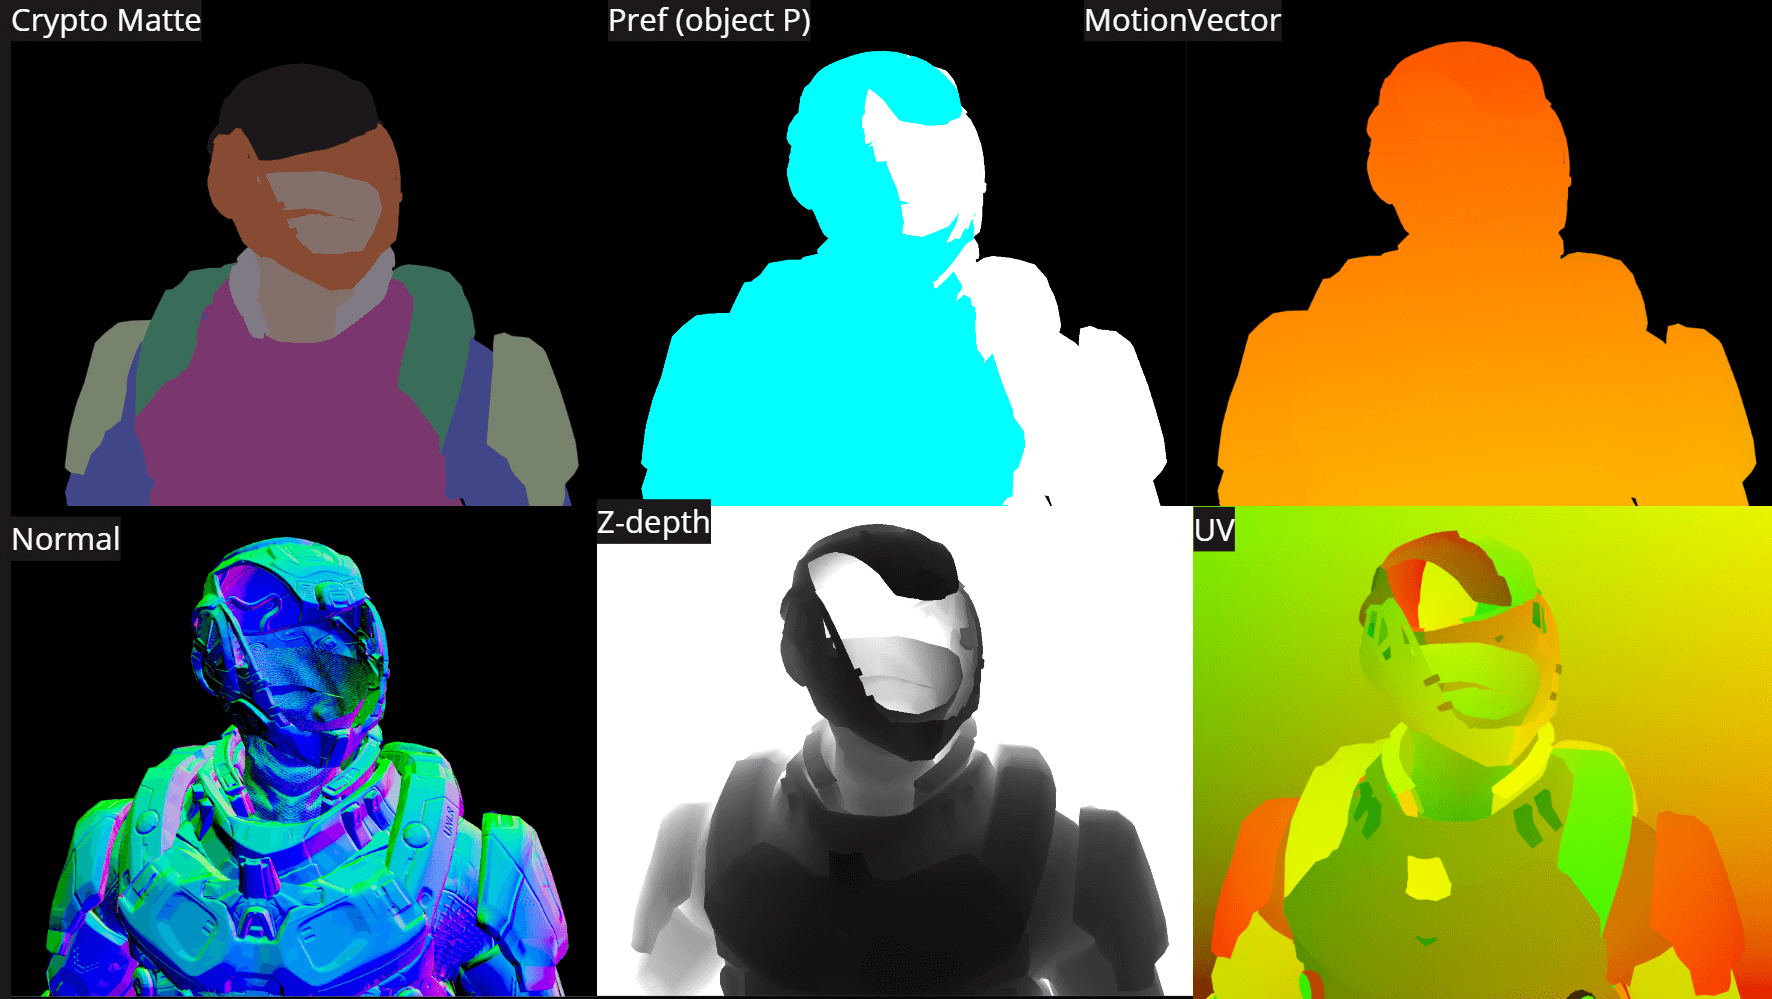
AOV Passes - Arbitrary Output Variables.
AOV passes goes a step further than normal beauty seperation render passes. AOVs allow for seperation of even more specific data. These passes can be a lot of different things depending on the need of the shot.
I have included some of the most commonly used ones here, which I used in my compositing process. When having access to these types of passes and preferably a file of the 3D camera, you can do a lot of amazing things just in 2D or (2.5D, simulating 3D using this 2D info).
Common use cases for these are adjusting/grading different parts of the suit. I can for example, use cryptomatte to seperate out different parts of the suit, then use a P-position pass to only effect a specific part on that suit part.
The Normal pass tells us which direction the surfaces are pointing, storing them in the Red, Green, and blue channels. This for instance, can be used to seperate only sides pointing up.
Background
When having the first versions of the composite I quickly saw that the filmed backround was not working very well at all.
After some different testing I found that it would be easiest to replace the whole BG with an Unreal Engine render. I sculpted a rough layout of the ground, and laid out a lot of megascan assets on top - from ground elements, to trees.
I think the hardest thing about Unreal Engine is getting the necessary passes for compositing. You can get quite a lot, but in my experience it's more of a headache than traditional render engines.
I used the Unreal reader Plugin, which is bridging Unreal engine and Nuke in a combination with Multi pass Renderer Plugin from "Bluray Addict", which let me have the light passes i talked about earlier.
Compositing
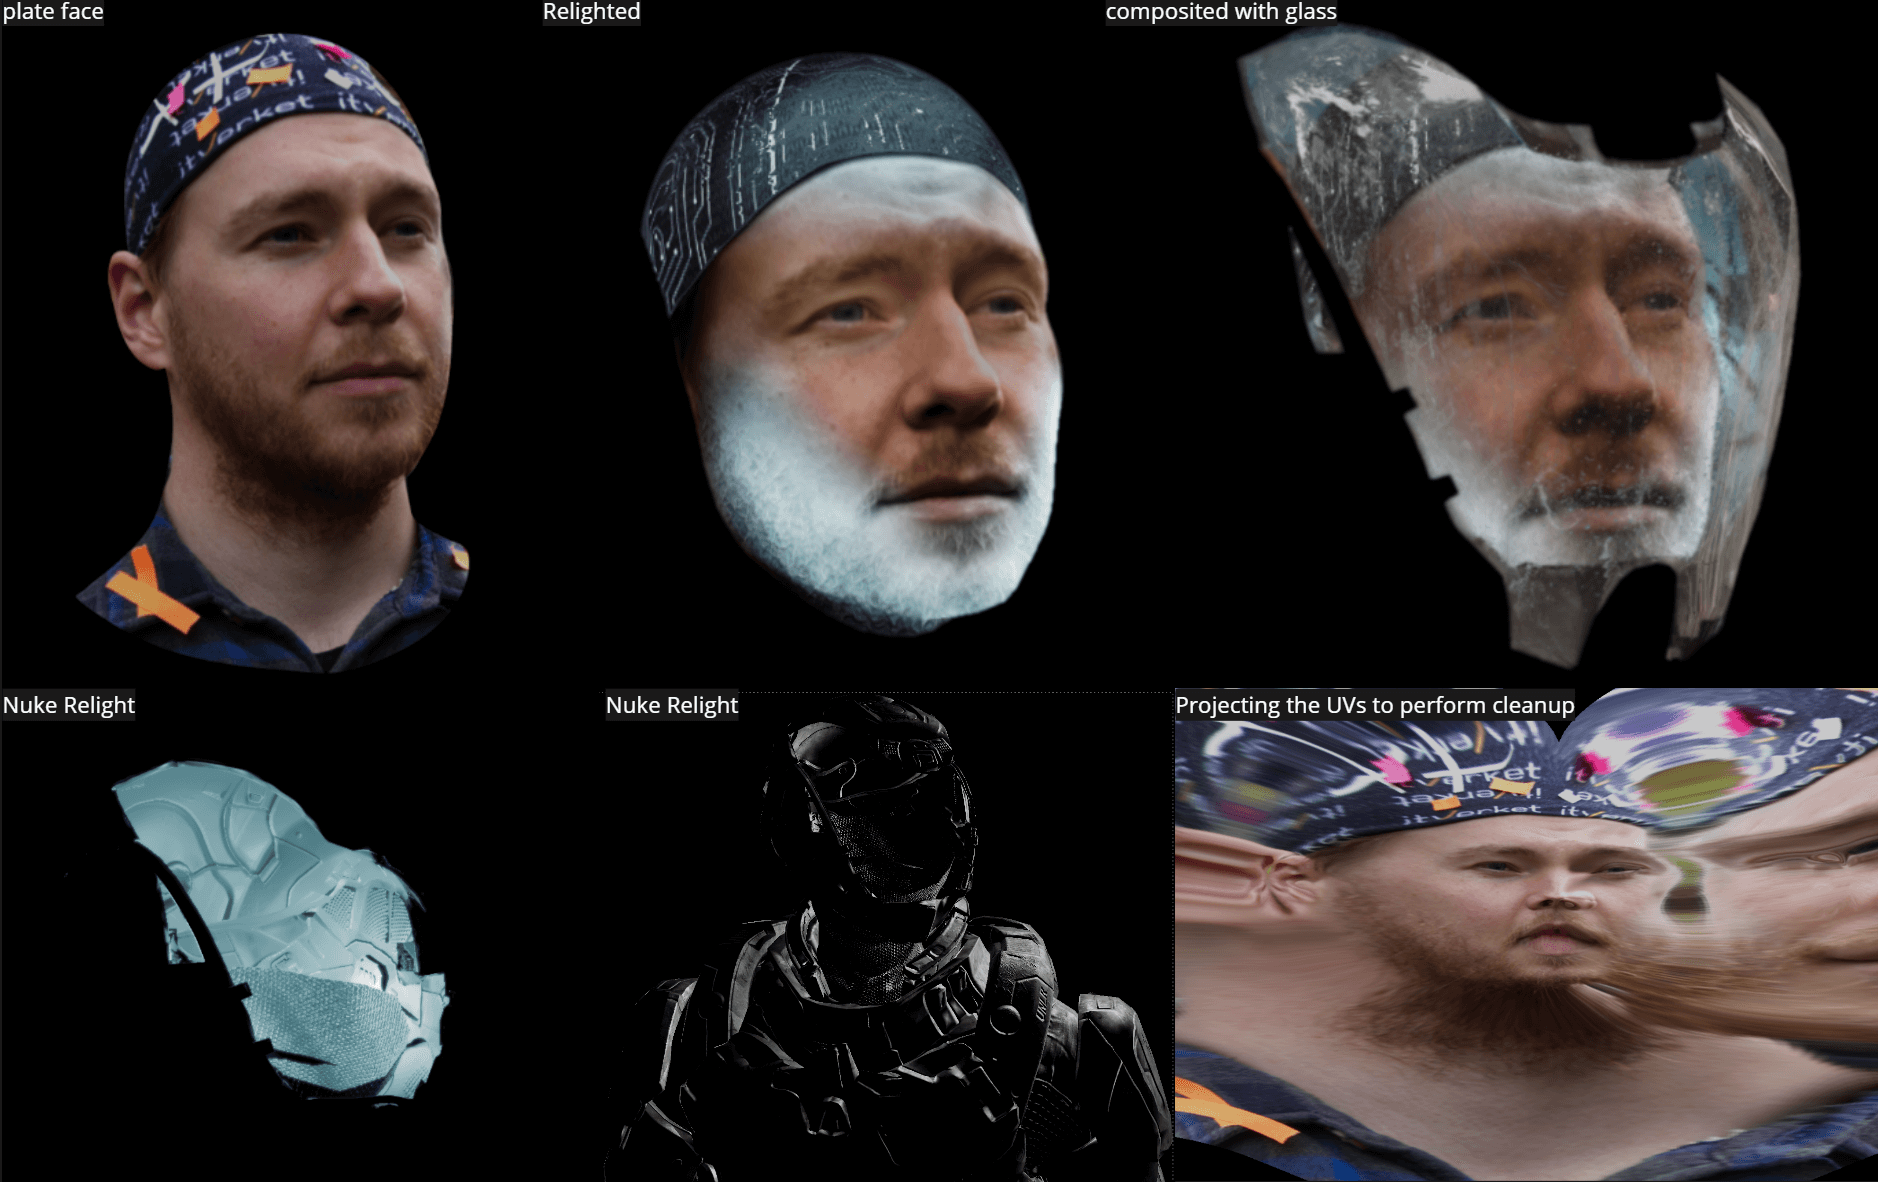
The main challenges on the compositing side was relighting the face, and getting the glass to look like; glass. This was harder than I thought. I did get a long way but there's still a lot that could be worked on here!
The Face
Since I had a pretty clean track of the face, I had quite some flexibility to play around. I did also use KeenTools in Nuke to get a nice and more accurate UV of the whole face.
The tricky part here is that the actors face is not evenly lit at all (a lot of shadow and highlights), meaning I had to manually paint away some highlights, and bring up some shadow parts. This made for a quite un-natural look which is hard to get realistic and good looking when doing a relight.
I was going a bit back and forth on the look, but when looking at reference I really wanted that nice side light from inside the helmet.
The Glass
What I figured is that when compositing glass, you need to work a whole lot with the frensel mask. I distorted what was inside the glass based on a frensel mask and the distance from the glass, and also having the the glass lighter where the front is pointing away from camera (the frensel effect itself).
Frensel Effect: how the reflectivity of a surface changes depending on the viewing angle
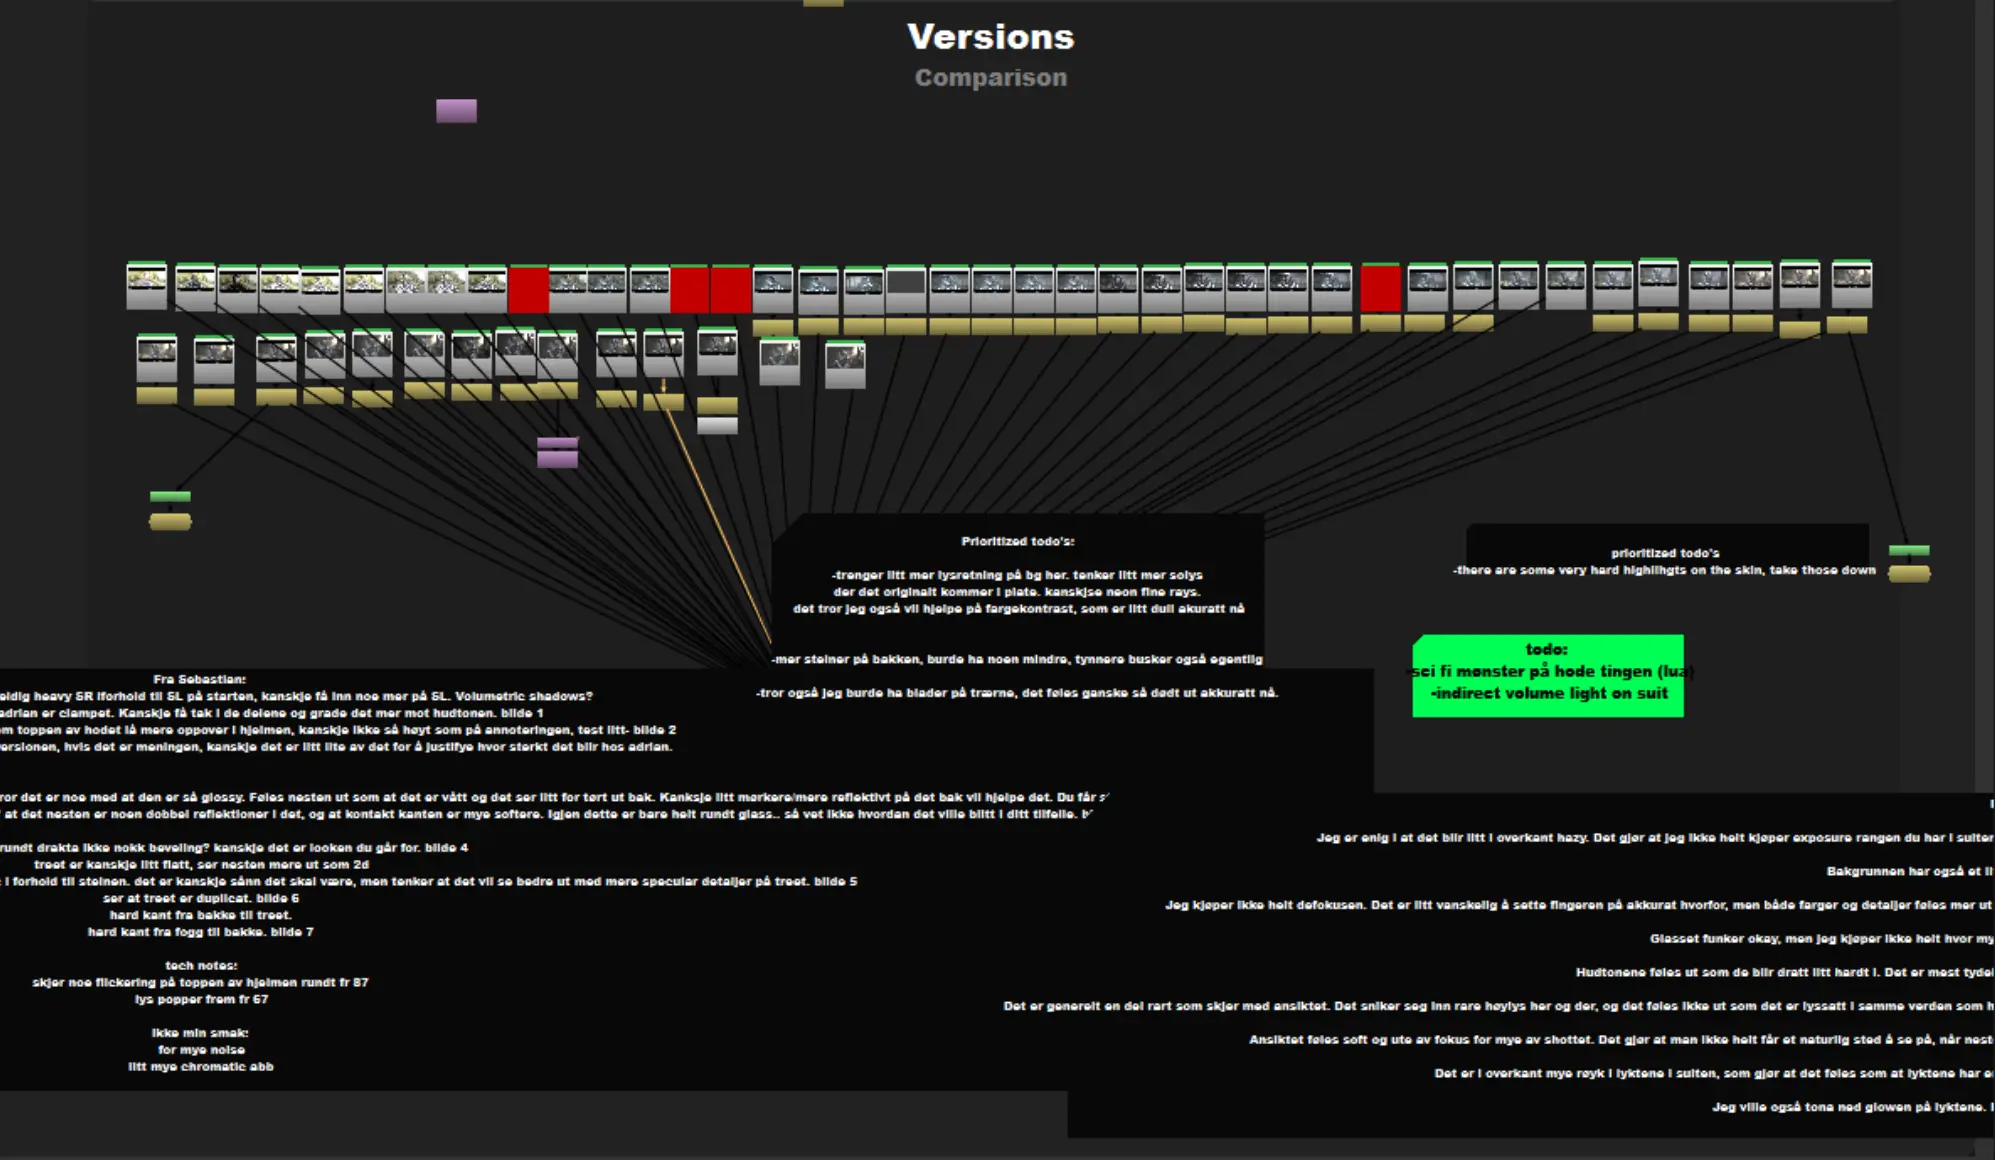
Creative Process, Versions and Feedback
I am quite happy with the result of this shot based on what I had to work with, despite the many flaws and potential extra workdays. I will take this with me into my next projects as learning; better planning of this whole shoot could have made the post process a lot easier, making the final result even better and more realistic.
I briefly want to mention the Creative Process for this shot as it was quite some work. The first versions (maybe the first 100) was not nearly as good as the final one.
I always see the importance of just doing many version, and asking for feedback. Having someone else's fresh eyes on your shot is golden!
You can reach out to Sondre and see more of his work via his Rookies profile.