Tips for Creating a Piece for Your Environment Art Portfolio Within Scope and Time
Joyce Jiao gives some tips on creating impactful environment art for portfolios and Rookie Awards entries while managing scope and time. Find your inspiration here!
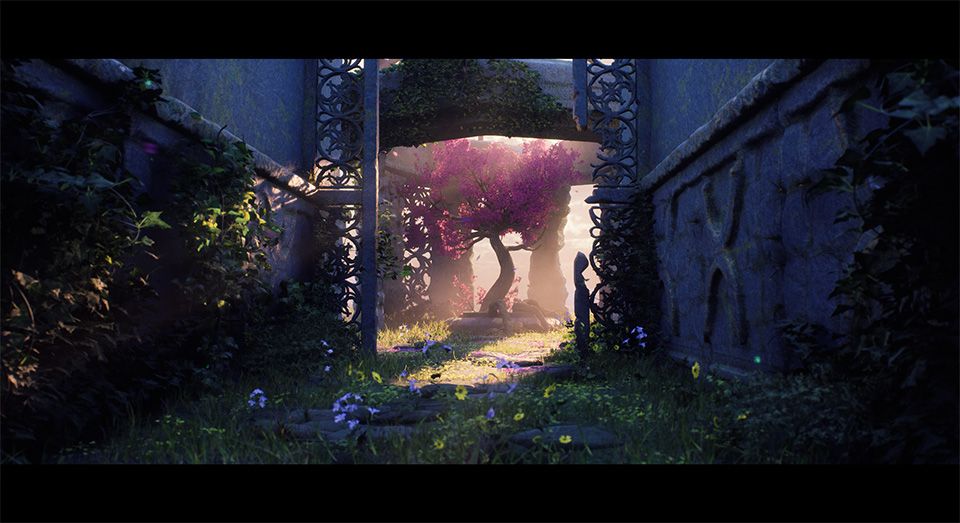
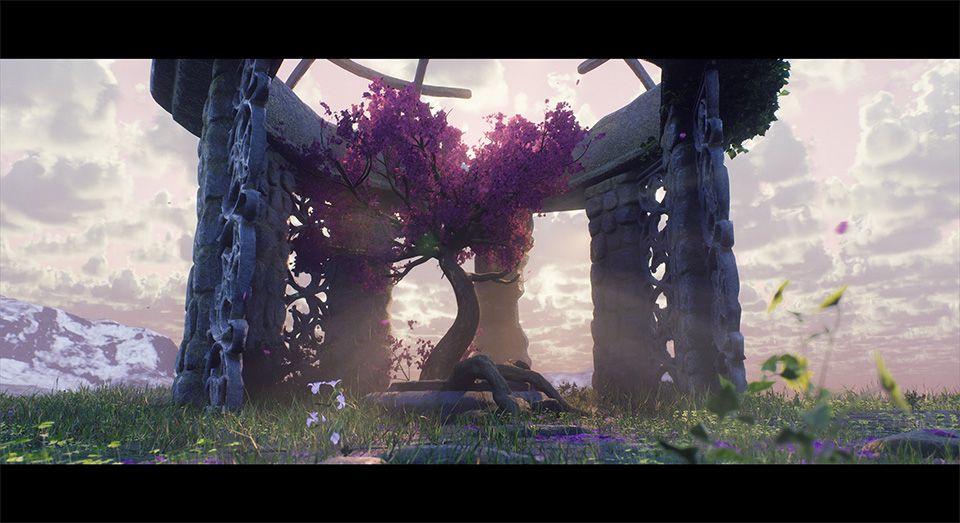
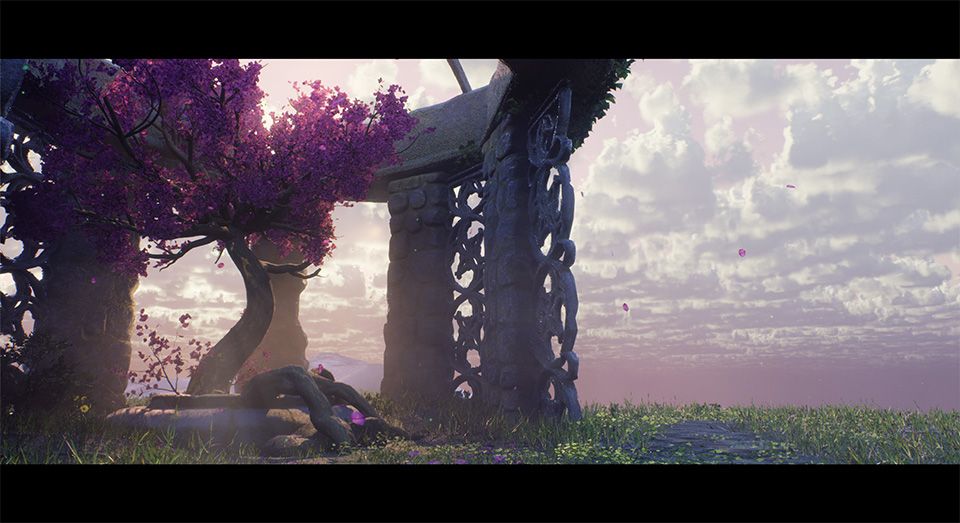
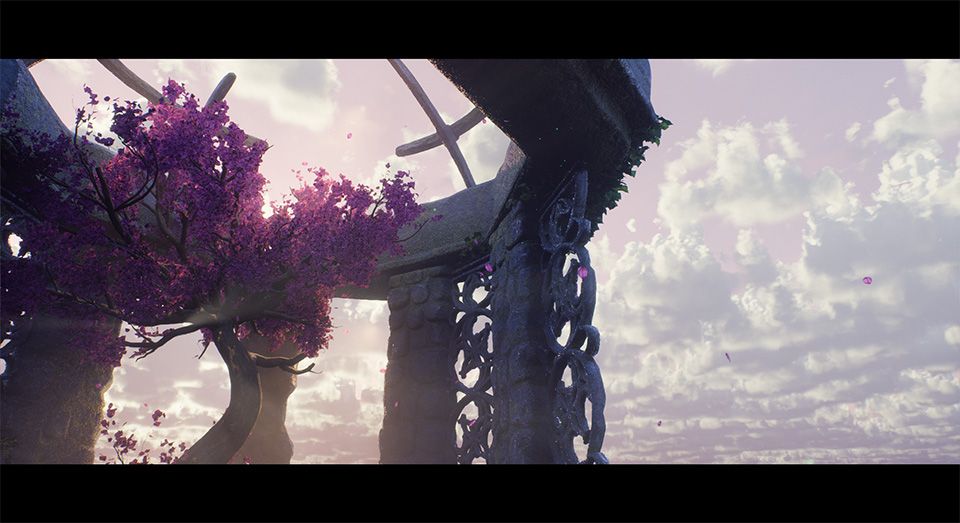
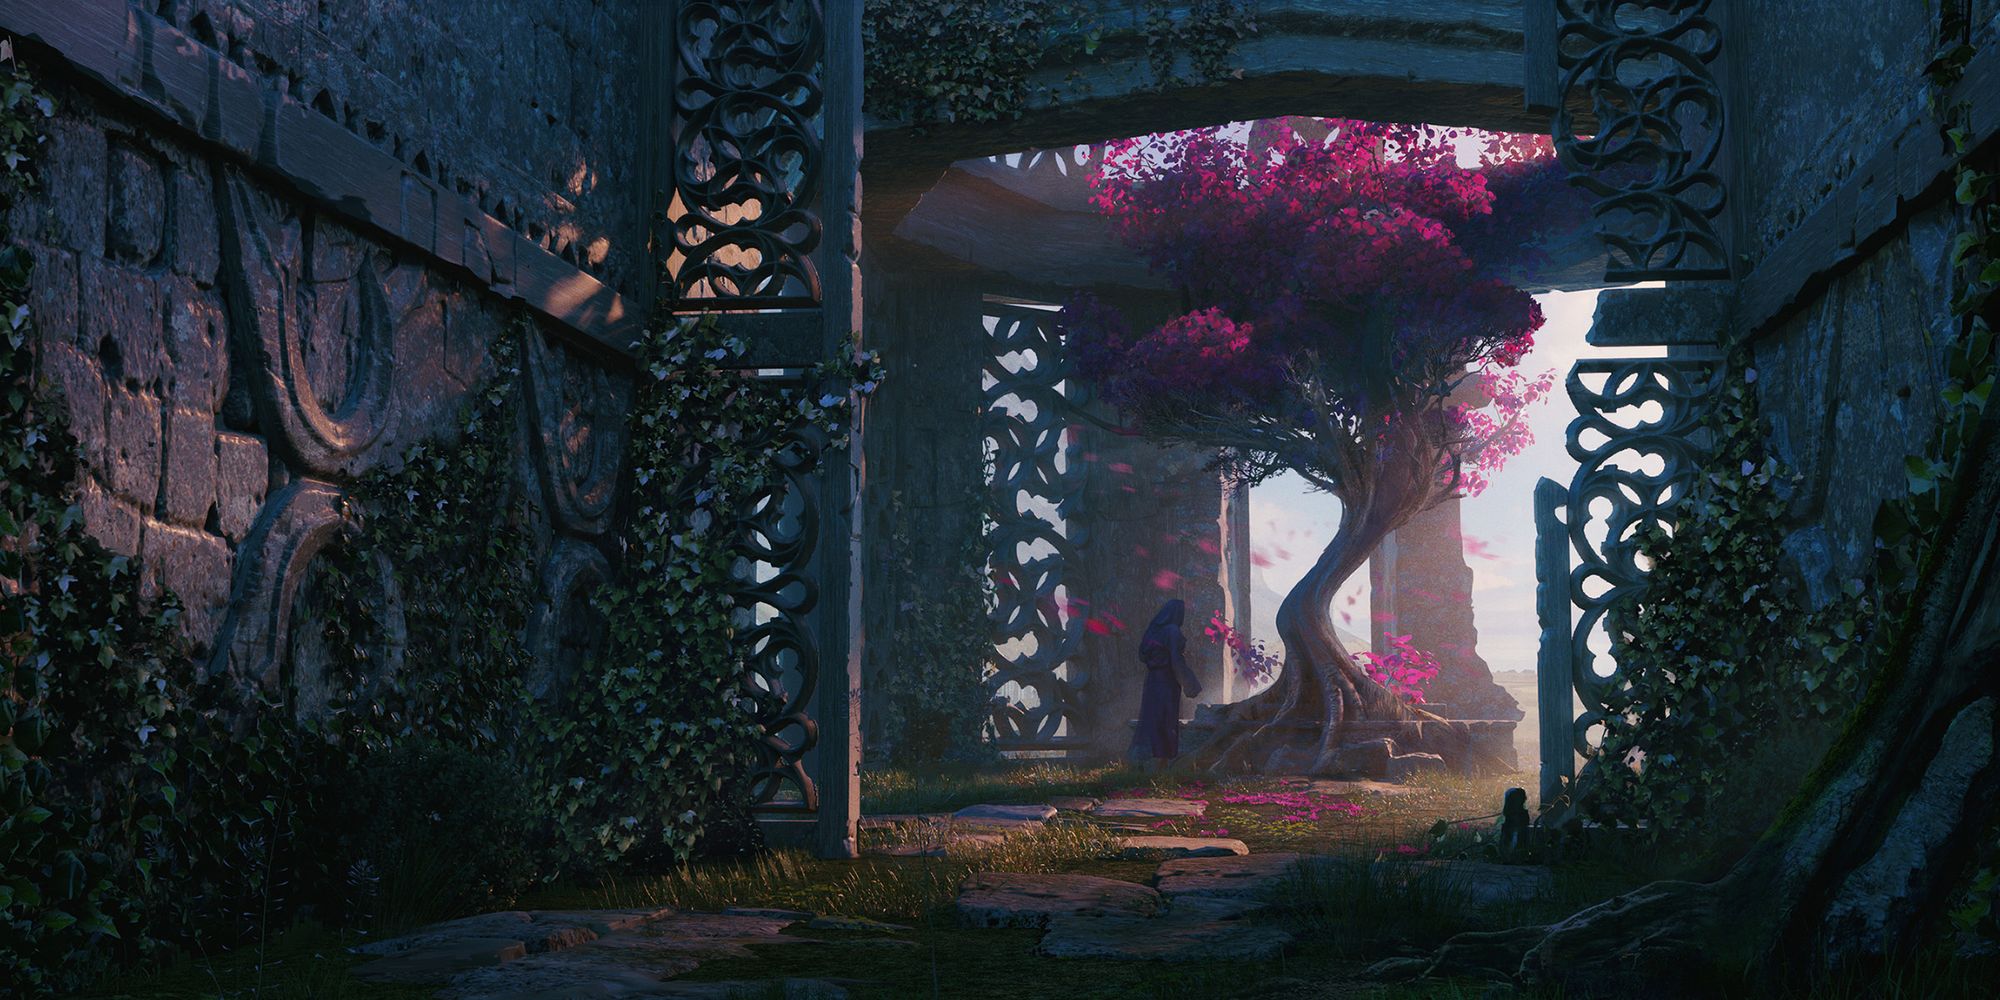
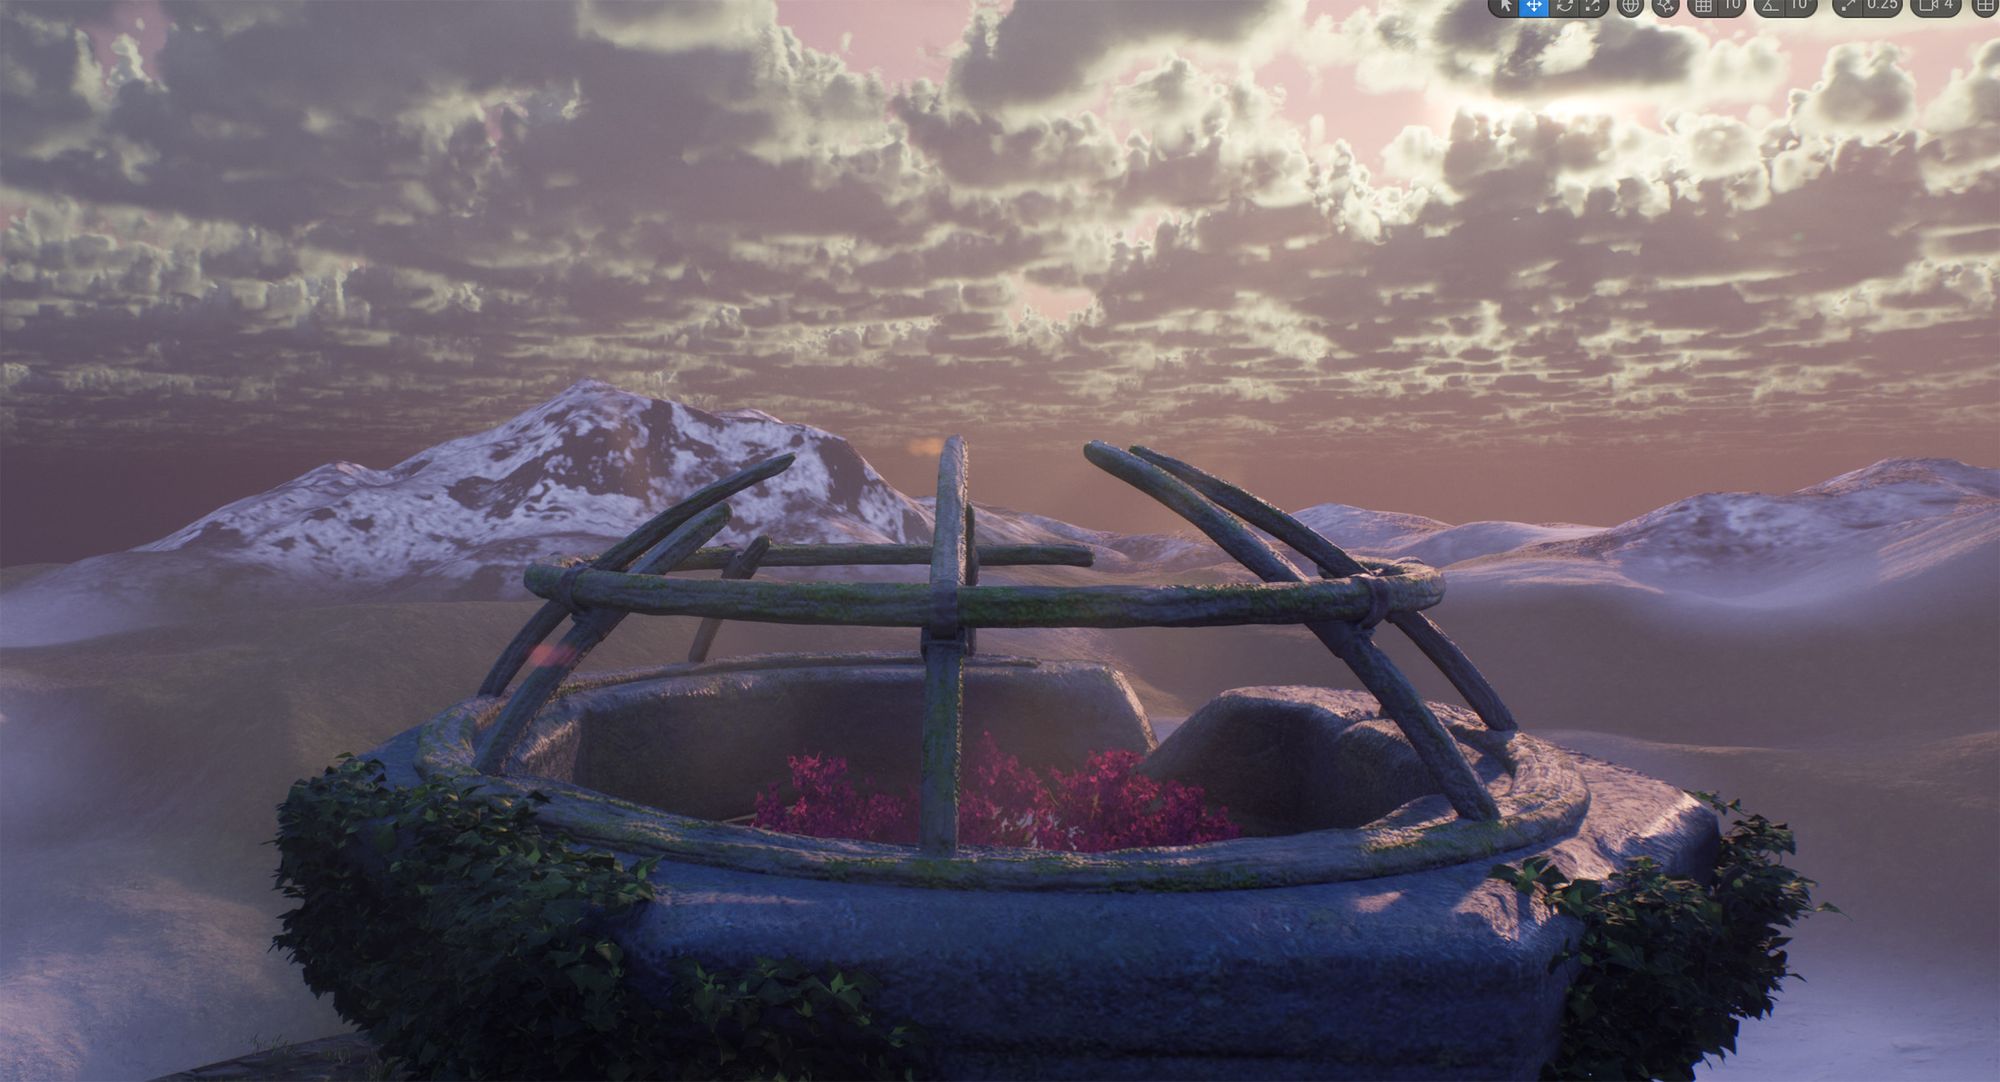
Unreal Engine 5: Spring Breeze Inside the Celtic Ruins, by Joyce Jiao.
Round of applause for our sponsors
In this article, Joyce Jiao offers aspiring environment artists valuable tips on crafting impactful pieces for their Environment Art portfolio or Rookie Awards entry, all while maintaining a manageable scope and timeline. If you're already contemplating Rookie Awards 2024 and seeking inspiration, this article is tailor-made for you!
Hello there, my name is Joyce. I’m super excited to have this opportunity to write this article for the Rookies, and I hope this information can be helpful to you!
The project I’m showcasing is called "Spring Breeze Inside the Celtic Ruins".
Cinematic
It is a Spring themed short-term project that was finished within 4 weeks right before the deadline of the Rookies Award this year.
The environment itself, it’s based on Jordan Albro’s beautiful concept art: Celtic Ruins. At the very first glance, the interesting overall shape language of the concept itself and the dark magenta-ish coloured leaves from the fantasy tree immediately reminded me of my hometown's city flower: Bougainvillea, which is also quite common urban vegetation here in Los Angeles. With such vivid colour inside an idea of the Celtic ruins would undoubtedly be able to create a unique spring day scene, which was also the reason why I would like to recreate this concept in a 3D environment.
Hero Shot/Main: Into the GardenOriginal concept by Jordan Albro.
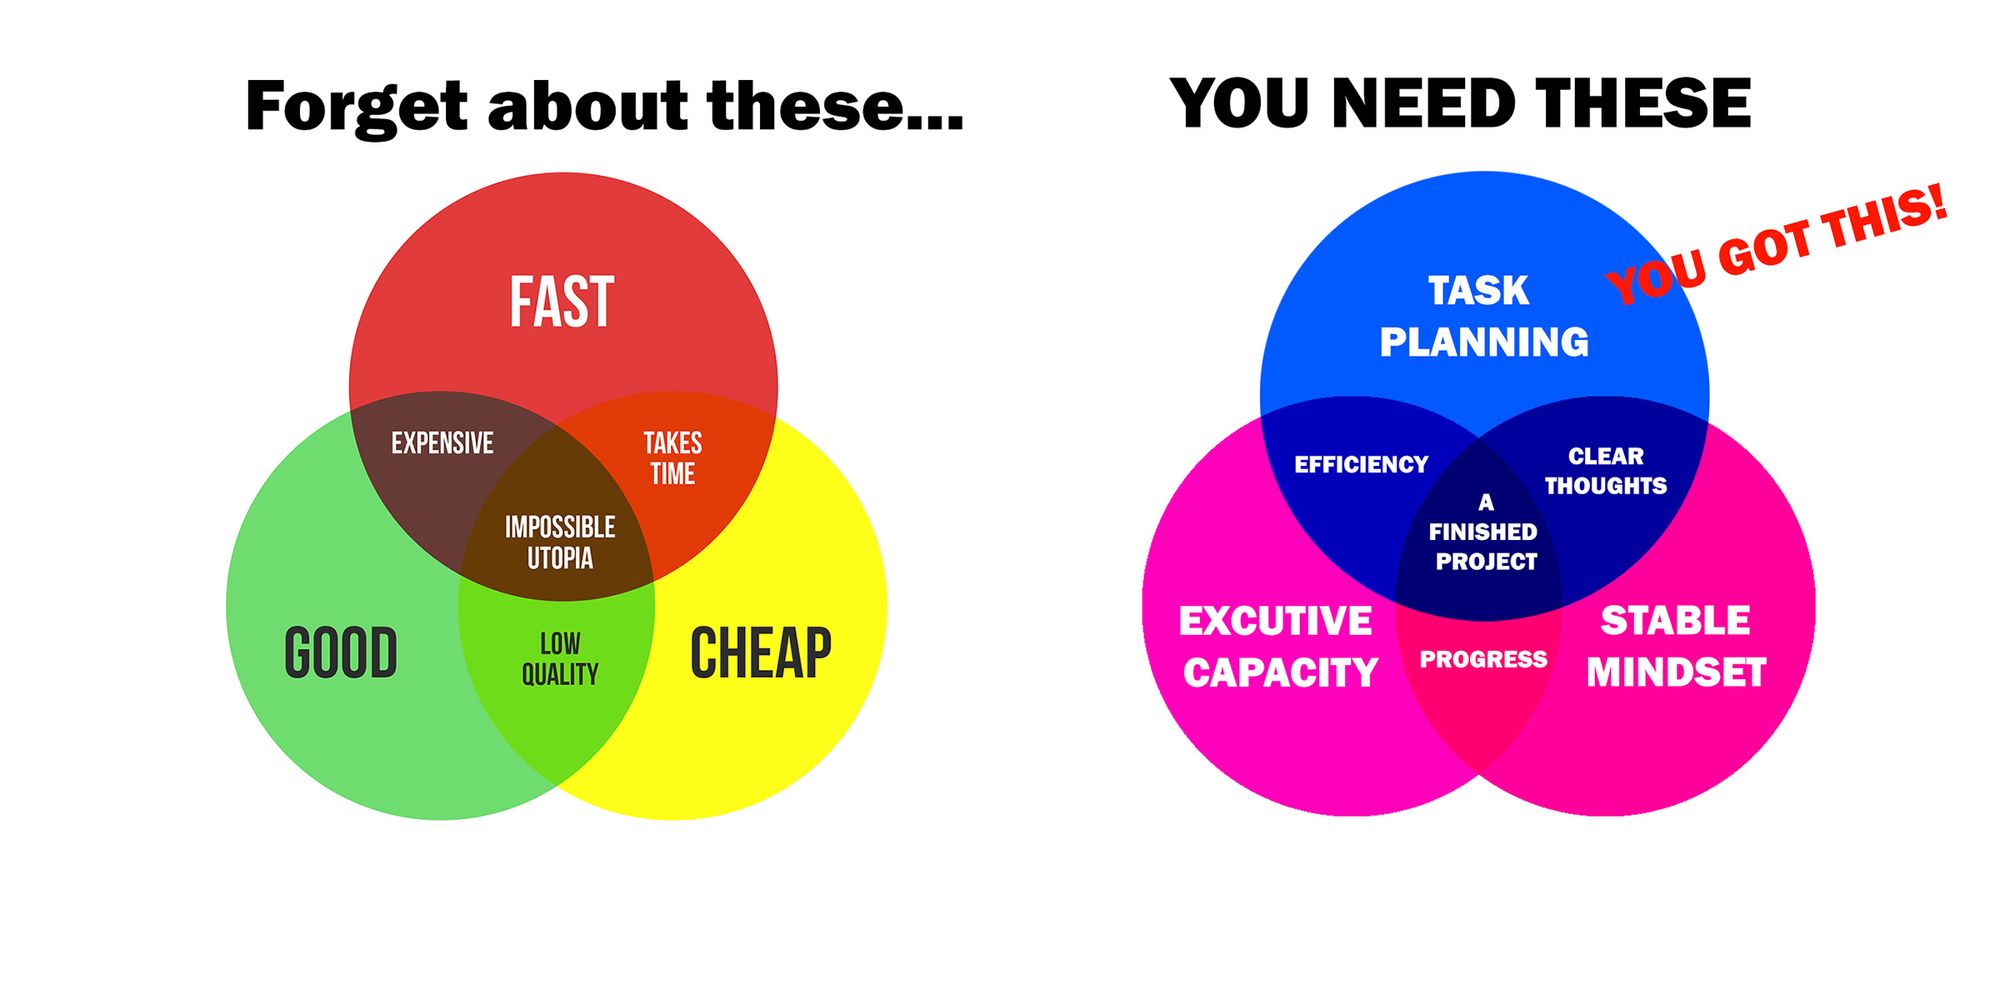
Mindset Preparation
To begin with, it is important for us to know that the key trick to finishing an environment project or any project in general within a short timeframe that is portfolio ready, is to ensure that each step needs to be solid. You need to maintain both efficiency and quality at the same time and the error-tolerance rate unfortunately is very minimum.
It is also essential to determine whether there are new things or any unfamiliar areas you want to explore that might be outside of your comfort zone as it is vital that we as creative beings always hone our skills so that we can keep improving. Therefore, you need to make sure to leave enough time for this part so that you can achieve all the aspects of the ideal finish you want.
Timing and scheduling are also important. Therefore, you can almost treat it as a relatively chill art test for yourself by isolating yourself from potential distractions as possible – as least long enough for you to focus on meaningful work. But you also want to make sure you don’t want to drain yourself out during this process emotionally and physically. Therefore, staying calm and keeping an optimistic mindset is vitally important.
Taking my case as an example, I was doing a freelance day job while I was working on this project. I made a hard decision to sacrifice my social life and reduced it to a minimal amount, just so that I can finish this project on time. And I did it!
Project Analysis
Aka the planning stage.
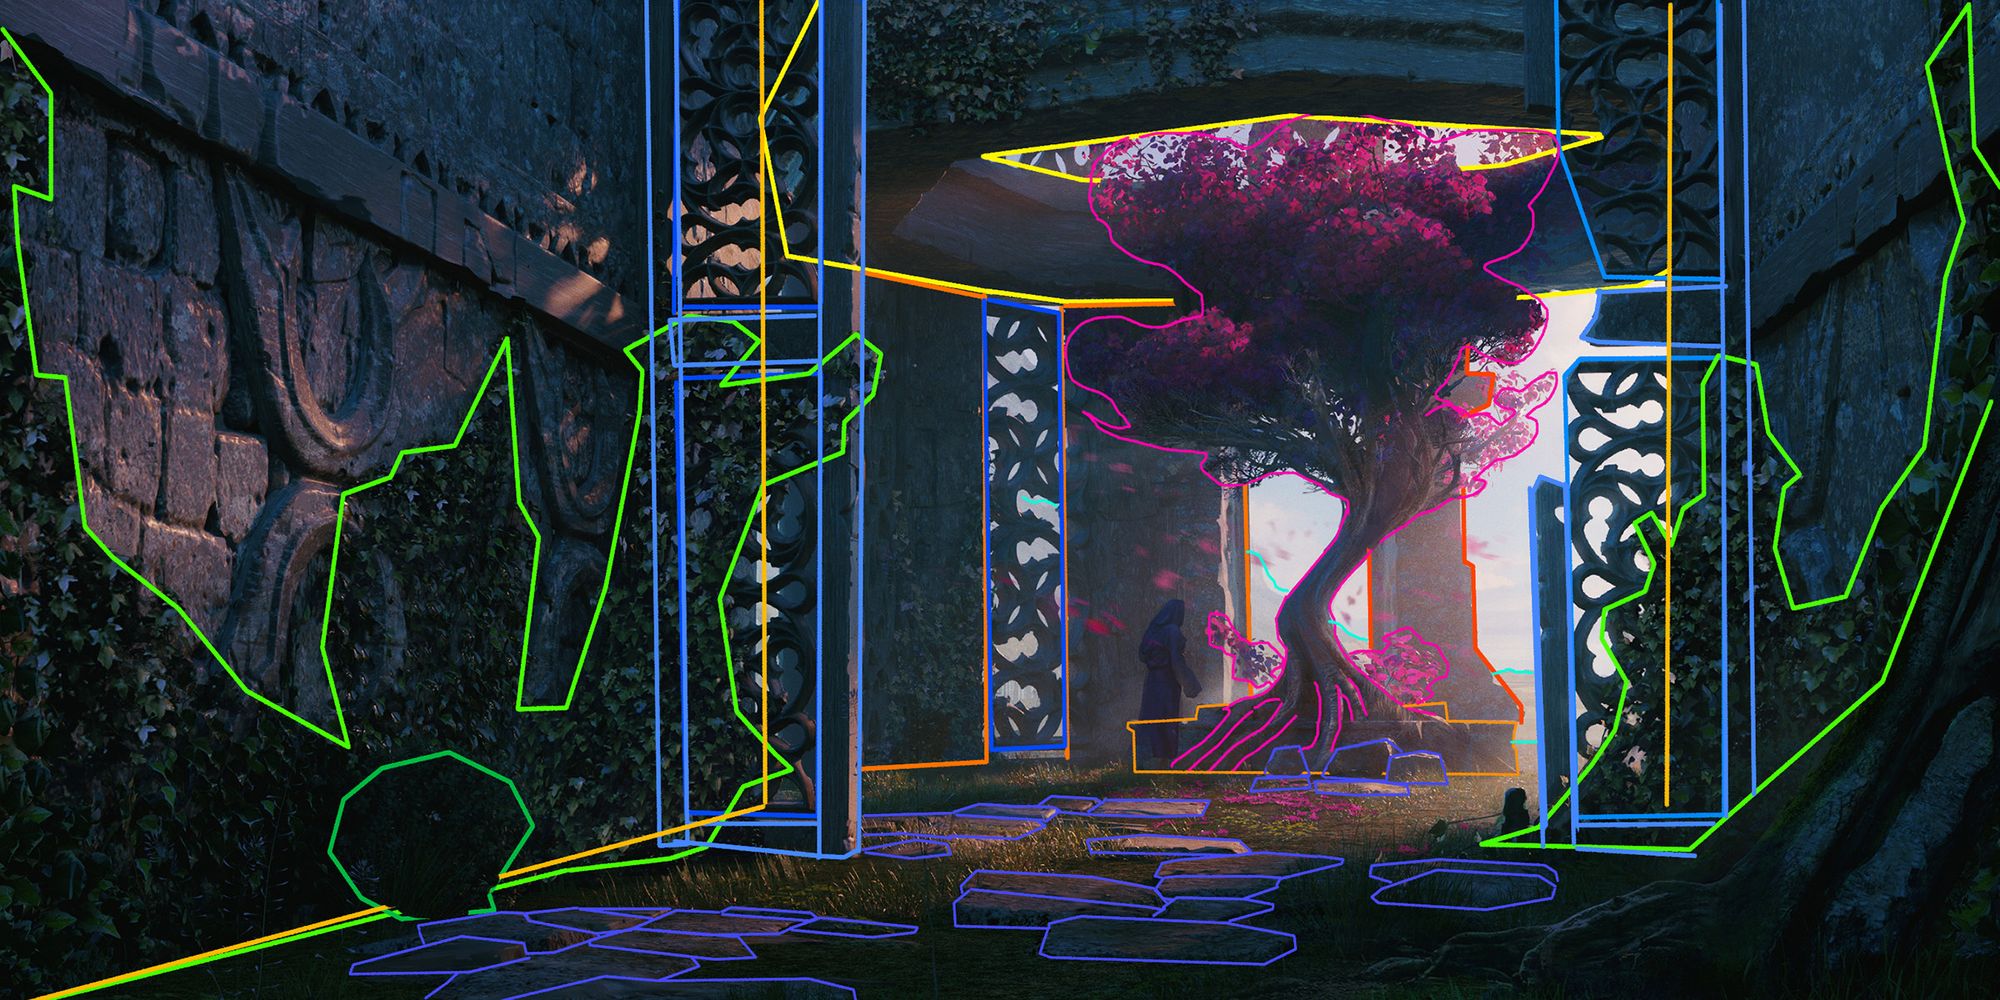
Before even starting to collect any reference materials, the first thing you might want to do is to look into the concept art itself and start thinking about what elements make the entire visual “complete”.
In other words: What’s in there?
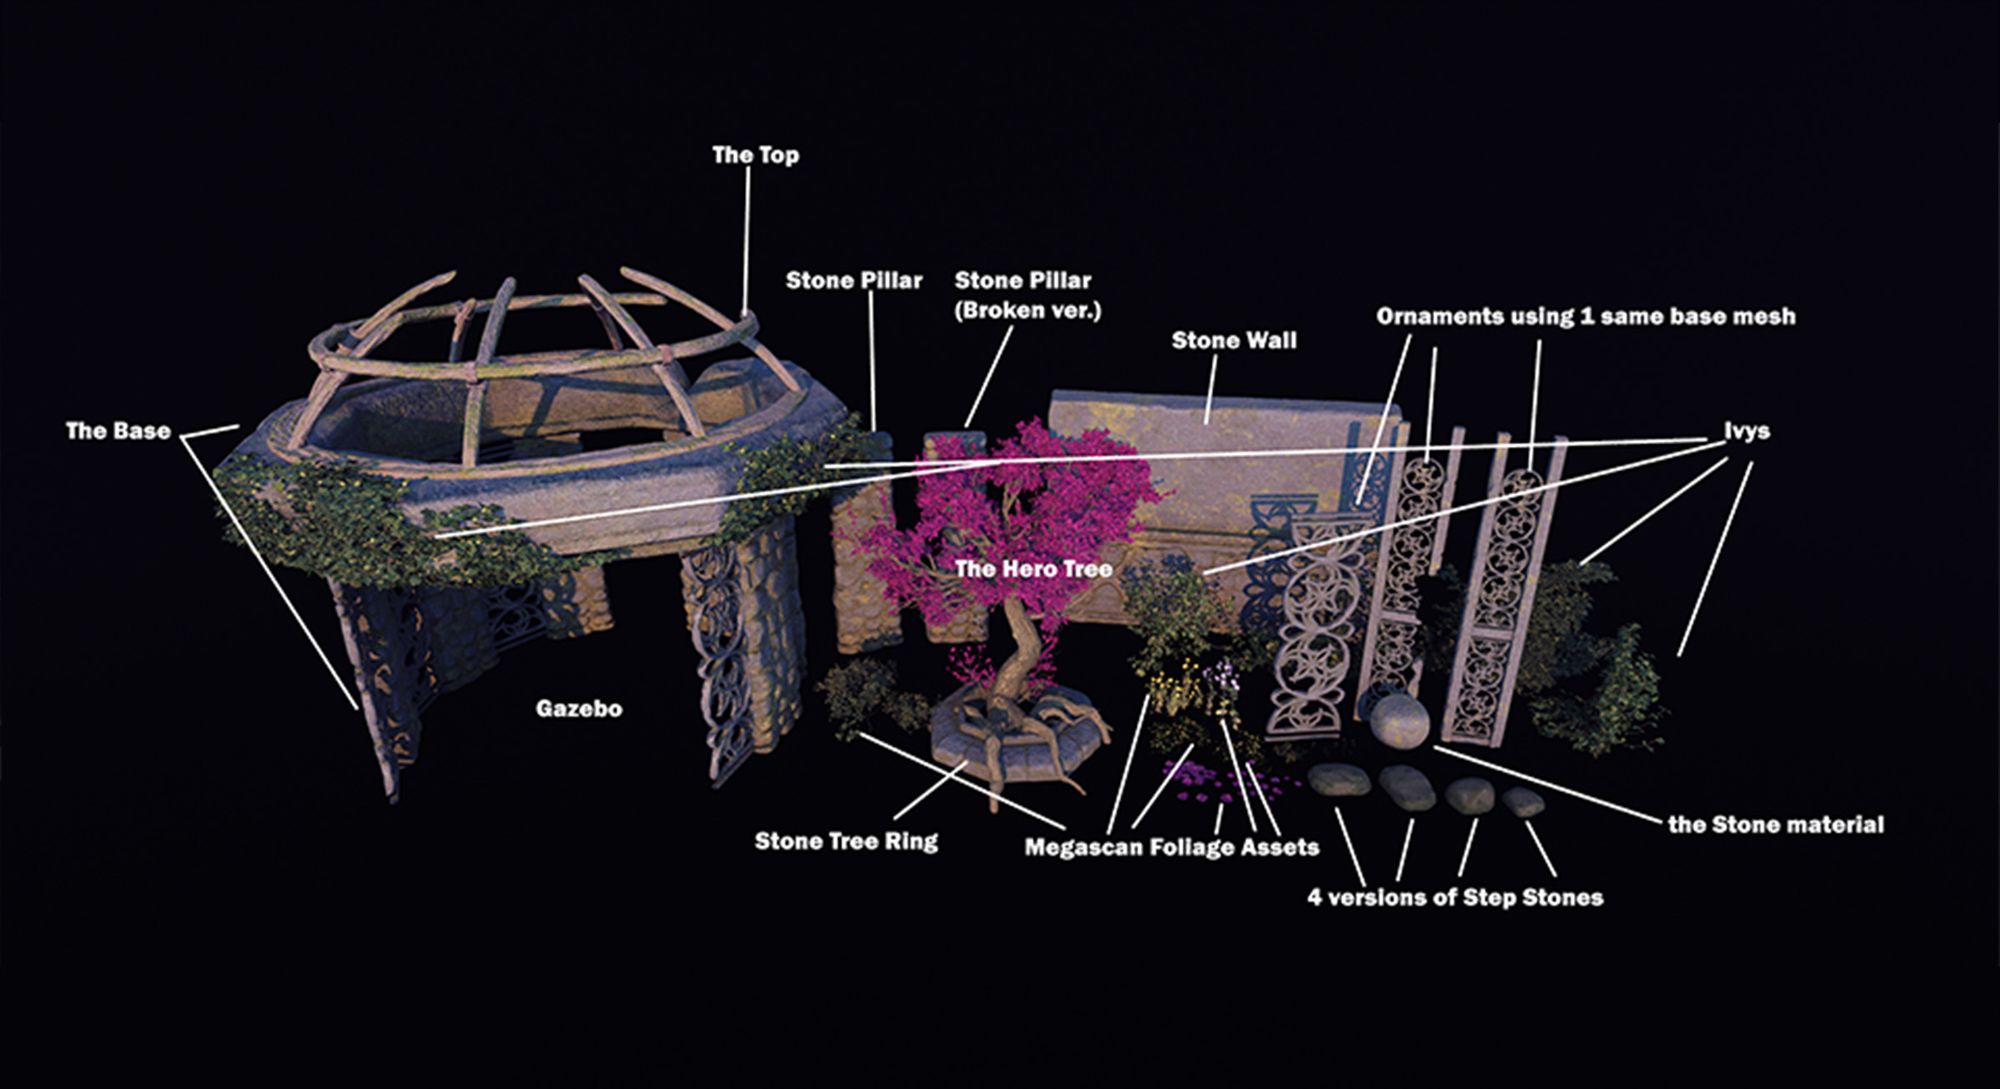
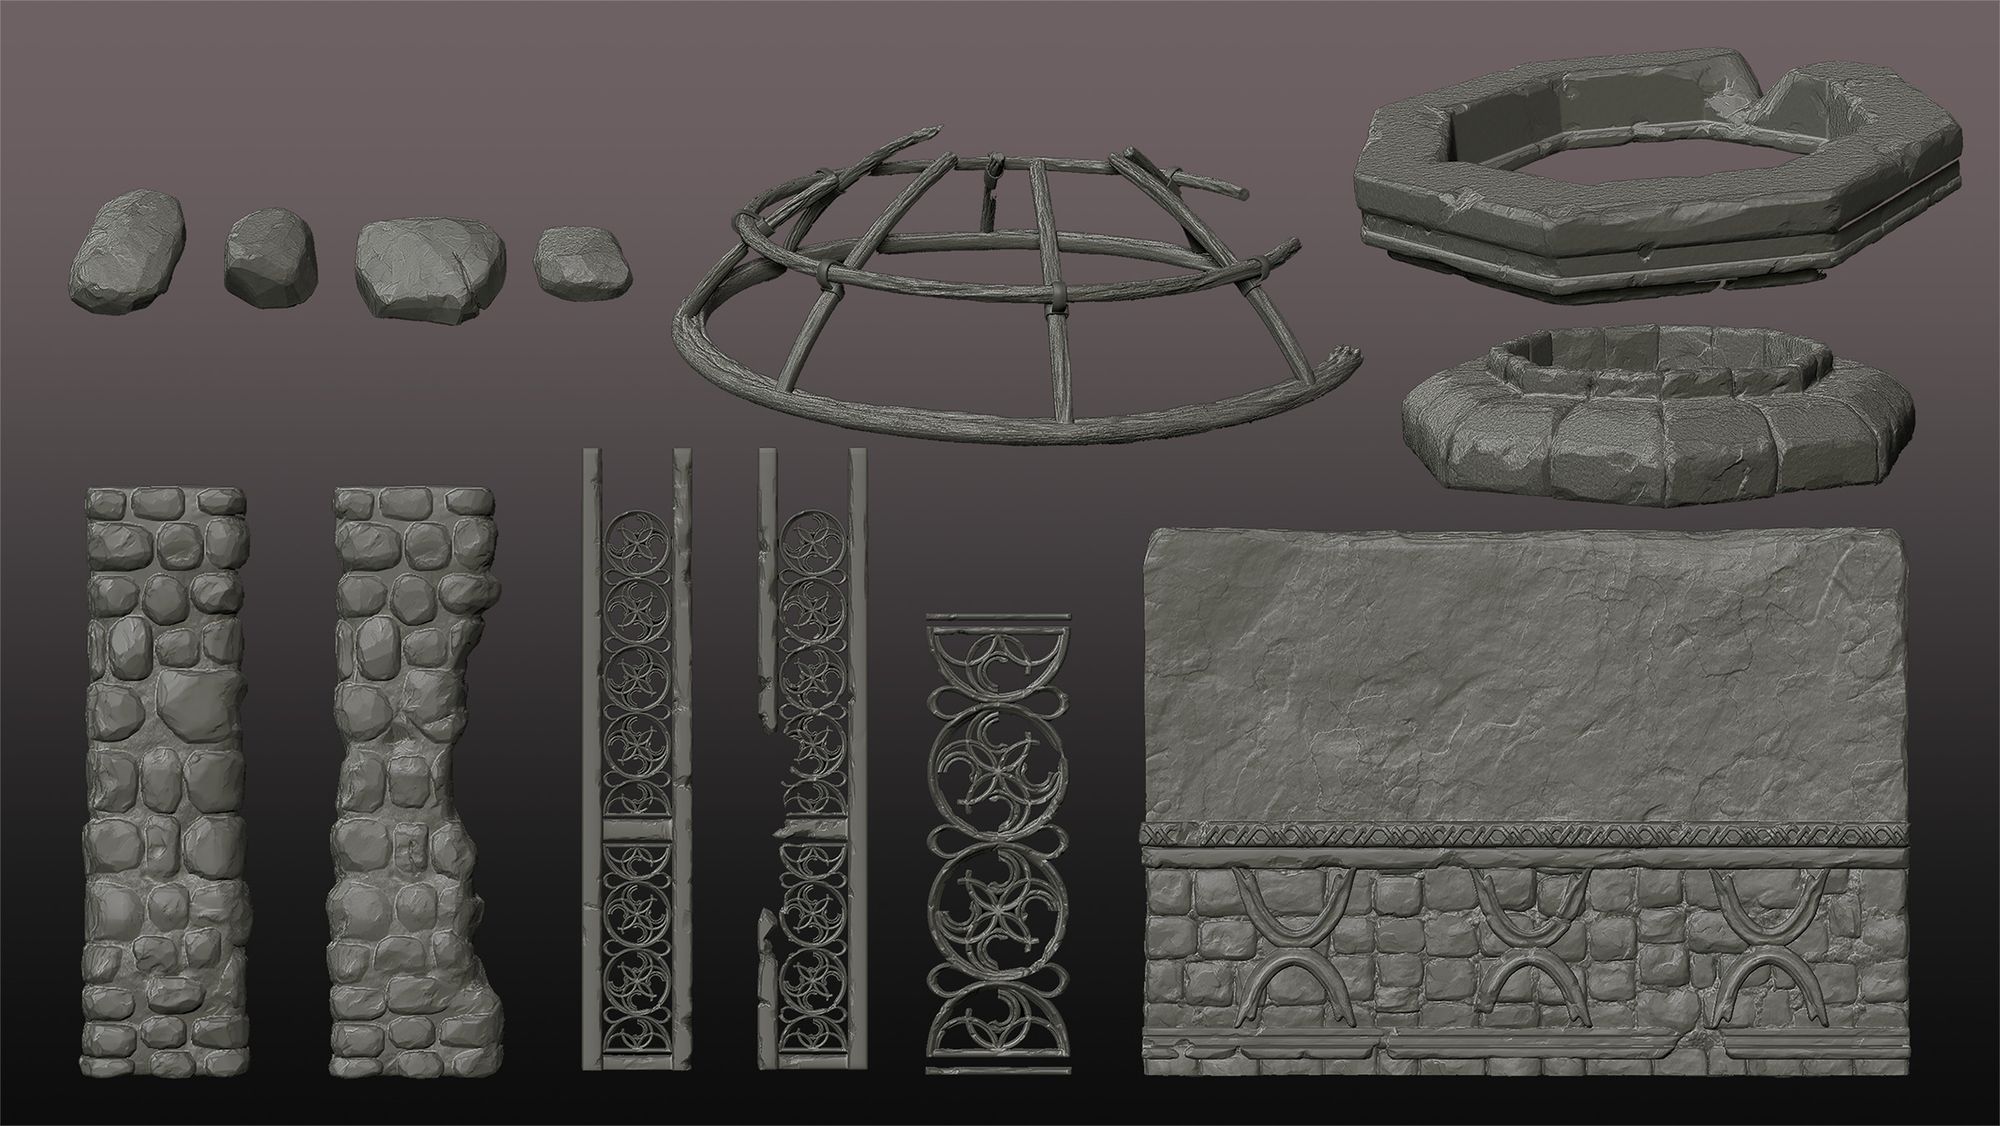
Concept BreakdownAssets Breakdown
By comparing the concept breakdown to my assets showcases, you can see it indicated me to know how many major assets I needed to make. It also allowed me to evaluate how much time roughly I need to spend on creating each asset.
Reference Gathering
As for collecting references, I personally like to collect as much as visual references I can at the beginning so that you won’t spend too much time doing sidetrack research later.
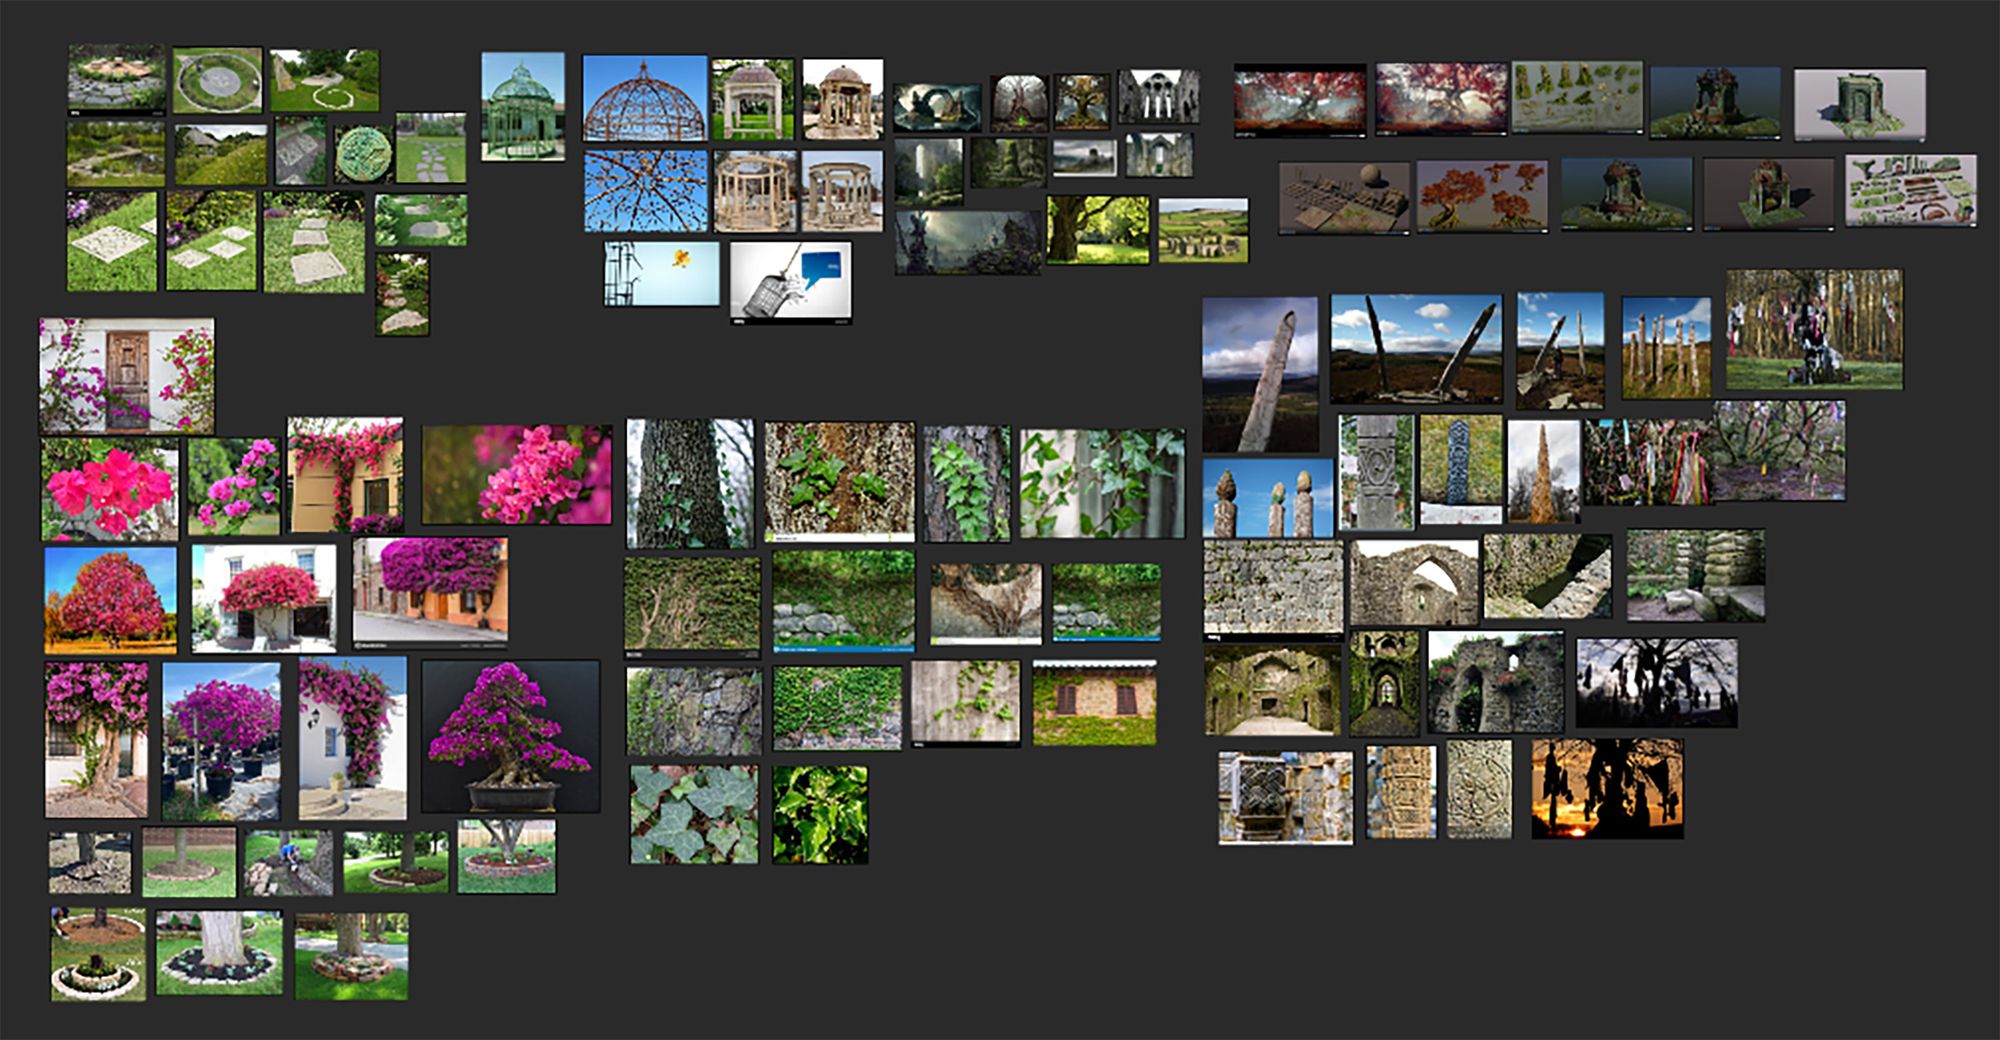
PureRef board I built for this project
For this project, the domain elements in this environment are the hero tree, some other foliage assets, and the stone masonries. Therefore, I prioritised collecting the visual references for those and put together a brief collage using PurRef.
At this stage, one thing I want to tell all beginner artists is that it is ok to start an investigation and look into other professional artists' portfolios, especially for those who are already working at the studios you like. As for most of the time, they are almost open resources online already! So don’t forget to take advantage of those and learn from them.
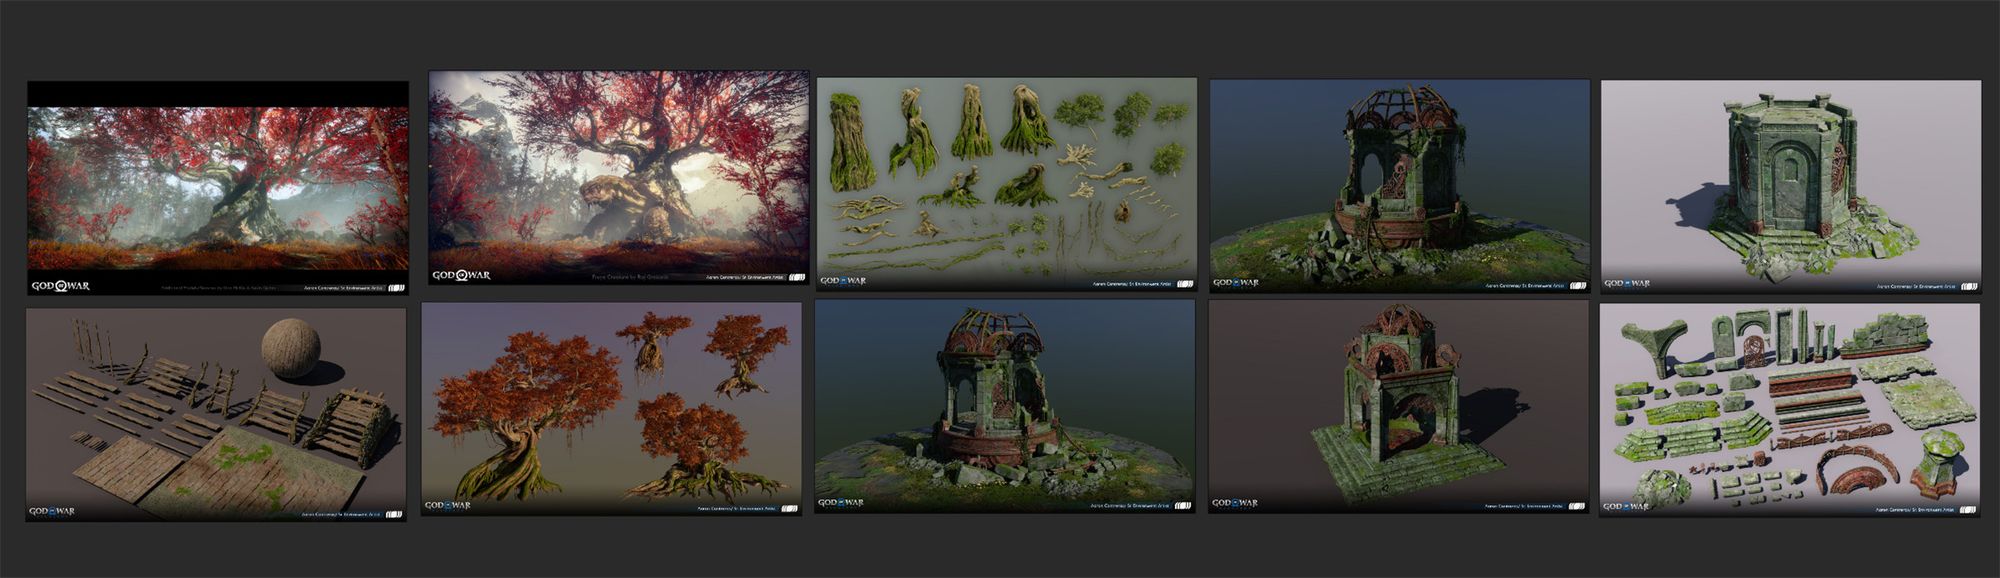
I personally had a great influence from the God of War series. And both Celtic and Norse mythology are two genres often borrowed for storytelling in games. Thus the art style of God of War immediately jumped into my head at the time, and I was lucky enough able to find these amazing breakdowns from Aaron Contreras, by simply just type in “God of War” in the ArtStation Search box and going to the Artists section.
Game environment art reference from Aaron Contreras's ArtStation page
This not only can help to develop the look of your environment project but also can give you a clue on the standards and skill level you might want to reach when comes to “breaking into the industry”.
Blocking & Project Setup
Assets Blocking
When it comes to blocking geometries for a project you need to finish within a short time frame. You might want to make this step solid and finish it as quickly as possible.
To ensure yourself able to block the camera correctly using “old fashion” approaches like camera perspective matching is an important fundamental skill indeed. But for this project, I “cheated” it a little bit, just to make sure I can get the most accurate camera perspective and lens information as fast as possible by using this cool Blender Plugin called fSpy. It is a free open-source plugin that allows you to import still images into it and generates camera data that you can use to import back into Maya or Blender for camera matching.
Camera matching workflow: from fSpy to Maya
After this step, it’s finished. It is time to open a new Unreal Engine Project!
Project Setup
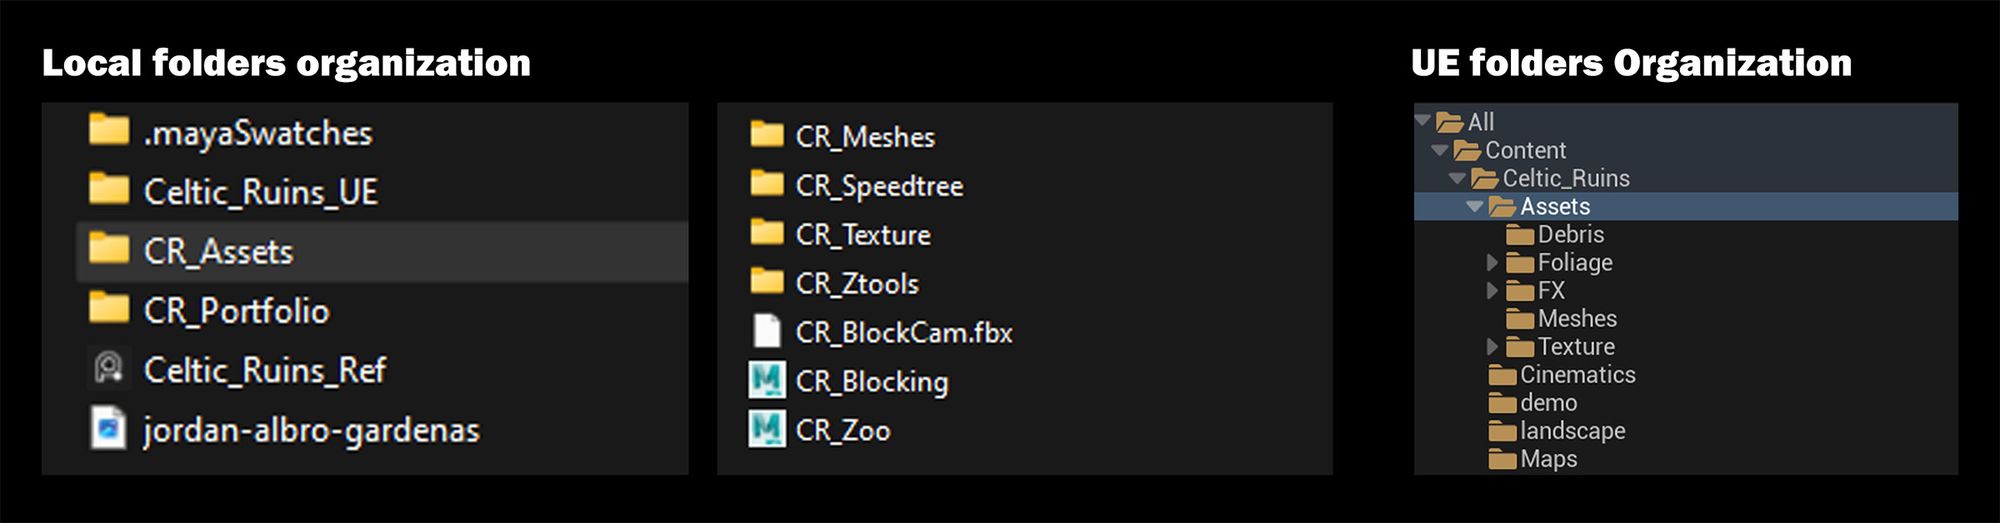
One trick that can save you a lot of time and prevent you get stuck in the chaos of looking for things is “folder organisation”.
I usually like to categorise my project files into 3 major categories: UE Project folder, Assets Folder, and Portfolio folder.
As for Unreal folder organisation, it may vary depending on personal habits. Below is mine for reference.
All the folders I created for my project
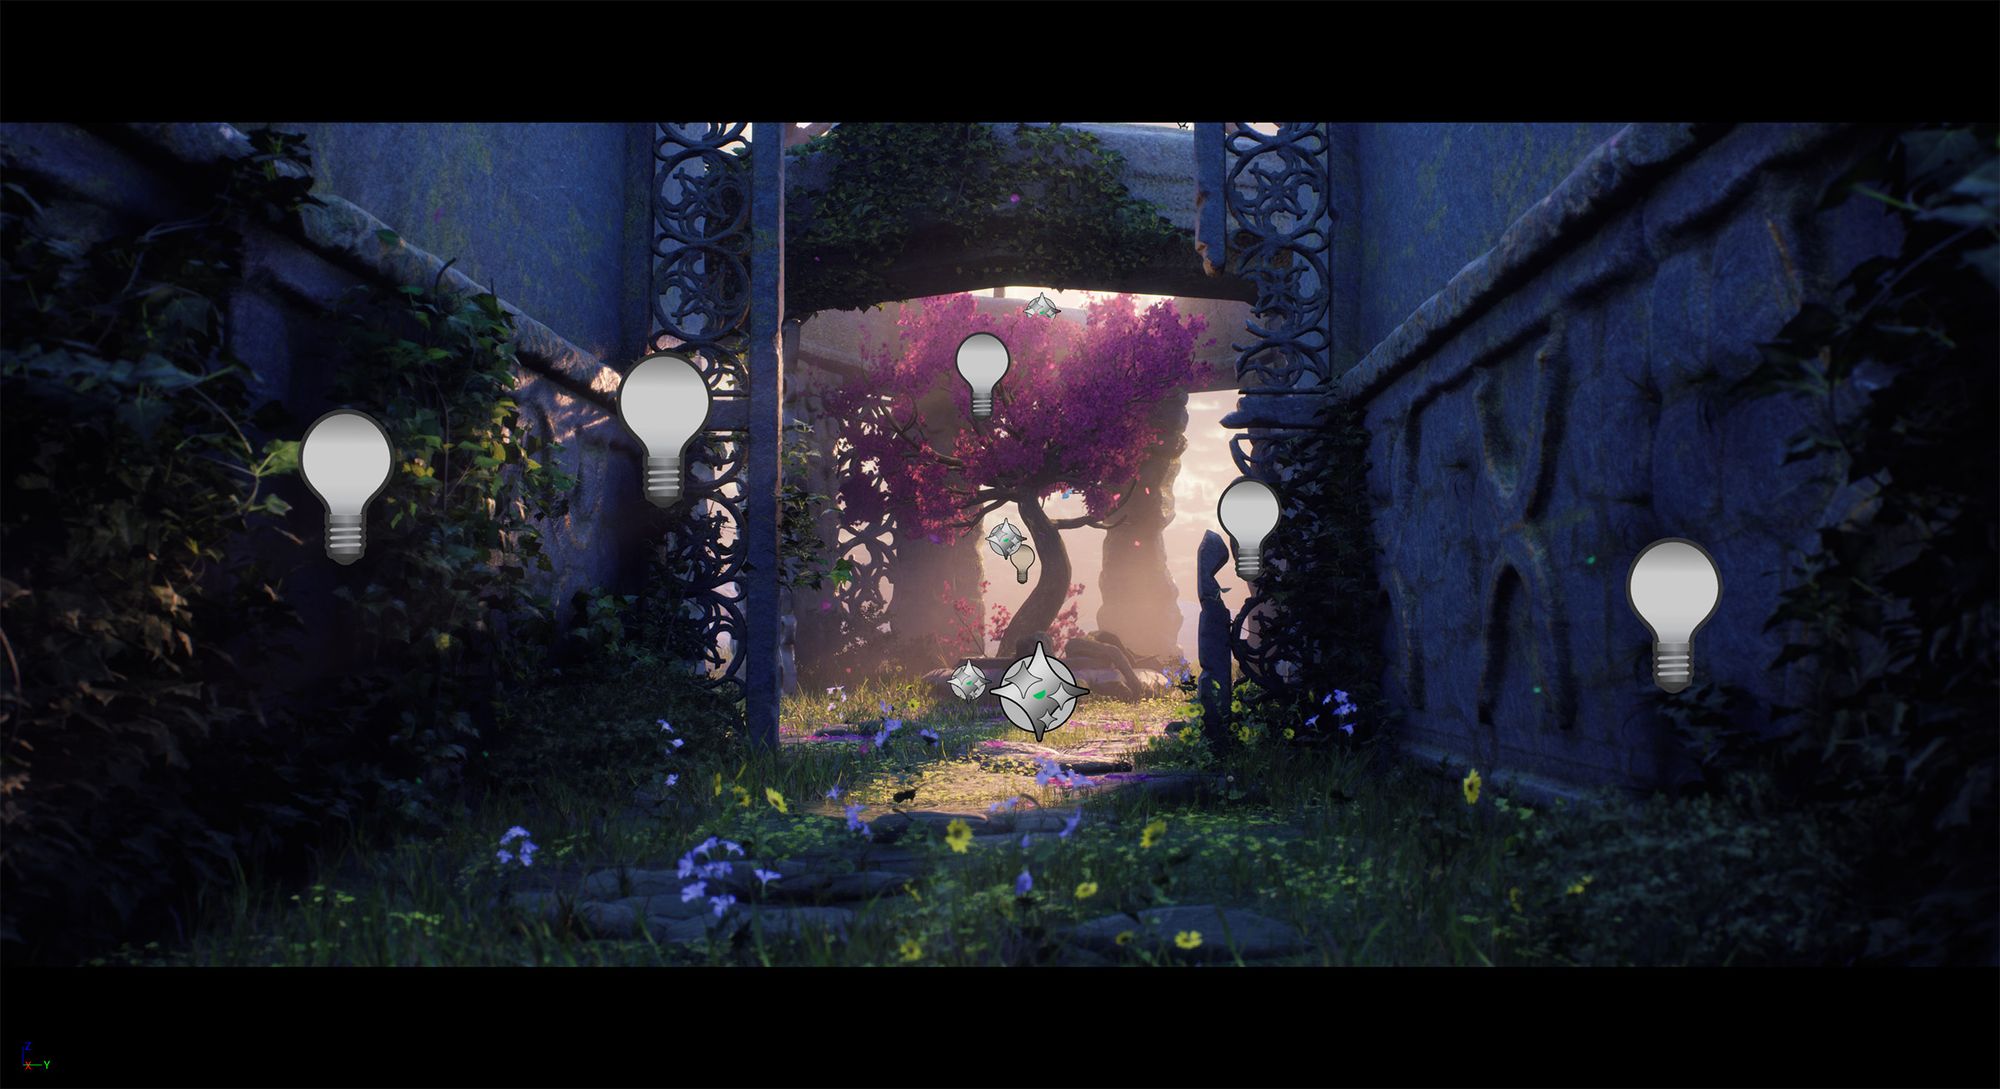
Lighting Blocking
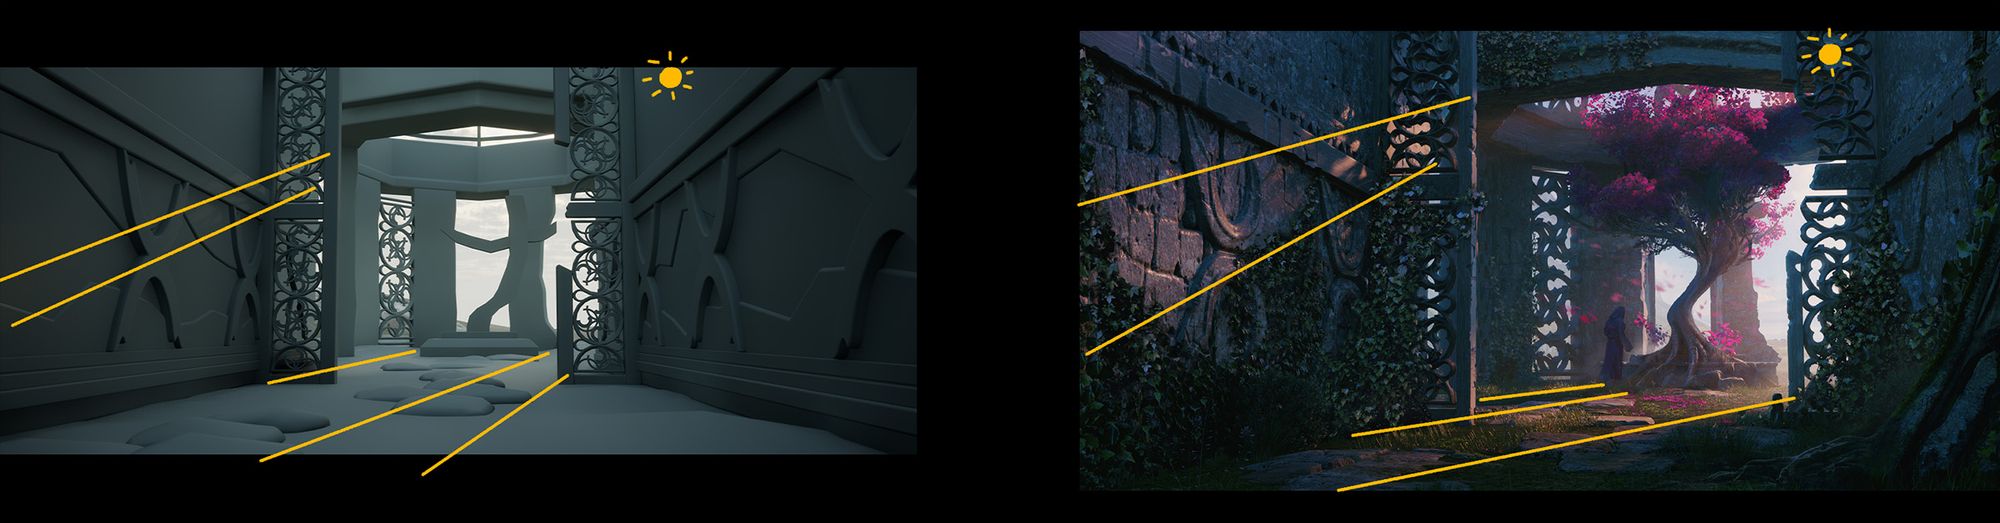
One of the key steps that can accomplish your project to a great degree is lighting. And lighting, blocking it’s a step that can also be at an early stage to prevent further adjustment later. As it is important for you to have a clue that the brightest part in a visual is usually the focal point for the audience's eyes, those areas demand extra attention and effort in terms of the level of detail than the dark areas. Just simply for the fact that, what’s the point of putting a highly detailed hero prop at a place that no one can see?
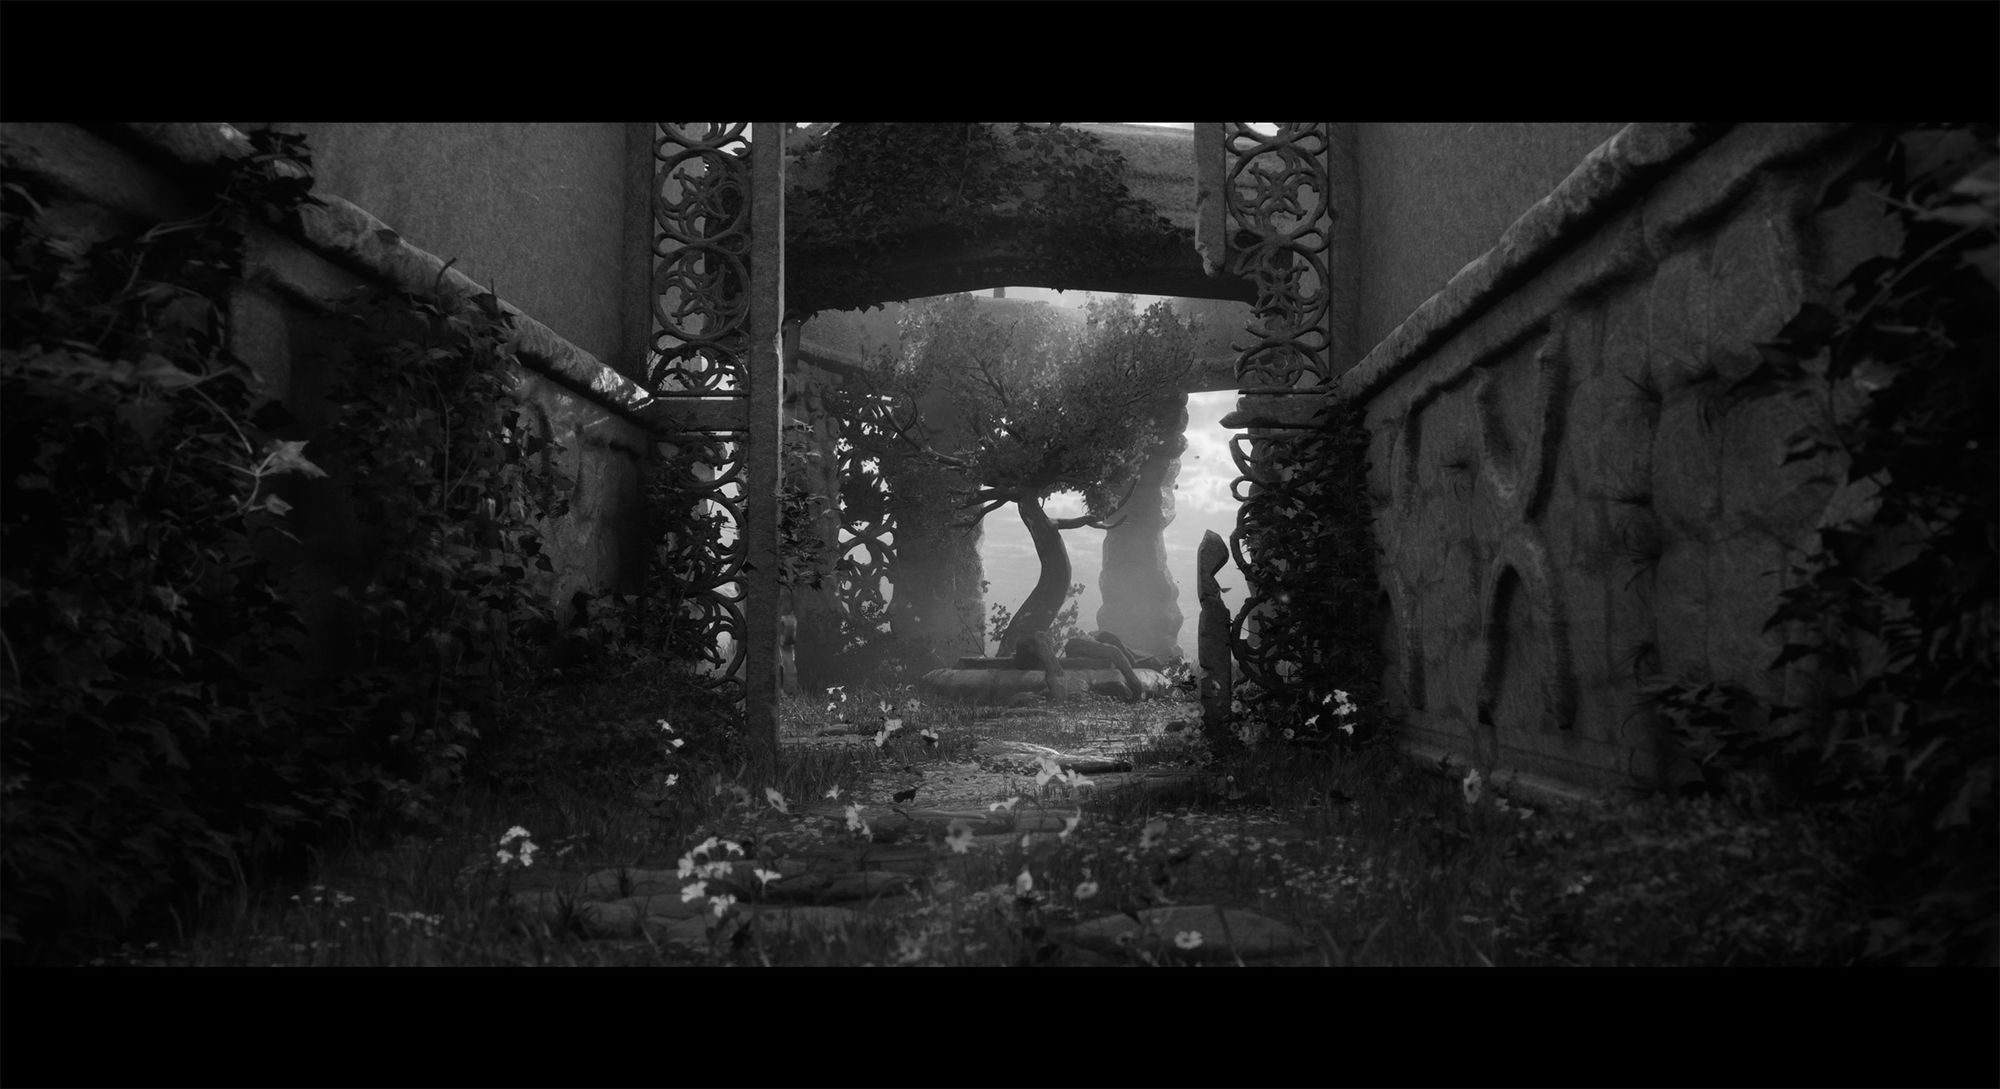
Matching the main light source position with the original concept
For this step, just get the key light (in this case, the key light is the sunlight) right. Other fill-lights might need to be adjusted later, according to the assets depending on what you want to highlight.
Assets Creation
Terrain Creation
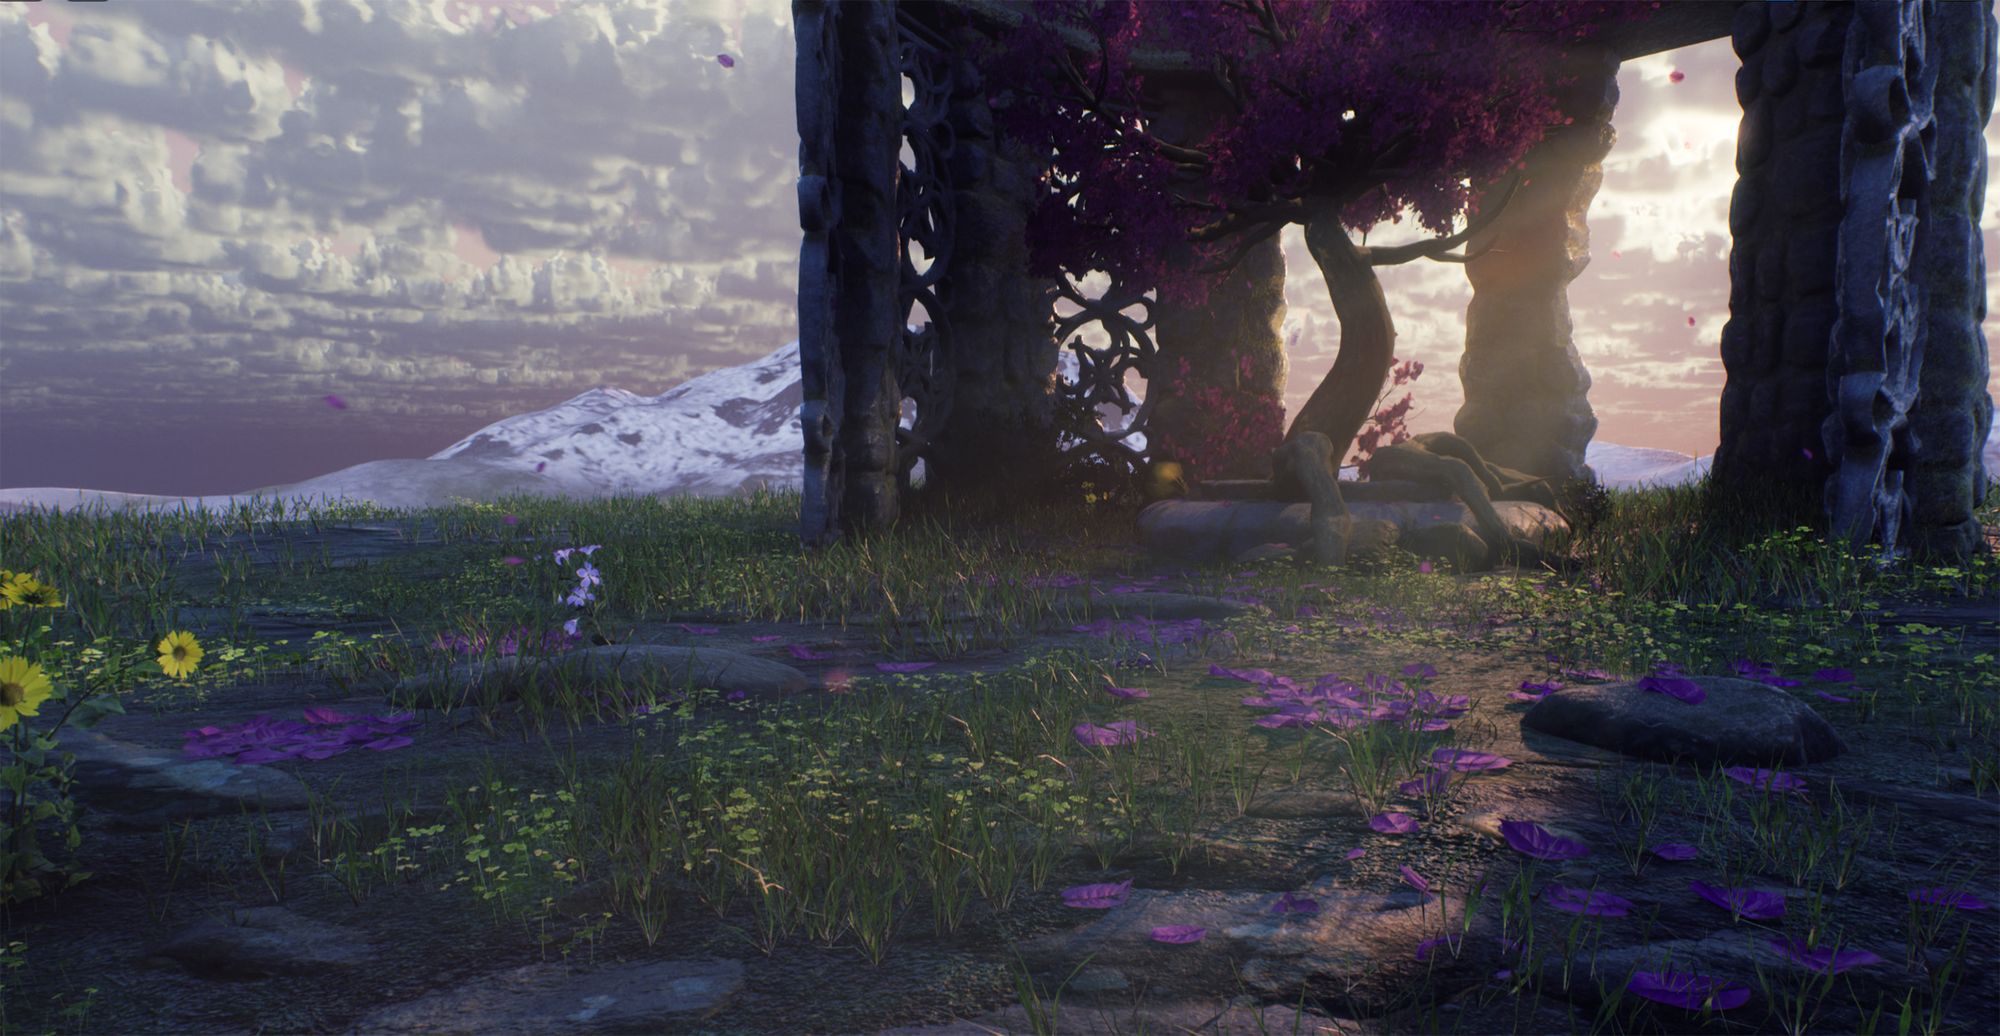
For the assets creation stage. The first asset I made myself do correctly was the background terrain itself.
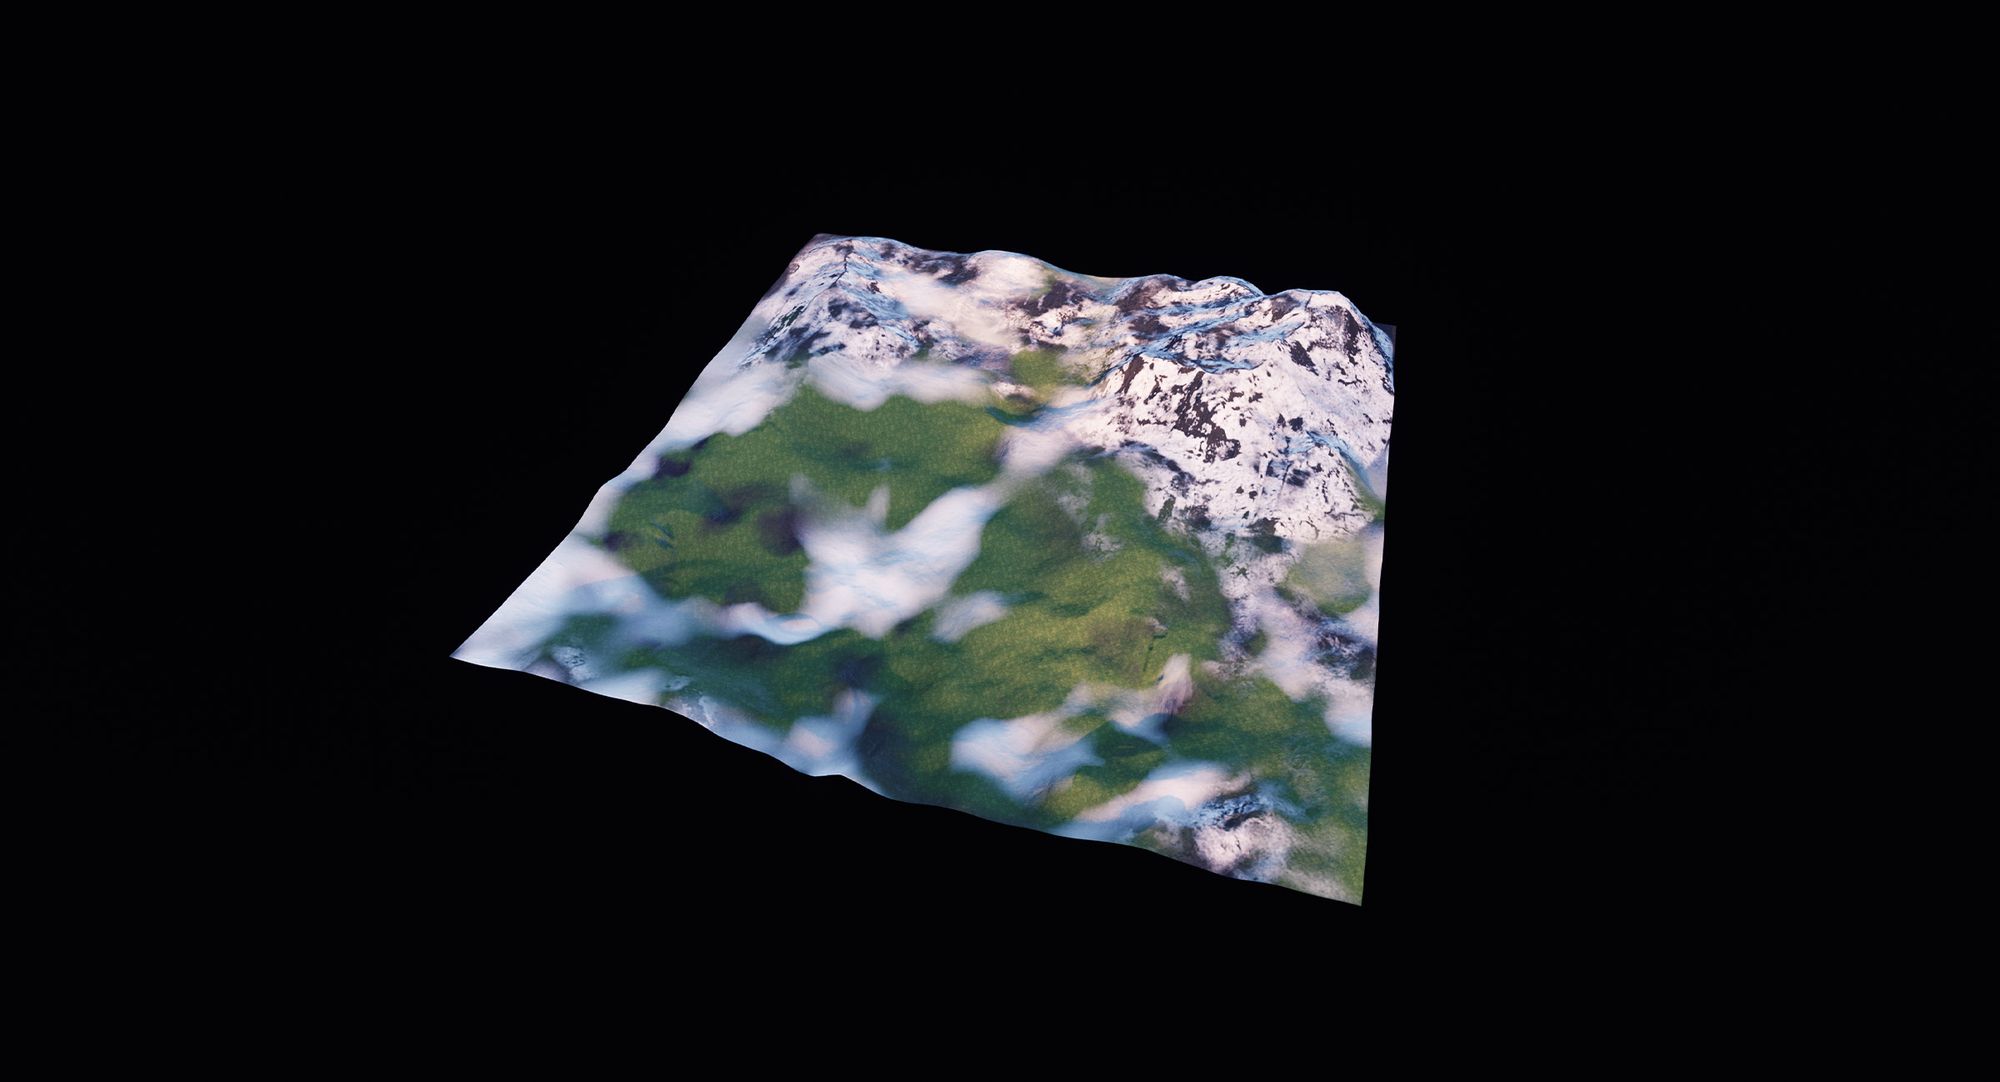
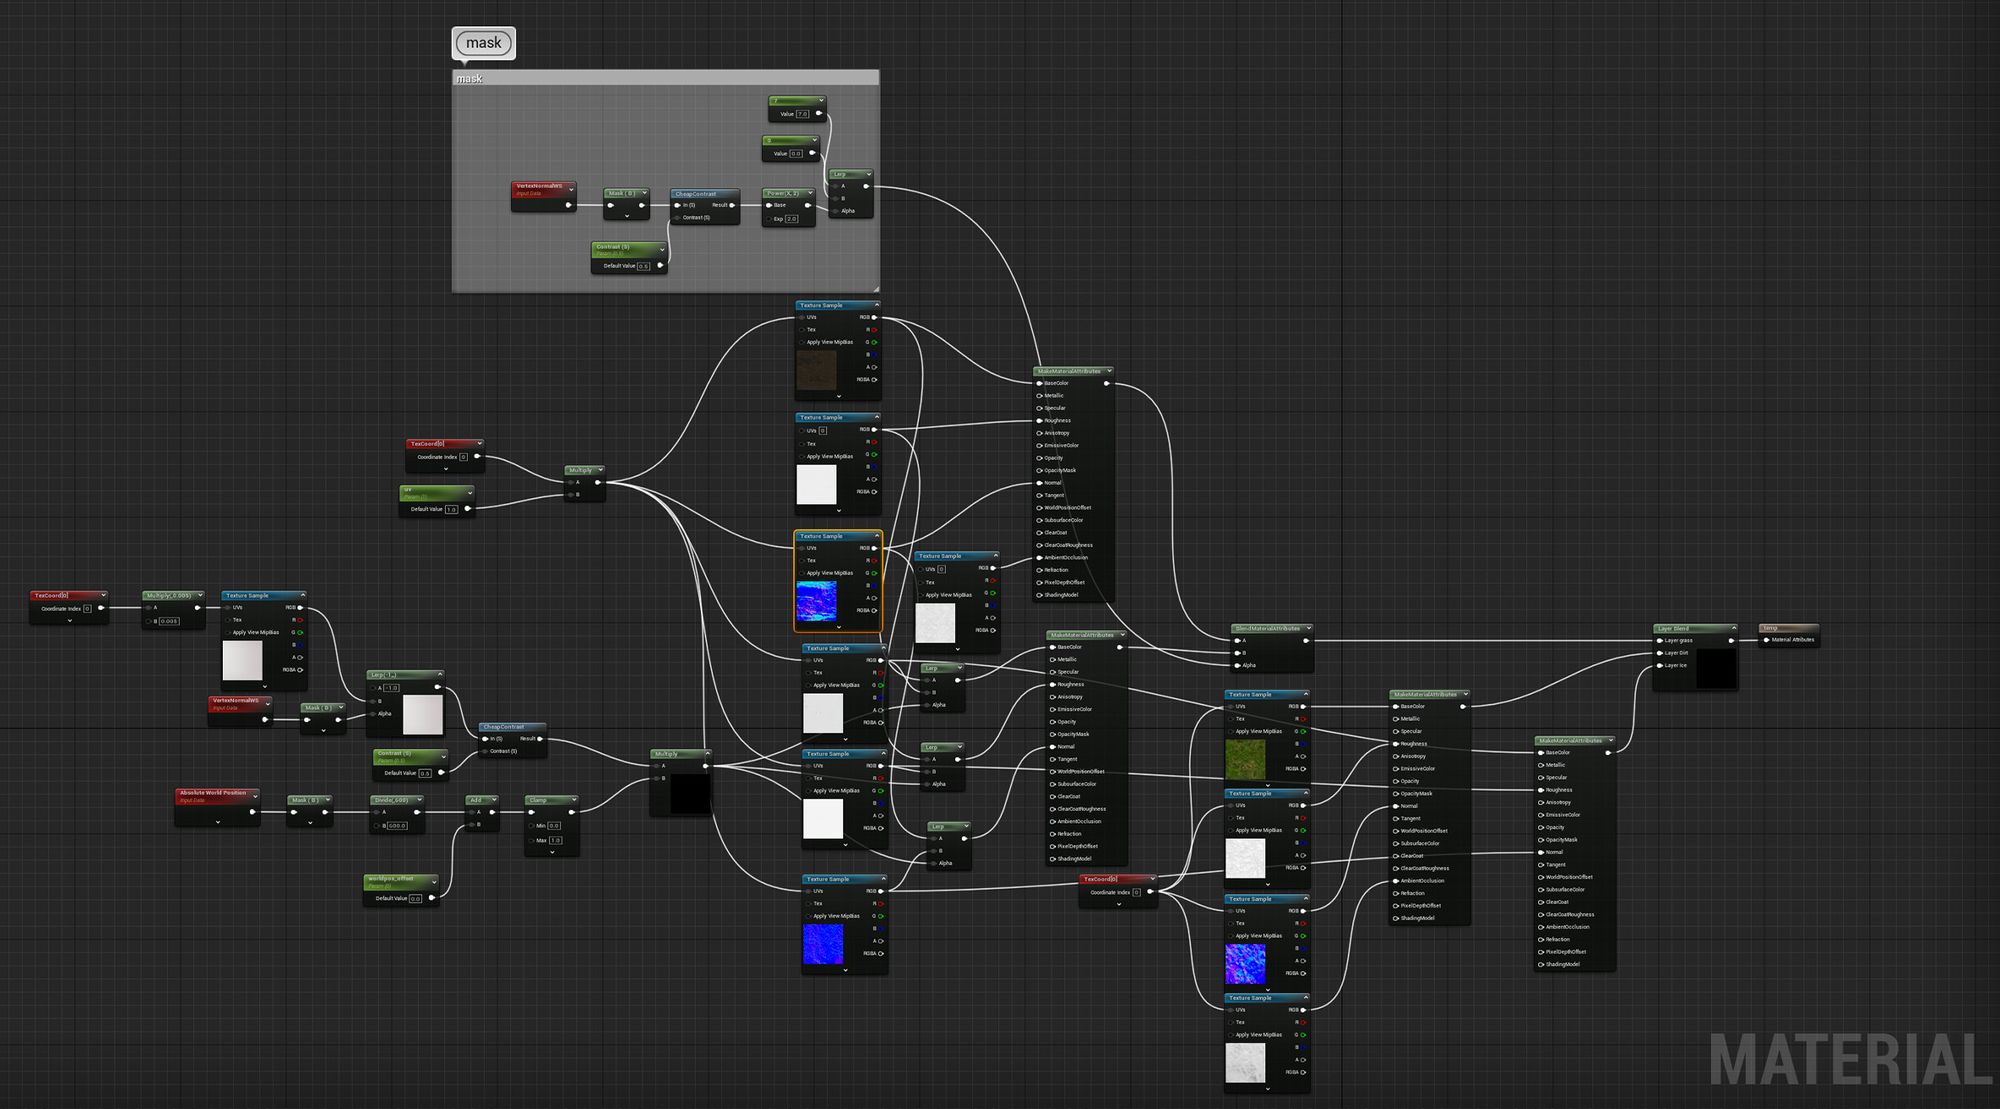
Background terrain that I modified into a melting snow mountain in order to add a sense of "early spring"Landscape Material Graph
Even though the terrain is not really the domain visual element in this environment, I still liked to produce it and put it into my portfolio to showcase that I’m capable of doing it. And out of consideration of timeframe, instead of using Houdini or other Terrain design tools, I directly sculpted it inside of Unreal using the Landscape tool very quickly and jumped to the texture part.
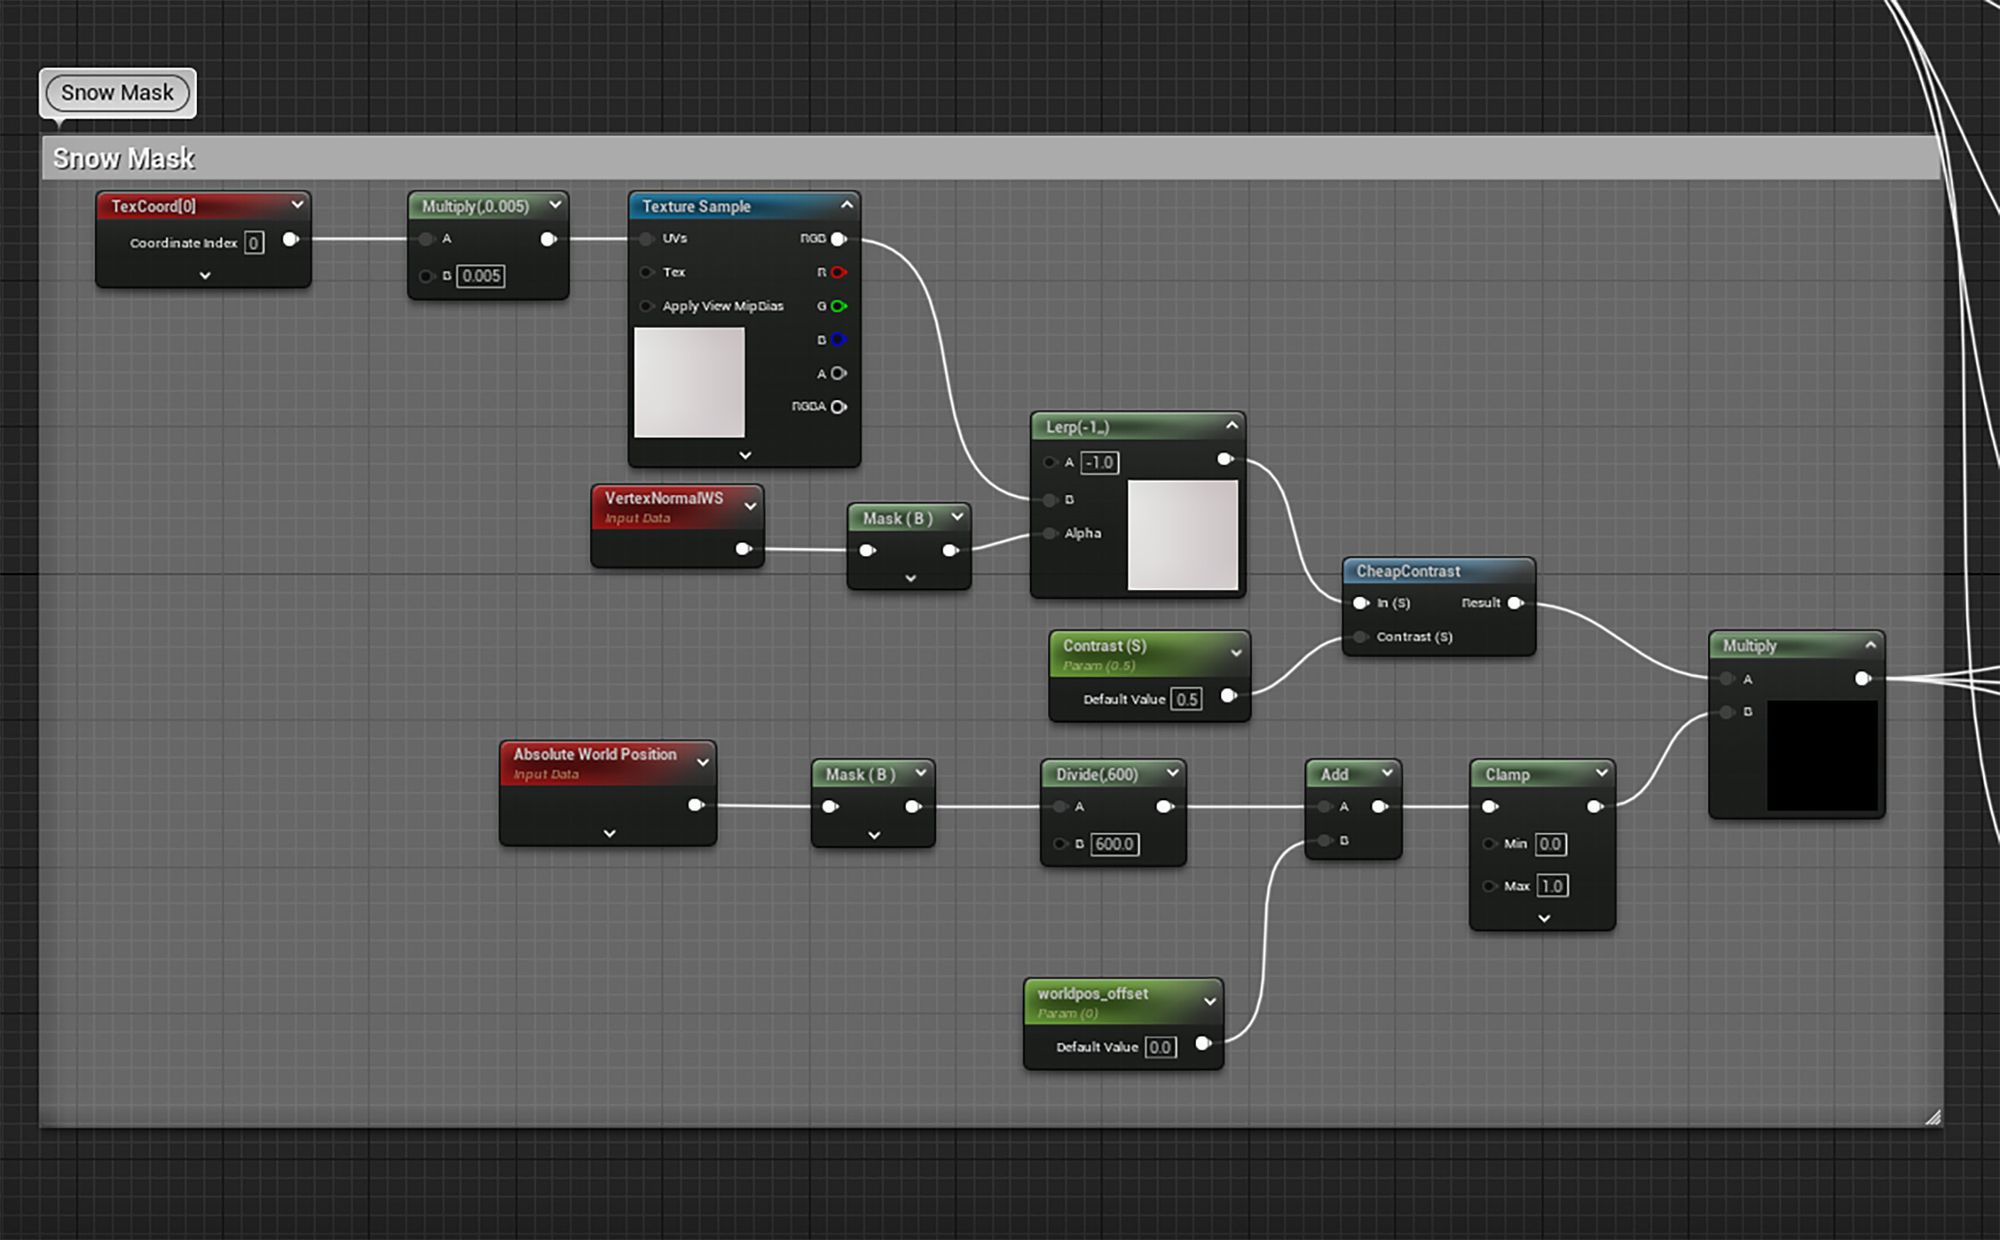
And as I mentioned in the Mindset Preparation stage, you want to make sure to leave enough time for things you want to explore. In this project, one thing I would like to try was to create an automatic mask for the melting snow mountain texture that works together with the terrain vertex painting.
Automatic Snow Mountain mask
Sculpting
Sculpting is one part you want to make SOLID, as it will really show in the final visual.
Even though the texture will be baked down, it is important to make the overall shape looks right in terms of a realistic degree. For some reason, that’s how human brains work when it comes to shapes.
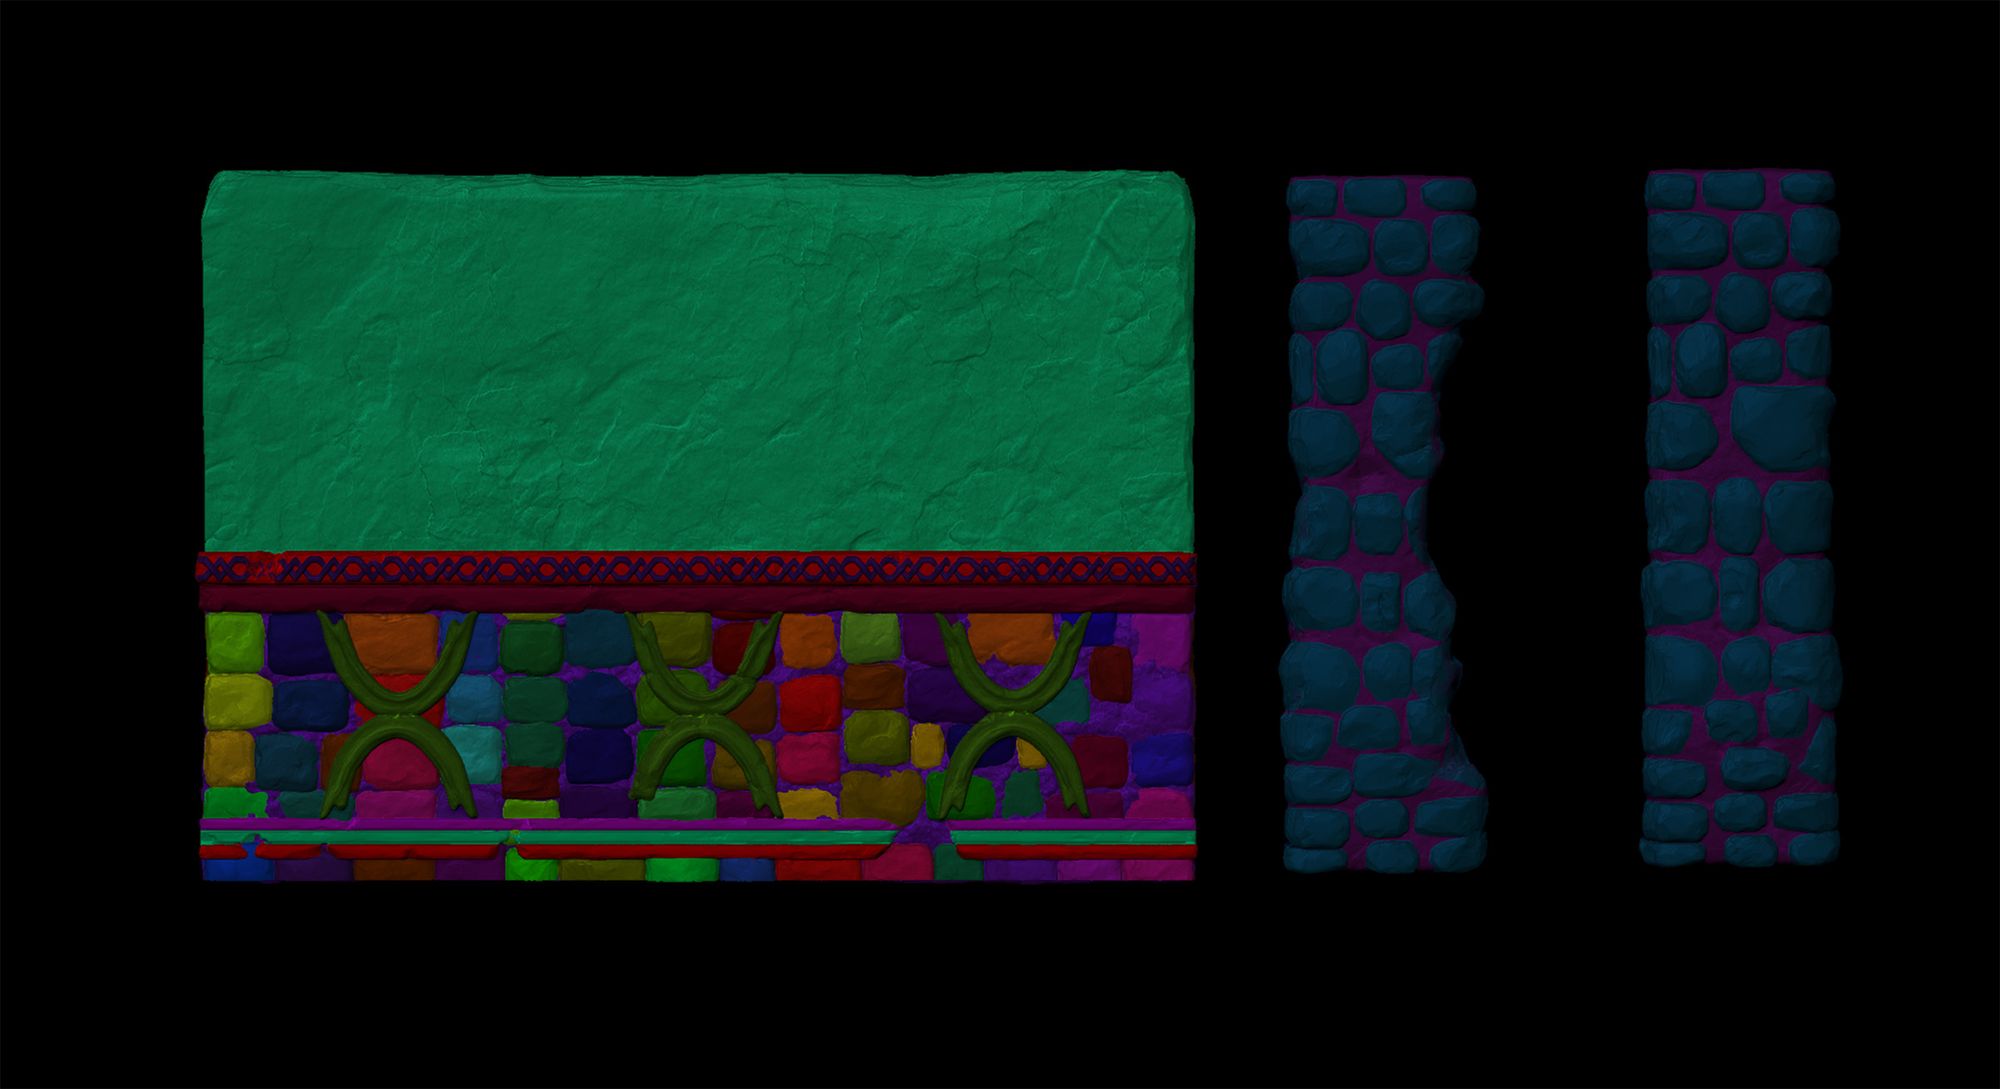
For this project, I put some effort into determining how realistic I wanted the masonry assets to look like and decided to maintain a certain degree of “gaming look” for them during the sculpting stage.
I brought the base meshes and geos that I created during the Maya blocking stage into ZBrush.
Texturing
When it comes to texturing for short-term projects, one thing we need to know is that you might not have time to make all the assets from scratch. Therefore, it is completely alright to use existing assets, such as Megascans for texturing.
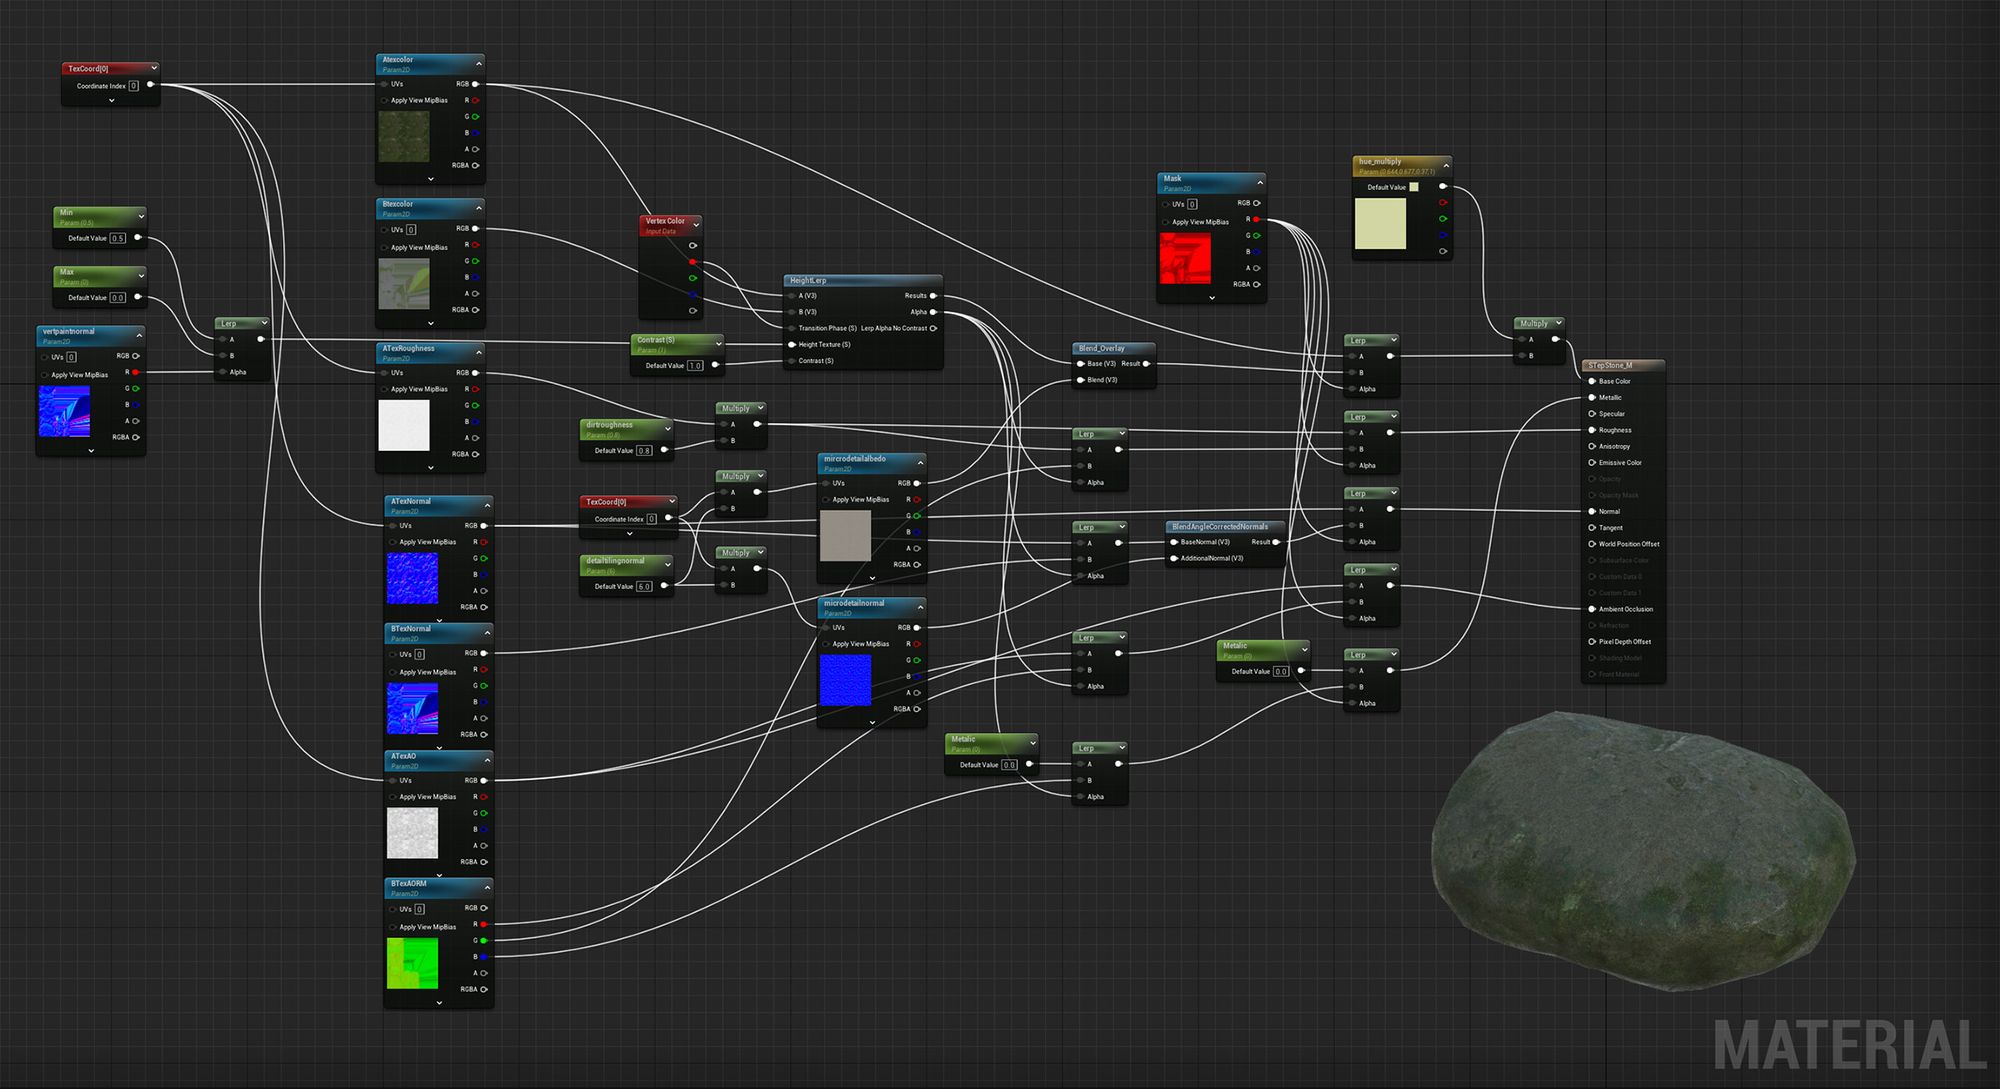
In this project, the major texture that I used for all the masonry assets were brought from Megascan and mixed in Substance 3D Painter with an extra layer of moss group into a Smart Material, in order to unify the look of all these stone assets.
Texturing in Substance Painter
Setups like vertex painting, RGB mask, and normal blending were also added in Unreal’s Material Editor just in case further adjustment is needed for blending assets into the environment.
I also downloaded some foliage assets that were used for the tree leaves and ground vegetation scattering, and the Niagara Falling Leave FX. They were cut and reorganised inside Maya and made into various cards.
In this case, you can see one existing Megascan Foliage Atlas can be used for several purposes to help you save time.
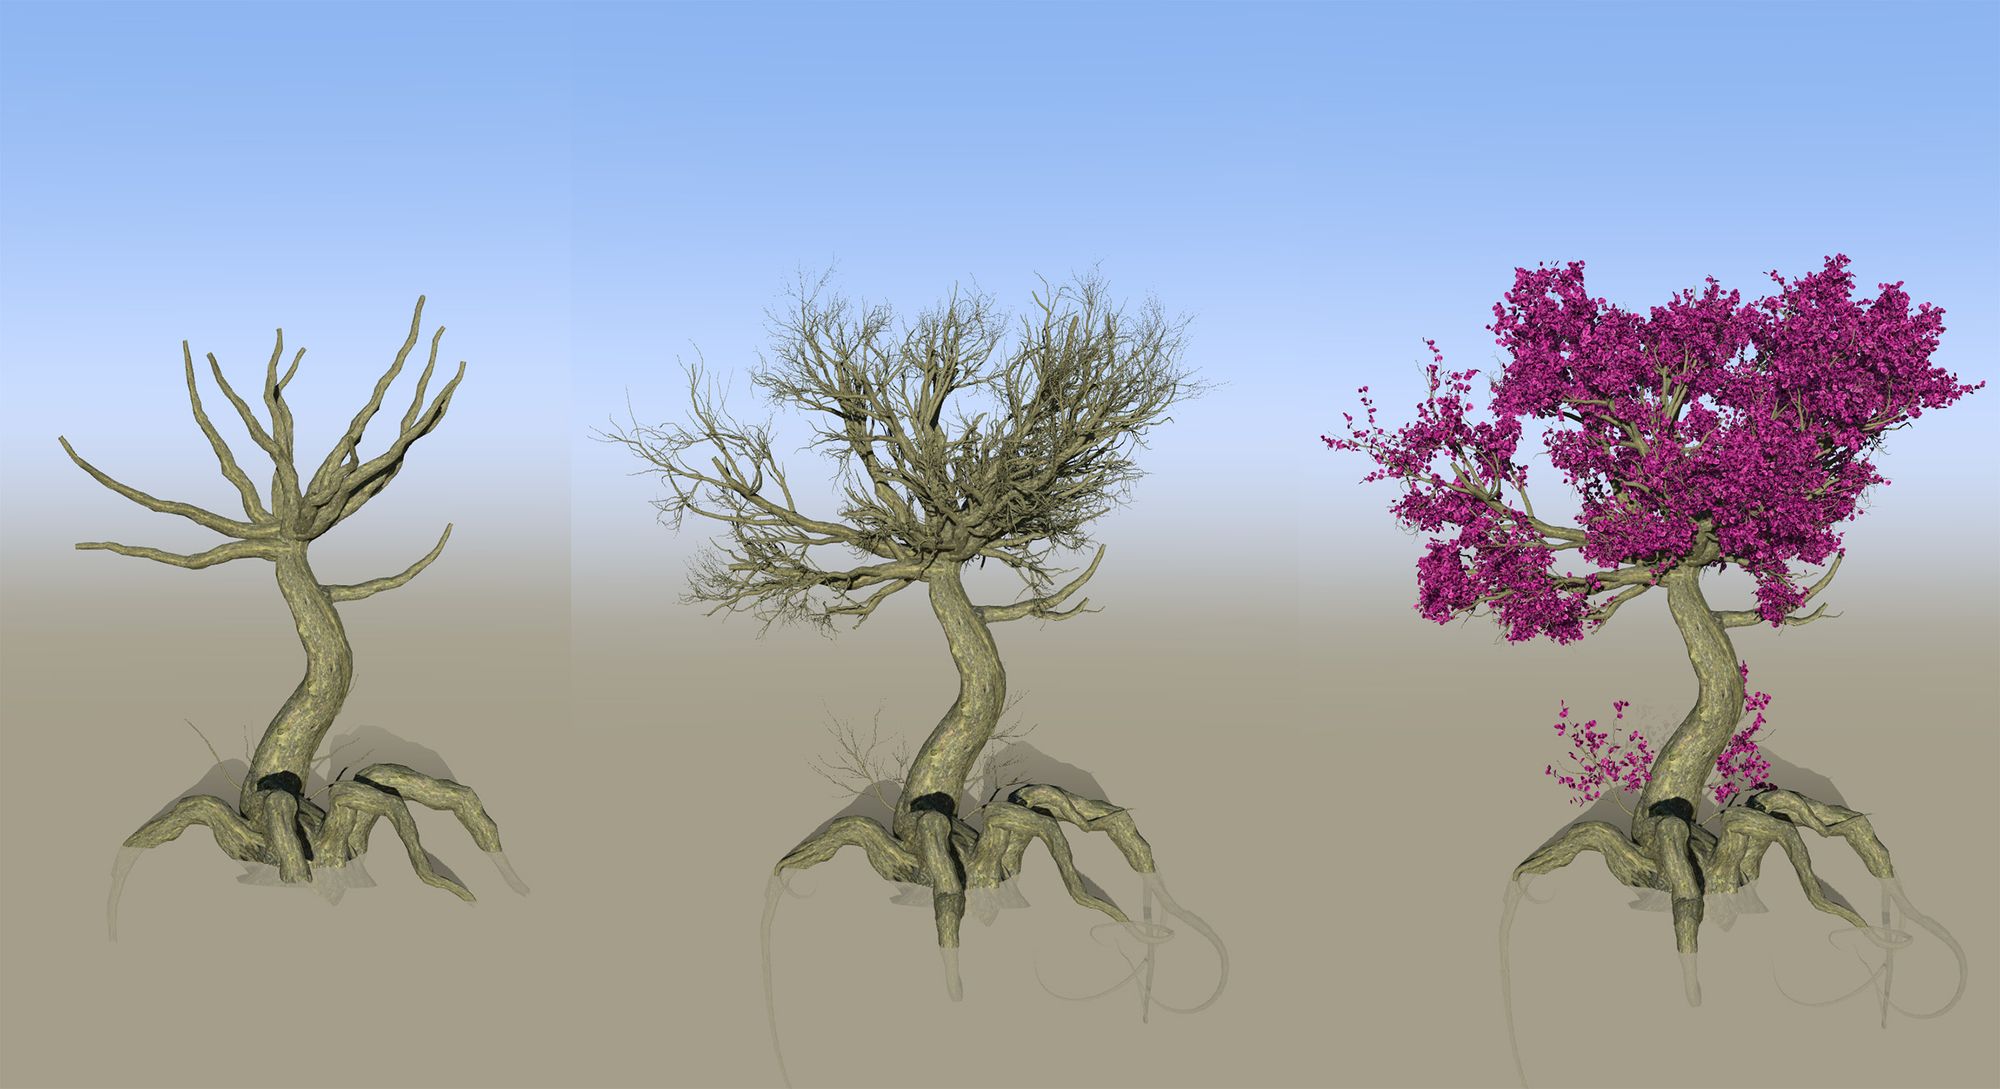
SpeedTree
When it comes to creating foliage like custom-made Ivies and the hero tree inside SpeedTree, I admitted it’s one of the most time-consuming and challenging processes within the entire project. Since it was really just a process of trial and error till you got the results you like.
Worldbuilding
Foliage Layering
For a foliage domain project like this, one trick I would like to share is called “layering”, which is also a trick that can help your CG environment look more realistic. And I was lucky to find a tutorial from Kaizen Tutorial that helped me explain this really well: The Secret to Real 3D Environments.
As you can see, I layered a couple of different foliage along with the texture itself on the ground surface to mimic the look of overgrown stone floors, not just to make the environment itself looks more “real”, but also to create visual dynamics in terms of colour variation and shots compositions.
Lighting & Ambient FX
My lighting setup for this project was very simple.
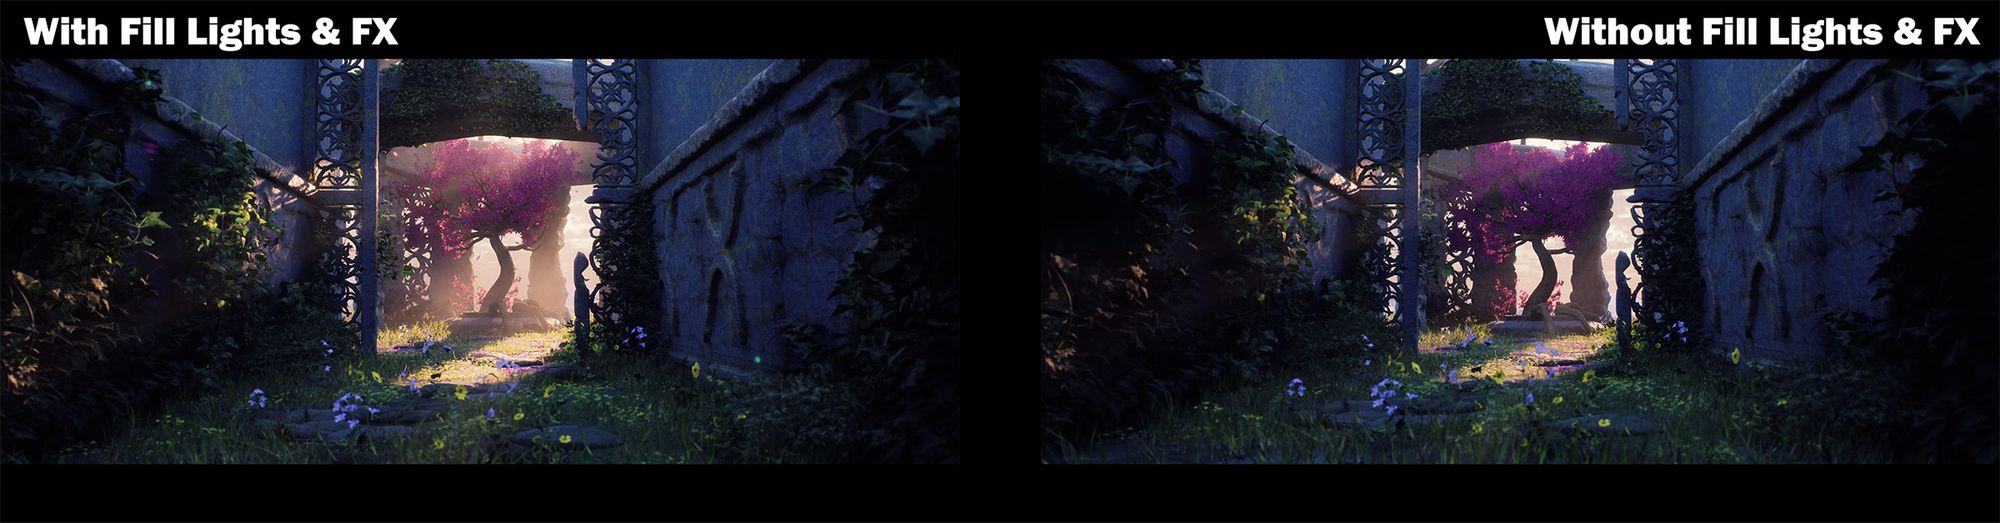
Besides the main light sources like skylights and the sunlight, I added a couple of fill lights in the entryway in order to brighten up the area to prevent extreme black-and-white contrast for visual purposes.
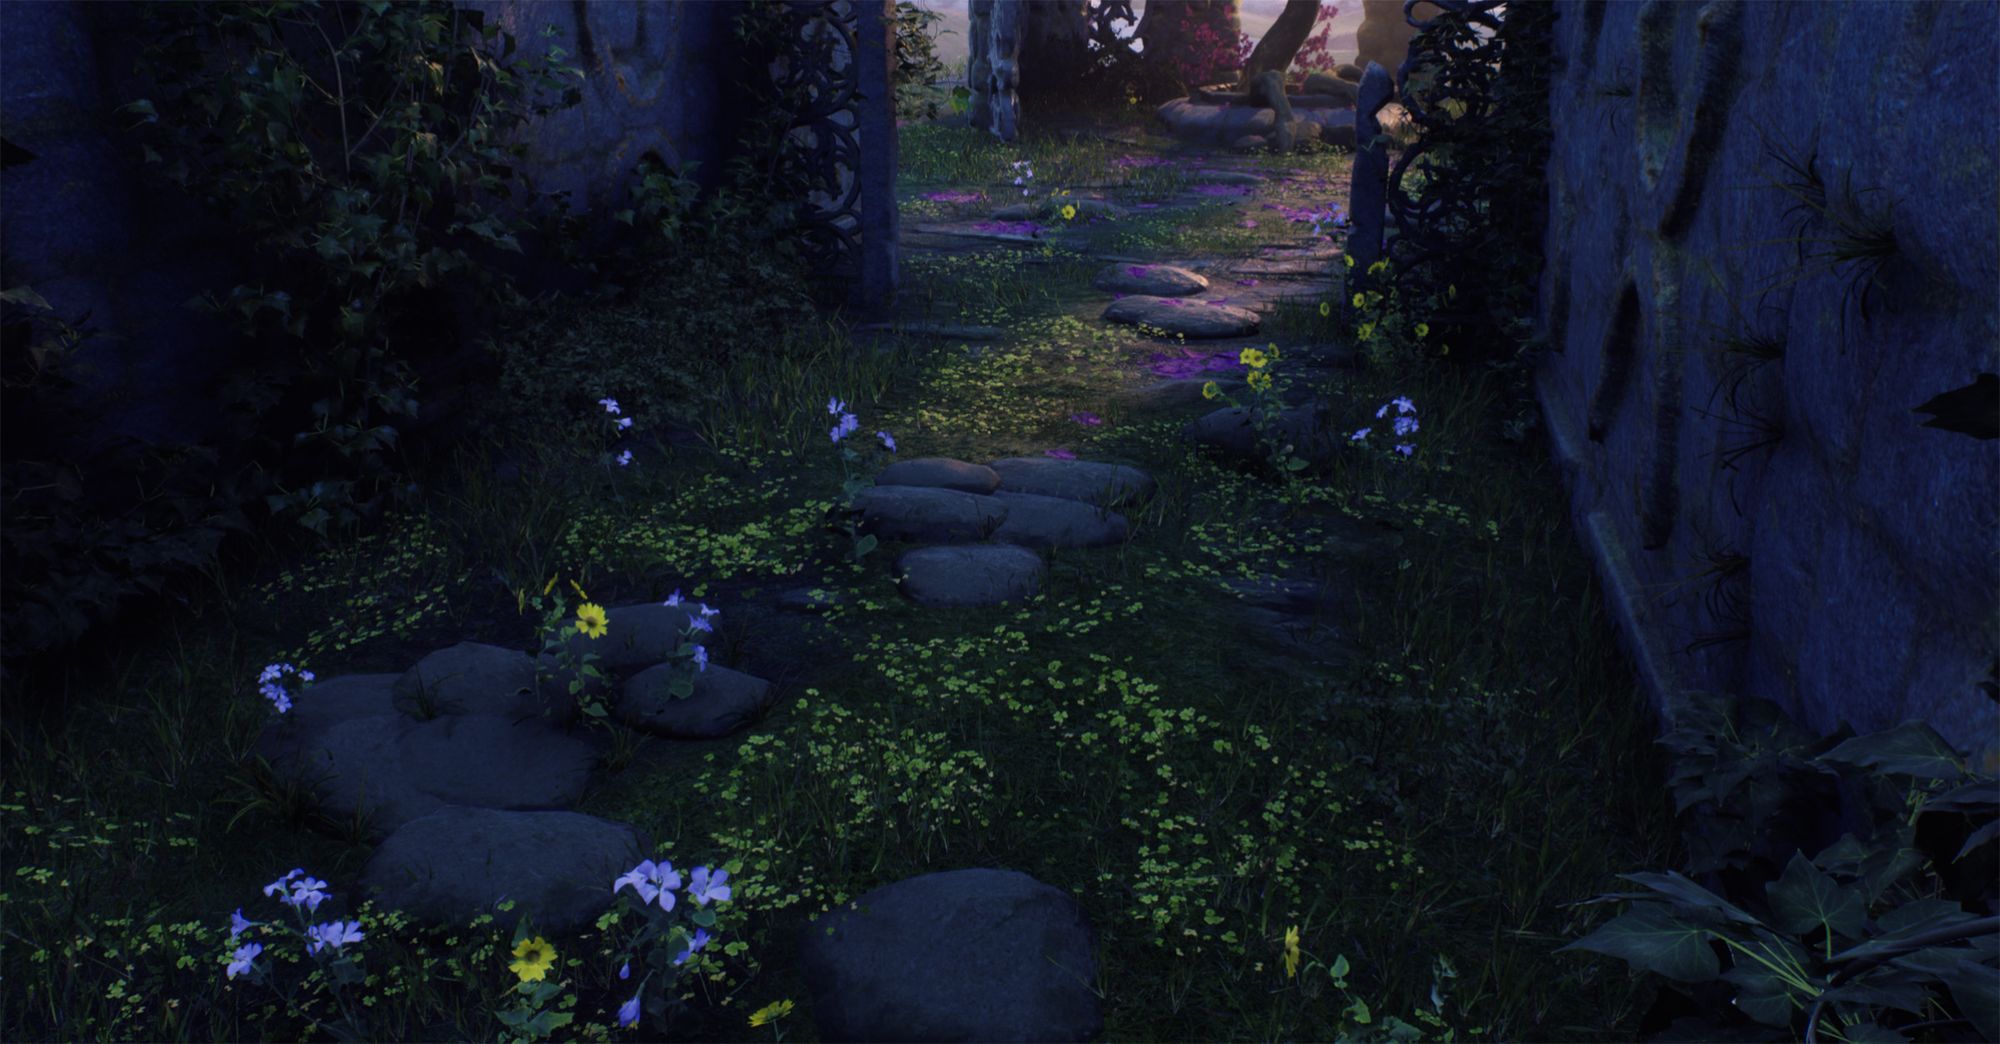
Ambient/atmospheric FX is one approach you can use to make your lighting stand out. It can also help your environment look more “vibrant”. In this project, besides the falling leaves, I also added some customized fireflies particle FX along with the morning fog behind the hero tree in the distance.
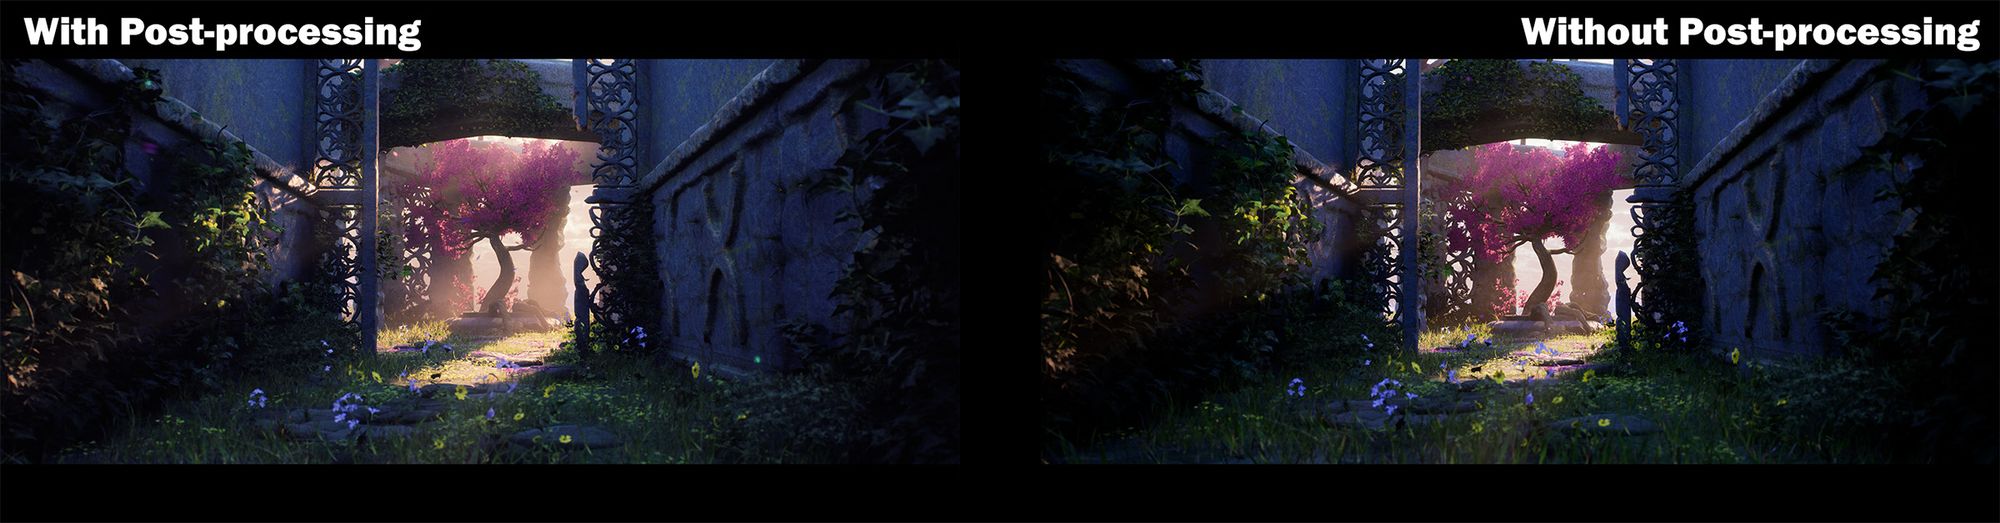
Post-Processing color grading is also one thing you might consider using for the final look.
For this project, I didn’t spend too much time playing with the color grading iterations. Instead of that, I directly aimed for the blue hue feeling that the original concept art has and also brought my own interpretation into it.
Below are some tutorials that really helped me when I just started touching lighting in Unreal before!
Now we’ve finally come to the last step, it is the one last you need to do even after you “finished” your project since it’s a portfolio piece!
Below are all the visual materials and breakdowns I gathered for the ArtStation and Rookies post of this project for your reference.
Conclusion
There’s no doubt that finishing a project in a short time frame requires energy both physically and mentally. And it might not be easy for beginners, because sometimes we might easily get lost during the process of trial-and-error learning, the result can either be a hit or miss. Therefore, one thing we as artists need to keep in mind is that you must believe in yourself and keep honing your skills. And it is ok to move on from one, not that “perfect” project that you were so rapt into the next.
The spirit of exploration is one trick for you to keep forging ahead.