Recreating Brokkr: A Comprehensive 3D Character Creation Journey
SAE Institute Geneva student, Damaris Stevens, shares her journey of creating a 3D character from concept to impressive render, while developing new skills. Join her to gain insights into the world of character creation.
Recreating Brokkr: A Comprehensive 3D Character Creation Journey
Round of applause for our sponsors
In this article, SAE Institute Geneva student, Damaris Stevens, takes us through her process of creating a 3D character, starting from a detailed concept and culminating in an impressive 3D render. Join Damaris as she develops new skills along the way, and gain insights into the world of character creation.
Project Overview
Creating Brokkr Úlfarr, a Viking character inspired by the work of artist Julen Urrutia, was a complex and exciting journey, which helped me fine-tune my character creation and final rendering skills.
As part of our ZBrush training at SAE Institute Geneva, I endeavoured not just to produce a 3D character but to encapsulate the mournful spirit of Brokkr by accurately translating Julen's artistry.
Through this venture, I deepened my understanding of the complex world of grooming via XGen. Despite the challenges, I found joy in working on parts of Brokkr's anatomy that only existed in Julen's 2D sketches, ensuring they synchronised perfectly with the already-existing upper body design.
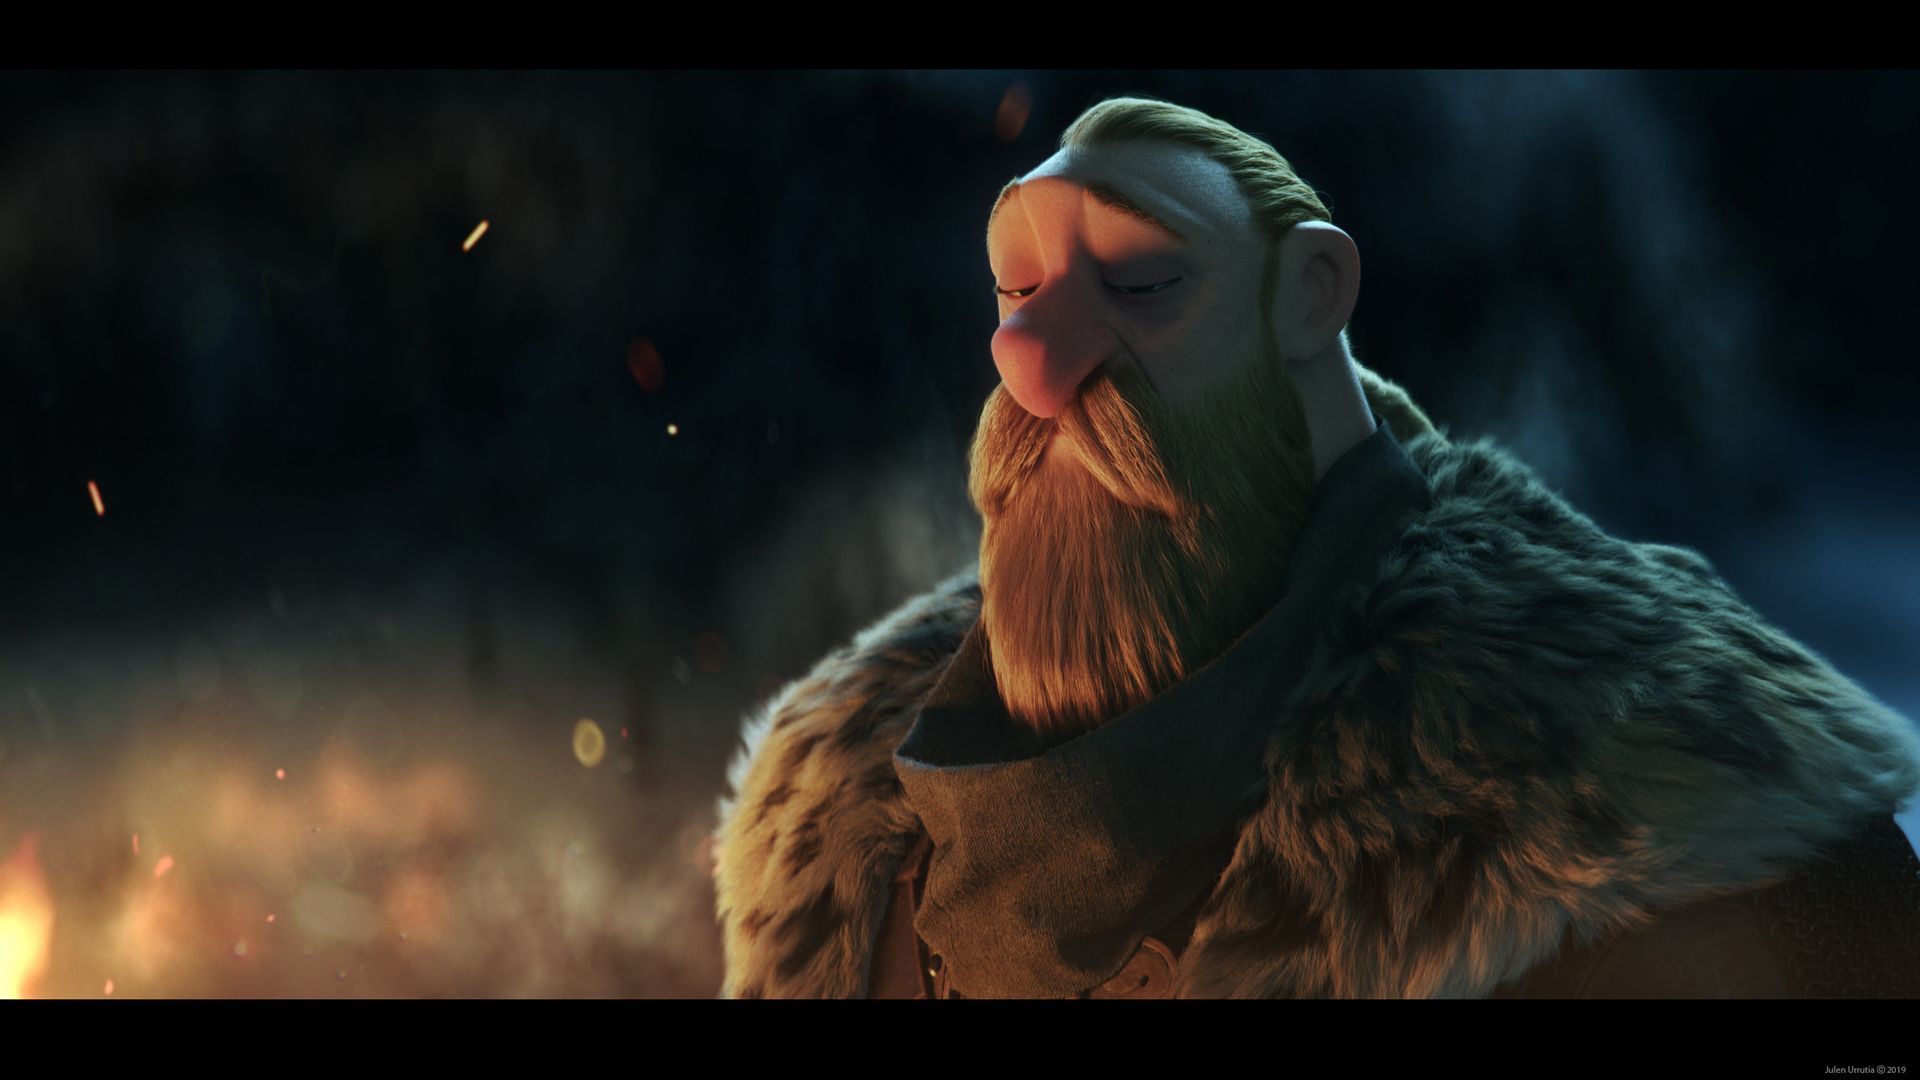
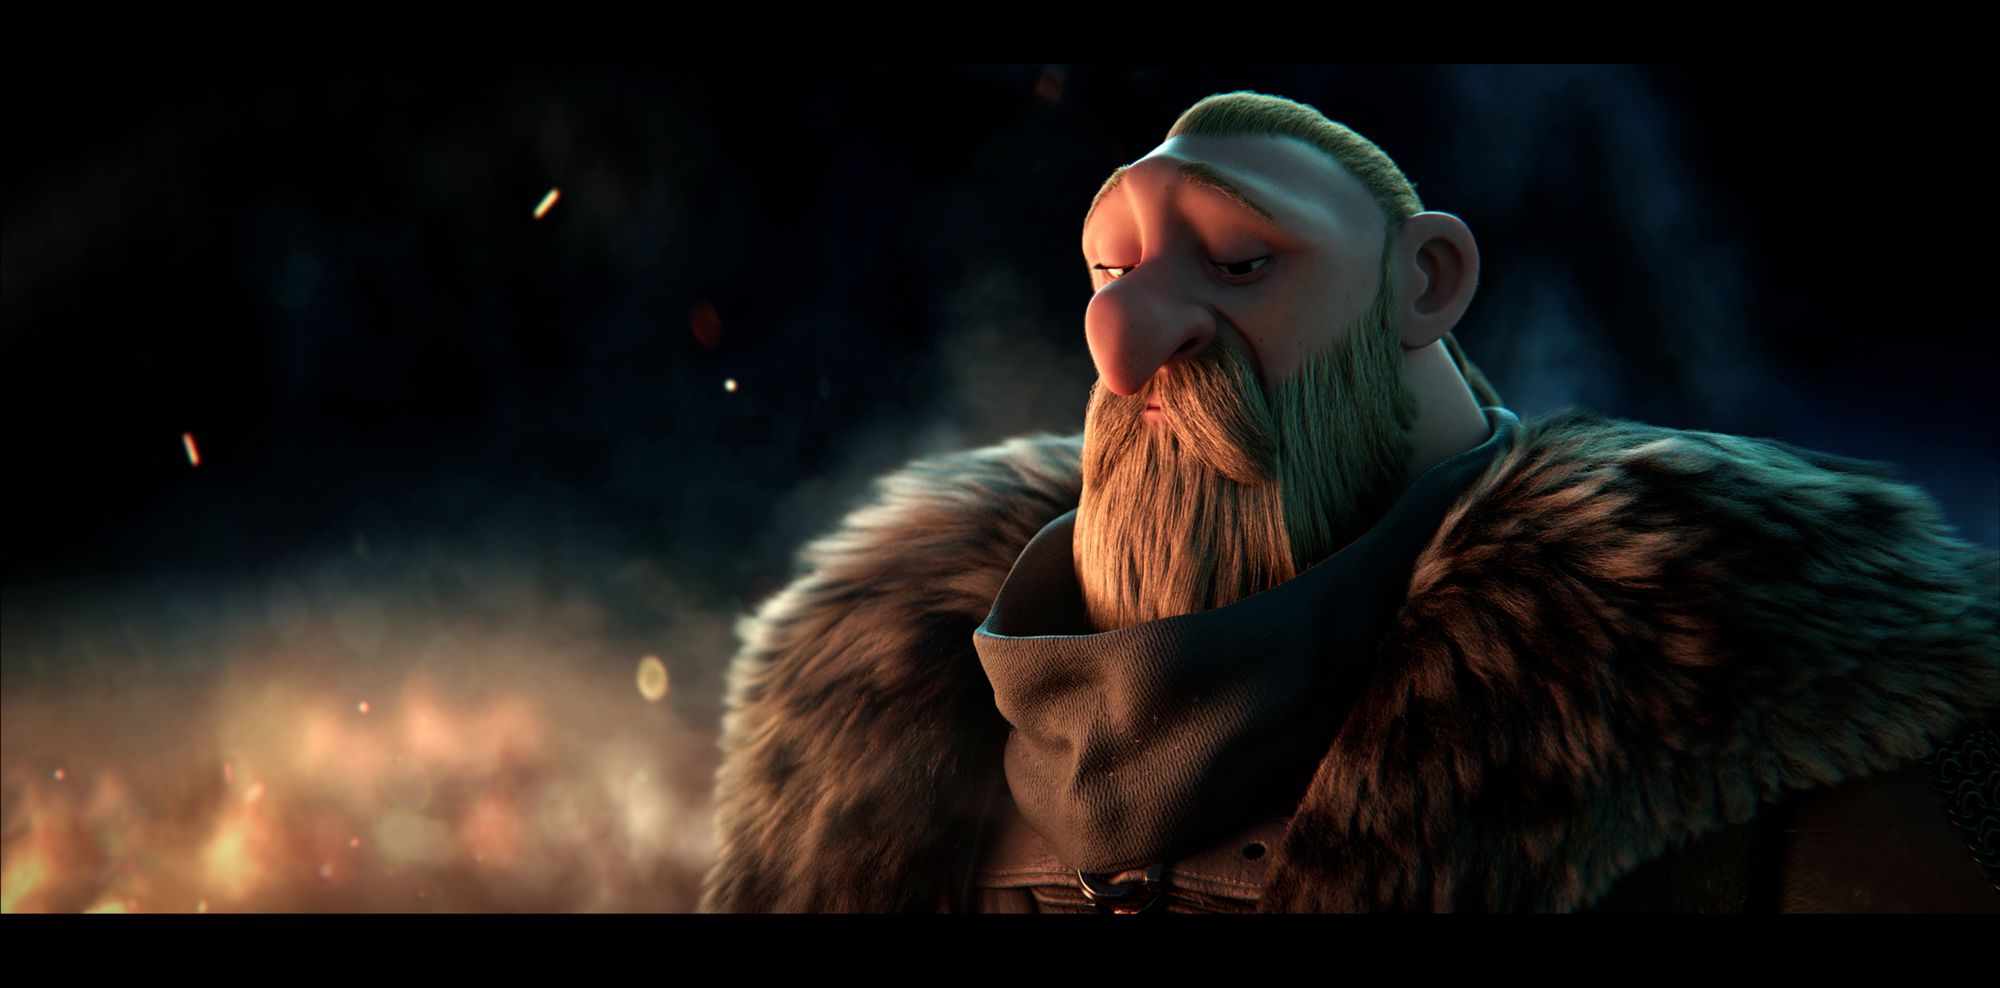
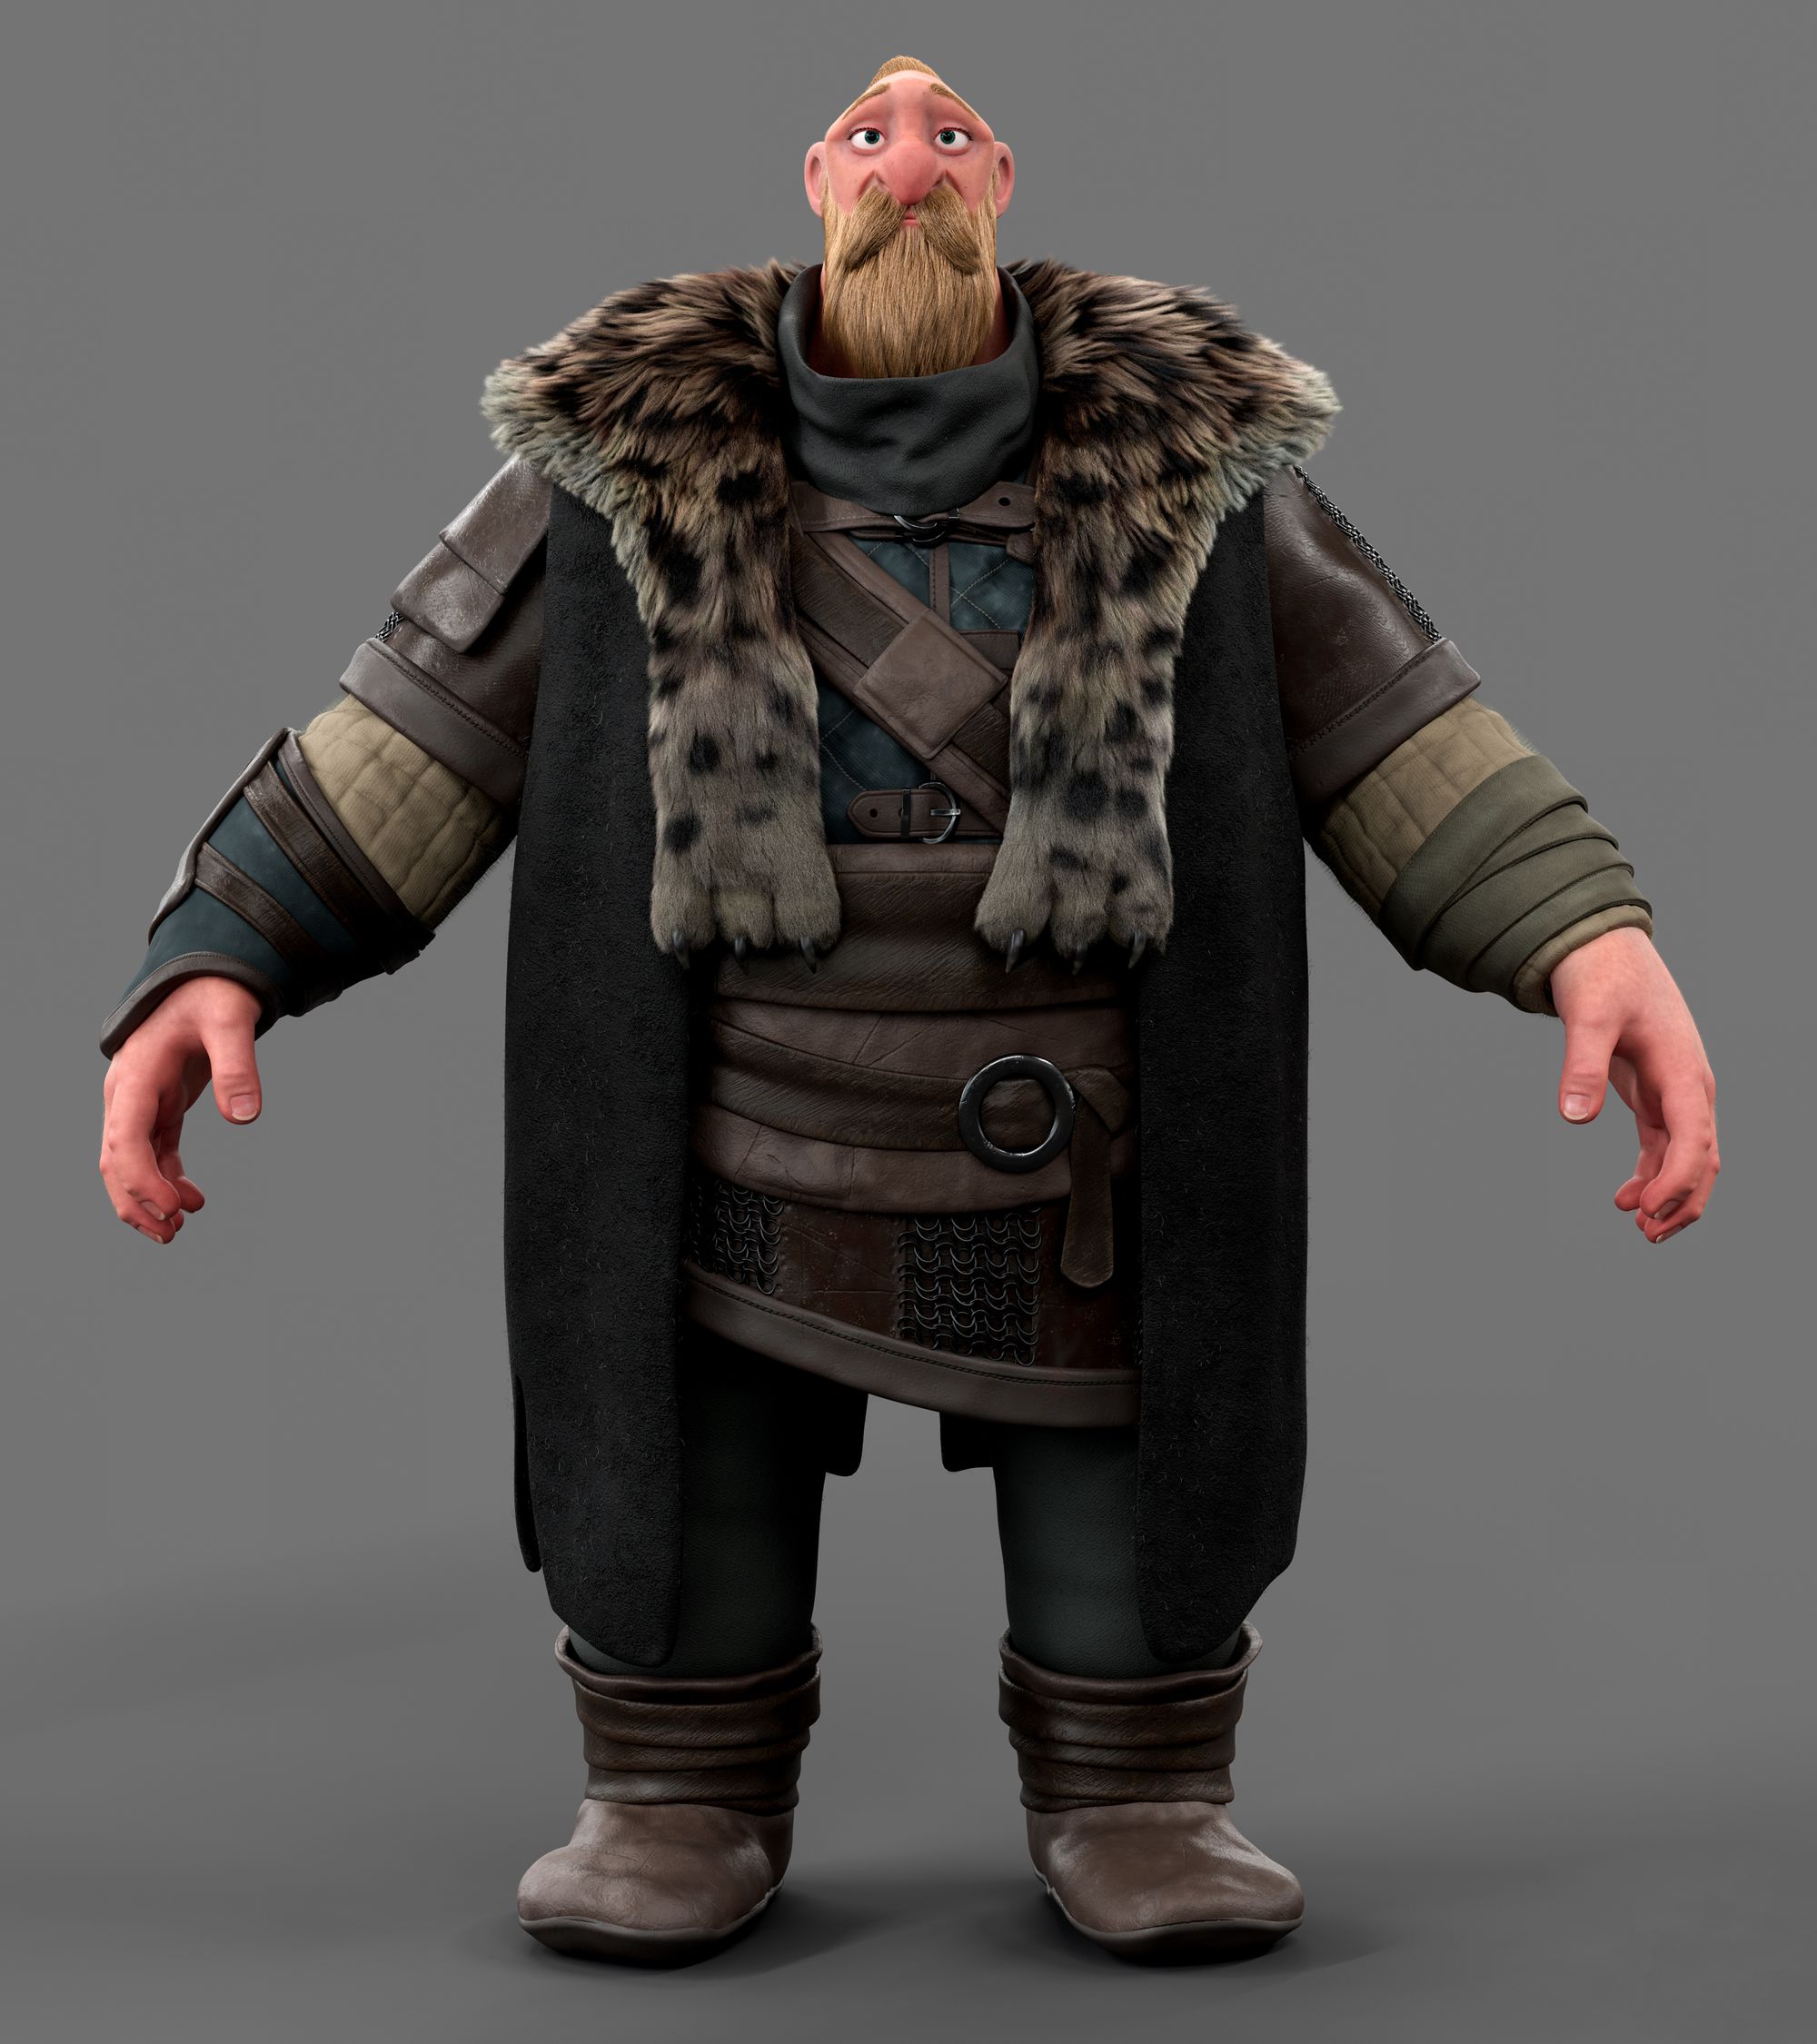
Julen Urrutia's reference image (left) vs. my final image (right).
Working on this project was a significant milestone in my artistic journey. Despite only a month's experience with ZBrush and one basic grooming lesson, I took the leap and brought this character to life. The project required the usage of various software tools such as ZBrush, Maya, XGen, Substance 3D Painter, Arnold, Nuke, Photoshop, and DaVinci Resolve.
Creation Process and Techniques
Developing Brokkr was a complex process that not only involved the use of various tools and techniques but also required my ability to quickly adapt and learn. Here's a breakdown of the process.
Reference Research
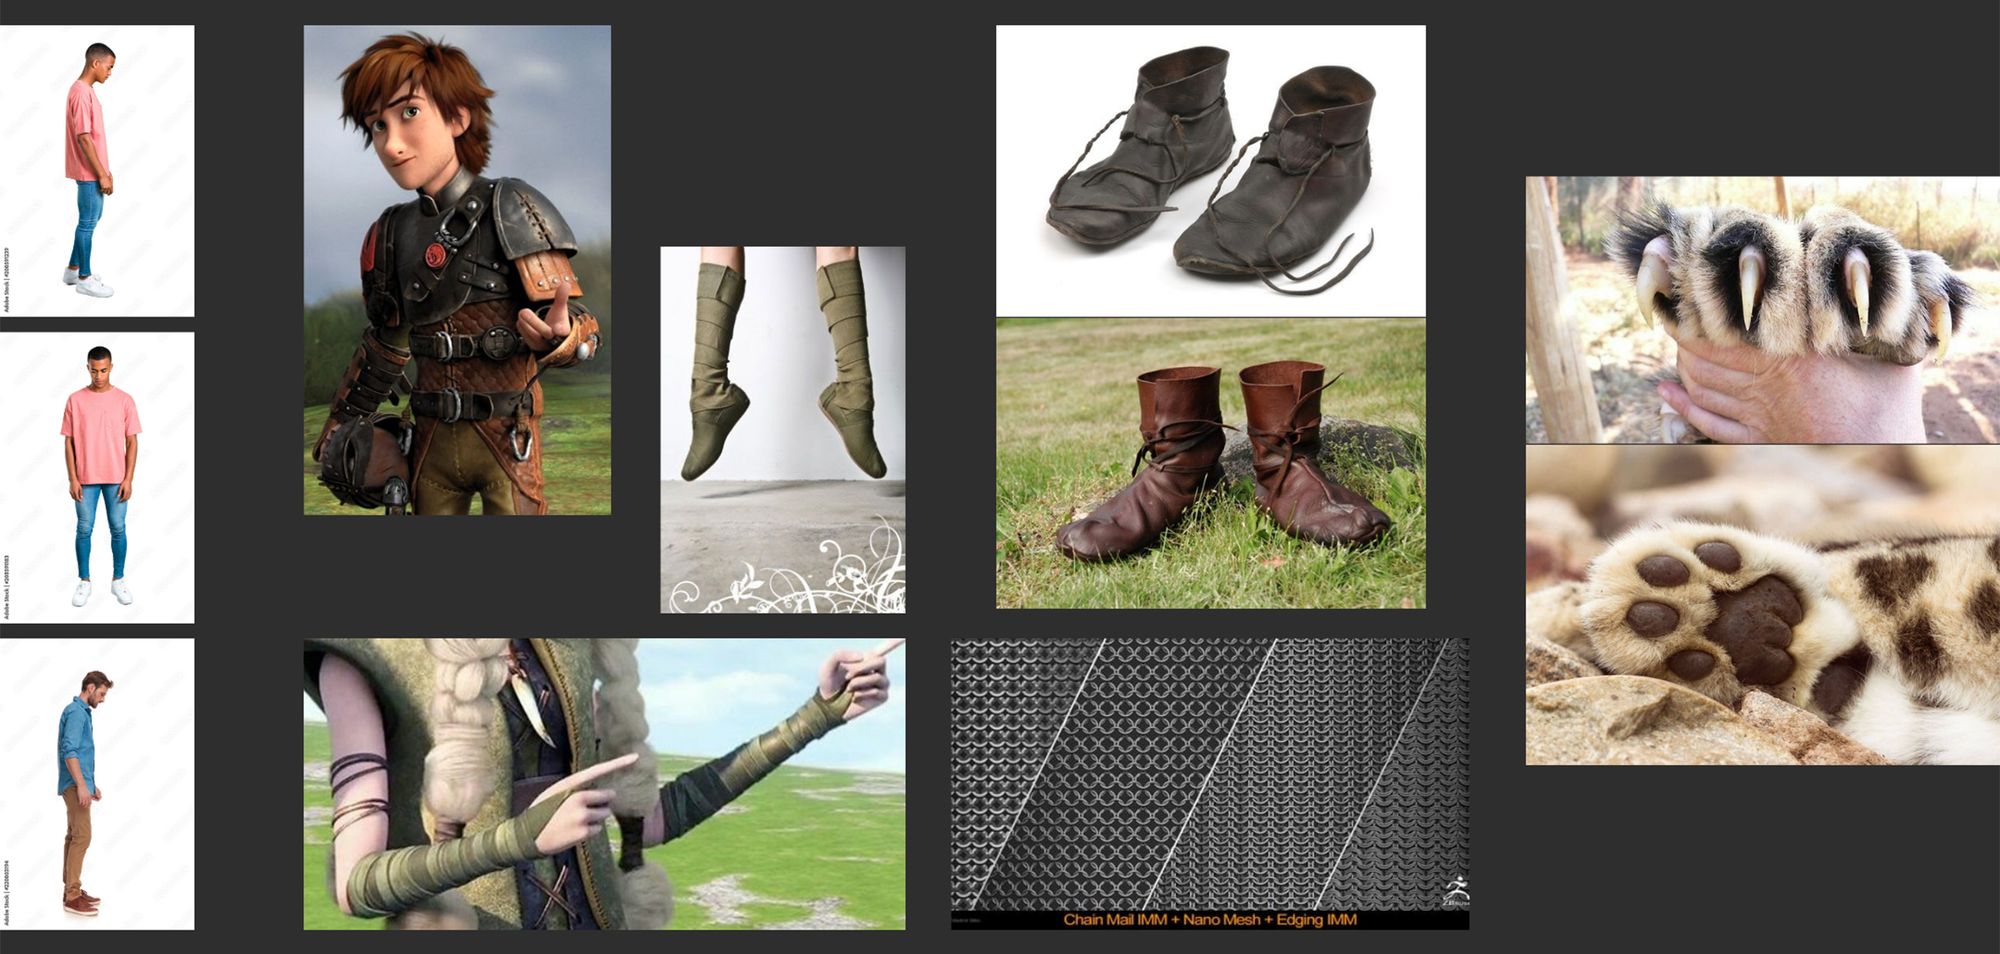
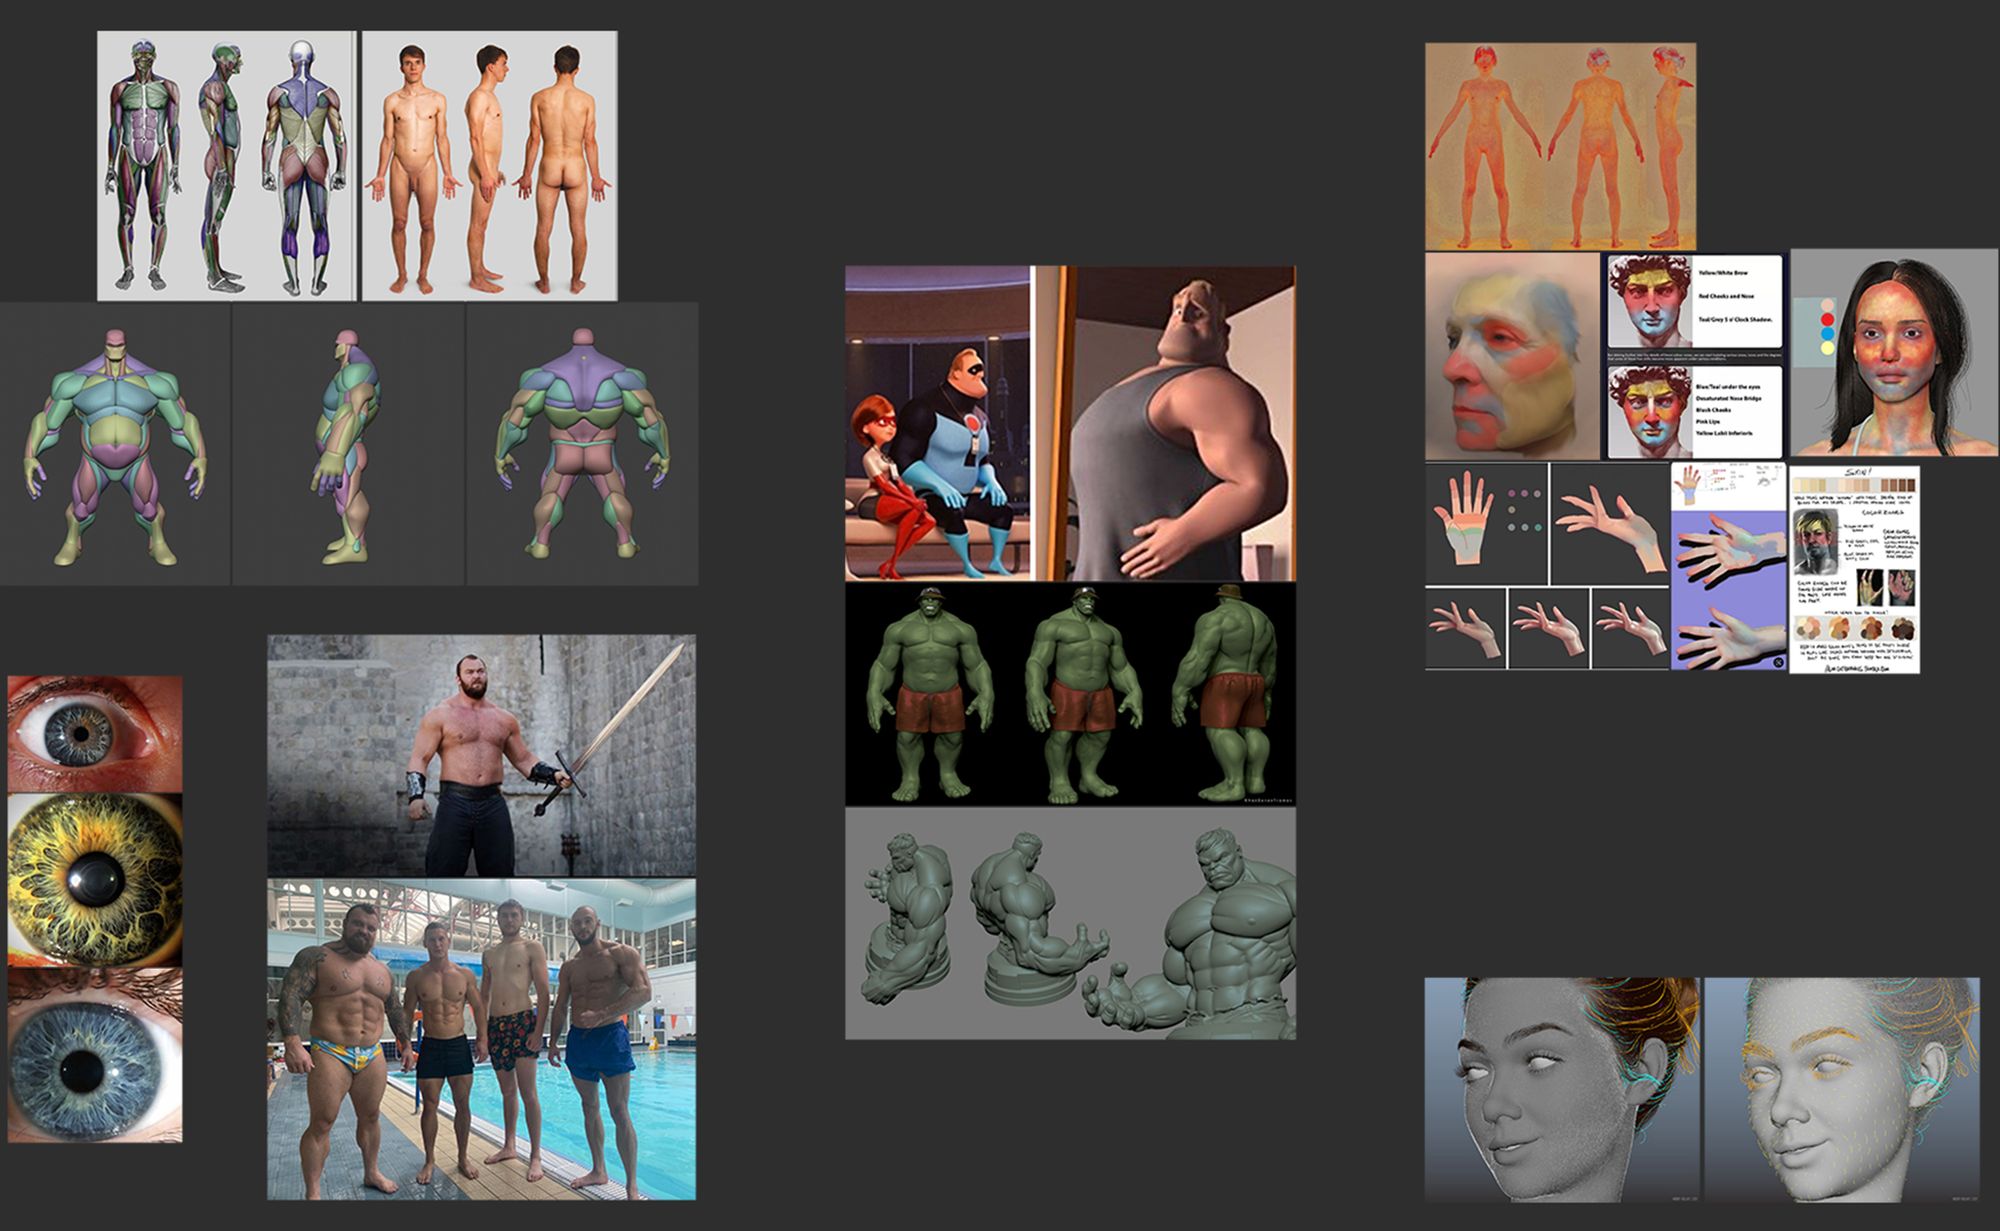
To accurately mimic Julen's 3D work, my first step was to gather all helpful references the artist shared on his ArtStation. I also found additional references useful for guidance on anatomy, clothing textures, posing, and the leopard fur's paw.
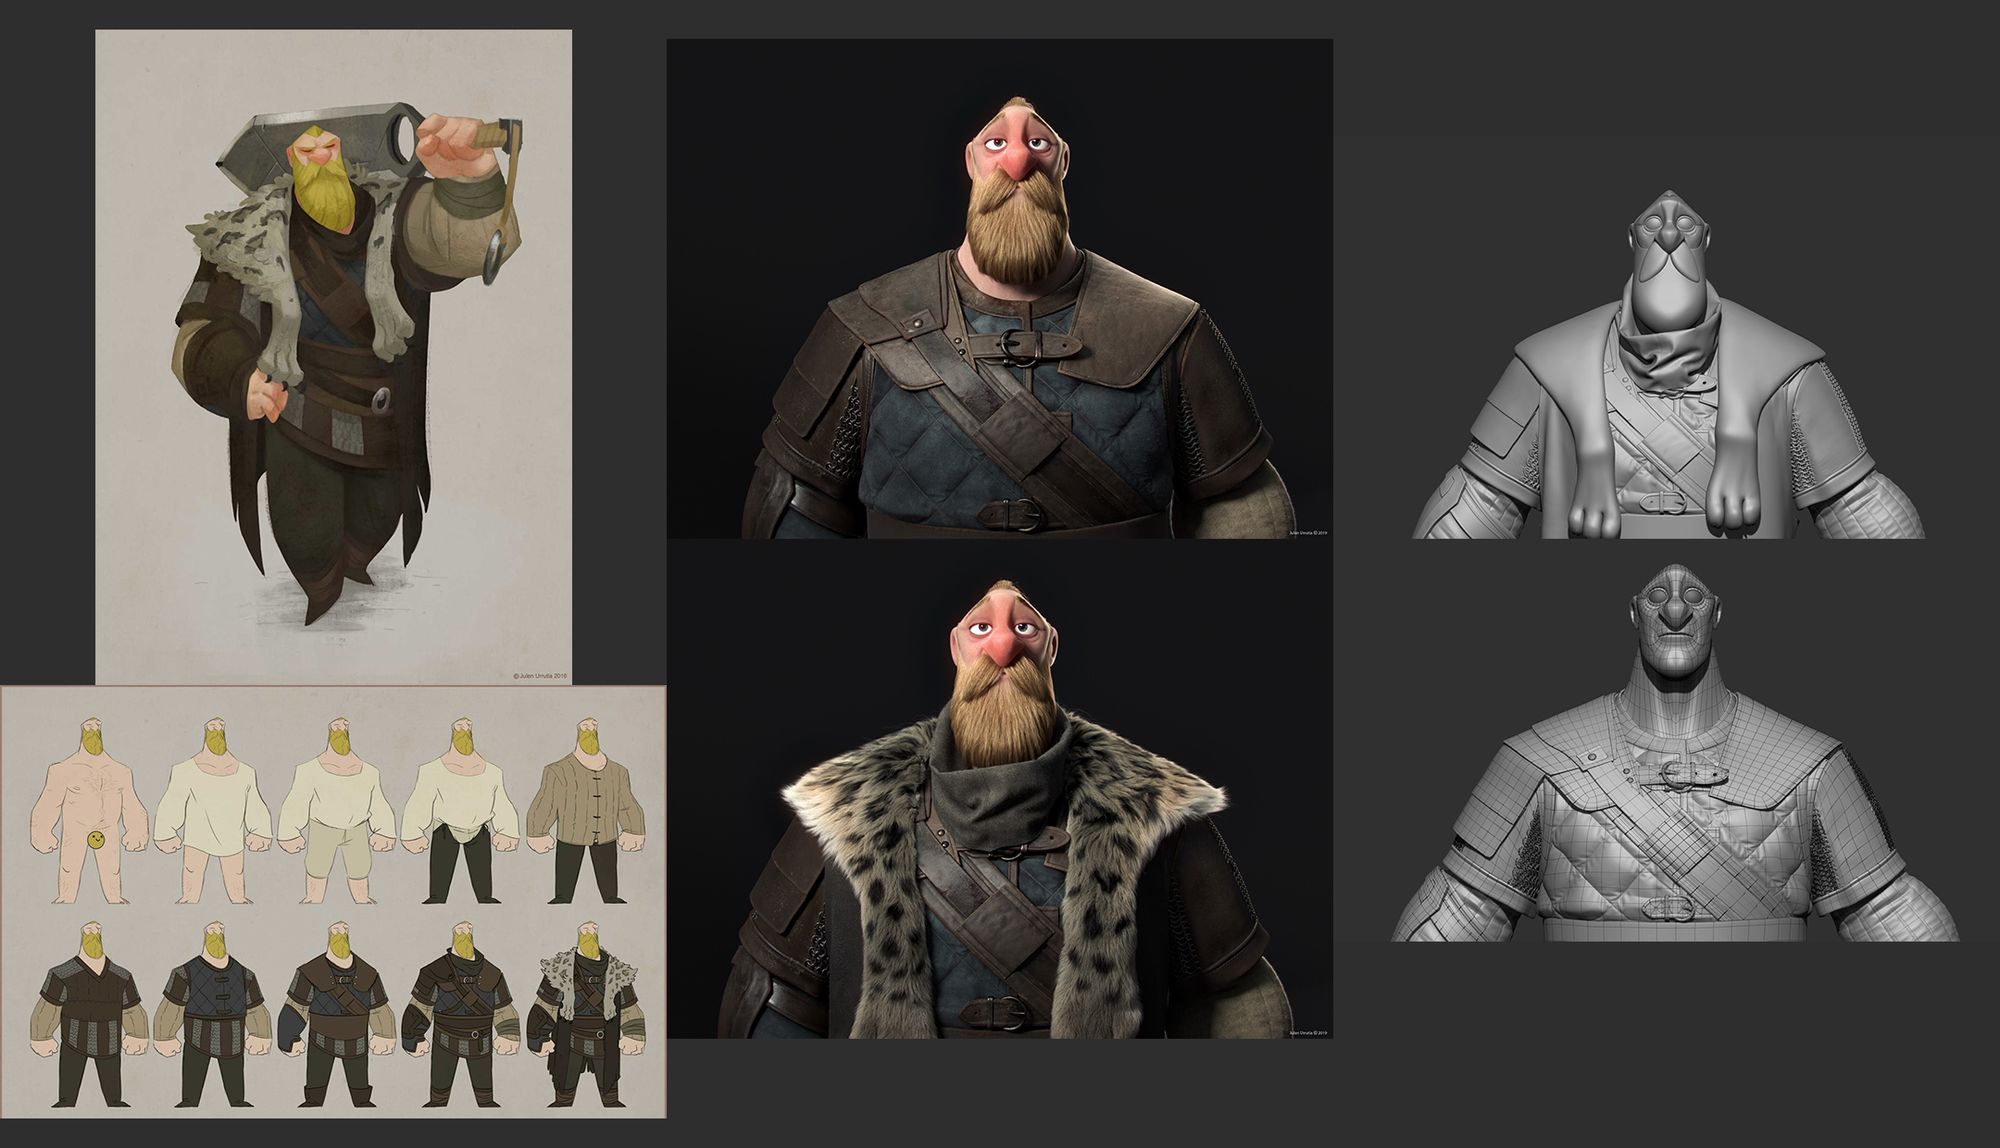
Selection of my actual references:Julen Urrutia's work (left), clothing (middle), and anatomy (right).
Modelling
I used ZBrush and Maya for modelling, carefully sculpting to portray Brokkr's strong Viking features.
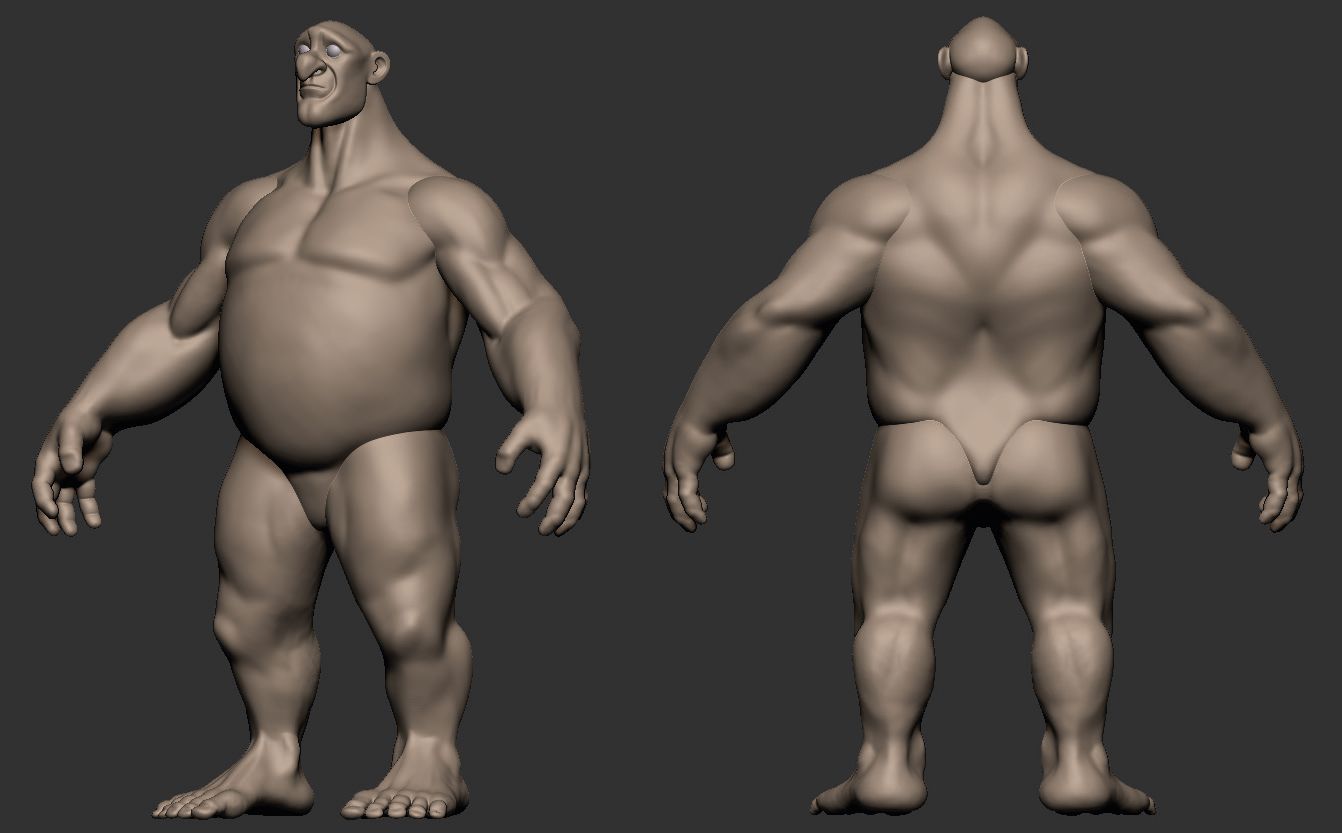
I began this project with direct blocking in ZBrush, progressing from the body to clothing layers, frequently switching between Maya and ZBrush facilitated by GoZ. I closed the eyelids for texturing and managed the body's retopology in Maya with Quad Draw.
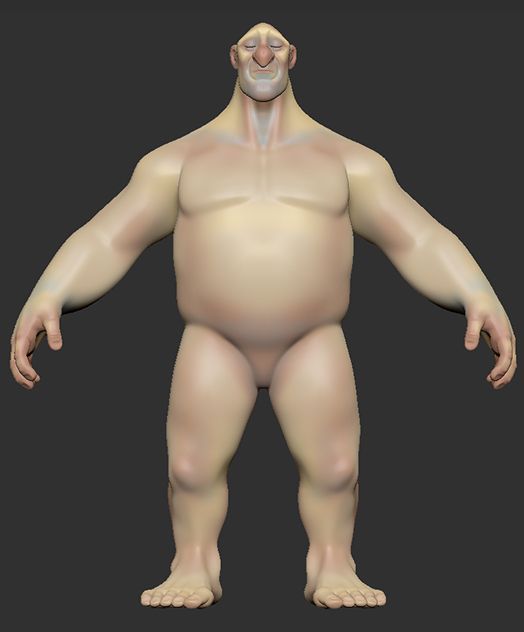
Blocking in ZBrush.
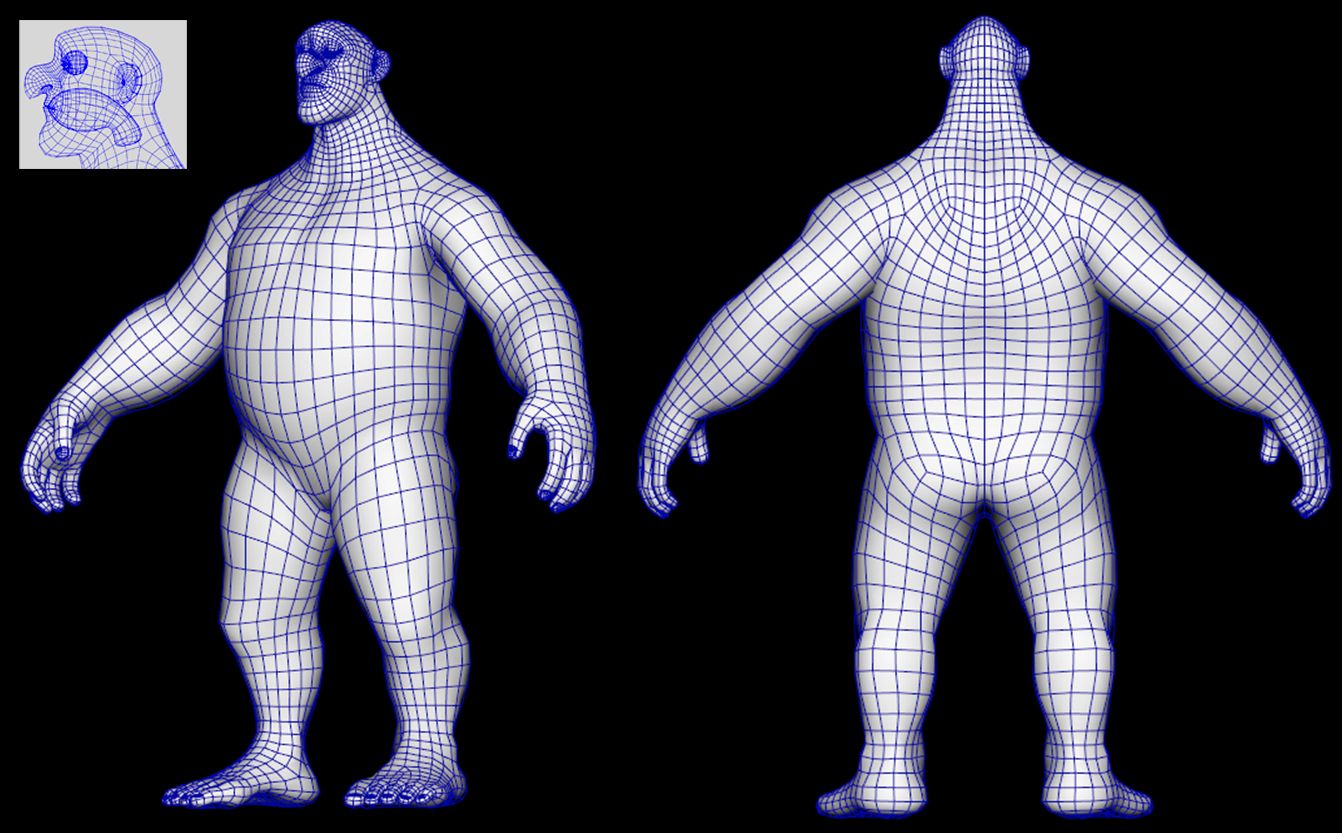
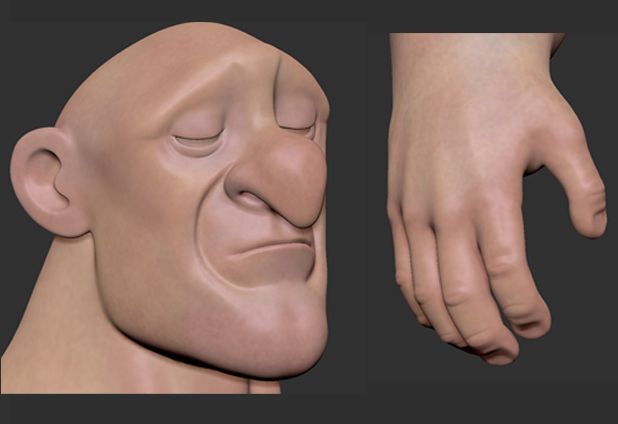
I paid close attention to loops at articulations and key facial regions while also maintaining low poly counts: 4 for fingers and toes, 8 for wrists, arms, eyes, ears, and legs, and 16 for the torso and neck. I then subdivided the final body retopology once for a bit more resolution. I also crafted a mouth cavity.
For the eyes, I defined the eyelid thickness and orbital cavity. I used the eye mesh in live surface mode for a smooth curvature. For efficiency, I only retopologised one side before mirroring on the X-axis.
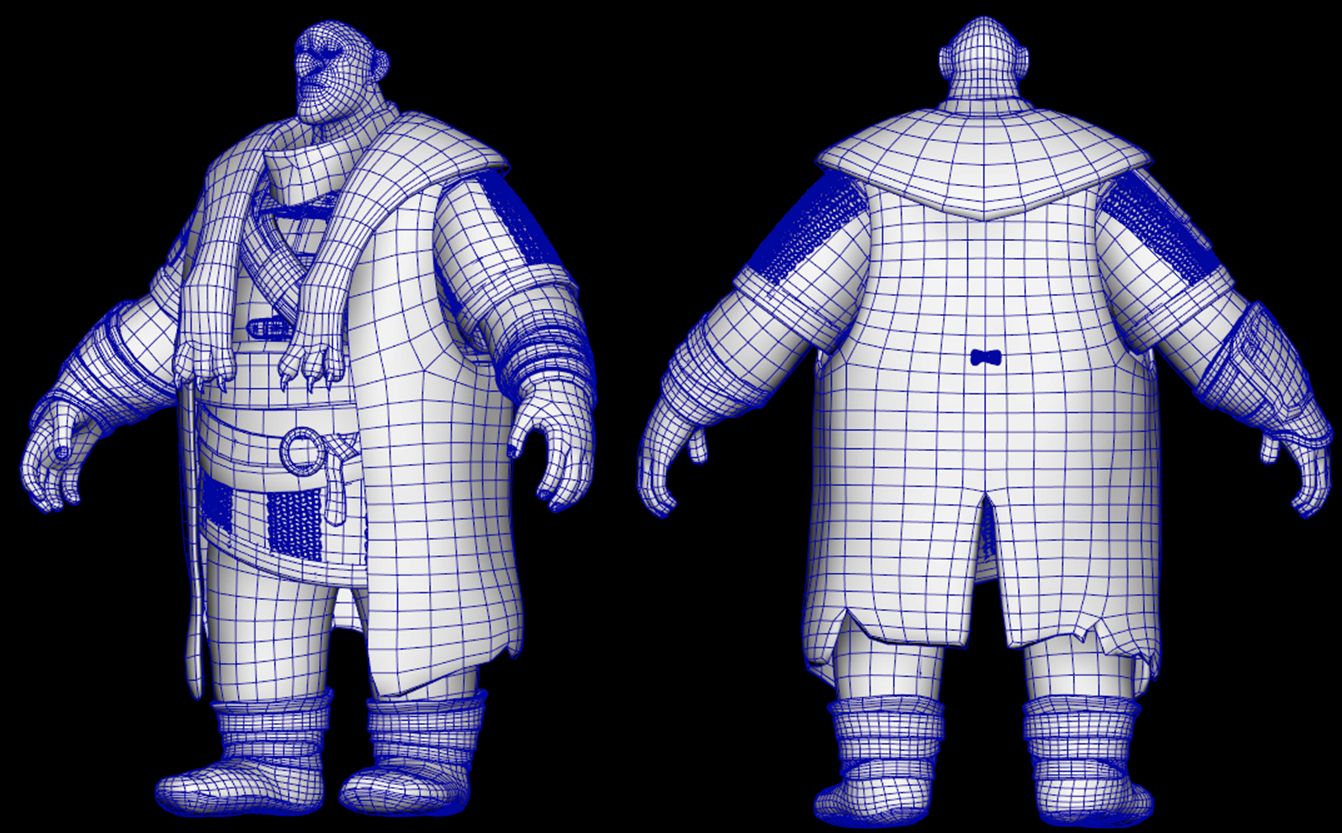
I replicated the body's retopology for the clothes in contact with the skin, and I used ZRemesher for the rest, except some assets that I manually retopologised for better results.
Cloth and body retopology in Maya.
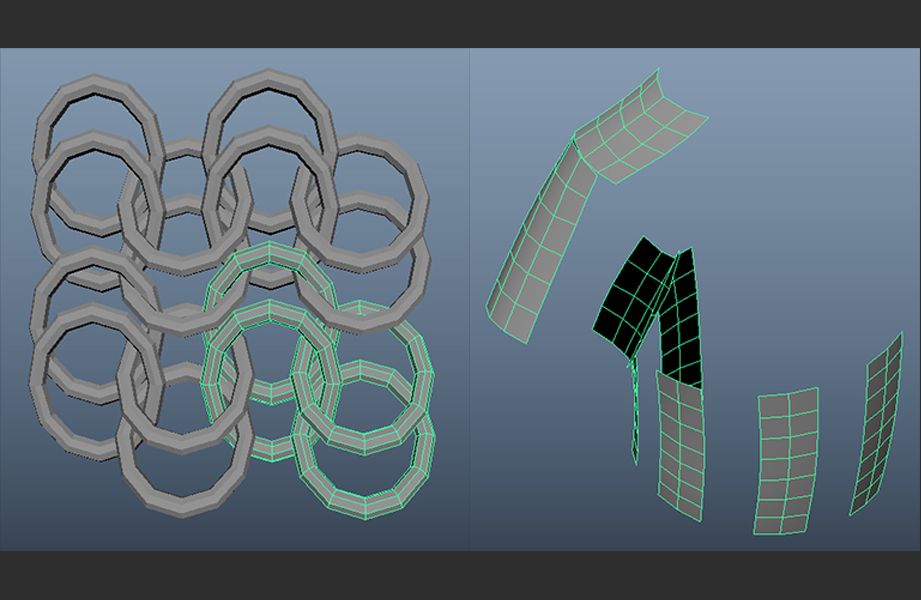
The chainmail creation process required a unique approach where I employed nanomeshes. I first crafted four chain links in Maya, ensuring they formed a continuous pattern when repeated. Then, I turned these links into nanomeshes in ZBrush and applied them onto the base meshes. After adjusting for size and order, I resized them to intertwine, creating the final chainmail.
Chainmail creation: Maya pattern and base mesh (left), then conversion into ZBrush nanomeshes (right).
I initially tried using 8 polygon chain links but ultimately chose 12 to keep the high-poly count manageable, despite an increase in the low-poly count.
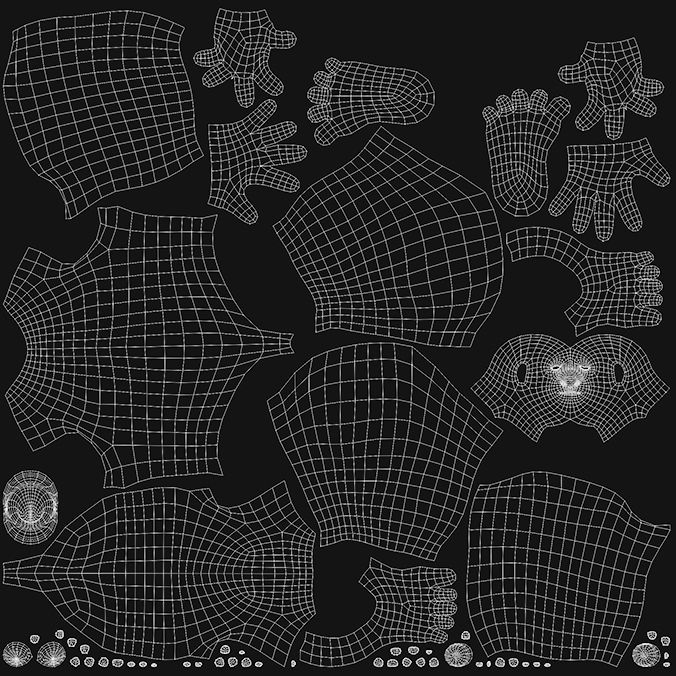
I performed the UV unfolding process in Maya, utilising GoZ for a quick transfer from ZBrush. I grouped all body parts, excluding the eyes, into a single UDIM. To ensure clear and detailed textures even when zoomed in, I conducted a quick size test in Substance Painter after applying consistent texel density to Brokkr's coat.
UV mapping of the body.
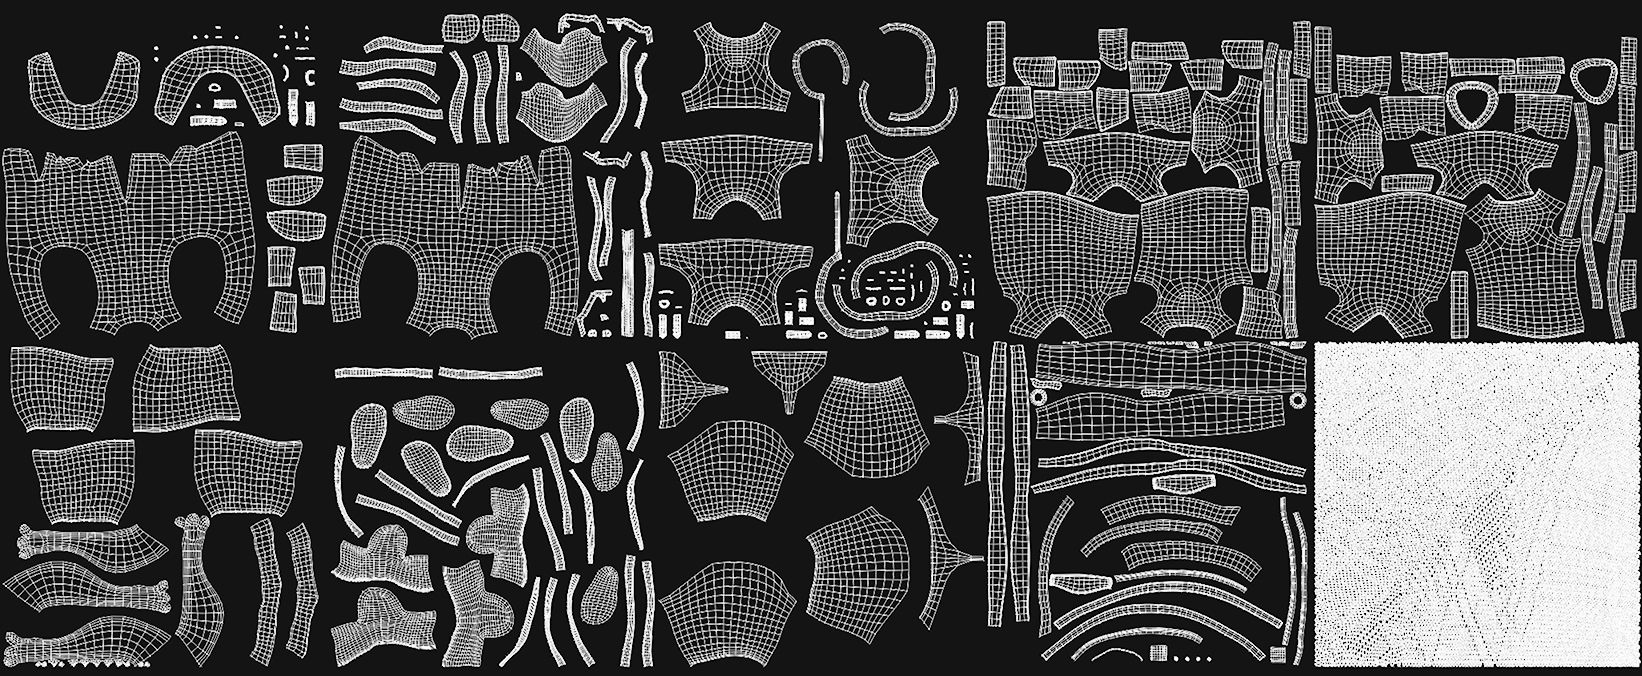
Once the texture validation was complete, I applied the same texel density to the UVs of all the clothing items. I organised the UVs of each clothing item within the UDIMs, aiming to group them together efficiently.
The chainmail needed tighter packing to fit within a single UDIM, and the fur was placed in the first UDIM for future grooming in XGen.
UV mapping of the clothing across 10 UDIMs.
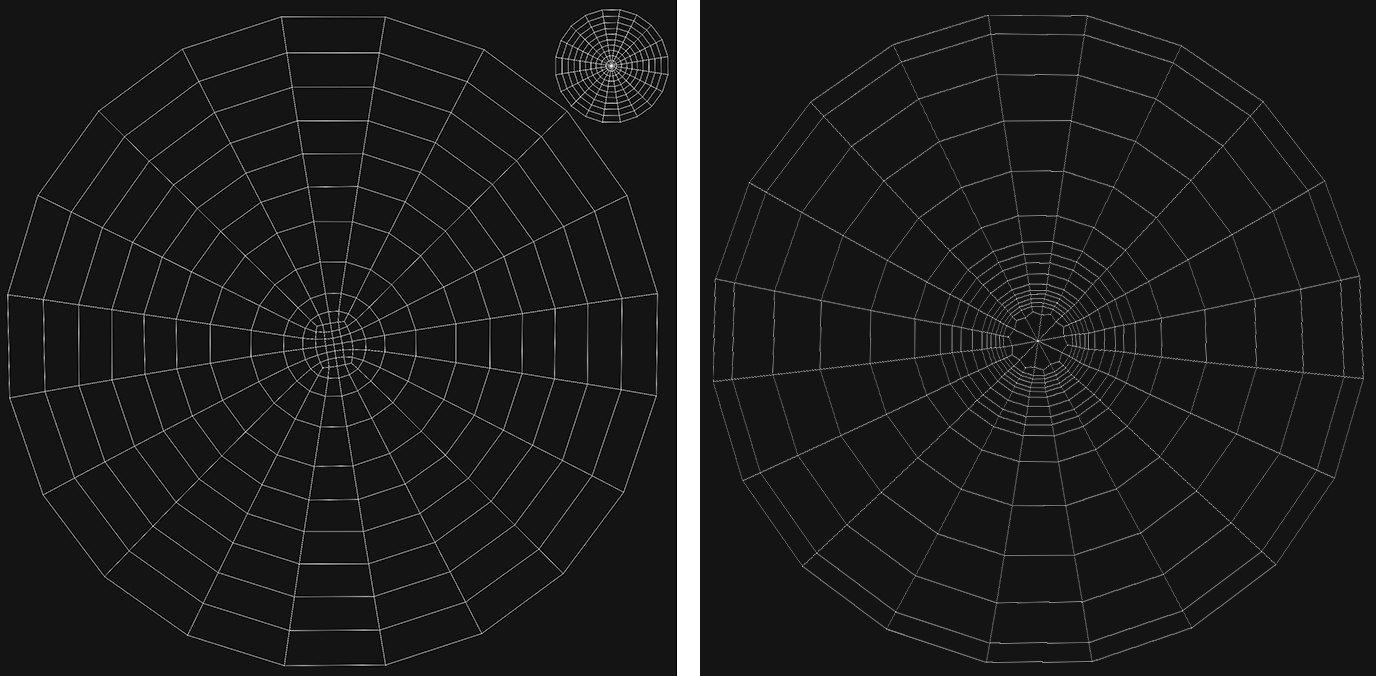
Furthermore, I gave particular attention to the UVs of the cornea and iris. The UV layout for the iris covered the entire UDIM, ensuring the finest texture quality and capturing the intricate details of the iris pattern. Similarly, for the cornea, I used the full UDIM for the UV mapping of the front half-sphere However, I reduced the UV of the back half-sphere to place it in a corner of the UDIM.
Additionally, I meticulously aligned the UVs of both the iris and front half-sphere of the cornea. These UVs were perfectly overlaid, with their centre precisely positioned in the middle of the UDIM, simplifying the subsequent look development stage.
UV mapping of the cornea (left) and the iris (right).
To finish the modelling, I sculpted additional details like minor clothing folds. I used alphas for the sleeves and vest, refining their sculpt with Morph Target and other tools.
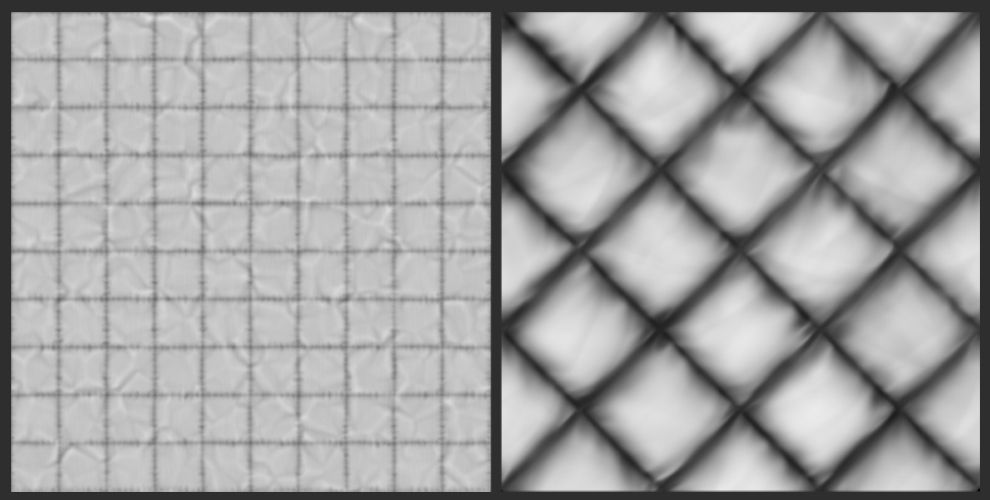
Alpha creation for the sleeves and vest garments.
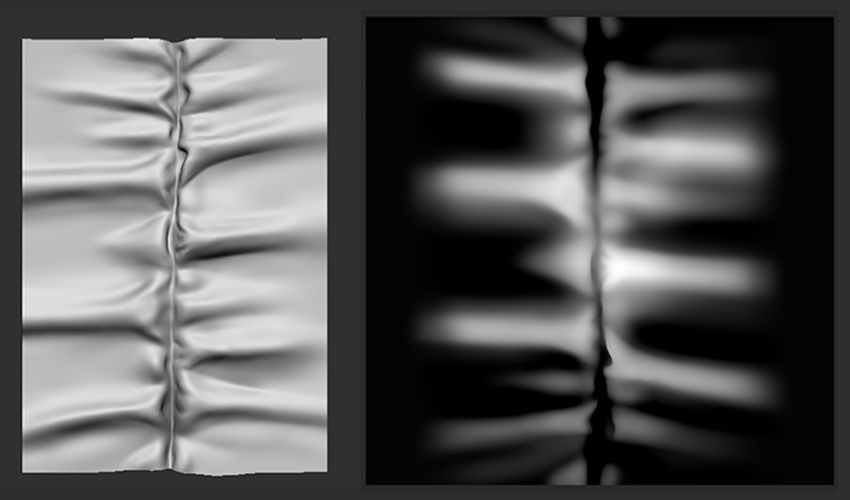
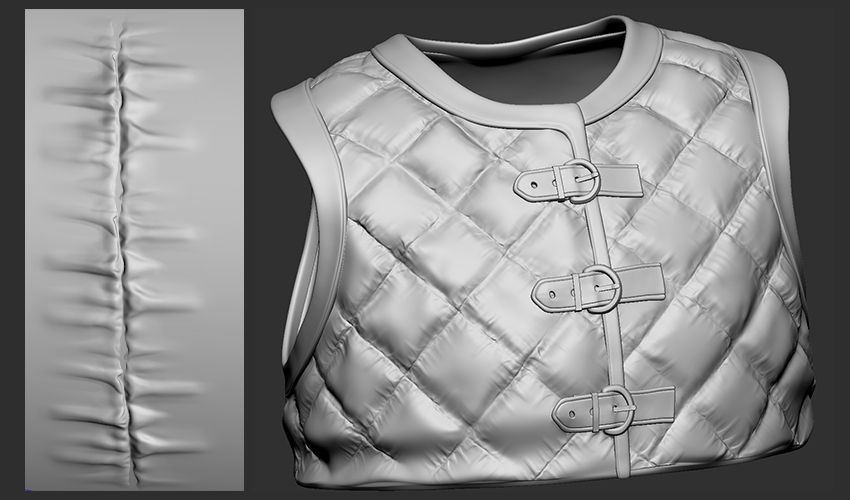
I also created a brush for sculpting folds between the vest cushions. I sculpted folds on a plane, converted them into an alpha, made some adjustments in Photoshop, and then created a brush based on it. I adjusted the brush's step and size for a seamless stitch and used Morph Target in ZBrush to refine the sculpt. Finally, I exported the displacement maps and checked them in Maya.
Texture
For texturing, I started by painting the body, eyes, and fur in ZBrush using polypaint. To ensure a seamless texture in Substance 3D Painter, I applied a basic uniform colour to the remaining clothes.
For the body, I used reference images to identify the red, yellow, and blue zones for the initial layer of paint. I focused on the most visible parts: the face, neck, and hands.
ZBrush polypaint: Colour zones (left), and final skin painting (right).
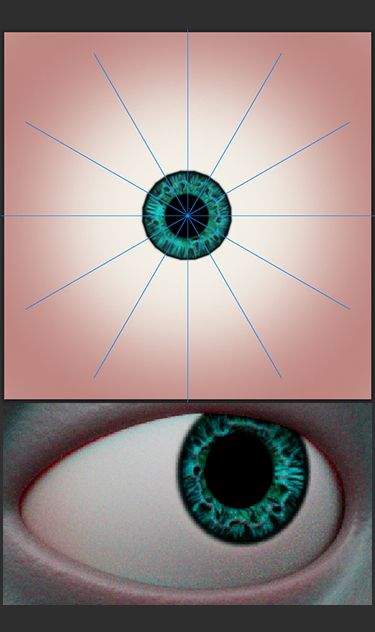
I hand-painted the eyes, using a mix of realistic and character-specific references. Instead of strictly adhering to the reference, I opted for realistic irises, selecting a colour close to Julen's choice. This decision was driven by my attention to detail and desire to infuse the character with as much life as possible. In a Maya test, I further fine-tuned the eye albedo in Photoshop, adjusting the colour and adding radial symmetry to introduce a pink tint to the back of the eye.
Eye painting: Radial symmetry to add pinkish colour (top), then rendering test in Maya (bottom).
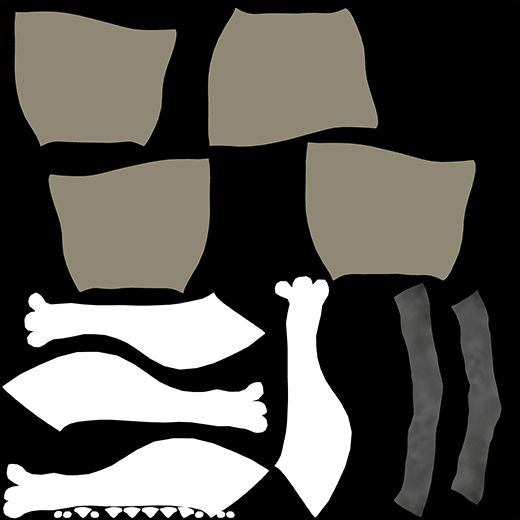
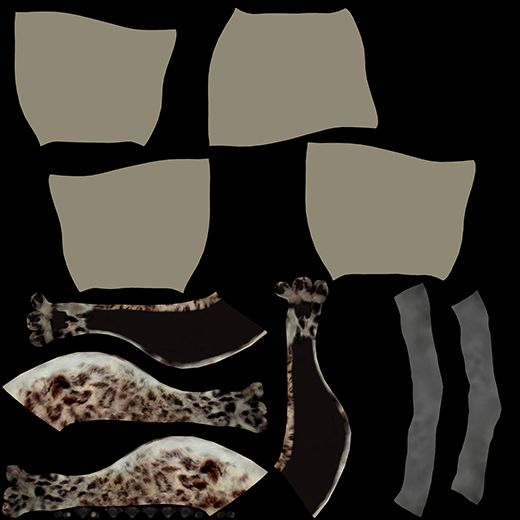
I used ZBrush's Spotlight tool to paint the fur in a projection-based technique for a more realistic effect. I took an image of fur and applied the desired patterns exactly where I wanted them, making sure to maintain the white border as seen in the reference.
I then exported the polypaint maps and automatically filled the black background in Photoshop. For the fur map, since the spots were dark, I avoided selecting them with the background by retrieving the solid-coloured fur instead. Once in Substance 3D Painter, I created a base texture that included the colours from my polypaint maps.
Automatic black background filling. The image on the left was used to create a selection mask, preventing the inclusion of dark fur areas in the background.
I considered adding a touch of realism by showing signs of wear and tear—missing links, scarred leather, torn boots, and the like. These imperfections would suggest that the character has been through a battle or two. However, I decided to maintain the pristine aesthetic of Julen's original concept, by keeping the textures 'clean'.
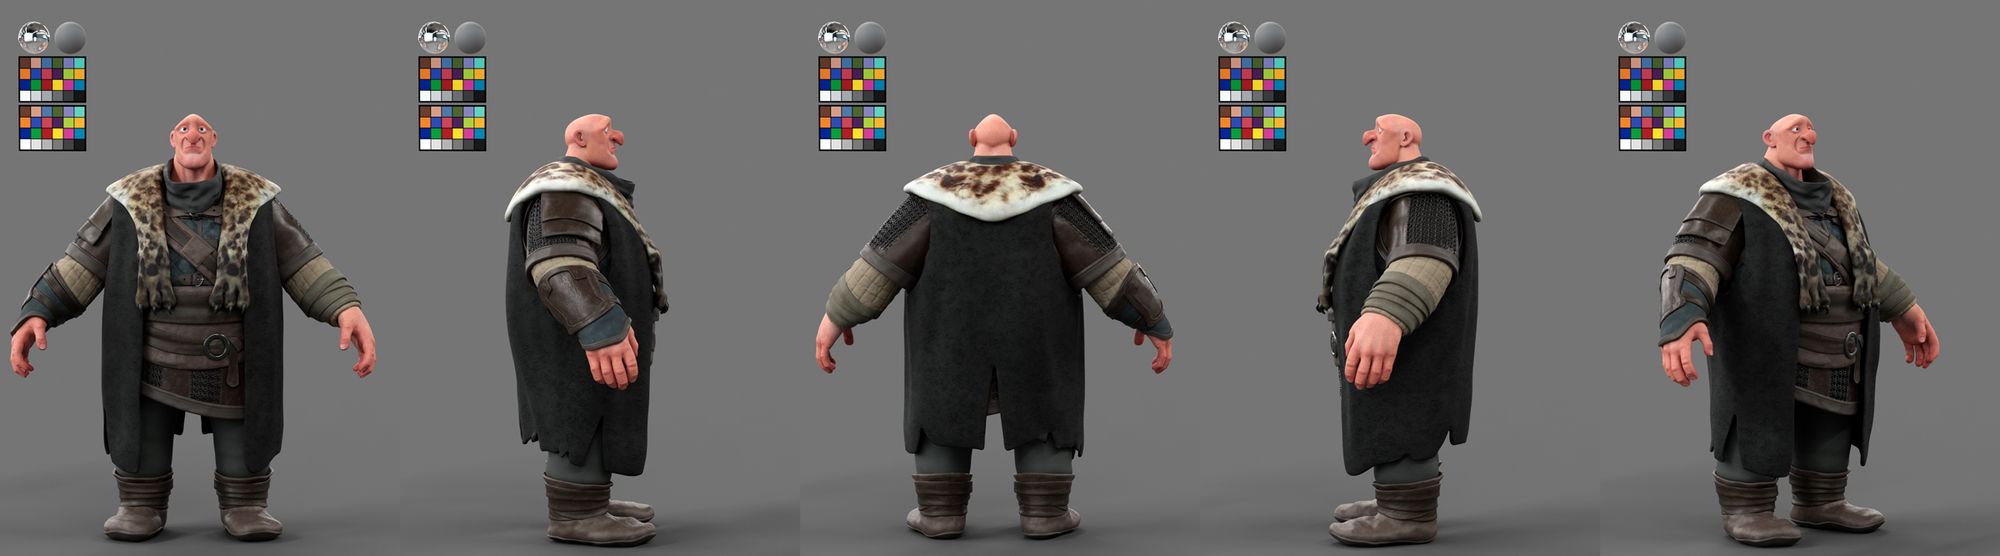
I used smart materials in Substance 3D Painter for most assets, carefully adjusting each parameter to closely match the reference. In the final image, you can see four distinct types of leather, with all the materials and stitching reproduced as closely as possible to the original concept. Finally, I set up shaders in Maya to fine-tune the hues and roughness of certain assets, striving to stick as closely as possible to the reference image.
Detailed final textures.
Groom
For grooming, I used Arnold rendering for validation, particularly for the brow area due to its significant displacement. At that time, I didn't know that a displacement map could be directly applied to XGen, so I manually adjusted the brow area. Using my high-poly body as a live surface in Maya, I carefully adjusted the position of the support mesh.
The moustache and eyelashes required separate descriptions due to their unique shapes, positions, and growth directions, which couldn't be effectively controlled using a region map.
While dealing with the peach fuzz, I took precautions to prevent hair from appearing on Brokkr's closed eyes by creating a specific mask for the eyelids. Later, I transferred the description to the model with open eyes to facilitate the look development process.
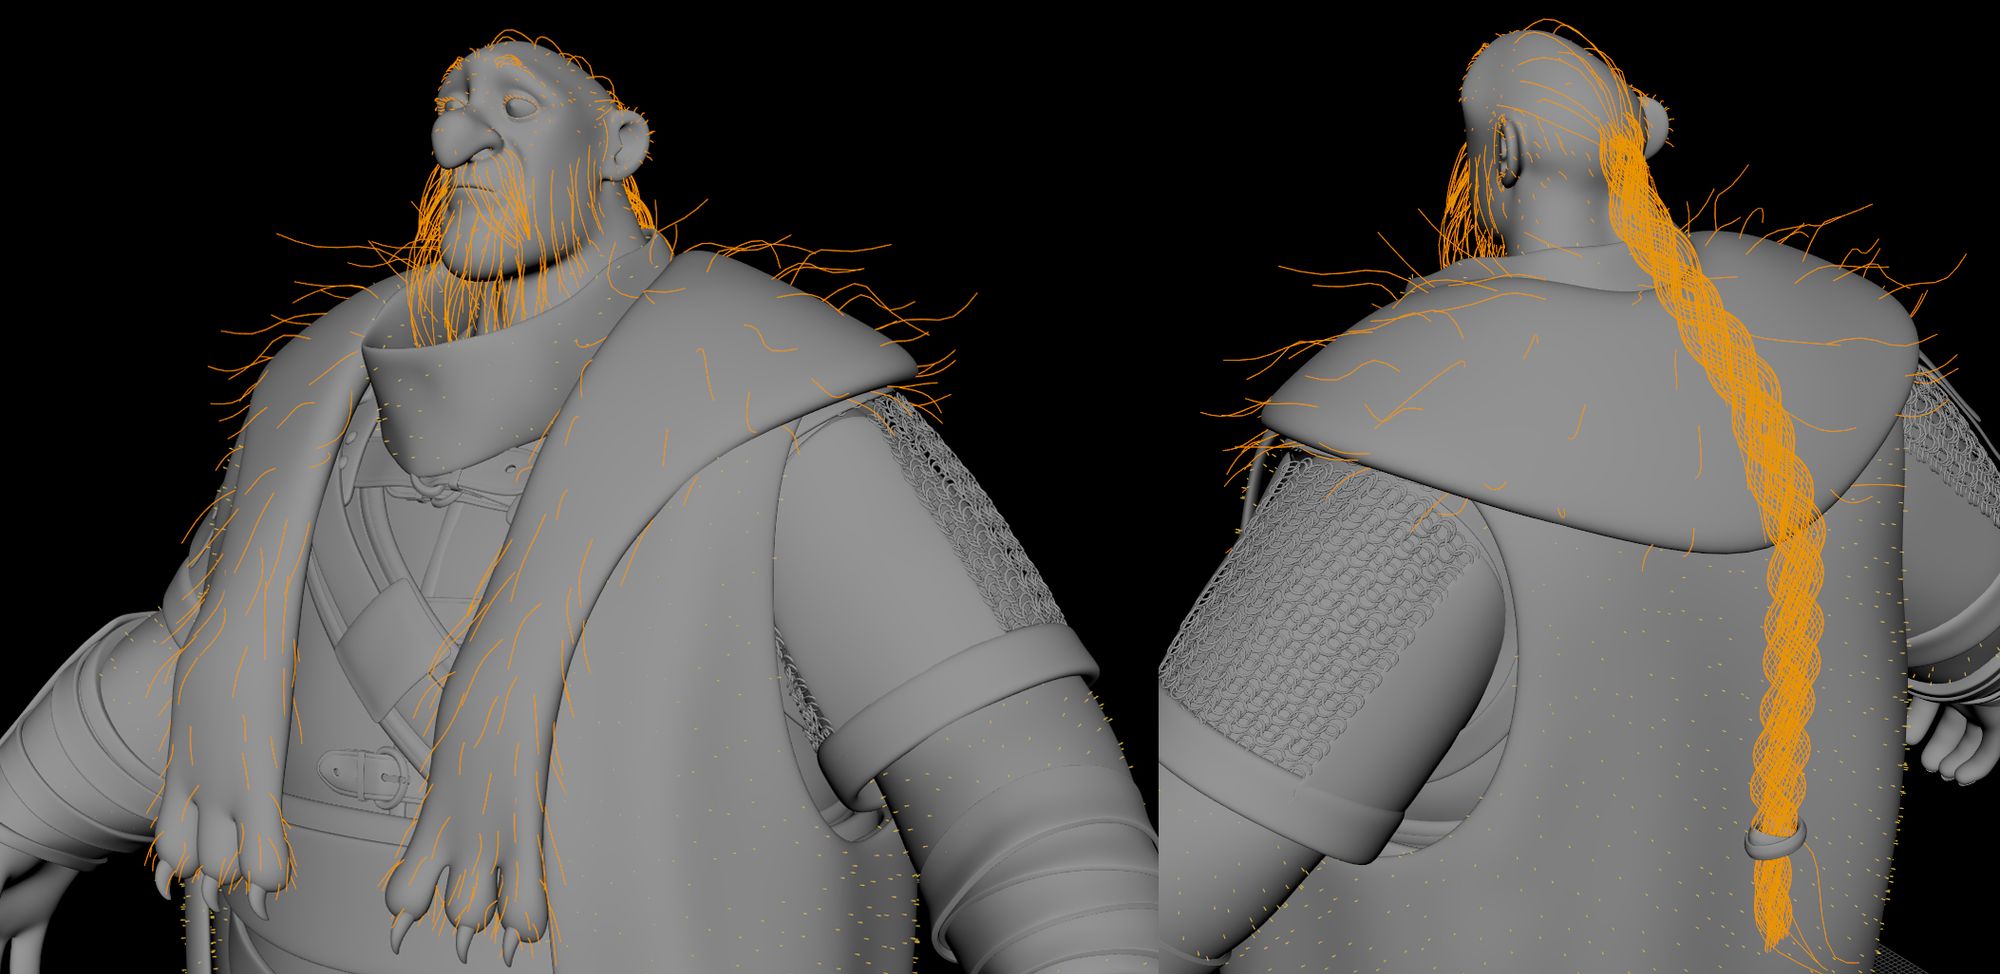
For the character's hair and braid, which were some of the most challenging aspects of grooming, I relied on the 2D concept references to determine the desired hair length and style. To manage the different hair variations, I used region maps and masks.
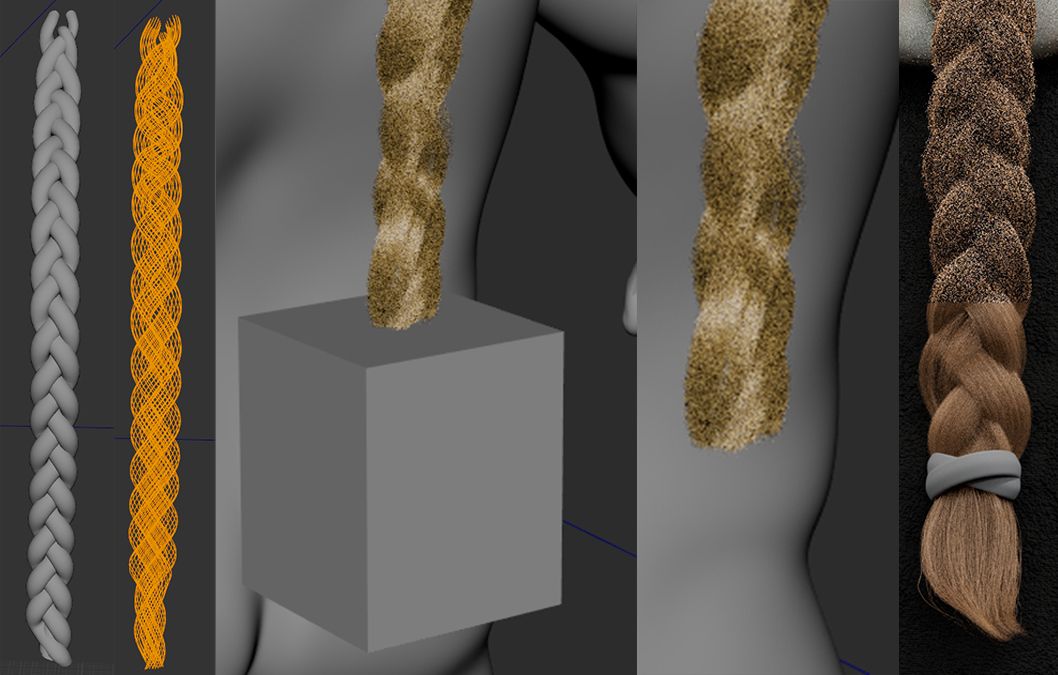
To create the braid, I used the Tube tool to generate the grooming guides. Starting from a basic shape, I shaped and arranged the guides to form the braid. Additionally, I used a cube to neatly cut the braid at the point where it enters the elastic band, ensuring a clean and precise result.
Step-by-step braid creation.
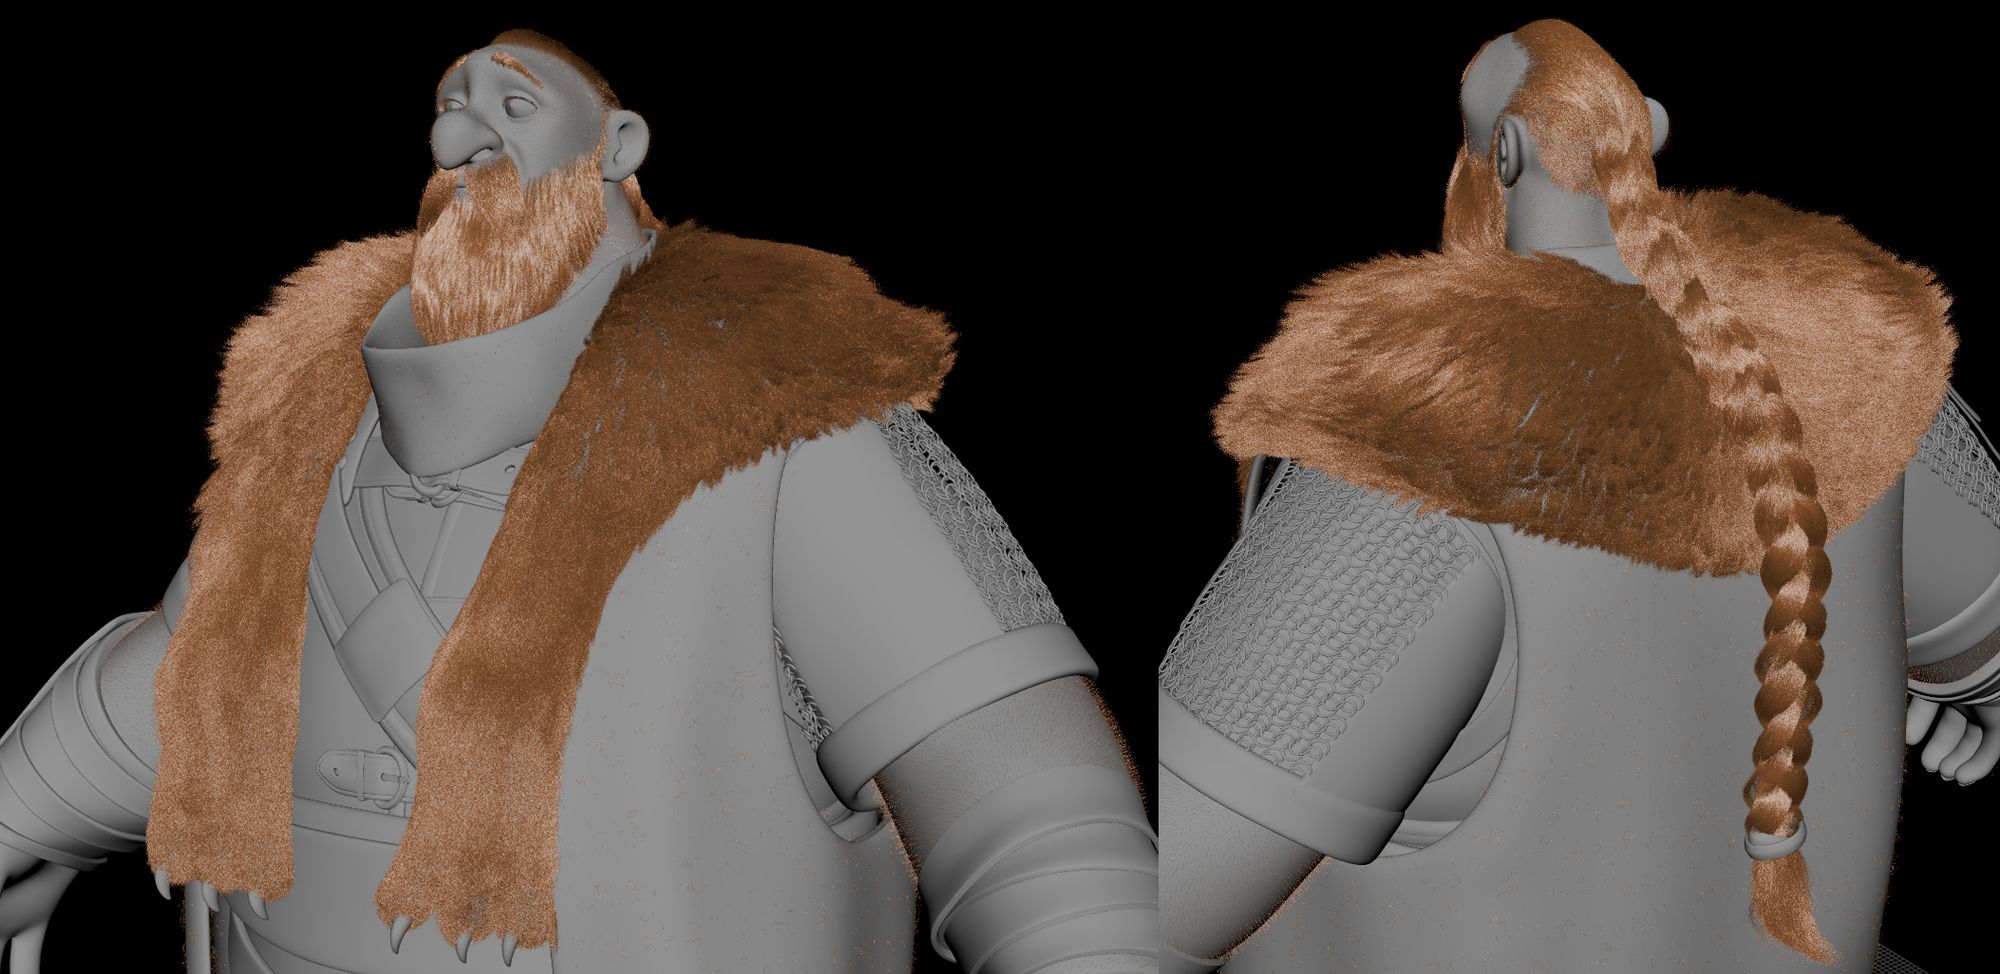
The fur pelt was created using a similar approach as the hair, with extra attention given to the paws. While keeping the reference in mind, I made the fur slightly fluffier than the original concept, as I believed it gave the character a more appealing look. I also manually adjusted the fur on the back to create the appearance of a collision effect, mimicking the effect caused by the weight of the braid.
For the secondary grooming tasks on the collar, trousers, sleeves, and coat, I used groomable splines, which helped to semi-automatically generate fur throughout the support mesh. With this approach, I only needed to make a few adjustments to achieve convincing fur on the garments.
The look development process was detailed and comprehensive. I used Photoshop to make precise adjustments to Brokkr's fur albedo, enhancing the markings and achieving a more realistic look.
To bring the groom to life, I used interactive grooming, which generated splines that seamlessly followed the turntable animation and integrated smoothly with Maya rendering.
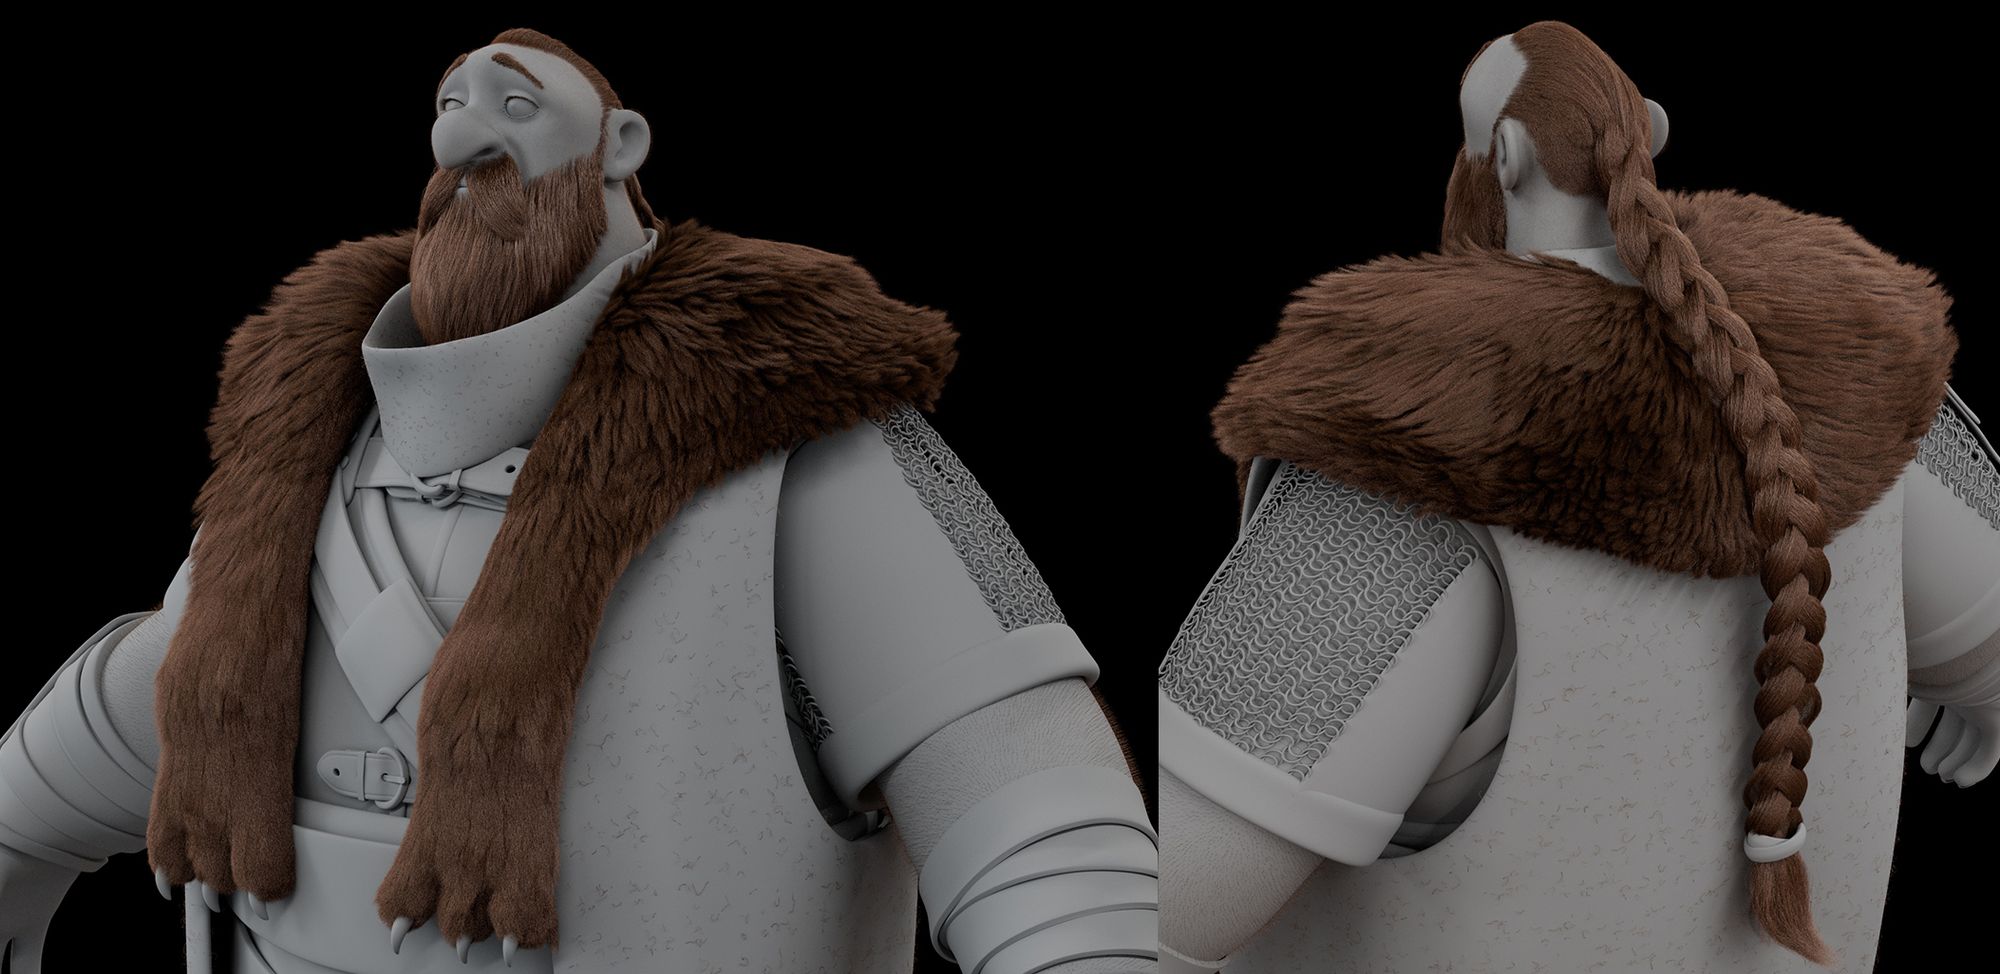
I dedicated careful attention to crafting accurate shaders that faithfully reproduced the materials and textures of Brokkr's clothing and accessories. Texture adjustments were meticulously executed to closely match the reference images, adding depth and enhancing the character's overall appearance.
Throughout the process, I relied on rendering previews and validations from Arnold, which allowed for rapid decision-making based on the character's rendered appearance. This meticulous approach, combining creativity with technical expertise, played a crucial role in achieving Brokkr's visual richness, texture, and distinct personality.
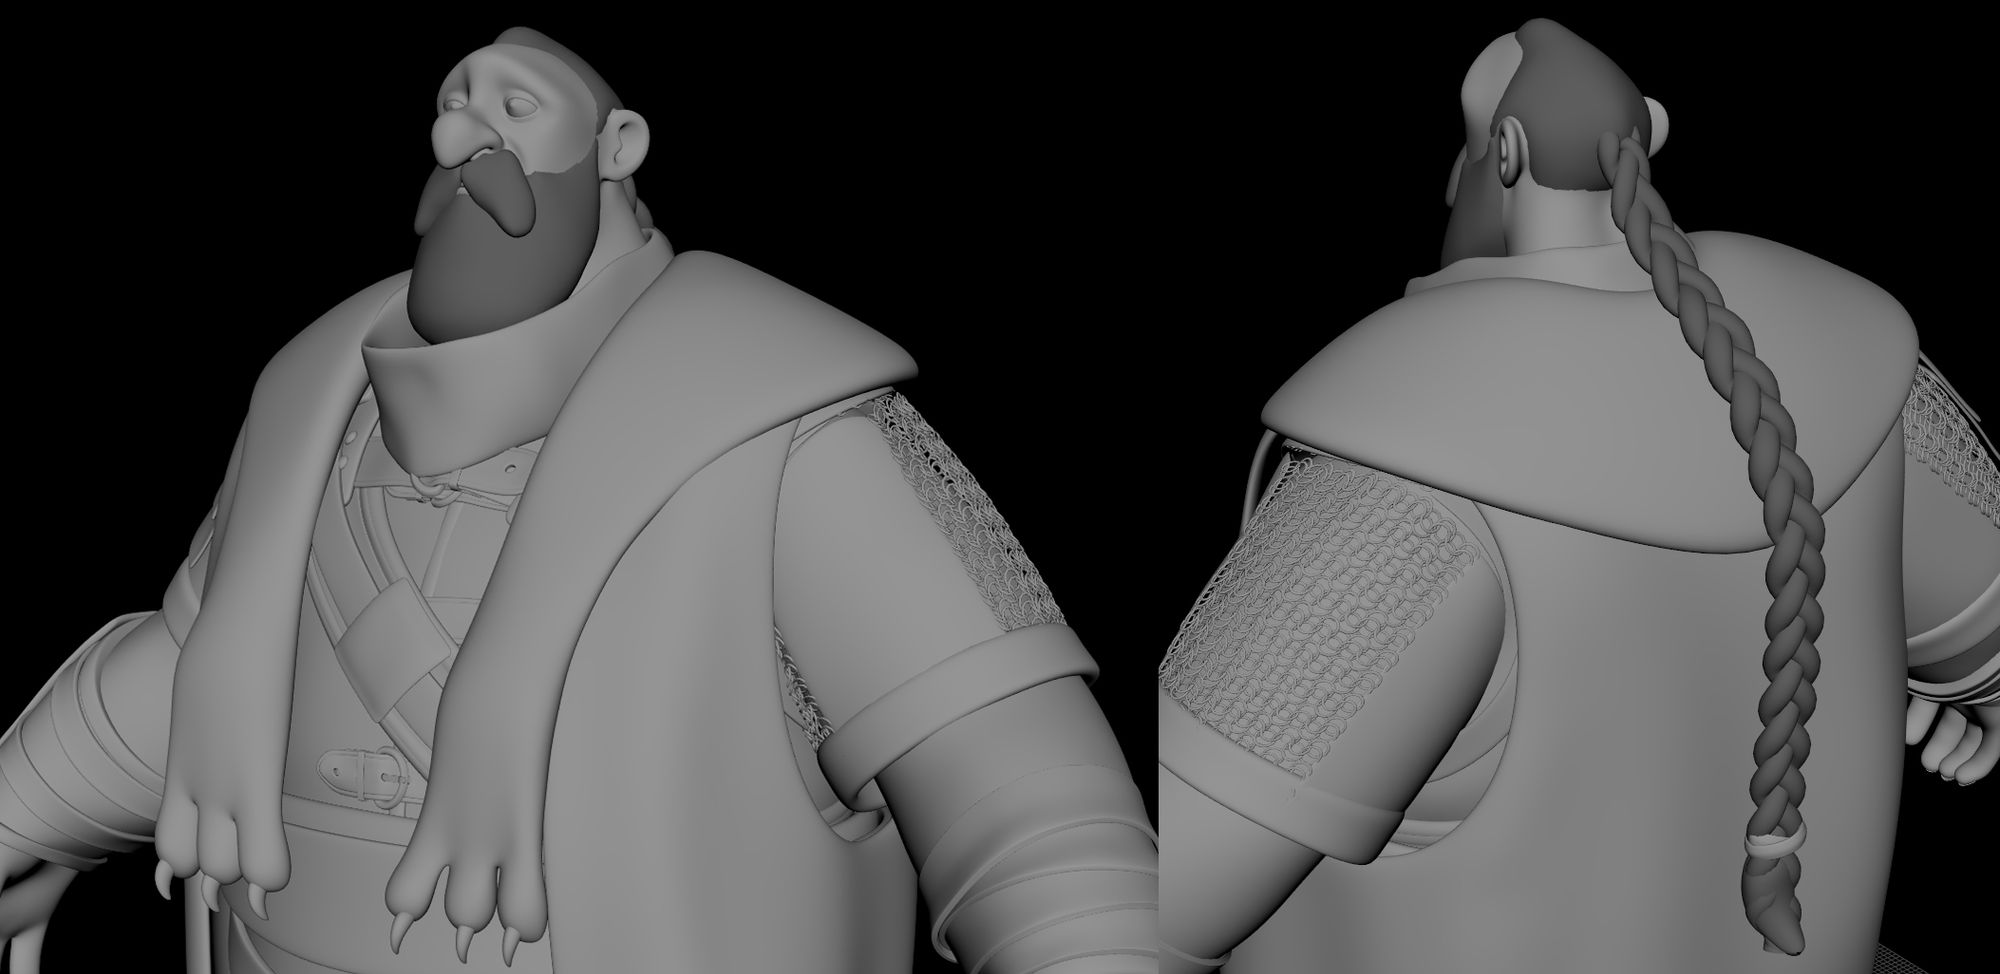
Brokkr's final lookdev: Before (top) and after (bottom) the grooming process.
Posing and lighting
Having completed the grooming phase, I moved on to the stage of posing and lighting. I took a preventive measure by creating a dedicated folder for posing to avoid any miscommunication or conflict with XGen that could potentially disturb the groom I had already designed. The character's pose was inspired by various images depicting melancholic expressions in men and was created using ZBrush.
Transferring the grooming descriptions and maps turned out to be quite time-consuming and required careful attention. Some of the maps needed to be redrawn, and I had to manually tweak some of the description guides to fix any disruptions in the groom caused by the transfer.
I then began the lighting phase in Maya, seeking to replicate the cinematic rendering achieved by Julen Urrutia. I saw this as a fantastic chance to sharpen my lighting skills. I not only sought to recreate the essence of Julen's work through a close-up shot but also wanted to create a broader turntable shot to showcase the intricate details and overall form of Brokkr.
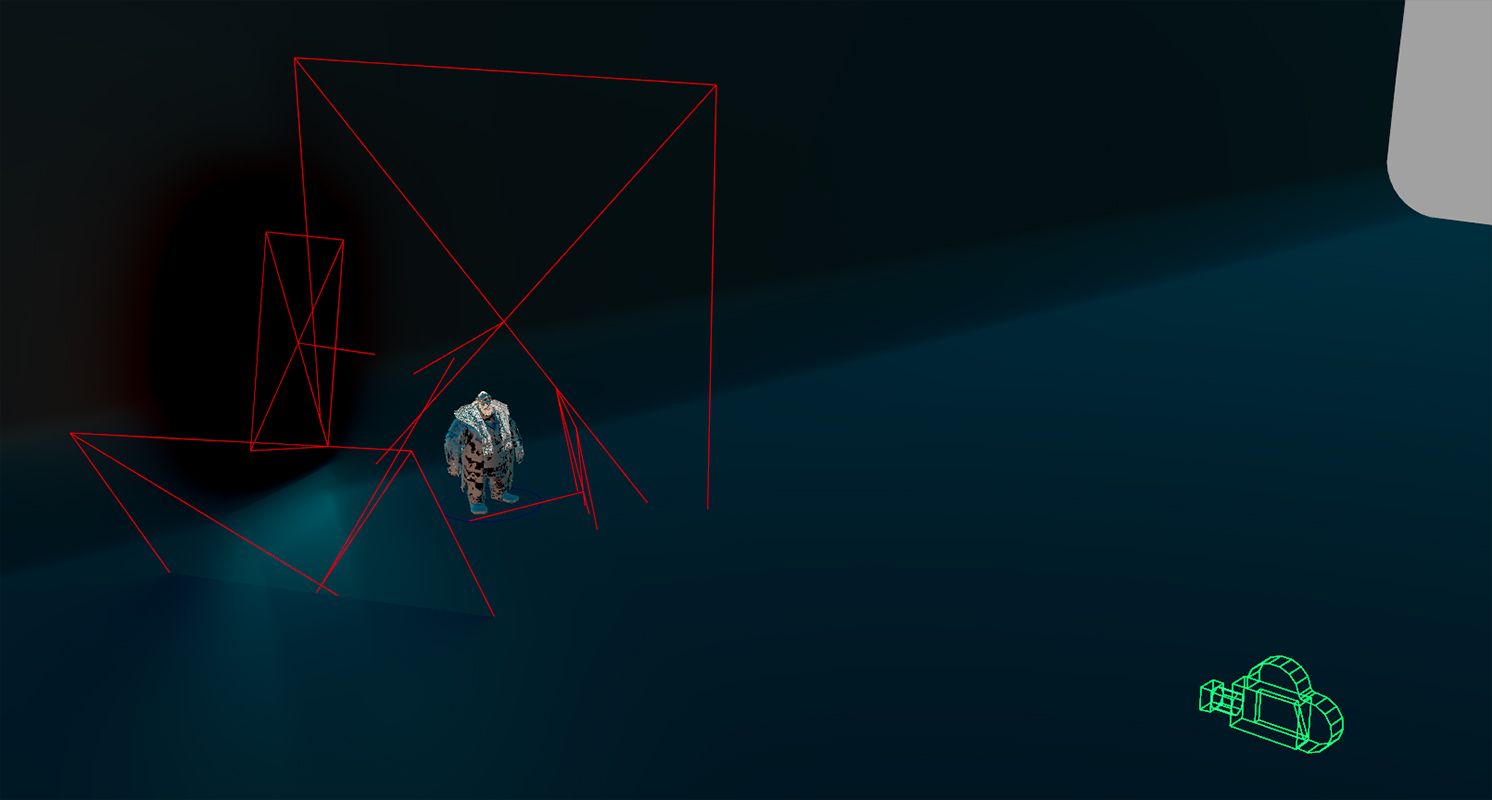
When preparing for the close-up shot, I adjusted the camera and Maya settings to achieve the desired composition. After testing different focal lengths, I found that a 90 mm lens gave the best results. I carefully placed each light to match the reference image as closely as possible, ensuring a clean and clear scene.
The close-up shot utilised a total of six lights: a night sky HDRI and five area lights. The area lights comprised a warm, fiery key light, balanced with blue and yellow fill lights, and further accentuated by blue and yellow rim lights. Even though there were slight differences between my model and the reference image, my objective was to replicate the same lighting reflections found in the reference. These minor variations presented a few challenges, but I am genuinely pleased with the final result.
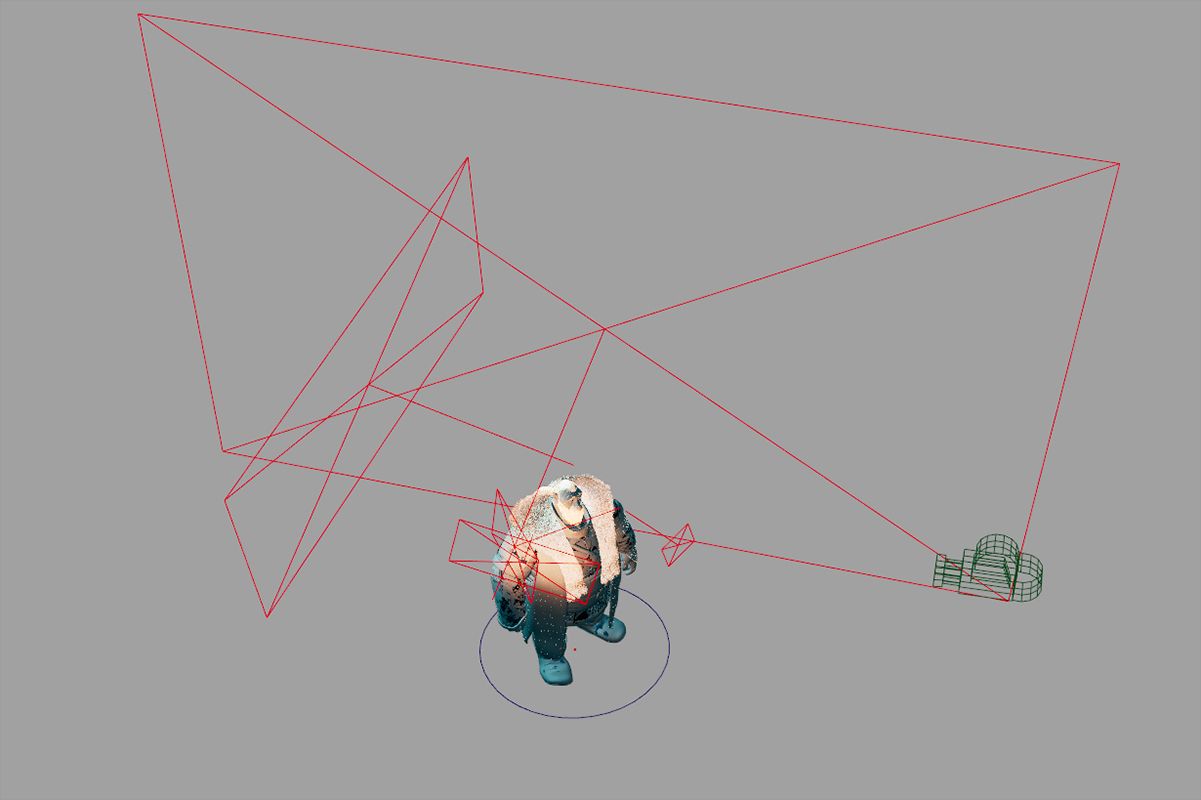
For the turntable shot, I chose not to use the yellow rim light. I readjusted the positions of the four area lights to cast uniform light across the entire body during the rotation.
Lighting stages: Close-up (left) and turntable (right) setups in the Maya viewport. Cameras are displayed in green wireframe and area lights in red wireframe.
A few adjustments were made at this stage. Particularly for the close-up shot, I slightly shifted the character's eye position to prevent a cross-eyed appearance. Yet, for the turntable render, I reverted the eyes to a neutral state.
Finally, I carefully managed the sampling and fine-tuned the render parameters to find the optimal balance between computational efficiency and image resolution. I carefully inspected the quality of various passes, including diffuse, specular, shadow matte, and SSS, to confirm that the optimisation efforts were successful.
Each light was set up with a resolution of 2000 and a sample count of 2 (HDRI with 3 samples). For added flexibility, each light was assigned its own light group for rendering, and all necessary passes were included.
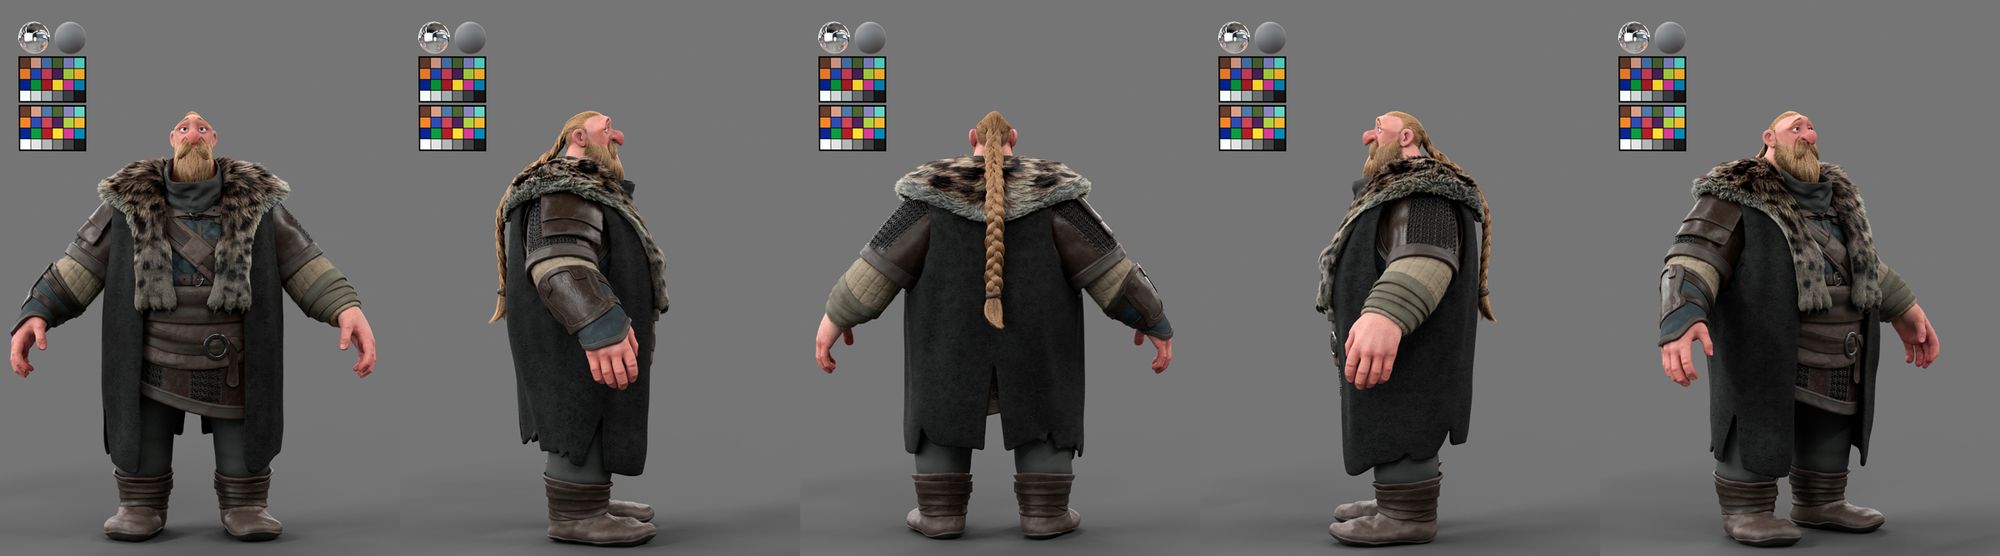
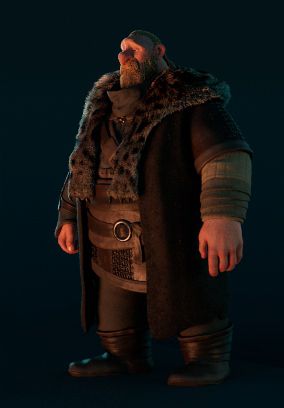
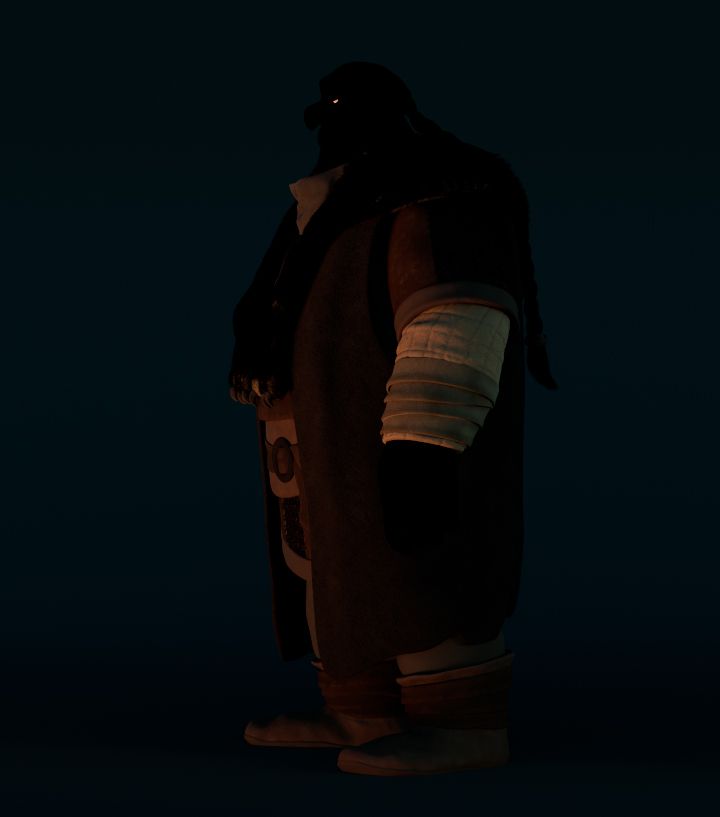
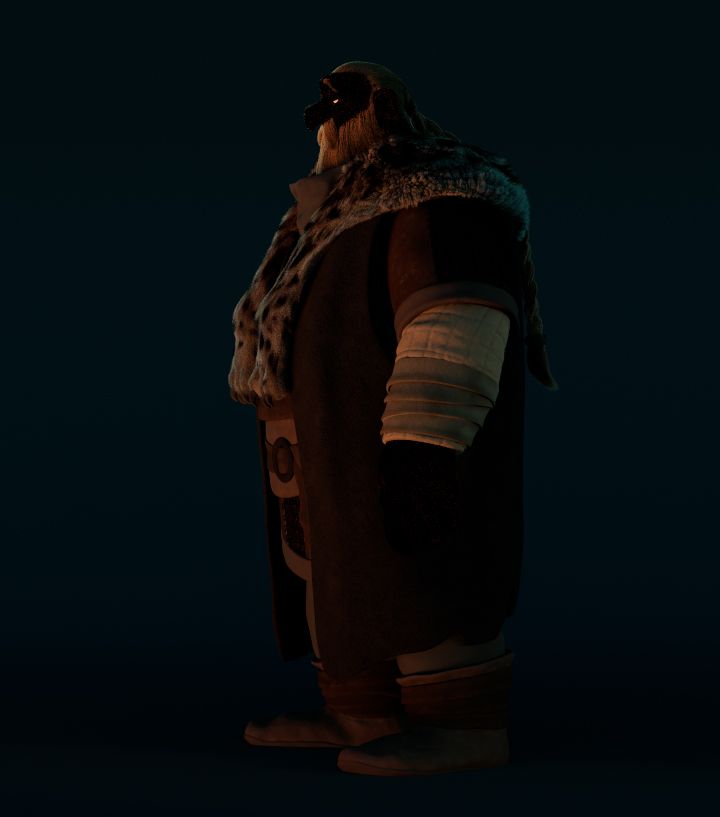
Final Maya renders: Close-up (left) and turntable (right).
Post-production
During the compositing phase, I faced an issue where the groom wasn't showing up in any light group. To fix this, I set up a custom Cryptomatte node specifically for the groom. This custom node acted as a mask on the general diffuse light pass, essentially creating an extra pass for more flexibility.
Reconstruction of light passes: Before (left) and after (right) fixing the groom lighting.
After assembling all the passes, I carefully controlled the intensity of certain lights to ensure Brokkr's silhouette was visually pleasing without any overly bright areas. I used a Cryptomatte with the leather items to tone down the rim light on the right arm, preventing overexposure.
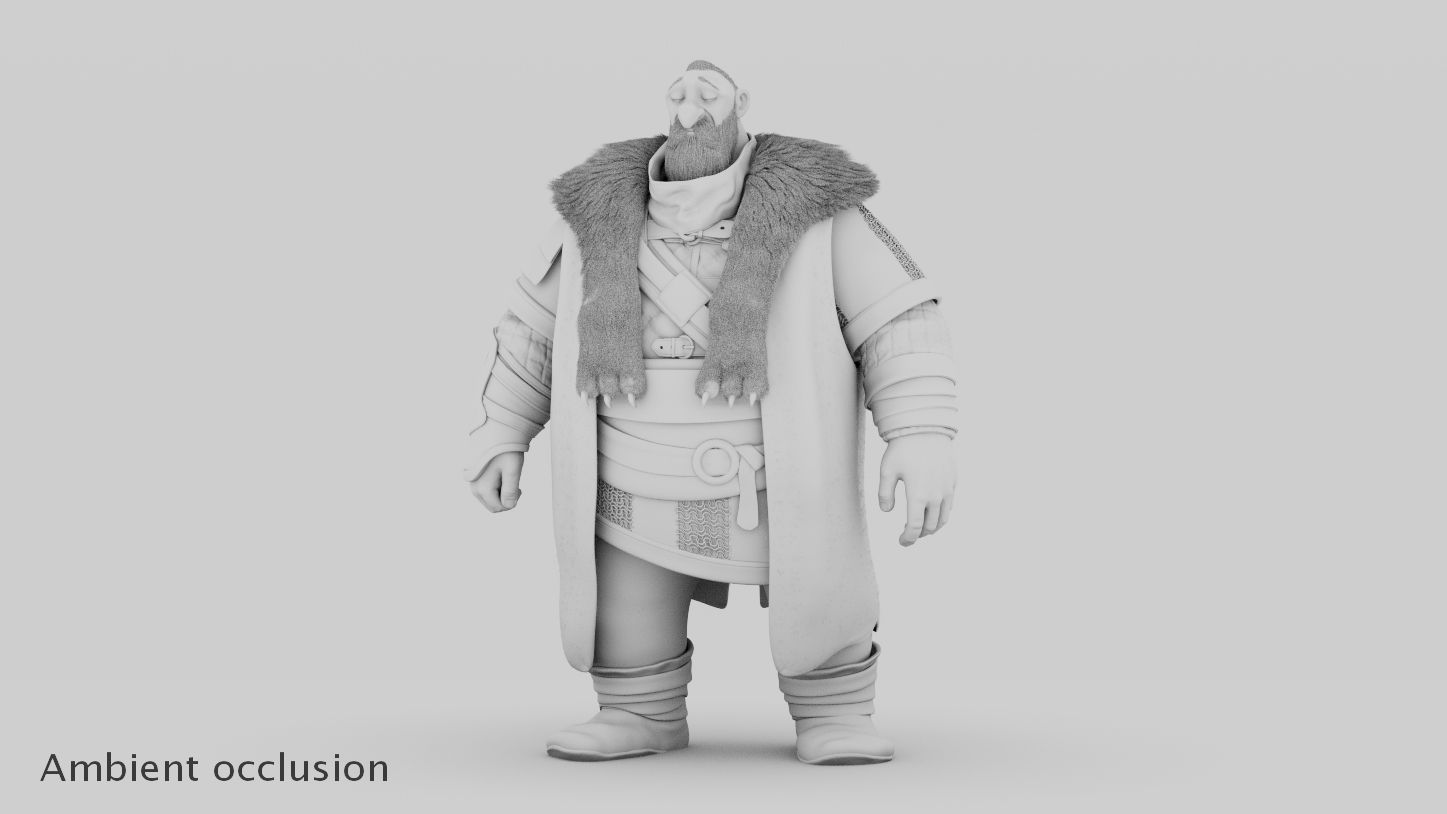
Ambient occlusion pass.
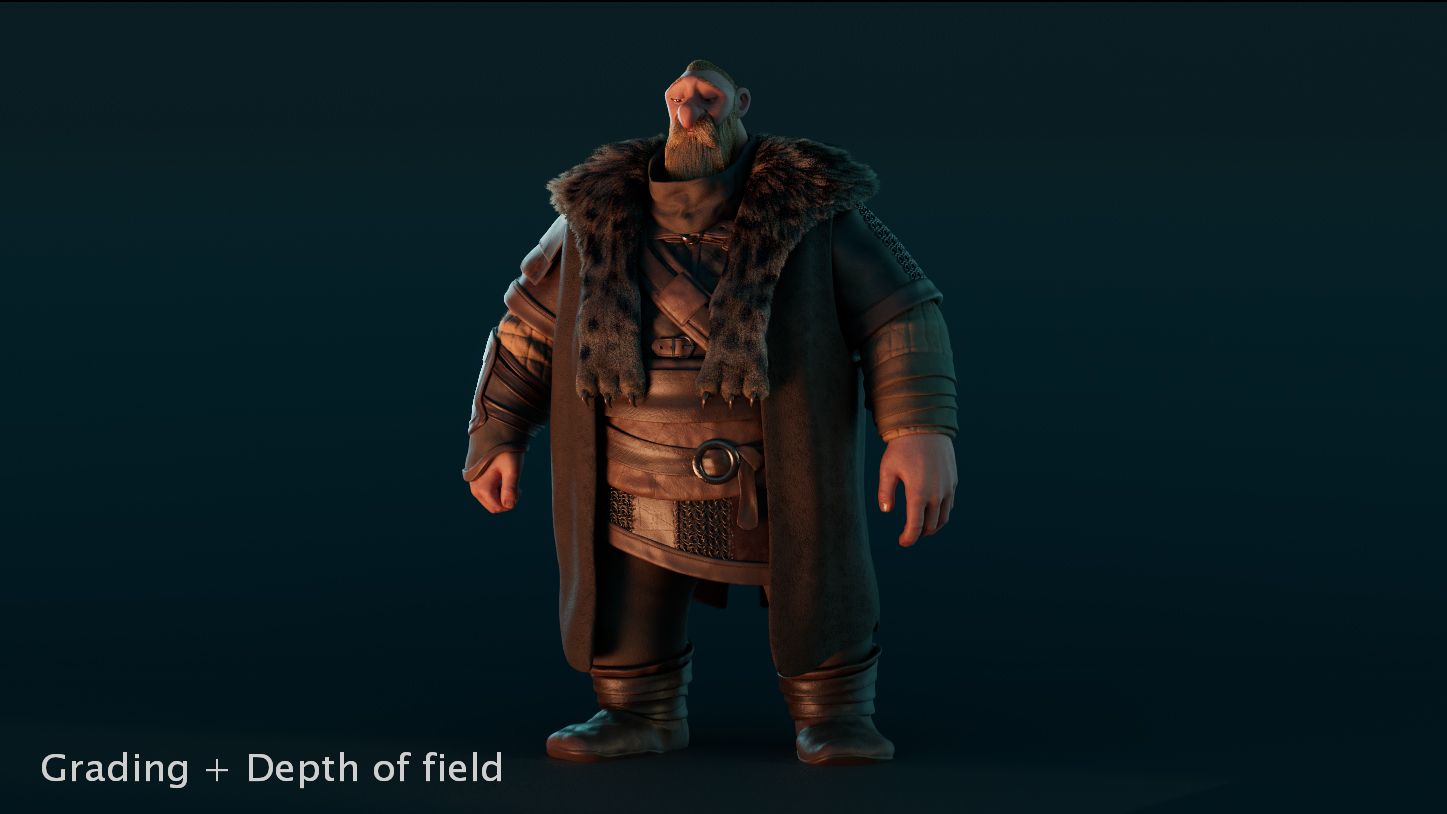
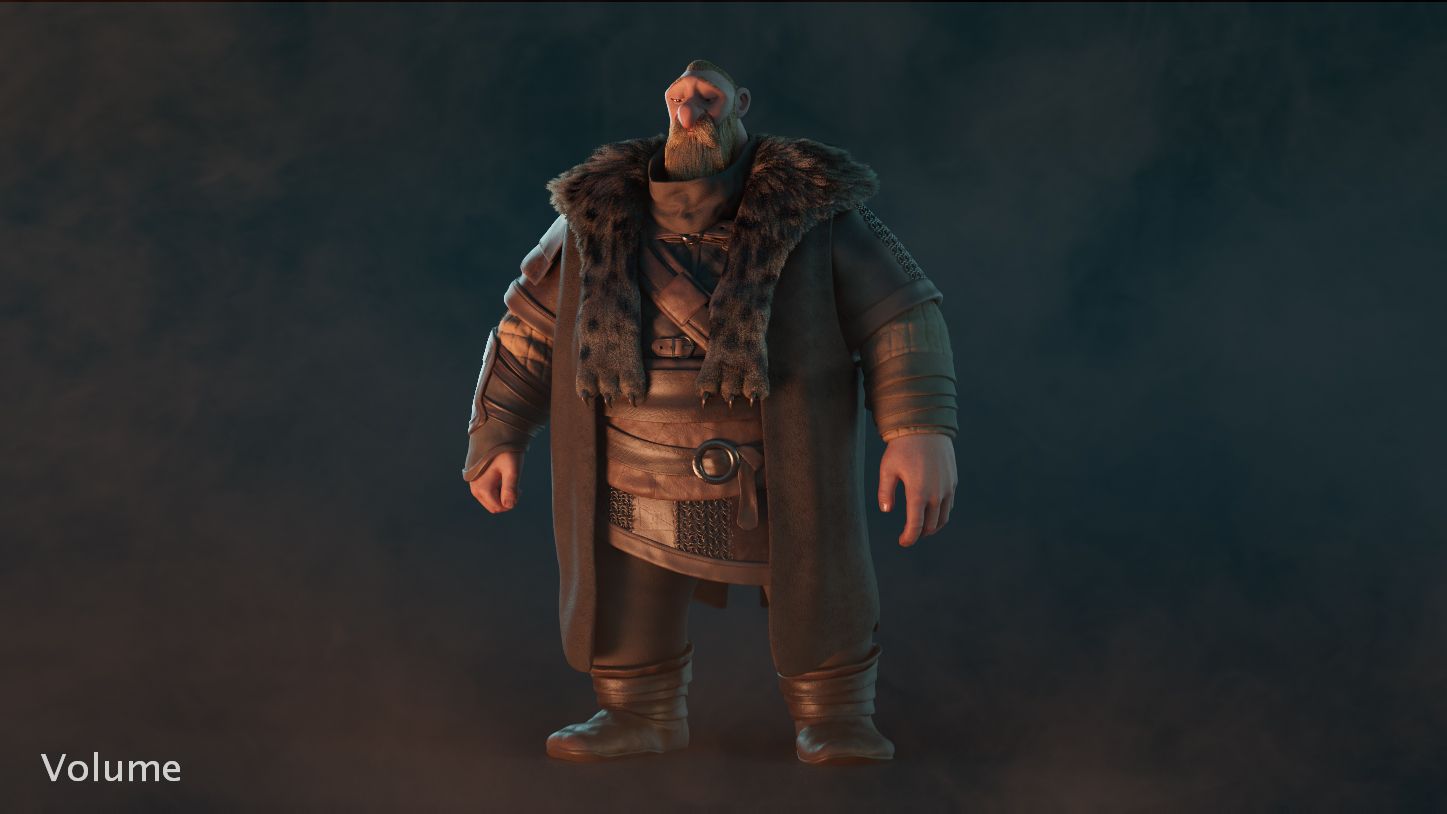
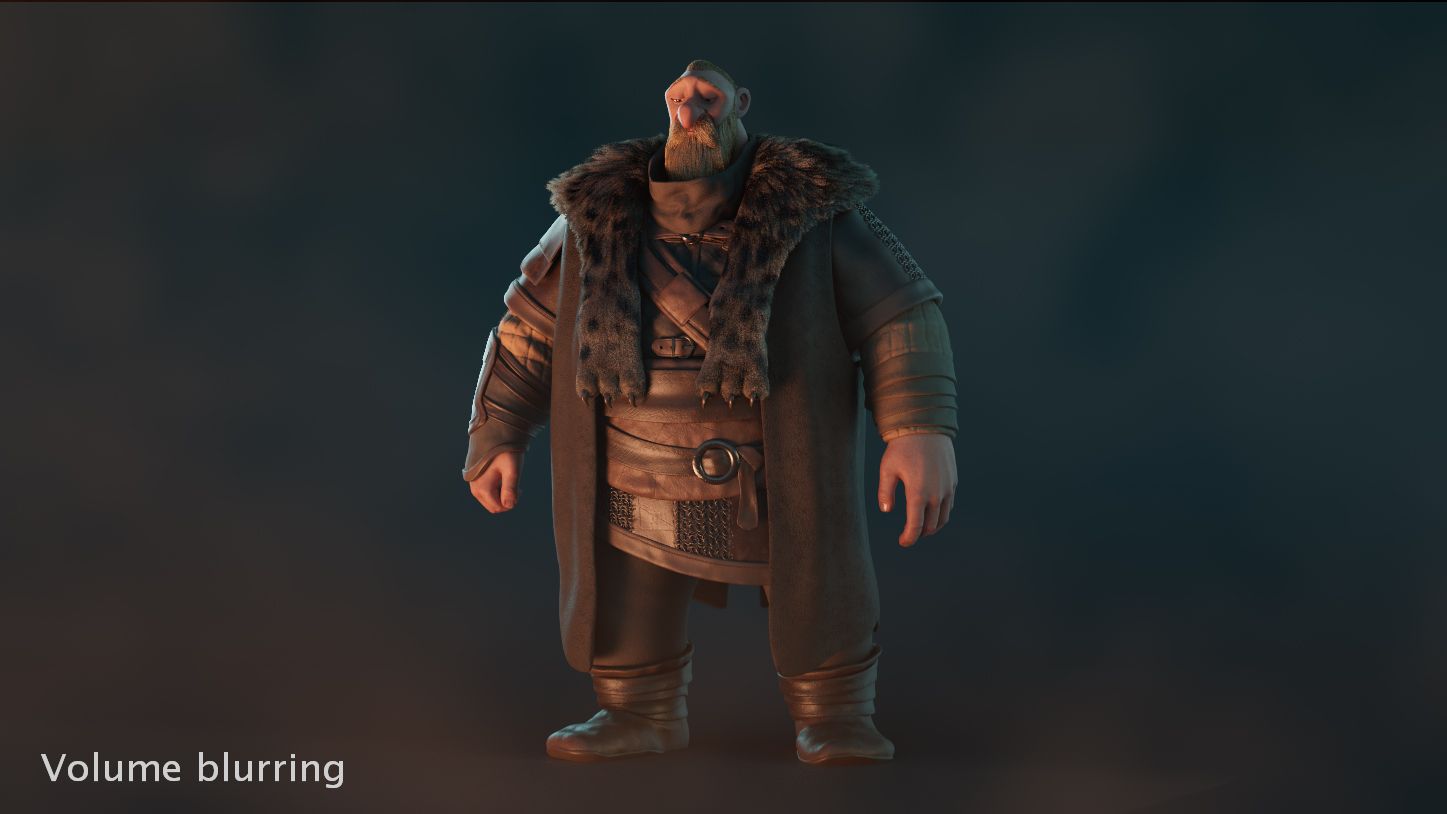
While striving to remain faithful to my reference, I made a few adjustments to better suit the overall look and feel of the composition. I introduced a subtle focus blur and incorporated a volumetric background effect using colour-graded cloud footage. To reduce the impact of the volumetric swirls, I applied a slight blur to the whole scene. Additionally, I added a layer of cloud footage in front of the character to enhance his blending with the background for a more natural blend with the background.
In the turntable shot, I enhanced the studio's shadows to ensure the character didn't appear to be floating. On the other hand, for the close-up shot, I utilised Photoshop to create a background that closely resembled the reference image.
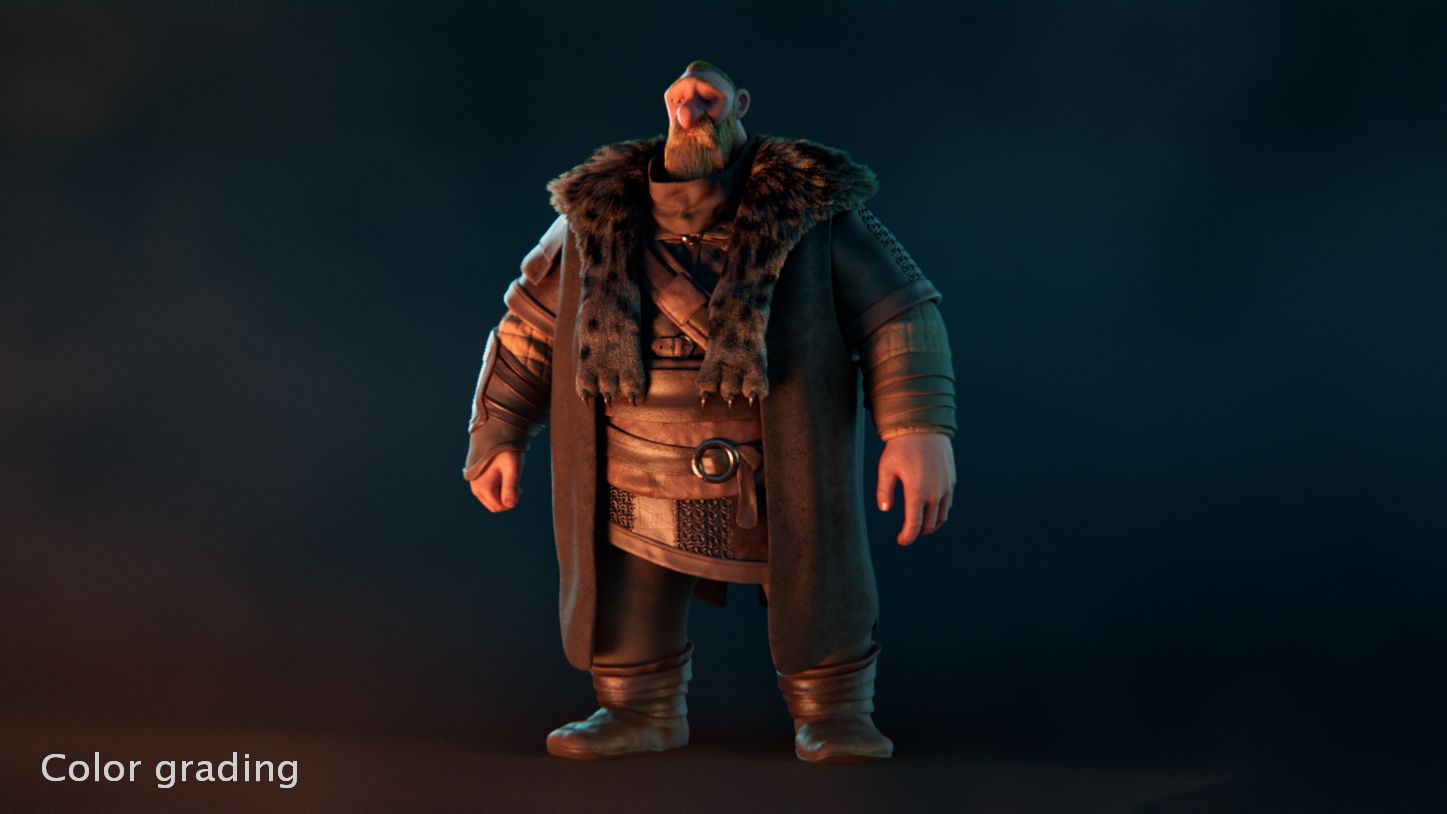
For the final adjustments, I used the CGcomp node. This allowed me to add the finishing touches like vignetting and colour grading, ensuring a unified and visually appealing composition.
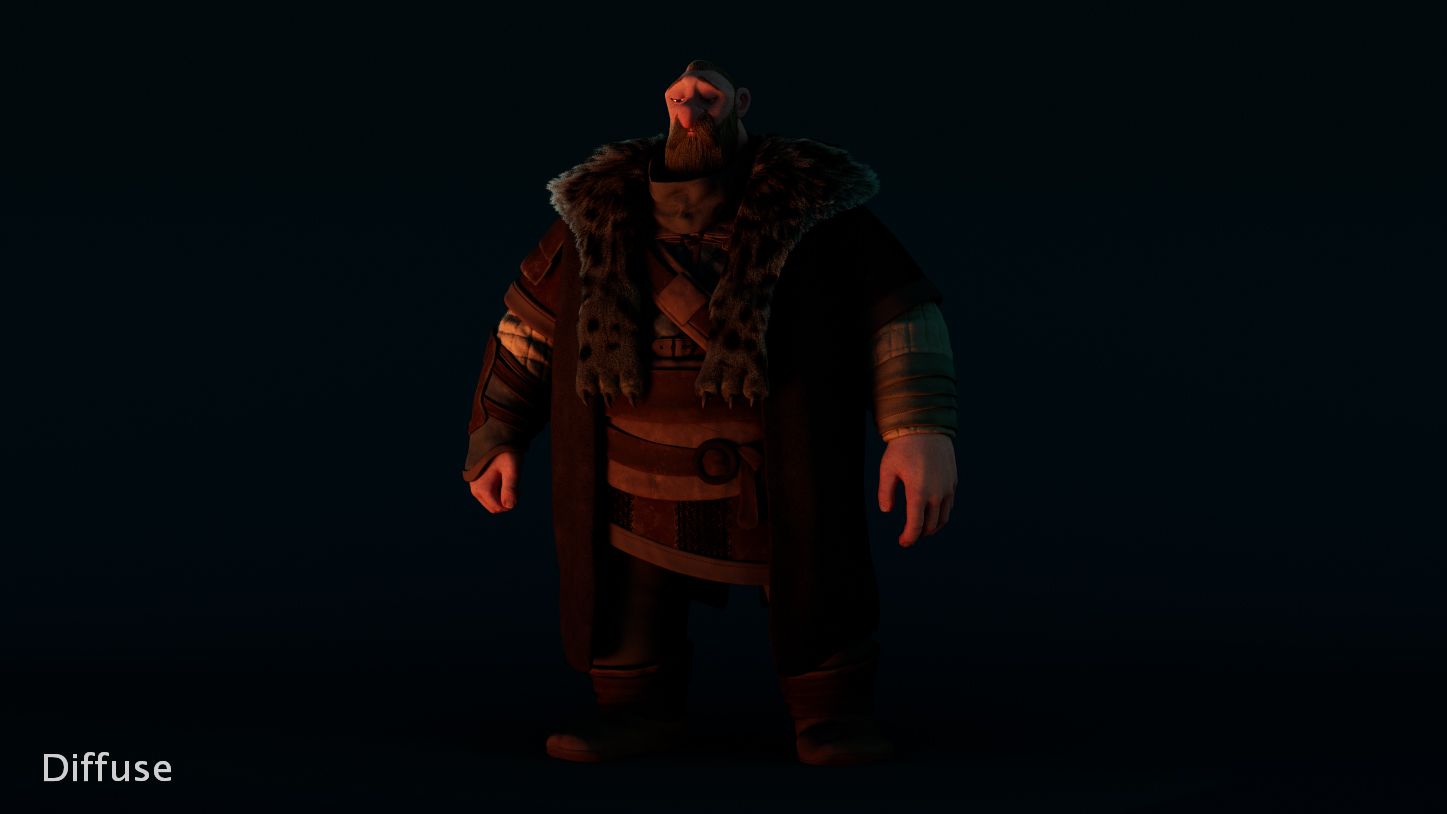
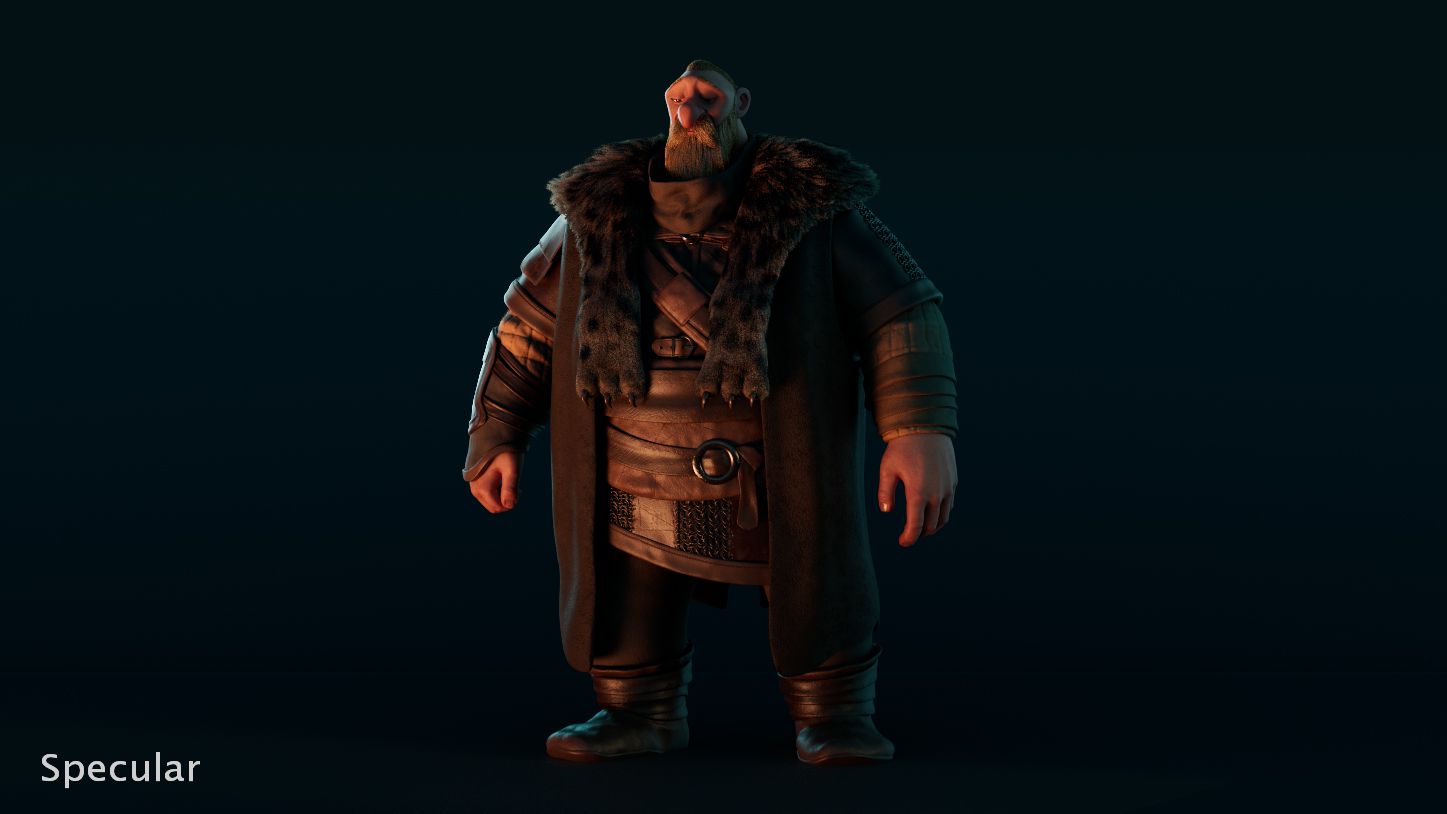
Compositing process from Maya render passes to final look.
Throughout the video editing and colour grading phase, I utilised DaVinci Resolve. Given the high quality of the initial Nuke renders, only minor tweaks were needed during colour grading. I made subtle modifications to heighten and fine-tune the final appearance, with an emphasis on enhancing contrast and saturation.
Finally, I further augmented the contrast in Photoshop. This step helped my Viking character to be more prominent, whilst preserving the overall aesthetic harmony of Julen's original artwork.
Final thoughts
Creating Brokkr was incredibly fulfilling. It expanded my knowledge of character creation and improved my ability to tackle unexpected issues. This was my second character project and my first time using XGen for grooming. The skills I acquired during my training at SAE Institute Geneva were crucial in bringing Brokkr to life.
While staying true to the original reference, I also infused my own creative touches to the character. This artistic freedom let me express my creativity, resulting in a version of Brokkr that truly resonates with my vision.
This project was not just a milestone in my growth as a character artist, but also a springboard for my future endeavours. The experiences and knowledge I gained from creating Brokkr have equipped me to tackle even more challenging projects in the future.
Thank you very much for reading and I hope you enjoyed it!
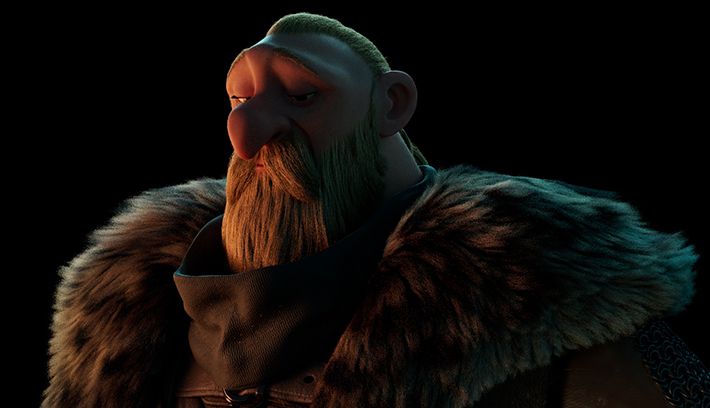
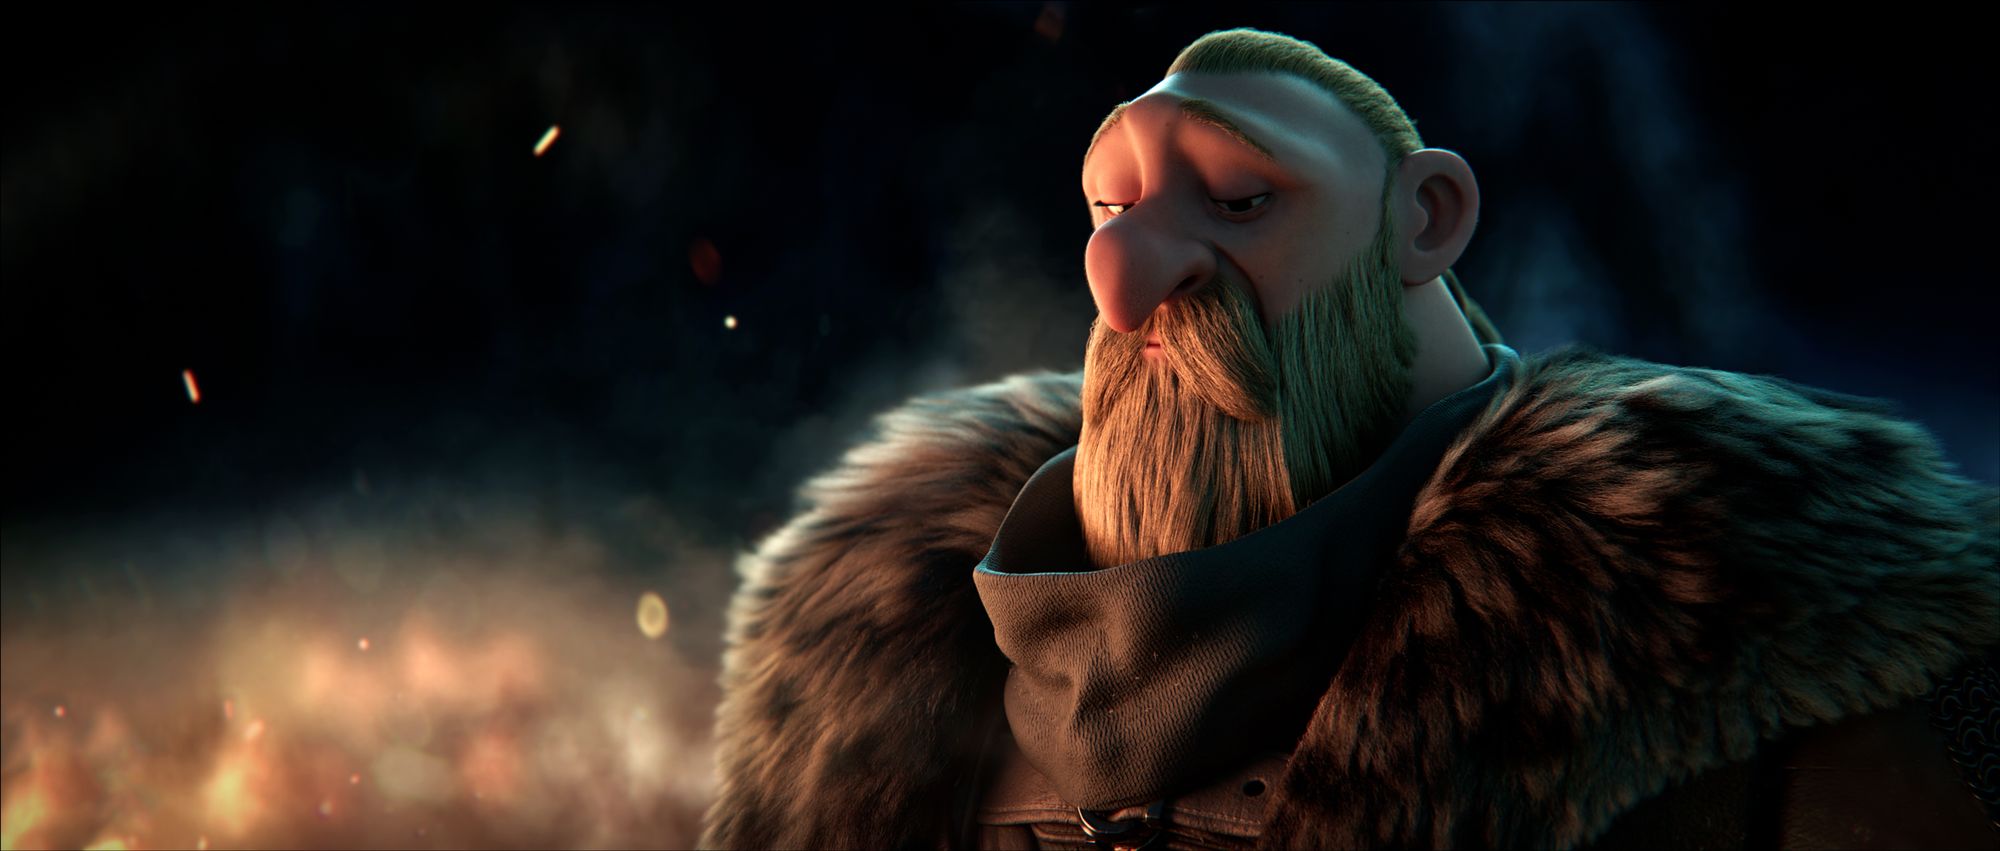
Final render of the close-up shot.
0:00
/
Final render of the turntable shot, including wireframe overlay.
Reach out to Damaris via her Rookies profile here.