Cinematic storytelling: Creating VFX for Game Environments using Unreal Engine
Rodolfo Silva's article explores his project, "Aftermath," where he utilises Unreal Engine to create game-ready Environmental VFX. Join him on this creative journey into cinematic storytelling and game VFX.
In this article, Rodolfo Silva shares his insights and experiences from his project, "Aftermath," which focuses on creating game-ready Environmental VFX using Unreal Engine. Building upon his previous article on modeling and game environment creation, Rodolfo delves into the realm of real-time VFX and technical art. From concept to production, he explores the utilisation of tools such as Niagara particles, dynamic materials, advanced shader effects, flipbook animations, and cloth simulations to bring his vision to life. Join Rodolfo on this creative journey as he explores the art of cinematic storytelling and VFX for games.
Hello everyone, Rodolfo Silva here! I’m incredibly thrilled to share some more workflows from my ongoing “Rookies Awards 2023” entry.
In this article I’ve decided to go through the “Aftermath” project which is centered around creating game-ready Environmental VFX from scratch in Unreal Engine.
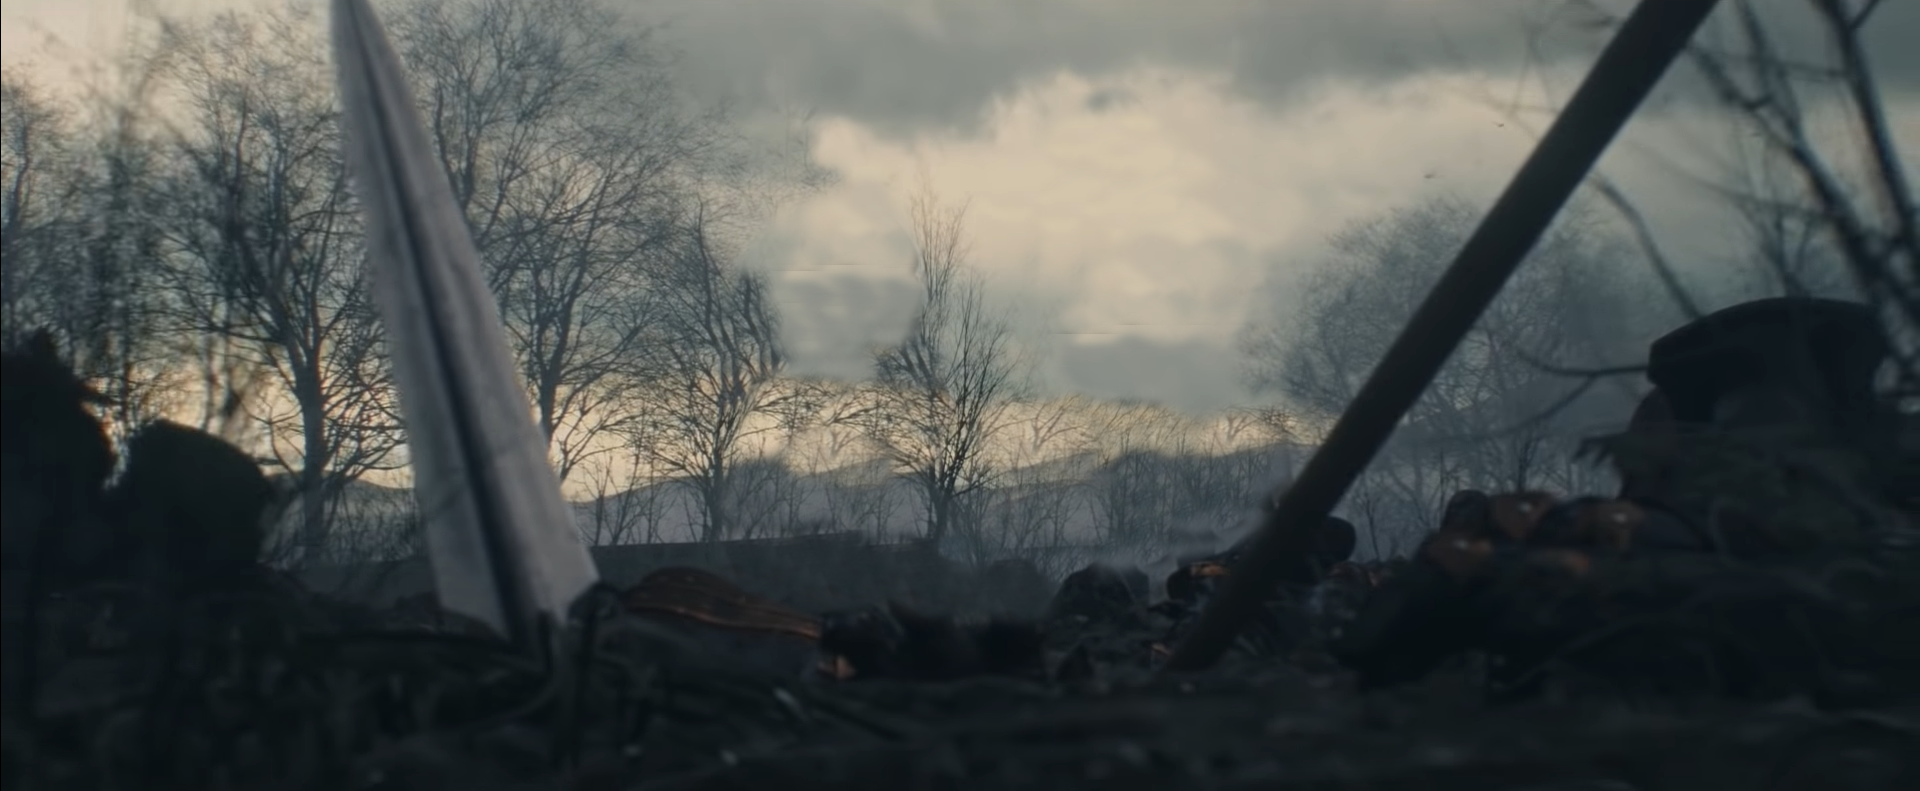
The Final Cinematic.
If you want to check out how to model and create game-ready environments using ZBrush and Unreal check out my previous article here.
As mentioned in the previous article, at Escape Studios, students were tasked to conceive a creative project for each module, apart from the class exercises and lessons. This particular project was executed for module 3 which was centered around Real time VFX and technical art.
This project was where I learned to be fluent in creating Niagara particles, dynamic materials, advanced shader effects, flipbook animations and creating cloth simulations for games.
Pre-production
Brief and inspiration
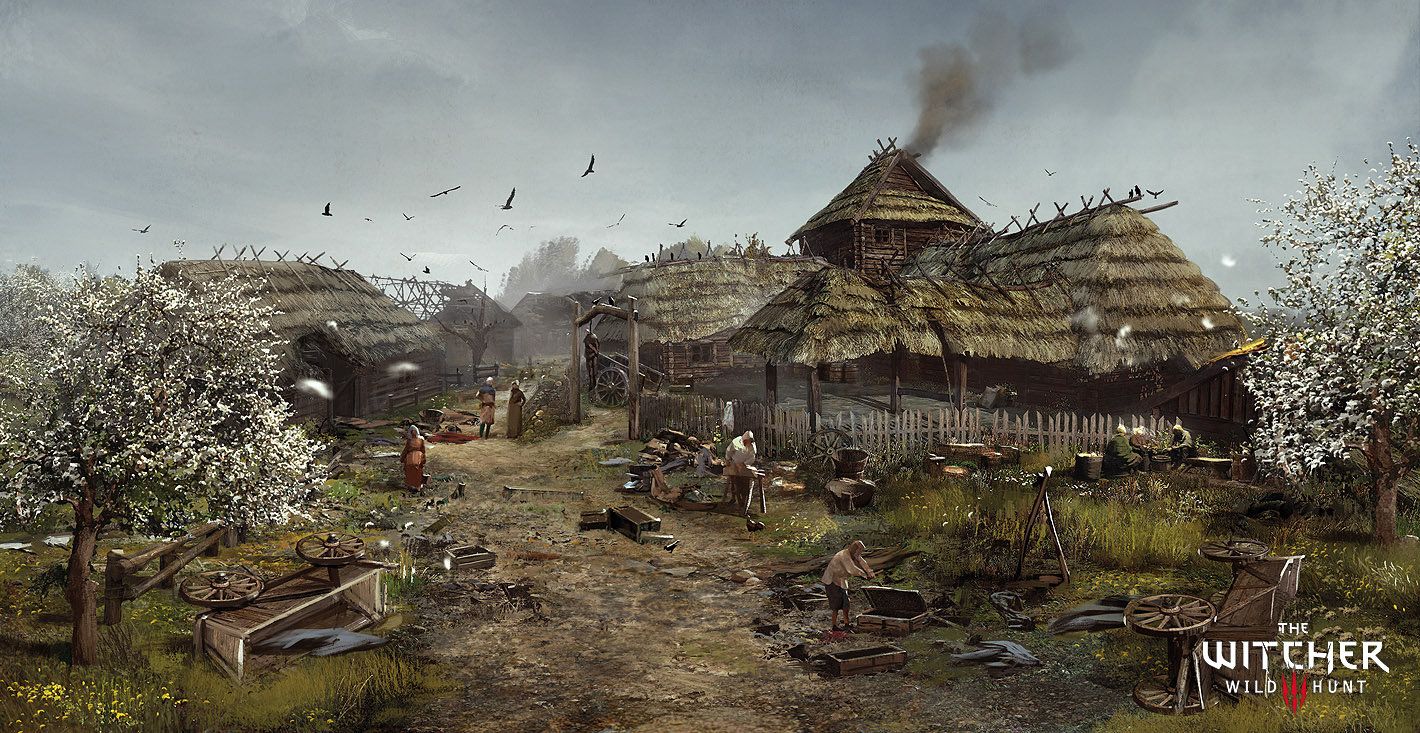
For this particular project,I decided to make a piece inspired by one of ‘The Witcher 3’ cinematic trailers where the entire story was told through camera shots, lighting FX, without any dialog. The whole point of this project was to focus on the cinematography (shot making) lighting and VFX.
The main inspiration images used to set the mood I was aiming for.
So, I tried to choose a concept that would allow me to try my hand at making as many and as varied VFX as possible as I wanted to experiment with Fire simulations, flipbook FX, shader FX, particle simulations, cloth simulations, etc…
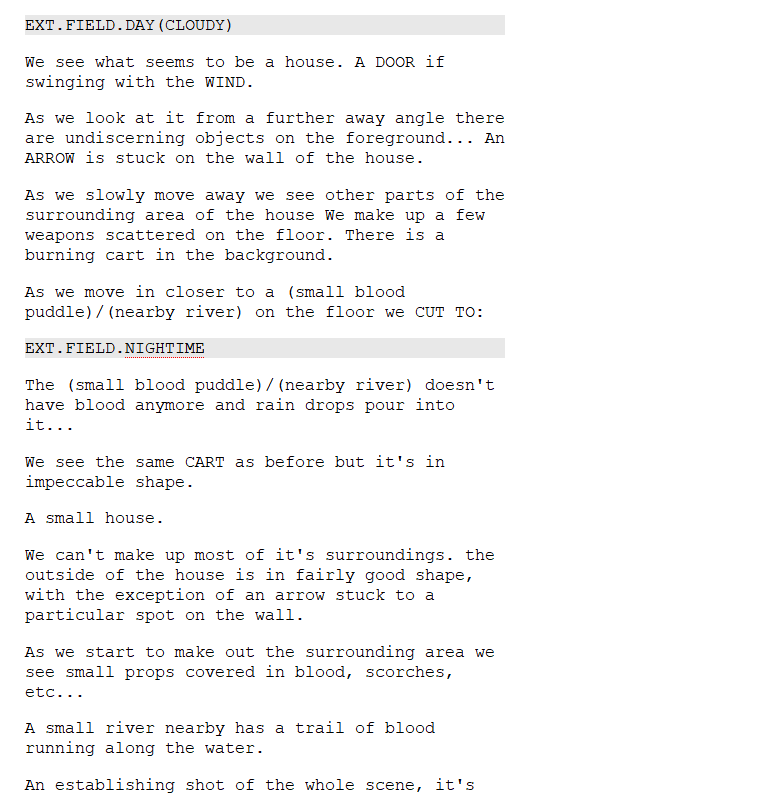
The script as a work in progress.
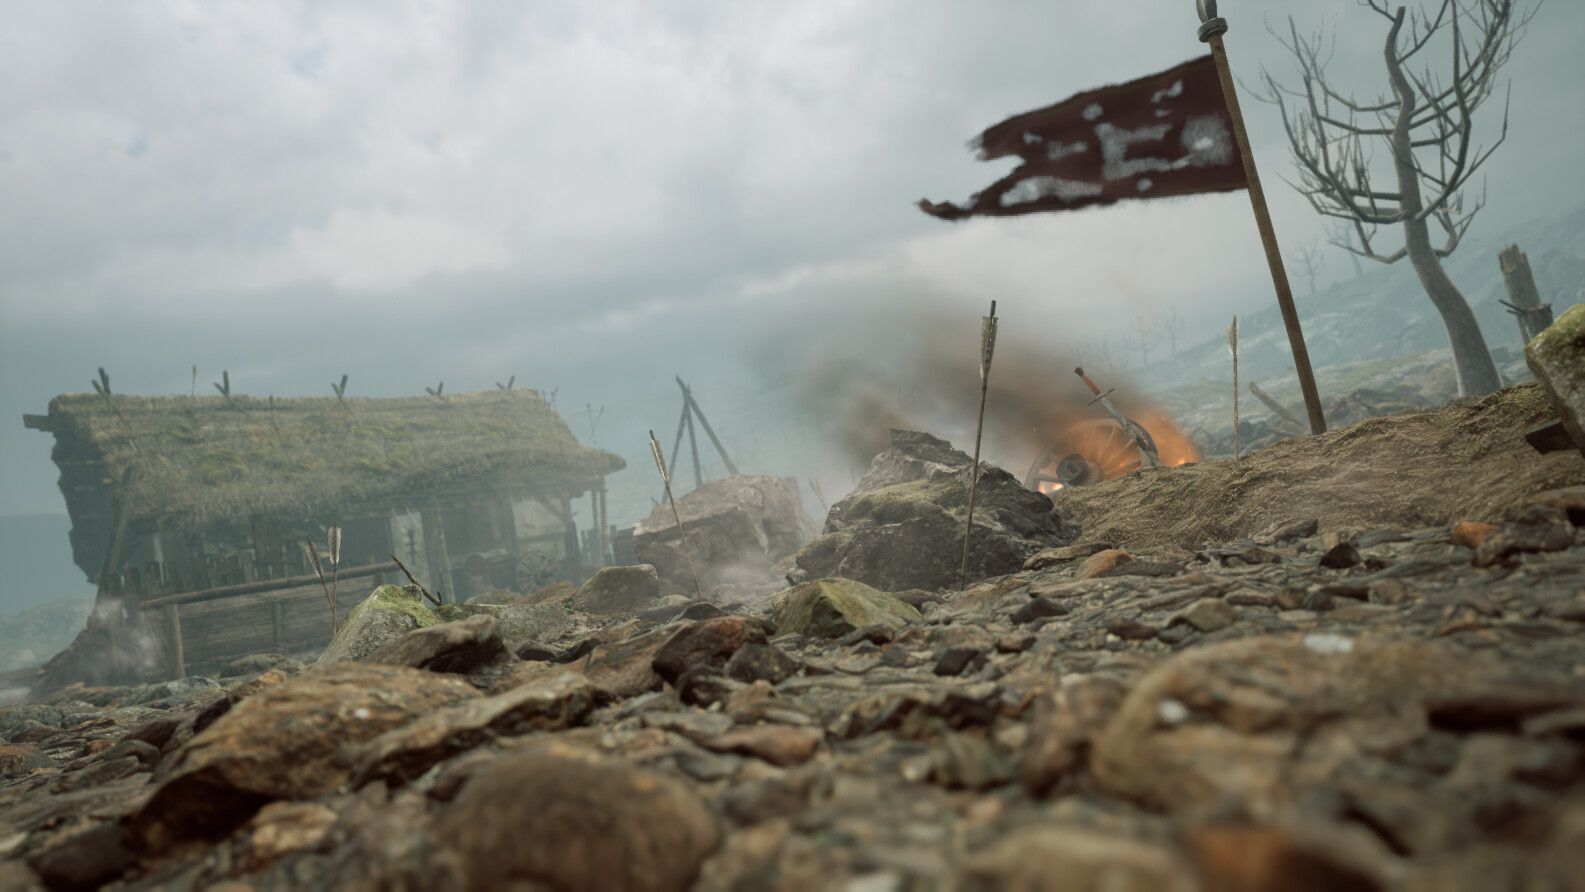
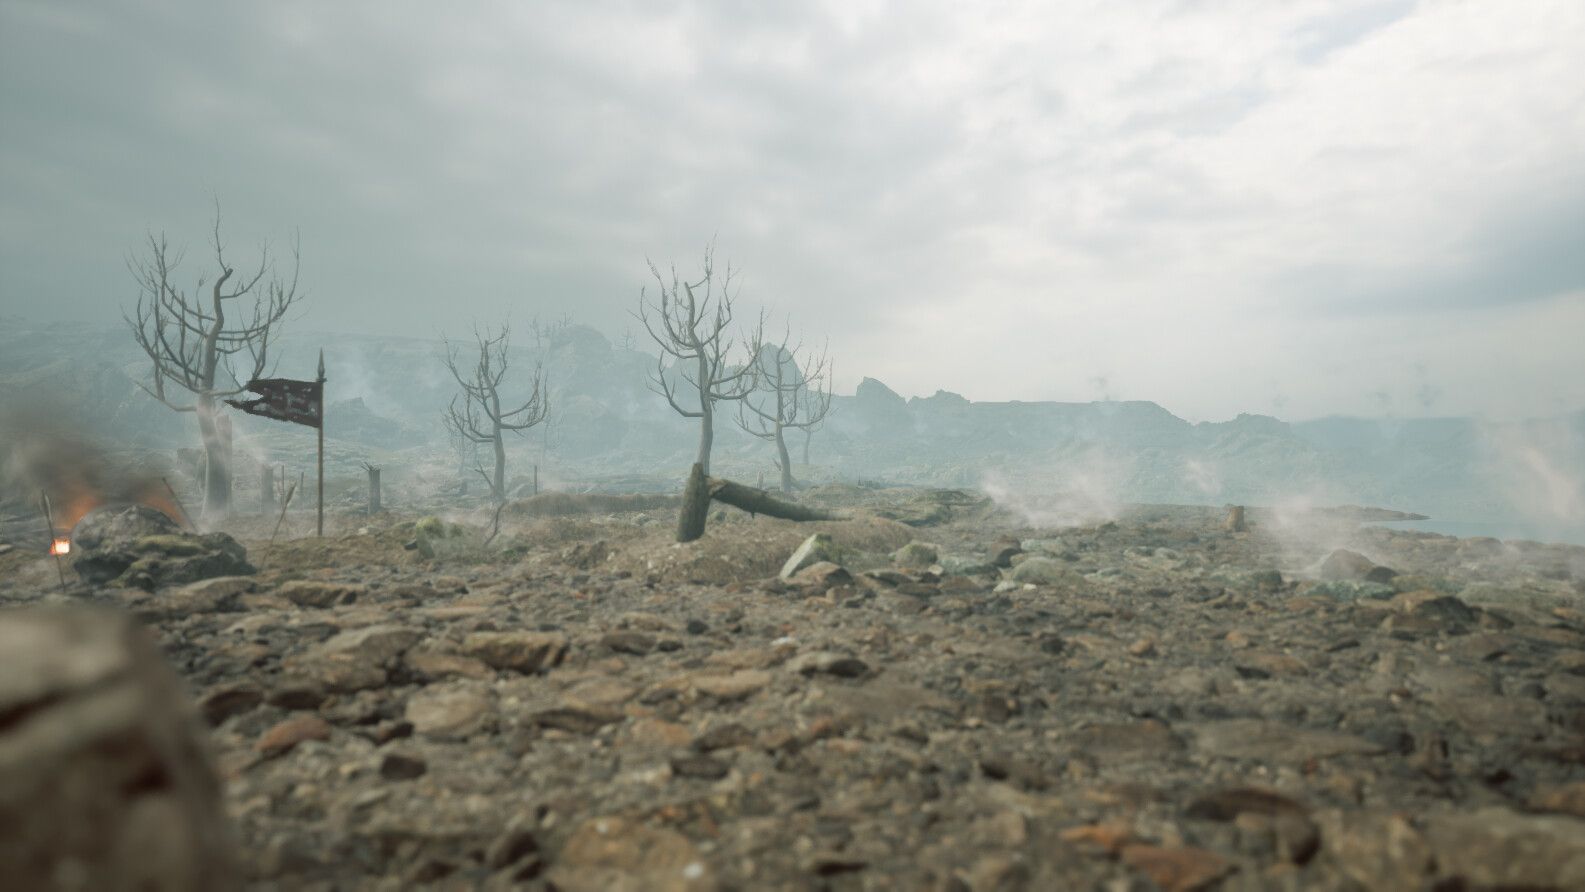
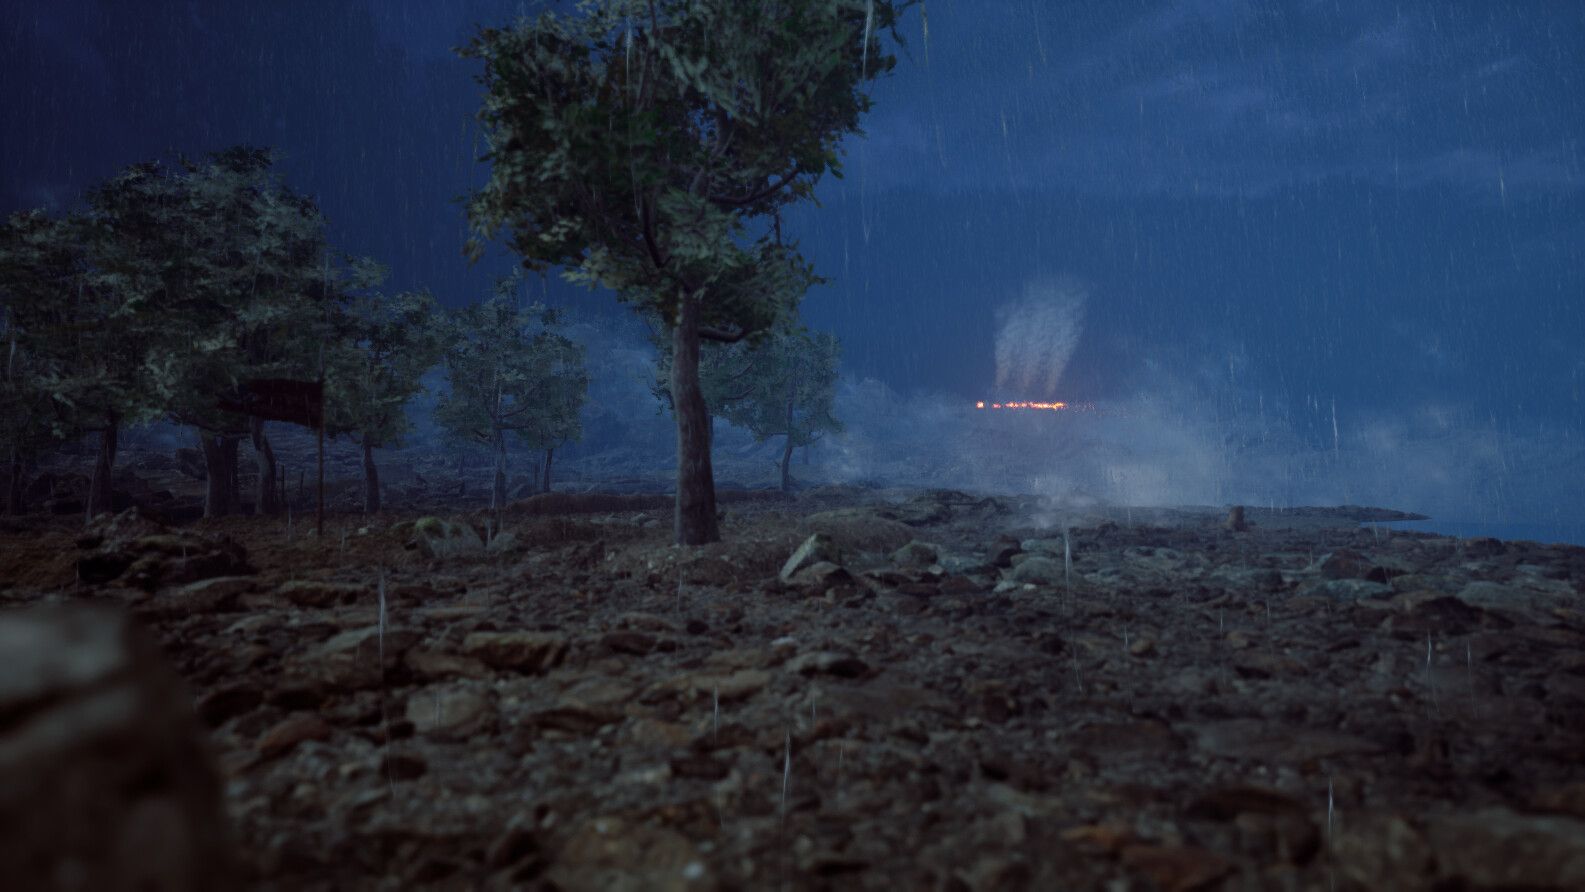
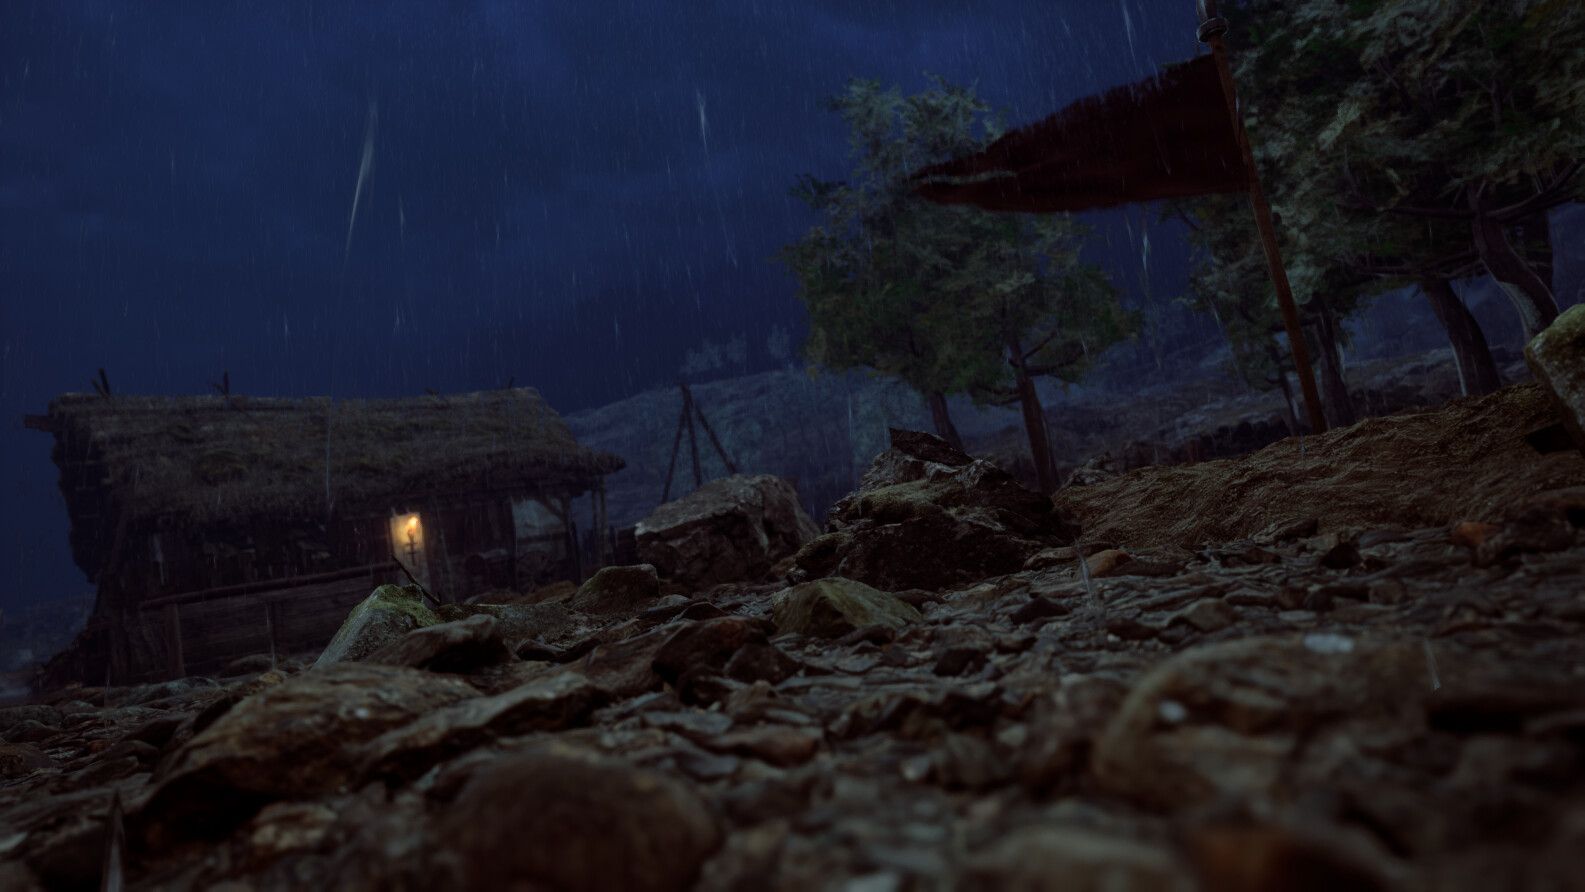
One of the goals of this project was to incorporate storytelling purely through the camera work and effects. That said, I imagined a medieval village in two time settings one during the night and another in the morning after. That way I could tell a story about a vicious battle that took place there without actually showing the battle and only show the moment before the battle (night scene) and the aftermath of the battle (yes, that’s where the idea for the title came from!)
Creating a simple script and thinking of each shot as a standalone scene was absolutely essential to start thinking about the project cinematically and be able to tell the intended story.
That way the VFX creation process would be thought out on a per-shot basis, preventing time wasted in creating FX that would either not be seen or wouldn’t add anything to the scene.
Production
Assembling the scene and lighting 1st pass.
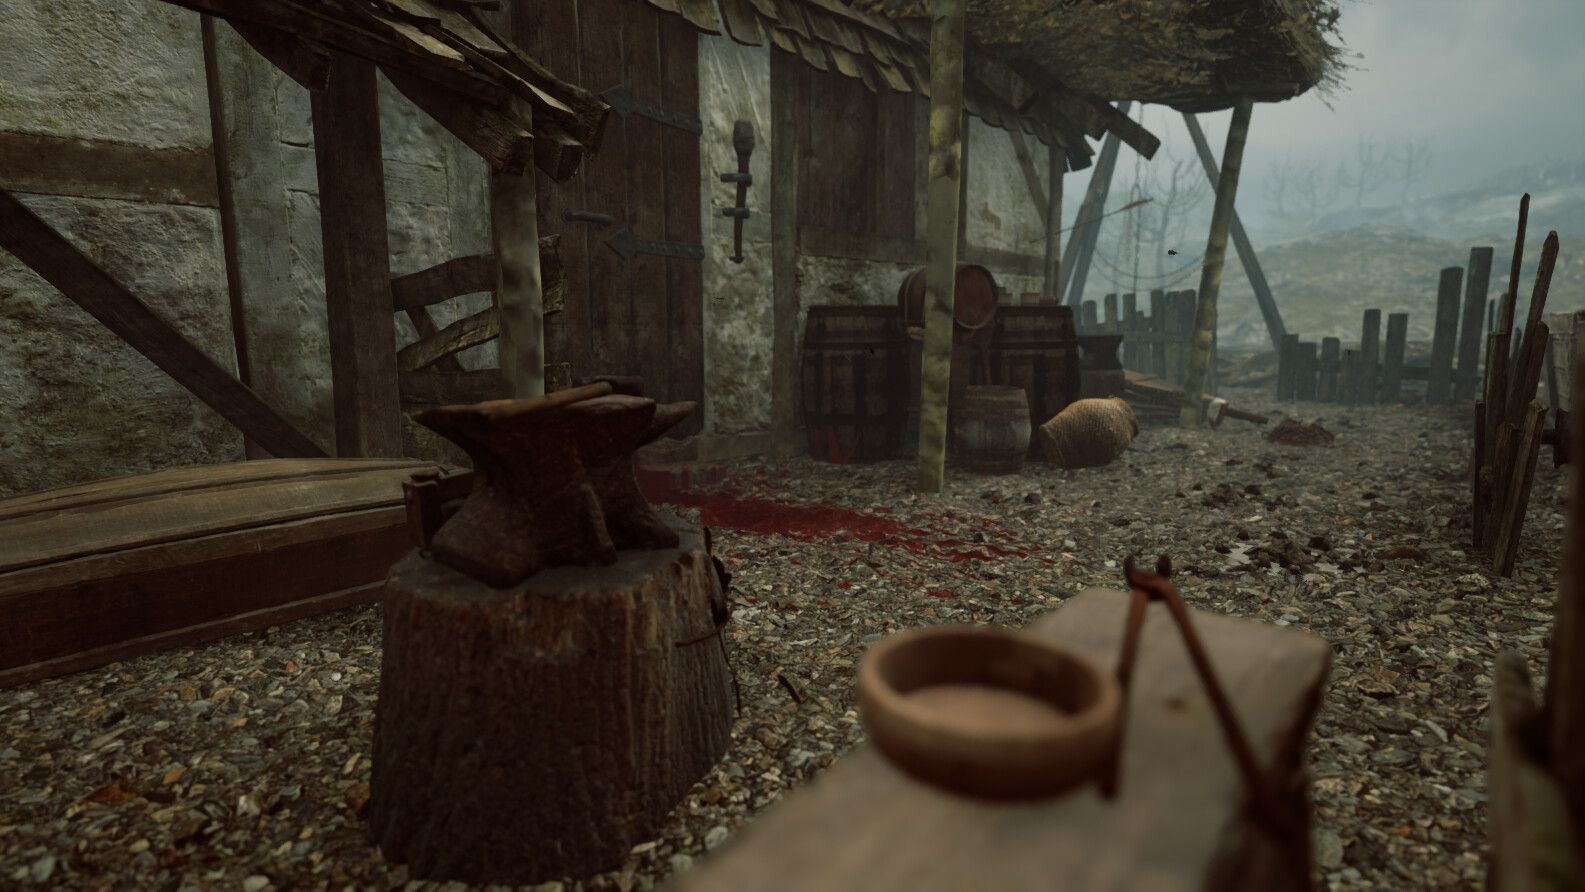
As stated before, the point of this project was not to create the 3D models but focus on the VFX and cinematography. Keeping that in mind, a range of megascans assets were used to assemble the actual scene. That way, the technical aspect of the work could be entirely centered around the VFX.
Cameras and lighting
I added the first few models in the scene and added a couple of cameras for the most important shots and immediately created the level sequences to control each shot per camera. Lighting was also something that was thought out from the very beginning.
The asset assembly and lighting process in the establishing shot, and its evolution as the project progressed.
Comparison shots of the initial stages and the finished stage of the shots.
As I would add more models and create the effects I would iterate on the lighting and keep the overall mood in check throughout the entire process.
VFX Breakdown
I outlined the types of effects I needed for the scene and then set the best approach to actually integrating them into the engine. The effects I decided to make include: Fog and atmospheric effects, Rain, lightning strikes in the sky, a river, banners flapping in the wind, the trees wind movement and a fire effect.
I decided to make the fog and atmospheric effects a priority since they would have a direct impact on the mood and lighting of the scene.
Wind is howling! (Atmospheric FX and fog).
The atmospheric effects would consist of a simple shader effect with panning cloud textures and then have a Niagara particle system spawn moving fog cards that used that texture.
The Fog cards effect in the scene.
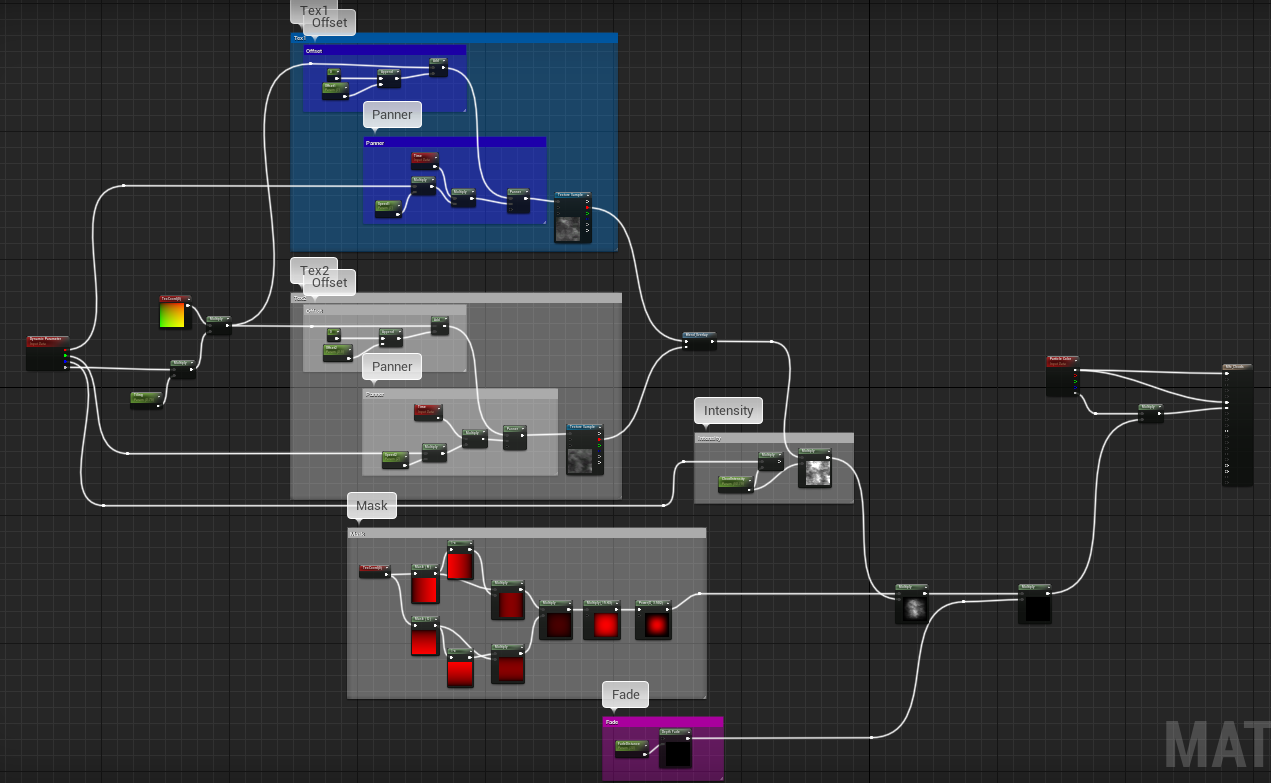
The material system for the fog cards.
The material on the fog cards consisted of a couple of copies of the same cloud texture with different tiling and offset parameter controls multiplied over each other and panning at different speeds. This would give the texture a volumetric "feel" when moving.
As seen in the material editor picture above, I used a dynamic parameter node to make the material communicate to Niagara and expose those parameters per Niagara system instance. That way I could have multiple types of fog card speeds and effects while only creating a single Niagara particle and have total art direction control when tweaking them while looking through the camera for the final shot.
It’s raining sprites! (Rain Niagara FX).
For the rain effect I created a basic material that would have its refraction and opacity controlled by a small texture. So in order to hand craft that texture I decided to use Substance 3D Designer. Substance Designer allows for quick and efficient iteration if, for any reason, I need to change anything in the source texture.
The progression of the Rain texture in Substance Designer.The water droplet material (left); The material system using the texture to control refraction.
The material interpolates between 1 (no refraction) and a custom refraction value. using the texture as an alpha. So whenever the texture is brighter it is less transparent and refracts more light and whenever the texture is darker it is more transparent and less refractive.
The rain would also be a Niagara system with the previously mentioned rain texture shader to control refraction faking the look of water particles falling.
The Rain particle emitter in Niagara.
Setting up the niagara with user parameters allowed to control the amount of rain drops being spawned per instance.
The lighting effects where generated from some real footage I got from “ActionVFX”. I tweaked some frames in photoshop to get a spritesheet to work with.
An example of the source footage and the resulting sprite sheet.
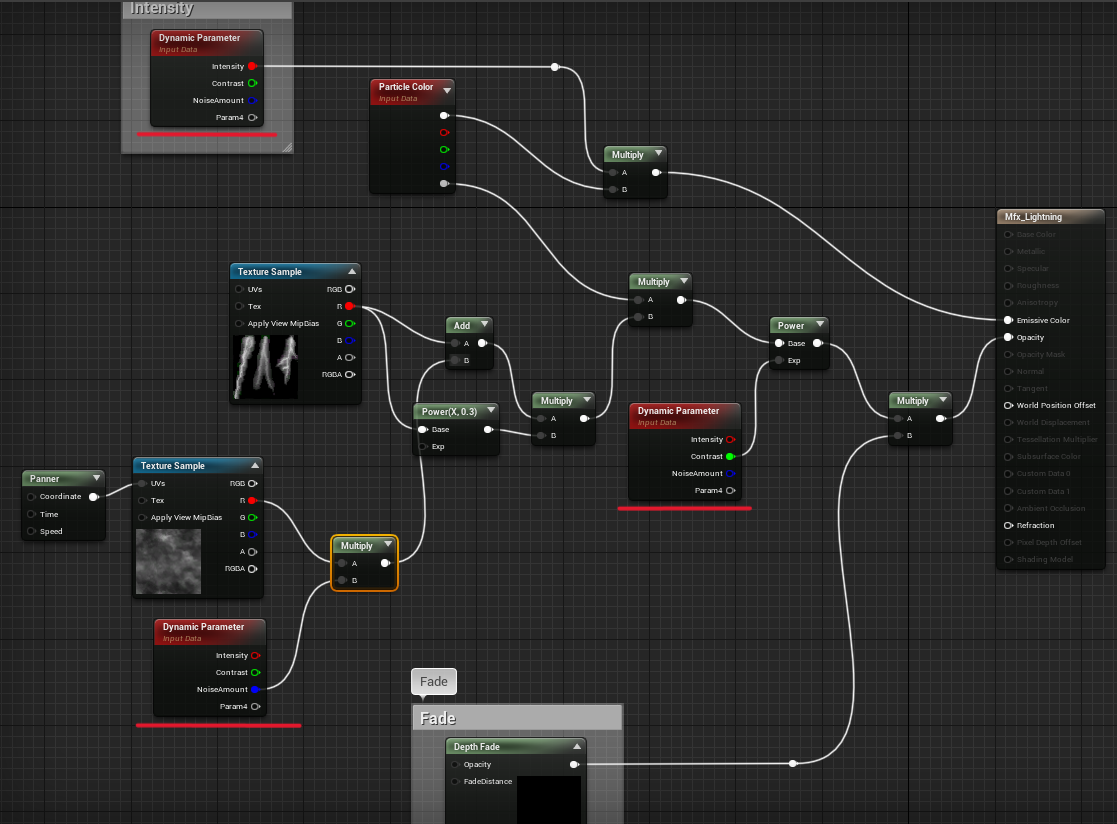
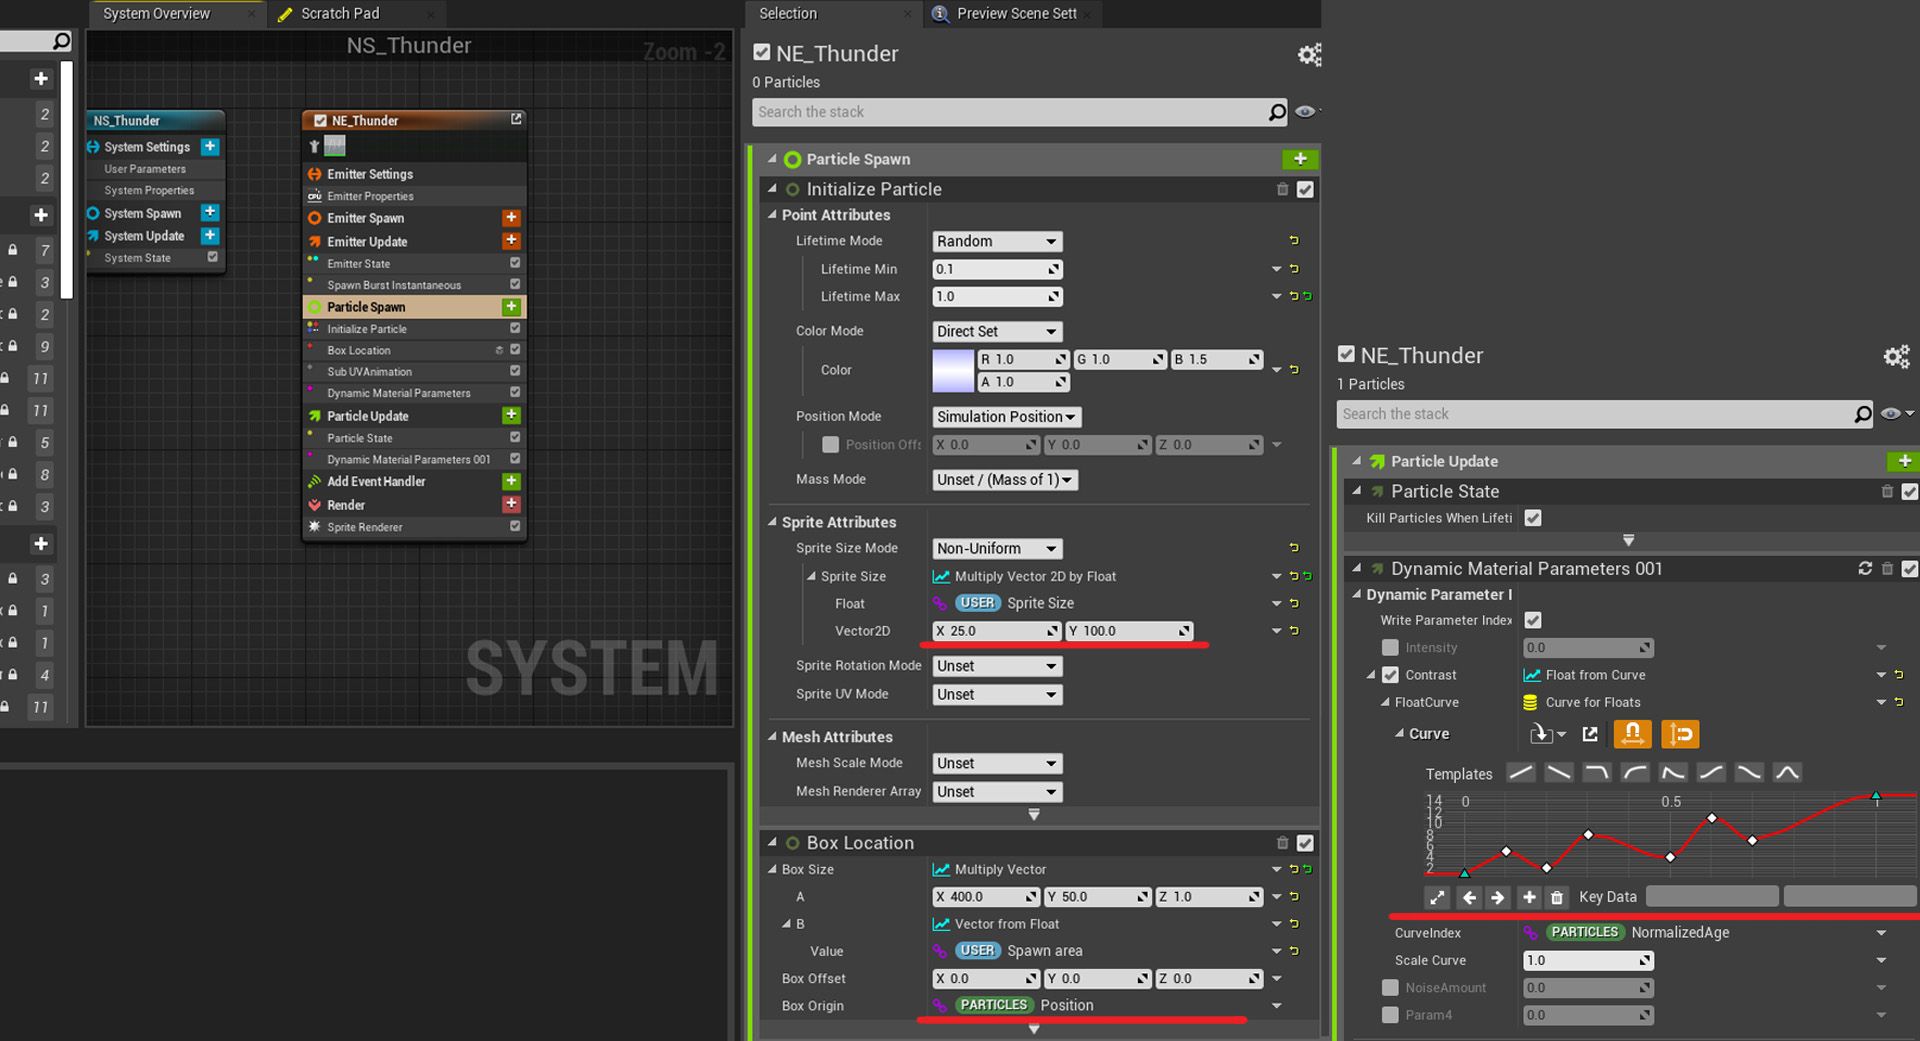
As per the fog card effect, I used dynamic parameters to have the shader communicate with the niagara particle system so I could have the spritesheet contrast, intensity and variation noise change along the particle's lifetime.
Breakdown of the Lightning material.
As mentioned above, the particle system itself, controls the contrast, opacity and intensity of the material as the particle is spawned and as it dies out.
Using Niagara to animate the dynamic parameters in the material to create the flashing effect.The final effect in the scene.
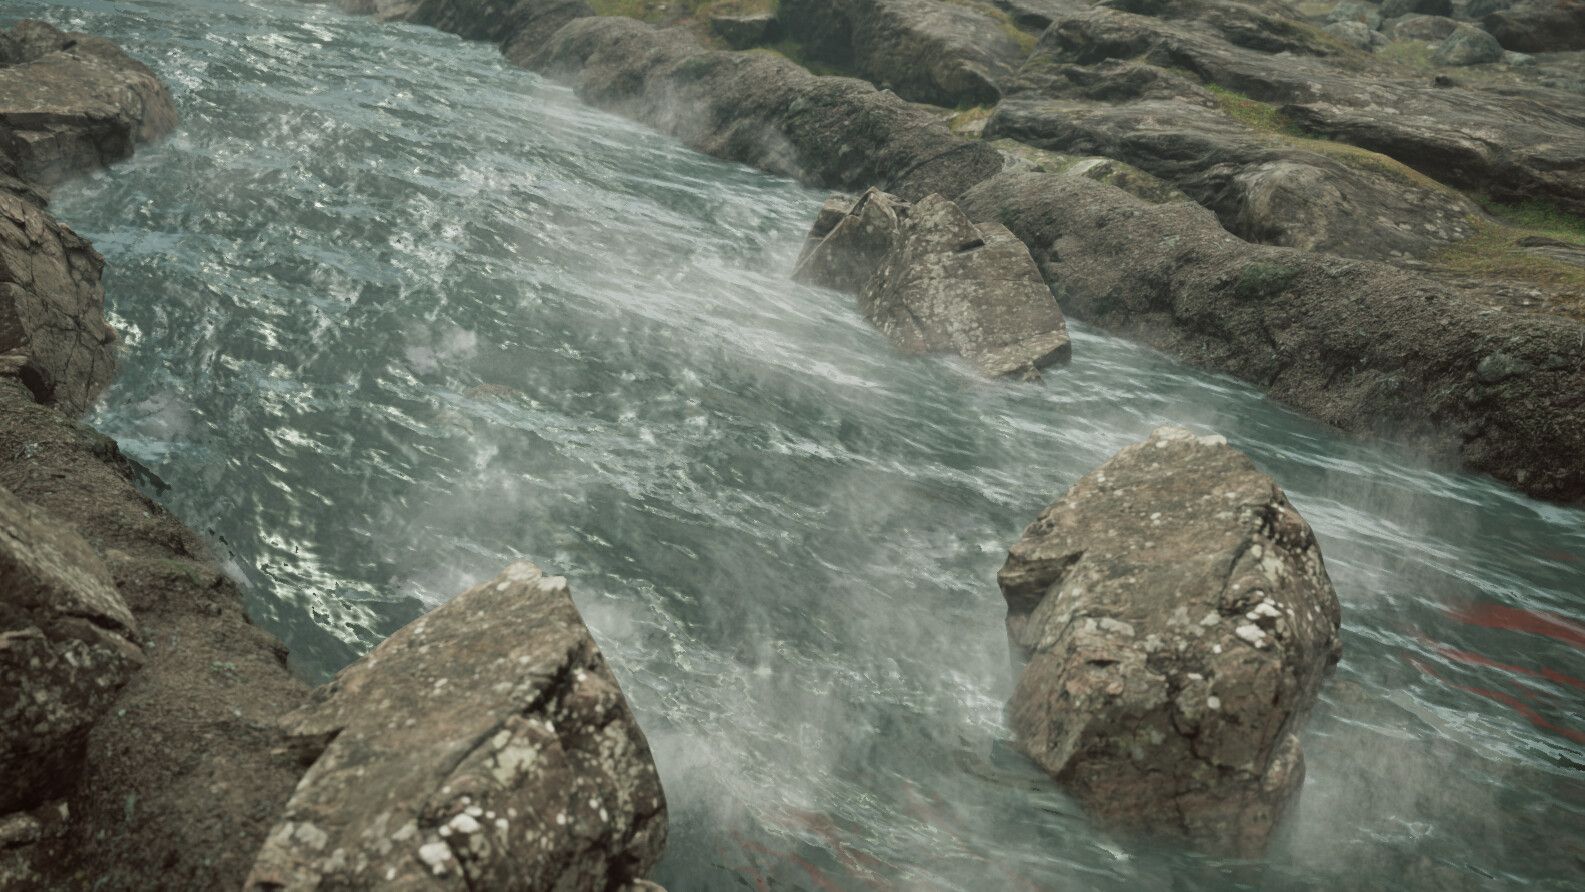
Glass half full. (Water shader effects)
Next, I moved on to the water material. I heard a while ago that you can tell the quality of a game’s visual fidelity by the water effect, since they can be the most tricky to pull off convincingly. And since this was a mix of a shader effect together with a couple of niagara systems I knew I had my work cut out for me.
The final effect in the scene.
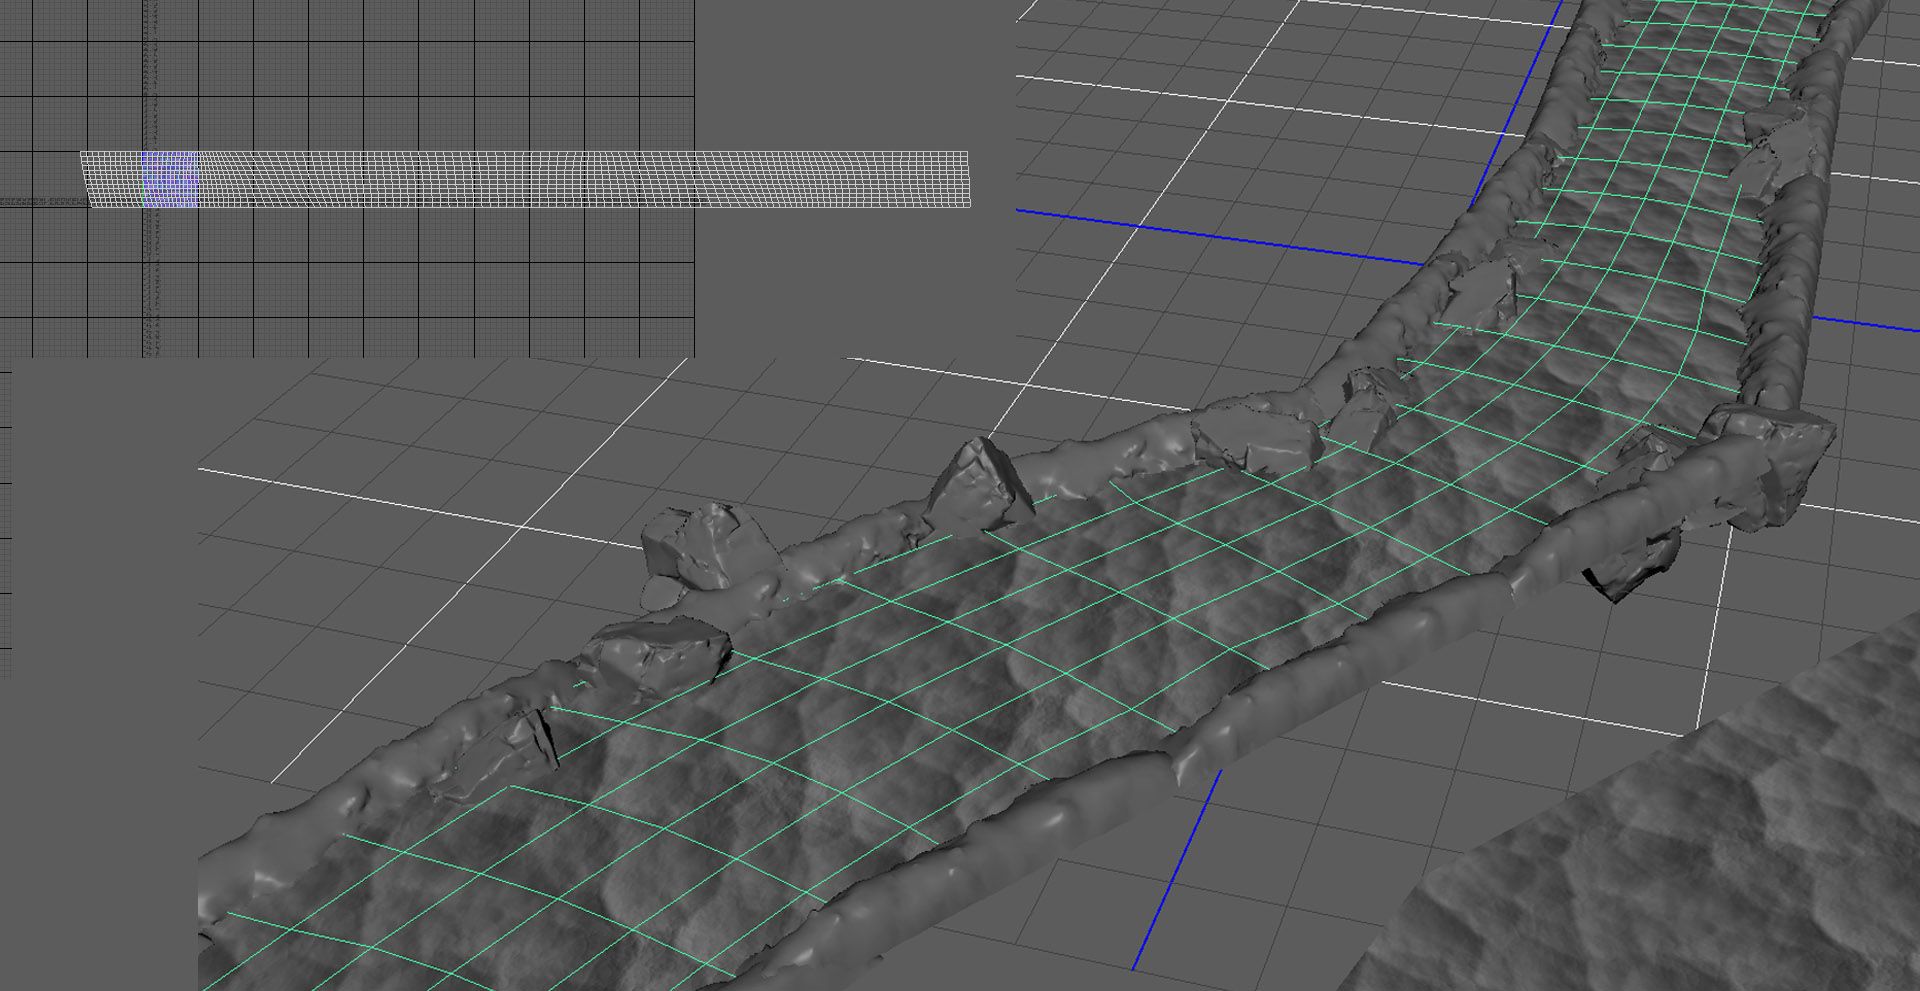
First I modeled a single plane that would go through the whole riverbank and then layed the uvs from left to right so I could generate a panner in the U coordinate, later in “Unreal”.
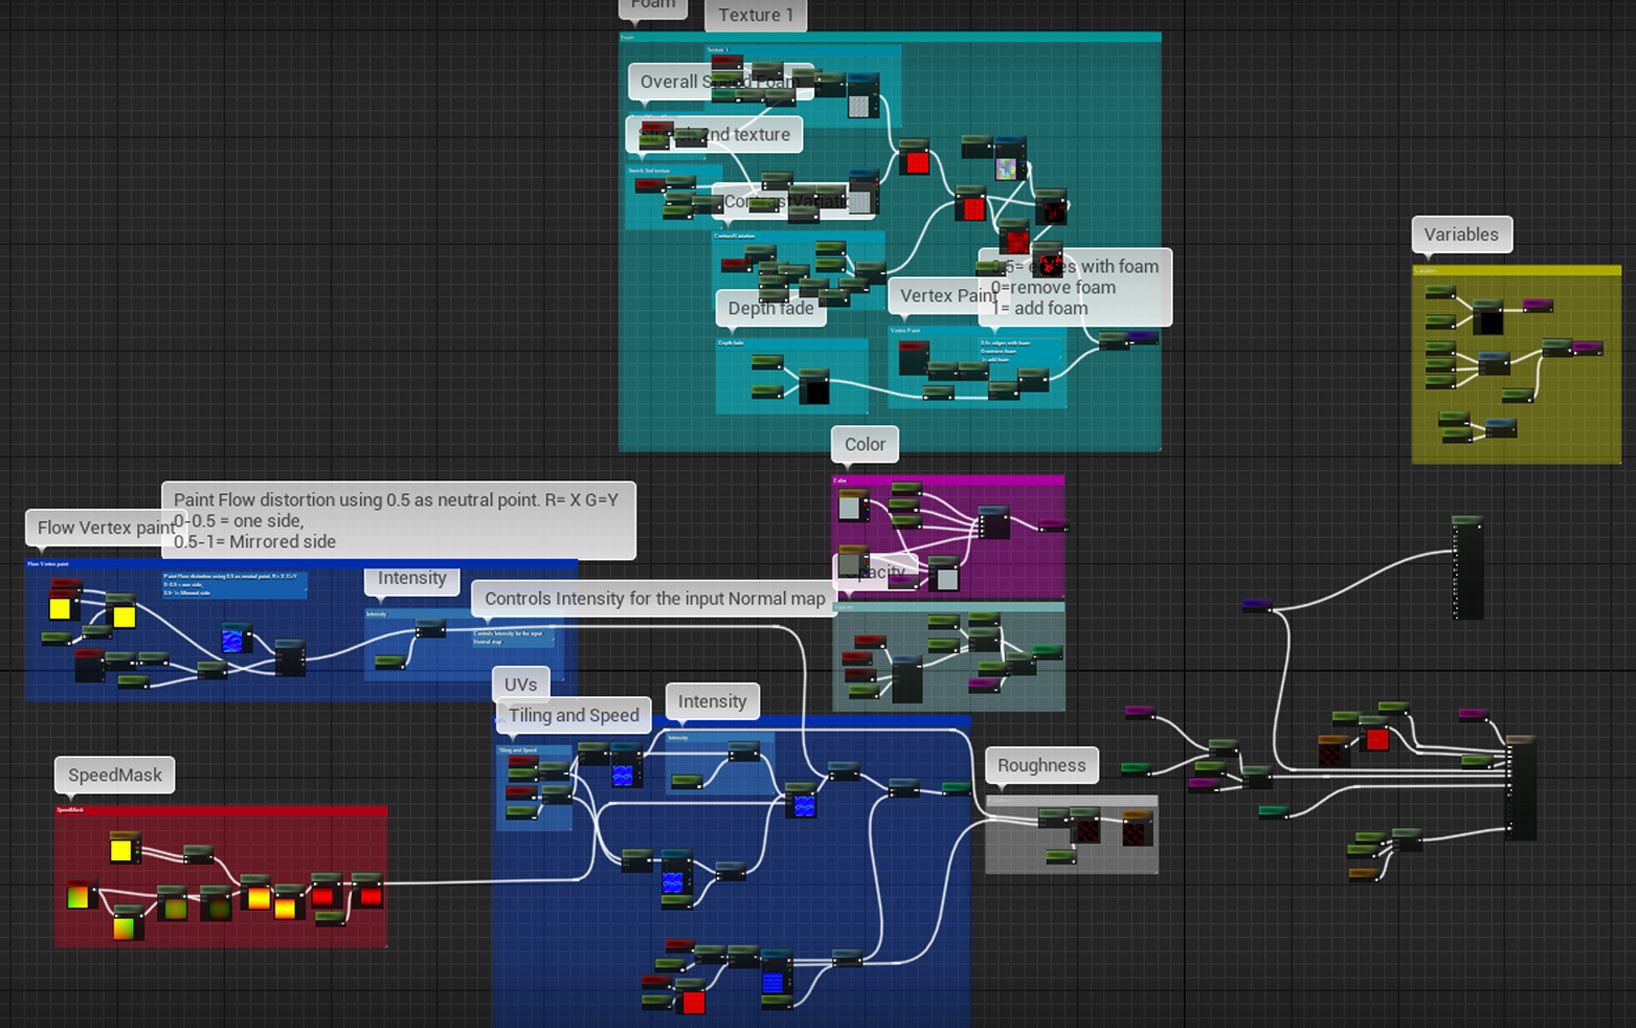
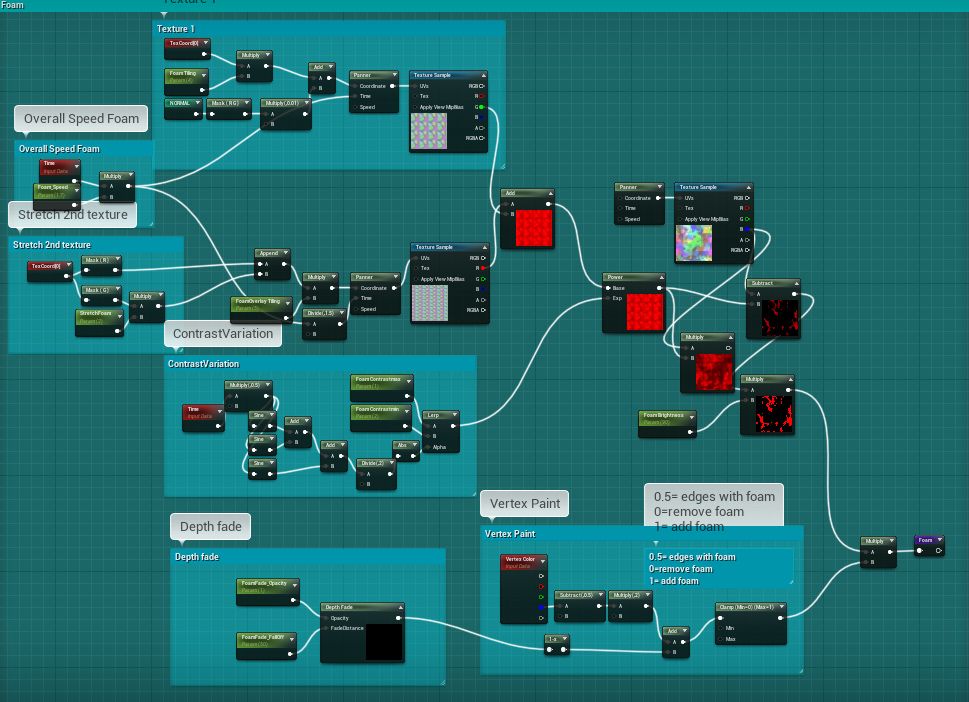
The mesh and UV layout laid out to pan the water texture along the river.Overall look at the water material.
You can see there’s a bunch of different systems at work in the material to make the water seem believable.
Things such as vertex painted controlled flow maps, vertex painted controls for foam, collision based foam, fake depth murkiness, small ripples and distortions, speed changes based on the distance from the river bank, etc….
The foundation of the whole effect consists in laying a normal map on top of itself with different speeds and tiling scales to give the effect of ripples and have a speed mask made directly in “Unreal” using the UVs so the water would run slower on the border of the riverbank and faster in the middle of the river, just like in real life.
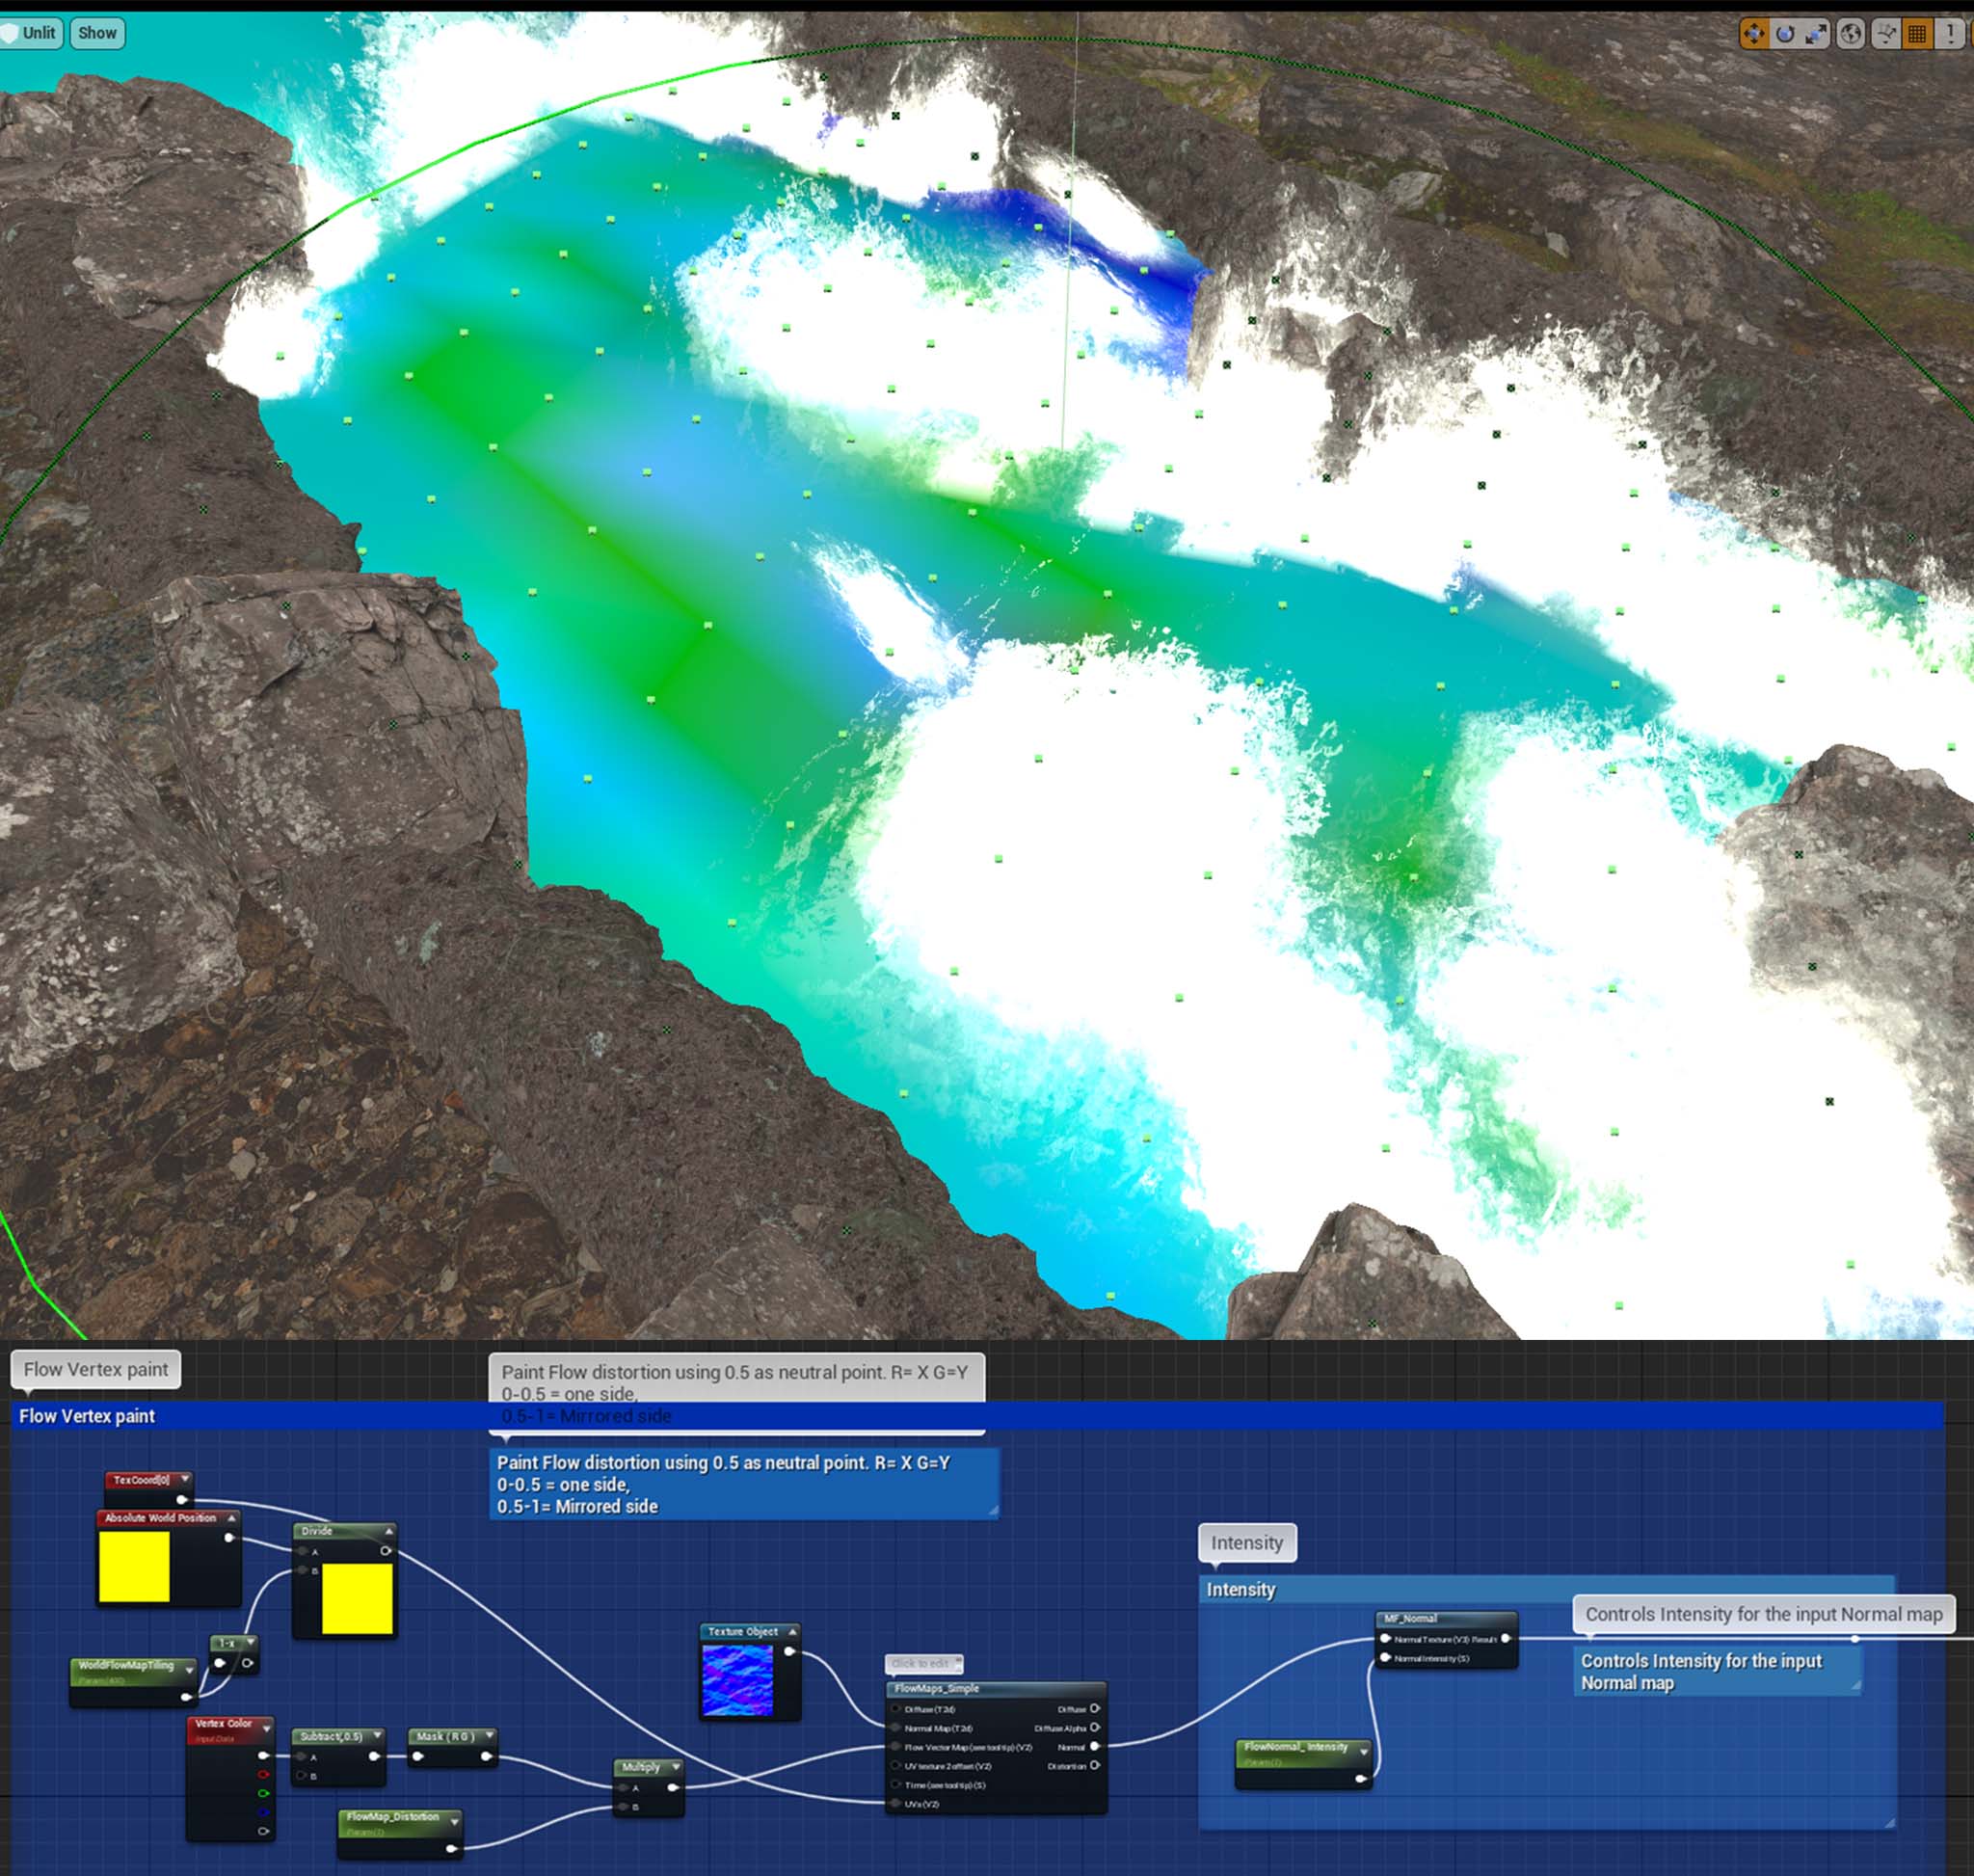
Flow map painting using Vertex color & the Flow map painting system in the material editor.
For the Flow maps I used the normal map texture and had the red and green channel vertex color control the direction of the distortion. By subtracting half a value I could distort the flow of the water from left to right on the green channel, for example. This would help convey the idea of the water flow going in slightly diferent directions as it hits the rocks or the river bank.
The foam system in the water material.The foam texture creation process in Substance Designer.
I created a foam node network that used ‘depth fade’ to control its opacity. That way if I changed the position of the rocks, for example, the foam would still generate around the rocks. Plus I added the blue channel of the vertex color to control the intensity of the foam so I could tweak where the foam would be more intense, and less intense around the rocks.
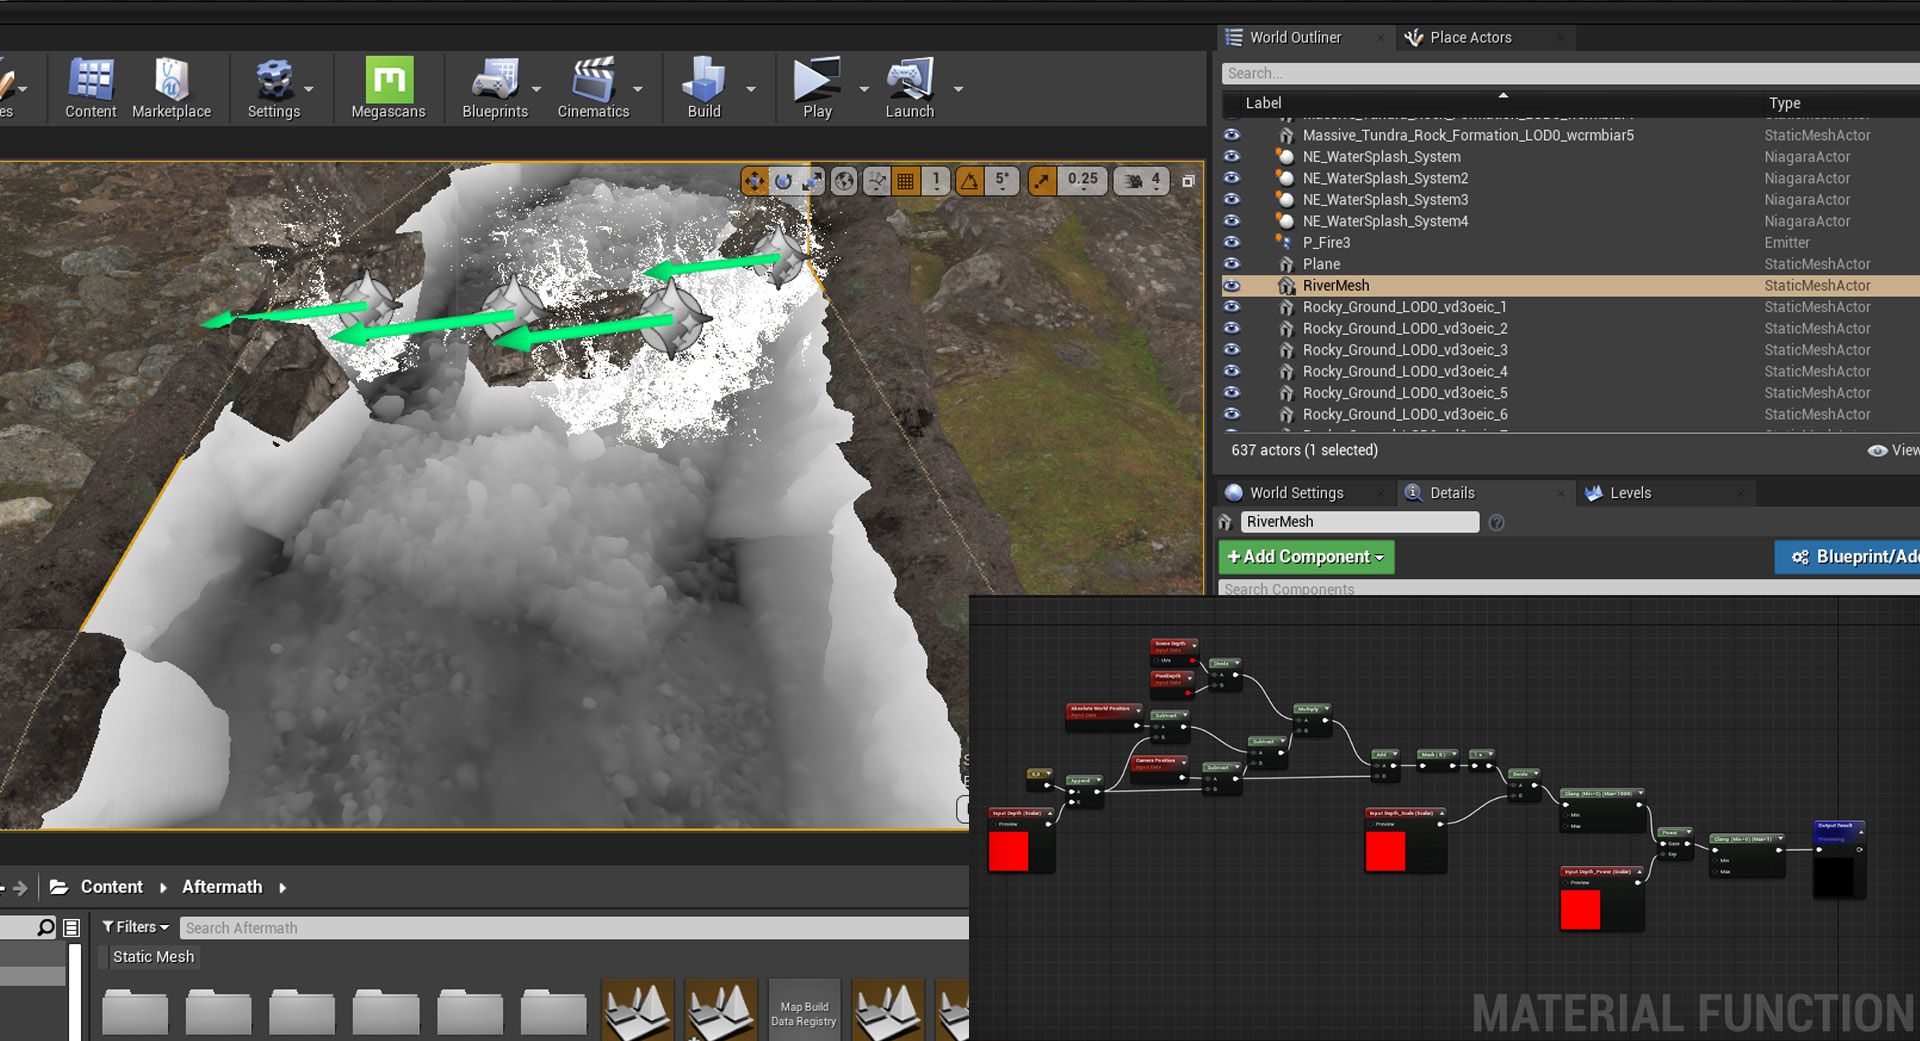
The fake murkiness function and its preview result in the editor.
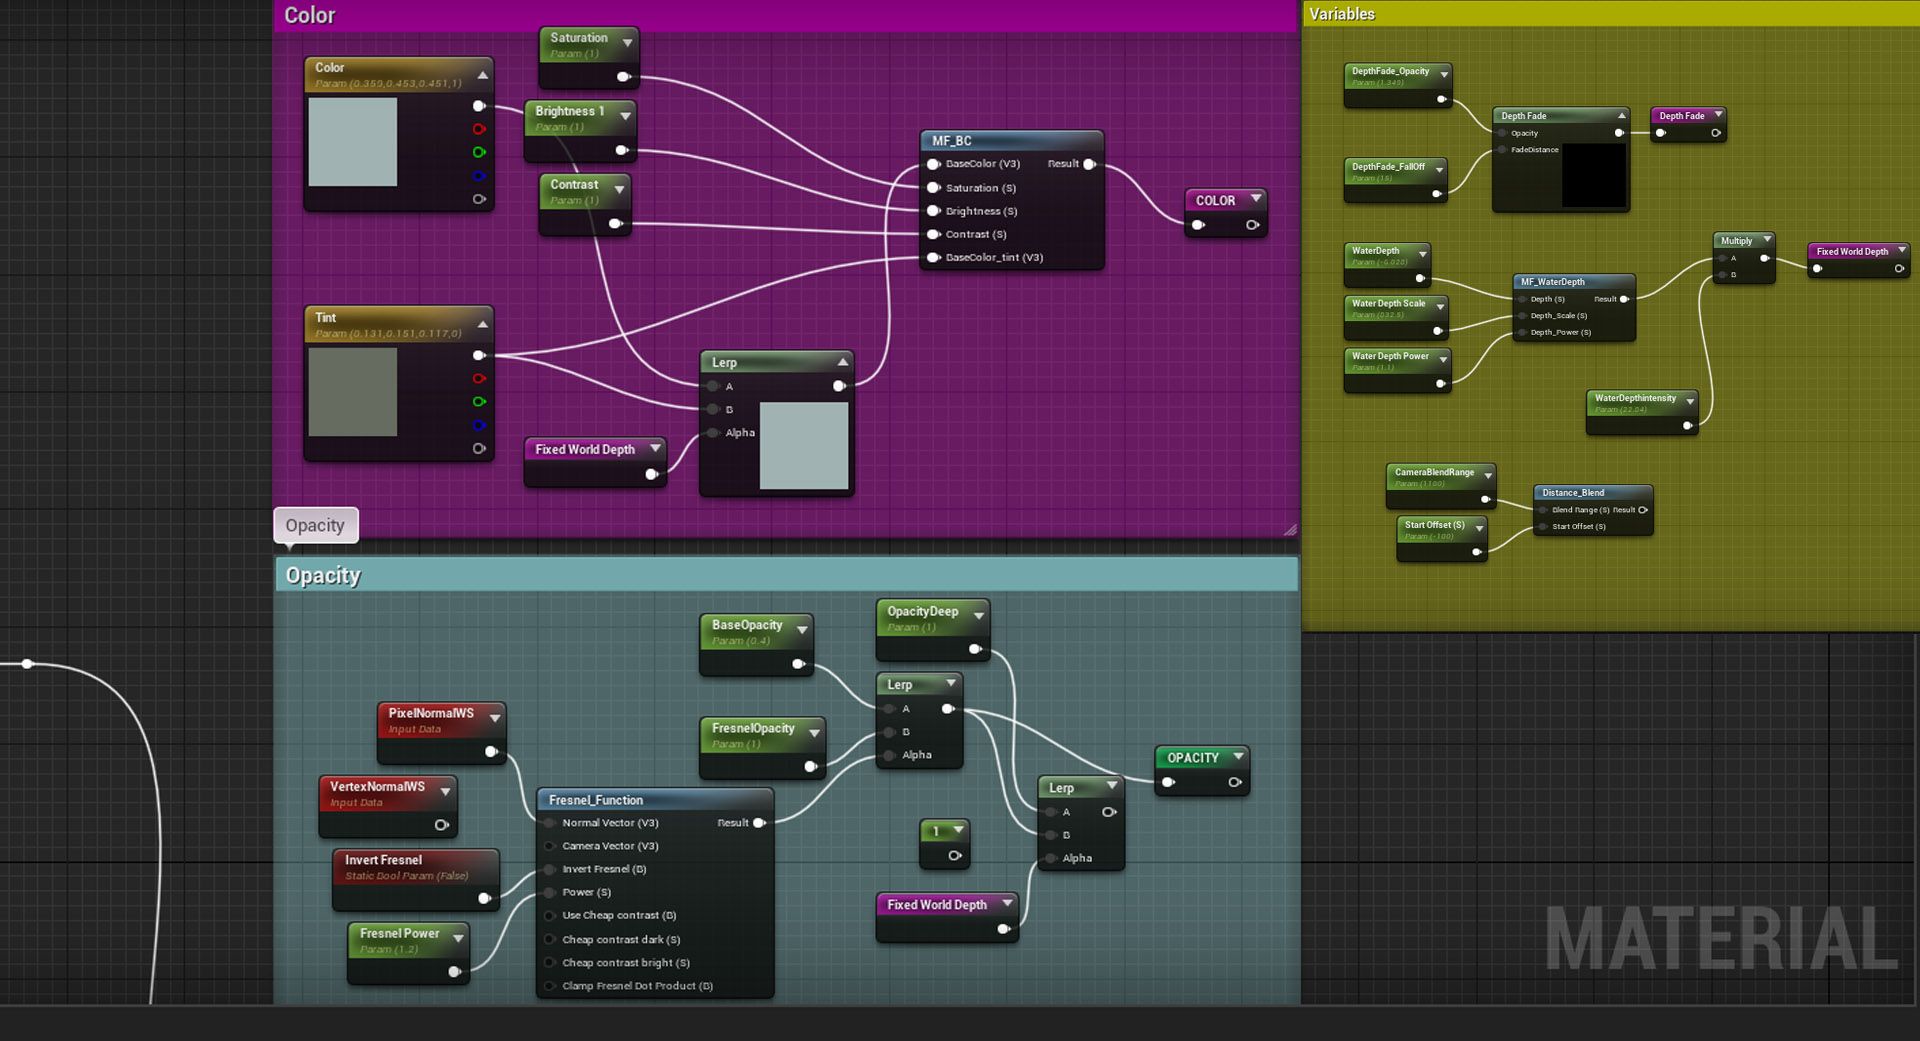
I built a fake murkiness system using what I like to call a ‘fixed world depth’. this would interpolate different colors and opacity values based on the distance between the water plane, the objects underneath it and render that effect on a per pixel basis related to the camera. The resulting effect gives the illusion of murkiness as it interpolates between two diferent colors based on the depth of the river.
The named reroutes for the fixed world depth. and its application to control color/ opacity interpolation.
I cleaned up my material by tying all my masks into named reroutes, that way I could plug those masks wherever I needed.
The Niagara splash effect.
I made this splash effect to add some “life” to the river. As with most of the effects in this project, I wanted to challenge myself to do something out of my comfort zone and with this effect I was trying to completely replace “photoshop” as a way to pack textures into layers with different ranges of grayscale values.
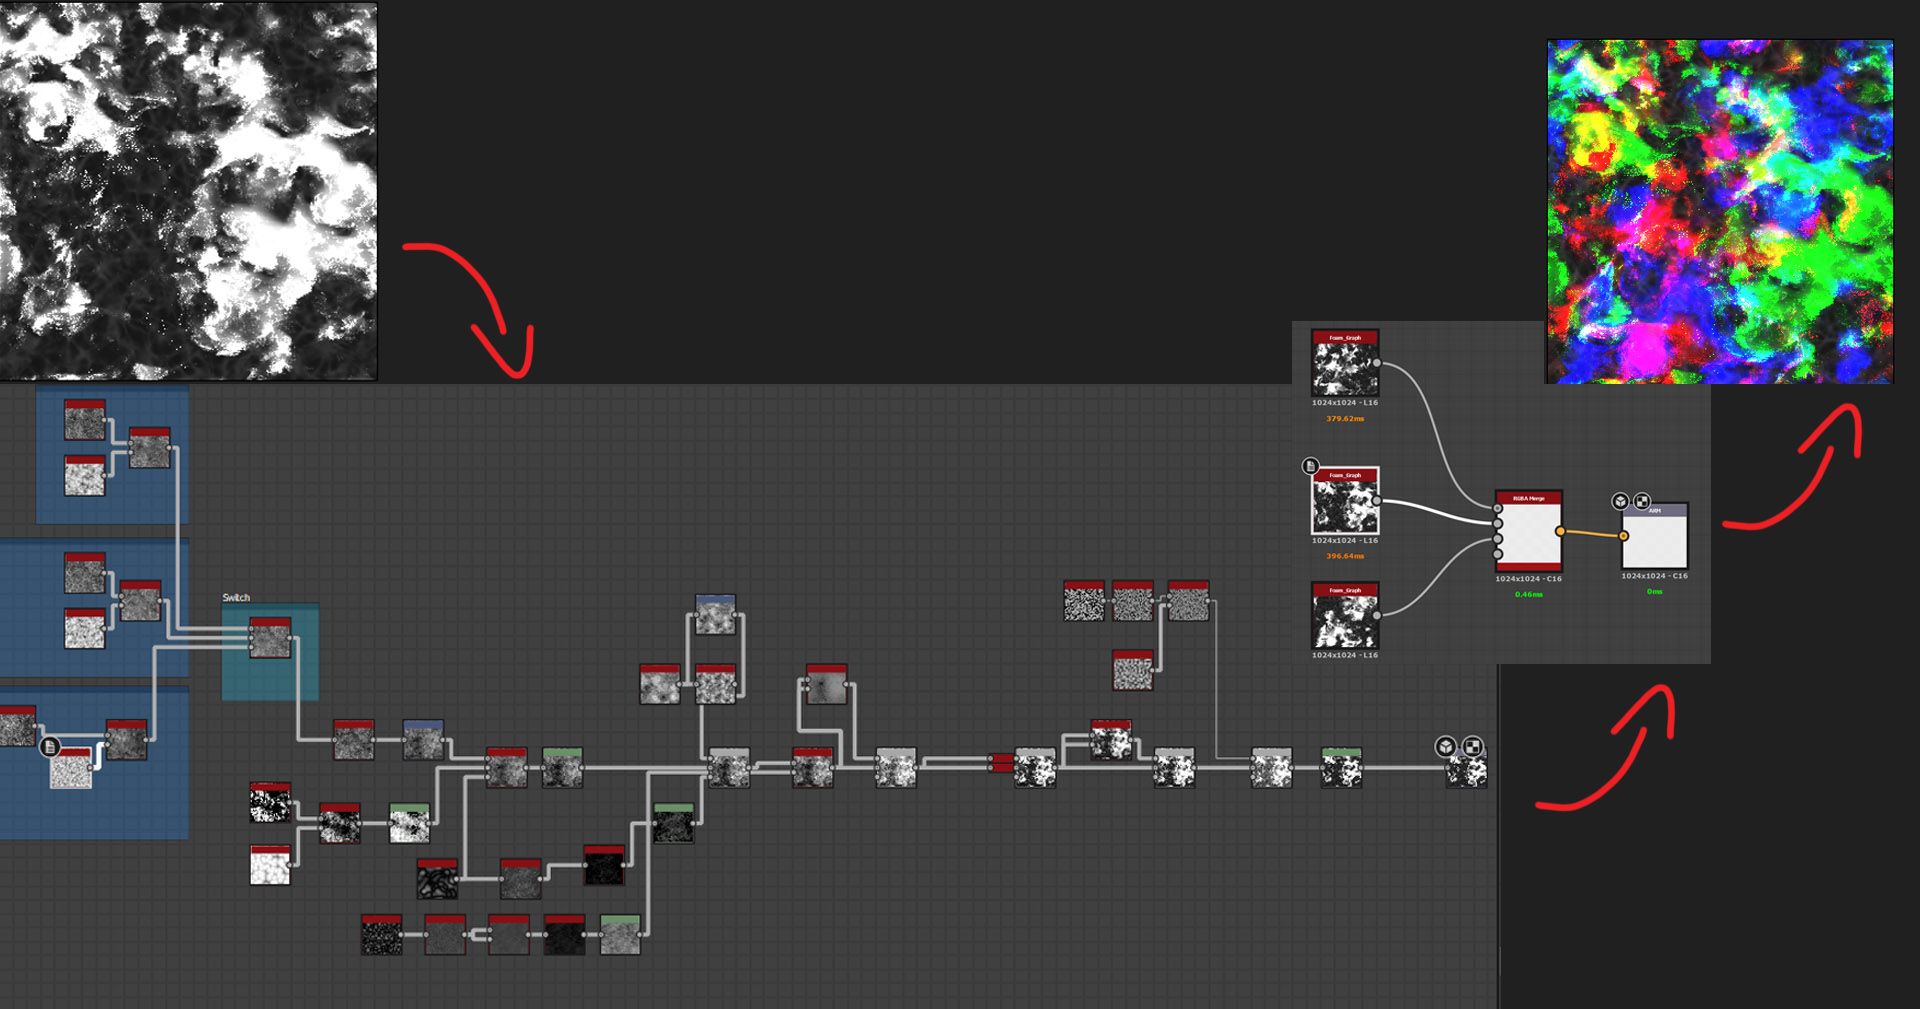
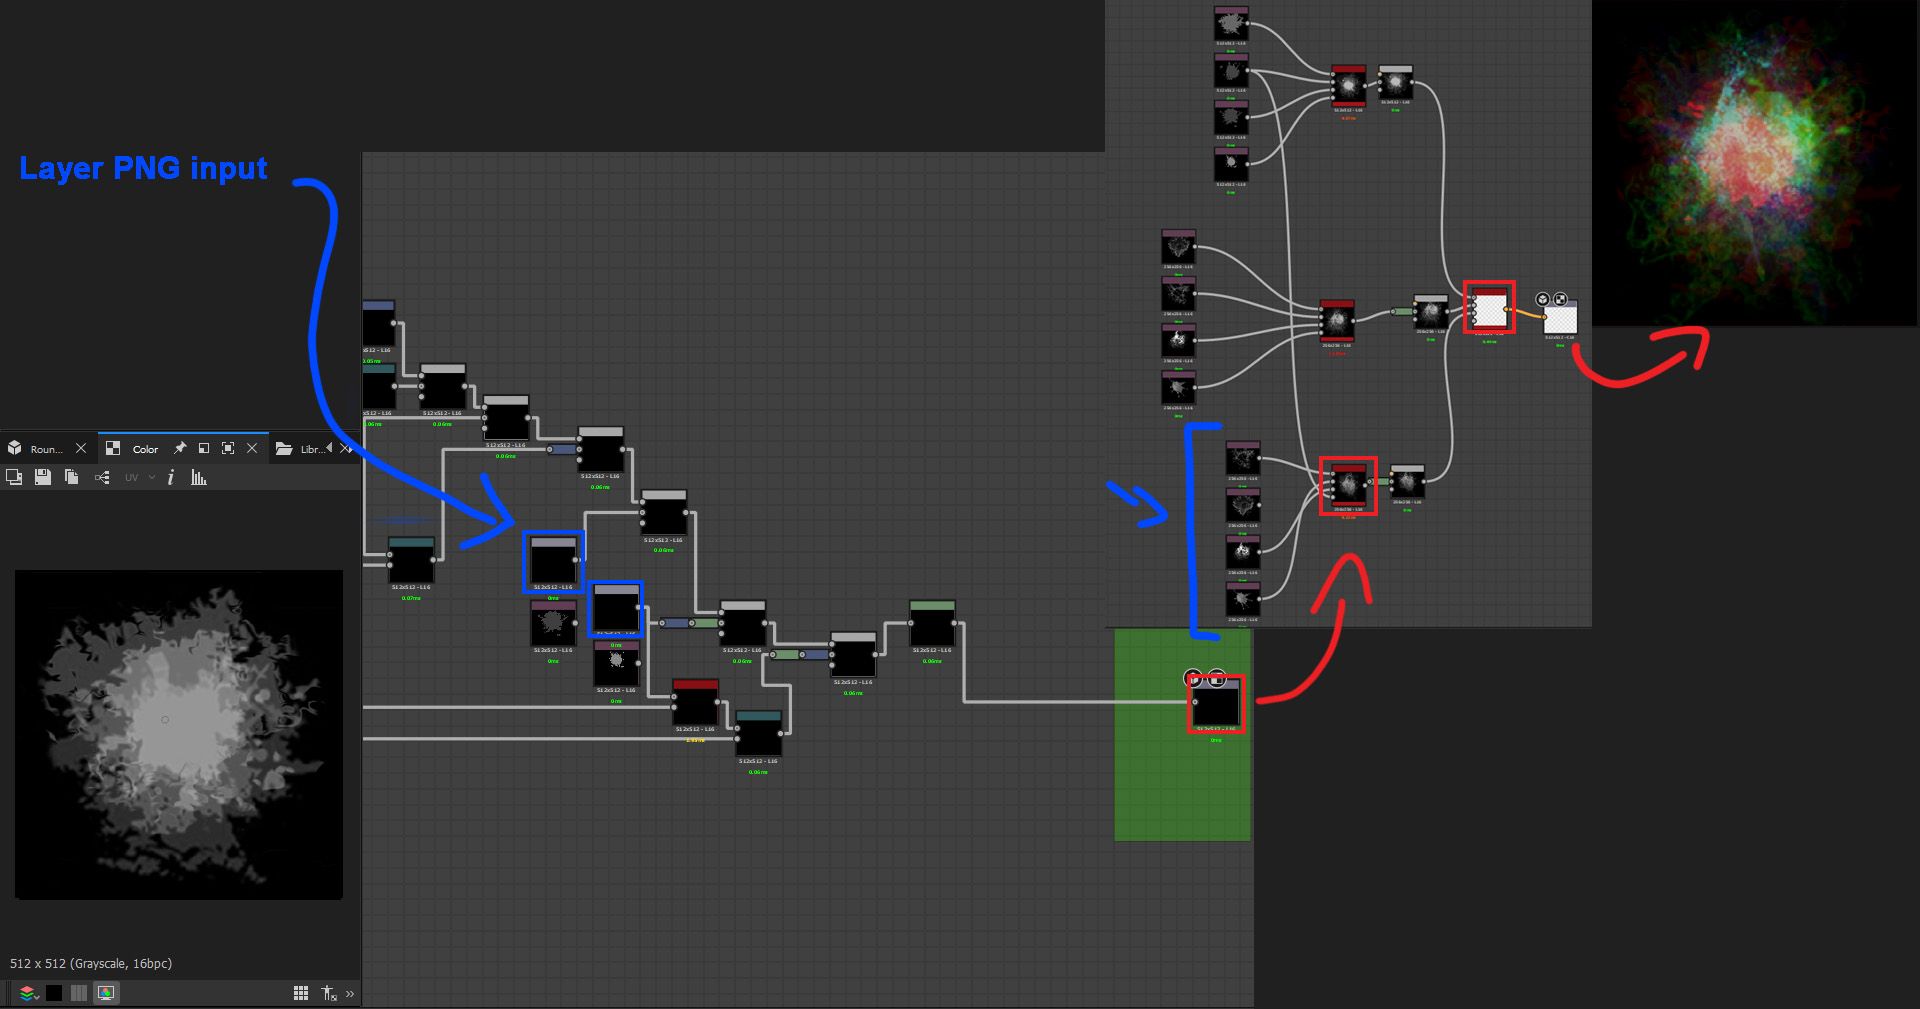
Using Substance Designer to distort and overlay 4 image inputs to achieve the splash texture result and using another graph to pack 3 variations into the 3 different RGB channels.
Using Substance Designer allowed me to just change a few nodes to achieve a completely different result and then pack the different variations into the 3 RGB channels automatically.
By having the image have a brighter center, I could use dynamic parameters to interpolate between two values of contrast using a lifetime parameter which would then be plugged into the actual particle’s life cycle. The particle would “appear” to grow from “inside out” and combining that with an opacity decay as the particle dies would make the splash animation would look seamless.
The material network for the splash effect and the shader animation which would be driven by the particle’s lifetime.
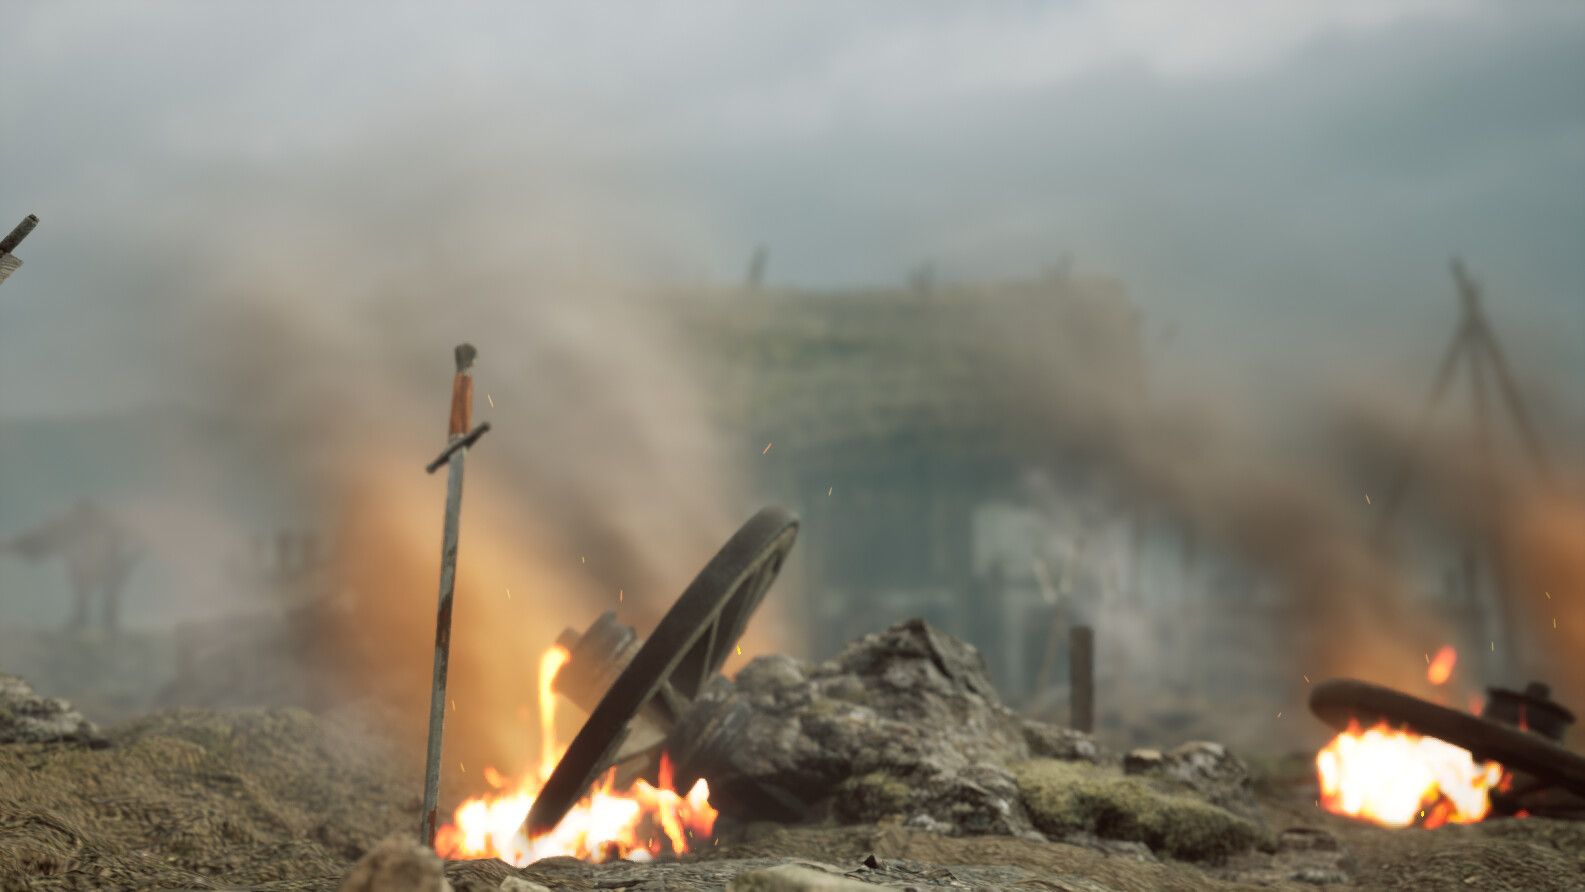
Lit! (Fire FX Baking simulations into a flipbook).
I decided to make some cool fire effects to challenge myself to give fluid simulations a go and also try my hand at making game-ready flipbooks effects.
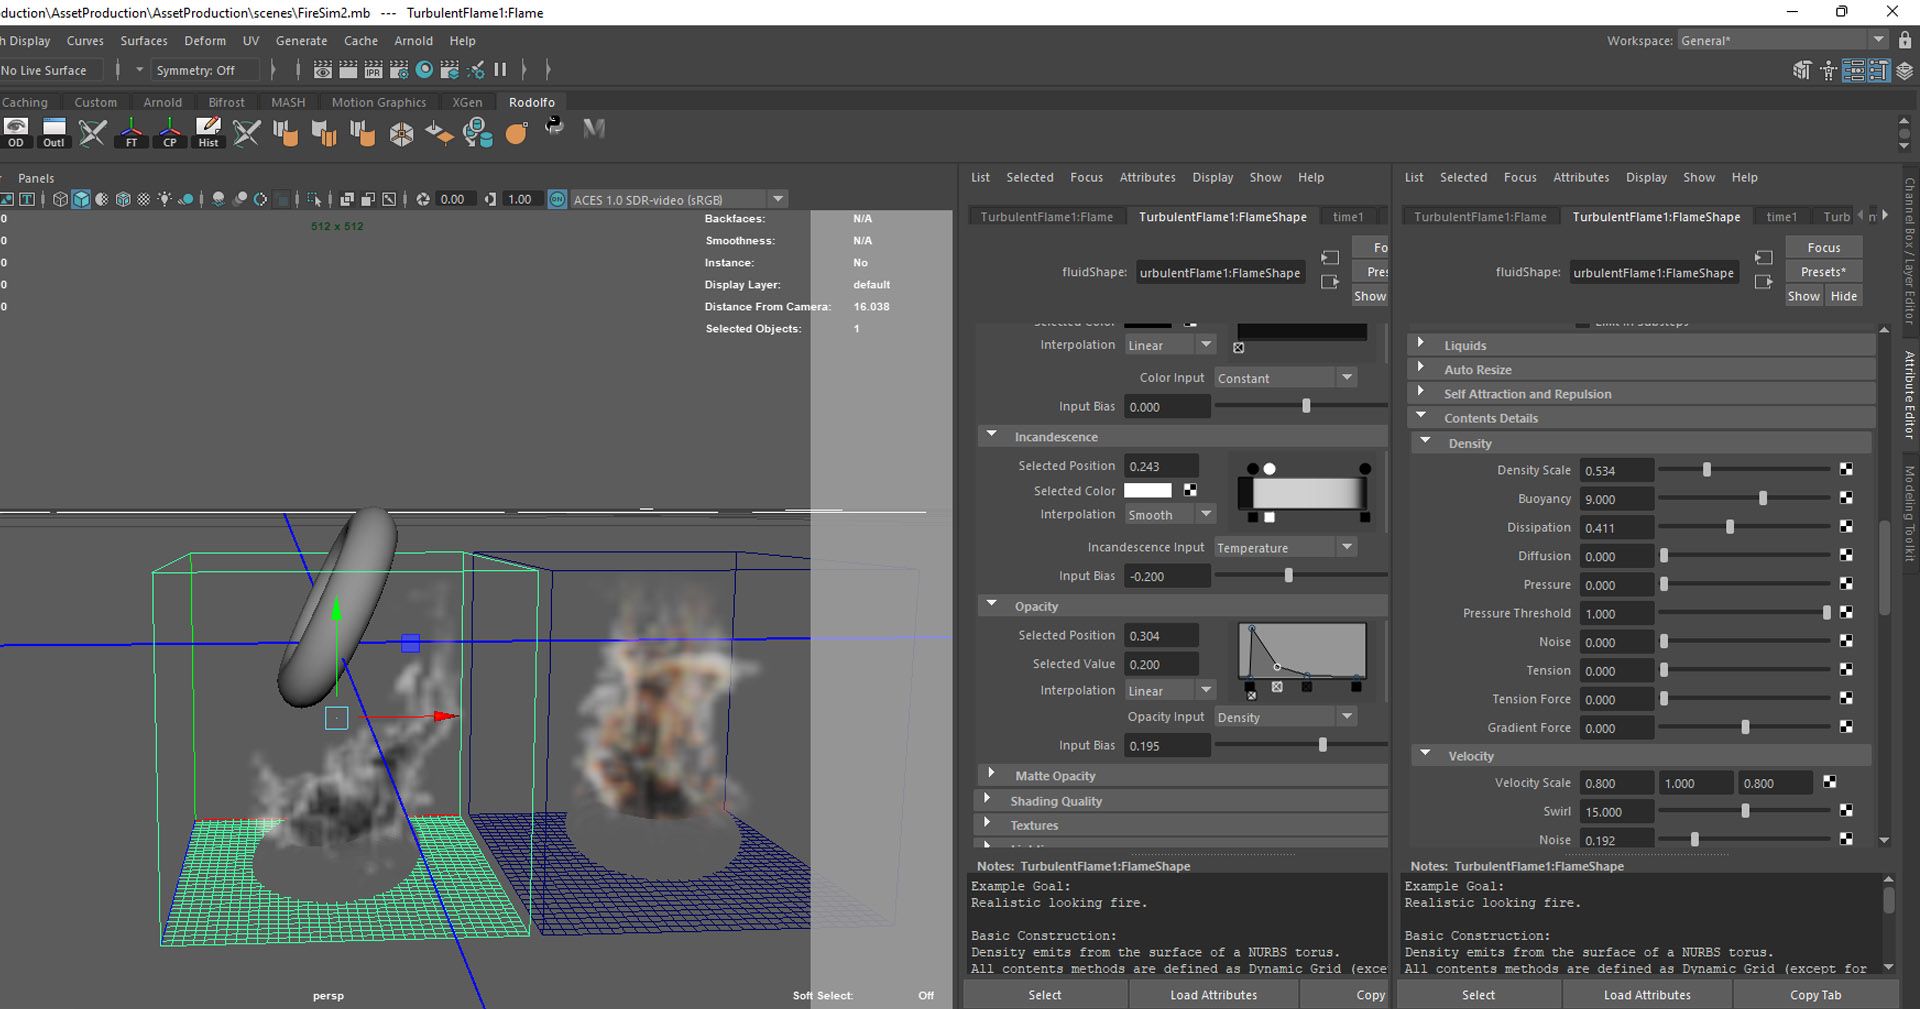
I made a fire simulation using ‘Maya fluids’ and rendered it as a grayscale 128 image sequence and then created the final flipbook in DaVinci Resolve by baking all the 128 images rendered out of Maya into a single image.
The Fire simulation in Maya & the flipbook assembly process in Resolve.
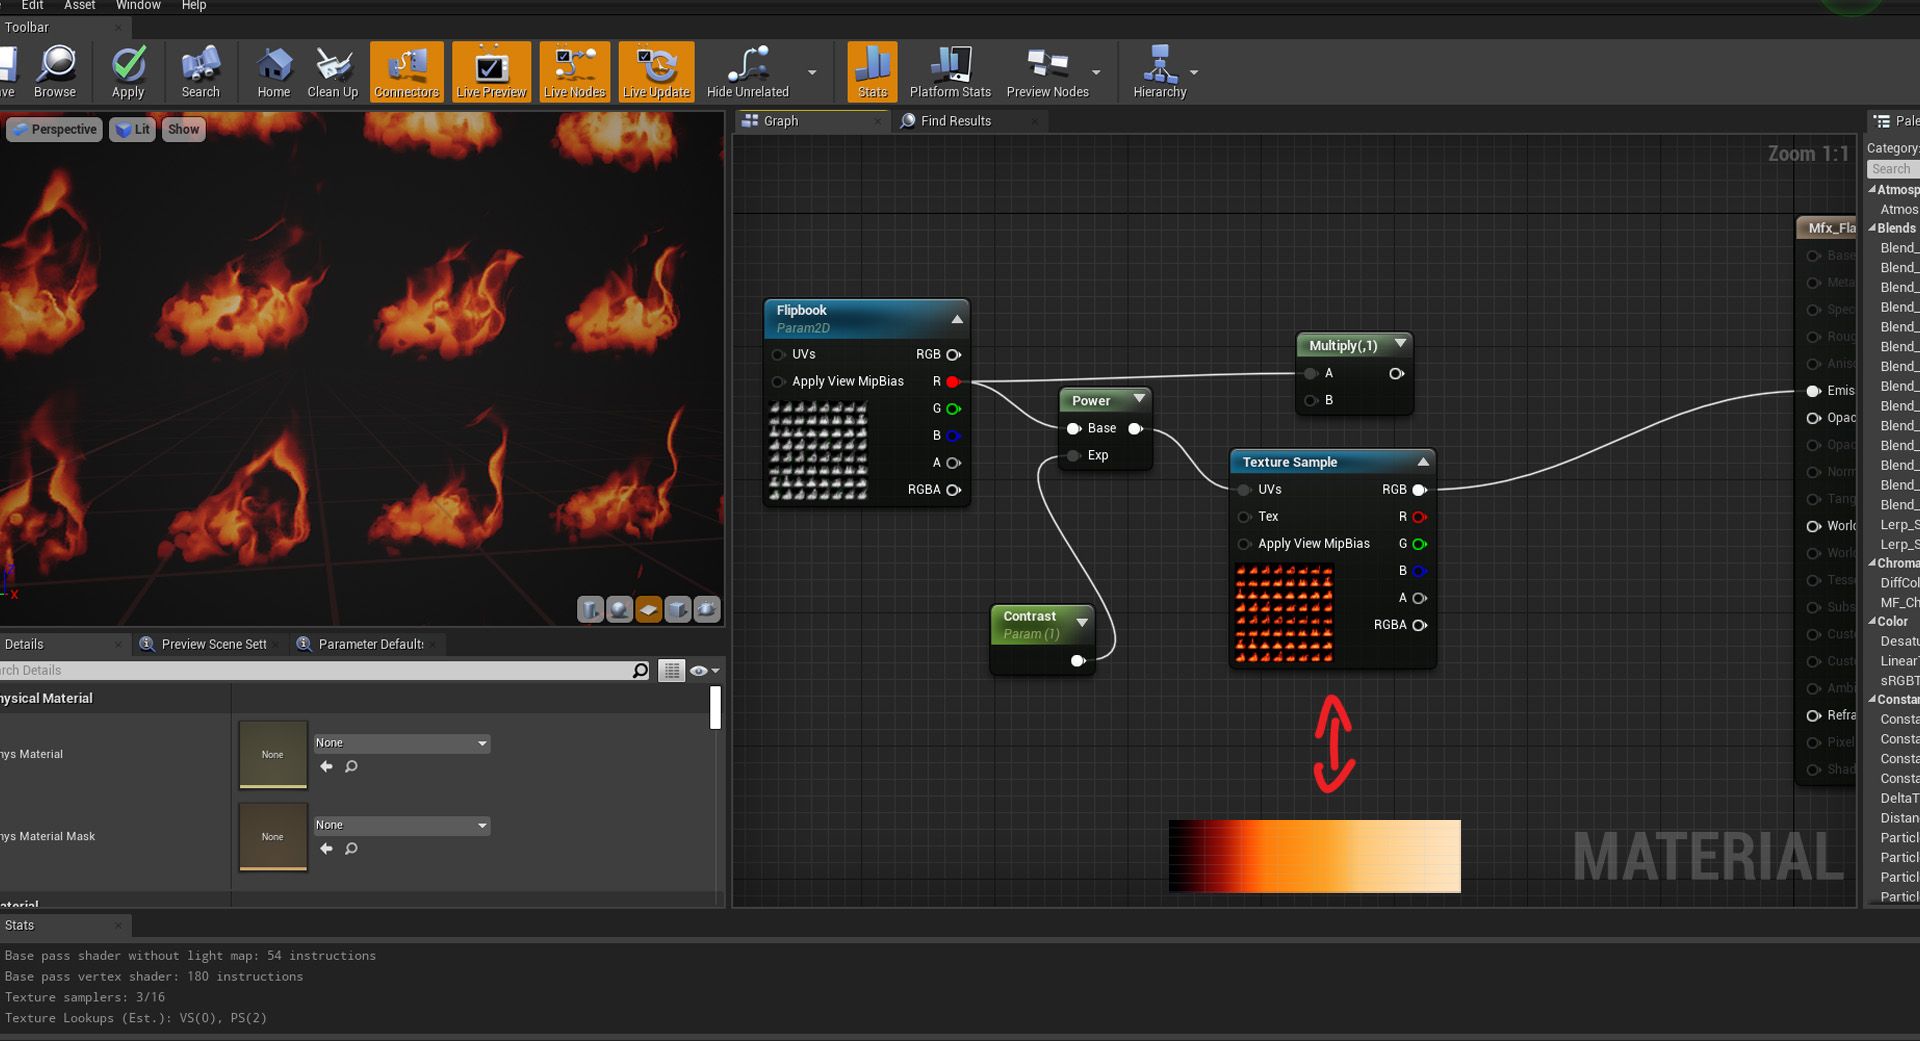
Similarly to the previous effects, I took full advantage of dynamic material parameters to control the emissive power of the flipbook texture and control the contrast.
Using a low res gradient map to control the colors allows to have variations while still preserving memory costs.
I used a low resolution gradient map to control the color of the flipbook which would allow me to create as many variations of colors by adding multiple ‘satmaps’. Since they are very low resolution, it means that it still costs less, memory-wise, than having multiple full resolution flip books at 4k resolution.
Setting the dynamic parameters and the system to allow particle level of control over the color and emissive outputs.
Besides setting the color via a gradient map by plugging in the flipbook to the UVS of the gradient map texture sample, I used a combination of dynamic parameters and the actual particle color node to allow for further tweaks to the color via the Niagara system.
The Fire simulation working in Niagara and tweaking the dynamic parameters.
The same workflow was used to create the torch effect for the night scene. But this time I simulated the Maya fluid effects around the low poly mesh of the torch model
For the torch effect I used the low poly torch mesh as a particle emitter in Maya to give the effect the illusion of wrapping around the mesh.
Flag coefficient. (cloth simulations for games).
Cloth simulations were made entirely in Maya and then imported as Alembic files into Unreal.
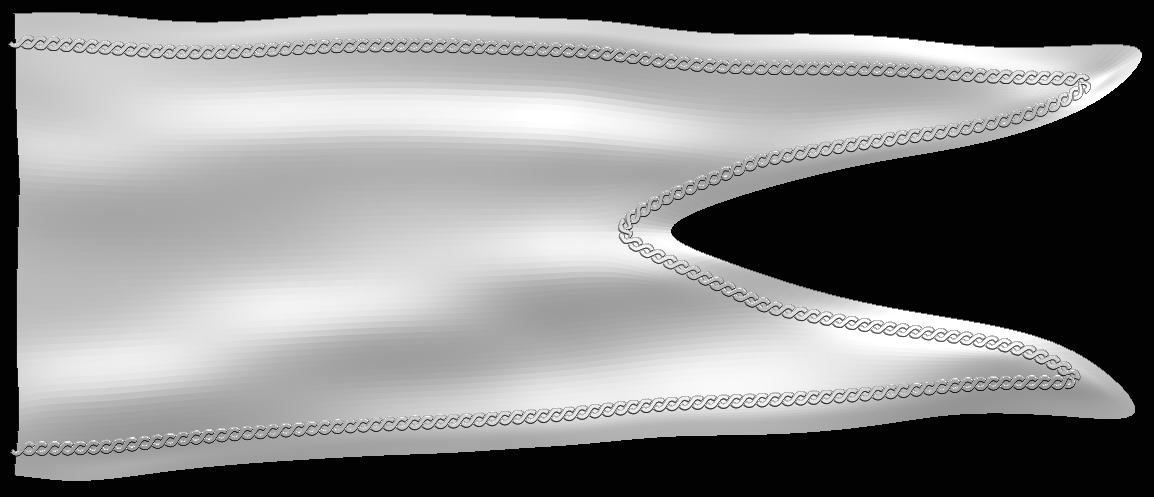
The banner flapping in the wind.
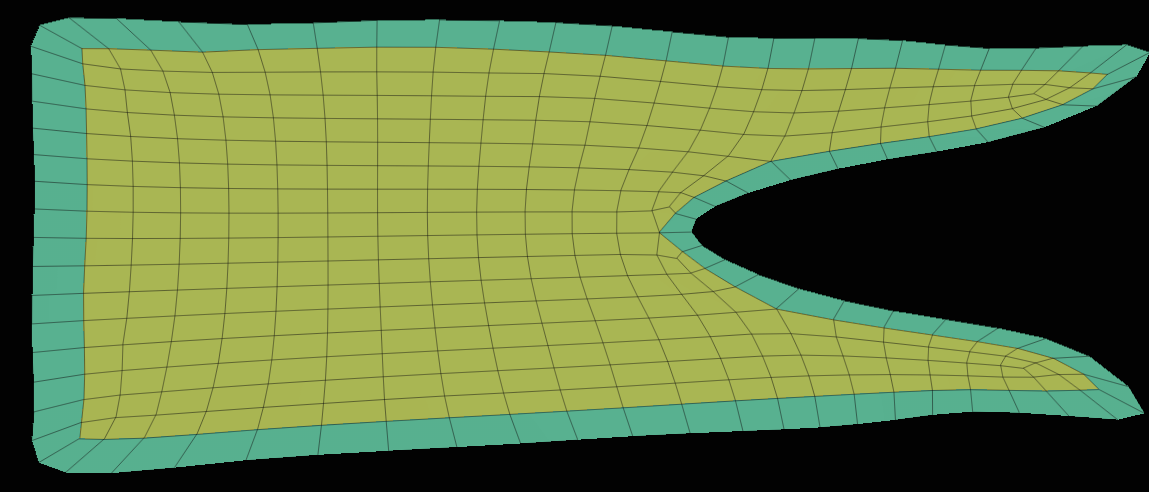
The flag model.
I modeled a simple banner, keeping in mind that the low poly needed to have fairly spaced quads and a slightly higher density on the tips.
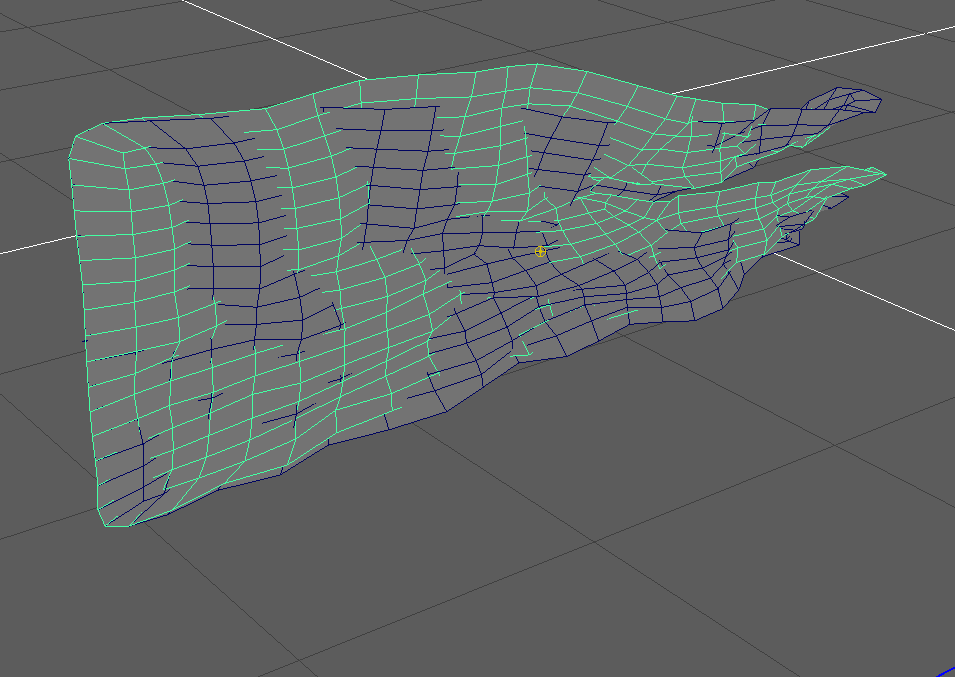
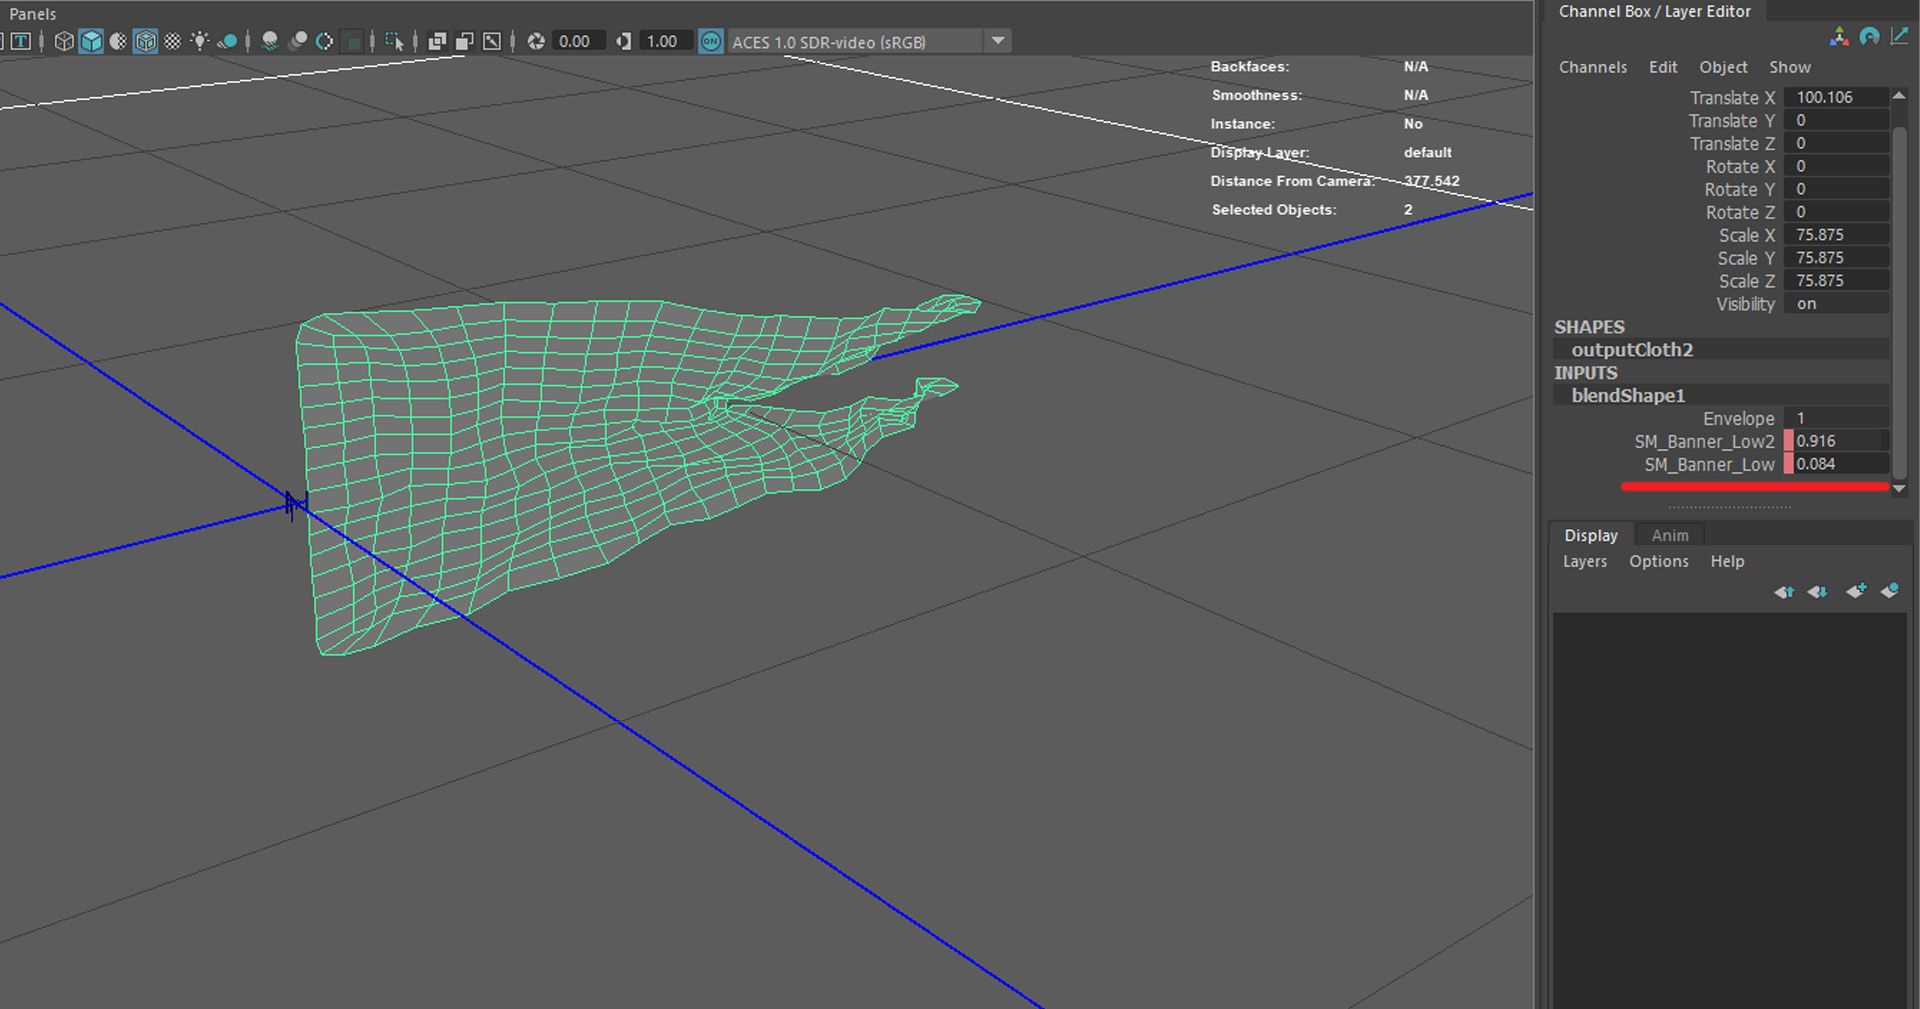
After generating a basic cloth simulation in Maya, I cached it and offset a copy of the same model. I used both of those copies as blendshapes to deform the final low poly mesh and blended them in a way to hide the loop cut, in order to make the animation loop seamless.
The animation copies and the blendshape animations.
The animated Banner was then imported into Unreal as an alembic file skeletal mesh.
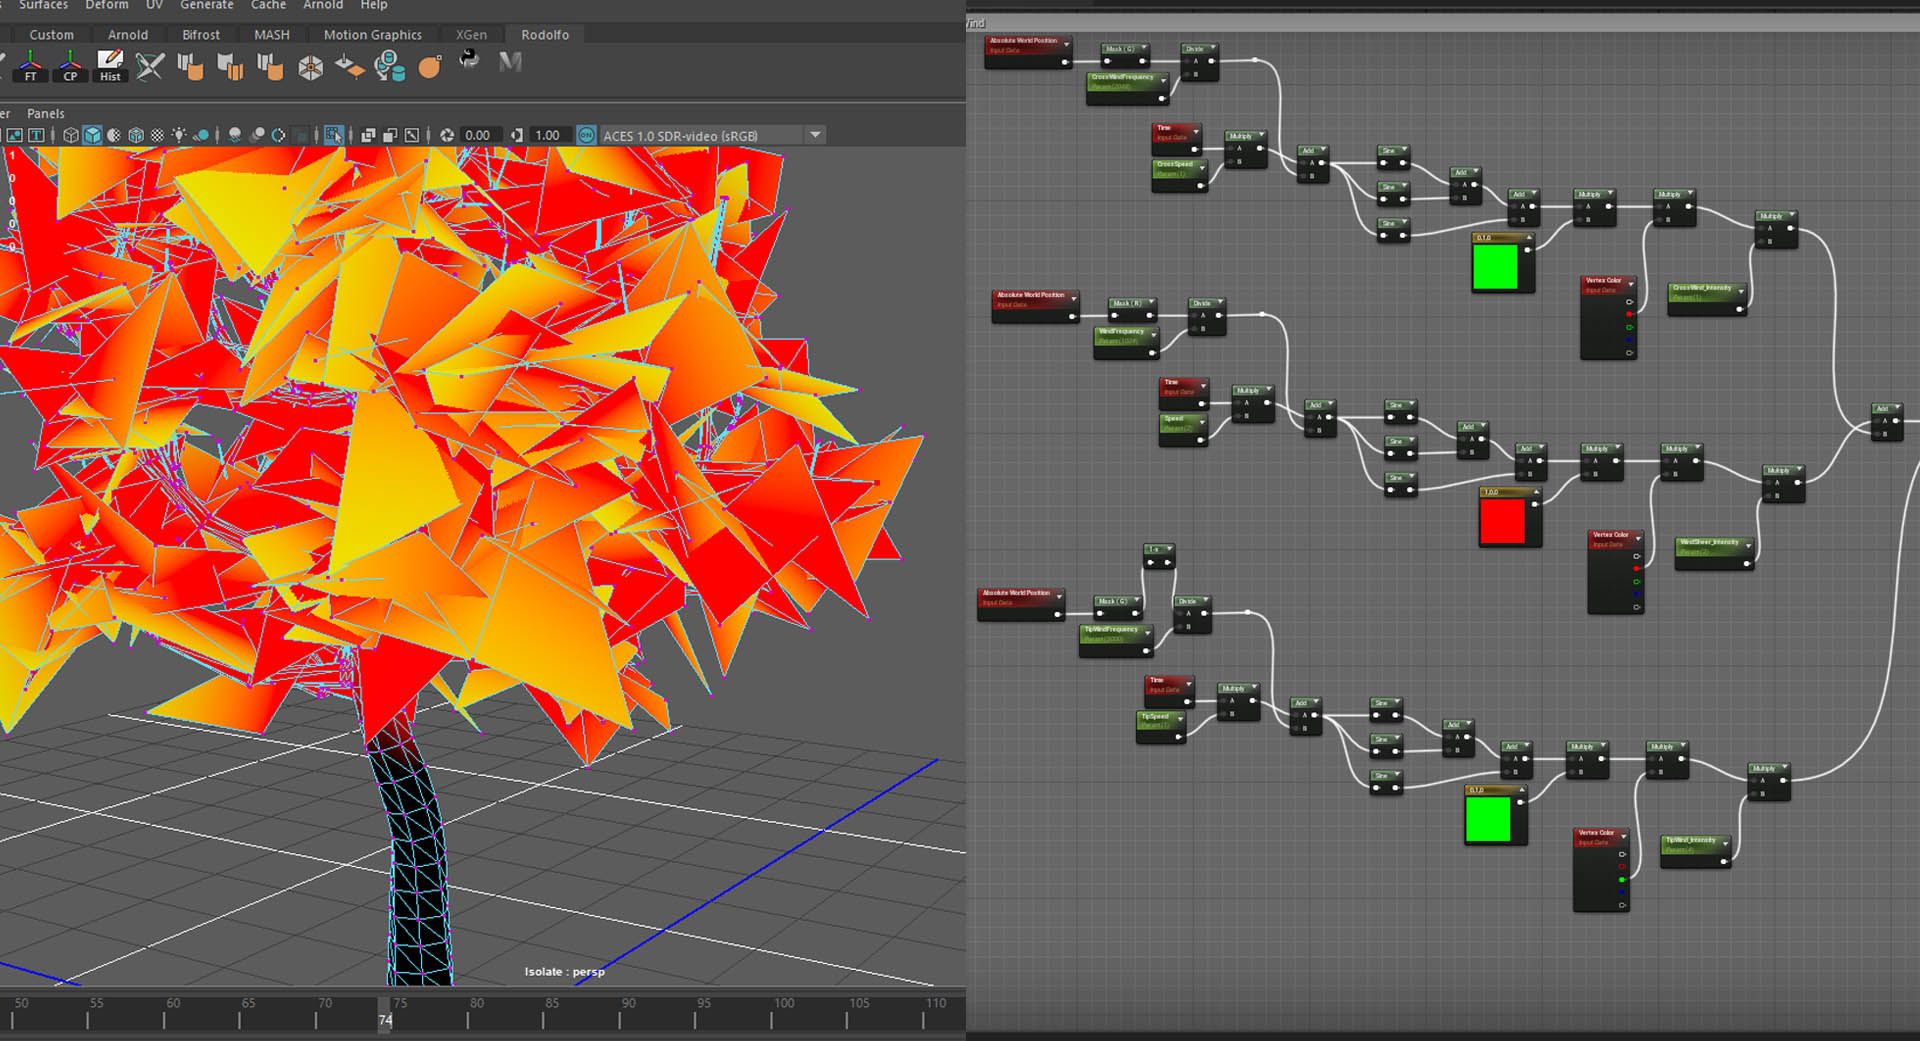
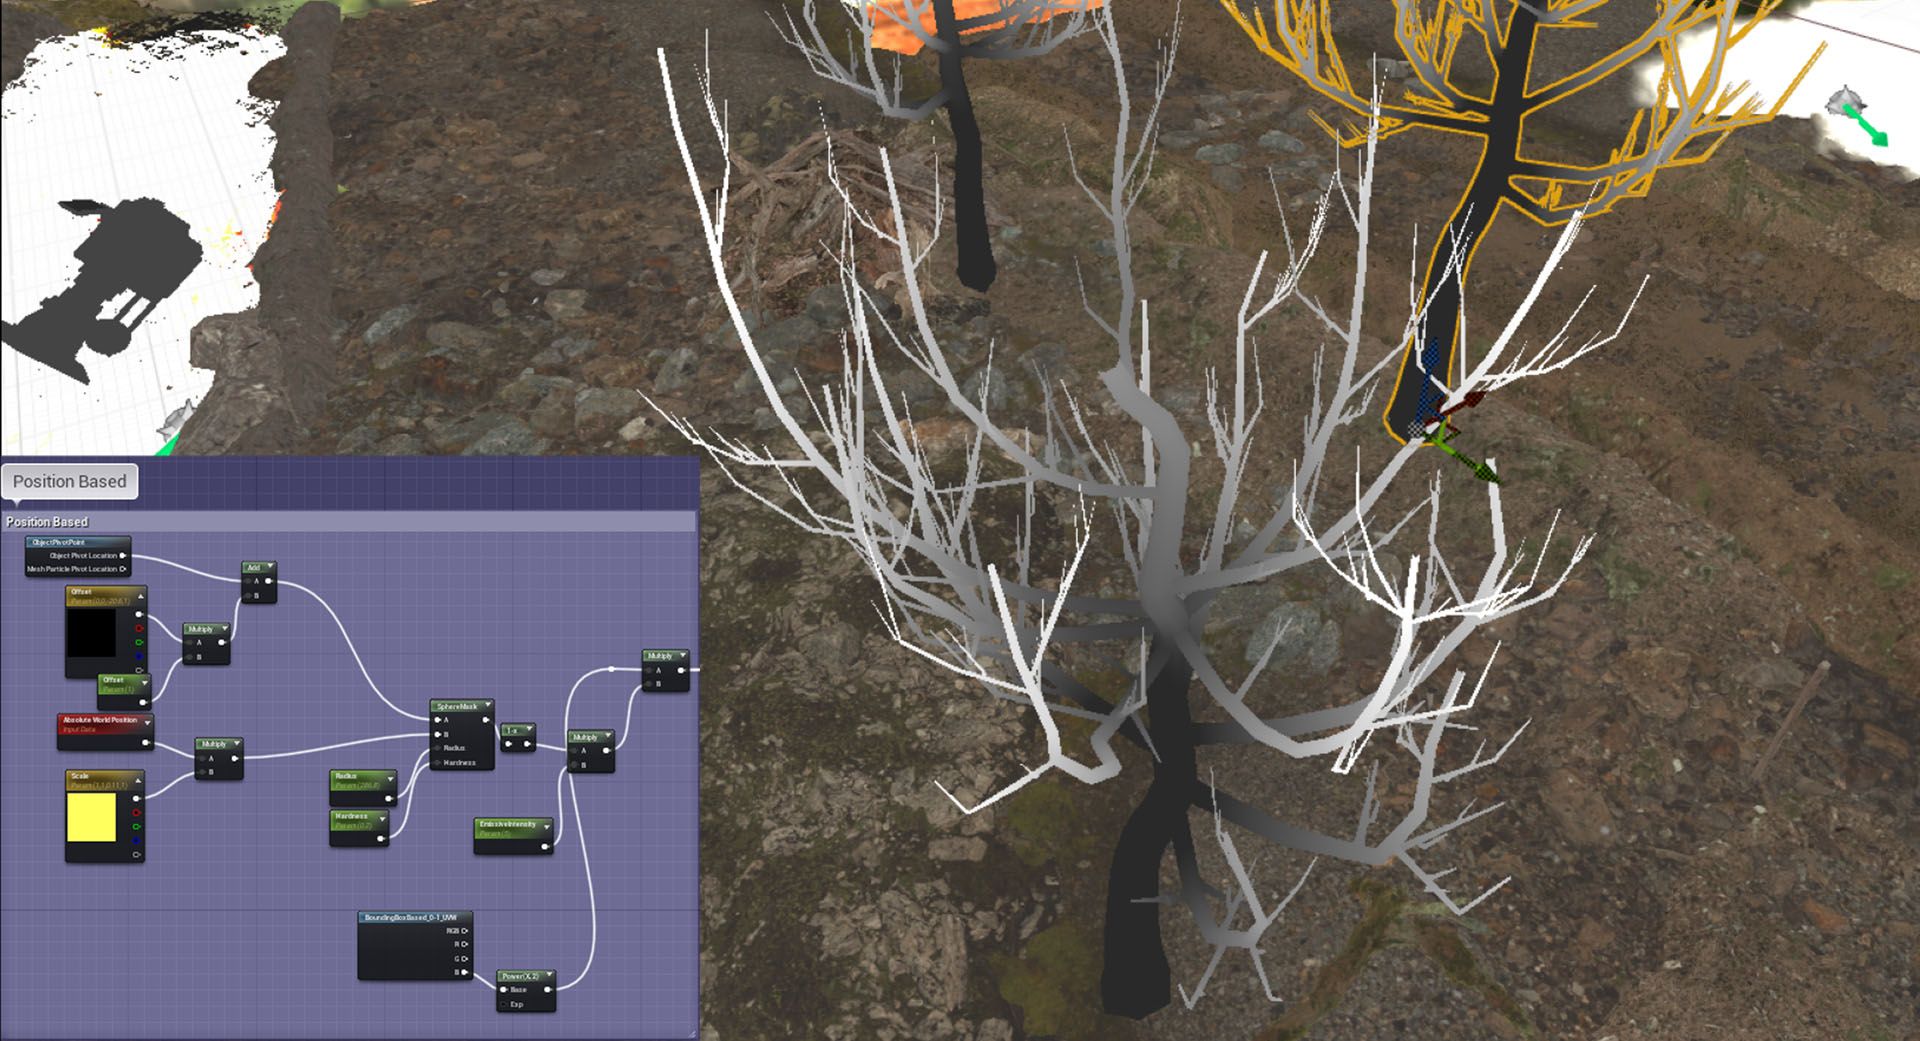
Wind is still howling! (Tree wind)
I also created a simple tree in ‘Speedtree’ and had a wind system that relied on a shader based mask for the overall wind movement and vertex paint to deform the leaf cards and make it look like the leaves are moving.
The tree wind creation process, from Speedtree to Maya to Unreal.The actor pivot based mask.
Conclusion
This project was a novelty to me as I had never done video game effects like these before. That said, I learned a lot throughout the process and attained a solid understanding of VFX, shaders and optimization, which really helped me enhance the quality of my future projects.
The final cinematic video of the environment
I really hope you found this article exciting and insightful and be sure to reach out if you have any questions regarding the topics discussed on this article.
Check out more of Rodolfo's Rookies portfolio and entry here, and contact him via Instagram and LinkedIn.