A Character Modeling Journey: Crafting Japanese Samurai Hino
Explore character modeling with Chong Yan Ni, a 3D animation graduate from UNDO Academy. She reveals her journey and insights in crafting the captivating character "Hino," showcased in her Rookie Awards 2023 entry.
Join us as we delve into the fascinating world of character modeling with recent 3D animation graduate, Chong Yan Ni from UNDO Academy. In this article, Chong shares her journey and insights into the process of creating the captivating character, "Hino," which was featured in her entry for the Rookie Awards 2023.
In this article, I will guide you through the process of character modeling, specifically focusing on a character named "Hino." This was my first attempt at character modeling, and it took me five months to create this model during my student years.
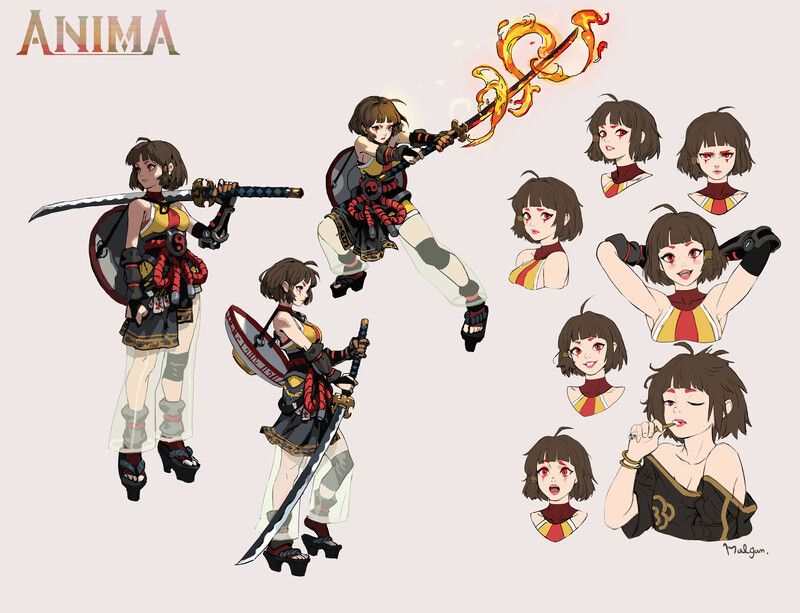
Concept Artist:Malgam
Initial preparation
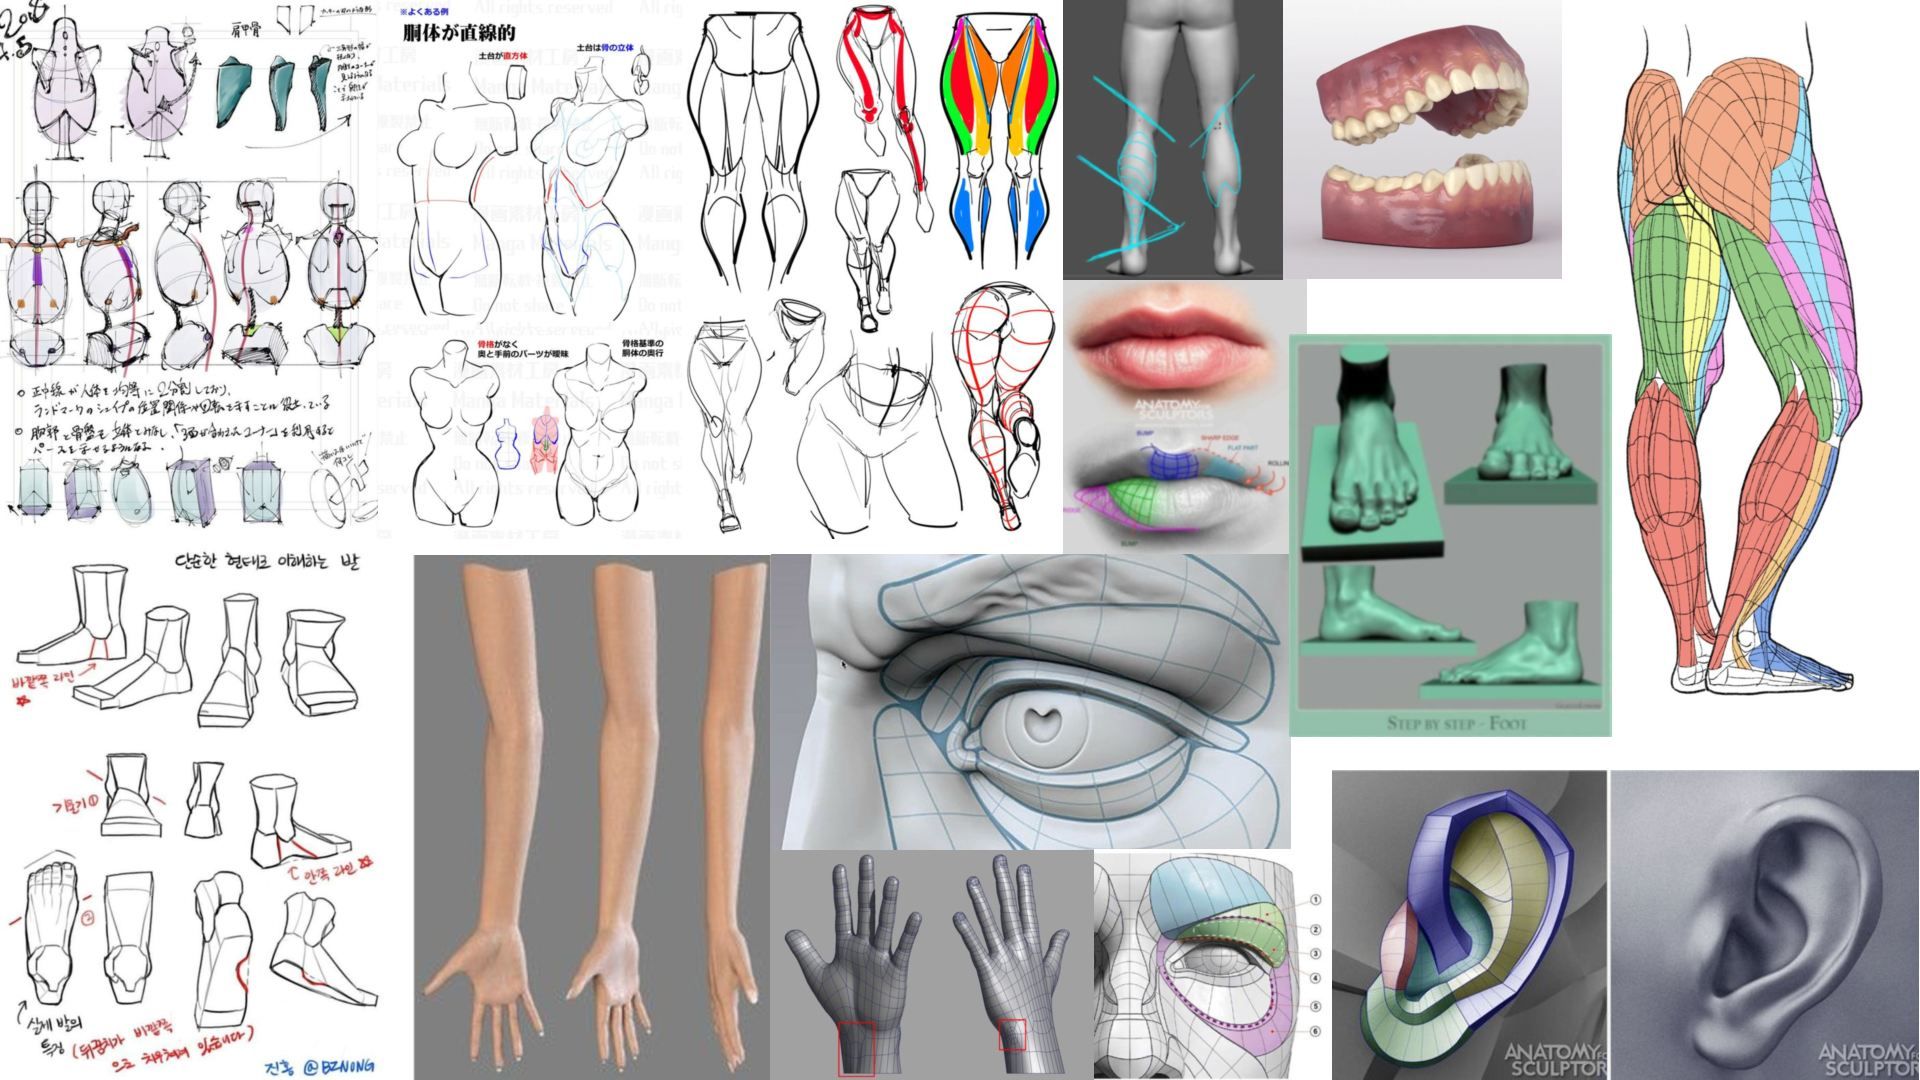
Concept design is the most important aspect before modeling. By understanding the character's backstory, we can design their appearance and infuse the artwork with soul. The biggest challenge is capturing the essence of the concept artwork in the 3D model. To achieve this, I immerse myself in the character's story and persona, and research various styles and anatomy.
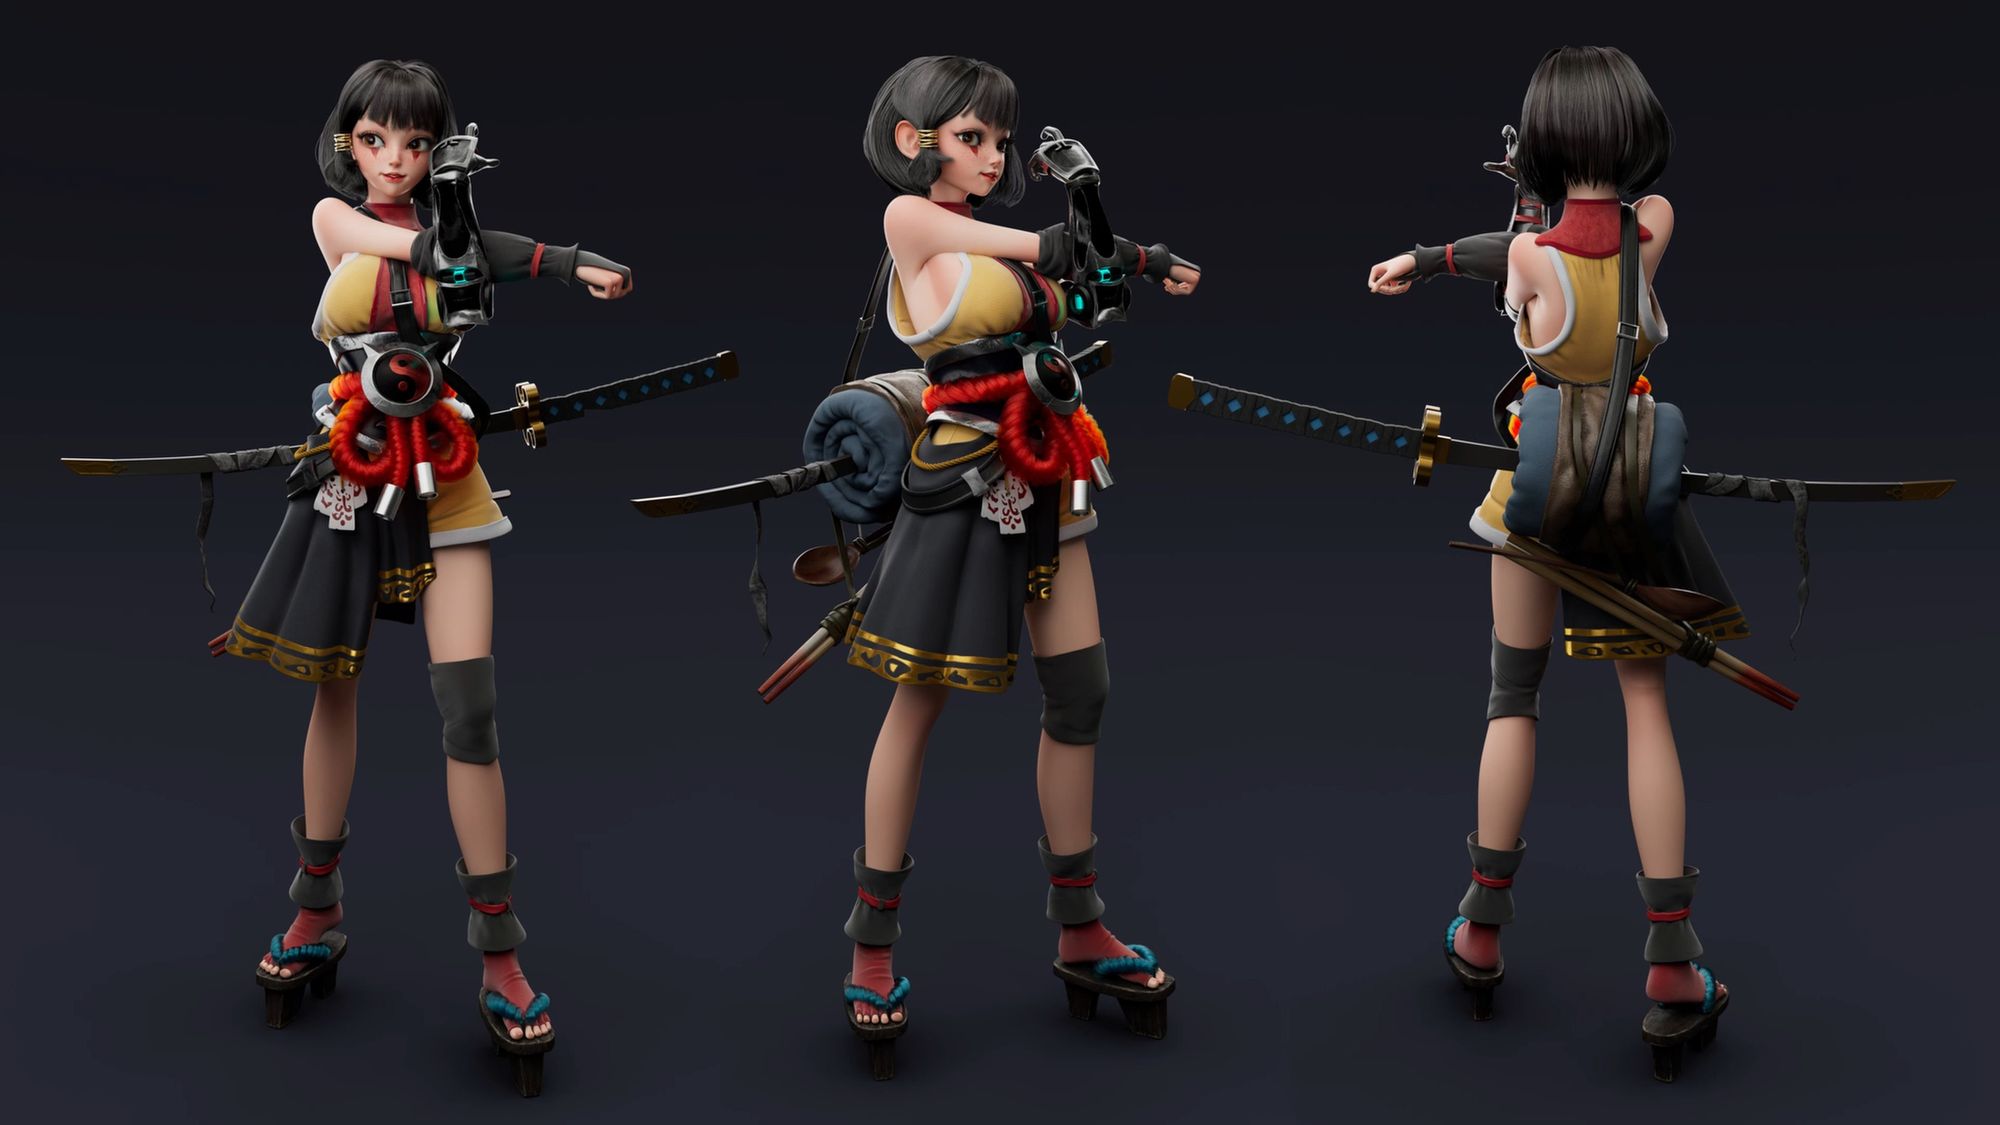
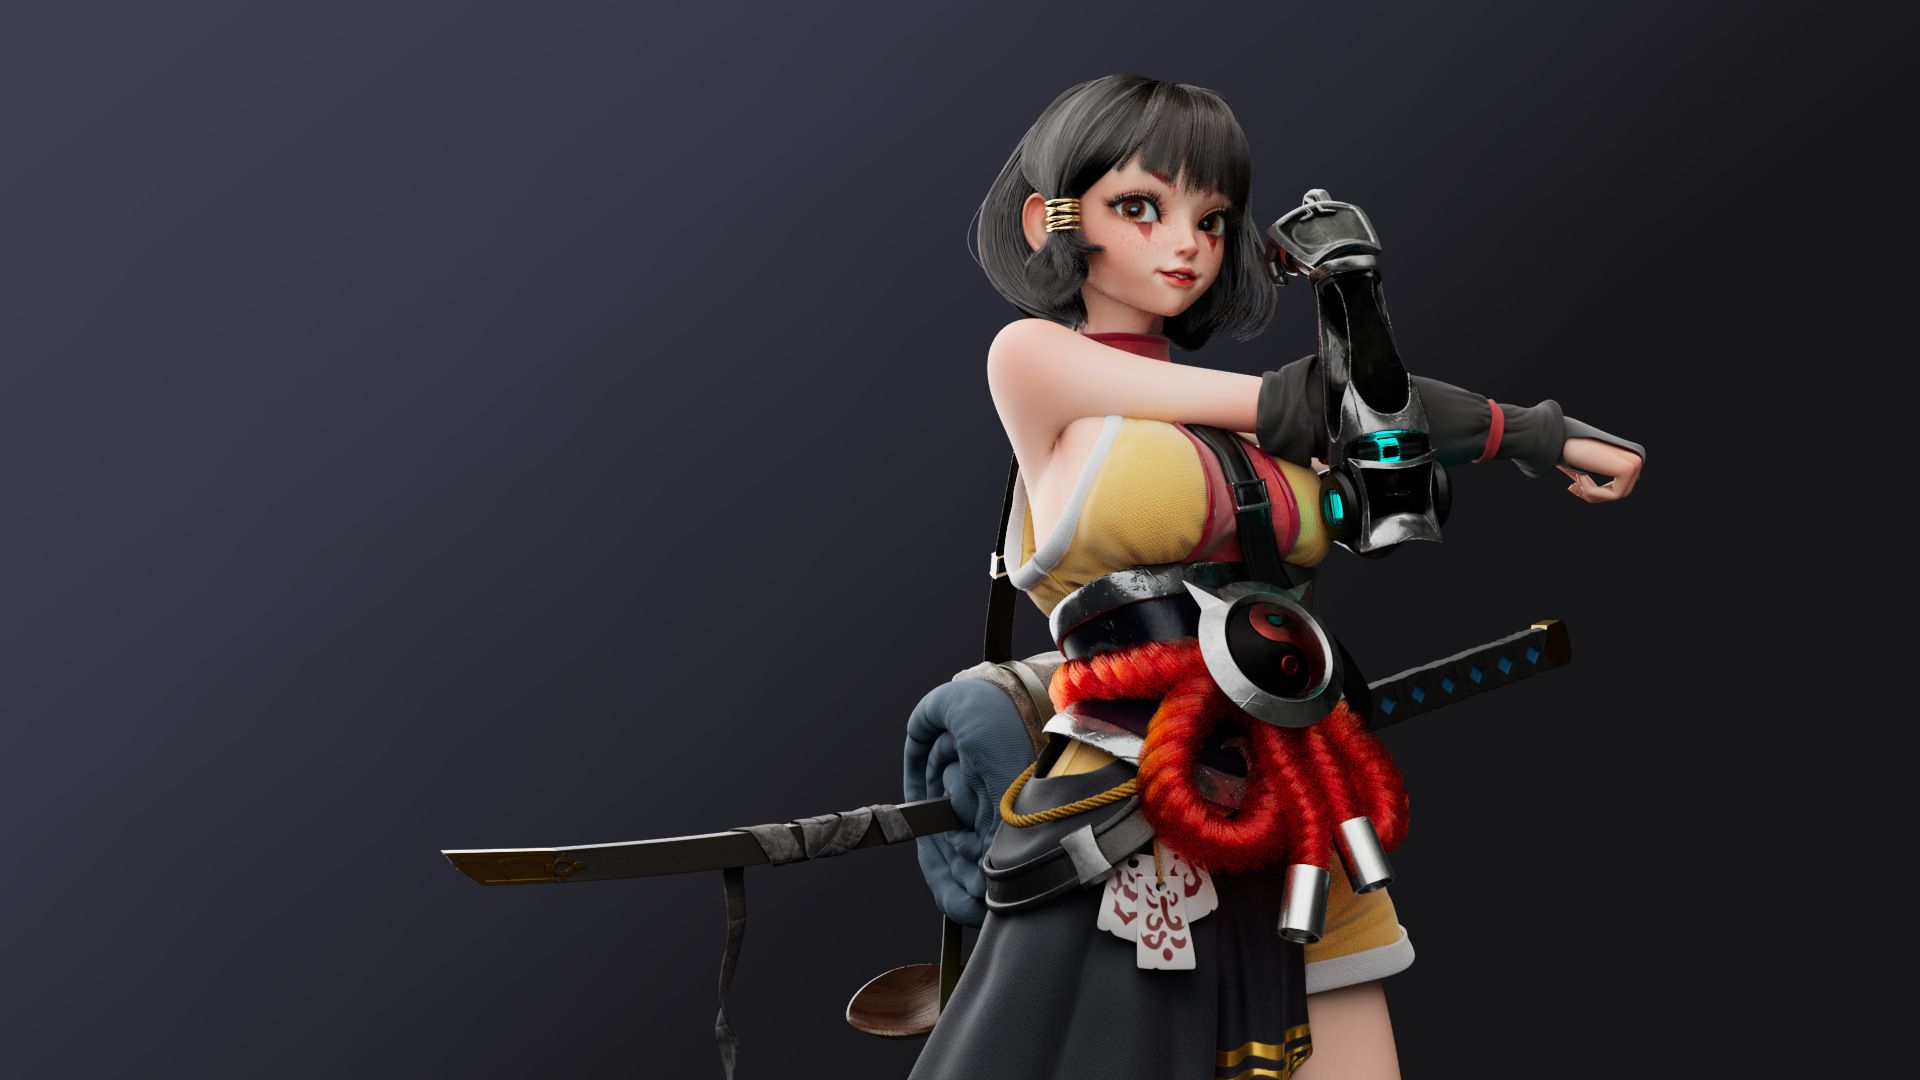
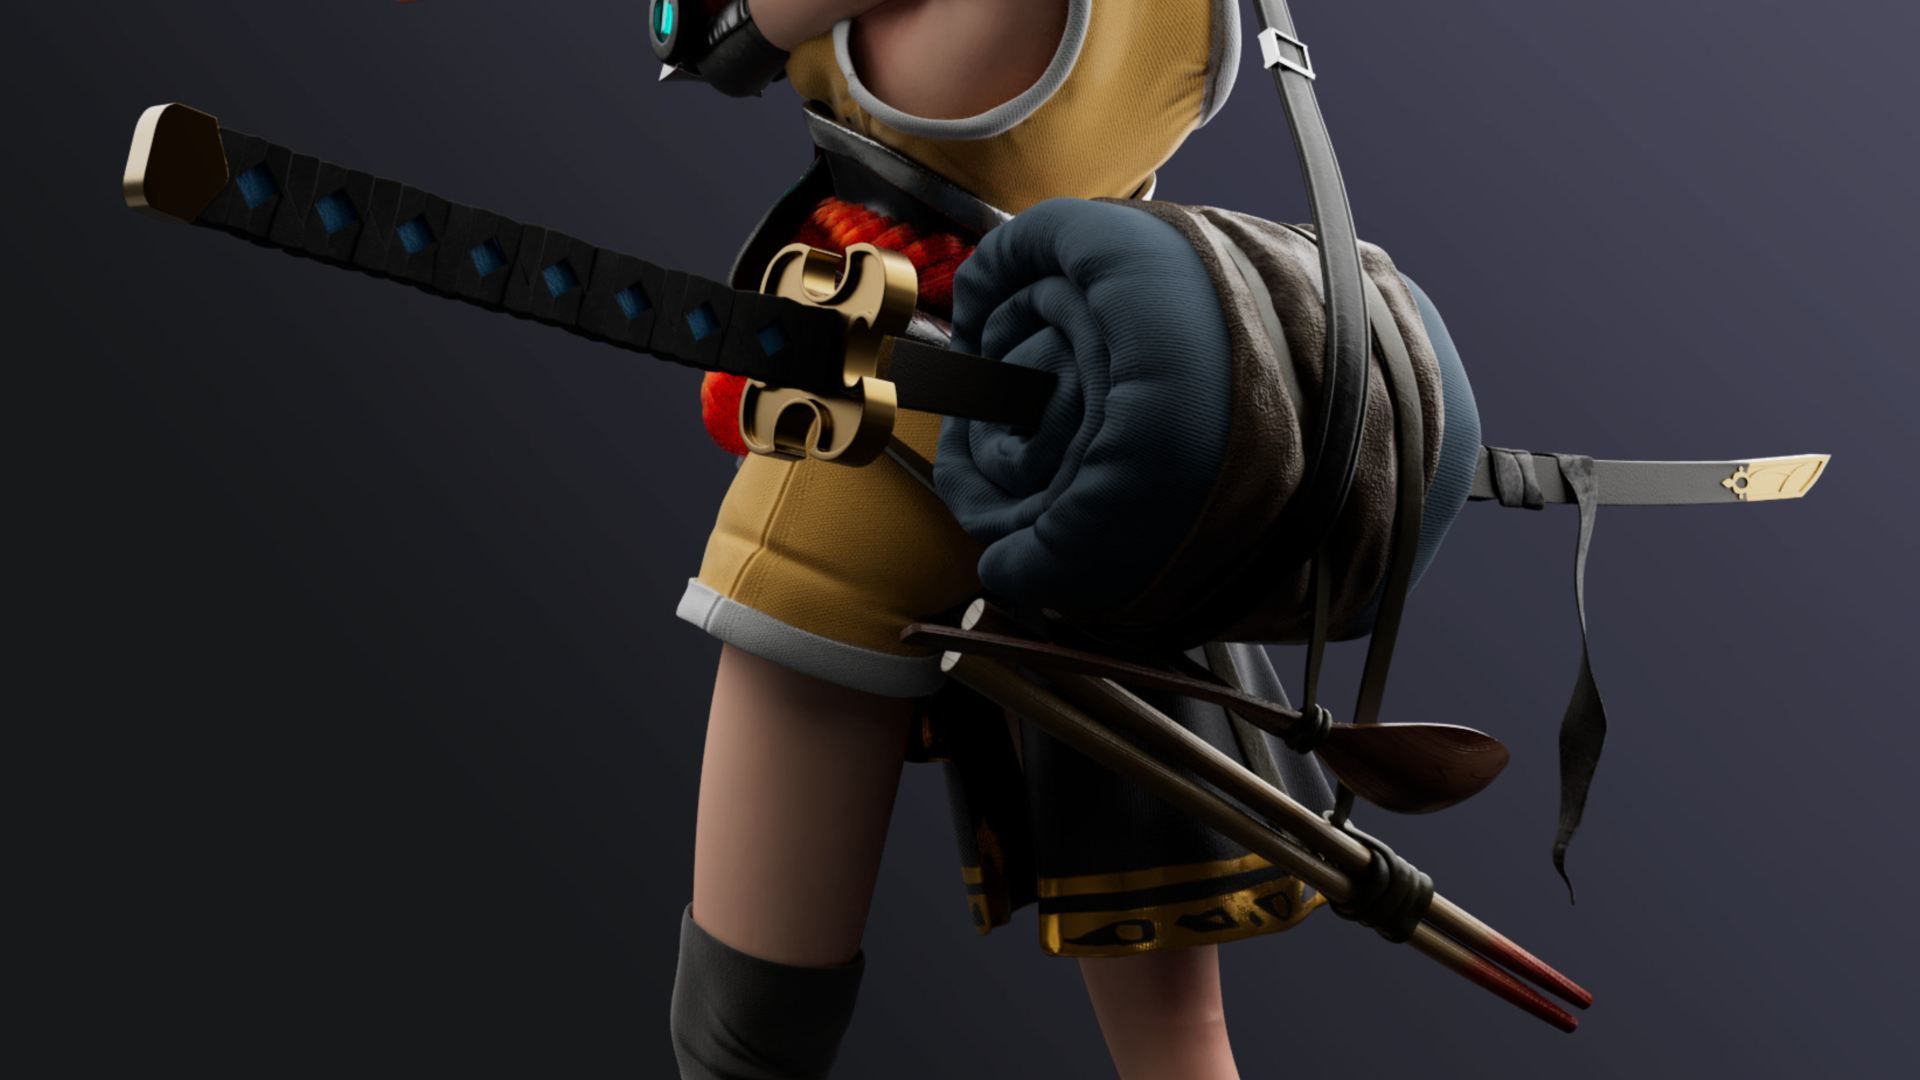
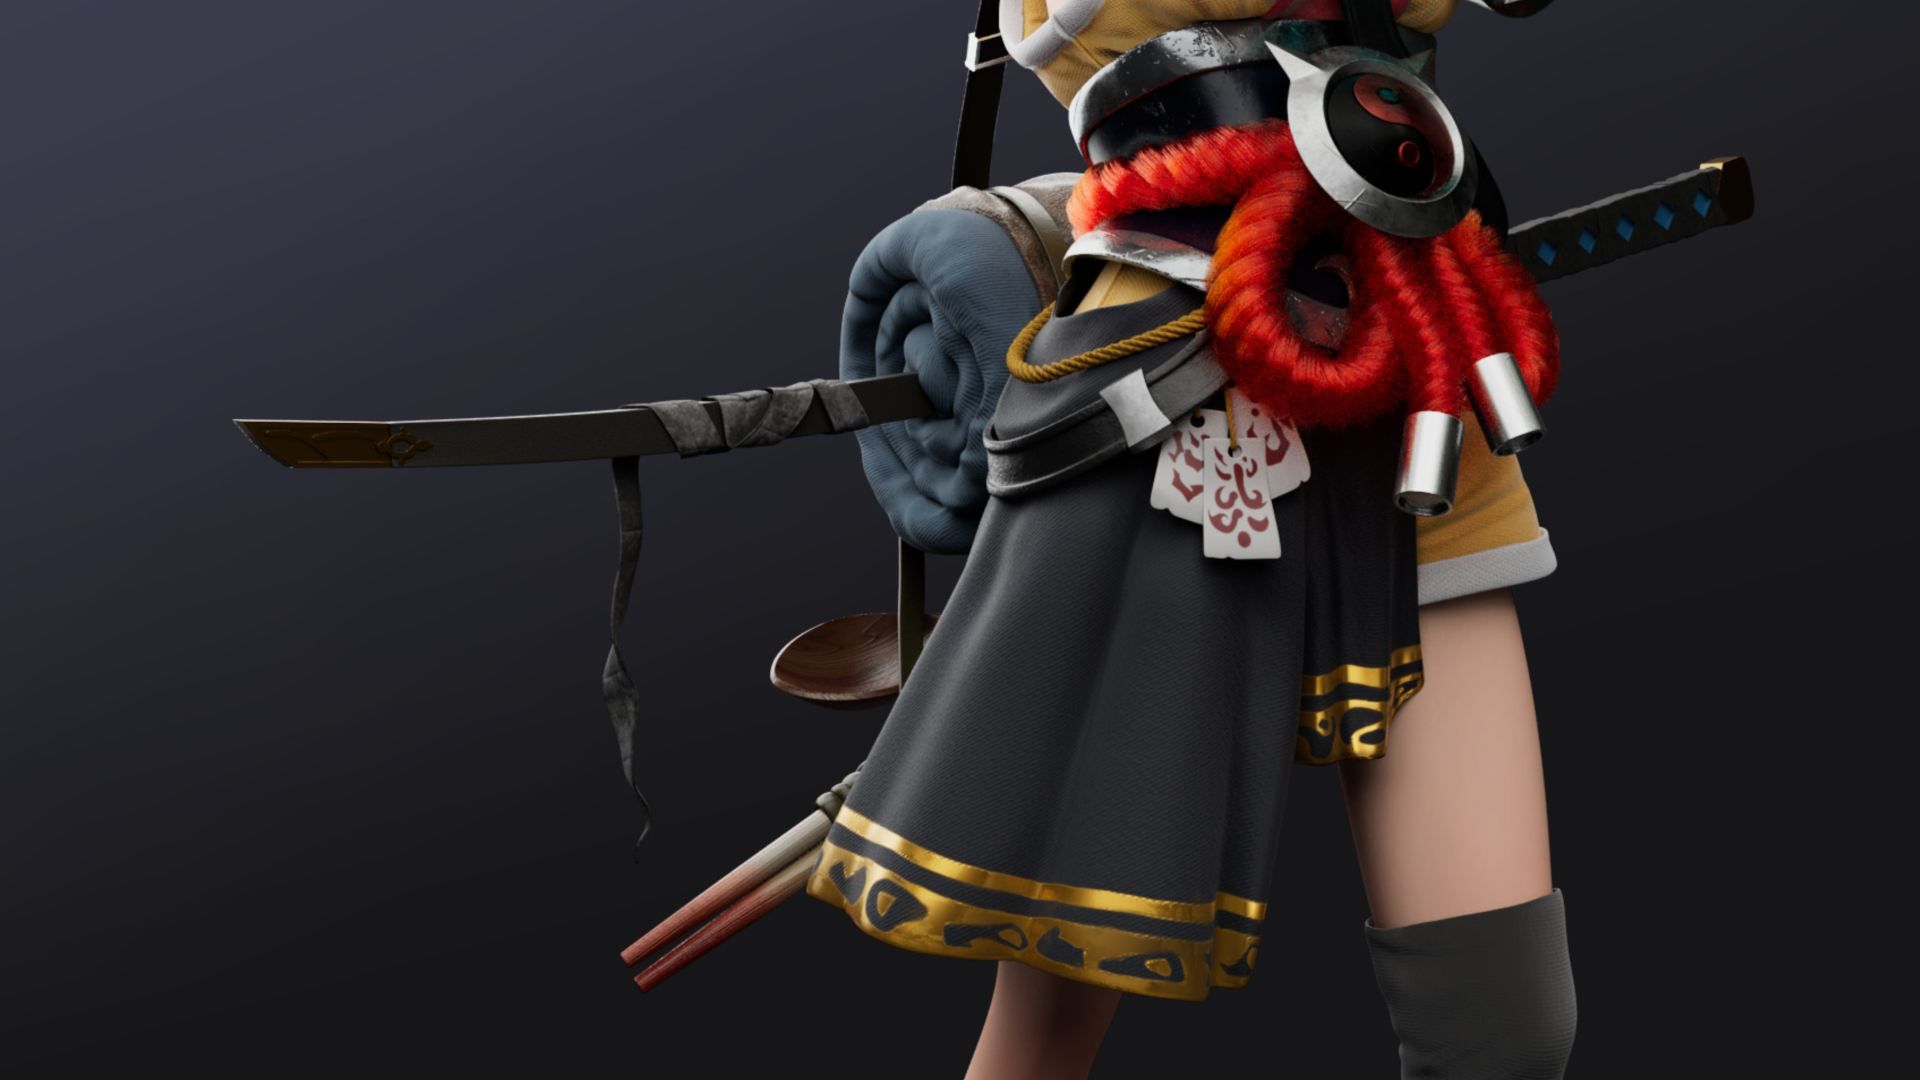
This is a Japanese-style samurai girl. She is a lively, cheerful, and sunny person who enjoys traveling and exploring new places. Her favourite food is ramen, so she always carries chopsticks and a spoon with her to eat quickly. Let's serve her some delicious ramen!
Why I chose this concept
I wanted to make a character with an Anime style because I'm a big fan of Anime. Hino was the perfect fit for what I had in mind. It's a chance for me to improve my skills and learn more about modeling, textures, and materials. The most challenging part for me will be figuring out how to use Xgen in Maya to create the hair, but I'm up for the challenge!
Sculpting
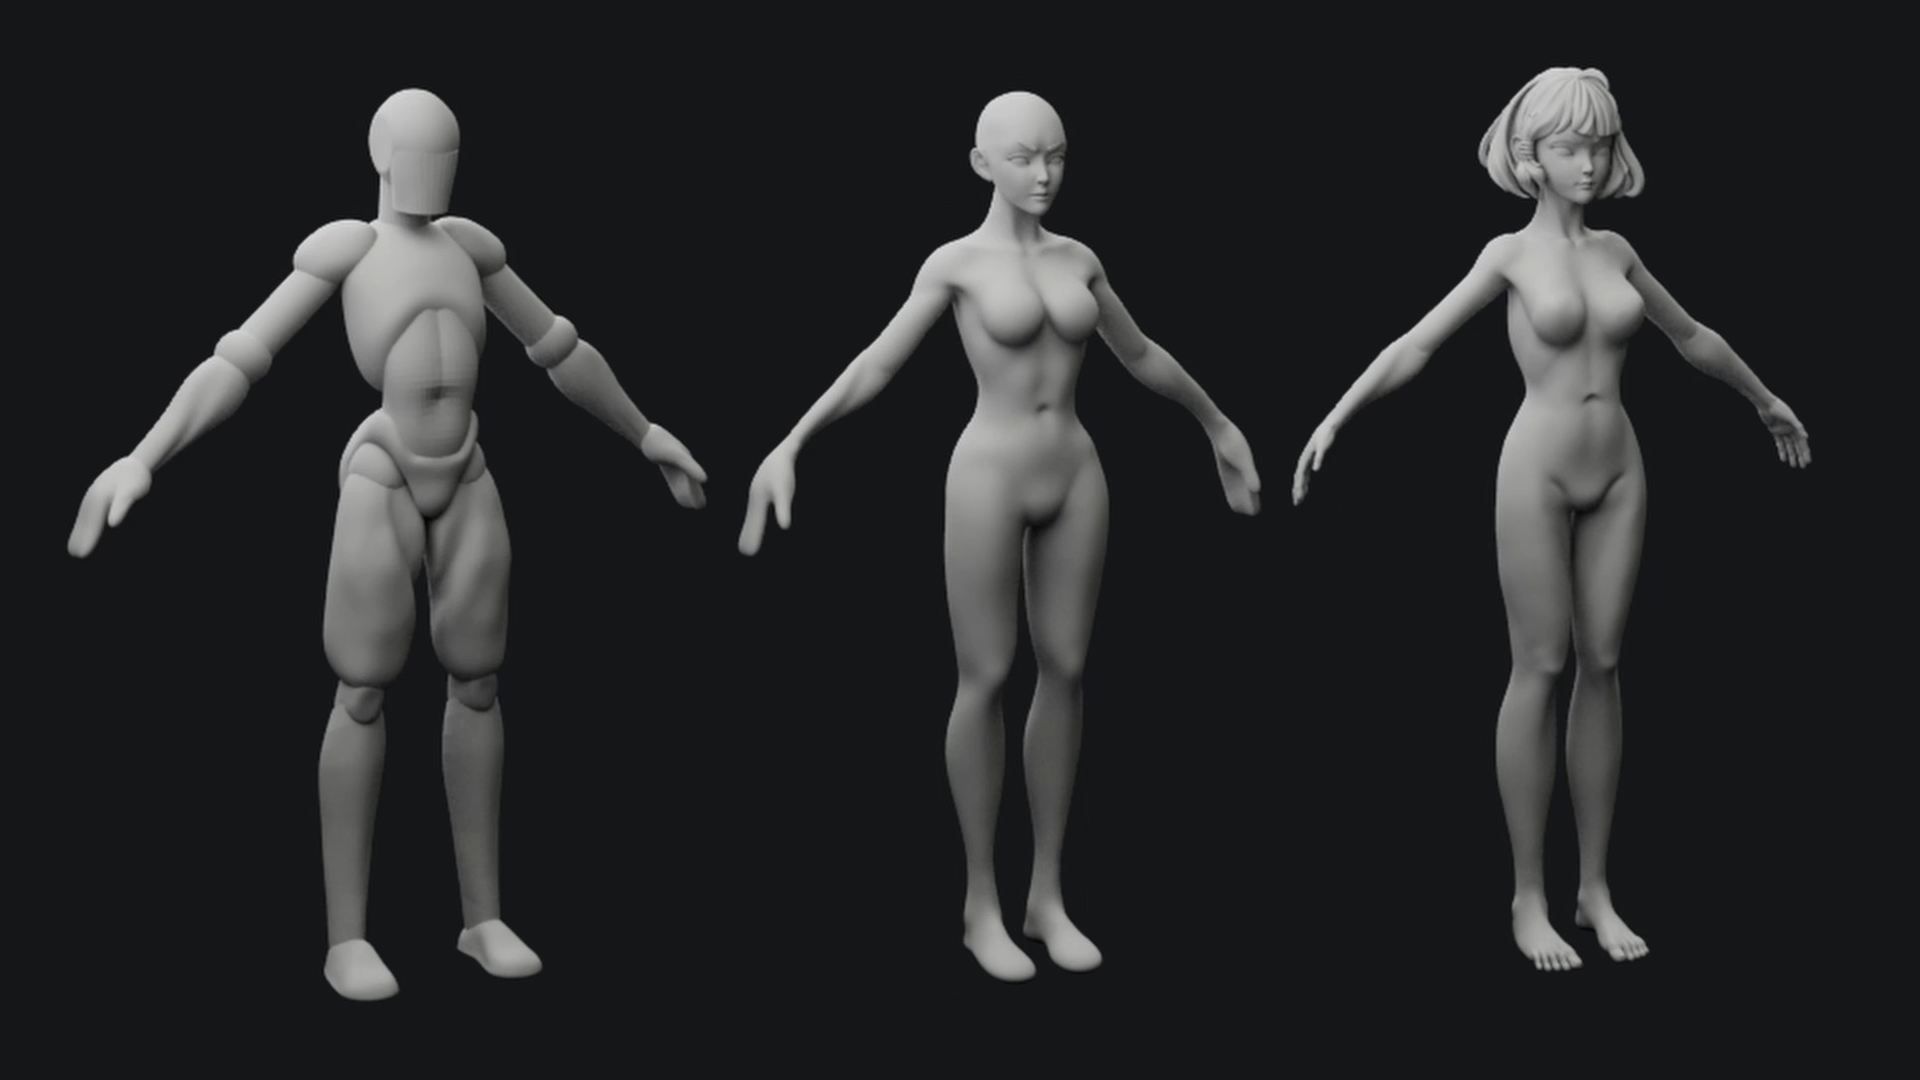
Before I started sculpting, I used the character's head as a measuring tool to measure the proportions of the character's body.
Basic shape
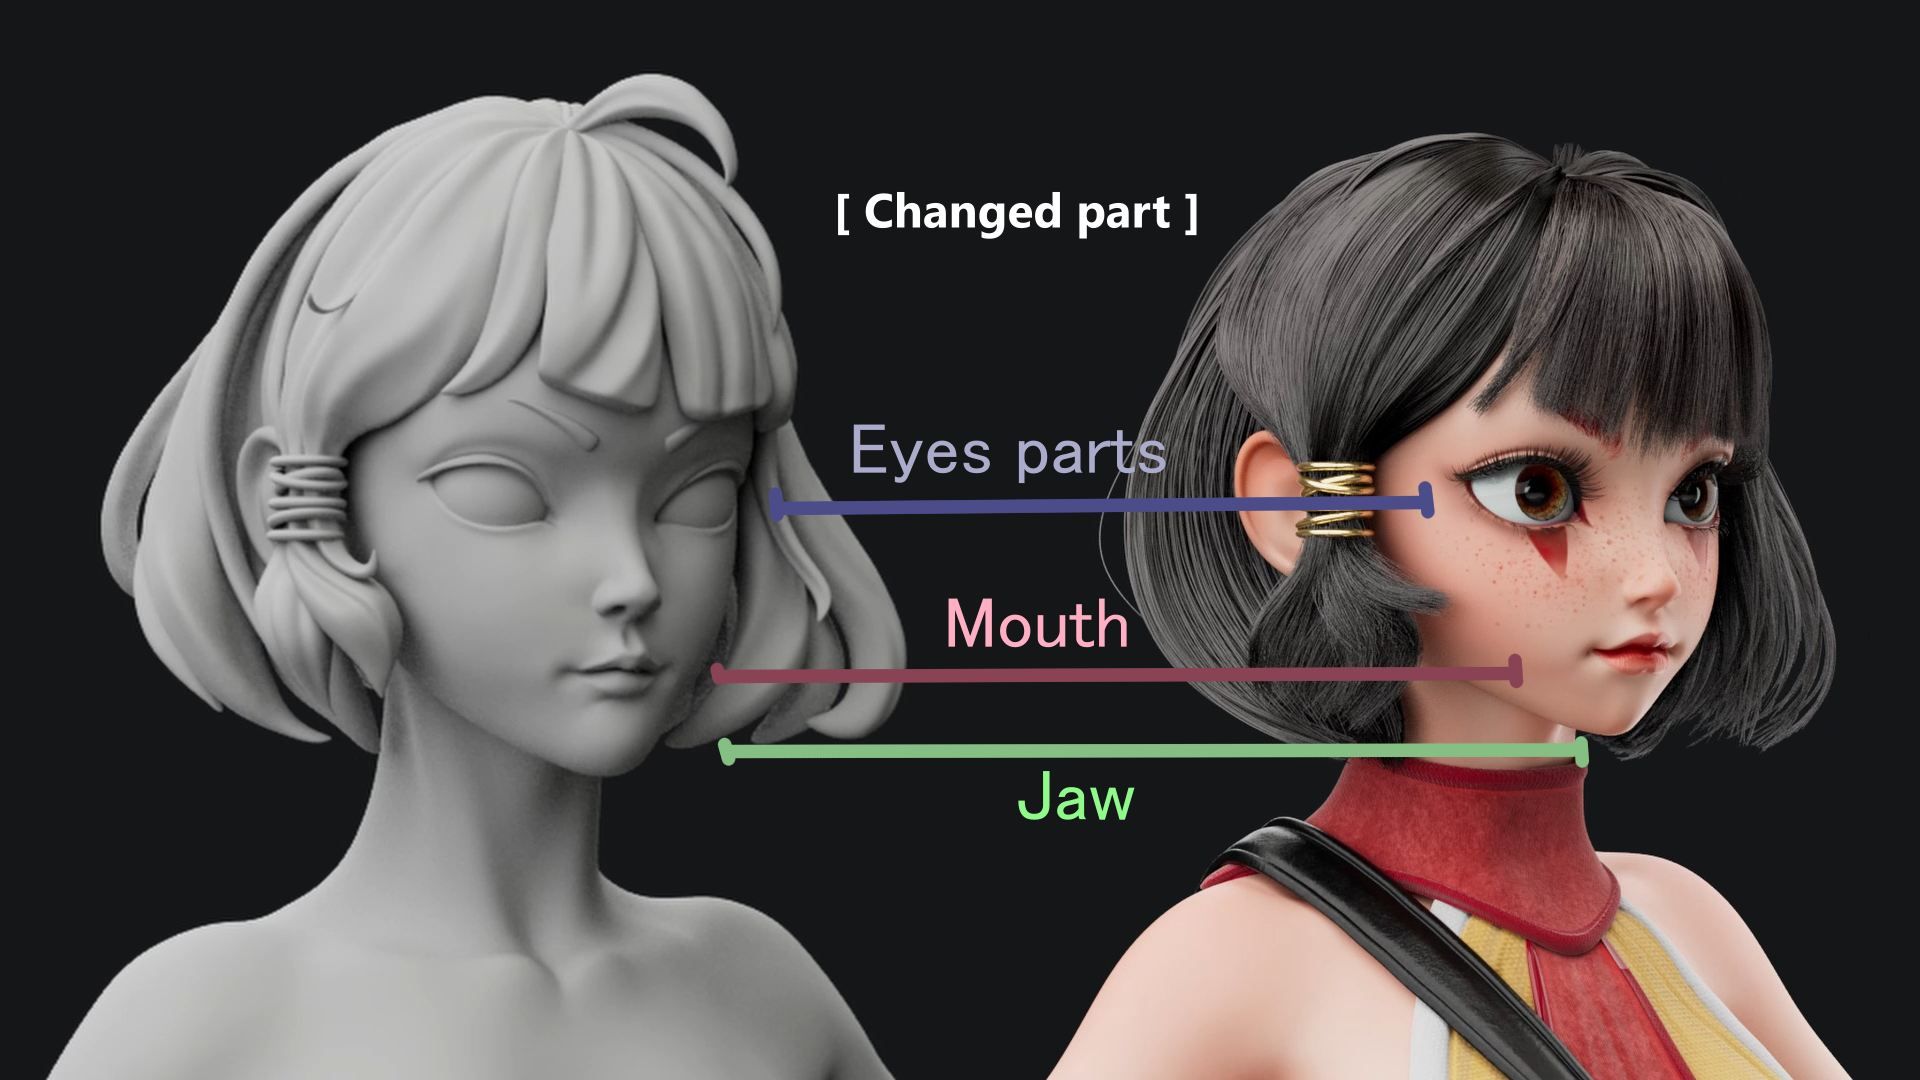
Step 1: In ZBrush, I started with basic shapes and used them to create the initial form of the character. I also referenced female anatomy to ensure accuracy. Once I was satisfied with the basic shape of the human body, I divided the character into four parts: the head, hands, body, and legs, and began working on each part.
Step 2: I focused on creating the female body shape and incorporated the specific features that women should have. This included things like shaping the hips, waist, and chest to create a more feminine silhouette.
Step 3: Refining the character by adding details to the face, hair, fingers, toes, muscles, and other areas to achieve the ideal result for the character. This required a lot of attention to detail and careful sculpting to ensure that everything looked just right.
Step of progressReference
By referring to reference images, I gain a better understanding of the construction and beautiful posture of the human body, which allows me to achieve better results with less effort in 3D modeling.
The Modeling Process
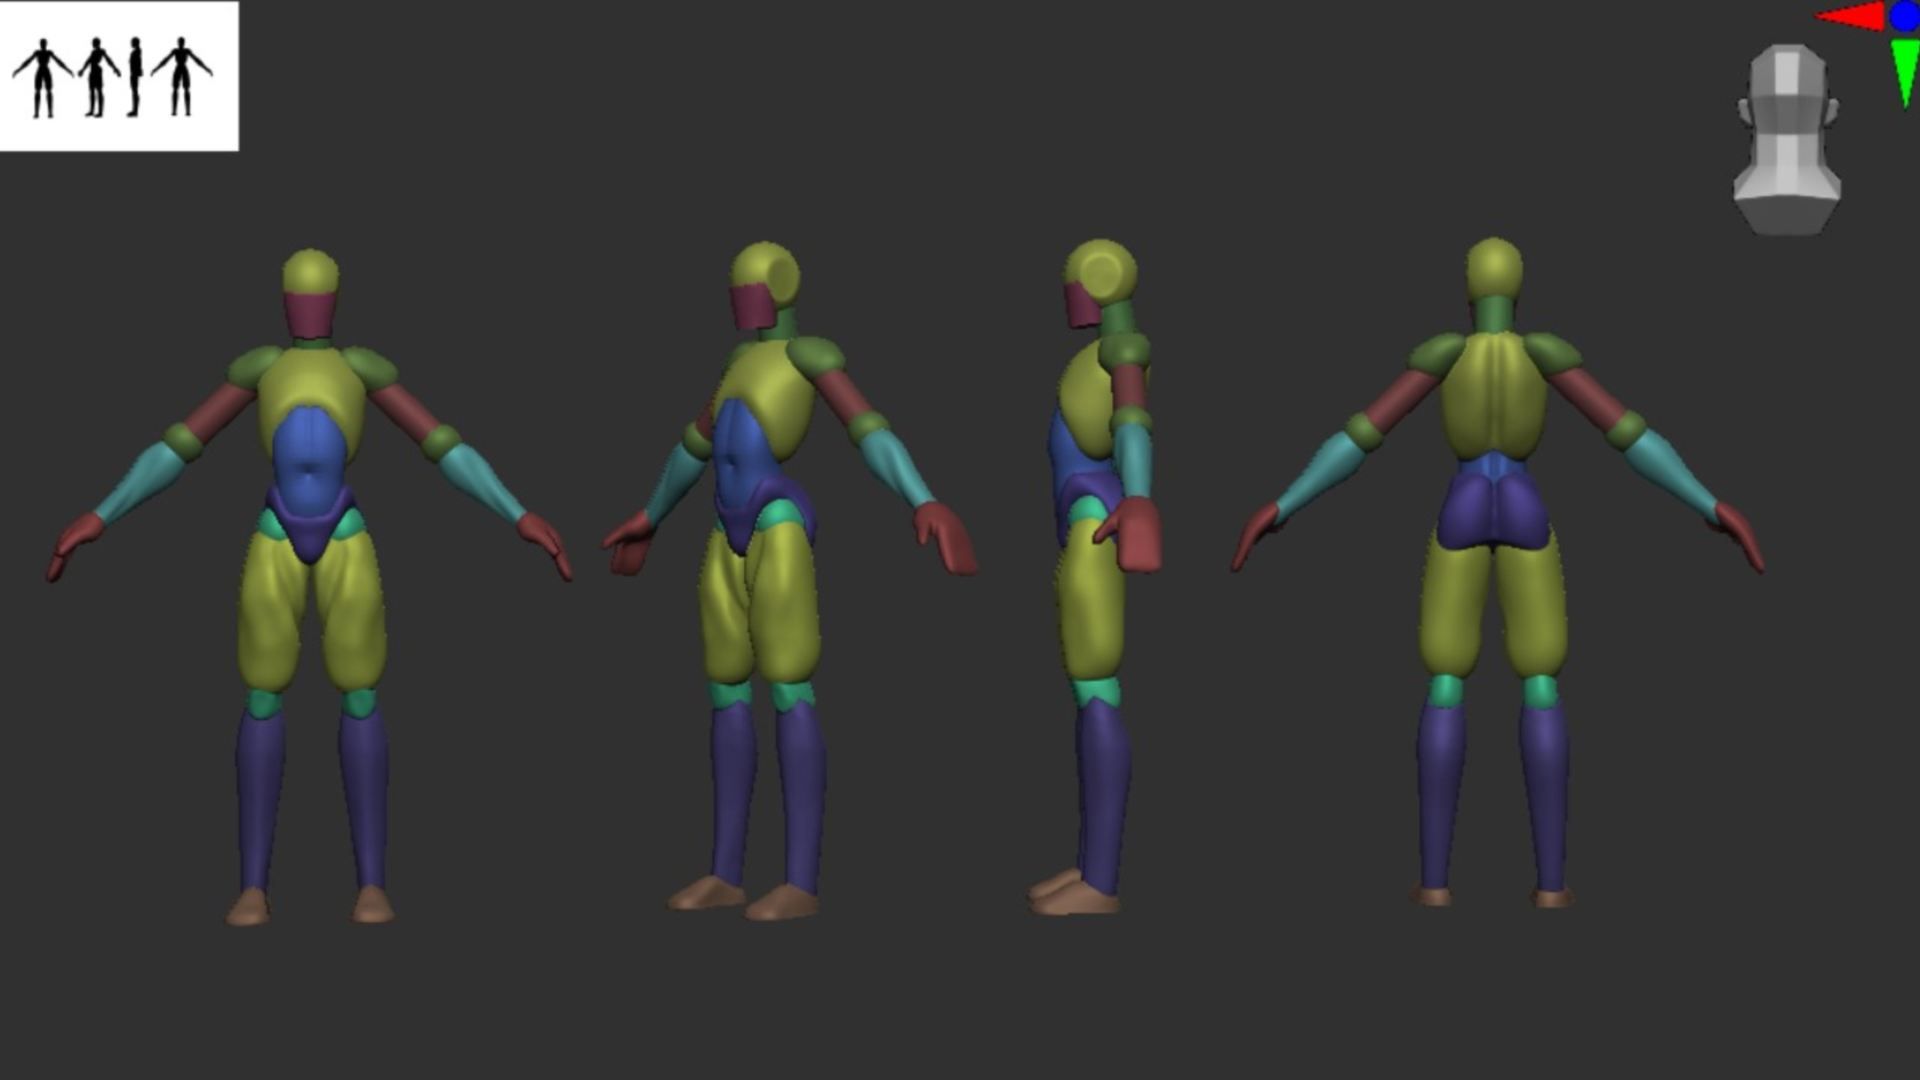
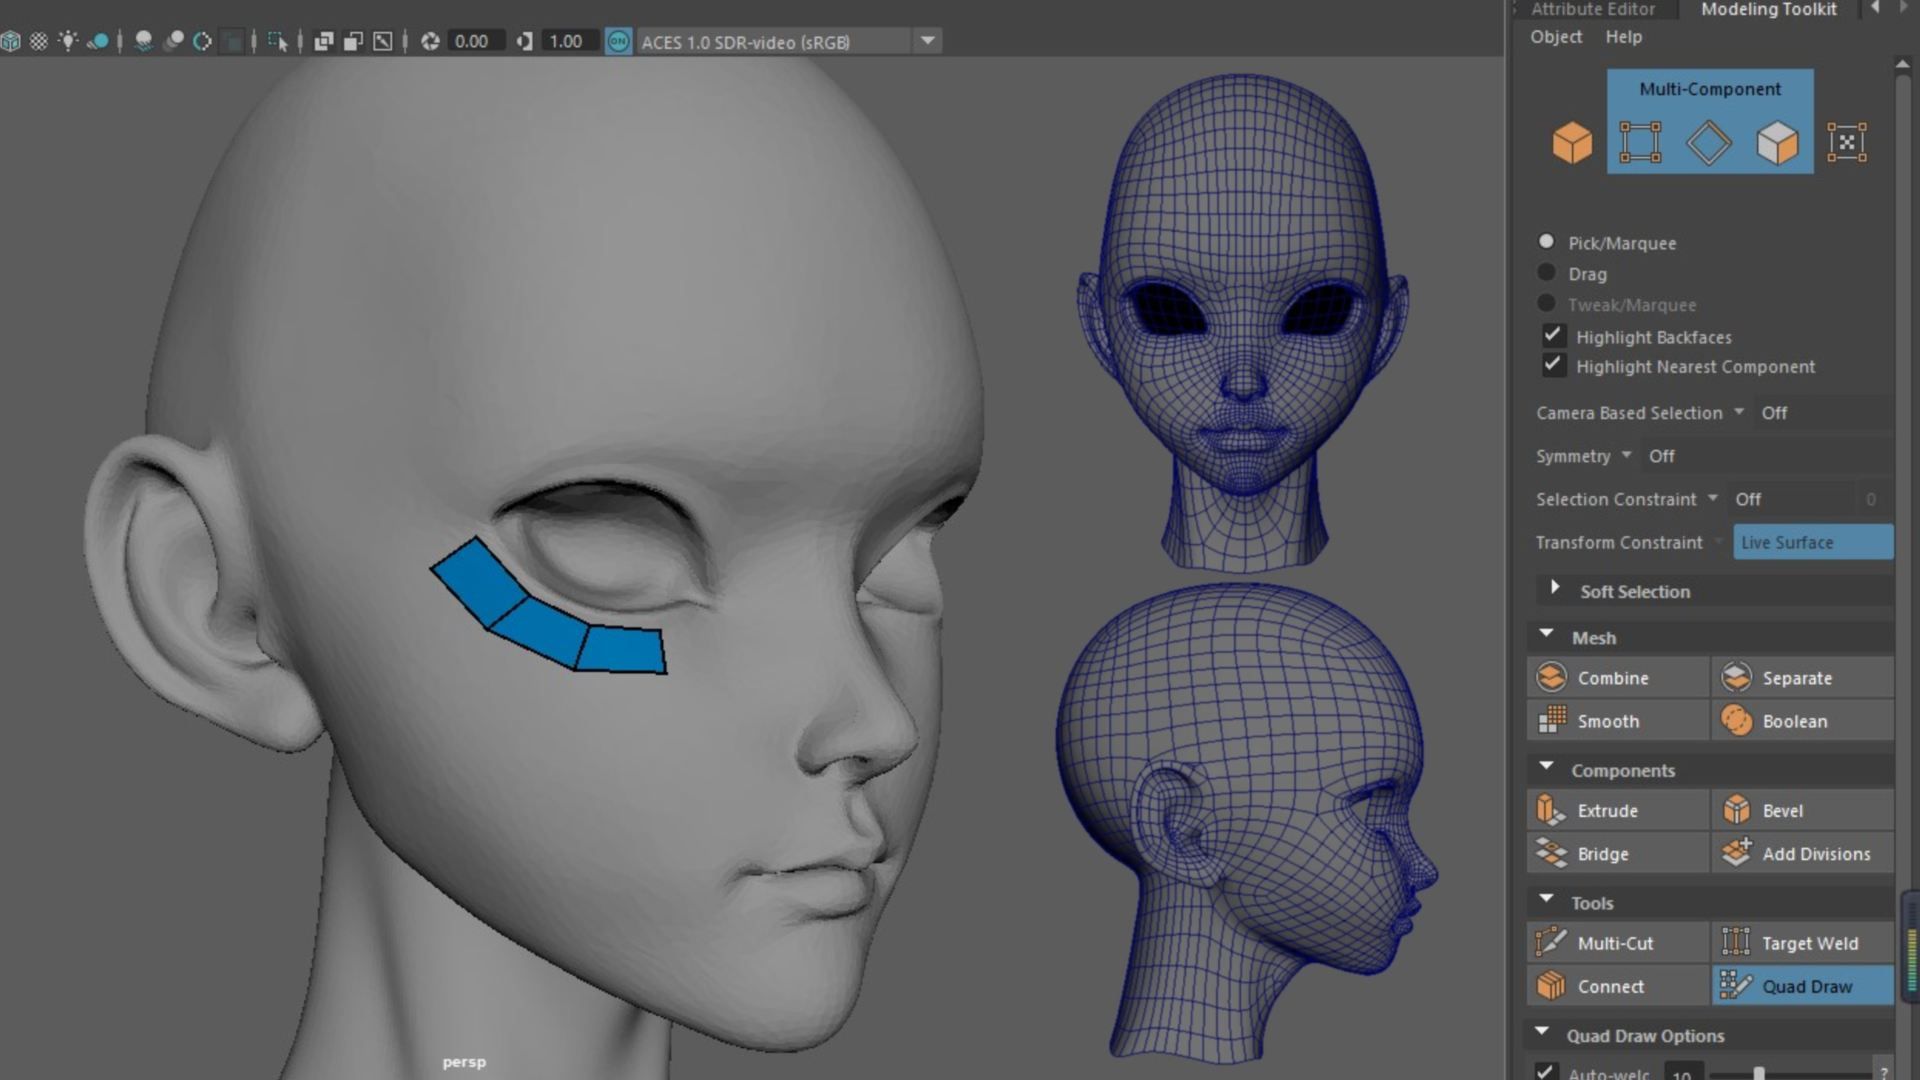
Retopology
I imported the high-poly model into Maya and I used the Quad Draw tool to draw new topology onto an existing mesh in real-time, while the Topology Brush tool allowed me to paint new topology onto an existing mesh.
While working on the retopology process, I also created the interior of the character's mouth, which allowed me to add the gums and teeth later on, making it look more realistic.
UV mapping
After completing the retopology, I moved on to UV mapping in Maya. I divided the human body's UV map into four parts: head, hands, body and legs to achieve high-quality textures. Additionally, I grouped props with the same material together to save UV map space and place them on the same UV map.
When importing the high-poly model from ZBrush to Maya, there may be differences due to the camera settings. I focused on Maya's camera and adjusted the model to improve its appearance.
Texturing
Before I start texturing, I need to bake all the details from the high-resolution version and transfer them to the low-resolution version.
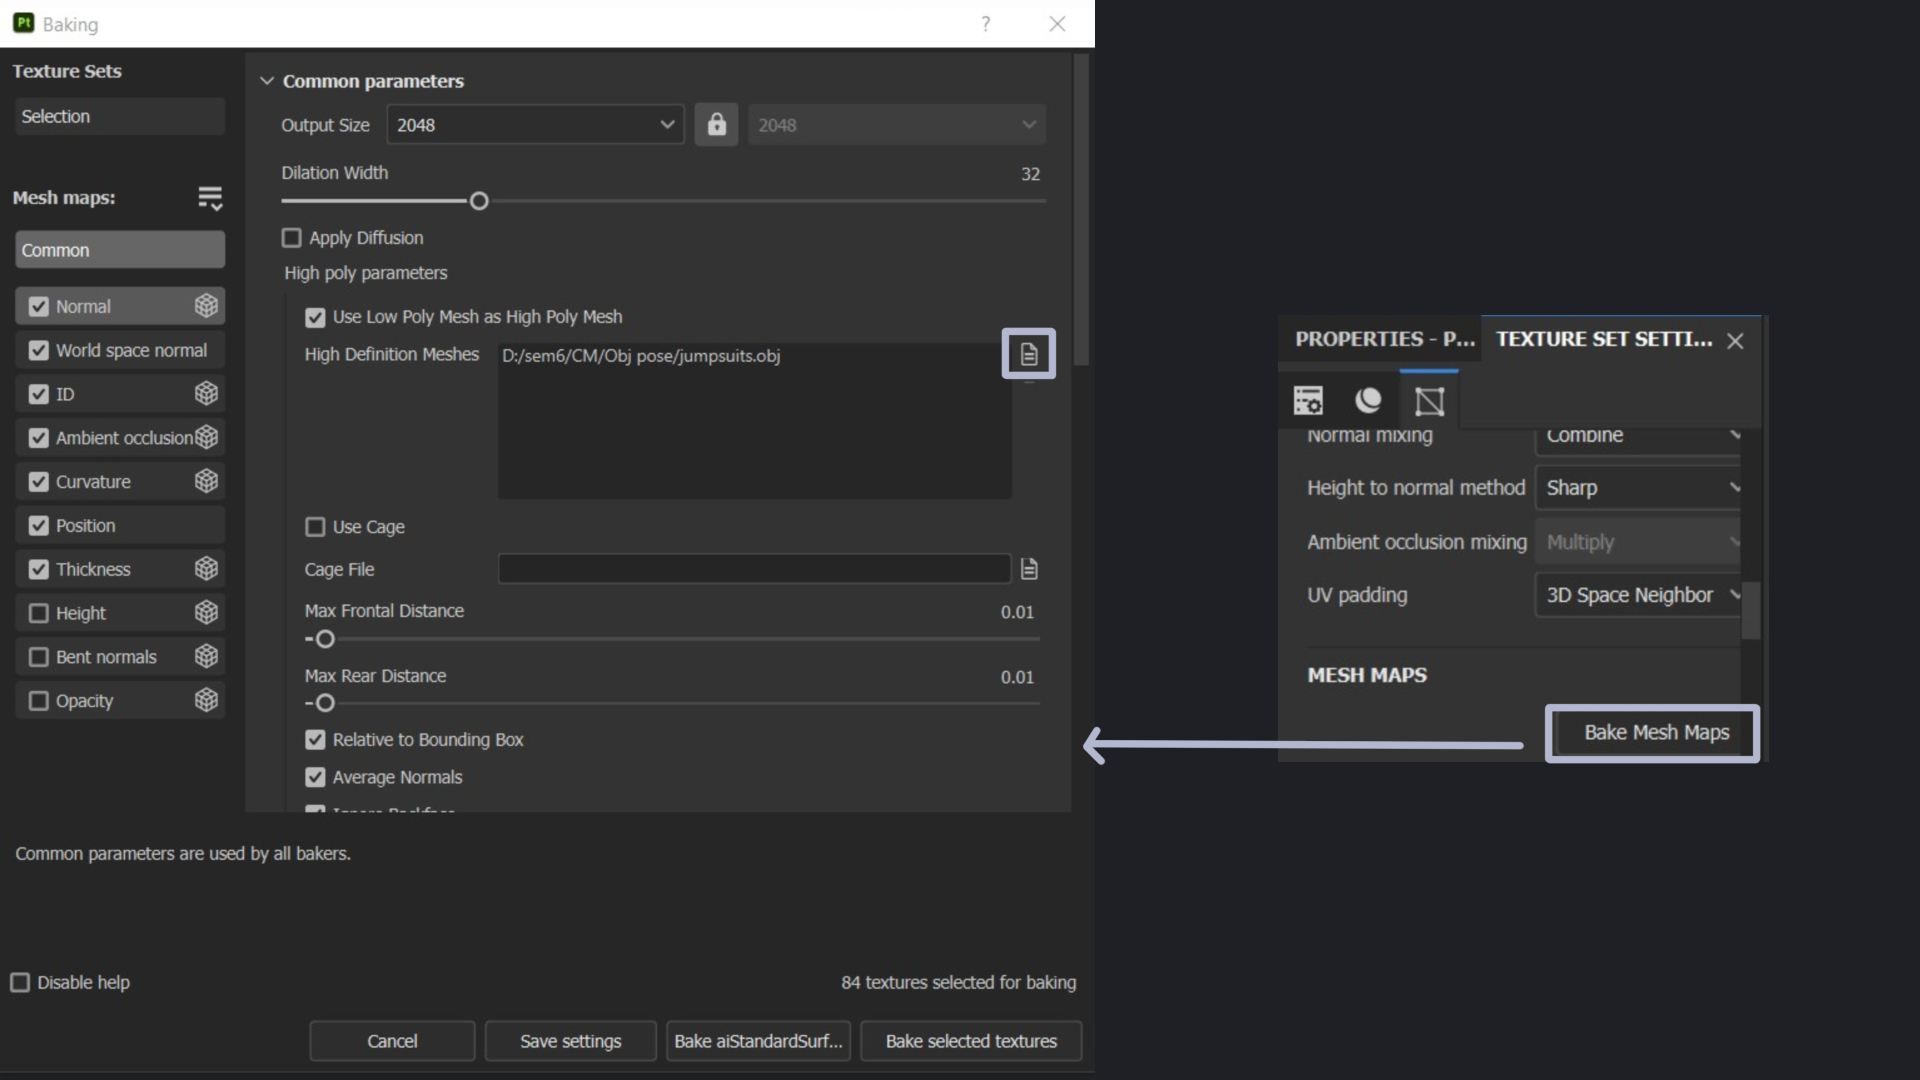
Baking
I used Substance 3D Painter's baking features to generate maps such as normal maps. Before baking, I made sure the high-poly and low-poly meshes were properly aligned and had the same UV layout. Then, I set up the baking options in Substance 3D Painter and started the process.
After finishing the baking process, I started adding corresponding materials and details to each object. In Substance 3D Painter, I used a variety of tools and brushes to add texture and depth to the model.
I often use masks to selectively apply textures to certain areas of the model, and I also take advantage of Substance 3D Painter's material presets to create realistic-looking textures.
Once I was done all the textures then I started to export. The output template I used was Arnold's (Ai Standard), size 4096.
Completing the above actions, I went back to Maya and I applied the maps in the Arnold aiStandardSurface material and adjusted the parameters as needed to achieve the desired result.
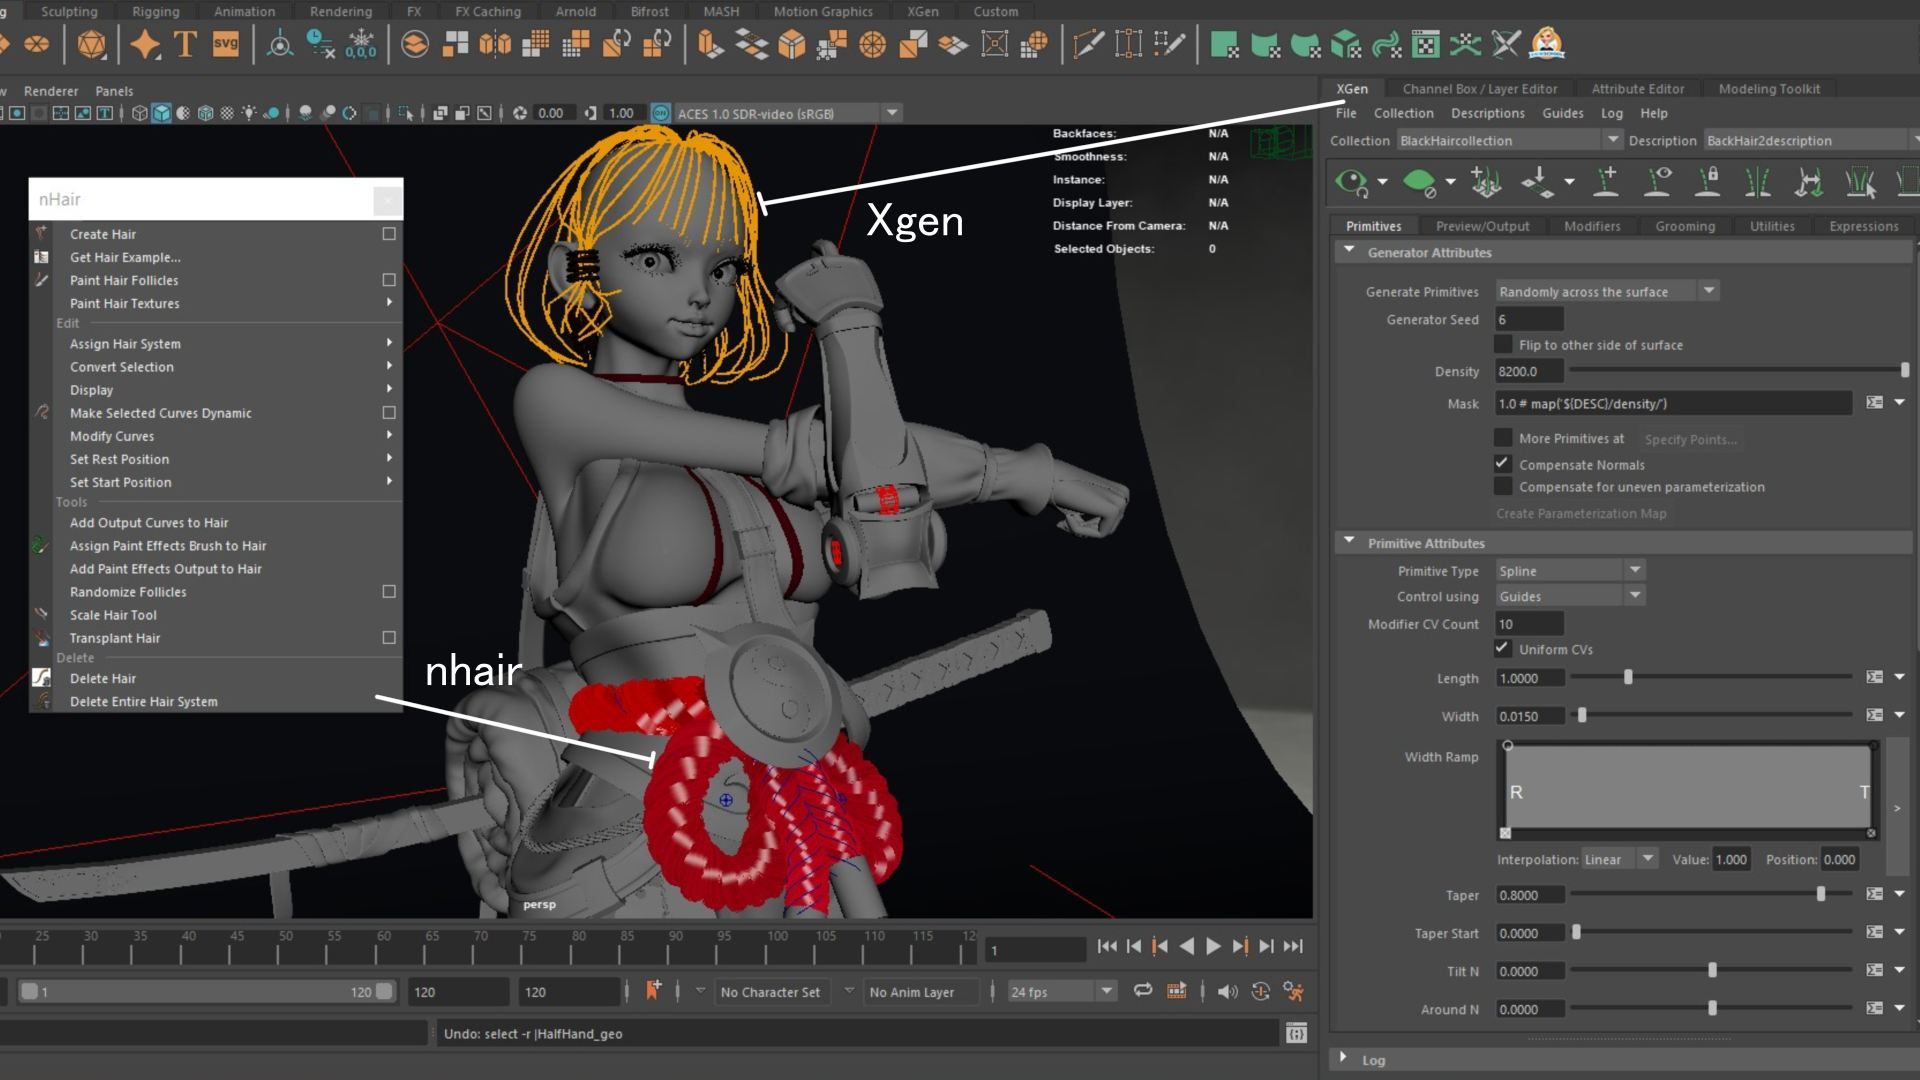
Hair & Rope
Hair & Xgen
In Maya, I selected the object where I wanted to add hair, then I created a new XGen description and distribution. Next, I created several hair systems in the scene to fit different parts of the character, such as hair, eyebrows, and eyelashes.
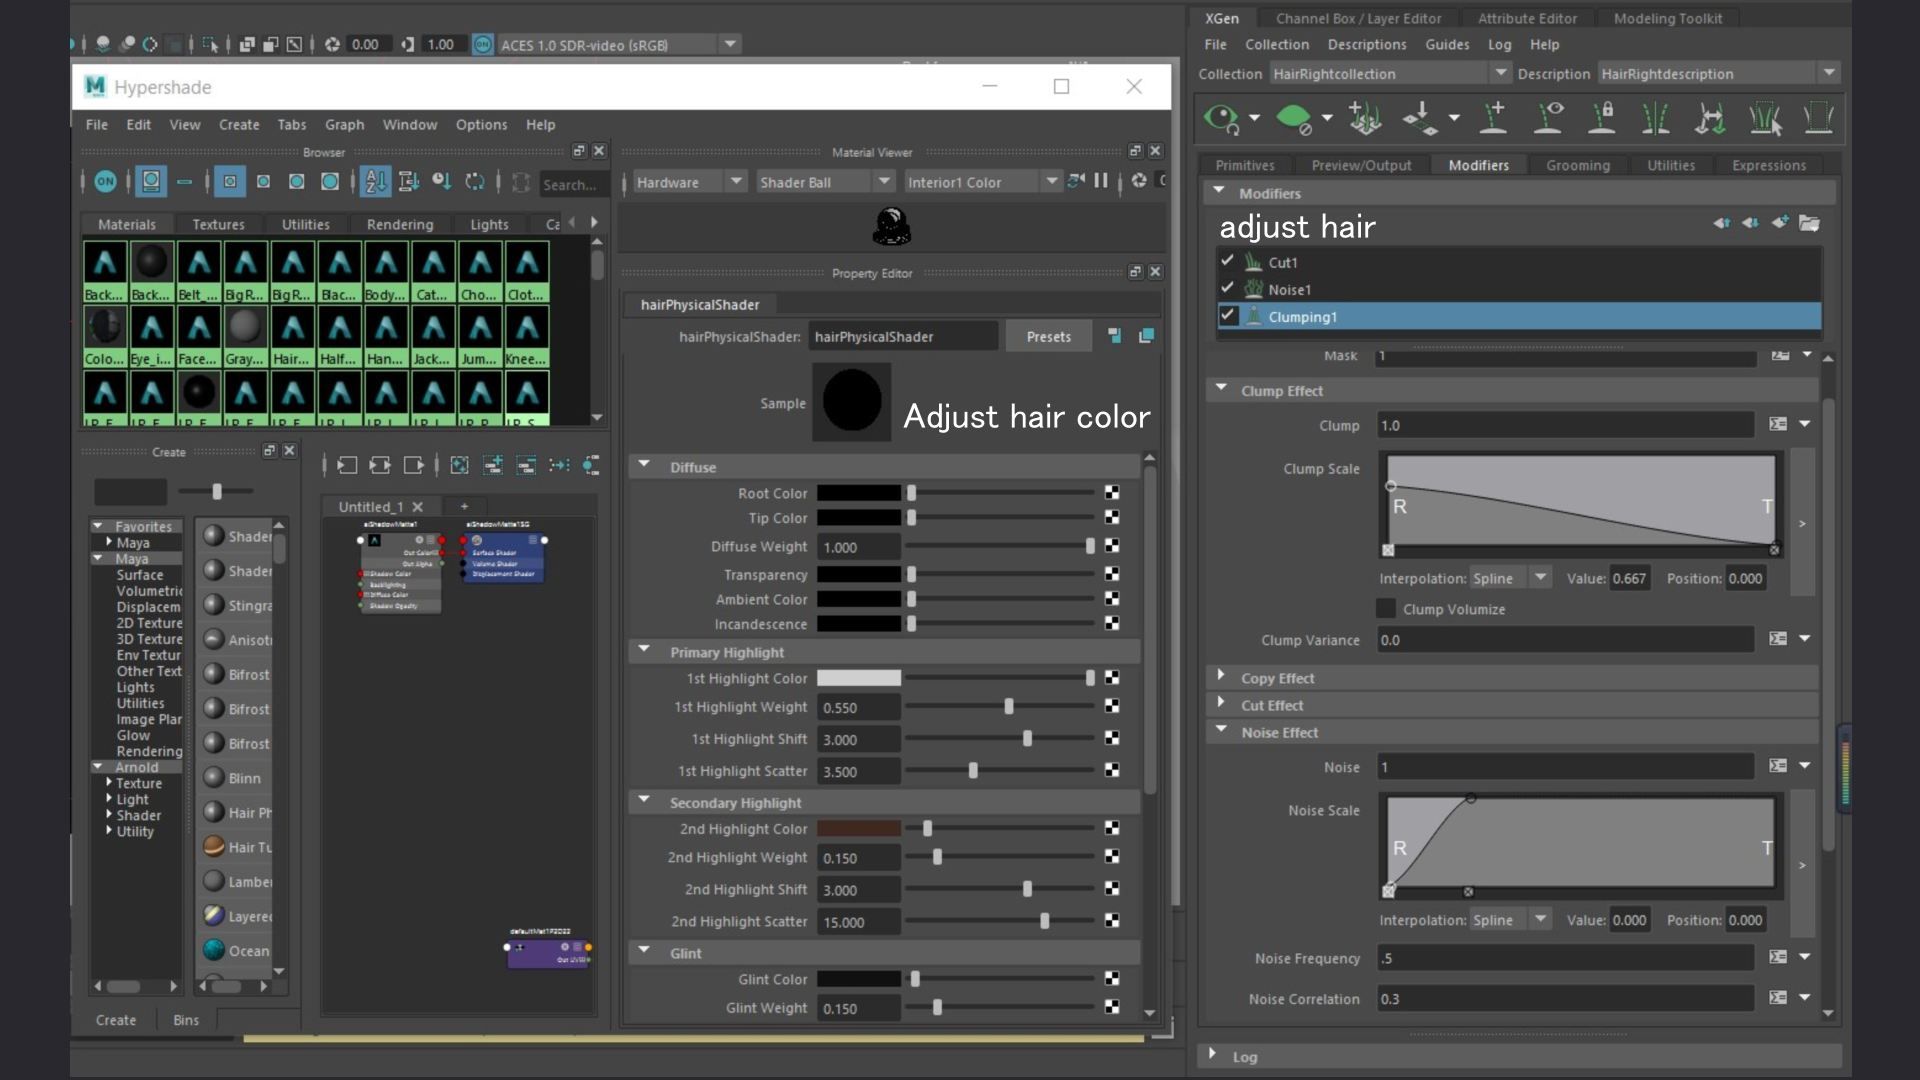
Xgen
Then, I edited the properties of each hair system, such as density, length, curliness, and colour. I used XGen's modifiers and manual adjustments to achieve the final look. Finally, I rendered the hair in the scene and made necessary adjustments to ensure they blended well with other elements for the final visual effect.
nHair
Rope & nHair
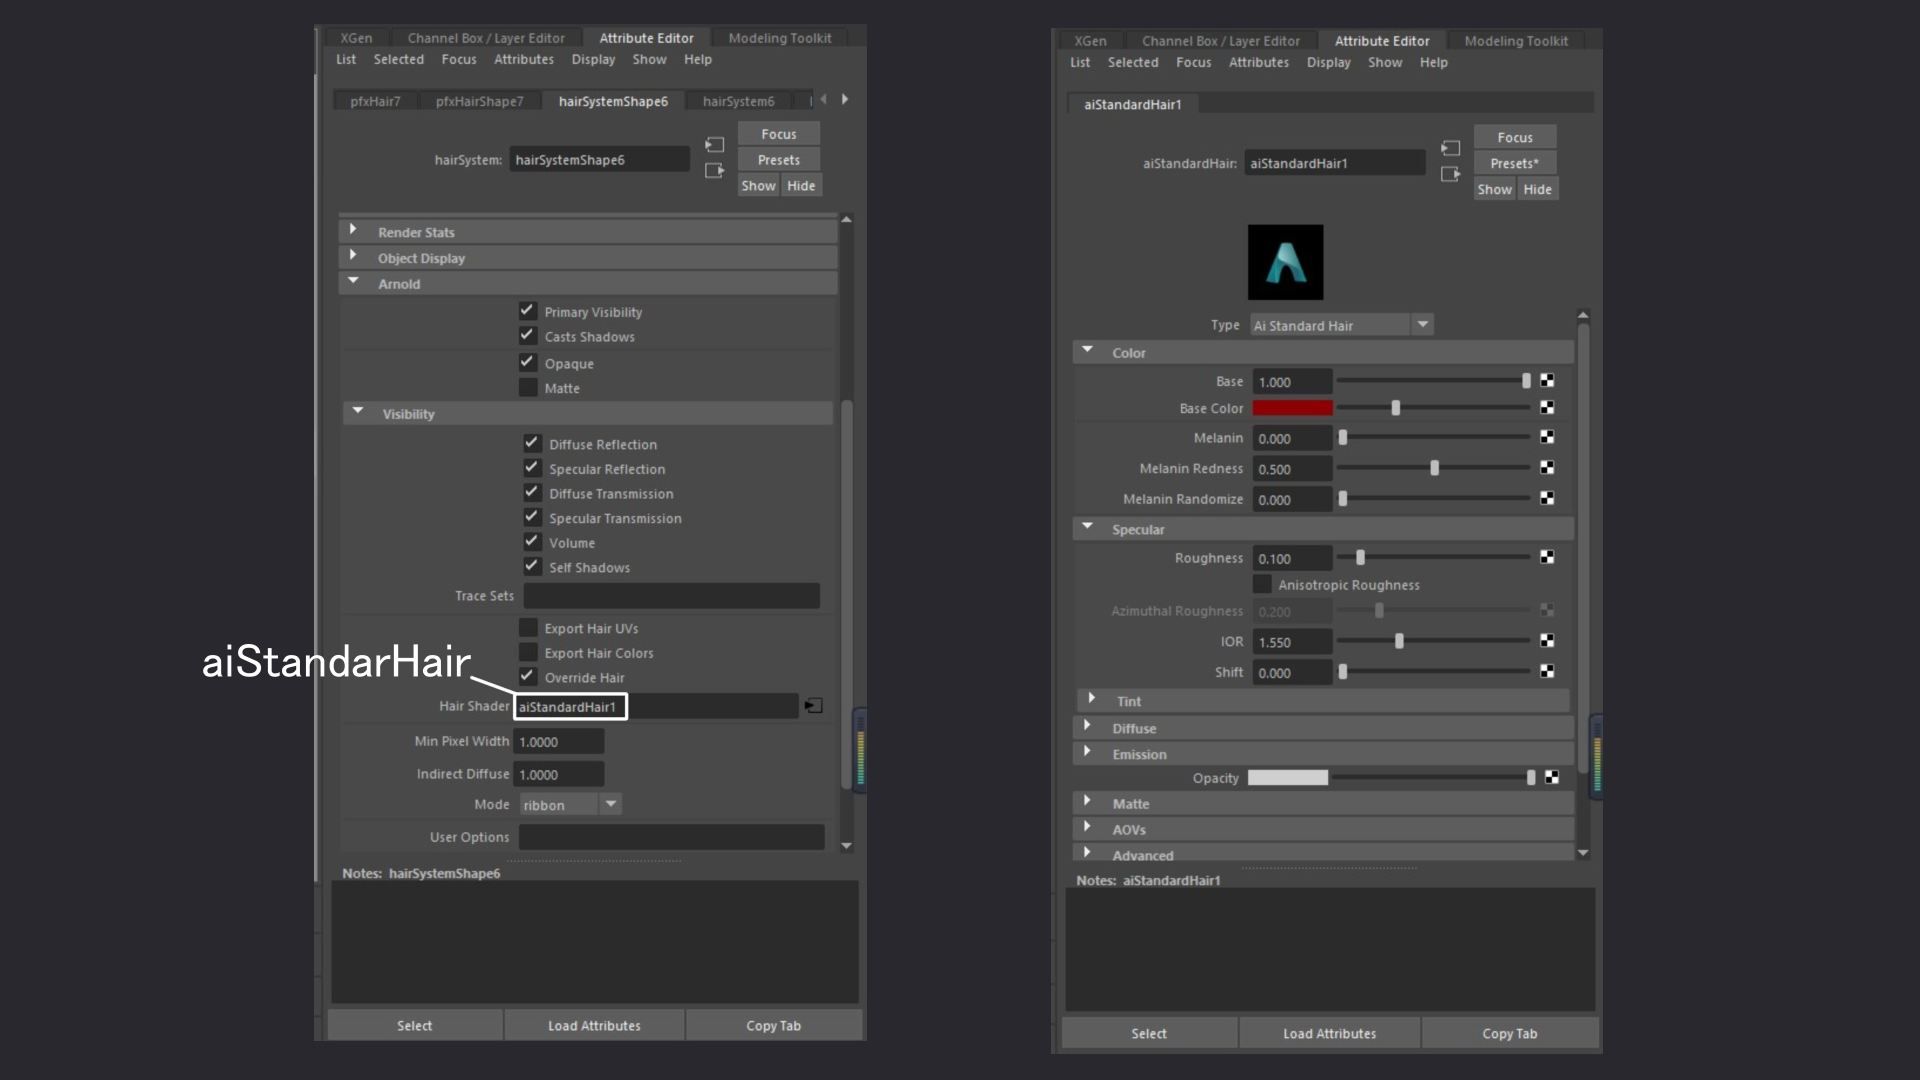
First, I extracted curves from the model and used the nHair tool to create a new hair system that was bound to the geometry of the rope. In the hair system, I set the root and tip of the rope and determined their motion path. I used keyframes and curve editors to finely adjust the movement path and shape of the rope. Then I added aiStandardHair and adjusted its settings to achieve the desired effect.
Lookdev
To achieve proper lighting in Maya I typically use four lights: a key light, a fill light, a rim light and SkyDome.
Rendering in Maya Arnold
Key light provides the main light source and is usually positioned at a 45-degree angle from the character, creating a clear highlight and shadow on the character's face.
Fill light helps to fill in the shadows created by the key light and is typically positioned on the opposite side of the key light, at a lower intensity. It illuminates areas not reached by the Key light, revealing hidden details.
Rim light is typically used to highlight the edges of an object and make it stand out more in the scene. It is placed at the back of the object to illuminate the edges around it.
SkyDome is used to simulate the sky and environmental lighting. This type of light is created by using an HDRI image as a texture to simulate natural lighting, making the scene look more realistic and natural.
Posing
Posing the character in ZBrush I use the Transpose Master plugin to pose.
Rendering in Maya Arnold
Go to Zplugin> Transpose Master > TPoseMesh to merge all model into one mesh, making it easier to pose the entire character.
Then use the Transpose tool to manipulate the joints and muscles of the character to achieve the desired pose. This process may require several iterations and adjustments to achieve a natural-looking pose. And lastly, bring it to Maya to do the rendering.
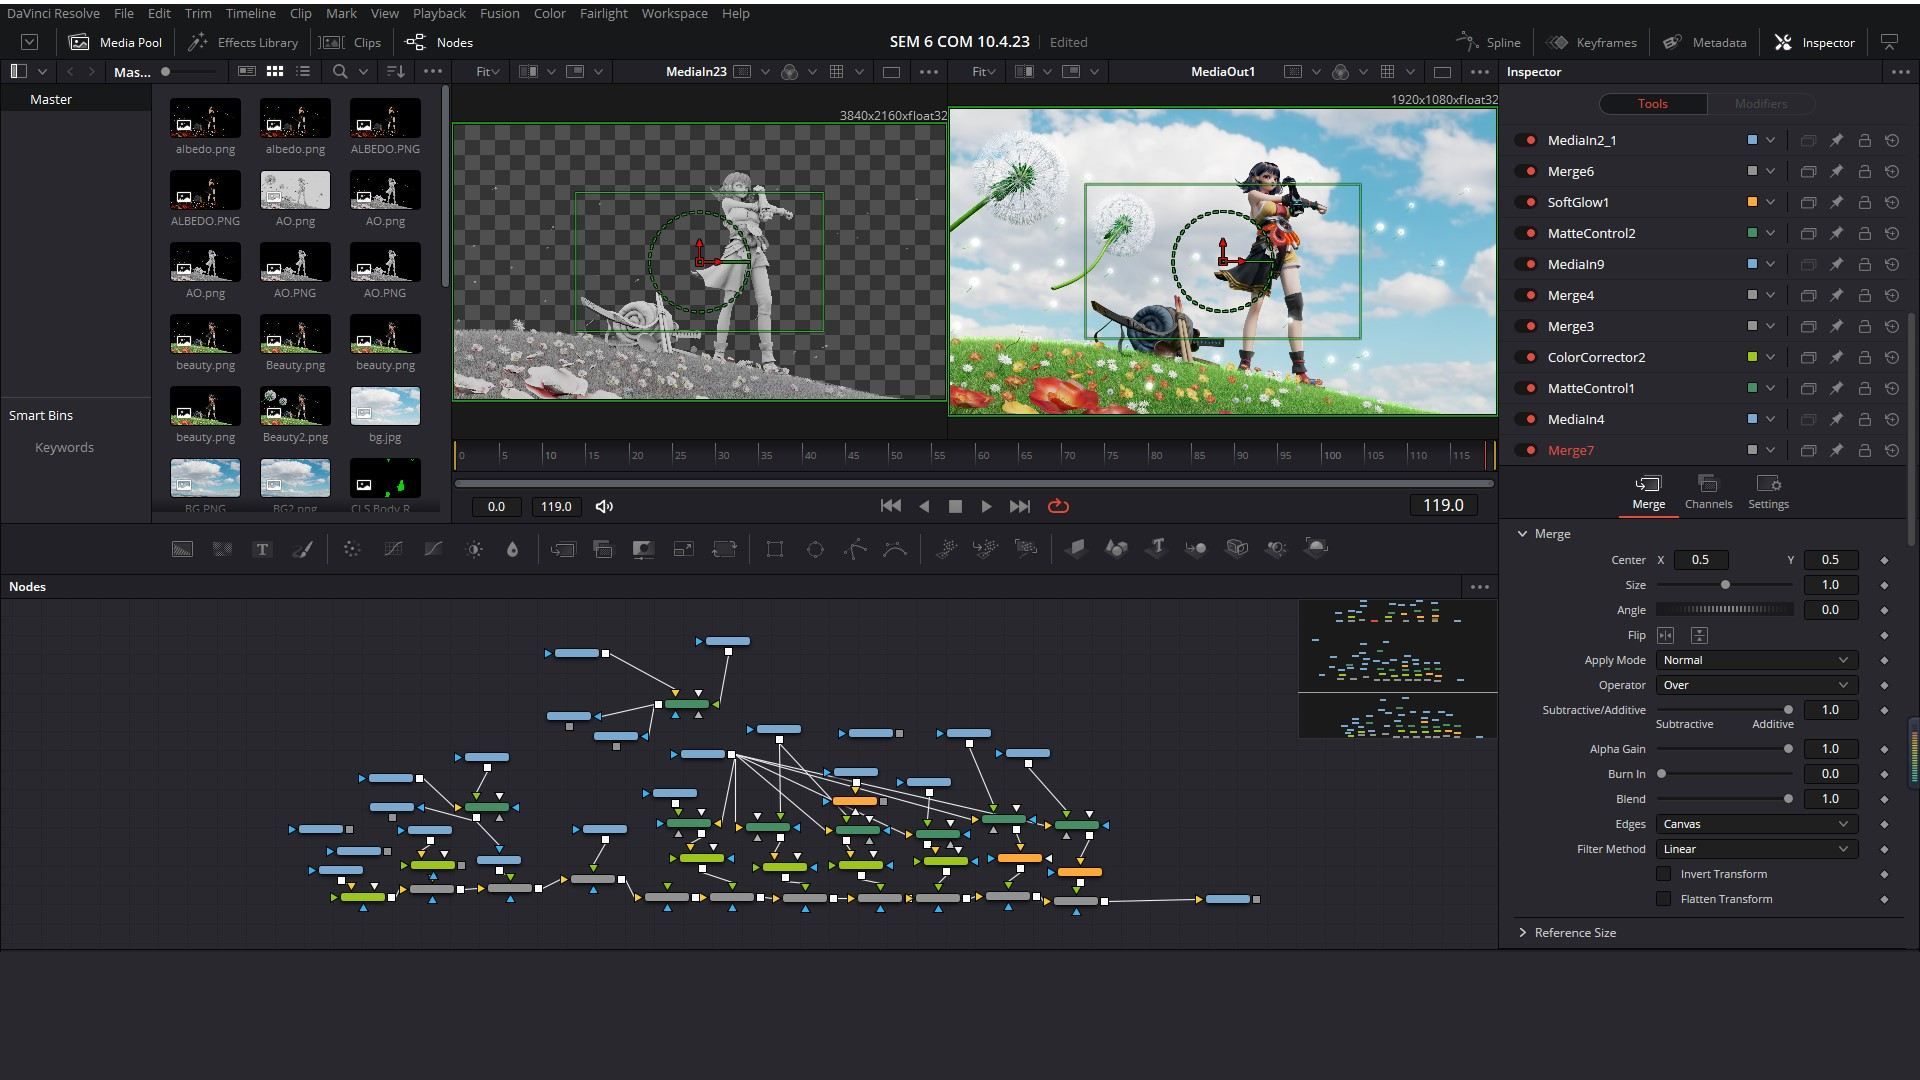
Composition
I look to create a corresponding scene to fit the character's personality. In this instance I went for a more "fresh and clean" direction. Then imported footage into DaVinci Resolve to do the final touches.
I created a new node to add a new composite layer, which served as the background in the composition. I added other nodes to create additional composite layers and combine them with the background layer.
For each composite layer, different effects can be added and the properties of the layer can be adjusted, such as opacity, hue and saturation, colour correction and masking.
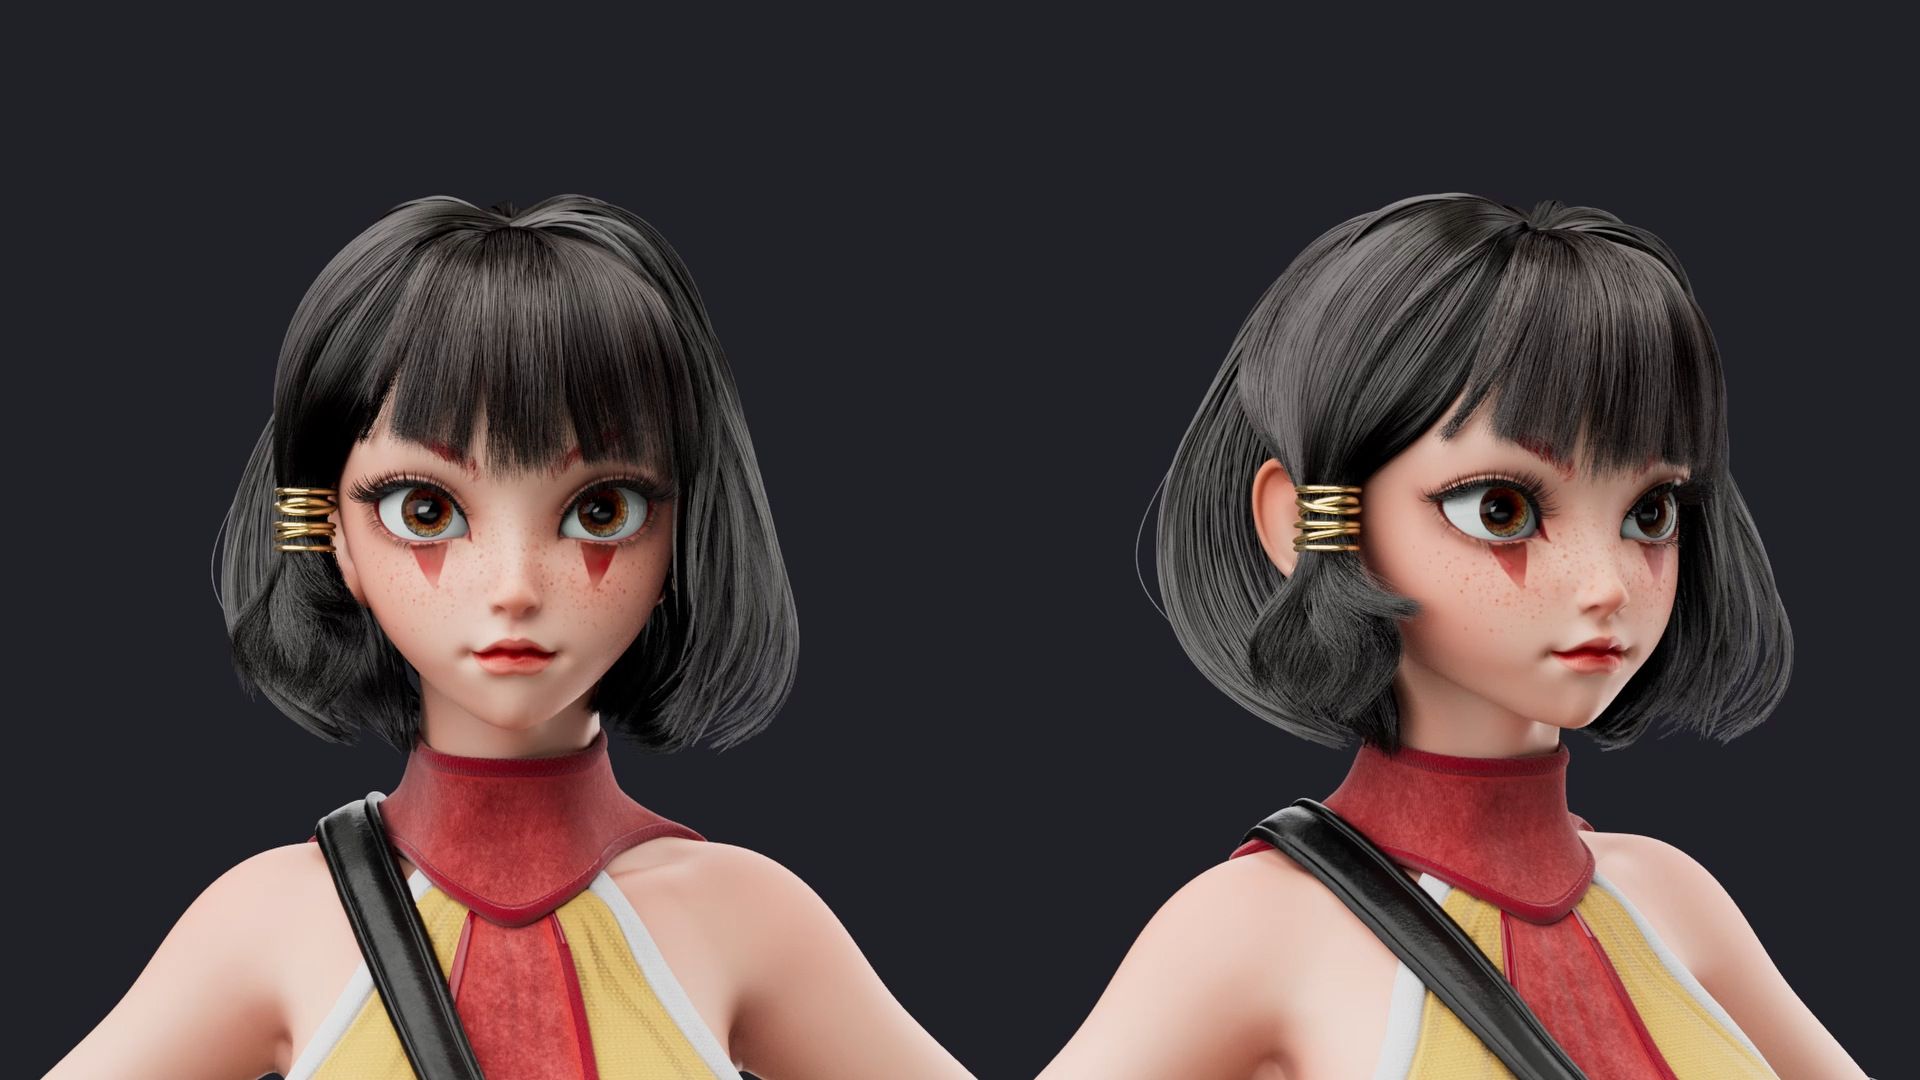
Final artwork
0:00
/
Conclusion
All of the aforementioned steps process I create the 3D character modeling "HINO".
I am incredibly grateful to The Rookies for giving me the opportunity to showcase my work and share my experience with others. Throughout the project, I gained valuable insights and learned a lot, and I appreciate your interest in my work. Have a wonderful day!