
Ever wanted to create a crazy visual effects shot like you'd see in a feature film? Well, today Omar Mukhtar, an artist based in Los Angeles, and currently studying at Gnomon - School of Visual Effects is going to help break it all down for you.
This post will be a breakdown of my project “Falling Arrows”. I created this project in my Dynamic Effects class at Gnomon. I will demonstrate my approach to this project and show you how I planned my workflow to create a dynamic effects shot.
Workflow
Maya - Animation, Texturing, Lighting, Look Development
Fracture FX - Destruction Simulation
Phoenix FD - Dust Simulation
Vray - Rendering
NukeX - Compositing
After Effects - Editing
Photoshop - 2D Lighting Tests
Concept
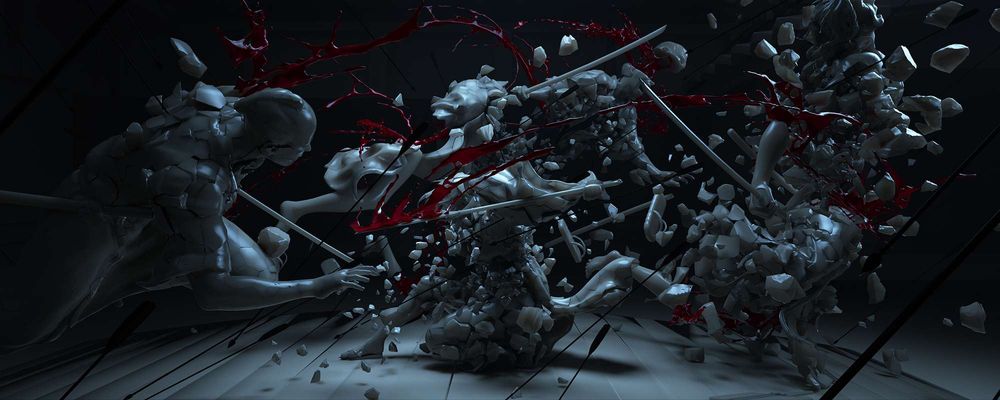
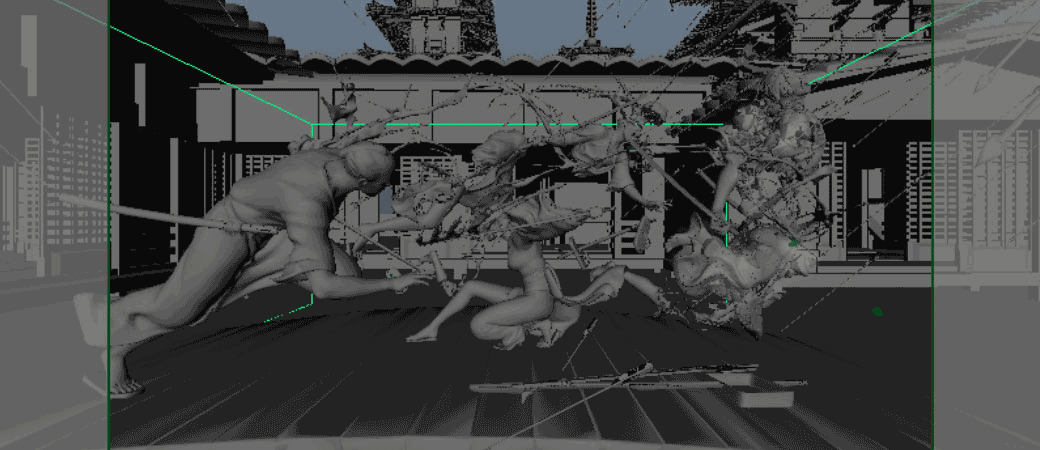
The idea for this project was inspired by the film Hero starring Jet Li. The film has extreme wide shots full of thousands of arrows falling from the sky. I liked the idea of black arrows showering over marble characters breaking them into many pieces.
I also wanted the sequences to be in slow motion, and was inspired by the James Bond and Westworld intro sequences.
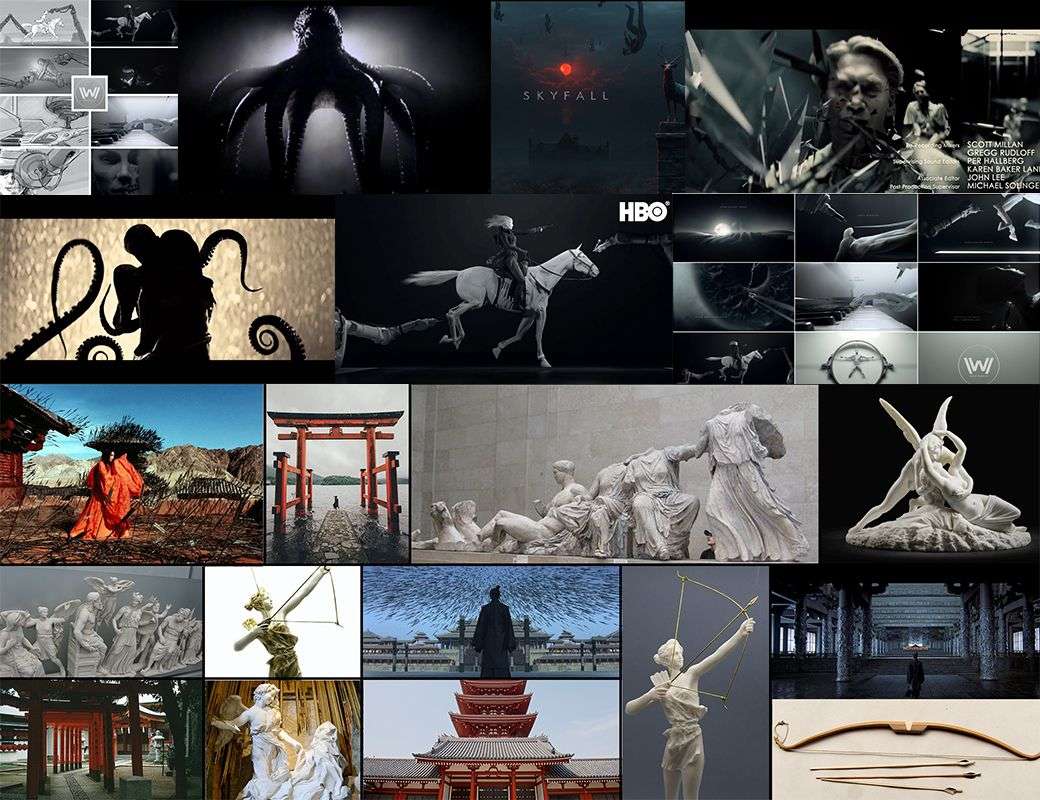
I also researched a very wide range of paintings from the Renaissance era. They are very epic and unreal. I thought mixing the ideas with some fantasy elements would be fun.
Reference
Reference is a very important part of my process. Your reference is the source of information you will come back to throughout your entire project. You want to reference your images to ensure that you don’t lose focus on your vision. Google and Bing can be good sources to get images together quickly. I researched many Japanese styled architecture, Japanese torii’s, marble statues, and wooden arrows. These images informed my art direction.
Set Up / Previsualization
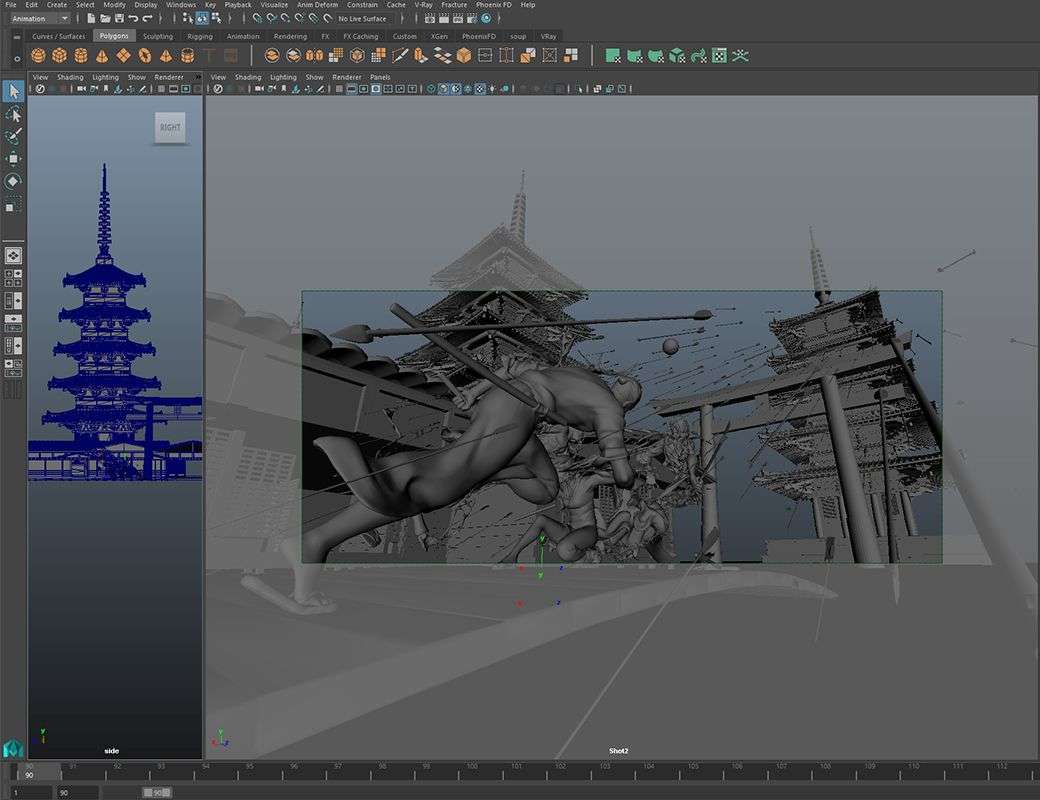
I started off with blocking my shots, throwing some quick shaders on my geometry, and creating some lighting tests. I like to do this in the beginning of my process where some people might do this after their simulations. I think it’s important to start this process early. You want to get a feel for your final result.
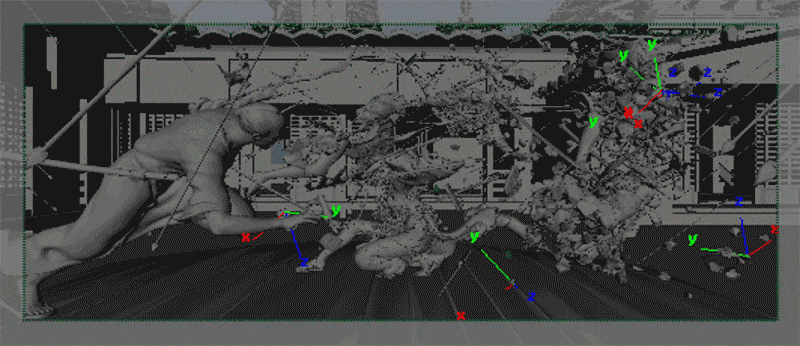
You can search for 3D models or build your own. This particular model was created by Frank Daniel Moen Vedvik. I imported the assets into Maya and began to block my shots. I created a separate camera for every shot to avoid getting confused. My goal was to create very wide shots. I decided to use a 2.35:1 (Cinemascope) aspect ratio. I blocked out the Japanese buildings and the character models.
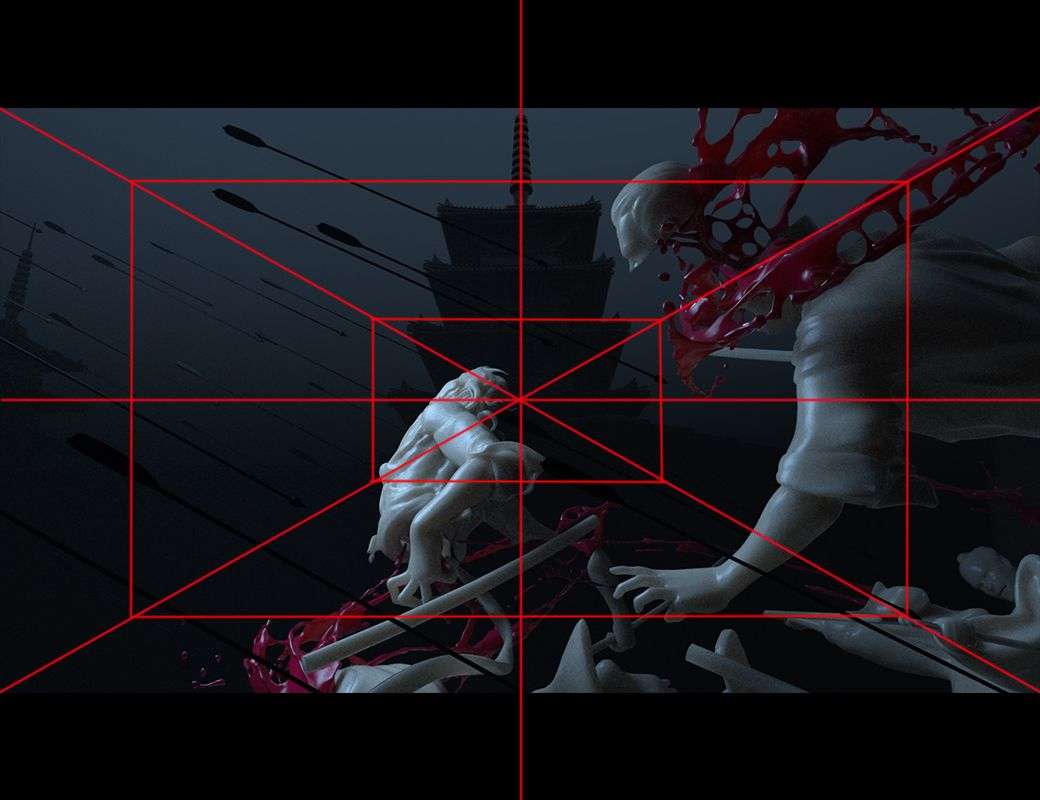
Symmetry
I always look back at my reference photos for framing ideas. Researching photography stills is a great way to learn how to frame like a cinematographer. I wanted every shot to be symmetrical.

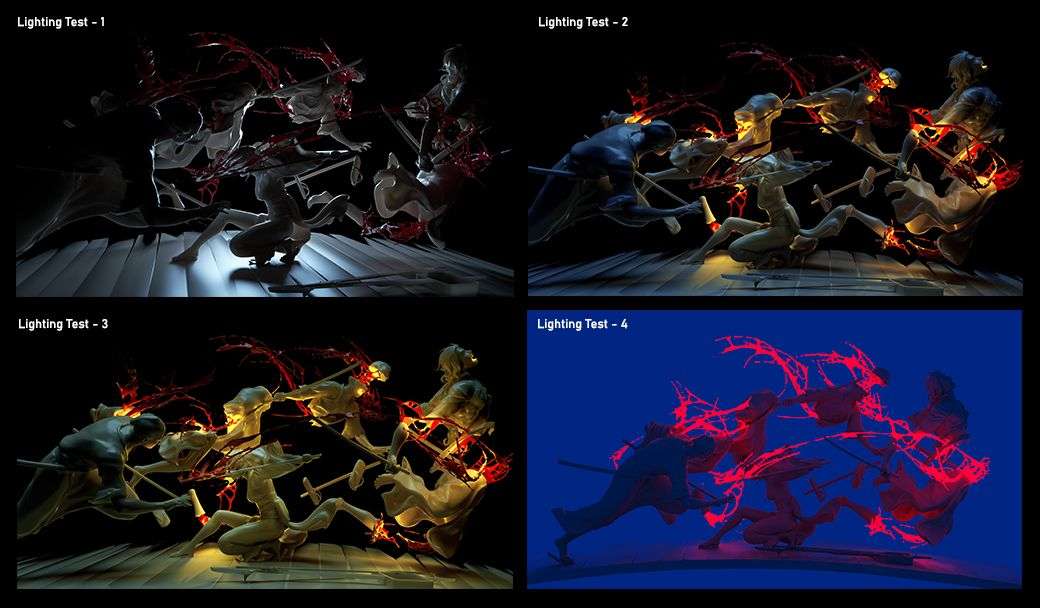
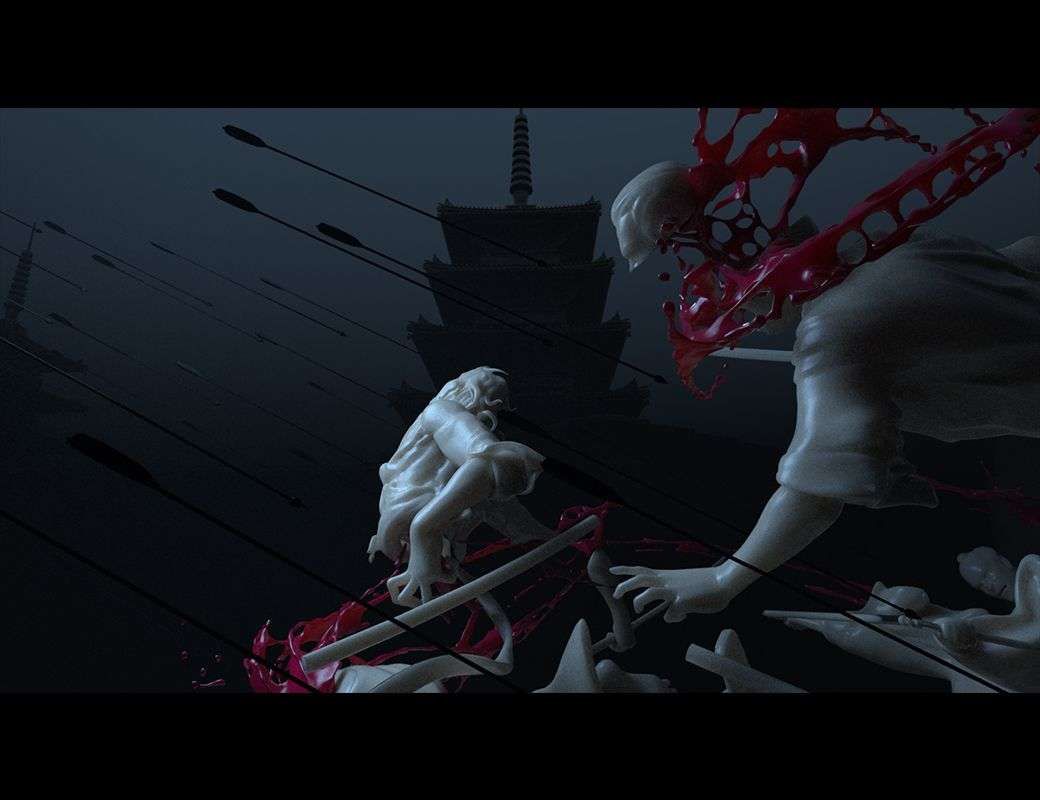
Lighting Test
I added basic shaders onto the geometry. I used a VrayFast SSS shader for the buildings, characters, and blood. Lighting and Rendering tests should be created throughout your whole process. I rendered tests out as PNG’s and did some quick color correcting in Photoshop. I didn’t take too much time on it. I kept the process quick in order to keep an open mind. This gave me some options. I decided to go with a darker mood.
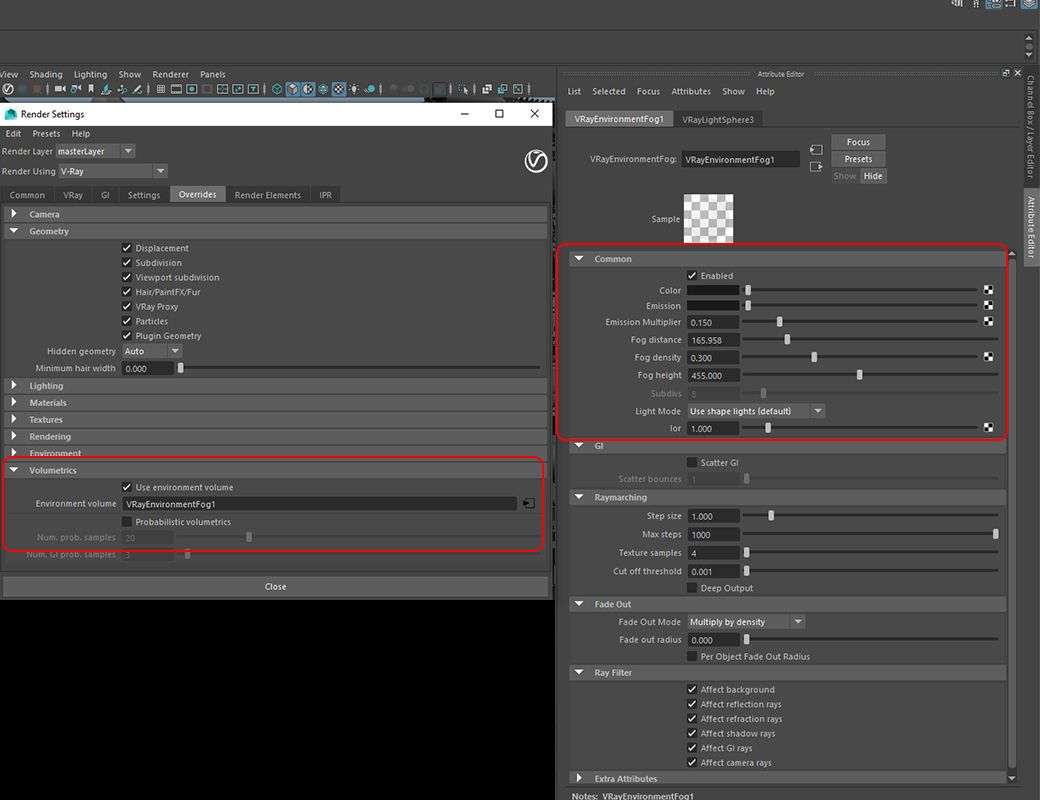
Atmosphere
I used the Vray Environment Fog to create more atmosphere in the shot. In the Vray Render Settings > Overrides > Volumetrics > Use Environment Volume. You can add a Vray Environment Fog node and adjust your settings in the Attribute Editor. I use this to generate a film look in all my projects. I think volumetric fog can make a huge difference between something looking too CGI and more cinematic.
Shot List
After experimenting and blocking out shots, I created my official Shot List, and decided on having about 7 different shots. It took quite a bit of time to decide on which angles were unique.
A shot list can be useful in a situation like this to stay organized. You can easily get off topic if you’re not constantly following your plan.

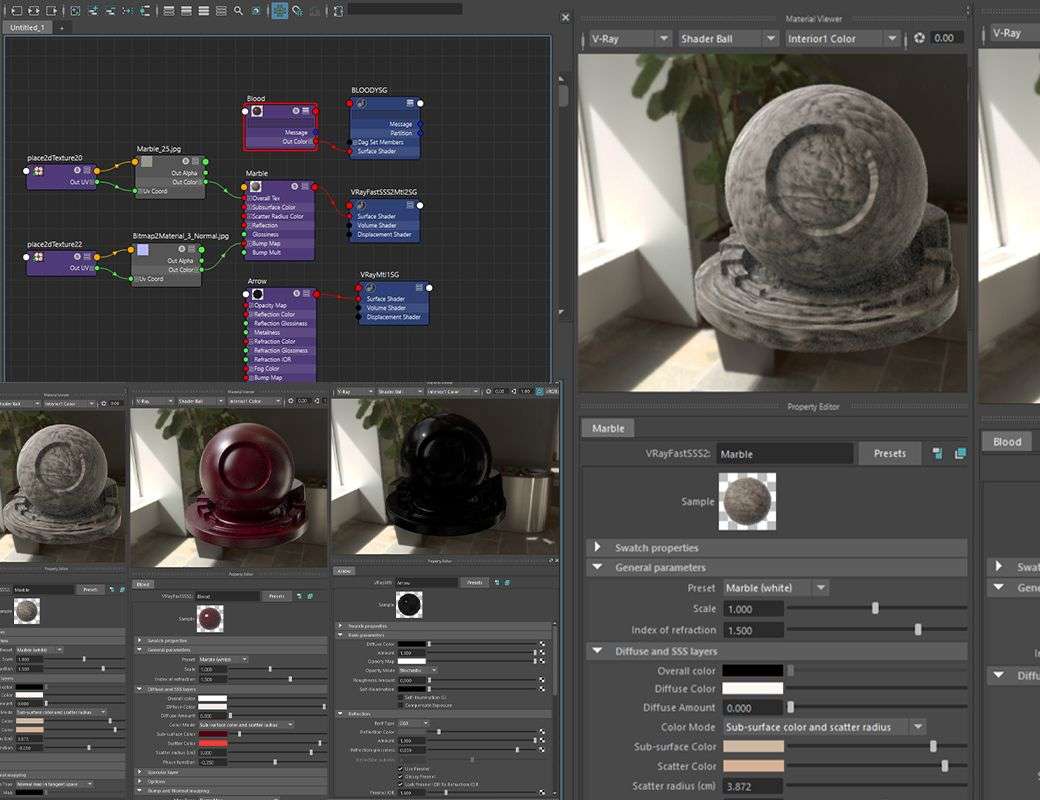
Texture & Shading
I finalized the textures to the environment and characters. I used Maya’s Hypershade and Node Graph to control the shaders.
I also added a Vray Displacement to give the texture more depth. The displacement can be a great way to break up the geometry and give you some nice detail and shadows.
Animation & Dynamic Effects
This is the point when I had to finalize my arrow animations and prep for my fracture simulations.
There's a few ways to approach handling many objects flying through the air. You can use expressions to have them fall randomly or animate them individually. In this case, I had over 100 arrows. For these shots, I animated the hero shots by hand and randomized the remaining arrows. I used expressions for the background arrows.
I wanted the arrows to be placed at different lengths from the camera. This was a way to show depth using the space. I used the graph editor to adjust my animation because it's easier to use the graph editor instead of doing everything by hand.
Primary Fractures
I used Fracture FX, which is a plugin for Maya to create my destruction simulations. I created this in a few passes. My first pass, or primary fracture, was to separate the pieces into bigger chunks.
I organized the character meshes into different groups. This will make it easier to fracture the groups individually.
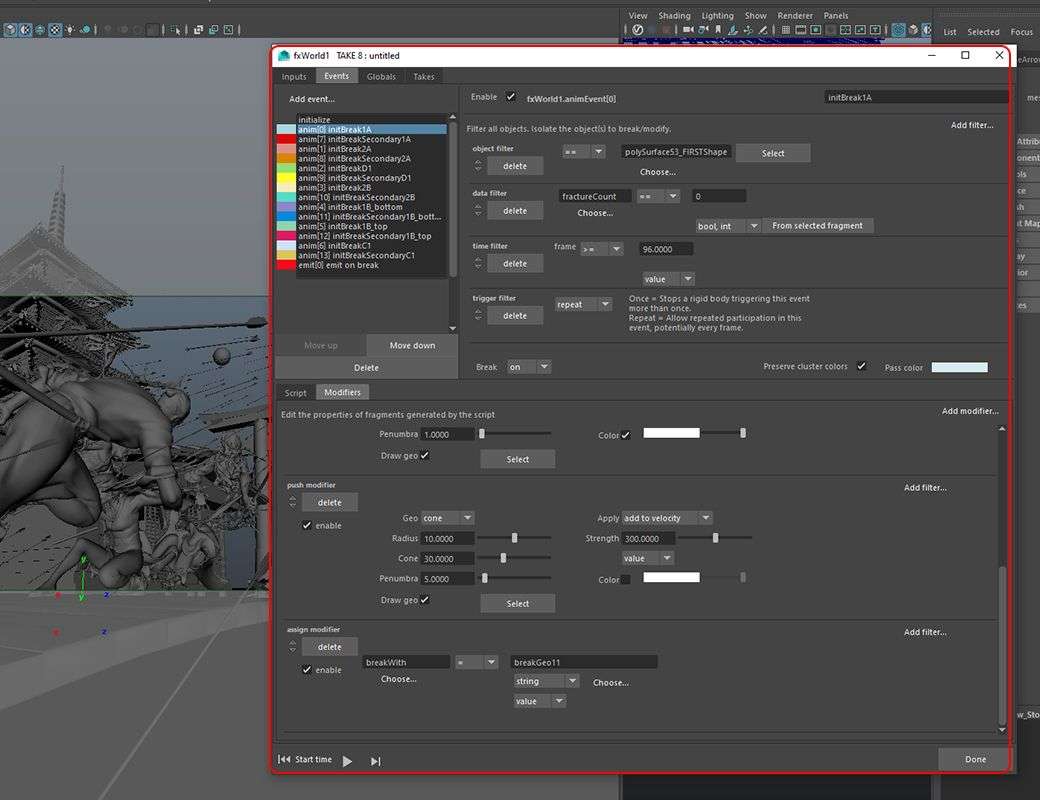
Some shots require all of the fracture sims to run at once while others only required one. Then, I started to art direct the simulations for individual shots.
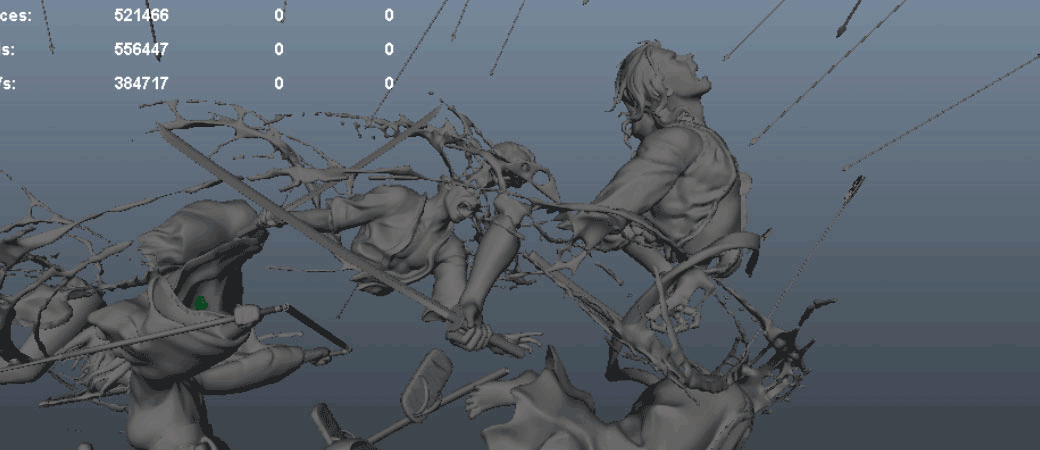
Secondary Fractures & Debris
Once the primary fractures were completed, I created a secondary fracture to get more detail from each individual fragment. After doing many tests, I added an interior displacement and noise to break up the inside faces. This is a way to break up the uniform look and give it so more realism.

After your primary and secondary fractures, you can prepare your simulation for debris. You can emit particles from the fragments to get dust trails. These dust trails were simulated using Phoenix FD.
Slow Motion
I wanted to achieve a slow motion effect so I used Maya’s Time Warp. This is under Animation > Key > Scene Time Warp > Add Scene Time Warp. This creates two keys in your timeline that can be manipulated to make your animation quicker or slower. The original animation was from frame 96 to 115. I stretched the keys so that it was from frame 2000 to 4000.
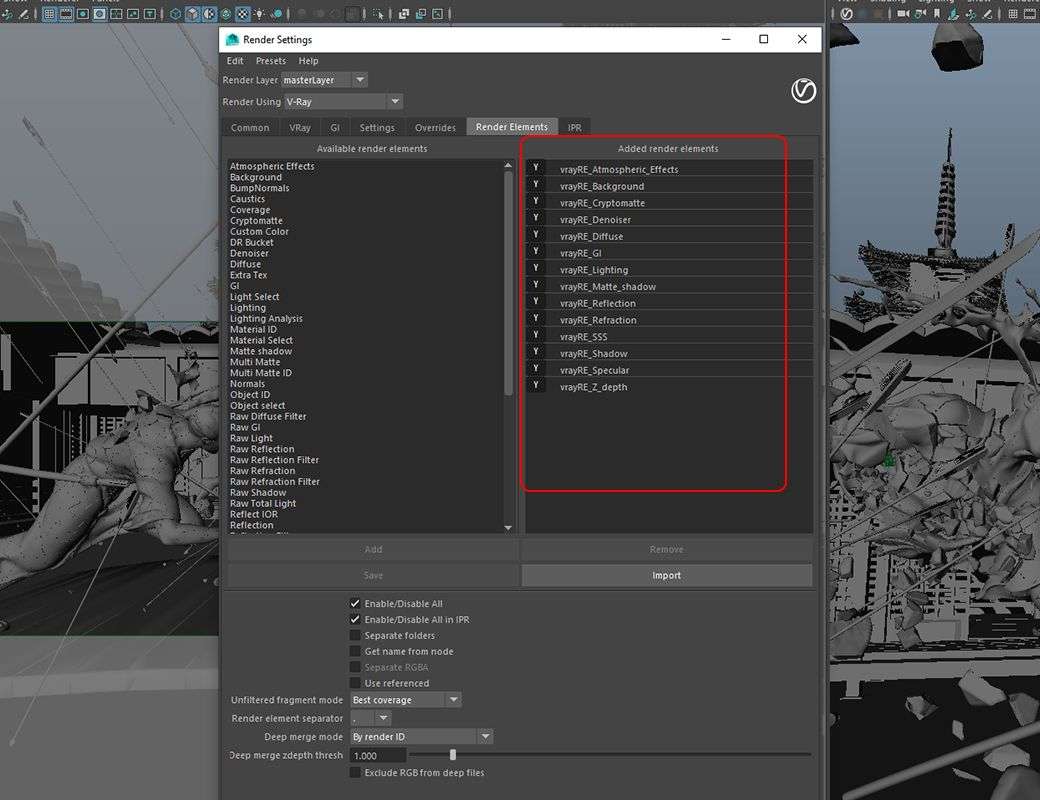
Rendering
I used Vray to render out the appropriate passes. I rendered multi-channel EXR images with multiple layer passes so that I could separate them in Nuke and control every layer the way I wanted. I made sure to make them 32 Bit EXR files, and rendered in 2K resolution. I rendered the images a bit bigger than HD so that I could have more room in post editing like 2D shaking effects, zooming, or cropping.
Compositing
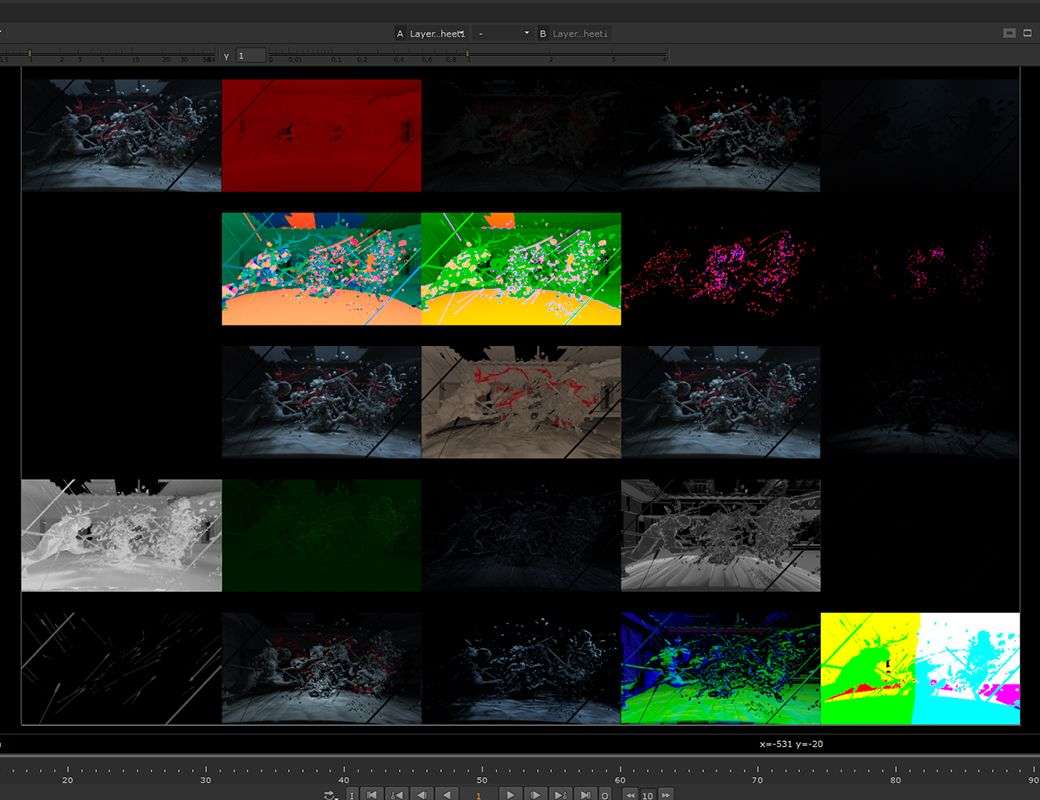
I imported my layer passes into NukeX. Nuke offers a great amount of flexibility when it comes to adjusting every layer of your image sequence. I used the shuffle node to separate all the passes. I continued to layer multiple grades and color corrects to achieve my desired look. I would recommend putting effort into learning as much as you can with Nuke. Your compositing skills can take your project to the next level. It can be the difference between looking too CGI and realistic.
Some finishing touches that I always include is a subtle vignette, lens distortion, and motion blur. After rendering out the shots, I used After Effects to edit the final shots together into one sequence and add the titles.
Final Result
Special thanks to The Rookies and my Gnomon instructors Andres Berkstein, Saad, Boomer, and Miki.