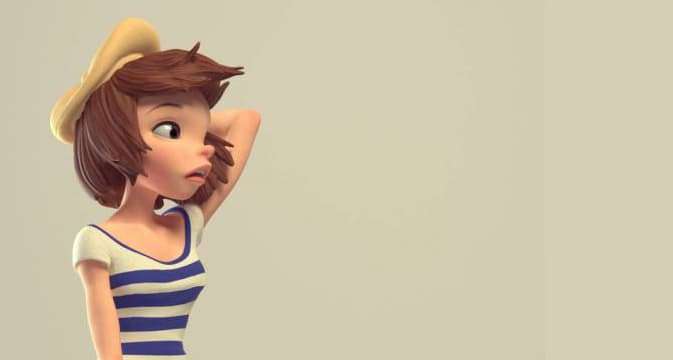

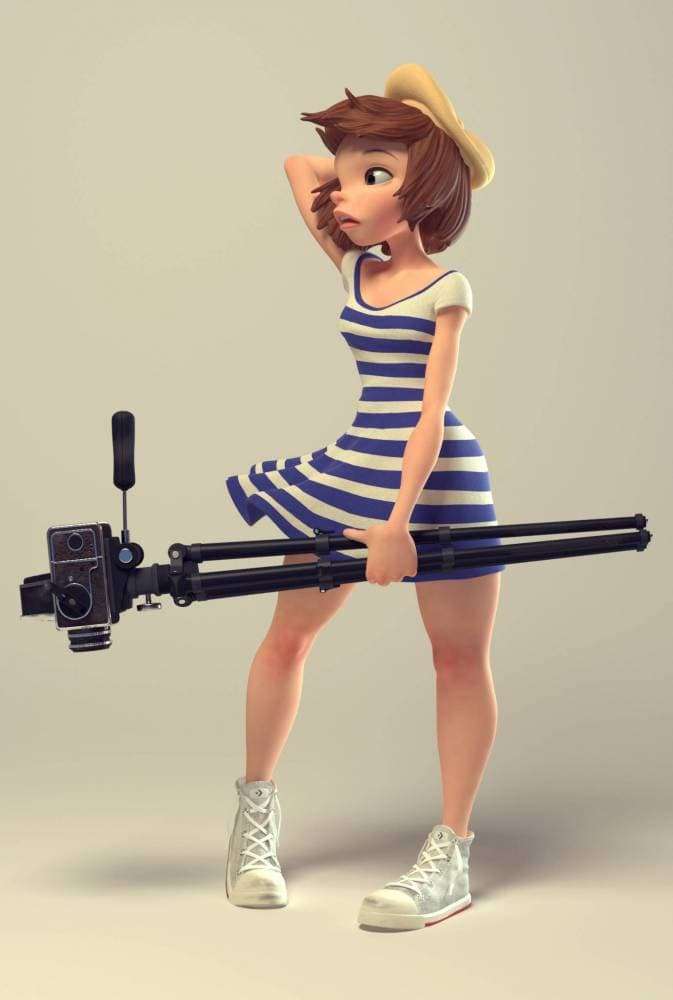
This is a model I did of a drawing from Chris Sanders’ sketchbook. One of the challenging parts of this piece was getting to translate the concept drawing well into 3d. Figuring out the warped proportions of Chris Sanders' drawing was key to making the model look correct.
However, I had a lot of fun creating this character and I hope this tutorial can help you guys in some way too!
Modelling
With almost all my models, I usually start out in Z-Spheres. I dynamesh it and start modelling to get the volume of the model I want. At a very early stage, I keep my models in symmetry in order for me to get the proportions and the shape of the character much faster, rather than sculpting it in a pose.
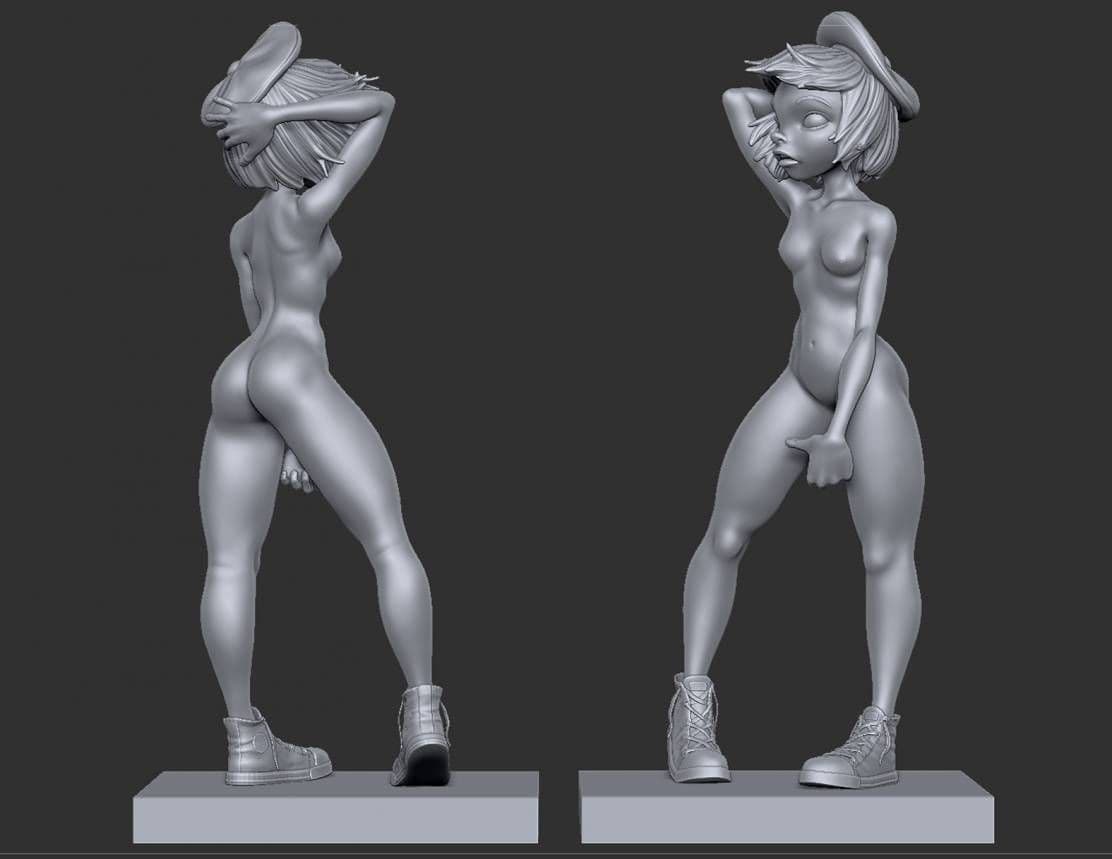
Right after I feel that my symmetry pose is in good shape, I break it into a pose. Such as being the arms and twisting the hips, remodelling certain areas are required. Also, muscles react differently with one another depending what the pose is. Even though clothes (her dress) covers the majority of her body, I feel that knowing and going that extra mile to figure our the anatomy of your character helps you find the character you’re looking for. It can also help you understand how the cloth material reacts with the anatomy underneath.
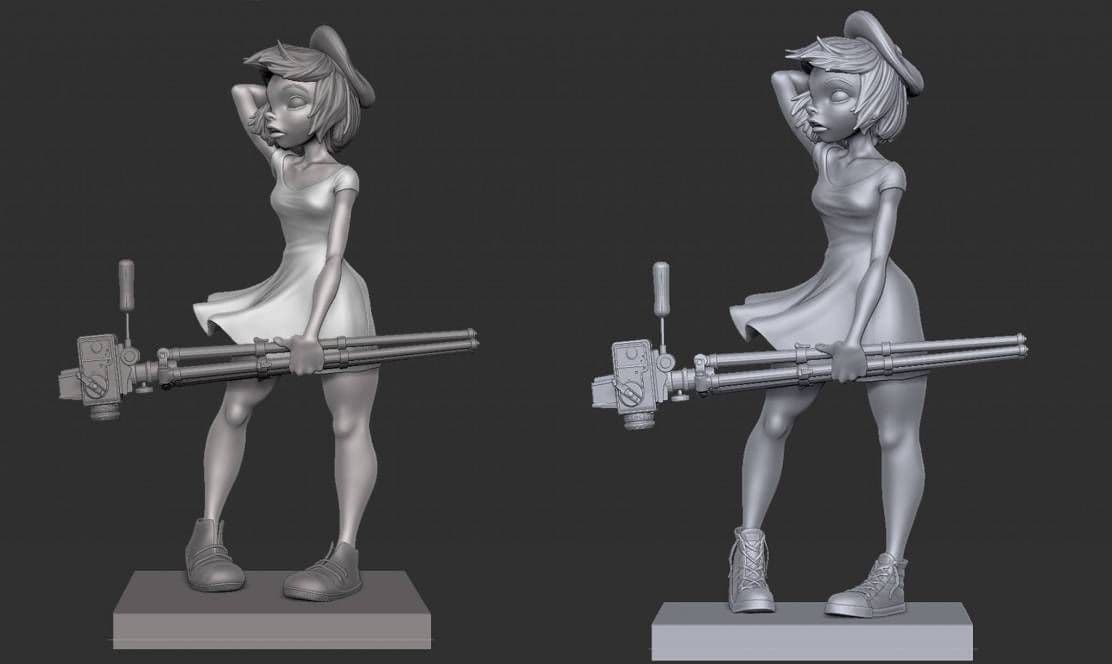
These are two of the same model. To the right is more of the final model. Going with the concept for the show (picture on the left), after going through several critiques, I heard several times that the shoes did not hold up very well. So I made a decision to tangent off the concept a bit and go with a different shoe design. The shoes are off the concept, but that was my creative decision to do so!
Lighting
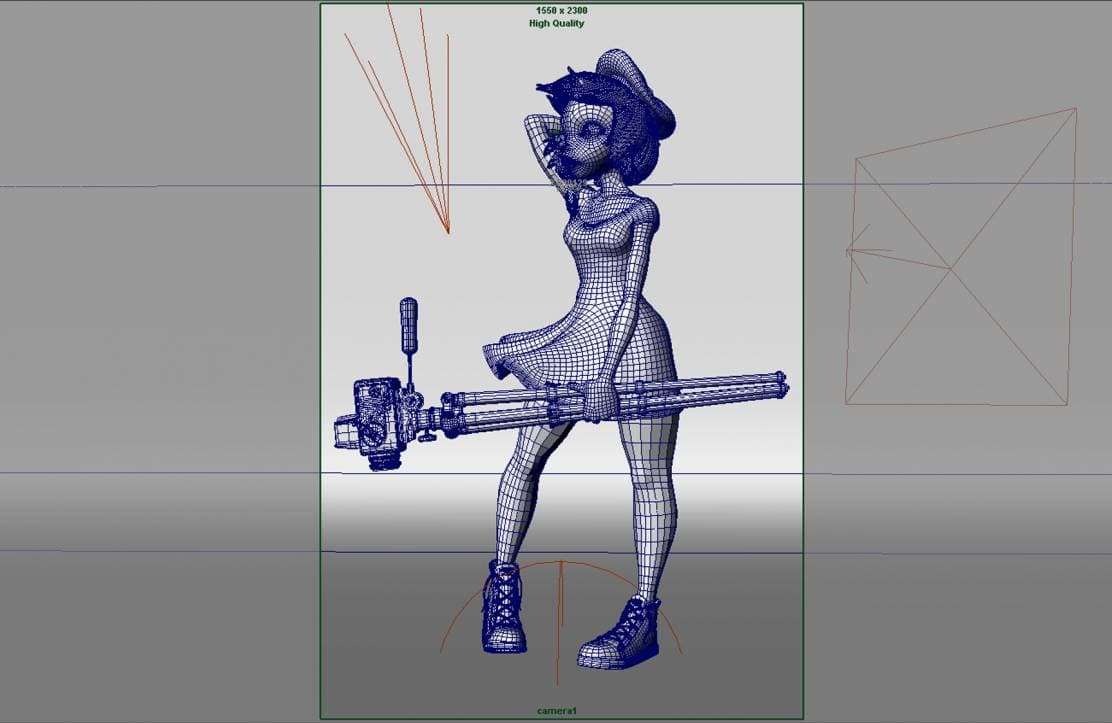
After modelling, retopoing, and UVs are done, I export all my models into Maya. I set up the scene and the light before any texturing begins. My main go to rendering software is Vray, I find it to be very user-friendly.
Make sure to have your models 100% done before starting texturing.
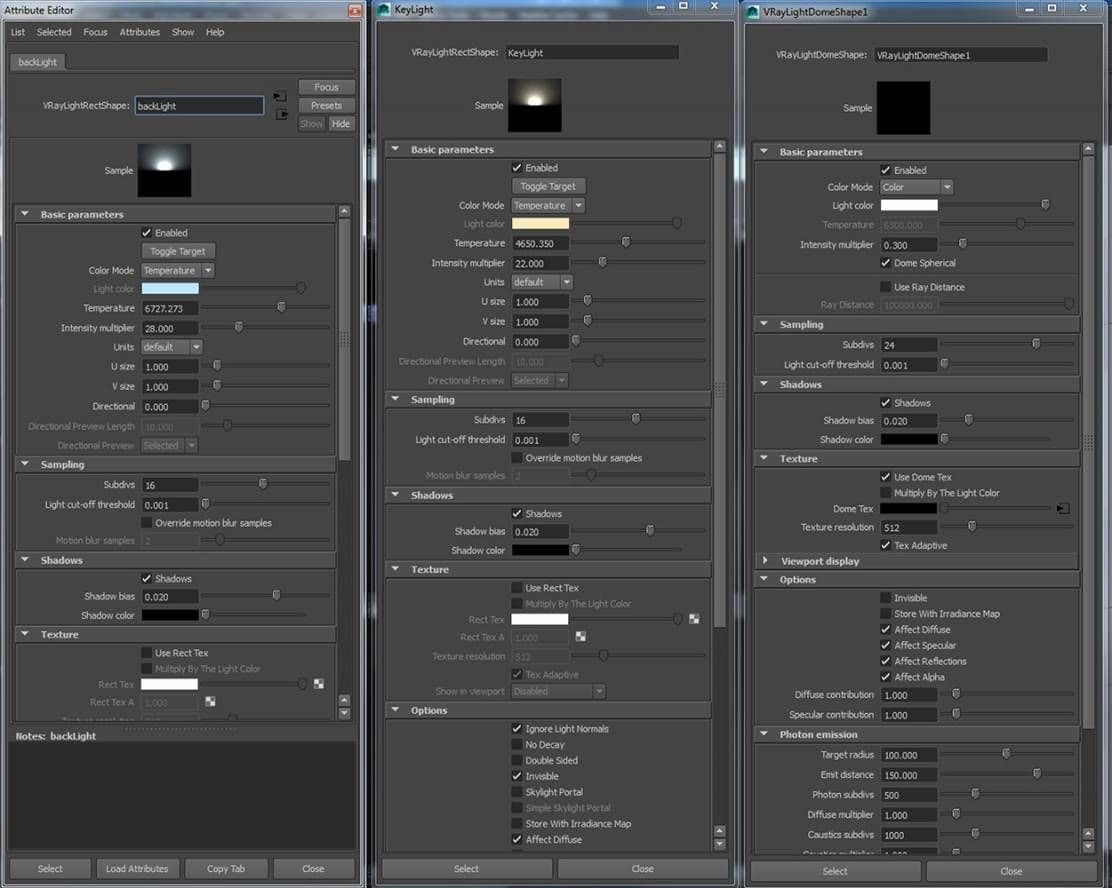
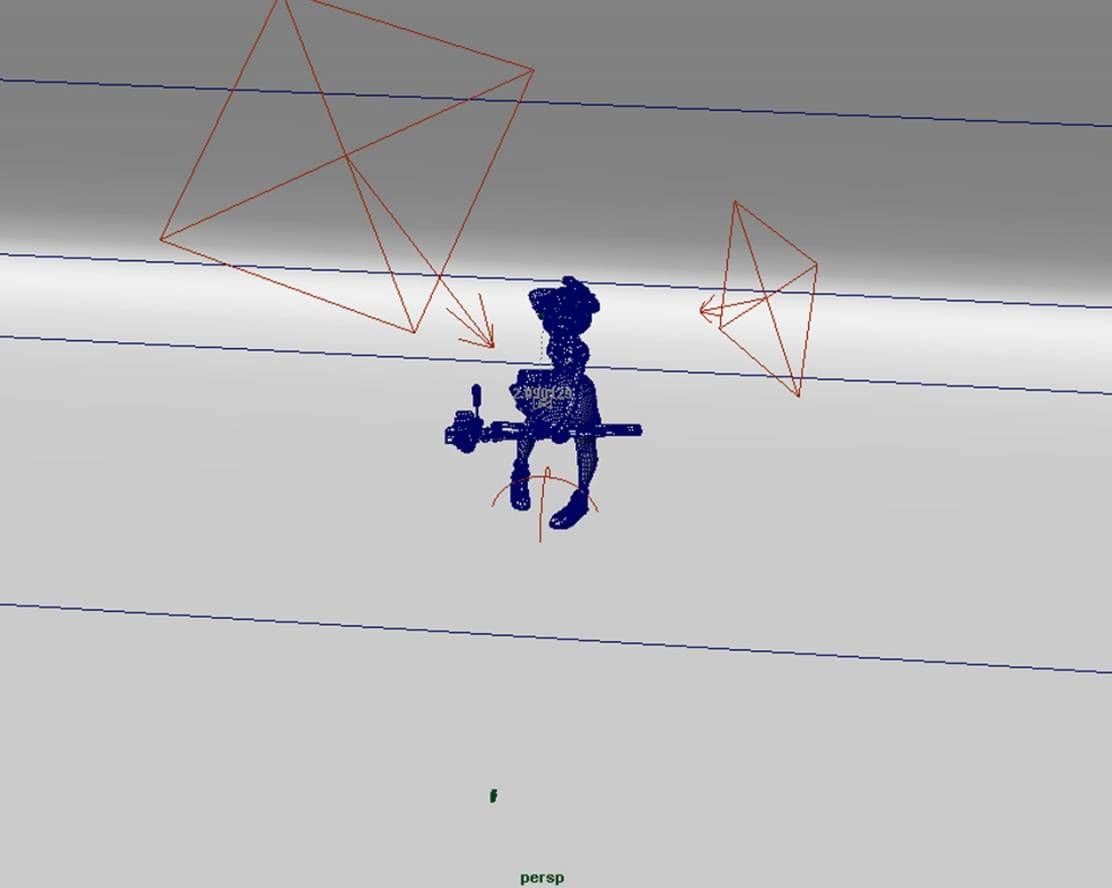
My lighting setup is very simple and straight forward. I have one dome light. I plug in an HDR photo into Texture -> Dome Tex. This helps getting a nice GI (global illumination) into the scene. After that, I put a key light on top to mimic sunlight. I make the temperature towards warmer color. Next I placed a backlight to add rim lighting, that being cool color.
Shading
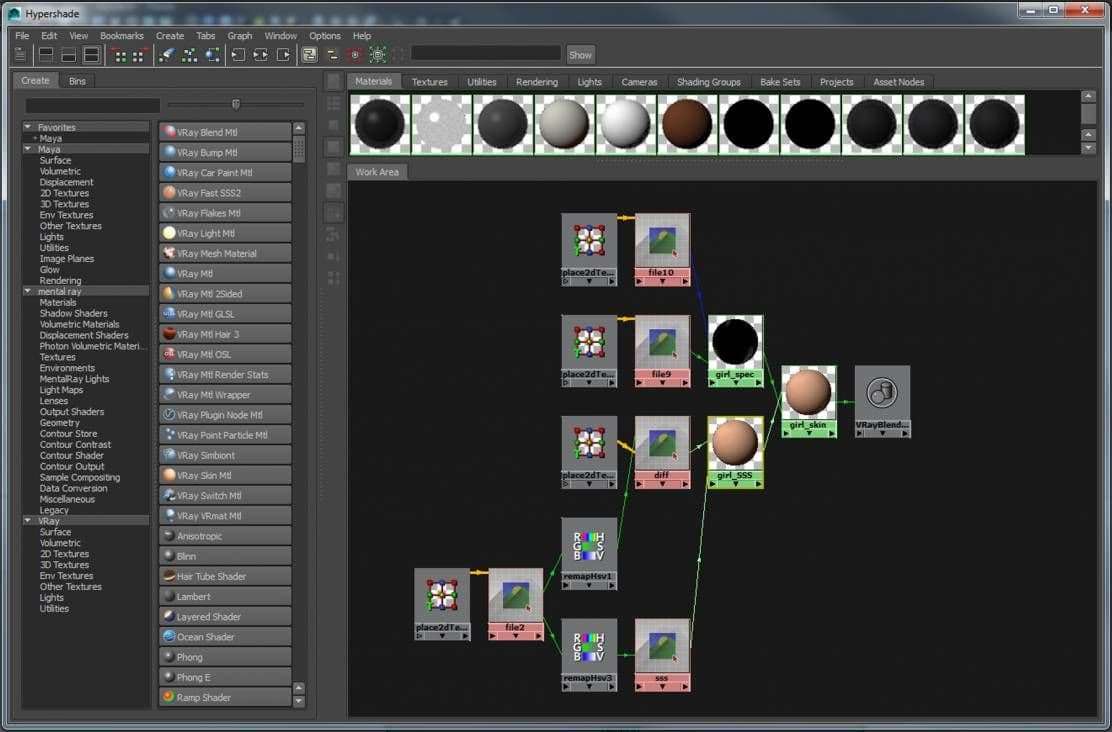
This is my skin texture set-up, I have 1 main skin texture map and I plug that into two separate remapHSV -> ramp. This allows me to have full control with sliders to manipulate hue, saturation, and value. Click on FastSSS2 for the skin node. Then grab one of the ramps and plug it into the sub-surface and the other for the overall.
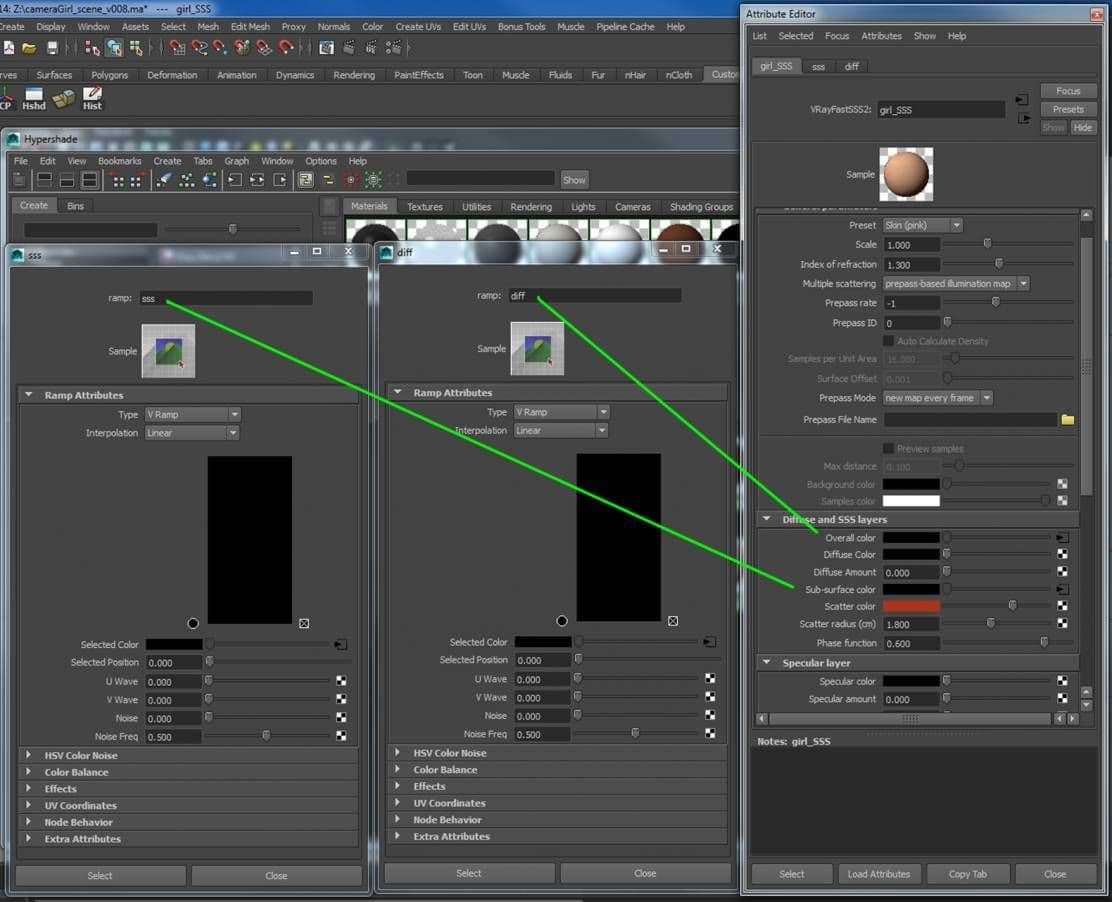
I set the preset to a skin (pink). After plugging in sub-surface and overall color, I take the diffuse color all the way to black. For the scatter color, you would want to have it on the saturated bright red color. This color scatters around internally which appears to look translucent. Scatter radius determines how translucent the material would be. Higher the number, more translucent it would be. 0 is neutral.
Positive value makes the light scatter forwards and negative scatter backwards. You can play with the scatter radius and phase function in relation to either other to get the result you want. After this, make sure to turn off the spec down to 0 in the spec layer. I will create a spec material later and later it on top of the FastSSS2.
Having a great model with nice texturing can make your model even stand out. However, bad texturing/lighting can also ruin nice model.
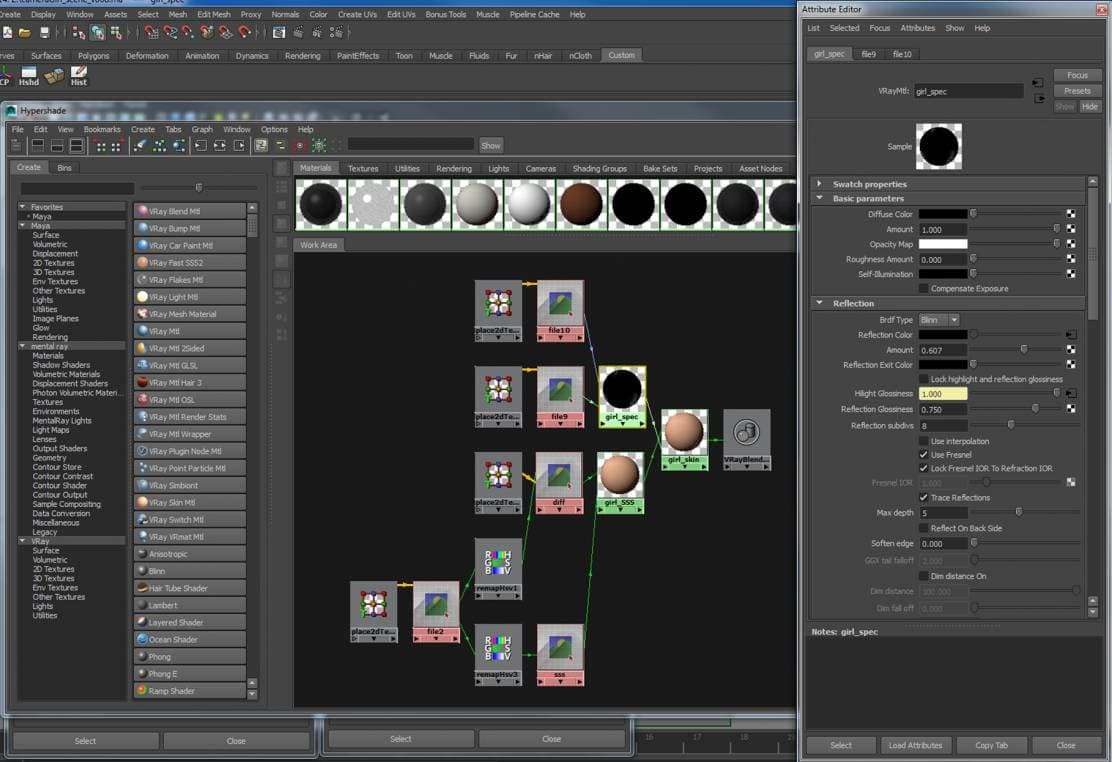
For the spec material, I just grab a vrayMaterial. I plug in my spec map (which I modified in Photoshop to give a tint of blue) into reflection color and I plug in another spec map but in black and white into Hi-Light glossiness. Make sure to check Fresnel on! This gives a realistic reflection.

Grab Vray blend material. This node can be very powerful when you want to manipulate each layer of material with full control. For the base material, I plugged in the FastSSS2 node. For the Coat Material 0, I plugged in the spec layer. Then assign the Blend material to your character!
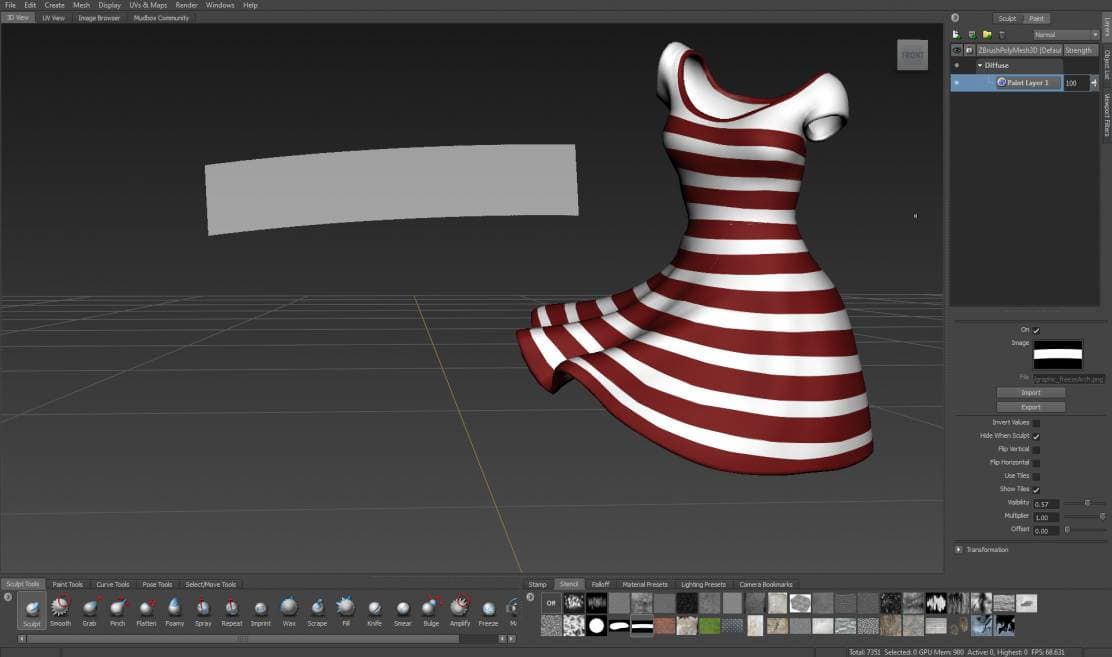
I used a lot of my texturing in Mudbox, sometimes MARI but would need a stronger computer for that. The stripes on the dress were simple as painting and masking. Using the stencil already provided for you (you can also make your own alphas, black and white maps, to help you get the stencil you prefer), I would paint and erase away to get the stripe shape I am aiming for.
Lastly, after getting the render I want, I would take all my passes and color correct it in Photoshop!
Make sure to have your models 100% done as much as possible. Having a great model with nice texturing can make your model even stand out more. However, bad texturing/lighting can also ruin nice models. 80% of your time will go into the last 20% of your work.
Written by Dreamworks Modeller and Gnomon School of Visual Effects Alumni, Hannah Kang.