
My journey on becoming an Environment Artist began having absolutely no knowledge about 3D Art or the Games Industry. When I discovered what it entailed during my initial University interview I was truly inspired. I instantly knew this was what I wanted to do as a career. I would be creating 3D Art for people to play and I loved the idea people could enjoy being part of an experience with what you could make.
Today I spend as much of my free time dedicated to learning new techniques to ensure my skill set is up to date as it can be. Your learning doesn’t stop after education, it’s going to be a lifetime of dedication for you to master your craft in whatever field you go into. If you want to get better at what you do, keep learning. That’s what I love about creating 3D Art, it’s a constant ongoing progress to improve your abilities.
Planning the Project
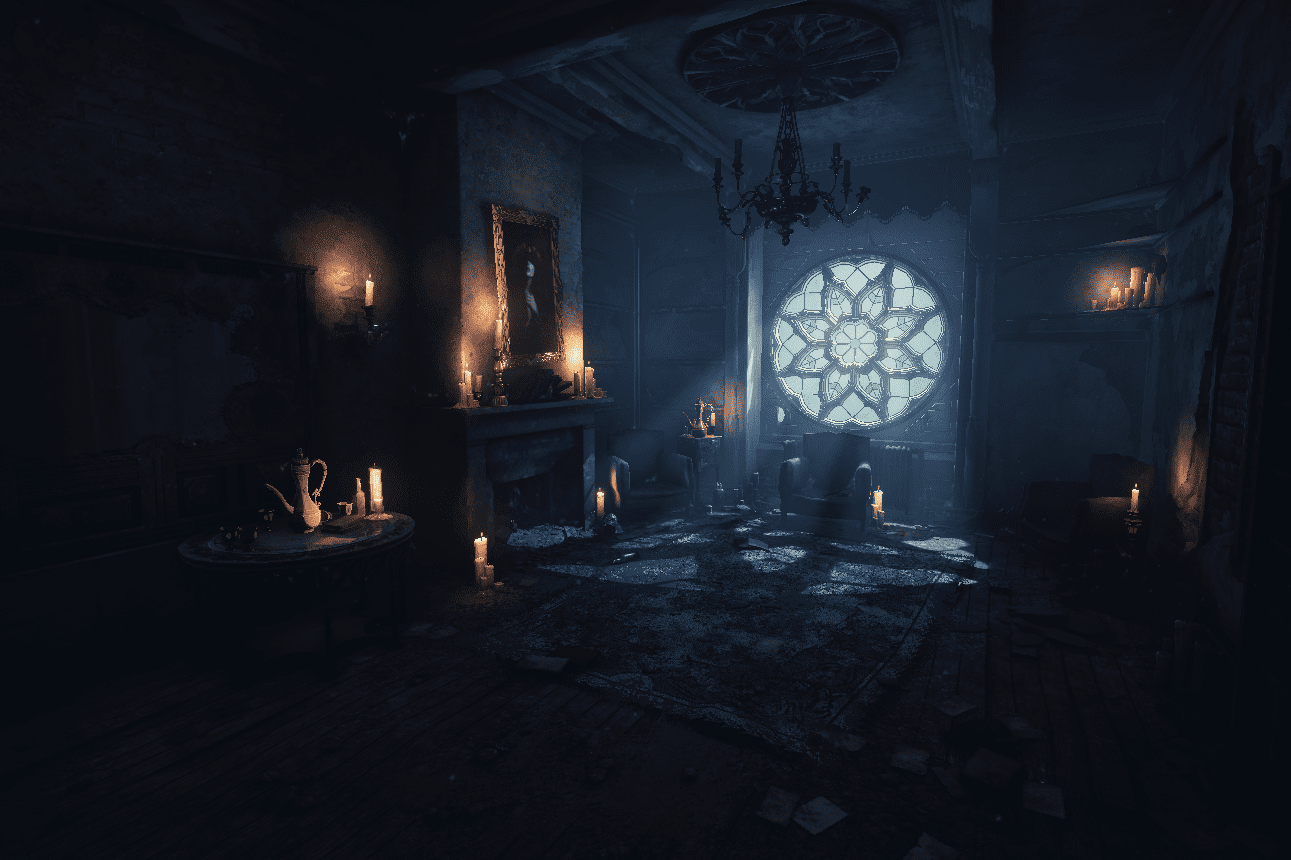
This blog is going to show a little window into the process of my project Haunted Chateau. Deciding on a project meant looking at ones I had taken on before. This time I wanted to challenge myself with an environment piece that would push my knowledge skills. I also wanted to identify areas to improve on and work on those. In the case for this project I decided my focus for improving would be on the Lighting and Composition.
It’s good to set a goal in mind for your own progress. Identify what it is you want to get better at so it's a more manageable learning curve so you're not taking too much on at once.
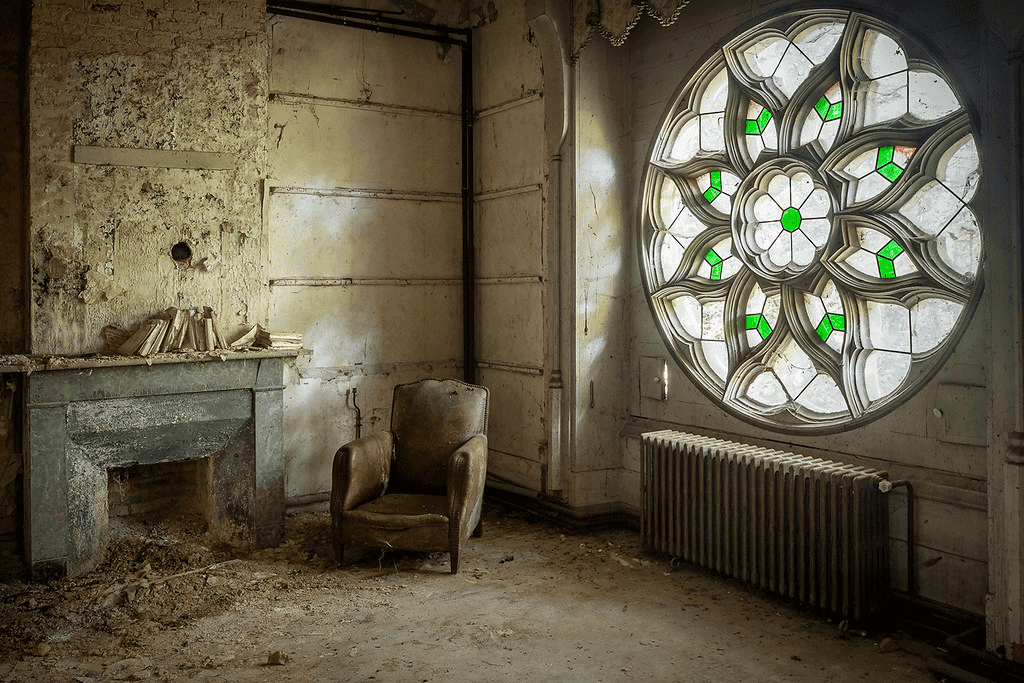
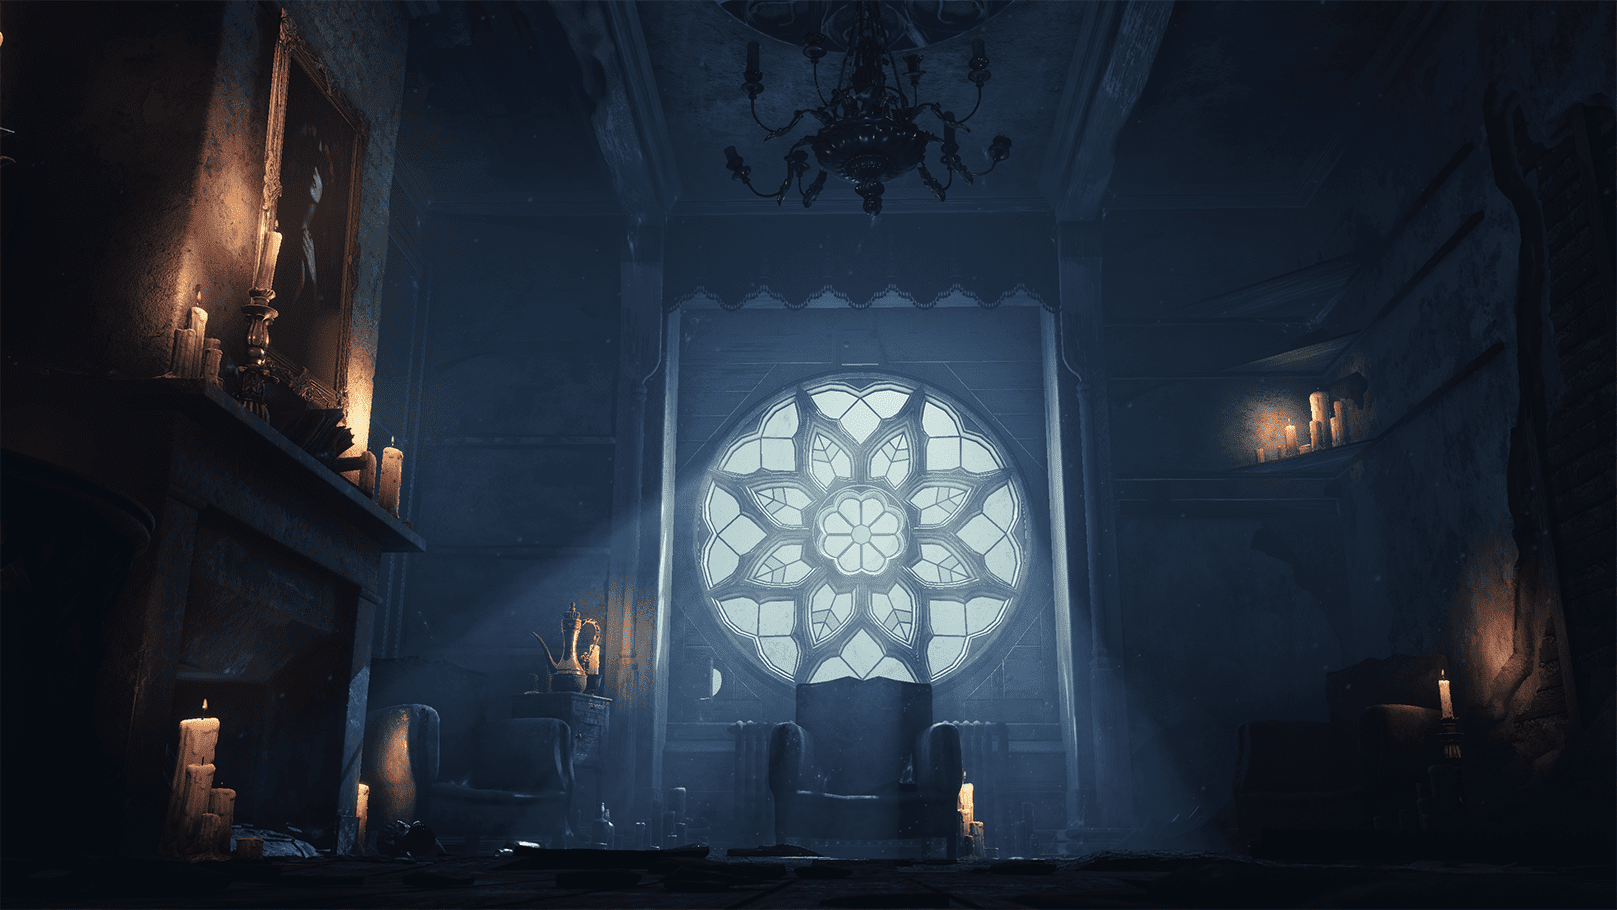
For this project I did some initial research into some derelict interiors. I had not created an environment scene like this before and I knew this would be an interesting challenge for me. Doing some online research, I came across some photos of an abandoned Chateau in France Pont-Remy. What stood out to me about this place was the stunning architectural structure of the rooms. One photo that made me settle on this as my project was one of the rooms with a stained-glass circular window.
To add interest to the project I decided I would also combine some of my own ideas and turn it into a Haunting Dark Fantasy themed piece. I felt that with a combination like that it would work well with the abandoned interior.
Composition Decision
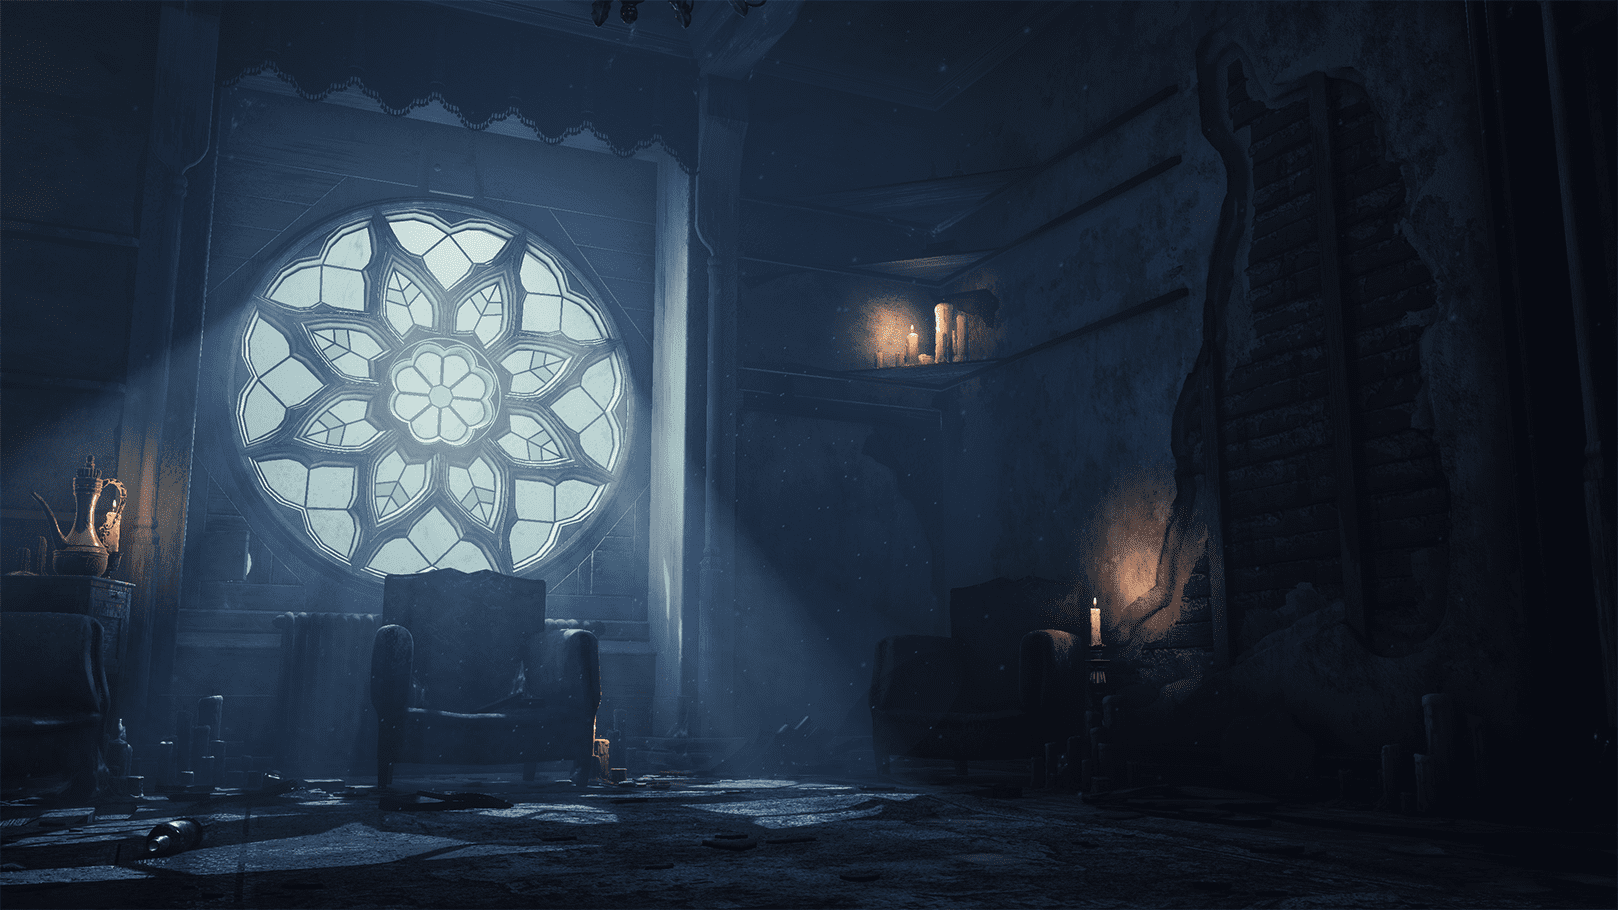
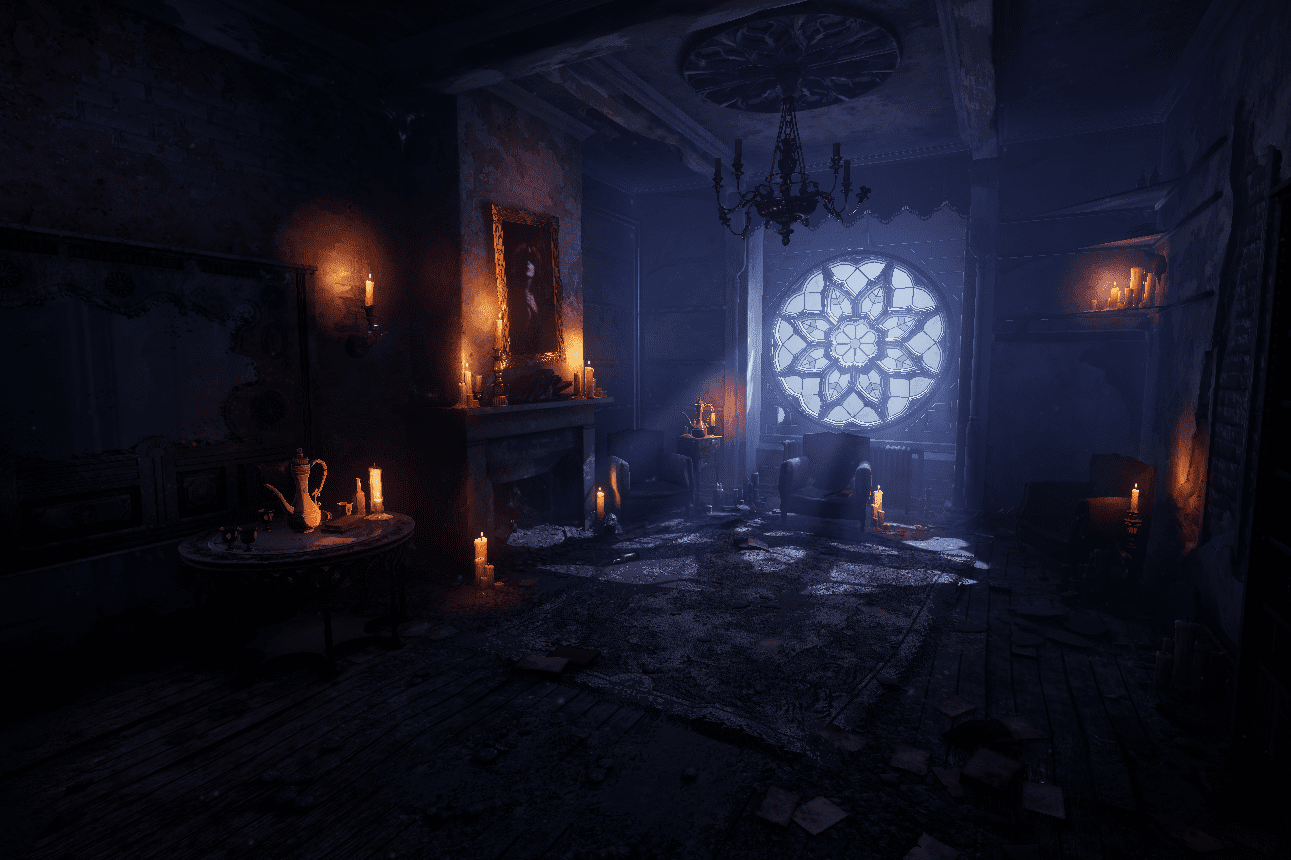
Now I had decided what the project would be based around I set on my composition goal; this was made up with two ideas. The stain glass window would be the first key focus of the piece. By having the room as the reference and it would enable the viewer to connect to something real and make the environment realistic.
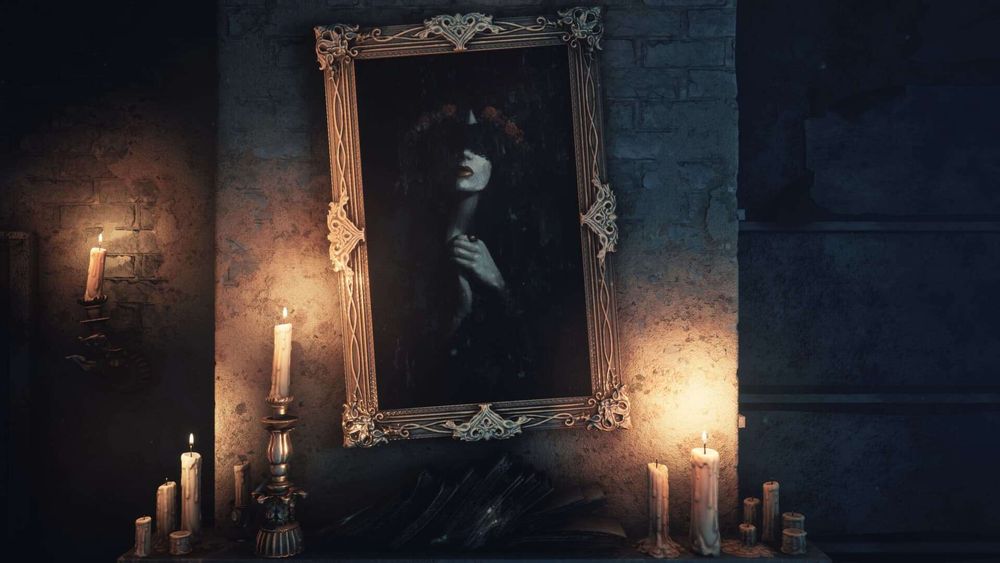
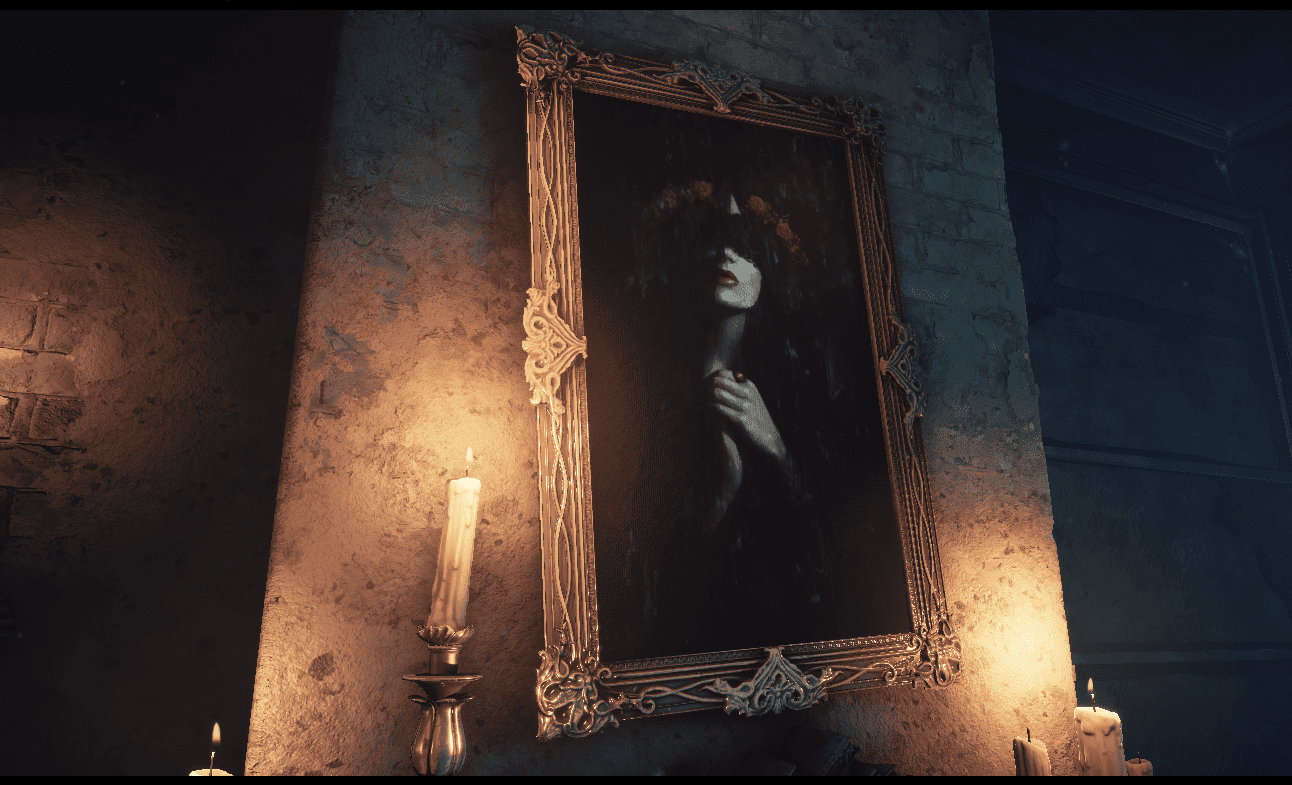
The second key focus for the piece was the Dark Fantasy element. I had noticed within the room a bare chimney and thought this would be a perfect place to add an additional focus point that would balance this out. I then came up with the idea I would add a painting with a haunted lady trapped within it to try and tell a story with this piece.
I felt these two focuses would really work well together as they would support the spooky haunted feel I wanted. Having the realistic reference combined with the Dark Fantasy vibe wouldn't seem too out of the realm of possibility.
Lighting Decision
With the composition goal outlined, the secondary goal I was focusing on is the lighting and the direction to go with it. I wanted to make an eerie type of atmosphere for this.
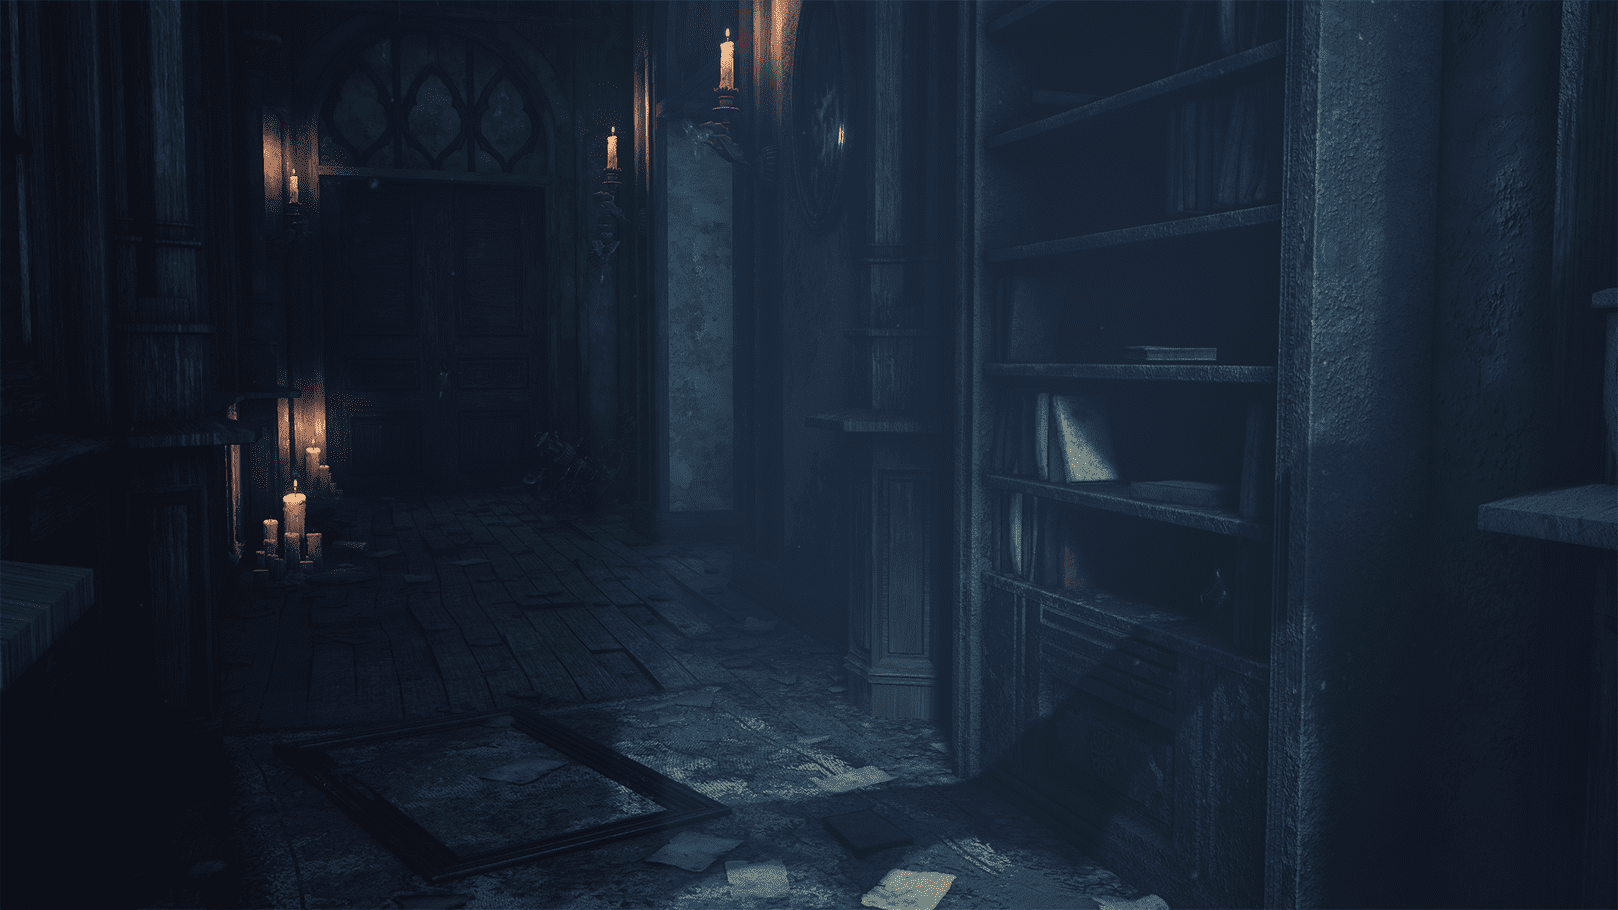
To achieve that for this scene I decided to lighting at night and have moonlight casting through. This would make the overall room ambience cold in feeling. To create a contrast and further add atmosphere to the room, I would also add candles warmth in colour. I felt that would really help create the mood for the piece with oranges and blues working together.
Gathering Reference
In my opinion and I can't stress this enough, always gather as much reference as you can before you start anything. This is so you can have your ideas set out and be accurate with what you make. If you want your creations and assets to make sense you need to learn from what is real first.
I've learned, especially with environment art that having good reference/concept art will really help create strong pieces as well as make it easier for you to translate in 3D.
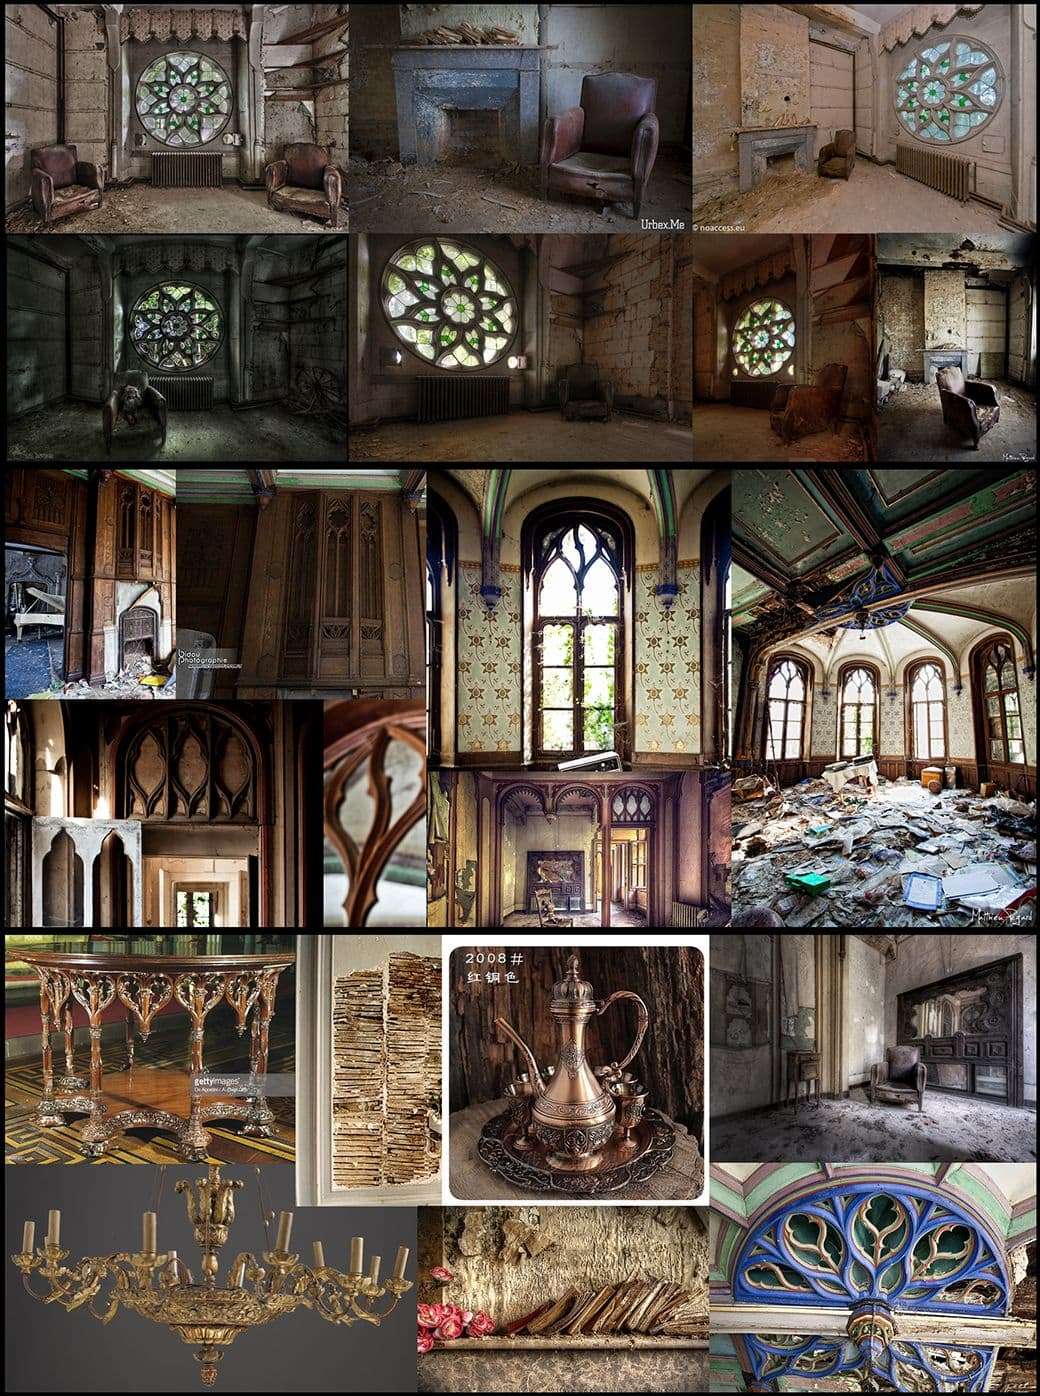
I collected as much imagery of the Chateau interior building as I could gather. To keep the project consistent with the period 17th-18th neo-Gothic, I also collected images related to the time for the assets. Then I decided that I would piece different key elements of the building structure together to create a room. I did this so that if others decided to look at my reference images, they could see what parts I combined. At the same time following what already exists structurally it would make it easier for me to replicate in 3D.
Tools and Software’s
The modeling software’s I use to create my props involves using a combination of Autodesk Maya and ZBrush depending on the asset. My textures are then created within Substance Designer, Substance Painter and Adobe Photoshop. There's no right software or techniques when creating your assets, in experimenting and combining various software’s you’ll find the results that get you what you’re after.
My previous scenes were also created in Unreal Engine 4, I have spent a lot of time learning what this engine and I’ve found there's so much it has to offer. You can achieve some really nice high-quality environment art with what you make and the workflow getting your assets in allows a lot of flexibility. I also was interested in learning it’s lighting system better which I hadn’t focused on properly before and knew this project would enable me that opportunity to do so.
Asset Creation
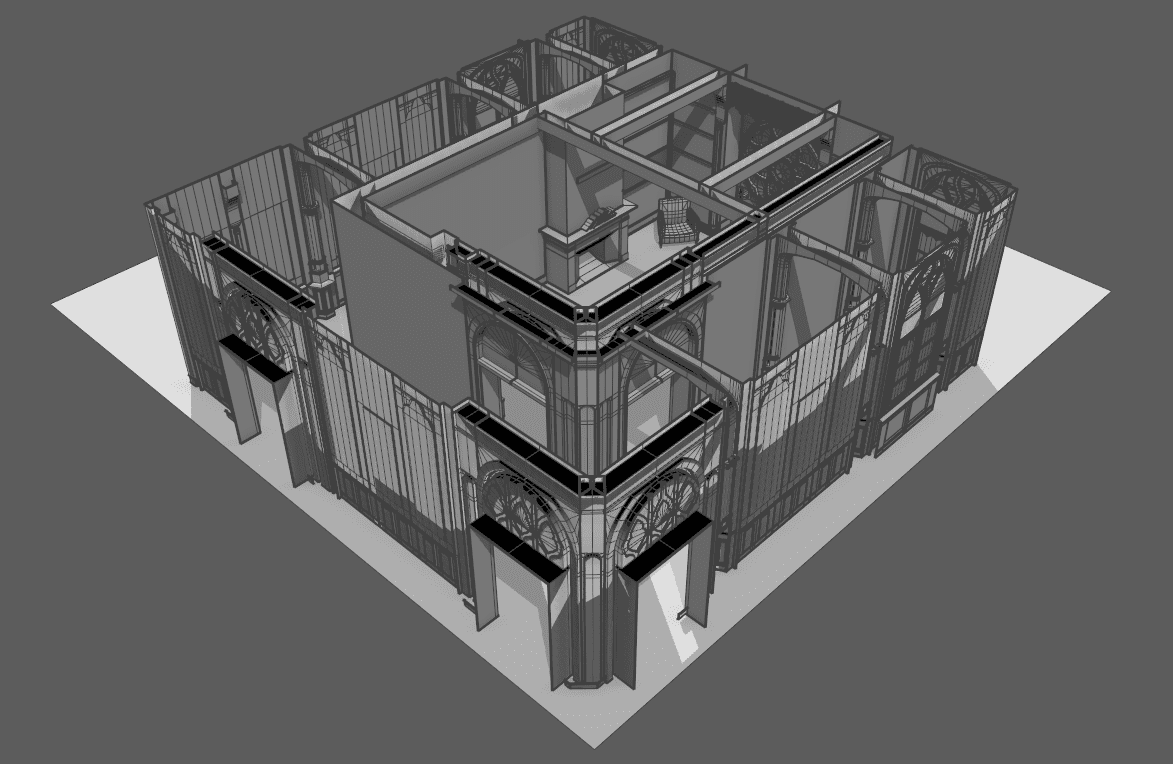
Blockout
When modeling I work iteratively in stages, I like this approach as it gives me an overall visual rather than just focusing on one asset at a time and I could re-import the updates for individual assets in UE4 when I had made alterations. I start with the blockout of all assets to form the structure of the scene. When the assets are blocked out with the correct measurements, I take it through the stages; 1st Pass is the first stage that the assets are at a base, this is followed by a 2nd Pass of improvement and then a Final Pass is then gone through where I finish up to the best standard I can.
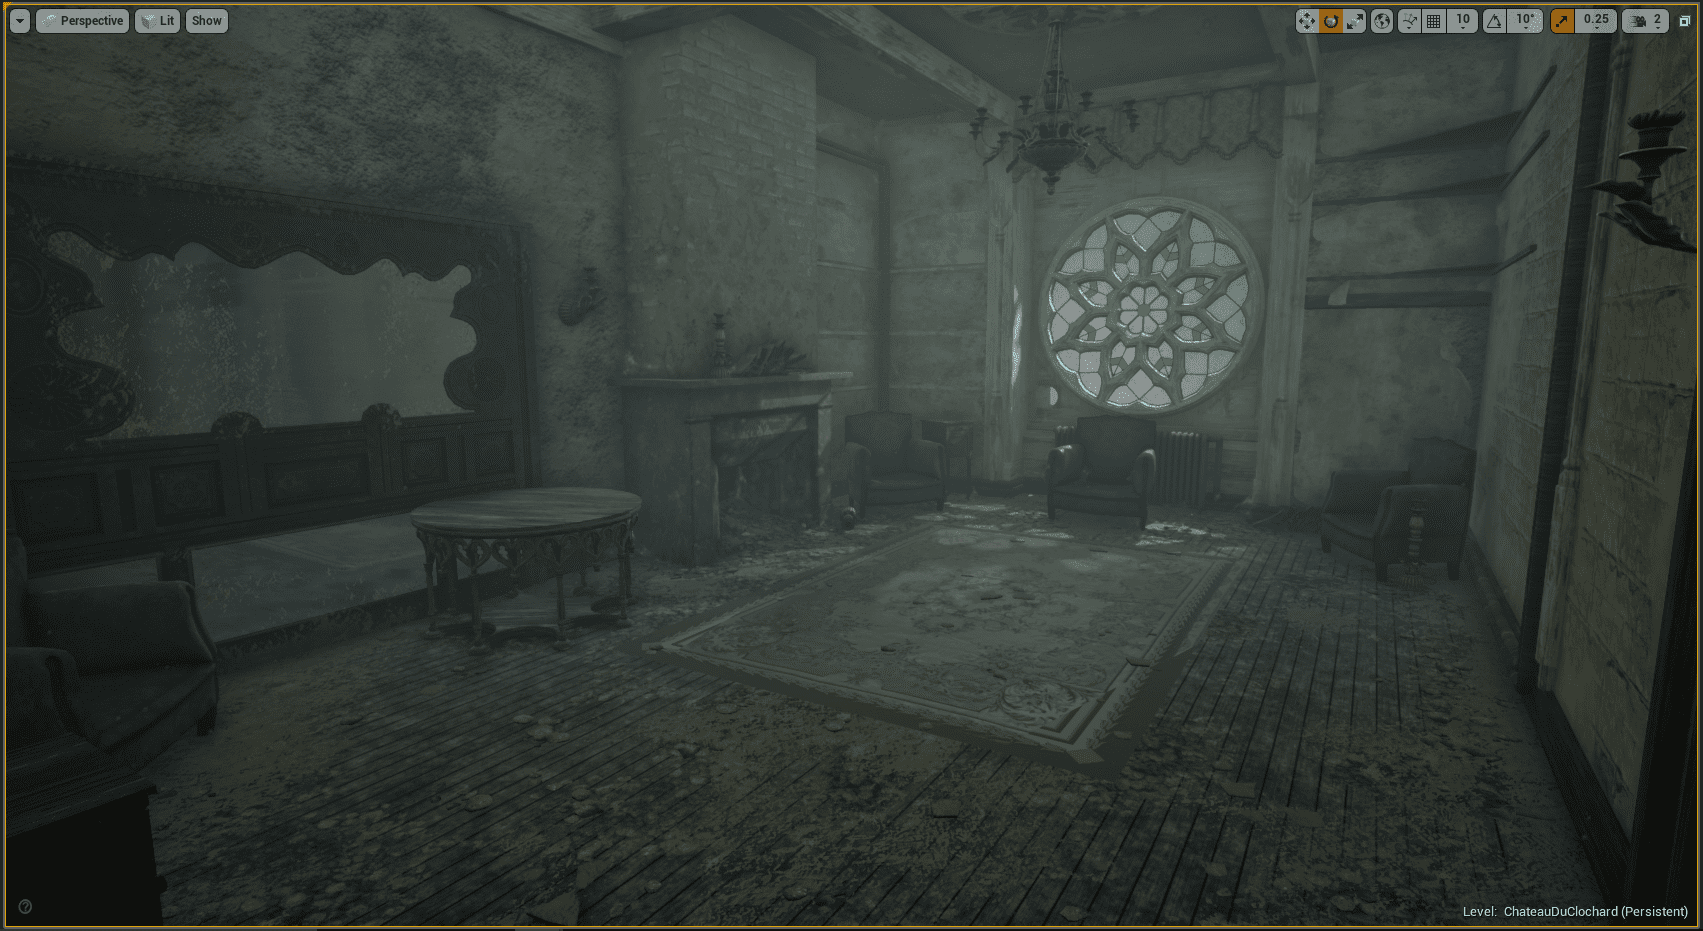
To begin I created the blockout for the room taking as much of the reference as possible that I gathered earlier. I would work on my modular assets, these assets were mostly the wooden architectural elements like the wooden paneling and additional neo-Gothic structural elements. When those modular assets were completed, I could then create the more unique assets in Maya such as the roof, exposed walls and floor to help break up the scene and avoid it looking too modular. Knowing where my modular pieces are, I could shape these to fit the remaining structure. After the frame structure of the environment was in place with the modular/unique assets I then worked on the props, damage assets and debris assets in stages to build up the rest of the room.
Modeling Processes
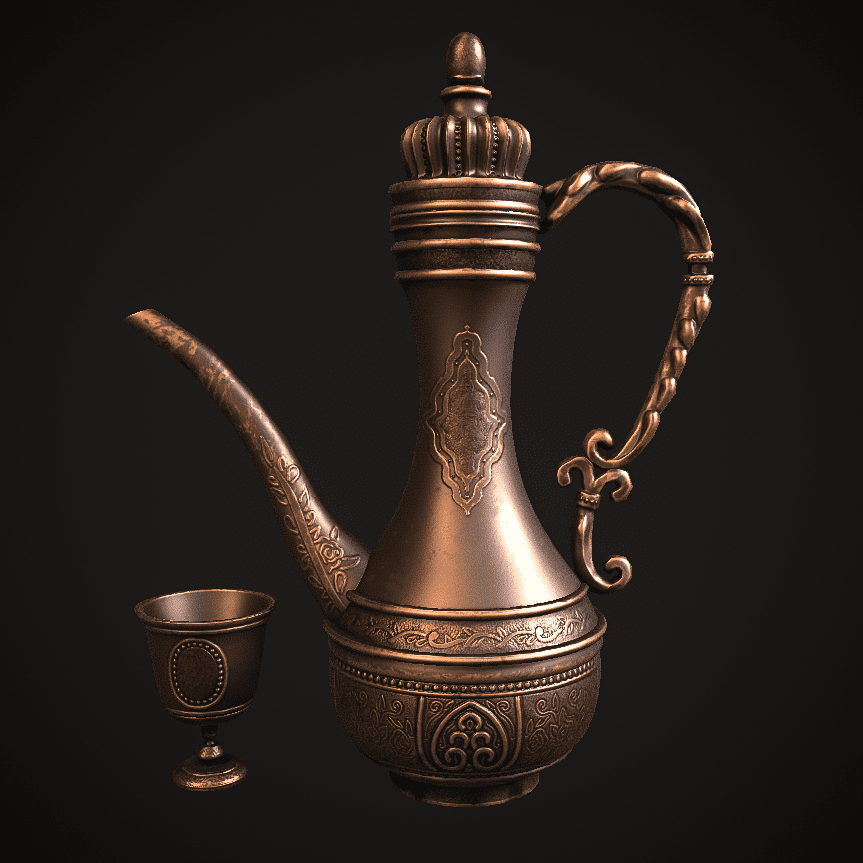
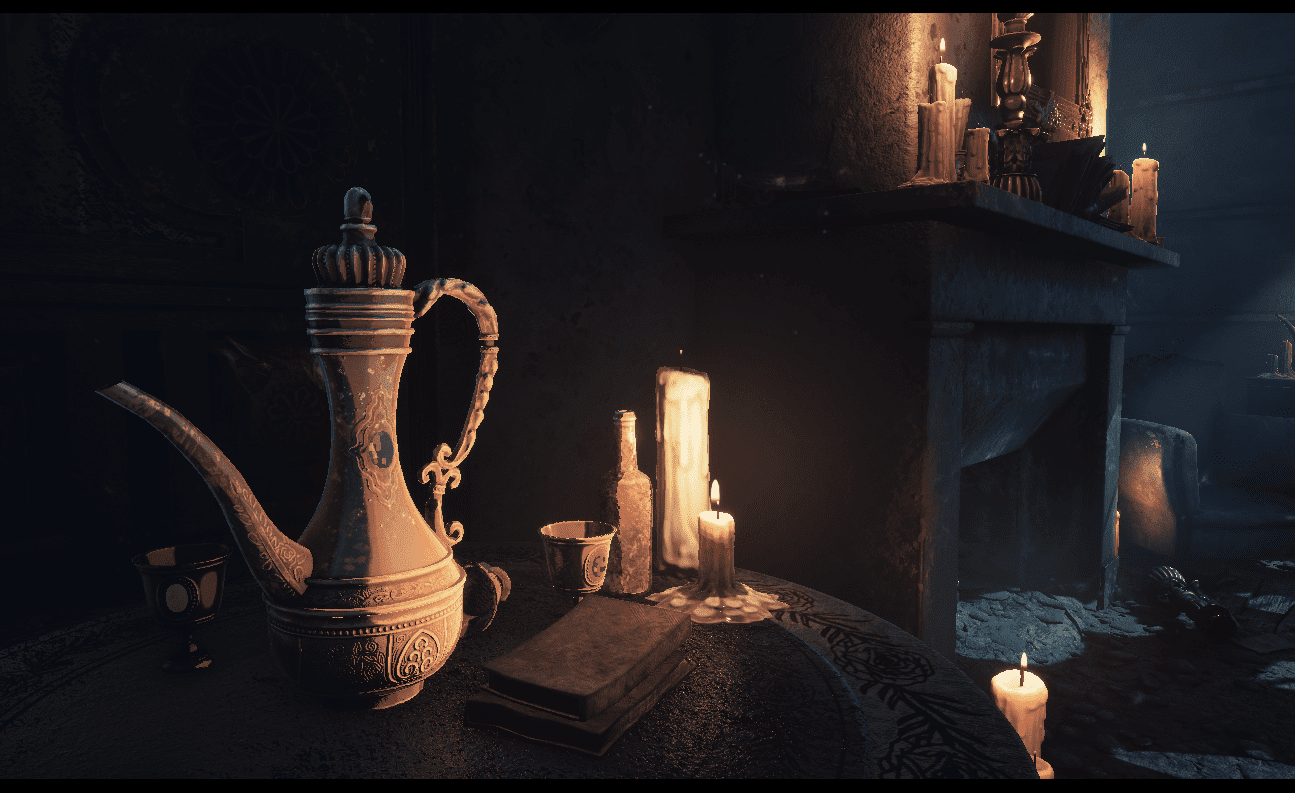
I’ll go through a couple of assets I created for the project to show my modeling process. The first asset is an example of a unique prop, the software’s I used was a combination of Maya and ZBrush. I modeled the neck of the Jug in Maya, inserting appropriately placed edgeloops in preparation for it to be exported into ZBrush for sculpting. This was to make sure that when subdividing in ZBrush you can achieve better results for with topology. For the more organic parts such has the handle it was sculpted completely from a ZSphere as for me it was quicker to create the forms that trying to achieve them in Maya.
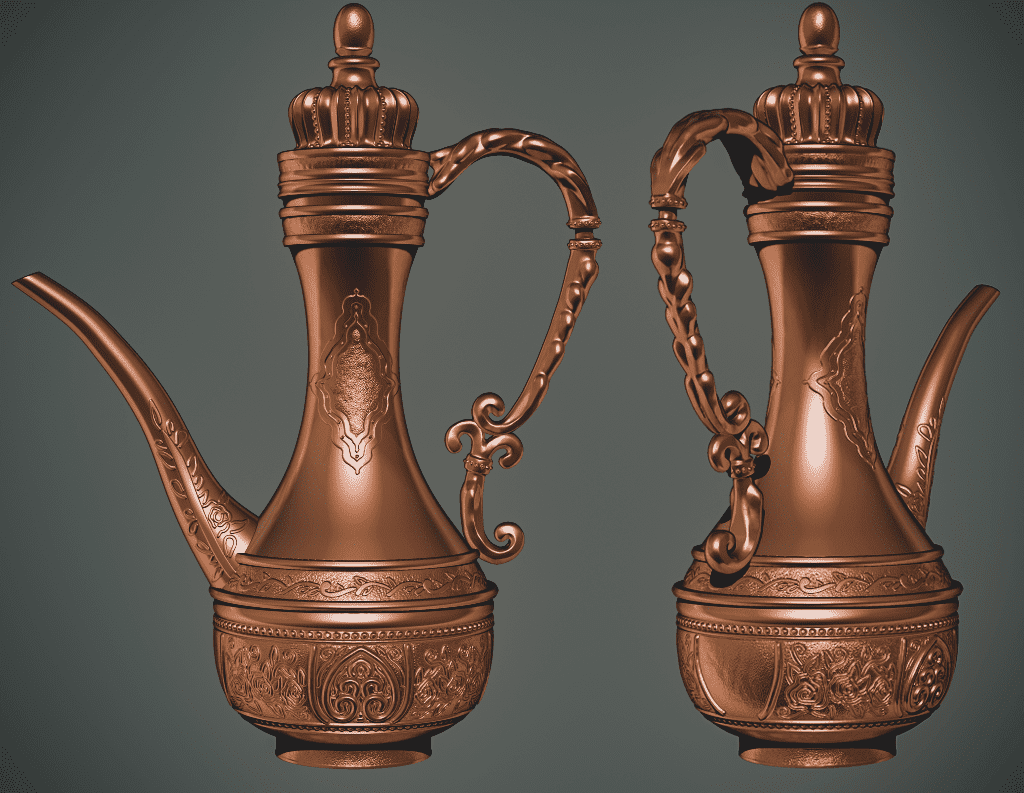
Once my high poly sculpts and low poly objects are ready for the baking and texturing process, I export the low object into Substance Painter. I had already made a brass material in Substance Designer and had exported this out as a Substance material which I had imported to be used in Substance Painter as the base material before refining with Smart Mask Generators that run off the baked information maps from the high objects.
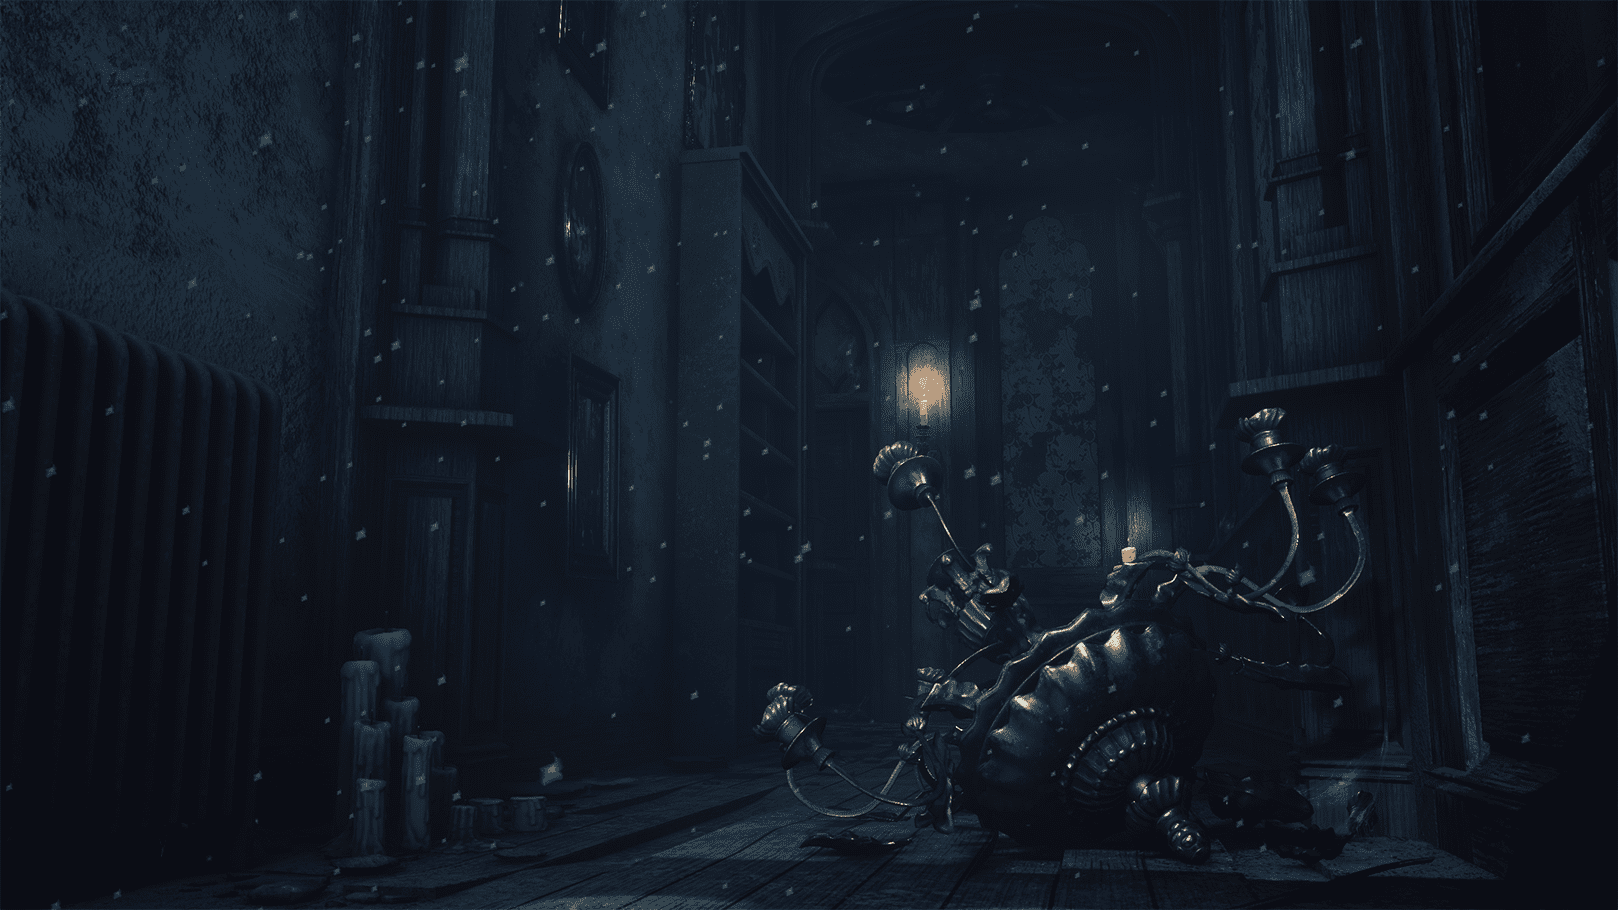
The brass material has been used on a lot of my props to make sure they’re consistent in theme, the wine jug, cups, chandelier, door handles and Candleholders share this material. When creating my assets, I always try to keep in mind to find ways of reusing as much of what make for possible other additional assets. With the Chandelier prop I broke down the modeled elements from the initial forms to make the candlestick holders and lights, this is a great way of being efficient with your assets, textures/materials and saves you time.
Another example of an asset I created was the gothic table, the way I approached the process with this is the same way I created my modular assets. I would calculate and cut shapes in stages to get the results I needed using Mayas Modelling toolkit.
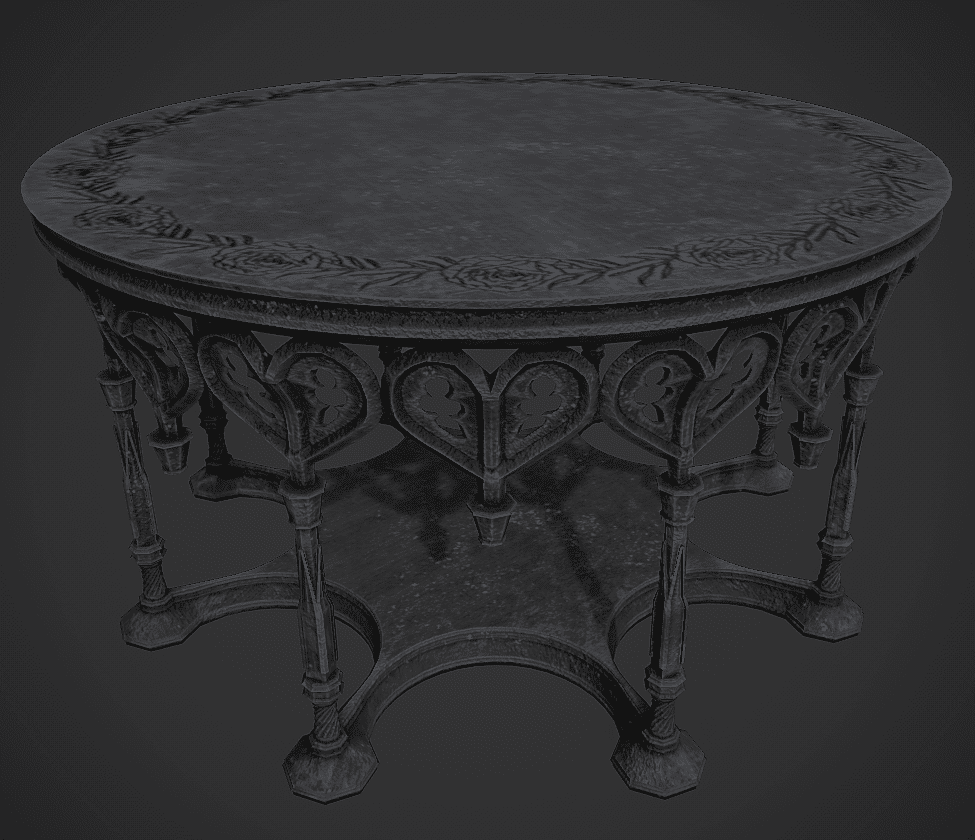
Breaking the modeling into stages and using that Toolkit allows you to create some precise forms, it’s one of my favorite tools to use within Maya as its quite powerful giving you a lot of control.

All along during this process I'm keeping in mind how it would look subdivided for high poly versions of the asset ready for baking in Substance Painter.
Materials and Texturing
My process for texturing my assets as mentioned earlier would be using a combination of Photoshop, Substance Designer and Substance Painter. Creating my base materials in Substance Designer; materials like Wallpaper, Wood, Wall plaster, Brick and Wood Lath created from the masks from scratch would allow me to make edits quite easily at those iterative stages of my workflow.
After exporting those into Substance Painter I would apply them directly onto my models or take the exported textures as they are into UE4 as the base materials for multi height blending. There's so much flexibility in making any alterations in Designer/Painter, you don't have to worry about focusing on getting anything perfect in one stage. I'll go through a couple of examples where I have used these software’s together to make my assets.
Asset: Painted Lady
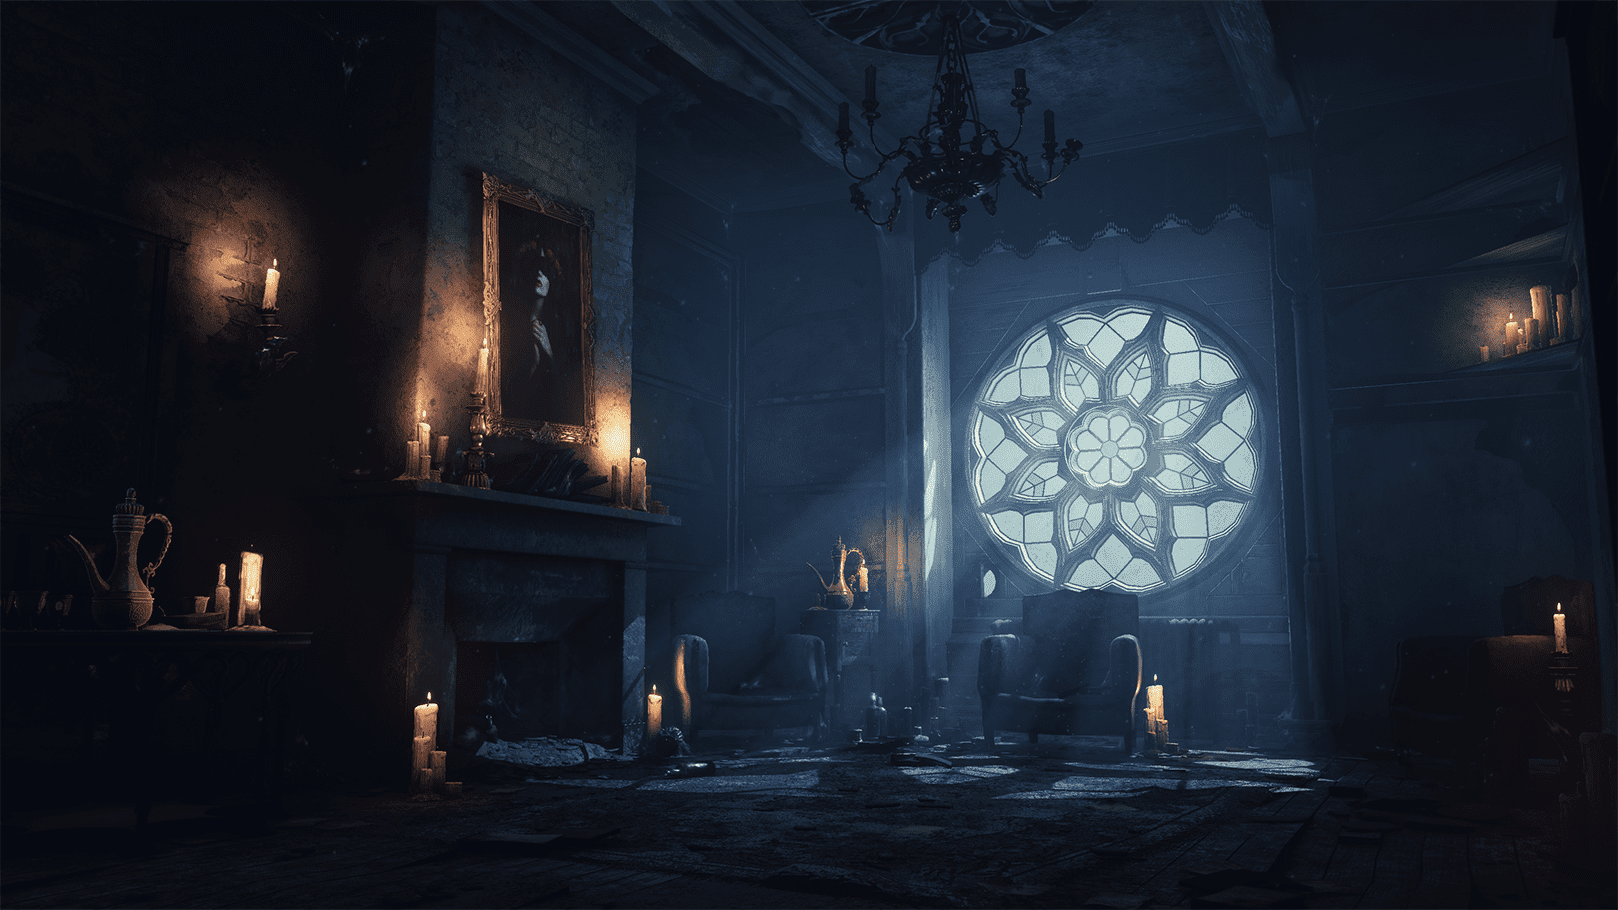
The painted lady prop involved painting a portrait in Photoshop, I digitally paint this, before my time at University I came from a more 2D traditional portrait background where I focused on drawing/painting portraits. To fit the composition theme of the scene of nightime blues within the scene I used red tones to create contrast. I also went for a moody dark theme with the portrait subject to add to the eerie atmosphere of the scene.
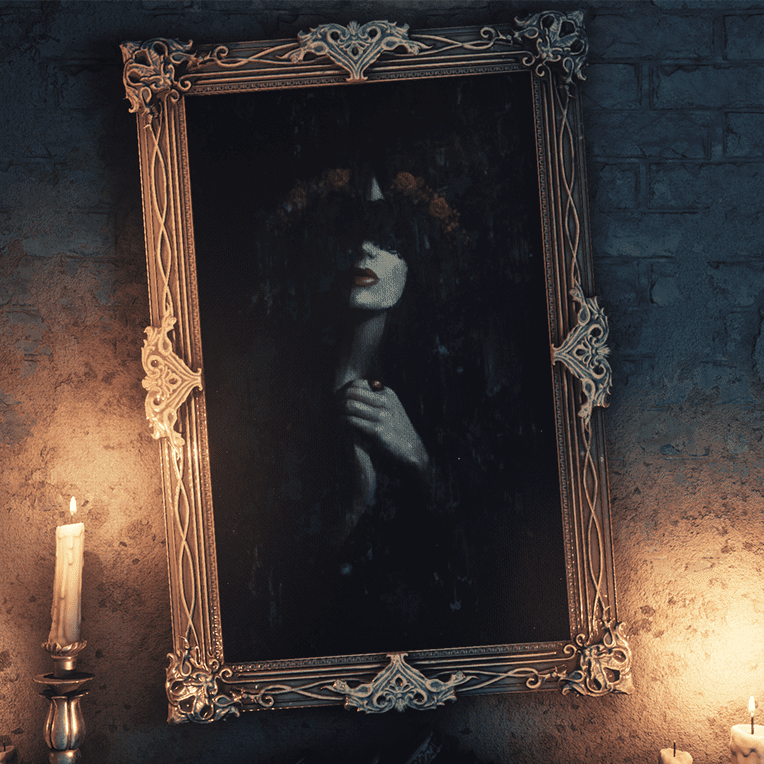
So, for the rest of the asset creating the frame I sculpted multiple ornate corners in ZBrush from ZSpheres and created the low poly versions for these in Maya, I then textured in Substance Painter using that brass material I had been using for the other props that I had imported in from Substance Designer.
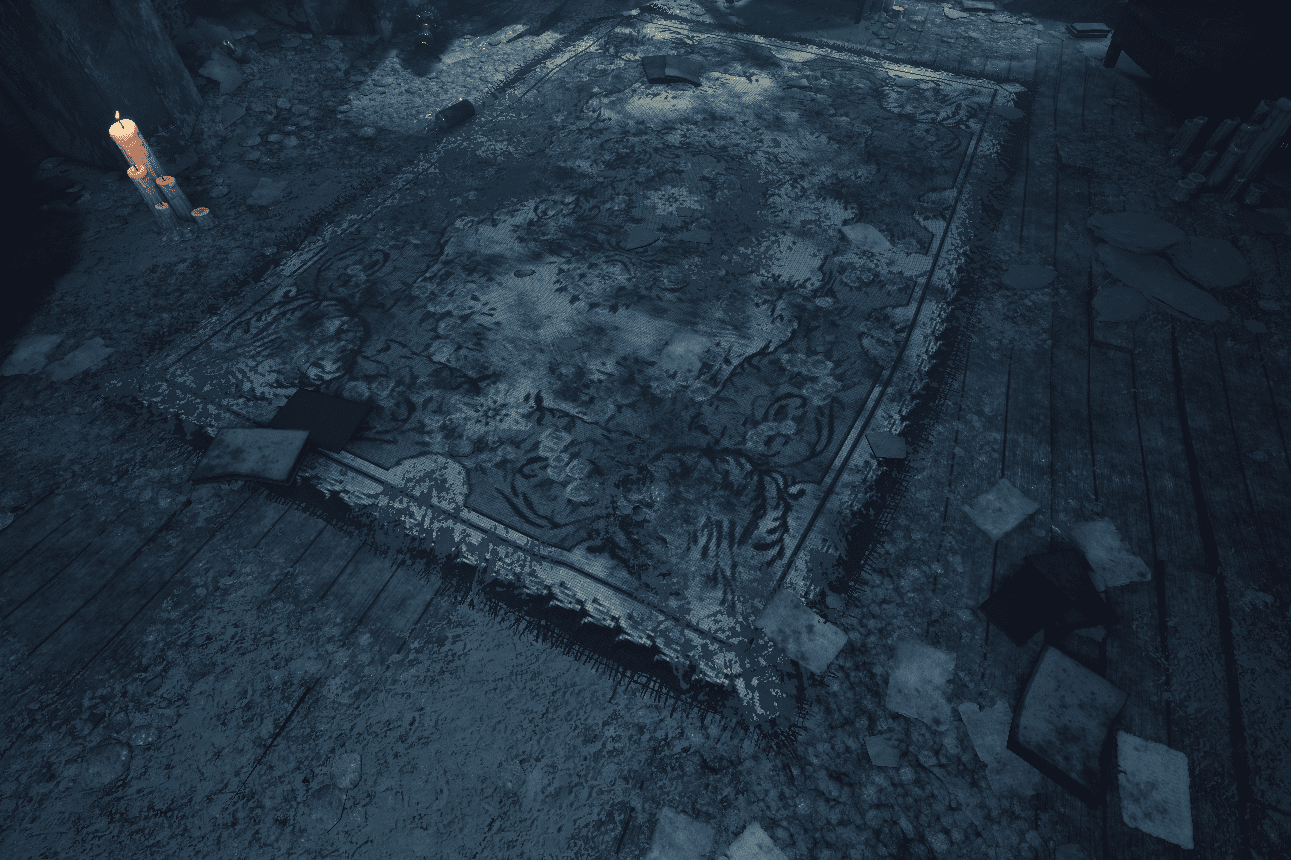
Asset: French Rug
Another example of material creation however this time using Photoshop was the French rug I made. I wasn't sure how to approach it initially, I knew I wanted a hand-woven cross stitch like effect.
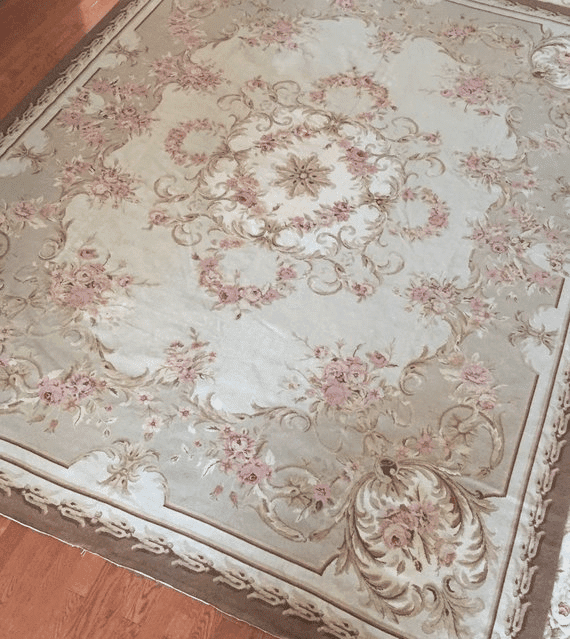
In the end I decided I would hand draw the entire rug from my reference and mirror the parts into the appropriate places. When I was pleased with the design, I ran it through multiple filters available in Photoshop and saved the filter steps as an action.
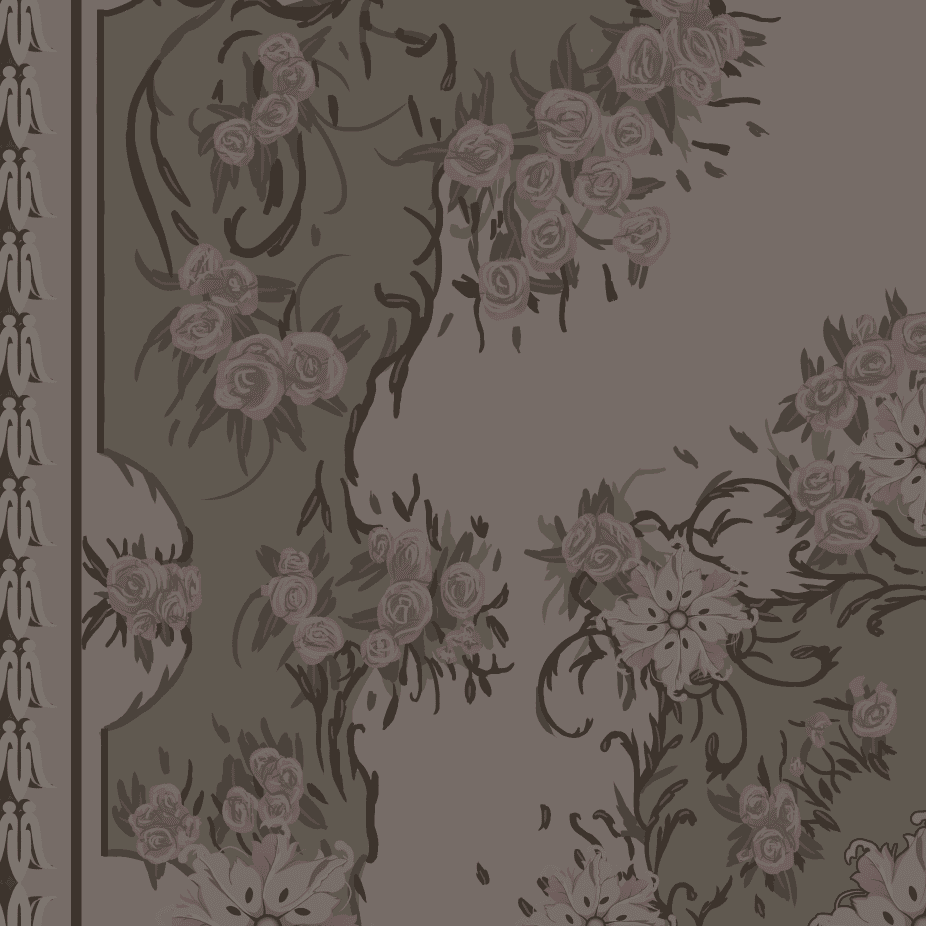
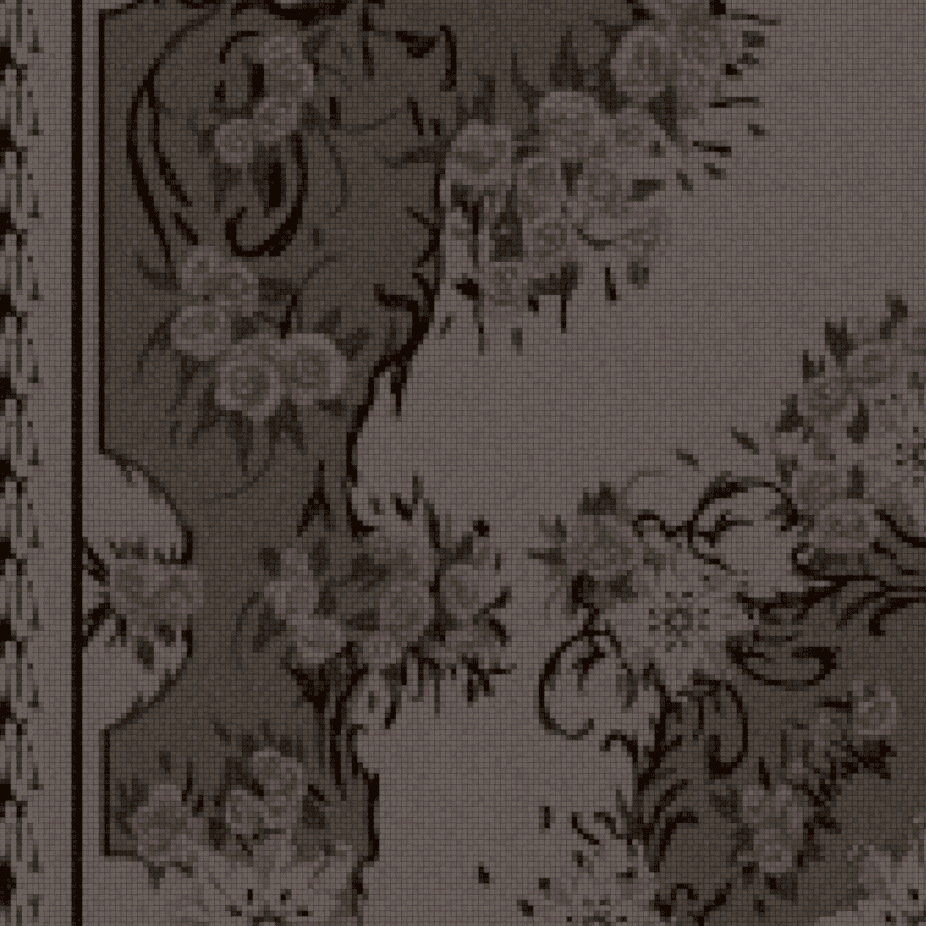
I did this so that if any changes needed altering to the drawn images it would save time and effort achieving the same cross stitch effect. One thing I've found with material creation is that it's an ongoing problem-solving process, there's so many techniques and software’s to achieve what you're after it's just a matter of figuring out solutions by learning them.
Lighting Breakdown
As I had mentioned at the start of this project I wanted to further learn and improve my knowledge lighting an environment scene. A lot of this process involved finding and gathering as much source material online with video tutorials and documentation provided on UE4 as I could. Using that I spent a lot of my time experimenting with various lighting set ups at low production bakes to test different set ups till I ended up with what I did for the lighting for my final scene.
I learned a lot from investing the time to look at other artists techniques into what Unreal Engine 4 can achieve.
Lighting Setup
To utilise the lighting tools within UE4 I decided to use both baked and dynamic lighting. To ensure my lights would be realistic I set them to be temperature-controlled values, this way I could create the cool and warm contrasts.
Static Lighting:
Setting my static lighting I set the casting skybox to dark blue tones as an ambient light so that when baked it would set the base tone of the lighting. I had already closed off the room to prevent possible light leaks when additional lights would be added which is important for an interior type scene.
To get the initial soft baked lighting boosted I added 3 Lightmass Portals at each of the window as it would calculate a focus at these areas. With the base set up I then added in 3 spot lights with their settings open facing a bounce card that I added that reflects light from the card back into the room to create those soft light bounces. In addition to this I added some spot lights to darker areas just to lift out harder to see areas where the bounces wouldn't quite reach.
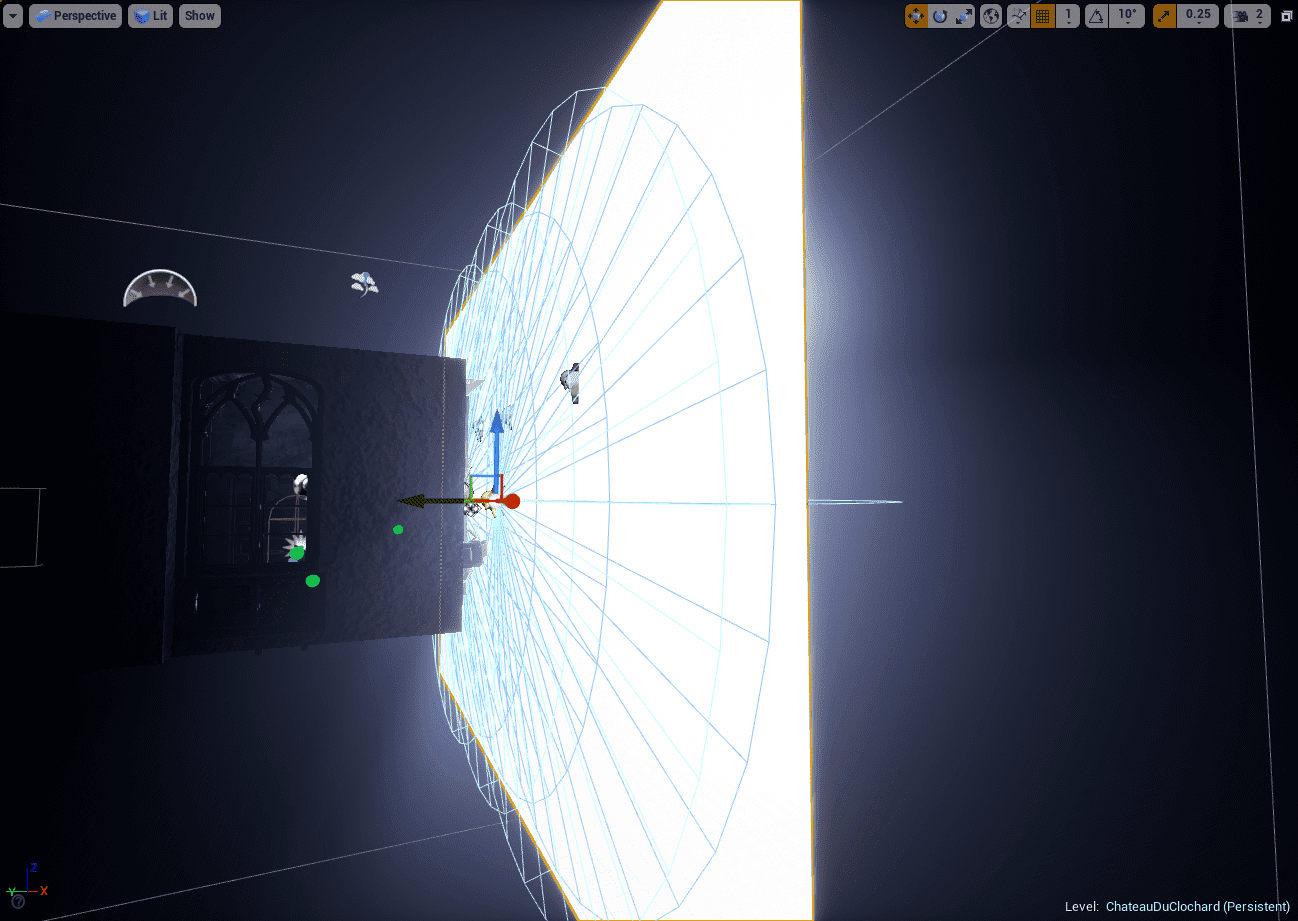
Dynamic Lighting Setup:
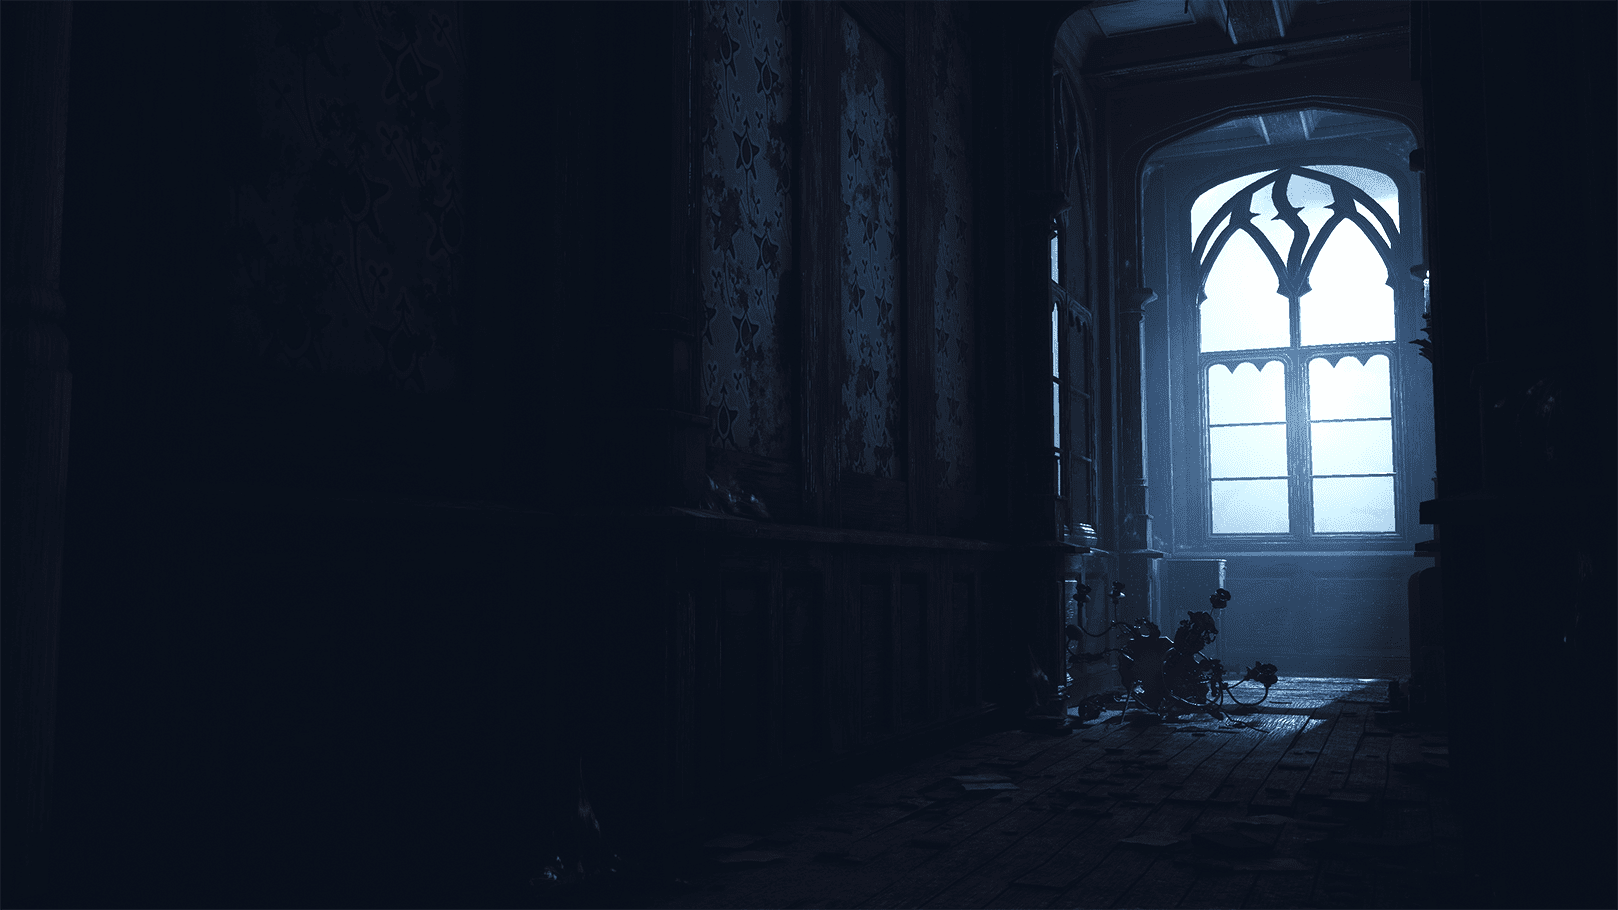
At each of the windows I created 3 dynamic spot lights that would cast through the widows at the same angle to get the crisp silhouettes of the windows. Above these I then added 4 fake spot lights that would spread above those that were casting and a couple point lights. I then added in an Exponential Height fog that would boost and scatter the lighting to get that atmospheric misty effect created by the lights.

Polish Lighting setup:
I used a combination dynamic and stating lighting was used for candles. For each of the lit candles I would create a static point light to bake in the soft ambient glow of the candle on top of that I add a smaller dynamic point light with an even warmer source temperature and flickering light function.
The final part was to add additional highlights by adding point lights in darker areas to create some focus points on some of the props, these had individual lighting channels ticked that would allow only controlled lights to affect them and not the surrounding areas.
I made some small adjustments to the general settings in the Post Process Volume by slightly upping the contrast, Ambient Occlusion and added a slight vignette to make the scene feel a bit closed off. The biggest impact made with the Post Process volume that really shaped the atmosphere was the Look-Up-Table (LUT) I created in photoshop. I'd taken a high-quality image of my scene and altered it the way I wanted. By having the screenshot loaded into photoshop I could see how my filters would end up affecting the whole scene almost and my aim was to get a realistic film quality moody feel that up uphold the Dark Fantasy feel.
With the project I felt was complete all that was left was getting beauty screenshots and using UE4 sequencer to make a video to show the project in particular the composition.
I feel the project met my goals for improvement for composition and lighting yet, I know there's still some more for me to learn particularly with lighting. The response for this scene once I had uploaded it was that it was still overly a little dark, with that in mind I will be focusing on Lighting improvement again for my next project.
Final Feedback
To conclude I'd like to thank my work colleagues for giving me invaluable feedback on this project. I had approached them towards the end of this to get their thoughts on it. Their advice and ideas really helped, I ended up creating more based on their inputs. The value of getting others to look at your work can really help you see where you can improve. I can't thank them enough for taking the time. My final bit of advice is for you to do the same, get input from those who understand a bit about your field to get the best kind of feedback. You can learn so much from having someone to have a look who have the experience in the same area.
Thank you for taking the time to read, I hope what I've wrote can help you with your future projects and learning.