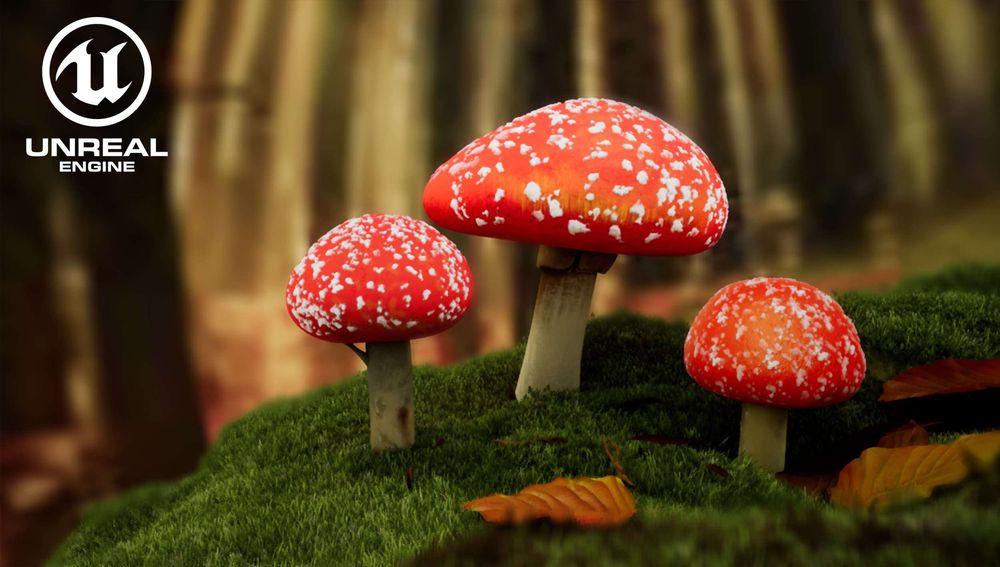

The biggest challenge of creating a scene in Unreal Engine is that you’re dealing with a game engine. It’s built to be as optimized as possible to be able to run in real-time. I’ll show you some of the features I used to create the best possible screenshot.
Finding a reference
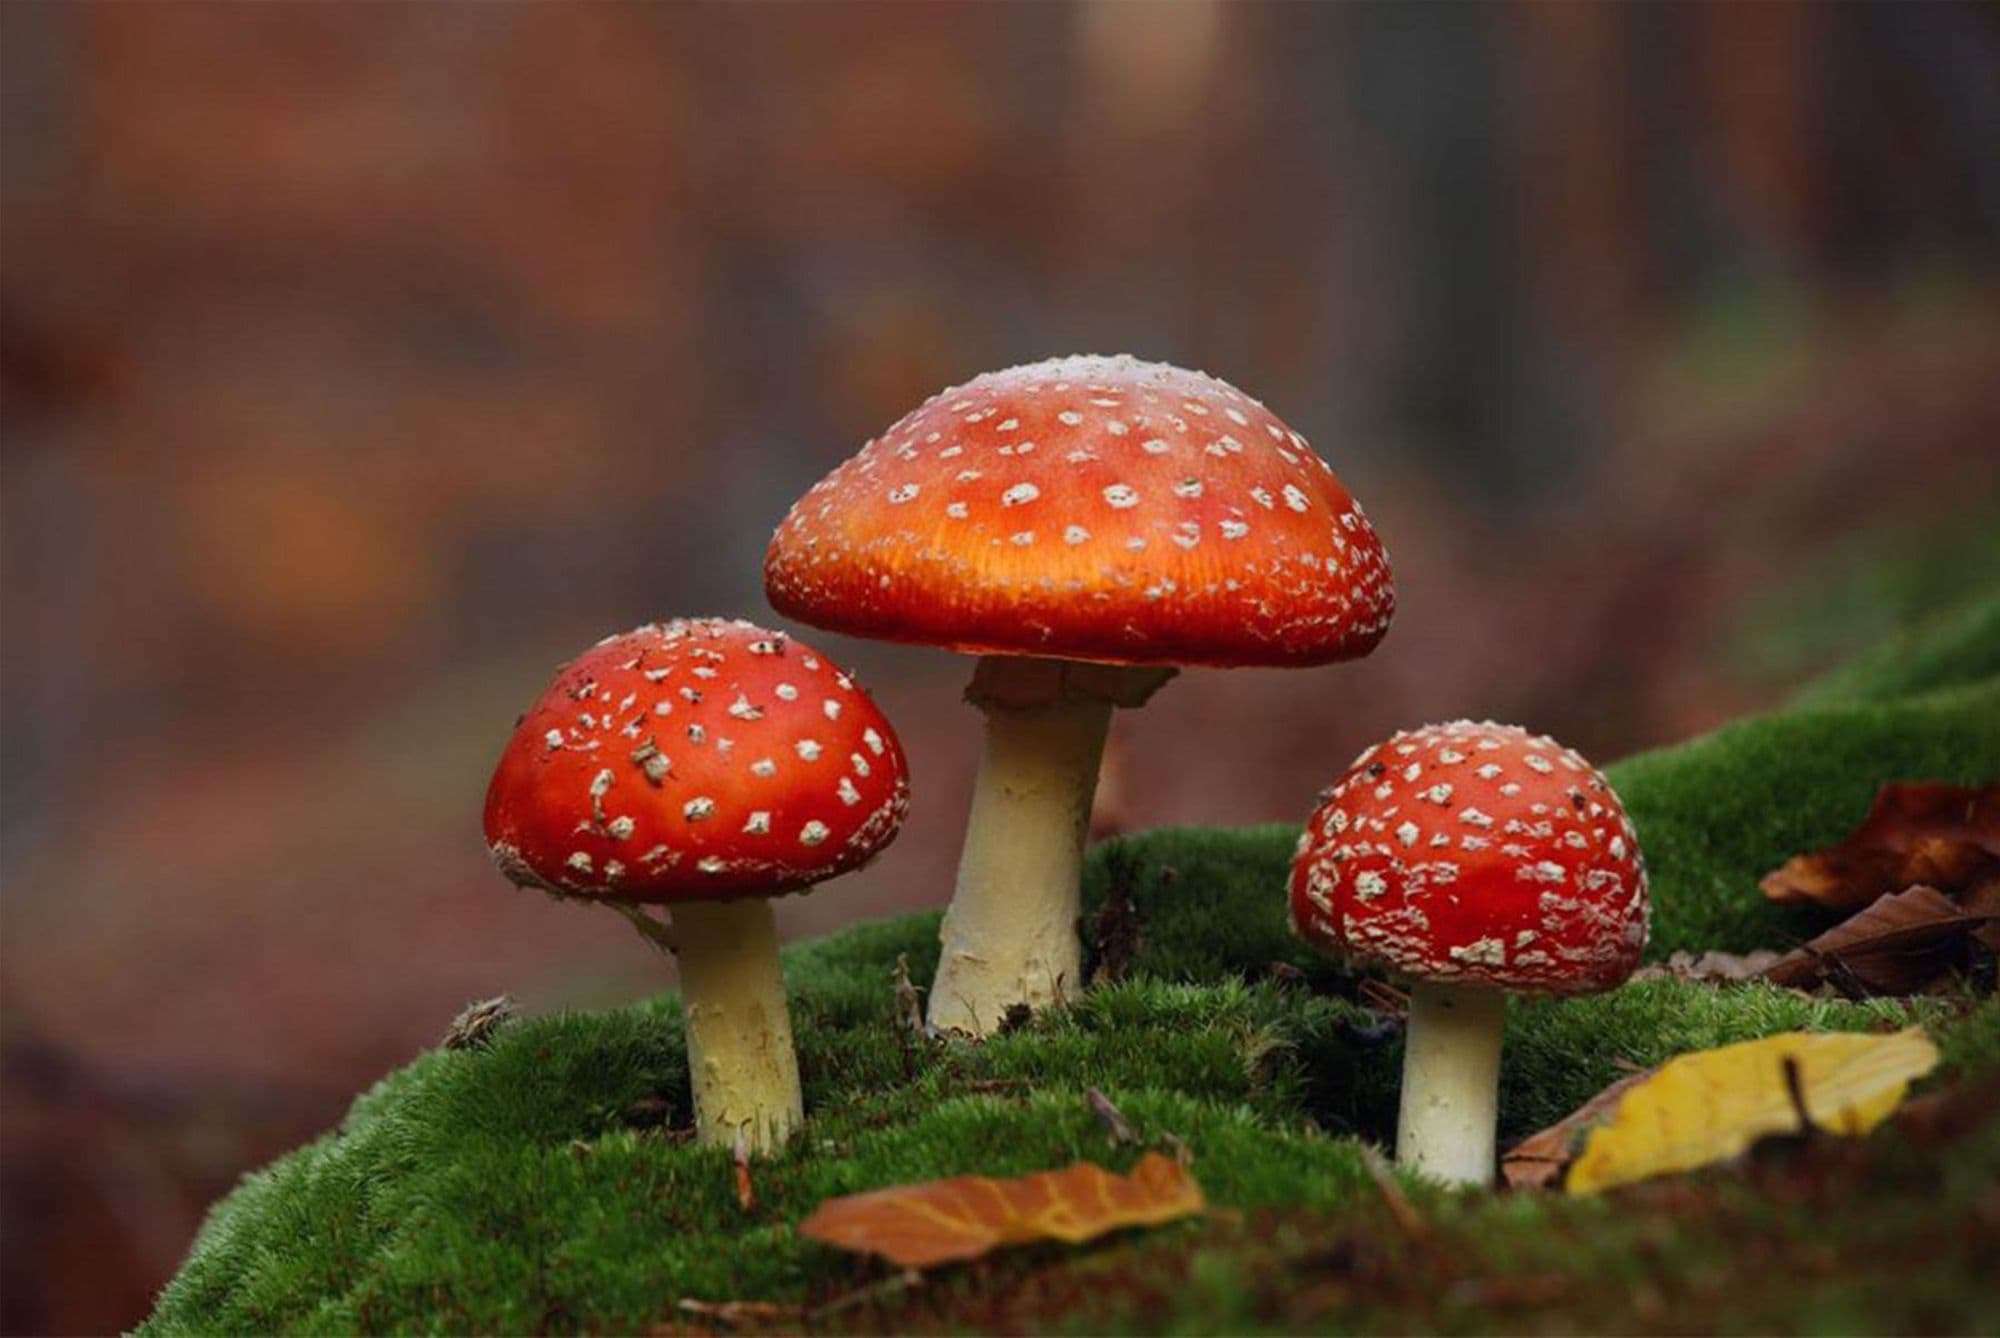
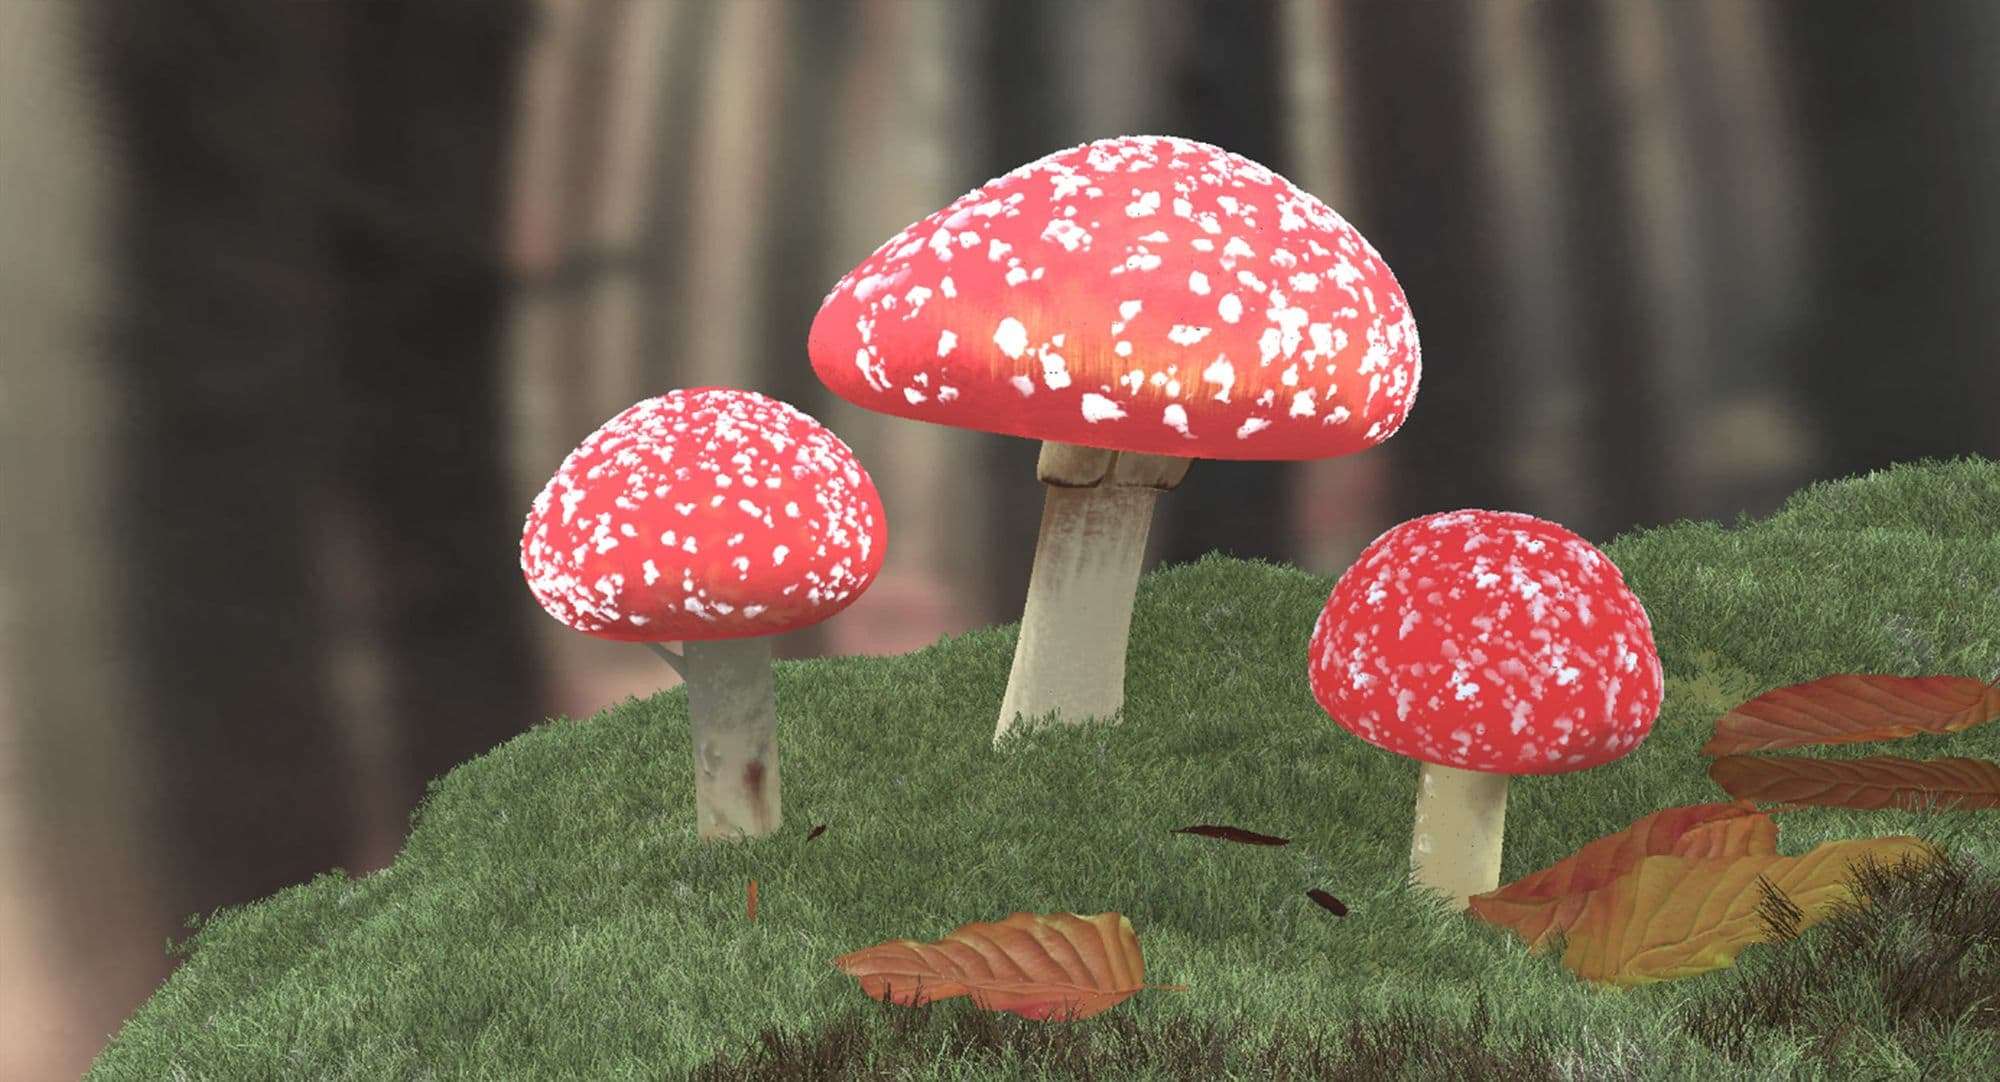
Since I wanted to challenge myself, I chose a nature scene. Nature's organic shapes and imperfections would pose a bigger challenge than the creation of a man-made object. While browsing the internet for a good reference image, I found a beautiful forest scene. It also has a unique subject, which would push me to do more research. I didn’t want my project to be too large because of the limited timeframe. It has a few key objects and the extra challenge of having to create realistic moss.
Modeling
While modeling was certainly not the most challenging part of my project, I’ll briefly describe how I did it.
Mushrooms
I created the base shape for my mushrooms in 3ds Max, with some extra tweaking in ZBrush to do the tops of the mushrooms. I pulled and pushed them in a certain asymmetrical shape using the move brush. I made sure to smooth it, so you wouldn’t be able to count the polygons.
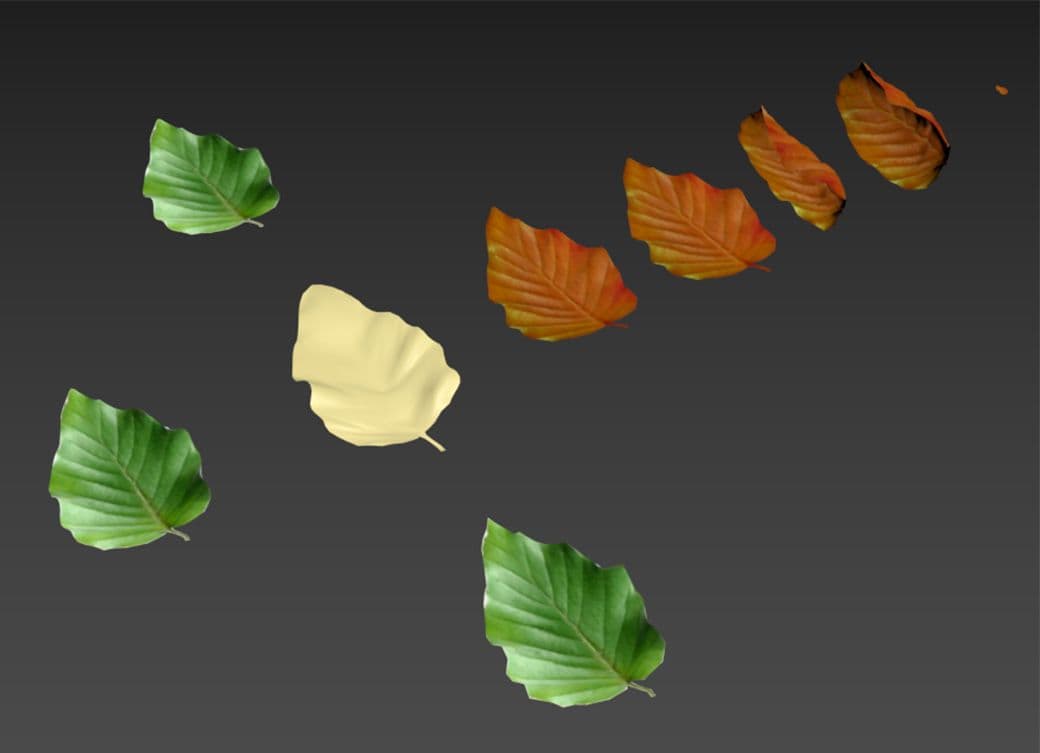
Leaves
For the leaves I used reference images to cut out their shape in 3ds Max. Then I smoothed them with Turbosmooth and created a few different varieties. The bend modifier in 3ds Max was particularly useful for this.
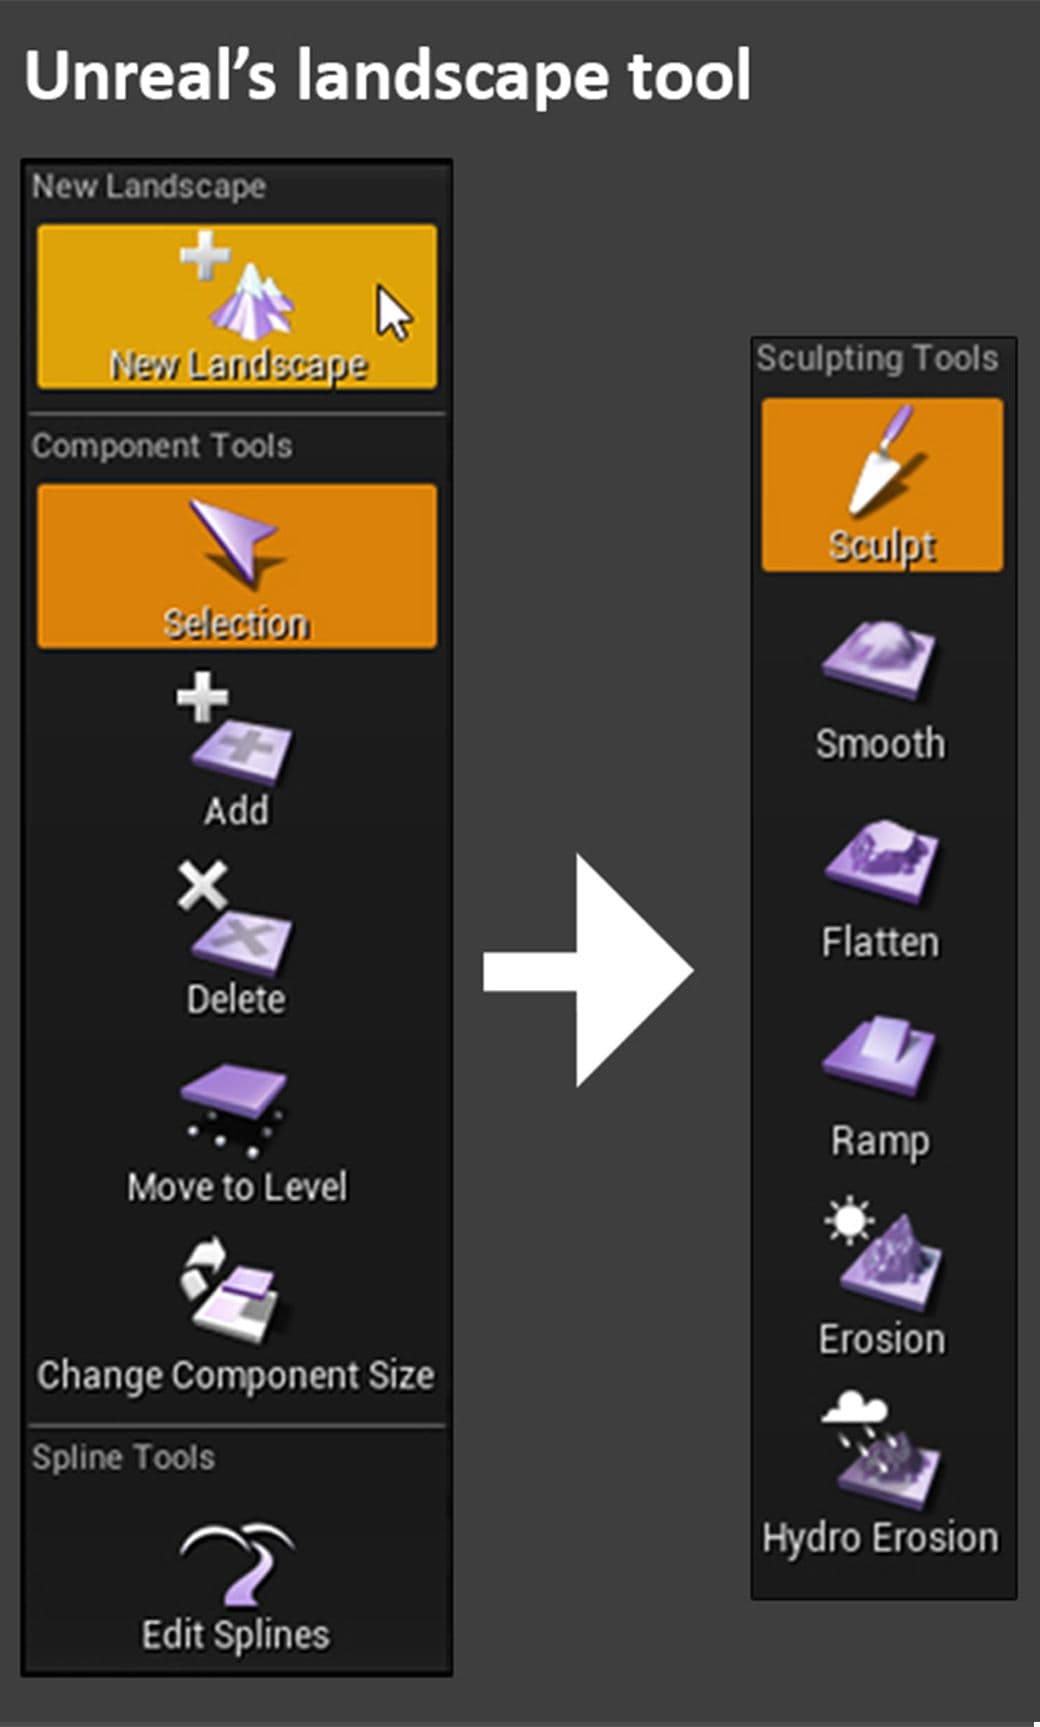
The ground
I used Unreal’s landscaping tool to create the ground plane. It provided me with a variety of sculpting tools and had the extra benefit of being able to paint and blend materials on it.
Moss
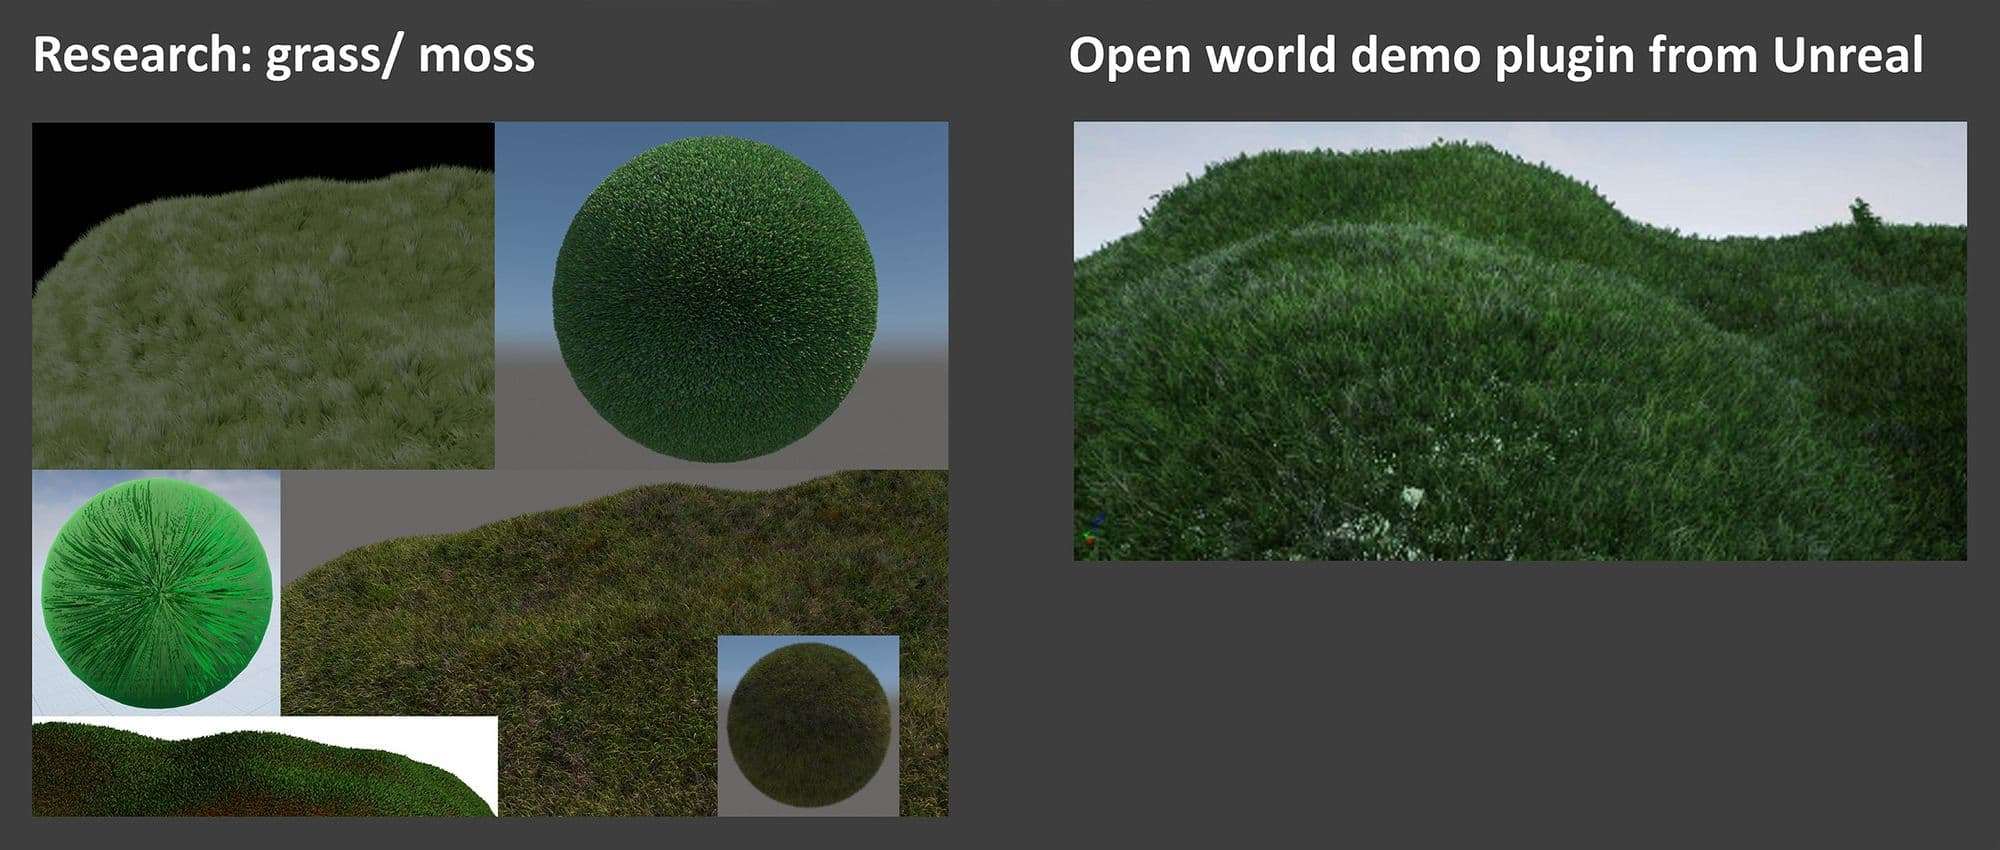
With the ground plane created, I needed to fashion the moss. I noticed that moss resembles grass in a lot of ways, but it was shorter and denser. I researched techniques to create realistic grass to then change it in such a way that it looked like moss. I researched VrayFur, displacement maps, hair and fur modifiers and parallax occlusion mapping. Unfortunately, a lot of these options were not detailed enough or not applicable in Unreal.
I decided to stick to an Unreal plugin called: ‘open world demo collection’, which provides you with a variety of nature models including grass. I painted it on my ground plane using the foliage tool. There were several modifiers for both the grass and the foliage tool that would allow me to customize it to my scene.
Texturing
When starting the project, I was very new to Substance Painter and found a lot of helpful tutorials online to help me work with it. I just researched how people texture their models and learned from that.
Mushrooms
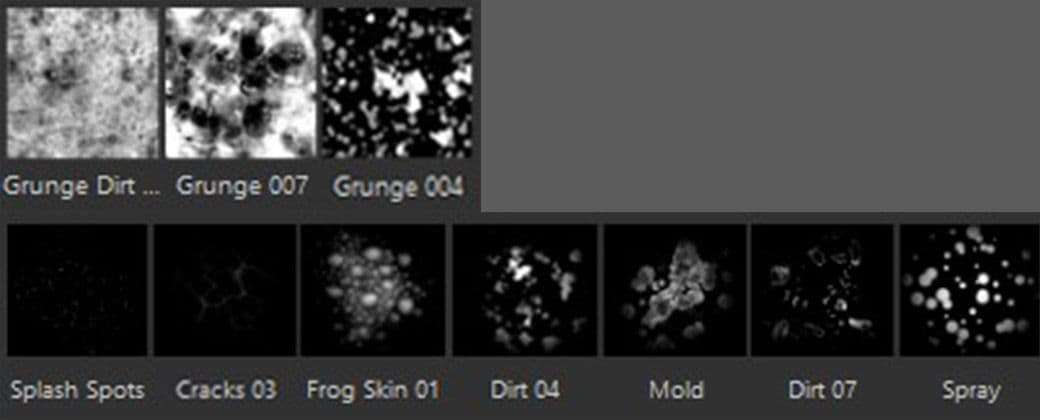
I decided that I’d use the grudges and brushes that are available to me instead of painting every little dot on the mushrooms exactly as in the picture.
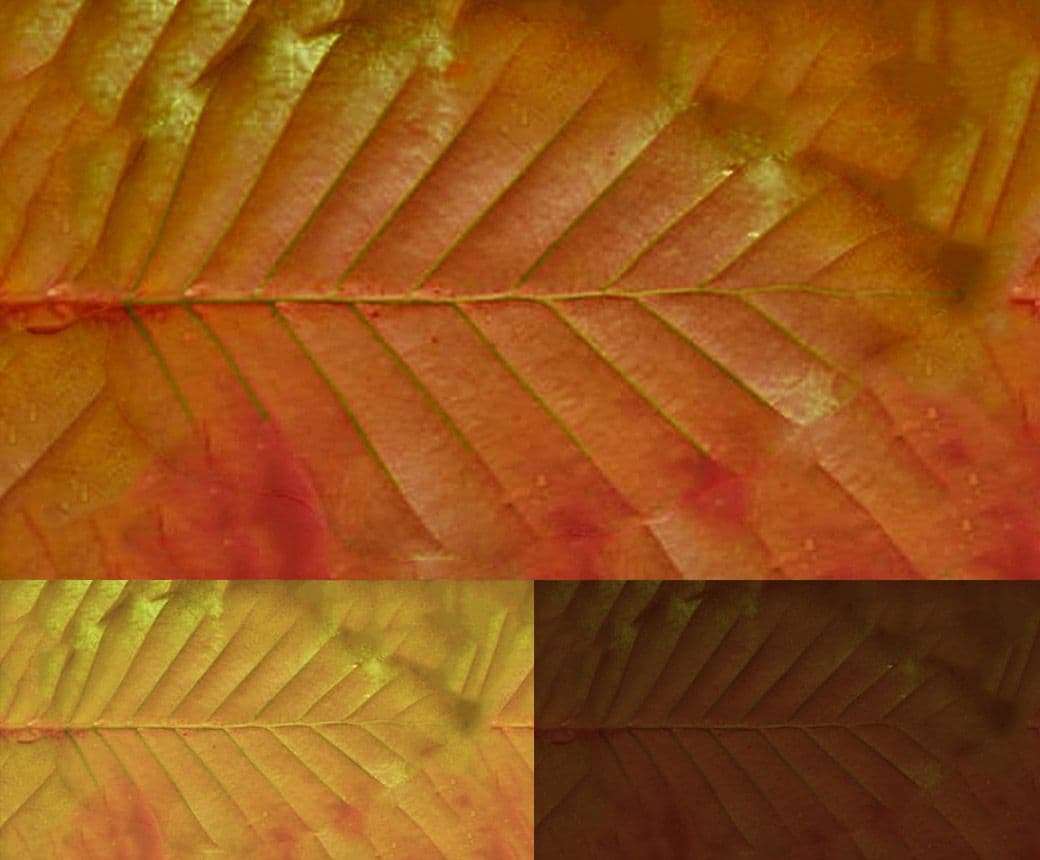
Leaves
For the leaves I used bitmaps, combined with a normal map to create a little bit of depth. I generated this normal map using a useful free software package called XNormal. http://www.xnormal.net/
Then I used Photoshop to create the variations I needed. I mostly used levels and color overlays.
Filters
You can enable several filters using the toolbar at the top of the viewport under ‘view mode’ which is usually set to ‘lit’ by default. It immediately shows you a few useful ones, but you can find more of them under the ‘buffer visualization’ tab.
When enabling the base color only option, it is important that your base colors are not too dark or too bright. When tweaking your scene later on, you want a neutral scene to begin with.
Unreal’s filters are in general very useful to help you spot what might be wrong with your scene.
Reflections
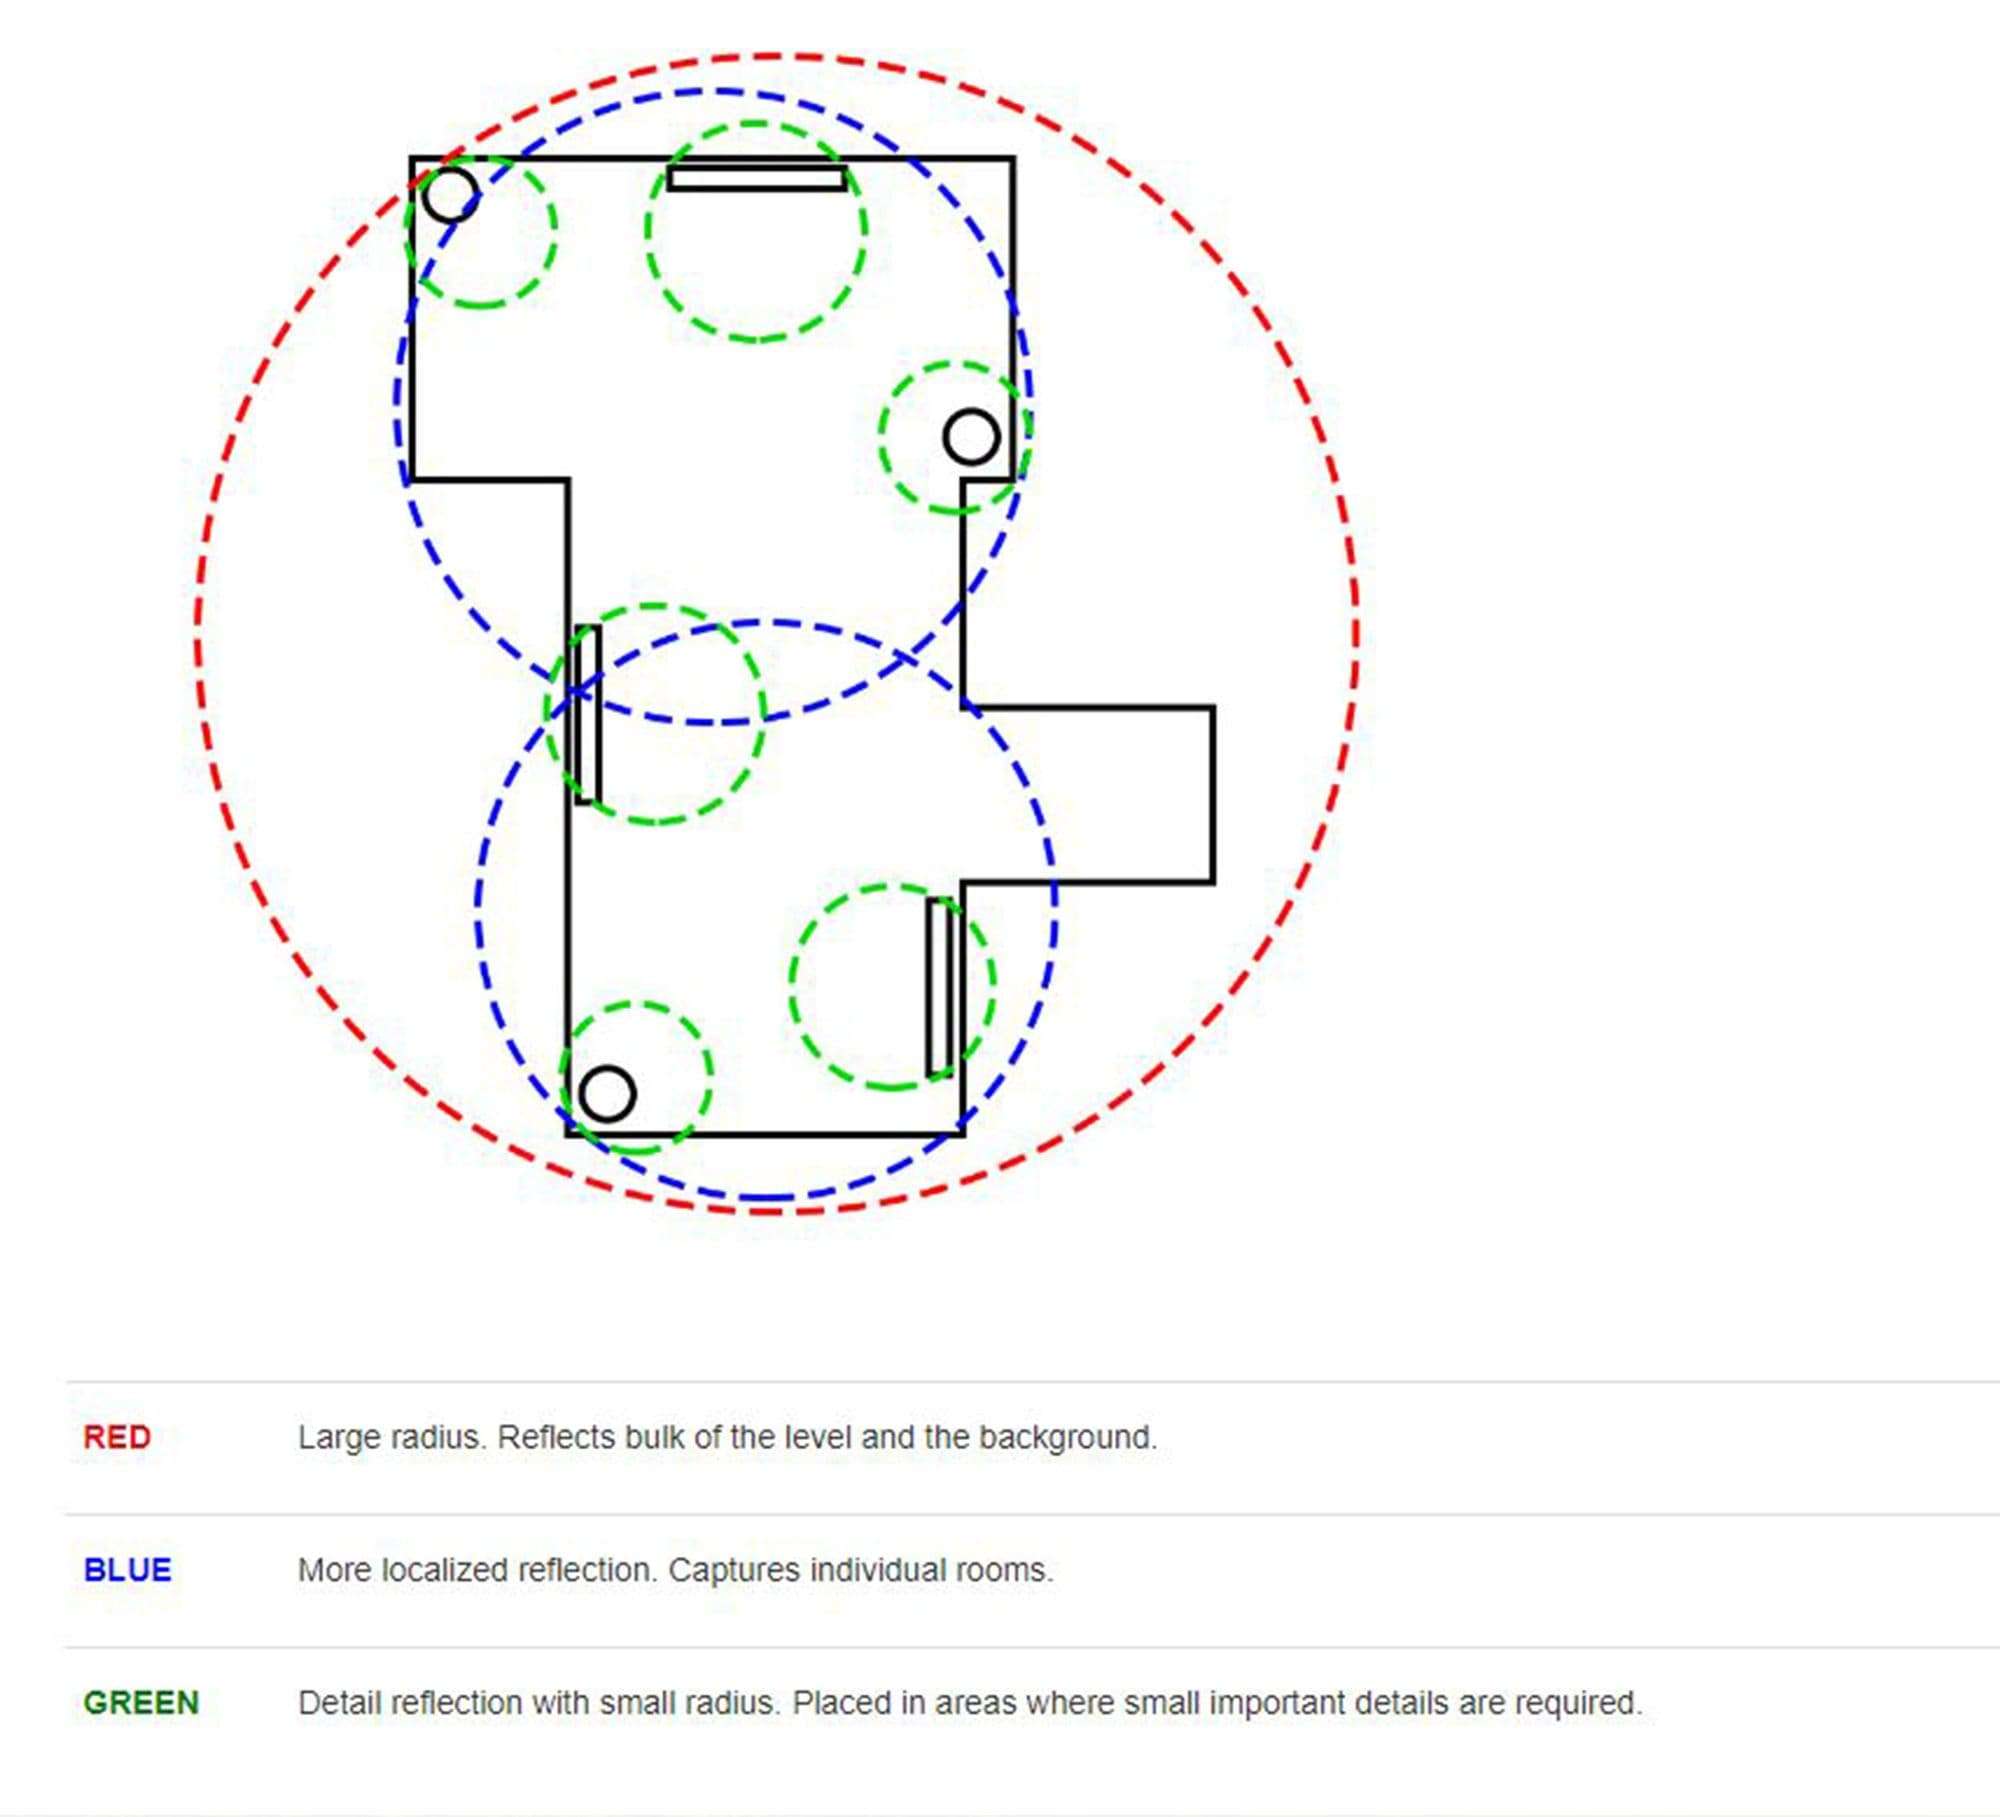
To create a realistic scene, it is also useful to add reflection captures. It was more profitable for me to use a sphere reflection capture instead of a box one because there’s less chance of artefacts. The larger the radius of the reflection sphere, the more bulk reflections you will get. If you want detailed reflections of certain parts on your scene, you want to decrease the reflection capture sphere’s radius.
Fog
There are two types of fog in Unreal: atmospheric and exponential. I used a subtle atmospheric fog in my case because it's used to scatter lighting in outdoor scenes and makes it look more realistic. While exponential fog can be used to create a volumetric fog, it didn't fit my scene very well.
Background
At first I tried to create a picture as in the original photo. Since I had to blur the image to not pull the focus away from my scene, everything looked flat. I wanted a background that made the scene look a bit more spacious. So I blurred this picture in Photoshop instead and applied it to a sphere in Unreal to act as the background.

Lighting
Lighting might even be the most important part of this project, so here are the some of the features I used in my scene.
Generally it’s a good idea to look at all the documentation of Unreal to get a good grasp of what the engine’s capable of.
Dynamic lighting vs static lighting
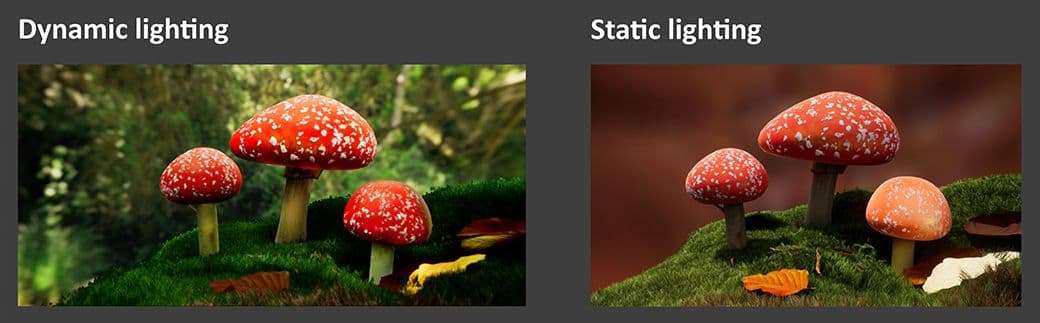
In Unreal there’s either dynamic lighting or static lighting. During my project, I experimented with them both. Dynamic lighting renders the lighting real-time while static lighting bakes the lighting information in the textures of the meshes. Since static lighting is pre-computed, you can choose the render time. This results in a more detailed and accurate lighting.
Different kinds of lamps
Initially, I used multiple spotlights to try and get the result I wanted, while all it did was make things uglier. Real life doesn't have 15+ spotlights in it either after all. In my final scene I only used a directional light and a skylight, tweaking the rest of the light with Unreal’s light mass settings. It provided me with a far more realistic result.
Light mass settings
Unreal has a light mass settings panel which can make a world of difference to your scene. You can boost among other things the lighting quality and the amount of times the light can bounce around in the scene. In reality, light rays bounce off everything they comes across. This causes a global illumination of a room and creates soft shadows. This is what I needed.
My supervisor at school then advised me to look at some videos of Daedalus on Youtube. He is a lighting artist, currently working for Dice.
Daedalus is an expert at lighting and I would recommend watching some of his videos here: https://www.youtube.com/user/51Daedalus/videos
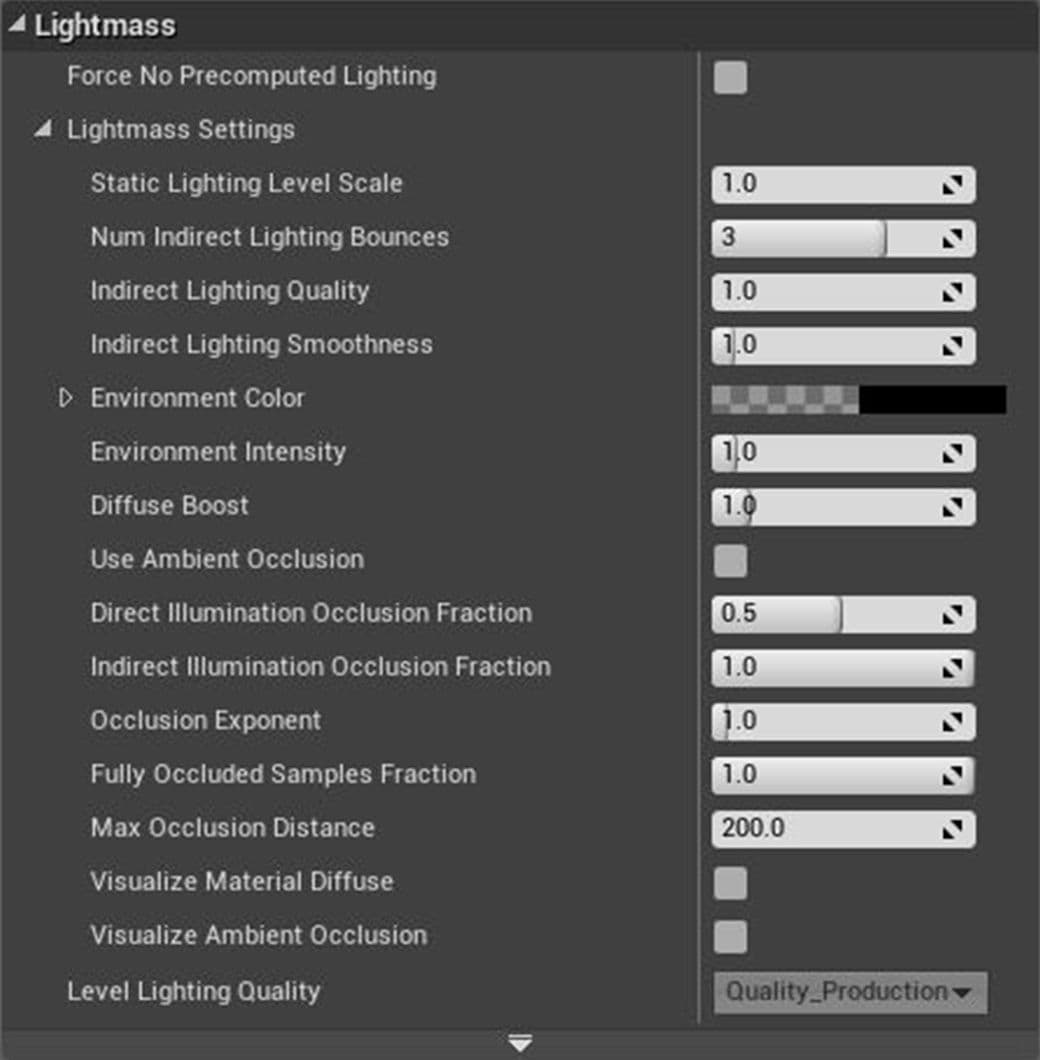
One important note though is that, while it might be very tempting, not to use the ‘use ambient occlusion option’. It makes your scene look a lot better, but it isn’t accurate.
If the light settings present in the light mass tab are tweaked correctly, it should automatically give you ambient occlusion. This is a lot more accurate because it's created by actual light traveling through your scene instead of an approximation of it.
Color bleeding
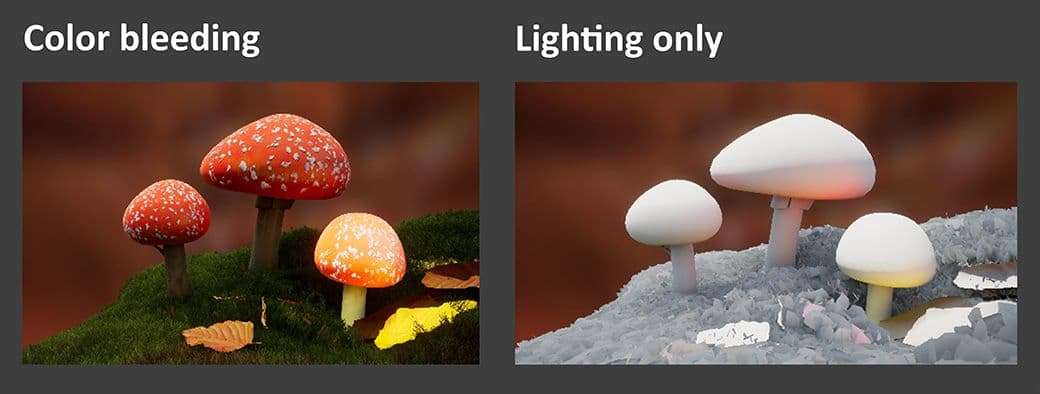
One of the problems I had with my lighting was color bleeding. Color bleeding is when your light ray bounces on a surface and then with its next bounce projects the color of the previous surface onto the new one. In my scene, it is most noticeable due to the saturated color of the mushrooms and the yellow leaf. I didn’t particularly like the effect it had on my scene and removed it by lowering the saturation.
Shaders
For my project I used some shaders within Unreal to help get the result I wanted.
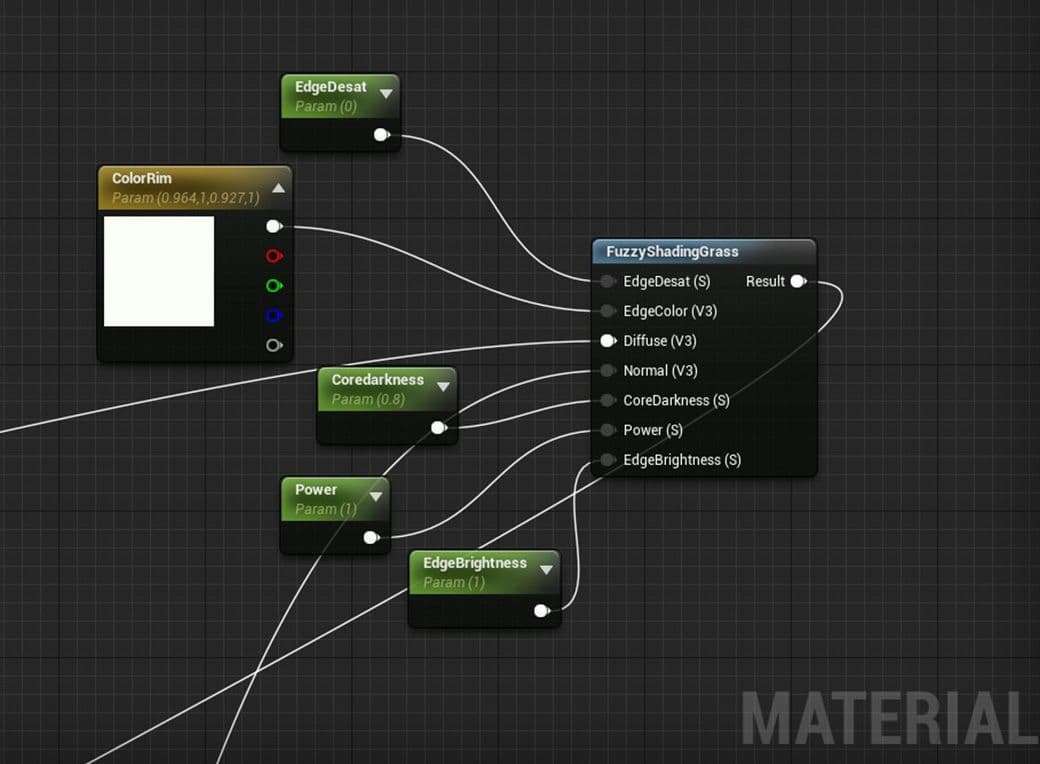
FuzzyShadingGrass
For the rim on the grass, I used the FuzzyShadingGrass node. This node creates the opportunity to add a rim to the moss and it has several parameters to edit that rim. Desaturation and edge color would be the most applicable in this case.
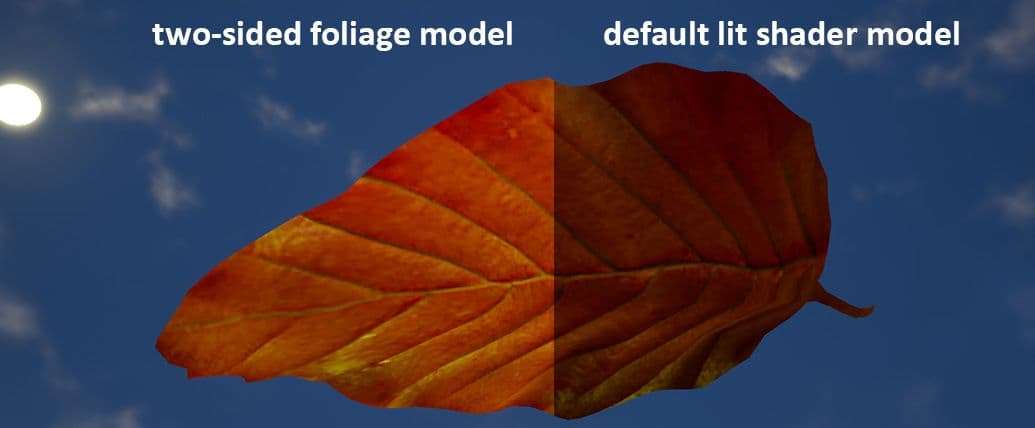
Two-sided foliage
Changing the shader model from ‘lit’ to ‘two-sided foliage’ helped my leaves look a bit more realistic. The two-sided foliage shading model uses a variation of the subsurface scattering lighting model that accounts for objects that are very thin. This helps to give the illusion that light is being transferred through the foliage. This also helps to eliminate the dark parts of the foliage and give the foliage a more uniform look to its lighting.
Material Instances
During this project I worked with material instances. While material instances are well known in Unreal, it is still worth mentioning. This avoids the incurring of an expensive recompilation of a material.
A typical material can’t be edited or changed without recompiling, an instanced material can be made to change without such recompilation. Then you can add parameters to the original material that you can then change on the fly. I added parameters like saturation, color overlay and darkness for example.

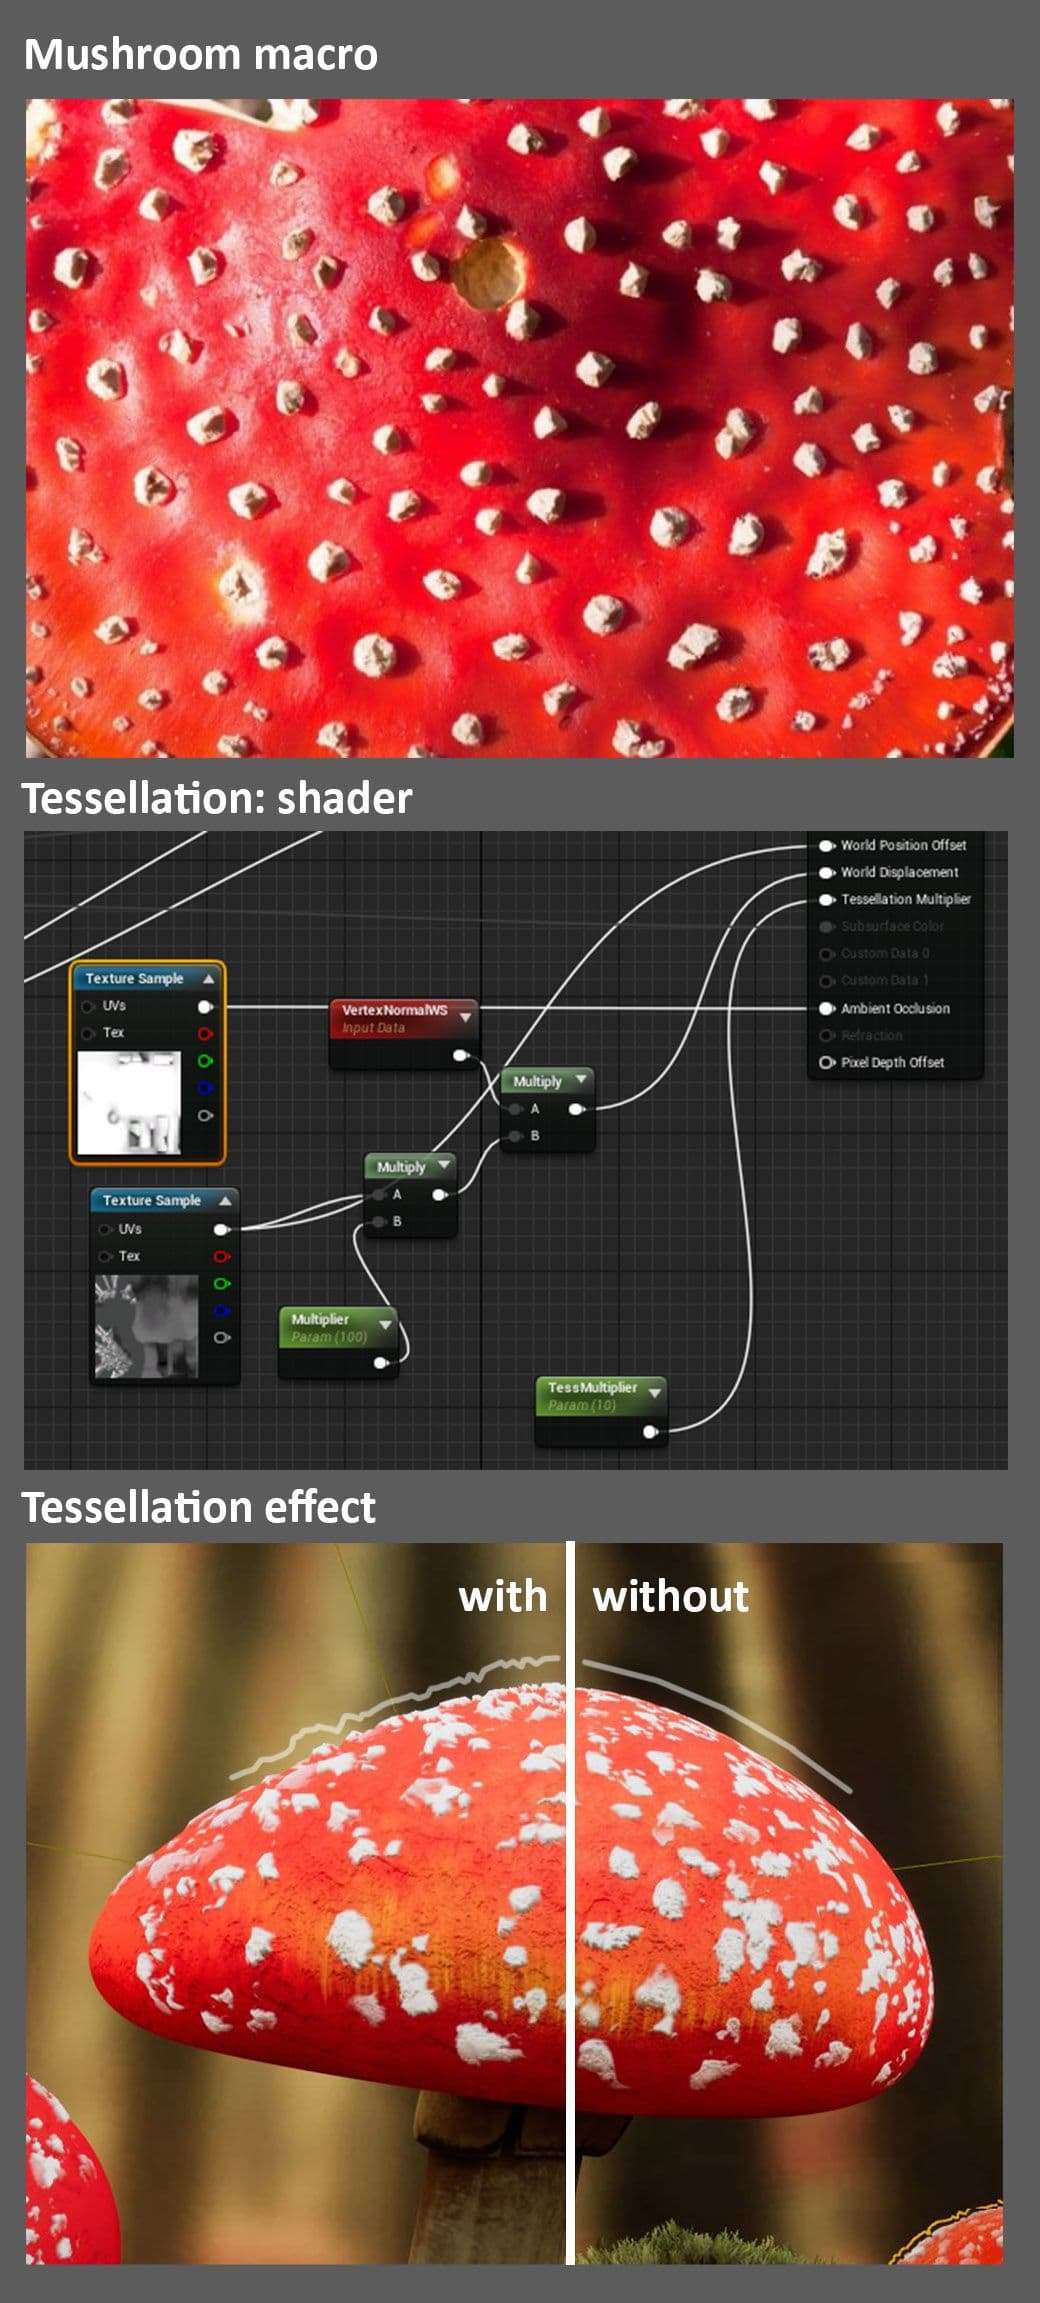
Tessellation
I noticed that the caps of my mushrooms were rather smooth which I thought ruined the silhouette a little bit. While looking at reference, I noticed that the spots on the caps of those mushrooms stick out. I used a tessellation shader because it gave me the result I wanted with a lot of control. The height of the spots can be tweaked with ease using a material instance.
Post processing
To make any scene look good, post processing is important. Luckily, Unreal happens to have a great amount of post processing features. You can access all these features by adding a post processing volume into the scene. I’ll name a few useful post processing features that made a difference for my scene.
Depth of field (DOF)
DOF can create a blurry effect that provides your scene with a focus point. DOF is used in a lot of realistic scenes because while looking at the real world, not everything is completely sharp all the time.
There are three kinds of blurring in Unreal: Bokeh, Gaussian blur and CircleDOF. Bokeh was the one that worked best in my case.
While I tested a lot and learned about the way Unreal does this blurring, I didn’t quite get the result I wanted. So, I tweaked my screenshot in Photoshop some more using Environmental Blur with masks to create a subtler effect.

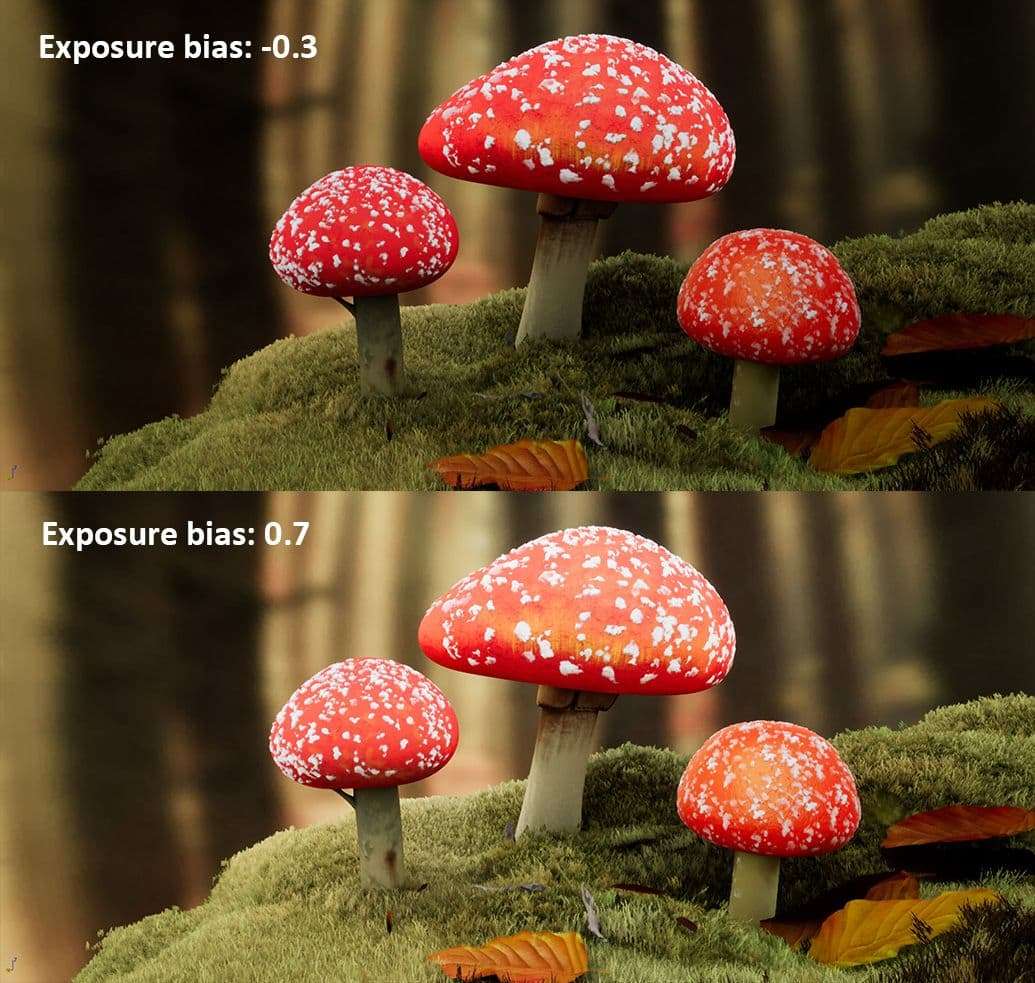
Exposure bias
Exposure bias in post processing is also extremely useful as it fixes your lighting better than any skylight ever could. In fact, this is a better workflow than increasing either directional lighting intensity or skylight intensity.
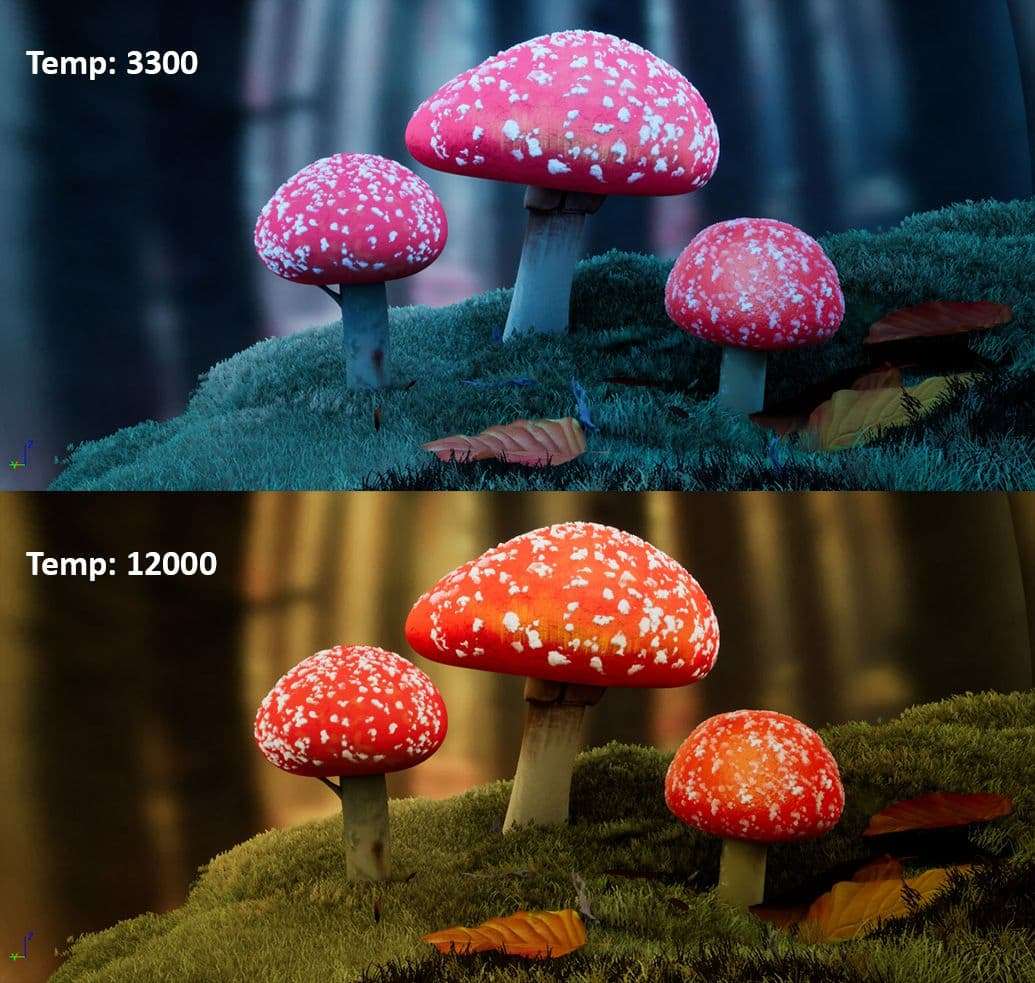
White balance temp
The ‘temp’ option in the post processing volume is a big feat as it changes the entire mood and feeling of your scene in an instant. It can however be dangerous too because it can get unrealistic. It can be used to make the scene slightly more cool or warm by giving it a kind of color overlay.
In general, you want to tweak these settings, so it fits your desired result. Here is a video showcasing some of my work in progress shots leading up to the result:
It’s also very important to keep asking feedback. Working on a project for long periods of time can make you blind for your own mistakes.
This project wouldn’t be possible without the help of my supervisors at school and my fellow students. They were constantly giving constructive feedback which helped me to improve my scene. They also gave me amazing ideas and pointed me towards good tutorials as well. So, a big thanks to them.
I hope this blog post provided you with some useful tips!