
My name is Junliang Zhang. I come from Shanghai, China. I was in the BFA Game Design program at the New York Film Academy. Snow Mountain was one of my personal projects during the school. The project goal was creating a realistic snowy environment for the game project.
Inspirations / Ideas
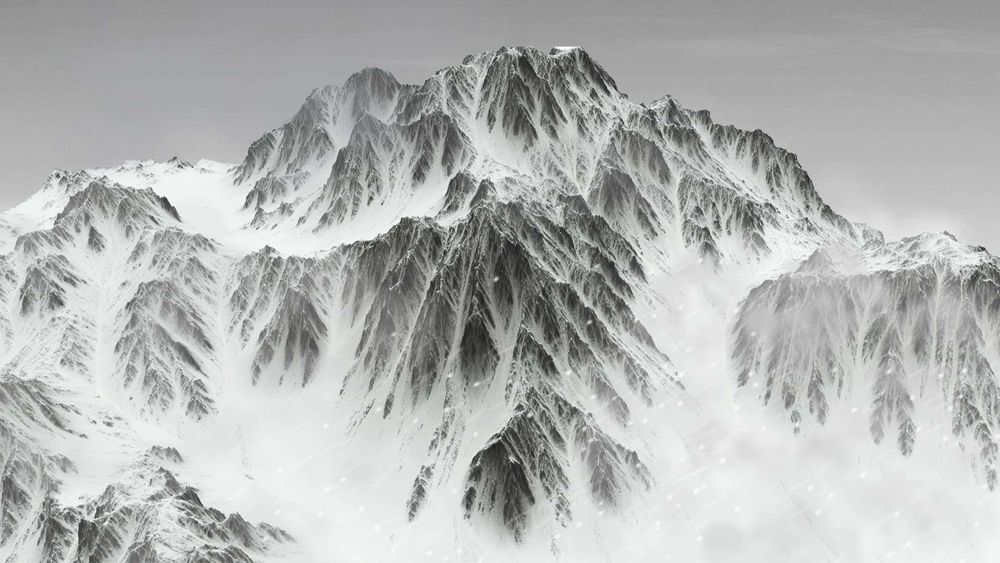
Awesome references or concept arts are always a great way to get started when you want to create something in the visual world. The idea for this project came from a trip where I went to Changbai mountains for skiing in China. I gained a lot of inspirations and ideas while traveling and playing. Ski racing was a part of my childhood and I have a lot of great memories with some of my friends.

This photo was awarded the 3rd Prize in the 7th Asian Students Photography Exhibition in China. I used this picture as a reference for creating this project.
When I start making a project like this, I usually will sit down and think about the background story of the scene. This is a great habit. It will help you get a lot of inspiration and ideas while designing and texturing.
I spent a lot of time that collected as many as I could with my trip images and Pinterest for the mood board. Eventually, I found a great picture from my trip that looked very cool and fits well for the project.
The Workflow Breakdown
For the entire workflow is quite simple. For the base terrain, I generated a mountain with nodes by nodes in World Machine. For texturing and rendering, I used Substance Designer and Unreal Engine 4 to finish the entire scene.
Snow Mountain Terrain Parts
As long as I have my initial ideas in my mind, it’s time to make a cool terrain with some simple nodes in World Machine. There is no right or wrong way to do this, but it is important to keep the scales, elevations and make sure the size is correct and also can fit well in the game.
Base Terrain Creation

I used Advanced Perlin Node as a base that is very great and simple way to generate some random terrain shapes with Feature Scale bar and styles. I created two Advanced Perlin and blended together.

I used a Simple Transform Node so that I can adjust the height map elevations.

As long as you felt that your terrain shapes and elevations are great, you can add some details for your terrains. I used Erosion Node that I can create some slope effects for the mountain. That is a very great way to generate some realistic feeling of the mountain.
Tip: If you did not see any details on your mountain, you need to hit this green button to build.

If you do not like default color, you can change any color you want. You can hit CTRL+T (Colortable Selector) shortcut but that is not the final color when you exported. I only use it for preview.
I added a Height Output Node that I can export my height map in RAW16 format at a resolution of 513 X 513.
Texturing in Substance Designer:
I used Substance Designer and Megascan for all my material and texture works; and then I created a master terrain layering materials in the Unreal Engine 4 later on.
Snowy Textures


I start with the overall snowy height map by creating a base snow shapes. I used Cell 1 and Crystal 2 blended together with Directional Warp. It can make the texture having some waves and slopes. And then, I used Clouds 2 and Clouds 3 to add more details for the shape of the snow. That is very a powerful node for artist creating or adjusting any variety of details on the snow ground.

I created a noise patterns in order to achieve a realistic shining dots on the snowy ground for the roughness map. I used sphere Shape Node and warped by a Clouds textures. You can either use a Tile Simpler Node or Splatter Node for scattering. In my case, I used Splatter Node for the final noise output because it’s more cheaper and easy to control. If you want to use a lot of masks or more details I definitely recommend you to use Tile Simpler Node rather than Splatter Node.

If you feel very satisfied for height map you can blend Snow Shapes and Noise together by using Height Blend Node. You can adjust the height between two different maps on the Instance Parameters tabs.
For the colors, I used a simple gradient map convert to the Albedo Map. All textures outputs based on the Height Map.
Substance Designer Breakdown


100% Substance Designer, rendered in Marmoset for the final texturing presentation purpose.
Master Material in Unreal Engine 4

I created a material function for each texturing layouts. It is very useful to stack each material into one node if you have a lot of landscape layers.
Landscape Master Material Setup

Here is a very simple example. I used MatLayerBlend_Standard Node to blend two different textures together and also I take advantage of HeightLerp Node, so that I can use height map that I generated from Substance Designer.

Furthermore, I also created a snow shader that base on the object position, which is very useful for the rocks or trees.

Here is the final result of snow shader.


If you finished this step, you can drag this material to your landscape. You’re all set for the terrain materials.
Rendering in Unreal Engine 4
A great lighting can not leave a great post-processing settings. In my scene, I used DaVinci Resolve to generate a great color-grading LUT, which can help me to improve the color and mood quality. At the same time, I just need to simply adjust some setting in the post-processing settings. After that, I used some snowy particles and fog on the scene for the final rendering in Unreal Engine 4.

In the end, I would like to thank The Rookies for this great interview to present my artworks and all of the readers. I hope this article can help you and your projects.