
I think creating food in CG can be challenging but it is essential for all CG artists. You are pushed to learn how to pay close attention to detail and use reference. It helps you to come out of your comfort zone by facing you with different challenges that you might not have faced before.
There is also a great pressure when recreating food because it is something that everyone is familiar with. so the audience will know right away if something is off.
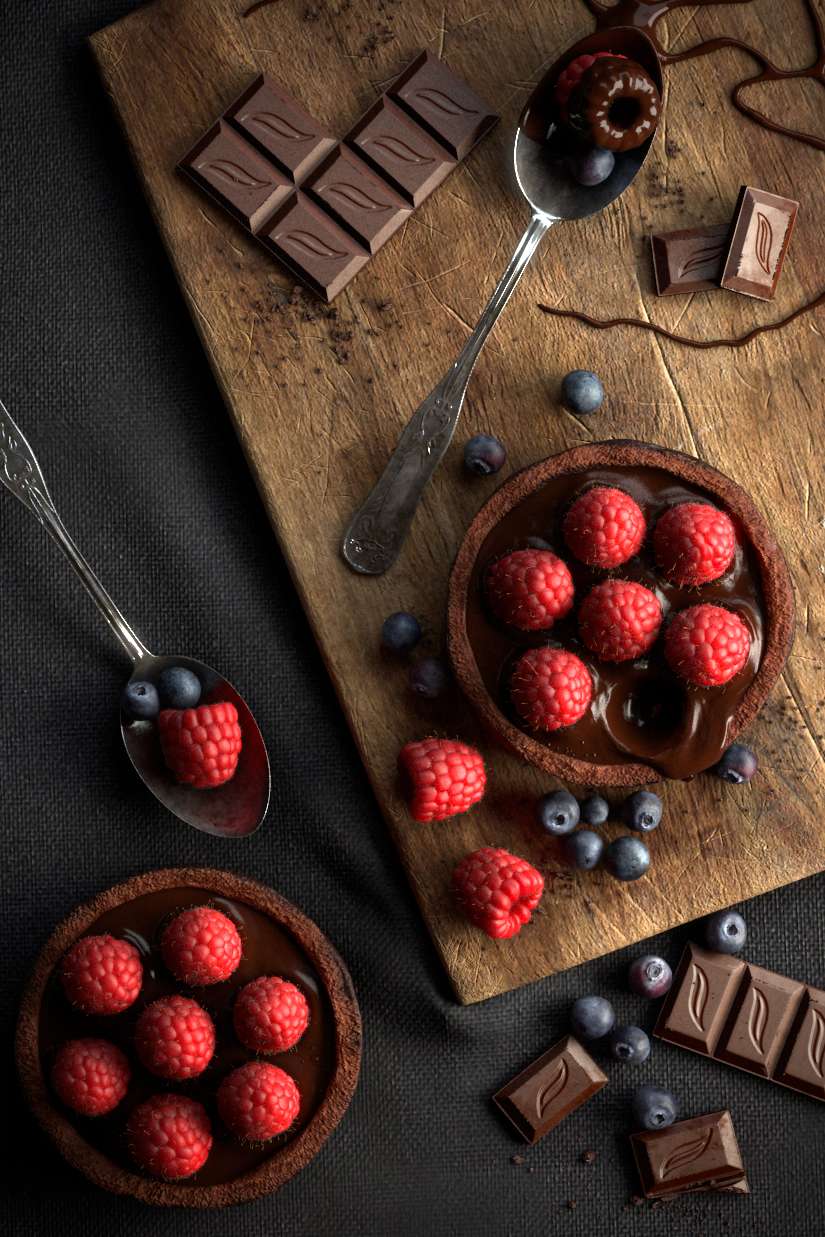
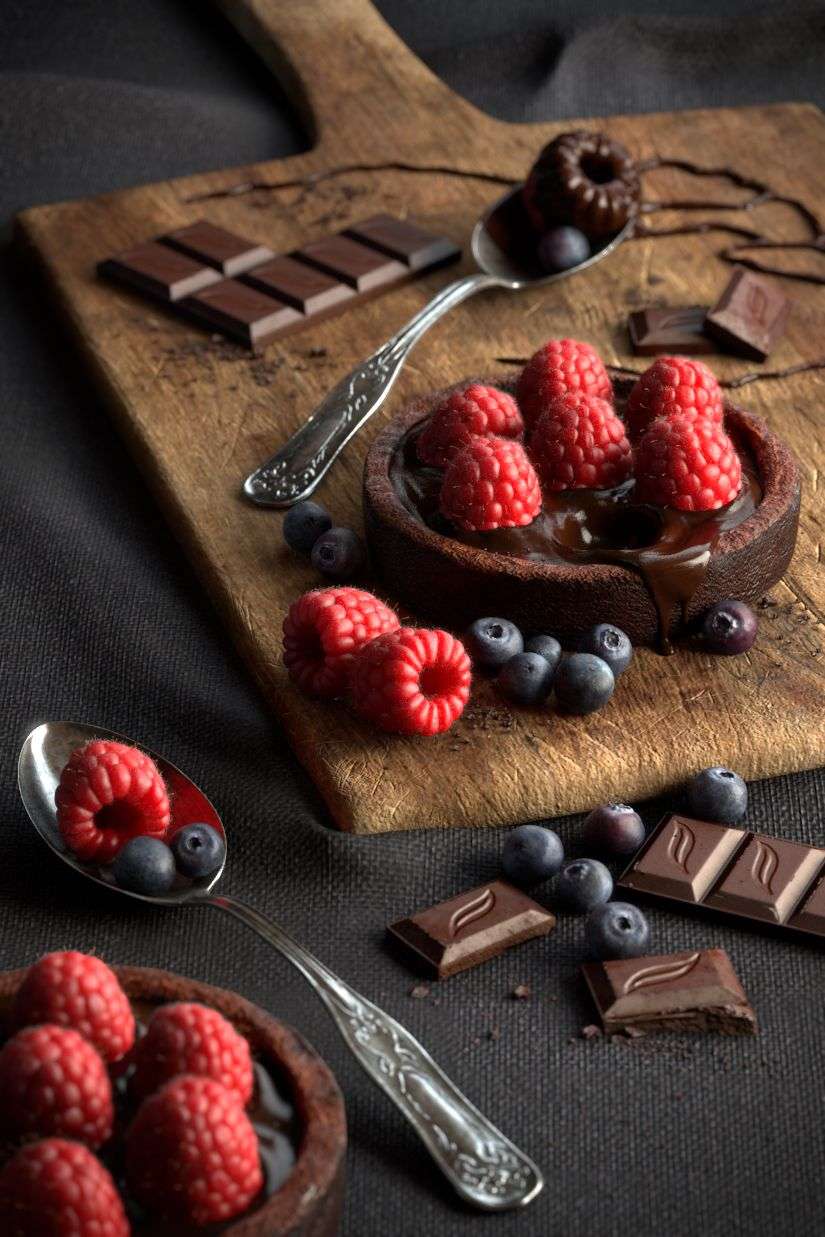
My main inspiration behind “Raspberry Madness” is food photography. I have always been eager to do a project that involved food. I would see renders of other types of food on different CG forums, so my inspiration comes from other artists as well.
Reference and R&D
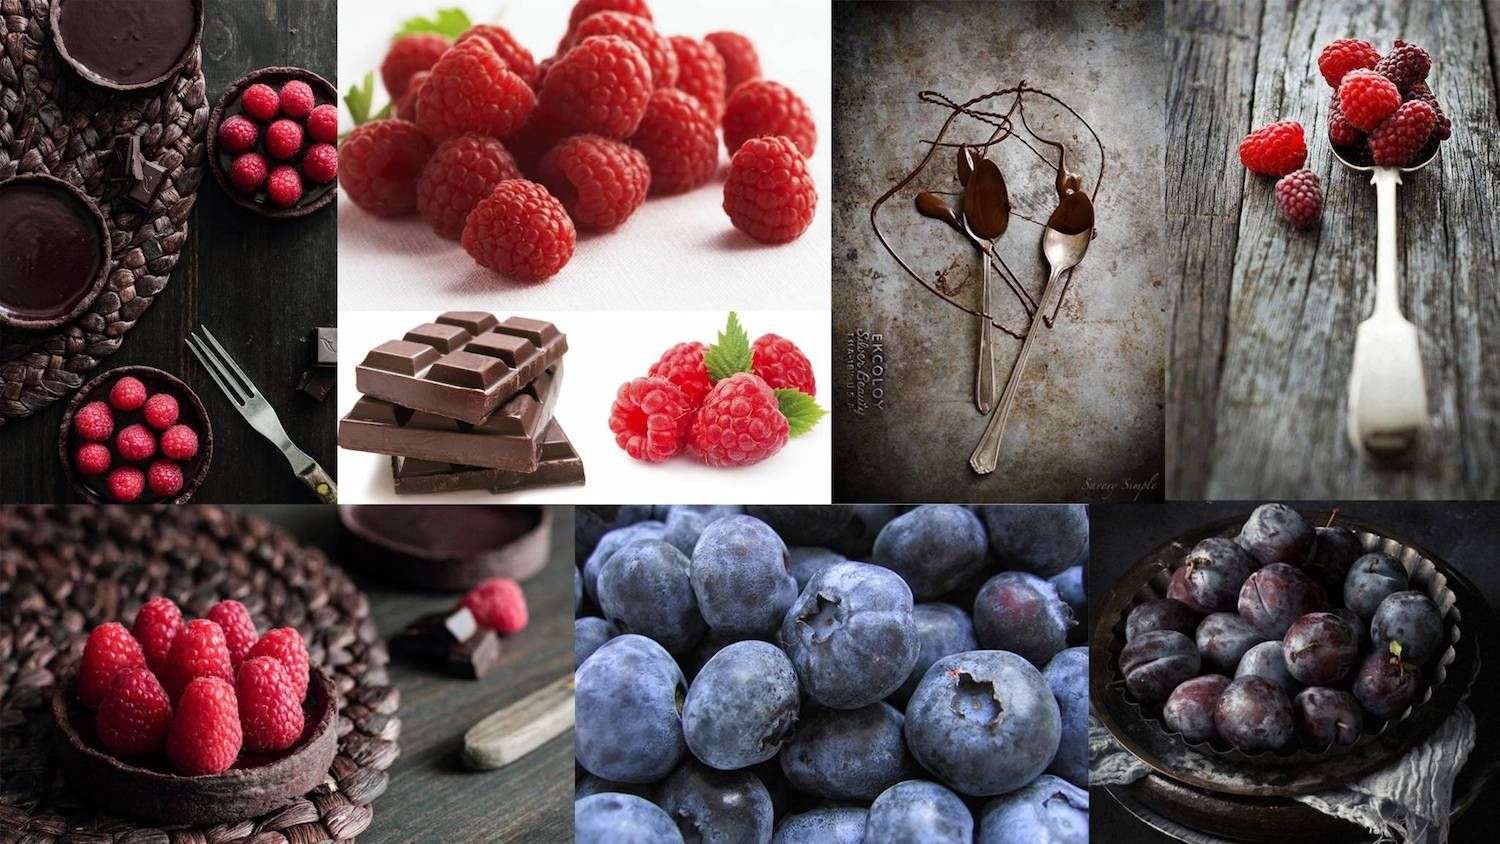
Before getting into any program at all, I like to gather reference images to create a small library. By observing reference images, both on the web and in real life, I can imagine the final picture in my head better and find elements that play well together.
I started my search with raspberries in food photography and then branched out to other types of food as I got inspired. I was not only considering the visual aspect that will please the eyes but also the logical relationship between different types of food.
Chocolate was as good as it gets! They played well with raspberries, both visually and logically.
Modelling
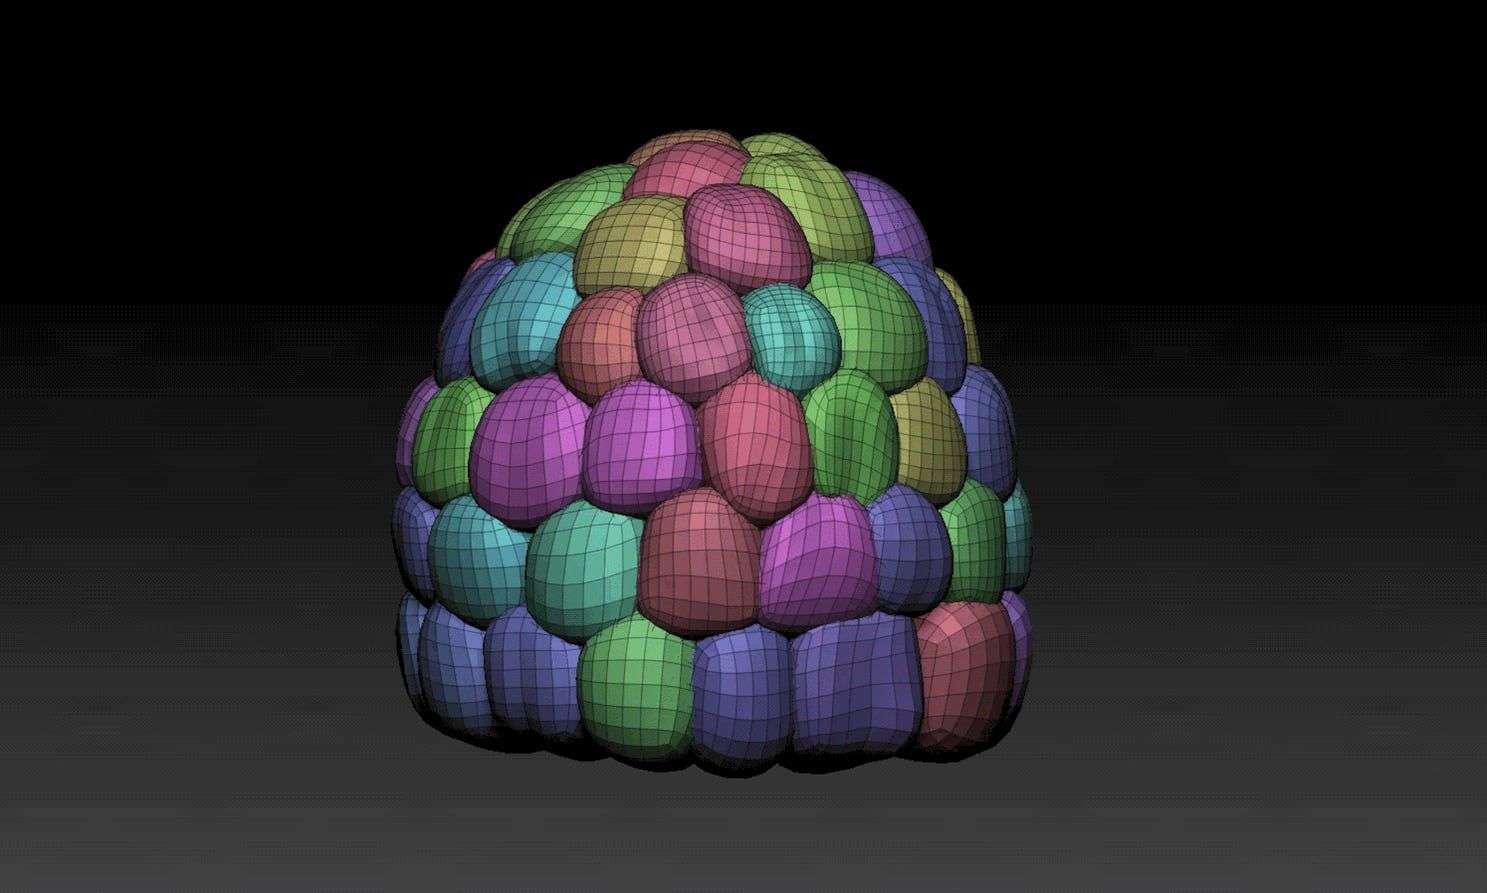
Models are very basic in the scene. I picked a raspberry image that I liked and put it into ZBrush as my background so that I could easily make a comparison. Then I started adding on spheres on top of spheres to create the overall shape of a raspberry.
It was like solving a puzzle rather than modelling. Each sphere had to be slightly different. Repetition was my enemy and once I added more variations to geometry, the scene started to look more realistic. I did not get the right model shape on my first try; it probably took me 5 or 6 tries of starting over until I was happy with what I got.
For the spoon with chocolate dipped raspberry, I used ShadowBox in ZBrush to create the drip shape on the wooden tray. I also masked some parts of the spoon and the top of the berry to extract polygons to a new subgroup. That way I could dynamesh all three pieces together to make it one continues geometry.
So it looked like somebody actually used the spoon to take out the berry from the tart and dripped chocolate around. For the spoon design, I mimicked what was in my reference and altered it a little bit for my own taste.
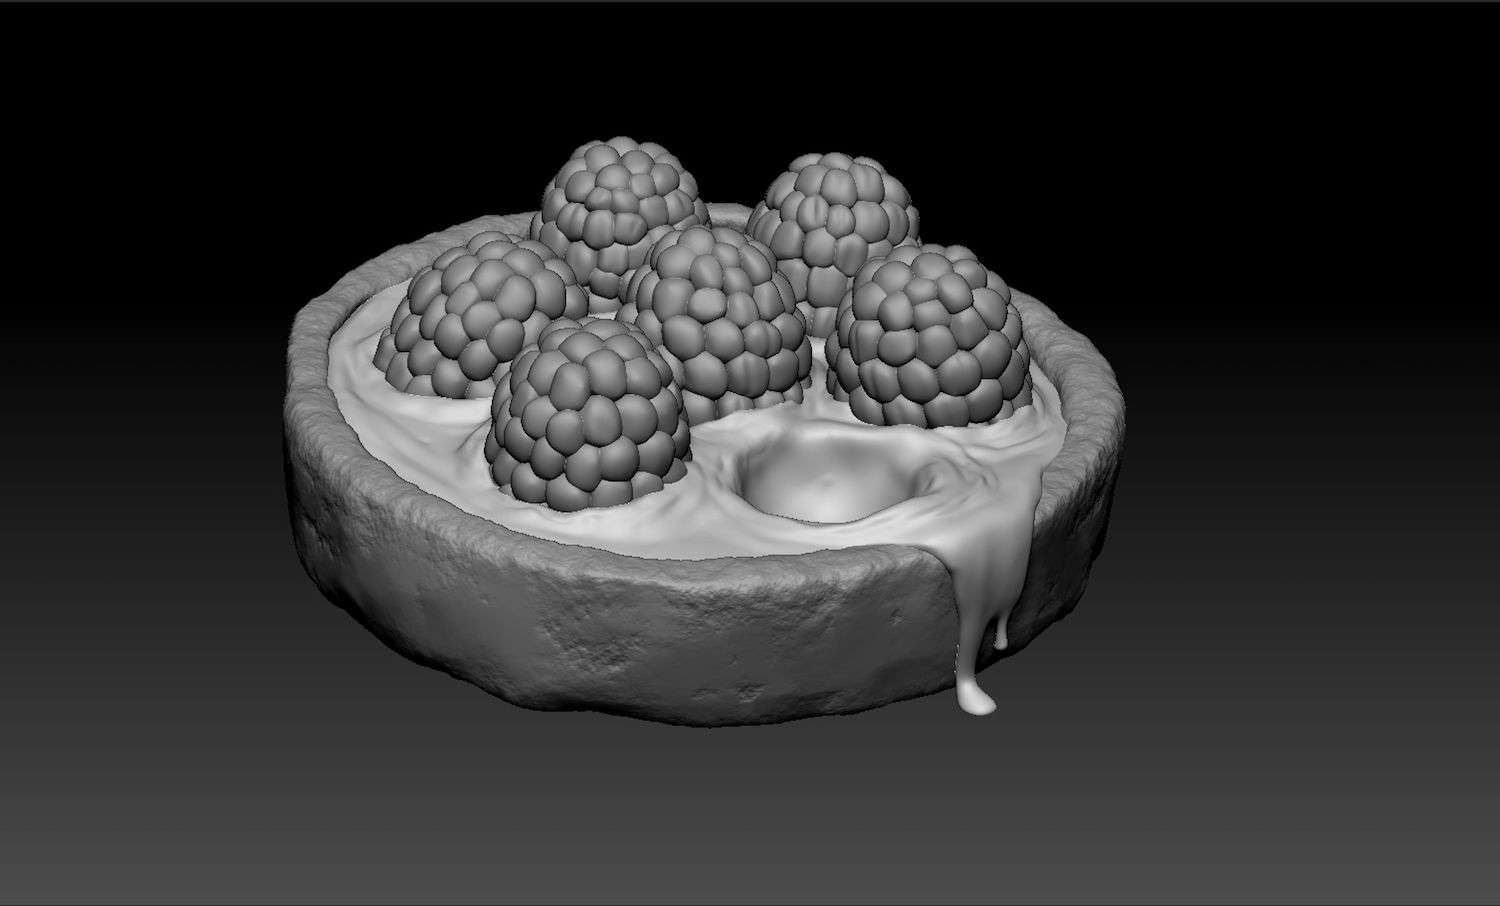
For the chocolate in the tart, I used the Clay and Standard brushes to create rings around the dipped raspberries to make it look like they are actually sitting in it rather than colliding through the geometry.
For the tart, I did not entirely follow my reference. I went with my imagination and wanted it to have a wet, oily look instead of dry and diffused. I thought it would be more appetizing to look at.
For the tart, I wanted to get the surface detail from a texture rather than sculpting. So I only used Noise under the Surface tab in ZBrush to create a bumpy surface on the object. After adding Noise, I used TrimDynamic brush to smooth out some of the surfaces.
I think the tart model still needs to be pushed more than any other model in the scene. Lastly, I sculpted the cloth in low poly to get the folds around the wooden tray by using the Standard brush. Overall, everything is basic ZBrush sculpting.
After adding Noise, I used TrimDynamic brush to smooth out some of the surfaces
I learned that simple models can make great renders too. I tried to maintain a good final result by putting emphasis on my textures, that way I was able to get away with simpler models. I learned using ZBrush recently so I tend to rely more on my textures.
Texturing
I used Mari to texture almost everything. Mari is incredibly user-friendly and a powerful texturing program that allows you to create complex textures. Only a few things were procedurally done in Maya, like the cloth, chocolate crumble bump, and two raspberry diffuse layers, which I will get into later in the compositing section.
For the wooden tray, I used 3 wood images to texture the colour map. All 3 of them along with most of my textures were downloaded from CGTextures. The first 2 was multiplied together to add more complexity and aged look. I made a scratches mask to reveal the third, cleaner wood texture underneath on certain areas.
Chopping board
For the blueberries, I started with a procedural cloud texture in Mari and picked my colours from a reference blueberry image. I picked different tones of blue to create a variety. When I was happy with the dark and bright spots, I started adding dirt, spots, and other imperfections.
In the end, I was able to colour correct everything to match my reference. I think it is always important to keep in mind how much detail you really need depends on how close you are going to get to the object in the scene.
Blueberries
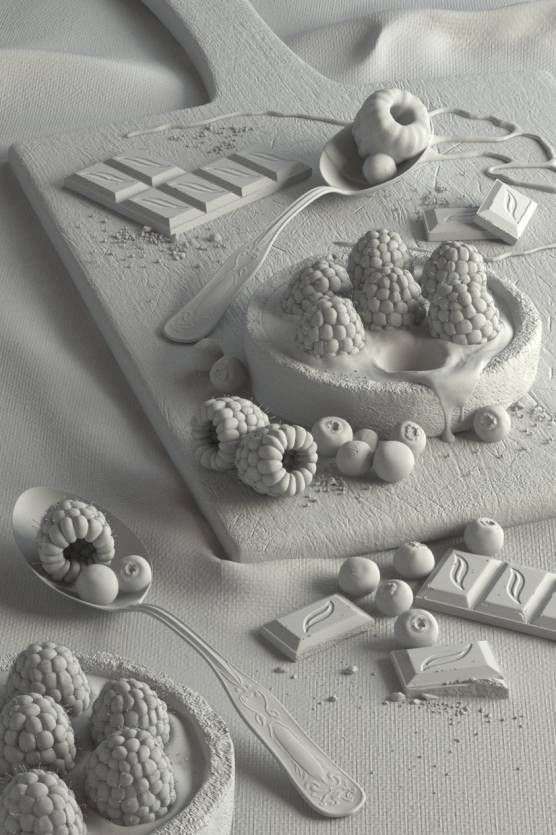
Here is the diffuse render pass to show all textures together.
For the tart, I found a cake texture and cleaned it up a bit in Photoshop then started painting in Mari. It is pretty straightforward texturing here as well. Once the colour map was done, I played with levels and colour balance to create my subdermal layer. Then I made my specular map and bump map by desaturating and playing with the levels. I used a bit of masking on areas that I wanted less or more bump/spec.
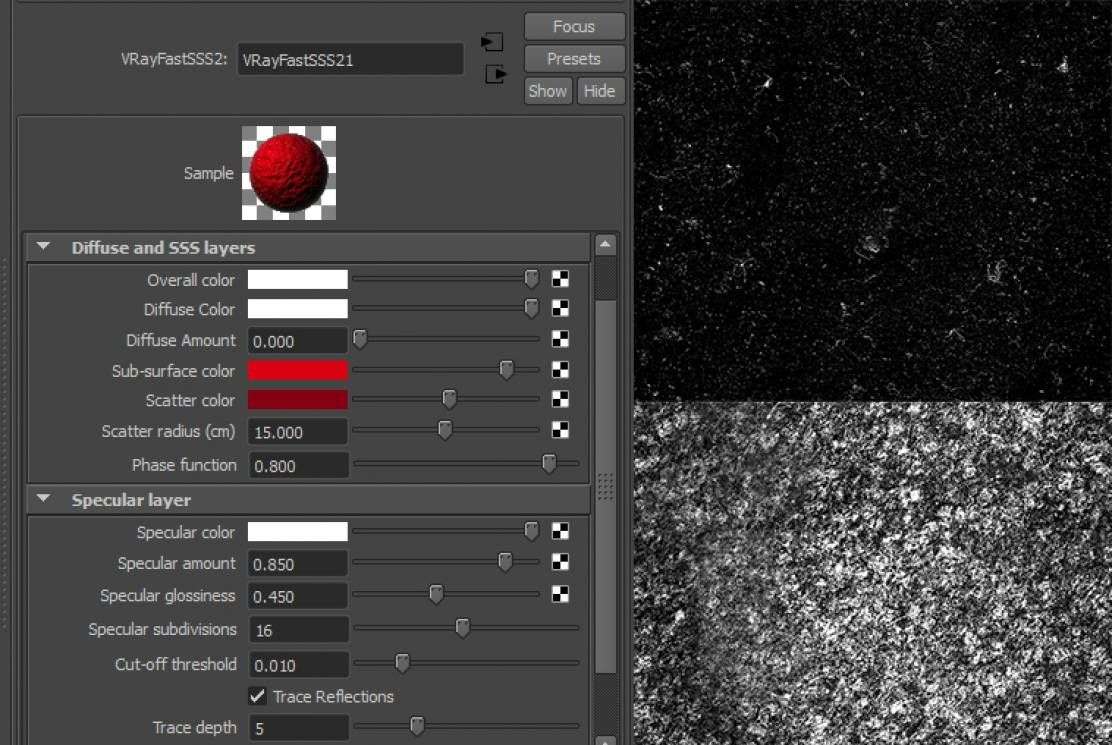
Raspberries are mainly SSS with a thin layer of diffuse from all the little hairs on it.
For the tart, I did not entirely follow my reference. I went with my imagination and wanted it to have a wet, oily look instead of dry and diffused. I thought it would be more appetizing to look at. So I adjusted my specular map according to that.
Lighting
After the models were roughly what I wanted, I set up my composition and camera with a high focal length. I assigned a diffuse 50% grey material on all objects to better understand my light set-up, exposure, temperature, and shadows. I ended up using 2 Area Lights; 1 as my Key and the other as my Rim Light. I also used an HDR as a fill light. My Rim Light had a tint of blue to add a more natural feel.
I searched to see how food photographers set up their scene. I found a few images explaining the light set up so I tried to mimic what they do in real life inside of Maya and adjusted it for my own taste.
Similar to the reference, I used two planes with a VrayMtl shader that had a tint of dark blue as its colour. Instead of bouncing light, I was able to block my Fill Light from reaching certain parts of the scene.
As a result, I was able to create better shadowing, as well as emphasize my Key Light more. This benefited the look of the berries more than anything.
It is also a good idea check to see how shaders react under different lighting conditions.
Look Development
Before I did any look development, I set up a new light rig that had neutral lighting, which means all the lights were pure white. This way I could see the pure colour of my maps without any other colours bouncing off from the environment or the lights that might lead up to an incorrect shader look when used in a different light rig.
With the neutral light setup, shaders can be used in different light rigs more accurately.
I definitely recommend for all lighters and look development artists to check out these 10 tips for lighting and look development by Cosku Turhan, Senior Lead TD at Sony Pictures Imageworks. His work is also an inspiration to me and someone I look up to.
Shading / Render Elements Compositing
For this project, I took a different approach than I normally do in my other projects. I did my look-dev on almost everything in Maya as I would normally do but left raspberries at a point where I was happy with only the SSS pass and then switched over to Nuke. V-ray offers a great amount of flexibility in creating your passes so I took a lot of advantage of it. I assembled my passes back in Nuke in order to have control over every aspect of the image. Passes sped up my workflow tremendously.
Raspberries are mainly SSS with a thin layer of diffuse from all the little hairs on it. Since I was not going to get too close to the berries, I found a hair texture and a ground texture that had a lot of noise type complexity. I used them as a different pass, assigned to VrayMtl and rendered it separately from my raw render. I also used the ground texture as my bump map to add irregularity to the surface.
Later, in Nuke I was able to adjust how much diffuse I wanted.
Raspberry Diffuse
I also made another custom mask where I assigned red and green surface shader to use as a mask. That way I could add some slight colour variation to specific parts of the berry.
This GIF shows the steps I took in post to create the raspberries. I tried to maintain a good final result by putting emphasis on my textures.
Here is a before and after comparison of the render element compositing along with other colour corrections and adjustments.
I would also like to take this opportunity to encourage everyone to visit Akin Bilgic’s website where he talks about things like V-ray scene optimization and 32-bit displacement workflow from ZBrush into Maya.
If you like using V-ray by Chaos Group, he has some incredible, easy to follow explanations of what goes under the hood of the render engine. Definitely recommended and it will save you a lot of rendering time down the road.
I hope I was able to explain my workflow as clear as possible. I tried to cover things that were more complex and interesting to read. I hope you enjoyed reading this article as much as I enjoyed writing it.