
Poulain Fanny is a digital illustrator from Paris. She loves creating realistic worlds and characters and in this article she provides some great insight on how to add realism to your own artwork.
I would describe my inspiration process as a melting pot between my own universe which I have been creating for the past 13 years and things that I have always loved like video games, movies, books and artists. Sometimes, I have a precise idea of what I want to draw , but most of the time I just let my imagination take the lead.
For this character, I wanted to create something inspired by the Victorian Era which I’ve always admired but adding a twist of modernity with big and strange shape.
Research & References
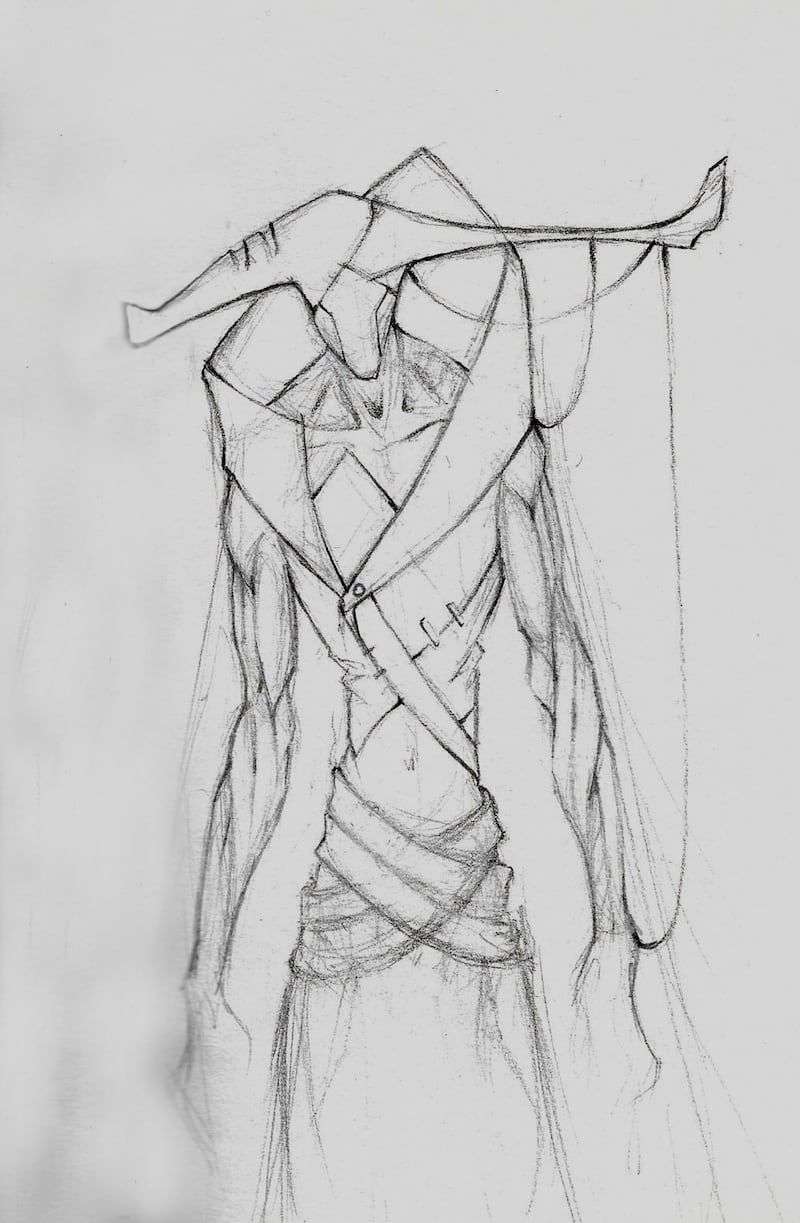
At the beginning, I start to draw some interesting shapes on my sketchbook or on my tablet, without focusing on the final result. These sketches can be in colors but most of the time I only use grey values or my pencil. At this point I don’t use any reference to keep it original. I just want something recognizable which sticks to my art direction. I do some iterations to find the right one.
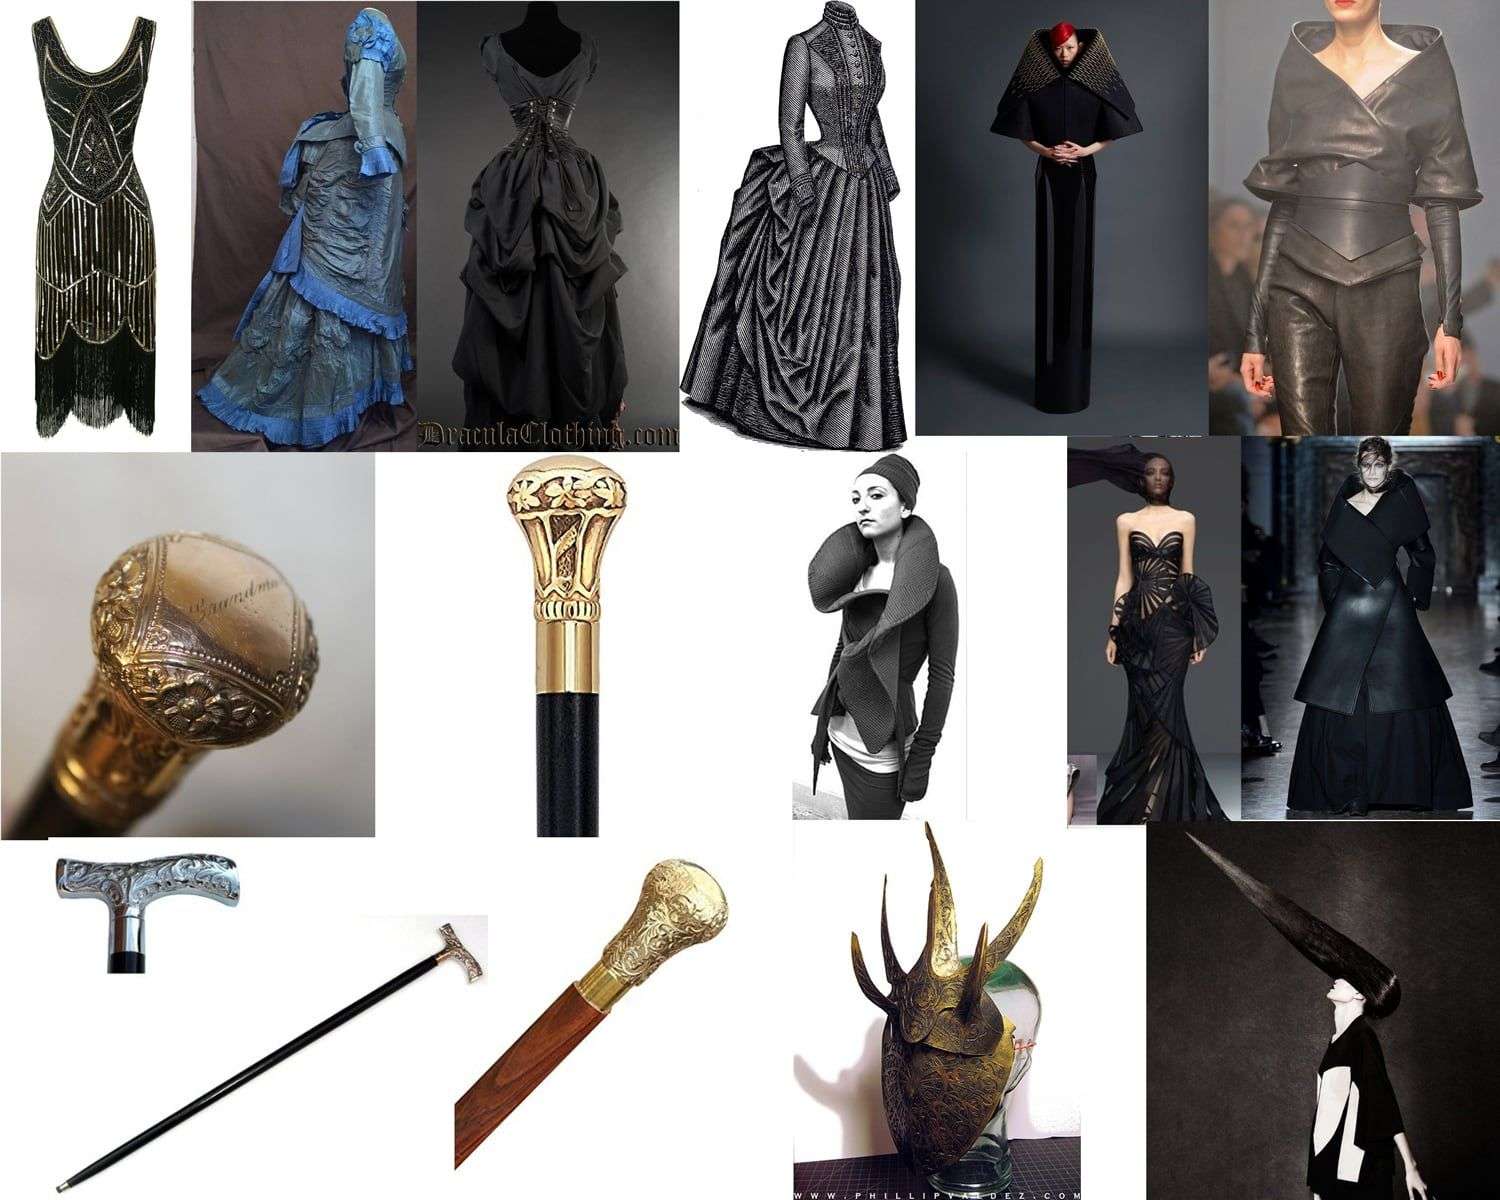
Then I start to search references to make them more coherent and consistent. I love to use photographs from haute-couture, there are always interesting shapes and materials I can apply to many different universe.
It’s my usual process but, plot twist , this time I didn’t do any iteration, I just followed my guts with my references. I did a single random drawing on my sketchbook and use it as a starting point for my concept.
First Steps
Then, let’s open photoshop !
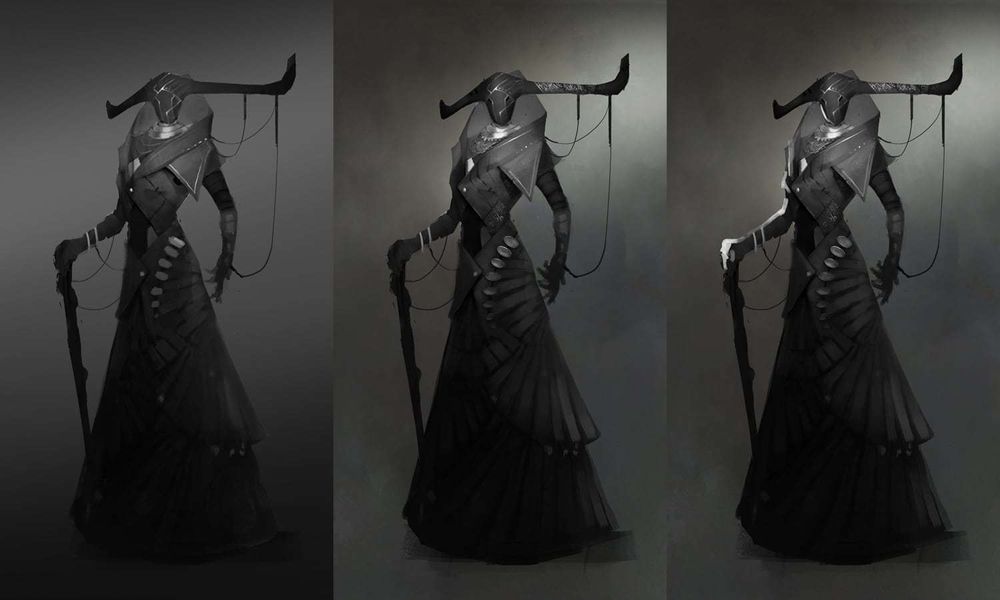
This time I used a photographs for the mood, it’s an egyptian temple. At this point , I tried to do big shapes just to get an idea of what I’m going to do.
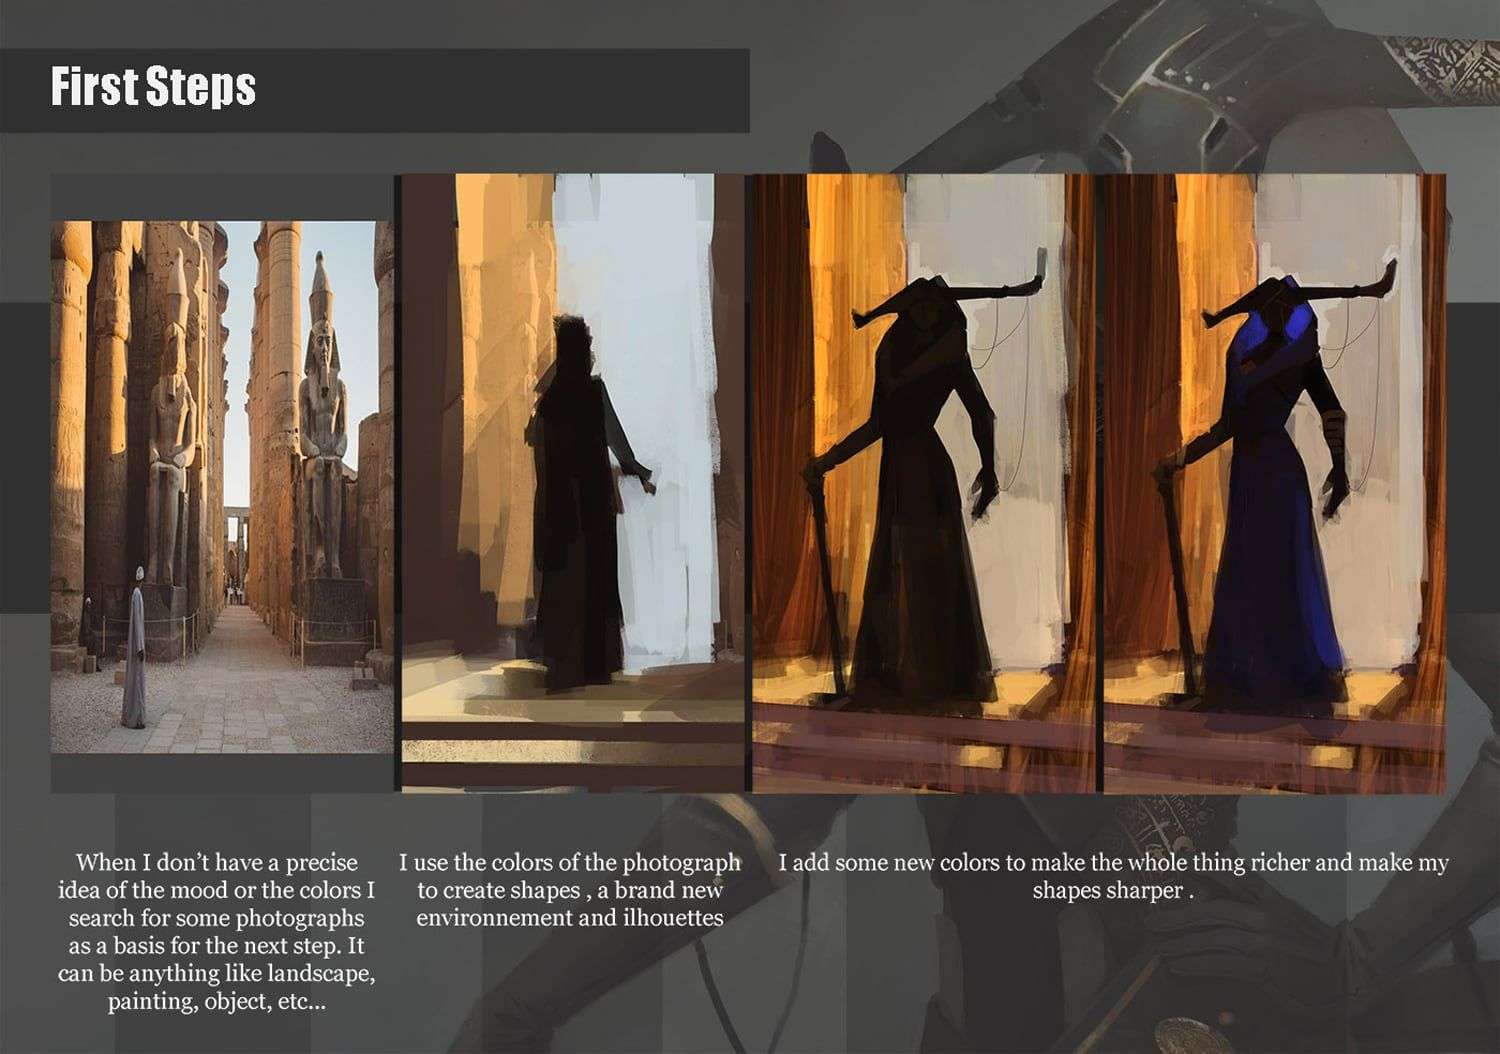
This was my expectation but the reality is a pretty different thing... ( Bare with me, my work takes many different turnaround )
I’d like to use this plot twist to remind you that it’s important to keep in mind that you can’t success right away, sometimes try many times to get it right.
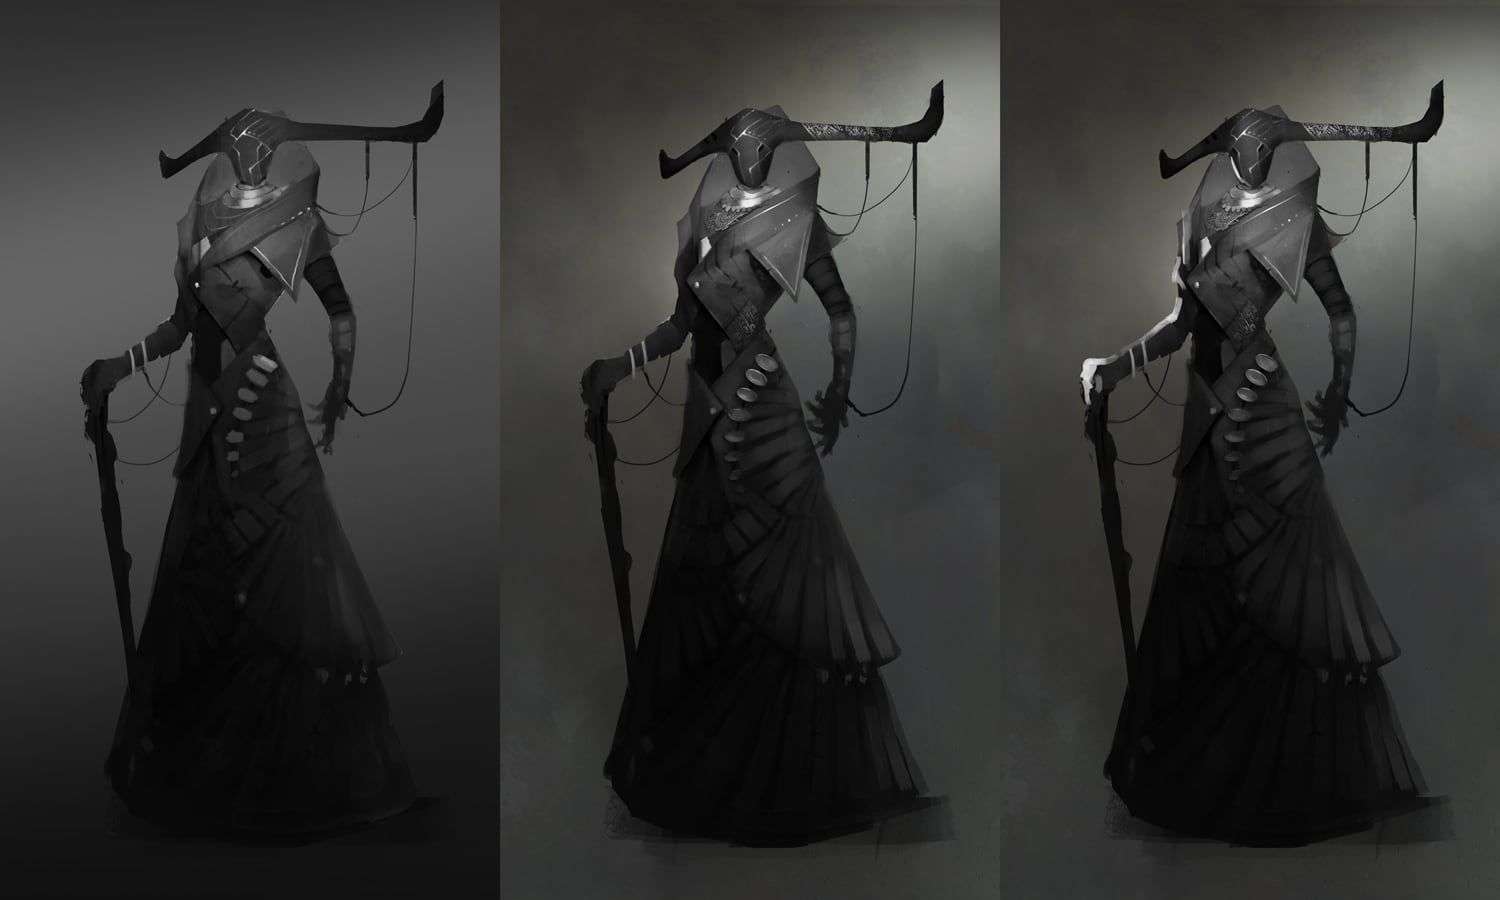
This being said, I cried, got my shit together and started again in black and white this time ! Thanks to that, my values and my lighting were more accurate.
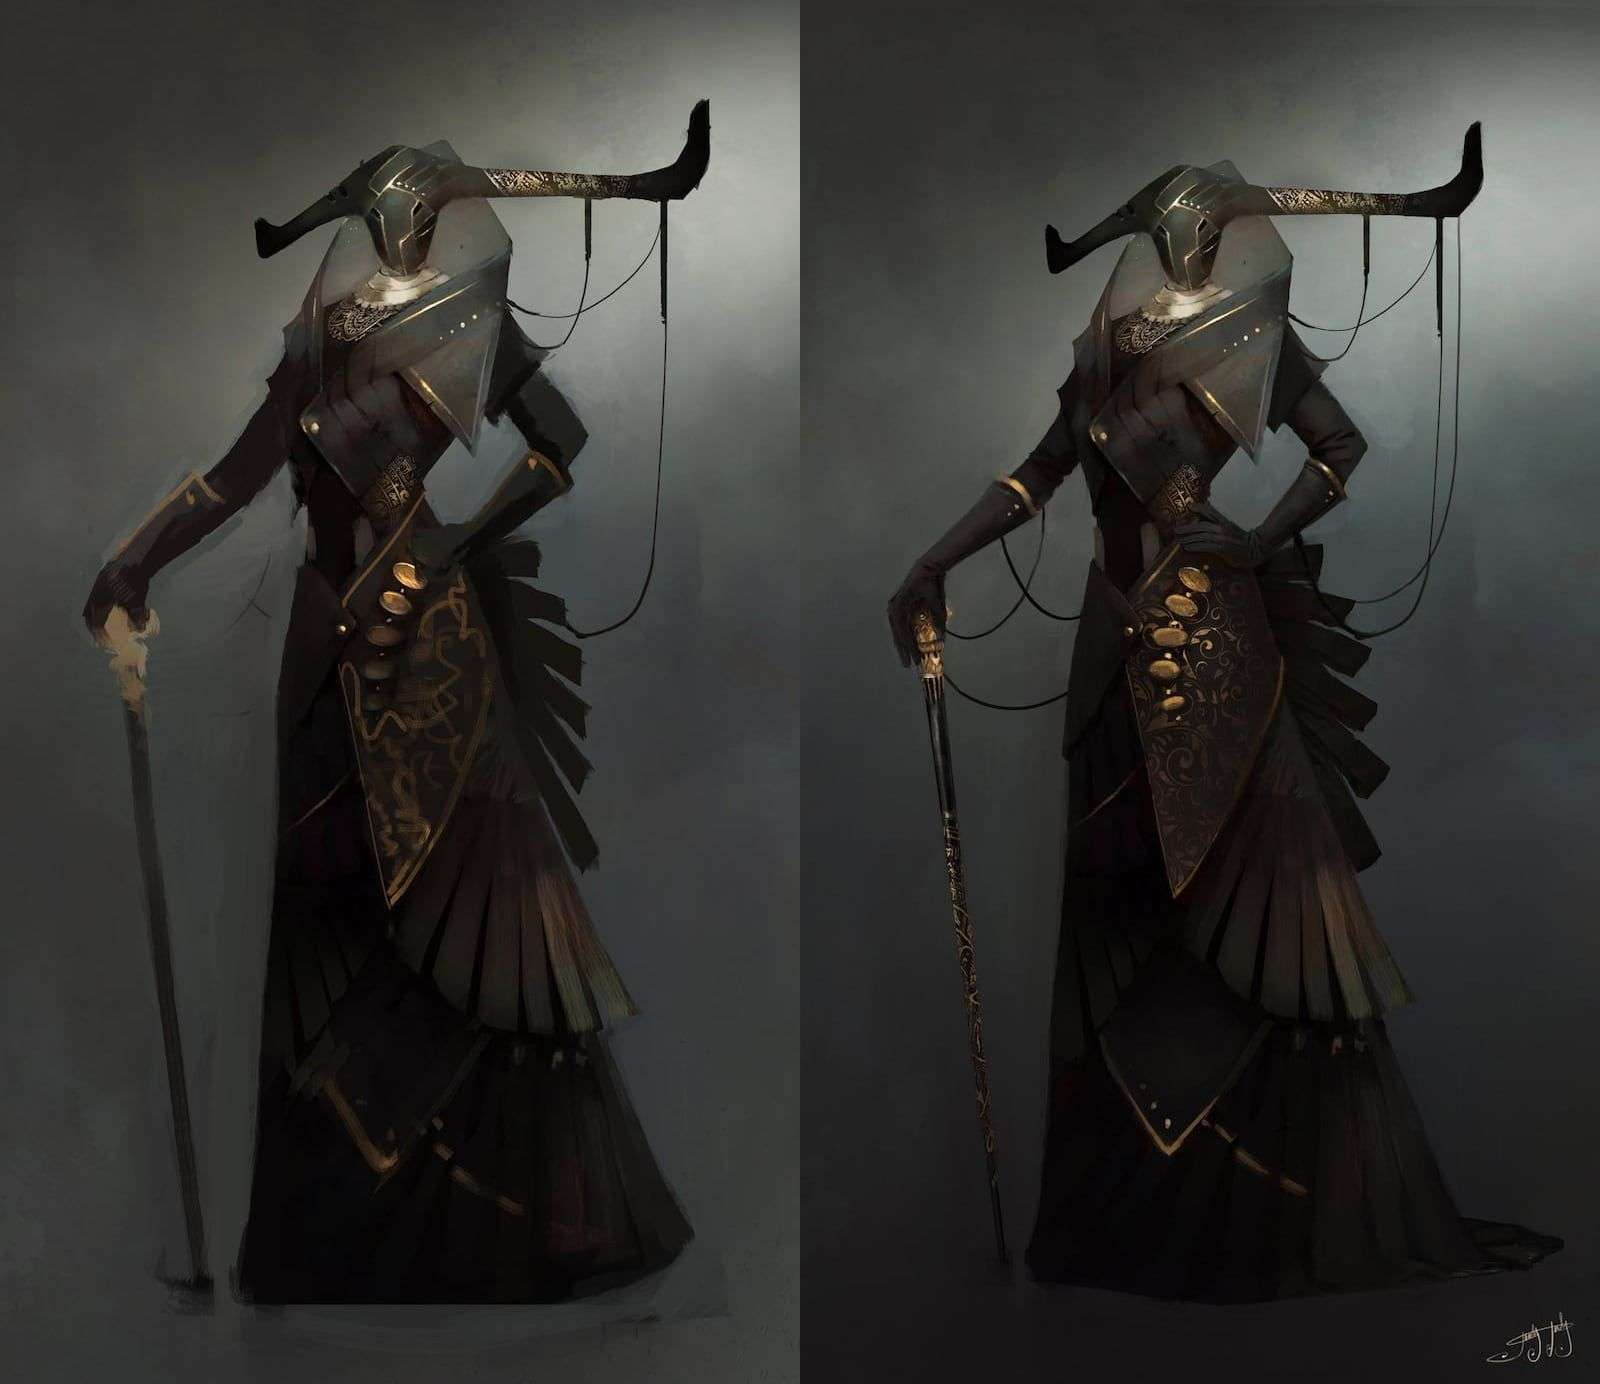
Then I go deeper in my painting, trying different lightings, working on not only in the shapes but more precisely on their fonction, overall design. It’s a really important part because you’re basically giving life to your character.
I really want to make sure that every single object or details has a purpose and contributes to create something logical. ( Why does she have a cane ? Why is she wearing a mask ? What do I want to trigger ? ).
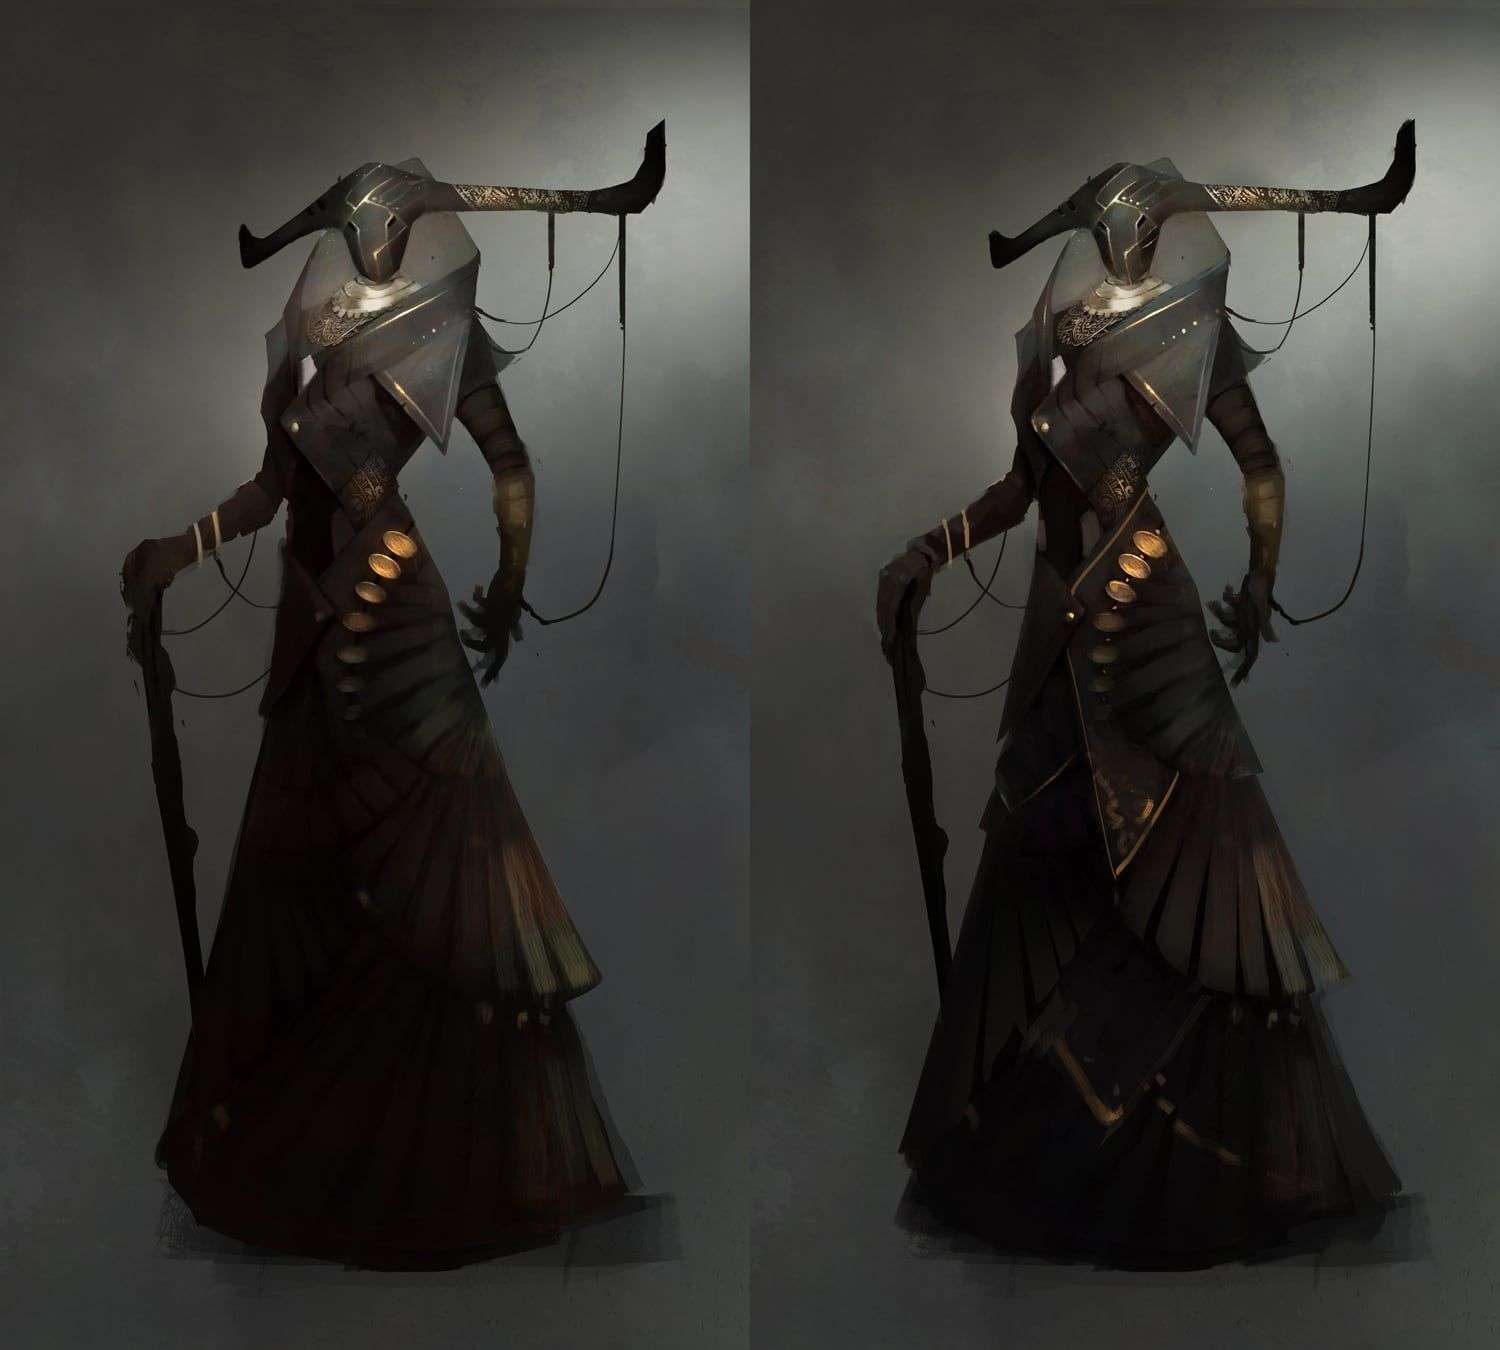
When I’m satisfied with my values I can either make some colored iterations or just try to find something cool directly on my painting. First, I play around with curves, levels , color balances, color corrections, etc...
At this point I keep on detailing but with colors , trying to precise patterns, textures, using photographs.
Finally , I can paint with colored brushes and start my render.
Last Adjustments & Render
Even at this step I can change everything if I’m not satisfied. For example, here, I changed the pose because I thought it didn’t reflect enough the personality of the character ( an old and cold aristocratic lady) . I wanted her to be very charismatic, confident and scornful.
Then , I finish my render. It’s a pretty long part but it’s worth it and you shouldn’t neglect it . It doesn’t necessarily have to be as detailed as an illustration but people have to understand what you wanted to paint. It’s for this reason that you have to understand how light works and how materials react to it.