
Shariq Altaf, a 3D artist at DNEG specialising in Modelling, Texturing and Look Development will take you through the steps used to create a photorealistic vinatage camera - the 'Bessa Voigtlander'.
The goal for this project was to refine the skills I had developed over the past year; I wanted to challenge my 3D modelling skills by recreating an asset which has various complex shapes, and then to texture it within Mari which I really enjoy working with.

RESEARCH/REFERENCE
Primary reference is without a doubt the most important part when it came to this kind of project. I learnt this through my experience when I first started modelling in general.
Images and videos can get you so far but it most likely won't be enough if you aim to create an accurate replica of an asset.
This is because you will always miss some of the details. This was the case for me when I started this project, I thought Google images would be enough and also looked at videos of the camera on YouTube; which actually got me angles that I couldn't find images of.
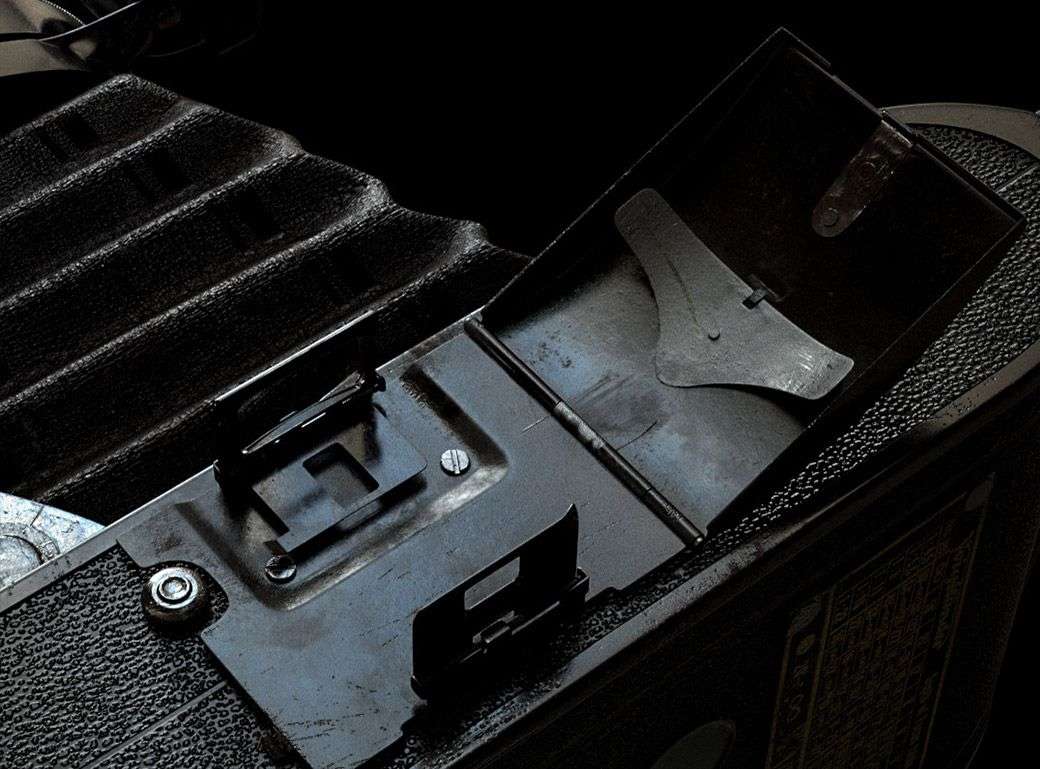
However, it wasn’t enough because in the darker areas of the reference (such as under the lens), there was a lot of mechanical details that I couldn’t see properly and there would be a lot of guesswork if I just used the online references.
So I decided to invest in the camera (I got this one through eBay) that looked the closest to what I was looking for (and the one I bought wasn’t too expensive).
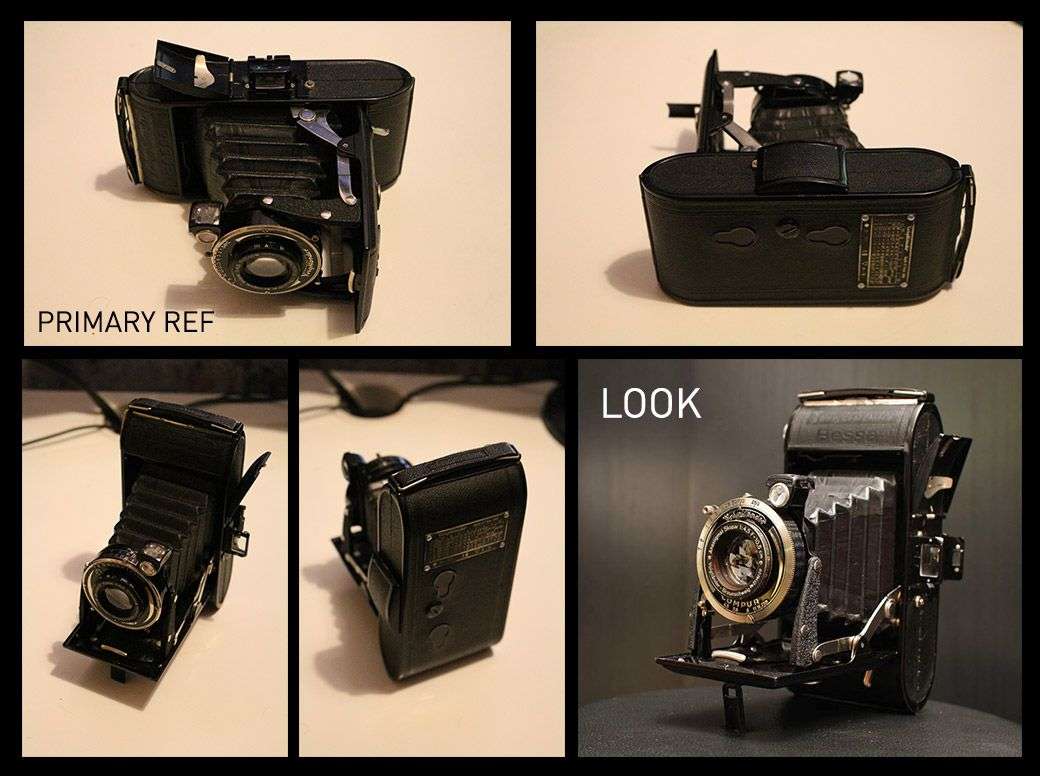
When I got the camera in the mail, I didn’t realise how small it was in real life and I could also clearly see the missing details I couldn’t see through the image and video reference; so I think it’s a good idea investing in an asset because it will definitely give you the edge when modelling the details, creating tileables from it for the texturing. You’ll also be able to see how the surfaces react to light, which will be a huge help when shading.
In addition to the primary reference, I wanted to go for a look which had some colour in it; the camera I got was mostly black and I felt with some colour, it would create a more striking image.
3D MODELLING
For this project I wanted to attempt to model everything I saw except the interior which I felt unnecessary as this would not be seen in the render.
I began by blocking out everything and getting the measurements as close as possible; the camera I bought helped in this as I could easily measure it myself.

The aim/challenge for the modelling stage was for everything to be quads (so no Triangles or Ngons); triangles might be ok sometimes but they are bad if you’re going to subdivide/smooth or bring the model into ZBrush.
Triangles or Ngons can be quite annoying to fix at first but get easier once you have an understanding of topology. So, knowing the fundamentals of modelling was very important before diving into a complex asset; a tutorial that really helped me understand how to model and troubleshoot topology was the ‘Professional Tips for Modeling Complex Shapes’ series on Pluralsight.
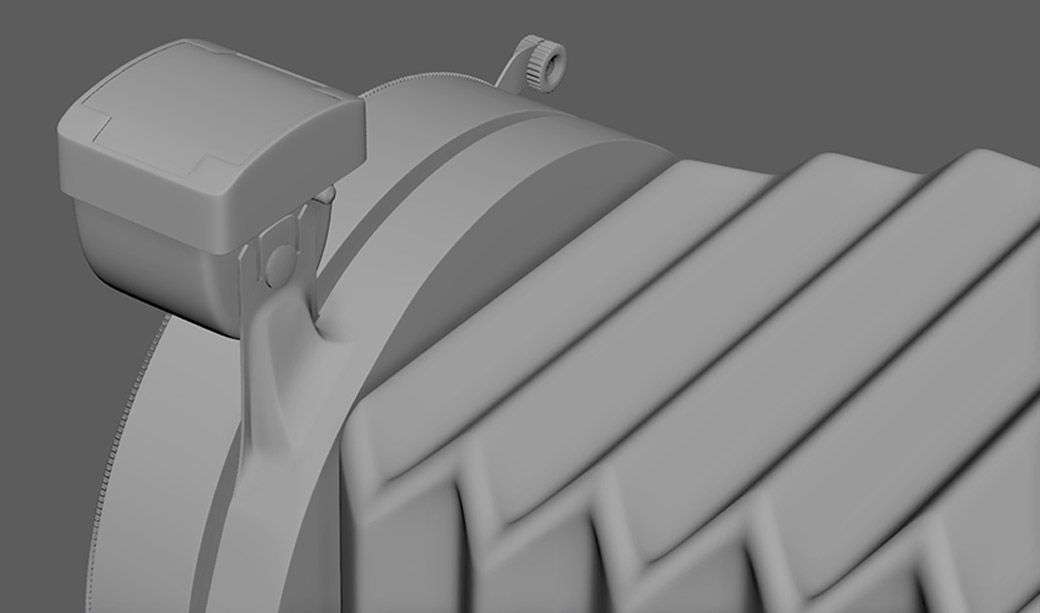
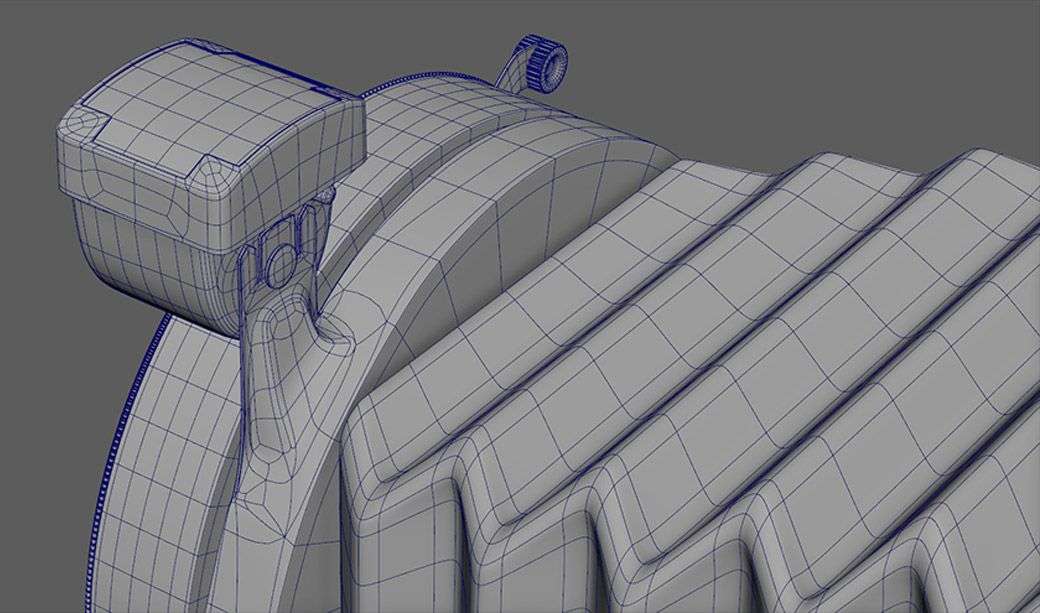
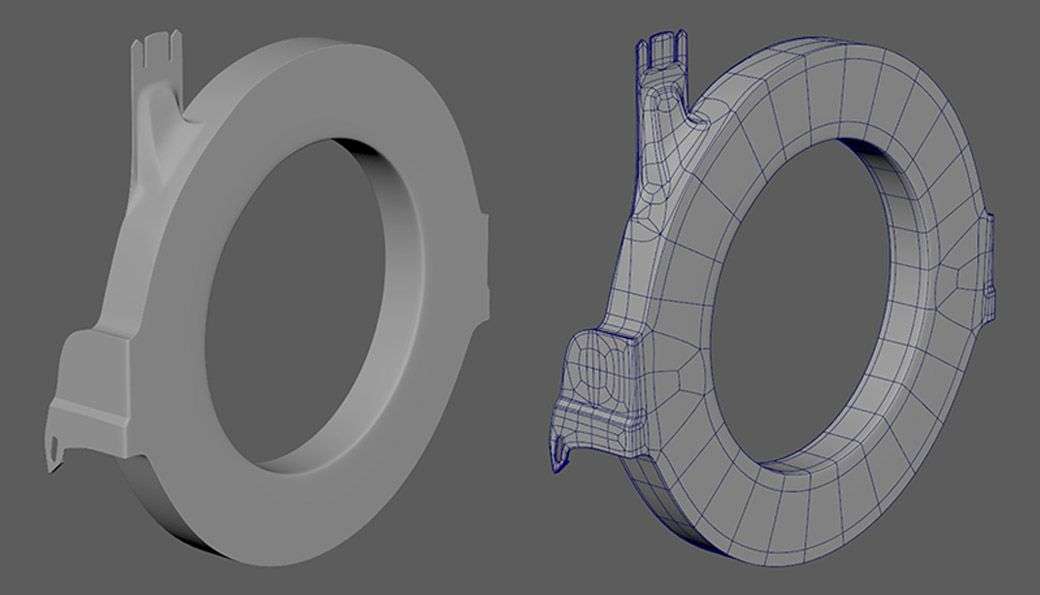
There were a few challenging objects to model during this stage, one being the ‘Brilliant Finder’ component which was one of the more challenging parts as it took a while to weld the components together and to have it smooth properly. This was also true of the cylindrical objects because of the way they transitioned into this complex looking shape. When it comes to cylindrical objects which will have extrusion around its edges, it’s a good idea to start with a higher topology count or flow the topology in a way that it will reduce the pinching.
TEXTURING & LOOKDEV
The texturing process was quite a challenge from the beginning because this was the first time I fully utilised Foundry’s Mari for a project. In addition to Mari, I also used Photoshop to create several masks on top of Mari projections.
The reason I chose to go with Mari other than it being the industry standard in the VFX Industry, was because it gives you a lot of control when it comes to creating a photoreal object and also being able to paint across UDIMs is a big plus.
During the time I was learning the software, I was also trying to figure out the best workflow for this kind of asset; and the tutorial I would recommend if you want to learn the texturing/shading workflow I used throughout this project, is the ‘Gnomon Workshops - Texturing and Shading for Production’ tutorial.
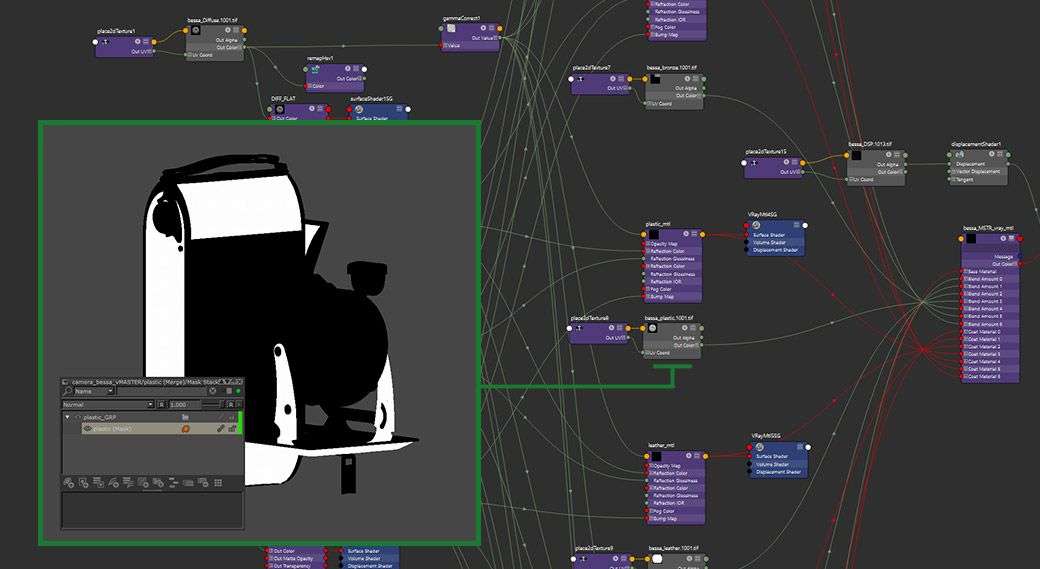
This was a great resource because it helped me understand the setup of the masks of each material for all the channels so that they are shared throughout all the channels and update when I paint.
When you link the mask stack to the other channels, it will update all of the corresponding linked mask stacks in the channels as you develop your texture masks. It kind of works like texturing in substance where you choose a smart material which has Diffuse, Spec, Gloss, etc. already within, it will apply on all the channels once you start painting it.
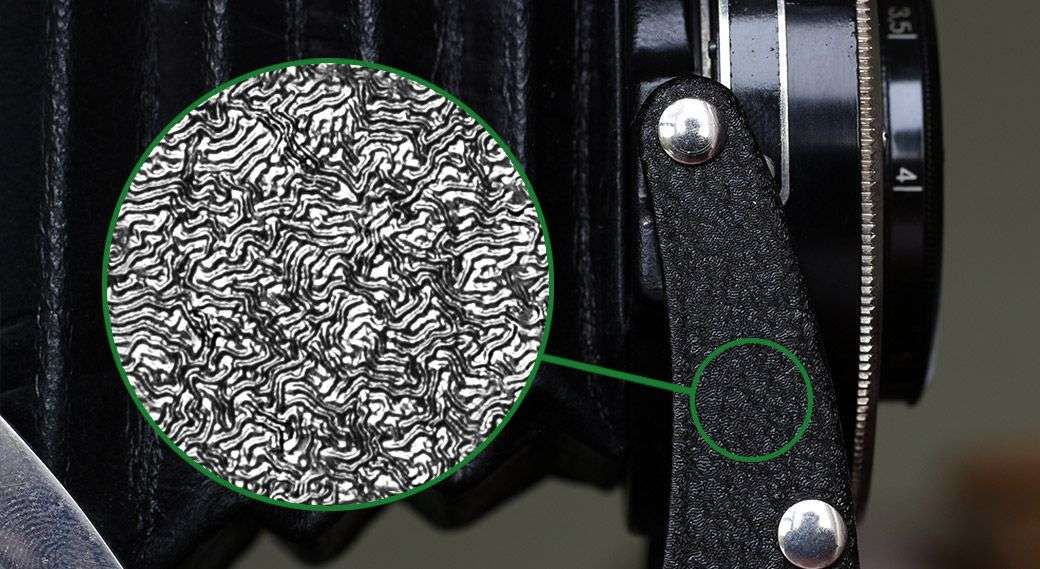
Creating Tileables
One of the great things about having access to the asset is that you can create tileables from it; so from this camera, I was able to get two pretty decent bump maps to use in the texture; one from the lens support component and the other from the body. The body bump took some trial and error to capture and also a while to create a good tileable from that I was pleased with.
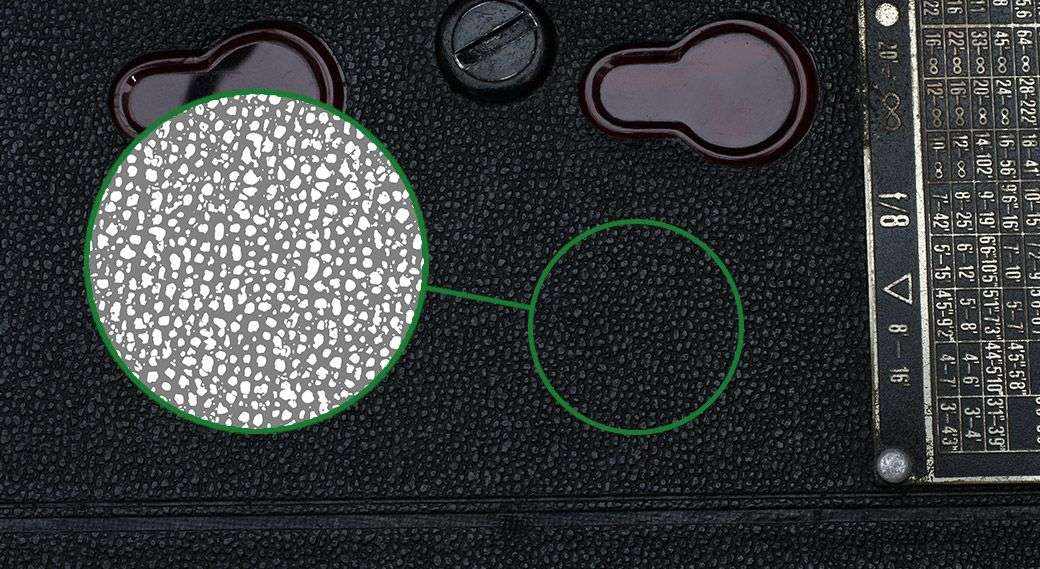
However, today there are better methods of capturing a bump from real world surfaces, such as taking multiple images of the texture with a light hitting it every 45 degrees for example, which you can then bring into Substance Designer and generate a bump, normal or displacement map from.
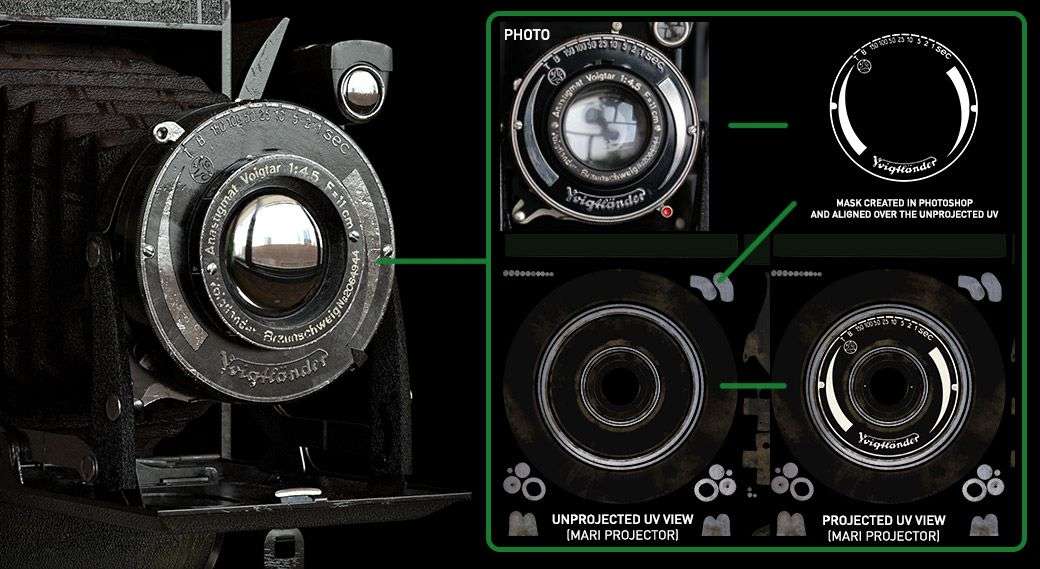
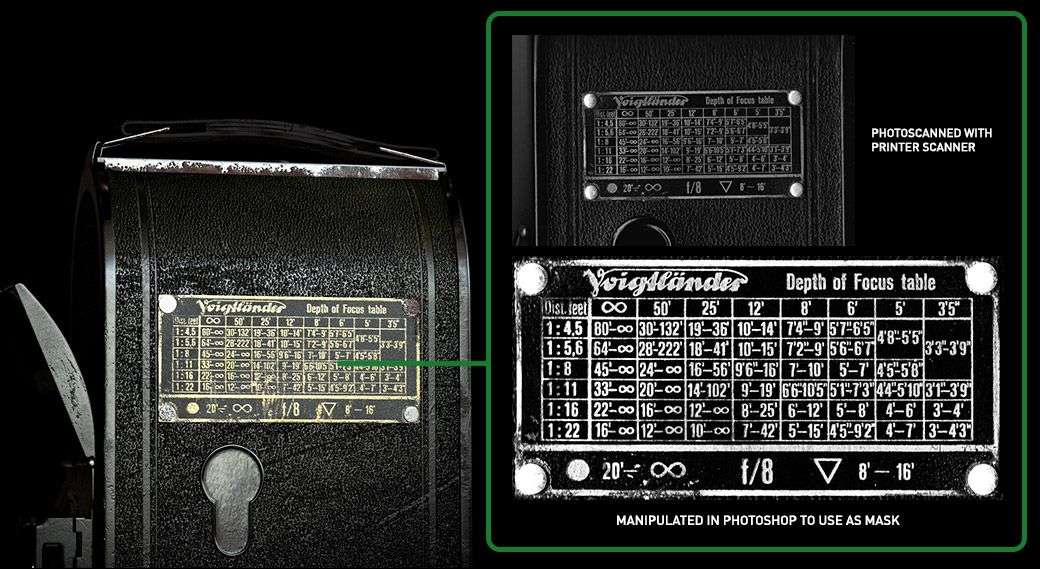
Creating Masks from Primary Reference
Another advantage of having access to primary reference is that I was able to create masks from parts of the camera, such as the ‘DOF Table’ (rear side) and the text on the front of the lens
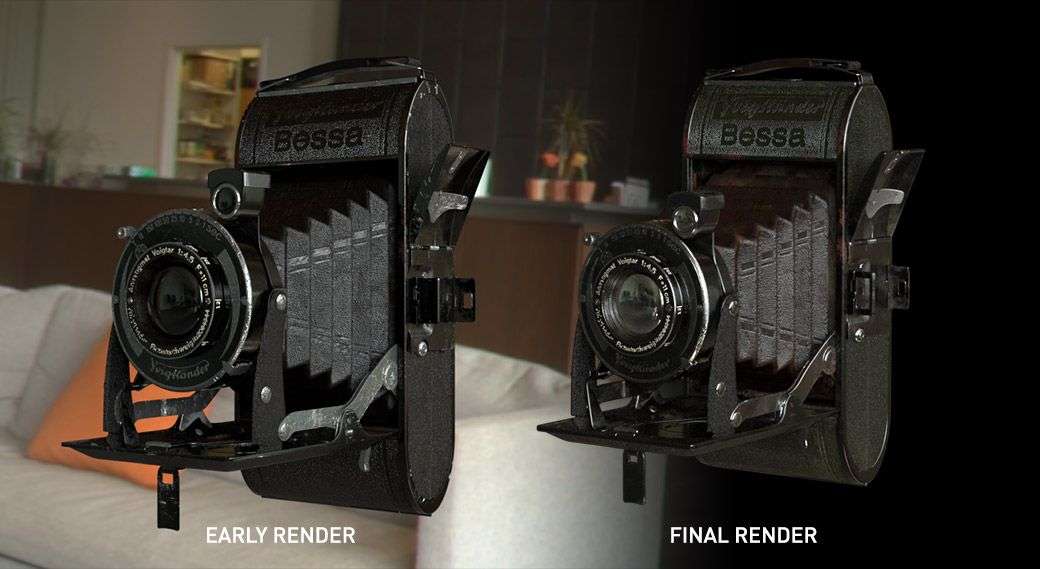
When I felt the textures were almost ready, I took them into Maya and began setting up the shaders to get a better idea of how it looks when it's rendered.
The texturing at this point is 90% done and throughout the shading process, I'm always going back to Mari to adjust the textures or develop the details even further to get the look I'm trying to achieve.
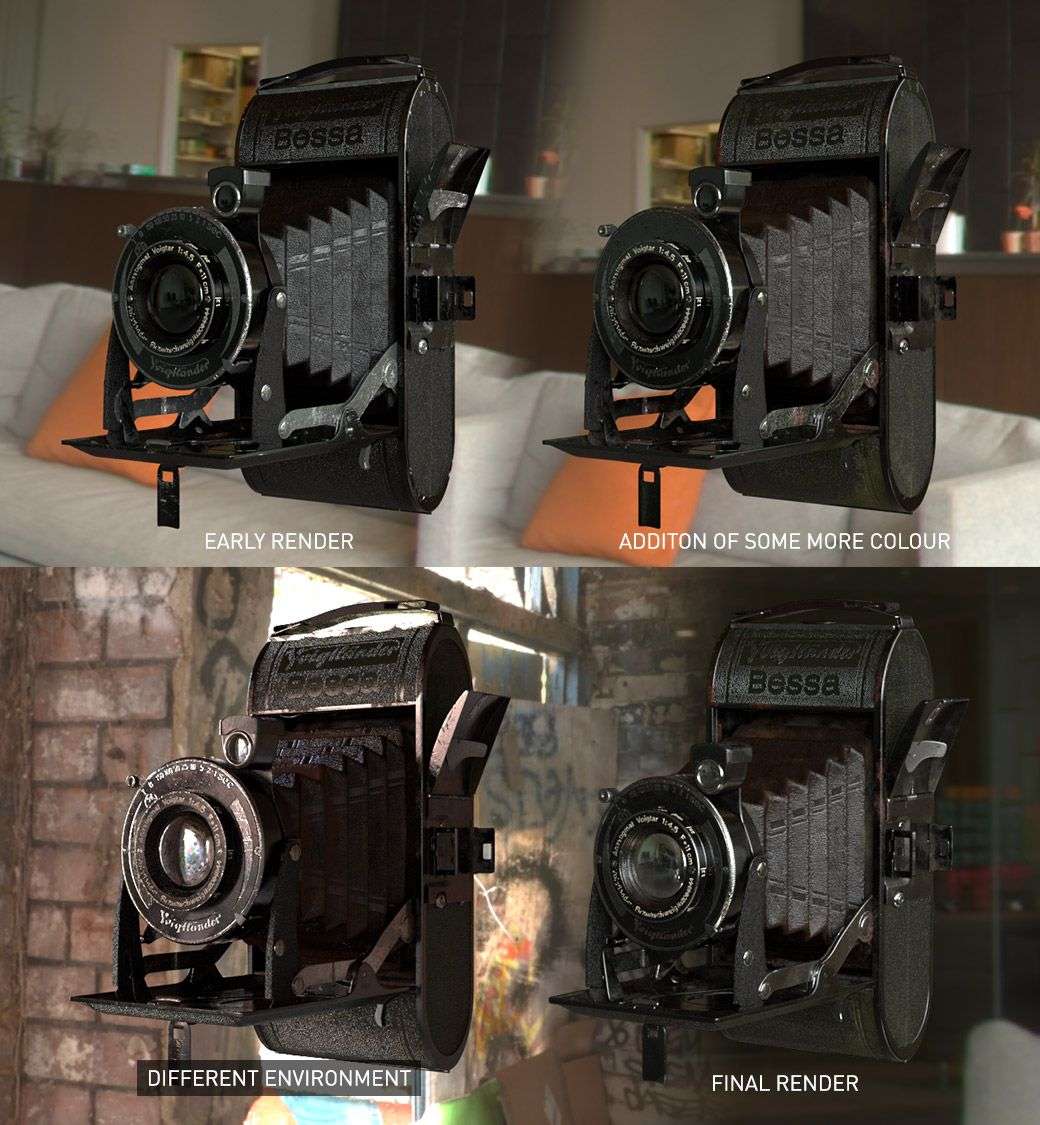
When I felt I was happy with the final look, I then setup a few close up shots and then the main turnable of the asset to showcase the material breakup and how the asset reacted to the environment.
BREAKDOWN VIDEO
To conclude, I felt I accomplished my aim of creating a photorealistic asset that was up to industry standard, and I think this is also evident from the positive feedback I have received so far. This project also opened a pathway of opportunities I couldn’t have thought to be offered so soon.