
The Hogwarts Express was one of two models which I created for the second part of my Negotiated Project. The other asset was much smaller and didn't take up as much of my time.
Being one of the largest assets I had tackled at the time, I divided the Hogwarts Express into sections. This allowed me to more effectively manage my time and helped keep myself motivated.
Matching References
My main aim for this project was to finish with an asset that replicated the real-life train in as much detail as possible. This ended up being one of the hardest parts of the project as it led to a few complications which I’ll cover in a moment.
The main reason that matching the references was problematic was that I didn't have any of the lens information. Due to this a lot of guess work was involved to get the train aligned.
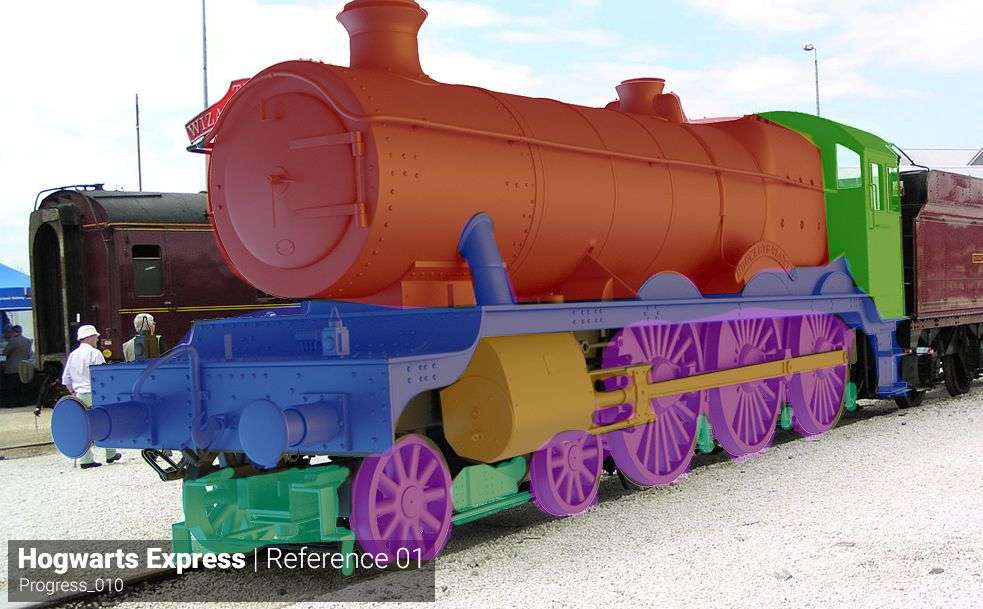
To start this process, using a mixture of references along with the train’s blueprints I began modelling very basic geometry. I began by block modelling the train alongside the trains blueprints. Working with the blueprints ensured the scale and proportions matched. This helped when matching the model to the other references, as I knew the train was to scale.
Even as I moved on from the box modelling stage I often found areas which needed to be adjusted for them to fit. It became a sort of puzzle, which I kept finding the missing pieces to help complete it.
A simple solution to this problem would be to photograph the reference images yourself. This isn't always possible but, it would ensure that you had all the relevant information to make this process much less painful.Bellow, you can see the initial block model which I was using to align the references.
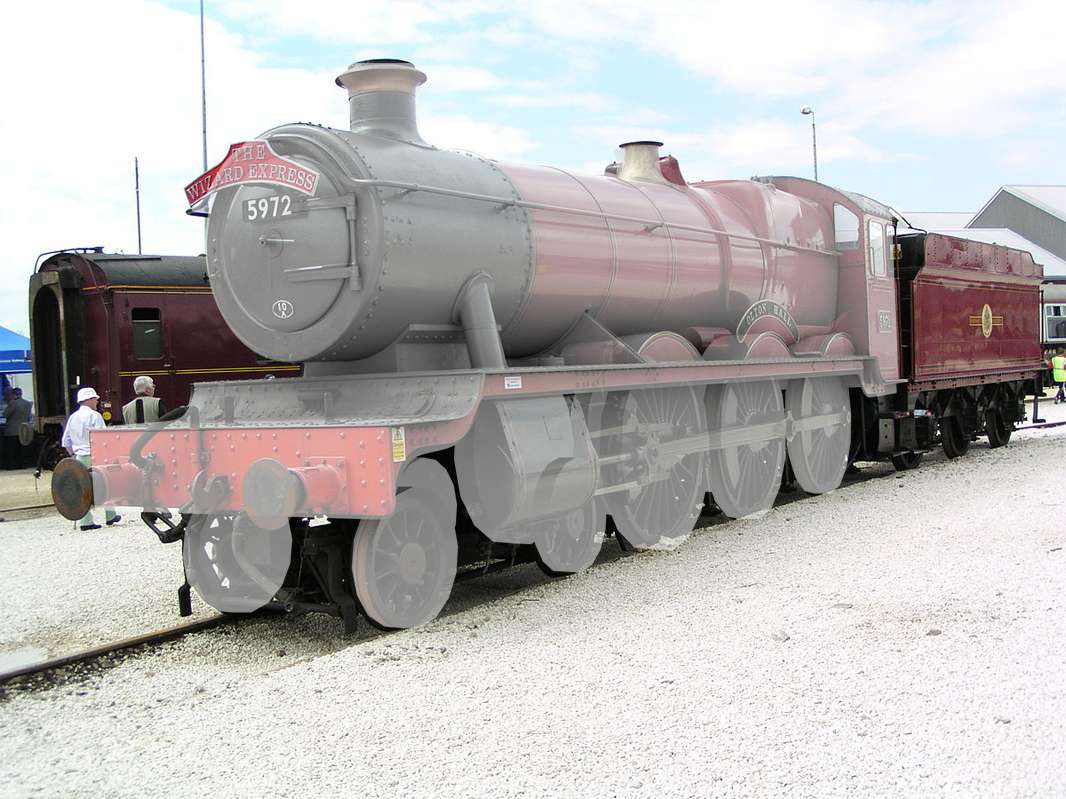
By the time I was wrapping this project up, the train matched the references. This was good for my showreel as I could do a wipe between the reference and my model to show my attention to detail.
Grouping The Model Up
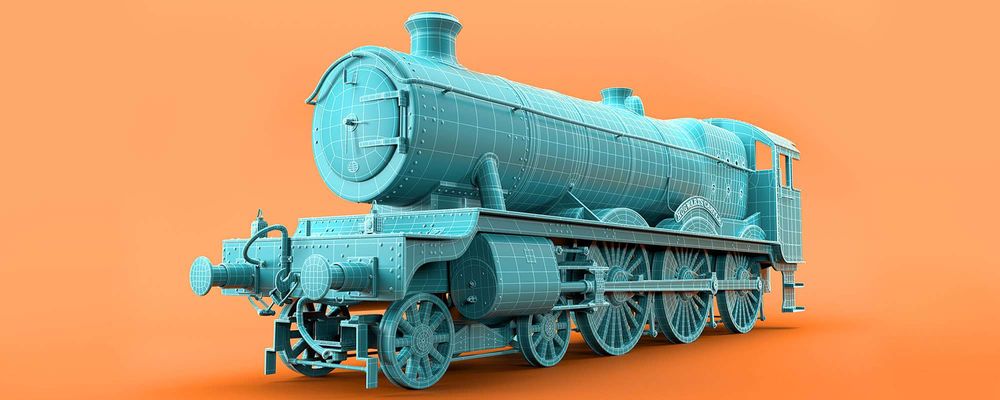
Once the block model was complete it was then time to start modelling the production ready asset. I started with the top sections of the train as I knew the wheels and pistons would be a challenge in themselves to get right.
I found that the easiest way to manage my time was to group the train into key parts. These parts for those interested were: Smoke Box, Walkway, Cabin Exterior, Wheels, Pistons, Pony Truck, and Cabin Interior.
Another reason I found grouping to be useful was, to begin with, I found myself quite overwhelmed by the number of small details on the train. I found that grouping the model up helped as it kept me focused on small sections of the train, rather than modelling random parts around the train.
Consistent Development
During the development stage, it is important to keep clear progress renders/screenshots of an asset. Doing so allows for faster feedback allowing you to progress much further in a shorter amount of time.
It's always good to use a variety of camera angles to showcase the smaller details on the asset. Although, I’d also suggest choosing one angle which can be your Base Angle to show overall progress of the asset.
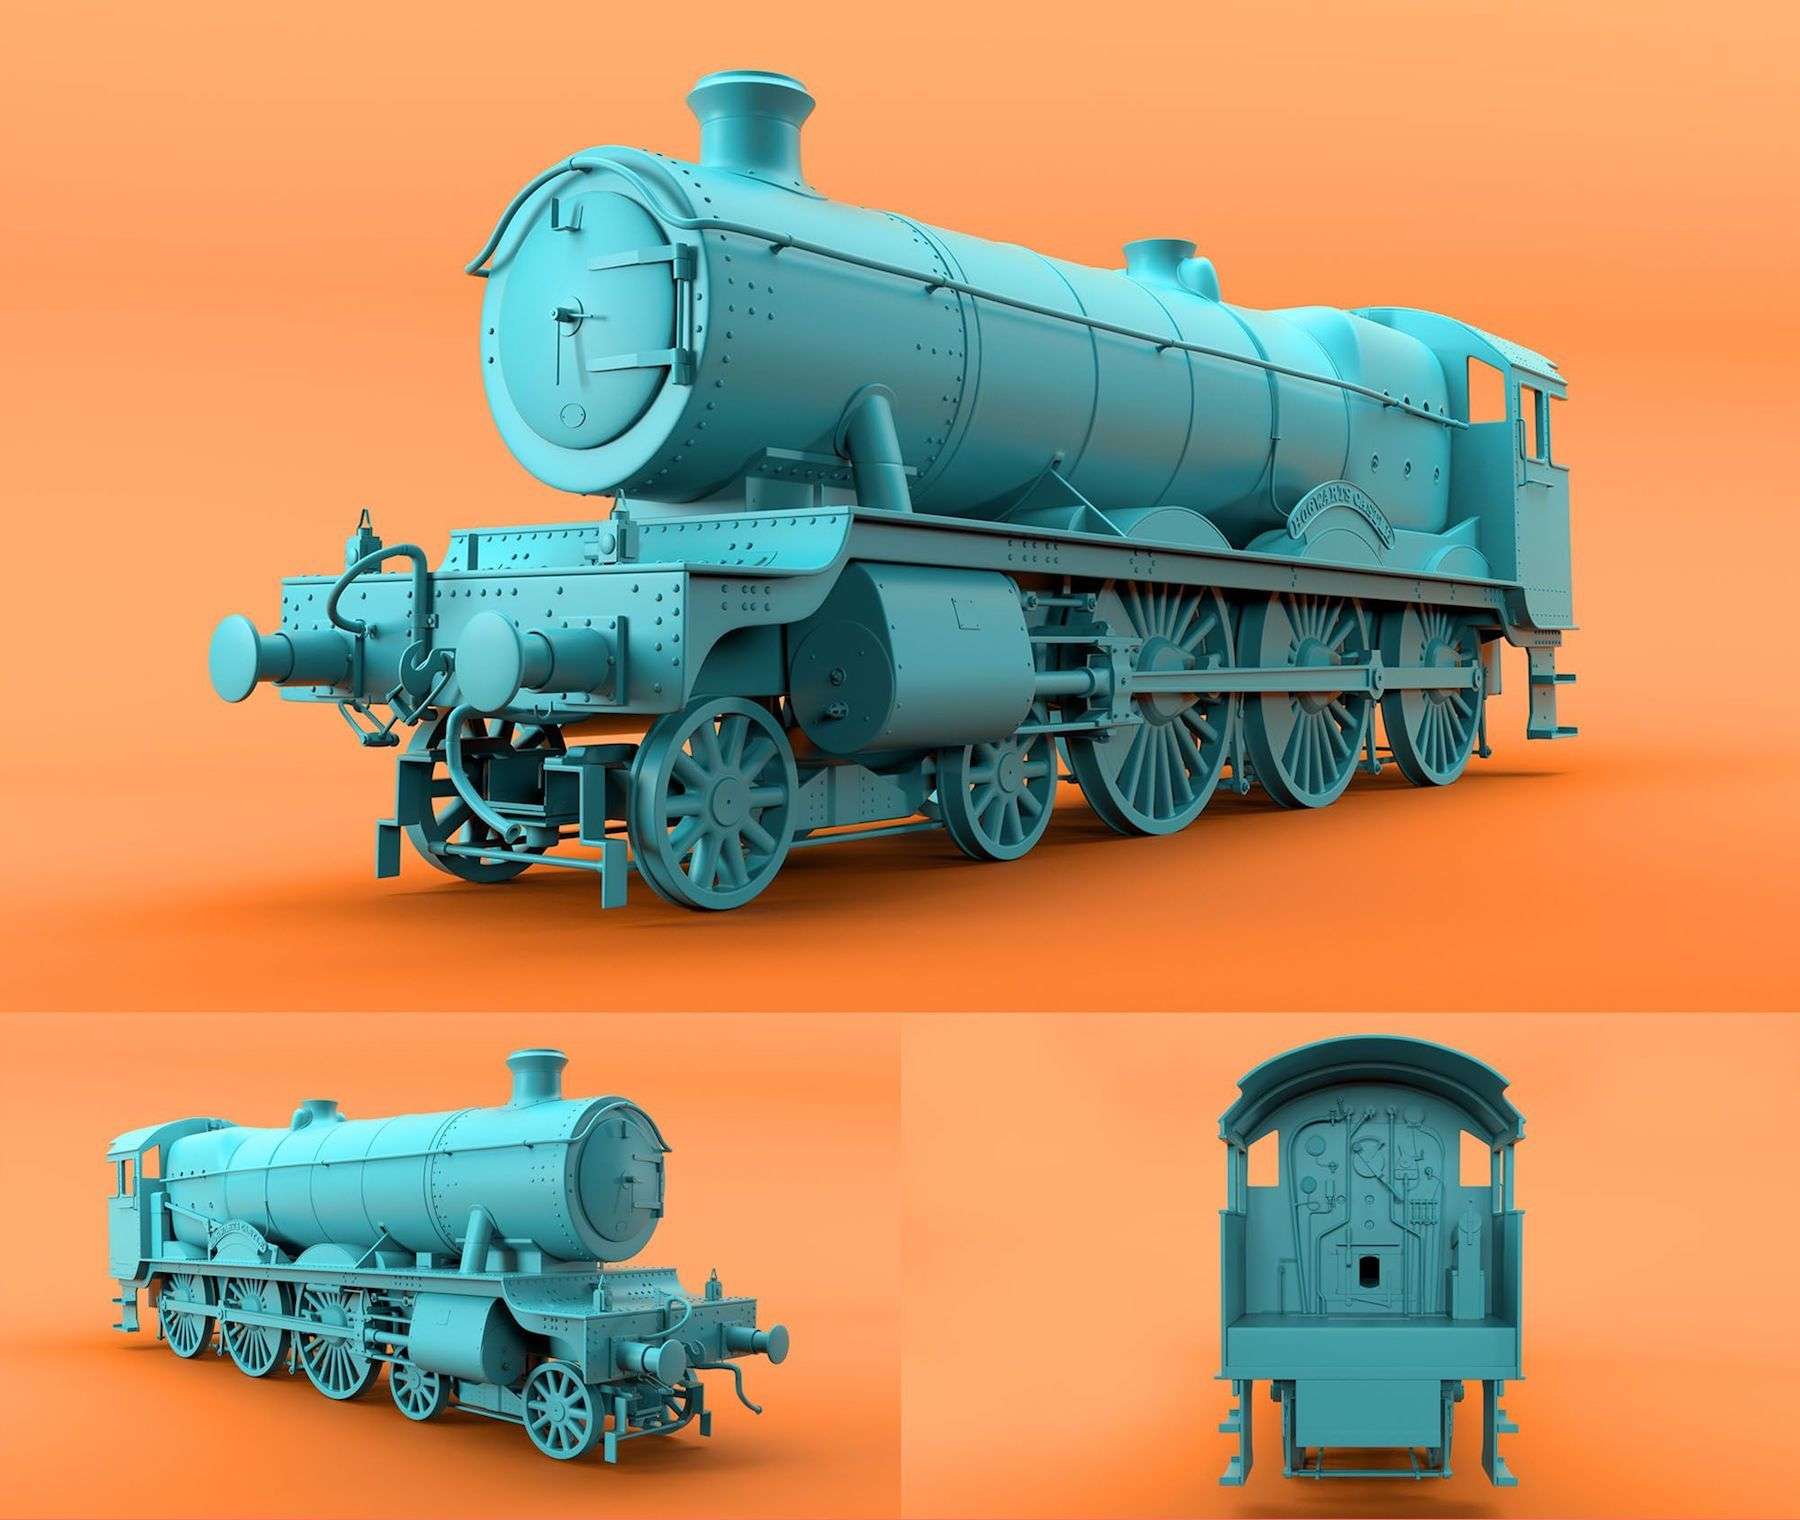
Doing this helps to see the continuous progress and will help keep you motivated. When modelling, a lot of your time your focusing on one small detail of an asset. It can become quite daunting when you think about how much time it is taking you. This is why I found it very rewarding to create a daily render from my Base Angle as it helped to show how each small component really added to the final model.
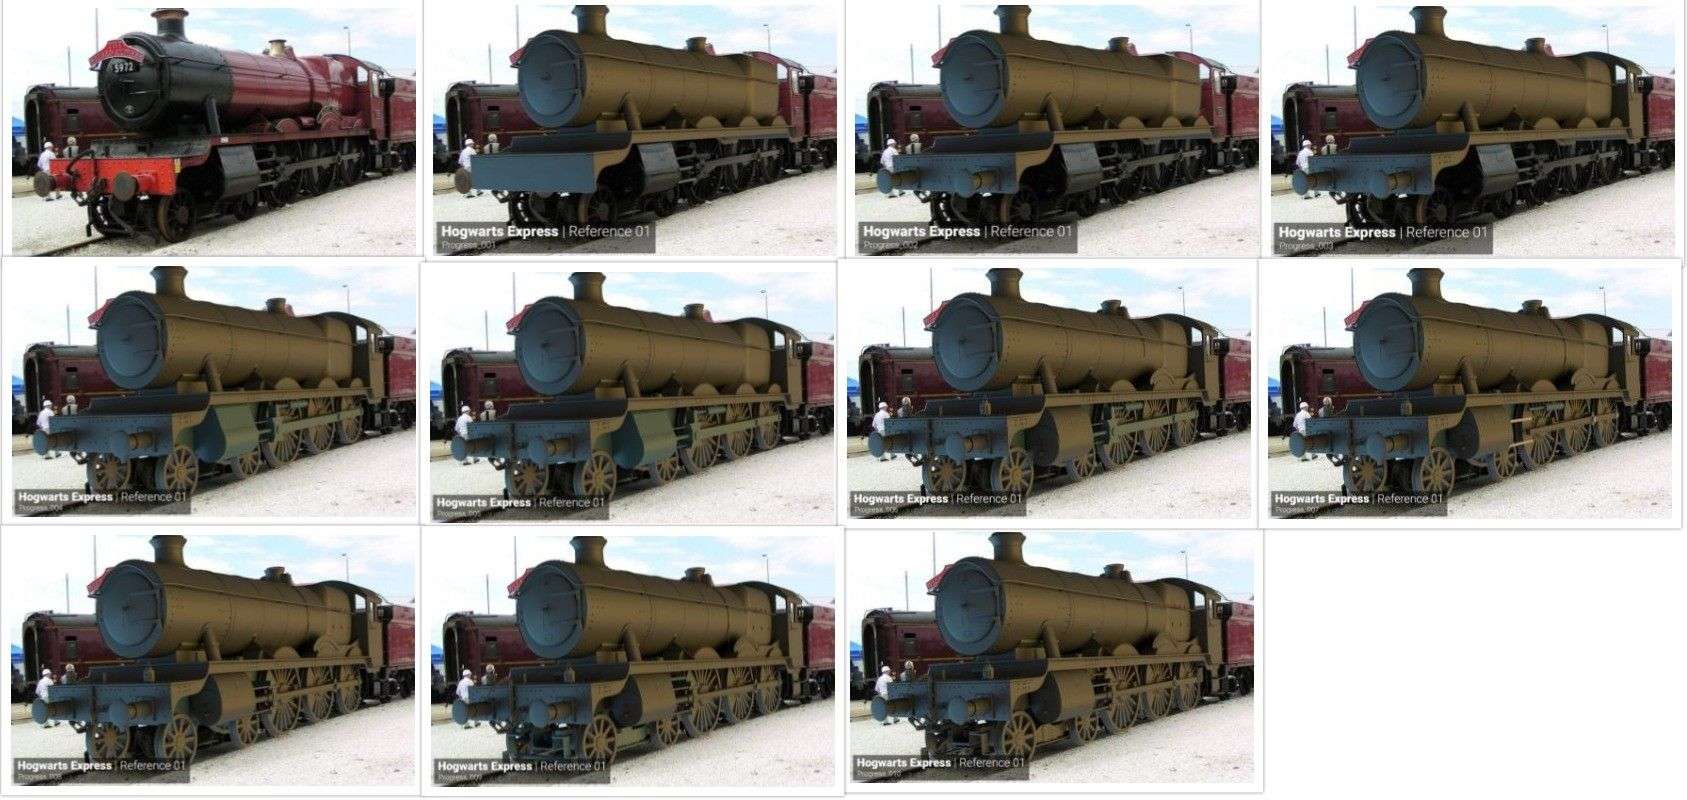
You can see the key progress renders once I completed each group of the train. It was really good for my lecturer as he could see which sections I had been working on and which sections I had just started. To make things clearer I also used a colour code for completed groups (dark grey) and unfinished groups (blue) which helped show my progress.
Discovering A Final Look
Ultimately both the M4 Assault Rifle and this Hogwarts Express were to be used primarily in my showreel. Because of this I wanted the final renders to be appealing and not just the bog standard Ambient Occlusion renders which are used so often. Not that there's anything wrong with using AO renders, I just wanted something a bit different.
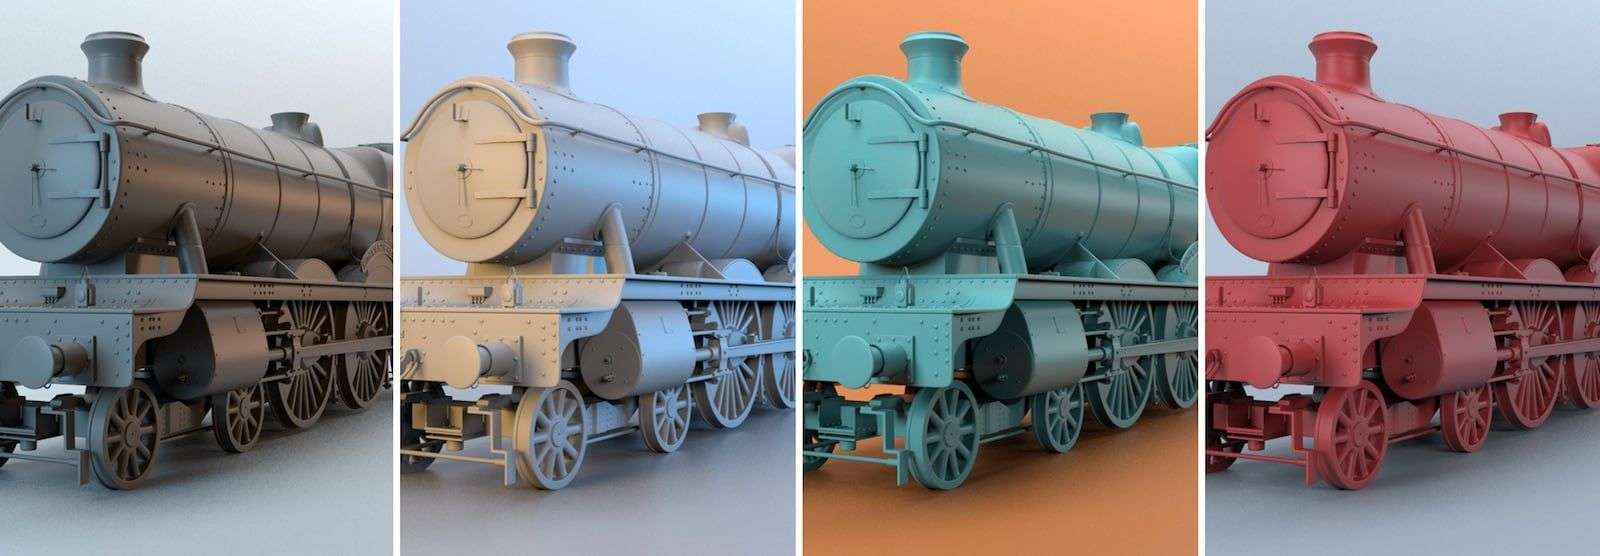
I wanted to be able to make iterations quickly during the look development stage. This is why I opted to use Redshift as my renderer of choice, it was the first time I had used it for a project at university.
The setup was simple and consisted of a backdrop and some area lights, yet I found this enough to create a wide range of different looks. I designed a bunch of different lighting setups, which I then got feedback on before decided on the final look.
I used these setups as a starting point for the M4 as well to ensure a more consistent look throughout my showreel.
Getting Feedback
This project wasn't exactly that creative as I was modelling closely to real life references. Feedback throughout this project was still a key resource to ensuring my work was to a high standard. Feedback for things such as topology and the final renders was very useful throughout this project.
As I wanted a wide spread of feedback from a range of people, I looked in a few places for feedback. Reaching out to 3D Modellers that worked inside the industry was a very good way to get clear pointers in where I was doing well or not so well. LinkedIn is a great platform for this kind of feedback.
I found that posting regularly on forums helped get more people viewing my work. CGSociety was a great place to post progress renders and to receive feedback. I found posting on forums kept me motivated as it felt like I was accomplishing something and people were waiting to see what I had done next.
Finally, of course, another great source of feedback is from your peers and the people around you. My lecturers and classmates were my main source of feedback during the project. These opinions are quite often based on the other work in the class and likely won't represent feedback you'd get outside the bubble which is your classroom.