This project was an exercise for my third year at Artfx, a private French university that specializes in teaching VFX and CGI. The goals of this project was to build an entire 3D image from scratch and discover all the aspects of the making it, from modeling to compositing. This project took me around four weeks to complete.
The subject: Challenging, but doable
The very first step was to choose an interesting subject that wasn't too easy, but not too complicated either. Indeed, it had to be challenging, but doable in the short amount of time we had. I think it was one of the main goals of this project: interesting, challenging BUT doable in the given amount of time.
Reference
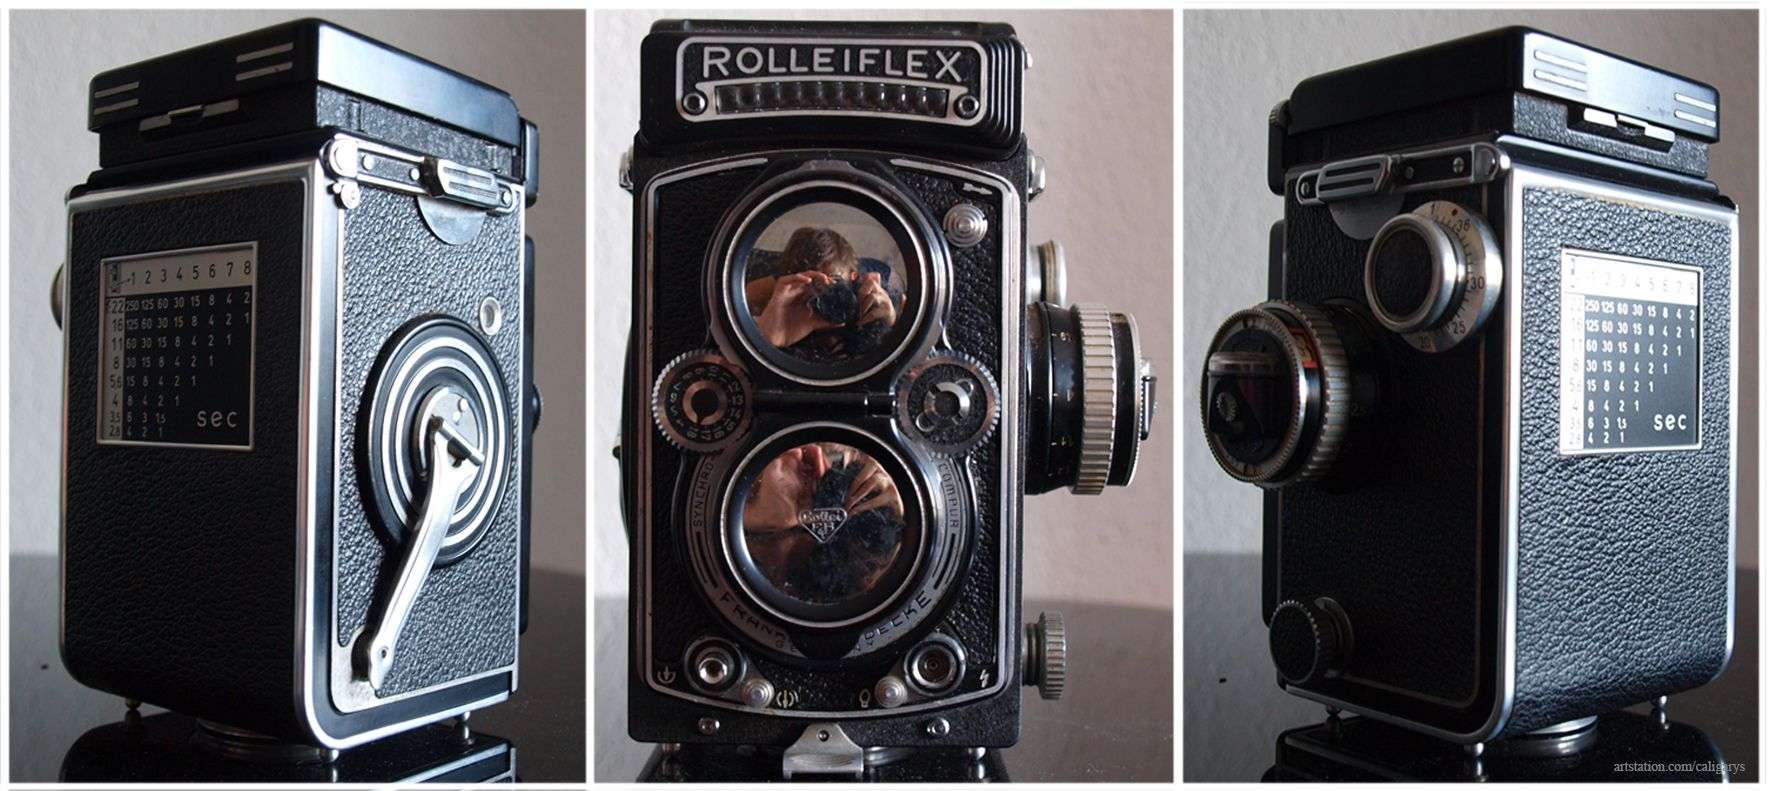
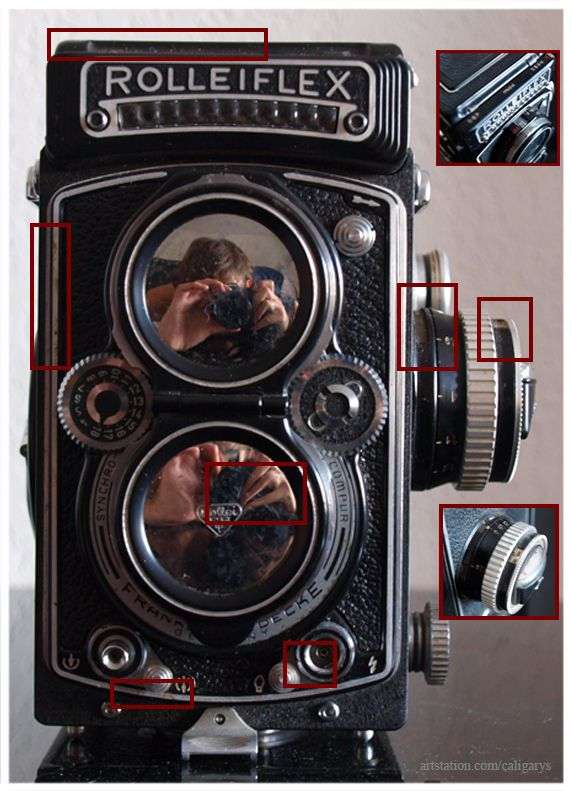
I chose to create a model of my grandpa's Rolleiflex. Like that I had all the references I wanted and I was able to touch and observe the object from every angle.
In this kind of project, references are really key. I wanted to have the most realistic result possible and while I was making my CG model I was able to memorize every aspect of it. During every part of this project (modeling, shading, etc), my object was right next to me on my desk. So, I was able to carefully study every detail, no matter how small.
Modeling
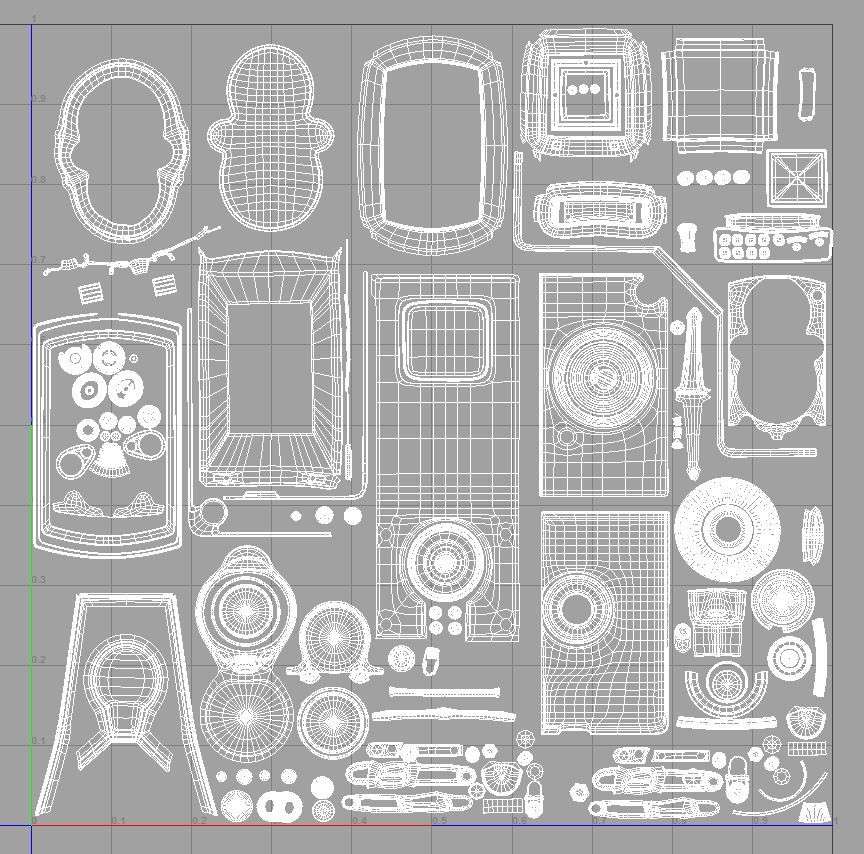
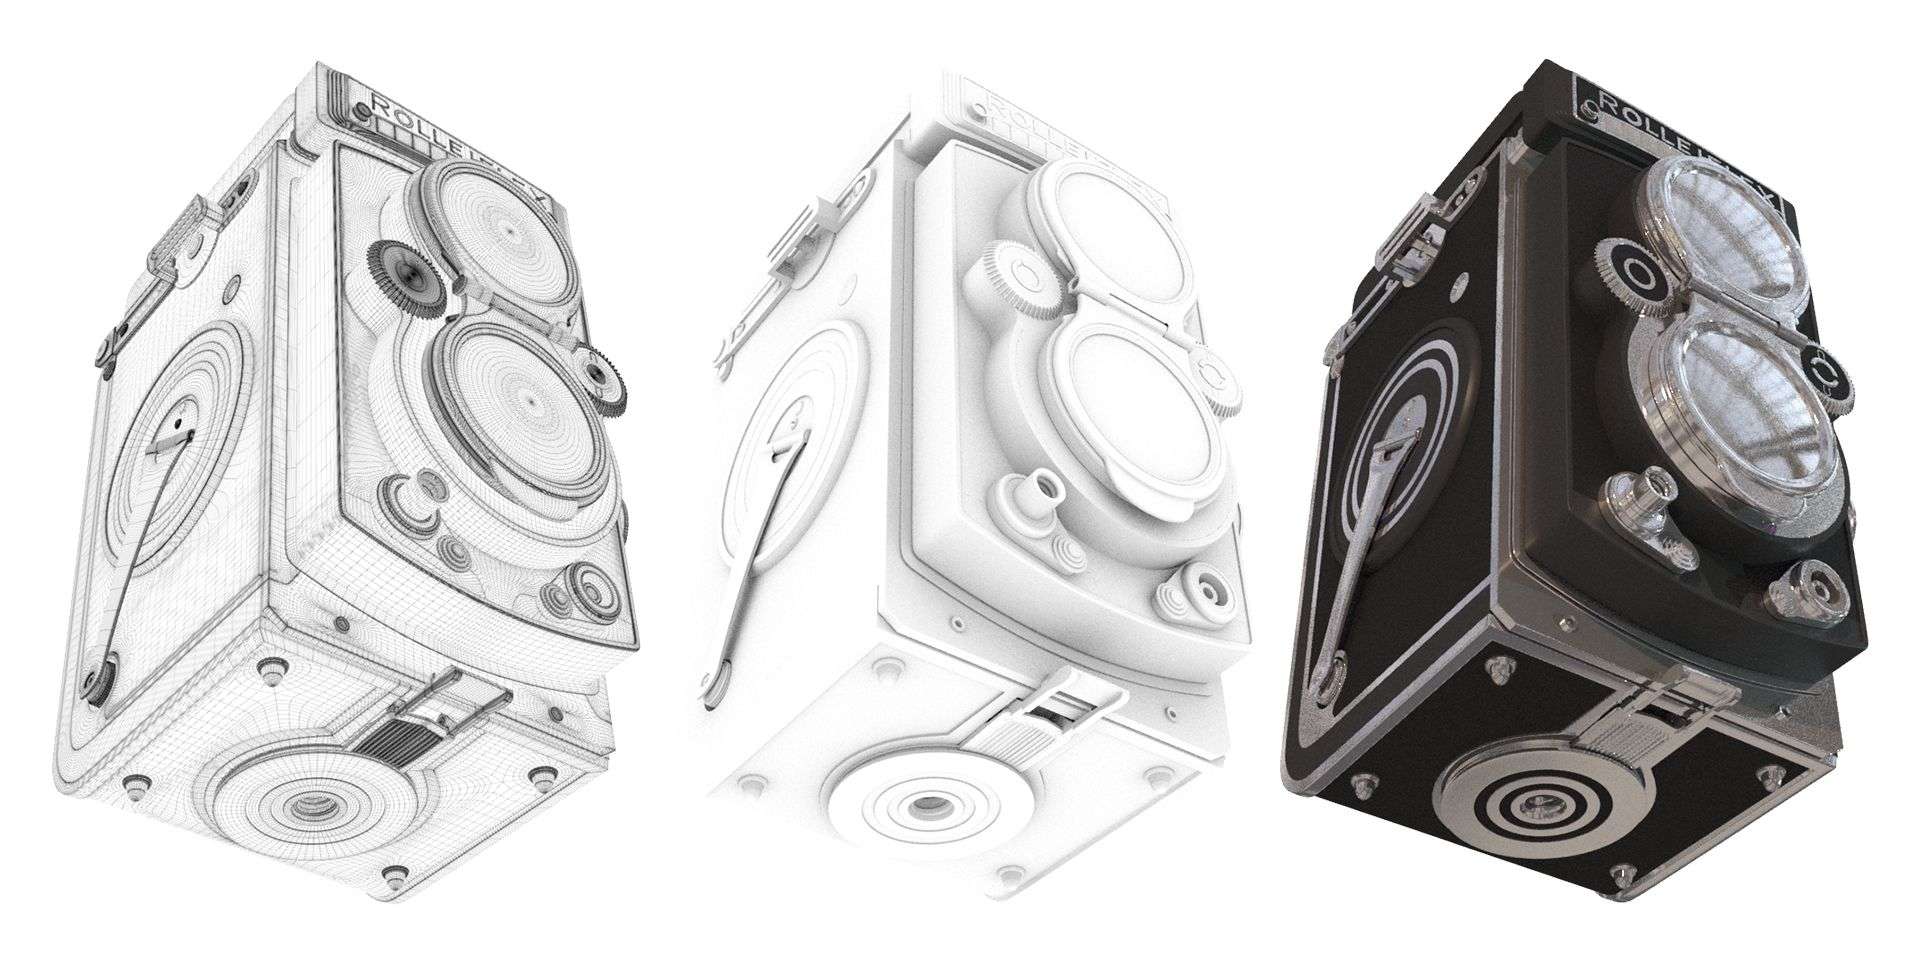
The modeling part took me two weeks including the UV unwrapping. It was quite challenging because we had other exercises to do at the same time. It was challenging and exhausting, but fun. Modeling was for me the best part because I found it relaxing, but challenging enough to keep me awake.
I think that it's really important to know what emotion you want before you light your scene.
I modeled my Rolleiflex by layers. First, the main part (the shape) and then I added all the sets of detailed pieces to my object layer by layer.
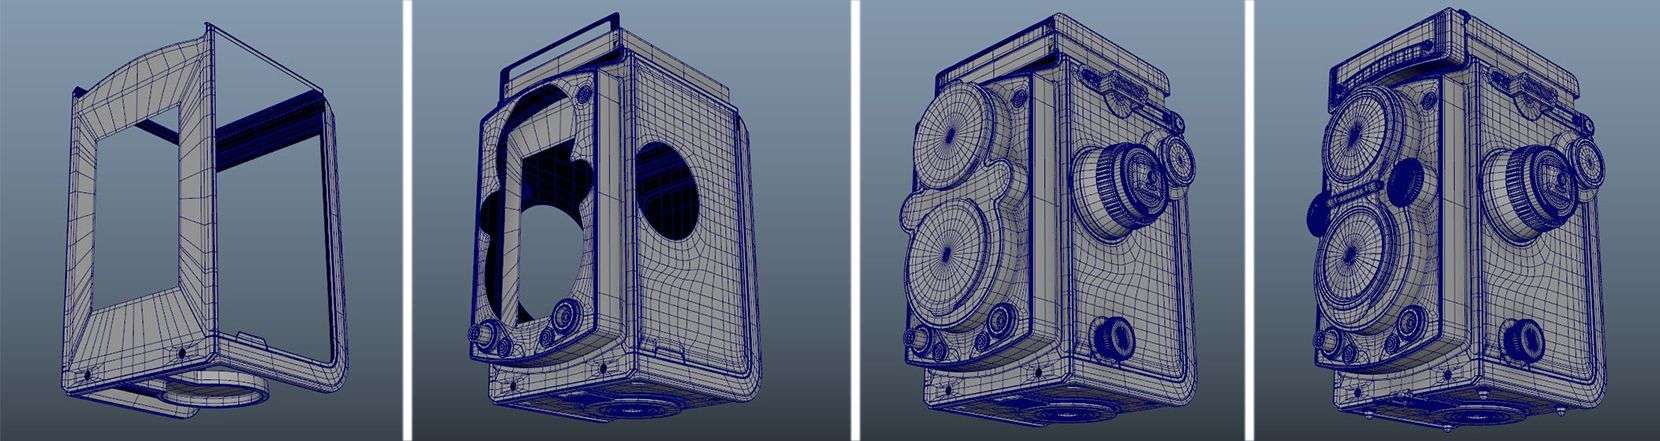
The tricky part was to have a workflow for good and clean edges. For that, again, it was not a mystery, I just had to observe every aspect of my object and fully understand how the pieces connected to each other.
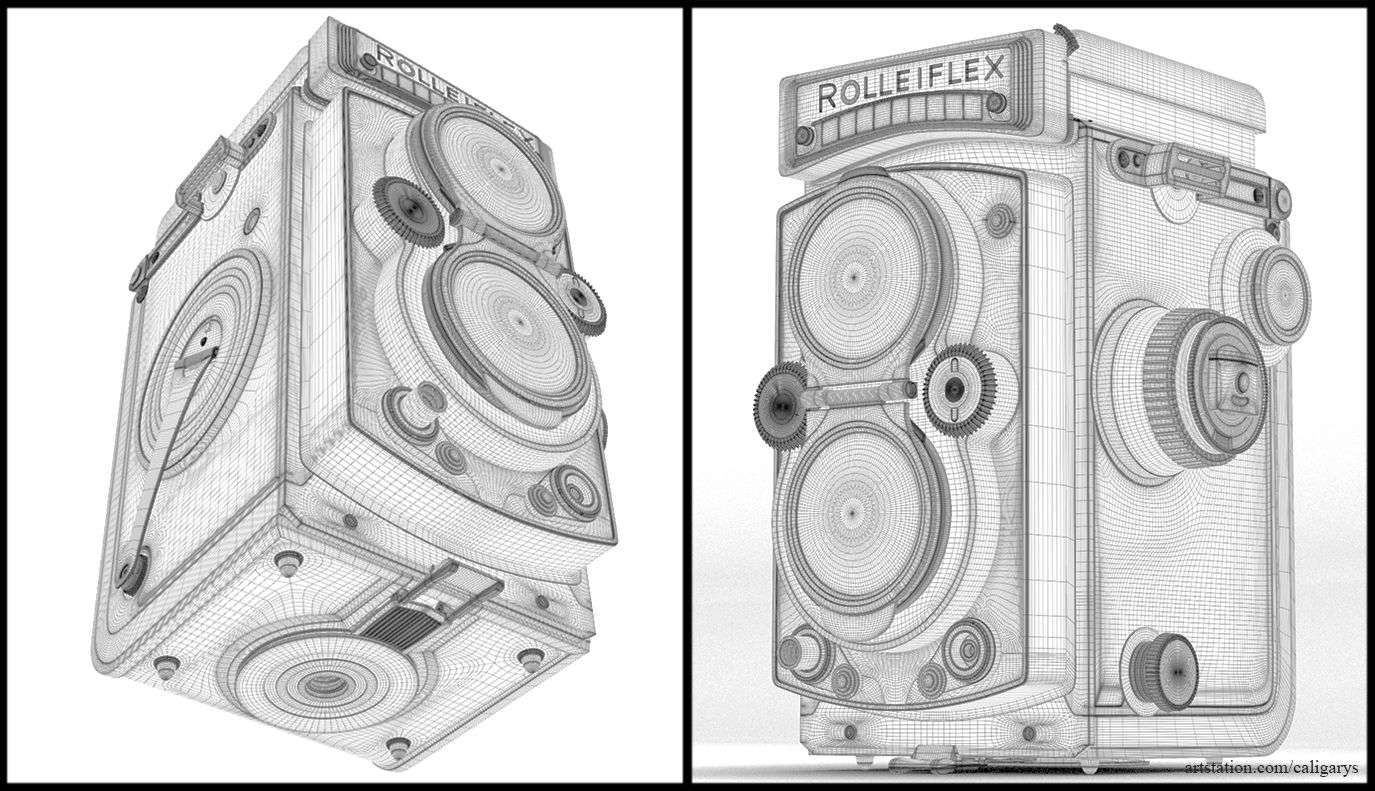
For the UV unwrapping, we had one constraint: to have only one UV set for every piece of the object. It was a real headache to have all the pieces (more than 150 pieces) properly set on one UV layer.
For that step, I had to think about which parts needed more space for texturing and which parts did not need a lot of texturing work.
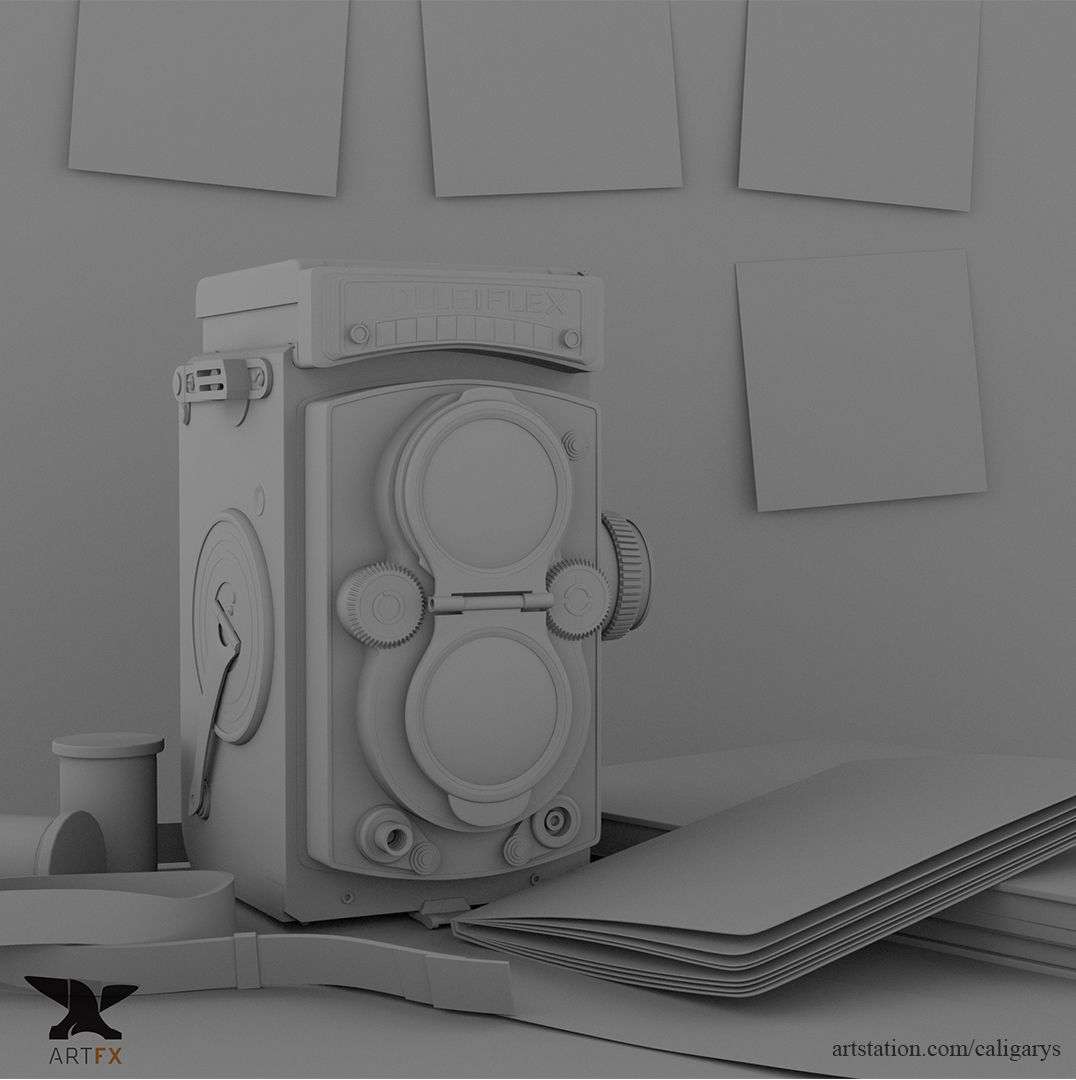
Lighting
After I modeled my Rolleiflex, I had to think about a proper way to stage it. The goal was to have an image staging an object with a little storytelling.
When searching for inspirations, I came across an image that caught my eyes: it was a photograph of someone who took a top view photo of all his drawing's pencils and sketchbook.
I knew I found my storytelling: I would put my Rolleiflex on stage as it was the beginning of a great adventure.
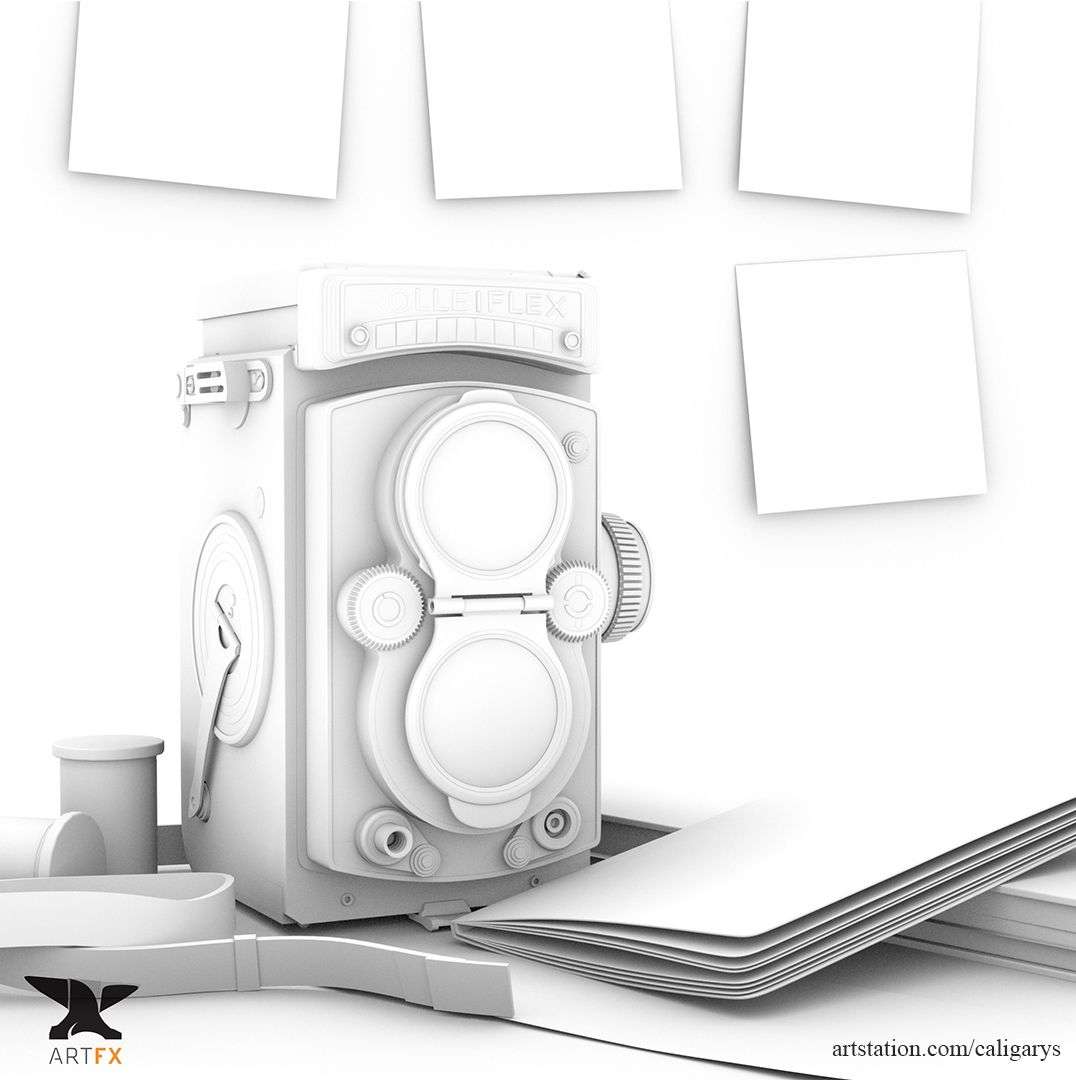
Once I found my image staging, the lighting came naturally. It was the beginning of an adventure, a voyage, so it had to be in the morning.
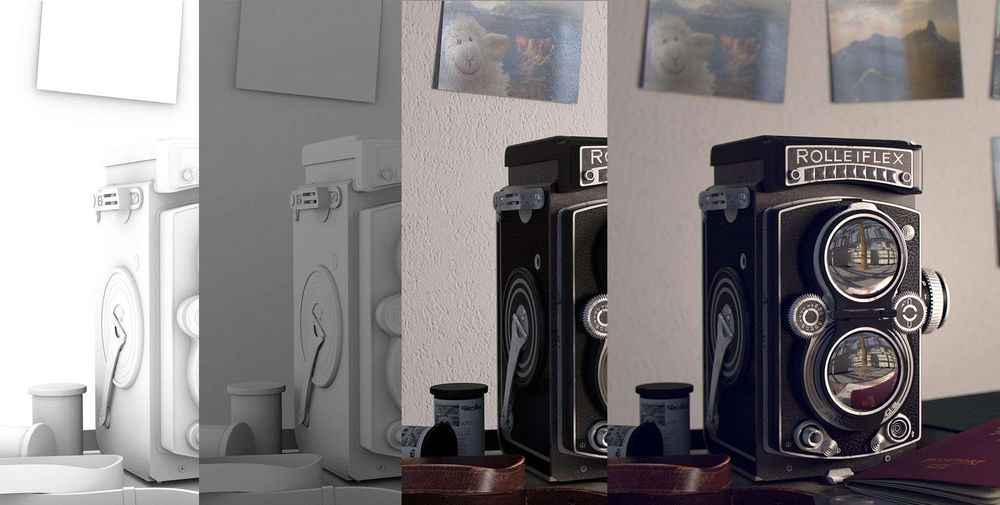
I chose a very simple and minimalist lighting: a key light on the right, a fill light on the left and an HDR environment for the reflections (I used the free Hdri made by Bosko Lazovic). Again, I wanted to have the most realistic image that I could have.
I imagined that my Rolleiflex along with its "travelling buddies" were waiting for its owner to go on a trip. I thought that because it was the most valuable thing that the traveller owned, it would be the last thing he would take before leaving the house. So it had to be on a table near the door entrance.
I therefore imagined a setting with two windows, naturally lighting my scene with an early morning light. After that, I started to search for good lighting references!
I think that it's really important to know what emotion you want before you light your scene. If you don’t decide this, in advance, it can become very difficult (for me) to light a scene. But with a clear emotional intent and a clear story, it's easier. Not easy, but easier.
Texturing/Shading
Of course, this was the part that I was the most anxious about. I had almost never done texturing or shading before so I was really scared to fail. But, I had no choice so I jumped in with both feet!
I used the Arnold Renderer for my rendering. For the texturing, I only used Photoshop. At this time point in my program, I hadn't touched any other texturing software (like Mari or Substance) and because I had another big project to work on alongside this one, I didn't think it was a good idea for me to add the challenge of learning a new software.
For the texturing, I took a lot of pictures of close-up details of my Rolleiflex and transformed my pictures to be used as displacement, specular, etc maps.
I drew some of the most detailed things like the scratches and the rust to highlight the age of my Rolleiflex. But even for the "drawing part" I just stared at my Rolleiflex and looked at where the scratches were and reproduced them in Photoshop.
Again I wanted a realistic image, so I had to know where and why there were scratches or impacts on my object to make it more plausible.
I built my shading the same way I modeled it: by steps. I added simple shaders on every part, then tweaked every shader, added bumps, etc. It's like a drawing, you can't focus on one part without thinking of the rest of the image.
I made my shading the same way, tweaking one AI surface of a piece then tweaking the shader of another piece, going back to the first piece, adding details, then jumping back to the other one, etc. In this way, I built the details of my shading steps by steps.
I think the trickiest part of my texturing/shading was the leather strap of my Rolleiflex. For that I took detailed pictures of the original strap, converted it into a bump map and blended it with a tileable leather pattern. After that, I only had to remap the blending in order to have both my specular roughness and strength.
The other tricky part was to have the right noise size pattern for both the wood and leather of my Rolleiflex. I did a lot of tests and tweaking to find the right pattern size.
The "rest" was only tweaking the AI surfaces until I had the same look in CGI as the real Rolleiflex. Again you should look at all the details of your object and understand how the specular of each material reacts etc. Then, tweak your shader until you have the same thing.

Compositing
Because of the deadline was quickly approaching, I only had a few hours to finish my compositing. I rendered the depth map, the beauty and my IDs and played with the colors a little. I was happy with my beauty shot then I had a little fun with the atmosphere in Nuke to push a little further.

Conclusion
I would like to thank my teachers who pushed me beyond what I thought I was capable of doing. It was a really challenging project, but I'm glad I did it, because it's the only way to learn a lot.
My process was really simplistic, but I think simple is always better as long as you stay close to your vision and the emotion you want to share with your audience. And the most important thing to remember is: you should ALWAYS have fun while doing it!