
My name is Junliang Zhang, I come from Shanghai, China. I was in the BFA Game Design program at the New York Film Academy. Space Fighter was one of my school project. The project goal was creating a top down space shooting game in the end of the 6th semester.
References/Concept Art
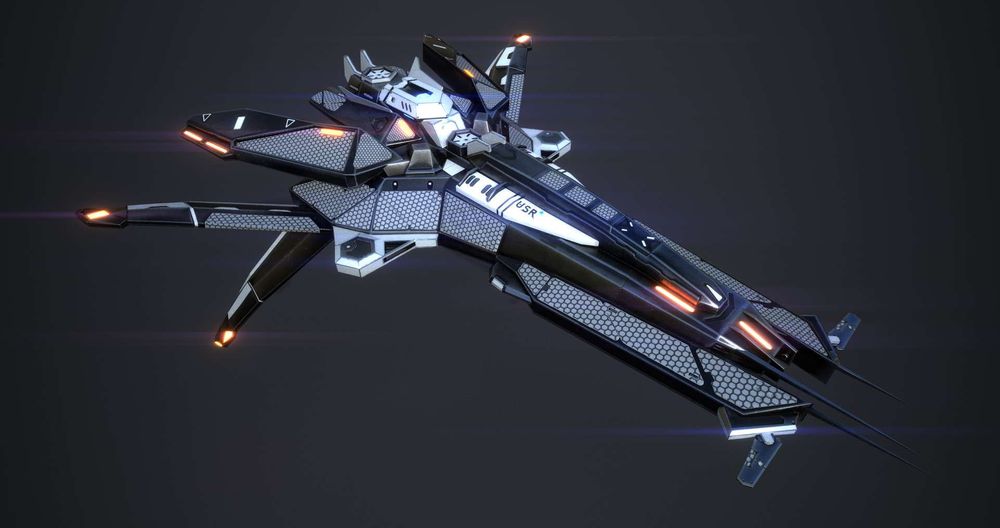
Awesome references or concept arts are always a great way to get started when you want to create something in the visual world. When I start making a project like this, I usually will sit down and think about the background story of the scene. This is a great habit.
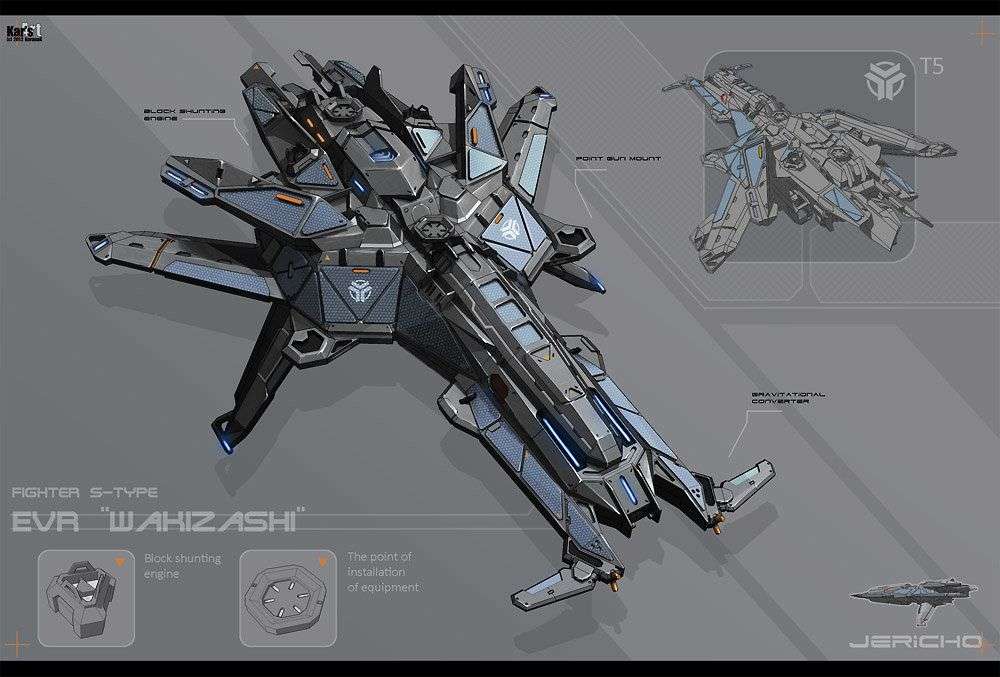
It will help you get a lot of inspiration and ideas while designing and texturing. I spent a lot of time that collected as many as I could with Google images and Pinterest. Eventually, I found a great concept art from amazing artist Alexey Pyatov that looked very cool and fits well for the project.
The Workflow Breakdown
For the entire workflow is quite simple. Low-poly, High-poly models, and UV Unwrapping are done in Maya. For texturing and rendering, I used Substance Painter and Iray to finish the entire model.
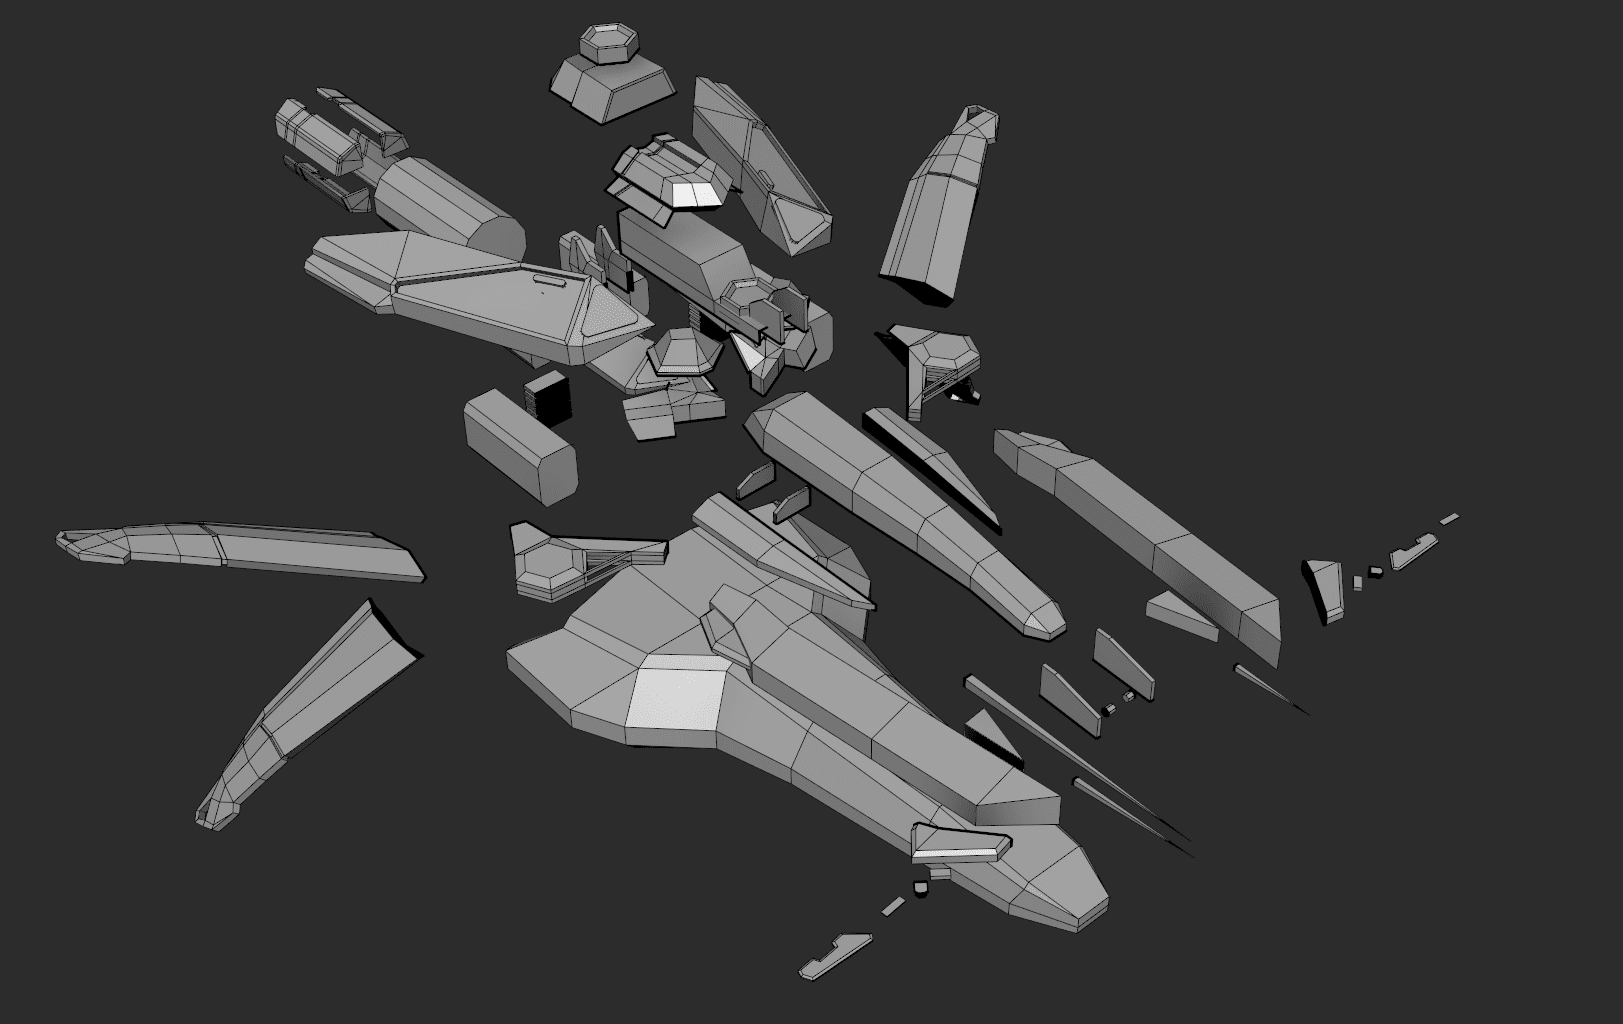
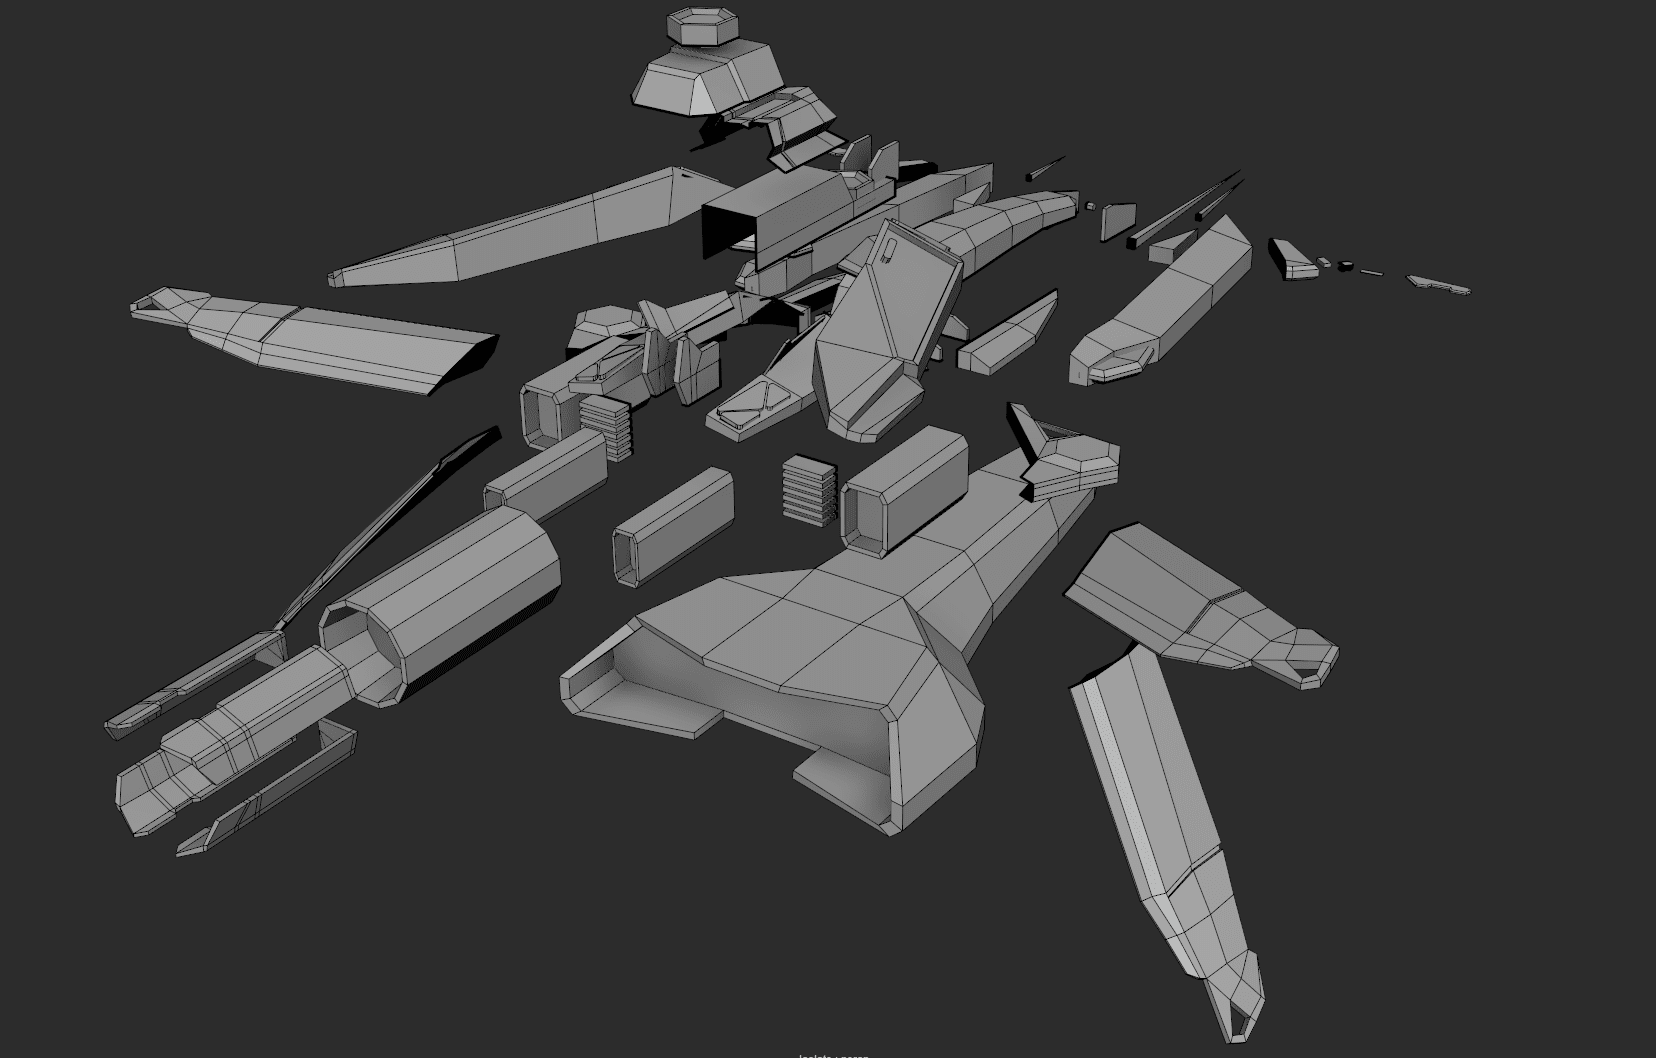
Space Fighter Modeling Parts
As long as I have my initial idea in my mind, it’s time to make a simple Low-poly block out with some sample boxes in Maya. Here are some basically modelings. There is no right or wrong way to do this, but it is important to keep the scale and make sure the size is correct and also can fit well in the game.
Low-poly Modeling
I usually will import a default character from game engines, such as Unity 2018, and Unreal Engine 4 in order to get correct size.
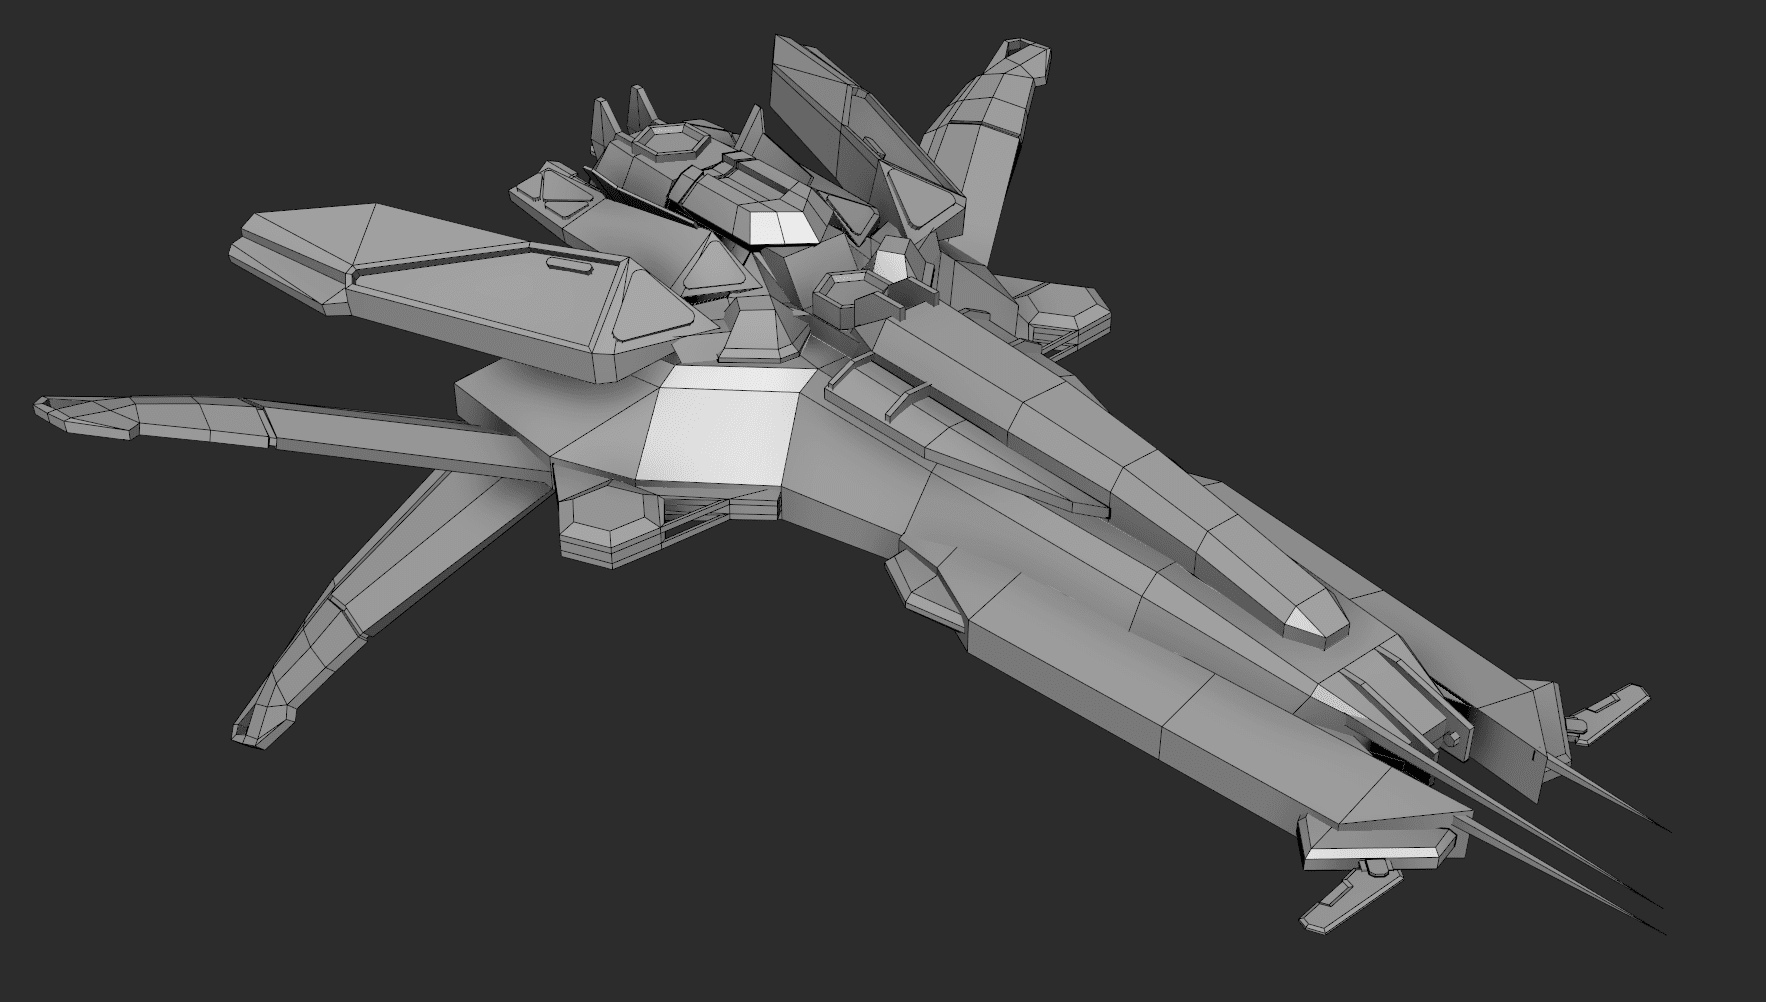
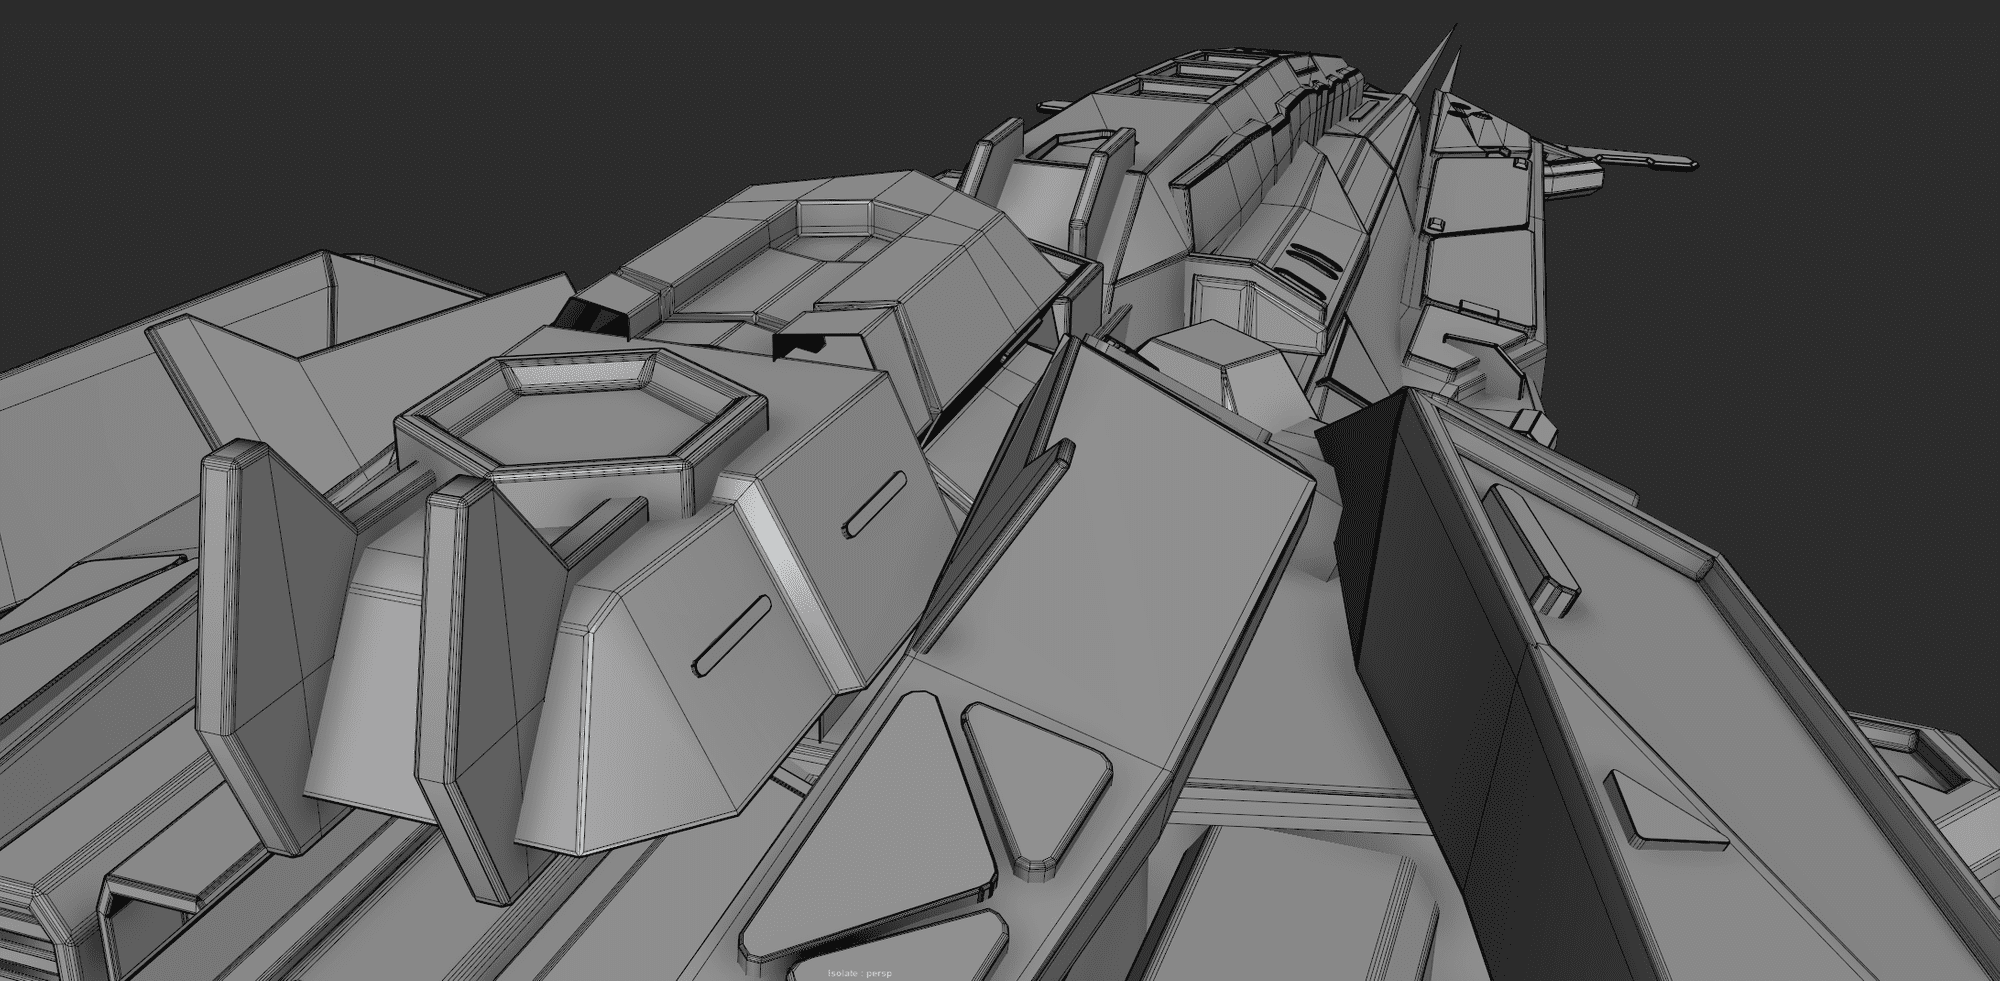
High-Poly Modeling
For the high-poly modeling, I did some beveling edges, adding big shape details in order to bake a great Normal map later in the Substance Painter.
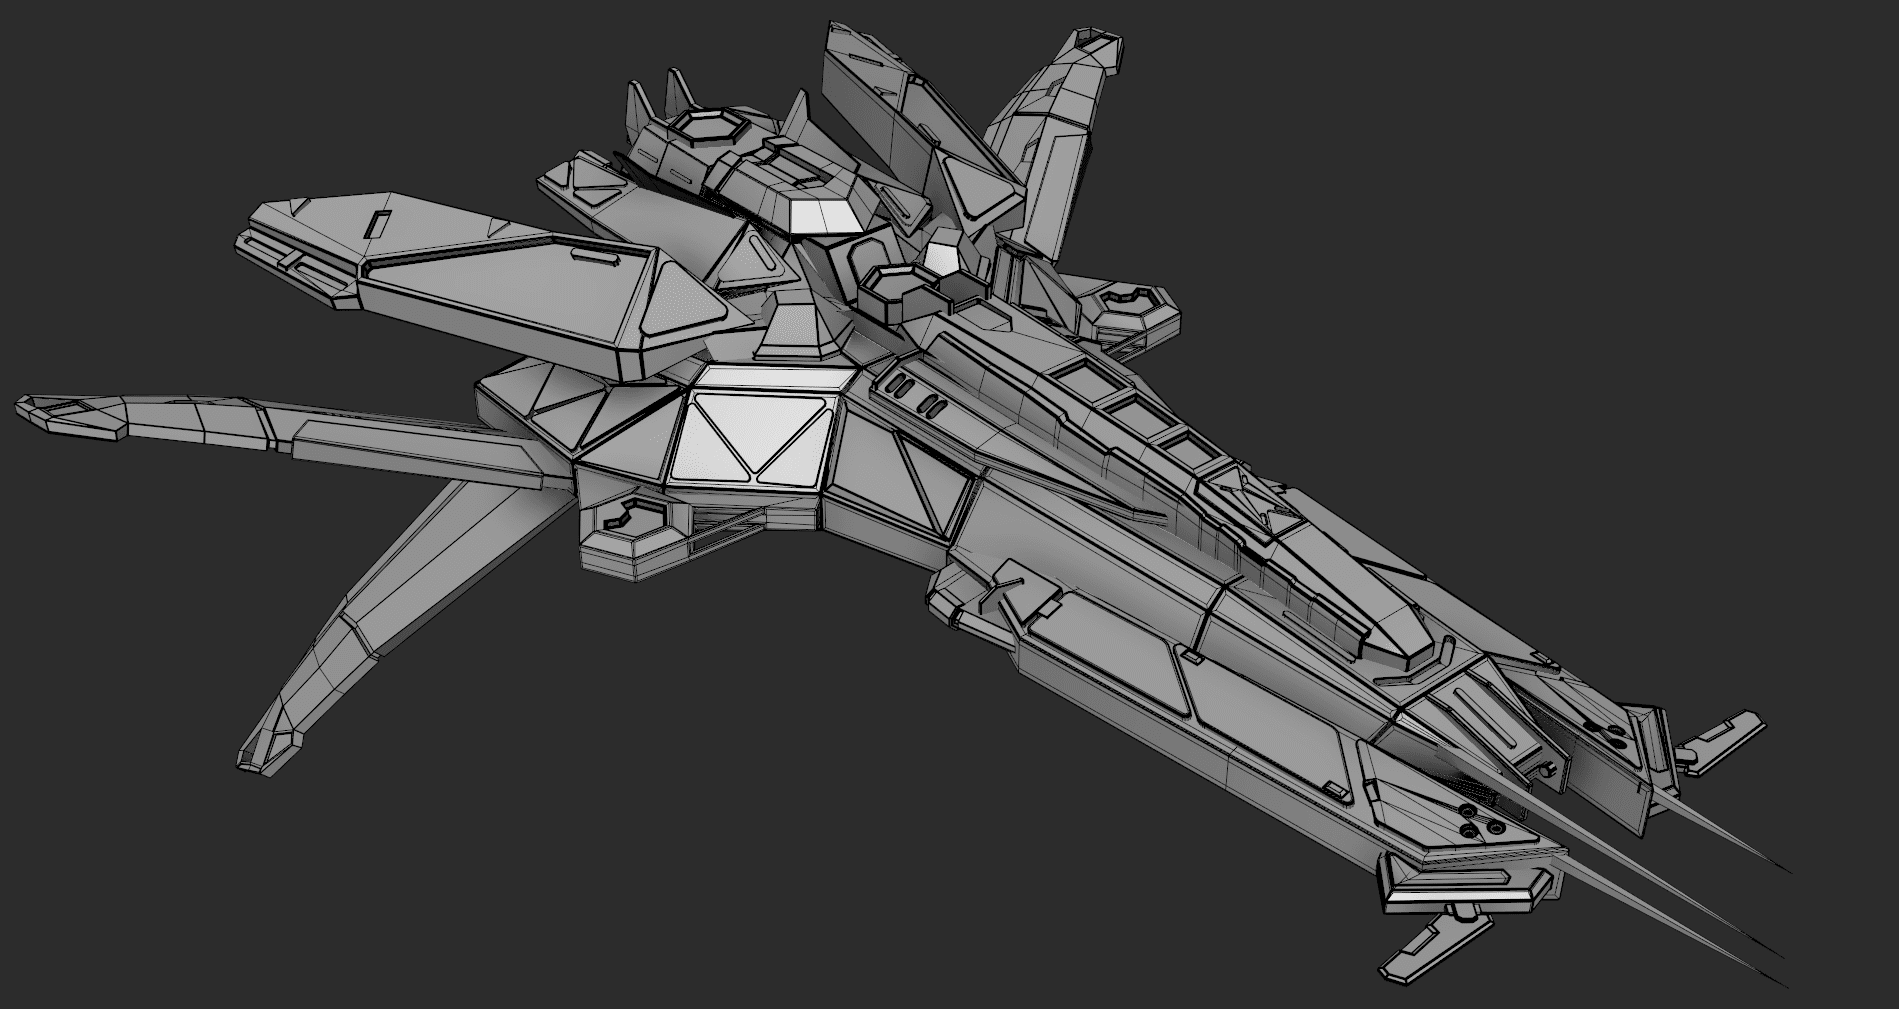
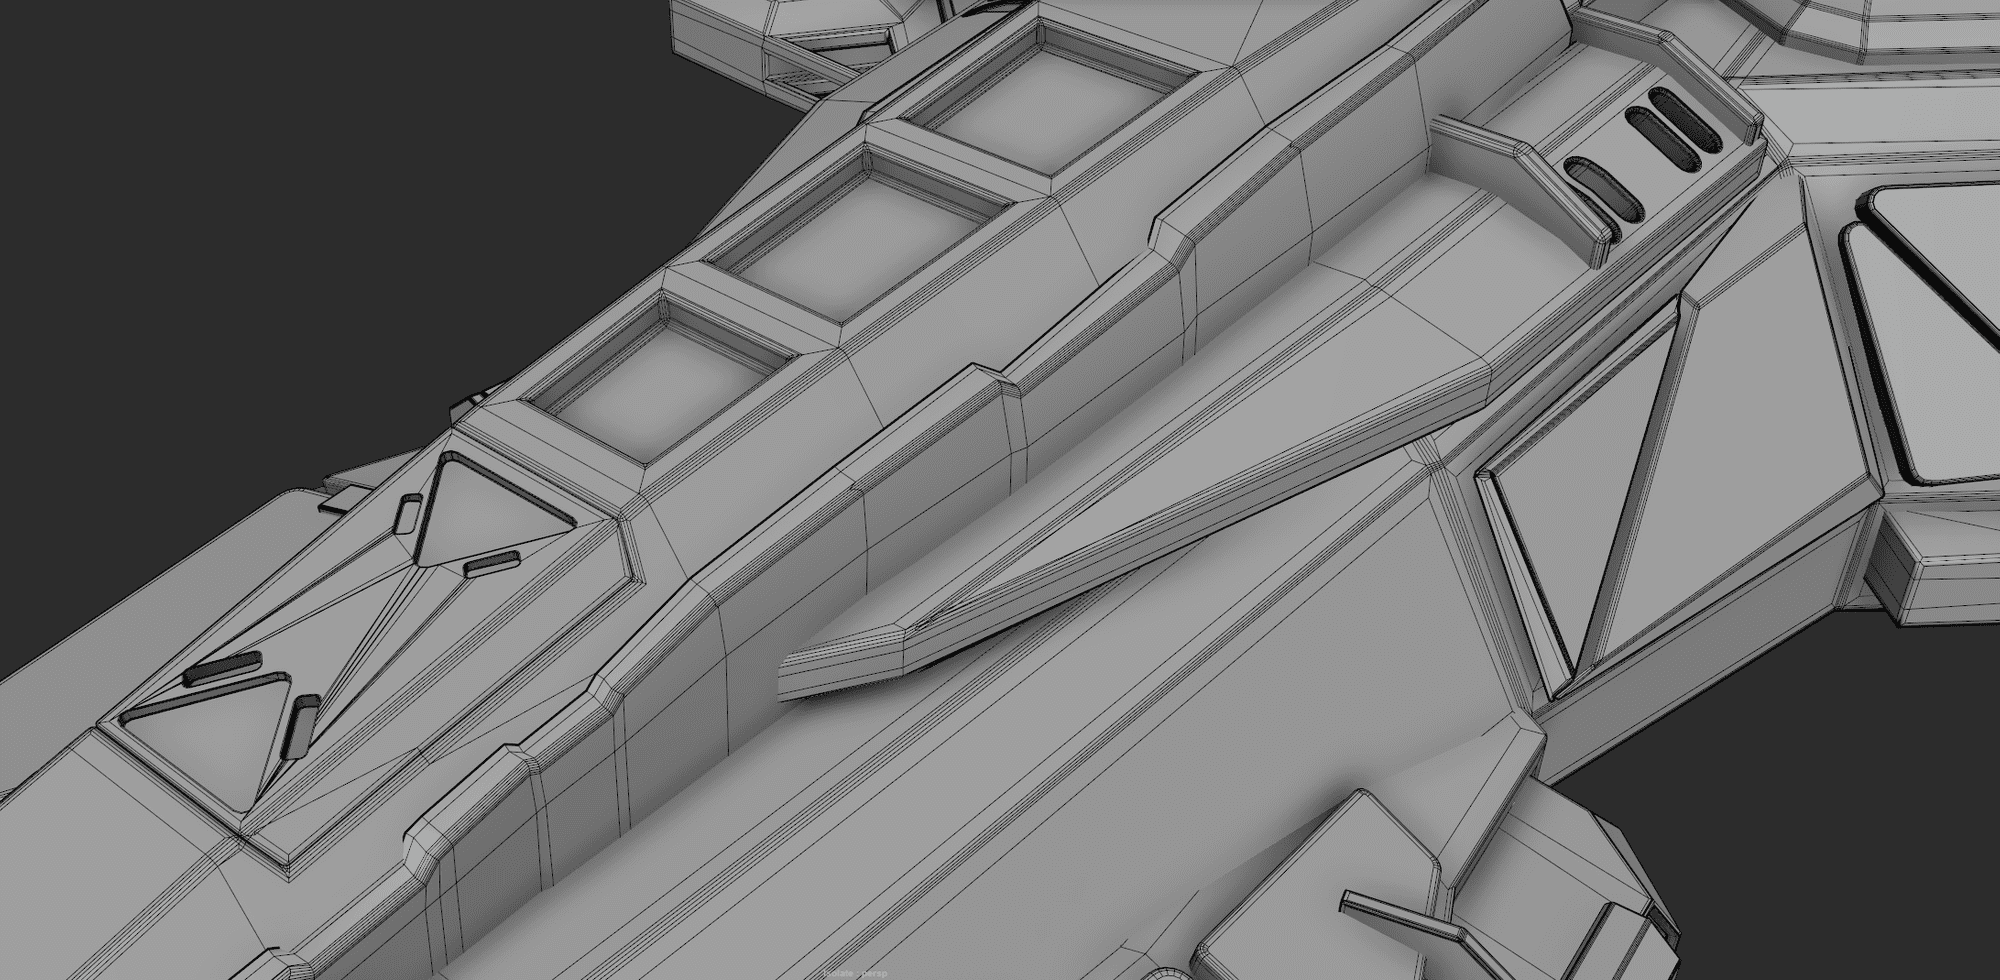
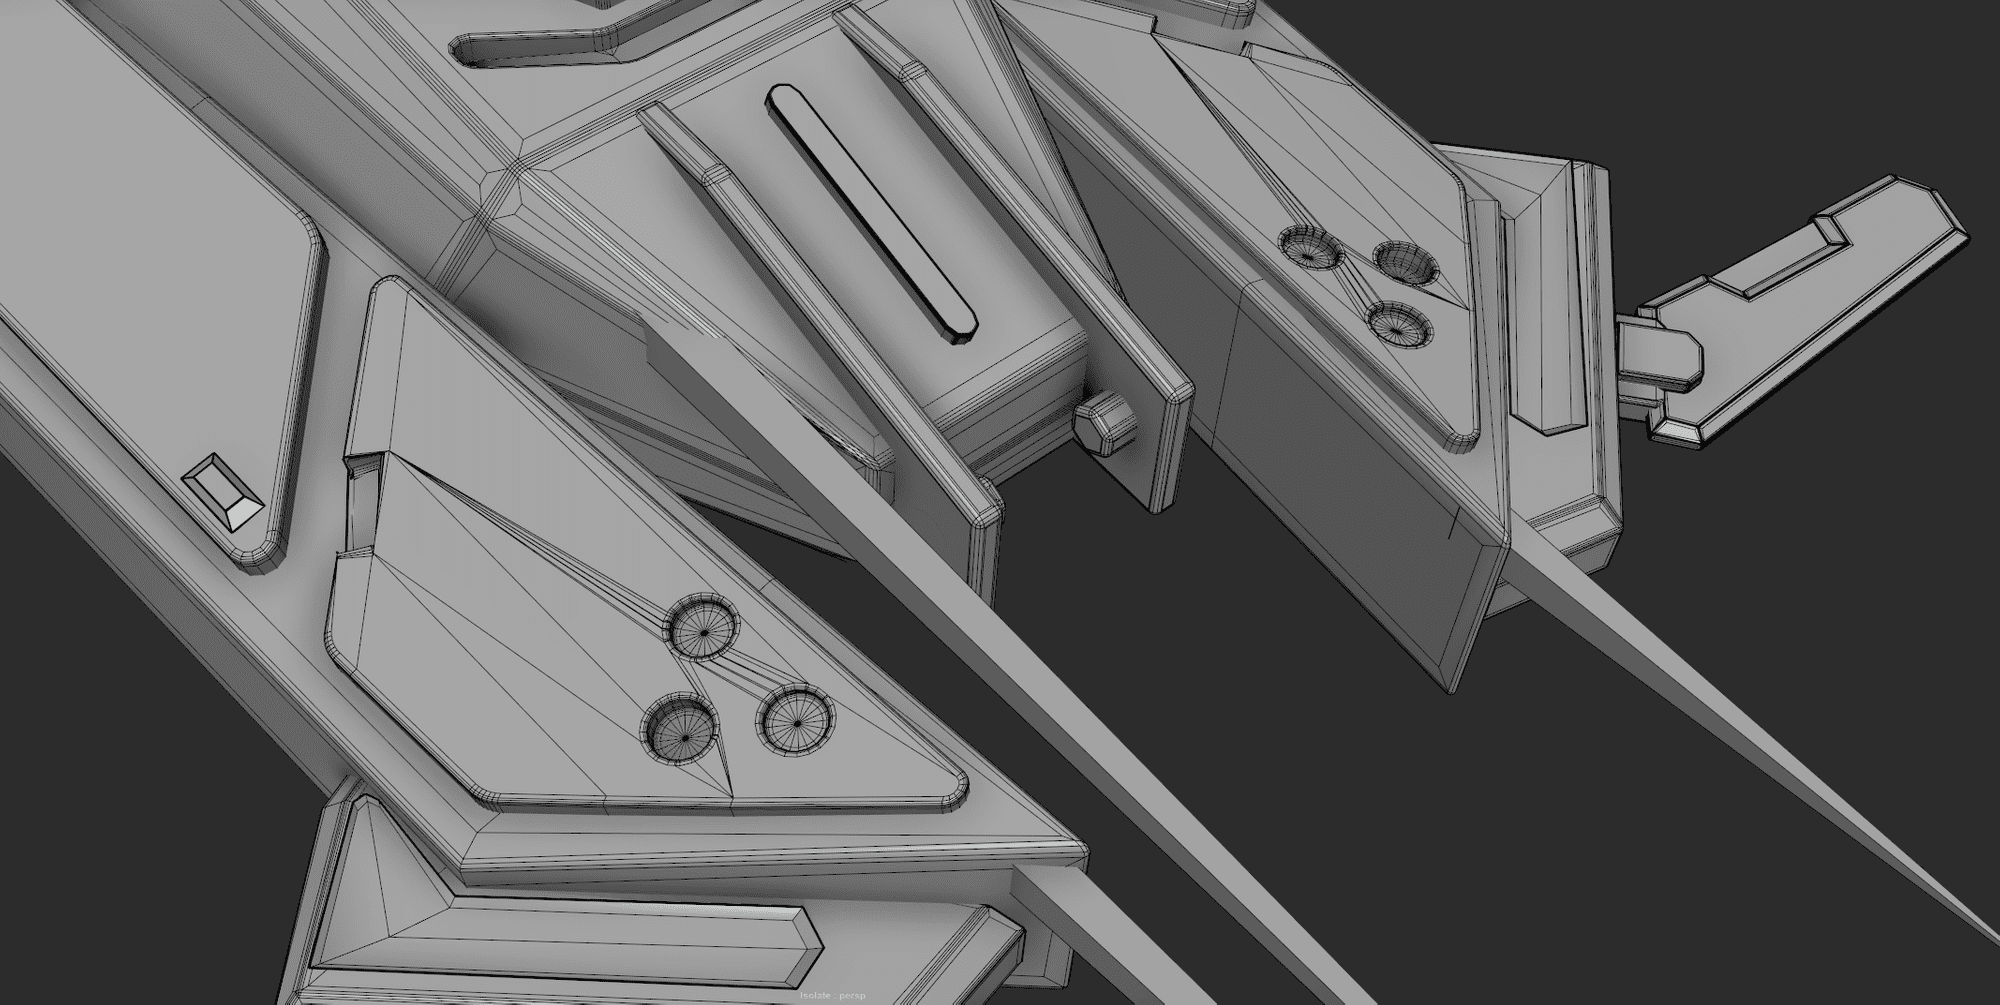
High-poly Models details
At this time, I do not worry about any small details like patterns, decals, screws and so on. I will do it with Normal Map decals during the texturing parts.
For the live boolean modeling techniques, I unintentionally found a great plugin for Maya on Gumroad, which was called “Crease Plus”. It was created by Baidhir Hidair. It was a fantastic tool for creating hard surface modeling to the next level!
UV Unwrapping
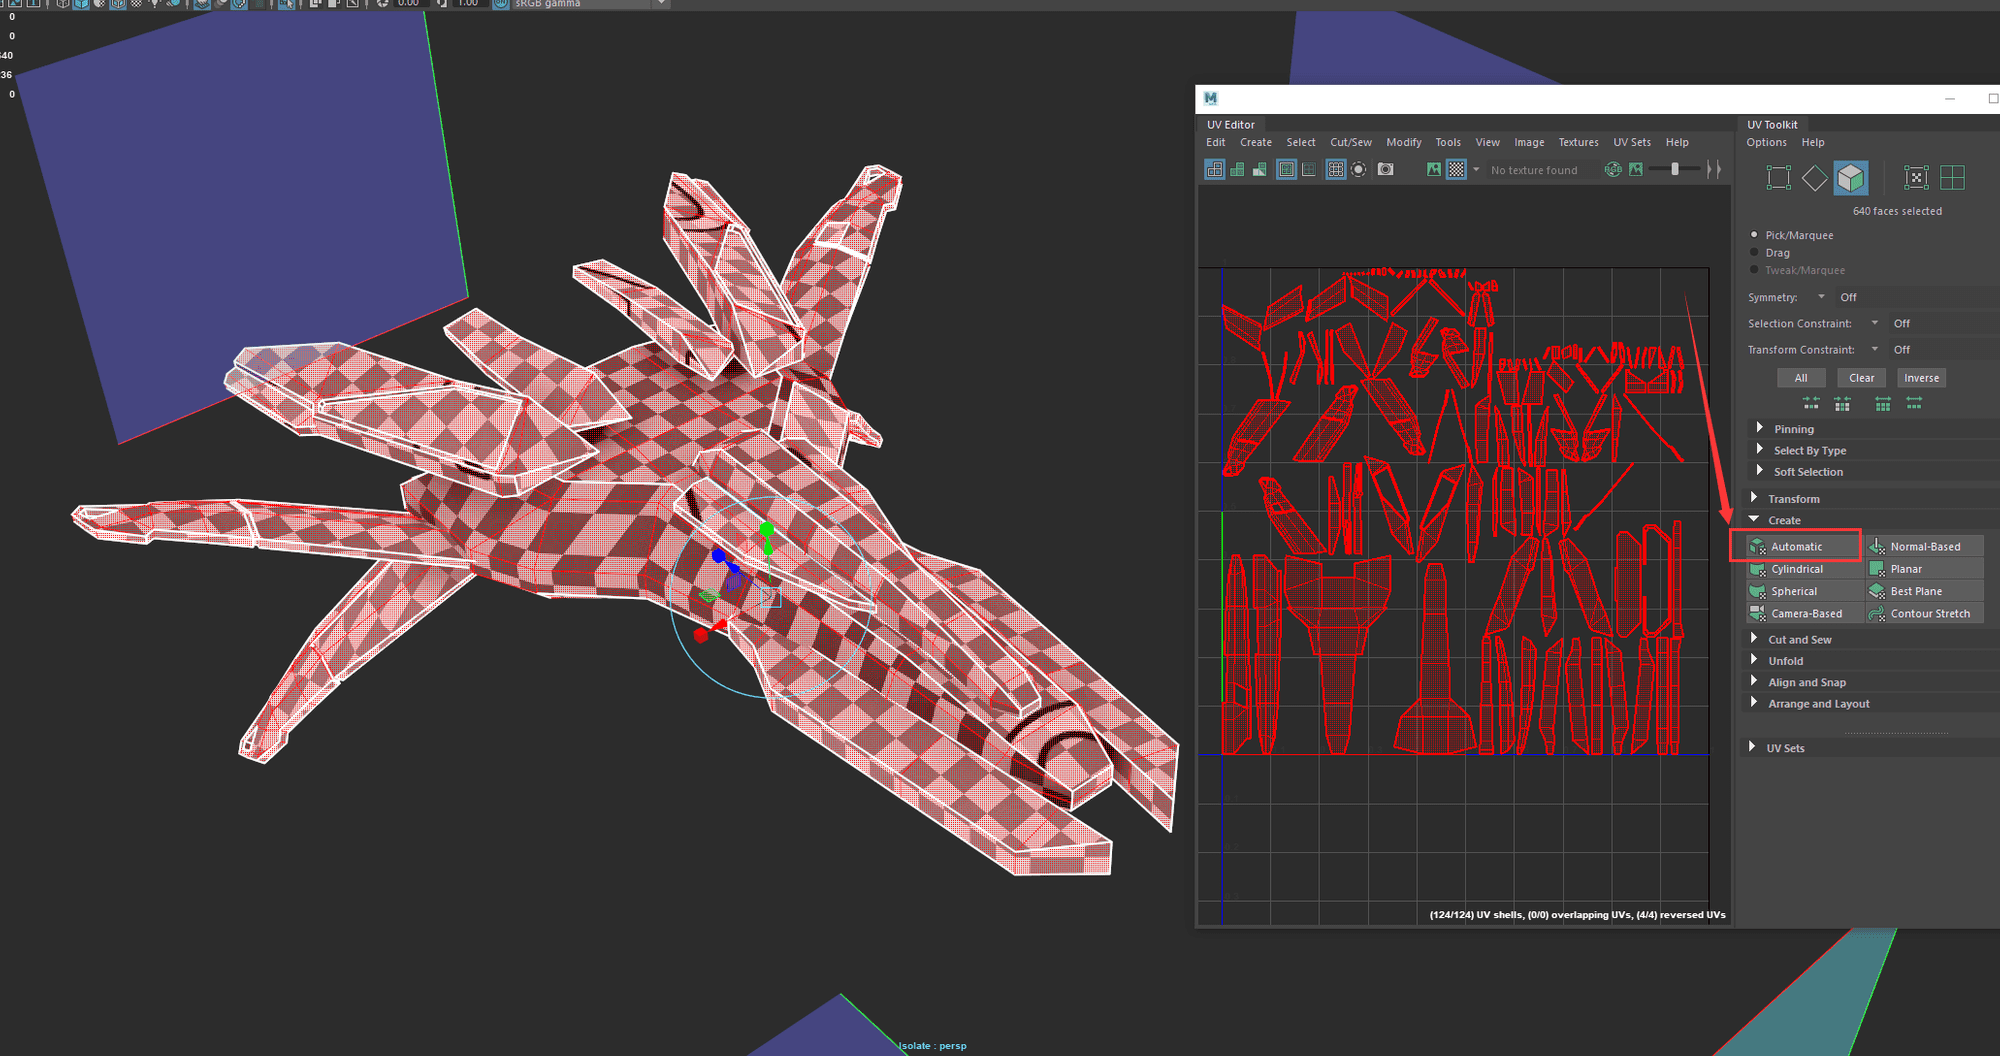
First of all, I decided to divide into two different UV sets, which are Ship-Bodies and Ship-Parts because the ship model has a lot of parts. It is a great way to make high resolution textures during the final texturing and rendering parts.

At first, I get started with Automatic Unwrapping for the Body part, It will automatically defined the best unwrapping edges and faces.
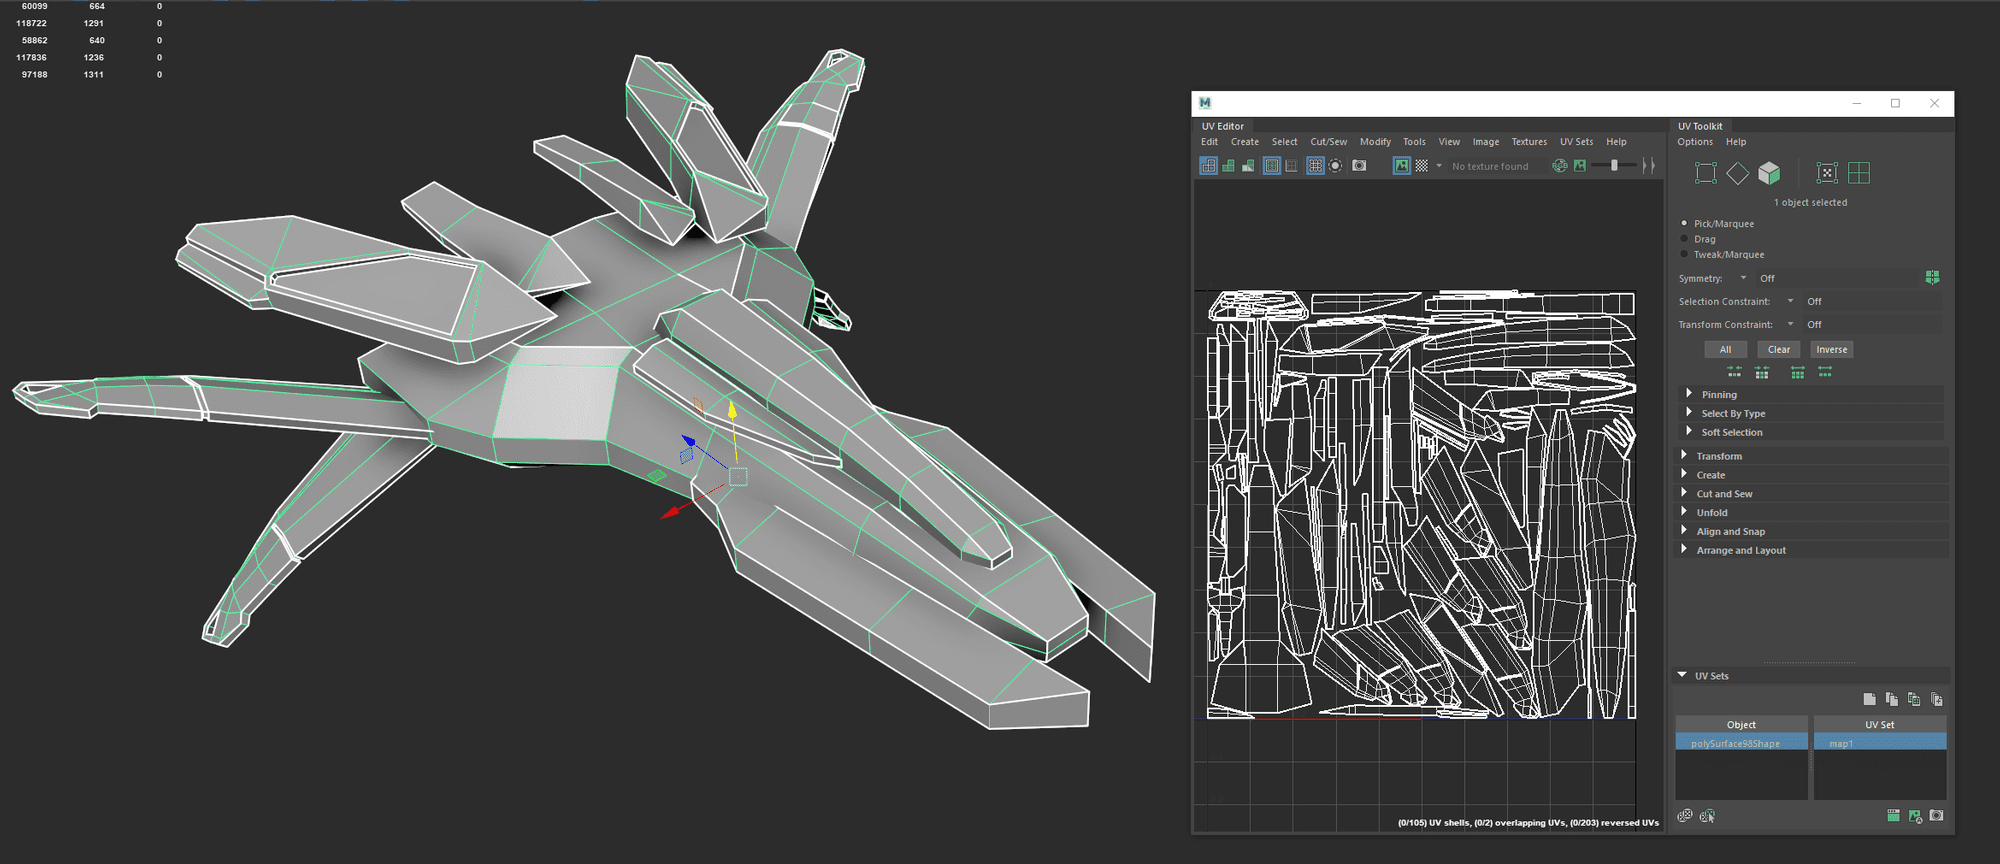
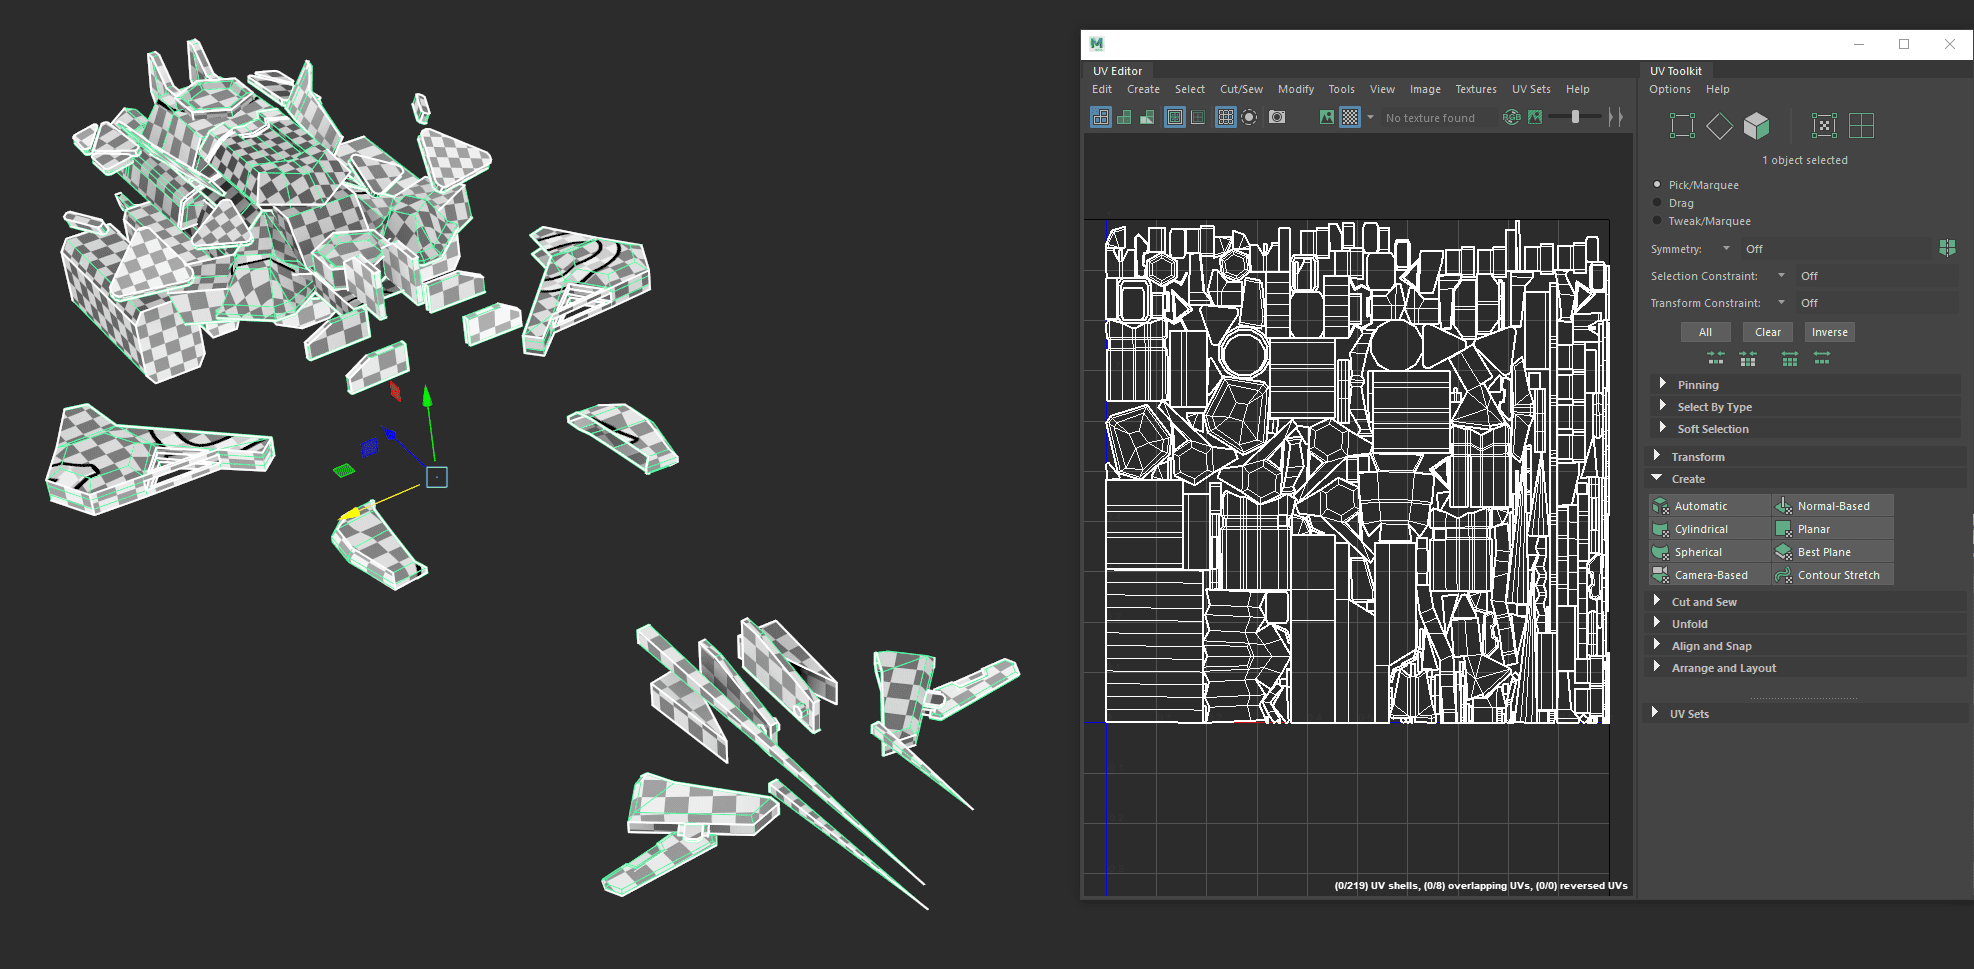
Second, I will sew all of different UV parts together with Move And Sew Edges short cut if the edge angle do not exceed 90% degree. It is very useful for baking a good Normal Map later.
Third, I will set a priority for which parts I can get as the best texturing resolution as I could. For some small or hided parts, I will give them some small UV texture space because the players could not see it.
4. Texturing
For the texturing parts, I used Substance Painter for all of the models because it is fast and high quality for PBR texturing.
Texturing Workflow
a. Import your low poly model
b. Bake all maps from your high-poly model
c. If you run into some problems or issues with the normal maps or modeling display incorrect. I will suggest you to go back Maya check all UV and modeling hard soft edges. If so, I found a very helpful automatic script with only one click for the smooth group based on the UV shells.
FREE Auto Smoothing Groups for Maya by Dennis Porter
d. If you already fixed the UV and model, it’s time to re-bake all of the textures again in Substance Painter.
e. As long as you had all of the great baking textures, It’s ready for the texturing. I usually will create a new layer for normal decals with existing hard surfaces tab in Substance Painter. If your model is symmetric it’s time to turn on.
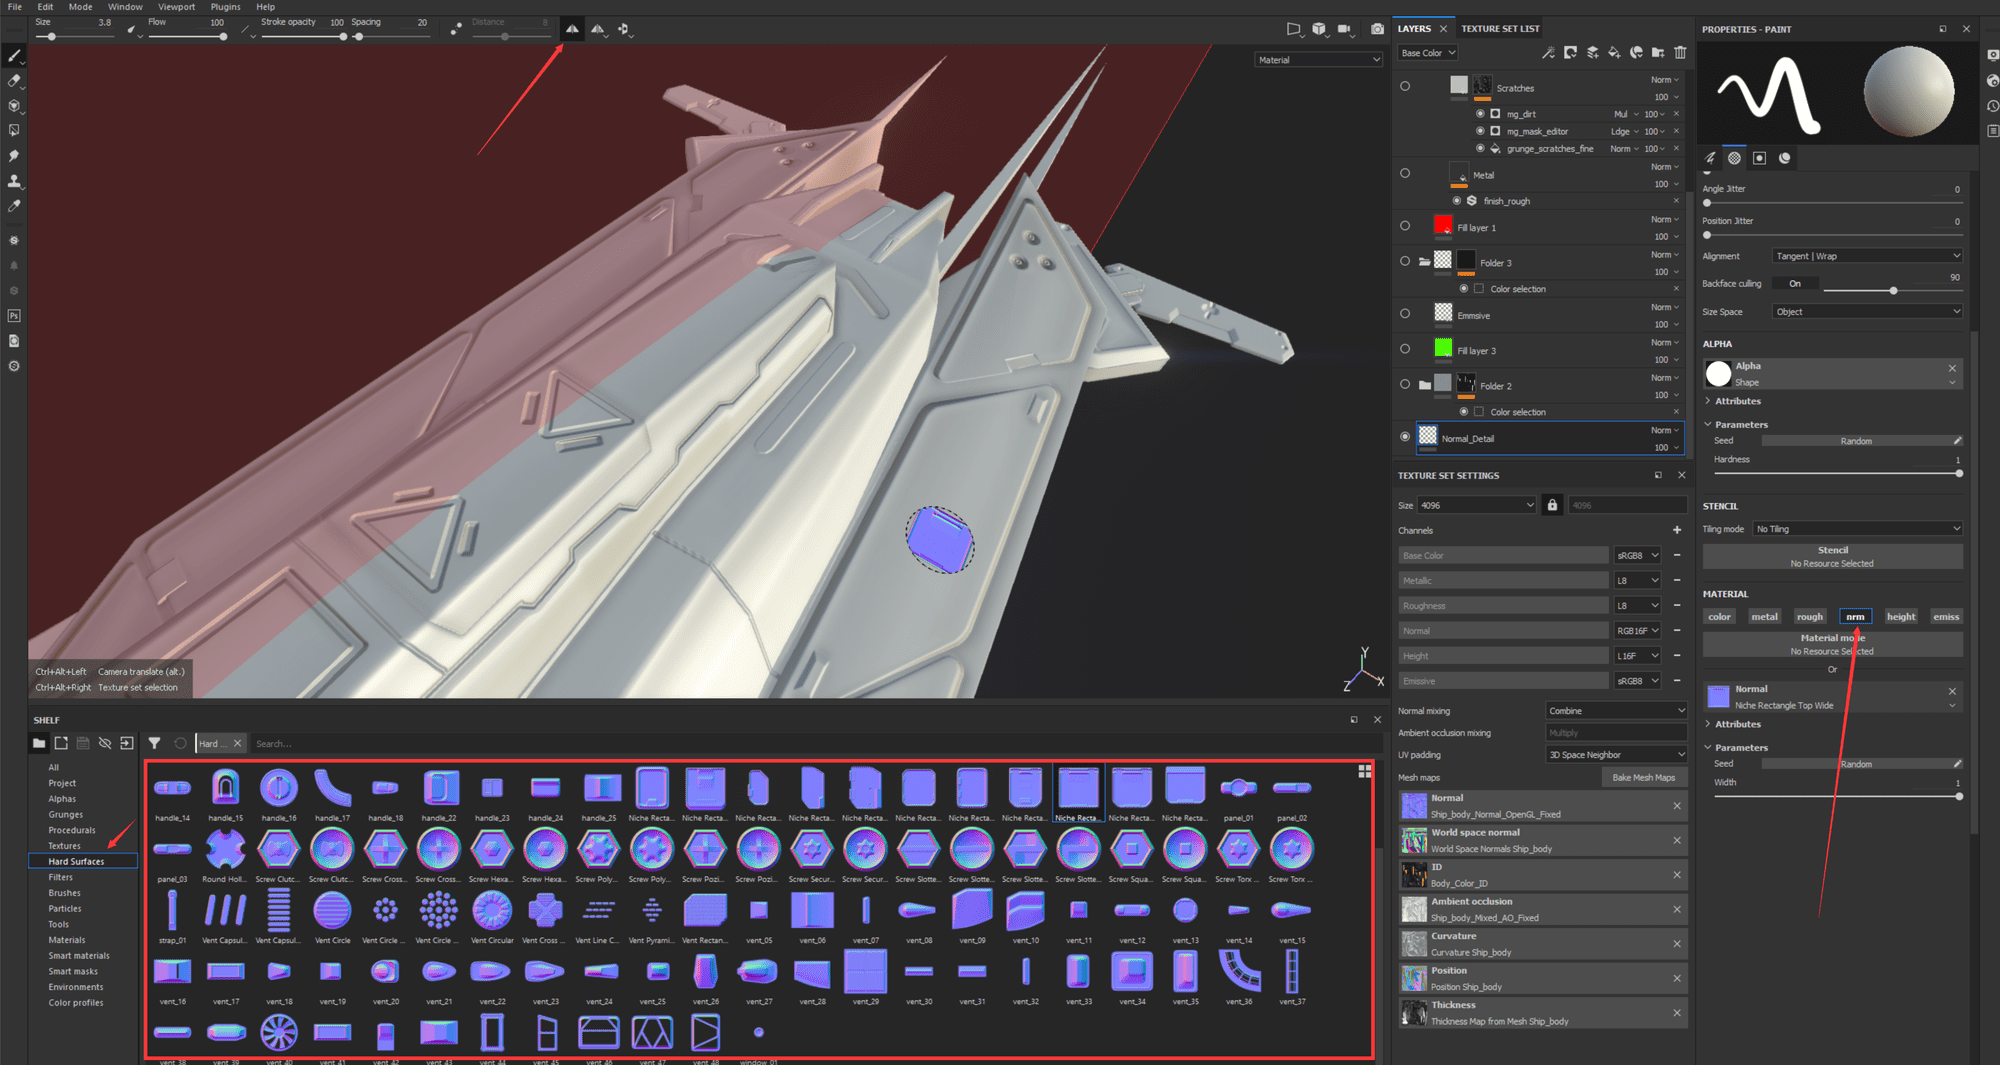
f. If you already finished Normal decals, let’s try some very cool different smart materials into the model, adjusting the smart masks and colors. It will give you completely freedom to change anything you want.
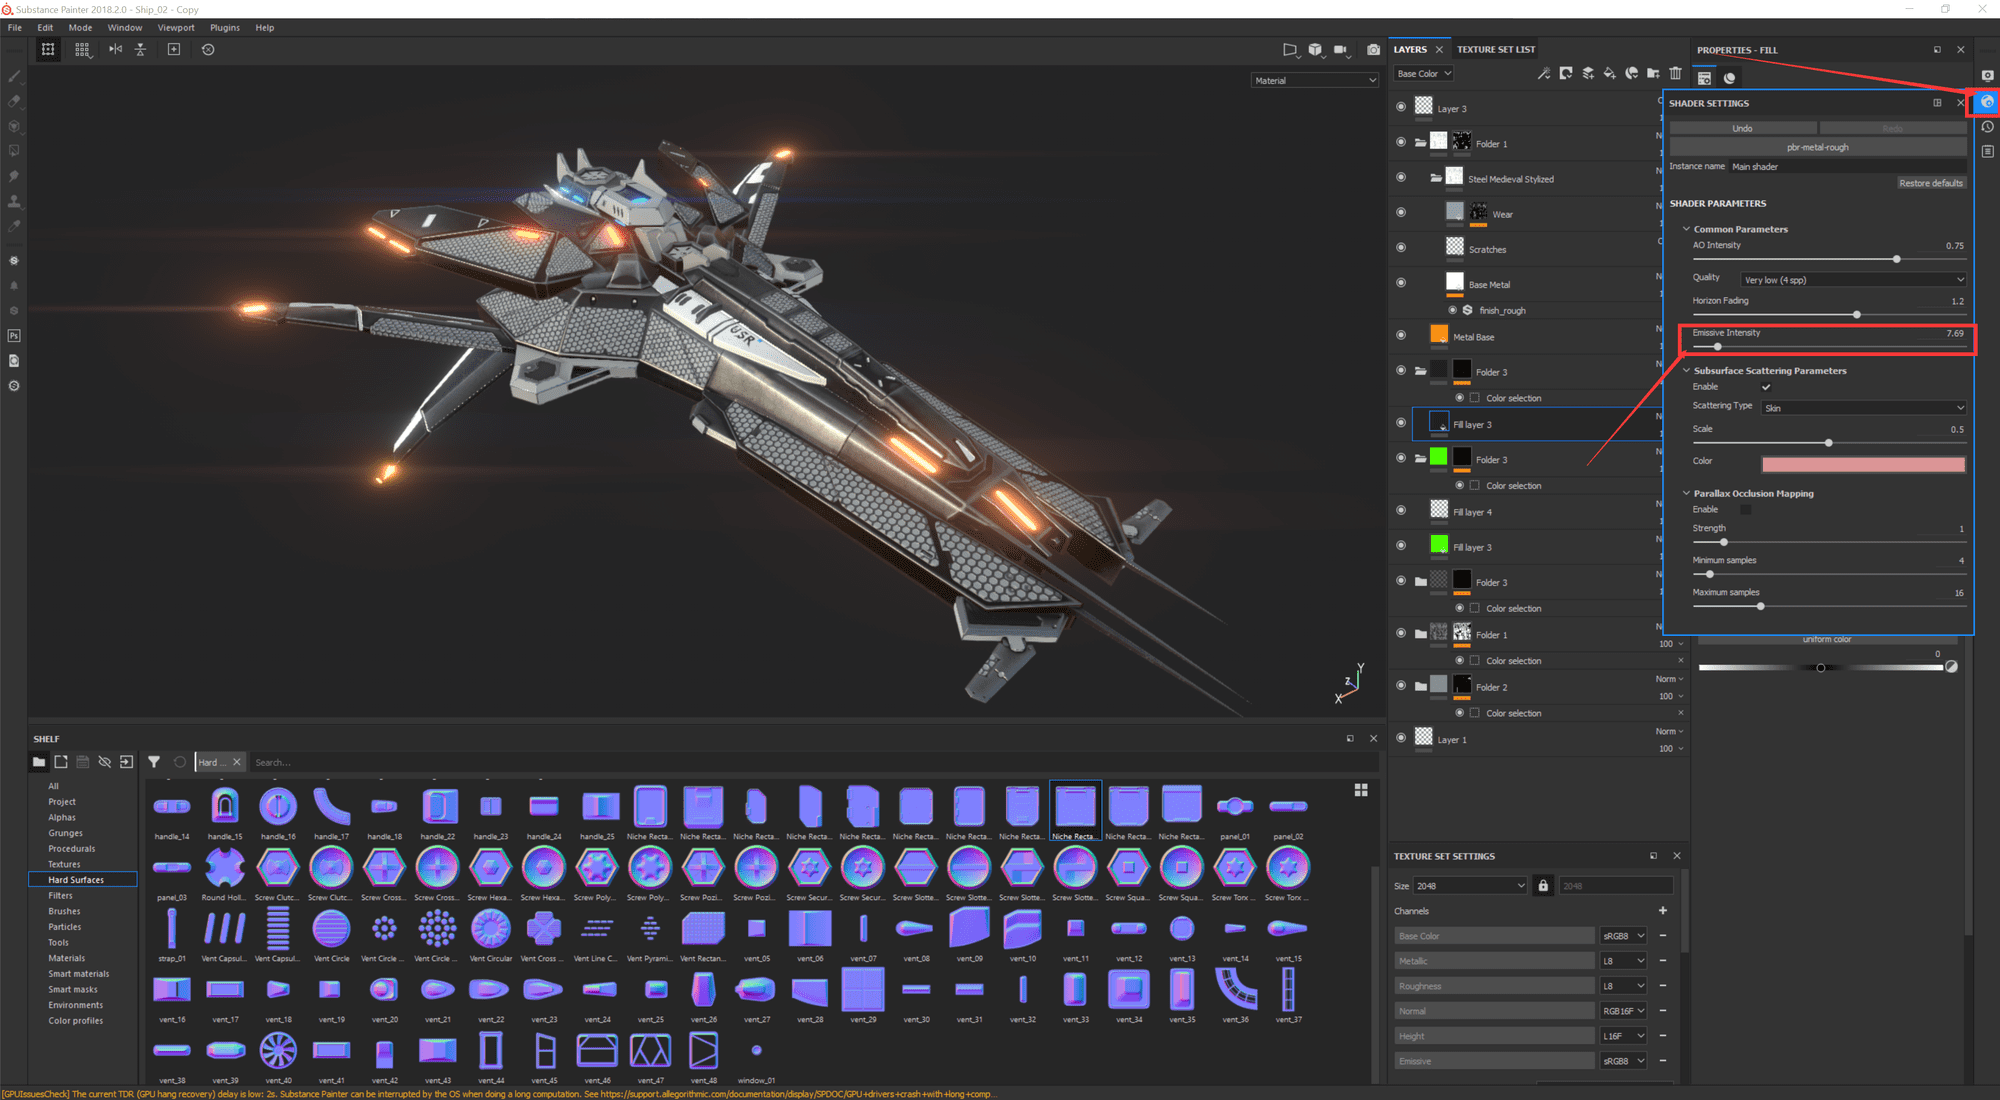
Tips: For someone can not increase the intensity of emissive colour.
Here is the solution:
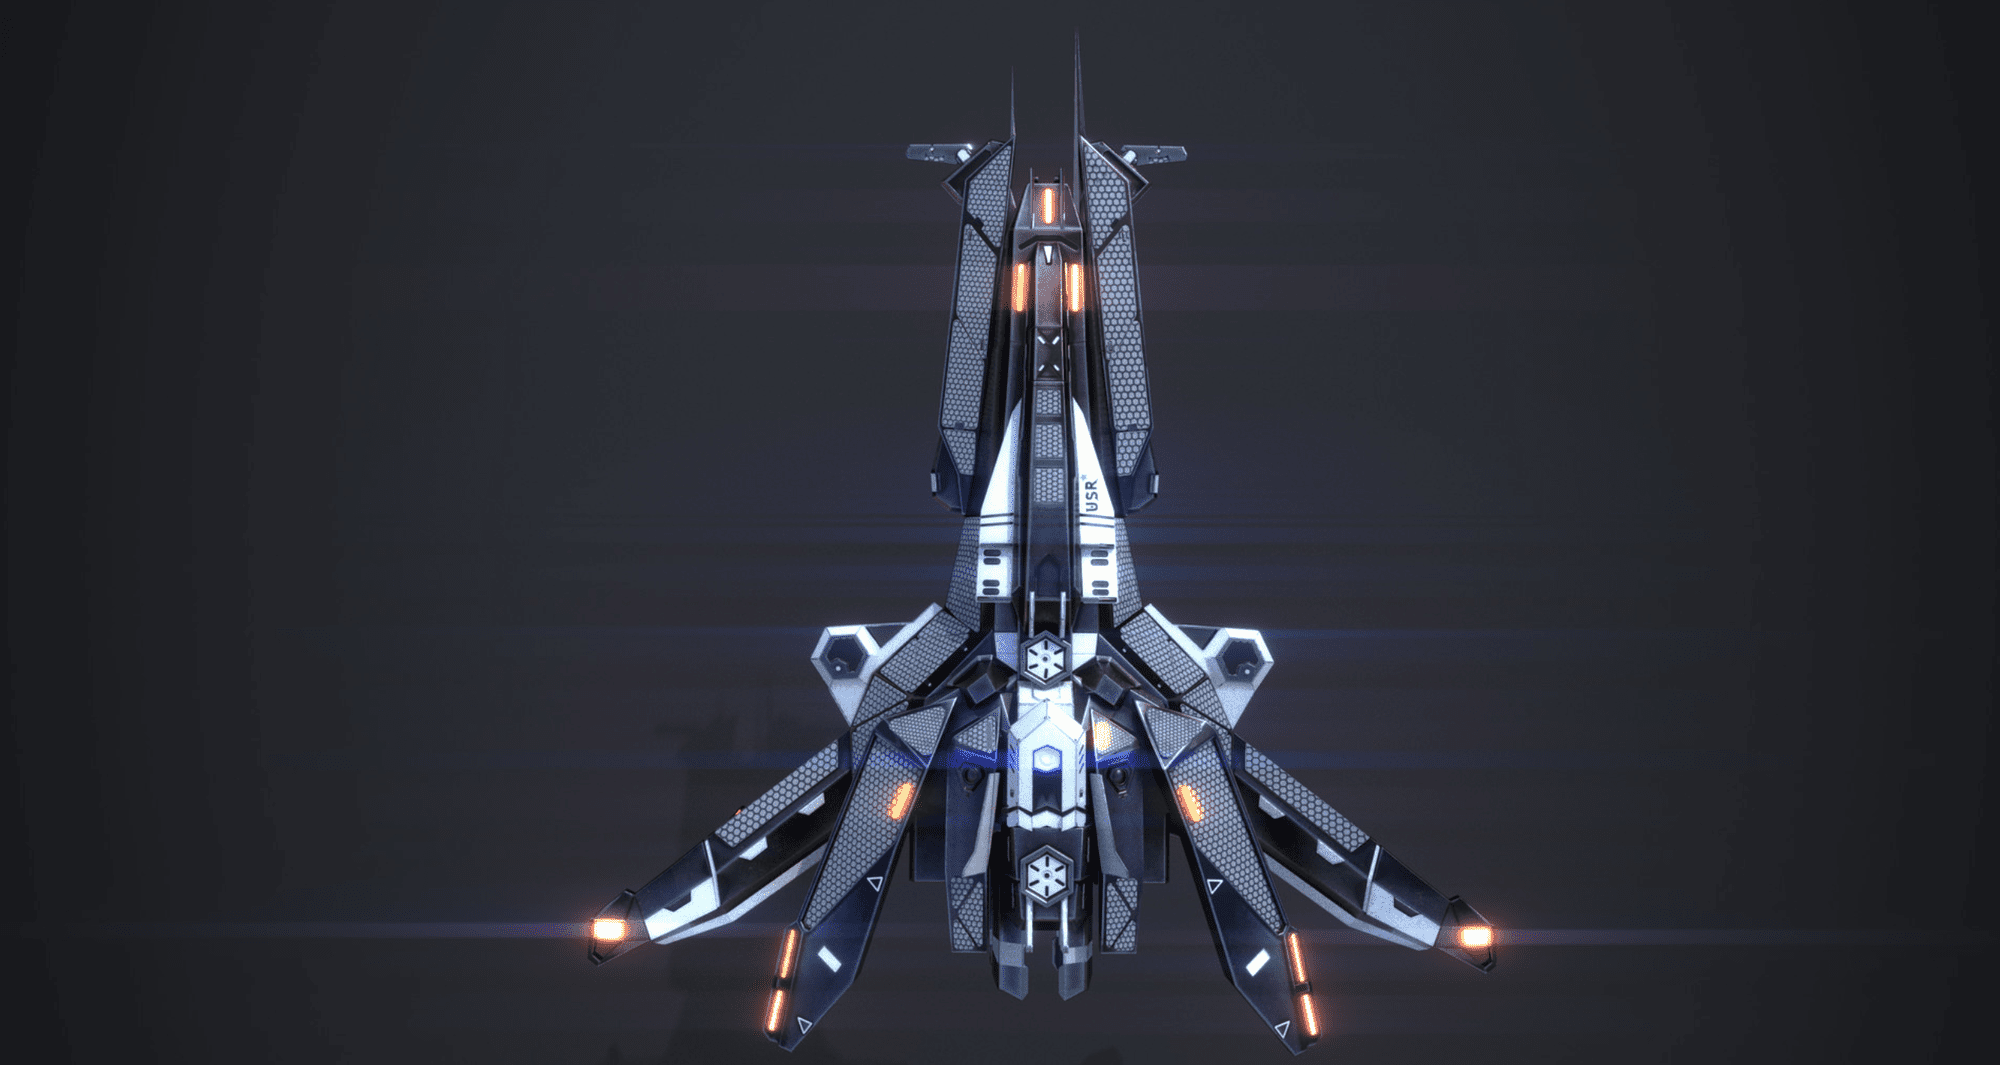
Rendering
I used Iray render for this models because it’s very easy to use. It’s a building in render in the Substance Painter. The render do not have a lot of options to adjust but for the quality is great and satisfied.
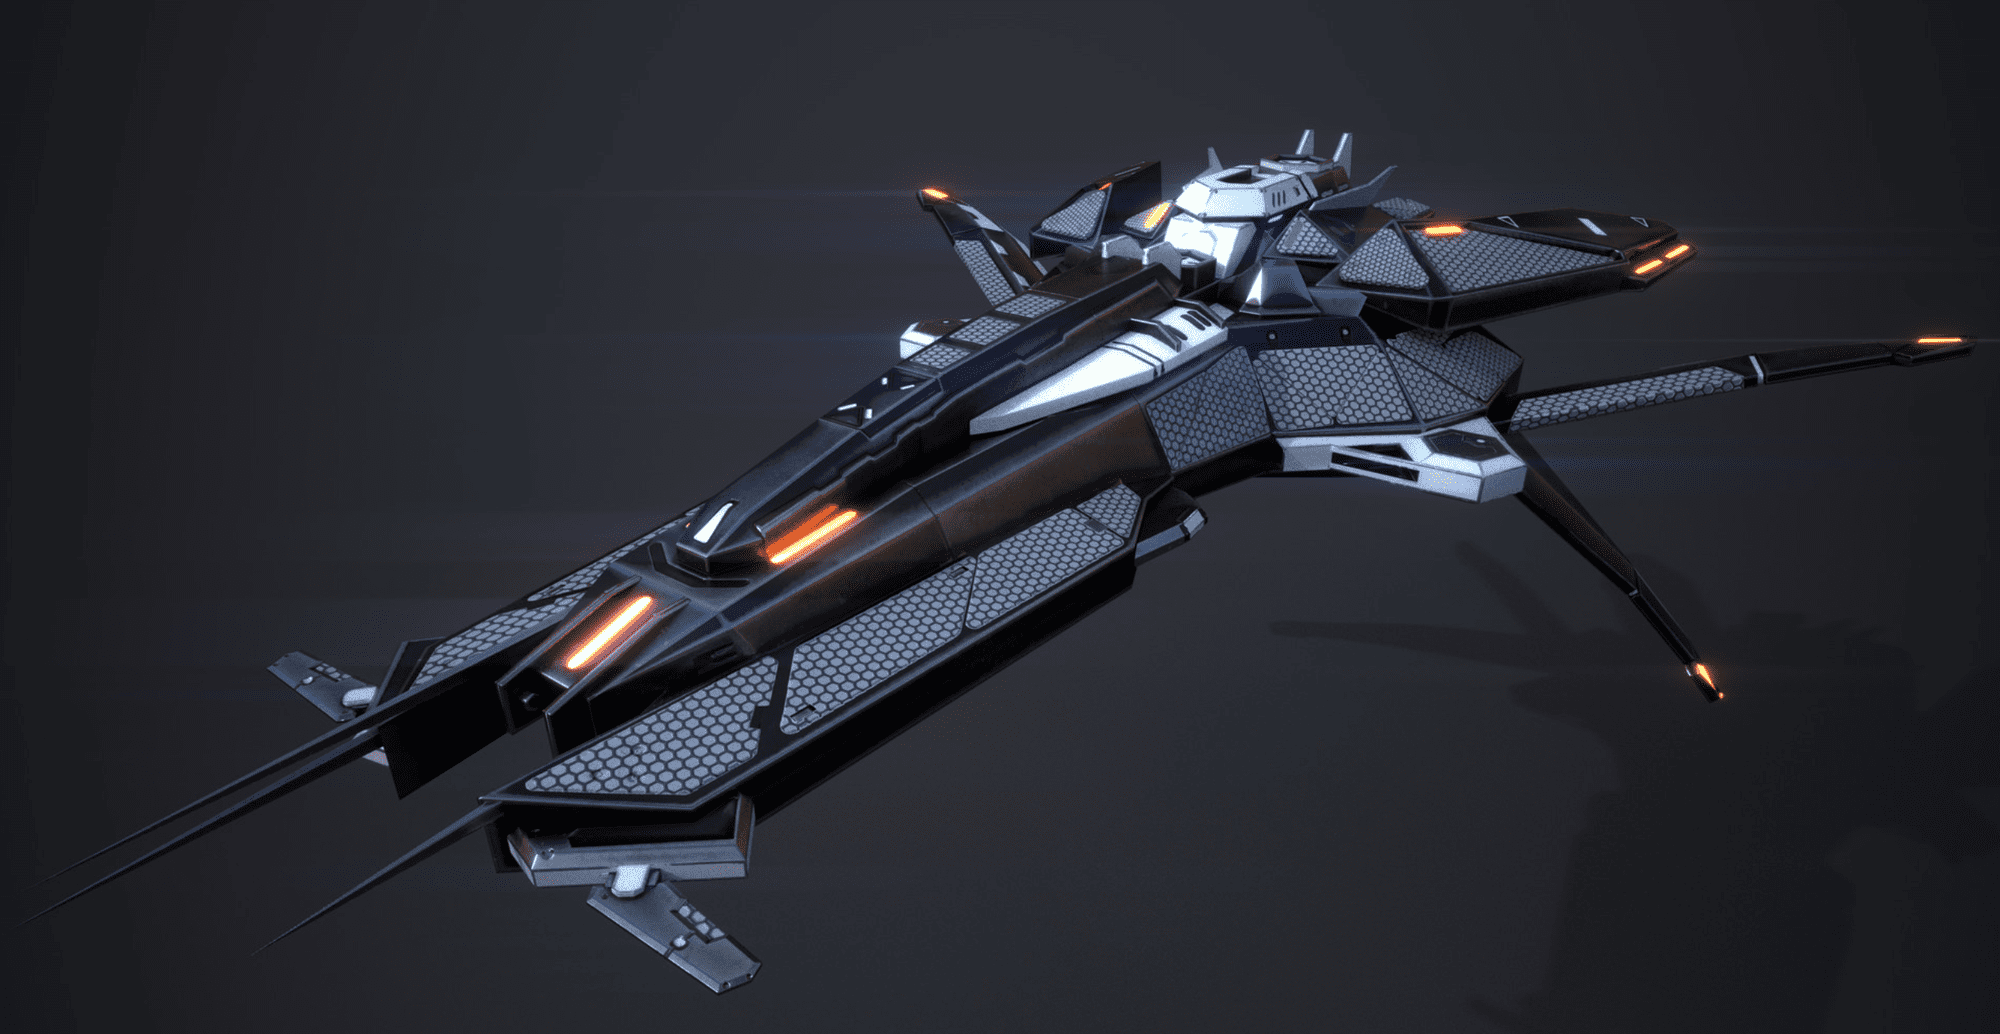
A perfect lighting can not leave a great post-processing settings. In my final rendering images, I used “DaVinci Resolve 14” to create a great color-grading Lut, which can rapidly help me to take the quality of the color and lighting up to next level.
In the end, I would like to thank The Rookies for this great interview to present my artworks and all of the readers. I hope this article can help you and your projects.