

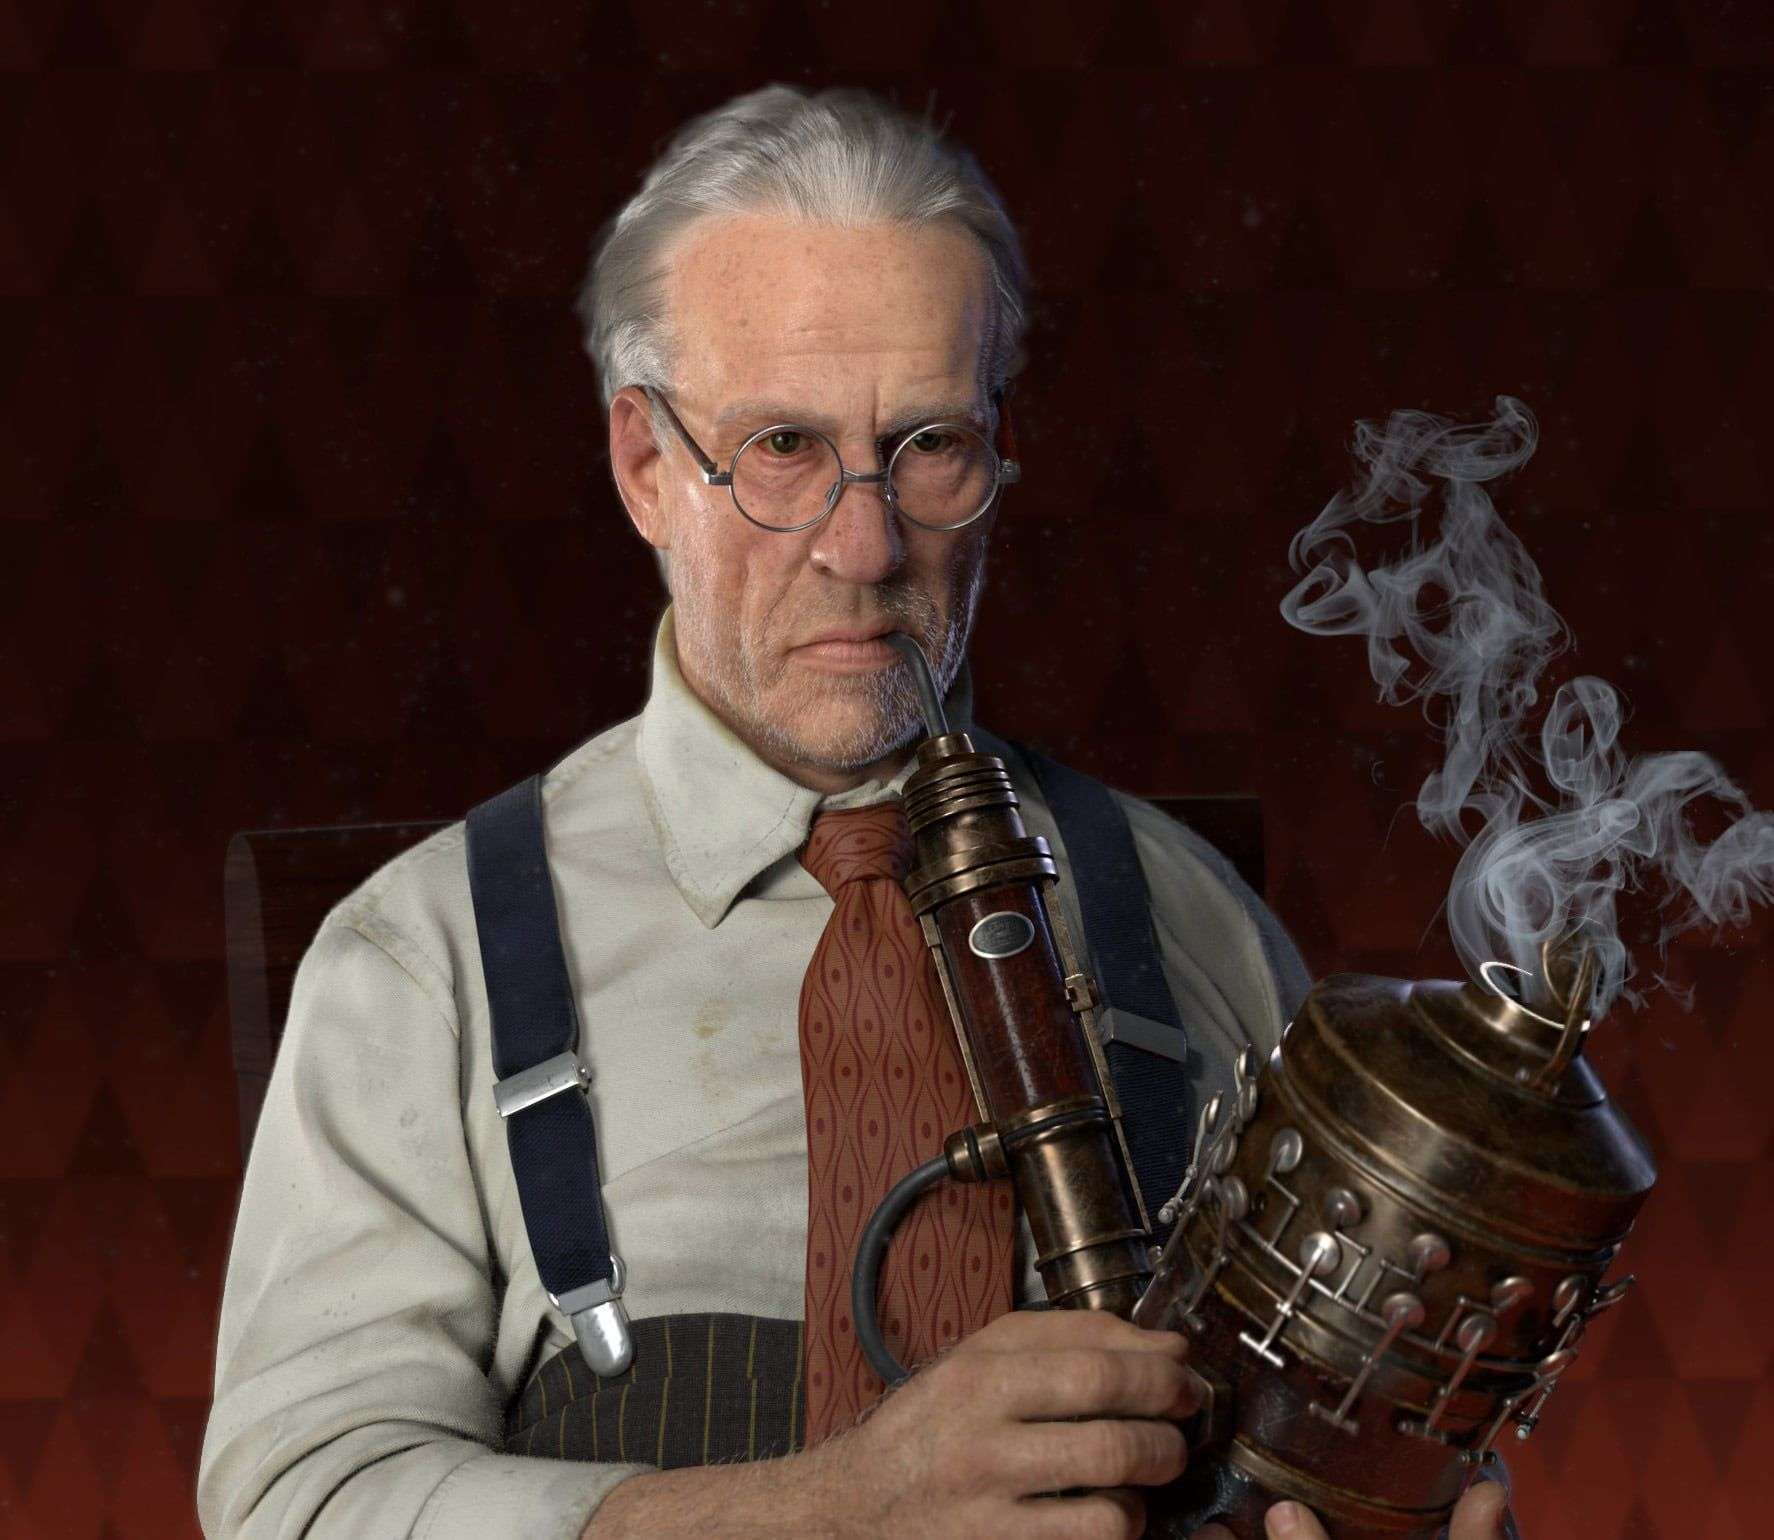
Creating a realistic high-resolution digital character can be quite challenging. Woong Bae Byun is here to show us his process for creating his latest work based on concept from a very talented artist named Cedric Peyravernay who worked on Dishonored franchise.
Concept Art Reference
I think most students who pursuing a dream as 3d character artist including myself might have some struggles to find a good concept. I think I spent about two weeks to find a concept art but I failed because I didn’t have a clear guideline that I want to do.
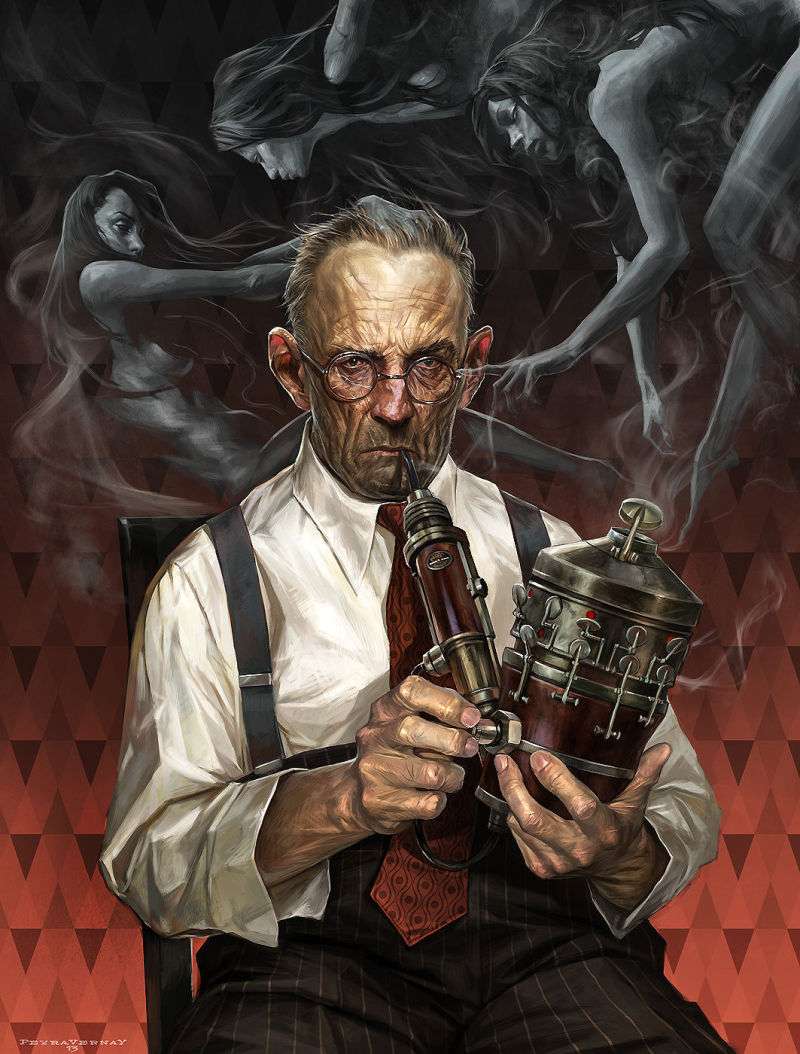
One day, while I was browsing intensely in Artstation, I found this beautiful artwork done by Cedric Peyravernay. What caught my attention was his distinctive art style. So I started to look into his Artstation gallery and right after I saw “E-pipe” from his Artstation gallery, I decide to make it realistic version of it.
It was good balance concept art, I could show my modeling, texturing and shading skills. Grooming and lighting were difficult areas for me but I managed to pull it off.
Finding reference
Since it is based on 2d concept, I had find to relevant references to match the concept art. I decided to make realistic version of Cedric’s concept, I tried to search similar facial references around late 40’s and early 50’s. I am a guy who likes to spend his money to buy good reference pictures and high quality texturing maps.
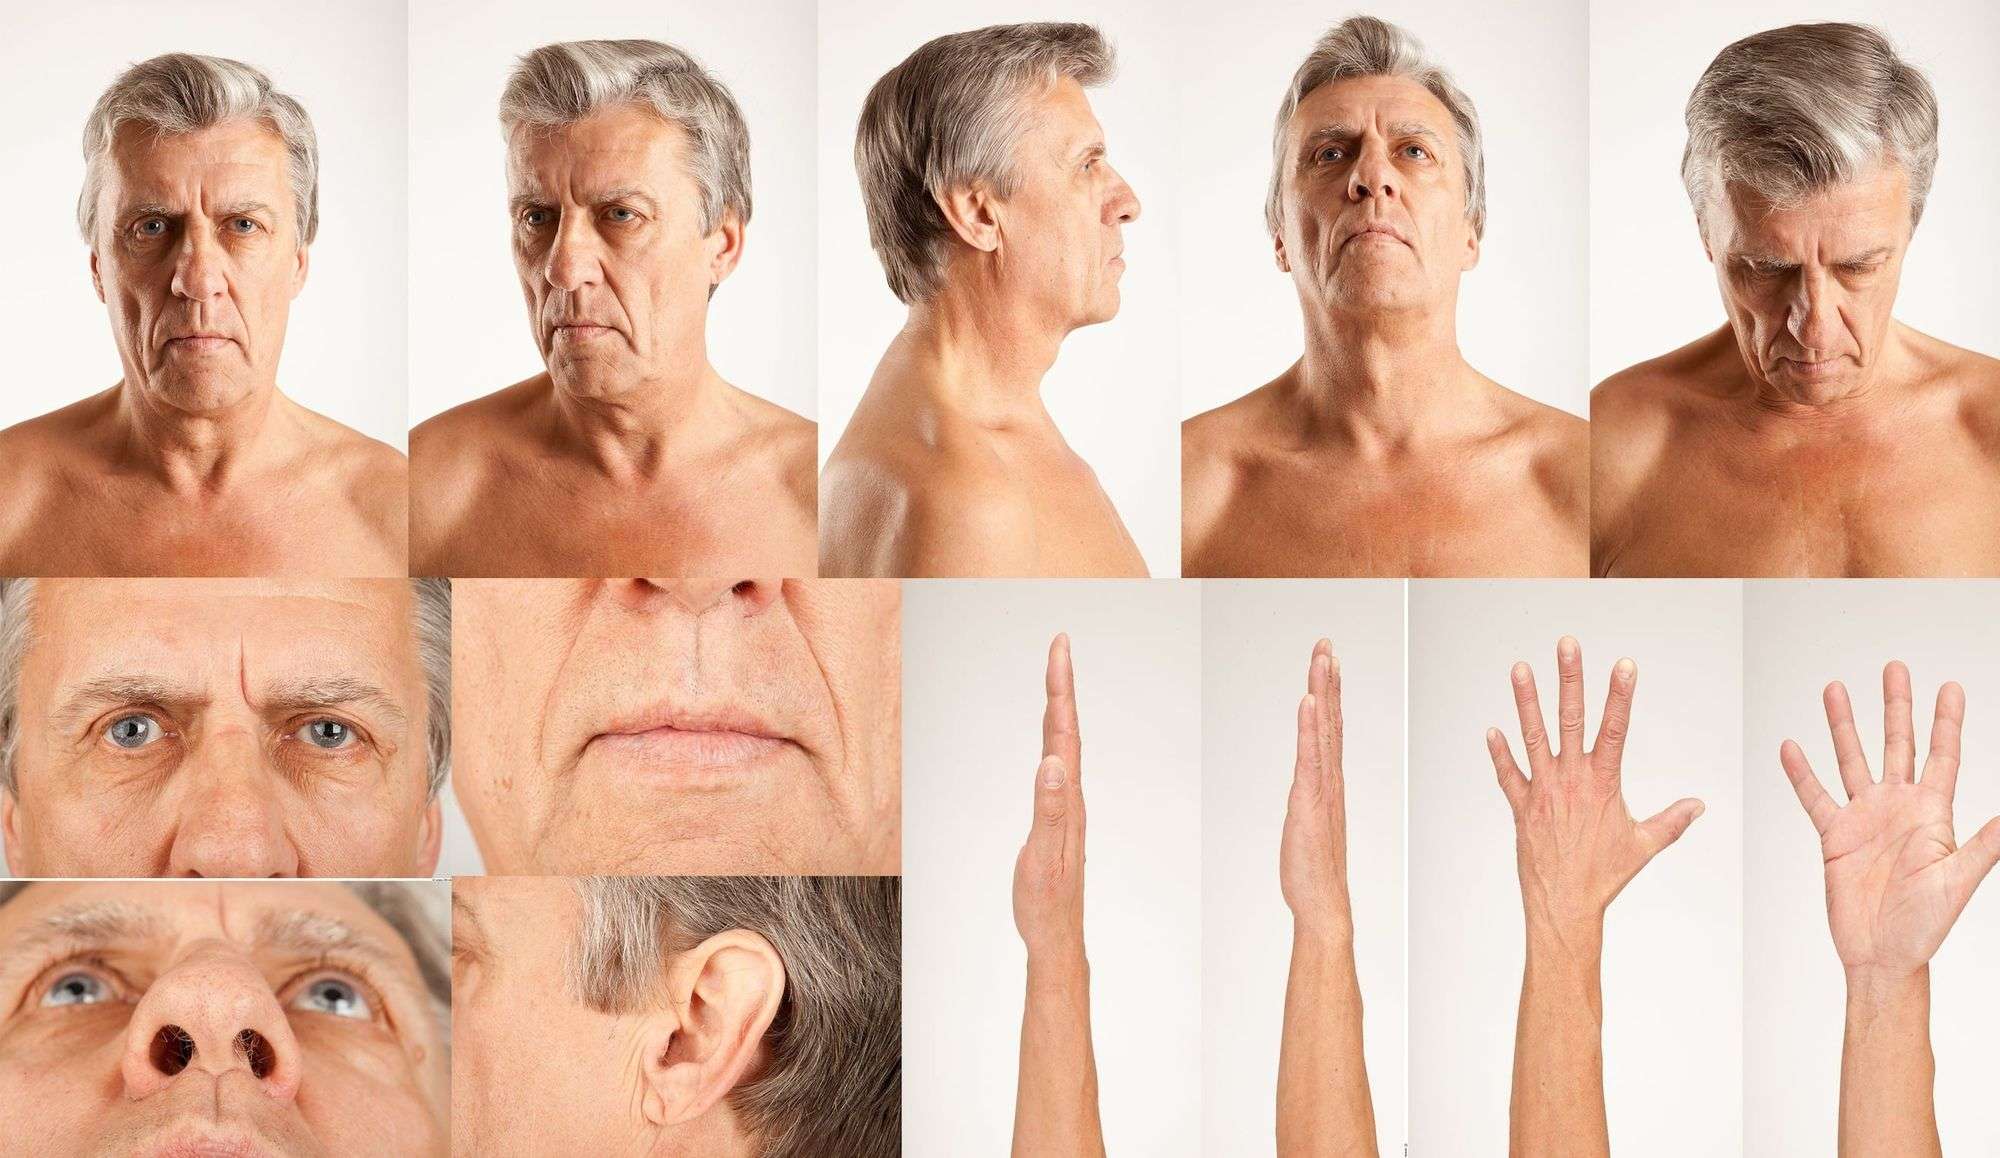
So I started to look facial reference in 3d.sk website and found an old man that almost matched the general feeling of 2d concept. Good thing about 3d.sk is that it gives you various angles of face and whole body that makes very helpful while you sculpting. Also, those reference pictures are very high resolution that can see every pores wrinkles and skin tones which helped a lot while I was texturing the face and arms.
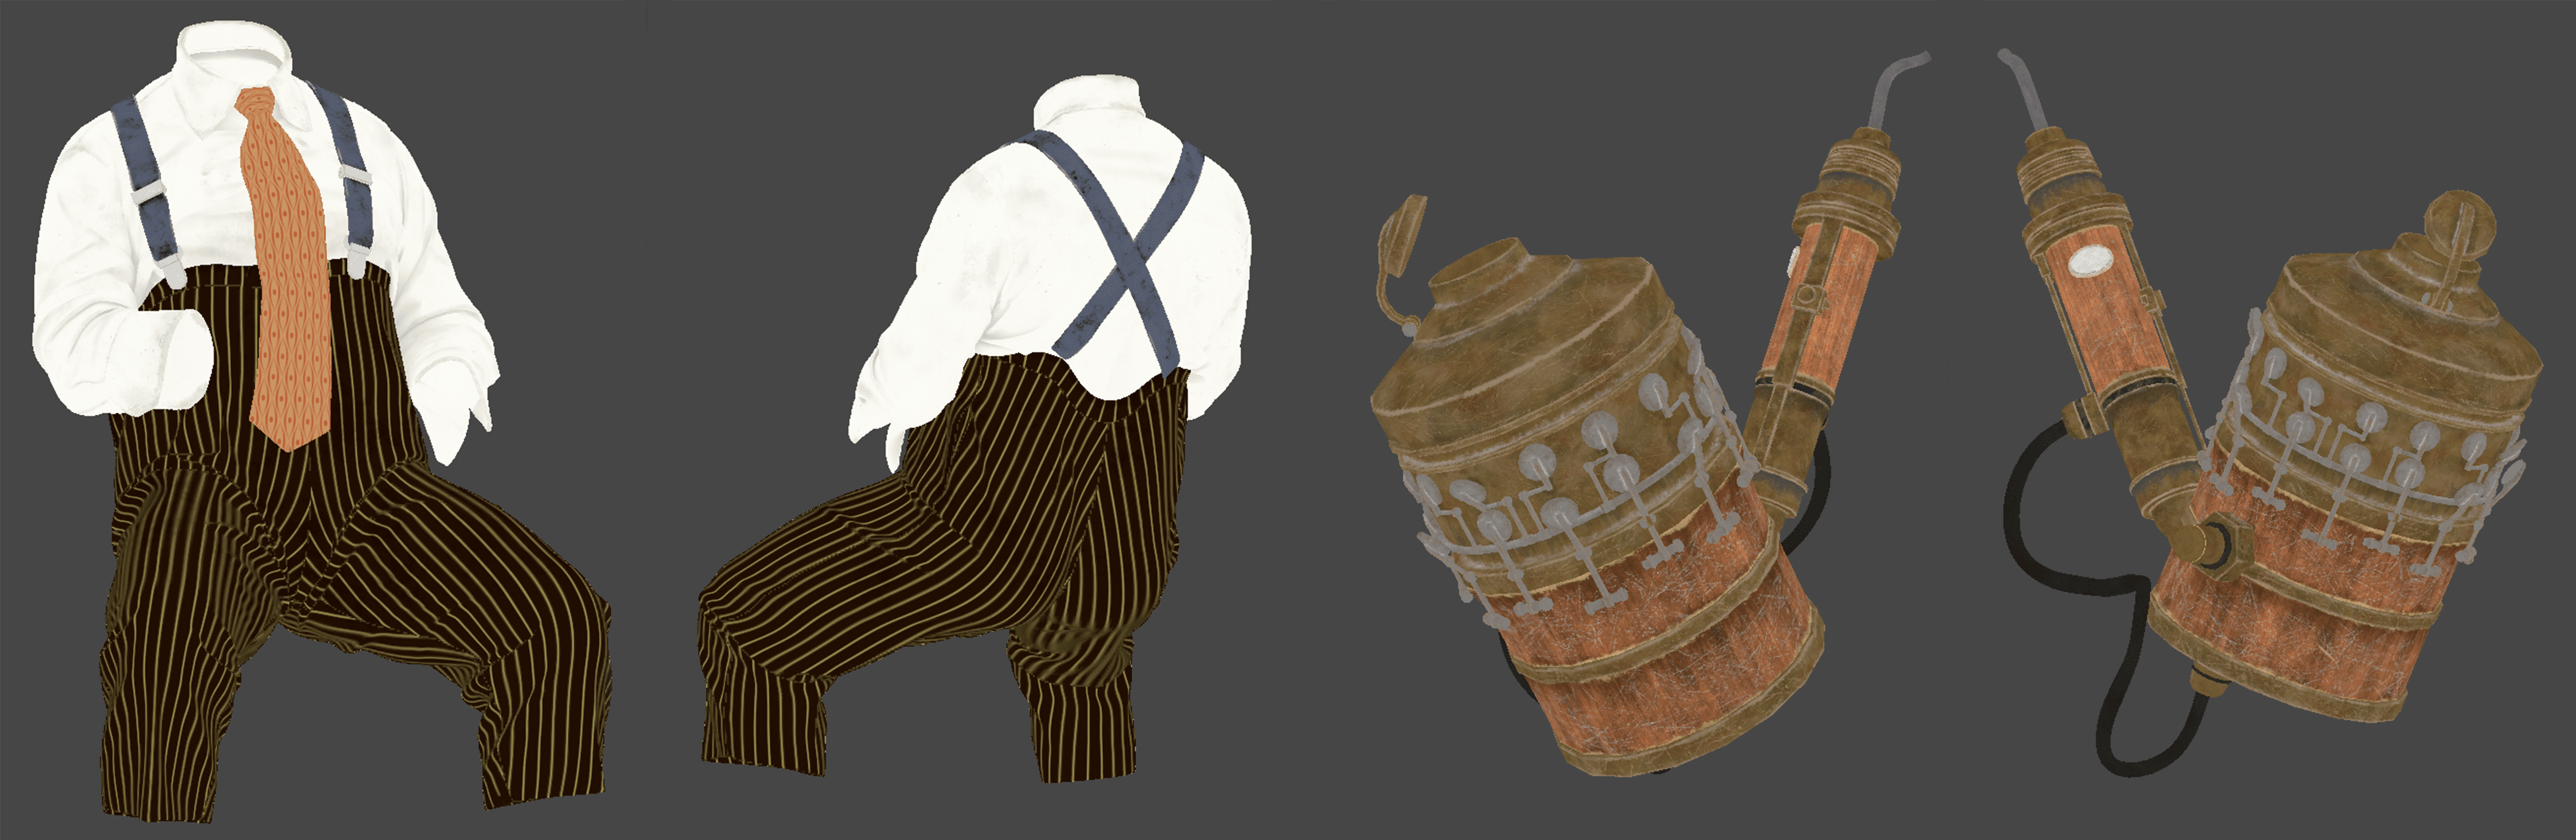
For clothing references, I found most of them through internet. Shirts and pants were easy to find good quality references but the pipe was the problem. Pipe was created from Cedric’s imagination so I had to wing it.
Modeling & Sculpting
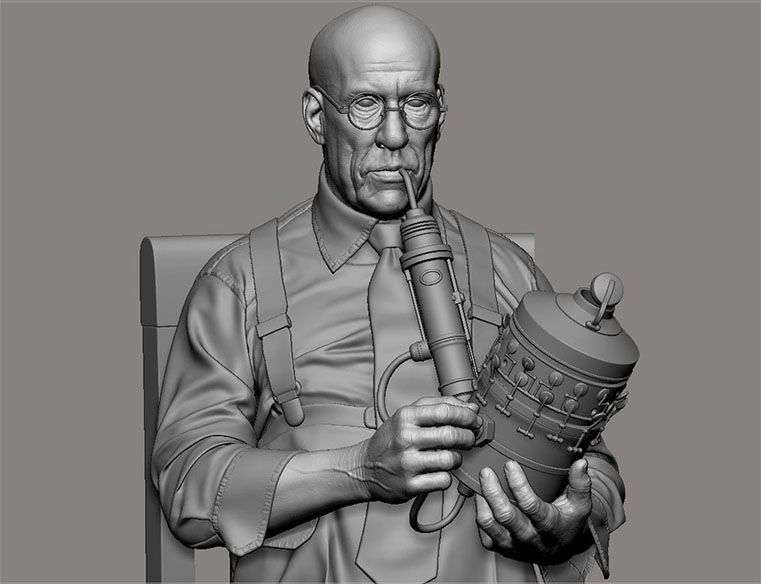
I built base-meshes in Maya which including whole body, glasses, chair and pipe. For clothing, I used Marvelous Designer to make shirts, pants and suspenders.
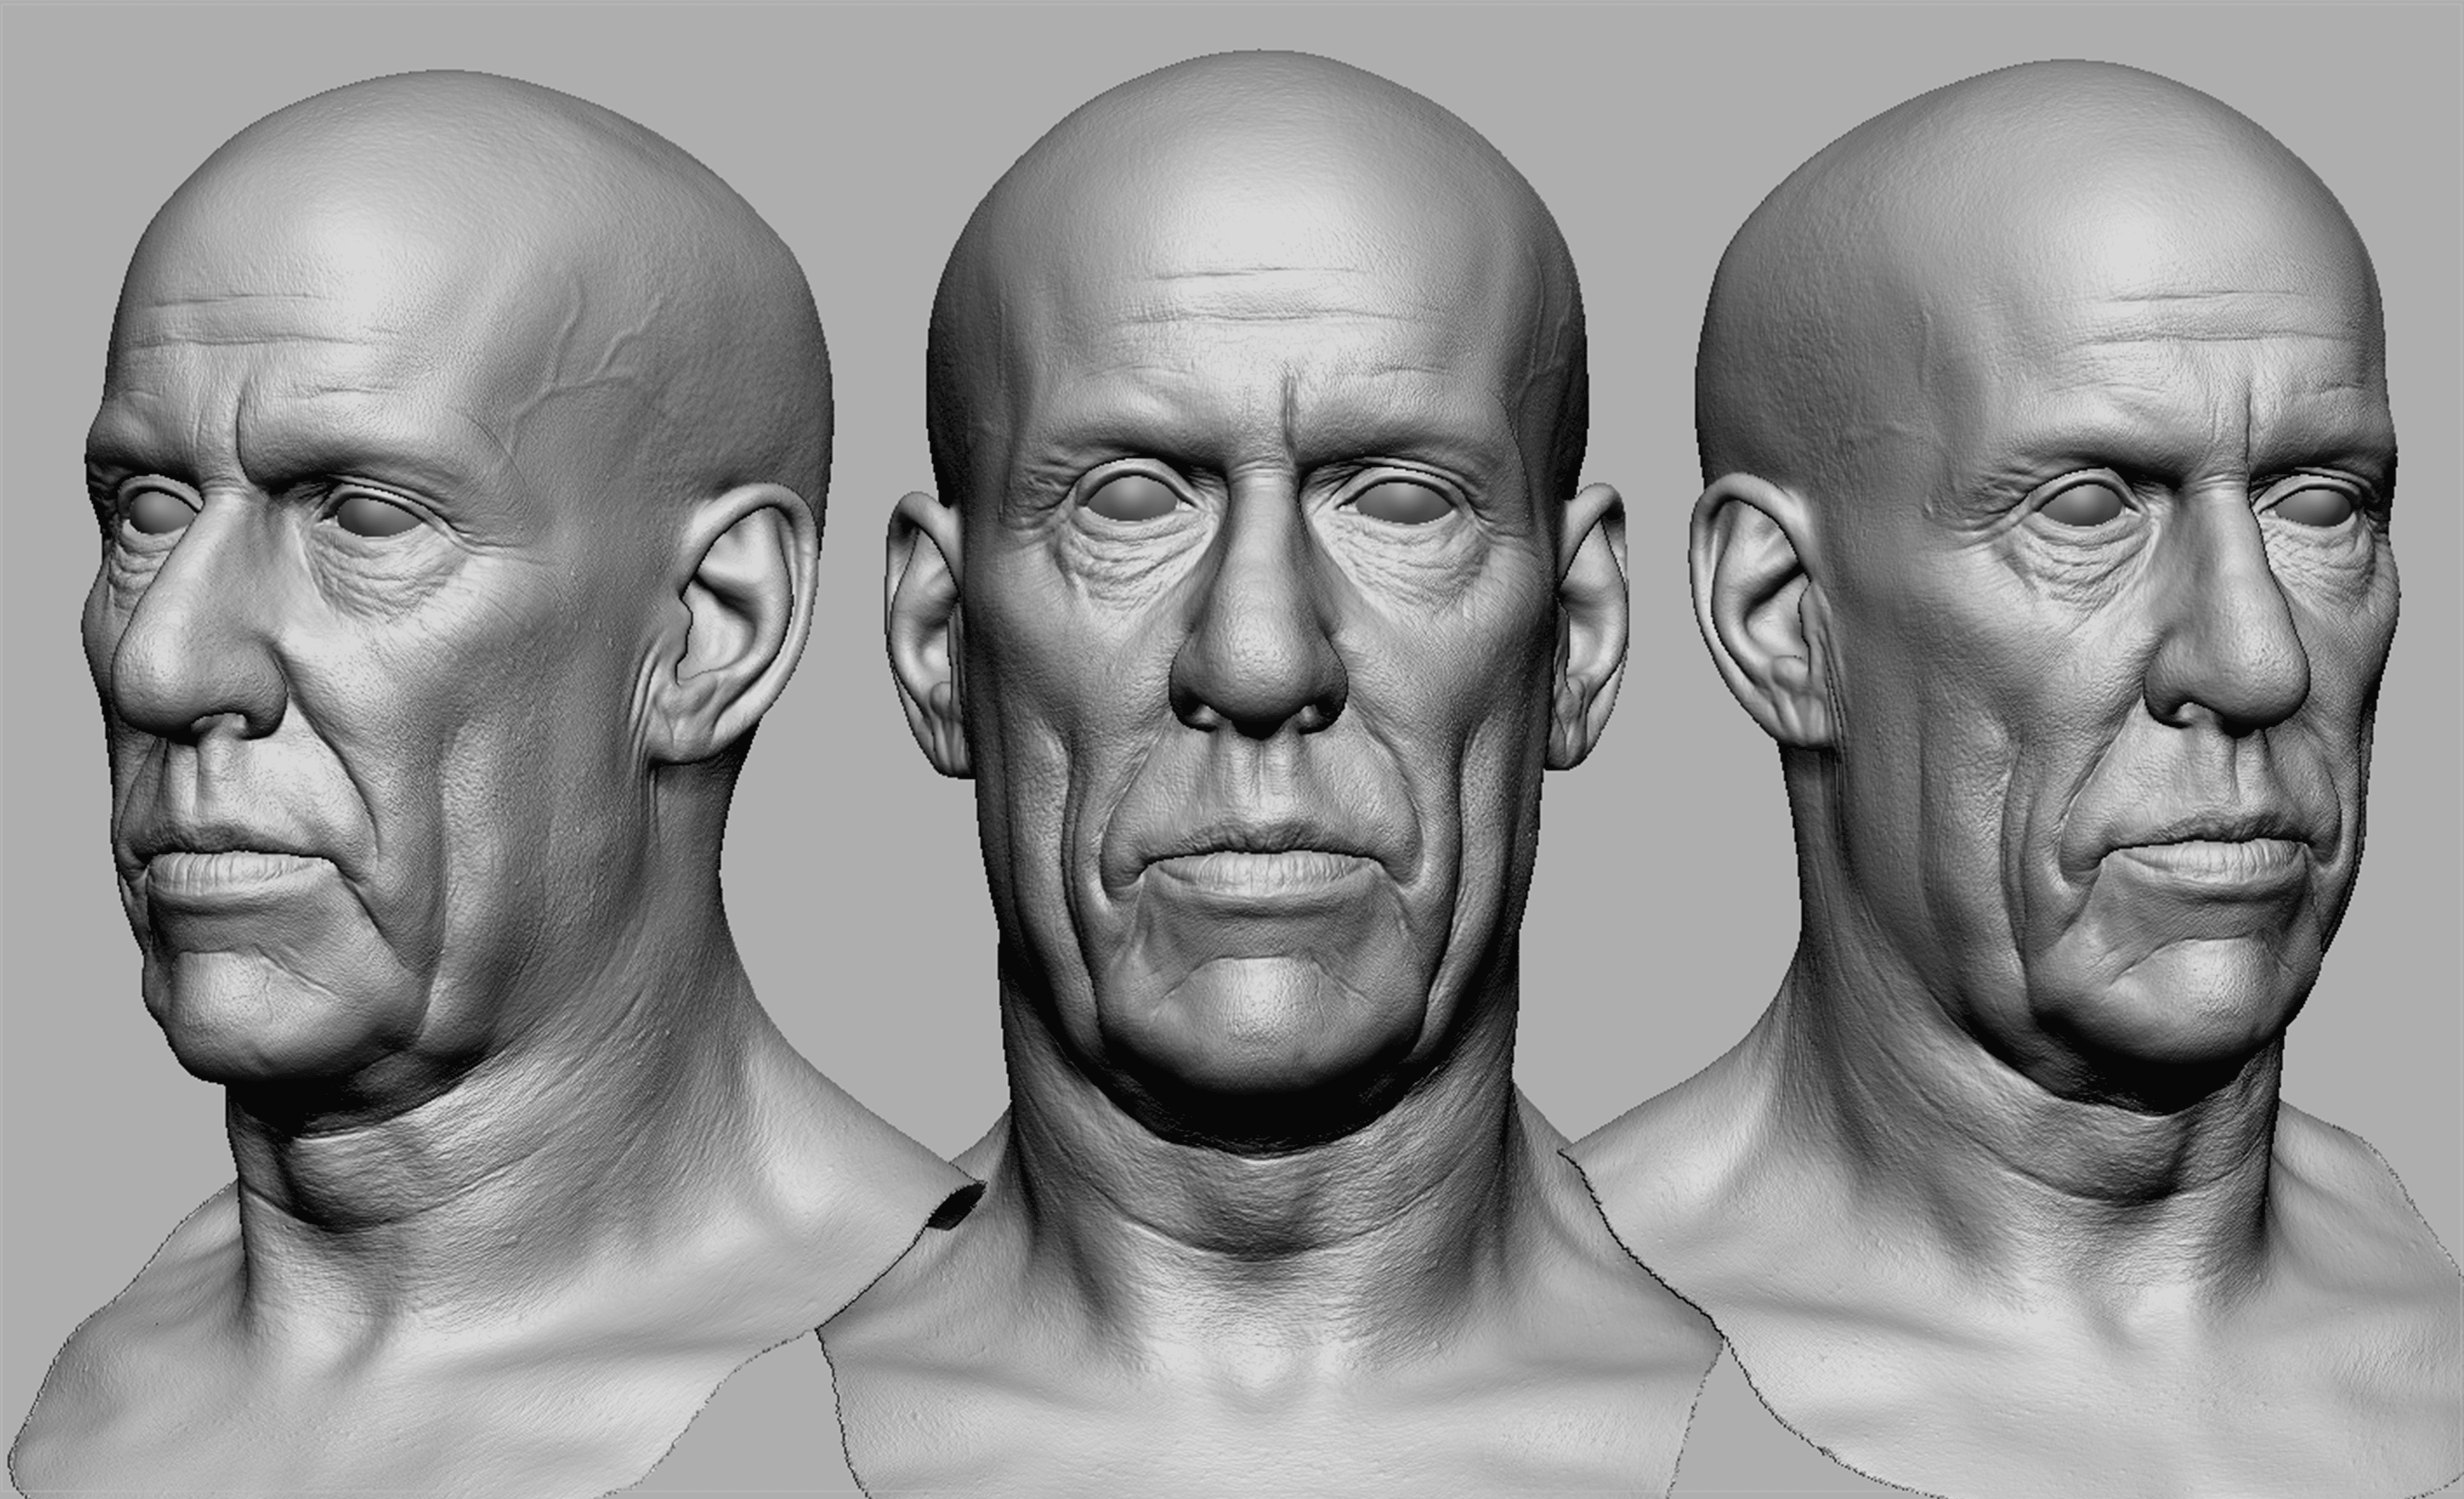
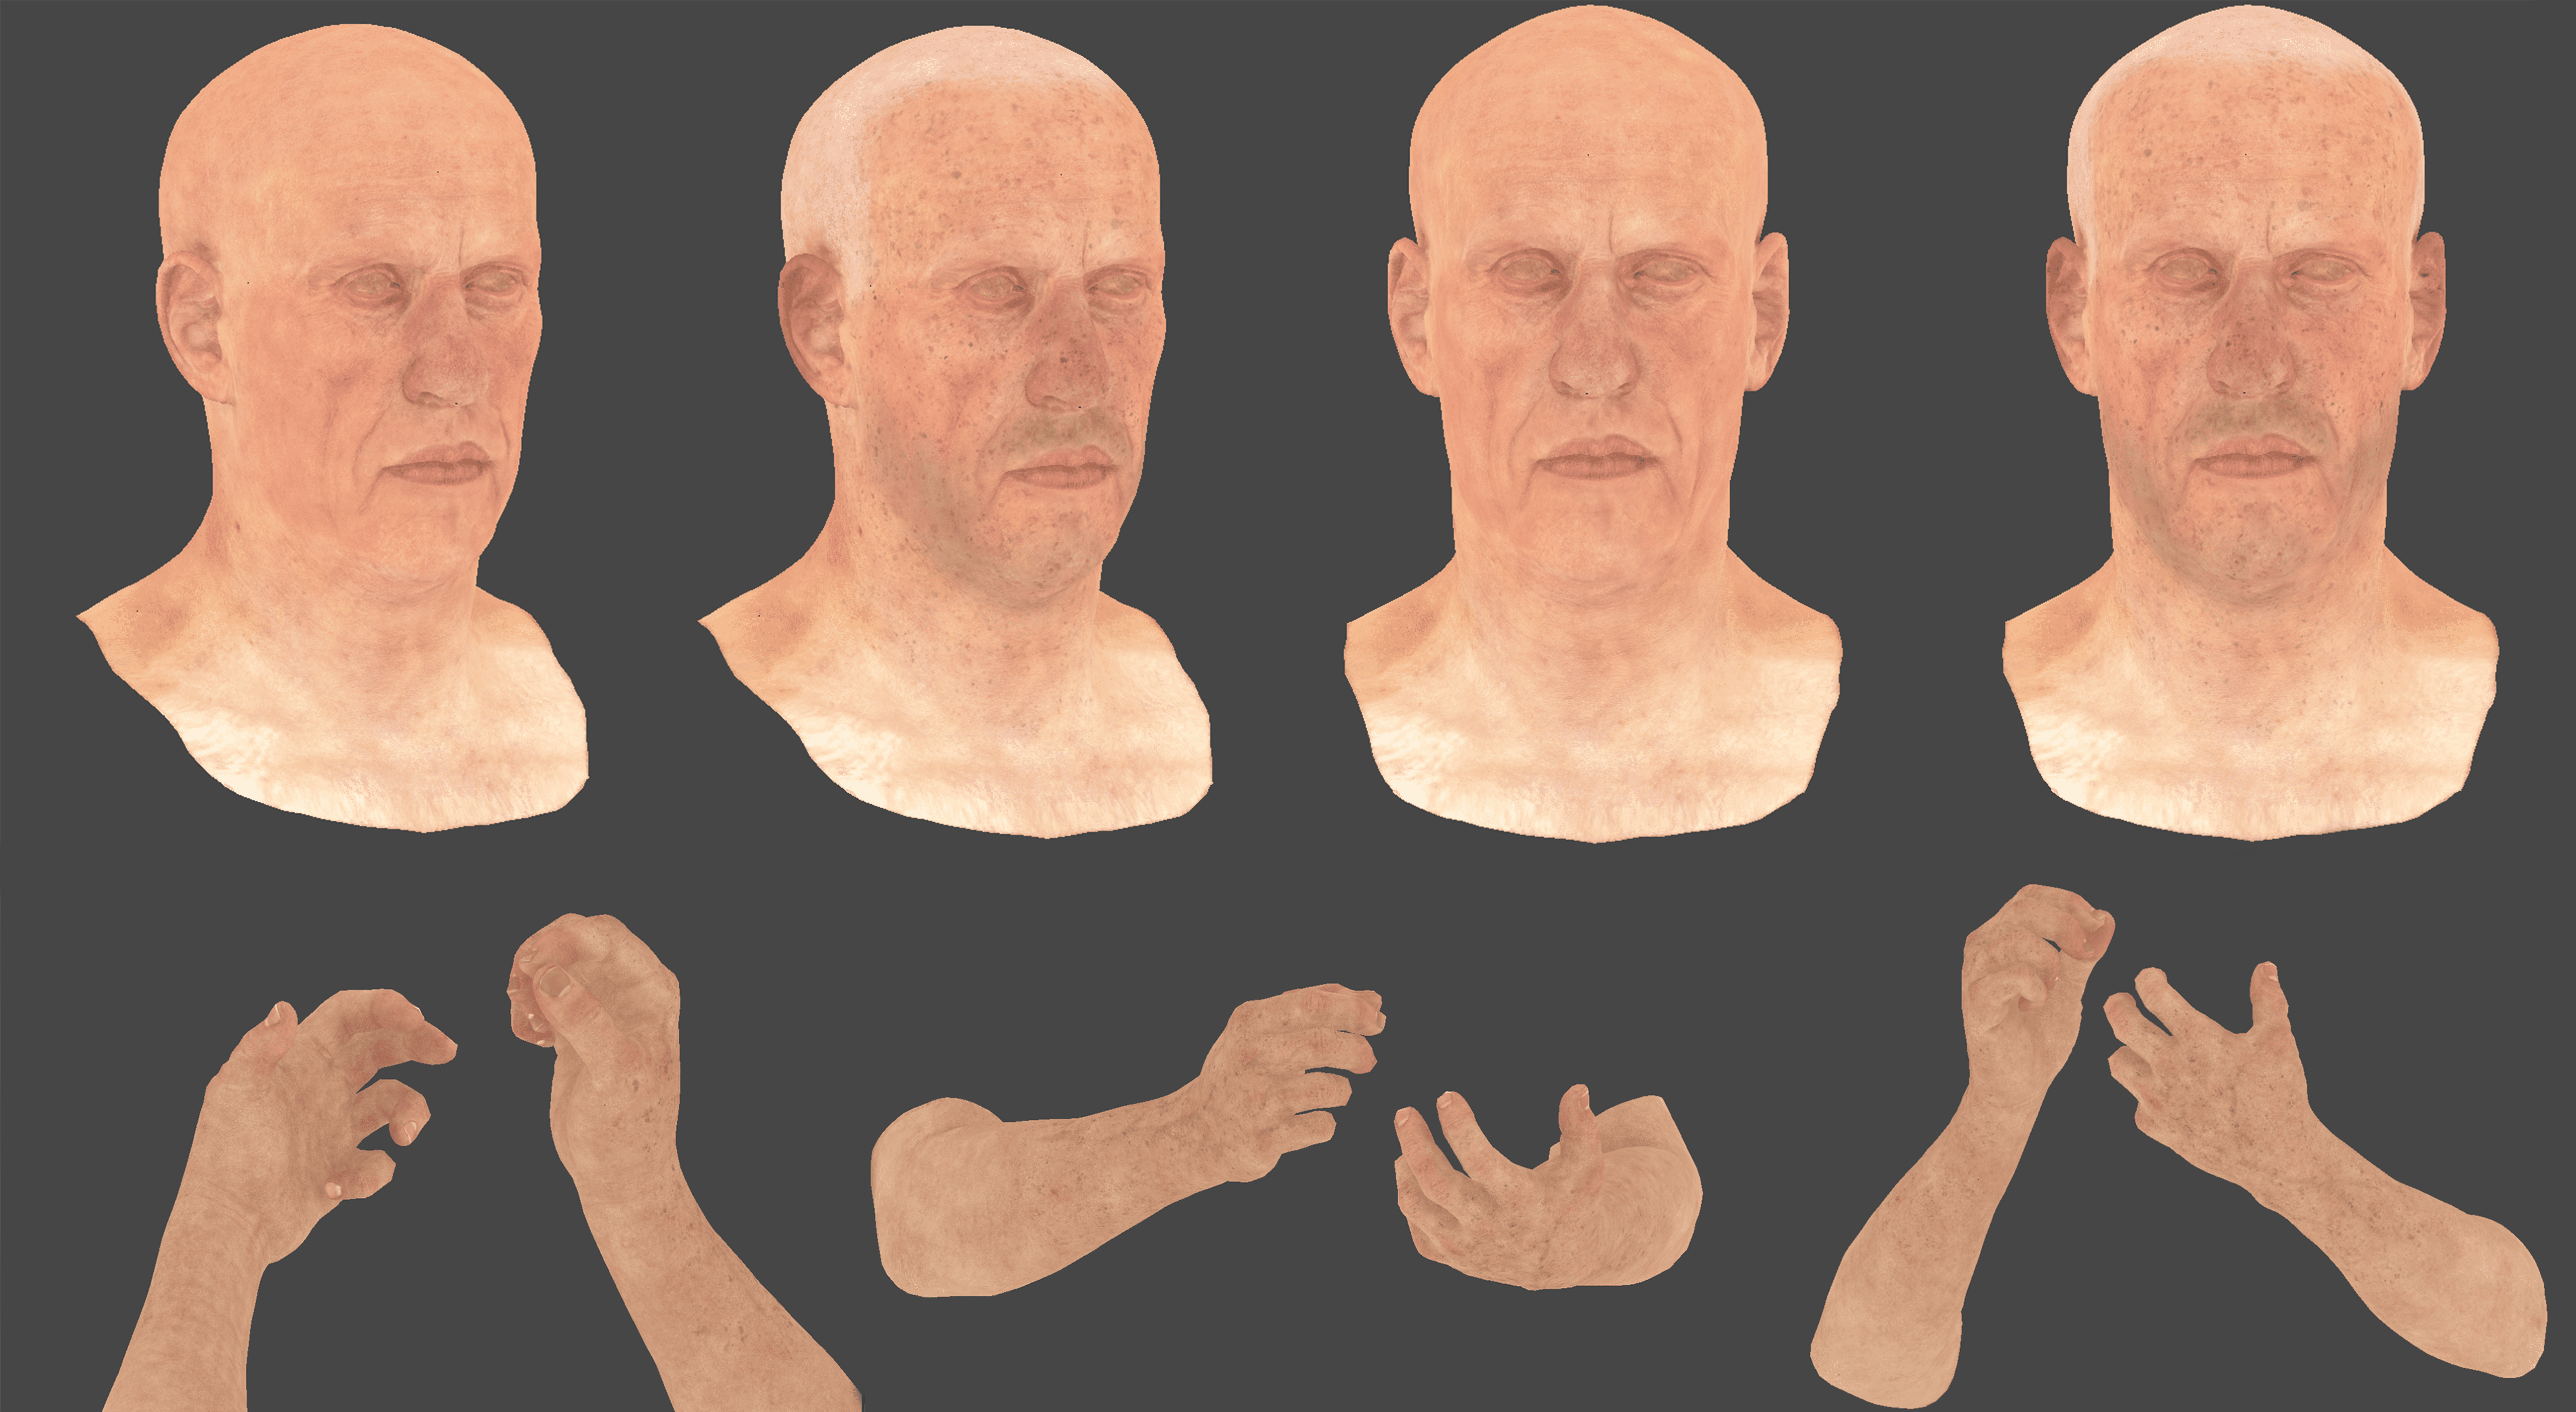
First, I have to match proportion for face, hands and general upper body shape. After proportion matches the concept, I bring it into Zbrush and start to sculpt. When I sculpt, I use brushes like Standard, Clay, Move, Pinch, Inflate and Dan-Standard.
When I am done with primary and secondary shape of head, I break symmetry and start to sculpt each side to give more human feeling into it. After that, I use Mari to project displacement map to head. Then, I bring it Zbrush again and start to sculpt fine additional details.

Hands sculpting applies same method as I did to head but the difference is they took more time than sculpting a head because I had to sculpt individual at the end. After I am all finished with sculpting, I pose the character just like the concept art by using T-pose master in Zbrush.
After that, I bring that posed model into Marvelous Designer and started to make shirts and pants by using real pattern that tailors use.
Texturing & Shading
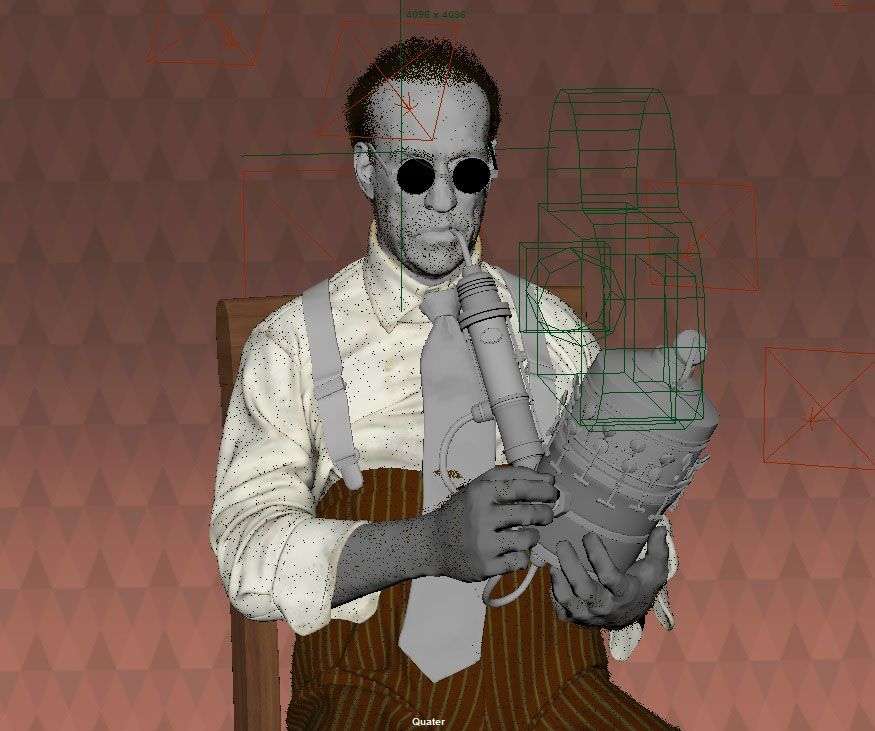
After I have finished with all the models, I take them to Maya and unwrap the UVs. Every textures were painted in MARI. I personally think that Mari is the best software for realistic texturing. Generally, I separated texture channels into four categories; diffuse, glossiness, specular and bump.
Usually, I start with diffuse color first because it is the base for rest of texture maps. I painted the base texture first to make it look brand new. After that, I applied details like dirt, scratches and smudges on top of base texture to make it more interesting and unique.
After I finished with diffuse map, I generate specular, glossiness and bump maps based on diffuse color. When I am done with all four maps, I exported into Maya for shading.
I used V-ray materials that I have used previously like metal and wood. I also used Alshader for the skin.
Epilogue
It was a difficult and challenging project for me because I had try new things that I haven’t done it before. However, it turned out really great and I felt it was really worth trying. Learning tools and techniques are difficult and intimidating first. However, if you just kept trying to learn, It will eventually become one of your pipeline tools that will benefit you.
I think there are numerous students who is graduating soon like myself. Personally, I am pretty horrified and stressed out for getting into visual effects industry because there aren’t many spaces for entry-level or junior artist to step in. However, I believe that if you just keep working on your personal projects and improving the skill sets, good thing might happen to you.