
Simon Verstraete takes us through the process of creating tools to speed up the process of building levels in a game engine. You will learn how to do less repetitive tasks and become more flexible and competant while working with Unreal Engine 4 and Houdini.
In the second year of my studies we had a course (Level Editing) were we are building a full 1v1 size map with modular models. Placing everything by hand takes a lot of time. With that in mind I start to think about how a tool can take away repetitive tasks. The project contains multiple tools, from a level builder tool to a ivy generator.
A big inspiration was the videos of Houdini at GDC were they procedural generate levels. I can recommend to take a look at the Houdini Vimeo channel if you want to start with Houdini. The channel is called "Go Procedural".
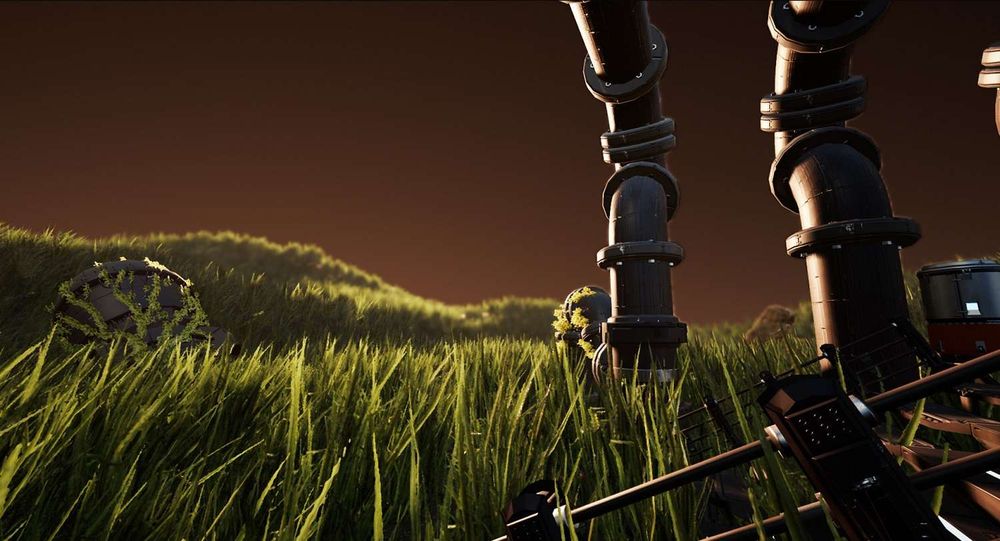
“Photo of one of the level I build. This was build within an 1 hour using the tools I have made. The process of making this is drawing lines and models will be automatically placed on it.”
How I found Houdini
In the last year of my studies there is a Graduation work where we have to research a topic in 6 weeks. The topics of graduation work can be chosen from a list. On that list there was Houdini with Unreal Engine 4. This topic alone gives me a lot of possibility of what to do. First I did research about Houdini and looking at what is possible. A big motivation and inspiration for the project was this video. I really like the idea of making a tool that helps you build levels (Level build tool in the video starts at 10:56). This set the focus for me on tools that helps with level building.
Level builder tool
After a few days of trying and learning with Houdini, I decided to start with the level builder tool. I started with the level builder because this would take the longest time to make. The tool itself builds a base of a level for you, based on a line that is controlled in the game engine. The tool has a couple of parameters, so it is easy to make changes and get variations.
The base idea here is that by drawing a line, models will be placed automatically. In Houdini I calculate/decide were models should be placed.
The tool starts with a curve node in Houdini and this is where the level should be. Enable snapping to grid to draw a nice aligned line. Then using the resample node to create more points on the line. The new added points are used to copy a box shape on it with the copy to points node. The shape that is now created is the base for the level but one problem is that the boxes are still individual. By using a VDB (Volume Denting Boolean) node the boxes will be converted in one big shape that is more usable.
Another advantage of using the VDB is that when the base line is intersecting with itself a crossing is then created. After that snapping the points to grid positions so the shape is aligned to the grid and it will be more reliable and controlled. The points of the shape are used to copy our final models on. With group nodes I made different point selections for each modular model.
For Example: the floor is a group node that looks at the points with normal looking down. By using copy to points I copy the floor tiles on the floor group.
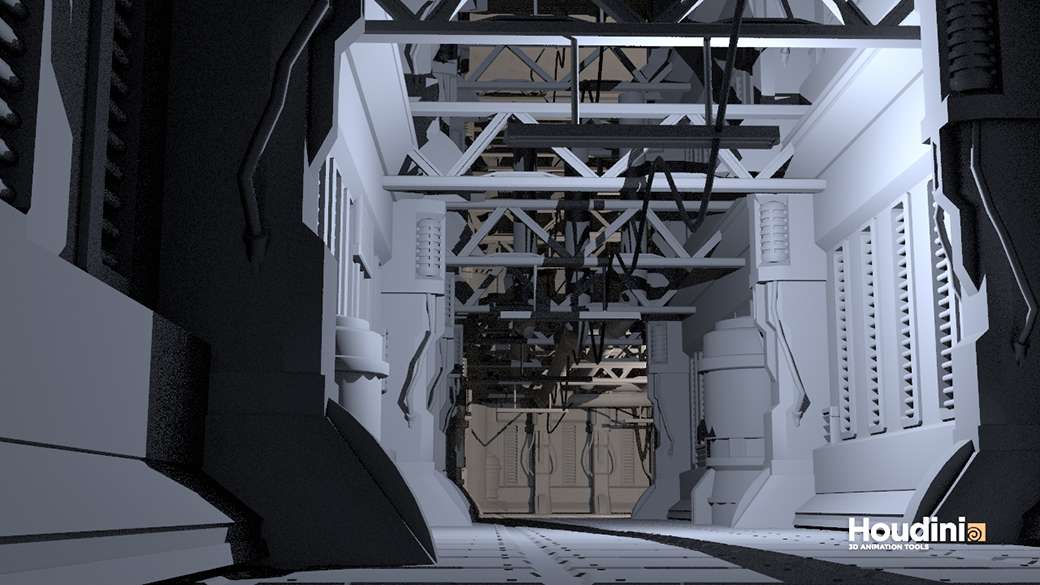
"Photo of the first version in Houdini"
An important feature that I can’t forget is adding instancing. The first time I opened my tool in Unreal Engine 4 there was no instancing and the performance was terrible. My computer got 15FPS and changing values of the tool took more than 2 minutes to updates in Unreal Engine 4. I started looking for ways to optimize the tool and by adding instancing fixed the performance issue.
In Unreal Engine 4 I got now a stable 60 FPS and changing values in the tool take now a few seconds to update real time. For doing instancing there are couple of ways to do this:
- Enable pack and instance in the Copy to points node
- Use the instance node
- Use the instance node on object level
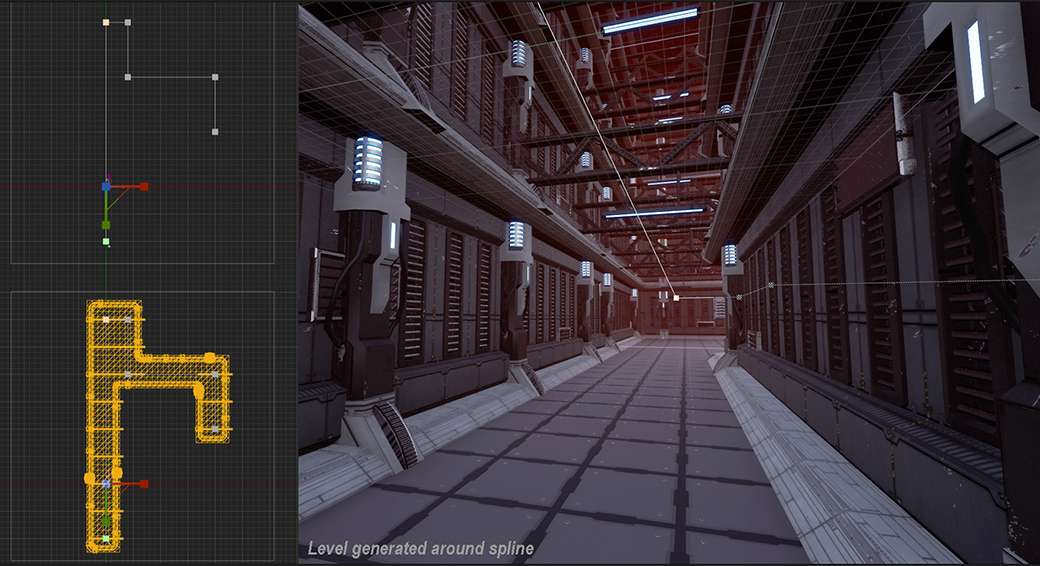
“Photo of early test of the level builder tool”
Pipe tool
The pipe allows you to create pipes around a level fast. The tool is controlled by a line. The base idea of the tool comes also from the video at the beginning. I found this tool also a good one for beginners with Houdini. I can recommend anyone to make a pipe tool, it is useful and simple to use. (Pipe tool in the video starts at 3:50)
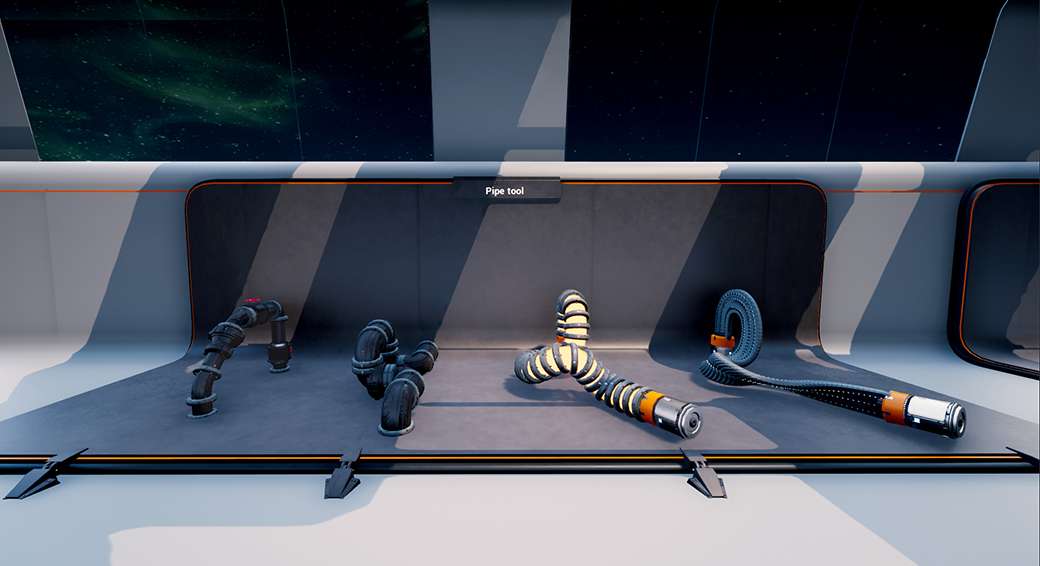
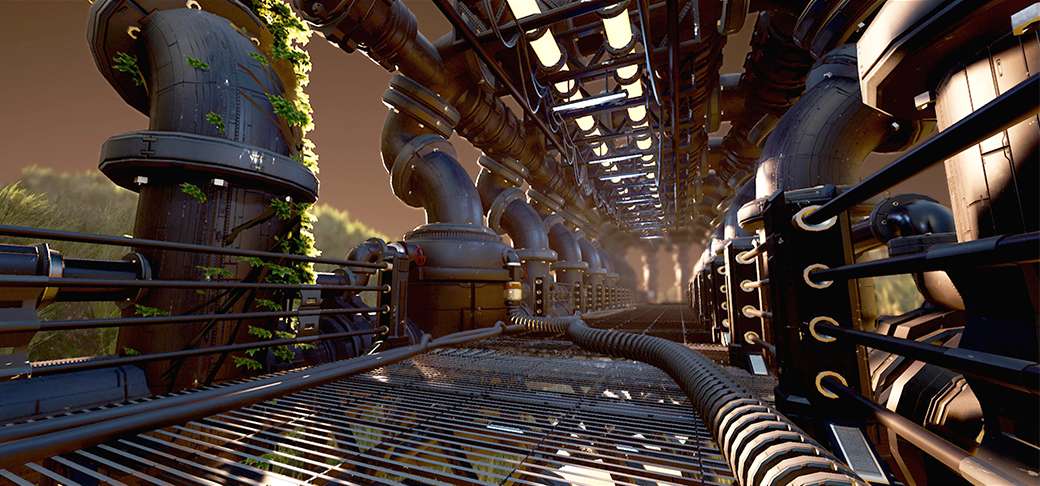
“Photo of the pipe tool and the variation you can get with one tool.”
After having the base of the pipe tool which is similar of what they show in the video. I added extra features to this tool. First I made it possible to change between styles of the pipes. This is quite easily done by adding a switch node at the end of the node network. In the picture you can see different types of pipes and it all comes from the same tool.
Another thing that I have added is instancing of models. This makes it possible to change the models on the pipe in the game engine. The tool can then be used in other projects by changing the input of the models and materials.
The last thing I have added was the automatic tilling of the UV’s. When using a materials on the pipe it while tile perfectly.
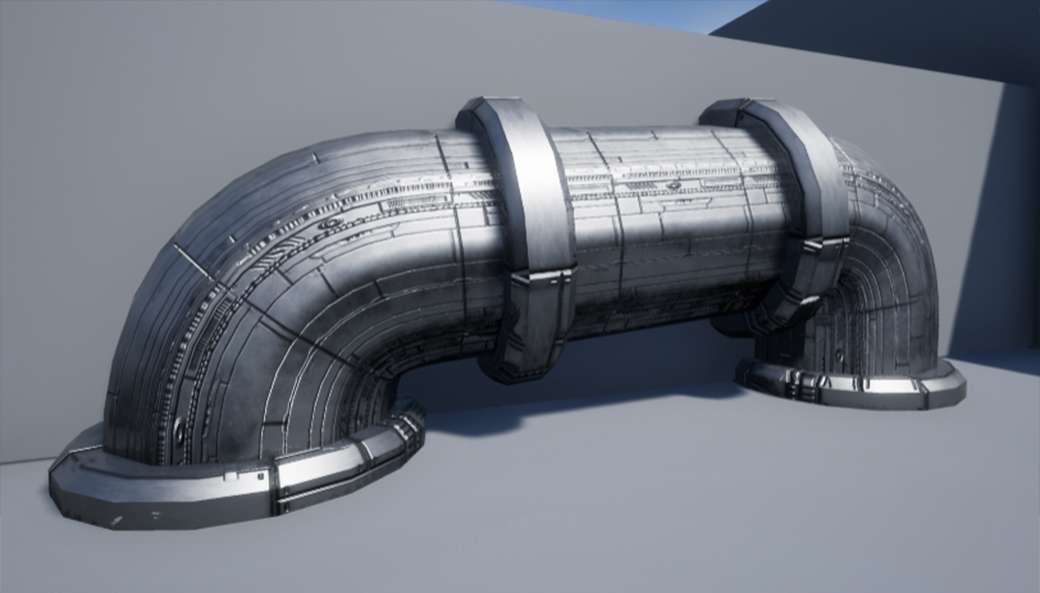
"Photo of the automatic uv's on the pipe"
Ivy generator
The ivy generator grows ivy around an object that is selected in the game engine. In Unreal Engine 4 you gave control over the growing of the ivy and the amount of the leaves on it.
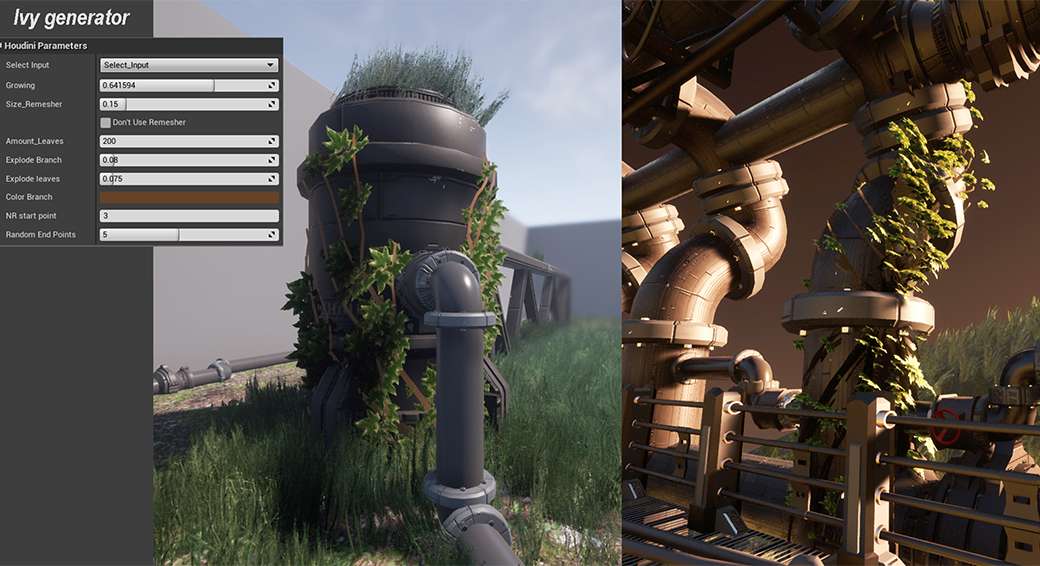
“Photo of the ivy generator in the UE4”
While doing research on how to achieve an ivy generator I was surprised how fast you can get a base. Using the find shortest path node gives you already a good result. First I remesh the input model so I get an interesting wireframe to work with. Remesh is optional if your model already has a high polycount.
Then I select a begin point for the ivy to grow and for the end points I use a group by range node to get a few points on the models. These 2 groups are used in the find shortest path node and lines will be showing up. The node creates lines between the begin and the end points that are in the groups. For controlling the growth of the ivy I used the carve node. Enable the second U and changing this value will result in how far each branch will go.
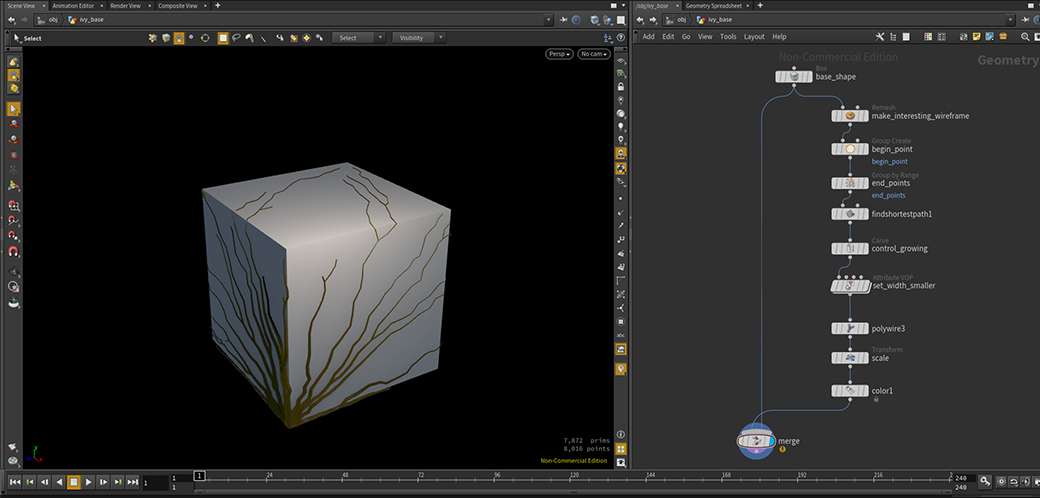
“Photo of the base of ivy generator”
Overlap of cables
For the project I made a few cable tools and implementing an overlap system was a must. The cables can overlap with each other or can overlap with object I have in the scene. Creating an overlapping effect by hand can cost time and having a tool that takes care of this is really nice to have.
The node in Houdini that makes this effect is the ray node. The ray node can be used in different ways but here I used it to create an overlapping. The tool starts with the a curve and resample it to get more points. The extra points are needed to get a better overlapping result. The input of the ray node is the curve and the second input is the object to overlap with.
In the example here it is a sphere but it is possible to add an input of Unreal Engine 4. Also add a smooth node so the transition between the overlapping is better. Keep in mind that I added more points and that will result in higher polycount. To clean it up there are a couple of ways to do it. You can do it by hand but that would take too long. One of the solutions is the facet node and use the remove inline point and changing the value (This node is placed after the smooth node). Another solution is to use the refine node and then go in the unrefine option.
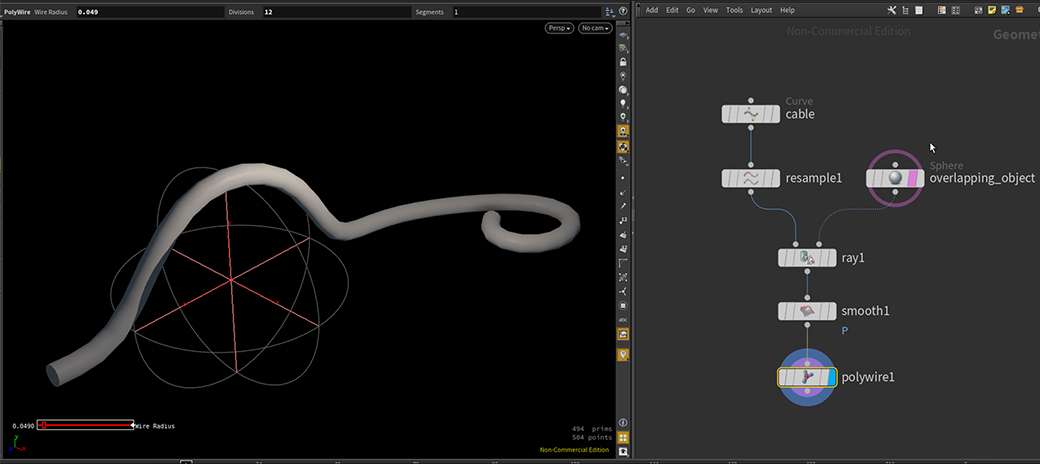
“Photo of the overlapping system”
Conclusion
Learning Houdini for my graduation work was very interesting. Houdini has a lot to offer and with this project I only explored the basics of procedural tools. The 6 weeks making the tools was awsome. Overall I’m pretty happy with the tools and I could show that having tools like this can speed up your workflow.
This project was the start of my Houdini adventure. Since the graduation work I have been using Houdini as my main 3D program. With future projects I will think about how Houdini can be an added value to the project. Not only using the procedural tools but also other features like simulations or making sprite sheets for particles. Recently I graduated and joined a company where they use also Houdini. There, it is used from modelling, destructions to procedural tools.