
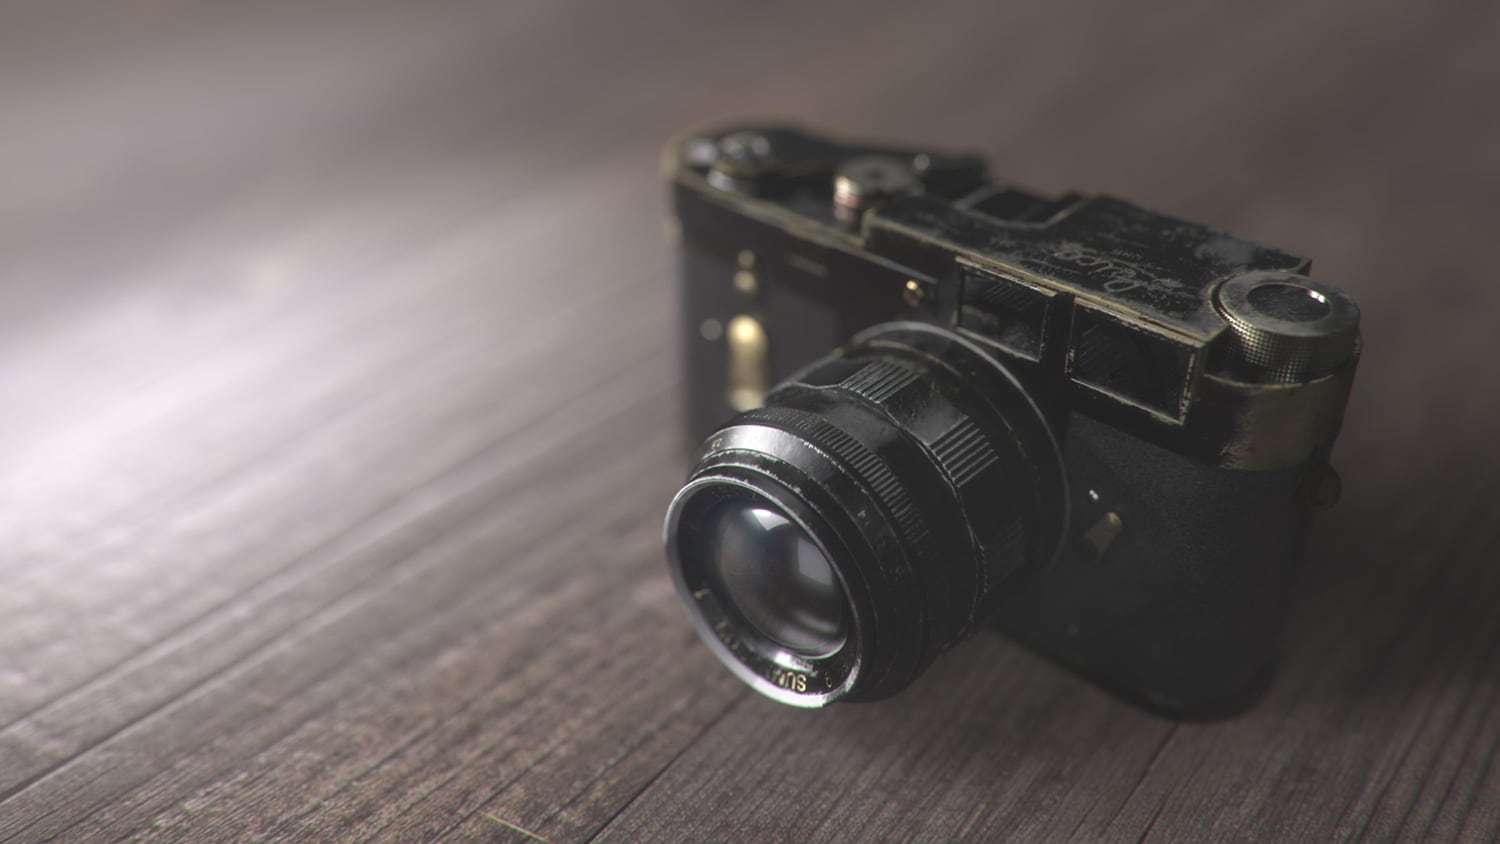
My name is Christian Wachter and in this article, I will go through, how I created my hyper-realistic ‘Vintage Leica Camera’ asset in 7 days. This was my project for the end of the second term at PIXL VISN Media Arts Academy.
Day 1: Idea and Reference
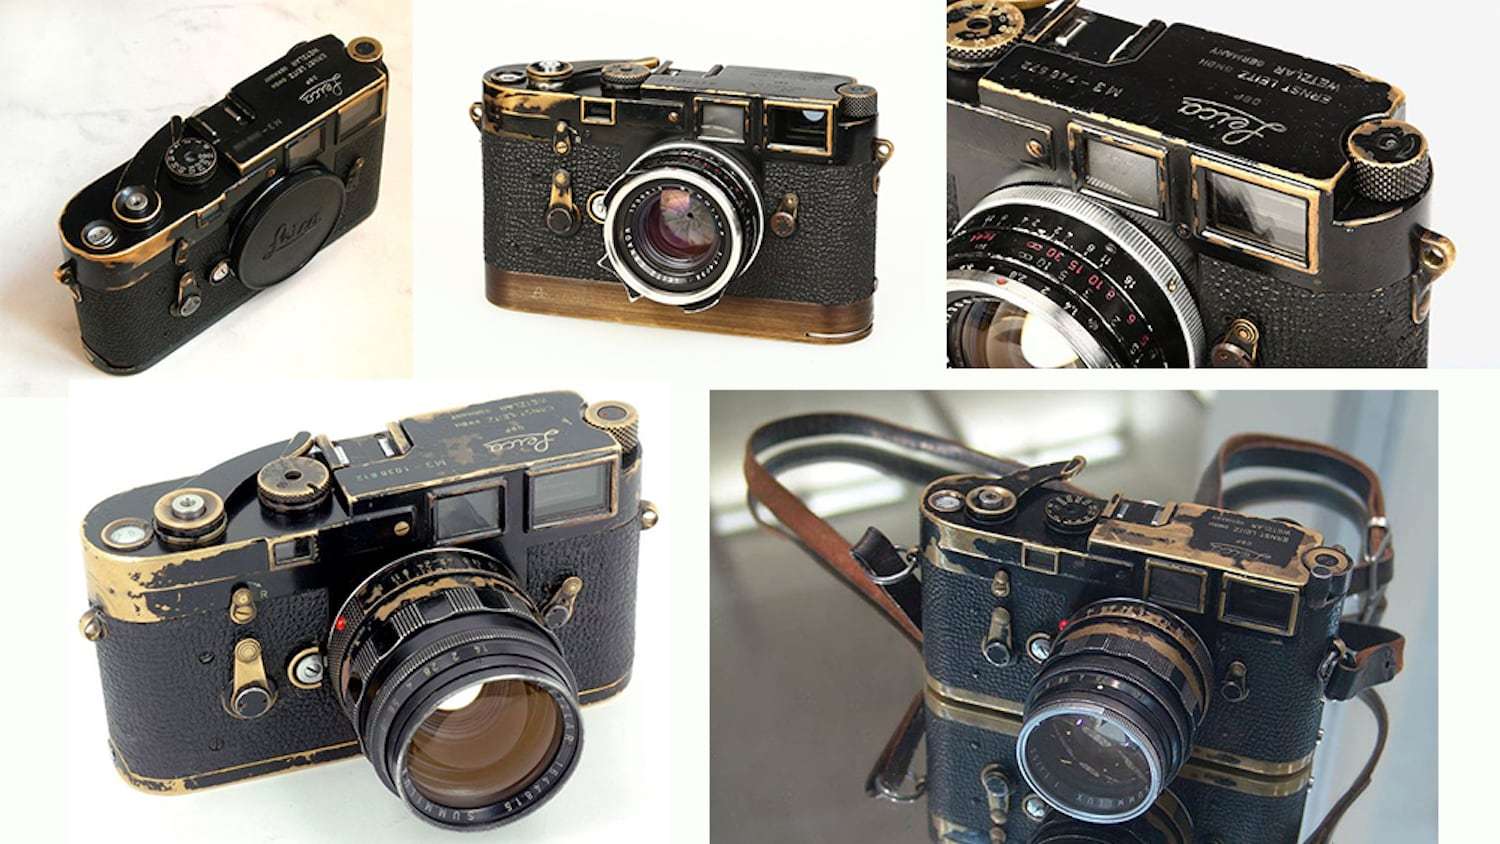
Choosing one asset and making it as realistic as possible in only 7 days – A task in which the choice of the right project is really important. Working with that time pressure means you can not change your project later on. So I made sure to choose a project for which I could find some really good references. Also, I wanted to do something really challenging, from which I could learn a lot.
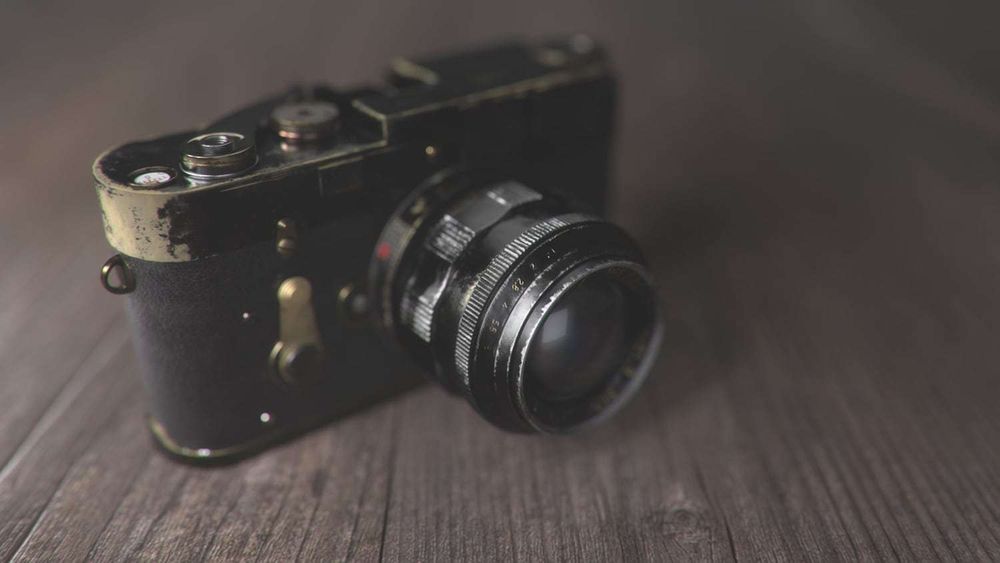
I am fascinated with photorealism and how to achieve it and I always try to push myself to get better results each time I take something like this on. I wanted to improve my skills in texturing, shading and lighting so I choose an imperfect vintage camera to recreate which meant I could bring in a lot of detail with scratches, dirt and wear.
One mistake people often made is that they use spheres to model things like the curved lens glass which will result in problems with the topology
The key in creating a photorealistic model is to gather a lot of references – take your time and search for good references. In addition, it was important to define my pipeline and to create a precise timetable to work to. One thing was clear, the deadline must be met!
Day 1 and 2: Modelling
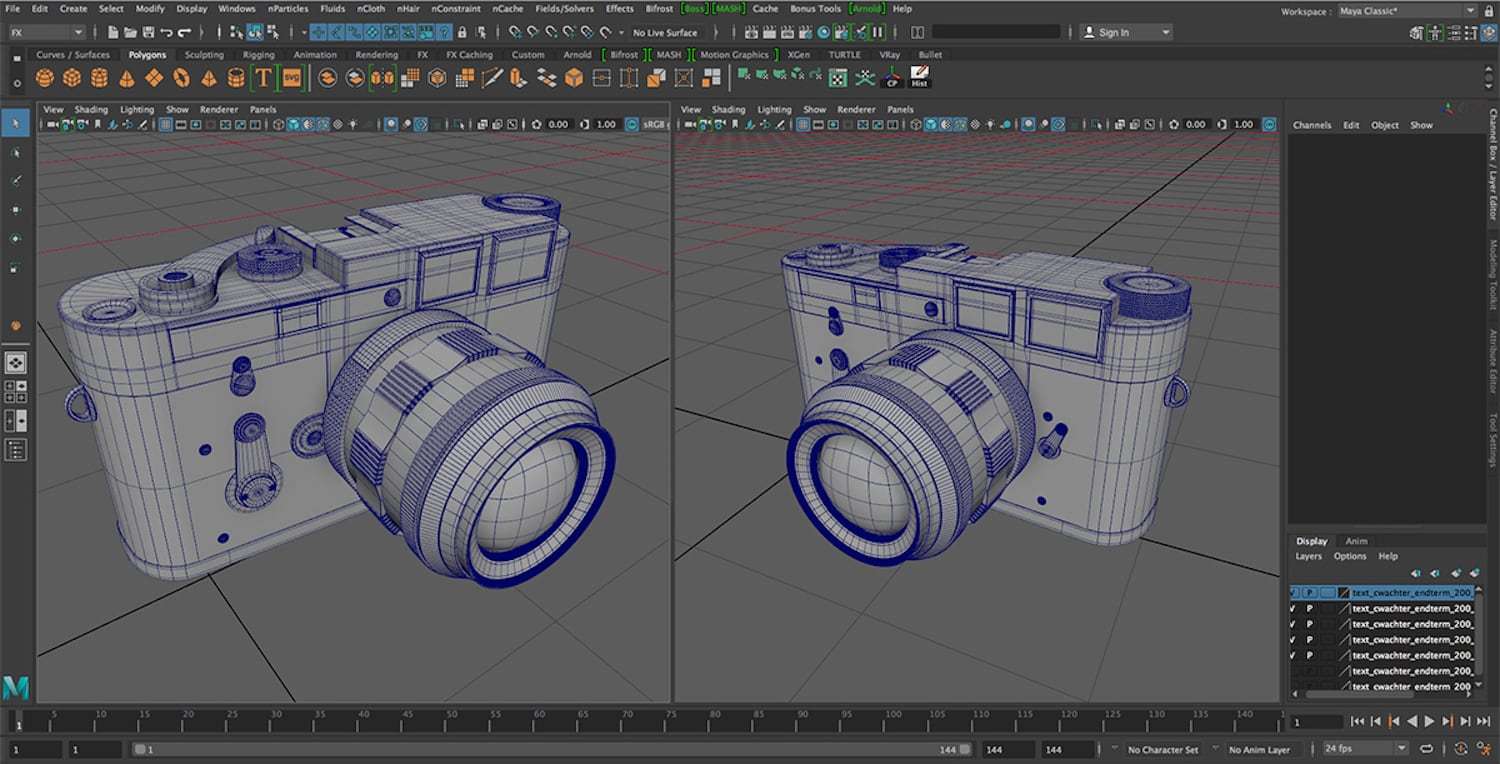
After everything was planned out, I went directly into Maya and started with the modelling. First of all, I did a rough block out, where I defined the silhouette using simple geometry. Then, I subdivided the camera into the main parts and started the detailed modelling process. I wanted to make my result were as realistic as possible and very detailed, so I tried to model it as it would be built in the real world.
One mistake people often made is that they use spheres to model things like the curved lens glass which will result in problems with the topology. Instead, I used a smoothed cube, then a high poly sphere as a live object to align the cube on that surface. Now you have a perfect sphere, with the topology of a cube!
Day 3: UV Unwrapping
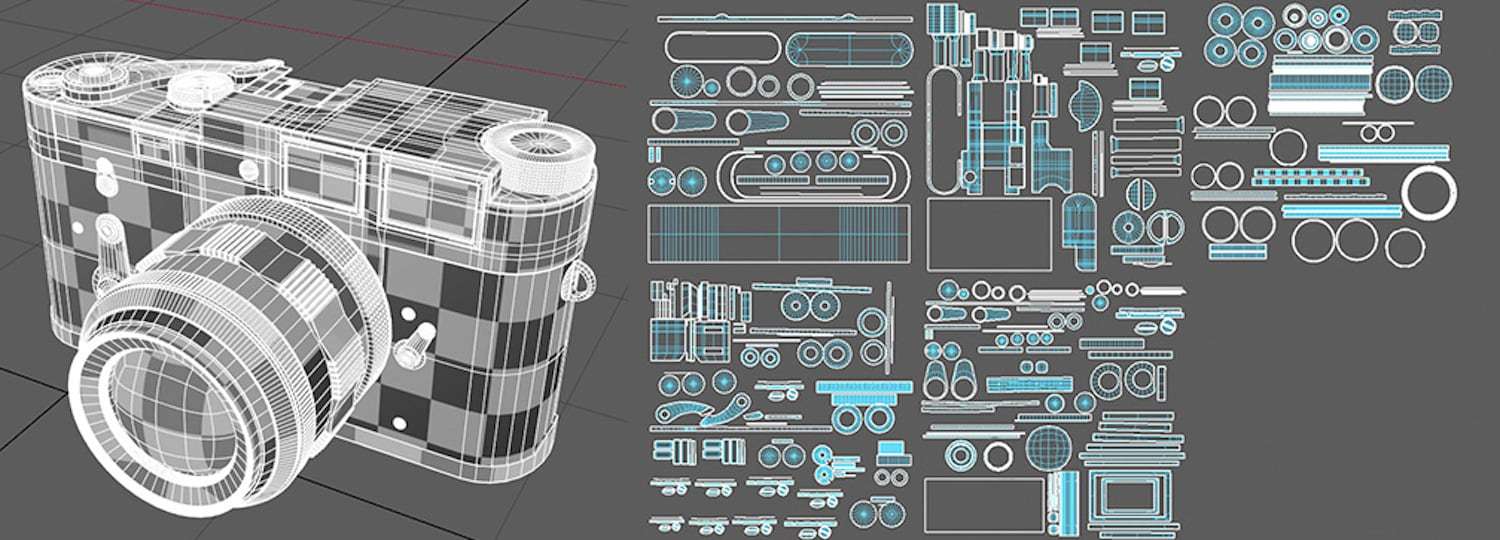
I spent the third day UV unwrapping. Firstly, I thought about how many patches I would need, which resolution I should choose and how I could organise things the most efficient way.
I divided my camera into five related groups, for example, one group only for the lens, one for the main body, one for the leather and so on. Every group organised into one patch. I decided to use a texture resolution of 8K, to get the highest quality even in the detailed shots.
I started with a flatten unwrap using classical methods like planar and cylindrical. I then sewed important parts together, but overall, I tried to keep it simple and clean.
I tried to keep a constant resolution between shells considered the right orientation to prevent intersections. In the end, I had five 8K patches and was finally ready to turn my grey model into a realistic, vintage camera.
Day 4 and 5: Texturing
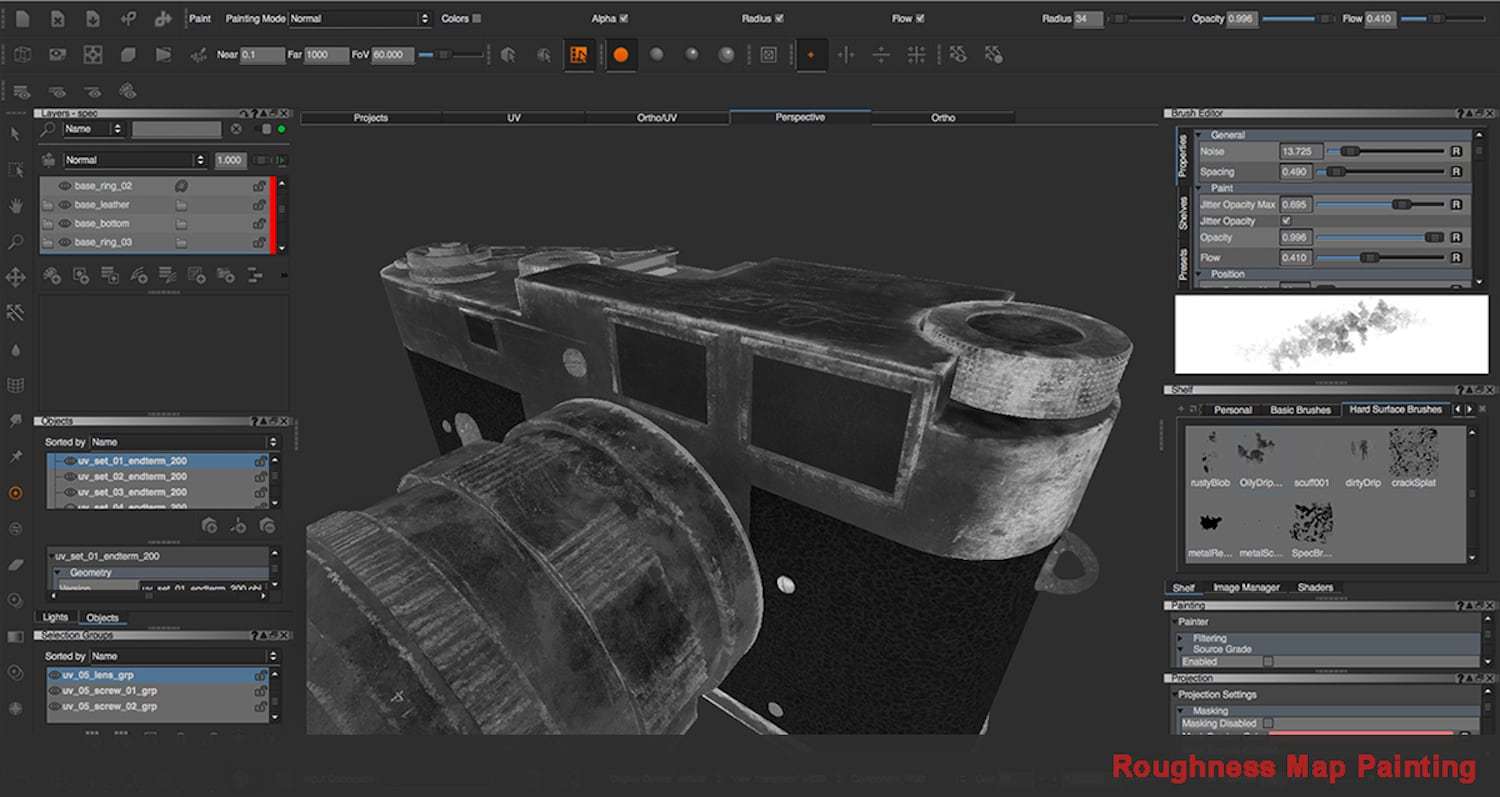
Texturing was probably the biggest milestone in the project. I used Mari and textures from Poliigon as a base. The texturing was so important and I tried to put a lot of work into every detail because there would be camera close-ups. I needed scratches and other dirt and wear layers to ensure the close ups would still look great.
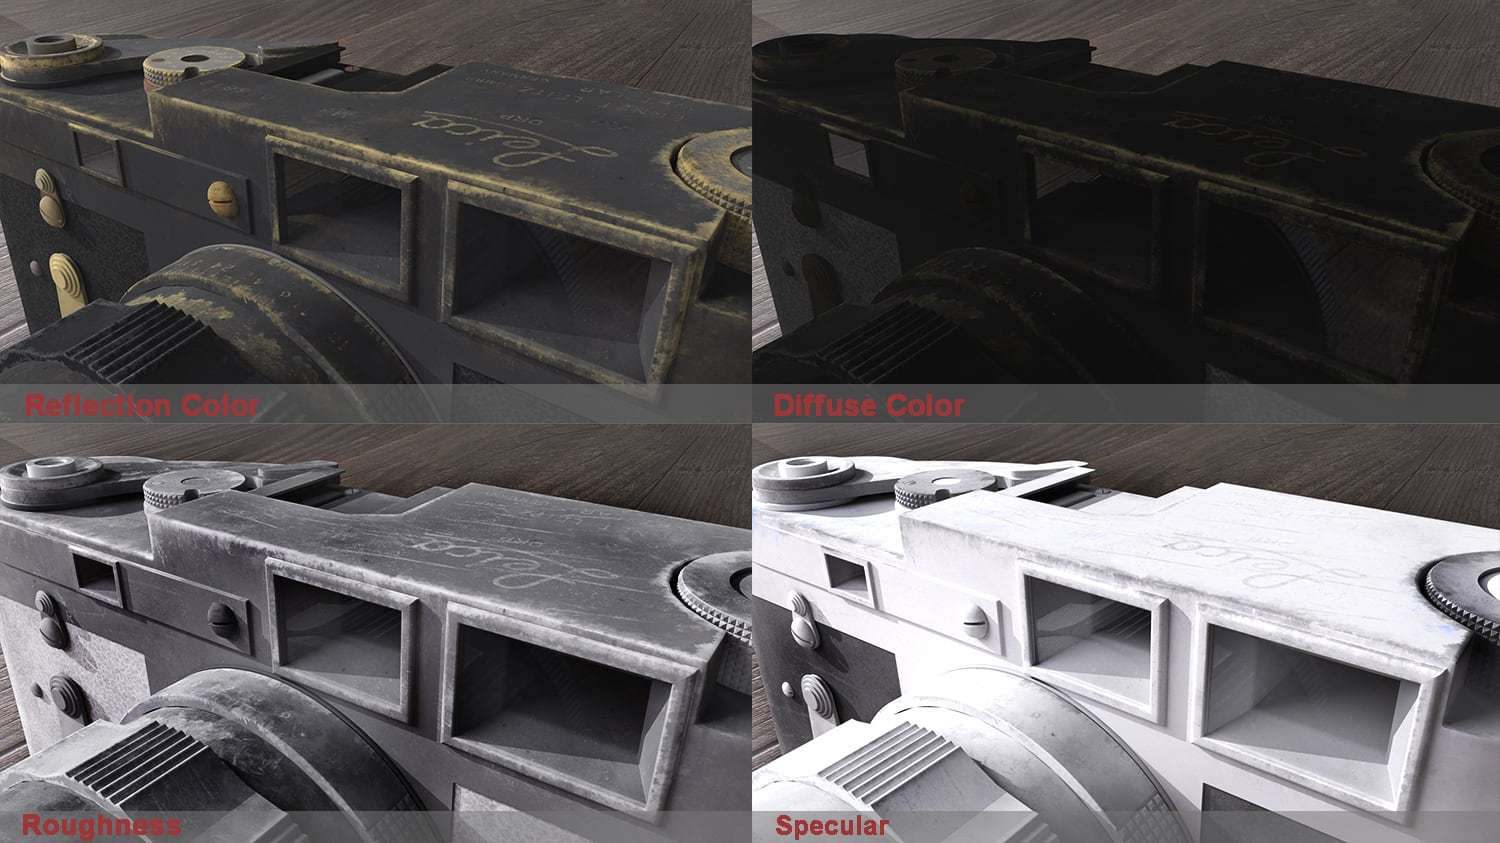
First I painted four different channels for my specular/glossiness workflow: Reflection Color, Diffuse Color, Specular and Roughness. With the Mari layer share system, it was easy to use my layers for each different channel. I edited them and painted new, full individually layers for each channel, like extra fingerprints and smears in the Roughness.
I created the old fonts and labels in Photoshop and added them to the camera, back in Mari. I also made a black/white height map and converted it to a normal map in of Mari.
Day 6: Shading and Lighting
The shading and lighting have been the most interesting part of the project, primarily because I want to work in this area after school. That is the part where I made it realistic, which was my main goal. I used Arnold Renderer and alShaders. I tried to make the shaders as realistic as possible. Each metal, for example, has two specular layers. One rougher, base specular layer and the top layere, with more glossiness and a brighter reflection colour.
The layers also had individually edge tint reflections. All these values are according to the physical real-world specifications for each type of metal. My reference pictures were very helpful here again.
For the lighting, I used a classic Three-Point- Lighting, which is often used in cinematography. I tried to create my lights in real world scale – they fit to the size of a window, or to a typical studio light. I used an area light as key light. The soft look of the area light strengthened my desired vintage look. I wanted everything to be a little bit softer than in the real world. On that point, I moved a little bit from realism to cinematic lighting.
It is always amazing, how DOF can break up your clean CG look
The key light was strengthened by directional light, only visible in the specularity, creating stronger highlights achieving a more interesting look. From the opposite side, I used an area light as a classic fill light and
From the opposite side, I used an area light as a classic fill light and another one as a top light. In addition, I have lightened the ground with a soft spotlight, to give even more bounce to the floor and to achieve an interesting glow effect, using DOF.
I also decided to introduce a soft volume scattering. First I was not quite sure about it because I lost some detail in the texturing, but it helped me to achieve a vintage look.
I rendered all my passes using Arnold AOV’s, to reach out the best flexibility in compositing.
Day 7: Rendering and Compositing
I worked through the last day without any sleep! There was still much to do and the deadline was close at hand. Anyway, I was much too motivated to get tired and I believe this passion is what makes our industry, it is more than just work.
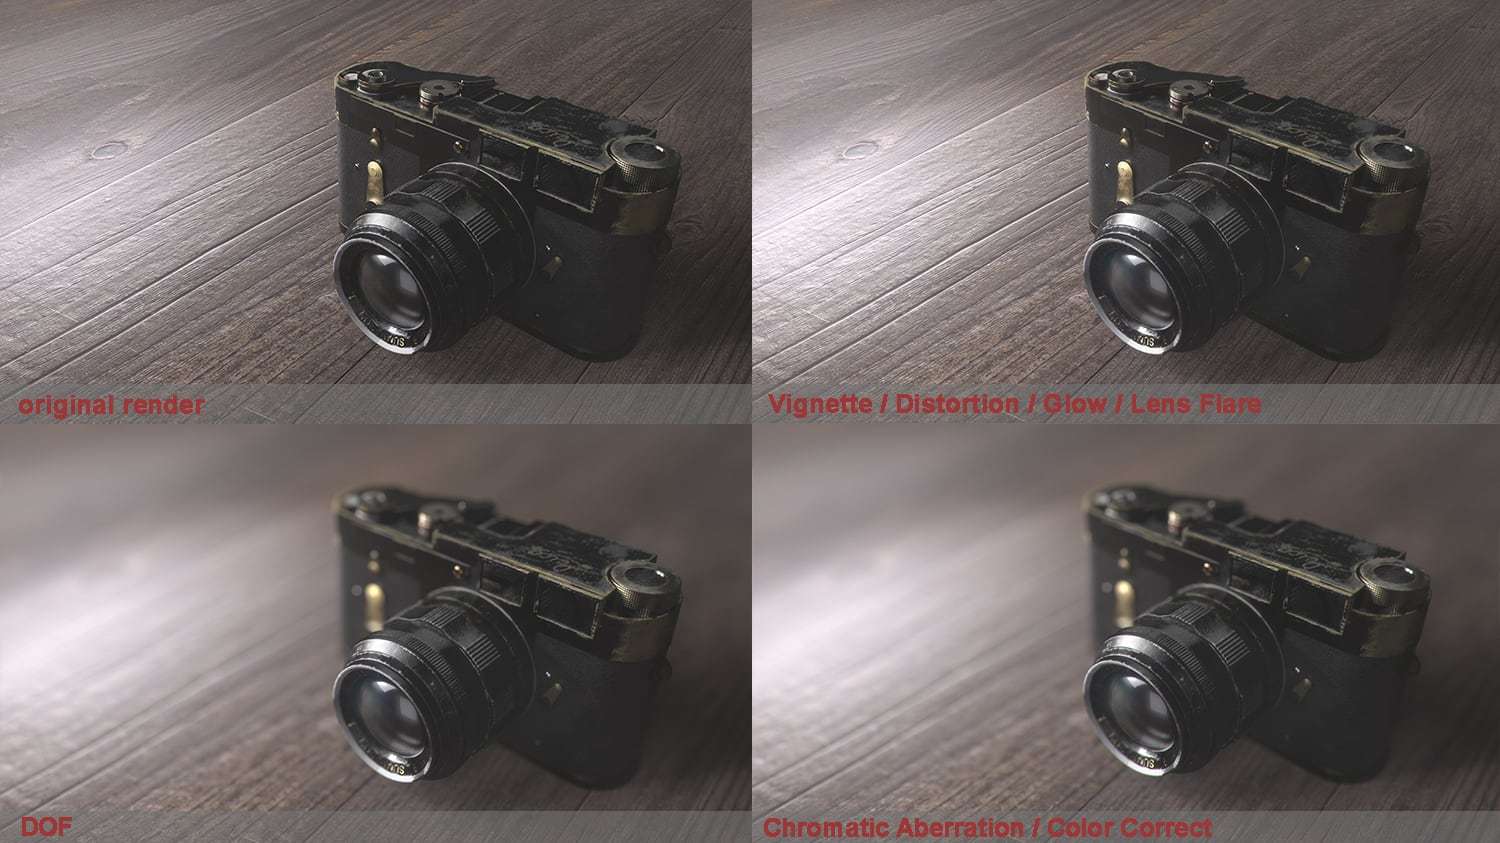
After I finished rendering, I started compositing using Nuke. I wanted to push my realism a little more. I tried to use photorealistic camera lens effects, to break the clean CG look.
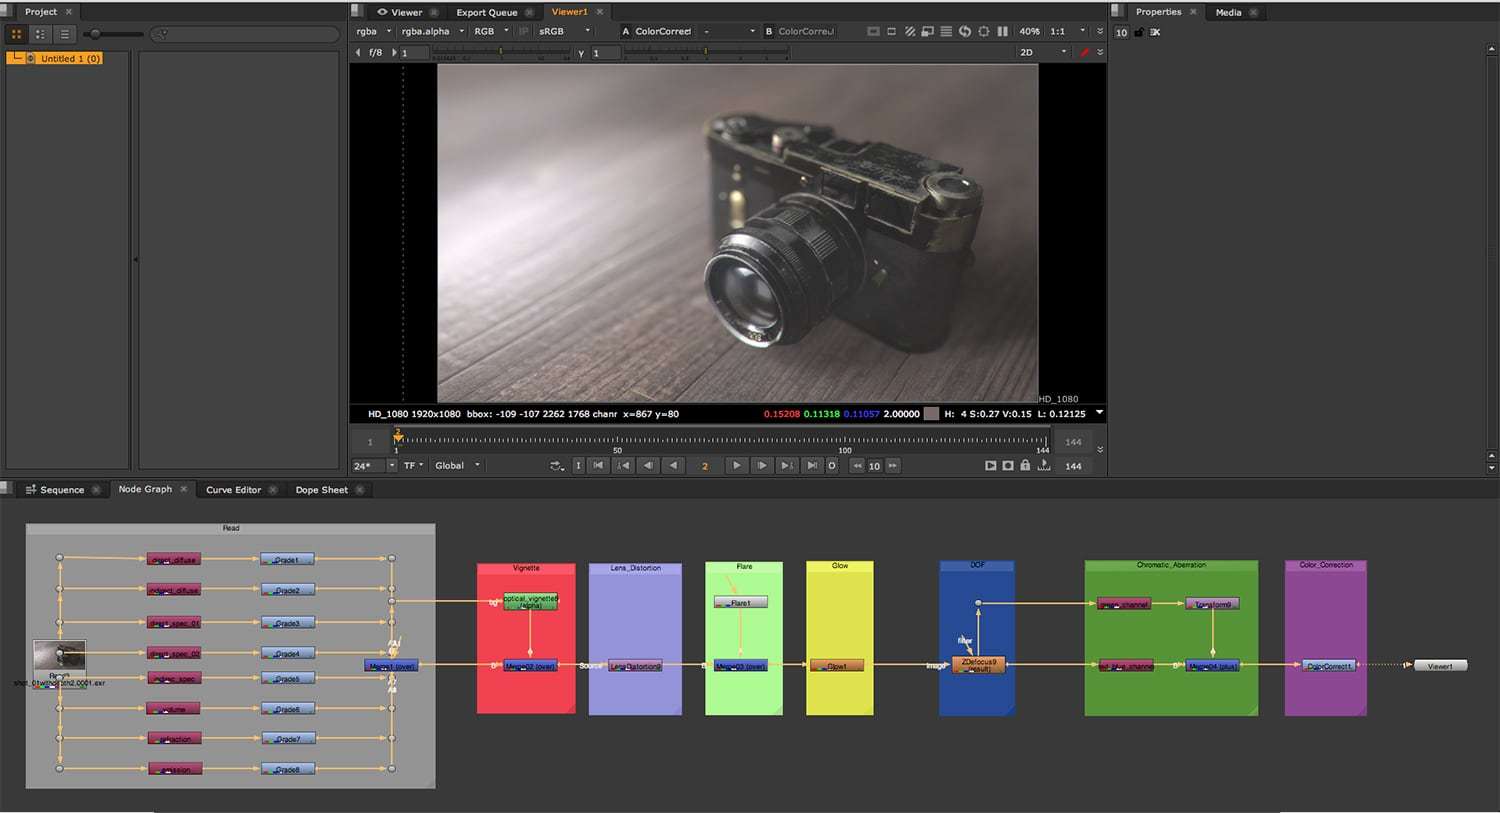
I used a soft optical vignette and adjusted the grading for each render pass. After that, I used a small amount of lens distortion. I wanted all these effects to be very subtle. The final touches should make the overall appearance more realistic, without being intrusive.
I created a slight glow and a lens flare reflection. After that, I generated my DOF, using the Z-depth channel. It is always amazing, how DOF can break up your clean CG look. In the end, I added a slight chromatic aberration and my final look was done!
So, that’s how I created my hyper-realistic “Vintage Leica Camera” in 7 days! Everything started to choose a smart project and searching
Together with a great reference, pipeline and realistic timetable, I’ve created an awesome model!