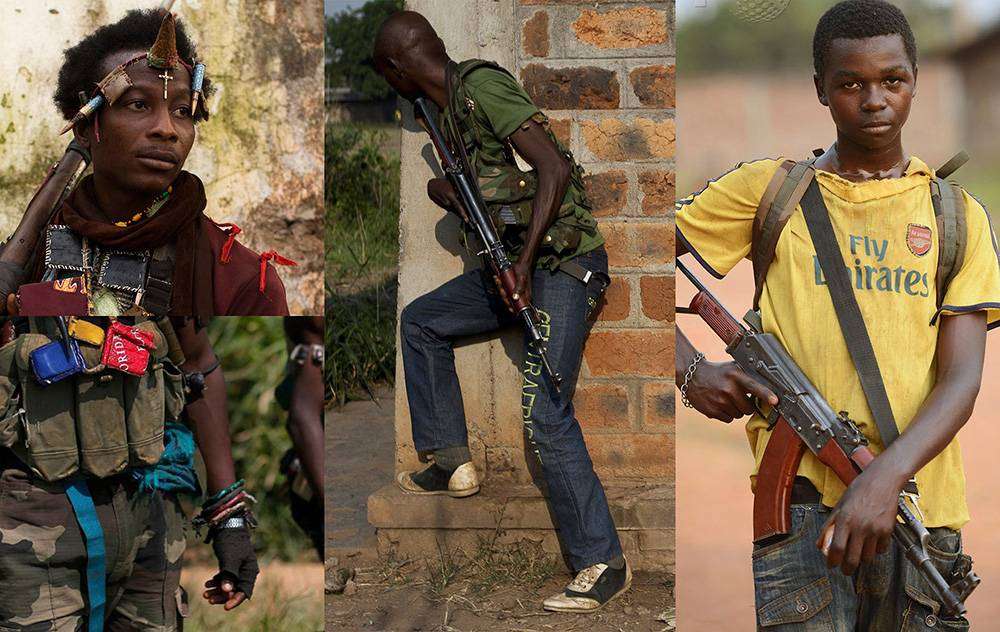
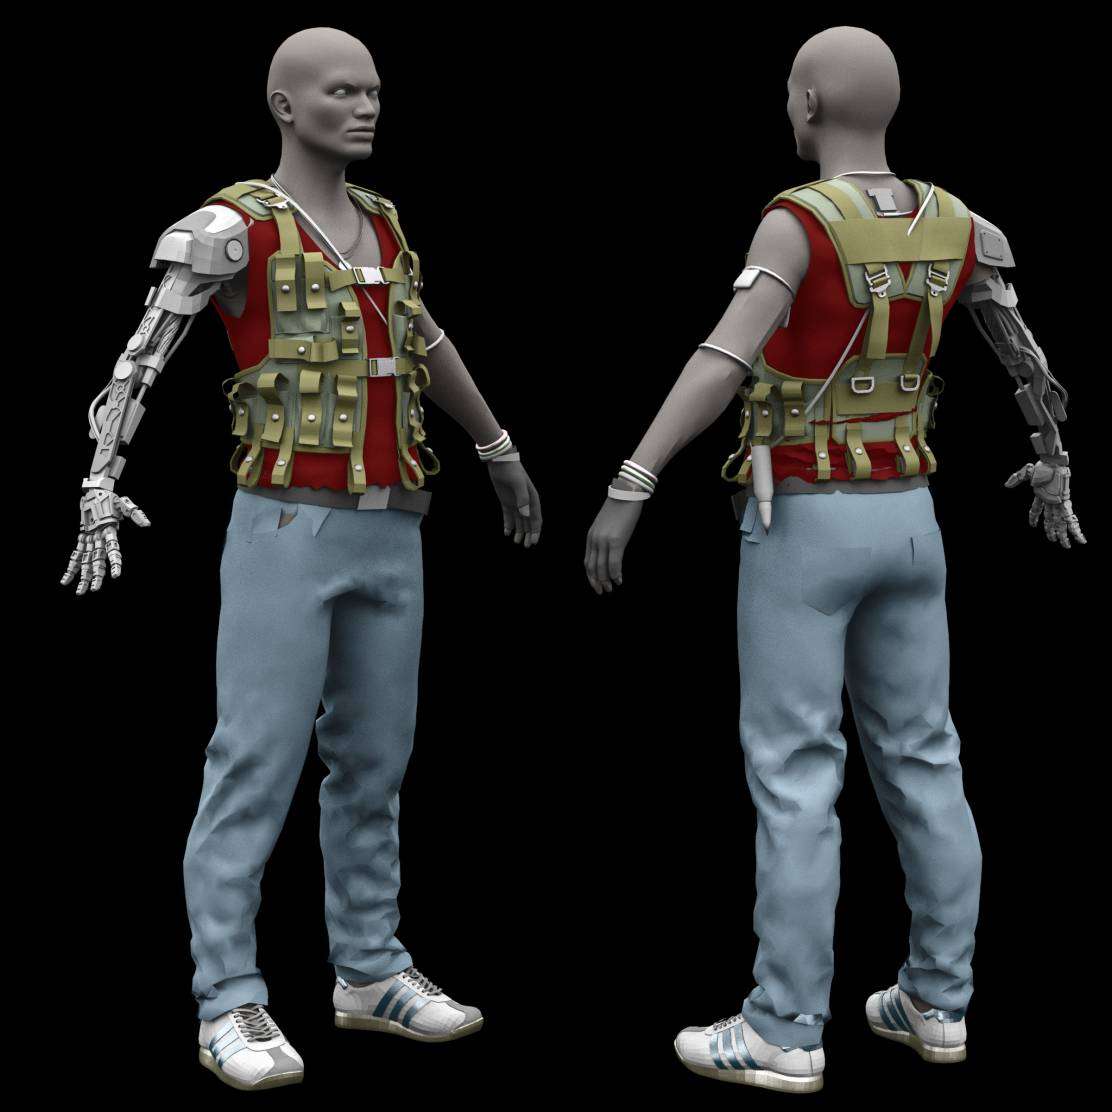
The evolution of a Rebel Fighter began with the idea of creating a believable sci-fi hero. A realistic, modern human with a futuristic twist. My inspiration was Syrian, Libyan and Ukraine rebel warriors that I’ve seen on the news.
I didn’t have any concrete concept art to work with so I gathered as many photo references as I could find and made a rough concept in photoshop.
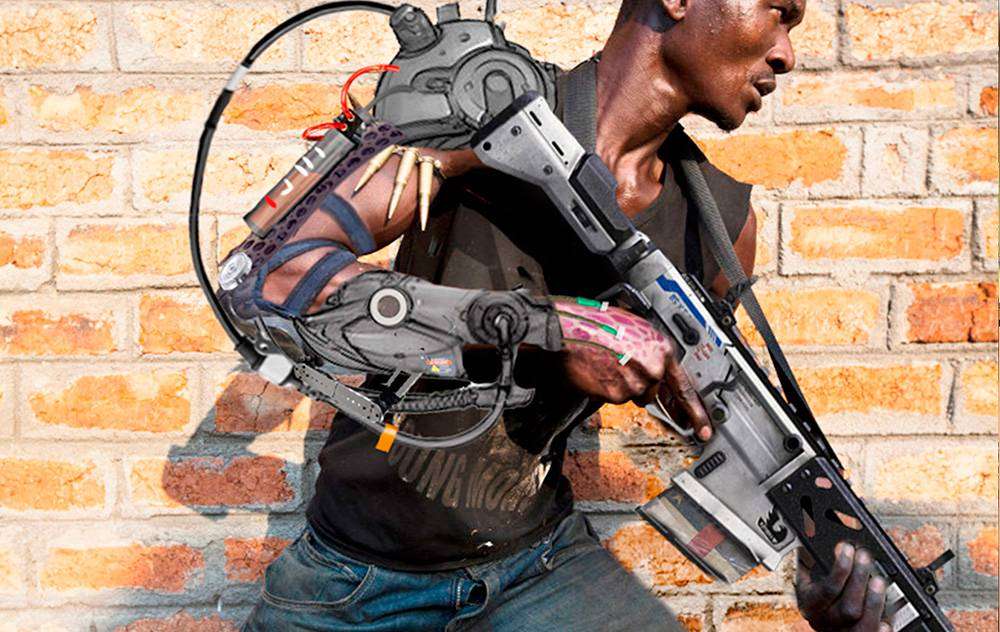
To visualize my idea I opened it in Photoshop and created this really rough concept piece. Later it was decided to change this exoskeleton device to a fully robotic arm.
Body
The next step was to create the body. It’s always good to practice anatomy, so I decided to start with a sphere. I used mostly the clay, move and dam standard brushes in ZBrush.
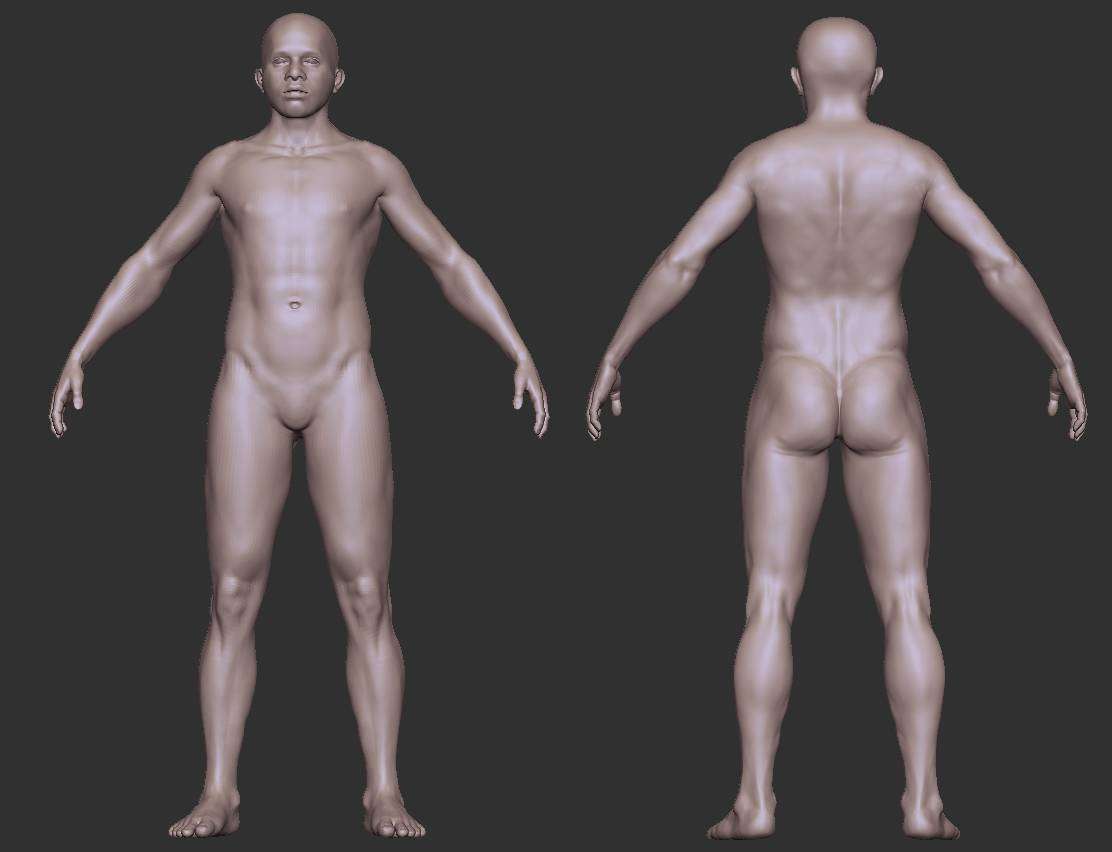
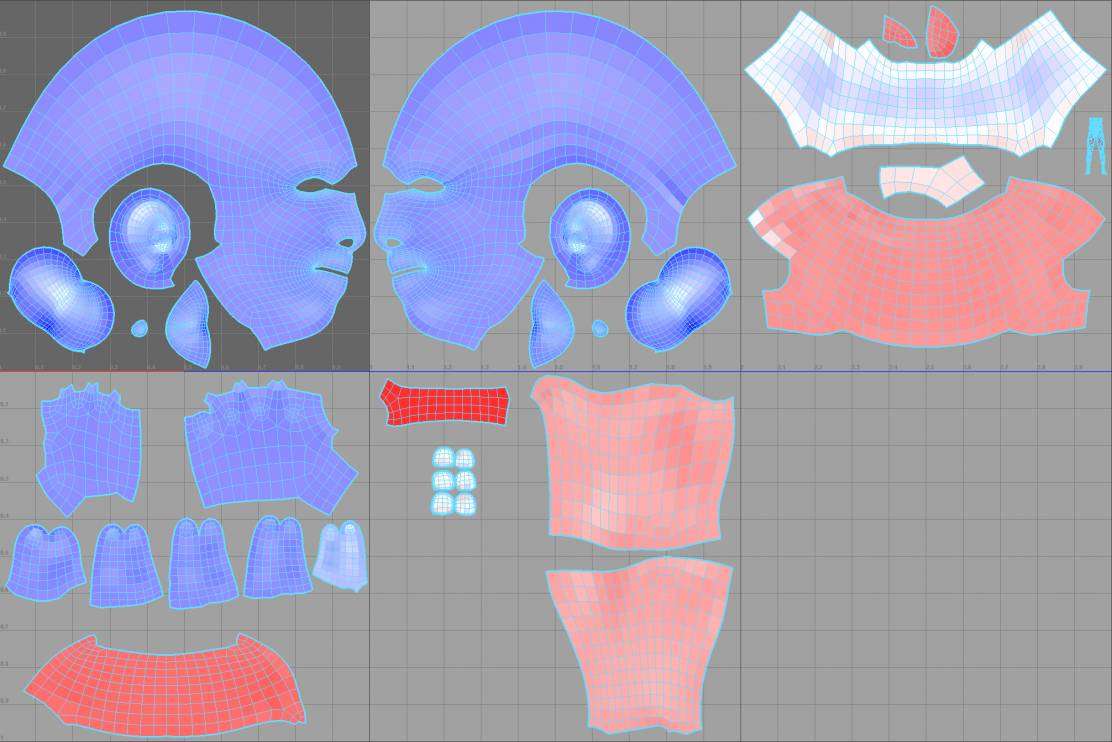
Upon finishing the sculpting, I took the model into Topogun for retopology and to Maya for UVing. The new unfold 3D UV tools that just came out with Maya 2015 at that time were extremely handy. I’ve split the body into 5 UV tiles and scaled the UV islands by importance. I gave the face the most resolution while less visible parts, that are covered with clothes, got the least amount.
Assets
Once the body was done, I could start testing different assets and clothing articles. I’ve made a low rez version of the clothes and accessories. It gave me the opportunity to continue testing my design in terms of shapes as well as colours. Once I had the different assets blocked in, I’ve split them into different individual scenes so that I could work on each part individually.
Once I had the different assets blocked in, I’ve split them into different individual scenes so that I could work on each part individually.
Clothes
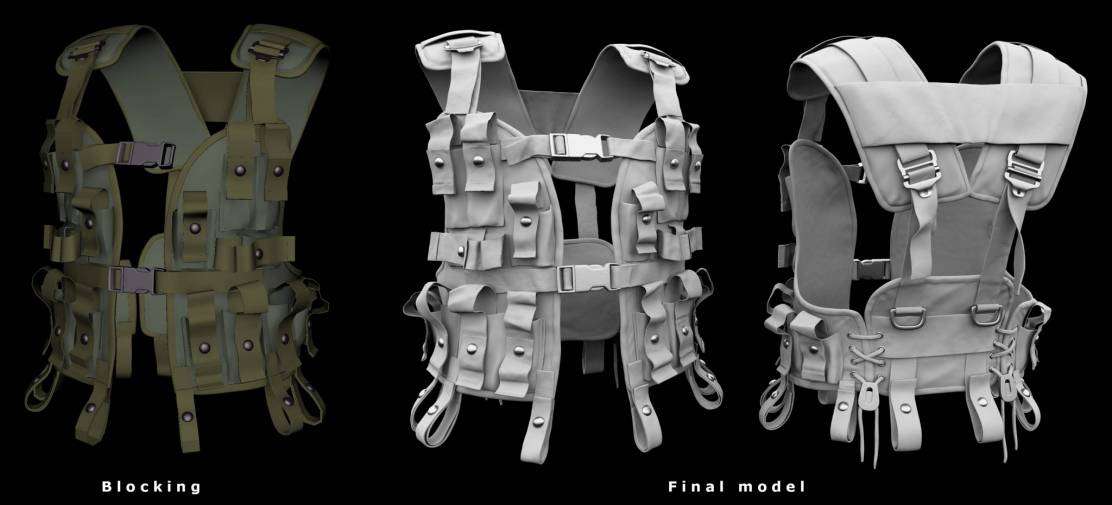
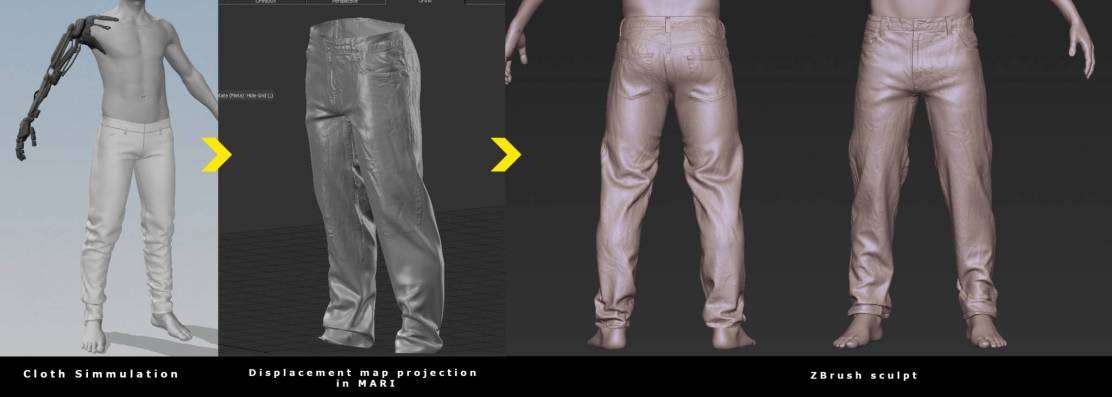
The first assets I made where the shirt and vest. I exported the low-rez into ZBrush where I added all the finer details. For the jeans, I started with a simulation using Marvelous Designer. It gave me the believable folds that I wanted. Then I made a clean topology with UV’s in Maya. The next step was to take the jeans into
The next step was to take the jeans into MARI, where I painted displacement maps. Then I combined the displacement detail and the Marvelous Designer simulation, cleaned it up and finalized the sculpt using ZBrush.
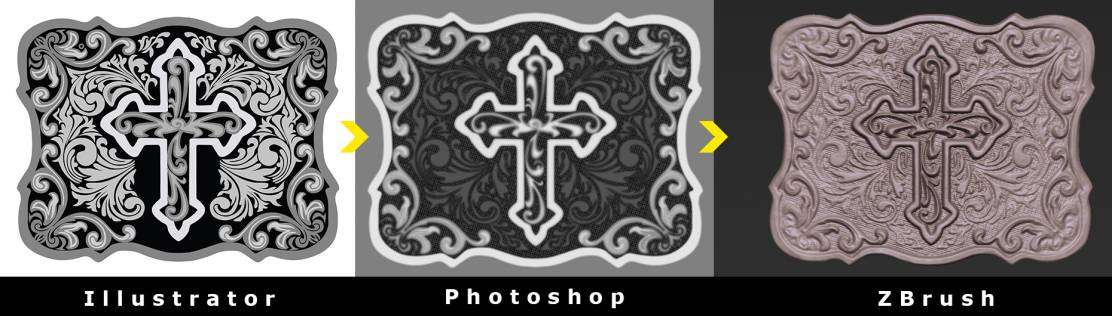
Belt Buckle
For the belt buckle, I’ve created a stencil in Illustrator. I converted it to a height map in Photoshop and used as a projection in ZBrush to create the engraving.
Shoes
I blocked the shoes in ZBrush, using my body sculpt as a base. the ZBrush sculpt was then exported to Maya, where I’ve created the model itself. The Quad Draw tool was very helpful for retopology purposes as well as creating the different parts of the shoe.
After the modeling and UV’s were done, I took it back to ZBrush for fine detail and wear and tear.

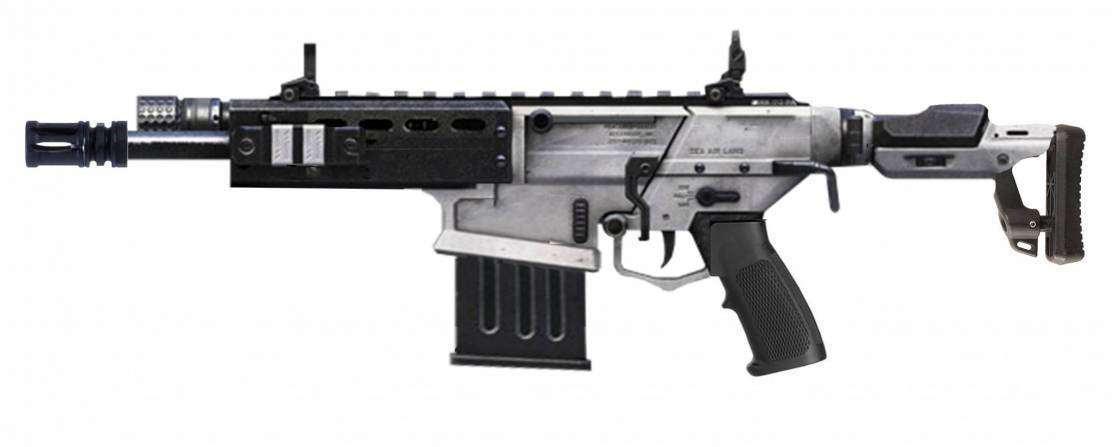
Assault Rifle
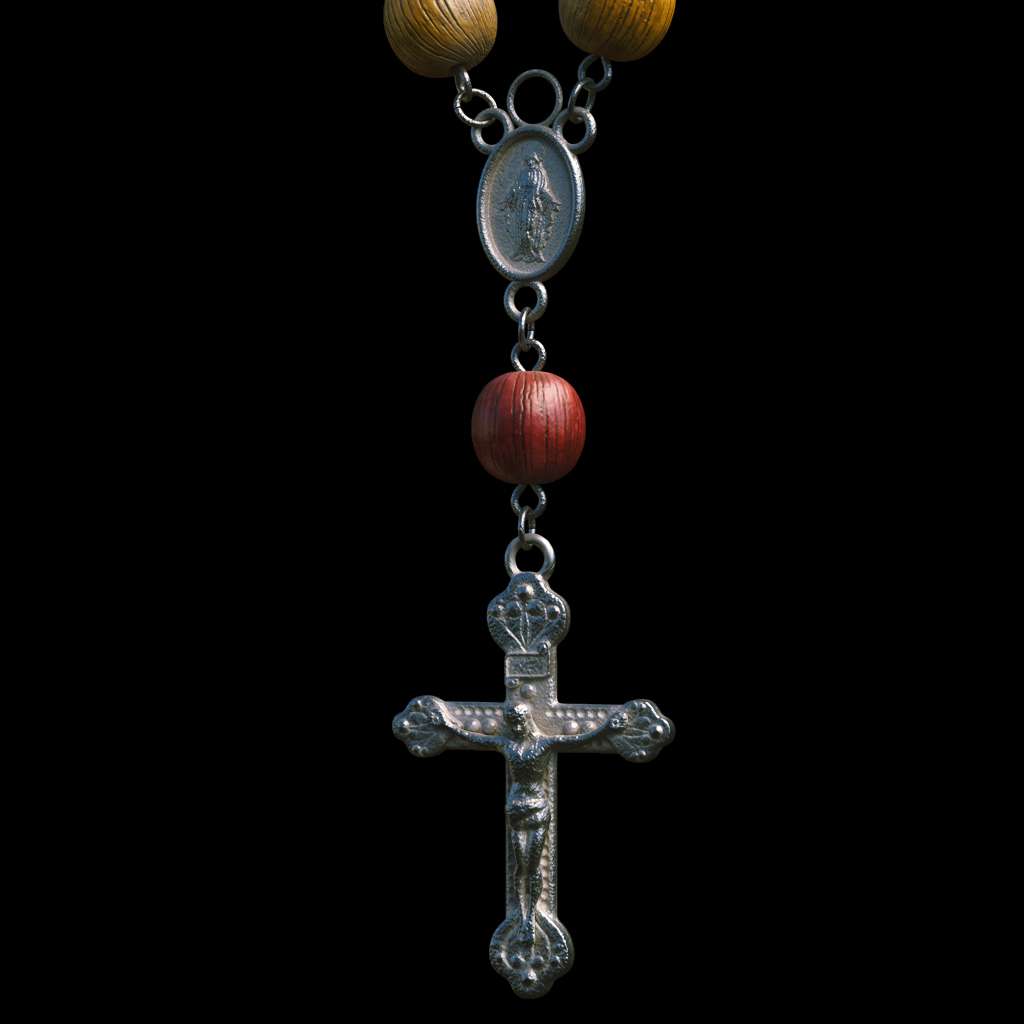
The base for my design was the AK-47 assault rifle. As with the rest of the concept, I’ve gathered a lot of references and made an initial concept collage in photoshop. I used my concept as a backdrop in Maya. To make the concept less generic, I’ve added some personal touches to the rifle, like colouration and a rosary.
It was also crucial for me that the mechanism would look as plausible and believable.
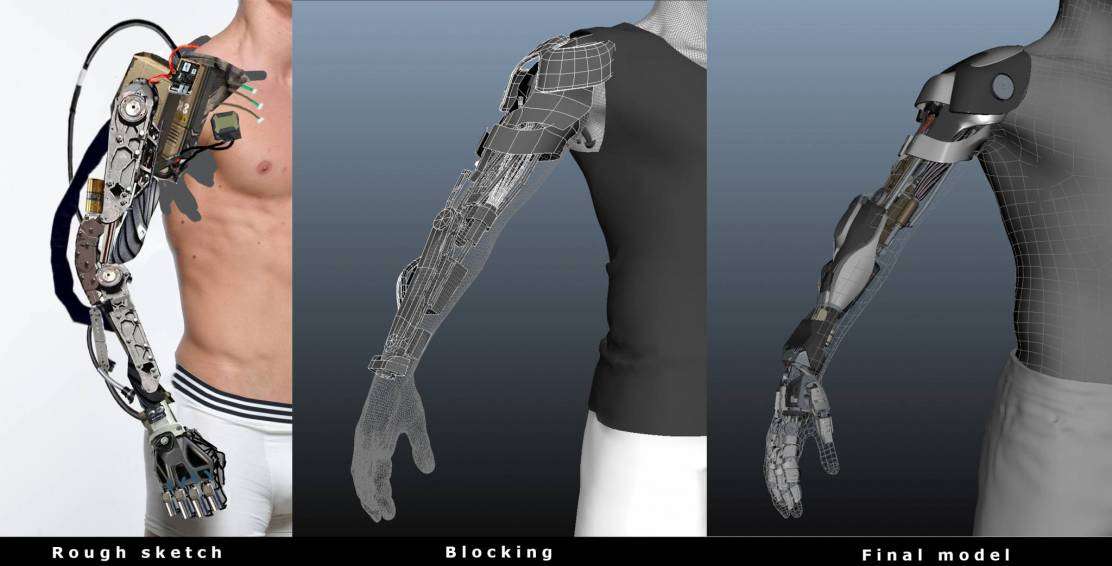
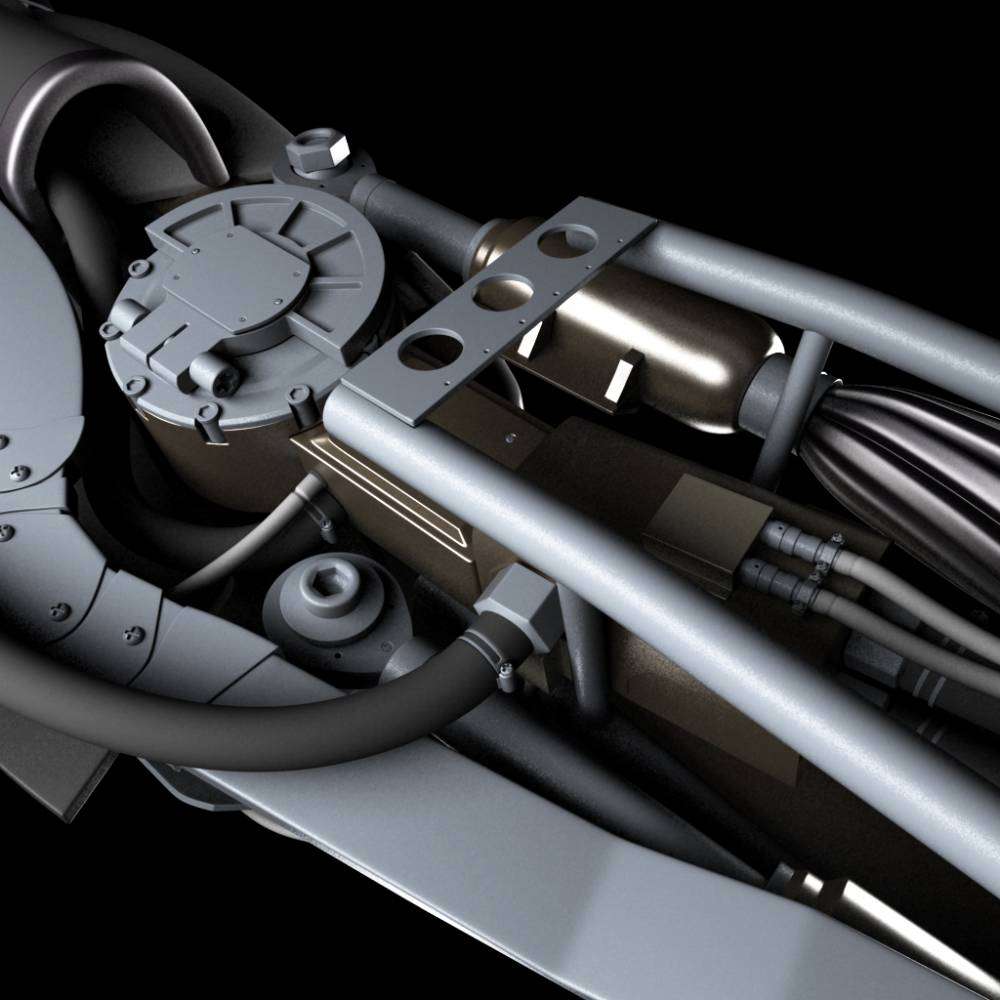
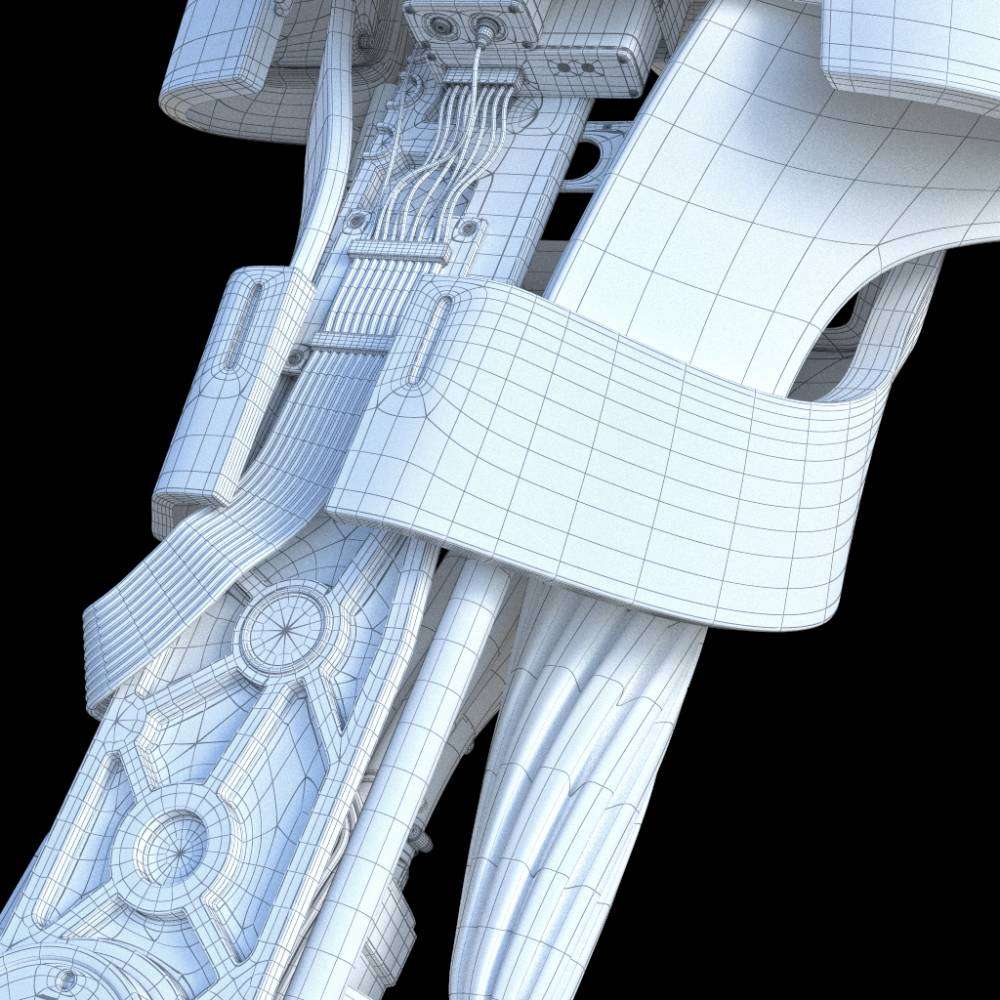
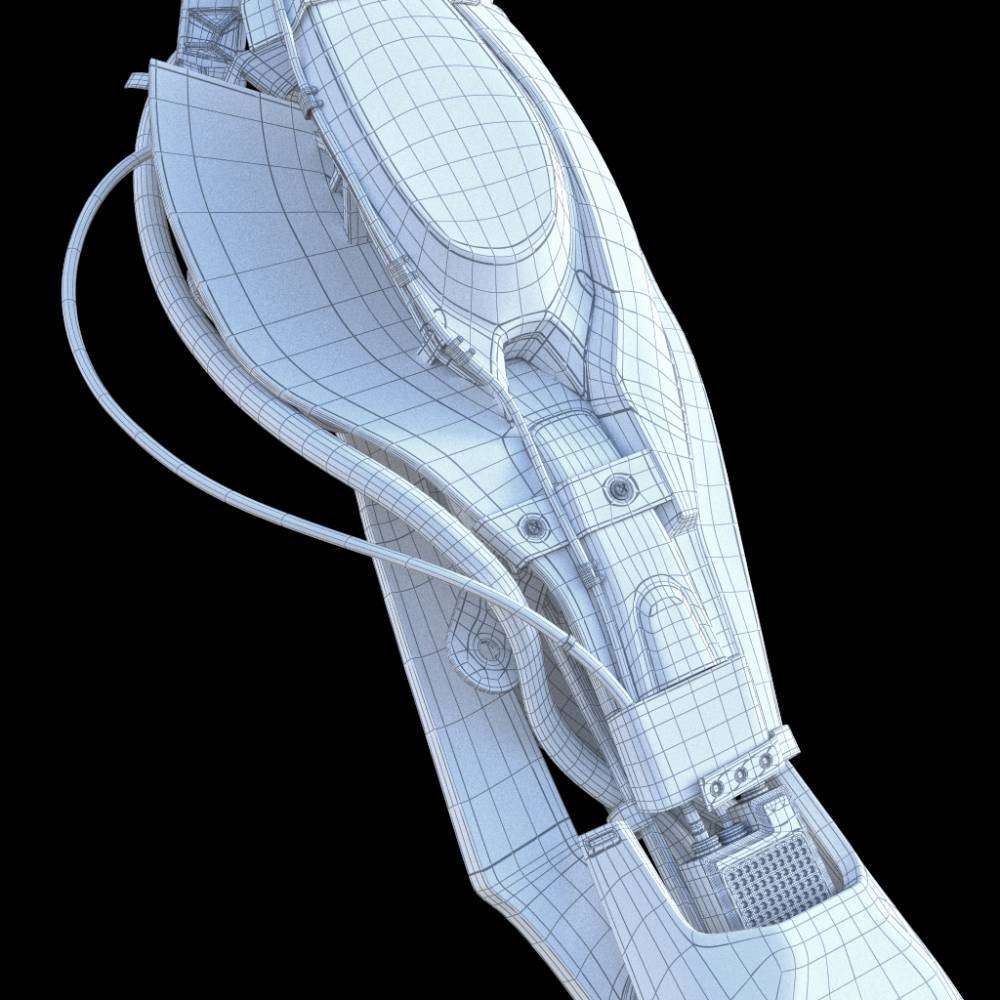
Robotic Arm
As with everything else, the first step was to gather references. I collected and studied everything that was relevant, from prosthetic limbs to mechanical joints and industrial cranes. I tried to make the mechanical parts to follow the forms of the underlying anatomy as much as possible.
It was also crucial for me that the mechanism would look as plausible and believable. At first I blocked all the shapes using primitives. As the work progressed I replaced the primitives with the finished part.
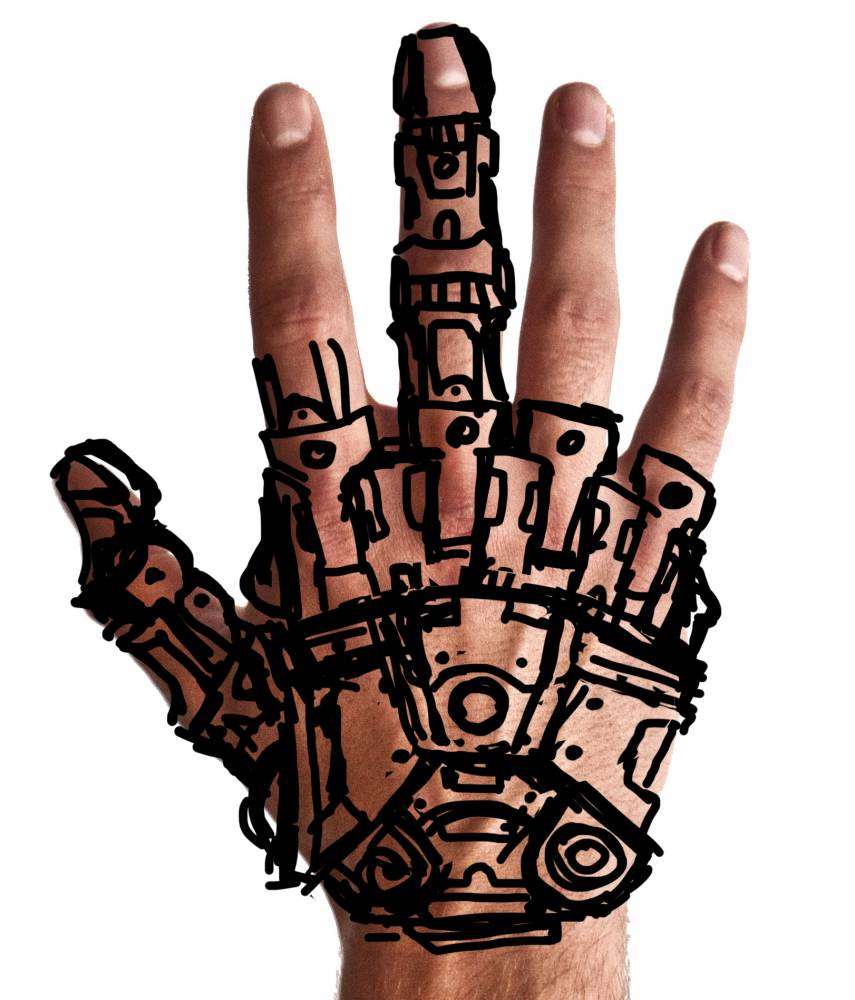
I used a hand scan as a base for the mechanical hand. Next I created a concept sculpt in ZBrush. that helped me to understand the shapes that I was going for. Based on this concept I modeled the hand in Maya.
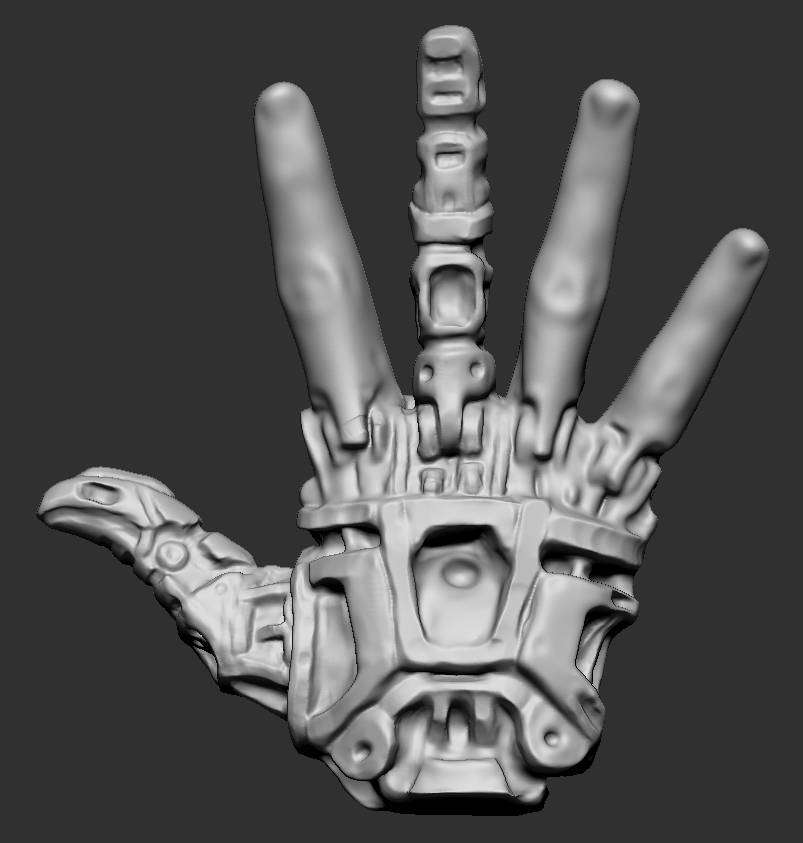
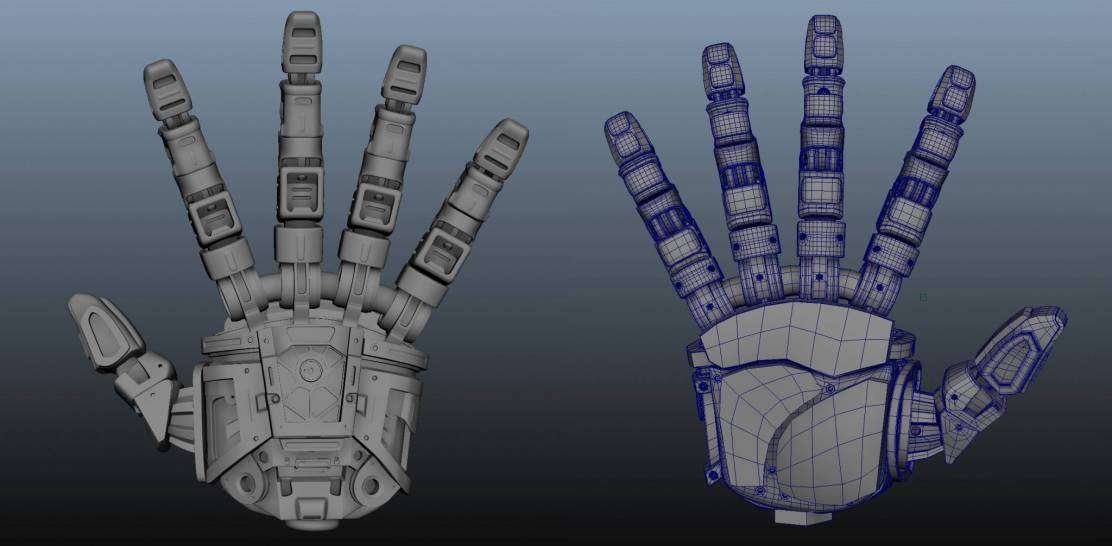
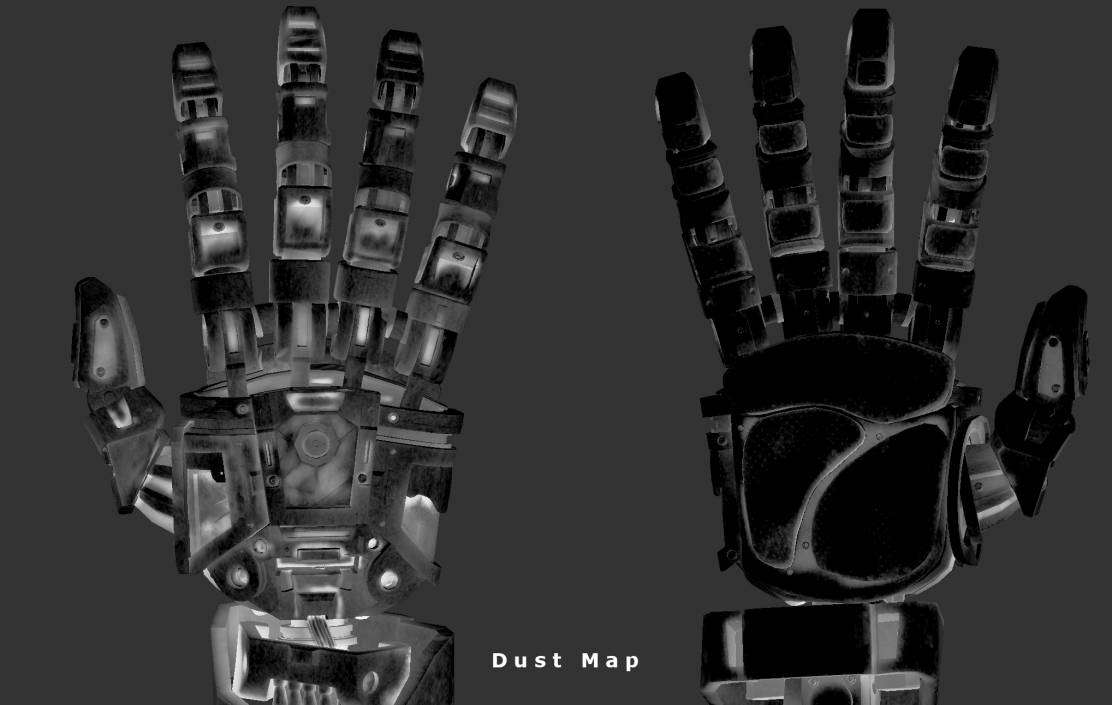
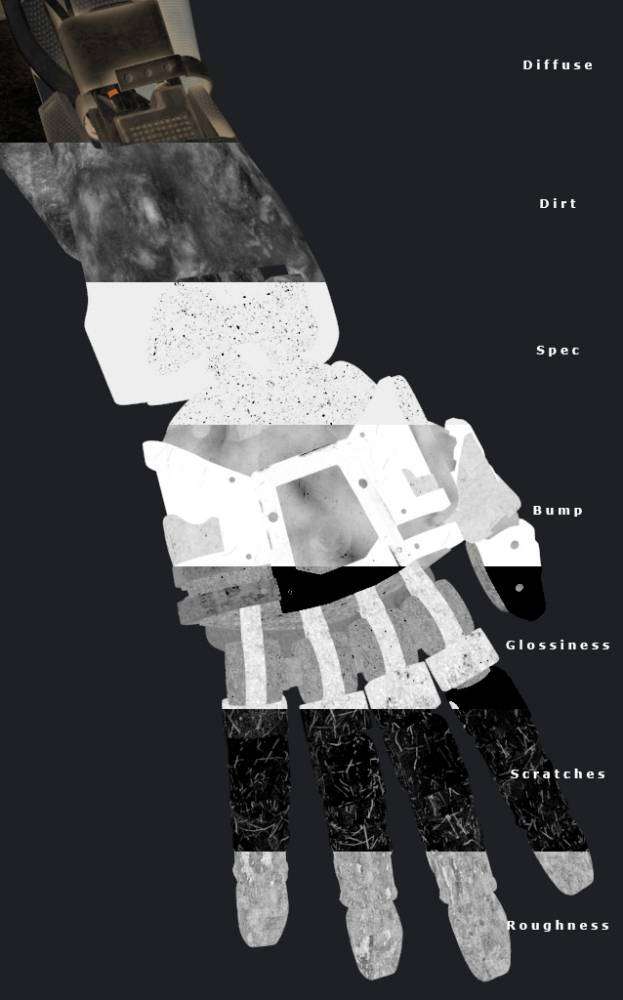
The mechanical arm consists of many material types. After breaking the arm into UV’s, I assigned material ID so that I could separate it into the different textures and materials.
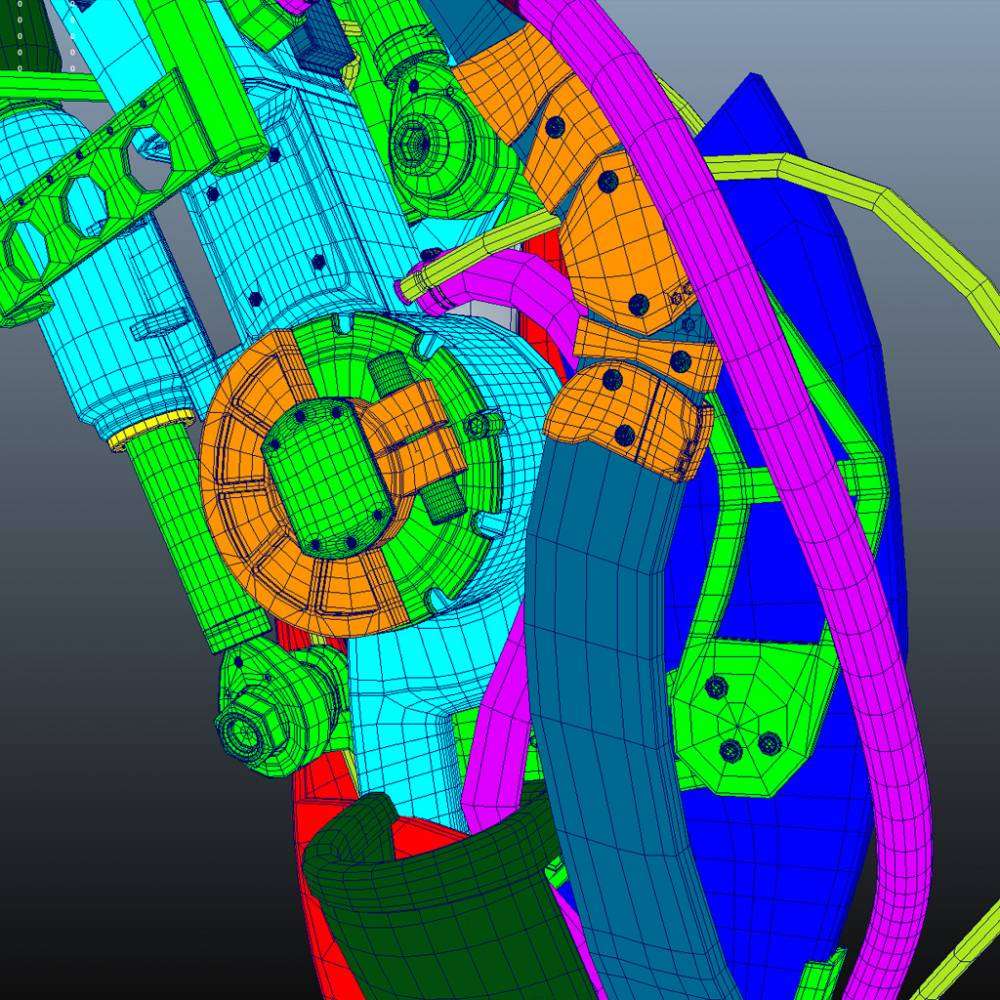
Topology was of the essence for this part of the project. I had to plan the divisions ahead. Proper polygon distribution and good UV’s were crucial for avoiding stretching in the textures.
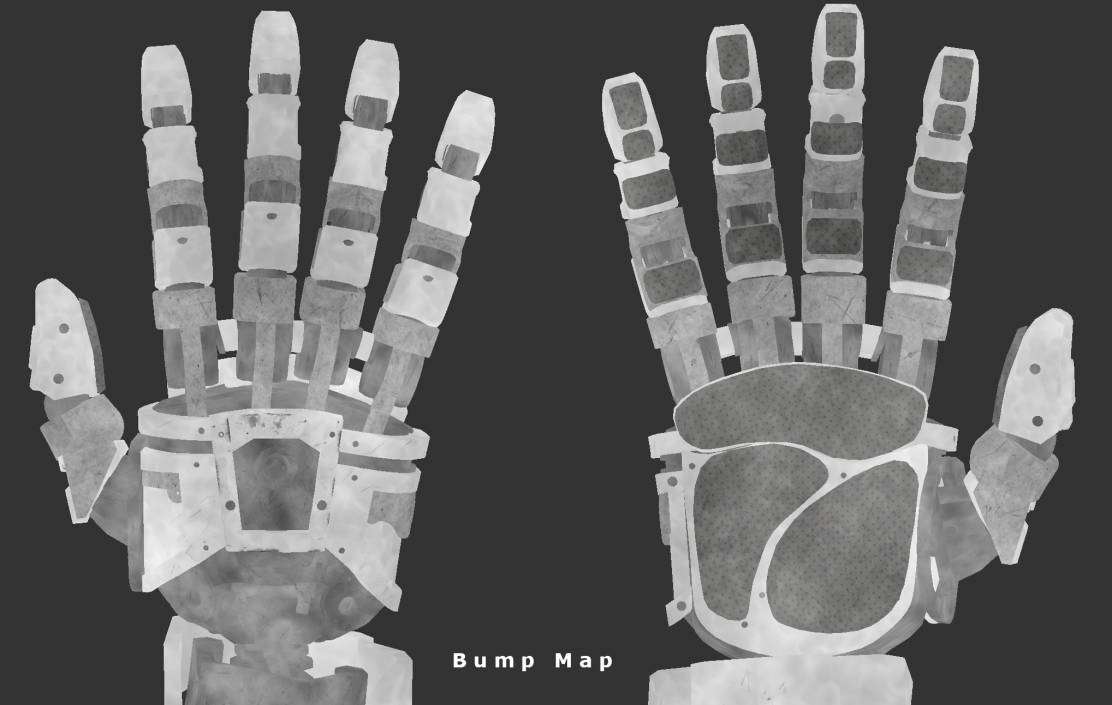
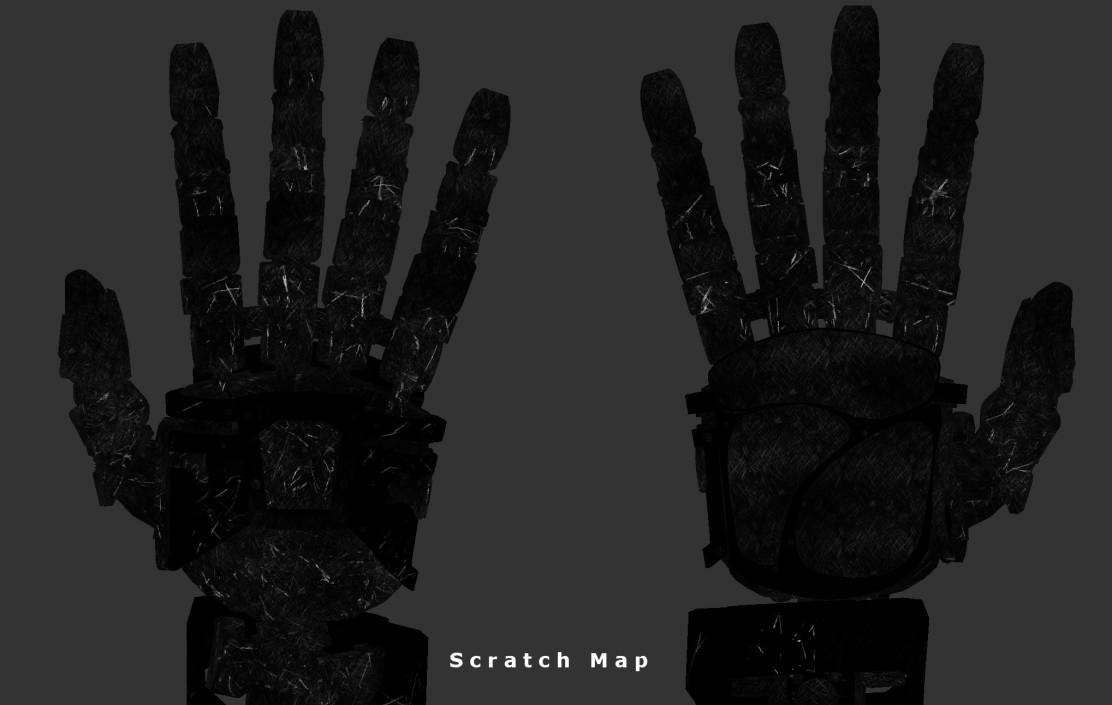
Textures
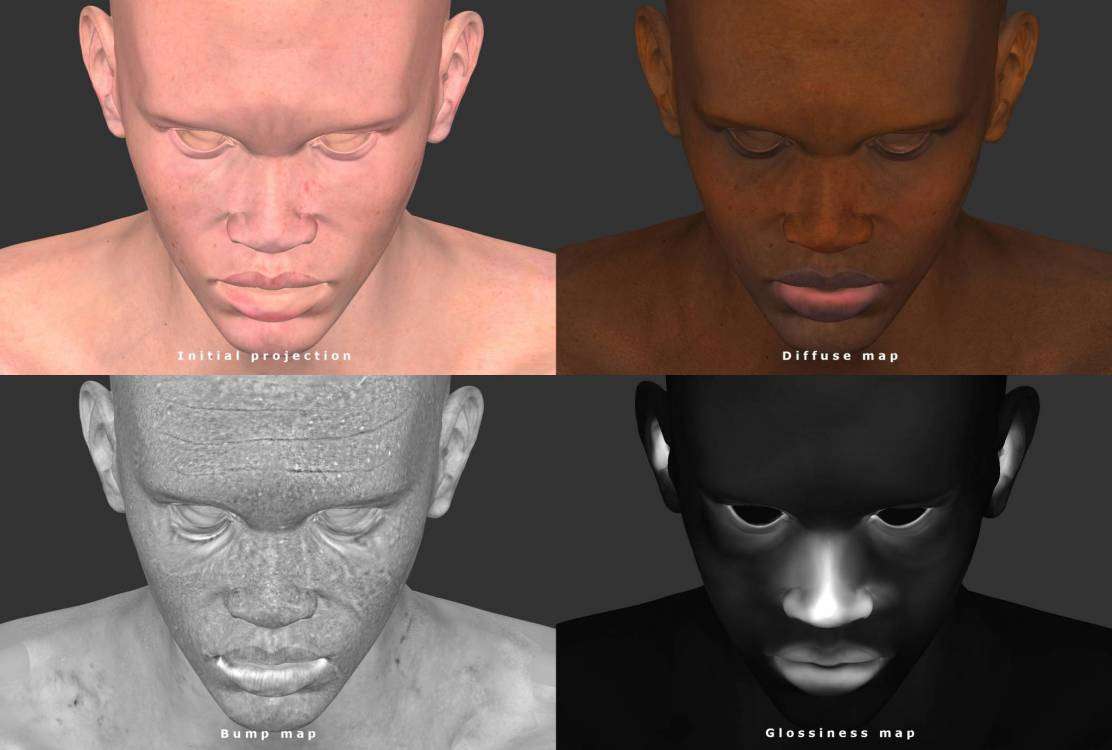
Textures where the biggest part of this project. I had to use different approaches to different parts. Most of the texture work was done in MARI. I used a lot of masks and layers and ended up using a mix of photo projections and procedurals. Metals, dirt and grime all got separate shaders and needed separate maps.
Getting lost and losing track of things was very easy to do so I had to have an orderly workflow. Each model had a Diffuse, Gloss, Specular and Roughness map to them. All were combined via a blend material node.
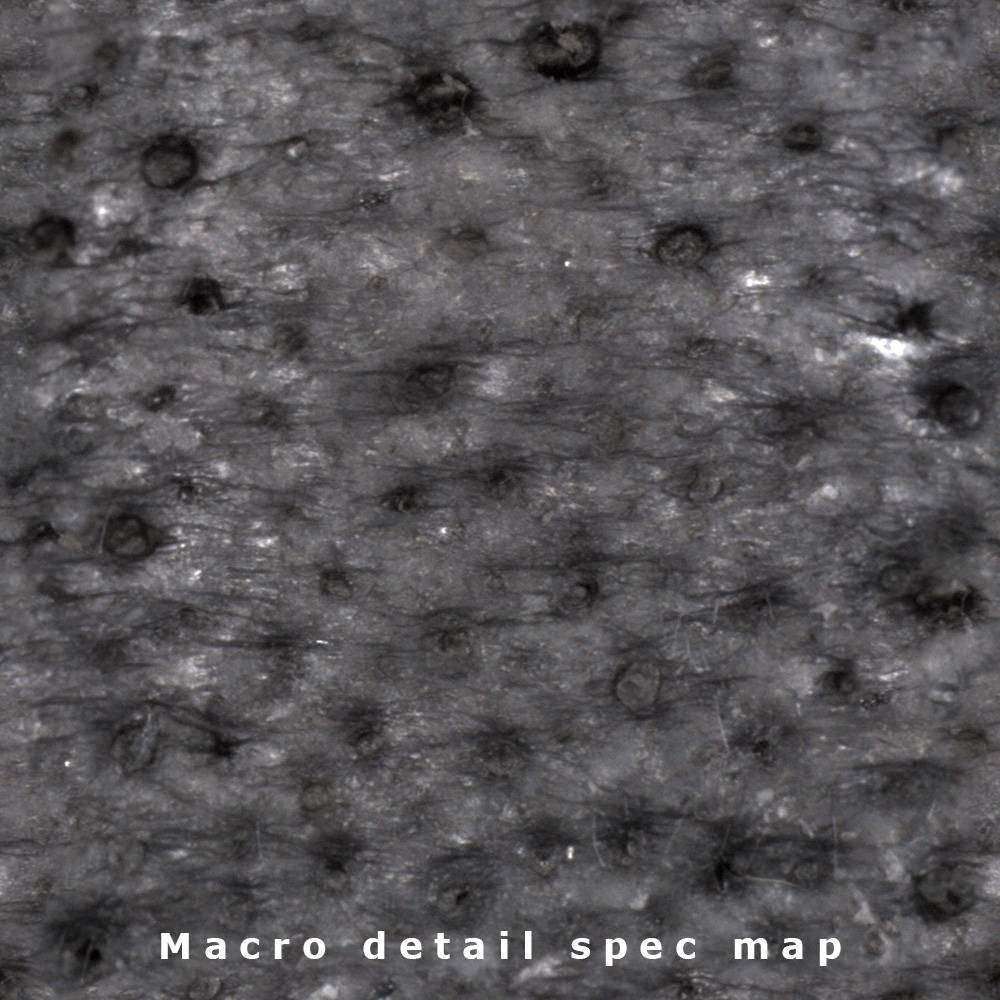
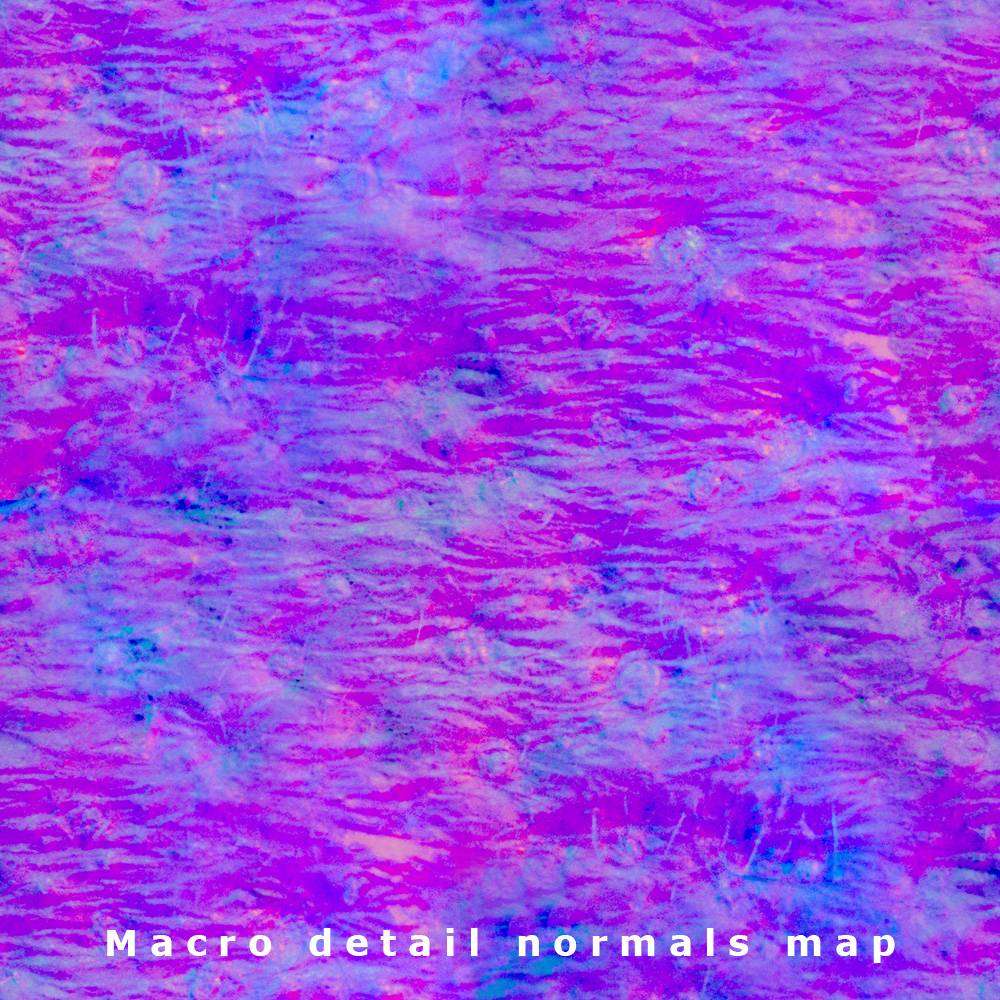
The best skin texture reference I had was a polarized photo of a caucasian woman. The resulting textures went through some extensive colour correction.
The small assets are a very crucial part of the work. On the one hand, they add to the richness and complexity of a project and they are also play a crucial part of the story telling.
I used Surface Mimic displacements for skin pore detail. The end result was a blend of the two maps and adjustment layers in MARI.
Look-dev
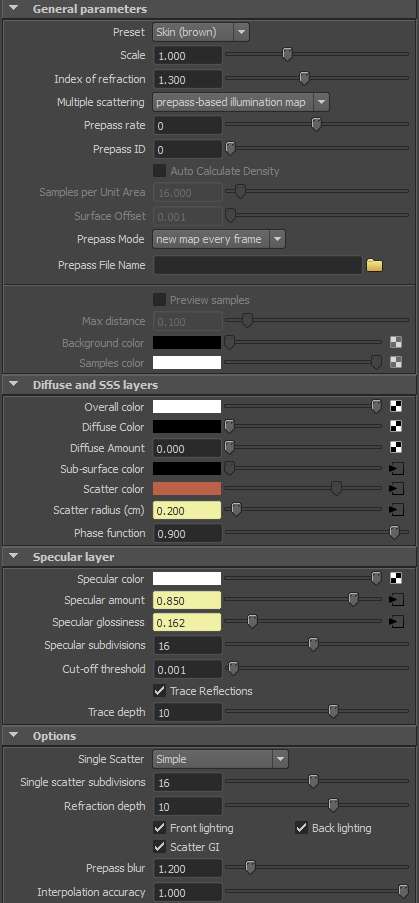
The project was rendered with Vray. For each material I’ve collected material references. Then I tried to make the materials as close to the reference as possible.
The different materials were mixed together using Vray blend material. This way I had the freedom to control each aspect of the material.
My skin shader comprised of an SSS Vray shader and two different spec shaders. One for glossy oily shininess layer and another sharp wetness spec.
Accessories
While this seems like small part of the overall project, it took me a third of the total time. The small assets are a very crucial part of the work. On the one hand, they add to the richness and complexity of a project and they are also play a crucial part of the story telling.
Rigging, Posing, Render and Post
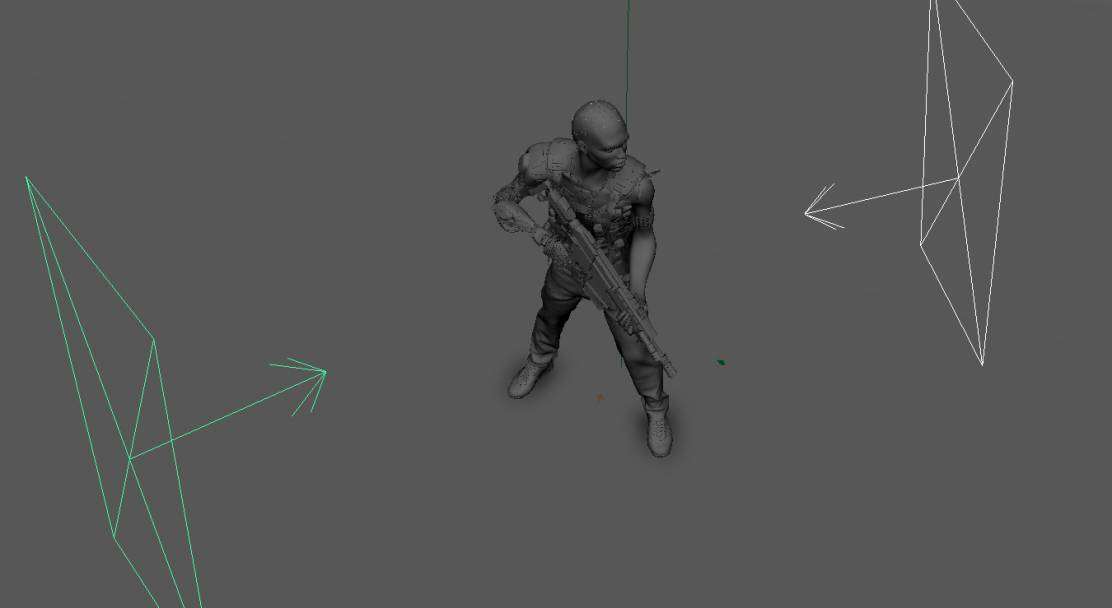
Once all the objects and maps were created I could finally pose the character and get it ready for a final render. I rigged and posed it using the Maya Rapid Rig plugin. I used Vray rectangular lights to create a simple 3-point lighting setup and an HDRI image as a fill light.
My passes include AO, Zdepth, reflection, refraction, specular, and SSS and were rendered using Vray. Once all the passes were done, I comped them in Nuke.
In terms of post-production, I ended up sharpening the image and strengthening the reflections, I also added lens blur, film grain and some minor color correction.
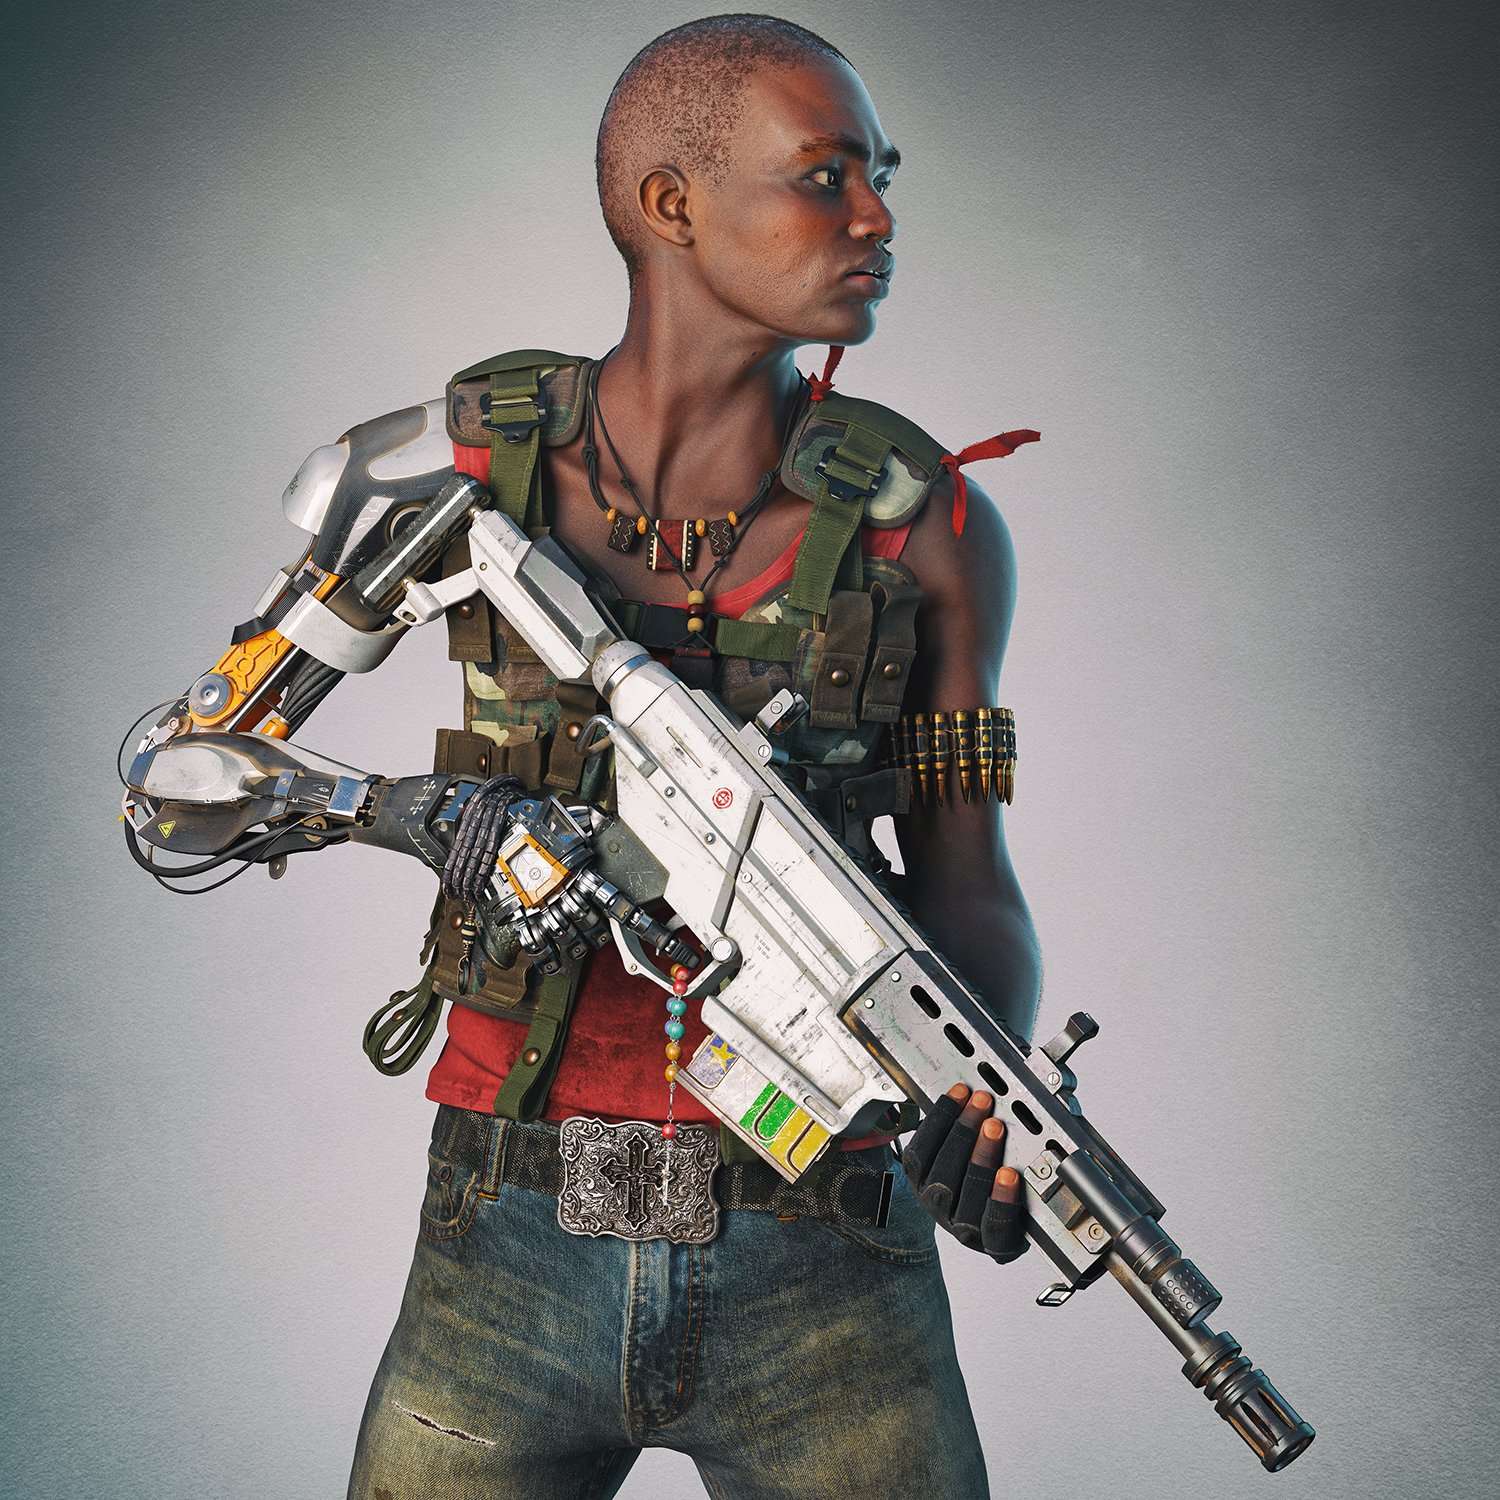
The final result