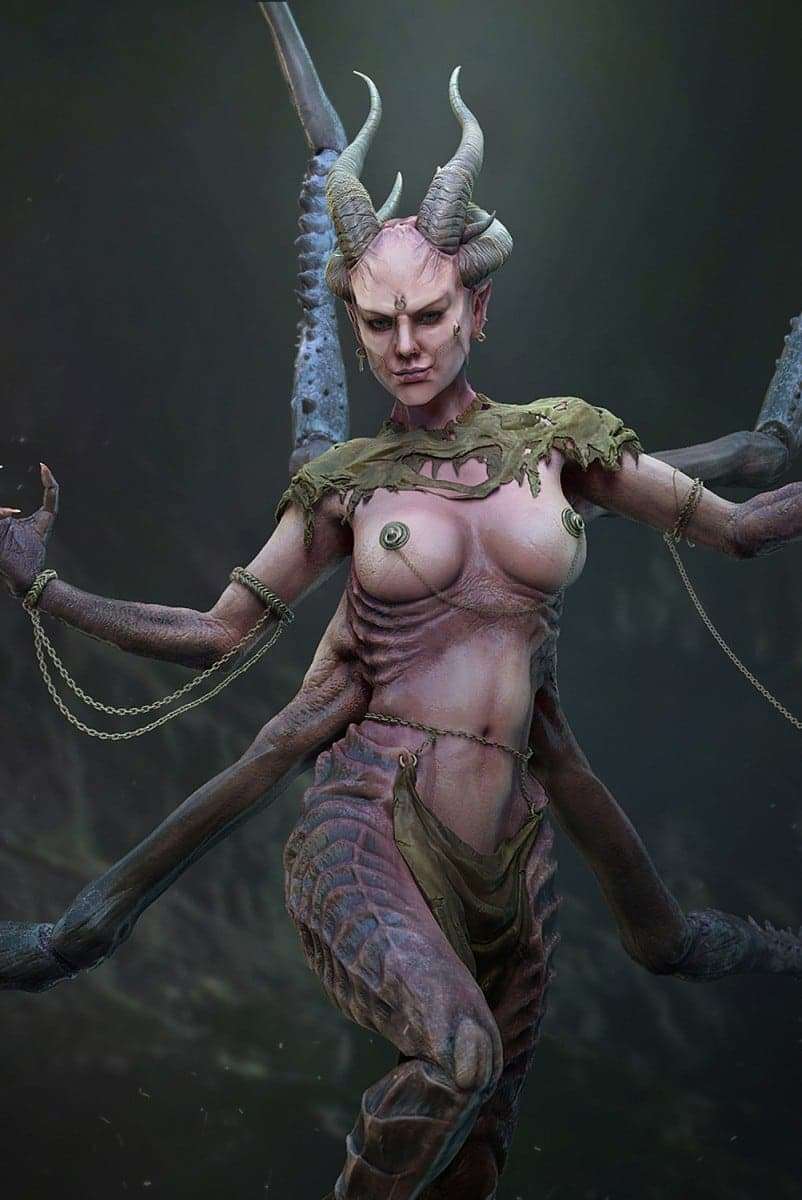
My name is William Chuarsa, a fresh graduate from **3DSense Media School **in Singapore. I specialized as 3D modeler and was mentored by Derrick Song; learning ZBrush and art fundamentals. I have loved painting miniatures and reading the novel books especially from the Warhammer settings since high school. That’s why I decided to create my vision based off one of the models from the Warhammer Character miniatures, as an element in my demo reel.
Brainstorming and References
I wanted to create a character based on one of Warhammer’s Greater Demon’s known as ‘Keeper of Secret’; a character that symbolizes lust and excess. From that base idea, I decided to do more research and collected reference images of demon character from games, or related concept illustration.
Looking at the bigger picture I kept silhouette, shapes and forms in mind, and then worked up the detail
From there, I picked lots of elements and tried to mix and match to make the demon version that I wanted. Looking at the bigger picture I kept silhouette, shapes and forms in mind, and then worked up the detail.
That’s the reason why planning early is so important; it will save a lot of time during the process!
Modeling
I needed to create a female base model, and did so using a male body from my previous school assignment. The process was a bit hard and fun at the same time, as it was my first time creating a female model using ZBrush.
I especially enjoyed creating the softer features and landmarks of the female anatomy. Once the base mesh was done for blocking, I reshaped the anatomy of the limbs to look unnatural, especially by changing the legs into Animal-like Bipedal legs. I tried to get the overall shapes looking sharp to make the character look evil; adding horns, sharp fingernails, the tips like extended bug limbs. I avoided, however, adding too much detail at this stage.
Major sculptural changes can be achieved using the ‘Dynamesh’ feature in ZBrush for the forms. Once the changes are done, I ‘Zremesh’ – the duplicate of the dynamesh sub tool to equalize the topology avoiding stretch sculpts on the model. Following this I increased the ‘Subdivision’ of the model then ‘Re-project’ the features and details from the previous dynamesh sub tool; doing this until the everything looks the same as the Dynamesh version.
At the next stage, I tried to limit adding detail before posing the model, to avoid deformation which takes longer to fix later. I mostly used the ‘Dam Standard’, ‘Claybuild Up’, and ‘Trim Dynamic’ brushes. Also, I learned that the more detail you add to the humanoid part of the female character, you need to reduce the intensity of the brush slowly, to maintain softness.
I then explored the poses of the character using ‘[Transpose Master](http://Transpose Master)‘ feature in ‘Zplugins’. This feature is helpful because it will collect all the active and visible sub tool’s, reverting them back to the lowest level of subdivision. They are then combined into one sub tool in a new 3D Layer. From there I could pose without worrying about destroying the mesh much. After I was satisfied with the pose, I use ‘Tpose>SubTool’ to update the changes that I had made to the previous 3D Layers with Subdivisions.
Related Link: How to create a game ready character
As for the finer details, I used ‘Standard Brush’ with brush mode ‘DragRect’ and also few ‘Alpha images’ to blend in the other details. For the finer rock details on the base, I used ‘Surface’ and ‘Noise’ with low values, then smoothed it out using ‘Smooth’ brush with low intensity in certain parts.
Texturing
Texturing is one of the critical phases because it will affect the final output of the model. And so, I decide to pick a limited color palette following the mood color of the reference that I collected during the Brainstorming phase; dominantly purplish color to match the Demon of Lust.
The material that I used is ‘Skinshade4’ as I wanted a less waxy feeling. For the base color, I used a flat skin tone color for the human body and a flat dark purplish color on the inhuman parts.
I proceeded to collect a few samples image for both the skin and the scales as pictured above. I then used the ‘Spotlight’ technique to get the various color palette to enrich the texture, mixing it with polypainting.
Rendering
With limited time, I decided to render the model using BPR (Best Preview Render). However using this method, I couldn’t simultaneously add all the lights (like Key Light, Fill Light, and Back Light) because the way Zbrush translates lights and shadows into BPR is a bit tricky.
To make sure the camera position was locked and saved for the final composition, I used ‘Zapplink’ on the ‘Documents’ tab. Once saved, I then proceeded to make the different passes for each type of light and some type materials (such as AO, Specular, SSS, Shadow).
Related Link: How to create environments for UE4
I wanted softer shadows, so I changed the setting of the shadow on the ‘Render’ tab, ‘BPR Shadow’ accordingly: ‘Rays’ to 35, and ‘Angle’ to 60. Increasing the ‘Rays’ softened the sharpness of the shadow edges which does come at a cost, increasing the render time slightly. The ‘Angle’ setting makes the middle part of the shadowless focused, creating an Ambient Occlusion effect.
Rendering the first passes, I activated the Ambient Occlusion in the ‘Render’ tab, ‘Render Properties’, to render out the Ambient Occlusion. Once the first passes were complete, I exported all the render result in ‘Render’ tab, ‘BPR Render Pass’. I repeated the process for the different angles of the light.
Once all the passes created, I opened up Photoshop, then listed the layers as following:
- Neutral light condition = normal layer, then the rest of different light source on top with layer type of ‘screen’ with very low opacity to capture the different light information, as if creating Global Illumination effect.
- Add the second passes, the Specular with ‘screen’ type of layer, and adjust the ‘Levels’ until really contrasty, so the specular will be more accurate and less have a shiny, oily feeling.
- Put the ‘Shadow’ then ‘Ambient Occlusion’ from the first passes on top of the Specular Layer and change it to Multiply with low opacity. For the Shadow
- Add the ‘Rim Light’ on top of the Ambient Occlusion layer with ‘screen’ layer type with high contrast on Levels to capture the light rim information, and since the rim light is white color, its much easier readjust the light color.
- Add Mask then add the background and continue to tweak the compositing to match both the backgrounds and the mood of the overall character.
Finally, I combined all the layers then added some Motion Blur using the Alpha from the Zdepth from earlier render passes. And to maintain the sharpness crisp of the character, I used ‘Filter,’ ‘Sharpen,’ ‘Smart Sharpen’ at 30-40% to avoid noise appearing in the image.
Special thanks to 3DSense Media School Singapore and also Derrick Song. With their direction, I have achieved great results and moved out from my comfort zone to improve as an artist. I hope you find this breakdown useful!


