
My name is Joshua Wu and I want to take you behind the scenes of how I created this dinosaur raptor concept. This piece was initially started as a speed sculpt practice. Ever since I was a kid, I have always loved Dinosaurs, Dragons, and other creatures. My parents were really supportive and bought me a lot of animal books, which I loved.
Concept
Having a strong idea before you start really helps the whole process to be much faster and refined. First of all, think about what kind of creature you want to create. What kind of habitat does this creature live in? Is it a carnivore or a herbivore? Is it huge or small? I had some idea of the type of creature I wanted to make from the start, I wanted to make a Raptor! The question was what kind of Raptor? A prehistoric one, or maybe a sci-fi one? Ask as many of these types of questions as you can to get a really good idea before you start.
Time to collect some references. I usually look for a cool looking images that I really like.
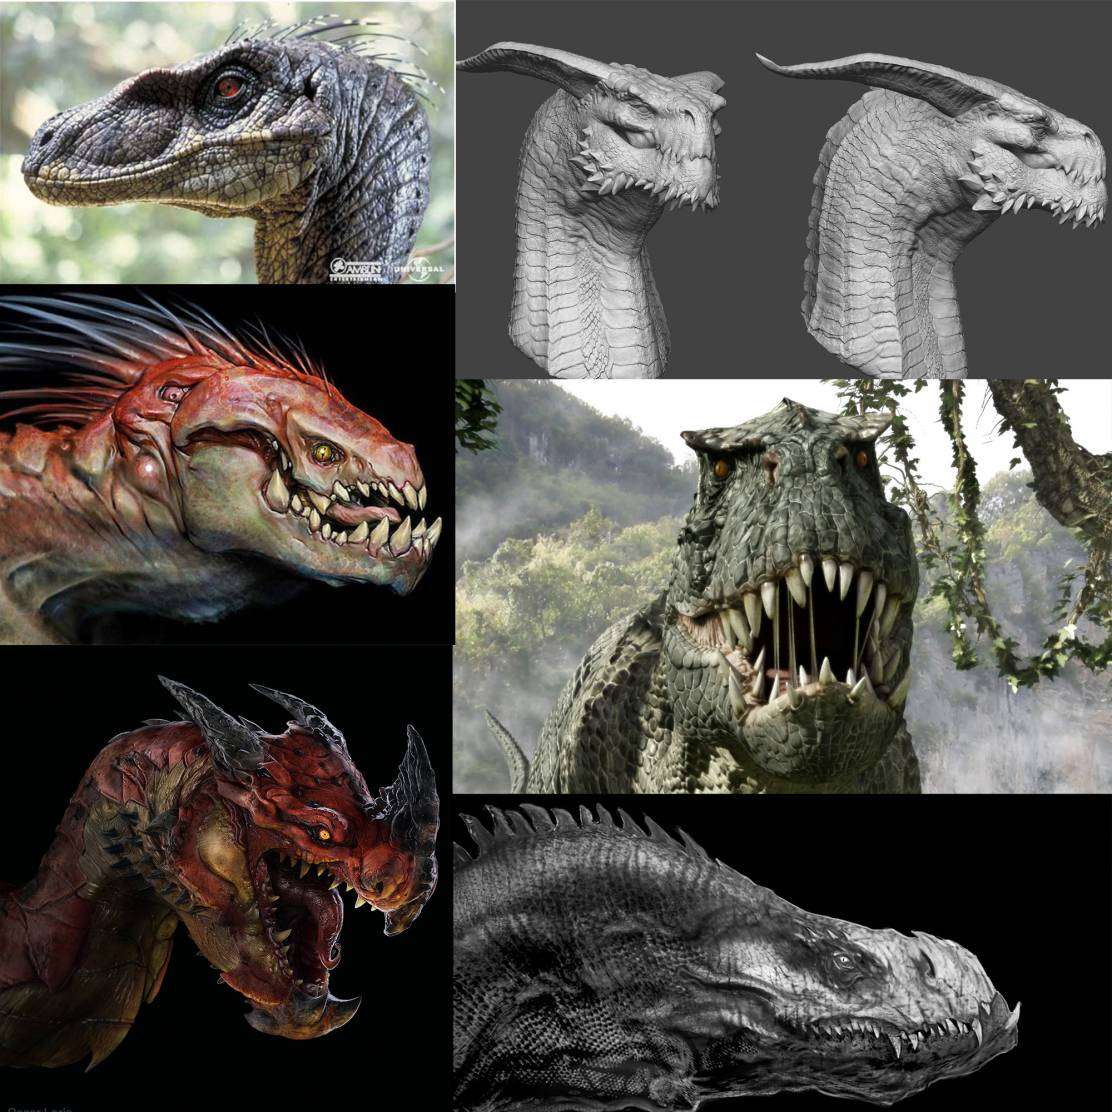
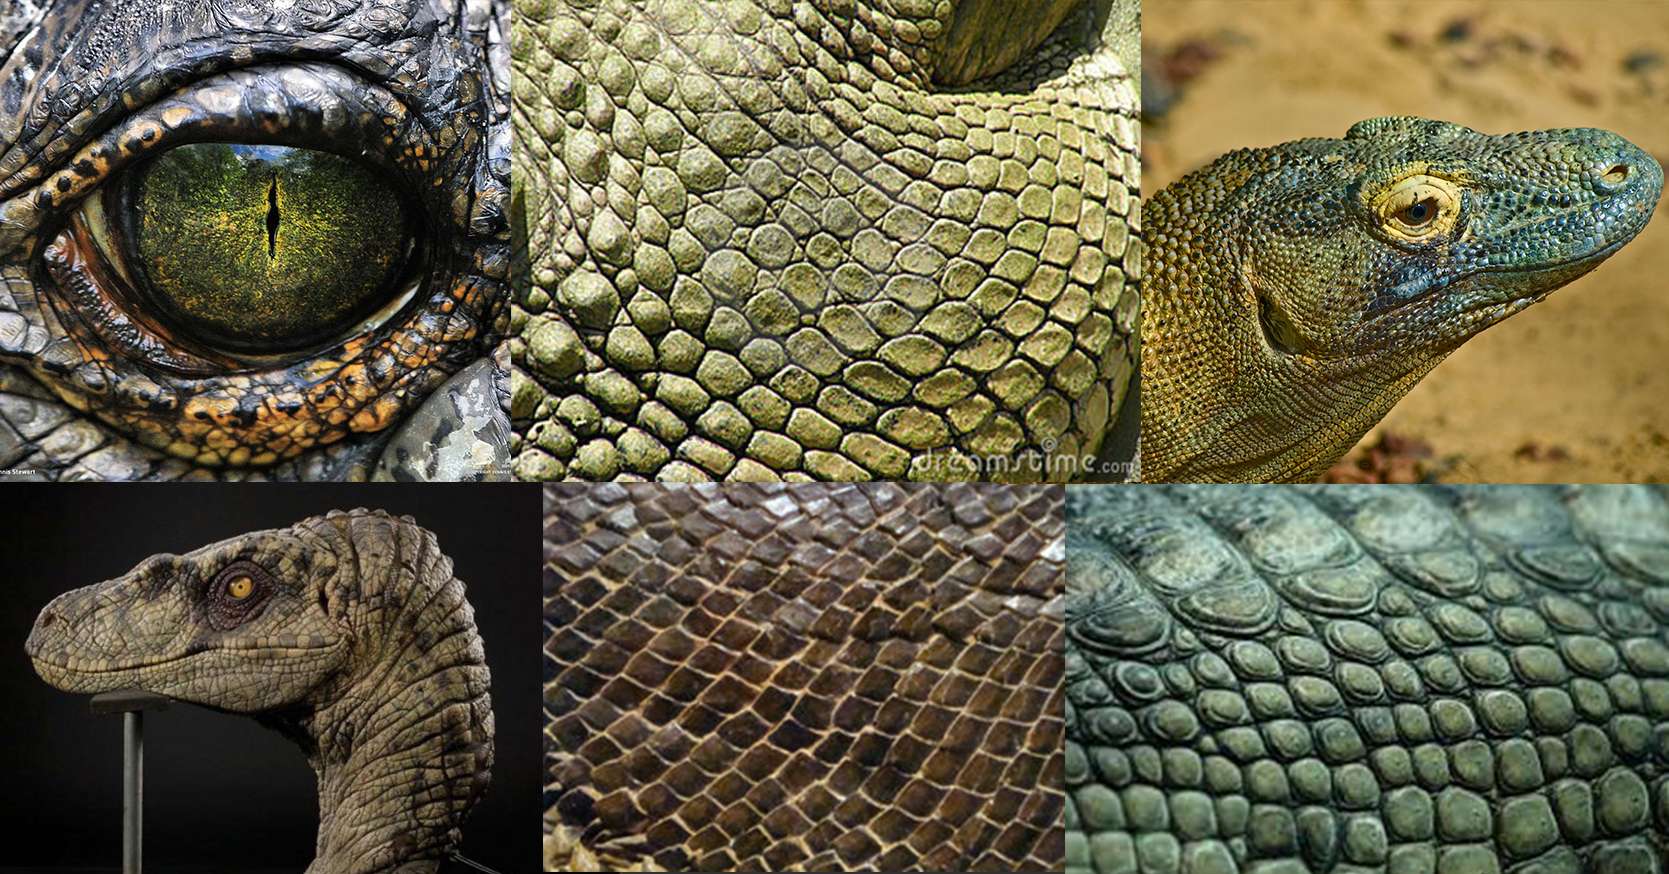
These were the main references that I used to create the Raptor. I did use other creature images as references as well. I spend time to study the references to try to understand the characteristic of each model and apply it to my own. I believe researching and planning is one of the most important parts of this whole process.
Modelling
For this project,I was trying to focus on my speed and quality, so my process was to work only with ZBrush and Photoshop. After I have a strong idea of the creature I’m making, I instantly move to ZBrush to block out the basic shape using Dynamesh. One of the most important things to note is to stay on the lower subdivision as long as possible! You don’t want to make the mistake of going straight into the detailing stage.
Having a strong silhouette allows the model to be easily recognizable from a distance, whether it’s in video games or movies. A strong silhouette can define the characteristics of a creature.
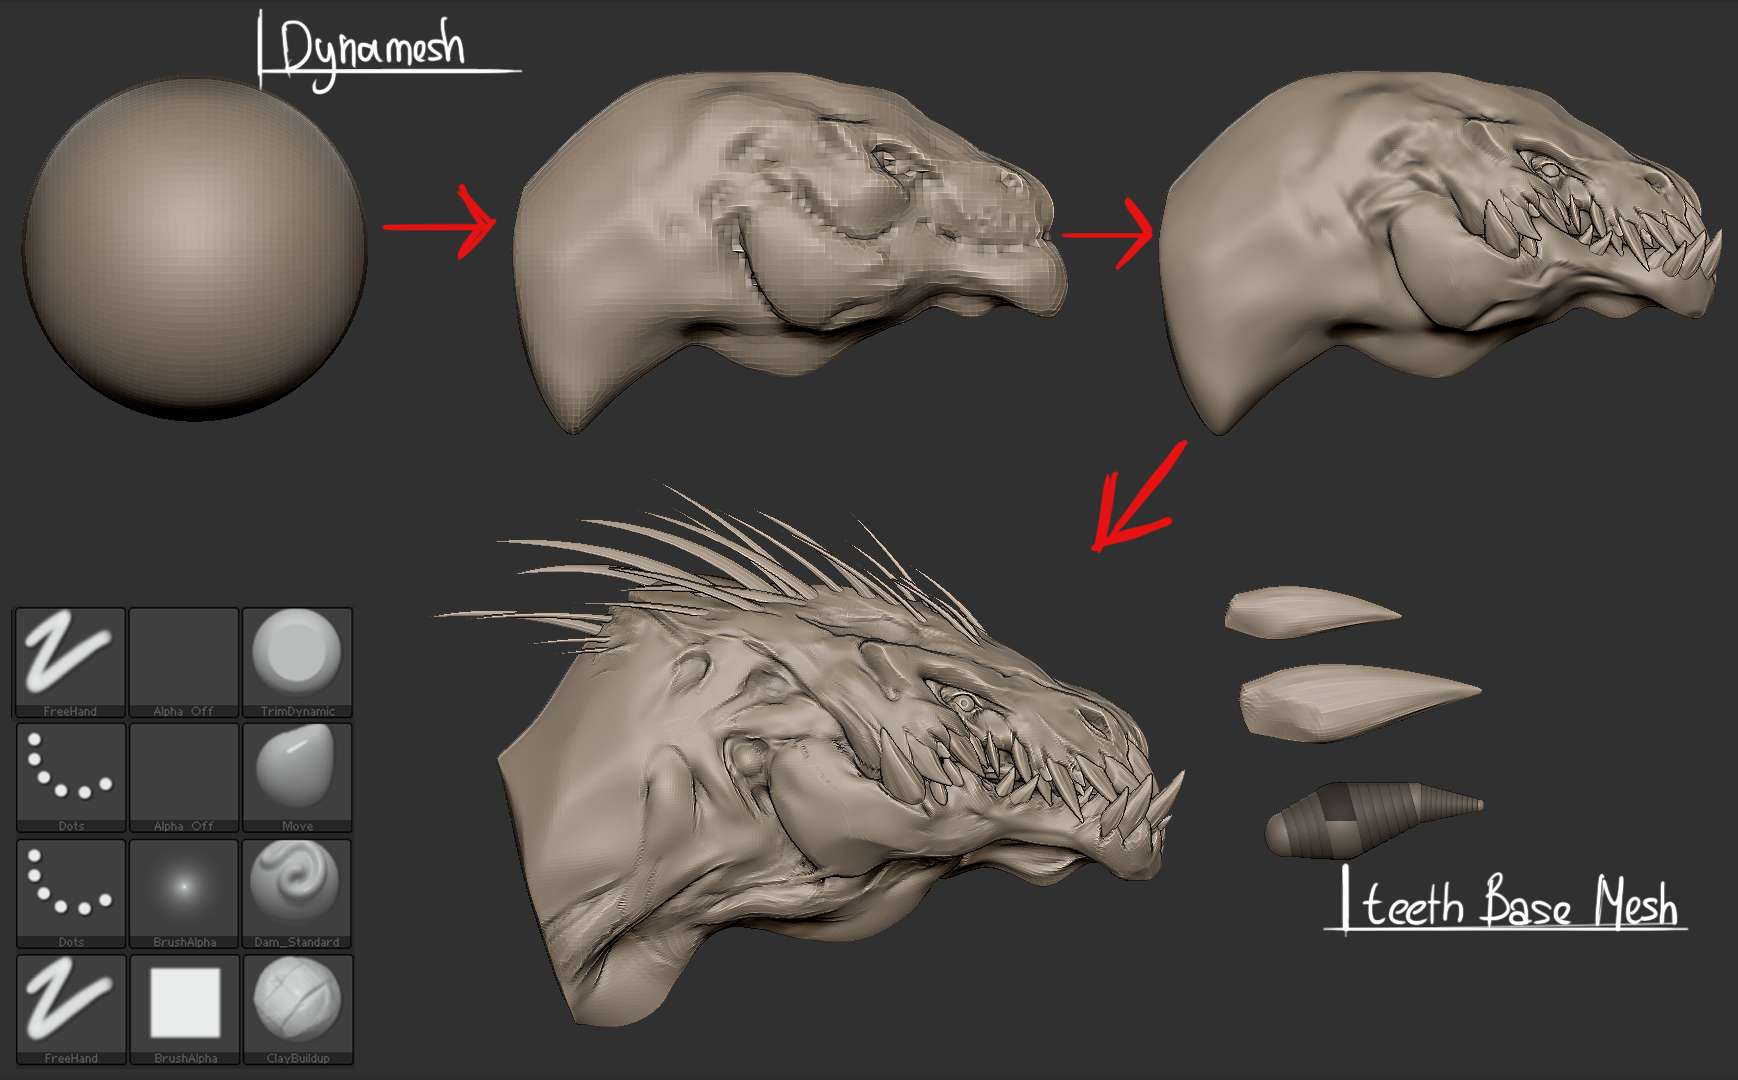
The main brushes I used were clay buildup, move brush, dam_standard, and trimDynamic. The image above is the sculpting process using only these 4 brushes to do the 1st pass of my model. The strokes are very rough and random. As for the hair and teeth, I made one base mesh using ZSphere, duplicated and moved it according to the placement I wanted.
Firstly, I blocked out the model before refining the muscles and the skin folds. Even at this stage, I was still sculpting on a very low subdivision mesh to maintain the flexibility. Now it’s time to ZRemesh the base sculpt in order to have a better topology distribution for the detailing pass.
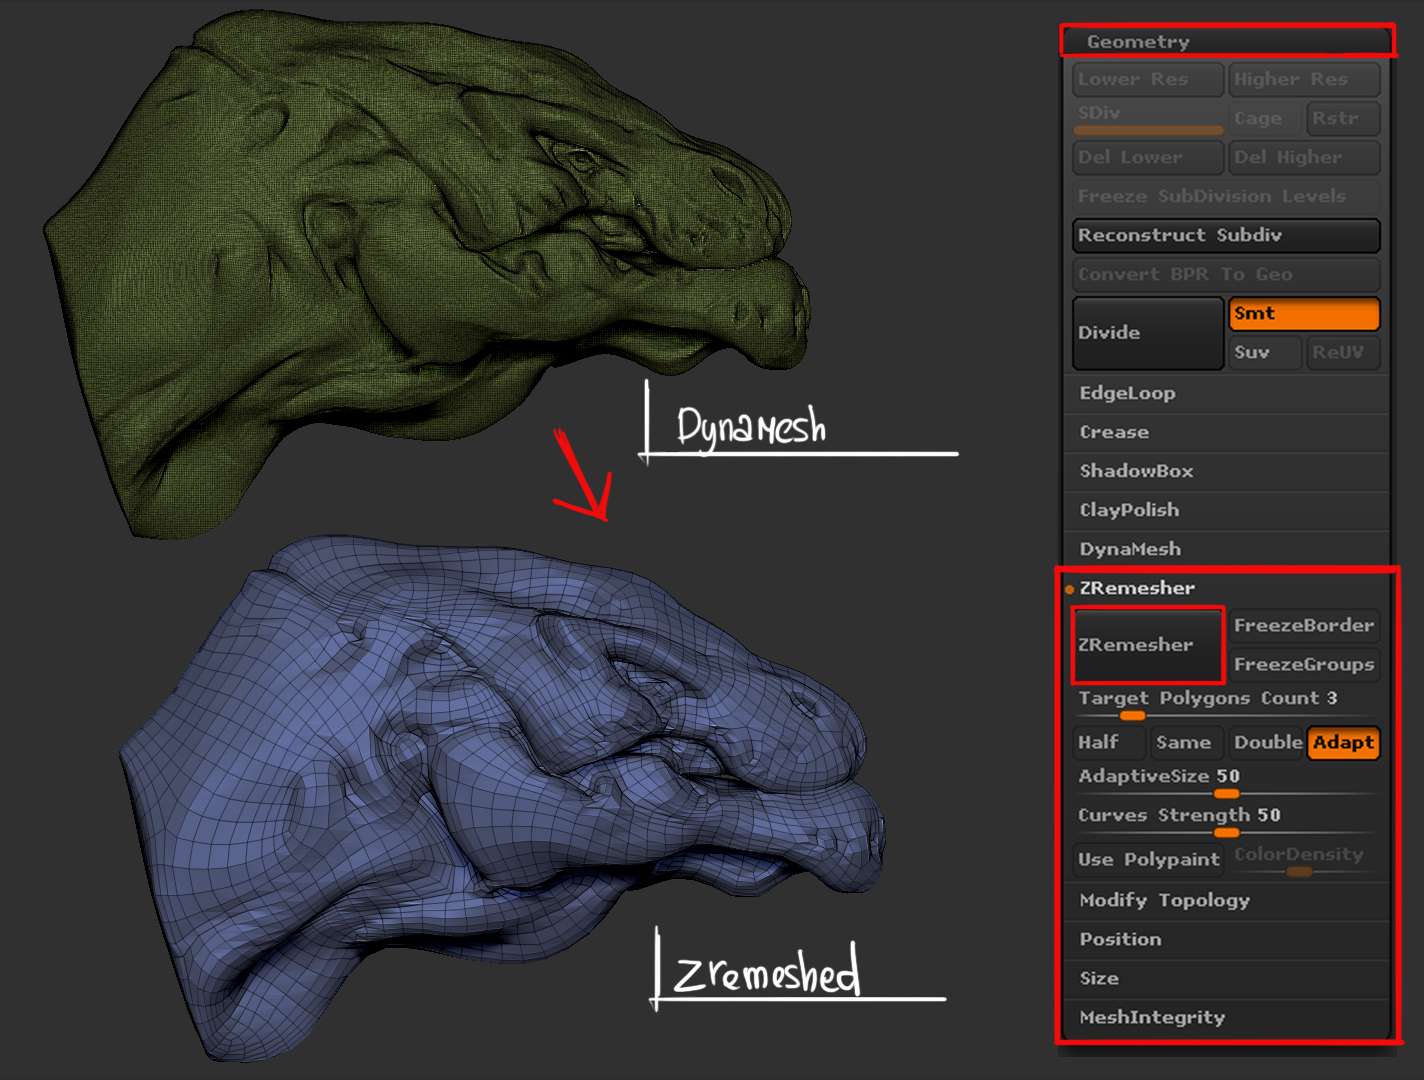
After I ZRemeshed the duplicated mesh, I transferred the detail from the DynaMeshed mesh onto the new one. Select the new mesh with the DynaMeshed one and start to subdivide and press the ‘Project All’ button every time you subdivide your model.
I subdivided my mesh until I’m satisfied with the density of the mesh. I the do the next detail pass. Now it’s time for me to continue my sculpting.
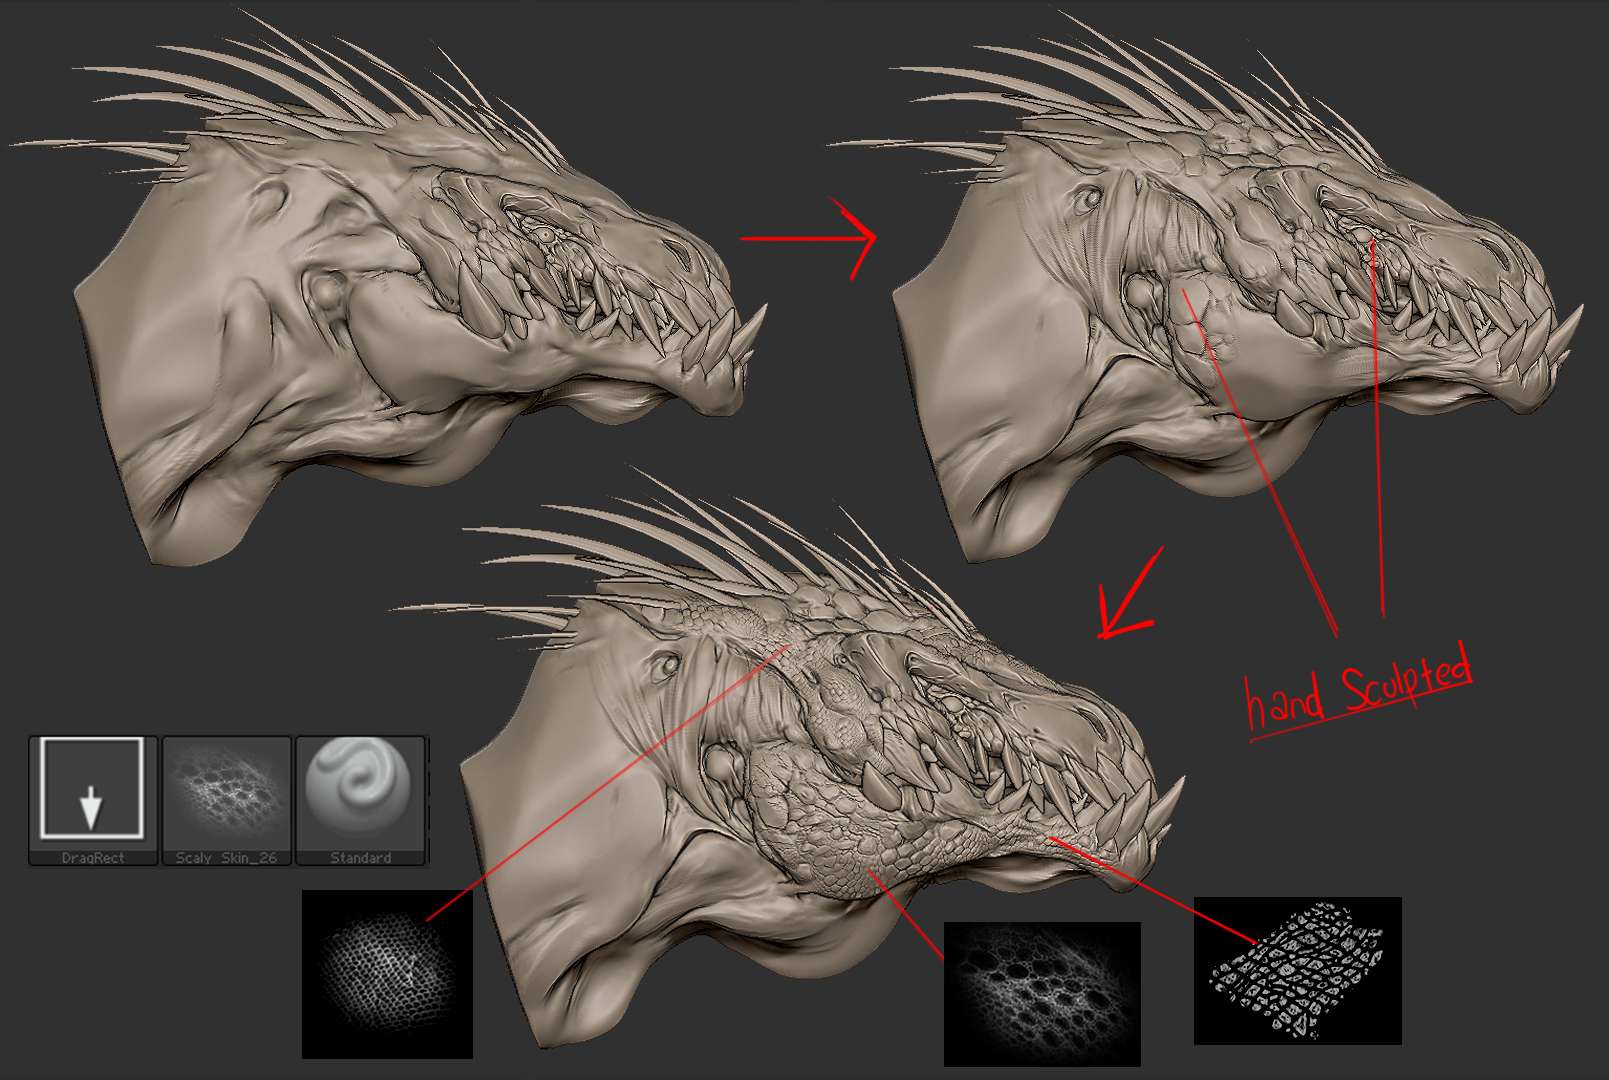
I personally do not use a lot of alphas to sculpt the detail, so around 50% of the scales detail were done manually. However, since I did not have a lot of time, sculpting the scales one by one would have taken me forever to finish, so I searched for scale alphas and photo texture from Google. One of the important things to remember while using alphas, is your mesh subdivision has to be very high to get a very good result. But even after that, it is better to do some clean up on the mesh. Sculpt on top of the alphas to blend the scales nicely. Having a clean mesh is always better to work with.
Up until this step, I took roughly around 5 hours, I didn’t want to spend too long and decided to move on to texturing.
Texturing
Texturing the creature was one of my favorite stages. The result of texturing a character always changes the overall Aura of it. Since this wasn’t a realistic character I allowed myself to go crazy with the texturing. But at the time I had no idea how it was going to turn out, so I started collecting lots of references. I used Snakes, Crocodiles, and Komodo Dragon photo as my main references.
Once I chose my main references, I started to block out the base color for the creature. I spent around an hour and a half to have the basic color.
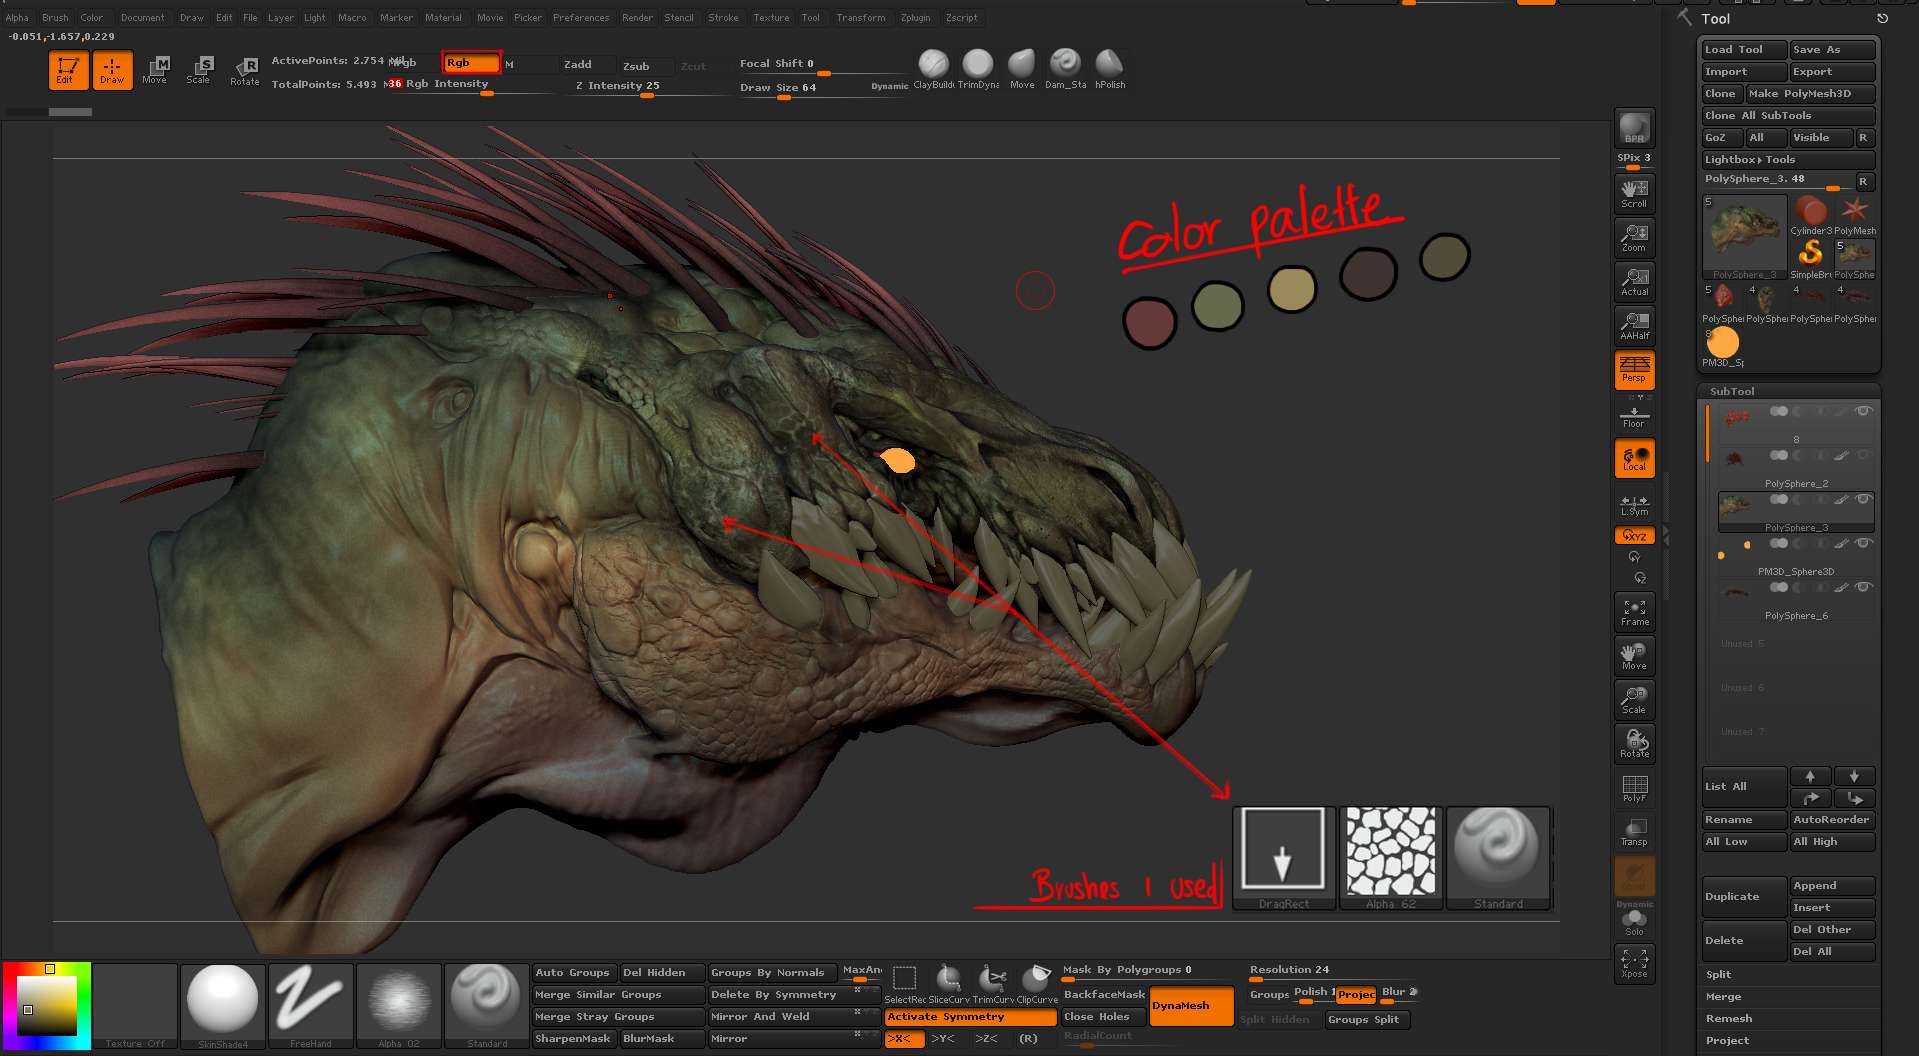
The picture above shows the 1st layer of my texture. No photo textures or anything fancy, just a quick Polypaint using some combinations of alphas and opacity. For me personally, I always set a certain color palette which consists of 3 to 5 color combination.
While I was experimenting, I decided to use complementary colors such as green and red as my main color palette, and from there I tried to develop another color to give more variations to the skin. The reason why I used green and red is because it creates the strongest contrast which is dynamic and pleasing to the eye.
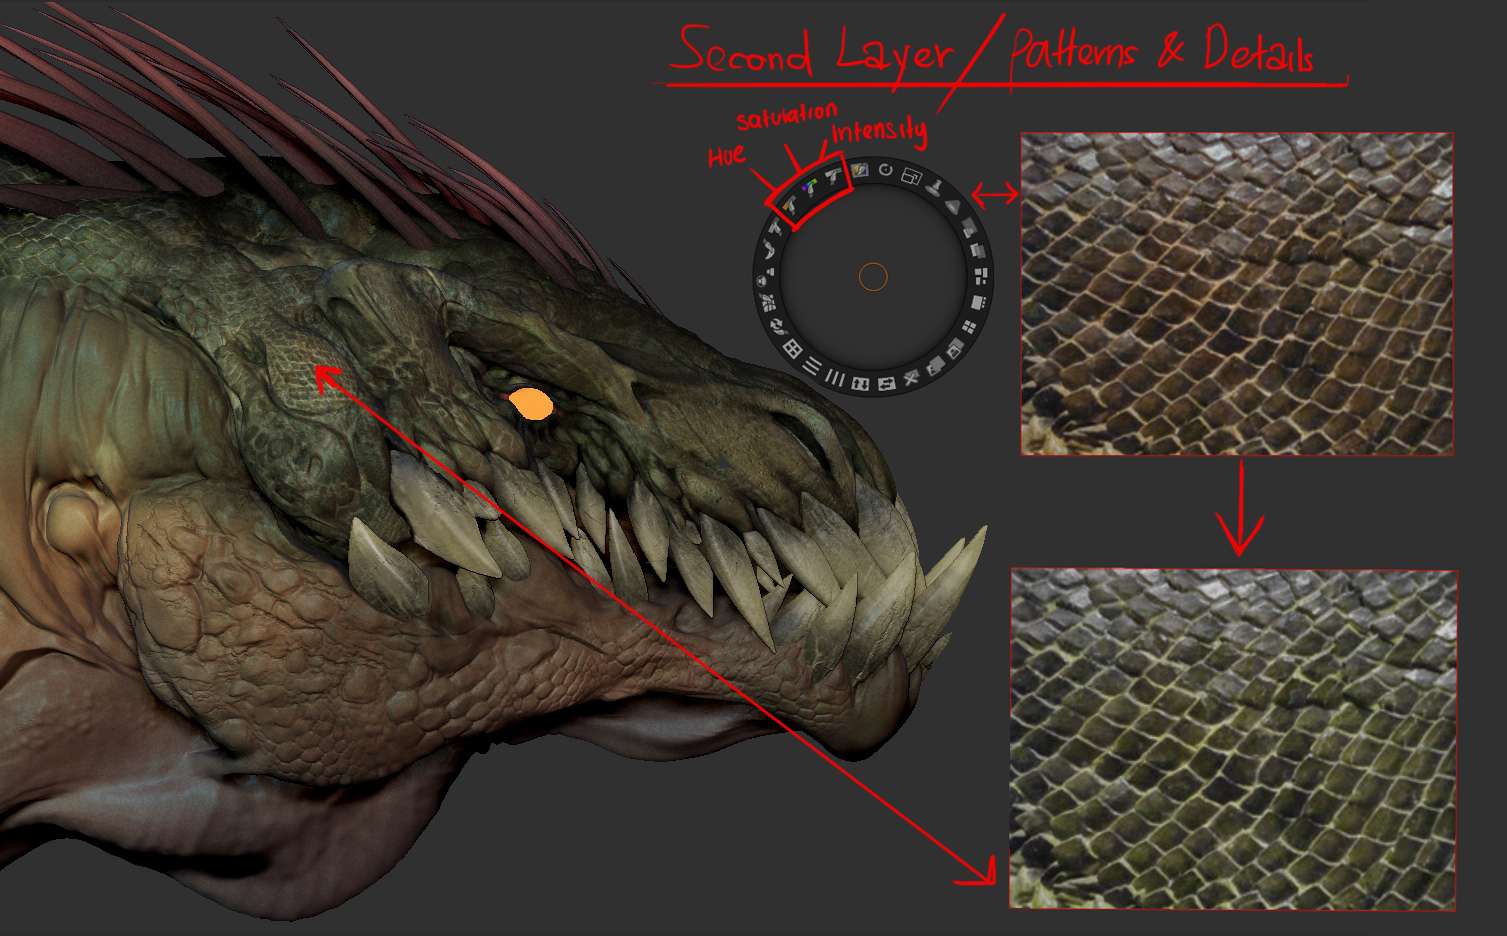
And now for the patterns and 2nd layer of details I used the photo texture references I found and bash it onto the mesh using spotlight.
Spotlight can be found under texture tab in ZBrush. Import the image you want, and you can earn the color and the detail from the photo which will enhance your mesh drastically.
However, do not depend on spotlight alone you have to once again Polypaint the mesh in order to blend the color nicely. Play around with the spotlight settings to get the result you want. Spotlight is very flexible and easy to use, a perfect tool to get a nice texture in a short time.
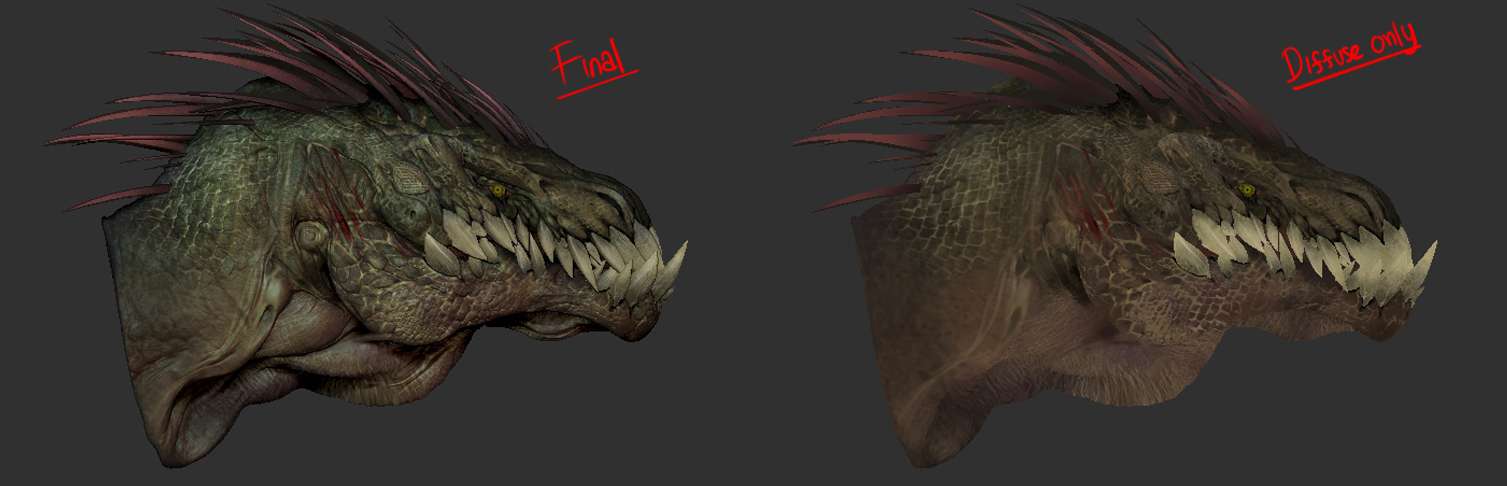
Rendering
Instead of using a heavy render engine which takes a lot of time to render, ZBrush is able to generate a quick render called BPR (Best Preview render). Unfortunately, this method is not very well suited for production. This rendering technique is fast but very conceptual, focusing on the aesthetic side.
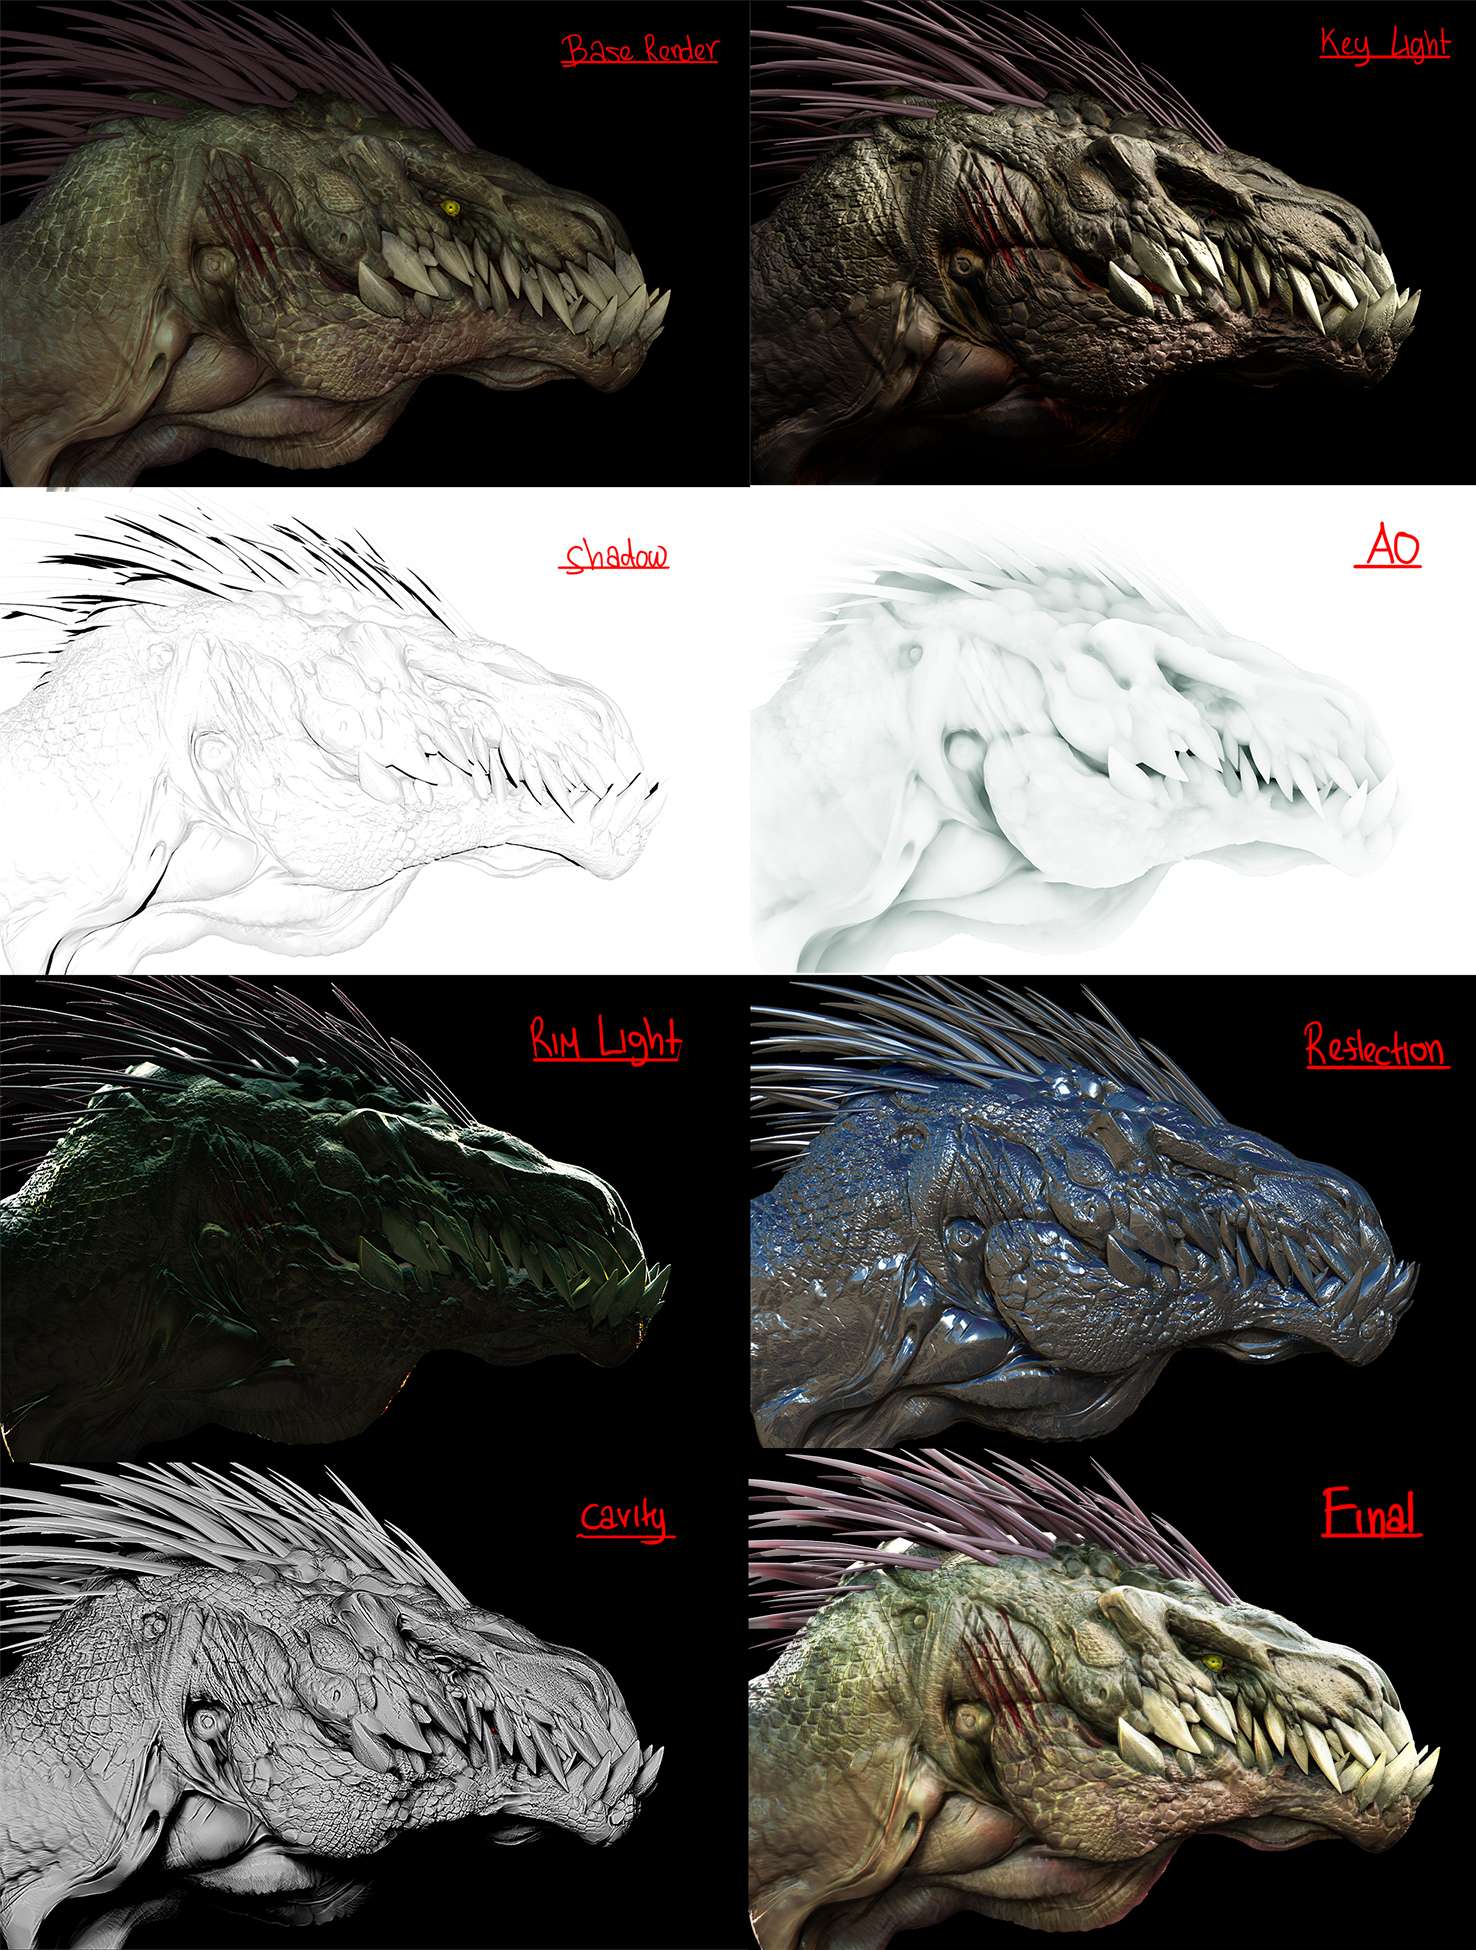
Before rendering all the passes, I saved a view using ZApplink (Document > Zapplink properties). This was to ensure that all the passes would be rendered at the same angle. For the final image, 7 render passes were used: color pass (base render), ambient occlusion, key light, specular (reflection), rim light, shadow, and cavity. I also applied a black background to all the passes.
The first pass I exported was the color passes, which is used as my base render. To do this, I applied a customized skin material to the skin and a normal Skin shader 4 for the hair and the teeth. I Would love to talk more about the materials but it is a long explanation, so I will just explain the basic idea. In the standard material tab there are 3 materials that can be used to combine several materials into one.
For me personally, I always set a certain color palette which consists of 3 to 5 color combination.
Double shaders, Tri shaders, and Quad shaders. Double shaders is used to combine two materials while tri is 3 and quad is 4. My customized skin material consists of 3 materials meaning i used trishaders. This method can be used to have a great looking materials such as metal, wood, etc. You can also download a lot of great Matcaps in the official ZBrush website and experiment with it!

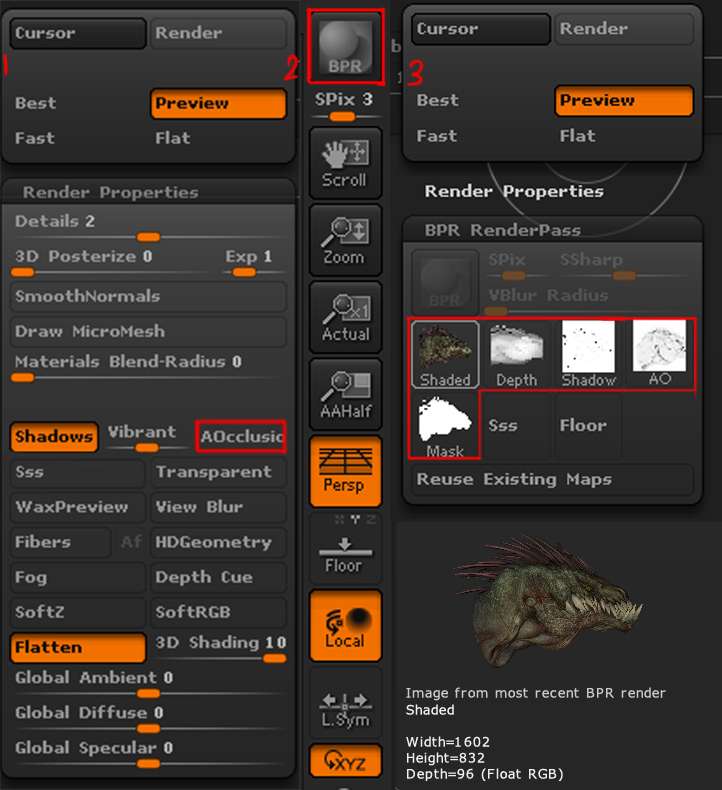
Before i generated the pass, I turned on the Ambient occlusion button found under the render setting. simply click BPR on the top right side of the canvas. Right after that, go to the render settings > Render properties, and save all the passes generated. I saved the shaded, depth, shadow, AO, and mask passes first so that I did not have to save it again while rendering the rest of the passes.
The second pass was the key light pass, I turned off the Ambient occlusion setting, changed the materials to basic and play around with the light to get the result I want. The key light was a simple light coming from the right.
I used a white light so I could change the color in Photoshop at will. in this project I used 3 point light settings, 1st light comes with the base render, 2nd one was key light and the last one is rim light. For the specular map, I used the reflective map and again played around with the light to get the reflections I desire. The last one is a Matcap called Frame01 as my cavity pass. I only saved the shaded version for the pass as I already saved the rest in the beginning.
Finally we have reached the last part of this breakdown. Now all I needed to do was assemble all the render pass in Photoshop.
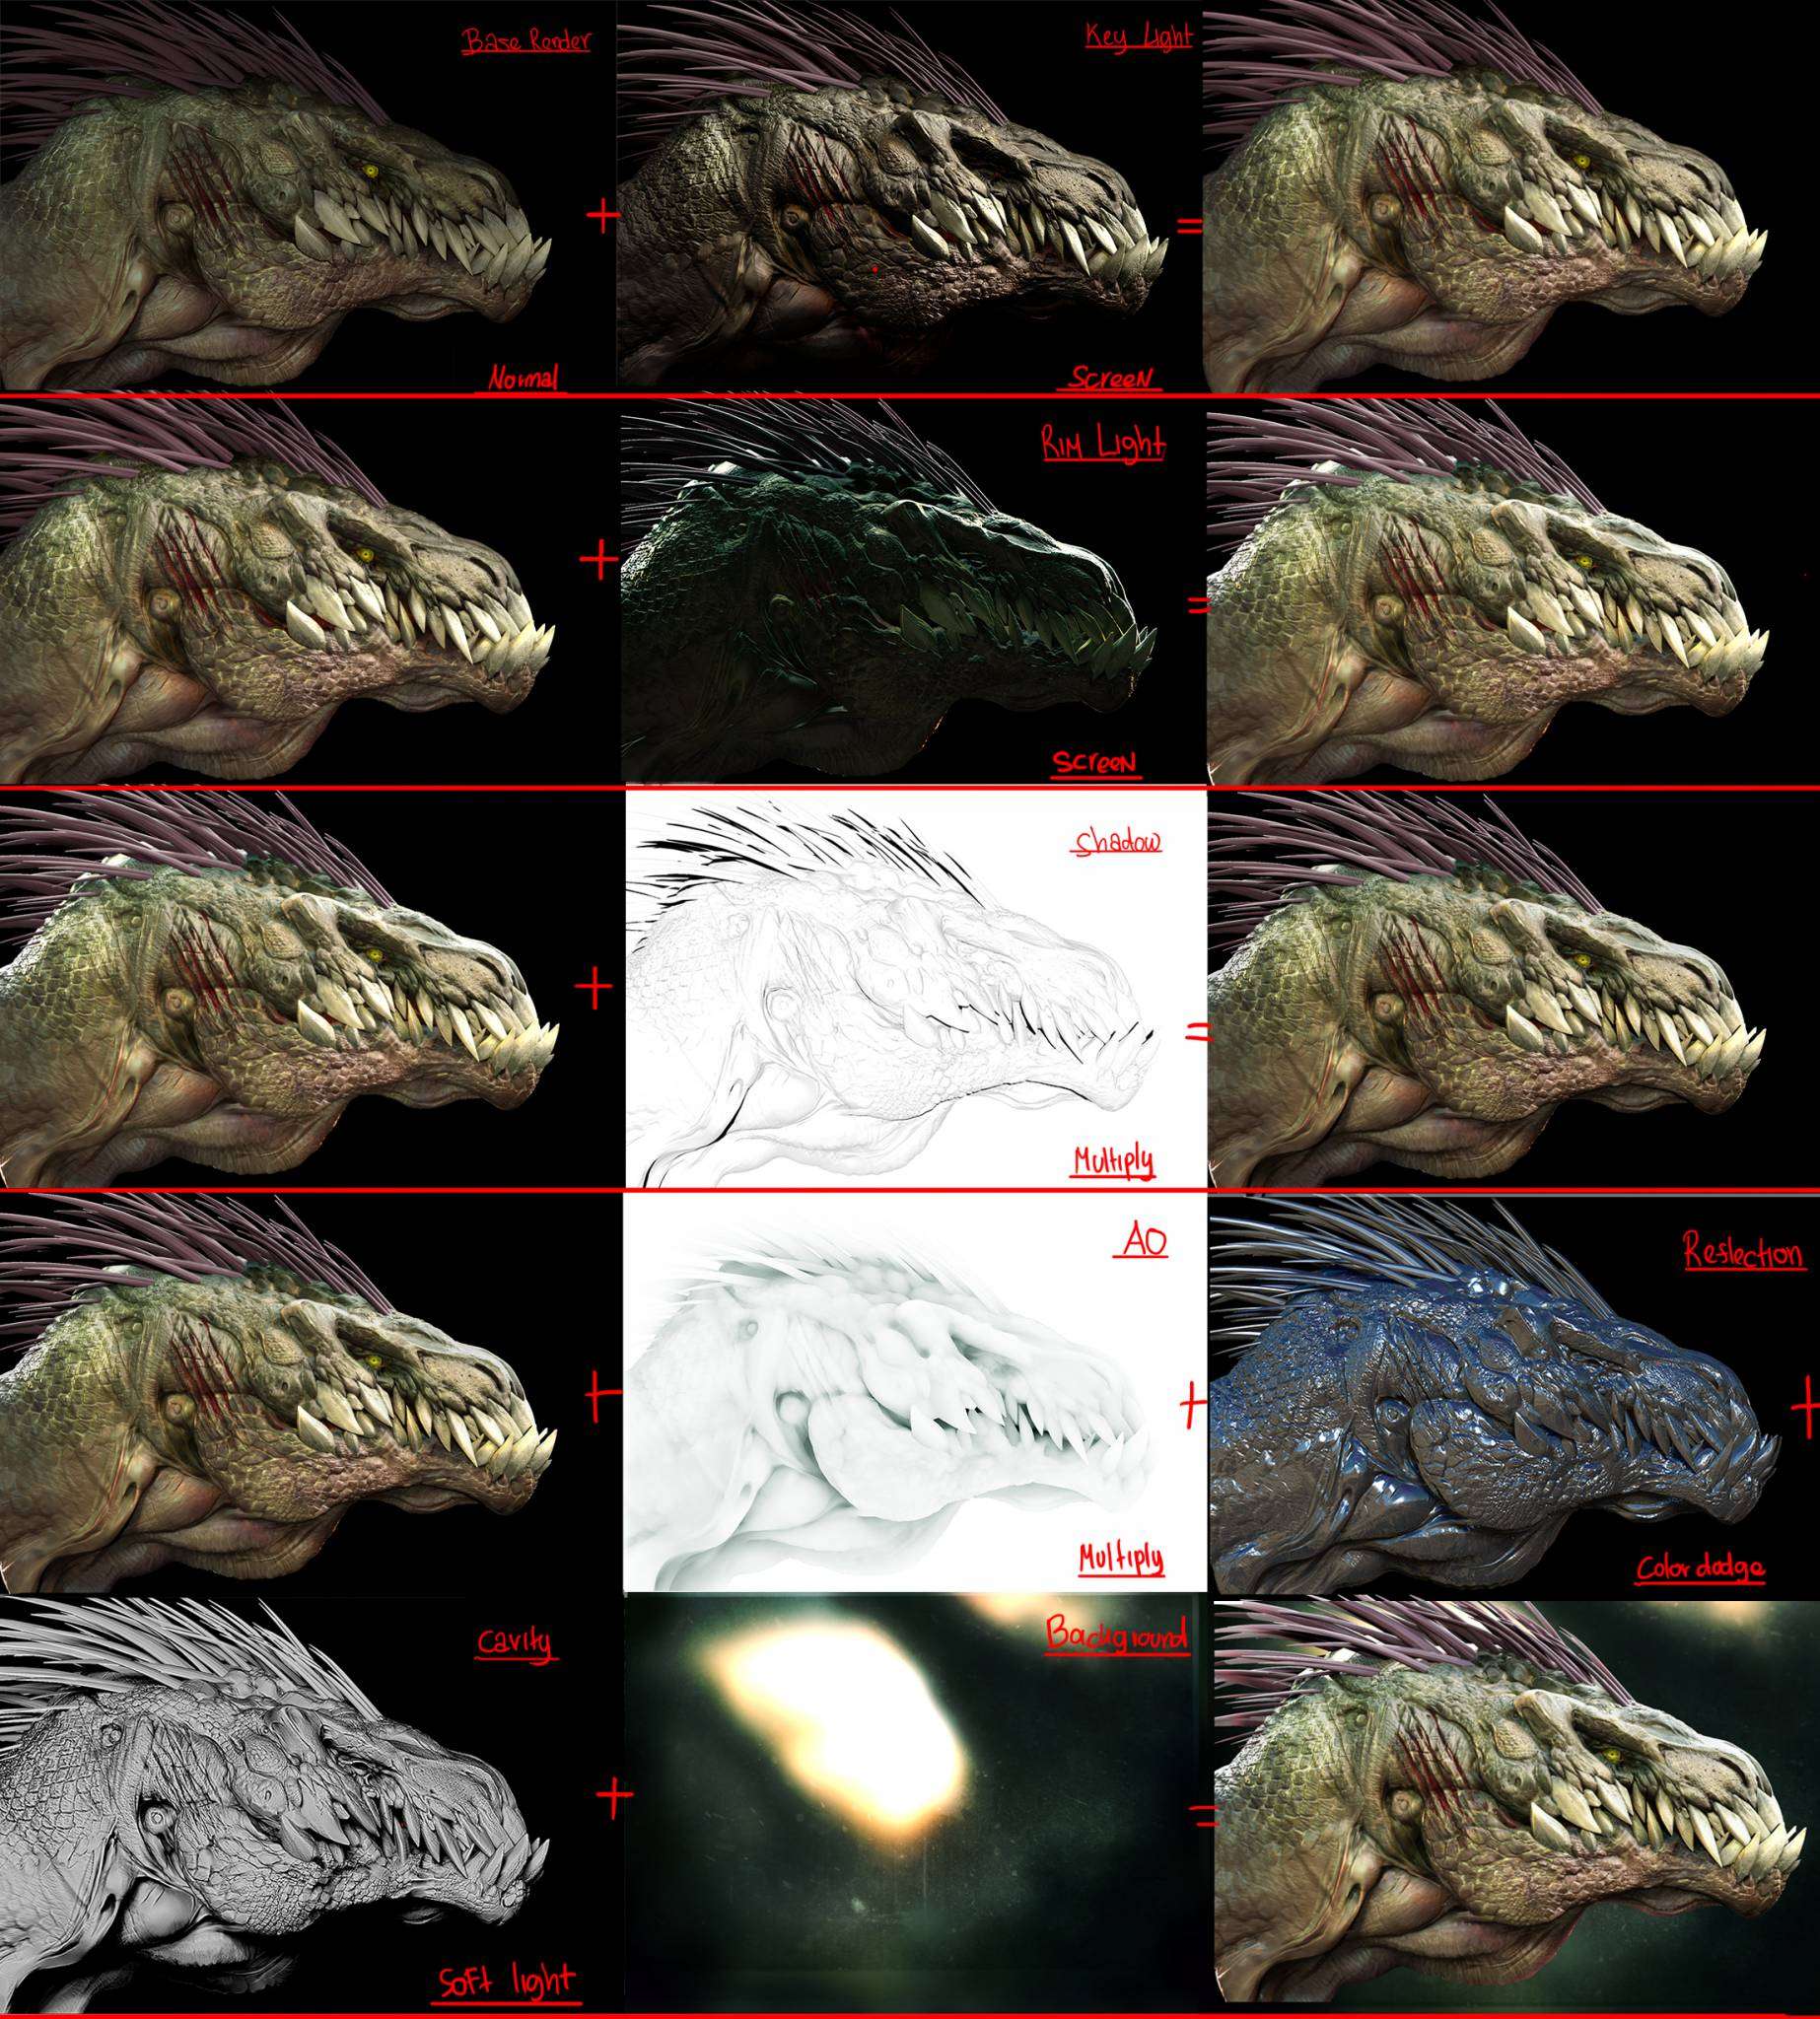
The image above shows all the passes in order of assembly.I started by opening the color pass which is the base render of the character and applied the key light using the screen layer mode. I then applied the rim light, which was given a greenish blue tint in Photoshop using hue and saturation. I also change the intensity using level. This was also applied using the screen layer option. i used multiply layer option for the shadow, and for the AO, once again i gave a little bit of bluish tint to get the feel i was aiming. The specular pass was then added in color dodge mode. In this pass i erased some of the areas such as the teeth, hair, and a little bit near the neck. Lastly, cavity pass in soft light mode.
I believe researching and planning is one of the most important parts of this whole process.
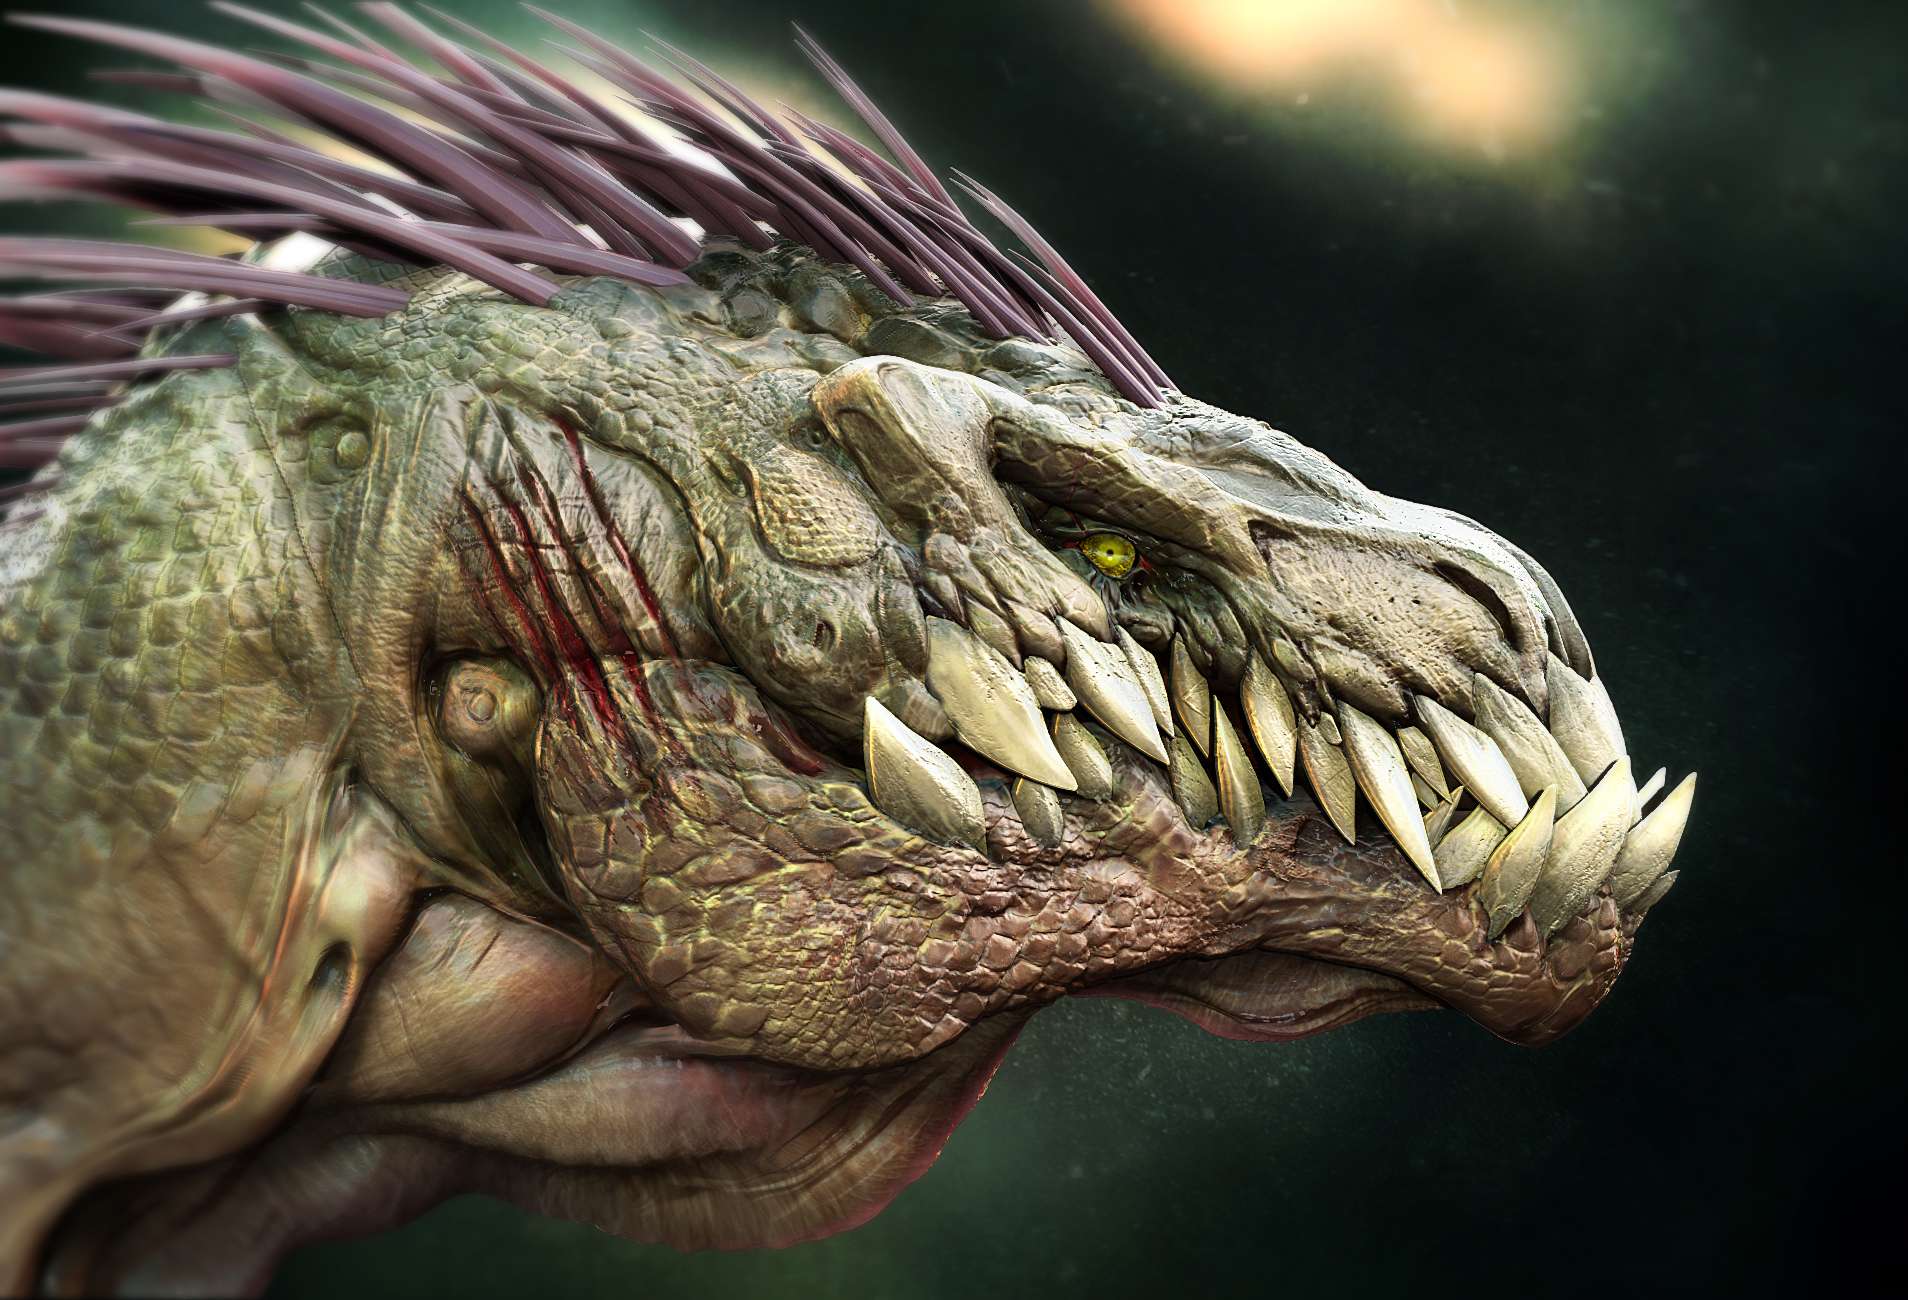
After I had assembled everything, I flattened the image and applied the Background using the Mask pass I generated earlier. Then I painted some parts to fix some of the parts that I did not like, I darkened the edges of the image and used the depth pass in the Lens Blur filter to achieve the blur effect. I sharpened the whole image using smart sharpened under Filter > Sharpen > Smart sharpen, and did a little bit of color correction. Initially wanted to have a colder feel of the scene, but in the end I gave a little more warm color to balance the overall feel of the image.
That’s it! Finally, the Mutated Raptor was done!
It was a great process and I learned a lot from this as well. However, I also realized that there’s always room for improvement. I believe that everyone should go out of their comfort zone in order to learn and improve further. There is no denying that practice makes perfect. I hope you can learn something from this breakdown. A big thanks to 3DSense Media School for helping me to grow for the past year, and special thanks to Derrick Song, a true inspiration and an amazing artist!
A big thanks to 3DSense Media School for helping me to grow for the past year, and special thanks to Derrick Song, a true inspiration and an amazing artist!